VSS安装图解
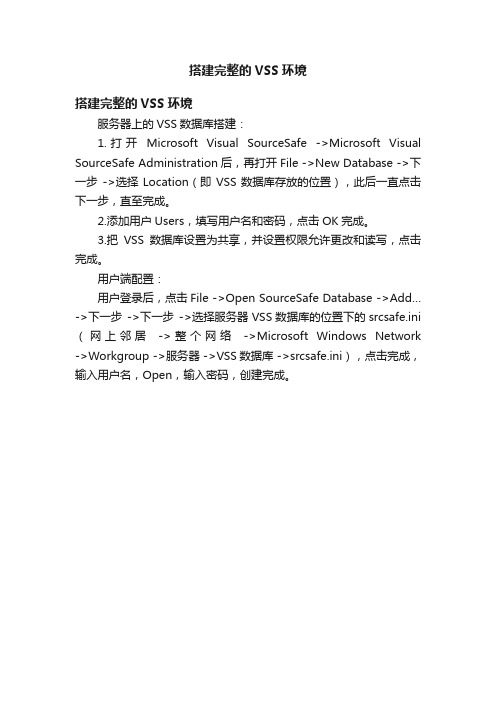
搭建完整的VSS环境
搭建完整的VSS环境
搭建完整的VSS环境
服务器上的VSS数据库搭建:
1.打开Microsoft Visual SourceSafe ->Microsoft Visual SourceSafe Administration后,再打开File ->New Database ->下一步->选择Location(即VSS数据库存放的位置),此后一直点击下一步,直至完成。
2.添加用户Users,填写用户名和密码,点击OK完成。
3.把VSS数据库设置为共享,并设置权限允许更改和读写,点击完成。
用户端配置:
用户登录后,点击File ->Open SourceSafe Database ->Add… ->下一步->下一步->选择服务器VSS数据库的位置下的srcsafe.ini (网上邻居->整个网络->Microsoft Windows Network ->Workgroup ->服务器 ->VSS数据库 ->srcsafe.ini),点击完成,输入用户名,Open,输入密码,创建完成。
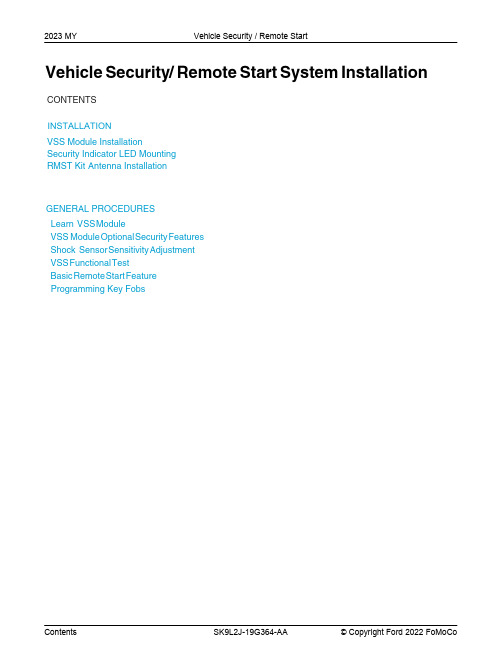
2023年模型年型福特VSS系统安装指南说明书
2023 MY Vehicle Security / Remote StartVehicle Security/Remote Start System Installation CONTENTS,167$//$7,21V SS Module InstallationSecurity Indicator LED MountingRMST Kit Antenna InstallationGENERAL PROCEDURESLearn V SS M oduleVSS M odule O ptional S ecurity F eaturesShock S ensor S ensitivity A djustmentVSS F unctional T estBasic R emote S tart F eatureProgramming Key FobsINSTALLATIONVehicle Security / Remote StartVSS System ComponentsSecurity Indicator LED (19D596) "Optional"Review VSS Kit ContentsNOTE:Kits are vehicle specific and are not interchangeable.1.Verify correct kit part number.2.Review the VSS kit contents.Vehicle Security System (VSS) KitQUANTITY DESCRIPTION1VSS Module1T-harness6Tie-strapsVehicle Security System (VSS) Kit(Continued)1Owner's Manual2Key Tags (not shown)Security Indicator LED Kit Contents "Optional"3.Verify correct kit part number.4.Review the Security Indicator LED kit contents.Security Indicator LED KitQUANTITY DESCRIPTION1Security Indicator LEDI.VSS System Installation - All VehiclesCAUTION:Carefully route and secure module and harnesses so that they do not interfere with moving parts or linkages.NOTE:If the VSS kit was installed previously and the vehicle is being upgraded, proceed to the "RMST" upgrade section(s).5.If the vehicle is equipped with factory remote start, test its operation by pressing the Lock buttonone time and the Remote Start button two times.•If the vehicle remote starts, stop the engine by pressing the Remote Start button one time.•If the vehicle does not remote start, diagnose the concern.6.Disconnect the vehicle battery negative terminal. For additional information, refer to WSM Section414-01.7.Disconnect the Gateway Module electrical connector, plug the VSS T-harness into the back of themodule and plug the other end of the VSS T-harness into the vehicle harness.NOTE:Explorer and Aviator, The gateway module (GWM) is located under driver side dash on the back side of the fuse box.NOTE:Edge and Nautilus, The enhanced central gateway (ECG) module is located behind the right rear quarter panel.NOTE:F-150, Expedition and SuperDuty, The enhanced central gateway (ECG) is located under the Front Display Interface Module, behind the sync module. For additional information refer to Workshop Manual (WSM) section 418-00.NOTE:Navigator, The enhanced central gateway (ECG) is located on the Driver Side C-Pillar. For additional information refer to Workshop Manual (WSM) section 418-00.NOTE:Transit, The SYNC 4 enhanced central gateway (ECG) is located behind the glove compartment on the top side, for SYNC 3 vehicles please refer to the "all other vehicles section". For additional information refer to Workshop Manual (WSM) section 418-00.NOTE:Bronco, The enhanced central gateway (ECG) module is located behind the glove compartment.NOTE:Escape and Corsair, The enhanced central gateway (ECG) is located under the center console. For additional information, please refer to Workshop Manual (WSM) Section 501-12.NOTE:For all other vehicles.8.Position the VSS harness inside the IP being careful to avoid sharp edges and moving parts.9.Install and secure the VSS module to the instrument panel frame or wiring harness on the driverside of the vehicle to the left of the steering column.•Ensure the VSS module is positioned so the shock sensor adjustment knob can be accessed for later use.•Ensure the tie-strap is routed through the VSS module loops at opposite corners.10.Connect the VSS harness to the VSS module.•Secure the VSS harness with tie-straps.11.Connect the vehicle battery negative terminal. For additional information, refer to WSM Section414-01.Optional Security Indicator LED MountingCAUTION:Carefully route and secure the LED and harness so that it doesn't interfere with moving parts or linkages.12.Keep the following points in mind when routing or positioning the LED for mounting:•Have at least 3/4" clearance behind trim panels for the wiring harness to be routed.•The LED should be clearly visible from the driver's side window when mounted.•Do not mount the LED on trim panels that cover air bags.13.Mount the LED at an appropriate location on the upper steering column shroud, using the guidelineslisted above.•Drill a 9/32" hole into the selected location, for the LED to mount in.14.Route the LED wire harness to the VSS module.15.Connect the LED wire harness to the VSS module 2-pin white connector.•Secure the LED wire harness with tie-straps.Learn VSS Module to VehicleNOTE:Make sure the brake pedal is not depressed during this sequence.16.Cycle ignition key ON then OFF.17.Upon ignition OFF, vehicle doors will lock then unlock.VSS Module - Optional Vehicle Security Features18.Start with ignition key OFF, doors unlocked and VSS system DISARMED.19.Place shifter in the PARK position (remaining in PARK).20.Open driver door (remaining open throughout).21.Depress and hold the brake pedal.22.NOTE:Brake pedal application is only required during the first ignition ON then OFF cycle.Cycle ignition key ON then OFF 5 times, then back to the ON position a 6th time. Keep ignition key in the ON position for the remainder of the program cycle.NOTE:The horn will sound 3 times.23.Close the driver door.24.Open the driver door.25.Close the driver door. The vehicle's horn will sound 1 time to indicate the security enable/disableoption has been accessed.26.Applying and releasing the brake pedal will toggle the security feature on/off.•The horn will sound once to indicate the security feature is ON.•The horn will sound twice to indicate the security feature is OFF.27.Cycle ignition key to the OFF position to exit security enable mode.Shock Sensor Sensitivity AdjustmentNOTE:The VSS module is equipped with an internal dual zone Shock Sensor. The VSS system will sound the horn and flash the lights once anytime a light to moderate impact is detected, and a "panic" horn sound/ light flash for a 30 second sequence when a heavy impact is detected while the VSS system is armed. Adjustment of both zones is accomplished through a single adjustment knob on the VSS module. Rotating the knob clockwise will increase sensitivity and rotating the knob counter-clockwise will decrease sensitivity. Sensitivity adjustment must be completed with the module securely mounted and the adjustment knob accessible.28.Starting with the adjustment knob in approximately the halfway position, lower the driver's windowand exit the vehicle.29.Press the LOCK button on the vehicle's RKE fob to arm the VSS system. If equipped, the LED willlight solid for 20 seconds and then begin to flash a steady on/off sequence to indicate the system is armed.ing a closed fist, impact the steering wheel with moderate force to simulate a light impact on thevehicle. If the impact is detected, the horn will sound and the lights will flash 1 time to indicate the warning impact was detected.ing a closed fist, impact the steering wheel with heavy force to simulate a hard impact (i.e. glassbreakage) on the vehicle. If the impact is detected, the horn will sound and the lights will flash a steady on off sequence to indicate the heavy or full shock trigger was detected.32.Increase (rotate clockwise) or decrease (rotate counter-clockwise) the adjustment knob as necessaryto achieve desired sensitivity, repeat the previous steps to test, and verify adjustment.VSS Functional TestNOTE:INSTALLATION (Continued)If installed, observe the LED while performing these tests.33.Lower the driver's door window, then close all doors, hood, and trunk/hatch and press lock on thekeyfob. The LED should stay lit for 20 seconds while the VSS system pre-arms, after which it will flash every 3-4 seconds in fully armed mode.34.Reach inside the window hit the door unlock trim switch. The LED should continue to flash,indicating that the vehicle is still armed. Use the inside driver's door handle to open the door. The alarm should sound, indicating perimeter breach. Turn the alarm off by turning the ignition to "On".•If equipped with OE perimeter security, there will be a 12 second interior chime prior to alarm sounding. For vehicles not equipped with OE perimeter security, there will be a 12 second delay with no interior chime prior to alarm sounding.•For push button start vehicles, the Intelligent Access (IA) key must be away from the vehicle, otherwise the security system may disarm immediately upon trigger.35.Exit the vehicle and arm it again, this time leaving the driver's door open. The vehicle should armitself, ignoring the open door but monitoring the rest. Once the vehicle is armed, shut the driver's door and reopen it after a few seconds. The alarm should sound. Turn the alarm off by hittingunlock on the keyfob.•For push button start vehicles, the Intelligent Access (IA) key must be away from the vehicle, otherwise the security system may disarm immediately upon trigger.36.Test all other vehicle doors, the hood and the trunk in the same manner, by setting off the alarm anddisarming with the keyfob.37.Please contact 1-800-FORD-KEY with any issues regarding hardware or kit contents. Standard Key Fob (15K601) "Sold Separately"Basic Remote Start Feature38.Enable/Disable Basic Remote Start Features:Locate the jumper supplied in the kit.•Install the jumper to the VSS module if the Basic Remote Start feature is to be enabled .•Not installing and/or removing the jumper from the VSS module will keep the Basic Remote Start feature disabled.Bi-directional Key Fob (15K601) "Sold Separately"Programming Key Fobs39.Key Start Vehicles:1Start with ignition key OFF, doors unlocked and VSS system DISARMED.2Open driver door (remaining open throughout).3Place shifter in the PARK position (remaining in PARK).4Depress and hold the brake pedal.5Cycle ignition key ON then OFF 5 times, then back to the ON position a 6th time.▪The horn will sound 3 times to indicate transmitter learn mode access.6Press and hold the remote start button for 3 seconds on each fob you wish to program (horn will sound indicating successful programming).7Cycle ignition key to the OFF position to exit transmitter learn mode.40.Push Button Start Vehicles:NOTE:The following steps must be performed with the driver door open.1Enter the vehicle with the vehicle key(s) and key fobs you wish to program. Doors should be unlocked and vehicle security disarmed.2Depress and hold brake pedal.3Press the start/stop button.4After the vehicle starts, press the start/stop button to shut down.5Repeat steps 3 and 4 an additional 5 times, ending in ignition ON, engine ON.NOTE:The horn will sound 3 times to indicate transmitter learn mode access (some vehicles may notsound the horn 3 times).6Press and hold the remote start button for 3 seconds on each fob you wish to program (horn will sound indicating successful programming).7Cycle ignition to the OFF position to exit transmitter learn mode.RMST Functional Test41.Make sure the shift lever is in PARK and the ignition is in the OFF position. Remove all keys fromthe vehicle.42.Close the hood.43.Roll window down.44.Close all of the vehicle doors.45.Start the vehicle by pressing the remote start button twice within 3 seconds on the remote start keyfob.46.Confirm the remote start works with the vehicle in park and with the hood and doors closed.47.Confirm full A/C and heat operation of the climate controls. If climate controls are inoperative,follow normal diagnostic procedures using the WSM.48.Open the hood.49.NOTE:Vehicle doors should be closed while performing this step.Confirm that the vehicle will not remote start with the hood open.Please contact 1-800-FORD-KEY with any issues regarding hardware or kit contents.50.See the Scalable Remote Start System Diagnosis Guide to resolve issues identified by the functionaltest.Optional RMST Upgrade Components "Sold Separately"51.Review the RMST Upgrade components.Remote Start (RMST) Upgrade - Antenna Kit "Sold Separately"QUANTITYDESCRIPTION 1Extended Range Antenna (15603)Extended Range Antenna Installation (Optional)52.Clean the antenna mounting surface using an alcohol base solution and a clean cloth.II.Remote Start (RMST) Upgrade - Antenna Kit "Sold Separately"CAUTION:Carefully route and secure the antenna and harness so that they do not interfere with moving parts or linkages.54.Position the LH A-pillar trim slightly outward to provide access to route the antenna wire.NOTE:Do not route the antenna wire over the top of air bags.55.Route the antenna cable along the headliner and down the LH A-pillar towards the floor. Continuerouting the wire Into the IP towards the VSS module.•Secure with tie-straps.56.Connect the antenna connector to the VSS module.57.Reposition the A-pillar trim panel back.53.NOTE:Do not touch the adhesive, reduced adhesion may result.NOTE:Make sure that the long wire on the antenna is pointing towards the top of the windshield since this wire will be routed along the headliner.NOTE:The wire will be attached to the control module later in this procedure.Remove the protective backing from the adhesive on the antenna and firmly press the body of the antenna onto the mounting surface.。
VSS的安装和使用方法
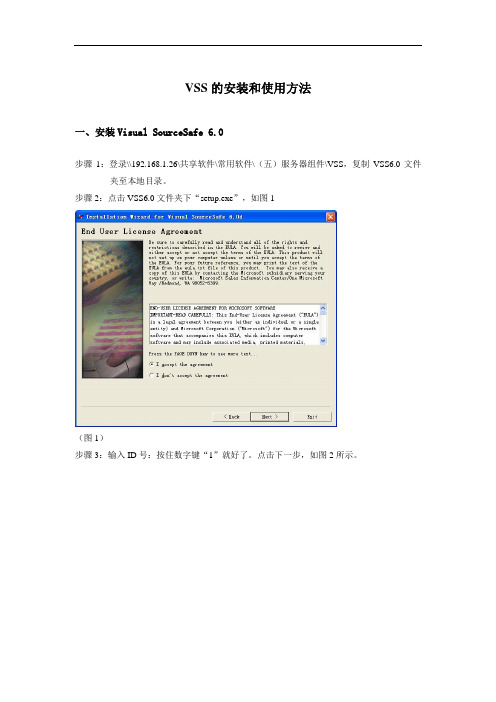
新的文档可以直接拖进VSS指定的目录下,对已经存在的文档进行修改,首先执行get latest version取得最新的版本,然后执行check out,到本地对应的文档进行编辑操作。如果本机上的文档与VSS上不一致,会出现图(11)的对话框,上面的意思是把本机上的文档覆盖VSS上的,下面那条是把VSS上的文档覆盖本机上的。根据实际情况进行选择,但一定要小心,避免不必要的返工。
图(13)
四、注意事项
(1)同一文件,多个人有修改的权限时,如果文档被其他人check out正在进行修改时,你不能同时check out进行修改,如果这样,后提交(check in)的会覆盖掉前面同时修改人的修改内容。
(2)对VSS上文档的修改,要养成填写comemnt的好习惯,便于文档的读者明白你修改了那些内容,也方便日后自己查找。
三、VSS界面操作
根据权限分配,每个用户分别拥有RCAD四个使用权限,权限分配的具体情况见《VSS权限管理》。
R:Read(只读)
C:Check Out/Check In(修改)
A:Add/Rename/Delete(新增目录/文档,对目录/文档重新命名,删除目录/文档)
D:Destroy(从服务器上彻底的删除)
(图2)
步骤4:选择安装路径,点击确认。如图3
(图3)
步骤5:选择第一个按钮,进行客户端安装。如图4
(图4)
)
说明:如遇到安装不了的情况,请直接打开VSS\VSS\Win32\ssexp.exe直接运行客户端。
二、登录VisualSourceSafe 6.0
步骤1:启动Microsoft VisualSourceSafe6.0(以下简称VSS),将跳出如图6的登录对话框,输入你的用户名和口令,
VSS的安装和使用流程
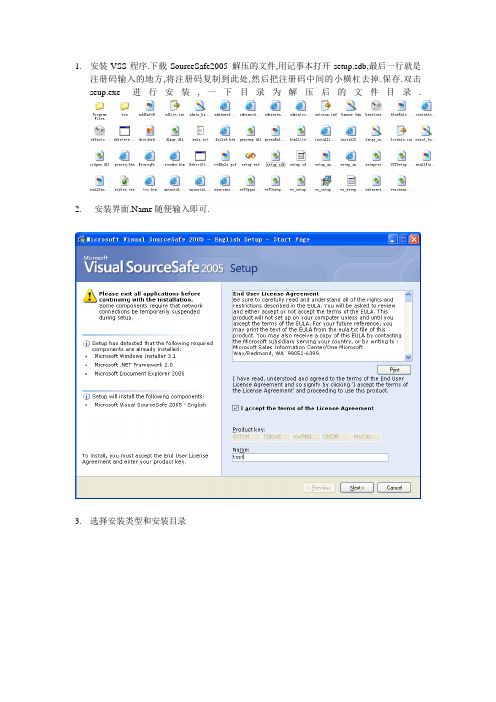
1.安装VSS程序.下载SourceSafe2005 解压的文件,用记事本打开setup.sdb,最后一行就是注册码输入的地方,将注册码复制到此处,然后把注册码中间的小横杠去掉.保存.双击seup.exe进行安装,一下目录为解压后的文件目录.2.安装界面.Name随便输入即可.3.选择安装类型和安装目录4.正在安装界面5.安装成功界面6.开始配置VSS2005.打开Microsoft Visual SourceSafe Administration创建database7.创建数据库,数据库的目录应该是一在服务器上的一个共享地址.这样就数据库创建好了.8.创建用户.开启读写权限9.现在数据库用户都创建了,可以登录了.选择Microsoft Visual SourceSafe打开以后的界面:创建项目现在可以开始上传你的工程了.打开到你的工程目录,直接拖放到到VSS上创建的目录上就可以了,如果你看VSS上有些目录不存在,则要手动的一个个目录对应的拖放上去.上传以后的现实设置工程目录,下图菜单中的Set Workding Folder.. 来设置默认的工程目录,设置以后每次Check Out 文件就不用选择目录了.其它用户更新自己本地文件的时候就选择Get Latest Vesion.Get Latest Vesion 选项Check Out 整个目录,可以加上注释.一般需要修改哪个文件了就直接找到那个文件Check Out 就行了,因为一个人把整个工程都check out了别人想修改就没办改了.修改完之后要记得再check in , check out 的时候要注意不要把服务上的文件覆盖了Check Out 的时候提示本地的文件可能和服务器上的不一样,是用服务器上的覆盖本地的还是用本地的覆盖服务器上的.看清楚了再选择Check Out 以后VSS服务器上会显示当前是哪个用户check out 了.右键点击文件可以对比文件。
VISUAL SOURCE SAFE 6.0安装技术文档
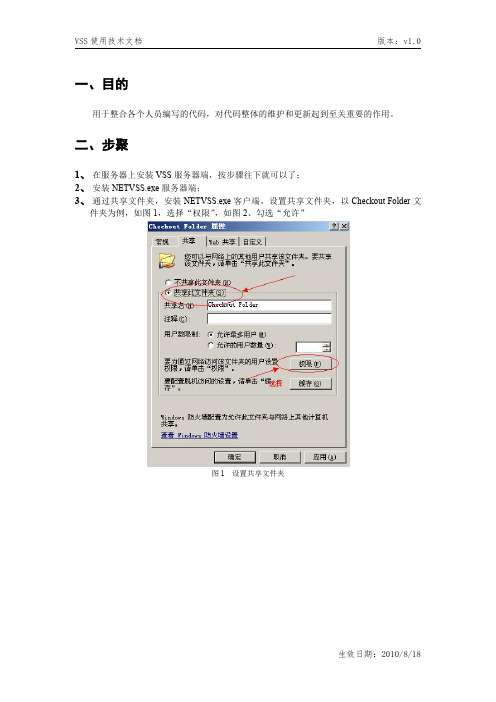
一、目的用于整合各个人员编写的代码,对代码整体的维护和更新起到至关重要的作用。
二、步聚1、在服务器上安装VSS服务器端,按步骤往下就可以了;2、安装NETVSS.exe服务器端;3、通过共享文件夹,安装NETVSS.exe客户端,设置共享文件夹,以Checkout Folder文件夹为例,如图1,选择“权限”,如图2、勾选“允许”图1设置共享文件夹图2选择“权限”然后,如图3、4、5、选择“添加”,添加“Guest”用户,图3选择“高级”图4选择“立即查找”图5勾选Guest的所有属性如图6、接着设置权限:图6设置Guest权限如图7、勾去“账户已禁用”这个选项,即可图7勾去“账户已禁用”4、如图8、在网上邻居中“添加网上邻居”,图8点击“添加网上邻居”如图9、根据提示,选取Checkout Folder文件夹图9进行网上邻居配置最后选择,服务器VSS文件夹中的NETVSS.exe安装就可以了5、服务器和客户端都安装好之后,就要进行调试首选ping下对方计算机是否连通;1:在计算机管理里面查看本地用户,启用guest帐号。
2:打开计算机管理->服务和应用程序->服务,在右窗中确保“computer browser”"server"两项没有被停止或禁用。
3:打开网络连接->本地连接->安装ipx/spx服务确保文件共享。
如果还不能共享的话请在文件夹选项->查看->使用简单共享打勾。
4:更改防火墙设置:勾选“文件和打印机共享”,如图10图10勾选“文件和打印机共享”5:查看本地安全策略设置是否允许guest(来宾)帐号从网络上访问。
在运行里输入gpedit.msc,弹出组策略管理器,在‘计算机配置-windows设置-本地策略-用户权利指派’中,有“拒绝从网络访问这台计算机”策略阻止从网络访问这台计算机,如果其中有guest帐号,解决办法是删除拒绝访问中的guest帐号。
如何使用vss安装说明
一.服务器配置。
1.首先建一个共享文件夹。
这里以E:\MyTest为例,并且应该给该文件夹分配共享权限,以及在安全里配置everyone和guest用户的所有权限。
2.然后登陆VSS服务器端。
3.然后建一个数据库。
4.下一步,选择创建一个数据库。
5.点击下一步。
选择刚才共享的文件夹。
6.点击下一步。
名字就叫:MyTest 。
7.点击下一步。
注意这里的要选择“Lock-Modify-Unlock"这个选项,这个选项的意思就是当别人修改的时候,你不可以修改这个文件。
8.点击下一步。
点击完成!。
然后为Admin用户添加密码。
9.见下图。
这步也添加一个用户,用户名和密码都设置为:DL修改密码:点击ok,密码修改成功。
10.打开VS,新建一个工程。
位置:选择刚才数据库(也就是共享的文件夹)12.这步是将工程添加到代码管理工具。
右键 ----->将解决方案添加到源代码管理。
如果:右键找不到[ 将解决方案添加到源代码管理 ]选项,需要进行配置一遍。
方法:工具----->选项------>源代码管理------>选择VSS 确定即可。
用Admin用户登陆。
这里的话,我们可以把Name中填入空,这样就能保证目录的顺序。
到这里,服务器端发布代码就完成了。
二.客户端。
先用刚才的DL用户登陆。
进去后,界面如下:解决方案文件MyApplication.sln选择Get Latest Version(或者是 Check Out)选择保存路径为:F:\MyWork 点击ok。
然后到F:\MyWork 下找到该解决方案。
双击打开,然后用DL用户签到本地。
OK,到这里,整个配置都完成了。
需要注意的是:1.有时用户必须在服务器登陆一遍,其他客户机器才能登陆。
3.服务器端建用户时,把Read Only不能勾上。
2.如果在别的机器上,可以采用如下方式:(中间连接的某步需要指定IP/共享文件夹名)文件---->打开---->直接找到MyTest里的sln解决方案文件打开即可。
VSS安装与配置
VSS的安装与配置一、VSS安装(服务器端和客户端均需安装)1、在弹出的界面中将复选框I accept the terms of the License Agreement 选中,表示同意VSS 的用户协议。
2、这一步中需要选择安装特征,其中分为Default(默认)、Full(完整)和Custom(自定义)安装,一般我们选择Default默认安装就行了,在窗体右边选择安装路径,然后点Install(安装)。
Framework 2.0; Document Explorer 2005和Visual SourceSafe 2005。
4、当看到下图,那么恭喜你,安装成功,选Finish,结束安装。
二、服务器端配置VSS administrator 是一个所谓服务器端的工具,用于管理VSS数据库,用户,组织属性,权限等。
1、创建DataBase步骤第一步:开始→程序中找到Visual SourceSafe安装好的目录,选择里面的Visual SourceSafe Administration运行服务器端并登陆,如下图:第二步:选择File下面的New Database创建VSS数据,在弹出来的窗口直接点击“下一步”。
注意:选择创建路径,在选择创建路径之前,需要先在你电脑的盘下新建一个文件夹,并把文件夹设置为共享,而且必须将权限设成允许更改和读取。
第三步:点击Browse 找到刚刚新建共享的文件夹,点击“下一步”,如下图:第四步:这一步是更改数据连接名,然后点击“下一步”。
第五步,注意这里的要选择“Lock-Modify-Unlock"这个选项,这个选项的意思就是当别人修改的时候,你不可以修改这个文件。
接着点“下一步”到“完成”。
这个时候我们再看“C:\Documents and Settings\Administrator\桌面\VSS”这个文件夹里的时候,会发现这个文件夹下面有文件生成。
第六步,更改服务器配置确定之后,出现如下,直接点OK就可以了2、账户管理此时已经有三个用户(其中Admin是管理员用户,Administrator是为本机分配的用户账户,Guest用户是来宾账户),通过User项可以添加、删除账户并修改密码。
Eclipse下VSS的安装和使用
Eclipse(MyEclipse)下VSS的安装和使用一、下载VSS插件可以去官方网站下载,也可以在这里下载最新的org.vssplugin_1.6.2 Eclipse的VSS插件。
文件大小大约1MB。
二、安装1.把下载回来的.rar压缩包解压,得到名为org.vssplugin_1.6.2的文件夹。
2.把该文件夹连同其下的所有文件放到Eclipse安装目录下的plugins文件夹下(MyEclipse中放到MyEclipse安装目录下的Eclipse目录下的plugins文件夹下)。
3.打开Eclipse(MyEclipse),打开“help/About。
”菜单,在出现的对话框中点“Plugin-Details”,可以查看目前已经安装的所有插件,在这里查看是否有刚才安装的org.vssplugin_1.6.2的包,如果有就说明安装成功了,如果没有,则需要关闭Eclipse(MyEclipse),然后把Eclipse(或者MyEclipse/eclipse)目录下的configuration目录里除了config.ini文件之外的所有目录和文件删除,这样就可以清除以前的配置,再重新启动Eclipse(MyEclipse)就可以看到安装的插件了。
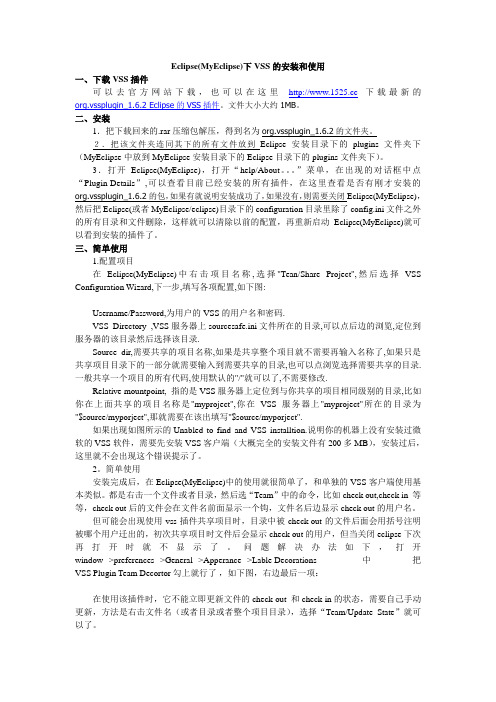
三、简单使用1.配置项目在Eclipse(MyEclipse)中右击项目名称,选择"Tean/Share Project",然后选择VSS Configuration Wizard,下一步,填写各项配置,如下图:Username/Password,为用户的VSS的用户名和密码.VSS Directory ,VSS服务器上sourcesafe.ini文件所在的目录,可以点后边的浏览,定位到服务器的该目录然后选择该目录.Source dir,需要共享的项目名称,如果是共享整个项目就不需要再输入名称了,如果只是共享项目目录下的一部分就需要输入到需要共享的目录,也可以点浏览选择需要共享的目录.一般共享一个项目的所有代码,使用默认的"/"就可以了,不需要修改.Relative mountpoint, 指的是VSS服务器上定位到与你共享的项目相同级别的目录,比如你在上面共享的项目名称是"myproject",你在VSS服务器上"myproject"所在的目录为"$source/myporject",那就需要在该出填写"$source/myporject".如果出现如图所示的Unabled to find and VSS installtion.说明你的机器上没有安装过微软的VSS软件,需要先安装VSS客户端(大概完全的安装文件有200多MB),安装过后,这里就不会出现这个错误提示了。
VSS服务器使用安装
第一步,为整个项目创建一个VSS数据库(在VSS服务器安装时,系统已经创建了一个缺省数据库Common),启动Visual SourceSafe6.0 Admin(Start/Programs/Microsoft Visual Studio6.0/Microsoft Visual SourceSafe/Visual Sou rceSafe6.0 Admin),跳出对话窗口,点击下拉菜单Tools中的Create Database ...菜单项,将出现对话窗口,选择新数据库的路径,例如创建MyApp数据库,然后点击OK按钮,系统将完成创建工作。
第二步,为新创建的数据库(例如MyApp)建立用户,首先需要打开该数据库,点击下拉菜单Users/Open SourceSafe Database...,然后选择数据库MyApp并打开。
再选择菜单项Add User...,输入用户名和口令。
然后依次创建其他的用户。
可以为不同的用户设置针对不同项目文件夹的不同存取权限,存在两种方法:1)使用VSS提供的功能。
选中Tools/Options…对话框中Porject Security属性页的Enable Project Security复选框并选择Tools/Rights by Project…或者Tools/Rights Assignments for User…进行设置;2)使用windows操作系统的cacls命令。
第三步,在该新建的数据库中创建项目Project。
启动 Microsoft Visual SourceSafe6.0(Start/Programs/Microsoft Visual Studio6.0/Microsoft Visual SourceSafe/Microsoft Visual SourceSafe6.0),出现对话窗口,点击下拉菜单File中Open SourceSafe Database...,跳出对话框,选择一个数据库(例如MyApp),双击它或按Open按钮打开该数据库;一个项目Project是一组相关的文档或者是一个文件的集合,VSS允许你以任何的层次结构来存贮和组织你的项目。
VSS安装操作说明(详细截图)
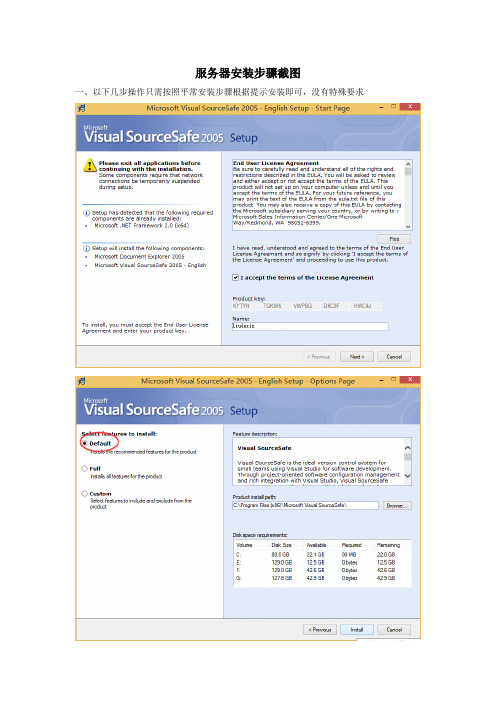
服务器安装步骤截图一、以下几步操作只需按照平常安装步骤根据提示安装即可,没有特殊要求二、设置1、建库注意:在此处输入项目程序存放位置,下一步则是给数据库起名,建议这两处为的名字相同,例如在本例中我都用“Project”2、设置共享上述步骤完成以后,需要将project文件夹设置为共享,此处不再截图说明3、设置权限管理注意:此处勾选上后,每次登录的时候无须输入用户名、密码,如果需要根据实际情况自己用不同的账号登陆则此处无需勾选注意:此处勾选上后才能给新增用户分配权限4、新增用户5、添加解决方案此处点击是按钮,则解决方案添加完成三、客户端四、异常处理(\serve\vssdose not contain a valid sourcesafe database(srcsafe.ini))配置完成后有可能会在客户端连接服务器的链接不上的情况,此时可以按照以下步骤操作1、在电脑中,依次点击开始-运行输入你所建的文件夹的地址,本例为//IP地址/Project看看是否能够连接成功,如果不能则需要输入用户名、密码保证能正常访问服务器2、运行组策略编辑器gpedit.msc -》打开计算机配置-》windows设置-》安全设置-》本地策略-》安全选项中的:网络安全:LAN管理器(XP中叫LAN Manager)身份验证级别,默认是“没有定义”,更改为“发送LM和NTLM响应3、将服务器数据库目录下(Project)的srcsafe.ini和users.txt拷到本地的我的文档里面4、并确认以下服务的[启动类型]选为[自动],并确保[服务状态]为[已启动]WorkstationComputer BrowserDHCP ClientRemote Procedure CallRemote Procedure Call (RPC) LocatorDNS ClientFunction Discovery Resource PublicationUPnP Device HostSSDP DiscoveryTIP/IP NetBIOSHelper。
VSS 安装和客户端配置
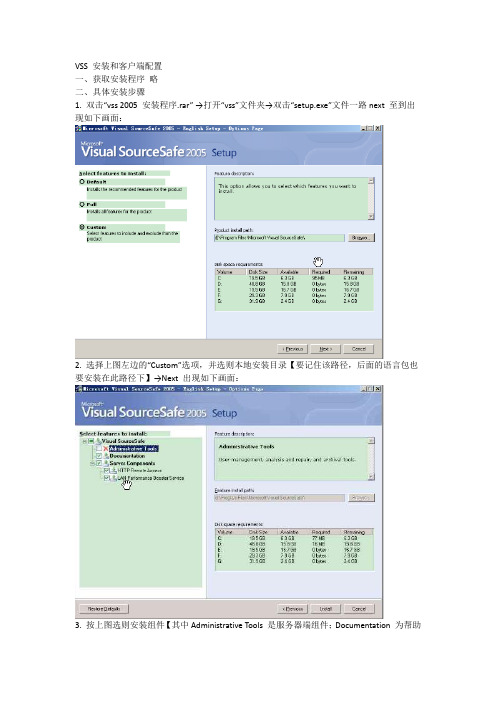
VSS 安装和客户端配置一、获取安装程序略二、具体安装步骤1. 双击“vss 2005 安装程序.rar” →打开“vss”文件夹→双击“setup.exe”文件一路next 至到出现如下画面:2. 选择上图左边的“Custom”选项,并选则本地安装目录【要记住该路径,后面的语言包也要安装在此路径下】→Next 出现如下画面:3. 按上图选则安装组件【其中Administrative Tools 是服务器端组件;Documentation 为帮助文档大家可自己决定安装与否;Server Components 是客户端组件必须安装】→ 点Install,然后一路NEXT 下去就OK 了。
4. 接着安装“VSS.2005 简体中文语言包.rar”,选择其中的“VSS.2005.LP.2052.exe” 文件,一路NEXT 下去就好了,需要特别注意的是安装路径必须和步骤6 的路径相同。
三、客户端连接服务器端VSS数据库5. 本机开始→程序→Microsoft Visual SourceSafe→Microsoft Visual SourceSafe 出现如下画面:6. 点击下一步出现如下画面:7. 选中“连接一个现有的数据库” →下一步,出现如下画面:8. 点击浏览出现如下画面:9. 点击上图左侧的“网上邻居”图标,出现如下画面:10. 在上图文件名中输入:\\192.168.0.26 点击打开,出现如下画面:11. 选择你参加的项目点击进入,例如:打开Vss_PMIS 文件夹,出现如下画面:12. 选择srcsafe.ini 文件→点击打开,一路NEXT 至到出现如下画面:13. 用户名和密码同步骤2,【例:****对应houhj,密码也是houhj】。
:(1 )此处的用户名和密码是登陆Vsserver 服务器上某个项目数据库的凭证【如:Vss_PMIS】,用户登陆后可自行修改(2)步骤2 的用户名和密码是用户登陆Vssserver 服务器的凭证,用户不能自行修改(3)为了方便大家记忆,故将两处用户名和密码设置成相同的,请大家注意区分14. 输入各自的用户名和密码,出现如下画面:至此连接操做全部完成。
VSS客户端安装及使用手册
VSS 客户端安装及使用手册
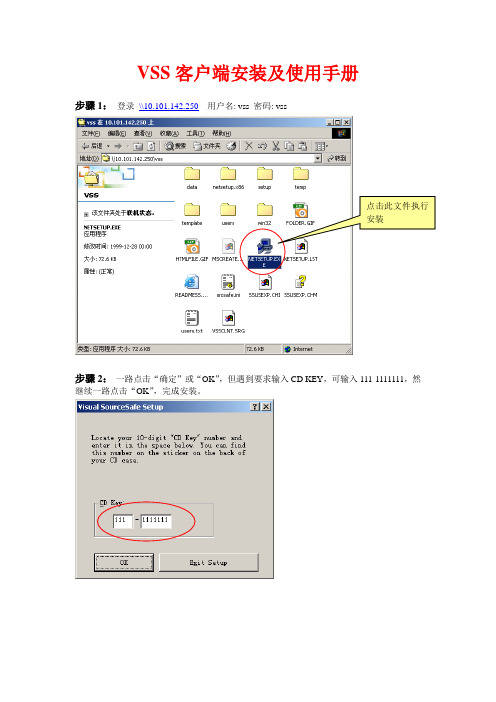
步骤1: 登录 \\10.101.142.250 用户名: vss 密码
: vss
步骤2: 一路点击“确定”或“OK ”,但遇到要求输入CD KEY ,可输入111-1111111,然
继续一路点击“OK ”,完成安装。
步骤3: 安装完后,点击“开始菜单 -> 程序 -> Microsoft V isual SourceSafe -> Microsoft
Visual SourceSafe 6.0 ”进入VSS 客户端。
步骤4:登录VSS 服务器,会出现登录对话框,这个时候,首先点击对话框上的按钮
“Browser …”,在 \\10.101.142.250\afc 中心技术文档 目录下选择 “srcsafe.ini ”文件,然后在对话框的“username ”
”即可进
入VSS
步骤5:登录VSS 服务器后,可以通过菜单“Tools\Change Password ”修改自己登录密码。
在这里修改自己的
登录密码
目前,VSS的所有用户,除管理员账户外,所有账户均仅有浏览权限。
vss安装及服务器端
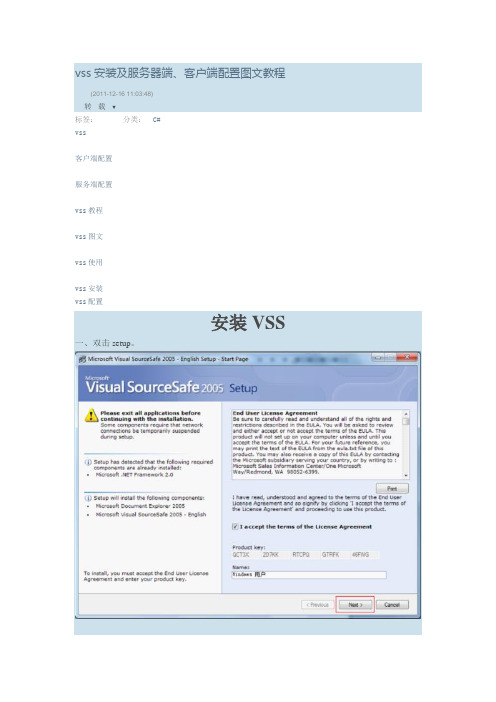
vss 安装及服务器端、客户端配置图文教程(2011-12-16 11:03:48) 转载▼标签: vss客户端配置服务端配置 vss 教程 vss 图文 vss 使用 vss 安装 vss 配置分类: C#安装VSS一、双击setup 。
之后点完成。
就安装完了!服务器端VSS配置一、选择开始——所有程序——打开一直下一步到完成二、然后再打开说明:把这个enable rights and assignments commands选项选上。
这是给用户分配权限用的三、共享权限找到你刚才新建的database。
我刚建的叫supsoft.为该文件夹设置共享权限。
点击权限.给everyone增加更改和安全控制权限。
四、分配用户将项目组成员的姓名一个个添加进来。
密码可以就设置为空。
让每个用户登录后自己修改密码。
五、将项目加入到vss中来。
打开一个项目。
选择文件——源代码管理——将项目加入到源代码管理中。
一直点下一步项目添加完成后。
再回到vss administrator.六、该给用户分配项目的权限了Tools——rights by projects为每个用户添加权限打开tools——rightsasignments for user为用户分配该项目的权限说明:点击add asingment..分配权限即可。
到这儿。
服务器端的配置就算完成了。
.这样就可以将你的项目在vs环境中打开了。
这时vs中看到的项目是加上锁的。
选择你要修改的部分,右键单击选择签出以进行编辑。
便可以修改你的项目了。
修改完后右键选择签入就可以了。
注意:每次修改前请单击右键选择递归获得最新版本。
每次修改后请生成成功以后再签入。
注意:如果你将项目添加到服务器端出问题了,或者你登录的时候说找不到共享文件夹的时候。
可以试着打开网上邻居。
找到工作组计算机。
打开服务端所在的计算机登录。
就可以打开看到服务器共享文件夹了。
再登录或添加项目的时候就没问题。
我也不知道为什么。
VSS安装图解
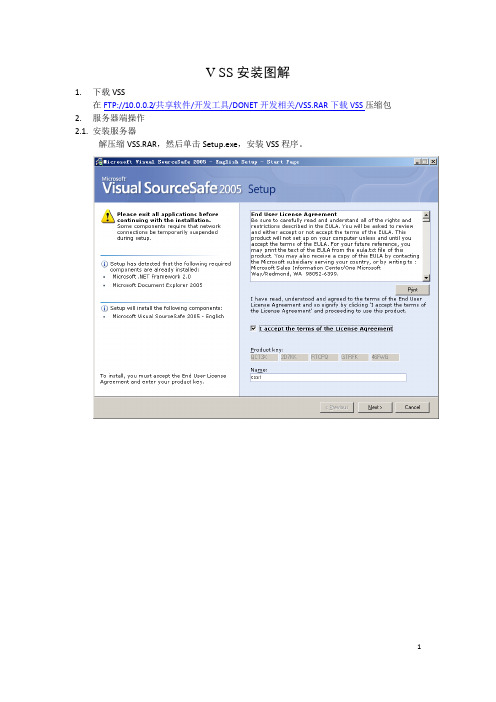
V SS安装图解
1.下载VSS
在FTP://10.0.0.2/共享软件/开发工具/DONET开发相关/VSS.RAR下载VSS压缩包2.服务器端操作
2.1.安装服务器
解压缩VSS.RAR,然后单击Setup.exe,安装VSS程序。
安装完毕后,打开开始中打开Microsoft Visual SourceSafe程序开始安装配置服务器端。
选择第二个选项,创建数据库。
建立数据库存放的文件夹。
选择第一选项,表示只能一人签出。
使用Admin登录,密码为空。
创建项目名称,用于源代码管理。
2.3.分配用户
分配客户端用户信息,用户名和密码。
将数据库文件夹设置为共享。
将VSS作为插件添加到VS 中。
2.6.上传代码文件
3. 客户端操作
3.1. 安装客户端
安装方法与安装服务器端方式相同。
3.2. 映射网络驱动器
将服务器端数据库文件夹映射为本地Z盘。
3.3.配置客户端
3.4.配置VS
与配置服务器端VS相同
3.5.下载代码文件
将服务器端源代码文件在VS中打开。
VSS的安装和使用

8、File->Create Shortcut(文件->创建快捷方式)
给该配置库创建一个桌面快捷方式。
9、File->Label(文件->标记)
给项目或文件打标签。
• • 标签名最长为31个字符。 打标签是对所选的项目或文件创建了一 个与原来版本一样的新版本。
•
当工作进展到特殊时期的时候,可以对 相关的项目打一个统一的标签,以便以 后能够获取该标签的一套完整的内容。
6、File->Properties(文件->属性)
查看文件属性。 (1)General:文件的基本信息。 (2)Check Out Status:文件的迁出信息。 (3)Links:记录了Share后的每个项目路径。 (4)Paths:显示了Branch的历史情况。
7、File->Set Working Folder(文件->设置工作目录)
2、File-> Add File
向指定的Project中添加文件。 – Apply same comment for all:批量增加文件时,所有的文件的Comment一致。 – Store only latest version:只存储最后一个版本。 – Check Out immediately:添加到配置库时,立即做一次该文件的迁出操作。 – Remove local copy:删除本地的文件。 – File type:设置文件的类型,有六个选项(Auto-detect、Binary、 ANSI/MBCS、Unicode(UTF-8)、Unicode、Unicode(Big Endian))。
Visual SourceSafe(VSS)概述
• 提供了完善的版本和配置管理功能,以及安全保护和 跟踪检查功能。 • 不管什么类型的文件,VSS都可以通过将文件存入数据 库来帮助用户管理项目。 • 当向VSS添加文件时,文件被备份到数据库中,使任何 用户都能访问文件,对文件的任何改动都会记录下来, 用户可以恢复文件的早期版本。 • 开发人员可以从开发环境中访问VSS功能。 • 使得项目组间的沟通与合作更简易而且直观。
VSS安装和客户端配置
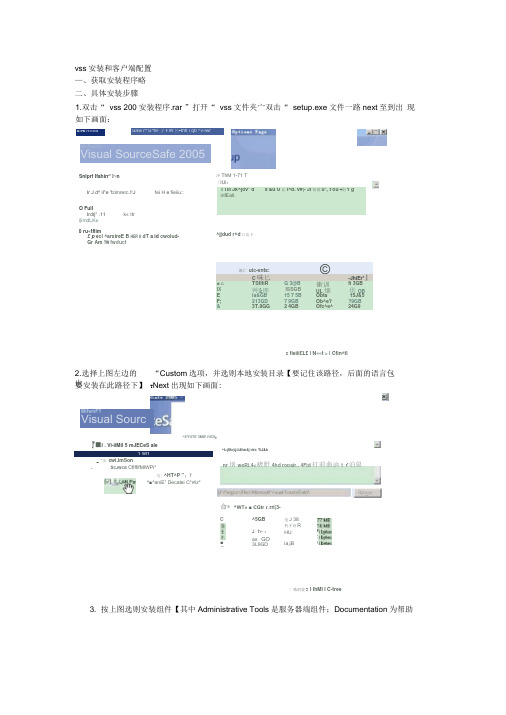
^EYUTE 3MIF.fUDI :『■I . Vi-iiMil 5 mJECeS ale1 wlf_ "出 cwi.imSon- S CJWCB CflffifMlWPi*电| ^HT^P " ;f^■^aniE 1 Decatei C*r4z*命* ^WT» ■ CGtr r _rri|3-< 皓的瓷3 I IhMl I C-tree3. 按上图选则安装组件【其中Administrative Tools 是服务器端组件;Documentation 为帮助vss 安装和客户端配置 —、获取安装程序略 二、具体安装步骤 1.双击“ vss 200安装程序.rar ”打开“ vss 文件夹宀双击“ setup.exe 文件一路next 至到出 现如下画面: ■»Hi rrciica McToiOf|>, Visual SourceSafe 2005Saw r^'S^fiF 孑FW 呂-tnfl i qb ^v-lwf Snlprt Ifahirr* l~n冷ThM 1-71 T 「IUl : Ir J.d^ il"e 'fzimrerc.!!J fei H e fieiiu::TTiii Jk^jov 1 d s'&u U 沁l^d. v#|- Ji 怡就u*, t ou #則1 ginfEall.O FullIrdrj" .11 k« Itr i|imdLK± 0 ru«tflim£ p ecl ^arxireE B HER U dT a id cwolud-Gr Am TW fwduct ^jjdud r^d 口出卜厲亡 uic-ents:©C 味匕-JhiEr*』 ■ c TSfifiRG 3@B 衝训 fi 3GB IX 艸&理ISSGB UL 畑供OBE ia&GB 15 7 5B Obta 15J&5 F; 213GD 7 9GB Ob^e? ?9GB & 3T.9GG2 4GBOfc^e^24G9c fieiii£L£ I N««t > I Cfin^tl 2.选择上图左边的 “Custom 选项,并选则本地安装目录【要记住该路径,后面的语言包也 要安装在此路径下】 T Next 出现如下画面: MifwnF? Visual Sourc^5GB J h-:as GO 3L9GD电J 38 朽孑诗RHU ia.jB^I<jllfe|ijiii4htr4j ti¥e TiJ&hnr 刖weRj 4<楮野4hd ropair,. 4Fid 打前曲讷t (泊鼠C■Gu u o文档大家可自己决定安装与否;Server Compo nents是客户端组件必须安装】f点In stall, 然后一路NEXT下去就0K 了。
VSS安装教程和使用教程
VSS安装教程和使用教程VSS配置安装教程一、Vss安装第一步:将Visual SourceSafe2005安装包解压。
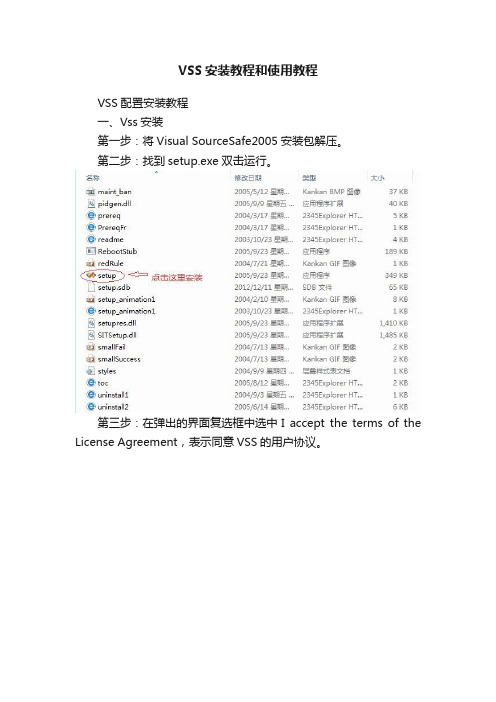
第二步:找到setup.exe双击运行。
第三步:在弹出的界面复选框中选中I accept the terms of the License Agreement,表示同意VSS的用户协议。
此处序列号已经默认填写好,直接点击Next即可。
第四步:选择安装特征,其中分为Default(默认)、Full(完整)和Custom(自定义)安装,一般我们选择Default默认安装即可。
在窗口右边点击Browse选择安装路径,然后点击Install。
第五步:这一步程序会自动运行安装,只需要等待。
第六步:然后出现下图所示,安装成功,选Finish完成安装。
二、服务器端配置(Vss2005)VSS administrator是一个服务器端的工具,用于管理VSS数据库、用户、组织属性、权限等。
1、创建DataBase步骤第一步:在Visual SourceSafe安装目录下,选择ssadmin运行服务器端并登陆,如下图。
第二步:在创建路径前,先你的电脑的盘下新建一个文件夹(database),并把文件夹设置为共享,而且必须将权限设成允许更改和读取,共享时设置为“everyone”并“添加”。
可以设置为“完全控制”看看。
第三步:选择File→New Databae,创建VSS 数据库database ,直接点击“下一步”。
第四步:点击Browse找到刚刚新建的文件夹database,点击“下一步”,如下图。
第五步:这一步是更改数据连接名,一般保持默认的文件夹名就好,直接点击“下一步”。
第六步:点击完成OK。
2、新建用户第一步:点击Tools→options,给用户登陆服务器数据库database权限和分配权限。
给用户配置权限时,最好开始只分配“Read”权限。
第二步:下面开始新建客户端的用户:选择Users下面的Add User,输入用户名和密码(密码可以设置为空),点击“OK”,添加用户成功。
- 1、下载文档前请自行甄别文档内容的完整性,平台不提供额外的编辑、内容补充、找答案等附加服务。
- 2、"仅部分预览"的文档,不可在线预览部分如存在完整性等问题,可反馈申请退款(可完整预览的文档不适用该条件!)。
- 3、如文档侵犯您的权益,请联系客服反馈,我们会尽快为您处理(人工客服工作时间:9:00-18:30)。
1.下载VSS
在,然后单击,安装VSS程序。
1.1.配置服务器
安装完毕后,打开开始中打开Microsoft Visual SourceSafe程序开始安装配置服务器端。
选择第二个选项,创建数据库。
建立数据库存放的文件夹。
选择第一选项,表示只能一人签出。
使用Admin登录,密码为空。
创建项目名称,用于源代码管理。
1.2.分配用户
分配客户端用户信息,用户名和密码。
1.3.共享数据库文件
将数据库文件夹设置为共享。
1.4.配置VS
将VSS作为插件添加到VS 中。
1.5.上传代码文件
2.客户端操作
2.1.安装客户端
安装方法与安装服务器端方式相同。
2.2.映射网络驱动器
将服务器端数据库文件夹映射为本地Z盘。
2.3.配置客户端
2.4.配置VS
与配置服务器端VS相同
2.5.下载代码文件
将服务器端源代码文件在VS中打开。
