雾化器维护手册
超声雾化器使用与维护
超声雾化器使用与维护一、超声雾化器的使用步骤:1.准备工作:确保超声雾化器处于完好状态,接通电源并检查电源线是否接触良好。
2.准备液体药物:将所需的液体药物倒入雾化器的药杯中,注意不要超过标示线。
不同药物的使用方式可能有所不同,所以最好在使用前仔细阅读说明书。
3.调节参数:根据需要,可调节雾化器的运行时间、震动频率和雾化速度等参数。
一般来说,儿童使用较小的参数,而成人则使用较大的参数。
4.使用雾化器:将口罩或嘴罩正确地安装在患者的口鼻处,并确保密封良好。
然后将雾化器开关打开,开始雾化。
患者应该保持深呼吸,以确保药物雾化物完全吸入呼吸道。
5.结束使用:使用完毕后,将雾化器开关关闭,并将其拆卸进行清洗和消毒。
同时,将雾化器存放在干燥通风的地方,以免受潮或受到污染。
二、超声雾化器的维护方法:1.零部件清洗:使用完毕后,拆卸超声雾化器的各个零部件,如药杯、雾化器头等,用温水或洗涤剂进行清洗。
切勿使用热水或擦洗工具,以防损坏零部件表面。
2.消毒处理:将清洗后的零部件浸泡在医用消毒液中,按照说明书的建议时间进行消毒处理。
然后用清水冲洗干净,确保消毒液完全清除。
3.电路保养:定期检查超声雾化器的电路部分是否有断线或者其他故障。
如发现问题,应及时请专业技术人员修理或更换零部件。
4.存放环境:超声雾化器在存放时,应放置在干燥通风的地方,远离阳光直射和潮湿环境,以防止雾化器受潮或发生腐蚀。
5.定期检查:定期检查超声雾化器的使用效果和工作状态,如发现异常情况,应及时进行处理或更换零部件。
总之,超声雾化器作为一种重要的医疗设备,使用和维护得当可以保证其正常工作并延长使用寿命。
因此,正确的使用和维护超声雾化器对于保证治疗效果具有重要意义。
在使用前应仔细阅读使用说明,并根据需要调节相关参数。
同时,定期对雾化器进行清洗、消毒和检查,确保其处于良好状态。
通过以上措施,可以确保超声雾化器的安全和有效使用。
雾化器启动维护保养说明书
START UP AND MAINTENANCE INSTRUCTIONS FORSHATOMIZER :喷雾器启动及维护手册TABLE OF CONTENTS目录1 START UP OF SHATOMIZER 启动喷雾器1.1Installation cold state / first start up 冷状态安装/首次启动1.2Start up after standstill 停止后再启动1.3Action temporary standstill 暂停启动1.4Withdrawing shatomizer from use 使用状态中撤下喷雾器1.5Replacing shatomiser 喷雾器的更换2 SETTINGS 装置配备2.1 Electrical cabinet: 电气柜2.1.1 Vibro Check稳定性检查2.2 Mechanical cabinet: 机械柜2.2.1 Oil-air lubrication unit 油气润滑单元2.2.2 pressure monitoring device primary cooling 压力监控装置初始冷却2.2.3 Heating element 加热装置2.2.4 Pressure reducing valve 减压阀2.2.5 Manual temperature control valve on secondary cooling circuit第二阶段冷却循环手动温控阀3 MAINTENANCE 维护3.1 Maintenance维护3.1.1 Shatomizer / Spray-disc 喷雾器/喷雾盘3.1.2 Mechanical cabinet 机械柜3.1.2.1 General 概述3.1.2.2 Secondary water filter 二次水过滤3.1.2.3 Filter in reducing valve secondary water 二次水过滤减压阀中的过滤器3.1.2.4 Temperature-controlled valve in secondary water pipe 二次水循环管中的温控阀3.1.2.5 Oil-lubrication unit 注油单元3.1.2.6 Cooling air fan for shaft 传动轴空气冷却风扇3.1.2.7 Cooling pumps for primary cooling system 基本冷却系统冷却泵3.2 Data sheets 相关数据3.2.1 Intervention report shatomizer 喷雾器干预报告3.2.2 Shatomizer filing card 喷雾器存档实用卡片1 START UP OF SHATOMIZER1 喷雾器启动1.1 INSTALLATION COLD STATE / FIRST START UP:1.1冷状态安装/首次启动1) Place shatomizer in wait position placed closest to the shaft将喷雾器放置在离传动轴最近的地方2) Cover in hoist. 置于起重机下方3) Connect couplings on shatomizer in following order: 按以下顺序联接各部件- Connect steel lifting cable 联接起吊钢丝绳- Power plug 电源电缆插头- Control plug 控制电缆插头- Cooling water in 冷却水进水- Cooling water out 冷却水回水- Lime milk / and water 石灰乳/和水- Sealing air 密封空气- Removal of closing coupling oil lubrication and place on the holderProvided 卸除油润滑装置隔离联接器,放在底座上- Installation of oil lubrication coupling 安装油润滑装置联接器。
雾化机的清洁与维修

雾化机的清洁与维修
清洁:
1.槽中应加入干净水,尤其是日用水质不好的地区,防止晶片表面结垢。
注入水槽中的水温度不低于15℃,否则会影响雾化率;超过60℃时要及时换水。
2.面罩波纹管、雾化杯等用化学法消毒(勿用酒精或高温消毒),每次使用完毕,将水槽中的水完全放掉,擦干雾化器,晶片用软布擦干。
若发现晶片上有水垢,用晶片专用清洗液浸泡3~5min,然后擦干,以延长寿命。
维修:
(1)不通电。
查看电源是否有电,电源线、熔断丝是否完好,定时器是否定好。
(2)风机不动。
检查保险丝、定时器、电源线及电机是否完好。
(3)机器通电,风机转,但不振动。
看水平是否达到,熔断丝是否接好,若均正常,则看变压器是否完好,用万用表判断功率放大器阻值情况,仍不正常,则更换1块超声换能片。
(4)电路指示灯亮,风机转,不出雾。
先检查水位是否正常,更换新晶片,若仍不出雾,则可能是振荡电路的两对三极管有问题,应避免选用放大倍数小的管子。
(5)雾量小。
首先看超晶片是否老化或有水垢,进行更换或清洁。
振荡一会儿,用手感受一下2片散热片是否有温度,若有一片不热,则此震荡管可能损坏,可焊下测量证实。
(6)熔断保险丝且换上又断。
原因是2只对管击穿而形成短路;雾化器进水潮湿或电源桥堆块断路。
(7)报警器不报警,其余工作正常。
检查是否水槽下簧管脱落、破裂或不能吸合,检查报警块是否存在故障。
雾化器说明书

USER INFORMATION - 使用者需知................................................................................1 About this instruction - 关于本说明书 .............................................................................. 1 Symbols - 符号................................................................................................................. 1 EU Directives and Harmonized Standards - EU 指示和符合标注 ................................... 1 EC declaration of conformity - 符合 EC 的声明 ............................................................... 2 General safety instructions - 总的安全指导 ..................................................................... 2 Markings - 标识................................................................................................................ 2 Packaging, handling and transport - 包装,处置和运输 ................................................. 3 Protection of the atomizer - 雾化器的保护....................................................................... 3 Recycling and disposal - 循环利用和处理 ....................................................................... 4 Disposal of packaging 包装的处理 .................................................................................4 Disposal of the rotary atomizer and accessories - 雾化器和附件的处理 .........................4
雾化器维修资料

13、物料分配盘
13、物料分配盘
五、设备清洗
• 轴承清洗要在轴承安 装完毕后进行,清洗 后转动轴承,轴承要 发出清脆的响声不存 在有任何异常声音和 振动,方能对主轴进 行下一步的安装
五、设备清洗
• 1、将所有的设备配件都 要进行清洗
• 要求:凡是在腔体内部与 润滑油接触的地方不能有 任何的杂质和线头毛毛等
9、电机的拆卸
• 1、将电机与电机的定位 销敲出
• 2、定位销敲出后,将电 机拔出
• 3、若连接电机非常紧凑 时可以将电机与变速箱用 稍微用撬杠撬动一下,松 动一下后可将电机提出
• 4、取出电机的过程中注 意保护变速箱与电机中间 的垫片
9、电机的拆卸
10、变速齿轮拆卸
• 1、取出电机后将看到变 速箱内部的情况
• 1、在拆卸到最后一个 螺丝时用手托住物料 分配盘,防止物料分 配盘拆卸完毕后掉到 地上造成摔伤
8、放油
• 1、使用14#开口扳手 打开雾化器底部的放 油螺丝将雾化器内部 的润滑油放出
• 2、注意:在放油时准 备一个容器将废油接 住
8、放油
9、电机的拆卸
• 1、使用8#的内六角扳 手将雾化器电机与变 速箱中的3个内六角螺 丝取出
承等不能再度使用 • 2、避免敲击主轴 • 3、拆卸下的主轴要垂直放置
13、物料分配盘
• 1、取下物料分配器后将 物料分配盘旋出
• 2、旋出物料分配盘后使 用24#的开口扳手将压紧 螺丝松开并旋转出来
• 3、旋出后将弹簧和铜轴 套取出检查其磨损情况
• 4、磨损严重应及时更换 (铜轴套保护雾化器主轴 在启动过程中的平稳运转)
• 要求:将物化器表面 的大颗粒灰尘清扫干 净,避免在拆卸、安 装过程中造成污染源
【雾化器】有关雾化器的维护 雾化器维护和修理保养

【雾化器】有关雾化器的维护雾化器维护和修理保养雾化器是将试液雾化。
雾化器是原子化系统的紧要部件,其性能对测定的精密度和化学干扰等产生显著影响。
因此要求雾化器喷雾稳定、雾滴细小、均匀和雾化效率高。
雾化器保管:请保持产品的良好状态并遵奉并服从以下七大注意引导事项,以免使产品受到破坏:1、请勿将产品放置于婴儿或无意识患者触及的地方。
2、请勿使产品受到任何猛烈的冲撞,例如从高处摔落本产品。
3、当药液瓶内存在药液时,请勿搬运或存放产品。
4、请勿把产品放在高温、低温、高压或阳光直射的地方。
5、请勿弄折送气管。
6、关于废弃的本体、附件和可选部件的处理方法,请遵奉当地政府的规定执行。
7、请勿使用苯、稀释剂和易燃化学药品来清洗产品。
氧气盒子雾化器:1超细雾化颗粒,吸取性好,见效快:氧气盒子雾化器所产生的雾化颗粒平均达到3?m—5?m,更简单让咽喉和气管与肺泡吸取;2医用级ABS材质,抗菌、安全环保,无异味、无臭味、拒绝二次毒害,使雾化更放心,空气过滤装置内置海绵,层层干净、雾化更健康;3独特超静音设计:杜绝噪音污染,让低于60分贝的噪音处理水平傲视同类产品,让家人享便安静的环境;4氧气盒子雾化器接受无油压缩泵:压缩机耐磨耐高温,稳定性好、可长达15年以上;5便携小巧:外置把手,提携便利;6独家双层防震设计:内部电机防震垫,外部整机减震垫注意:仅使用本产品专用的过滤片。
请勿在未安装过滤片的情况下使用本产品。
过滤片不分正反面。
更换前请确认过滤片清洁且无灰尘。
请勿清洗过滤片。
假如过滤片沾湿,请更换过滤片。
过滤片沾湿时将引起堵塞。
为防止过滤片盖发生堵塞,请定期清洗过滤片盖。
请勿对过滤片盖煮沸。
清洗时,请务必先将过滤片盖取出。
清洗后充分干燥,然后依照正确的方法安装过滤片盖。
超声雾化器是对药物进行气雾化的一种医疗设备。
广泛应用于呼吸系统疾病的防备和治疗。
它是通过压电晶片耦合产生振荡,并由晶片产生超声波(1.7MHz)。
超声波以水为介质,作用于药杯中的水溶性药物,将药物变成极其微细的雾粒(1~5μm),经波纹管引导至病人口腔,达到治疗的目的。
不锈钢雾化器保养流程

不锈钢雾化器保养流程英文回答:Maintaining a stainless steel atomizer is essential to ensure its longevity and optimal performance. Here is a step-by-step guide on how to properly maintain your stainless steel atomizer:1. Disassemble the atomizer: Start by disassembling the atomizer into its individual components. This usually includes the drip tip, top cap, tank, and coil.2. Clean the components: Use warm water and a mild detergent to clean the components thoroughly. You can also use a small brush or toothbrush to scrub away any residue or buildup. Rinse the components with water to remove any soap residue.3. Dry the components: After cleaning, ensure that all components are completely dry before reassembling theatomizer. You can use a clean cloth or paper towel to dry the components, or let them air dry for a few minutes.4. Inspect the coil: Take a close look at the coil to check for any signs of damage or wear. If the coil is worn out or burnt, it may need to be replaced. You can easily find replacement coils for your specific atomizer model.5. Reassemble the atomizer: Once all the components are dry and in good condition, reassemble the atomizer. Make sure that all the connections are secure and tight.6. Fill the tank: Fill the tank with your preferred e-liquid. Be careful not to overfill it, as this can lead to leakage. Follow the manufacturer's instructions on how to properly fill the tank.7. Prime the coil: Before using the atomizer, it is important to prime the coil to avoid dry hits. Apply a few drops of e-liquid directly onto the coil and let it soakfor a few minutes. This ensures that the coil is properly saturated.8. Adjust the airflow: Most atomizers have adjustable airflow settings. Adjust the airflow according to your preference for a smooth and flavorful vaping experience.9. Clean regularly: It is recommended to clean your stainless steel atomizer regularly to prevent any buildup or residue. Depending on your usage, cleaning once a week or every few weeks should suffice.中文回答:保养不锈钢雾化器对于确保其寿命和性能至关重要。
雾化器的操作流程调试维护及观察要点

雾化器的操作流程调试维护及观察要点下载提示:该文档是本店铺精心编制而成的,希望大家下载后,能够帮助大家解决实际问题。
文档下载后可定制修改,请根据实际需要进行调整和使用,谢谢!本店铺为大家提供各种类型的实用资料,如教育随笔、日记赏析、句子摘抄、古诗大全、经典美文、话题作文、工作总结、词语解析、文案摘录、其他资料等等,想了解不同资料格式和写法,敬请关注!Download tips: This document is carefully compiled by this editor. I hope that after you download it, it can help you solve practical problems. The document can be customized and modified after downloading, please adjust and use it according to actual needs, thank you! In addition, this shop provides you with various types of practical materials, such as educational essays, diary appreciation, sentence excerpts, ancient poems, classic articles, topic composition, work summary, word parsing, copy excerpts, other materials and so on, want to know different data formats and writing methods, please pay attention!一、操作流程1. 开机准备。
在使用雾化器之前,首先要确保整机已经连接好电源线。
雾化器的维护保养 雾化器解决方案
雾化器的维护保养雾化器解决方案1、在每次开机前水槽中必需加足蒸馏水。
检查药杯底膜片是否漏水,以防止药液进入水造成挥霍,另外药液侵蚀晶片。
2、雾量调整应由小到大,定时器要顺时针方向扭动,禁止逆时针钮动。
3、提倡病号用面罩做雾化,不用咬嘴(以防止呼出气流进入雾化器内,锈蚀雾化器内部元件)。
4、每次使用完毕,将水槽中水完全放掉,擦干雾化器,晶片用软布擦干,发觉晶片上有水垢,用晶片专用清洗液浸泡3min—5min,然后擦干,以延长寿命。
雾化器的相关选用介绍雾化器的种类有很多,这里,我们一起来了解一下选用雾化器应考虑的几个方面。
选用雾化器应考虑的几个方面紧要有:1、在雾化器进料范围内,能达到完全雾化。
旋转式或喷嘴式雾化器(包括压力式和气流式)在低、中、高速的供料范围内,都能充分各种生产本领的要求。
在高处理量情况下,尽管多喷雾雾化器可以充分要求,但接受旋转式雾化器更有利。
2、料液完全雾化时,雾化器所需的功率(雾化器效率)问题,对于大多数喷雾干燥来说,各种雾化器所需的功率大致为同一数量级。
在选择雾化器时,很少把所需功率作为一个紧要问题来考虑。
实际上,输入雾化器的能量远远超过理论上用于分裂液体为雾滴所需的能量,因此,其效率相当低。
通常只要在额定容量下能够充分所要求的喷雾特性就可以了,而不考虑效率这一问题。
例如三流体喷嘴的效率特别低,然而,当只有用这种雾化器才能使某种高黏度料液雾化时,效率问题也就无关紧要了。
3、在相同进料速率条件下,滴径的分布情况。
在低等和中等进料速率时,旋转式和喷嘴式雾化器得到的雾滴滴径分布可以具有相同的特征。
在高进料速率时,旋转式雾化器所产生的雾滴一般具有较高的均匀性。
4、大和小滴径(雾滴的均匀性)的要求。
大、小或平均滴径通常有一个范围,这个范围是产品特性所要求的。
叶片式雾化轮、二流体喷嘴或旋转气流杯雾化器,有利于要产生细雾滴的情况。
叶片式雾化轮或压力式喷嘴一般用于生产中等滴径的情况。
而光滑盘雾化轮或压力式喷嘴适用于粗雾滴的生产。
耗材一级雾化器安全操作及保养规程
耗材一级雾化器安全操作及保养规程1. 简介耗材一级雾化器是一种用于医疗领域的设备,主要是将液体药物雾化成微小颗粒,通过呼吸道传递至肺部从而达到治疗目的。
本文主要介绍该设备的安全操作和保养规程。
2. 安全操作2.1 使用前检查在使用雾化器前,需要检查设备的外观是否完好,是否有任何松动的零部件、损坏或裂纹等。
同时,检查设备的电源和电缆是否符合要求。
2.2 正确安装雾化器在使用雾化器前,需要确保其正确安装在呼吸回路上,并且各部件牢固。
在接通电源前,需要先关闭药物流量开关。
2.3 使用正确的药物耗材一级雾化器只适合用于雾化药物,不适合用于雾化其他物质。
在使用药物前,需要确认该药物适合雾化,并且按照药物说明书中的使用方法正确使用。
2.4 操作流程在使用雾化器时,需要按照以下流程操作:•将药液装入喷雾杯•安装好喷雾杯•将呼吸回路连接到患者•打开药物流量开关•打开气体流量控制阀门2.5 关闭操作在使用完雾化器后,需要按照以下流程进行操作:•关闭气体流量控制阀门•关闭药物流量开关•拆卸喷雾杯•关闭电源3. 保养规程3.1 清洁在每次使用完毕后,需要对雾化器进行清洁。
首先要拆卸各个部件,并用温水冲洗干净。
另外,雾化器的喷嘴需要单独清洗。
需要注意的是,不要使用任何化学清洁剂清洗雾化器,以免对患者造成危害。
3.2 消毒在使用完雾化器后,需要进行消毒。
最常用的方法是将雾化器部件放入消毒器中进行消毒。
另外,也可以选择将雾化器部件放入加氯酸钠的水中进行消毒。
3.3 更换部件雾化器的各个零部件需要定期更换,以确保设备的稳定性和安全性。
建议根据厂家的说明书,定期更换喷嘴、过滤器和零件。
4. 总结以上就是耗材一级雾化器的安全操作和保养规程。
为了确保医疗过程中的安全性和患者的健康,医护人员需要仔细阅读和遵守本文中的建议。
另外,在使用过程中,如遇到任何问题,请及时联系厂家或相关专业人士求助。
不锈钢雾化器保养流程

不锈钢雾化器保养流程英文回答:Maintaining a stainless steel atomizer is essential to ensure its longevity and optimal performance. Here is a step-by-step guide on how to properly care for your stainless steel atomizer:1. Disassemble the atomizer: Start by taking apart the different components of the atomizer, including the tank, coil, and drip tip. This will allow for a thorough cleaning of each part.2. Clean the tank: Rinse the tank with warm water to remove any e-liquid residue. You can also use a mild soap or dishwashing liquid to help break down any stubbornbuild-up. Be sure to rinse thoroughly and dry completely before reassembling.3. Clean the coil: The coil is the heart of theatomizer and requires regular maintenance. Remove the coil from the atomizer and gently rinse it under warm water to remove any gunk or residue. You can also use a small brush or toothbrush to scrub away any stubborn debris. Allow the coil to air dry completely before reinserting it into the atomizer.4. Clean the drip tip: The drip tip is the part of the atomizer that comes into direct contact with your mouth. It is important to keep it clean to avoid any potential contamination. Use a cotton swab or small brush to clean the inside and outside of the drip tip. Rinse with water and dry thoroughly.5. Reassemble the atomizer: Once all the components are clean and dry, reassemble the atomizer carefully, making sure all the parts fit snugly together. Double-check that everything is properly aligned and tightened.6. Prime the coil: Before using the atomizer again, it is crucial to prime the coil to ensure proper wicking and prevent dry hits. Apply a few drops of e-liquid directlyonto the coil and let it soak in for a few minutes. Thiswill help saturate the wick and prevent any burnt taste when vaping.7. Regular maintenance: In addition to regular cleaning, it is important to perform routine maintenance on your stainless steel atomizer. This includes checking for any signs of wear or damage, such as leaking or loose connections. Replace any worn-out parts promptly to avoid any potential issues.中文回答:不锈钢雾化器的保养对于确保其长久使用和最佳性能至关重要。
雾化仪操作保养规程

雾化仪操作保养规程
随着人们对健康的关注度增加,雾化仪在日常生活中越来越受到欢迎。
雾化仪是一种将液体药剂雾化成微小颗粒后,通过呼吸道吸入达
到吸入治疗作用的设备。
不仅可以缓解呼吸道疾病,还能提高皮肤免
疫力,对保持健康起着重要作用。
为保证雾化仪的正常及安全使用,
提高雾化仪的寿命和使用成效,特制定以下操作保养规程。
一、使用前
1.请在使用前仔细阅读说明书,按照说明书操作。
2.检查电源插头和线路有无损坏,电源开关处于“关闭”位置。
3.检查气路管路、氧气瓶、减压器、流量计有无损坏并正确
连接。
二、使用中
1.请将雾化液倒入雾化器杯中,使用过程中避免过量。
2.请调整雾化器喷雾口的角度,保证雾化剂能准确地进入呼
吸系统。
3.在操作过程中如发现水面下降请停止操作,及时添加雾化
液。
4.操作过程中需保证雾化仪处于平稳状态,避免倾斜造成雾
化液溢出。
5.请注意切勿将手指伸入雾化器的喷头内或磨动器内。
雾化器维护手册
雾化器维护手册雾化器维护手册对于玻璃或石英材质的雾化器,任何浓度的氢氟酸(HF)均会对雾化器造成不可修复的损坏。
厂家提供的雾化器在出厂的时候已经经过清洁,可以立即在仪器上使用,无须进行酸预处理。
绝对不能采用超声波清洗对雾化器进行清洗。
超声波会使毛细管共振并且与喷嘴碰撞而碎裂,造成雾化器的损坏。
雾化器的操作、保存和运输除了OpalMist,PolyCon,和VeeSpray等型号的雾化器以外,雾化器均由硅玻璃或者石英制造。
二者均为易碎材料,不正确的操作和外力的撞击会导致它们产生锋利的边缘而可能对人员造成伤害。
注意保护雾化器的喷嘴,在不使用雾化器时不要敲击喷嘴或者使喷嘴长期暴露在外。
一旦喷嘴损坏,其性能是不可恢复的。
每个雾化器提供Teflon帽以防止喷嘴意外损坏以及微粒进入毛细管细孔导致堵塞。
日常维护在开始和结束使用同心雾化器的时候利用酸空白和去离子水对雾化器冲洗几分钟。
这样可以确保样品不在雾化器毛细管内沉积或者结晶。
如果毛细管堵塞,可以使用雾化器专用清洁装置清洁堵塞的雾化器。
另外,分析时发现RSD指标下降,并且雾化室没有故障,请检查雾化器载气连接处。
Tygon或其他聚合物材料管道会由于长期使用硬化导致载气泄漏,可以利用听诊器检测漏气点。
1%的气体泄漏会造成许多分析结果比较大的漂移。
雾化器堵塞的处理方法如果毛细管堵塞,可以使用雾化器专用清洁装置清洁堵塞的雾化器。
颗粒:a. 将进样管拆除,雾化器喷嘴朝上在木质表面轻轻敲击以使颗粒堵塞松散并在重力作用下排出毛细管。
b. 在喷嘴处接入压缩空气(15-30 psi)“反吹”喷嘴和环面,利用手指堵住进样口和载气口,突然释放进样口以清除毛细管颗粒堵塞或突然释放载气口以清除载气颗粒堵塞。
c. 在喷嘴处反向通入异丙醇使颗粒流出。
d. 利用热水浸泡雾化器以使聚合物颗粒软化以疏通堵塞。
e. 对于硅类颗粒的堵塞,可以使用氢氟酸(HF 3-5%)清洗,吸取清洗液5-10秒后立即用清水冲洗。
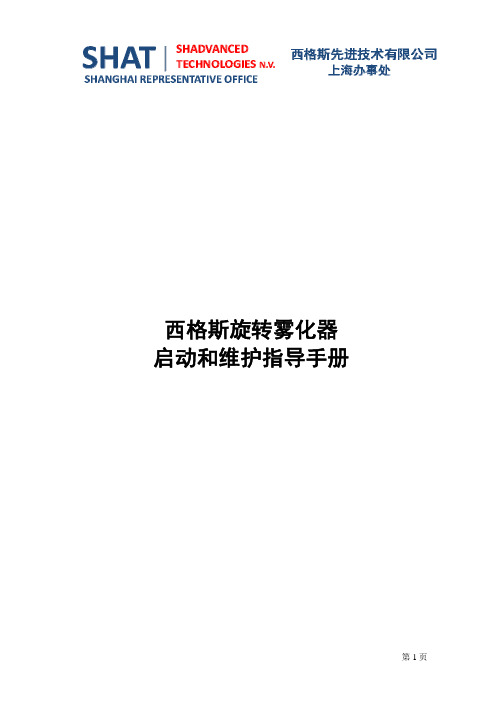
西格斯旋转雾化器启动和维护指导手册
20 mm/s 16 mm/s 18 mm/s 30 s. 60 s. 10 Hz.
3 1.00 4-20 mA 0 s. 4 s. 1 Hz.
1) 将旋转雾化器放到最接近于套筒的等待安装位置
2) 将电动葫芦移至其上方
3) 按下述顺序连接在旋转雾化器上的挂钩 : - 连接钢起重索 - 电源插入 - 控制插入 - 接进冷却水 - 接出冷却水 - 接石灰浆/和水 - 接密封气 - 移除紧快接头油润滑及置于所供支托 - 安装油润滑快接头
4) 移除套同上闭合盖
2 设定......................................................................................................................... 11 2.1 电气柜: ......................................................................................................... 12 2.1.1 振动检测:........................................................................................ 12 2.2 机械柜: ......................................................................................................... 13 2.2.1 油-气润滑单元: ................................................................................. 13 2.2.2 压力监视装置一次冷却.................................................................... 13 2.2.3 加热单元: .......................................................................................... 13 2.2.4 减压阀: .............................................................................................. 14 2.2.5 二次冷却回路的手动温度控制阀: .................................................. 14
有关雾化器的维护

有关雾化器的维护什么是雾化器?雾化器是一种电子烟设备中的核心部件,它通过将电子烟油变成细小的液滴,然后通过加热使其转化为雾气,从而让使用者能够吸入到肺部,创造出与香烟相似的感觉。
雾化器的清洁雾化器的清洁非常重要,因为它会直接影响到电子烟的使用效果。
如果雾化器不干净,会造成烟雾量减少,口味变差,或者甚至完全无法使用。
因此,定期对雾化器进行清洁非常重要。
常规清洁常规清洁包括清洗雾化器罐、喷嘴以及电子烟底座,可以使用所谓的清洁液和纸巾进行清洁。
请注意在使用清洁液和纸巾时避免用力过猛,以免在清理过程中损坏雾化器。
深度清洁除了常规清洁之外,定期进行深度清洁也非常重要,对于老旧的、使用频率较高的雾化器,更需要进行深度清洁。
当雾化器出现问题,比如说烟雾量减少、口味变差、或者设备自身有异响时,建议进行深度清洁。
深度清洁需要完全拆开雾化器,注意不要遗漏部件。
然后用酒精或清洁液清洗。
如果使用酒精,请务必彻底清洗,并在清洗后晾干雾化器。
清洗频率清理频率取决于使用情况。
如果您是一个热爱电子烟并经常使用的人,那么建议每周进行一次清洁,以保证雾化器的良好状态。
一般情况下,电子烟使用 2-3 周后进行一次深度清洁也是非常必要的。
雾化器的更换经过长时间使用,雾化器会磨损。
如果您发现油口越来越小,烟液流出的速度越来越慢,说明雾化器已经需要更换。
更换雾化器是一件非常容易的事情,只需要把旧的雾化器取下来,然后用新的替换,并确保它连接紧密。
一般来说,雾化器的使用寿命为 3-4 周。
总结对于一个电子烟爱好者而言,进行好雾化器的清洁和更换保养是非常重要的。
这不仅可以保证电子烟使用的效果,而且也可以更好地保护身体健康。
西格斯旋转雾化器维护措施

西格斯旋转雾化器维护措施旋转雾化器维护措施1.雾化器首次安装步骤1将旋转雾化器放到最接近于套筒的安装位置。
2.将电动葫芦移至其上方3按下述顺序连接在旋转雾化器上的接口:连接起吊钢丝绳电源插入控制插入接冷却水进水接冷却水回水接石灰浆/和水接压缩空气移除润滑油接头置于所供接口安装润滑油快接头4移除套筒上闭合盖5将旋转雾化器放入套简6除钢丝绳外,以上述相同顺序连接盖板上的快接头。
将雾化器起吊后缓慢放入反应塔内。
2.需要维护的部件:每日:雾化器由程序提供一个自动清洗系统。
每8小时,运行速度降低至6000转/分钟30秒。
同时,由石灰浆喷雾转换成水喷雾。
然后转速提升至最大(12000转/分钟),该转速维持30秒后再降低恢复至正常转速。
每周:肉眼检查快接接头损坏或污染情况,检査一次冷却水液位。
润滑油液位。
每月:二次水过滤器清洗。
关闭二次水供水阀门,松下过滤器并加以清洗。
重新装上过滤器并打开供水阀门,检查泄漏情况。
肉眼检查快接接头损坏或污染情况,如果快接接头非常脏,则加以清洗。
雾化盘清洗:将清洗槽加注酸液(30%磷酸液)至标线处。
用刮铲或螺丝刀除去大的沉淀物颗粒。
然后放置于清洗槽中。
允许在酸液中停留30分钟进行分解反应,然后使用螺丝刀将碳化钨块间孔中的沉淀物除去,用水冲洗除去残留的污垢。
在此清洁期间,勿使用任何工具撞击喷雾盘,必须避免在喷雾盘上的尖锐物击。
每年:全部进行机械拆解,所有部件按各回路进行清洗(油路,冷却水等.)更换:内部油管,石灰浆快接接头-水快接接头,冷却水进水快接接头,冷却水出水快接接头,压缩空气快接接头,润滑油快接接头,电源接头,控制接头。
完整组装。
更换雾化盘:雾化盘运行8000小时后,要更换雾化盘。
停运后用电动葫芦吊出旋转雾化器,再移除密封盖帽,松掉螺栓,拉下喷雾盘,推上新的喷雾盘,旋紧螺栓,按上密封盖帽。
再放于反应塔中。
超声雾化器使用与维护

第十六节超声雾化器使用与维护超声波雾化器是应用超声波声能,将药液变成细微的气雾,由呼吸道吸入,达到治疗目的,其特点是雾量大小可能调节,雾滴小而均匀(直径在5μm 以下),药液随着深而慢的吸气被吸入终末支气管及肺泡。
又因雾化器电子部分能产热,对雾化液有加温作用,使病人吸入温暖、舒适的气雾。
一、超声波雾化器原理目前,市面上超声波雾化器品种繁多,尽管在外形上不同,内部电路上有差异,但基本电路原理与整机结构组成却无本质区别。
超声波雾化器它是通过换能器(压电晶片,简称晶片)耦合产生高频振荡,并由晶片产生超声波1.7MHz。
在振荡电路中大部分采用单管式输出,有的采用双管式输出,超声波以水为介质,通过水槽底下的谐振发射窗使药杯里的水溶性药物,雾化成微细的雾粒(0.5~10μm)。
使药物液体由液态转化为气态,产生雾化效果,送风机将药雾通过波纹管输运到患者作为吸入治疗。
二、超声波雾化器临床适应症和禁忌症(一)适应症1.消炎、镇咳、祛痰。
2.解除支气管痉挛,使气道通畅,改善通气功能。
3.在胸部手术前后,预防呼吸道感染。
4.配合人工呼吸作呼吸道湿化或间歇雾化吸入药物。
5.应用抗癌药物治疗肺癌。
(二)禁忌症吸入药物是水溶剂,对药物过敏者慎用。
三、超声波雾化器基本结构及常用超声波雾化器性能(一)超声波雾化器基本结构超声波雾化器结构比较简单,它是由雾化器外壳、底座、电源变压器、风扇电机(风机)、电路板、换能片(晶片)、储药罐(药杯)、塑料螺纹管、口含管等组成。
其外壳多数是用塑料制成,在雾化出口设有风量调节,面板有定时器、电源开关、雾量调节旋钮以及电源和输出指示灯等。
1.超声波发生器通电后输出高频电能。
雾化器面板上操纵调节器有电源开关、雾化开关、雾量调节旋钮。
2.水槽盛蒸馏水。
水槽下方有一晶体换能器,接发生器发出的频电能,将其转化为超声波声能。
3.雾化罐(杯)盛药液。
雾化罐底部的半透明膜为透声膜。
当声能透过此膜与罐内药液作用,产生雾滴喷出。
雾化器的保养维护
雾化器的保养维护良好的保养维护可以让雾化器的使用寿命更加长久,更加健康,同时也可以提升使用效果和体验。
以下是一些关于雾化器保养维护的建议:1. 定期清洗雾化器是需要定期清洗的,建议每周至少清洗一次,如果是高频使用者,建议可以每两天清洗一次。
清洗可以避免积存烟垢和沉积物,影响口感和使用效果。
1.1 拆卸槽和喷嘴,清洗雾化器本体要清洗雾化器本体,需要把槽和喷嘴拆下来,然后用软毛刷或者牙刷沾水润湿,刷洗雾化器表面,同时可以用软毛长棒小心地清理内部和喷射孔,尽可能清除积垢杂物。
1.2 浸泡清洗雾化器对于一些无法拆卸的雾化器,可以用清洁剂或者75%左右的酒精浸泡清洗,一定要充分泡透,然后取出来擦拭干净即可。
在浸泡和清洗的过程中,也要注意卫生,避免手部接触脏物。
2. 拆卸清理系统定期清理整个系统并不是必需的,但当你的雾化器因为过度清洗或清洗不干净而出现了问题时,比如口感不佳、热力不足、漏油等问题,那么就要考虑整个系统彻底清理了。
2.1 拆卸清理雾化器首先需要将整个雾化器拆卸下来,然后将各部位分离,用温暖的水清洗干净,让水流穿过每一部分,以确保所有的残留物都被冲洗干净。
2.2 替换弹簧和O型环当雾化器使用时间长了,弹簧和O型环可能变得失效,这时候可以考虑更换弹簧和O型环,以维持雾化器的良好状态,也可以防止出现漏油和口感不佳等问题。
3. 待机和存储除了定期清洗保养,待机和存储也是必不可少的一部分,以下是一些常见的方法。
3.1 确保干燥在使用后,记得清洗干净,擦干细节,确保完全干燥后再存放。
湿度会影响雾化器的使用效果,而干燥则有助于保护雾化器更长时间的使用。
3.2 存放在安全干燥的地方最好将雾化器存放在安全干燥的地方,避免沾污和潮湿,可以考虑使用保护套来保护雾化器表面,避免因为摔落和碰撞导致雾化器损坏。
4. 结语以上是我分享的关于雾化器保养维护的建议,如果你对这方面还有疑问,可以咨询相关的专业人士。
在使用过程中,也要注意使用安全,定期保养维护,以保证使用效果和健康。
西格斯雾化器操作维护

pump pulsecontrol
泵脉冲控制
oil pump 油泵
pressure control (L/H) on the oil supply to the 3 bearings
3根轴承提供润滑油的压力控制
compressed air supply 压缩空气
9 目前九页\总数五十二页\编于十二点
24
目前二十四页\总数五十二页\编于十二点
雾化器的停止 雾化器正常停止操作步骤: 在雾化器就地控制柜操作面板上操作
当雾化器转速降为零后,将雾化盘吊出到1米时悬停。关闭雾 化器变频器电源。将雾化盘上的电缆和管道拆除,拆除顺序 为:动力电源电缆、控制信号电缆、压缩空气管、轴承润滑 油管、冷却水进出口管、石灰浆管、稀释水管。
25 目前二十五页\总数五十二页\编于十二点
雾化器故障停运
当雾化器高优先级报警时雾化器会立即停止工作(非正常停止)。雾化器
非正常停止后需在15分钟内将雾化器吊出,操作步骤如下: •当雾化器转速降为零后,将雾化盘吊出到1米时悬停。关闭雾化器 变频器电源。将雾化盘上的电缆和管道拆除,拆除顺序为:动力 电源电缆、控制信号电缆、压缩空气管、轴承润滑油管、冷却水 进出口管、石灰浆管、稀释水管。
pressure and flow measurement on sealing air supply
压缩空气压力 和流量测量设备 compressed air supply to the pump and for fluidisation of the oil
oil vessel 油箱
level indication
18 目前十八页\总数五十二页\编于十二点
将操作板上总电源合上,等待操作屏和PLC启动到位 当出现如图所示画面时:先点击右下角的“勾号“直到报警消失
高速离心雾化器维护保养

高速离心雾化器维护保养检查润滑系统1、检查油箱油位检查方法:在雾化器停止状态下拉起油尺(图D),油位不得低于最低油位线,否则应该及时添加新油。
2、清洗吸油管雾化器在使用过程中,每周应拆下吸油管(图C)放在清洗油(煤油)中仔细清洗过滤孔。
拆卸方法:先松开接在吸油管接头上的油管,然后逆时针拧下吸油管。
3、检查油路保护装置检查方法:在不启动油泵电机的情况下,主电机应不能工作。
4、更换润滑油雾化器工作2000小时应更换一次新油,如雾化器长时间不用,重新启用时也应彻底更换一次新油,并将冷凝器油管内的陈油用气泵吹出,为确保有效润滑,建议用46号汽轮机油,气候寒冷地区在冬季必须使用8号防冻液压油。
更换方法:(图B)d、用专用工具拆下雾化盘和不锈钢外罩批;b、下油箱下方的放油螺丝,将油放入备用桶内;c、起油尺从孔内倒入清洗油冲洗油箱,直至流出的油完全洁净;d、放油螺丝上重新包裹生料带,拧紧放油螺丝。
清洗喷雾系统1.每次连续喷完一批料,在不关掉加热器的情况下,从进料管中注1入温水继续运行十儿分钟,进行初步清洗。
耐磨瓷喷嘴雾化盘在清洗时,水温应略高,以防温差过大发生瓷嘴破裂。
2.对黏度较大的料液,须吊起雾化器,用专用工具和扳手拆下雾化盘、料液分配盘取出弹簧座、弹簧、弹簧垫片、导向铜轴承,并将上述零件放入清洗油内彻底清洗,雾化盘上不得有残留料液。
3.将清洗好的零件放置在洁净处,并用干净的棉布或绸布擦干净(切勿使用棉纱回丝)。
4. 依次重新安装上述零件,拧紧到位。
固定雾化盘的两枚带弹簧垫的左旋螺母要用力拧紧(越紧越易折卸),以免松动而引起雾化器振动。
5. 如雾化器长时间不用,请将上述零件放在洁净处备用,并在主轴底部涂抹防锈油。
6. 以上清洁工作十分重要,必须认真执行,否则会引起干燥料液堆积,导致主轴卡住或雾化盘不平衡造成断轴事故。
- 1、下载文档前请自行甄别文档内容的完整性,平台不提供额外的编辑、内容补充、找答案等附加服务。
- 2、"仅部分预览"的文档,不可在线预览部分如存在完整性等问题,可反馈申请退款(可完整预览的文档不适用该条件!)。
- 3、如文档侵犯您的权益,请联系客服反馈,我们会尽快为您处理(人工客服工作时间:9:00-18:30)。
MAINTENANCE TIPS FOR USERSOF THE MEINHARD® CONCENTRICGLASS NEBULIZER1900 East Warner Avenue Suite JSanta Ana, CA 92705 USATelephone: 800-634-6427Fax: 949-250-3991Email: meinhard@WWW: http:\\© 2001 J. E. Meinhard Associates, Inc.Your MEINHARD® nebulizer reflects the exacting standards in design and manufacturing that have made it the choice of the industry worldwide. Properly maintained this nebulizer should yield stable performance indefinitely. However, failure to apply a few simple preventive measures can lead to obstructed gas and liquid passages in the nebulizer which can seriously impair operation. We recommend that you follow the maintenance tips outlined here for long-lasting and trouble-free performance. We also include a diagnosis and treatment scheme [1] to help restore inoperative (but undamaged) nebulizers (see Figure 2 at end of booklet.). Refer to Figure 1 below for nebulizer configuration. We provide this information as a courtesy to our customers.J E M EINHARD A SSOCIATES, I NC ASSUMES NO RESPONSIBILITY FOR ACCIDENTAL DAMAGE RESULTING FROM APPLICATION OF THE RECOVERY PROCEDURES.Figure 1. MEINHARD® Nebulizer ConfigurationPREVENTIVE MEASURESBlockage in the nebulizer is caused generally by either particulate matter (from the sample or the carrier gas) or chemical deposits. It normally occurs in the nozzle where the flow passages are extremely small. Constriction is greatest in the annular gas channel between the tip of the capillary and the taper of the nozzle. In some nebulizer models this annular gap can be as small as 10-15 µm.Tip #1: Filter the carrier gas.Install low-impedance in-line gas filters to prevent particles from being carried into the nebulizer and lodging in the gas annulus. This is especially important when polytetrafluoroethylene (PTFE-Teflon®) tape has been used in the gas line plumbing. Shreds of this tape have been found wedged in the gas annulus and have resulted in drastic reductions in performance [2]. For the same reason, avoid using PTFE or other friable sealants at the gas connection to the nebulizer.Tip #2: Filter the sample.The sample capillary is more tolerant of particulate matter than the gas annulus. In high sample uptake models especially, the capillary will carry visibly turbid suspensions. We suggest, however, that you filter or centrifuge the sample if the solids are not of analytical importance. Particulates and colloids of a polar nature such as silica, peptides, polyvalent metal hydroxides and others tend to build up on the (polar) glass and impede the fluid flow. In some instances, you can prevent deposition by adjusting the pH of the suspension away from its (presumed) isoelectric point.Tip #3: Rinse your nebulizer.It is especially important to rinse the nebulizer before turning the gas off. Depending on the chemistry of your samples it may also be advisable to rinse periodically throughout the testing. Solids may deposit in the nozzle as sample solvent evaporates, further constricting the flow passages and reducing the signal. Rinsing will minimize or eliminate these deposits. Gas flow through most nebulizer models creates a venturi suction at the capillary tip that can be used to draw rinse liquid through the capillary. Follow the testing of any salt solution promptly with a chemically compatible rinse consisting only of volatiles. (This is not as necessary in flow injection analysis systems.)A low-pH (acidic) sample should be followed by a low-pH rinse; a high-pH sample by a high-pH rinse; an organic sample by an appropriate solvent. Rinse finally with pure water and/or isopropyl alcohol. Allow the nebulizer to dry before turning off the gas. Also make sure that the liquid feed is disconnected or arranged so as to prevent siphoning into the nebulizer while the gas is off.Tip #4: Do NOT use ultrasonic cleaning.Sympathetic vibrations may be set up in the capillary causing it to bounce against the inside of the nozzle and chip. Nebulizer performance can decline severely as a result.RECOVERY METHODSIf you find that solids inside the nebulizer are interfering with performance, you generally can remove them by means of the steps outlined below. Full function usually can be recovered. This sequence is diagrammed in Figure 2.1. Preliminary Examination:Disengage the nebulizer from its mounting and examine it under 20X or 30X magnification. If a particle appears to be wedged in one of the channels, go to Step 2. If solids are present in the capillary but there is still a passage through them, go to Step 3. If solids have completely blocked the capillary, go to Step 6. If the nozzle is encrusted with crystalline deposits, go to Step 4. If no foreign matter can be seen, go to Step 5. In all cases discontinue treatment when you have removed the obstruction.NOTE: Rinse the nebulizer after any treatment that introduces caustic or corrosive cleaning agents into the shell and/or capillary. Make sure that the final rinse is with isopropyl alcohol to speed the drying process. Introduce a rinsing agent into the shell, either from the gas input or the nozzle (a squeeze bottle works well in both cases). Fill all areas previously exposed to corrosive solutions. Attach pressurized gas to the side-arm to expel the liquid. Inject more rinse solution into the liquid input while the gas is flowing and allow venturi suction to draw it through the capillary. Repeat the treatment if you think it necessary. Finally, dry the nebulizer completely.NOTE: If you have an A-type nebulizer, avoid touching the capillary tip when injecting solutions into the shell from the nozzle. The capillary is flush with the nozzle surface. 2. Particles:These operations are ranked in order of increasing aggressiveness. We recommend that you start with the gentlest. Some of these methods may take a little practice before they feel comfortable.a. Tap the liquid input of the nebulizer gently against a wood surface (or surfaceof comparable hardness) to jar the particle loose. This helps the particle to move in the direction of increasing inner diameter. Repeat the tapping as necessary to work the particle toward the appropriate exit orifice. Avoid extremely harsh tapping.b. Apply compressed gas (15-30 psig) to the nozzle, forcing the gas backwards through the annulus and the capillary (backflushing). Make sure you hold the nebulizer securely during this operation. Tap or flick the shell soundly with your fingernail a few times. If this fails to dislodge the particle, close off the liquid and gas input tubes with your fingertips. When the pressure builds up, "pop" a fingertip quickly off the appropriate orifice (if something is wedged in the gas annulus, "pop" your finger off the gas input; if in the capillary, off the liquid input). The sudden expansion of gas should help jar the particle loose in the direction of increasing inner diameter. Try to orient the nebulizer so that gravity assists you.c. Force isopropyl alcohol backwards through the nozzle in an attempt to float the particle out through the larger gas and liquid input tubes. Use a squeeze bottle or plastic dropper with a tip that will form a good seal over the nebulizer nozzle. Then blow the alcohol through the input tubes using compressed gas, or blot onto lintless tissue (e.g., "Kimwipe").A variation of this procedure works best if (i) you know which passage the particle is in and (ii) your nebulizer is a type C or K with a recessed capillary. Inject 1/4" to 1/2" of solvent into the shell through the nozzle or the gas input tube. Close off the nozzle with a fingertip. (Caution: Use protection if the solvent is caustic.) Apply pressurized gas to the passage that does not contain the particle. Pressurized solvent will force its way out the other channel in the direction of increasing diameter, hopefully carrying the particle along with it.d. If the particle still remains and you believe that it might be a shred of PTFE tape from the gas line, immerse the nebulizer nozzle in hot water and apply gentle gas pressure to the side-arm. The hot water "relaxes" the polymer and allows it to be forced out of the nozzle.e. To loosen especially stubborn particles such as silica, use a solution of 3%-5% hydrofluoric acid (HF). (Caution: Use appropriate protection and care when handling HF.) HF breaks the bonds between glass and other substances. Introduce the acid into the nozzle from a plastic dropper. Drain after 5-10 seconds and rinse with pure water and/or isopropyl alcohol. Examine the nebulizer under magnification. This process can be repeated several times without significantly altering the performance of your nebulizer. However, longer soaks (e.g., 5 minutes) and higher HF concentrations will reduce the operating gas pressure. Dry the nebulizer thoroughly after the final treatment.f. If the particle still remains and is believed to be organic (e.g., a cellulose fiber), go to Step 5.g. If the particle is located in the capillary and still does not move, go to Step 7.3. Solid Deposit in Sample Capillary: This step assumes that a passage still exists through the contaminating material. If the capillary is plugged completely, go to Step 6.a. Try to deduce from prior use the chemical nature of the deposit. Select thesolvent most likely to dissolve it. Inject the solvent into the nozzle with a plastic dropper or squeeze bottle until the affected area is filled. Expel the solvent with compressed gas. Refill and expel the solvent repeatedly. Examine the nebulizer under magnification. If the material is gone, rinse the nebulizer with isopropyl alcohol and dry thoroughly.b. If the residue remains, fill the affected area with solvent and warm thenebulizer under a heat lamp. Place it 20-25 cm (8-1 0 in.) away from the heat.Heat as long as necessary. The solvent may boil out of the capillary loosening the residue and perhaps carrying some of it away. This does not harm the capillary.Refill and repeat the process as necessary.You may substitute microwave heating for radiant heating. A treatment of up to 15 seconds may be sufficient but this should be determined empirically for your equipment. Cover the nebulizer(s) with paper towels to trap any particles forced out by the solvent vaporization. (Note: The microwave may be used to dry the nebulizer any time this is required.)c. To loosen especially stubborn (hydrophilic) deposits such as silica or barelysoluble metal salts, use a solution of 3%-5% hydrofluoric acid (HF) (as in 2e above). (Caution: Use appropriate protection and care when handling HF) The HF breaks the bonds between glass and other material, even in the case of baked-on gold and platinum. Introduce the acid into the nozzle from a plastic dropper.Expel after 5-10 seconds and follow with a rinse of pure water and/or isopropyl alcohol. Examine the nebulizer under magnification. You can repeat this process several times without significantly altering the performance of the nebulizer.However, longer soaks (e.g., 5 minutes) and higher HF concentrations will reduce the operating gas pressure. Dry the nebulizer thoroughly after the final treatment.d. If the deposit still remains and you believe it is organic, go to Step 5.4. Crystalline Encrusted Nozzle:Accumulated salt deposits occur most frequently with high- concentration samples or when the tubing arrangement permits siphoning of the liquid when the gas is not flowing. Salt deposition is controlled with appropriate rinsing.a. Immerse the nozzle in a rinse solution. Warm the solution for stubborndeposits. Follow with a rinse of pure solvent, then isopropyl alcohol and dry thoroughly.b. If the deposit remains after prolonged soaking, apply pressurized gas at theappropriate input(s) to help force the deposit away. Return to Step 4a above.c. Apply the techniques outlined in Step 3c (HF) if the above treatments fail toremove all the residue.5. Organic Matter:Immerse the nozzle of your nebulizer in a hot cleaning solution of chromic and sulfuric acids. Hold the temperature at about 100ºC. (Caution: This solution is corrosive. Please use it with appropriate safeguards.) Allow the solution to rise into the passages of the nebulizer until the affected area is filled. Expel and replace the solution at intervals until the deposit is gone or until the chromium reduction (green color) ceases. Rinse the nebulizer thoroughly with water, then with isopropyl alcohol, and dry completely.6. Plugged Capillary (fusible solids such as waxes):Follow these steps when no passage remains through the deposit: Carefully heat the nebulizer in the region of the capillary obstruction. Simultaneously (or intermittently) apply gentle gas pressure at the sample input tube. (Caution: avoid overheating residues that may produce insoluble pyrolysis products.) Stop treatment when you have opened a passage through the blockage. Return to Step 3 (Capillary Deposit) or Step 5 (Organic Matter) to complete the cleaning.7. Firmly Lodged Particle in the Capillary:WARNING! THIS PROCEDURE PLACES THE NEBULIZER AT SUBSTANTIAL RISK. RESORT TO IT ONLY WHEN ALL OTHER METHODS HAVE FAILED.Insert a fine (7-8 mil) piano wire into the capillary from the nozzle end of the nebulizer. Gently push against the particle, in the direction of increasing diameter, until it is dislodged. Avoid pushing hard enough to buckle the wire. This can break the capillary. Such damage will be permanent and could have a drastic negative effect on the nebulizer's performance. Remove the wire and backflush with compressed gas. Do not attempt to insert the wire (or any other object) into the gas annulus.Figure 2. Cleaning Strategy for the MEINHARD® Nebulizer[1] Updated from a paper originally presented at the 1980 Winter Conference on Plasma Spectrochemistry, San Juan, PR., and reproduced in the ICP Information Newsletter, Vol. 12, No. 9, 677, (1987). R. M. Barnes, Ed.[2] Private communication. A number of comments and suggestions related to concentric nebulizer maintenance have been received over the past several years. To cite these sources individually is not possible, but their contributions are gratefully acknowledged.。
