Oracle 11g官方快速安装指南
Linux系统(X64)安装Oracle11g完整安装图文教程另附基本操作

Linux系统(X64)安装Oracle11g完整安装图⽂教程另附基本操作⼀、修改操作系统核⼼参数在Root⽤户下执⾏以下步骤:1)修改⽤户的SHELL的限制,修改/etc/security/limits.conf⽂件输⼊命令:vi /etc/security/limits.conf,按i键进⼊编辑模式,将下列内容加⼊该⽂件。
oracle soft nproc 2047oracle hard nproc 16384oracle soft nofile 1024oracle hard nofile 65536编辑完成后按Esc键,输⼊“:wq”存盘退出2)修改/etc/pam.d/login ⽂件,输⼊命令:vi /etc/pam.d/login,按i键进⼊编辑模式,将下列内容加⼊该⽂件。
session required /lib/security/pam_limits.sosession required pam_limits.so编辑完成后按Esc键,输⼊“:wq”存盘退出3)修改linux内核,修改/etc/sysctl.conf⽂件,输⼊命令: vi /etc/sysctl.conf ,按i键进⼊编辑模式,将下列内容加⼊该⽂件fs.file-max = 6815744fs.aio-max-nr = 1048576kernel.shmall = 2097152kernel.shmmax = 2147483648kernel.shmmni = 4096kernel.sem = 250 32000 100 128net.ipv4.ip_local_port_range = 9000 65500net.core.rmem_default = 4194304net.core.rmem_max = 4194304net.core.wmem_default = 262144net.core.wmem_max = 1048576编辑完成后按Esc键,输⼊“:wq”存盘退出4)要使 /etc/sysctl.conf 更改⽴即⽣效,执⾏以下命令。
CentOS6.5下Oracle11G完整安装步骤

CentOS6.5下Oracle11g安装完整步骤一、硬件要求本部分内容命令,均以root用户执行。
1、内存建议内存应大于2G以上,1G可以运行,但比较吃力。
内存查看命令:[root@tsp-rls-dbserver /]# cat /proc/meminfo或[root@tsp-rls-dbserver /]# free -mtotal used free shared buffers cachedMem: 32062 1301 30760 0 40 552-/+ buffers/cache: 708 31354Swap: 16095 0 160952、交换分区交换分区大小,通常设为内存的1.5倍以上,也可以根据实际情况进行调整。
交换分区查看命令:[root@tsp-rls-dbserver /]# grep SwapTotal /proc/meminfoSwapTotal: 67682296 kB3、硬盘空间建议数据使用独立的挂载分区,本文中采用/data作为数据分区。
要求/tmp目录空间不小于400M。
磁盘空间查看命令:[root@tsp-rls-dbserver /]# df -hFilesystem Size Used Avail Use% Mounted on/dev/mapper/vg_tsprlsdbserver-lv_root 50G 4.3G 43G 10% /tmpfs 16G 348K 16G 1% /dev/shm/dev/sda1 485M 39M 421M 9% /boot/dev/mapper/vg_tsprlsdbserver-lv_home 210G 190M 199G 1% /home/dev/sdb1 1.1T 4.5G 1.1T 1% /data目录空间大小查看命令:[root@tsp-rls-dbserver tmp]# du -ch /tmp二、软件要求1、安装依赖包建议安装系统时,选择开发库。
Windows安装oracle11g教程完整版

oracle11g安装教程完整版
64位WIN7+oracle11g+plsql安装
1、下载Oracle 11g R2 for Windows的版本
下载地址:https:///technetwork/database/enterprise-edition/downloads/index.html
其中包括两个压缩包:win64_11gR2_database_1of2.zip,win64_11gR2_database_2of2.zip 2、将两个压缩包解压到同一个目录下,即“database”,然后单击解压目录下的“setup.exe”文件:
3、在出现的“配置安全更新”窗口中,取消“我希望通过My Oracle Support接受安全更新”,
单击“下一步”:
出现下面的界面,点击“是”
4、在“安装选项”窗口中,选择“创建和配置数据库”,单击“下一步”:
5、在“系统类”窗口中,选择“桌面类”,单击“下一步”:
6、在“典型安装”窗口中,选择Oracle的基目录,选择“企业版”和“默认值”并输入统一的密码为:Oracle11g,单击“下一步”:
7、在“先决条件检查”窗口中,单击“下一步”:
8、在“概要”窗口中,单击“完成”,即可进行安装:
9、出现的安装过程如下:
数据库创建完成后,会出现如下“Database Configuration Assistant”界面:。
oracle 11g workflow 安装说明
Oracle 11g workflow 安装说明Oracle workflag 是owb 中的一部分,安装workflow请先安装owb11g,owb11g请从官网下载OWB_11.1.0.6_Windows.zip进行安装,我电脑是64位系统,安装的是64位的OWB。
在OWB安装完成后,打开OWB的安装目录,在安装目录下的\db_1\owb\wf\install下面有个wfinstall.bat文件(unix系统则是wfinstall.csh),双击执行该文件,系统开始进行安装。
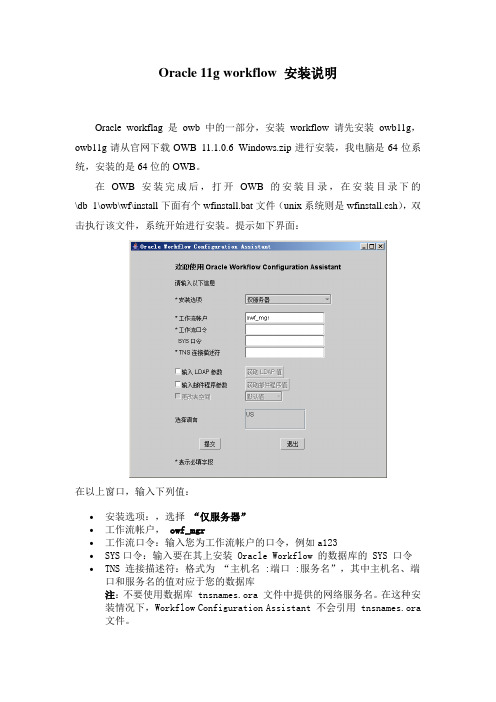
提示如下界面:在以上窗口,输入下列值:∙安装选项:,选择“仅服务器”∙工作流帐户,owf_mgr∙工作流口令:输入您为工作流帐户的口令,例如a123∙SYS口令:输入要在其上安装 Oracle Workflow 的数据库的 SYS 口令∙TNS 连接描述符:格式为“主机名 :端口 :服务名”,其中主机名、端口和服务名的值对应于您的数据库注:不要使用数据库 tnsnames.ora 文件中提供的网络服务名。
在这种安装情况下,Workflow Configuration Assistant 不会引用 tnsnames.ora 文件。
输入后的结果如下:点击“提交”,这时系统出现“table or view do not exists”错误,经检查,原来是表空间选择错了,用默认表空间即。
整个配置过程可能需要10分钟左右。
完成后,系统提示如下窗口:您可以查看owb 主目录/owb/wf/install/wf.log内容,查找跟踪配置过程进度的日志。
安装完毕,你需要配置owf_mgr的权限,将EXECUTE ANY PROCEDURE赋给owf_mgr,通过SQLPLUS,以SYSDBA用户连接数据,输入命序:grant execute any procedure to owf_mgr。
Oracle 11g详细安装步骤

【知识点1】操作系统准备工作(六步)一、OS版本限制oracle 8ioracle 9i rhel 4.xoracle 10G R2 rhel 4.xoracle 11G R2 rhel 5.xoracle 12c【注1】其中,10g以及之前的版本已经不支持了。
【注2】oracle 版本出现的时期对应的 rhel版本要注意,如:oracle 10G R2版本,官方是不支持装在rhel 5上的。
1【问题1】8i 9i 后面跟字母i什么意思?1998年9月,ORACLE公司正式发布ORACLE 8i。
“i”代表Internet,这一版本中添加了大量为支持Internet而设计的特性。
【问题2】10g 11g 后面的g是什么意思,12 c 中的c是什么意思?2003年9月8日,旧金山举办的ORACLE World大会上,Ellison宣布下一代数据库产品为“ORACLE 10g”。
ORACLE应用服务器10g(ORACLE Application Server 10g)也将作为甲骨文公司下一代应用基础架构软件集成套件。
“g”代表“grid ,网格”。
这一版的最大的特性就是加入了网格计算的功能。
c 代表cloud二、磁盘空间限制1、oracle是数据库的一款产品软件,然后在这款产品之上,可以建库。
2、两个安装目录/软件安装目录 /u01/oracle/数据库目录2这2个目录安装初期需要大约3.5G,以后再学习备份恢复的课程,又会拷贝出来一份,所以一般留出至少10G 的空间,我们可以设置60G3、/tmp安装时会用到临时目录/tmp,产生临时文件,至少400M的空间4、swap 交换分区 real_memory*2 测试环境可以不满足生产环境尽量满足2g 4g4g 8g# free 查看Swap分区 # cat /proc/meminfo三、软件包依赖oracle软件是用C语言和JAVA写的,源代码安装需要做编译,所以需要编译器,而且需要动态链接库,所以装OS时选择“开发库”、“开发工具”和“老软件支持”# yum grouplist --- 查看包组Development LibrariesDevelopment Tools3Legacy Soft Support ------ legacy除此之外,官方列出了很多软件包rpm -q binutils compat-libstdc++ elfutils-libelf elfutils-libelf-devel elfutils-libelf-devel-static gcc gcc-c++ glibc glibc-common glibc-devel glibc-headers ksh libaio libiao-devel libgomp libstdc++ libstdc++-devel make sysstat unixoDBC unixoDBC-devel | grep not四、主机名和解析地址1、不要使用DHCP分配的IP,要使用静态IP2、解析# vim /etc/hosts【语法格式】IP 主机全名192.168.1.88 rh6oracle五、用户和资源限制(PAM)4# id oracle 查看是否有oracle这个用户【解释】建立一个账户 oracle ,因为公司不可能把root的权限给你,权限太大,你的职责是管理数据库,所以,专门给DBA建立一个账号叫oracle的账户使用1、建议指定GID和UID方式(尤其集群环境)# groupadd -g 54321 oinstall2\# groupadd -g 54322 dba# useradd -u 54321 -g oinstall -G dba oracle# echo oracle | passwd --stdin oracle2、/etc/security/limits.conf 里的内容,针对单个用户的限制oracle soft nproc 2047 ---软限进程数(nproc:number of process):此时会有警告,告诉你进程有点多了,但是还可以继续运行更多的进程oracle hard nproc 16384 --- 最多可以运行16384个进程oracle soft nofile 1024 --- 软限文件数1024个oracle hard nofile 65536 --- 硬限文件数65536个5【注】要保证session required pam_limits.so 这个模块要加载,红帽默认是加载的。
Oracle 11gR2安装图解
Oracle 11g R2 Installation Guideline – Server 1.Open fold and double click ‘Setup.exe’.122. Uncheck the checkbox and click ‘Next ’button.33. Click ‘Yes ’button.4. Choose Install Database software only, then click ‘Next ’button.45.Choose Single instance database installation.6. Choose the language you want to install and make sure the language which you choseare in the list at right side, then click ‘Next ’button.57. Choose Enterprise Edition and click ‘Next ’button.68. Check the options and click ‘Finish ’button, wait for install process finished.9. Click ‘Close ’ button. (Congratulations! You ’ve done this part!)7Oracle 11g R2 Guideline – Create Database1.Go to Start -> All programs -> Oracle Server -> Configuration and Migration Tools2.Click Database Configuration Assistant83. Click ‘Next ’button.4. Choose Create a Database and click ‘Next ’button.95. Choose Custom Database and click ‘Next ’button.6.Input Global Database Name.107. Click ‘Next ’button.8.Uncheck the checkbox before Configure Enterprise Manager.1110. Click the radio button before Use the same Administrative Password for All Accountsand input password.1212. Click ‘Yes ’button.1314. Click ‘Next ’button.1416. Click ‘Next ’button.1518. Click ‘Finish ’button to create a database.19.Click ‘OK’button and wait for the process finish.20.Click Exit button.1617Oracle 11g R2 Installation Guideline – Client1. Double Click ‘setup.ext ’.182. Choose ‘Administrator ’ and click ‘Next ’button.3. Choose the language you want to install and make sure the language which you choseare in the list at right side, then click ‘Next ’button.194. Change the path and click ‘Next ’button.205. Check options and click ‘Finish ’button, wait for the process finished.6. Click ‘Close ’ button. (Congratulations again!)21Oracle 11g R2 Guideline – Server Configuration1. Got to Server machine, and choose Start -> All Programs -> Oracle Server ->Configuration and Migration Tools2.Choose ‘Listener configuration’ and click ‘Next’button.3.Choose Add and click ‘Next’224.Input name of listener and click ‘Next’button. (we always set it as default.)5.Click ‘Next’236.Choose default port and click ‘Next’button.7.Choose No and click ‘Next’2425Oracle 11g R2 Guideline – Client Configuration1. Go to Client machine and choose Start -> All Programs -> Oracle Client -> Configurationand Migration Tools2.Click Net Configuration Assistant.3.Choose ‘Listener configuration’ and click ‘Next’button.4.Choose Add and click ‘Next’265.Input name of listener and click ‘Next’button. (we always set it as default.)6.Click ‘Next’277.Choose default port and click ‘Next’button.8.Choose No and click ‘Next’289.Click ‘Next’button.10.Choose Local Net Service Name configuration and click ‘Next’2911.Choose Add and click ‘Next’button.12.3013.Click ‘Next’button.14.Choose TCP and click ‘Next’3115.Input Name or IP of server in Host Name textbox.16.Click ‘Next’3217.Choose ‘Yes, perform a test’ and click ‘Next’button.18.Click ‘Change Login’3319.Change the password to be the one you set yourself before, and click OK button.20.Click ‘Next’3422.Click ‘Next’button.353624. Click ‘Finish ’ button.25.Choose Start -> All Programs -> Administrator Tools26.Click Data Sources (ODBC). (If you need to configure 32bit ODBC, please go toC:\WINDOWS\SysWOW64 and click odbcad32.exe)Go to System DSN tab.27.3728.Click ‘Add…’button.29.Choose the client installed just now and click ‘Finish’3830.Input Data Source Name. (anything you want)31.Choose the Service Name which you created just now. (I used ‘EX’394032. Input ‘system ’ in User ID textbox and click ‘Test Connection ’button.33. Input Password which you created and click ‘OK ’button.34. Click ‘OK ’button.35.Click ‘OK’button.41。
在linux64上安装oracle11g_完整版本
Oracle 11g安装手册1、在linux的root用户下建立一个oracle用户//添加用户组及用户groupadd dbagroupadd oinstalluseradd oracle -g oinstall -G dbapasswd oracle//新建目录权限mkdir -p /u01chown -R oracle:dba /u01chmod -R 755 /u01安装时步骤8、9会指向此位置(建议:用户更改/opt/oracle11g)2、将Oracle11g安装文件复制到linux中的指定目录下(/home/oracle/tools)cp /光盘目录/linux.x64_11gR2_database_1of2 /home/oracle/tools3、执行目录中的runInstallsu - oracleLANG=zh_CN.gbk4、开始图像界面安装可能需要export DIAPLAY=:1.0xdpyinfo步骤1:将红框中的内容勾选去掉,点击下一步。
提示“未指定电子邮件地址”点击“是”步骤2:点选“创建和配置数据库”此选项也为默认选项,点击下一步。
步骤3:点击选中“服务器类”,点击“下一步”步骤4:点击选中“单实例数据库安装”,点击下一步。
步骤5:点击选中“高级安装”,点击“下一步”步骤6:选择需要的语言,点击“下一步”,此处客户确认是否需要增加其他语言步骤7:点击选中“企业版(4.29GB)”,点击“下一步”点击上图的“选择选项”,勾选需要的组件,此处全部勾选。
步骤8:此处为默认路径,u01的建立参考第1点orcale用户的建立,点击“下一步”步骤9:此处默认即可,点击“下一步”步骤10:点击选中“一般用途/事务处理”,点击“下一步”步骤11:此处默认,点击“下一步”vpmsdbs步骤12:此处可以设置内存、字符集、安全性、示例方案(可根据用户环境调整),点击“下一步”,内存分配建议至少50%步骤13:此处默认,点击“下一步”步骤14:此处默认处理,点击“下一步”步骤15:点击选中“不启用自动备份”,点击“下一步”步骤16:各帐号口令设定,此处统一使用相同口令,客户现场请在同客户确认口令设定规则步骤17:点击“下一步”步骤18:点击“修补并在此检查”,会产生修补文件,按照提示内容执行即可A、切换到root用户,此处为测试环境执行内容如上述步骤执行完成后依旧存在失败内容,请到linux光盘中寻找对应的rpm文件,复制到linux某一目录中,按下图命令执行步骤19:修补完成后,出现如下信息,点击“完成”步骤20:执行安装过程复制文件,创建实例过程完成后信息,点击“确定”完成后,如出现以下内容,请按照操作步骤,执行完成后,完成安装过程配置监听器1、执行su - oraclesh /u01/app/oracle/product/11.2.0/dbhome_1/bin/netca2、点击选中“监听程序配置”,点击“下一步”3、点击选中“添加”,点击“下一步”4、设定监听程序名,点击“下一步”5、选定协议所有协议,点击“下一步”6、设定标准端口号,点击“下一步”7、设定标准TCP/IP SSL端口号,点击“下一步”8、设置IPC键值,点击“下一步”9、提示是否配置另一个监听程序,点“是”,再点击“下一步”配置数据库1、执行sh /u01/app/oracle/product/11.2.0/dbhome_1/bin/dbca2、点击“下一步”3、点选“创建数据库”,点击“下一步”4、点选“一般用途或事物处理”,点击“下一步”5、设定数据库名及SID,点击“下一步”6、配置管理选项,此处暂时用7、设定口令,点击“下一步”8、网络配置,点击“下一步”9、数据库文件所在位置,点击“下一步”,按照实际的文件规划位置10、恢复配置,点击“下一步”11、数据库内容,点击“下一步”12、初始化参数,点击“下一步”13、数据库存储,点击“下一步”14、创建选项,点击“完成”15、概要显示,点击“确定”16、创建进行17、创建完成,点击“退出”环境变量设置及启动1、设置环境变量在服务器上配置环境变量,编辑vi /etc/profile,在末尾加入以下配置export ORACLE_HOME=/u01/app/oracle/product/11.2.0/dbhome_1export PATH=.:$ORACLE_HOME/bin:$PATHexport ORACLE_SID=VPMSDBS (数据库SID)保存并退出vi /etc/oratab最后的N 改成Y(否则dbstart和dbshut命令无效)lsnrctl start (启动oracle监听)提示:The listener supports no servicesThe command completed successfully这样启动后远程连接会造成oracle ORA-12514:TNS:listener does not currently know of service requested in connect descriptor-----方案一-------------------------在listener.ora里面添加了一行SID_LIST_LISTENER =(SID_LIST =(SID_DESC =(GLOBAL_DBNAME = VENDB)(ORACLE_HOME = /opt/oracle11g/app/oracle/product/11.2.0/dbhome_1)(SID_NAME = VENDB)))-----方案二-------------------------linux上面:[oracle@localhost ~]$ netmgr在下图的Listeners->Database Services中配置要监听的SID及ORACLE_HOME,退出保存。
Linux安装Oracle 11g(图文版)

Linux安装Oracle 11g服务器(图文)应该是最完整的Oracle安装教程了,全程在测试服务器上完成,软件环境:Red Hat Enterprise Linux 6;Oracle 11g (11.1.0.6)1. 从Oracle网站下载linux_11gR1_database_1013.zip,在终端输入unzip linux_11gR1_database_1013.zip进行解压,解压后得到的database文件夹即是Oracle的安装文件。
2. 修改/etc/hosts,添加IP地址和域名的映射关系:#格式如下<IP-address> <fully-qualified-machine-name> <machine-name>#比如127.0.0.1 localhost.localdomain localhost10.16.37.104 ol5-11gr1.localdomain ol5-11gr13. 修改/etc/sysctl.conf,在文件中增加以下内容:kernel.shmall = 2097152kernel.shmmax = 2147483648 # Smallest of -> (Half the size of the physical memory) or (4GB - 1 byte)kernel.shmmni = 4096# semaphores: semmsl, semmns, semopm, semmnikernel.sem = 250 32000 100 128fs.file-max = 65536 # 512 * PROCESSESnet.ipv4.ip_local_port_range = 1024 65000net.core.rmem_default=4194304net.core.rmem_max=4194304net.core.wmem_default=262144net.core.wmem_max=2621444. 在终端运行/sbin/sysctl -p,使内核参数立即生效。
Oracle11Gr2数据库安装配置详细步骤

Oracle11Gr2数据库安装配置详细步骤一、 Oracle 11G 下载安装配置(一) Oracle 11g r2下载官网链接可以在Oracle 官网下载Oracle 11g r2数据库:/technetwork/database/enterpriseedition/downloads/index.htm l解压使用这里下载的是for windows x64位win64_11gR2_database_1of2.zip、win64_11gR2_database_2of2.zip 将两个压缩包解压到同一个目录下即“database”,然后单击解压目录下的“setup.exe”文件。
(二) Oracle 11g r2软件安装安装程序-安装数据库软件-步骤1/10在出现的“配置安全更新”窗口中,取消“我希望通过My Oracle Support接受安全更新”,单击“下一步”:安装程序-安装数据库软件-步骤2/10在“安装选项”窗口中,选择“仅安装数据库软件”,单击“下一步”:安装程序-安装数据库-步骤软件3/10网格安装选项。
选择“单实例数据库安装”,如下图所示,单击下一步。
Real Application Clusters用来在群机环境下实现多机共享数据库,以保证应用的高可用性。
同时可以自动实现并行处理及均分负载,还能实现数据库在故障时的容错和无断点恢复。
安装程序-安装数据库-步骤软件4/10产品语言。
直接默认即可(简体中文、英语),如下图所示,单击下一步安装程序-安装数据库-步骤软件5/10数据库版本。
选择“企业版”,如下图所示,单击下一步。
之所以选择企业版, 是因为它提供了全面的功能来支持要求最严格的事务处理、商务智能和内容管理软件。
防止服务器故障、站点故障和人为错误的发生,并减少了计划内的宕机时间,利用独特的行级安全性、细粒度审计和透明的数据加密技术来确保数据安全,包括了高性能的数据仓库、在线分析处理和数据挖掘功能。
oracle11g client安装及配置

Oracle Client 客户端的安装和配置一、客户端的下载解压1、在官方网站下载客户端(此处用的是11gR2)/technetwork/database/enterprise-edition/downloads/112010-win32soft-098987.html ?ssSourceSiteId=otncn选择合适的版本(这里是32为的windows 操作系统)2、下载完成后解压缩如下所示,双击setup.exe可执行文件进行安装。
二、客户端的安装1、选择安装类型:这里是开发用,所以选择【管理员(1.02GB) (A)】安装类型。
2、选择选择语言(这里选择简体中文和英语)3、选择客户端安装的位置4、检查先行条件(系统自动检查)5、系统显示前面步骤的设置摘要信息。
6、点击完成进行安装。
7、Oracle Clinet客户端安装完成。
三:配置Oracle Client 连接Oracle 服务器找到oracle client的【配置和移植工具】下的【Net Configuration Assistant】1、配置Client的监听。
A、添加一个监听器(如果客户端中原先以配置监听器则可以修改,也可以在添加一个新的监听器),点【下一步(N)】B、输入该客户端未使用的监听名(如:LISTENER),完成后点击【下一步(N)】。
C、选择该监听连接Oracle服务器所使用的协议(如:TCP),完成后点击【下一步(N)】。
D、选择该监听连接Oracle服务器所使用的端口号(默认端口号:1512),完成后点击【下一步(N)】。
E、完成该监听程序,选择是否要配置另一个监听程序,然后【下一步(N)】。
2、配置Client的本地网络服务名A、在 Net Configuration Assistant配置界面中选中【本地网络服务名配置】,然后【下一步(N)】。
B、在本地网络服务名配置界面中网络配置名,(如果客户端中原先已配置网络配置名则可以修改,也可以再添加一个新的网络配置名),点【下一步(N)】C、输入该客户端未存使用的服务名,点【下一步(N)】D、选择该服务连接Oracle服务器所使用的协议(如:TCP),完成后点击【下一步(N)】。
oracle 11g r2 安装过程与卸载详细图解

Oracle 11g安装1.解压下载的包,然后进入包内,点击setup.exe开始安装。
2.出现如下:一般把那个小对勾取消,点击下一步进行,弹出下图这个后点‘是’3.下图后,选择创建和配置数据库,点击下一步。
4.下图,选择服务器类,因为桌面类没有高级选项的功能,下一步。
5.下图,选择单实例数据库,下一步6.下图,选择高级安装,下一步7,下图选择语言,如果数据库内没有用到其他的语言,就这样默认的就可以了,下一步8.下图,选择安装版本,用企业版的,下一步更改,不要用这个默认的,删除的时候麻烦。
下面说一下怎么新建一个自定义目录。
新建一个文件夹,取名oracle. 注意:这两个文件夹的名字可以自己定义,但是最好不要用中文名作文件夹的名字,容易出问题。
最好是如下这样的目录结构。
如图,就是这个样子的:11.继续安装,点击‘oracle基目录’后面的那个浏览:12.选择刚新建的d:\myoracle\oracle这个文件夹:如图:好了,不用管下面的那个浏览了,直接点击下一步。
14.下图,选择‘一般用途事务处理’直接点击下一步:两个就使用默认的了。
下一步。
16.下图,就按照默认的来吧,点击下一步。
17.下图,也选择默认,下一步18.下图,还是默认的,点击下一步。
19.下图,直接下一步20.下图,配置口令,如果怕麻烦的话,如果仅仅是做学习用的话,统一口令就行。
如果以后高级了,可以分别设置口令。
这几个用户权限是不同的。
我就用统一口令了,输入了oracle123.。
注意一点:你的这个口令,必须以字母开头,数字开头的话,后面会有很多问题的。
21.22.输入上面那个oracle123后,会弹出如下:在这里要注意了,oracle的密码标准是要字母数字大小写组合的大于八位才行,一般要是仅供学习用的话,不用在意这个。
直接点‘是’就行。
23.下图,检测环境:24.环境检测完后,有的是可以直接点击下一步的,有的会出现如下图:这个时候,一般是下图这样的,那么就应该没多大问题,选择全部忽略,再点击下一步就行了。
Cent OS 7_5(x86_64)下安装Oracle 11g
目录一、硬件要求二、软件三、系统安装注意四、安装Oracle前的系统准备工作五、安装Oracle,并进行相关设置一、硬件要求1、内存& swapMinimum: 1 GB of RAMRecommended: 2 GB of RAM or more检查内存情况# grep MemTotal /proc/meminfo# grep SwapTotal /proc/meminfo2、硬盘由于CentOS安装后差不多有4~5G,再加上Oracle等等的安装,所以请准备至少10G的硬盘空间。
检查磁盘情况# df -h二、软件准备系统平台:CentOS 7.5(x86_64)CentOS-7-x86_64-DVD-1804Oracle版本:Oracle 11gp1*******_112040_Linux-x86-64_1of7.zip、p1*******_112040_Linux-x86-64_2of7.zip 三、系统安装注意系统安装时一定要安装桌面模式,否则无法安装oracle,另外请勿开启SELinux,oracle官方不建议使用SELinux,防火墙也请暂时关闭,减少安装时的困扰。
为防止Oracle安装过程中出现乱码,建议使用英文作为系统语言,进行Oracle的安装工作。
本文中所描述的系统命令,未经特殊标示,均为“#”代表root权限,“$”代表oracle权限。
四、系统准备工作首先,请先以root账号登入作一些前置设定作业。
1、关闭防火墙//临时关闭systemctl stop firewalld//禁止开机启动systemctl disable firewalld2、安装依赖包以下RPM包拷贝到/opt目录下,进入opt目录,执行以下命令。
rpm -ivh libmpc-1.0.1-3.el7.x86_64.rpmrpm -ivh cpp-4.8.5-28.el7.x86_64.rpmrpm -ivh kernel-headers-3.10.0-862.el7.x86_64.rpmrpm -ivh glibc-headers-2.17-222.el7.x86_64.rpmrpm -ivh glibc-devel-2.17-222.el7.x86_64.rpmrpm -ivh gcc-4.8.5-28.el7.x86_64.rpmrpm -ivh libstdc++-devel-4.8.5-28.el7.x86_64.rpmrpm -ivh gcc-c++-4.8.5-28.el7.x86_64.rpmrpm -ivh libaio-devel-0.3.109-13.el7.x86_64.rpmrpm -ivh pdksh-5.2.14-37.el5_8.1.x86_64.rpmrpm -ivh compat-libstdc++-33-3.2.3-69.el6.x86_64.rpmrpm -ivh pkgconfig-0.27.1-4.el7.x86_64.rpmrpm -ivh zlib-devel-1.2.7-17.el7.x86_64.rpmrpm -ivh elfutils-libelf-devel-0.170-4.el7.x86_64.rpm3、创建Oracle用户与组在这里只讨论单主机环境,不考虑RAC环境的配置。
Oracle-11g-r2数据库在Win7下的安装卸载详细方法

Oracle-11g-r2数据库在Win7下的安装卸载详细⽅法在oracle官⽅⽹站上下载Oracle-11g-r2数据库。
两个压缩⽂件,解压缩第⼀个,将第⼆个压缩包中的内容放到第⼀个包解压后的\stage\Components⽂件夹下1. 安装步骤,可以不选择接收安全更新2.选“是”,下⼀步3. 创建和配置数据库4. 选择桌⾯类,也可以选择服务器类,多了选择语⾔和⼀些设置的选择,但是⼤多都直接选择默认的配置5.选择要安装到的⽬录,密码要求⼤⼩写字母加数字,多于8位,不按要求设置也能安装,这个密码是系统管理员密码。
全局数据库名是SID,很重要。
6. 安装程序会进⾏硬件环境检查,满⾜要求的话可以直接点击完成开始安装7.开始安装程序,等待8. 第⼀次安装或者卸载完全没有出现问题的话,100%后会进⼊另⼀个界⾯的安装9. 安装完成,这时要设置登录的⽤户,点击⼝令管理10.将scott和hr两个⽤户的勾去掉(解锁定),在新⼝令⾥设置密码,⼀般scott的设为tiger,hr的设为hr点击“是”确定确定后,关闭,完成安装Oracle的卸载是件很复杂⿇烦的事情,尤其是卸载不完全再重装会造成重装失败,下⾯介绍卸载的⽅法,win+R打开运⾏,输⼊services.msc,回车,打开服务⾸先需要关闭所有oracle服务,由于oracle11g r2⾮常占⽤系统资源,建议在管理⼯具中将所有oracle服务改为⼿动运⾏,需要时再启动,⽅法是右键服务,选择属性,在启动类型中改为⼿动。
在卸载oracle之前,在所有已启动的oracle服务上右键选择停⽌。
运⾏开始->所有程序->Oracle - OraDb11g_Home1->Oracle安装产品->Universal Installer选择解除安装的产品,勾选所有安装的产品,点击删除,这时会提⽰使⽤%oracle%/product/11.2.0/dbhome_1/deinstall/deinstall.bat卸载产品实例,接下来找到这个⽂件,右键选择以管理员⾝份运⾏。
Oracle11g的安装图文教程(个人安装总结)
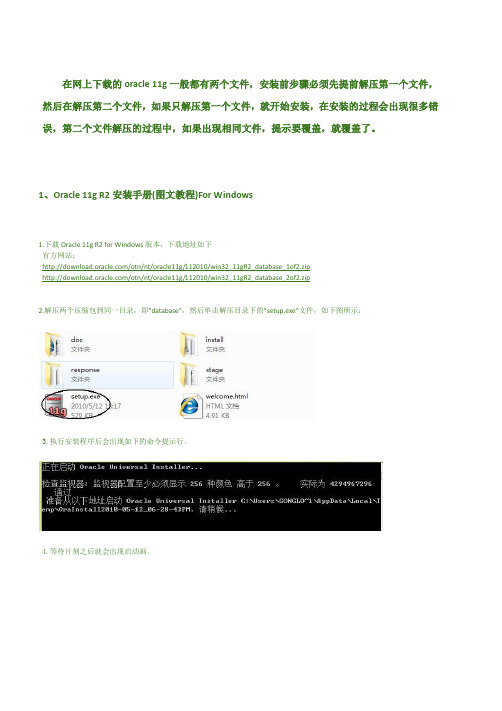
在网上下载的oracle 11g一般都有两个文件,安装前步骤必须先提前解压第一个文件,然后在解压第二个文件,如果只解压第一个文件,就开始安装,在安装的过程会出现很多错误,第二个文件解压的过程中,如果出现相同文件,提示要覆盖,就覆盖了。
1、Oracle 11g R2安装手册(图文教程)For Windows1.下载Oracle 11g R2 for Windows版本,下载地址如下官方网站:/otn/nt/oracle11g/112010/win32_11gR2_database_1of2.zip/otn/nt/oracle11g/112010/win32_11gR2_database_2of2.zip2.解压两个压缩包到同一目录,即"database",然后单击解压目录下的"setup.exe"文件,如下图所示:3.执行安装程序后会出现如下的命令提示行。
4.等待片刻之后就会出现启动画。
5.稍微等待一会,就会出现如下图所示的安装画面,取消下图所示的选中,然后单击"下一步"继续,同时在出现的信息提示框单击"是"继续。
6.之后就会出现安装选项对话框,默认点击"下一步"继续7.之后会出现安装类型对话框,点击"下一步"继续,如果奔出你是安装在Windows Server上的话就选择服务器类。
8.然后就是安装配置,在这要注意的是:管理口令的格式要至少包含一个大写字母,一个小写字母和一个数字,否则会提示警告,正确输入后点击"下一步"继续。
9. 之后会出现"先决条件检查"对话框,选中"全部忽略"并单击"下一步"以继续。
10.之后点击"完成"就开始安装了11.安装画面如下图所示:12.当上述进度到达100%时会出现线面的对话框,请耐心等待它完成。
Oracle11g数据库安装方法与步骤图文教程

衷心感谢各位同学的支持! 谢谢!
实验步骤9
选择JDK8的安装路径,找到 Java.exe即可。
安装路径在前面JDK8安装时提及。
选择完毕后,点击Ok即可启动该 SQL工具。
实验步骤10
10.进入SQL Developer 主界面,创建连接。
实验步骤10
填写相关信息进行连 接,并测试是否成功。
请注意:
第一次使用scott用户 登录,可能会提示密
实验步骤4
到此JDK8安装完成!
实验步骤5
5.前往官方网站下载Oracle11g安装包。
实验步骤5
找到图中链接,点击进入下载页。
实验步骤5
点击“同意条款”按钮,再往下找到下载链接。
实验步骤5
实验步骤6
6.同时选中下载的2个安装包(32 位的2个或者64位的2个)进行 同时解压到同一文件夹位置内。 解压完毕后运行安装包里面的安 装程序即可,进入安装界面。
是作为练习的最佳选择。要学 会运用这个帮手。
1. 在自己电脑上安装Oracle 11g,放便以后的练 习和作业。并对本实验内容进行复习和巩固。 2. 将课本中“认证目标1.03”中的内容进行上机 实验。 3. 将本实验相关内容,即自己安装Oracle 11g的 实验过程(适当截图)放入上机实验报告册 中。
配置方法:
右键该项,选择“属性”,将“目标”项的后面内容改 成(红色部分):sqldeveloper\bin\sqldeveloperW.exe
实验步骤9
9. 点击并第一次使用“SQL Developer”工具时, 会弹出如图提示,需要进行相关配置。
配置方法:
点击“Browse”按钮,选择JDK8的安装路径,找到 Java.exe即可。安装路径在前面JDK8安装时提及。
Cent OS 6_5(x86_64)下安装Oracle 11g

目录一、硬件要求二、软件三、系统安装注意四、安装Oracle前的系统准备工作五、安装Oracle,并进行相关设置一、硬件要求1、内存& swapMinimum: 1 GB of RAMRecommended: 2 GB of RAM or more检查内存情况# grep MemTotal /proc/meminfo# grep SwapTotal /proc/meminfo2、硬盘由于CentOS安装后差不多有4~5G,再加上Oracle等等的安装,所以请准备至少10G的硬盘空间。
检查磁盘情况# df -h二、软件系统平台:CentOS 6.5(x86_64) 【可以安装中文界面】CentOS-6.5-x86_64-bin-DVD1.isoOracle版本:Oracle 11gp1*******_112040_Linux-x86-64_1of7.zip、p1*******_112040_Linux-x86-64_2of7.zip 三、系统安装注意系统安装时一定要安装桌面模式,否则无法安装oracle,另外请勿开启SELinux,oracle官方不建议使用SELinux,防火墙也请暂时关闭,减少安装时的困扰。
为防止Oracle安装过程中出现乱码,建议使用英文作为系统语言,进行Oracle的安装工作。
本文中所描述的系统命令,未经特殊标示,均为“#”代表root权限,“$”代表oracle权限。
四、安装Oracle前的系统准备工作首先,请先以root账号登入作一些前置设定作业。
1、关闭防火墙2、安装依赖包以下RPM包拷贝到/opt目录下,进行opt目录,执行以下命令。
# rpm -ivh libstdc++-devel-4.4.7-4.el6.x86_64.rpm# rpm -ivh mpfr-2.4.1-6.el6.x86_64.rpm# rpm -ivh cpp-4.4.7-4.el6.x86_64.rpm# rpm -ivh ppl-0.10.2-11.el6.x86_64.rpm# rpm -ivh cloog-ppl-0.15.7-1.2.el6.x86_64.rpm# rpm -ivh gcc-4.4.7-4.el6.x86_64.rpm# rpm -ivh gcc-c++-4.4.7-4.el6.x86_64.rpm# rpm -ivh compat-libcap1-1.10-1.x86_64.rpm# rpm -ivh compat-libstdc++-33-3.2.3-69.el6.x86_64.rpm# rpm -ivh libaio-devel-0.3.107-10.el6.x86_64.rpm# rpm -ivh pdksh-5.2.14-37.el5_8.1.x86_64.rpm# rpm -ivh elfutils-libelf-devel-0.152-1.el6.x86_64.rpm3、创建Oracle用户与组在这里只讨论单主机环境,不考虑RAC环境的配置。
如何在Linux环境下安装Oracle 数据库11g
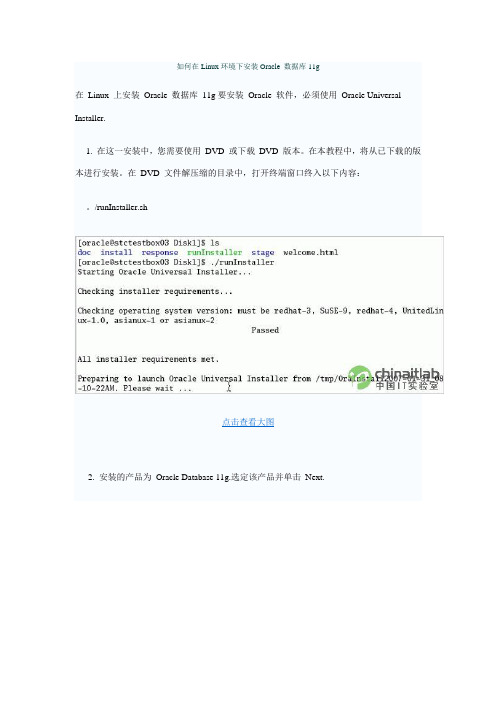
如何在Linux环境下安装Oracle 数据库11g在Linux 上安装Oracle 数据库11g要安装Oracle 软件,必须使用Oracle Universal Installer.1. 在这一安装中,您需要使用DVD 或下载DVD 版本。
在本教程中,将从已下载的版本进行安装。
在DVD 文件解压缩的目录中,打开终端窗口终入以下内容:。
/runInstaller.sh点击查看大图2. 安装的产品为Oracle Database 11g.选定该产品并单击Next.点击查看大图2. 您将通过一个入门级数据库来执行基本安装。
输入orcl 作为Global Database Name 以及oracle 作为Database Password 并确认口令。
然后单击Next.点击查看大图3. 您需要指定Inventory 目录。
位置应该设置为/u01/app/oracle/oraInventory.接受默认的Operating System 级名oinstall.然后单击Next.点击查看大图∙Oracle 数据表分区的策略∙详细介绍Oracle 数据库的聚簇技术∙Oracle 数据库的配置方案完全分析∙在Linux x86 上安装Oracle 数据∙简单讲述oracle 数据库查询原理∙六大方面教您学好Oracle 数据库∙从oracle 数据库读取日期时间,并在∙Ruby on Rails 连接Oracle 数据库∙Oracle 数据库优化的R方法(Method∙oracle 数据分页查询4. 安装程序现在将验证系统是否满足安装和配置所选产品的最低要求。
继续前改正任何报告的错误。
检查成功完成后,单击Next.点击查看大图5. Oracle Configuration Manager 允许您将配置信息与Metalink 帐户相关联。
您可在该窗口上选择启用它。
然后单击Next.点击查看大图4. 安装程序现在将验证系统是否满足安装和配置所选产品的最低要求。
oracle11详细安装步骤
安装oracle11g的步骤Oracle11gR2官方联机文档:/pls/db112/homepage一、安装Oracle前的准备工作1、检查物理内存及Swap# grep MemTotal /proc/meminfoMemTotal: 1031320 kB(1G内存)#grep SwapTotal /proc/meminfoSwapTotal: 2064376 kB(2G)2、检查可用的内存和Swapfree –mtotal used free shared buffers cached Mem: 1007 696 310 0 43 479 -/+ buffers/cache: 172 834Swap: 2015 0 2015建议:物理内存最好是2GB及以上。
1024MB的物理内存,可用的只有1001MB,安装时不能通过Oracle“执行先决条件检查”,事实证明即使物理内存低于1GB一,也可以忽略此警告,并不影响Oracle软件的成功安装,如下:物理内存- 此先决条件将测试系统物理内存总量是否至少为1GB (1048576.0KB)。
预期值: 1GB (1031320.0KB)实际值: 1007.9MB (1025944.0KB)错误列表:-PRVF-7530 : 节点"ctcdb01" 上的物理内存不足[所需物理内存= 1GB (1048576.0KB)] - Cause: 发现物理内存(RAM) 的数量不满足最低内存要求。
- Action: 向指定的节点添加物理内存(RAM)。
二、检查Oracle11gR2所需要的rpm包如果你的是 Oracle 11g Release 2 (11.2) for Linux x86,请看下面链接的安装文档/docs/cd/E11882_01/install.112/e10857/toc.htm我使用操作系统 , CentOS release 6.0(Final) Kernel 2.6.32-71.el6.i686检查相关的开发工具和一些包The following or later version of packages for Asianux 3, Oracle Enterprise Linux 5, and Red Hat Enterprise Linux 5 should be installed: /cd/E11882_01/install.112/e24322/pre_install.htm#BABCFBDG1、检查命令格式如下:rpm -qa | grep 名字binutils-2.17.50.0.6 okcompat-libstdc++-33-3.2.3 okelfutils-libelf-0.125 okelfutils-libelf-devel-0.125 okelfutils-libelf-devel-static-0.125 okgcc-4.1.2 okgcc-c++-4.1.2 okglibc-2.5-24 okglibc-common-2.5 okglibc-devel-2.5 okglibc-headers-2.5 okkernel-headers-2.6.18 okksh-20060214 oklibaio-0.3.106 oklibaio-devel-0.3.106 oklibgcc-4.1.2 oklibgomp-4.1.2 oklibstdc++-4.1.2 oklibstdc++-devel-4.1.2 okmake-3.81 oknumactl-devel-0.9.8.i386 oksysstat-7.0.2 okunixODBC-2.2.11 okunixODBC-devel-2.2.11 okpdksh-5.2.14-8.i386 ok(先移除自带的ksh yum remove ksh 在yum install pdksh-* centos6.2中会遇到此情况)下载地址:/index.php3?stat=3&search=pdksh从 CentOS-5.5-i386-bin-DVD.iso\CentOS 文件找到缺少的包,并且上传到 linux 上去ls *.rpmrpm -ivh *.rpm2、配置内核参数# sysctl -a | grep semkernel.sem = 250 32000 32 128(centos6.2可能会出现内核不对头,修改参数echo "kernel.sem=250 32000 100 128" >> /etc/sysctl.conf)# sysctl -a | grep ip_local_port_rangenet.ipv4.ip_local_port_range = 32768 61000如果原有的内核参数值大于Oracle建议的内核参数值,则不用修改该内核值,反之,则需要修改,建议内存大于2G的正式,一定一条条要仔细检查;Oracle建议的内核最小值3、这里使用Oracle建议值配置:vi /etc/sysctl.conffs.aio-max-nr = 1048576fs.file-max = 6815744kernel.shmall = 2097152kernel.shmmax = 1010000000kernel.shmmni = 4096kernel.sem = 250 32000 100 128net.ipv4.ip_local_port_range = 9000 65500net.core.rmem_default = 262144net.core.rmem_max = 4194304net.core.wmem_default = 262144net.core.wmem_max = 1048586etcsysctl.conf 参数说明.txt# sysctl -p #使内核参数立即生效# sysctl -a |grep kernel.shmmax #查看内核参数的值kernel.shmmax = 5368709124 、配置Oracle用户资源限制# vi /etc/security/limits.conforacle soft nproc 2047oracle hard nproc 16384oracle soft nofile 1024oracle hard nofile 65536oracle soft stack 10240加入以下行到/etc/pam.d/login,如果存在,则不加入# grep pam_limits.so /etc/pam.d/loginvi /etc/pam.d/loginsession required pam_limits.so5、在/etc/profile文件中加入以下行For the Bourne, Bash, or Korn shell, add the following lines in the /etc/profile file (or the /etc/profile.local file on SUSE Linux Enterprise Server systems): # vi /etc/profileif [ $USER = "oracle" ]; thenif [ $SHELL = "/bin/ksh" ]; thenulimit -p 16384ulimit -n 65536elseulimit -u 16384 -n 65536fifi强调:Oracle用户资源限制这个部分,不配置也不会影响Oracle数据库的成功安装;但是考虑到,若有糟糕的sql语句对服务器资源的无限占用,导致长时间对用户请求无响应,还是建议提前限制Oracle用户资源为好。
Linux上Oracle11g安装步骤图解
Linux上Oracle11g安装步骤图解安装准备⼯作⽬录下载地址:选择需要的oracle安装⽂件下载联机⽂档:可以下载其PDF⽂档参考(其中的有关Linux安装向导是最权威的安装⼿册)数据库安装硬件配置要求:最⼩内存 1 GB of RAM虚拟内存容量Available RAM Swap Space RequiredBetween 1 GB and 2 GB 1.5 times the size of RAMBetween 2 GB and 16 GB Equal to the size of RAMMore than 16 GB16 GB硬盘空间要求数据库软件硬盘空间需求:Installation Type Requirement for Software Files (GB)Enterprise Edition 3.95Standard Edition 3.88数据⽂件硬盘空间需求:Installation Type Requirement for Data Files (GB)Enterprise Edition 1.7Standard Edition 1.5检查的命令内存# grep MemTotal /proc/meminfo交换空间# grep SwapTotal /proc/meminfo磁盘空间# df -ah平台查看联机⽂档,可以看出Oracle 11g⽀持Linux操作系统下⾯是 X86(32位)上Linux其中Red Hat 4与Oracle Linux 4对应,以及与Cent OS 4对应(版本要对应)通过查看Oracle安装⽂档中列出的Package Requirements可以查看在不同平台上需要的软件包,下⾯列出Asianux 3, Oracle Enterprise Linux 5.0, and Red Hat Enterprise Linux 5.0的要求,检查下系统是否安装过这些包,如果没在对应的系统光盘查找对应的rpm包并安装。
- 1、下载文档前请自行甄别文档内容的完整性,平台不提供额外的编辑、内容补充、找答案等附加服务。
- 2、"仅部分预览"的文档,不可在线预览部分如存在完整性等问题,可反馈申请退款(可完整预览的文档不适用该条件!)。
- 3、如文档侵犯您的权益,请联系客服反馈,我们会尽快为您处理(人工客服工作时间:9:00-18:30)。
Oracle® DatabaseQuick Installation Guide11g Release 2 (11.2)for Linux x86-64E24326-04September 2013This guide describes how to quickly install Oracle Database 11g Release 2 (11.2) onLinux x86-64 systems. It includes information about the following:■Reviewing Information About This Guide■Logging In to the System as root■Checking the Hardware Requirements■Checking the Software Requirements■Creating Required Operating System Groups and Users■Configuring Kernel Parameters and Resource Limits■Creating Required Directories■Configuring the oracle User’s Environment■Mounting the Product Disc■Installing Oracle Database■Installing Oracle Database Examples■What to Do Next?■Additional Information■Documentation Accessibility1Reviewing Information About This GuideThis guide describes how to install Oracle Database by using the default installationoptions.Tasks Described in This GuideThe procedures in this guide describe how to:■Configure your system to support Oracle Database■Install Oracle Database on a local file system by using the Typical Installationoption■Configure a general-purpose Oracle Database installation that uses the local filesystem for database file storageResults of a Successful InstallationAfter you successfully install Oracle Database:■The database that you created and the default Oracle Net listener process run on the system.■Oracle Enterprise Manager Database Control run on the system and can be accessed by using a web browser.Tasks Not Described in This GuideThis guide covers the Typical Installation scenario and does not describe how to complete the following tasks:■Using the Advanced Installation option to install the software■Installing the software on a system that has an existing Oracle software installation ■Installing Oracle Clusterware and Oracle Real Application Clusters on a cluster■Enabling Enterprise Manager e-mail notifications or automated backups■Enabling core file creation■Verifying UDP and TCP kernel parameters■Using alternative storage options such as Oracle Automatic Storage Management ■Installing and configuring Oracle Grid InfrastructureWhere to Get Additional Installation InformationFor more information about installing Oracle Database, including information about the tasks not described in this guide, refer to one of the following guides:■If you want to install the software on a single system, then refer to Oracle Database Installation Guide for Linux.■If you want to install Oracle Grid Infrastructure for a standalone server, then refer to the "Oracle Grid Infrastructure" chapter in Oracle Database Installation Guide for Linux.■If you want to perform an Oracle Real Application Clusters installation, then refer to Oracle Grid Infrastructure Installation Guide for Linux and Oracle Real Application Clusters Installation Guide for Linux and UNIX. These guides describe how to install Oracle Clusterware and Oracle Real Application Clusters. Oracle Clusterware is a prerequisite for Oracle Real Application Clusters installations.All these guides are available on the product disc. To access them, use a web browser to open the welcome.htm file located in the top-level directory of the media.Platform-specific documentation is available in PDF and HTML formats in the Documentation section..2Logging In to the System as rootBefore you install the Oracle software, you must complete several tasks as the root user. To log in as the root user, complete one of the following procedures:Note:You must install the software from an X Window Systemworkstation, an X terminal, or a PC or other system with X serversoftware installed2.6.32 or later■On Red Hat Enterprise Linux 6 with the Oracle Unbreakable Enterprise Kernel for Linux2.6.32-100.28.5.el6.x86_64 or later ■On Red Hat Enterprise Linux 62.6.32-71.el6.x86_64 or later■On Asianux Server 3, Oracle Linux 5 Update 2, and Red Hat Enterprise Linux 5 Update 22.6.18 or later■On SUSE Linux Enterprise Server 102.6.16.21 or later■On SUSE Linux Enterprise Server 112.6.27.19 or laterTo determine whether the required kernel is installed, enter the following command:# uname -rThe following is a sample output displayed by running this command on an Oracle Linux 5.0 system:2.6.18-128.el5PAEIn this example, the output shows the kernel version (2.6.18) and errata level (-128.el5PAE ) on the system.If the kernel version does not meet the requirement specified earlier in this section, then contact the operating system vendor for information about obtaining and installing kernel updates.4.3Package RequirementsThe following are the list of packages required for Oracle Database 11g Release 2 (11.2):See Also:"About Oracle Unbreakable Enterprise Kernel for Linux"section in Oracle Database Installation Guide for Linuxlibaio-0.3.105 (32 bit)libaio-devel-0.3.105libaio-devel-0.3.105 (32 bit)libgcc-3.4.6libgcc-3.4.6 (32-bit)libstdc++-3.4.6libstdc++-3.4.6 (32 bit)libstdc++-devel 3.4.6make-3.80numactl-0.6.4.x86_64pdksh-5.2.14sysstat-5.0.5■The following or later version of packages for Asianux 3, Oracle Linux 5, and Red Hat Enterprise Linux 5 must be installed:binutils-2.17.50.0.6compat-libstdc++-33-3.2.3compat-libstdc++-33-3.2.3 (32 bit)elfutils-libelf-0.125elfutils-libelf-devel-0.125gcc-4.1.2gcc-c++-4.1.2glibc-2.5-24glibc-2.5-24 (32 bit)glibc-common-2.5glibc-devel-2.5glibc-devel-2.5 (32 bit)glibc-headers-2.5ksh-20060214libaio-0.3.106libaio-0.3.106 (32 bit)libaio-devel-0.3.106libaio-devel-0.3.106 (32 bit)libgcc-4.1.2libgcc-4.1.2 (32 bit)libstdc++-4.1.2libstdc++-4.1.2 (32 bit)libstdc++-devel 4.1.2make-3.81sysstat-7.0.2■The following or later version of packages for Oracle Linux 6, and Red Hat Enterprise Linux 6 must be installed:binutils-2.20.51.0.2-5.11.el6 (x86_64)compat-libcap1-1.10-1 (x86_64)compat-libstdc++-33-3.2.3-69.el6 (x86_64)compat-libstdc++-33-3.2.3-69.el6.i686gcc-4.4.4-13.el6 (x86_64)gcc-c++-4.4.4-13.el6 (x86_64)glibc-2.12-1.7.el6 (i686)glibc-2.12-1.7.el6 (x86_64)glibc-devel-2.12-1.7.el6 (x86_64)glibc-devel-2.12-1.7.el6.i686kshlibgcc-4.4.4-13.el6 (i686)libgcc-4.4.4-13.el6 (x86_64)libstdc++-4.4.4-13.el6 (x86_64)libstdc++-4.4.4-13.el6.i686To determine whether the required packages are installed, enter commands similar to the following:# rpm -q package_nameIf a package is not installed, then install it from the Linux distribution media or download the required package version from the Linux vendor’s website.4.4Compiler RequirementsIntel C++ Compiler 10.1 or later and the version of GNU C and C++ compilers listed under "Package Requirements" are supported with these products.Note:Intel Compiler v10.1 can be used only with the standardtemplate libraries of the gcc versions mentioned in the PackageRequirements section, to build Oracle C++ Call Interface (OCCI)applications.Oracle XML Developer's Kit is supported with the same compilers asOCCI.4.5Additional Software RequirementsDepending on the components you want to use, you must ensure that the following software are installed:■Oracle ODBC Drivers■Oracle JDBC/OCI Drivers■Linux-PAM Library■Oracle Messaging Gateway■Programming Languages■Browser Requirements4.5.1Oracle ODBC DriversYou should install ODBC Driver Manager for UNIX. You can download and install the Driver Manager from the following URL:To use ODBC, you must also install the following additional ODBC RPMs, depending on your operating sytem:■On Oracle Linux 4 and Red Hat Enterprise Linux 4:-unixODBC-2.2.11 (32-bit) or later-unixODBC-devel-2.2.11 (64-bit) or later-unixODBC-2.2.11 (64-bit) or later■On Asianux Server 3, Oracle Linux 5, and Red Hat Enterprise Linux 5: -unixODBC-2.2.11 (32-bit) or later-unixODBC-devel-2.2.11 (64-bit) or later-unixODBC-2.2.11 (64-bit) or later■On Oracle Linux 6 and Red Hat Enterprise Linux 6:-unixODBC-2.2.14-11.el6 (x86_64) or later-unixODBC-2.2.14-11.el6.i686 or later-unixODBC-devel-2.2.14-11.el6 (x86_64) or later-unixODBC-devel-2.2.14-11.el6.i686 or later■On SUSE 10:-unixODBC-32 bit-2.2.11 (32-bit) or later-unixODBC-2.2.11 (64-bit) or later-unixODBC-devel-2.2.11 (64-bit) or later■On SUSE 11:-unixODBC-2.2.12 or later-unixODBC-devel-2.2.12 or later-unixODBC-32bit-2.2.12 (32-bit) or later4.5.2Oracle JDBC/OCI DriversUse JDK 6 (Java SE Development Kit 1.6.0_21) or JDK 5 (1.5.0_24) with the JNDI extension with the Oracle Java Database Connectivity and Oracle Call Interface drivers. However, these are not mandatory for the database installation. Note that IBM JDK 1.5 is installed with this release.4.5.3Linux-PAM LibraryInstall the latest Linux-PAM (Pluggable Authentication Modules for Linux) library to enable the system administrator to choose how applications authenticate users.4.5.4Oracle Messaging GatewayOracle Messaging Gateway supports the integration of Oracle Streams Advanced Queuing (AQ) with the following software:■IBM WebSphere MQ V6.0, client and server, with corrective service diskette 5 (CSD05) or later:MQSeriesClientMQSeriesServerMQSeriesRuntime■TIBCO Rendezvous 7.3If you require a CSD for WebSphere MQ, then refer to the following website for download and installation information:/support/entry/portal/Downloads/Software/WebSphere/W ebSphere_MQ4.5.5Programming LanguagesThe following products are certified for use with:■Pro* COBOLMicro Focus Server Express 5.12.Check the soft and hard limits for the file descriptor setting. Ensure that the resultis in the recommended range. For example:$ ulimit -Sn4096$ ulimit -Hn655363.Check the soft and hard limits for the number of processes available to a user.Ensure that the result is in the recommended range. For example:$ ulimit -Su2047$ ulimit -Hu163844.Check the soft limit for the stack setting. Ensure that the result is in therecommended range. For example:$ ulimit -Ss10240$ ulimit -Hs327685.Repeat this procedure for each Oracle software installation owner.If necessary, update the resource limits in the /etc/security/limits.conf configuration file for the installation owner. However, note that the configuration file is distribution specific. Contact your system administrator for distribution specific configuration file information.Note:If the grid or oracle users are logged in, then changes in thelimits.conf file do not take effect until you log these users out and logthem back in. You must do this before you use these accounts forinstallation.7Creating Required DirectoriesCreate directories with names similar to the following, and specify the correct owner, group, and permissions for them:■The Oracle base directory■An optional Oracle data file directoryThe Oracle base directory must have 3 GB of free disk space, or 4 GB of free disk space if you choose not to create a separate Oracle data file directory.Note:If you do not want to create a separate Oracle data filedirectory, then you can install the data files in a subdirectory of theOracle base directory. However, this is not recommended forproduction databases.To create the Oracle base directory:1.Enter the following command to display information about all mounted filesystems:# df -kThis command displays information about all the file systems mounted on the system, including:■The physical device name■The total amount, used amount, and available amount of disk space■The mount point directory for that file system2.From the display, identify either one or two file systems that meet the disk spacerequirements mentioned earlier in this section.3.Note the name of the mount point directory for each file system that youidentified.4.Enter commands similar to the following to create the recommendedsubdirectories in the mount point directory that you identified and set theappropriate owner, group, and permissions on them:# mkdir -p /mount_point/app/# chown -R oracle:oinstall /mount_point/app/# chmod -R 775 /mount_point/app/For example:# mkdir -p /u01/app/# chown -R oracle:oinstall /u01/app/# chmod -R 775 /u01/app/8Configuring the oracle User’s EnvironmentYou run Oracle Universal Installer from the oracle account. However, before you start Oracle Universal Installer, you must configure the environment of the oracle user. To configure the environment, you must:■Set the default file mode creation mask (umask) to 022 in the shell startup file.■Set the DISPLAY environment variable.To set the oracle user’s environment:1.Start a new terminal session, for example, an X terminal (xterm).2.Enter the following command to ensure that X Window applications can displayon this system:$ xhost fully_qualified_remote_host_nameFor example:$ xhost 3.If you are not logged in to the system where you want to install the software, thenlog in to that system as the oracle user.4.If you are not logged in as the oracle user, then switch user to oracle:$ su - oracle5.To determine the default shell for the oracle user, enter the following command:$ echo $SHELL6.To run the shell startup script, enter one of the following commands:■Bash shell:$ . ./.bash_profile■Bourne or Korn shell:$ . ./.profile■ C shell:% source ./.login7.If you are not installing the software on the local computer, then run the followingcommand on the remote computer to set the DISPLAY variable:■Bourne, Bash or Korn shell:$ export DISPLAY=local_host:0.0■ C shell:% setenv DISPLAY local_host:0.0In this example, local_host is the host name or IP address of the local computer to use to display Oracle Universal Installer.Run the following command on the remote computer to check if the shell and the DISPLAY environmental variable are set correctly:echo $SHELLecho $DISPLAYNow to enable X applications, run the following commands on the local computer: $ xhost + fully_qualified_remote_host_nameTo verify that X applications display is set properly, run a X11 based program that comes with the operating system such as xclock:$ xclockIn this example, you can find xclock at /usr/X11R6/bin/xclocks. If the DISPLAY variable is set properly, then you can see xclock on your computer screen.See Also:PC-X Server or operating system vendor documents forfurther assistance8.If you determined that the /tmp directory has less than 1 GB of free disk space,then identify a file system with at least 1 GB of free space and set the TMP andTMPDIR environment variables to specify a temporary directory on this file system:a.To determine the free disk space on each mounted file system use thefollowing command:# df -h /tmp9Mounting the Product DiscOn most Linux systems, the disk mounts automatically when you insert it into the installation media. If the disk does not mount automatically, then follow these steps to mount it:1.Enter a command similar to the following to eject the currently mounted disc, thenremove it from the drive:■Asianux, Oracle Linux, and Red Hat Enterprise Linux:$ sudo eject /mnt/dvd■SUSE Linux Enterprise Server:# eject /media/dvdIn these examples, /mnt/dvd and /media/dvd are the mount point directories for the disc drive.2.Insert the DVD into the disc drive.3.To verify that the disc mounted automatically, enter a command similar to thefollowing:■Asianux, Oracle Linux, and Red Hat Enterprise Linux:# ls /mnt/dvd■SUSE Linux Enterprise Server:# ls /media/dvd4.If this command fails to display the contents of the disc, then enter a commandsimilar to the following:■Asianux, Oracle Linux, and Red Hat Enterprise Linux:# mount -t iso9660 /dev/dvd /mnt/dvd■SUSE Linux Enterprise Server:# mount -t iso9660 /dev/dvd /media/dvdIn these examples, /mnt/dvd and /media/dvd are the mount point directories for the disc drive.10Installing Oracle DatabaseAfter configuring the oracle user’s environment, start Oracle Universal Installer and install Oracle Database as follows:1.To start Oracle Universal Installer, enter the following command:$ /mount_point/db/runInstallerIf Oracle Universal Installer does not start, then refer to Oracle Database Installation Guide for Linux for information about how to troubleshoot X Window displayproblems.2.The following table describes the recommended action for each Oracle UniversalInstaller screen. Use the following guidelines to complete the installation:■If you need more assistance, or to choose an option that is not the default, then click Help for additional information.■If you encounter errors while installing or linking the software, then refer to Oracle Database Installation Guide for Linux for information abouttroubleshooting.Note:If you have completed the tasks listed previously, then you cancomplete the installation by choosing the default values on mostscreens.Screen Recommended ActionConfigure Security Updates Enter your e-mail address, preferably your My Oracle Supporte-mail address or user name in the Email field.You can select the I wish to receive security updates via My Ora-cle Support check box to receive security updates.Enter your My Oracle Support password in the My Oracle Sup-port Password field.Click Next.Download Software Updates Starting with Oracle Database 11g Release 2 (11.2.0.2), you can usethe Software Updates feature to dynamically download and applylatest updates. Select one of the following options and click Next:■Use My Oracle Support credentials for download: Select thisoption to download and apply the latest software updates.Click Proxy Settings to configure a proxy for Oracle UniversalInstaller to use to connect to the Internet. Provide the proxyserver information for your site, along with a user accountthat has access to the local area network through which theserver is connecting. Starting with Oracle Database 11gRelease 2 (11.2.0.3), you can enter the Proxy Realminformation if required. The proxy realm information iscase-sensitive.Click Test Connection to ensure that your proxy settings arecorrectly entered, and the installer can download the updates.■Use pre-downloaded software updates: Select this option toapply previously downloaded software updates.■Skip Software Updates: Select this option if you do not wantto apply any updates.Apply Software Updates This screen is displayed if you select to download the softwareupdates or provide the pre-downloaded software downloads loca-tion.If you selected Use My Oracle Support credentials for download inthe previous screen, select Download and apply all updates, andthen click Next.If you selected Use pre-downloaded software updates in the previ-ous screen, select Apply all updates, and then click Next.Select Installation Option Select Create and configure a database from the following list ofavailable options, then click Next:■Create and configure a database■Install database software only■Upgrade an existing databaseSystem Class Select Server Class from the following options to install the data-base, and click Next.■Desktop Class: Choose this option if you are installing on alaptop or desktop class system.■Server Class: Choose this option if you are installing on aserver class system, such as what you would use whendeploying Oracle in a production data center.Grid Installation Options Select Single instance database installation for the type of data-base installation you want to perform, and click Next.■Single instance database installation: This option installs thedatabase and the listener.■Real Application Clusters database installation: This optioninstalls Oracle Real Application Clusters.■Oracle RAC One Node database installation: This optioninstalls the Oracle RAC One Node database.Note: Oracle RAC One Node is supported only with OracleClusterware.Select Install Type Select Typical Install as the installation type from the followingoptions, and click Next:■Typical Install: This installation method is selected by default.It lets you quickly install Oracle Database using minimalinput.■Advanced Install: This installation method enables to performmore complex installations.Typical Install Configuration Enter the following information according to your requirements:Oracle base: The Oracle base path appears by default. You canchange the path based on your requirement.Software location: In the Software Location section, accept thedefault value or enter the Oracle home directory path in which youwant to install Oracle components. The directory path should notcontain spaces.Storage Type: Select File System, or Oracle Automatic StorageManagement as the database storage option.Database file location: If you select File System as your storagetype, then click Browse and specify a database file location.ASMSNMP Password: If you select Oracle Automatic Storage Man-agement as your Storage Type, then specify the password for theASMSNMP user.Database edition: Select the database edition to install.OSDBA Group: The OSDBA group is selected by default. You canalso select the OSDBA group from the list.Global database name: Specify the Global Database Name usingthe following syntax:database_name.domainFor example, Administrative password: Enter the password for the privilegeddatabase account.Confirm Password: Reenter, and confirm the password for the priv-ileged database account.Click Next to continue.Create Inventory This screen is displayed only during the first installation of Oracleproducts on a system.Specify the full path of the Oracle Inventory directory. Ensure thatthe operating system group selected is oinstall. Click Next to con-tinue.To log in, use the user name SYS and connect as SYSDBA. Use the password that you specified for this user during the Oracle Database 11g installation.■Refer to Oracle Database Installation Guide for Linux for information about required and optional postinstallation tasks, depending on the products to use.■Refer to Oracle Database Installation Guide for Linux for information about how to use Database Control to learn about the configuration of your installed database.■To learn more about using Oracle Enterprise Manager Database Control to administer a database, refer to Oracle Database 2 Day DBA.This guide, designed for new Oracle DBAs, describes how to use Database Control to manage all aspects of an Oracle Database installation. It also providesinformation about how to enable e-mail notifications and automated backups, which you might not have configured during the installation.13Additional InformationThis section contains information about the following:■Product Licenses■Purchasing Licenses and Version Updates■Contacting Oracle Support Services■Locating Product DocumentationProduct LicensesYou are welcome to install and evaluate the products included in this media pack for30 days under the terms of the Trial License Agreement. However, you must purchasea program license if you want to continue using any product after the 30 day evaluation period. See the following section for information about purchasing program licenses.Purchasing Licenses and Version UpdatesYou can purchase program licenses and updated versions of Oracle products from the Oracle Store website:https://Contacting Oracle Support ServicesIf you have purchased Oracle Product Support, you can call Oracle Support Services for assistance 24 hours a day, seven days a week. For information about purchasing Oracle Product Support or contacting Oracle Support Services, go to the Oracle Support Services website:/us/support/index.htmlLocating Product DocumentationProduct documentation includes information about configuring, using, or administering Oracle products on any platform. The product documentation for Oracle Database products is available in both HTML and PDF formats online on the Oracle Technology Network (OTN) website:/technetwork/indexes/documentation/index.html。