UITableView实例
tableview 和table widget使用案例

tableview 和table widget使用案例`TableView` 和 `TableWidget` 是两种常用的表格控件,它们在各种应用程序中都有广泛的应用。
下面我将分别给出使用这两种控件的简单案例。
1. 使用 `TableView` 的案例(Python + PyQt5):假设我们有一个简单的数据集,我们想在 `TableView` 中展示它。
```pythonimport sysfrom import QApplication, QTableViewfrom import QStandardItemModelapp = QApplication()创建一个模型model = QStandardItemModel()填充数据data = [['Name', 'Age', 'Gender'],['Alice', '25', 'Female'],['Bob', '30', 'Male'],['Charlie', '35', 'Male']]for row in data:(row)创建一个视图并设置模型table_view = QTableView()table_(model)table_()(_())```2. 使用 `TableWidget` 的案例(Python + PyQt5): 与上面的例子类似,但这次我们使用 `TableWidget`。
```pythonimport sysfrom import QApplication, QTableWidgetfrom import Qt, QAbstractItemModelapp = QApplication()创建一个模型class SimpleModel(QAbstractItemModel):def __init__(self, data):QAbstractItemModel.__init__(self)self._data = dataself._column_count = len(data[0]) if data else 0self._row_count = len(data) if data else 0def rowCount(self, parent=None): return self._row_countdef columnCount(self, parent=None): return self._column_count def data(self, index, role=):if role == :return self._data[()][()] if 0 <= () < len(self._data) else None def index(self, row, column, parent=None):return (row, column) if 0 <= row < self._row_count and 0 <= column < self._column_count else Nonedef parent(self, index): return None No parent for top-level items. def headerData(self, section, orientation, role): return None No header.def setData(self, index, value, role): return False Read-only data. def indexWidget(self, index): return None No widgets for cells.def flags(self, index):if not (): returnreturn Cells are editable.def removeRows(self, row, count, parent=None):if row >= 0 and row + count <= self._row_count: delself._data[row:row+count]return True if row >= 0 and count > 0 else False Returns whether the rows were removed.def insertRows(self, row, count, parent=None):if row >= 0 and count > 0: self._(row, [''] self._column_count) return True if row >= 0 and count > 0 else False Returns whether the rows were inserted.def blockSignals(self, block): pass No signals are emitted when rows are inserted or removed.def reset(self): pass No model support for reset().def clear(self): self._data = [] Clearing the model removes all rows from the view.def dataChanged(self, index1, index2): pass Signal emitted when data changes in the model.def layoutChanged(self): pass Signal emitted when the layout changes in the model.def rowsMoved(self, parent, startIndex, endIndex, newParent, newStart): pass Signal emitted when rows are moved in the model. def columnMoved(self, originalColumn, newColumn): pass Signal emitted when columns are moved in the model.。
tableview的用法
tableview的用法TableView,是iOS平台中非常重要的一个组件。
它经常被用于显示长列表,支持多列显示,也可以搭配不同的数据源实现复杂的布局。
本文将详细介绍TableView的使用流程和常见的处理场景。
1、TableView简介TableView是iOS中最常用的视图控件,它是基于UITableView 实现的,也是iOS开发中最重要的一个组件之一。
TableView经常被用于显示大量信息,它有两个重要的功能:显示,让我们可以看到大量的内容;编辑,支持我们对数据进行增删改查的操作。
TableView实质上是一个UIScrollView的子类,它支持基本的滚动操作,并且配合UITableViewDataSource和UITableViewDelegate实现更多的显示和编辑功能。
2、TableView的使用(1)实例化一个TableView为了使用TableView,首先需要实例化一个TableView,也就是在工程中添加一个UITableView控件,这里我们可以使用storyboard 进行操作,也可以使用代码来添加。
(2)注册单元格添加完TableView以后,需要注册单元格模板,这样才能够正确的显示单元格,这里我们可以使用storyboard进行操作,也可以使用代码来注册:(3)设置TableView的数据源在实现TableView的前期准备工作完成后,我们可以设置TableView的数据源,这里我们可以使用一个数组,也可以使用一个字典或者其他数据结构,这个对TableView的显示结果有很大的影响:(4)实现TableView的数据源方法当TableView的数据源准备就绪后,我们就可以实现TableView 的数据源方法了,这个数据源方法会被TableView调用,以显示数据:(5)实现TableView的代理方法在实现完TableView的数据源方法之后,我们可以实现TableView的代理方法,这些代理方法会在TableView进行某些特定操作时被调用,比如点击某个单元格时:(6)显示TableView当实现完TableView的数据源方法和代理方法之后,我们就可以显示TableView了,只需要调用TableView的reloadData方法,就可以让TableView显示出相应的数据了:3、常见的TableView处理场景(1)显示一个简单的列表在一般的常见TableView处理场景中,我们最常遇到的就是显示一个简单的列表了,这里可以使用一个简单的数组来实现,在TableView的数据源方法中,只需要将数组中的值赋予给TableViewCell就可以了:(2)显示复杂的布局在一些复杂的布局中,比如显示多列的TableView,我们可以使用一个字典来实现,这里只需要在TableView的数据源方法中,将字典中的值赋予给TableViewCell就可以实现多列的布局:(3)实现TableView的编辑操作TableView除了支持显示之外,还支持编辑,比如我们可以实现TableView的增加、删除和移动操作,这里需要实现TableView的代理方法,比如tableView:moveRowAtIndexPath:toIndexPath和tableView:commitEditingStyle:forRowAtIndexPath::4、总结本文详细介绍了TableView的使用流程和常见的处理场景。
iOS开发UI篇—UITableview控件基本使用

1#import<Foundation/Foundation.h>23@interface NJHero :NSObject4/**5 * 头像6*/7 @property (nonatomic, copy) NSString *icon;8/**9 * 名称10*/11 @property (nonatomic, copy) NSString *name;12/**13 * 描述14*/15 @property (nonatomic, copy) NSString *intro;1617 - (instancetype)initWithDict:(NSDictionary *)dict;18 + (instancetype)heroWithDict:(NSDictionary *)dict;19@endNJViewController.m文件代码1#import"NJViewController.h"2#import"NJHero.h"34@interface NJViewController ()<UITableViewDataSource, UITableViewDelegate>5/**6 * 保存所有的英雄数据7*/8 @property (nonatomic, strong) NSArray *heros;9 @property (weak, nonatomic) IBOutletUITableView *tableView;1011@end1213@implementation NJViewController1415#pragma mark - 懒加载16 - (NSArray *)heros17 {18if (_heros == nil) {19// 1.获得全路径20NSString *fullPath= [[NSBundlemainBundle] pathForResource:@"heros"ofType:@"plist"]; 21// 2.更具全路径加载数据22NSArray *dictArray = [NSArrayarrayWithContentsOfFile:fullPath];23// 3.字典转模型24NSMutableArray *models = [NSMutableArrayarrayWithCapacity:dictArray.count];25for (NSDictionary *dict in dictArray) {26NJHero *hero = [NJHeroheroWithDict:dict];27 [models addObject:hero];28 }29// 4.赋值数据30 _heros = [models copy];31 }32// 4.返回数据33return _heros;34 }3536 - (void)viewDidLoad37 {38 [super viewDidLoad];39// 设置Cell的高度40// 当每一行的cell高度一致的时候使用属性设置cell的高度41self.tableView.rowHeight = 60;42self.tableView.delegate = self;43 }4445#pragma mark - UITableViewDataSource46// 返回多少组47 - (NSInteger)numberOfSectionsInTableView:(UITableView *)tableView48 {49return1;50 }51// 返回每一组有多少行52 - (NSInteger) tableView:(UITableView *)tableViewnumberOfRowsInSection:(NSInteger)section53 {54return self.heros.count;55 }56// 返回哪一组的哪一行显示什么内容57 - (UITableViewCell *)tableView:(UITableView *)tableViewcellForRowAtIndexPath:(NSIndexPath *)indexPath58 {59// 1.创建CELL60UITableViewCell *cell = [[UITableViewCellalloc]initWithStyle:UITableViewCellStyleSubtitlereuseIdentifier:nil];61// 2.设置数据62// 2.1取出对应行的模型63NJHero *hero = self.heros[indexPath.row];64// 2.2赋值对应的数据65cell.textLabel.text = ;66cell.detailTextLabel.text = hero.intro;67cell.imageView.image = [UIImageimageNamed:hero.icon];68// 3.返回cell69return cell;70 }71#pragma mark - UITableViewDelegate72/*73// 当每一行的cell的高度不一致的时候就使用代理方法设置cell的高度74- (CGFloat)tableView:(UITableView *)tableViewheightForRowAtIndexPath:(NSIndexPath *)indexPath75{76 if (1 == indexPath.row) {77 return 180;78 }79 return 44;80}81*/8283#pragma mark - 控制状态栏是否显示84/**85 * 返回YES代表隐藏状态栏, NO相反86*/87 - (BOOL)prefersStatusBarHidden88 {89return YES;90 }91@end实现效果:代码注意点:(1)在字典转模型的代码处用下面的代码,为可变数组分配dictArray.count个存储空间,可以提高程序的性能NSMutableArray *models =[NSMutableArrayarrayWithCapacity:dictArray.count];(2)设置cell的高度有三种办法可以设置cell的高度1)可以在初始加载方法中设置,self.tableView.rowHeight = 60;这适用于当每一行的cell高度一致的时候,使用属性设置cell的高度。
iOS开发:UITableView的优化技巧-异步绘制Cell

iOS开发:UITableView的优化技巧-异步绘制Cell最近在微博上看到⼀个很好的开源项⽬,是关于如何优化UITableView的。
加上正好最近也在优化项⽬中的类似朋友圈功能这块,思考了很多关于UITableView的优化技巧,相信这块是难点也是痛点,所以决定详细的整理下我对优化UITableView的理解。
UITableView作为开发中最重要的控件之⼀,其中的实现原理很是考究。
Apple在这块的优化⽔平直接决定了的体验能甩⼏条街,哈哈,扯淡扯多了。
好了,废话不多说,直接进⼊主题。
⾸先来谈谈我对UITableView的认识:UITableView的简单认识UITableView最核⼼的思想就是UITableViewCell的重⽤机制。
简单的理解就是:UITableView只会创建⼀屏幕(或⼀屏幕多⼀点)的UITableViewCell,其他都是从中取出来重⽤的。
每当Cell滑出屏幕时,就会放⼊到⼀个集合(或数组)中(这⾥就相当于⼀个重⽤池),当要显⽰某⼀位置的Cell时,会先去集合(或数组)中取,如果有,就直接拿来显⽰;如果没有,才会创建。
这样做的好处可想⽽知,极⼤的减少了内存的开销。
知道UITableViewCell的重⽤原理后,我们来看看UITableView的回调⽅法。
UITableView最主要的两个回调⽅法是tableView:cellForRowAtIndexPath:和tableView:heightForRowAtIndexPath:。
理想上我们是会认为UITableView会先调⽤前者,再调⽤后者,因为这和我们创建控件的思路是⼀样的,先创建它,再设置它的布局。
但实际上却并⾮如此,我们都知道,UITableView是继承⾃UIScrollView的,需要先确定它的contentSize及每个Cell的位置,然后才会把重⽤的Cell放置到对应的位置。
所以事实上,UITableView的回调顺序是先多次调⽤tableView:heightForRowAtIndexPath:以确定contentSize及Cell的位置,然后才会调⽤tableView:cellForRowAtIndexPath:,从⽽来显⽰在当前屏幕的Cell。
oc 开发 uiview、uitableview 用法

oc 开发uiview、uitableview 用法UIView和UITableView是iOS开发中常用的UI组件,分别用于显示和管理用户界面上的视图和表格数据。
1. UIView使用方法:UIView是所有用户界面元素的基类,用于显示和管理视图层次结构。
以下是一些常见的UIView用法示例:- 创建一个UIView对象:swiftlet view = UIView(frame: CGRect(x: 0, y: 0, width: 200, height: 200))- 设置UIView的背景颜色:swiftview.backgroundColor = UIColor.blue- 添加一个子视图:swiftlet subview = UIView(frame: CGRect(x: 50, y: 50, width: 100, height: 100))subview.backgroundColor = UIColor.redview.addSubview(subview)- 设置视图的边框和圆角:swiftyer.borderWidth = 2.0yer.borderColor = UIColor.black.cgColoryer.cornerRadius = 10.0yer.masksToBounds = true- 响应用户交互事件:swiftclass MyView: UIView {override func touchesBegan(_ touches: Set<UITouch>, with event: UIEvent?) {处理触摸事件}}2. UITableView使用方法:UITableView是用于显示表格数据的UI组件,可以显示多个可滚动的行和列。
以下是一些常见的UITableView用法示例:- 创建一个UITableView对象:swiftlet tableView = UIT ableView(frame: CGRect(x: 0, y: 0, width: 320, height: 480), style: .plain)- 设置数据源和代理:swifttableView.dataSource = selftableView.delegate = self- 实现UITableViewDataSource协议来提供表格数据:swiftfunc tableView(_ tableView: UITableView, numberOfRowsInSection section: Int) -> Int {返回表格的行数}func tableView(_ tableView: UITableView, cellForRowAt indexPath: IndexPath) -> UITableViewCell {返回每行的单元格}- 实现UITableViewDelegate协议来处理表格行的选择和交互事件:swiftfunc tableView(_ tableView: UITableView, didSelectRowAt indexPath: IndexPath) {处理行选择事件}func tableView(_ tableView: UITableView, heightForRowAt indexPath: IndexPath) -> CGFloat {返回每行的高度}- 注册自定义的UITableViewCell类:swifttableView.register(MyCell.self, forCellReuseIdentifier: "MyCellIdentifier")- 刷新表格数据:swifttableView.reloadData()以上是UIView和UITableView的一些常见用法,你可以根据自己的实际需求进行进一步的学习和使用。
UITableViewCell详解

UITableViewCell详解UITableViewCell:1.使⽤系统⾃定义的各种UITableViewCell的样式- (UITableViewCell *)tableView:(UITableView *)tableView cellForRowAtIndexPath: (NSIndexPath *)indexPath{ static NSString* indentifier = @"cell"; MyTableCell* cell = [tableView dequeueReusableCellWithIdentifier:indentifier]; if (!cell) { /* typedef NS_ENUM(NSInteger, UITableViewCellStyle) { UITableViewCellStyleDefault, // Simple cell with text label and optional image view (behavior of UITableViewCell in iPhoneOS 2.x) UITableViewCellStyleValue1, // Left aligned label on left and right aligned label on right with blue text (Used in Settings) UITableViewCellStyleValue2, // Right aligned label on left with blue text and left aligned label on right (Used in Phone/Contacts) UITableViewCellStyleSubtitle // Left aligned label on top and left aligned label on bottom with gray text (Used in iPod). }; */ cell = [[[MyTableCellalloc]initWithStyle:UITableViewCellStyleDefault reuseIdentifier:indentifier]autorelease]; } cell.textLabel.text = [_data objectAtIndex:indexPath.row]; cell.detailTextLabel.text = @"detail"; cell.imageView.image = [UIImage imageNamed:@"checkmark.png"]; return cell; }使⽤UITableViewCellStyleDefault的效果:使⽤UITableViewCellStyleValue1的效果:使⽤UITableViewCellStyleValue2的效果:在UITableViewCell内默认是有contentview和accessoryView这两个subview的,contentview中的subview根据不同的cell的style会使⽤不同的布局。
swift tableview的用法
标题:Swift TableView的用法一、介绍Swift是一种流行的iOS应用开发语言,而TableView是iOS应用中常用的UI组件之一。
本文将介绍Swift中TableView的基本用法,包括如何创建、配置和使用TableView来展示数据。
二、创建TableView1. 在Xcode中创建一个新的Swift项目。
2. 打开Main.storyboard,拖拽一个TableView到ViewController 中。
3. 选中TableView,点击右侧的Attributes Inspector,在Prototype Cells中选择Static Cells或Dynamic Prototypes,这取决于你想要创建静态的还是动态的行。
三、配置TableView1. 创建一个UITableViewCell的子类,命名为CustomCell,用于定义TableView中每一行的样式。
2. 在Storyboard中的TableView中注册CustomCell,可以通过给CustomCell添加一个Identifier来实现。
四、实现TableView的DataSource和Delegate协议1. 在ViewController中实现UITableViewDataSource和UITableViewDelegate两个协议。
2. 实现UITableViewDataSource协议中的方法numberOfSections(in:)、tableView(_:numberOfRowsInSection:)和tableView(_:cellForRowAt:),用于配置TableView中的行数和内容。
3. 实现UITableViewDelegate协议中的方法tableView(_:didSelectRowAt:),用于处理用户点击某一行时的操作。
五、显示数据1. 创建一个数据源,可以是数组、字典或其他数据结构。
UITableViewController详解

UITableViewController详解UITableViewController表格视图控制器继承⾃UIViewController类,极⼤地简化了创建UITableViewController类继承⾃UITableView的过程。
UITableViewController负责处理表格布局,并使⽤⼀个UITableView实例对其进⾏填充。
可设置此控制器的窗体以⽀持任意导航栏或⼯具栏。
可以通过tableView实例变量访问表格视图。
重要提⽰:⼿⼯代码创建UITableViewController的⼦类时,如果定义如果定义loadView⽅法,则确保重要提⽰:调⽤其超类的实现[super loadView]。
只有这样才能保证表格视图的正确设置以及在⼦类中添加定制功能。
若是使⽤IB创建UITableViewController,则不必向loadView添加任何调⽤。
UITableView表格视图实例数据源⽅法(setDataSource)UITableView实例依赖外部资源按需为新表格单元格或现有表格单元格提供内容。
这种外部源即为数据源。
要显⽰表格,每个数据源都必须实现以下3个核⼼⽅法(其定义了表格结构并提供内视图必须实现这三个核⼼⽅法:容)。
即每个具体UITableView视图必须实现这三个核⼼⽅法numberOfSectionsInTableView 返回有多少个分段。
可以实现是分段显⽰或者单个列表显⽰具体数据。
tableView:numberOfRowsInSection返回对应的分段有多少个元素,即有多少⾏。
tableView:cellForRowAtIndexPath返回指定的⾏的单元格cell。
注:每个返回的cell类型,都有textLabel、detailTextLabel、imageView、accessoryType四个常⽤的个性化cell元素的属性。
注意:数据源根据索引路径提供表格单元格。
uitableview sectionheader 实现原理

uitableview sectionheader 实现原理下载温馨提示:该文档是我店铺精心编制而成,希望大家下载以后,能够帮助大家解决实际的问题。
文档下载后可定制随意修改,请根据实际需要进行相应的调整和使用,谢谢!并且,本店铺为大家提供各种各样类型的实用资料,如教育随笔、日记赏析、句子摘抄、古诗大全、经典美文、话题作文、工作总结、词语解析、文案摘录、其他资料等等,如想了解不同资料格式和写法,敬请关注!Download tips: This document is carefully compiled by the editor. I hope that after you download them, they can help you solve practical problems. The document can be customized and modified after downloading, please adjust and use it according to actual needs, thank you!In addition, our shop provides you with various types of practical materials, suchas educational essays, diary appreciation, sentence excerpts, ancient poems, classic articles, topic composition, work summary, word parsing, copy excerpts, other materials and so on, want to know different data formats and writing methods, please pay attention!UITableView SectionHeader 实现原理UITableView 是iOS 开发中常用的界面组件之一,它用于展示大量数据并支持滚动浏览。
UITableViewUICollectionView设置单元格的默认选中状态
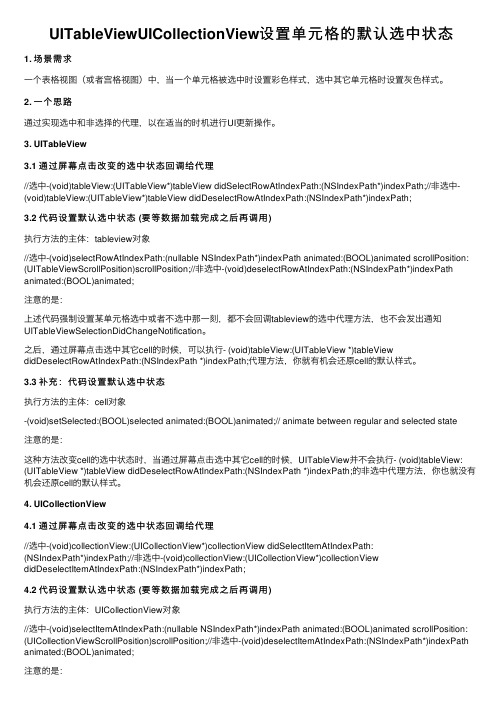
UITableViewUICollectionView设置单元格的默认选中状态1. 场景需求⼀个表格视图(或者宫格视图)中,当⼀个单元格被选中时设置彩⾊样式,选中其它单元格时设置灰⾊样式。
2. ⼀个思路通过实现选中和⾮选择的代理,以在适当的时机进⾏UI更新操作。
3. UITableView3.1 通过屏幕点击改变的选中状态回调给代理//选中-(void)tableView:(UITableView*)tableView didSelectRowAtIndexPath:(NSIndexPath*)indexPath;//⾮选中-(void)tableView:(UITableView*)tableView didDeselectRowAtIndexPath:(NSIndexPath*)indexPath;3.2 代码设置默认选中状态 (要等数据加载完成之后再调⽤)执⾏⽅法的主体:tableview对象//选中-(void)selectRowAtIndexPath:(nullable NSIndexPath*)indexPath animated:(BOOL)animated scrollPosition: (UITableViewScrollPosition)scrollPosition;//⾮选中-(void)deselectRowAtIndexPath:(NSIndexPath*)indexPath animated:(BOOL)animated;注意的是:上述代码强制设置某单元格选中或者不选中那⼀刻,都不会回调tableview的选中代理⽅法,也不会发出通知UITableViewSelectionDidChangeNotification。
之后,通过屏幕点击选中其它cell的时候,可以执⾏- (void)tableView:(UITableView *)tableView didDeselectRowAtIndexPath:(NSIndexPath *)indexPath;代理⽅法,你就有机会还原cell的默认样式。
iOSScrollView嵌套tableView联动滚动的思路与最佳实践

iOSScrollView嵌套tableView联动滚动的思路与最佳实践前⾔随着业务的发展,页⾯的复杂度越来越⾼,嵌套滚动视图的⽅式也越来越受设计师们的青睐,在各⼤电商App⼗分常见。
如下Demo 图:但是这样的交互官⽅并不推荐,⽽且对开发来说确是不那么友好,需要处理滚动⼿势的冲突,页⾯的多层级嵌套都给开发带来了⼀定程度的⿇烦。
接下⾥我聊聊我们的实现思路。
思路和过程对应这种页⾯结构应该毫⽆疑问是最底层是⼀个纵向滚动的scrollView,它的页⾯上⾯放⼀个固定⾼度的header,紧接着下⾯⼀个⽀持横向滚动切换的容器scrollView,容器上⾯才是各个页⾯具体的tableView,如下图:思路⼀最先想到的是,既然是滚动视图那么我们是否可以通过滚动视图的可滚动属性来做呢,在初始时把最上层具体业务的tableView禁⽌滚动,那么根据事件响应链,滚动事件事件会由底层的ScrollView接收并处理,在到达最⼤偏移量之后,禁⽤底层的ScrollView滚动,同时开启上层的tableView,使得上层可以滑动,想起来是有⼀定可⾏性的,可惜,事实现实是残酷的,效果如下:这样会导致当偏移量到达临界值时,由于设置了scrollEnable属性和最⼤偏移量,此次滚动⼿势会被截断,需要再次拖拽才能继续滚动,显然,这样的效果是⽆法接受的。
思路⼆这是同事提供的思路,在做这个时和同事有过讨论,他们之前有这样的交互页⾯,使⽤的是⾃定义⼿势,但由于UIScrollView是有弹性效果的,⼀般的滑动⼿势做不到这⼀点的,所以需要引⼊UIDynamic模拟⼒场,实现阻尼效果。
想了⼀下,虽然有⼀定的可⾏性,但是为了⼀个联动滑动,要做这么多的事情,感觉⽐较繁琐,⽽且⾃定义⼿势做的模拟弹性效果可能和原⽣ScrollView的效果还是有⼀定的差距,所以选择放弃。
思路三回到我们思路⼀,除了边界位置会阻断联动滚动外,其他效果还是可以的,那么能不能通过⼿段解决这个问题呢?既然能写到了这⾥,那么毫⽆疑问,肯定是可以的。
uitableview复用原理

uitableview复用原理UITableView是iOS开发中常用的控件之一,它是一个能够显示大量结构化数据的列表视图。
UITableView的优势在于它具备了很高的灵活性和性能的平衡,这主要得益于它的复用机制。
UITableView使用了“可视化窗口”的概念,可以在一次通知的情况下绘制很多个cell。
UITableView复用的原理是基于cell的复用机制,即在滚动的过程中,UITableView会将划出屏幕的cell放入复用队列中,然后从复用队列中取出cell来显示。
以UITableView的delegate方法cellForRowAt为例,当显示一个cell时,UITableView会调用这个方法,让用户来提供一个具体的cell。
这个方法中首先会尝试从复用队列中取出一个cell来使用,如果复用队列中没有可用的cell,就会创建一个新的cell。
这样做的好处是避免了频繁创建和销毁cell的操作,提高了性能和内存的使用效率。
当tableView滚动时,UITableView会根据滚动的方向和速度来预加载新的cell。
这是因为滚动时会出现新的cell需要显示出来,如果不预加载,用户会感觉到卡顿和延迟。
UITableView根据预加载策略来决定应该加载的cell数量,它会提前创建一些cell并放入复用队列中,这样可以避免在滚动过程中频繁创建cell的操作。
UITableView的复用机制还可以减少内存的消耗。
当某个cell从屏幕上滚出时,UITableView会将其放入复用队列中,而不是立即销毁它。
当再次需要显示这个cell时,只需要从复用队列中取出来即可,这样就避免了频繁申请和释放内存的操作。
UITableView的复用机制需要开发者进行正确的配置和使用。
首先,需要正确设置每个cell的重用标识符(reuse identifier),这样UITableView才能够正确地从复用队列中取出和返回cell。
uitableview reloaddata 原理

UITableView的reloadData方法是用来重新加载表格视图的。
它的原理是重新加载整个表格,包括表格的行和列。
在调用reloadData 方法后,表格会重新发送一次数据请求,并且重新创建所有的单元格。
这意味着所有之前的数据和单元格都会被清除,然后根据新的数据源重新创建表格。
reloadData方法会立即返回,并且不会等待表格更新完成。
这意味着在调用reloadData方法后,可以继续执行其他代码,而不需要等待表格更新完成。
但是,这也意味着无法确定reloadData方法何时完成。
因此,如果需要在表格更新完成后执行某些操作,例如滚动到特定的单元格,需要在调用reloadData方法之前保存相关的状态信息,然后在表格更新完成后手动执行相应的操作。
另外需要注意的是,如果表格中的数据量非常大或者单元格的布局比较复杂,可能会导致在调用reloadData方法后表格更新过程变得非常慢。
在这种情况下,可能需要采用更高效的方法来刷新表格视图,例如使用beginUpdates和endUpdates方法来批量更新单元格。
UITableViewHeaderFooterView的使用+自己主动布局

UITableViewHeaderFooterView的使⽤+⾃⼰主动布局UITableViewHeaderFooterView的使⽤+⾃⼰主动布局使⽤UITableView的header或footer复⽤时,假设採⽤⾃⼰主动布局,你会发现有约束冲突,以下这样写能够消除约束冲突:#import <UIKit/UIKit.h>@interface SectionView : UITableViewHeaderFooterView@property (nonatomic, copy) NSString *sectionTitle;@end#import "SectionView.h"@interface SectionView (){UIImageView *titleBgImageView;UIImageView *timePonitImageView;UIImageView *circleImageView;UILabel *titleLabe;}@end@implementation SectionView// 带有复⽤- (instancetype)initWithReuseIdentifier:(NSString *)reuseIdentifier{self = [super initWithReuseIdentifier:reuseIdentifier];if (self) {[self createUI];}return self;}- (void)createUI{titleBgImageView = [[UIImageView alloc] initForAutoLayout];erInteractionEnabled = NO;UIImage *image = [UIImage imageNamed:@"event_bottom_line"];image = [image stretchableImageWithLeftCapWidth:image.size.width*0.5 topCapHeight:image.size.height*0.5];titleBgImageView.image = image;[self.contentView addSubview:titleBgImageView];circleImageView = [[UIImageView alloc] initForAutoLayout];UIImage *circleImage = [UIImage imageNamed:@"event_blue1"];circleImage = [circleImage stretchableImageWithLeftCapWidth:circleImage.size.width*0.5 topCapHeight:circleImage.size.height*0.5]; circleImageView.image = circleImage;[self.contentView addSubview:circleImageView];timePonitImageView = [[UIImageView alloc] initForAutoLayout];timePonitImageView.image = [UIImage imageNamed:@"event_write_line"];[self.contentView addSubview:timePonitImageView];titleLabe = [[UILabel alloc] initForAutoLayout];titleLabe.font = [UIFont systemFontOfSize:13];titleLabe.textColor = [UIColor whiteColor];titleLabe.textAlignment = NSTextAlignmentCenter;[circleImageView addSubview:titleLabe];}把布局代码写到这⾥- (void)layoutSubviews{[super layoutSubviews];[titleBgImageView autoPinEdgesToSuperviewEdgesWithInsets:UIEdgeInsetsMake(0, 0, 0, 0)]; [circleImageView autoPinEdgeToSuperviewEdge:ALEdgeLeading withInset:8];[circleImageView autoPinEdgeToSuperviewEdge:ALEdgeTrailing withInset:8];[circleImageView autoSetDimension:ALDimensionHeight toSize:23];[circleImageView autoAlignAxisToSuperviewAxis:ALAxisHorizontal];[timePonitImageView autoPinEdgeToSuperviewEdge:ALEdgeLeading withInset:16];[timePonitImageView autoPinEdgeToSuperviewEdge:ALEdgeTop withInset:39/2.0-4];[timePonitImageView autoSetDimensionsToSize:CGSizeMake(9, 23.5)];[titleLabe autoCenterInSuperview];[titleLabe autoSetDimension:ALDimensionWidth toSize:200];}。
Swift-使用表格组件(UITableView)实现分组列表

Swift-使⽤表格组件(UITableView)实现分组列表1,样例说明:(1)列表以分组的形式展⽰(2)同时还⾃定义分区的头部和尾部(3)点击列表项会弹出消息框显⽰该项信息。
2,效果图:3,代码如下:1234567 8 9 10 11 12 13 14 15 16 17 18 19 20 21 22 23 24 25 26 27 28 29 30 31 32 33 34 35 36 37 38 39 40 41 42 43 44 45 46 47 48 49 50 51 52 53 54 55 56import UIKitclass ViewController: UIViewController, UITableViewDelegate, UITableViewDataSource{var tableView:UITableView?var allnames:Dictionary<Int, [String]>?var adHeaders:[String]?override func loadView() {super.loadView()}override func viewDidLoad() {super.viewDidLoad()//初始化数据,这⼀次数据,我们放在属性列表⽂件⾥self.allnames = [0:[String](["UILabel 标签","UITextField ⽂本框","UIButton 按钮"]),1:[String](["UIDatePiker ⽇期选择器","UIToolbar ⼯具条","UITableView 表格视图"])];println(self.allnames)self.adHeaders = ["常见 UIKit 控件","⾼级 UIKit 控件"]//创建表视图self.tableView = UITableView(frame:self.view.frame, style:UITableViewStyle.Grouped) self.tableView!.delegate = selfself.tableView!.dataSource = self//创建⼀个重⽤的单元格self.tableView!.registerClass(UITableViewCell.self, forCellReuseIdentifier: "SwiftCell") self.view.addSubview(self.tableView!)//创建表头标签var headerLabel = UILabel(frame: CGRectMake(0, 0, self.view.bounds.size.width, 30)) headerLabel.backgroundColor = UIColor.blackColor()headerLabel.textColor = UIColor.whiteColor()headerLabel.numberOfLines = 0headerLabel.lineBreakMode = NSLineBreakMode.ByWordWrappingheaderLabel.text = "⾼级 UIKit 控件"headerLabel.font = UIFont.italicSystemFontOfSize(20)self.tableView!.tableHeaderView = headerLabel}//在本例中,有2个分区func numberOfSectionsInTableView(tableView: UITableView!) -> Int{56 57 58 59 60 61 62 63 64 65 66 67 68 69 70 71 72 73 74 75 76 77 78 79 80 81 82 83 84 85 86 87 88 89 90 91 92 93 94 95 96 97 98 99 100 101 102 103 104 105 106 107 108 109 110 111 112 113 114 115 116 117 118 119 120 121 122 func numberOfSectionsInTableView(tableView: UITableView!) -> Int{return2;}//返回表格⾏数(也就是返回控件数)func tableView(tableView: UITableView, numberOfRowsInSection section: Int) -> Int{var data = self.allnames?[section]return data!.count}// UITableViewDataSource协议中的⽅法,该⽅法的返回值决定指定分区的头部func tableView(tableView:UITableView, titleForHeaderInSectionsection:Int)->String{var headers = self.adHeaders!;return headers[section];}// UITableViewDataSource协议中的⽅法,该⽅法的返回值决定指定分区的尾部func tableView(tableView:UITableView, titleForFooterInSectionsection:Int)->String{var data = self.allnames?[section]return"有\(data!.count)个控件"}//创建各单元显⽰内容(创建参数indexPath指定的单元)func tableView(tableView: UITableView, cellForRowAtIndexPath indexPath: NSIndexPath)-> UITableViewCell{//为了提供表格显⽰性能,已创建完成的单元需重复使⽤let identify:String= "SwiftCell"//同⼀形式的单元格重复使⽤,在声明时已注册let cell = tableView.dequeueReusableCellWithIdentifier(identify, forIndexPath: indexPath) as UITableViewCellcell.accessoryType = UITableViewCellAccessoryType.DisclosureIndicatorvar secno = indexPath.sectionvar data = self.allnames?[secno]cell.textLabel?.text = data![indexPath.row]return cell}// UITableViewDelegate ⽅法,处理列表项的选中事件func tableView(tableView: UITableView!, didSelectRowAtIndexPath indexPath: NSIndexPath!) {self.tableView!.deselectRowAtIndexPath(indexPath, animated: true)var itemString = self.allnames![indexPath.section]![indexPath.row]var alertview = UIAlertView();alertview.title = "提⽰!"alertview.message = "你选中了【\(itemString)】";alertview.addButtonWithTitle("确定")alertview.show();}override func didReceiveMemoryWarning() {super.didReceiveMemoryWarning()// Dispose of any resources that can be recreated.}}。
使用UITableView的分组样式

使⽤UITableView的分组样式分组样式顾名思义是对TableView中的数据⾏进⾏分组处理,每个分组都有⼀个header和footer。
TableView中header的英⽂⽂本是⼤写的,footer的英⽂⽂本是⼩写的。
如下图浅灰⾊区域就是header和footer。
header的作⽤更像是标题,⽽footer则是详细描述信息在之前的⽂章中我们创建的TableView样式是UITableViewStylePlain,分组样式可以使⽤UITableViewStyleGrouped创建:设置UITableView的header和footer的⽂本UITableViewDataSource中有两个⽅法可以帮助我们设置header和footer的本⽂,它们分别是:- (NSString *)tableView:(UITableView *)tableView titleForHeaderInSection:(NSInteger)section- (NSString *)tableView:(UITableView *)tableView titleForFooterInSection:(NSInteger)section下⾯我们实现这两个⽅法:运⾏效果:⾃定义Header和Footer的样式(view)通过下⾯⼏个在UITableViewDelegate协议中声明的⽅法,我们可以对Header和Footer进⾏⾃定义操作。
- (UIView *)tableView:(UITableView *)tableView viewForHeaderInSection:(NSInteger)section- (CGFloat)tableView:(UITableView *)tableView heightForHeaderInSection:(NSInteger)section- (UIView *)tableView:(UITableView *)tableView viewForFooterInSection:(NSInteger)section- (CGFloat)tableView:(UITableView *)tableView heightForFooterInSection:(NSInteger)section⽅法实现:作为演⽰,只是简单设置了⼀个UIView作为header和footer的视图,运⾏效果:。
IOSUITableView拖动排序功能

IOSUITableView拖动排序功能 UITbableView作为列表展⽰信息。
除了展⽰的功能,有时还会⽤到删除。
排序等功能。
以下就来解说⼀下怎样实现排序。
排序是当表格进⼊编辑状态后,在单元格的右側会出现⼀个button。
点击button,就能够拖动单元格。
移动位置。
进⾏⼿动排序。
使⽤系统⾃带拖动排序功能的步骤:1、让tableView进⼊编辑状态,也就是设置它的editing为YES2、返回编辑模式,也就是实现UITableViewDelegate中的tableview:editingStyleForRowAtIndexPath:⽅法,在⾥⾯返回UITableViewCellEditingStyleNone模式。
假设不实现,默认返回的就是删除模式3、实现tableView:moveRowAtIndexPath:toIndexPath⽅法,仅仅要实现该⽅法,就能实现单元格的拖动排序。
但仅仅是实现了表⾯的排序,并没有改动真实地数据4、在⽅法中完毕数据模型的更新代码:// ViewController.m// JRTableView删除//// Created by jerehedu on 15/6/11.// Copyright (c) 2015年 jerehedu. All rights reserved.//#import "ViewController.h"#import "Goods.h"@interface ViewController ()<UITableViewDataSource, UITableViewDelegate>{UITableView *_tableView; //列表NSMutableArray *_goodsAry; //商品数组UIButton *_editBtn; //编辑button}@end@implementation ViewController- (void)viewDidLoad {[super viewDidLoad];//加⼊标题UILabel *titleLabel = [[UILabel alloc] initWithFrame:CGRectMake(0, 20, self.view.frame.size.width, 44)];titleLabel.text = @"购物车";titleLabel.textAlignment = NSTextAlignmentCenter;titleLabel.backgroundColor = [UIColor redColor];titleLabel.textColor = [UIColor whiteColor];[self.view addSubview:titleLabel];//加⼊编辑button_editBtn = [UIButton buttonWithType:UIButtonTypeCustom];_editBtn.frame = CGRectMake(self.view.frame.size.width-60, 25, 50, 34);[_editBtn setTitle:@"编辑" forState:UIControlStateNormal];[_editBtn setTitle:@"完毕" forState:UIControlStateSelected];_editBtn.titleLabel.font = [UIFont systemFontOfSize:15];_editBtn.backgroundColor = [UIColor colorWithRed:0.8 green:0.8 blue:0.8 alpha:0.5];[self.view addSubview:_editBtn];[_editBtn addTarget:self action:@selector(clickEditBtn:) forControlEvents:UIControlEventTouchUpInside];//加⼊tableview_tableView = [[UITableView alloc] initWithFrame:CGRectMake(0, 64, self.view.frame.size.width, self.view.frame.size.height-64)];_tableView.dataSource = self;_tableView.delegate = self;[self.view addSubview:_tableView];//取数据NSArray *ary = [NSArray arrayWithContentsOfFile:[[NSBundle mainBundle] pathForResource:@"ShoppingGoodsList" ofType:@"plist"]];//把数据存到模型对象中,然后把对象存到数组中_goodsAry = [NSMutableArray array];for (int i=0; i<ary.count; i++) {Goods *good = [Goods goodsWithDic:ary[i]];[_goodsAry addObject:good];}}#pragma mark 数据源返回有⼏⾏-(NSInteger)tableView:(UITableView *)tableView numberOfRowsInSection:(NSInteger)section{return _goodsAry.count;}#pragma mark 每⾏显⽰内容-(UITableViewCell*)tableView:(UITableView *)tableView cellForRowAtIndexPath:(NSIndexPath *)indexPath{static NSString *idGood = @"goods";UITableViewCell *cell = [tableView dequeueReusableCellWithIdentifier:idGood];if (cell==nil) {cell = [[UITableViewCell alloc] initWithStyle:UITableViewCellStyleSubtitle reuseIdentifier:idGood];}Goods *good = _goodsAry[indexPath.row];cell.imageView.image = [UIImage imageNamed:good.icon];cell.textLabel.text = ;cell.detailTextLabel.text = good.details;cell.detailTextLabel.numberOfLines = 6;cell.detailTextLabel.textColor = [UIColor brownColor];return cell;}#pragma mark 选中⾏-(void)tableView:(UITableView *)tableView didSelectRowAtIndexPath:(NSIndexPath *)indexPath{// 取消选中状态[tableView deselectRowAtIndexPath:indexPath animated:YES];}#pragma mark 设置⾏⾼-(CGFloat)tableView:(UITableView *)tableView heightForRowAtIndexPath:(NSIndexPath *)indexPath{return 110;}#pragma mark 点击编辑button- (IBAction)clickEditBtn:(UIButton *)sender {//设置tableview编辑状态BOOL flag = !_tableView.editing;[_tableView setEditing:flag animated:YES];_editBtn.selected = flag;}#pragma mark 选择编辑模式,加⼊模式⾮常少⽤,默认是删除-(UITableViewCellEditingStyle)tableView:(UITableView *)tableView editingStyleForRowAtIndexPath:(NSIndexPath *)indexPath{return UITableViewCellEditingStyleNone;}#pragma mark 排序当移动了某⼀⾏时候会调⽤//编辑状态下。
[无限互联] IOS之UITableView的横向滑动
![[无限互联] IOS之UITableView的横向滑动](https://img.taocdn.com/s3/m/76864e7731b765ce050814a0.png)
实现原理:在纵向滚动的UITableView的每一个section里面嵌套横向滚动的UITableView。
其中横向滑动的UITableView,是重新建了一个类来重写UITableView,将其旋转90°实现方法:[objc]view plaincopy1. hortable = [[UITableView alloc]initWithFrame:CGRectMake(90, -90, 140,320) style:UITableViewStylePlain];2. hortable.delegate = self;3. hortable.dataSource = self;4. hortable.transform = CGAffineTransformMakeRotation(M_PI / 22 *3);5.[self addSubview:hortable];注:hortable是UITabelView对象作为单元格的子视图,将horttable顺时针旋转M_PI/2*3,hortable的Frame的计算:X =(屏幕宽度- 单元格的高度)/ 2Y = - ( 屏幕宽度- 单元格的高度)/ 2[objc]view plaincopy1.NSString *CellIdentifier = [NSString stringWithFormat:@"cell%d",indexPath.row];2.UITableViewCell *cell = [tableView dequeueReusableCellWithIdentifier:CellIdentifier];3.if (cell == nil){4. cell = [[UITableViewCell alloc]initWithStyle:UITableViewCellStyleDefault reuseIdentifier:CellIdentifier];5.6. cell.transform = CGAffineTransformMakeRotation(M_PI/2);7. [[cell textLabel] setText:[_dataArray1 objectAtIndex:indexPath.row]];8. cell.textLabel.numberOfLines = 0;9. }10.return cell;创建子类化单元格中的单元格时,要旋转M_PI/2 调整单元格中内容的方向。
uitableview的reuse原理
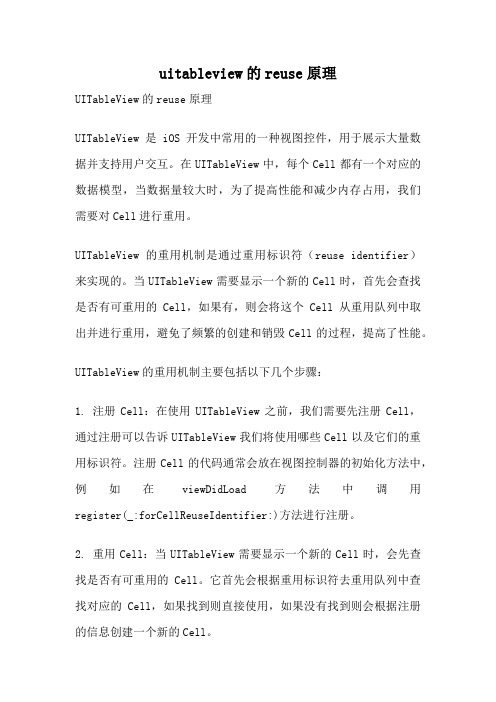
uitableview的reuse原理UITableView的reuse原理UITableView是iOS开发中常用的一种视图控件,用于展示大量数据并支持用户交互。
在UITableView中,每个Cell都有一个对应的数据模型,当数据量较大时,为了提高性能和减少内存占用,我们需要对Cell进行重用。
UITableView的重用机制是通过重用标识符(reuse identifier)来实现的。
当UITableView需要显示一个新的Cell时,首先会查找是否有可重用的Cell,如果有,则会将这个Cell从重用队列中取出并进行重用,避免了频繁的创建和销毁Cell的过程,提高了性能。
UITableView的重用机制主要包括以下几个步骤:1. 注册Cell:在使用UITableView之前,我们需要先注册Cell,通过注册可以告诉UITableView我们将使用哪些Cell以及它们的重用标识符。
注册Cell的代码通常会放在视图控制器的初始化方法中,例如在viewDidLoad方法中调用register(_:forCellReuseIdentifier:)方法进行注册。
2. 重用Cell:当UITableView需要显示一个新的Cell时,会先查找是否有可重用的Cell。
它首先会根据重用标识符去重用队列中查找对应的Cell,如果找到则直接使用,如果没有找到则会根据注册的信息创建一个新的Cell。
3. 配置Cell:在重用Cell之后,UITableView会调用数据源的tableView(_:cellForRowAt:)方法来获取Cell,并将对应的数据模型传递给这个方法。
我们需要在这个方法中根据数据模型来配置Cell的内容,例如设置文本、图片等。
4. 显示Cell:配置完成后,UITableView会将Cell显示在屏幕上,并根据Cell的位置和内容来计算它的大小和位置。
同时,UITableView还会为Cell添加一些额外的装饰,例如分割线、选中效果等。
- 1、下载文档前请自行甄别文档内容的完整性,平台不提供额外的编辑、内容补充、找答案等附加服务。
- 2、"仅部分预览"的文档,不可在线预览部分如存在完整性等问题,可反馈申请退款(可完整预览的文档不适用该条件!)。
- 3、如文档侵犯您的权益,请联系客服反馈,我们会尽快为您处理(人工客服工作时间:9:00-18:30)。
Xib设计UITableViewCell然后动态加载(注:环境Mac OS X Lion 10.7.3 + Xcode 4.2.1 + iOS SDK 5.0.)一、新建iOS Application工程,选择Single View Application,不要选中Use Storyboard.假设指定的是product name和class prefix都是one,则完成后自动生成代码视图如下图:该应用默认加载的是oneViewController的view.双击oneViewController.xib,在该xib默认的view上面添加控件UILabel、UIButton和一个UITableView,如下图所示:在oneViewController头文件和*.m文件中定义和声明三个属性label、button、tableViewCell前两个对应xib界面上的label和button,最后一个对应于即将创建的xib 文件中的tableViewCell,并且将label和button属性和界面上的控件通过拖拽相互关联,如下图:oneViewController.h:oneViewController.m:二、新建根view为UITableViewCell的xib文件Cell.xib:无法直接生成根view为UITableViewCell的xib文件,可以通过先新建根view为UIView 的xib文件,然后将该xib的根view删除,再从Library窗口中拖一个Table View Cell 到该xib中做为该xib的根view.如下图:刚生成的时候:将上面的view删除,拖一个table view cell代替,并且在该table view cell上面添加一个label和一个button,如下图:设置Table View Cell下面的Cell Label和Cell Button的view Tag分别为1和2:然后选中上面的File's owner,在identify inspector视图Custom Class中选择对应的加载类为oneViewController:并且从connections inspector下面的Outlets内的UITableViewCell对象tableViewCell 与中间视图窗口中的Objects下面的Table View Cell相拖拽连接:(图XXX)在Attributes inspector中设置Table View Cell的identifier为:CellIdentifier:保存。
三、代码中动态加载Table View Cell XIB:打开oneViewController.h让oneViewController实现协议UITableViewDataSource,UITableViewDelegate,即:oneViewController.m中实现下面的接口方法:- (NSInteger)tableView:(UITableView *)tableViewnumberOfRowsInSection:(NSInteger)section{return20;}// Row display. Implementers should *always* try to reuse cells by setting each cell's reuseIdentifier and querying for available reusable cells with dequeueReusableCellWithIdentifier:// Cell gets various attributes set automatically based on table (separators) and data source (accessory views, editing controls)- (UITableViewCell *)tableView:(UITableView *)tableView cellForRowAtIndexPath:(NSIndexPath *)indexPath{staticNSString *CustomCellIdentifier =@"CellIdentifier";UITableViewCell *cell = [tableView dequeueReusableCellWithIdentifier: CustomCellIdentifier];if (cell ==nil) {NSArray *nib = [[NSBundlemainBundle]loadNibNamed:@"Cell" owner:selfoptions:nil]; // if ([nib count] > 0) {// cell = self.tableViewCell;// } else {// NSLog(@"failed to load CustomCell nib file!");// }cell = [nib objectAtIndex:0]; // 注释掉的和该句是两种方式,在这里两种方式都行。
但是如果没有上面红色处(图XXX)的拖拽连接过程,这里只能使用nib objectAtIndex方式。
}NSUInteger row = [indexPathrow];NSLog(@"++++++++++++++ jonesduan %s, cell row:%d", __func__, row);UILabel *cellLabel = (UILabel *)[cellviewWithTag:1];cellLabel.text = [NSStringstringWithFormat:@"cell index: %d", row];UIButton *cellButton = (UIButton *)[cellviewWithTag:2];[cellButton setTitleColor:[UIColorredColor]forState:UIControlStateNormal]; [cellButtonsetTitleColor:[UIColororangeColor]forState:UIControlStateHighlighted]; [cellButton setTitle:@"Press me!"forState:UIControlStateNormal];[cellButton setTitle:@"Pressed!"forState:UIControlStateHighlighted];return cell;}- (CGFloat) tableView:(UITableView *)tableViewheightForRowAtIndexPath:(NSIndexPath *)indexPath {// Modified by jonesduan.return80;}- (void)didReceiveMemoryWarning{[superdidReceiveMemoryWarning];// Release any cached data, images, etc that aren't in use.}#pragma mark - View lifecycle- (void)viewDidLoad{[superviewDidLoad];// Do any additional setup after loading the view, typically from a nib. [belsetBackgroundColor:[UIColorgrayColor]];[self.buttonsetTitleColor:[UIColorgreenColor]forState:UIControlStateNormal]; [self.buttonsetTitleColor:[UIColororangeColor]forState:UIControlStateHighlighte d];//这里控制的是oneViewController.xib中的label和button,前面已经拖拽连接过。
}这样完成后。
CMD + R运行一下看看,发现界面如下图所示:并没有显示Cell.xib中的Cell Label和Cell Button,下面是最重要的一点,也是一个人研究了很久才知道的,即:选中oneViewController.xib中view下的子Table View,切换到connections inspector,将Table View的dataSource和delegate均与File's owner 相拖拽进行连接。
如下图:连完后,再CMD + R运行看看,结果是不是就如下图所示了,OK,成功!总结:通过xib自定义view比较重要的一点就是这个view被哪个view controller使用,比如xxxViewController,就要在identity inspector中Custom Class指定对应的加载类为xxxViewController,然后选中File's owner(中间大窗口中的Placeholders下),并切换到connections inspector将Outlets下面的对象与中间大窗口中的Objects(与Placeholders同级别,在Placeholders下面)下的根视图相连接。
最后别忘了Table View 的dataSource和delegate均与File's owner相拖拽进行连接。
APPLE开发最不习惯的就是拖拽连接,在此记录一下作为个人参考,免得以后忘记了。
demo下载地址:/detail/duanyipeng/4063778。