怎样使用 OmniPeek 实现无线监听
OmniPeek_用户手册

OmniPeek_⽤户⼿册OmniAnalysis?PlatformGetting Started GuideG e t t i n g S t a r t e d G u i d eCopyright ? 2006, WildPackets, Inc. All rights reserved. Information in this document is subject to change without notice. No part of this document may be reproduced or transmitted in any form, or by any means, electronic or mechanical, including photocopying, for any purpose, without the express written permission of WildPackets, Inc. AiroPeek SE, AiroPeek NX, AiroPeek VX, EtherPeek SE, EtherPeek NX, EtherPeek VX, Gigabit Analyzer Card (GAC), GigaPeek NX, iNetTools, NAX, NetDoppler, NetSense, Network Calculator, Omni3, Omni Capture Engine, Omni Desktop Engine, Omni DNX Engine, OmniEngine Desktop, OmniEngine Enterprise, OmniEngine Workgroup,Omni Management Console, Omni PacketGrabber, OmniPeek, OmniPeek Enterprise, OmniPeek Enterprise Connect, OmniPeek Personal, OmniPeek Workgroup, OmniPeek Workgroup Pro, OmniPeek Personal, Omnipliance, OmniSpectrum, PacketGrabber, Peek DNX, ProConvert, ProtoSpecs, RFGrabber, RMONGrabber, WAN Analyzer Card (WAC), WANPeek NX, WildPackets, WildPackets Academy, and WildPackets OmniAnalysis Platform are trademarks of WildPackets, Inc. All other trademarks are the property of their respective holders.The material in this document is for information purposes only and is subject to change without notice. While reasonable efforts have been made in the preparation of this document to assure its accuracy, WildPackets, Inc. assumes no liability resulting from errors or omissions in this document, nor from the use of the information contained herein.WildPackets, Inc. reserves the right to make changes in the product design without reservation and without notification to its users.Contacting WildPacketsMailing AddressWildPackets, Inc.1340 Treat Blvd., Suite 500Walnut Creek, CA 94597Voice/Fax8 AM - 5 PM (PST)(925) 937-3200(800) 466-2447 (US only)Fax: (925) 937-3211info@/doc/199652966bec0975f465e2dd.htmlSalessales@/doc/199652966bec0975f465e2dd.htmlWeb/doc/199652966bec0975f465e2dd.htmlTechnical Support/doc/199652966bec0975f465e2dd.html/supportResourcesSee /doc/199652966bec0975f465e2dd.html/support/additional_resources/white_papers for white papers, tutorials, technicalbriefs and more.iiT raining and CertificationWildPackets Academy offers the most effective and comprehensive network and protocol analysis training available, meeting the professional requirements of corporate, educational, government, and private network managers. Our instructional methodology is centered on practical applications of protocol analysis techniques.See /doc/199652966bec0975f465e2dd.html/services for course catalog, current public course scheduling, web-delivered courses,and consulting services.WildPackets Academy(800) 466-2447training@/doc/199652966bec0975f465e2dd.htmlProduct Support and MaintenanceWildPackets Product Maintenance Programs ensure that you grow along with our products as new features and enhancements to existing features are added. All WildPackets customers are entitled to technical support for the life oftheir purchased product(s).Enhanced support services are available through our Premium Maintenance Programs. Premium Maintenance offers Remote Trace File Analysis assistance and free seats in our WildPackets Academy Training courses, in addition to our standard maintenance services.Standard or Premium Maintenance can be purchased by contactingsales@/doc/199652966bec0975f465e2dd.html.About WildPackets, Inc.Since 1990, WildPackets has been delivering real-time fault analysis solutions that enable the world's leading organizations to keep their networks running securely and reliably, day after day. From the desktop to the datacenter,from wireless LANs to Gigabyte backbones, on local segments and across distributed networks, WildPackets products enable IT organizations to quickly find and fix problems affecting mission-critical network services. WildPackets products are sold in over 60 countries through a broad network of channel and strategic partners. More than 5,000 customers, spanning all industrial sectors and including 80% of the Fortune 1000, use WildPackets products daily to troubleshoot networks and maximize network uptime. WildPackets customers include Agilent, Cisco Systems, Comcast, EDS, Microsoft, Siemens AG, Qualcomm, Unisys, Motorola, and Deutsche Bank. Strategic partners include Aruba, Atheros, Cisco, 3Com, Intel and Symbol Technologies. For further information, please visit/doc/199652966bec0975f465e2dd.html.20060410-E-OP40_d4iiiContentsChapter 1Introduction . . . . . . . . . . . . . . . . . . . . . . . . . . . . . . . . . . . . . . . . . . . 1System requirements. . . . . . . . . . . . . . . . . . . . . . . . . . . . . . . . . . . . . . . . . . . . . . . . . . . . . . 1Installing the OmniPeek console . . . . . . . . . . . . . . . . . . . . . . . . . . . . . . . . . . . . . . . . . . . 3Installing an OmniEngine . . . . . . . . . . . . . . . . . . . . . . . . . . . . . . . . . . . . . . . . . . . . . . . . . 3Main program window and Start Page. . . . . . . . . . . . . . . . . . . . . . . . . . . . . . . . . . . . . . 4Displaying the Remote Engines window . . . . . . . . . . . . . . . . . . . . . . . . . . . . . . . . . . . . 5Connecting to a remote engine. . . . . . . . . . . . . . . . . . . . . . . . . . . . . . . . . . . . . . . . . . . . . 6 Chapter 2Capturing Packets . . . . . . . . . . .. . . . . . . . . . . . . . . . . . . . . . . . . . 11Capturing packets into a Capture window. . . . . . . . . . . . . . . . . . . . . . . . . . . . . . . . . . 11Capturing packets on a remote engine . . . . . . . . . . . . . . . . . . . . . . . . . . . . . . . . . . . . . 14 Chapter 3Viewing Decoded Packets . . . . . . . . . . . . . . . . . . . . . . . . . . . . . . 17The packet decode window. . . . . . . . . . . . . . . . . . . . . . . . . . . . . . . . . . . . . . . . . . . . . . . 17 Chapter 4Forensics Analysis . . . . . . . . . . . . . . . . . . . . . . . . . . . . . . . . . . . . . 21Creating forensic captures . . . . . . . . . . . . . . . . . . . . . . . . . . . . . . . . . . . . . . . . . . . . . . . . 21Using the remote engine files tab . . . . . . . . . . . . . . . . . . . . . . . . . . . . . . . . . . . . . . . . . . 23 Chapter 5Monitoring the Network . . . . . . . . . . . . . . . . . . . . . . . . . . . . . . . 27Displaying Monitor statistics on the console . . . . . . . . . . . . . . . . . . . . . . . . . . . . . . . . 28Baselining with summary statistics . . . . . . . . . . . . . . . . . . . . . . . . . . . . . . . . . . . . . . . . 29Using the remote monitoring capture template . . . . . . . . . . . . . . . . . . . . . . . . . . . . . 31 Chapter 6Creating Graphs . . . . . . . . . . . . . . . . . . . . . . . . . . . . . . . . . . . . . . . 33Creating a graph from a console Capture window. . . . . . . . . . . . . . . . . . . . . . . . . . . 33Creating a top ten protocols graph on a remote engine. . . . . . . . . . . . . . . . . . . . . . . 35 Chapter 7Wireless Statistics in Capture Windows . . . . . . . . . . . . . . . . . . 37The WLAN view . . . . . . . . . . . . . . . . . . . . . . . . . . . . . . . . . . . . . . . . . . . . . . . . . . . . . . . . 37The Channels view . . . . . . . . . . . . . . . . . . . . . . . . . . . . . . . . . . . . . . . . . . . . . . . . . . . . . . 39The Signal view . . . . . . . . . . . . . . . . . . . . . . . . . . . . . . . . . . . . . . . . . . . . . . . . . . . . . . . . .40vContentsvi Chapter 8Troubleshooting with the Expert . . . . . . . . . . . . . . . . . . . . . . . . 41 The Expert view. . . . . . . . . . . . . . . . . . . . . . . . . . . . . . . . . . . . . . . . . . . . . . . . . . . . . . . . .41Using the Expert EventFinder Settings . . . . . . . . . . . . . . . . . . . . . . . . . . . . . . . . . . . . . 42Using the Visual Expert . . . . . . . . . . . . . . . . . . . . . . . . . . . . . . . . . . . . . . . . . . . . . . . . . . 43 Chapter 9Creating Filters . . . . . . . . . . . . . . . . . . . . . . . . . . . . . . . . . . . . . . . 47 Enabling a filter . . . . . . . . . . . . . . . . . . . . . . . . . . . . . . . . . . . . . . . . . . . . . . . . . . . . . . . . . 47 Creating filters with the Make Filter command. . . . . . . . . . . . . . . . . . . . . . . . . . . . . . 48Creating a simple filter . . . . . . . . . . . . . . . . . . . . . . . . . . . . . . . . . . . . . . . . . . . . . . . . . . . 49 Chapter 10Using the Peer Map . . . . . . . . . . . . . . . . . . . . . . . . . . . . . . . . . . . . 51 The Peer Map view . . . . . . . . . . . . . . . . . . . . . . . . . . . . . . . . . . . . . . . . . . . . . . . . . . . . . . 51 Chapter 11Using VoIP Analysis . . . . . . . . . . . . . . . . . . . . . . . . . . . . . . . . . . . . 55 The V oIP view . . . . . . . . . . . . . . . . . . . . . . . . . . . . . . . . . . . . . . . . . . . . . . . . . . . . . . . . . .55Analyzing a single call or channel. . . . . . . . . . . . . . . . . . . . . . . . . . . . . . . . . . . . . . . . . . 57 Appendix A Keyboard Shortcuts. . . . . . . . . . . . . . . . . . . . . . . . . . . . . . . 61 Index . . . . . . . . . . . . . . . . . . . . . . . . . . . . . . . . . . . . . . . . . . 63C H A P T E R1 IntroductionWelcome to OmniPeek, the software console for distributed network analysis fromWildPackets!The OmniPeek console provides centralized expert analysis for 10/100 Ethernet, full-duplexGigabit Ethernet, 802.11 WLAN, and WAN networks by managing and interacting withremotely installed OmniEngines. With OmniPeek’s intuitive user interface, network engineerscan quickly troubleshoot problems on remote segments, drill down through multiple layers ofanalysis, and pinpoint problems that need correction.Important!The OmniPeek console and the OmniEngines are described here in their full-featuredversions. Please visit our web site at /doc/199652966bec0975f465e2dd.html for details about how to order the Omni features and media types that precisely fit the needs of your distributednetwork.System requirementsThe system requirements for the OmniPeek console are:●Windows XP Professional (SP2), Windows 2000 (SP4) or Windows Server 2003 (SP1)●Internet Explorer 6.0 (SP1)●Microsoft .NET Framework 2.0Note OmniPeek with Enhanced Voice Option does not support Windows Server 2003.OmniPeek supports most rack mount, desktop and portable computers as long as the basicsystem requirements to run the supported operating systems are met. Depending on trafficand the particular usage of OmniPeek, the requirements may be substantially higher.The following system is recommended for OmniPeek:1Chapter 1: Introduction 2System requirements●P4 2 GHz Processor (P4 2.4 GHz Processor for OmniPeek with Enhanced Voice Analysis)●512 MB RAM (1 GB RAM for OmniPeek with Enhanced Voice Analysis)●10 GB Available Hard Disk Space (20 GB Available Hard Disk Space for OmniPeek withEnhanced Voice Analysis)Factors that contribute towards superior performance include high speed CPU, dual CPUs, two or more GB of RAM, high performance disk storage subsystem (RAID 0), and as much additional hard disk space as is required to save the trace files that you plan to manage.Note Supported operating systems require users to have “Administrator” level privileges in order toload and unload device drivers, or to select a network adapter for the program’s use incapturing packets.For more information, please see our web site at /doc/199652966bec0975f465e2dd.html/products. Optional hardware requirementsTo analyze wireless, Gigabit, WAN, or traffic, a supported network analyzer card (GAC orWAC) or wireless LAN adapter is required for OmniPeek:●Full-duplex capture of Gigabit Ethernet networks : requires a WildPackets GigabitAnalyzer Card (GAC).Note Capture on Gigabit Ethernet networks is also possible using other supported Gigabit Ethernetinterfaces, but not in full-duplex mode.●Capture from T1/E1 WAN links : requires a WildPackets WAN Analyzer Card (WAC).●Capture from T3/E3 WAN links : requires a WildPackets WAN Analyzer Card (WAC).For more information, refer to the documentation that ships with the product or visit ourwebsite at /doc/199652966bec0975f465e2dd.html/products .For information on configuring wireless, Gigabit, and WAN analyzer cards, please refer to the OmniPeek User Guide or online help.Network connectivity and driversOmniPeek and the OmniEngines communicate over TCP/IP through port 6367, the default port for the WildPackets DNX proprietary protocol.OmniPeek Getting Started Guide WildPackets has developed a set of driver APIs for 802.11 WLAN cards, the Gigabit AnalyzerCards, and the WAN Analyzer Cards. OmniPeek and the OmniEngines ship with a number ofdrivers that support the WildPackets APIs.For the most recent information on network adapter cards and drivers, please visit http:///doc/199652966bec0975f465e2dd.html/support/product_support/overview.Installing the OmniPeek consoleTo install the OmniPeek console, follow these steps:1.Uninstall any earlier versions of OmniPeek.2.Insert the OmniPeek Installer CD into your CD or DVD drive.3.Follow the installation instructions that appear on the screen.During installation you are asked to enter a valid Activation Key. When prompted, youcan select Automatic or Manual:●Automatic: The installer uses your Internet connection to send an encrypted messageto an activation server, which retrieves and displays your Activation Key. Please writedown the Activation Key for future reference.●Manual: The installer allows you to enter the Activation Key manually. You canobtain an Activation Key in the following ways: Go to a computer with an Internetconnection and web browser and complete the request form, or call WildPacketsTechnical Support.For more information about the product activation process, please see our website at:/doc/199652966bec0975f465e2dd.html/activation.4.When the Installer has finished installing the program files, you can choose to view theReadme or launch the program.Installing an OmniEngineFor complete instructions on how to install, configure, and update settings for anOmniEngine, See the Getting Started Guide that ships with the OmniEngine or the online helpin the Omni Management Console application.Installing the OmniPeek console3Chapter 1: Introduction4Main program window and Start PageMain program window and Start PageTo start OmniPeek:●Choose Start > All Programs > WildPackets OmniPeek .The main program window and Start Page appears. The parts of the main program window are described below.●T oolbar: Provides icons for frequently-used tasks in OmniPeek. The function of each iconappears at a tooltip. Choose View > Toolbars > Show Toolbars to toggle the display ofthe icons in this toolbar.●Status Bar: Shows brief context-sensitive messages on the left and the current monitoradapter on the right. Choose View > Status Bar under the menu to toggle the display ofthis status bar.●Start Page: Provides links to useful resources, both local and online. You can:●open recently saved Capture files (click Open Capture File button)●start a new OmniPeek console capture (click New Capture button)ToolbarStatus BarOmniPeek Getting Started Guide●start a new remote engine capture (click View Remote Engines button)●view the Readme file●open the HTML version of the Getting Started Guide●open PDF versions of related hardware documents●access online resources and technical support●Network Statistics Gauge:Shows network utilization as analog dials with correspondingdigital displays. Choose Monitor > Network to display.●OmniPeek Log: Records Start, Stop, and other OmniPeek events. Choose View > Log todisplay.Displaying the Remote Engines windowThe Remote Engines window is used for interaction between the OmniPeek console and theOmniEngines. The Remote Engine window allows you to perform many of the sameoperations on a remote engine that you can perform locally with OmniPeek.Do one of the following to display the Remote Engines window:●Choose View > Remote Engines.●Click the View Remote Engines button on the Start Page.The Remote Engines window appears.Insert Engine Discover EngineInsert Group DeleteConnectDisconnectDisplaying the Remote Engines window5Chapter 1: Introduction6Connecting to a remote engineConnecting to a remote engineIn order to view packets and data from a remote engine, you must first connect to the engine from the Remote Engines window.To connect to a remote engine:1.From the Remote Engines window, click the Insert Engine icon. The Connect dialogappears./doc/199652966bec0975f465e2dd.htmlplete the dialog:●Host: Enter the IP address of the OmniEngine that you want to connect to.●Port: Enter the TCP/IP Port used for communications. Port 6367 is the default portfor the WildPackets OmniEngine.●Authentication: Select the method used to authenticate the user. Typically, you wouldselect Default if you don’t use a third-party authentication server.●Domain: Type the Domain for login to the remote engine. If the remote engine is not a member of any Domain, leave this field blank.●Username: Type the Username for login to the remote engine.●Password: Type the Password for login to the remote engine.3.Click Connect . When the connection is established, the remote engine appears in theRemote Engines window.Connecting to a remote engine 7OmniPeek Getting Started GuideTip You can add multiple OmniEngines to the Remote Engines window by using the InsertEngine icon.4.Click the Insert Group icon to add a group of engines to the Remote Engines window.5.Select the engine group and click Insert Engine to add an engine to the group.Chapter 1: Introduction8Connecting to a remote engineDiscover OmniEnginesWhen you click the Discover button in the Remote Engines window, the Discover Engines dialog appears. This dialog lets you search for OmniEngines installed on the network. You can then select the specific OmniEngines that you want to display in the Remote Engineswindow.●Engines: Displays the OmniEngines found on the network. Select the check box of theOmniEngine that you want to display in the Remote Engines window.●Discover: Click to search for OmniEngines installed on the local segment of yournetwork. The box on the right will change from Listening... to Finished when all network-available OmniEngines are discovered.●Advanced Settings:●Listen time: Enter the number of seconds that the OMC will listen for responses tothe discovery request. You can enter a minimum of 2 and a maximum of 30 seconds.●Device backoff time: Enter the number of seconds that the devices will wait beforeresponding to a Discover request. The Device backoff time should always be less thanthe listen time. You can enter a minimum of 0 and a maximum of 10 seconds.Discover OmniEngines 9OmniPeek Getting Started GuideNote You will need to select an engine in the Remote Engines window and connect to it beforecapturing packets and analyzing data.Chapter 1: Introduction10Connecting to a remote engineC H A P T E R211Capturing Packets Packets are the units of data carried on the network and the basis for all higher level network analysis. The Packets view of a Capture window is where you can view information about the individual packets transmitted on your network.OmniPeek and the OmniEngines can capture packets in multiple configurable Capture windows, each with its own dedicated capture buffer and settings for filters, triggers, and statistics output. You can establish and view multiple Capture windows up to the limits of available system resources.Capture windows allow you to:●View and monitor network traffic in real time ●Use a different adapter for each Capture window, or use the same adapter for multiple Capture windows●Apply filters, both before and after capture●Start or stop capture based on network events or time settings●View statistics based on selected network traffic●View packet contents, raw and/or decoded●Save packets for post-capture analysis in Capture file windows Capturing packets into a Capture window Note For remote capture, see Capturing packets on a remote engine on page 14.To capture packets:1.To start a new capture, do one of the following:●Click the New Capture button on the Start Page ●Choose File > New…Chapter 2: Capturing Packets12Capturing packets into a Capture windowThe General view of the Capture Options dialog appears.2.Configure the options in the General view.3.Click the Adapter view to select the capture adapter.Note For information on configuring settings in the other views of the Capture Options dialog, seethe OmniPeek User Guide or online help.4.Click OK . A new Capture window appears.Capture window titleSave to disk options Continuous capture optionsPacket slicing optionsCapture buffer size“Show this dialog...”OmniPeek Getting Started GuideStart/Stop Capture5.Click Start Capture to begin capturing packets. The Start Capture button changes to theStop Capture button and packets begin populating the Capture window.Note You can right-click a column heading to hide or display available column headings in the Packets tab.6.Click Stop Capture when you want to stop capturing packets.Capturing packets into a Capture window13。
Omnic软件使用指南

Omnic软件使用指南1.Omnic与系统Omnic是Nicolet公司的在PC机使用最广泛的窗口软件平台上运行的红外软件,从开始在Windows3.1 上运行的版本的 1.0到目前的 6.1a,现行的的操作系统Windows98/Me/NT/2000/XP都支持。
EZ-Omnic是简化的软件,一方面价格比较低,同时更加简明,容易掌握,虽然功能比较简单,仍可以满足先当部分用户的需求。
使用的仪器通讯接口有:LTP(并行口)或PCI卡,部分早一些的仪器使用ISA卡。
2.文件结构Omnic 6.0以上版本的缺省的文件分别存在于三个目录中:C:\My Documents\Omnic,在其子目录中分门别类地存放数据与参数等文件,如Spectra存光谱,Param中存设置参数,Quant 存定量方法;C:\Program Files\Omnic,存有驱动与程序文件等,系统的卸载命令在它的子目录Uninstall中;C:\MyDocument\Omnic\Lib,存放谱库,包括购买和自建的谱库。
软件安装的应用程序除了Omnic外还有Bench Diagnostics,这是一个在系统发生故障时进行判断的重要命令,能够检查从接口卡到仪器的各个重要部件。
它们与PDF文件一起置于Thermo Nicolet程序组中,3.启动Omnic软件使用下列方法之一启动Omnic 红外软件系统:1.在Windows98等的桌面上双击(或者)2.从Srart→Program→Thermo Nicolet→Omnic(或者从Srart→Program→Omnic5.0→) 3.其他,如Win98中的快捷方式启动。
4.Omnic显示面板:1.Omnic是一种与窗口软件充分兼容的软件,可以显示一个或多个显示窗口,当显示多个窗口时可以选择平铺(Tile)或层迭(Cascade)方式,但其中只有一个是活动窗口(被选中的)。
光谱图可以在窗口间拖动、复制与粘贴,而且可以把复制的光谱图直接粘贴到其他应用程序的文本文件中,为发表文章或书写报告带来方便。
OmniPeek使用手册入门版

陈科锦
2. 启动抓包
完成网卡的驱动安装后,我就可以开始启动抓包工具进行空中抓包操作了。 OmniPeekFile New Capture ,需要选择是否要实时存储抓取的报文。
点击 Adapter 选择抓包用网卡:
陈科锦
如果你能够确定当前需要抓包的信道号的话,则点击 802.11,选择抓包用信道,否则用“Scan”:
OmniPeek 使用手册入门版
在定位 WIFI 问题时,我们一般采用 OmniPeek 工具进行空中抓包来分析他们的交互过程,以获取有用的信息。 以下为具体的操作步骤:
1. 配备可用于抓包的无线网卡
我采用的是 D-Link DWA-140 ,你可以通过网购获取此 USB 网卡。安装驱动后显示如下:
点击确定,进入抓包页面,然后启动抓包:
陈科锦
3. MAC 地址过滤
如果在复杂的环境下做抓包,报文量会很大,所以我们可以增加特定的 AP 和特定的 STA 的 MAC 地址过滤,比如 AP MAC 地址为 00:11:22:33:44:55,而 STA MAC 为 50:44:33:22:11:00,则点击 filter 里面的 insert 来增加过滤选项:
Filter 里面输入名字,选择以太网地址,并输入地址,然后点击 ok:
陈科锦
然后把这两项选勾:
最后重新回到 packets 页面点击 start capture 开始抓包。
4. 结尾 因空口抓包对应环境的特殊性,不一定每次抓包都能把报文抓全,建议多抓几次以做分析。
陈科锦
OmniPeek安装以及使用
OmniPeek使用技巧一直以来无线网络故障的排查和扫描都是比较麻烦的事情,和有线网络不同的是很少有无线网络下专门应用于无线数据包扫描的工具,这直接影响了用户检查网络的效果。
然而现在这个问题已经应刃而解,最近笔者发现了一款不错的扫描软件,他不仅可以扫描有线网络下的数据包信息,还可以针对无线网卡进行监控和扫描。
通过该软件我们就可以更清晰更快捷的定位无线网络故障,根据扫描结果调整自己无线设备的位置和参数信息。
下面就请各位跟随笔者一起从OmniPeek 开始无线扫描吧。
一、OmniPeek能做什么?和其他sniffer工具一样OmniPeek可以针对自己网卡接收和发送的每个数据包进行分析和保存,另外还可以针对一些广播数据包进行分析,结合各种过滤规则可以让我们更清楚的了解当前网络中存在的问题。
当然和其他sniffer工具不同的是OmniPeek可以针对无线网卡进行监控,通过对无线数据包的分析了解无线网络的运行状况,让用户可以清楚的知道无线网络使用的频段,信号强弱,SSID信息等内容。
二、安装OmniPeek软件:笔者以OmniPeek 5.0为例进行介绍,首先我们到https:///evals/eval.php?id=58055386地址下载主程序。
第一步:下载后运行主程序将进行自解压操作,我们指定一个路径点“unzip”解压按钮即可。
第二步:到解压缩目录中找到可执行安装程序,运行后选择第一行的install OmniPeek。
第三步:出现OmniPeek安装向导,我们点“NEXT”按钮继续操作。
第四步:经过注册步骤后同意安装许可协议。
一直以来无线网络故障的排查和扫描都是比较麻烦的事情,和有线网络不同的是很少有无线网络下专门应用于无线数据包扫描的工具,这直接影响了用户检查网络的效果。
然而现在这个问题已经应刃而解,最近笔者发现了一款不错的扫描软件,他不仅可以扫描有线网络下的数据包信息,还可以针对无线网卡进行监控和扫描。
omnipeek无线空口抓包分析.

目录1. 目的 (2)2.认证方式 (2)1.WEB用户接入流程 (2)2. PEAP认证流程 (4)3. WEB认证抓包分析 (5)1.关联过程 (5)2.DHCP地址分配过程 (5)3.Portal推出以及WEB认证 (6)1.强制Portal (6)2.认证报文 (6)3下线报文 (7)4.PEAP认证抓包分析 (7)1. 用户关联 (7)2. 认证过程 (7)5.抓包建议 (9)1.过滤 (9)1) 抓包前的过滤 (9)2) 抓包后的过滤 (9)2.Omnipeek使用问题 (9)1.目的802.11协议工作在物理层和数据链路层,为STA和AP之间建立数据连接。
通过使用omnipeek来进行空口抓包能抓取到STA和AP之间802.11报文交互情况,快速的进行故障定位和分析。
本次主要是完成了WEB认证的抓包和PEAP认证的抓包,将两种认证方式的流程中STA 与AP之间数据交互信息进行了抓取分析。
2.认证方式WLAN现网主要的认证方式有1)WEB认证通过强制Portal的方式将用户的http请求重定向到Portal服务器,通过Portal页面上完成认证过程。
2)PEAP(Protected EAP)是EAP认证方法的一种实现方式,网络侧通过用户名/密码对终端进行认证,终端侧通过服务器证书对网络侧进行认证。
用户首次使用PEAP认证时,需输入用户名和密码,后续接入认证无需用户任何手工操作,由终端自动完成。
1.WEB用户接入流程2.PEAP认证流程3.W EB认证抓包分析1.关联过程一个完整的关联过程包括Probe request(探测请求)、Probe response(探测响应)、Authentication(身份验证)、Association request(关联请求)、Association response(关联响应)。
图1、关联过程1)Probe request和Probe response。
手把手教你连接OminPeek Engine(入门篇)
手把手教你连接OminPeek Engine(入门篇) 手把手教你连接OminPeek Engine
实验环境:
客户端:VM+XP+OmniEngine4.0
服务端:WildPackets OmniAnalysis Platform
第一步:安装系统,设置用户名密码。
第二步:安装OmniEngine,配置使用户
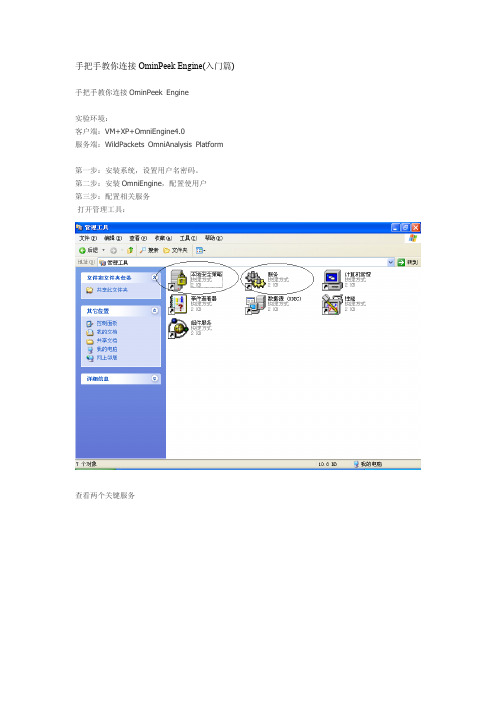
第三步:配置相关服务
打开管理工具:
查看两个关键服务
第四步:配置相关的安全策略
如果没有配置成,经典-本用户。
的话,会在服务端出现以下的情况
看看安装之后程打开的端口,默认为6367
配置防火墙,TCP,UDP都要配
第六步配置Omni Engine打开向导,一步一步就行了
增加用户
第七步:配置服务端
首先测试一下:打开
打开Omnipeek,,View,Remote Engine
连接了
成功了
开始。
Omnipeek使用方法
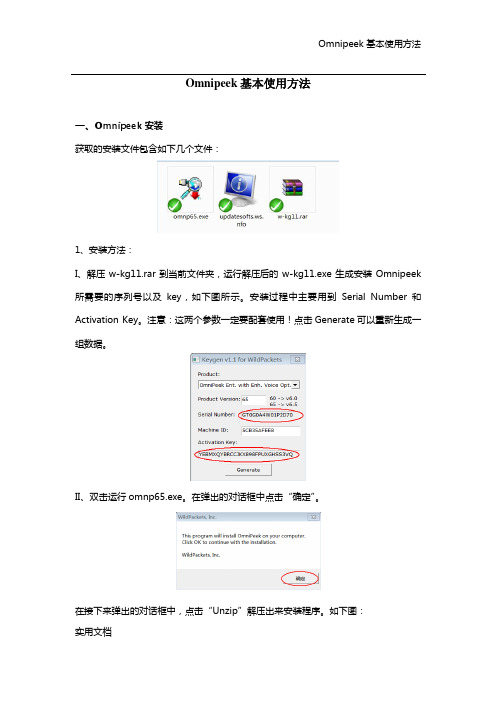
Omnipeek基本使用方法一、Omnipeek安装获取的安装文件包含如下几个文件:1、安装方法:I、解压w-kg11.rar到当前文件夹,运行解压后的w-kg11.exe生成安装Omnipeek 所需要的序列号以及key,如下图所示。
安装过程中主要用到Serial Number和Activation Key。
注意:这两个参数一定要配套使用!点击Generate可以重新生成一组数据。
II、双击运行omnp65.exe。
在弹出的对话框中点击“确定”。
在接下来弹出的对话框中,点击“Unzip”解压出来安装程序。
如下图:实用文档III、点击上图中“Install Omnipeek”开始安装过程。
首先在弹出来的对话框中点击“Next”。
在接下来的页面上,点选“Manual:pause and go to webpage.”选项,然后Next。
如下图所示。
实用文档在接下来的对话框中,依次输入User Name、Company Name以及通过第一步中w-kg11.exe生成的Serial Number。
如下图所示。
输入完上述信息以后,连续点击Next,在下面的对话框中输入Activation Key。
输入完成后,点击Next,后面没有特殊的步骤了,就和安装其他的软件相同。
需要说明的是,如果选用默认的Complete方式,软件会自动安装到C盘中。
建议使用Custom 方式自己定义安装的路径,不要装到C盘。
二、抓包无线网卡驱动安装不是每一块网卡都可以通过Omnipeek软件来进行空口抓包的。
目前支持的USB 无线网卡有Cisco Linksys WUSB600N、Wildmac等。
在安装了网卡自身的驱动程序以后,还需要将驱动程序更新为Omnipeek支持的驱动程序。
对应的驱动程序包为实用文档“x86”文件夹,在svn上的Omnipeek安装文件目录下可以同时获取该文件夹。
在安装好网卡以后,通过设备管理器找到该网卡,右键-->更新驱动程序-->手动选择路径到x86文件夹,安装即可。
安装Omnipeek无线网卡驱动详情
安装Omnipeek无线网卡驱动详情相信大家对Omnipeek并不陌生吧,这是一款优秀网络抓包软件,不仅可以抓取有线网络的数据包,还可以抓取无线网络的数据包。
要想利用此软件抓取无线网络的数据包,除了要依靠无线网卡之外,还要对此无线网卡安装Omnipeek专有的驱动程序。
由于初次接触Omnipeek,对如何安装无线网卡的Omnipeek 驱动还是比较陌生的,结合网上的资料特写此短文,希望同志们少走弯路。
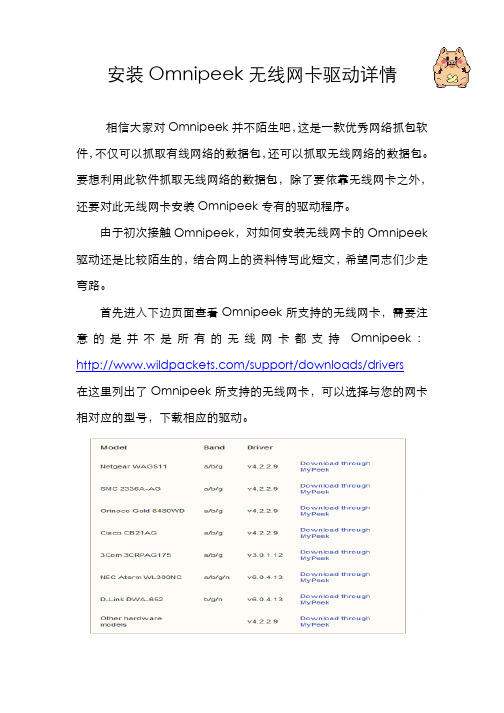
首先进入下边页面查看Omnipeek所支持的无线网卡,需要注意的是并不是所有的无线网卡都支持Omnipeek:/support/downloads/drivers在这里列出了Omnipeek所支持的无线网卡,可以选择与您的网卡相对应的型号,下载相应的驱动。
上图列出了几种常用的无线网卡的型号,如果您的无线网卡和此图的网卡型号一致,那么恭喜您。
如果您的网卡没有在这里面也不要着急,那么我们可以找使用与上面无线网卡相同芯片的网卡。
最常见的无线芯片是Atheros,请在此查询您的网卡是否支持Omnipeek:/customerproducts/de fault.asp我的无线网卡是D-Link公司的DWL-G650,我们来查询一下:Cardbus的意思是笔记本专用无线网卡。
上面列出了支持Omnipeek的D-Link无线网卡列表,包括DWL-G650。
返回此页面,由于列表中没有列出DWL-G650,选择“Other hardware models”,然后进入下载页面。
需要进行注册才可以下载驱动,注册完毕以后需要进行邮箱确认,步骤省略。
下载了驱动以后,接下来就是进行安装了。
在安装之前,首先确保你的无线网卡可用,也就是无线网卡的普通驱动安装正确。
然后进行安装,就可以了。
安装驱动完毕后的状态。
捕捉到的无线数据帧如上所示。
omnipeek
WEP加密破解教程(OmniPeek 4.1抓包破解WEP )1.首先还是要先用Network Stumbler软件找出你要破解的信号的频段和AP的MAC地址,就是软件开头那12位值2.将Intel PRO/Wireless 3945ABG驱动升级为10.5.1.72 or 10.5.1.75,有装管理软件请先关闭。
3.OmniPeek4.1软件WildPackets API显示为YES,则说明已正常识别网卡。
Microsoft .NET Framework 2.0(先安装Microsoft .NET Framework 2.0 然后再装WildPackets OmniPeek Personal 4.1)[/b]WildPackets OmniPeek Personal 4.14.如果我们只是抓WEP数据包的话,设置一下只允许抓WEP的数据包。
按"ctrl+M"打开过滤器列表中没有"802.11 WEP Data”过滤项,我们可以增加一个"802.11 WEP Data过滤项"点击左上角绿色"十"字。
5.Filter输入"802.11 wep data",在"protocol filter"中选择"802.11 wep data"并打勾"protocol filter"。
6.然后我们要设置一下内存缓存大小,General-Buffer size,调整为100M就足够(这步很重要不然要抓很多次包)。
7.802.11设置好信号的频道,在BSSID中输入AP的MAC(为什么只设置AP的MAC 地址呢?是这样子的在多个同名SSID的AP的情况下设置SSID没有用的)8.在“Filters”选项中在"801.11 WEP Data ”打勾,就是只抓801.11 WEP数据包,过渡掉不需要的包。
Wireshark与OmniPeek分别抓包实现IP电话的窃听
Wireshark与OmniPeek分别抓包实现IP电话的窃听2008年07月14日星期一 13:21本文针对的读者是对网络知识有一定的了解,知道什么叫做嗅探器和嗅探的作用,还在使用非常古老的Sniffer软件的同学。
至于想了解虫洞是否通向四维空间,或者黑洞产生的技术内幕,又或者是聚变发动机及太阳能电池在星际航行中的应用等等高深问题的同学,可以到这两个网站去逛逛:,。
本文也不涉及原理方面的讲解,对于软件的应用也非常的简单。
所以,高手请漂过……以前一直用NAI Sniffer,虽然的确非常强大,但是可惜它里面很多东东都是Java写的,Java这个东西吧,虽然说可移植性比较强,但是可惜不少人用起来都会或多或少的有些死机或者蓝屏。
于是我们开始用OmniPeek(EtherPeek),或者是Wireshark(Etherreal)——当然这两款软件都是出现时间不太长的,不过他们的前身还是有很久远的历史了……这里我们就不做详细讨论了。
有兴趣的同学可以上网搜索下。
前两天在客户那边做测试,他们抓包使用Wireshark,玩了一下,觉得比较有感觉,于是装上试了试,本文就以VoIP的抓包实例来给各位同学演示一下Wireshark与Omnipeek的不同点。
首先来看Wireshark怎么样打开软件就不用介绍了,点开Capture,选择一个有流量的接口(有可能你有两个网卡——现在的笔记本一般都自带一个无线一个有线来着),然后点Start。
至于Option什么的不是本文重点,不表。
图一图二这个时候我们打开NetMeeting软件,开始打电话——至于Netmeeting里面网守或者网关的配置这里不做详细说明,想知道的话可以留言我发新贴。
图三通过下面这张图片,我们看到H.225协议相关的交互。
——Display Filter 的定义就是h225,h245,和rtp即可。
图四下面我们打开Stacistics -> VoIP Calls页面,可以看到我们刚才产生的呼叫的详细信息。
跑吞吐时使用OmniPeek抓包
在测试吞吐时,一般要提供完整的无线抓包log, iperf 控制台显示的log,还有slog一起提供,无线抓包我们现在使用的是OmniPeek抓包软件1.1 OmniPeek抓包软件使用(前提:请确保PC上已正确装上抓包网卡驱动和OmniPeek抓包软件)Omnipeek 是出自WildPackets的著名的抓包软件,它和其他Sniffer Pro工具一样,OmniPeek可以针对自己网卡接收和发送的每个数据包进行分析和保存,另外还可以针对一些广播数据包进行分析,结合各种过滤规则可以让我们更清楚的了解当前网络中存在的问题。
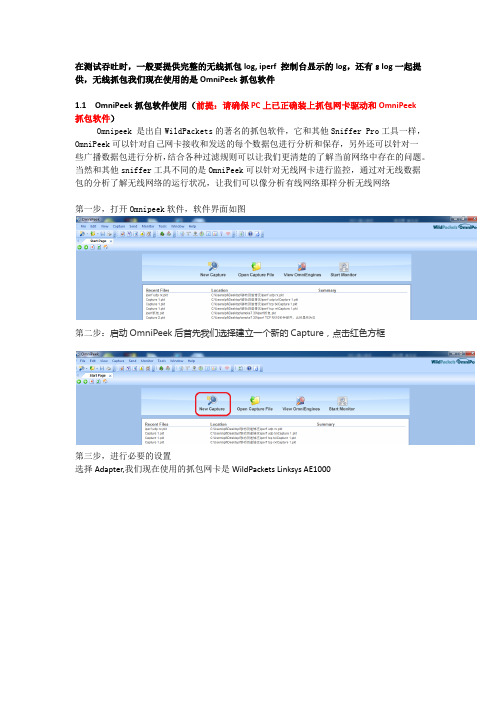
当然和其他sniffer工具不同的是OmniPeek可以针对无线网卡进行监控,通过对无线数据包的分析了解无线网络的运行状况,让我们可以像分析有线网络那样分析无线网络第一步,打开Omnipeek软件,软件界面如图第二步:启动OmniPeek后首先我们选择建立一个新的Capture,点击红色方框第三步,进行必要的设置选择Adapter,我们现在使用的抓包网卡是WildPackets Linksys AE1000选择需要抓取得Channel(可以登录AP查看和修改)设置过滤,不然会抓到所有包不利于分析,一般基于MAC地址过滤,右键然后insert,参照下图设置注意设置完过滤后一定要打勾如图中红色框第四步,点击Start Capture,如图中红色框第三步的设置在抓包过程中也可以通过Capture Capture Options 如图红色框查看包的具体信息可以直接双击查看第五步,测试完成后点击stop capture,然后点file save ALL Packts注意事项1.每次测试都需要提供完整抓包log,包括连接过程,吞吐测试过程所有抓包,遇到有跑吞吐断开时,断开后请持续抓包一段时间(约1分钟)在停止保存log2.跑吞吐时一般log量较大,抓包软件抓满后就会停止抓包,必须设置将抓包保存在电脑硬盘上,这样抓满后会持续抓包,可参考如下设置其中参数大概解释如下1.“General”项中,默认“Continuous capture”是未勾选的。
无线网络数据窥探技术-电脑资料
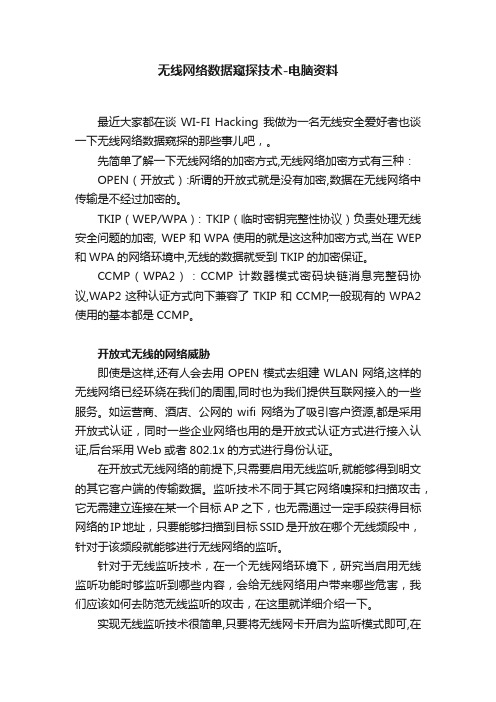
无线网络数据窥探技术-电脑资料最近大家都在谈WI-FI Hacking 我做为一名无线安全爱好者也谈一下无线网络数据窥探的那些事儿吧,。
先简单了解一下无线网络的加密方式,无线网络加密方式有三种:OPEN(开放式):所谓的开放式就是没有加密,数据在无线网络中传输是不经过加密的。
TKIP(WEP/WPA): TKIP(临时密钥完整性协议)负责处理无线安全问题的加密, WEP和WPA使用的就是这这种加密方式,当在WEP 和WPA的网络环境中,无线的数据就受到TKIP的加密保证。
CCMP(WPA2):CCMP 计数器模式密码块链消息完整码协议,WAP2这种认证方式向下兼容了TKIP和CCMP,一般现有的WPA2使用的基本都是CCMP。
开放式无线的网络威胁即使是这样,还有人会去用OPEN模式去组建WLAN网络,这样的无线网络已经环绕在我们的周围,同时也为我们提供互联网接入的一些服务。
如运营商、酒店、公网的wifi网络为了吸引客户资源,都是采用开放式认证,同时一些企业网络也用的是开放式认证方式进行接入认证,后台采用Web或者802.1x的方式进行身份认证。
在开放式无线网络的前提下,只需要启用无线监听,就能够得到明文的其它客户端的传输数据。
监听技术不同于其它网络嗅探和扫描攻击,它无需建立连接在某一个目标AP之下,也无需通过一定手段获得目标网络的IP地址,只要能够扫描到目标SSID是开放在哪个无线频段中,针对于该频段就能够进行无线网络的监听。
针对于无线监听技术,在一个无线网络环境下,研究当启用无线监听功能时够监听到哪些内容,会给无线网络用户带来哪些危害,我们应该如何去防范无线监听的攻击,在这里就详细介绍一下。
实现无线监听技术很简单,只要将无线网卡开启为监听模式即可,在BT5下使用airmon-ng 将网卡调味监听模式.再使用airodump-ng进行抓包,即可完成无线监听的过程,电脑资料《无线网络数据窥探技术》(https://www.)。
使用OmniPeek抓无线数据包
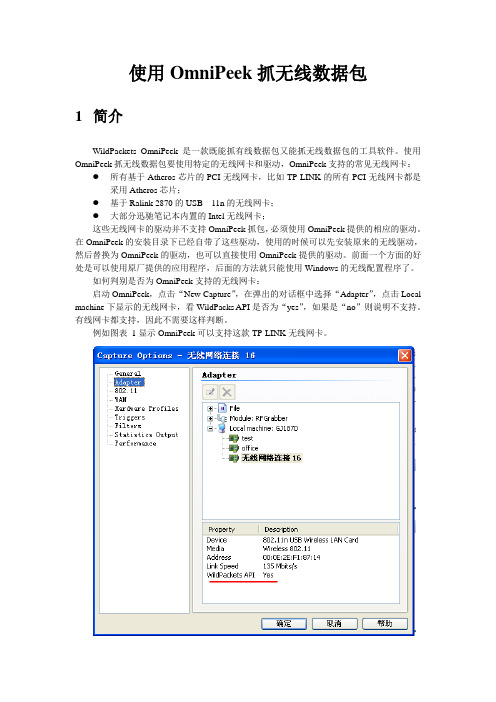
使用OmniPeek抓无线数据包1简介WildPackets OmniPeek是一款既能抓有线数据包又能抓无线数据包的工具软件。
使用OmniPeek抓无线数据包要使用特定的无线网卡和驱动,OmniPeek支持的常见无线网卡:●所有基于Atheros芯片的PCI无线网卡,比如TP-LINK的所有PCI无线网卡都是采用Atheros芯片;●基于Ralink 2870的USB 11n的无线网卡;●大部分迅驰笔记本内置的Intel无线网卡;这些无线网卡的驱动并不支持OmniPeek抓包,必须使用OmniPeek提供的相应的驱动。
在OmniPeek的安装目录下已经自带了这些驱动,使用的时候可以先安装原来的无线驱动,然后替换为OmniPeek的驱动,也可以直接使用OmniPeek提供的驱动。
前面一个方面的好处是可以使用原厂提供的应用程序,后面的方法就只能使用Windows的无线配置程序了。
如何判别是否为OmniPeek支持的无线网卡:启动OmniPeek,点击“New Capture”,在弹出的对话框中选择“Adapter”,点击Local machine下显示的无线网卡,看WildPacks API是否为“yes”,如果是“no”则说明不支持。
有线网卡都支持,因此不需要这样判断。
例如图表1显示OmniPeek可以支持这款TP-LINK无线网卡。
图表 1 判别OmniPeek能否支持某个无线网卡2安装无线驱动以TP-Link TL-WN951N 11n无线网卡为例,OmniPeek提供了Atheros_6.0的驱动,如果是TL-WN651G等11g的Atheros无线网卡则需要使用11g版本的驱动:Atheros_4.2。
方法一:正常安装完TP-LINK自带的无线驱动和应用程序后,把Atheros_6.0目录下的ar5416.sys 文件改名为athw.sys,替换E:\WINDOWS\system32\drivers目录下的athw.sys文件,重新启动电脑。
实验九 WildPackets OmniPeek 进行网络流量和网络性能分析
掌握WildPackets OmniPeek 5.1的基本使用。
实验环境 windows Server 2003 、XP 虚拟机。
实验学时 2学时,必做实验。
实验内容
1. 设置俘获选项
2. 启动俘获
3. 流量及性能分析。
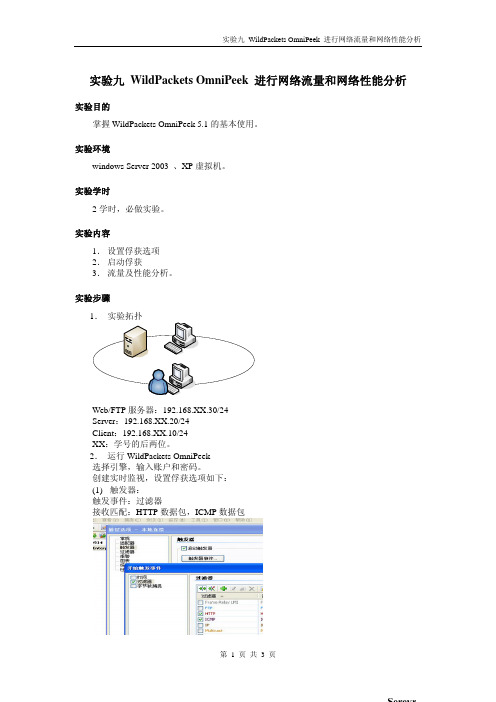
实验步骤 1. 实验拓扑 Web/FTP 服务器:192.168.XX.30/24 Server :192.168.XX.20/24 Client :192.168.XX.10/24 XX :学号的后两位。
2. 运行WildPackets OmniPeek 选择引擎,输入账户和密码。
创建实时监视,设置俘获选项如下:
(1) 触发器: 触发事件:过滤器 接收匹配:HTTP 数据包,ICMP 数据包 s h i q i n
3. 服务器端,访问Web 服务器。
可以在客户端,发现俘获已经被触发,开始俘获数据
包。
执行Ping 命令。
4. 停止俘获,进入专家系统,查看应用程序项,在细节窗格可以看到应用程序对网络的访问
单击“+”展开。
查看应用程序使用网络的细节。
5. 进入可视栏,选择“Peer Map ”,细节窗格可以看到拓扑形式的网络数据流量分布图
光标移动的某个节点上是会显示该节点上数据包的接收与发送情况;光标移动到某个连s h i q i n
实验九 WildPackets OmniPeek 进行网络流量和网络性能分析 线上时,会显示连线的两个节点间数据流量。
6. 将监视数据保存为报告 s h i q i n g。
无线空口抓包OmniPeek使用

目录一、环境准备 (2)1. 使用环境 (2)2. 系统要求 (2)3. 工具准备 (2)4. 安装程序 (2)5. 安装网卡驱动 (8)二、使用方法 (12)一、环境准备1.使用环境1.1实施项目前,检查周围无线环境。
如周围信道占用情况等;1.2排错抓包分析。
无线网络信号不好;有信号但连不上;能连上但无法获取地址等;1.3查看AP下的终端;1.4以及其他。
2.系统要求Windows 2000/XP/7 32和64位3.工具准备抓包软件WildPackets OmniPeek ftp://10.1.145.247/08-常用工具/03-无线产品/ OmniPeek 6.5.rar抓包网卡及驱动ftp://10.1.145.247/08-常用工具/03-无线产品/无线抓包软件及驱动/网卡驱动4.安装程序3.1解压缩Omnipeek 6.5.rar,双击解压后的文件夹中的setup.exe,看到如下界面,点击Install OmniPeek,如下图:3.2在弹出的新界面中,点击下一步Next,选择第二项Manual手工方式激活,如下图:3.3选择第二行手工方式激活Manual,点击下一步Next,出现如下界面:3.4打开安装目录中的Keygen.exe,会自动生成一组SN和Key,也可以点击Generate重新生成。
注:运行此程序需要关闭杀毒软件,或者在杀毒软件中将keygen.exe添加信任。
3.5将上图中的Serial Number复制到下图中的Serial Number文本框里,Company Name可随便写。
点击下一步Next。
3.6将Keygen.exe中的Activation Key复制到下图中的文本框,点击下一步Next。
3.7在弹出的新界面中,选择第一项接受,点击下一步。
如图:3.8若无需指定安装位置,请选择第一项Complete,然后一直点击下一步Next,直到安装结束。
如图:3.9若需指定安装目录,请选择第二项Custom。
omnipeek 原理

omnipeek 原理
Omnipeek是一款网络分析软件,它的原理涉及到网络数据包的
捕获、分析和可视化展示。
首先,Omnipeek通过网络接口捕获数据包,这些数据包是网络通信的基本单位,包含了从源到目的地的信息。
捕获的数据包经过过滤和分类,然后被存储在内存或者磁盘中。
接着,Omnipeek对这些数据包进行解析,提取出各种网络协议中的
字段和信息,比如IP地址、端口号、协议类型等。
然后,这些解析
后的数据被分析和统计,用户可以通过Omnipeek的图形界面查看网
络流量、延迟、丢包率等信息,从而分析网络性能和运行状态。
此外,Omnipeek还提供了一些高级的功能,比如报文重组、VoIP分析、安全漏洞扫描等,这些功能都是基于对捕获的数据包进行深入分析
和处理实现的。
总的来说,Omnipeek的原理就是通过捕获、解析和
分析网络数据包来帮助用户监控和优化网络性能,识别和解决网络
问题。
Omnic软件使用指南

Omnic软件使用指南1.Omnic与系统Omnic是Nicolet公司的在PC机使用最广泛的窗口软件平台上运行的红外软件,从开始在Windows3.1 上运行的版本的 1.0到目前的 6.1a,现行的的操作系统Windows98/Me/NT/2000/XP都支持。
EZ-Omnic是简化的软件,一方面价格比较低,同时更加简明,容易掌握,虽然功能比较简单,仍可以满足先当部分用户的需求。
使用的仪器通讯接口有:LTP(并行口)或PCI卡,部分早一些的仪器使用ISA卡。
2.文件结构Omnic 6.0以上版本的缺省的文件分别存在于三个目录中:C:\My Documents\Omnic,在其子目录中分门别类地存放数据与参数等文件,如Spectra存光谱,Param中存设置参数,Quant 存定量方法;C:\Program Files\Omnic,存有驱动与程序文件等,系统的卸载命令在它的子目录Uninstall中;C:\MyDocument\Omnic\Lib,存放谱库,包括购买和自建的谱库。
软件安装的应用程序除了Omnic外还有Bench Diagnostics,这是一个在系统发生故障时进行判断的重要命令,能够检查从接口卡到仪器的各个重要部件。
它们与PDF文件一起置于Thermo Nicolet程序组中,3.启动Omnic软件使用下列方法之一启动Omnic 红外软件系统:1.在Windows98等的桌面上双击(或者)2.从Srart→Program→Thermo Nicolet→Omnic(或者从Srart→Program→Omnic5.0→) 3.其他,如Win98中的快捷方式启动。
4.Omnic显示面板:1.Omnic是一种与窗口软件充分兼容的软件,可以显示一个或多个显示窗口,当显示多个窗口时可以选择平铺(Tile)或层迭(Cascade)方式,但其中只有一个是活动窗口(被选中的)。
光谱图可以在窗口间拖动、复制与粘贴,而且可以把复制的光谱图直接粘贴到其他应用程序的文本文件中,为发表文章或书写报告带来方便。
- 1、下载文档前请自行甄别文档内容的完整性,平台不提供额外的编辑、内容补充、找答案等附加服务。
- 2、"仅部分预览"的文档,不可在线预览部分如存在完整性等问题,可反馈申请退款(可完整预览的文档不适用该条件!)。
- 3、如文档侵犯您的权益,请联系客服反馈,我们会尽快为您处理(人工客服工作时间:9:00-18:30)。
转贴一篇不错的文章:怎样使用 OmniPeek 实现无线监听
原文:/wordpress/html/news/66/index.html
本文的思路来自于的“扫盲贴:关于无线监听”(实在搜索不到这个帖子了,对不起),或者可以参考这个帖子:
/viewthread.php?tid=5980。
本文的实现环境:
Windows XP + SP2 英文版
OmniPeek Personal 4.0
实际上,在有线环境下用 Sniffer 久了,再换到无线环境下,没有了 Sniffer 还真不习惯,我一直在找无线环境下的嗅探工具,刚开始时我用 Ethereal,虽然有种种的优点,但是也不能不否认其严重的缺点:没有好的 GUI 系统、报表系统,没有良好的专家系统,而且没有类似 Sniffer 的 Matrix 功能,直到我找到了 OmniPeek。
关于 OmniPeek 的使用方法,我就不多说了,有班门弄斧的嫌疑,这里只介绍它如何实现无线监听。
实际上实现无线监听,是需要特殊网卡的支持的,如果没有专门的网卡,虽然可以嗅探,但是那是剥离了 802.11 帧信息的,是 Windows NIDS 实现的,意义不大。
关于 NIDS ,我也不明白是怎么回事 >_<,不懂开发,没办法。
根据我自己的理解,就是 Windows 的 NIDS 驱动把 802.11 变成了 Ethernet 2 帧(高手不要笑我)。
而且,普通网卡只能嗅探到本机网卡的通信数据,没有办法捕获到其他设备的通信数据(虽然你可以使用 ARP 欺骗达到目的)。
OmniPeek 所支持的网卡可以在网站上查到
(/support/downloads/drivers),这里列出它所支持的几块无线网卡:
Proxim Orinoco 11a/b/g adapter, model 8480-WD
Cisco adapter, model CB21AG
3Com a/b/g adapter, model 3CRPAG175
Netgear WAG511, version 1
很幸运,我的一个哥们送给了我一块 Cisco AIR-CB21AG-A-K9(1000多呀,真是感谢我的哥们),是被 OmniPeek 所支持的。
要达到无线监听,不仅仅要它支持的网卡,
还需要它专门为这几种网卡定制的驱动程序,也可以在上边的这个地址找到下载链接。
Down 下来之后,开始安装驱动:
1. 打开设备管理器,找到这块网卡,双击它,出现属性对话框,找到 Driver 选项卡,单击“ Update Driver ”按钮:
2. 出现了驱动程序升级向导,不要让 Windows 自己 Update 驱动,选择“No, not this time”
3. 下一步中选择“Install from a list or specific location”,手动来选择驱动程序
4. 然后,不要让 Windows Search 驱动程序,手动安装,然后选择“下一步”
6. Windows 会跳出驱动程序未经签名的警告,不要理它,选择 Continue anyway即可安装成功之后,启动 OmniPeek,在 Monitor 菜单的 Monitor Options 中,找到左边的 Adapter,在右边选中刚才安装的那块网卡,然后确定,初次安装,有可能会出现这个对话框:
这是由于 OmniPeek Personal 版本不支持多个网卡的 Monitor 所导致的,解决的方法也很简单,在刚才的 Monitor 对话框中的 Adapter 选项中选择“None”:
然后再次打开 Monitor 对话框,选择刚才安装的那块网卡,确定之后,就可以了,如果你能看到下图中的 2 个箭头指向的那 2 个图标,恭喜你,已经成功了。
回
复
引
用
收
藏
分
享
评
分
订
阅
TO
P
恩山无线2#
超级
版主
积分
36
21
贡献
7
分
金钱
12
1
nb
发表于 2007-12-20 15:25 | 只看该作者
现在开始监听,单击 OmniPeek 中的 New Capture 按钮:
出来了 Caputer 设置对话框,由于是第一次抓包,并不知道感兴趣的 AP 所在的频段,幸好 OmniPeek 为我们提供了一个 Scan 功能,它可以用来扫描附近所有的 AP 所在的频段,在这里我使用 Scan 来扫描一下:
开始之后,可以看到 OmniPeek 的状态栏中在扫描所有的频段:
稍等一会儿,等到扫描一轮之后,就可以结束了,单击左边的 Wireless –> WLAN,就可以看到扫描出来的 AP:
可以看到箭头标出的 AP 所工作的频段,有 Channel 11,Channel 7,Channel 9,Channel 5,等等,然后可以根据 ESSID 来找到感兴趣的 AP,比如 default (这是我一直偷着上网的 AP),它工作在 Channel 5,现在关闭掉 Capture窗口,然后再次重新进行 Capture,这次可以设置频段了:
然后再次开始捕获数据,可以看到,当前 Channel5 中的数据全部出来了:
呵呵,这么晚了还有人在用 MSN 聊天呀~~~
这些数据有好多都是不太感兴趣的,比如 802.11 的管理帧,可以定义一个过滤器把它们过滤掉。
这里不得不提一下 OmniPeek 的过滤器,它的Advanced 过滤器提供的 And、Or、Not 的确是非常爽的功能,打开左边的Filters ,单击绿色的加号按钮:
用 And 按钮把 802.11 Management、Contorl、Frag 等协议都加进去,然后统统 Not,就可以了:
完成之后,在 Filters 中选中刚才定义的过滤器,然后再开始抓包,这下干净多了:
双击一个数据包,打开看看:
下载 (17.37 KB)
2007-12-20 15:25
呵呵,802.11 数据都在呢。
当然,这个 AP 是没有经过 WEP 或 WPA 加密的,所以可以嗅探到明文数据,(当然,否则我怎么能偷着上网?)如果要嗅探经过 WEP 加密的数据,只有先破解 WEP 密码了,连到 AP 之后再进行 ARP 欺骗,这已经不是本文讨论的范围。