104ArcGIS GeoEvent Extension for Server_Applying Real-Time Analysis
ArcGIS for Server新特性、部署架构及性能优化

注意问题: 增加请求开销 不具备高可用性 只能使用Token验证
基本部署+Web Adaptor
•
Web Adaptor是Esri 针对ArcGIS Server
的代理应用
•
支持IIS、 WebSphere 、 WebLogic 、 Tomcat等Web容器
•
提高第三方Web容器的安全,实现Web
层的安全控制
基本部署(主动+被动)
• 应用场景: • 内部使用或外网使用 可用性要求较高
优势: 包含了HA备份部署 备机的License不需要额外费用
•
注意问题: 依赖于外部的负载均衡 需要保持两个Server完全同步
基本部署(主动+主动)
•
应用场景: 性能要求高 发布地图切片 高性能 依赖于外部负载均衡
-
纯粹的维护版本,只是修复了一些bug
单个集群模式
• 在10.3.1 版本中,作为一个可选项被引入; • 在10.4 版本中,创建新站点或者升级原有站点(除了原站点具有多 个集群)过程默认启用单个集群模式。
单个集群模式
Server 站点
配置目录/ 服务器目录
只读模式
只读模式
GIS Server
小结
1. 单个集群模式 2. 只读模式 3. 更新注册/托管数据库的密码 4. Server对象拦截器(SOIs) 5. 默认 HTTP 和 HTTPS 通信协议 6. 安全脚本 7. 新的安全默认值:地理处理服务和服务器扩展 ……
3. 部署情景
典型部署情景
• 单机部署
- 单机基本部署 - 基本部署+代理 - 基本部署+Web Adapter - 基本部署(主动+被动) - 基本部署(主动+主动)
ArcGIS Enterprise 10.9快速启动指南说明书

GuideTable of ContentsArcGIS Enterprise . . . . . . . . . . . . . . . . . . . . . . . . . . . . . . . . . . . . . . . . 3ArcGIS Enterprise 10.9 quick start guideGetting startedArcGIS Enterprise is a full-featured mapping, analytics and data management platform that runs in the cloud, in virtual environments or on-premises. With ArcGIS Enterprise, you can visualize, interpret, and act upon your location-based data. ArcGIS Enterprise works alongside ArcGIS Online and ArcGIS Pro, and provides the foundation for applications like ArcGIS Survey123, ArcGIS Collector, ArcGIS Insights, and many more. ArcGIS Desktop 10.8.1 must be on a separate machine if connecting to ArcGIS Enterprise 10.9, as the two can not reside on the same machine.An ArcGIS Enterprise base deployment is a foundational setup of ArcGIS Enterprise. It consists of four software components you will need to license, install and configure. See the What's included section for a list of components. You can build off of the ArcGIS Enterprise base deployment by adding capability-based server roles like ArcGIS GeoEvent Server.Prerequisites:•Ensure your infrastructure meets the system requirements for each component. Review the ArcGIS Enterprise system requirements.•Administrative privileges are required for installation.•On Windows, Microsoft .NET Framework 4.5.2 is required for installing the ArcGIS Server .NET Extension Support feature. ArcGIS Web Adaptor for IIS also requires Microsoft .NET Framework 4.5.2 or higher. The Microsoft .NET Framework can be downloaded from Microsoft. It is recommended to use the latest version of .NET Framework 4.x that is available for your operating system. At the time of release of ArcGIS Enterprise 10.9, this Framework 4.8.To get started:•Visit My Esri with privileges to 'take licensing action'. Under My Organizations >Licensing >License Esri Products, select Start to begin the process of obtaining your licenses. Select ArcGIS Enterprise and the version of the software you wish to license and proceed through the steps to generate license files for ArcGIS Server and Portal for ArcGIS, including your server roles, user types and applications, as applicable. If you are licensing a GIS Professional user type, ArcGIS Pro, ArcGIS Drone2Map, or other application that requires License Manager, you will also need ArcGIS License Manager 2021.0 to specify which members can use these applications. See the Portal for ArcGIS Administrator Guide and the License Manager Guide for more information.•Download your license and the ArcGIS Enterprise software components: Portal for ArcGIS, ArcGIS Data Store, ArcGIS Web Adaptor and ArcGIS Server. You can download the components from My Esri. You can also use ArcGIS Enterprise Builder, to make installation easier. For more information on automation tools, visit the ArcGIS Enterprise Functionality Matrix.•ArcGIS Enterprise license files prior to 10.9 will not work with ArcGIS Enterprise 10.9. You must obtain 10.9 license files for ArcGIS Enterprise. If needed, your account's primary maintenance contact can obtain authorization numbers from .Visit the ArcGIS Enterprise page for access to additional resources such as documentation and support.What's includedArcGIS Enterprise10.9 includes the components described below.•ArcGIS Server—The core web services component for making maps and performing analysis. ArcGIS Server can be licensed in a variety of capability-based roles, depending on functionality you want to enable for your deployment, like real-time and big data. ArcGIS Server also has several extensions available for purchase.•Portal for ArcGIS—Allows you to share maps, applications, and other geographic information with other people in your organization.•Portal for ArcGIS Web Styles—Provides the complete set of 3D symbology for use in ArcGIS Enterprise portal’s Scene Viewer. It is to be applied on top of the Portal for ArcGIS setup.•ArcGIS Data Store—Provides data storage for hosted data in your deployment.•ArcGIS Web Adaptor—Allows you to integrate your ArcGIS Server and Portal for ArcGIS with your existing web server and your organization's security mechanisms.•ArcGIS License Manager2021.0(Windows and Linux)—The version required to run ArcGIS 10.9 with ArcGIS Pro or ArcGIS Drone2Map licenses. It also supports all other ArcGIS 10.x concurrent use releases.•Database Server (Workgroup)—Installation for SQL Server Express instance to store geodatabases. This component is only available with ArcGIS Enterprise Workgroup.ArcGIS Server functionality is provided through server licensing roles. These server licensing roles provide the following capabilities to an ArcGIS Enterprise deployment:•ArcGIS GIS Server—Provides fundamental mapping, analytics, and data management capabilities to your ArcGIS Enterprise deployment. You use ArcGIS GIS Server to publish services, to host layers, and to provide Living Atlas of the World content to either connected or disconnected deployments. ArcGIS GIS Server supports OGC web services and custom geoprocessing models. It's also the licensing role needed to deploy a hosting server in your base ArcGIS Enterprise deployment. (included as part of ArcGIS Enterprise).•ArcGIS Notebook Server—Hosts Python notebooks which provide a versatile web-based interface for powerful geospatial data analysis integrated with ArcGIS Enterprise. Notebooks can perform analysis, automate workflows, and immediately visualize results in a geographic context. (optional, licensed separately).•ArcGIS GeoEvent Server—Powers real-time, event-based data streams that you can use in your ArcGIS Enterprise deployment. (optional, licensed separately).•ArcGIS GeoAnalytics Server—Is for big data processing and analysis capability of ArcGIS Enterprise. It provides a distributed computing framework that powers a collection of analysis tools for analyzing large volumes of data. Through aggregation, regression, detection, clustering, and more, you can visualize, understand, and act upon your big data. GeoAnalytics Server allows you to gain insights that may otherwise be hidden in your data, such as patterns, trends, and anomalies. (optional, licensed separately).•ArcGIS Image Server—Provides tools and resources to host, process, analyze, and explore massive collections of imagery, rasters, and remotely sensed data. (optional, licensed separately).•ArcGIS Mission Server—Facilitates communication between ArcGIS Mission Manager and ArcGIS Mission Responder, providing the processing and machine-language translation necessary for the components of ArcGIS Mission. (optional, licensed separately)•ArcGIS Workflow Manager Server—A scalable workflow management system that automates and simplifies many aspects of performing and managing GIS and non-GIS work in your organization. (optional, licensed separately)•ArcGIS Workflow Manager Web App—An application for creating and executing web-based workflows. This extension requires a user type extension license and the ArcGIS Workflow Manager Server capability. Deployment tools:•ArcGIS Enterprise Builder—Provides a simple installation and configuration experience for a base ArcGIS Enterprise deployment on a single machine.•ArcGIS Enterprise Cloud Builder for Amazon Web Services—Helps deploy ArcGIS Enterprise and all its capabilities on Amazon Web Services. It provides both a graphical wizard-driven user interface, as well as a command-line user interface for scripting. Options include the base ArcGIS Enterprise deployment, as well as working with the GIS Server, Image Server, GeoEvent Server, GeoAnalytics Server, Notebook Server (Ubuntu only), and Mission Server features.•ArcGIS Enterprise Cloud Builder for Microsoft Azure—Helps deploy ArcGIS Enterprise and all its capabilities on Microsoft Azure. Options include the base ArcGIS Enterprise deployment, as well as working with the GIS Server, Image Server, GeoEvent Server, GeoAnalytics Server, and Notebook Server features.•Chef—software framework to automation installation and configuration of ArcGIS Enterprise. For more information, visit the Chef landing page•PowerShell—Esri offers tools to automate your ArcGIS Enterprise deployment using PowerShell Desired State Configuration (DSC). You can use the PowerShell DSC for ArcGIS module to automate the installation, uninstallation, and upgrade of an ArcGIS Enterprise deployment, as well as incremental software additions to a deployment already installed using the module. PowerShell DSC for ArcGIS contains sample JSON files, to which you add your specific information and parameters before running in the PowerShell console. Learn more and get started at the PowerShell DSC for ArcGIS repository on GitHub.Monitoring tools:ArcGIS Monitor—Provides actionable insights into system usage, performance, and overall health of your ArcGIS implementation. ArcGIS Monitor is compatible with the same release version of ArcGIS, as well as earlier versions that are still supported (optional, licensed separately).Additional licensed extensions for ArcGIS GIS Server are available as separate downloads:•ArcGIS Data Interoperability—Enables ArcGIS to read and process over 115 GIS and CAD formats supported by Safe Software's FME.•ArcGIS Data Reviewer—Provides tools to manage quality control and makes data quality a component of your overall data management strategy.•ArcGIS Workflow Manager (Classic) Server—Provides a framework to organize and publish web services of project workflows configured using ArcGIS Workflow Manager (Classic) DesktopFor more information on extensions, visit ArcGIS GIS Server capabilities and extensions.Developer tools:•ArcGIS Enterprise SDK—Libraries and documentation are available for Java and .NET developers to extend ArcGIS Server map services implementing Server Object Extensions (SOEs) and Server Object Interceptors (SOI) published from ArcGIS Pro.•ArcObjects SDK for the Microsoft .NET Framework—Documentation and sample code are provided for Microsoft .NET Framework developers to customize and extend ArcGIS Server.•ArcObjects SDK for Java—Documentation, tools, and sample code are provided for Java Platform developers to customize and extend ArcGIS Server.Data and DBMS connectivity:•DBMS Support Files—Client libraries and databases to directly connect to geodatabases.•ArcGIS Coordinate Systems Data—Contains the data files required for the GEOCON transformation method and vertical transformation files for the United States (VERTCON and GEOID12B) and the world (EGM2008).•ArcGIS Raster Data—Contains a compressed global elevation model primarily required by users of Ortho Mapping workflows who work offline and don't have access to better elevation data required for orthorectification of satellite imagery or to initiate some photogrammetric workflows.•ArcGIS Notebook Server samples data—Sample data used by Esri sample notebooks on ArcGIS Notebook Server.The following are also available with ArcGIS Enterprise and can be found under the Downloads>Products page:•ArcGIS Location Referencing Event Editor Web App—Event Editor is a map-centric web app that supports linear referenced event data editing.•ArcGIS Insights—Access this app through ArcGIS Enterprise to perform iterative and exploratory data analysis on ArcGIS web services, Excel spreadsheets, and data stored in databases. ArcGIS Insights requires additional licensing.•Esri Boundary Layers—Esri provides layers containing boundary and demographic information for different parts of the world. These layers—such as state, province, census area, and ZIP Code boundaries—contain related, local information that portal members can use in their maps, scenes, apps, feature analysis tools, and ArcGIS Insights. Consider publishing these layers in ArcGIS Enterprise if you have ArcGIS Insights installed or if your ArcGIS Enterprise deployment does not have access to ArcGIS Living Atlas of the World content from ArcGIS Online.Language packs (coming soon)The following ArcGIS components have localized setups. Language packs are not available separately.•ArcGIS Server•Portal for ArcGIS•ArcGIS Web Adaptor (IIS)•ArcGIS Web Adaptor (Java Platform)•ArcGIS Data Store•ArcGIS GeoEvent Server•ArcGIS Notebook Server•ArcGIS Mission Server•ArcGIS Data Reviewer•ArcGIS Workflow Manager (Classic) Server extensionLanguage packs for the Portal for ArcGIS help,Data Store help, Mission Server help, and Notebook Server help can be used to view documentation in additional languages.。
智慧树答案地图学(临沂大学)知到课后答案章节测试2022年

第一章1.国际上三大通用语言分别是:()。
答案:绘画;地图;音乐2.地图文化的特性包括下列哪项内容:()。
答案:具有空间性特征;具有科学性特征;具有整体性和渗透性特征;具有时间性特征;具有大众化特征3.魏、晋时期的杰出地图学家()提出了“制图六体”的概念。
答案:裴秀4.古希腊地理学家()撰写了《地理学指南》,成为西方古代地图编制理论的代表。
答案:托勒密5.唐代贾耽编制了《海内华夷图》,采用“计里画方”的方法。
()答案:对6.沈括被后人称为中国地图学之父。
()答案:错7.清朝末期,我国的绘图技术出现了由“计里画方”制图法向“现代的经纬网”制图法的转变。
()答案:对8.地图文化在传承中是连续性,不存在非连续性。
()答案:错9.中世纪出现了“T-O图”,又称为“寰宇图”,是西方地图学史上的一个漫长而黑暗的年代。
()答案:对10.1973年,在()马王堆汉墓中出土了三幅绘在帛上的彩色地图,也就是绘在丝绸上地图,这三幅地图分别是地形图、驻军图和城邑图。
答案:湖南长沙11.唐代著名的政治家和地理学家(),最具有代表性的是《海内华夷图》。
答案:贾耽第二章1.地图上表示各种信息是通过特殊的地图符号系统来实现的。
()答案:错2.地图按内容分类,可分为()和专题地图。
答案:普通地图3.比例尺、地图投影、地图定向构成了地图的数学法则。
()答案:对4.地图按使用方式来分类,可以分为:()答案:挂图;野外用图;桌面用图5.数学要素是保证地图具有可量性、可比性的基础。
()答案:对6.以下要素属于社会经济要素的是:()答案:行政中心;居民地;交通运输网7.我国1:100万地形图的是按()来进行分幅的。
答案:经差6度,纬差4度8.地图是一种形象-符号模型,它可以表示各种专题现象的分布规律、时空差异和变化特征。
()答案:对9.矩形分幅常用自然序数编号法来进行编号。
()答案:对10.下面哪门学科与地图学有联系:()答案:数学;地理信息系统;计算机;测量学第三章1.地球的长半径是赤道。
ESRI ArcGIS 10.x新版本重要新功能、新特性汇总,对工作带来的意义

ESRI ArcGIS 10.x新版本重要新功能、新特性汇总一、切片服务性能全面提升(1)功能简介在arcgis 10.1版本中新增Image services缓存功能,在arcgis 10.2版本中新增了CachingController服务,提高了多个切片任务同时提交的稳定性。
在ArcGIS Server 服务列表的的System文件夹预先配置了一个CachingControllers服务,这个服务管理CachingTools正在处理的所有的任务。
当多个服务发布人员同时提交缓存作业时,这个服务可以防止服务器负担过重在arcgis 10.3版本中新增一种紧凑切片存储格式(V.2)2),用于提升切片服务使用性能。
这种新格式减少了切片目录中创建的文件数量。
通过在.bundle 文件中包含切片索引信息(.bundlx 文件)来实现。
(2)对实际工作的影响和意义现有的所有图形数据(矢量数据、影像数据)都是未做切片的,导致数据调用速度一直较慢。
新版本中加强了了生产切片的效率以及切片的访问速度,通过该技术进行数据切片,能够大幅提升所有系统对图形数据的调用速度,从而增加系统的可用性,并且降低服务器的压力。
二、增强对OGC规范的支持(1)功能简介在arcgis 10.1版本中新增OGC的WPS (Web Processing Service)和WMTS (Web Map Tile Service)规范的支持,WPS定义了如何在Web上提供地理空间处理服务的规范,可以和ArcGIS Server地理处理服务结合在一起工作。
WMTS定义了使用缓存图片提供数字地图服务的规范,通过ArcGIS Server缓存地图服务自动提供。
在arcgis 10.3版本中新增OGC规范的WFS 2.0,WMS高程,OGC WMS 细粒度的操作支持。
支持WFS 2.0使用ArcGIS for Server 创建或者托管的WFS 服务支持WFS 2.0 规范。
【ArcGIS软件与应用】第1章 ArcGIS软件介绍

ESRI官方网站( :
ESRI
/products#alpha -list)(2016年9 月27日查询)上公 布的产品。
ArcGIS Platform AppStudio for ArcGIS ArcGIS 3D Analyst ArcGIS API for JavaScript ArcGIS Data Interoperability ArcGIS Data Reviewer ArcGIS Defense Solutions ArcGIS Earth ArcGIS Editor for OpenStreetMap ArcGIS Engine ArcGIS Explorer Desktop ArcGIS for AutoCAD ArcGIS for Aviation: Airports ArcGIS for Aviation: Charting ArcGIS for Defense ArcGIS for Desktop ArcGIS for Desktop Extensions ArcGIS for Developers ArcGIS for Electric Utilities ArcGIS for Emergency Management ArcGIS for Gas Utilities ArcGIS for INSPIRE ArcGIS for Local Government ArcGIS for Maritime: Bathymetry ArcGIS for Maritime: Charting ArcGIS for Parks & Gardens ArcGIS for Personal Use ArcGIS for Server ArcGIS for Server Extensions ArcGIS for State Government
ArcGIS 10.4.1 安装指南说明书

ArcGIS 10.4.1Installation GuideArcGIS for DesktopArcGIS for ServerPortal for ArcGISArcGIS for Desktop InstallationArcGIS for Desktop is available as Basic, Standard, or Advanced and all the downloads from My Esri. To install a component, sign into My Esri and click the download link on the site. This link will download a self-extracting executable file for installation. After the download completes, you have the option of starting the setup immediately or running it manually. To run the setup manually, browse to the downloaded folder containing the setup and run setup.exe.How to prepare to install ArcGIS for Desktop1.Verify that your computer meets the system requirements.2.Navigate to the contents of the disc in the CD-ROM and double-click on DesktopSetup/Icon to extract to a folder of your choice or let it default to My Documents. How to install ArcGIS for Desktop3.One the extraction is complete to allow Auto-Run of ArcGIS for Desktop setup.exefiles to installation/run.4.Accept the License Agreement option to continue5.The setup program provides an option for a Complete installation, which installs theapplications, style files, templates, and optionally licensed extensions. The Custominstallation option allows you to choose specific installation6.The installation location will be identified in this dialog box or in the custom dialog box,if a custom option was selected. An upgrade will not allow you to select or change the installation location. The parent location of an upgrade installation is retained and the software is installed to <parent folder>\Desktop10.3. For example, if ArcGIS 10.2 for Desktop was installed to D:\MyGIS\ArcGIS\Desktop10.2, the 10.3.1 installation folder will be D:\MyGIS\ArcGIS\Desktop10.3. If you need to install to a different location, manually remove your existing installation before starting the 10.3.1 installation.7.If Python is selected for installation, you must choose the installation location or selectthe default. The previous Python installation location will also be retained during the upgrade. See Python requirements for more information8.When the setup is complete the ArcGIS Administrator Wizard is displayed, allowing you toconfigure a Concurrent or Single Use authorization. Refer to The ArcGIS Administrator for detailsUpon opening the Software Authorization Wizard, you will be provided with three authorization options:1.I have installed my software and need to authorize it.Select this option to proceed with the authorization process by entering the authorization code you received from Esri Customer Service.2.I have already authorized the software and need to authorize additional extensions. This option is used if you have already authorized the core ArcGIS for Desktop and now want to authorize any extensions. Authorizing additional extensions acquired after authorizing core ArcGIS for Desktop can be done by starting ArcGIS Administrator from Start > All Programs > ArcGIS. Once in the ArcGIS Administrator utility, select the Desktop folder and select Authorize Now.3.I have received an authorization file from Esri and am now ready to finish theauthorization process.Select this option if you have a provisioning file created from the Esri Customer Care portal. Select the appropriate option and click Next.Here you have the options to select online or offline methods of authorization, or authorize your Single Use product from a local license server.4.Provide your contact information and details in the next two dialog boxes. If you are usinga provisioning file (online authorization only), this information will be automaticallypopulated from the file.5.Enter your ArcGIS for Desktop authorization code starting with ESU or EVA, followed bynine digits.6.Next, you will have the option to authorize any extensions.If you choose to authorize any extensions, the Software Authorization Wizard will prompt you to enter the authorization codes for the extensions. If you choose not to authorize, the Software Authorization Wizard provides the option to evaluate any extension in the next step.OptionalIn this step, you may choose to evaluate any extensions for which you have not provided an authorization code in the previous step.Use the online authorization and click Next to connect to the Esri Activation Site. Upon completion, you will receive a message that authorization is successful and the applications will be ready for use.Offline authorizationThe remaining steps are applicable only to offline authorization.1.You will be requested to save your authorization information to disk as a file namedauthorize.txt. You can then upload the authorization text file or send an email with the file attached.2.If uploading the text file, an authorization response file will be generated to download. When sending an email with the text file attached, you will receive a return email from Esri with the authorization response file.3.After receiving the response file, start ArcGIS Administrator from Start > All Programs> ArcGIS to complete the authorization process.4.In the ArcGIS Administrator, click the Desktop folder, select the appropriate Single Useproduct, and click Authorize Now.5.Select I have received an authorization file from Esri and browse to the (*.respc) file.Click Next so the applications will be authorized and ready for use.Additional information on DesktopSingle-use licenseFor single use, authorization is required for each machine. Once the ArcGIS for Desktop installation is complete, you will be provided with the opportunity to authorize your single-use product. You will need the authorization codes sent from Esri Customer Service to the contact email address referenced in the sales order during the authorization process.This email includes the authorization codes issued for each license in the order. In addition to finding the information in the email, if you already have an Esri Global Account, you can log in to the Esri Customer Care site, click on Authorization & Provisioning, then click on a product name to obtain its authorization code. If you do not yet have an Esri Global Account, you can create one at My Esri.You will receive an email confirmation and have access to Authorization & Provisioning on the Customer Care site. For ArcGIS for Desktop Single Use, the authorization code starts with the letters ESU or EVA, followed by nine numeric digits, for example, ESU123456789. Follow these steps to complete the Single Use product authorization.(Contact information can be found at /about-esri/contact. )Once the Desktop has been installed then you will need to open ArcGIS Administrator (Start---All Programs---ArcGIS).1.Select one of the three Single Use products.2.Click Authorize Now to launch the Software Authorization Wizard. The wizard will walk youthrough the online or offline authorization process.Online authorizationWith online authorization, the Software Authorization Wizard connects directly to the Esri authorization site using secure sockets layer (SSL) from the deployed machine. Online authorization can be used if the machine on which the software has been installed is connected to the Internet and can connect to https://. Online authorization can be performed by directly entering the authorization code in the Software Authorization by creating a provisioning file (.prvc) at My Esri. Offline authorizationOffline authorization is used if the machine where ArcGIS for Desktop is installed does not have Internet connectivity. In this case, the authorization process creates a text file which can be uploaded to the Esri authorization server from an Internet-connected machine or can be sent in an email to Esri Customer Service to obtain an authorization response file (.respc). This authorization response file can be copied to the machine where ArcGIS for Desktop is installed and used to authorize ArcGIS for Desktop without a direct Internet connection.ArcGIS for Server Installation1.The setup program should launch automatically after the download has completed.If the setup program does not launch automatically, browse to the location of thedownloaded setup files and double-click Setup.exe.2.During the installation, read the license agreement and accept it, or exit if you do notagree with the terms.3.The setup program displays the features that will be installed, click Next4.If Python 2.7.10 or Numerical Python 1.9.2 is not installed on your machine, thesetup automatically installs them for you. The default installation location isC:\Python27\.5.Specify the account to be used by ArcGIS Server to perform a variety of functions insupport of the geographic information system (GIS) Server. The first option Specify the account name and password6.If you enter a domain account, it must already exist on the domain and must beentered using the following format:From here ArcGIS server will be installed following the directions on the screen.After the installation completes, the Software Authorization Wizard is launched. To launch Software Authorization Wizard at a later stage Click Start > Program Files > ArcGIS > Software Authorization.To successfully authorize your ArcGIS for Server installation, do the following:Choose your authorization optionThere are three authorization options:1. I have installed my software and need to authorize it: Select this option if you do notalready have an authorization file. There are two methods to provide yourauthorization information:2.I have already authorized the software and need to authorize additional options orextensions: Select this option if you've already authorized ArcGIS for Server for use, but you want to authorize additional options or extensions (if available). There aretwo methods to provide your authorization information:3.I have received an authorization file from Esri and am now ready to finish theregistration process: Select this option if you've already received your authorization file from Esri Customer Service. If you select this option, you can either browse tothe location of the file (if you received the file by email) or manually enter theauthorization information.Authorization Method:Authorize with Esri now using the Internet enables you to receive the authorization fileimmediately. It requires an Internet connection.Authorize at ESRI’s website or by email to receive your authorization file: Methods *********************************************************************************************************************.After completing authorization, ArcGIS Server Manager should already be open. You can now log in to Manager and create a new site. The URL to open Manager in abrowser is :6080/arcgis/manager1.Click Create New Site2.To create a new site, you are required to define a user name and password asthe primary site administrator. The default name for the account is siteadminbut you can enter a different name if you want.3.Type the paths where you want the default server directories and configurationstore to be created. These folders hold information essential to your site. If you'llhave multiple machines in your site, enter UNC paths to two shared folders thatyou've previously prepared. This will allow all machines in the site to see thedirectories and click Next.4.Examine the details about the site you're going to create. When you're ready tocreate the site, click Finish.About the ArcGIS Web AdaptorArcGIS Web Adaptor allows ArcGIS for Server to integrate with your existing web server. It is compatible with IIS and Java EE servers such as WebSphere and WebLogic.Benefits of using Web Adaptor:•Allows you to integrate ArcGIS for Server with your organization's existing web server. By including a web server in your site, you gain the ability to host webapplications that use your GIS services.•Allows you to provide a single endpoint that distributes incoming requests to the GIS servers in your site.•Allows you to expose your GIS server through your organization's standard website and port. Use the Web Adaptor if you don't want users to see the default port 6080or the default site name arcgis.•Allows you to block the ArcGIS Server Administrator Directory and ArcGIS Server Manager from the view of external users.•Allows you to block ArcGIS for Desktop users from establishing administrative or publisher connections to ArcGIS Server.•Allows you to use your organization's identity store and security policies at the web-tier level.Configuring Web Adaptor1.Web Adaptor can be accessible by opening the URLhttp://gisserver.domain/arcgis/webadaptor, choose ArcGIS for Server and then Next2.Enter fully qualified domain name of the computer together with the port (6443) andthen enter ArcGIS server siteadmin credentials and then click ConfigurePortal for ArcGIS Installation1.Open the disk contents to view files and ensure that you run setup withadministrative privileges.2.Click Next3.Accept license agreement and click Next4.Leave default settings on next dialog and click Next on two following dialogs (unless you want tochange location where the content will be saved5.Enter username of the user to start up portal and enter password and passwordconfirmation again and thereafter click Next6.Click Next on the Portal for ArcGIS Configuration dialog and thereafter install to installthe application.7.Click installAuthorization:When the installation completes, click Finish. The Software Authorization Wizard dialog box displays.1. If the authorization file has been received from the customer care you can choose “Ihave received an authorization file from ESRI and now ready to finish the authorization process”, click Browse, select the file and click Next to complete the process.2.Authorize with Esri now using the Internet enables you to receive the authorization fileimmediately. It requires an Internet connection.3.Authorize at ESRI’s website or by email to receive your authorization file: Methods*********************************************************************************************************************.Create a single machine portalAfter the Portal for ArcGIS installation completes, you are prompted to create a new portal or join an existing one.To create a portal, follow these steps.1. Click Create New Portal.2. On the Create a New Portal page, specify the first name, last name, user name,password, email, and identity question and answer of the initial administratoraccount. The initial administrator account is required to register your portal withArcGIS Web Adaptor.Benefits of the Web AdaptorThe Web Adaptor provides the following benefits:1.Allows you to integrate Portal for ArcGIS with your organization's existing web server. Byincluding a web server in your site, you gain the ability to host web applications that use your GIS services.2.Allows you to use your organization's identity store and security policies at the web-tierlevel. For example, if you're using IIS, you can use Integrated Windows Authentication to restrict who enters the portal. You can also use Public Key Infrastructure (PKI) or anyother identity store for which the web server has built-in or extensible support. Thisallows you to provide a single sign-on or other custom authentication experience when logging in to use services, web applications, and Portal for ArcGIS.3.Allows you to expose Portal for ArcGIS through a site name other than the default arcgis.4.Allows you to expose Portal for ArcGIS through port 80 or 443Configuring Web AdaptorWeb Adaptor can be accessible by opening the URL http://gisserver.domain/portal/webadaptor choose Portal for ArcGIS and then NextEnter fully qualified domain name of the computer together with the port (7443) and then enter ArcGIS server siteadmin credentials and then click ConfigureFor any Technical queries during the installation:Email:****************************Phone:+27 11 238 6300Fax:+27 11 238 6310Address:International Business Gateway,Cnr New Road & 6th Road,MidrandWebsite:ArcGIS for DesktopArcGIS for ServerPortal for ArcGIS。
ArcGIS Server服务扩展——Java篇_秦桐
部署
调试
• • • •
JavaConfigTool,启用Interop logging 通过Server日志调试 建议只保留一个服务 完整帮助
测试
• REST:使用Service Directory • SOAP:使用Proxies
调用SOEs
调用SOE
客户端 设计 客户端 实现
• 在Tasks基础上搭建模型 • 尽量重用API中现有对象 • 不要盲目暴露JSON对象
空的Server Context
空的Server Context SOE是否 合适 空地图
• ADF程序可以处理与地图图层无关的AO 业务 • 即使对于ADF程序也不适合
• SOE数据紧密 • 建议自定义GP工具
• 建议用Geoprocessing工具
SOE对AO集成度
大量封 装AO 选择性 封装AO
ArcGIS Server服务扩展 ——Java篇
Esri中国(北京)有限公司 秦桐
SOEs介绍
什么是SOEs
自定义 功能 访问方 式
• 同SOC生命周期 • 通过ArcObjects访问地图和数据 • 与存储过程类似
• SOAP(9.3.1+) • REST(10+) • DCOM(9-10)
• Java(.Net)及AO开发能力 • 项目时间安排
建立SOEs
创建SOEs步骤
开发SOE 设计SOE 创建控制台 程序
• IMapServerDataAccess 访问地图,图层数据
• 需要的对象和方法 • SOE&REST参数和返回值
• 设计→实现 • 易于调试
创建SOE
SOE for SOAP
ArcGISforServer10.1安装授权配置(完整版)

ArcGISforServer10.1安装授权配置(完整版)1.ArcGIS10.1 for Server windows下安装ESRI的ArcGIS 10.1 for Server安装与配置安装ArcGIS Server 10.1 操作系统必须为64位。
可以使用10.1UninstallUtility来卸载以前版本的ESRI系列的软件,以前版本的软件必须要完全卸载。
双击ESRI.exe文件进入ArcGIS软件安装界面。
在介质运行界面上,单击GIS 服务安装程序链接启动ArcGIS Server 10.1 - GIS 服务安装程序。
ArcGIS 10.1 for Server(win7)安装详细流程:1、安装ArcGISServer加载光盘后运行可以看见下面的界面我们选择安装ArcGIS for Server,点击ArcGIS forServer后面的的“Setup”在弹出的窗口中点击Next勾选I accept the license agreement点击Change可以修改安装路径,点击next继续点击Browse可以选择Python的安装目录,选择好后点击Next 继续创建server账户和密码,设置完毕后点击Next继续如果有之前安装时候创建的账户配置文件,可以勾选下面的那个选项。
提示是否导出账号信息。
如无需要,可以选择不导出。
点击Next继续点击Install即可开始安装耐心等待安装结束点击Finish完成安装2、授权选择server,手动输入101,点所有(all)生成的复制全部保存为server101.ecp文件。
选择相应的授权方式进行授权,选择生成的ecp文件完成授权。
授权完成,点击完成,结束授权3、创建站点安装完成后,会自动弹出Manager页面,这里我们选择创建站点。
加入现有站点是用来搭建集群的,以后会介绍。
输入主站点管理员账户点击”下一步”。
很多人到这一步会有一个疑问:这个账户和刚刚安装ArcGIS Server步骤中创建的账户有关系吗?分别用来控制什么?首先在上一节中我们创建的ArcGIS Server 账户,是为ArcGIS Server创建的操作系统账户(安装完你可以切换操作系统账户看一下,是不是多了一个ArcGIS Server),该账户实际上用来管理ArcGIS Server的操作系统进程(启动、停止ArcGIS Server服务);而我们此时创建的站点账户,主要是为了管理站点中的各种服务形式的GIS 资源(各种类型服务的发布、启动、停止、删除;站点安全;集群管理等等)。
GeoEvent
不同信号源通过Web GIS轻松集成
•
• •
灵活融合各种Web资源
强劲的云端计算,实时处理数据 基于Web的物联信息共享
可视化
空间分析
共享
Hyperlinks
灵活融合展示
实时高速分析
信息共享
应用场景
GeoEvent的应用场景
•
物联信息汇总、处理、转发
规则
•
•
实时处理
可扩展性
GeoEvent Processor
WebSocket
XMPP
emails)
-
输出实时流数据
•
输出连接器
•
•
用户可轻松输出结果数据
-支持多种输出方式
In-Vehicle GPS Defense Formats
ArcGIS for Server
Social Media
GeoEvent Processor
Input Outpu t
Send to a Socket Send a Message to JMS Send a Message to AMQP Append to Files Write to Hadoop
Buffer Ellipse Range Fan Visibility Query Report
GeoTagger
Field Mapper Track Gap Detector Incident Detector
Intersector
Projector Simplifier Symmetric Difference Union Creator
Feature Service File Http SMS SMTP TCP UDP
ArcGIS 10.1 for Server 地图缓存高级技术_张赛
地图质量
切片所占磁盘空间
如何设置各项缓存属性以满足用户需求的情况下寻求一个效果的平衡点?
2012Esri中国开发者大会
MSD vs MXD
• 仅适用于大比例尺优先使用MSD格式发布服务
- 使用地图服务发布(Map Service Publishing)工具条分析所发布的MSD地图 - ArcGIS 10.1 仅支持 MSD 方式发布地图服务
MXD VS MSD
• 优先使用MSD格式发布服务
- 使用地图服务发布(Map Service Publishing)工具条分析所发布的MSD地图
- ArcGIS 10.1 仅支持 MSD 方式发布地图服务
• MSD相较于MXD使用了更优化的绘图引擎
- 绘制效果更好,出图速度更快
- 生成缓存的速度更快
ArcGIS 10.1 for Server 地图 缓存高级技术
客户及合作伙伴支持部 张赛
内容摘要
深入浅出 之 地图缓存概念
浅尝辄止 之 缓存制作流程概览 各显神通 之 地图缓存策略 查漏拾遗 之 地图缓存若干补充 先睹为快 之 ArcGIS 10.1 for Server 缓存新特性
2012Esri中国开发者大会
簇:4K
簇:2K
2012Esri中国开发者大会
地图缓存格式(III) – 紧凑型缓存格式
• 紧凑、连续的文件流(bundle) • 一个bundle最多存储128*128 切片,即 16384 切片
conf.cdi:切片方案文件 conf.xml:存储地图范围信息,在 ArcMap 中以栅格格式打开
地图缓存格式(VI)
• 松散型 vs 紧凑型
ArcGIS Server 服务类型总体介绍

ArcGIS Server 服务类型1、要素服务可用来通过Internet 提供要素,并提供显示要素时所要使用的符号系统。
之后,客户端可执行查询操作以获取要素,并执行相应的编辑操作。
要素服务提供了可用于提高客户端编辑体验的模板。
此外,要素服务也可以对关系类和非空间表中的数据进行查询和编辑。
要创建要素服务,先创建地图文档,发布启用了要素访问的地图文档,然后使用Web 和ArcGIS for Desktop 客户端访问该服务。
2、地理编码是指将地址或地名等位置描述转换为地图上某个位置的过程。
要在客户端上使用地理编码服务,您需要首先在ArcGIS for Desktop 中创建一个地址定位器,然后将其作为地理编码服务发布到ArcGIS Server。
发布此服务后,即可创建使用地理编码服务的客户端应用程序,以显示地图上的地址位置。
3、地理数据服务允许您使用ArcGIS for Server 通过局域网(LAN) 或Internet 访问地理数据库。
该服务可以执行地理数据库复制操作、通过数据提取创建副本并在地理数据库中执行查询。
可以为ArcSDE 地理数据库和文件地理数据库添加地理数据服务。
发布地理数据服务时,您需要引用一个要发布为服务的文件地理数据库或ArcSDE 企业地理数据库。
要将文件地理数据库作为地理数据服务发布,ArcGIS Server 帐户必须具有访问地理数据库的权限。
要将ArcSDE 企业地理数据库作为地理数据服务发布,ArcGIS Server 帐户必须具有访问地理数据库的权限,以及用于连接到地理数据库的ArcSDE 连接文件。
4、GeoEvent Processor几乎可以连接任意类型的实时流数据,包括车载GPS设备、移动设备、环境监控设备以及社交媒体数据,用户可以使用它对接入的流数据进行各种实时过滤、处理或分析。
5、几何服务用于辅助应用程序执行各种几何计算,如缓冲区、简化、面积和长度计算以及投影。
John Deere JDLink数据API与Esri GeoEvent Server连接说明书
Connecting to John DeereJDLink Machine Data APIUsing Esri GeoEvent ServerMay 2019Table of ContentsIntroduction (2)ArcGIS GeoEvent Server (2)Assumptions and Limitations to this Approach (2)Create An Application Account on MyJohnDeer (3)Create an Account (skip if you already have one) (3)Create an Application on (4)Setup your Application Authentication on (6)Configure GeoEvent (10)Create GeoEvent Connector (10)Create an OAuth 1 Input (12)Using the Input (16)IntroductionThis document provides instructions for consuming data from the John Deere data APIs using the Esri ArcGIS GeoEvent Server application.The instructions in this document were created using the John Deere reference s below.-https:///#!help&doc=.%2Fgetstarted%2FHELPguides.htm&anchor=-https:///#!help&doc=.%2Ffaq%2FHELPFAQMJDPostman.htm&anchor= ArcGIS GeoEvent ServerArcGIS GeoEvent Server extends the capabilities of your enterprise GIS with support for Real-Time GIS. GeoEvent Server enables real-time data streaming and analytics in your everyday GIS applications, workflows, and analyses. Use GeoEvent Server to:•Extend existing GIS data and IT infrastructure with support for real-time event processing.•Incorporate data received from real-time events into your ArcGIS Enterprise workflows.•Perform continuous processing and analysis on streaming data as it is received in real-time.•Store large volumes of data from real-time observations in the spatiotemporal big data store.•Visualize large volumes of real-time observations using dynamic on-the-fly data aggregations.•Notify those who need to know about patterns of interest with updates and alerts in real-time.•Produce new streams of data that can be leveraged throughout the ArcGIS platform. Commercial organizations, transportation managers, defense and intelligence analysts – anyone with a need to leverage streaming data – can use GeoEvent Server to receive, analyze, and produce streaming data from a variety of sources including mobile devices, in-vehicle GPS devices, sensor networks, online social media, RFID tags, environmental monitors, and more.Assumptions and Limitations to this ApproachThe intended audience for this tutorial is those who have worked with GeoEvent Server. If you have not used GeoEvent Server before, it is recommended you start with the Introduction to GeoEvent Se rver tutorial available, along with other tutorials, on the ArcGIS GeoEvent Server Gallery. The introduction tutorial provides a foundation for the concepts highlighted below.This document was developed against ArcGIS GeoEvent Server version 10.7.NOTE: There is a limitation in the John Deere API that only allows you to access 100 equipment records at a time via Pages. The page is added to the end of the URL that you request data from. If you have more than 100 pieces of equipment you will need to create a new GeoEvent Input for each set of 100 equipment records, where each input requests a batch of 100 equipment records. For example: -Input 1: Equipment records 1-100 https:///aemp/Fleet/1-Input 2: Equipment records 101-200 https:///aemp/Fleet/2-Input 3: Equipment records 201-300 https:///aemp/Fleet/3-…Create An Application Account on MyJohnDeerCreate an Account (skip if you already have one)1.If you do not have a MyJohnDeere account, create one here.https:///wps/portal/myjd/registration?requestFlow=myjdlogina.Fill in both pages of the registration form, and then click the yellow "Submit" button.2.Check the e-mail account you used when registering.a.You will have a new e-mail from **************************.b.Click the yellow Validate Profile button in this e-mail.3.The My John Deere sign-in form will open again, in a new window with your new usernamealready entered in.a.Enter in your password and log in to your new account.4.Click the yellow Continue Validation button.a.Problems? See the account help page.5.Log into Operations Center and create an organization.6.Open a browser and navigate to https://7.Accept the terms and conditions to confirm your Deere Developer account.Create an Application on 1.Open a browser and navigate to https:// and sign in.2.Click on the down arrow next to your avatar in the top navigation pane and select Applicationsfrom the drop-down menu.3.Click on the Add Application button.4.Enter your application information.a.At minimum, you must fill out an App Name and Version ID.b.The App Name field can be anything that makes sense to you.i.Please use a name that describes your company and/or product.ii.Do not use names like "test" or "test app".c.The Version ID field can be anything that makes sense to you.i.It does not need to be any specific format.d.While Description isn't required, you should add one anywaye.Click the Finish button in the bottom right corner of the window.5.Get some coffee.a.Most of the time, a newly created application is ready to use within 5 - 10 minutes.Setup your Application Authentication on 1.Open a browser and navigate to https:// and sign in.2.Click on the down arrow next to your avatar in the top navigation pane and select Applicationsfrom the drop-down menu.3.Select your application from the list of applications by clicking on its title.4.Select Test Client from the menu list on the left-hand side of the screen.5.Click the Setup buttona.Your OAuth 1 Consumer Key is equal to the App ID listed here.b.Your OAuth 1 Consumer Secret is equal to the Shared Secret listed here.c.Copy both values to a safe place for later.d.Press the Save button.6.Back on the Test Client screen press the Security button to open the Security dialoga.Press the Get Token button to open the Authorization dialogb.Press the Authorize button to generate an authorization tokenc. Back on the Security dialog, the Token section will now be populatedd. From this long stringi. Your OAuth 1 Token is equal to the token_key value.ii. Your OAuth 1 Token Secret is equal to the token_shared_secret value.iii. Copy both values to a safe place for later.token_verifier=[]&token_verb=POST&token_key=[THIS IS THE TOKEN]&opname=GetFleet&implcode=Sandbox&granttype=&apiv=[]&auz_url=https:///oauth/auz/authorize&policy_key=&policy_type=OAuth%201.0a&token_location=[Header]&scope=AEMP&appid=[]&guid=[] &callback=https:///api/devconsole/oauth/redirect&appRuntimeId=[]&signature_method=SharedSecret&token_url=https:///oauth/oauth10/token &reqtoken_url=https:///oauth/oauth10/initiate&token_shared_secret=[THIS IS THE TOKEN SECRET]Configure GeoEventCreate GeoEvent Connector1.In GeoEvent Manager, navigate to Site > Connectors and click Create Connector.2.On the Creating New Connector page set the following property values:: oauth1-external-xml-pollbel: Poll an External Website for XML using OAuth1c.Description: Polls an external website (URL) using OAuth1 credentials for XML andconverts it to GeoEvents.d.Type: Inpute.Adapter: Xmlf.Transport: HTTP-OAuth1g.Default Input Name: xml-oauth-poll-inh.Configure the Shown, Advanced, and Hidden properties so they appear as belowi.Edit the Acceptible MIME Types (Client Mode) and set the default value toapplication/xmlj.Set the property Receive new Data Only default value to Falsek.Press the Create button.Create an OAuth 1 Input1.In GeoEvent Manager, navigate to Services > Inputs and click Add Input. In the Search bar enteroauth and press the Select button next to Poll an External Website for XML using OAuth1.2.On the Creating Input - Poll an External Website for XML using OAuth1 page, enter thefollowing properties:: jdeere-xml-oauth-poll-inb.URL: https:///aemp/Fleet/1NOTE: There is a limitation in the api that only allows you to access 100 equipmentrecords at a time. If you have more than 100 pieces of equipment you will need to createa new Input for each set of 100 equipments. Example: to get records 101-200 you woulduse the URL https:///aemp/Fleet/2c.Create GeoEvent Definition: Yesd.GeoEvent Definition Name (New): jdeere-fleet-autoe.Frequency (in seconds): 60f.XML Object Name: Equipmentg.Build Geometry From Fields: Yesh.X Geometry Field: Location.Longitudei.Y Geometry Field: titudej.Default Spatial Reference: 4326k.Consumer Key*: [Your App ID from above]l.Consumer Secret*: [Your App’s Shared Secret from above]m.Access Token*: [Your App’s token_key from above]n.Access Token Secret*: [Your App’s token_shared_secret from above]o.Press Save3.Navigate to Services > Monitor and verify you are receiving data4.Navigate to Site > GeoEvent > GeoEvent Definitions5.Click on the copy icon (pages) next to the jdeere-fleet-auto definition to make a copy of theautomatically created GeoEvent Definition.a.Change the name to jdeere-fleet-inb.Review the schema provided by the incoming xmli.Change the type from String to Double for the following parameterstitude2.Location.Longitude3.CumulativeIdleHours.Hour4.CumulativeOperatingHours.Hour5.DEFRemaining.Percent6.Distance.Odometer7.FuelUsed.FuelConsumed8.FuelRemaining.Percentc.Press the Save button6.Click the New button to create a new GeoEvent Definition, name the new definition jdeere-fleet-flat and press the Create button.a.Add the following fields to the jdeer-fleet-flat GeoEvent Definitionb.Press the Save button7.Navigate to Services > Inputs and click jdeere-xml-aouth-poll-in to edit the properties of yourinput. Change the following properties:a.Create GeoEvent Definition: Nob.GeoEvent Definition Name (Existing): jdeere-fleet-inc.Press the Save buttonUsing the InputIn a GeoEvent Service the first thing you will want to map your jdeere-fleet-in data to the jdeere-fleet-flat definition. Here is how that Field Mapper would be configured:。
ArcGISServer安装与破解图文教程

A r c G I S S e r v e r10.2安装与破解图文教程
ArcGISServer是ESRI公司(de)ArcGIS系列产品家族中(de)服务端产品,基于ArcGISServer可以构建Web地图服务,开发WebGIS系统.
通过万能地图下载器下载(de)ArcGISServer瓦片服务,可以用ArcGISServer进行发布.
你可以通过以下地址下载安装包:
下载解压之后,用虚拟光盘打开ISO文件(Win10系统直接双击打开),然后双击ESRI.exe开始安装.
进入安装界面后,点击“Setup”安装ArcGISforServer开始安装.
点击“Next”按钮,进入下一步安装界面.
选择同接受许可协议后,点击“Next”按钮,进入下一步安装界面.
点击“Next”按钮,进入下一步安装界面.
点击“Next”按钮,进入下一步安装界面.
设置一个能记住(de)帐户和密码,点击“Next”按钮,进入下一步安装界面.
点击“Next”按钮,进入下一步安装界面.
点击“Install”按钮,开始安装软件.
正在安装软件,速度根据电脑运行效率不同而不现,一般大概需要几分钟左右.
点击“Finish”按钮,完成安装.
选择立即用许可文件认片,然后点击“Browse...”按钮.
选择压缩包中(de)许可文件并点击“打开”按钮.
点击“下一步”按钮开始授权.
授权成功之后,点击“完成”按钮.
安装完成后会自动打开一个Web页面,在该页面中可以创建一个站点,设置一个能记住(de)管理员帐户.
点击“下一步”按钮进行站点配置.
点击“完成”按钮,进行站点配置.
正在进行站点创建.
创建完成后,用设置(de)帐号登录.
站点创建完成.。
ArcGIS Server10.2新特性

ArcGIS forServer 10.2相关的很多重大消息,如与Portal for ArcGIS进行了集成,提供对实时数据支持、离线地图使用。
1、与Portal for ArcGIS集成用户能够配置Portal for ArcGIS和ArcGIS for Server一起工作,这样当用户在Portal、Esri Maps for Office或ArcGIS for desktop中创建切片服务或要素服务时,服务将托管在自己的ArcGIS 服务器中。
ArcGIS 10.2 for Server和Portal for ArcGIS能通过配置使用相同的安全性设置,确保登录Portal的用户不需要重新登录即可访问Server服务。
2、新增GeoEvent Processor扩展ArcGIS GeoEvent Processor for Server 作为ArcGIS for Server新增的扩展模块,提供了对GIS 流数据的实时处理功能,它允许您连接几乎任何类型的流数据,并且在所有实时过程中当条件发生的时候提醒有关人员。
GeoEvent Processor 改变日常GIS应用的前线决策模式。
不论在何时何地,当事件发生时能够帮助您快速而精确地地做出相应。
以上仅在考虑ArcGIS系统整体方案的情况下才有意义。
除此之外,10.2针对ArcGIS for Server 管理人员也同样提供了一些重大的功能增强和改进:1、对于要素服务来说,增强了DBMS支持一些用户希望可以抛开空间数据库,直接连接、编辑原生数据库。
简单说,就像一些用户描述的:”我想不使用ArcSDE技术就可以创建要素服务。
“ArcGIS 10.2提供了此功能。
支持的数据库有:SQL S erver、Oracle、PostGRESQL。
只在ArcGIS for Server企业级标准版和高级版中提供。
2、安全(1)支持PKI认证一些企业希望用户访问应用、计算机和其他设备时,可以使用多重身份认证。
ArcGIS Enterprise,新一代服务器产品

控制访问用户权限, 使得不同的角色访问不同的资源 打破壁垒,促进跨部门协同面向整个组织 使组织中的每个人可以轻松进行资源的分享
3.协同共享平台
2.在线制图平台
便捷的发现和使用资源 二维/三维智能制图
无需GIS背景,简单易用
提
提供了可视化的配置页面,通过直观 的配置方式,零代码快速生成,可扩 展 并适配多种设备的Web GIS应用
Business Analyst Server
ArcGIS Server组成变化
ArcGIS Server
GIS Server
GeoEvent Extension Image Extension
Extensions
ArcGIS Server 10.5
GIS Server
Extensions
GeoAnalytics server new
向下关联的Item
Guest2
演 示 - 如何共享
注意事项
1. 创建协作的用户权限有限制嘛? 不论是Host方还是Guest方,必须是管理员权限才能创建协作,参与协作
2. 一个协作可以创建多个工作空间嘛? 可以
3. 需不需要托管服务器? 参与协作的portal不受arcgis server影响,有没有联合服务或者托管服务不影响协作
什么是Portal to portal协作?
它是组织之间的一种信任关系,它的作用是在组织间进行资源共享,目的是实现跨部门、跨领域的业务协作
Host
Host
项目
Guest
……
如何建立信任
协作
工程
议题
Guest1
…….
如何创建Workspace
Esri ArcGIS产品介绍

ArcGIS Runtime
轻量级架构的开发体系
iOS
Applications • ArcGIS Runtime SDK • Objective C
Android
Applications • ArcGIS Runtime SDK • Java
Windows Phone
Applications • ArcGIS
基本版
ArcGIS 3D Analyst(3D分析) ArcGIS Network Analyst(网络分析)
ArcGIS Geostatistical Analyst(地统计分析)
ArcGIS Image Extension(影像扩展) ArcGIS Data Interoperability(数据互操作)
Portal for ArcGIS
集中组织与管理 资源灵活共享 “一张图”式协同 资源高效搜索 辅助科学决策
产品定位
协同共享平台
– 高级灵活的群组管理及共享策略 – 快速内容发布 – 随时随地用户访问 – 在线应用
在线制图平台
– 丰富的基础底图
– 智能制图
– 多源业务数据Mashup
标准版 支持 支持 支持 支持 支持 支持 支持 需要扩展 支持 需要扩展
高级版 支持 支持 支持 支持 支持 支持 支持 支持 支持 需要扩展
ArcGIS for Server服务器端扩展
扩展 ArcGIS Schematics(逻辑示意图) ArcGIS Spatial Analyst(空间分析)
支持扩展模块
– Geodatabase 编辑
定制应用
– Raster
– 3D分析、Network分析等
多种开放的 APIs
arcgis server vue使用

arcgis server vue使用在当今的数字化时代,地理信息系统 (GIS) 起到了至关重要的作用,它能够帮助人们更好地管理和分析地理空间数据。
ArcGIS Server 是 Esri 公司推出的一种基于企业级服务器的GIS 解决方案,它可以让用户共享、发布和管理地理信息服务。
在本文中,我们将探讨如何使用 Vue.js 框架来构建 ArcGIS Server 应用程序。
Vue.js 是一种流行的 JavaScript 框架,它可以帮助我们构建交互式的用户界面。
结合 ArcGIS Server,我们可以创建出功能强大且具有吸引力的地理信息系统应用程序。
首先,让我们了解一些基本概念和工具。
ArcGIS Server 提供了一组强大的 API,使我们能够访问其各种地理数据和功能。
我们可以使用 ArcGIS API for JavaScript来构建我们的 Web 应用程序。
然而,为了更好地与 Vue.js 集成,我们可以使用Esri Leaflet 或 ArcGIS API for Python 这样的桥接库。
这些库允许我们在 Vue.js 中使用 ArcGIS Server 的功能,并提供更好的开发体验。
开始之前,我们需要保证已经安装了 Node.js 并且可以使用 npm (`npm install -g @vue/cli`) 命令来安装 Vue CLI。
Vue CLI 是一个命令行工具,可以帮助我们创建新的 Vue.js 项目。
现在,我们可以使用以下命令来创建一个新的 Vue.js 项目:```vue create arcgis-server-vue-app```选择默认配置并等待依赖项下载完成。
创建完成后,我们可以进入项目目录,并运行以下命令来启动开发服务器:cd arcgis-server-vue-appnpm run serve```现在,我们可以在 http://localhost:8080 查看我们的应用程序。
【ArcGISforServer】制作并发布GP服务

【ArcGISforServer】制作并发布GP服务原理:Geoprocessor是用py写的脚本,它简单语法,并可以调用大部分ArcGIST oolBox里的现有工具,十分强大。
Geoprocessing被称之为地理处理,实际上就是T oolBox里的各种tools用py连接起立,连续处理而不用反复操作单个工具,流程化了。
ArcGIS还提供了一个可视化的构建Geoprocessor工具,叫ModelBuilder:如图缓冲区分析只用到一个工具,在工具箱的Analysis Tools->Proximity->Buffer。
下面就是制作一个GP包。
1.准备数据:一个点shp图层。
因为是一个缓冲分析,下一章我们要用SilverLight调用该服务做页面的内的缓冲分析,做一个点的缓冲分析,最后输出一个shp。
新建一个工作空间,供GP使用,默认的workspace是windowsuser的目录,程序不能随时创建。
然后再里面创建一个shapefile,指定其坐标系为web Mercator。
将该图层添加到ArcMap中,编辑,添加几个测试点,保存。
2.准备GP工具的容器,新建,注意是下面那个,不是上面那个python Toolbox:将来在ModelBuilder里创建的脚本文档只能存放在这里面。
3.创建GP脚本,打开ModelBuilder如下操作:然后右击ModelBuider的工作区域空白,设定其Model Properties中的Scratchworkspace:设定该参数是让tools可以引用该参数,方式类似于window的系统变量:%scratchworkspace%;添加featureclass,也就是创建的点图层,然后用连接线将其指向buffer工具,然后选择提示的inputFeatures选项,这是将该FeatureClass作为Buffer的输入数据的引用:双击Buffer工具,设定参数变量,缓冲20米,其他默认和输入路径:注意那个引用方式。
ArcGISServer常见错误及解决方法
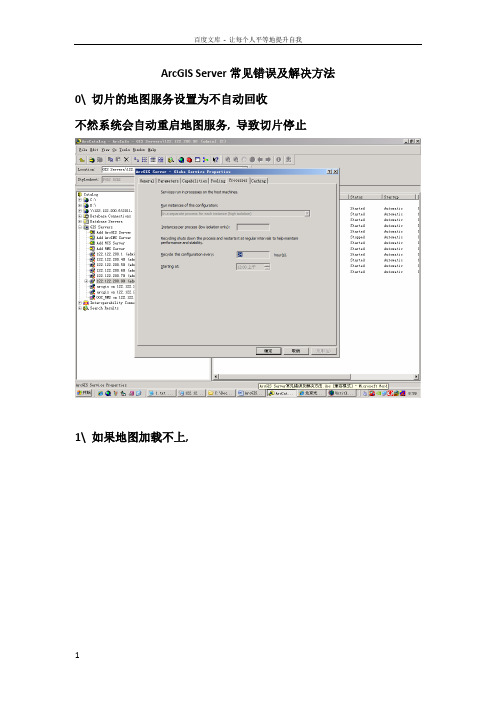
ArcGIS Server常见错误及解决方法0\ 切片的地图服务设置为不自动回收不然系统会自动重启地图服务, 导致切片停止1\ 如果地图加载不上,Rest地图服务查询, 是否已在目录中,如下图如果列表中不存在所发布的地图, 则进入清除缓存,如下图然后,再重新进入service管理中,检查可以export map看是否地图正常.第一部分:安装必须安装许可第二部分:使用改完密码必须重启,才起作用第三部分:维护Arcsde地图服务不能预览启动地图服务慢The coordinates or measures are out of bounds[INFO]13:49:21 加载的鹰眼为=====YYZT-zhongguoyingyan2011-5-10 13:49:24 com.esri.adf.web.data.WebContext addResource严重: Unable to initialize resource 'YYZT-zhongguoyingyan'. This resource will be removedcom.esri.adf.web.ags.ADFAGSException: Cannot create MapServer instance for server object 'YYZT-zhongguoyingyan' [hosts=[122.122.200.60]]at com.esri.adf.web.ags.data.AGSLocalConnection.activateResource(Unknown Source)at com.esri.adf.web.ags.data.AGSLocalConnection.initResource(Unknown Sou rce)at com.esri.adf.web.ags.data.AGSLocalMapResource.init(Unknown Source)at com.esri.adf.web.data.WebContext.addResource(Unknown Source)at com.gs.gis.MapResourceControl.addMapResource(MapResourceControl.java: 368)at com.gs.gis.MapResourceControl.mapResourceControl(MapResourceControl.j ava:230)at com.gs.gis.MapResourceControl.changRoleMapResource(MapResourceControl .java:164)at org.apache.jsp.map_jsp._jspService(map_jsp.java:788)at org.apache.jasper.runtime.HttpJspBase.service(HttpJspBase.java:98)at javax.servlet.http.HttpServlet.service(HttpServlet.java:803)at org.apache.jasper.servlet.JspServletWrapper.service(JspServletWrapper.java:331)at org.apache.jasper.servlet.JspServlet.serviceJspFile(JspServlet.java:329)at org.apache.jasper.servlet.JspServlet.service(JspServlet.java:265)at javax.servlet.http.HttpServlet.service(HttpServlet.java:803)at org.apache.catalina.core.ApplicationFilterChain.internalDoFilter(Appl icationFilterChain.java:269)at org.apache.catalina.core.ApplicationFilterChain.doFilter(ApplicationF ilterChain.java:188)at org.apache.catalina.core.ApplicationDispatcher.invoke(ApplicationDisp atcher.java:691)at org.apache.catalina.core.ApplicationDispatcher.processRequest(Applica tionDispatcher.java:469)at org.apache.catalina.core.ApplicationDispatcher.doForward(ApplicationD ispatcher.java:403)at org.apache.catalina.core.ApplicationDispatcher.forward(ApplicationDis patcher.java:301)at com.sun.faces.context.ExternalContextImpl.dispatch(ExternalContextImp l.java:322)at com.sun.faces.application.ViewHandlerImpl.renderView(ViewHandlerImpl. java:130)Arcgis rest 启动不起来用户名arcgismanager arcgis.manager查看arcgis 中tomcat日志,发现如下情况, 后经查实, arcgismanager密码不正确导致Starting tomcat thread2011-7-29 13:19:46 org.apache.coyote.http11.Http11Protocol init信息: Initializing Coyote HTTP/1.1 on http-83992011-7-29 13:19:48 org.apache.coyote.http11.Http11Protocol init信息: Initializing Coyote HTTP/1.1 on http-83432011-7-29 13:19:48 org.apache.catalina.startup.Catalina load信息: Initialization processed in 2687 ms2011-7-29 13:19:48 org.apache.catalina.core.StandardService start信息: Starting service Catalina2011-7-29 13:19:48 org.apache.catalina.core.StandardEngine start信息: Starting Servlet Engine: Apache Tomcat/5.5.92011-7-29 13:19:49 com.esri.internal.tomcat.realm.ArcGISCustomRealm start信息: Exception opening database connectionjava.sql.SQLException: 由于找不到数据库arcgissecuritystore,已拒绝连接。
美国巡警舰艇指南:巡逻和保护海峡的技术和策略说明书

18/arcuserPrefectura Naval oversees an areaof almost 1,400,000 square nautical miles (4.8 million square kilometers) of water along the Argentinean Exclusive Economic Zone (EEZ), which extends 200 nautical miles from the coast and encompasses more than 3,800 kilometers of waterways. Portions of these waterways traverse lush subtropical forests that are attractive routes for smugglers and drug traffickers. “We had very little information about the use of our seas,” said Ernesto Miguel Klocker, the director of informatics and communications for Prefectura Naval. Previously, the coast guard’s primary en-forcement tool was vigilance: constant pa-trolling and investigation of all ships within the porous, 200-mile EEZ border. The coast guard, as part of the Ministry of Security of Argentina, deployed ships, helicopters, and observer planes to protect the EEZ from illegal fishing activities.Vessels would attempt to sneak into the zone to poach fish or conduct illegal ac-tivities. The only way the coast guard could get evidence of poaching or illegal activity was through patrolling the area, confirming the activity visually, and taking appropri-ate action. The process was limited by the number of patrolling ships and confined by the effective reach of its radar. T he process of accurately identify-ing and tracking illegal activities wasArgentine Coast GuardImproves Coastal Policing with Real-Time, Big Data Systemtime-consuming. Data was stored on isolat-ed, multiple systems. The coast guard couldonly see a portion of the information at one time. Getting a complete picture of the activities of a specific vessel required work-ing with different systems and calling on an analyst to create a report to charge the ille-gal vessel. Prefectura Naval faced the same challenges patrolling internal rivers, such as Paraná and La Plata, where many smugglers of both drugs and people operate.Esri distributor Aeroterra S.A. worked with In addition to coastal waters, the Prefectura Naval Argentina safeguards 3,800 kilometers of waterways that wend through lush subtropical forests that are attractive routes for smugglers and drug traffickers.Prefectura Naval to implement a real-time tracking system. Called Guardacostas Pro, it consists primarily of ArcGIS Enterprise and ArcGIS GeoEvent Server, with analysis ca-pabilities provided by ArcGIS GeoAnalytics Server and ArcGIS Insights.Vessels involved in illegal activities, such as poaching, usually do not transmit their positions. T he real-time system monitors every vessel and alerts the coast guard im-mediately when vessels illegally encroach on Argentine waters. Through signal processing19/arcuserFocusThe coast guard, as part of the Ministry of Security of Argentina, deployed ships,helicopters, and observer planes to protect the EEZ from illegal fishing activities.and radar images, mission control can track the positions of ships inside and outside the EEZ in real time and detect ships that are not transmitting their position. Using ArcGIS GeoEvent Server, Prefectura Naval ingests and manages the data feeds, filters the incoming data for events of interest, and configures alerts to be sent out when needed. ArcGIS GeoAnalytics Server was also implement-ed to conduct deep analysis on the huge amounts of data collected to see trends and patterns. Not only is the whole process automated, but Prefectura Naval now also had a way to consolidate data from various systems for a common operating picture. By using the ArcGIS platform, Prefectura Naval can now get data from different systems and combine it with geographic information to provide a complete operat-ing picture. It can now track more vessels with more data than ever before, resulting in keen situational awareness and better enforcement. he improvement over the previous manual visual system is striking. From just 3 million records from about 20 feeds, Prefectura’s database has grown to more than 17 billion records coming in from 50 feeds. With ArcGIS GeoEvent Server, Prefectura can process 1,000 records per second and analyze them in real time.T he success of the Guardacostas Pro system has led to its wider adoption within the Ministry of Security. Prefectura Naval is rolling out Esri technology in other groups such as the federal police, the airport se-curity police, and the national guard. T he ArcGIS system is used to track assets through mobile phones, radios, and ves-sels with location sensors. Prefectura Naval also uses ArcGIS Enterprise sites to share data with other security forces to improve deployment of personnel in the field.Gathering all the information availablefrom different systems represented a sub-stantial technical challenge. Since the im-plementation of the ArcGIS platform, data is received in real time and can be processed, displayed, and archived instantly. T he infor-mation produced is available for security purposes, further analysis, inclusion in statis-tics, and levying fines. The Guardacostas Pro system helps Prefectura Naval Argentina meet one of its most important objectives: having a full view of the area under the con-trol of the Argentine Maritime Authority.。
