卓唐液压站出厂检验报告-英文版
验货报告范本(英文版)
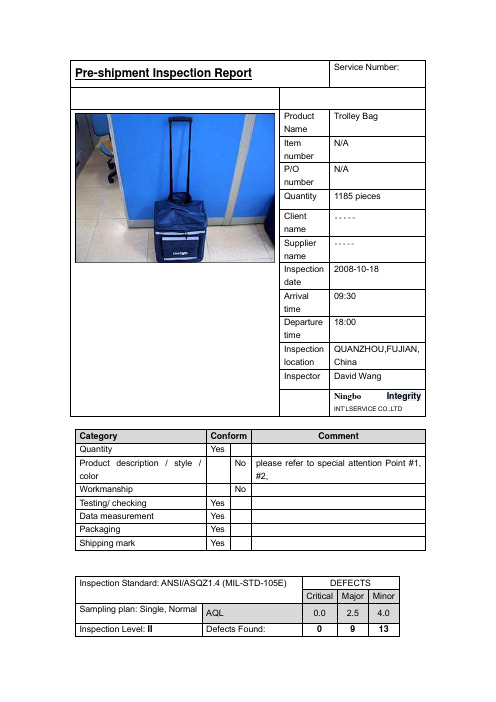
Pre-shipment Inspection Report Service Number: Summary SectionProductNameTrolley BagItemnumberN/AP/OnumberN/AQuantity 1185 piecesClientname。
Suppliername。
Inspectiondate2008-10-18Arrivaltime09:30Departuretime18:00Inspection location QUANZHOU,FUJIAN, ChinaInspector David WangNingbo IntegrityINT’LSERVICE CO.,LTDCategory Conform CommentQuantity YesProduct description / style / color No please refer to special attention Point #1, #2,Workmanship NoTesting/ checking YesData measurement YesPackaging YesShipping mark YesInspection Standard: ANSI/ASQZ1.4 (MIL-STD-105E) DEFECTSCritical Major Minor Sampling plan: Single, Normal AQL 0.0 2.5 4.0Inspection Level: II Defects Found: 0 9 13QuantityProduct description / style / colorspecificationCheck against sample submitted by client:Discrepancy was found on inspection samples, please refer to Special Attention point # 1 & #2.WorkmanshipDefectives ListDefectivesListDefectivesCRI MAJ MIN PictureDescription0 0 8Wrinkle markon fabricDirty stains 0 0 5DefectivesListDefectives ListDefectivesDescriptionCRI MAJ MIN PictureHandle standslant ( can beused)0 9 0TESTING /CHECKINGFunction test on handle, wheel, zip and Velcro.Performed on all seletced samples, the result was passed.Function checking for Velcro tape/zip Performed all selected samples, the result was acceptablePull test at handle strap by hand normal force Performed on S-3 samples, the result was passed.Adhesive test by tapes Performed on S-3 samples, Noprinting peel off, the result waspassedSize measure performed on 5 pcs samples,result is below measurement table.Internal Check performed on 5 pcs samples,Discrepancy was found oninspection samples, please refer toSpecial Attention point # 1 & # 2.(Page 2).Mass productions Approved sampleGap locationCarton Drop Test from 76cmheight, drop 10 times at 1 corner, 3edges and 6 faces.Performed on 3 cartons, the resultwas passedDATA MEASUREMENTSize MeasurementItems Spec.(cm)Samples1 2 3 4 5Product size (L * W * H) N/A 36 * 26.5* 4036 * 26.5* 4036 * 26.5* 4036 * 26.5* 4036 * 26.5* 40Side pocket23*25 23*24.5 23*24.5 23*24.5 23*24.5 23*24.5 Logo printing(L * W)N/A 11 * 2.6 11 * 2.6 11 * 2.6 11 * 2.6 11 * 2.6PE boardthickness onbottom and backpart4.0mm 4.0mm 4.0mm 4.0mm 4.0mm 4.0mmPE boardthickness around3 sides3.0mm 3.0mm 3.0mm 3.0mm 3.0mm 3.0mmGross Weight ofexport cartonN/A 5.0 KGS 5.1 KGS 5.2 KGS 5.0 KGS 5.0 KGSSize of Export carton N/A 39 * 32 *44cm39 * 32 *44cm39 * 32 *44cm39 * 32 *44cm39 * 32 *44cmPackagingUnit packingEach product was packed into anindividual poly bag ,sealed onopeningOuter packing Carton size: 39 * 32 * 44cm1 pc with an instruction sheet packed ina carton which fixed by 1 nylon strap.Shipping markShipping MarkFront mark Side markOther markingBar code label on CartonPrinting logo on bag Other PicturesSewn label Sewn label (back)Instruction sheet Bottom viewString on zipper puller Compare with approved sample (rightside one)CartonsTotal cartons Inspected cartons。
英文版验货报告
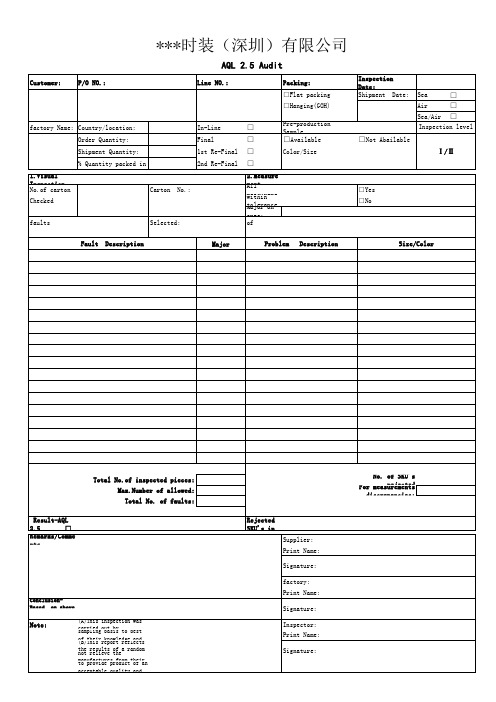
现场测试报告QC英文版

WARRANTY
SERVICE
Start-up Procedure for Tank Master View System VERSION:1.0 Rig Name:JU2000E-6
General
The file provides guidance for start-up of tank master view system. Before the procedure is carried out, it is acknowledged that connection including internal and external of the system should be completed, all the sensors including level sensors (VEGAFLEX) and pressure sensors should be installed and tested electrically. Communication between touch panels and PLC is established.
No.3 cement
High level(m) Low level(m) High pressure (Psig)
No.4 cement
High level(m) Low level(m) High pressure (Psig)
No.1 bent
High level(m) Low level(m) High pressure (Psig)
Conclusion
1.5. Touch panel: push “Real Value” button, check height, gravity, volume and weight of each tank, and then compare them with measured height and “Volume Table”. Use current calibrator instead of level sensor. a. Cut off the system power, and then disconnect one of level sensor wiring. b. Connect current calibrator, instead of the level sensor. The positive connect (signal+) terminal, and the negative connect the “M” (signal -). c. Adjust current calibrator, make its output 4mA, 8mA, 12mA, 16mA and 20mA. Record the data from touch panel, and then compare real with ideal. d. Fill the TABLE 1-1 in the last page.
验货报告(中英文)表格

15.Toe string 鞋头翘度
6.Ticket&lable 贴标
16.Shoes stable 鞋子稳定性
7.Others 其他
17.Sock cementing 贴中皮
18.Others 其他
REMARK:
REMARK:
总结 PASS:
REWORK:
OTHERS:
1.所有货品必须在出前检验 2.每份订单必须抽检15%方可以出货。 3.检验超过15%有问题必须要翻箱处理。 4.请将一份给工厂,另一份由QC保留并同时要传真回公司。 5.此份报告作为出货证时,客人收到货品若有任何品质问题工厂必须要责任。
3.Upper back cementing 布里贴合
LASTING: 1.Insole length 中底长度 2.Insole hardness 中底强度 3.Insole covering &bing 包中底
4.Folding and Binding 滚边
4.Toe lasting 腰帮
5.Color of upper thread 车线颜色
验货报告 INSPECT REPORT
FACTORY 工厂:
CUST(客户)
DELIVERY:
ORD NO 订单号:
TTL QTY总对数:
INSPECT C/NO:
STYLE NO款号:
TTL CTNS总箱数:
以下项目情况良好(),尚可(O),不良(X),无此项检查(——)
MATERILS:
1.Materi al 2.Cuttin g
FACOTRY:
INSPECTOR:
DELIVERY: INSPECT C/NO:
中底长度 中底强度 &bing 包中底 帮 后帮 Hardess 前后套定型硬度 鞋面带位置
中英文对照版出货检验报告
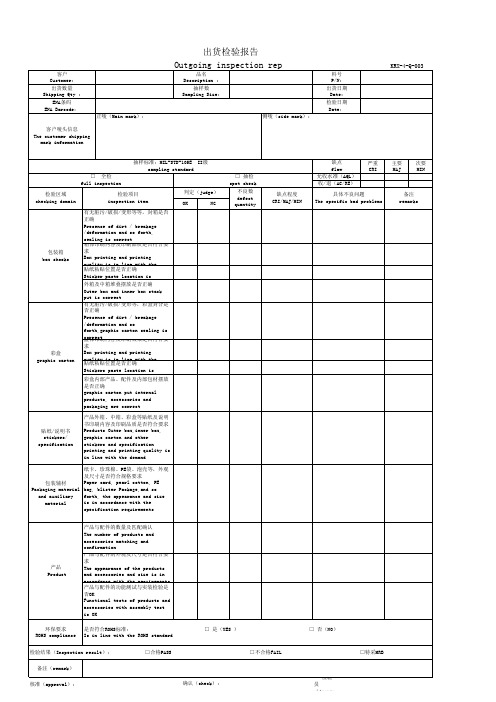
中英文验货报告模板
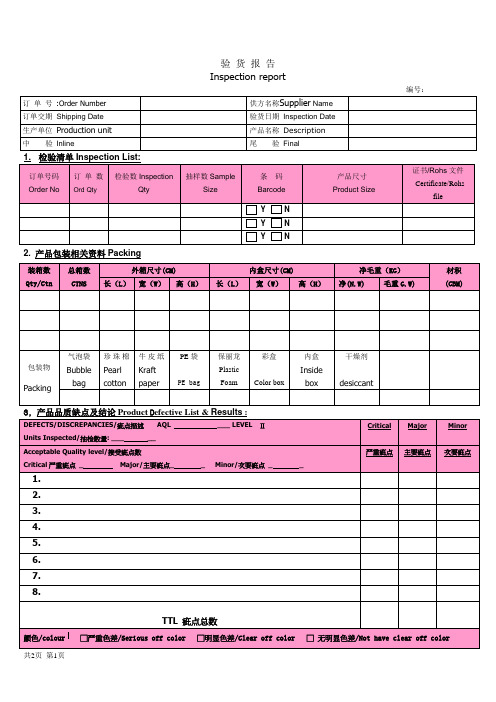
Inspection report
编号:
订单号:Order Number
供方名称SupplierName
订单交期ShippingDate
验货日期Inspection Date
生产单位Production unit
产品名称Description
中验Inline
尾验Final
1.检验清单InspectionList:
Critical严重疵点_Major/主要疵点__Minor/次要疵点__
严重疵点
主要疵点
次要疵点
1.
2.
3.
4.
5.
6.
7.
8.
TTL疵点总数
颜色/colour□严重色差/Serious off color□明显色差/Clear off color□无明显色差/Not have clear off color
干燥剂
desiccant
3,产品品质缺点及结论ProductDefective List&Results:
DEFECTS/DISCREPANCIES/疵点描述AQL___LEVELⅡ
Units Inspected/抽检数量:_____
Critical
Major
Minor
Acceptable Quality level/接受疵点数
3,验货时应最少完成批货量80%的完整包装。
验货员
Inspector(s):
供方代表SupplierRepresentative:
1,此报告仅作为本公司对所抽验的货品质量之确认,如产品在后续验货及到达客户手中仍发现有质量瘕疵,由供方负全部责任.
2,验货标准:MIL-STD-105E II级单次抽样.
液压站出厂检验报告
液压站出厂检验报告一、引言液压站是一种利用液体来传递动力的设备,常用于工业生产中的液压系统。
为了确保液压站的质量和性能,我们对其进行了出厂检验。
本报告旨在汇总和总结液压站的出厂检验结果,并提供相关的评估和分析。
二、检验内容1. 外观检验:- 检查液压站整体结构是否完好无损;- 检查密封件是否完好且无泄漏;- 检查各连接部位是否紧固可靠。
2. 性能检验:- 检查液压站的压力是否符合设计要求;- 检查液压站的流量是否符合设计要求;- 检查液压站的工作温度是否在规定范围内。
三、检验结果1. 外观检验结果:根据检验,液压站的外观结构完好无损,密封件完好,各连接部位紧固可靠。
2. 性能检验结果:- 压力检验结果:液压站的压力符合设计要求,平均压力稳定在规定范围内;- 流量检验结果:液压站的流量符合设计要求,并且流量稳定;- 温度检验结果:液压站的工作温度在规定范围内,无异常情况。
四、评估和分析1. 外观检验评估:液压站的外观结构完好无损,密封件完好,各连接部位紧固可靠,表明液压站在运输和安装过程中未受到损坏,各部件安装正确。
2. 性能检验评估:- 压力检验评估:液压站的压力符合设计要求,表明液压站能够产生足够的压力来驱动液压系统;- 流量检验评估:液压站的流量符合设计要求,表明液压站能够提供足够的液压功率;- 温度检验评估:液压站的工作温度在规定范围内,表明液压站能够在正常运行条件下保持稳定的温度。
五、结论通过出厂检验,我们可以得出以下结论:液压站的外观结构完好无损,各部件安装正确,密封件完好,各连接部位紧固可靠。
性能检验结果显示液压站的压力、流量和工作温度符合设计要求,能够提供稳定的液压功率和工作温度。
最后,我们建议购买液压站的用户在安装和使用前仔细阅读并遵守操作手册中的要求,以确保液压站能够稳定、高效地运行,并延长其使用寿命。
如有任何问题或需要进一步咨询,请随时与我们联系。
出厂质检报告模板英文
出厂质检报告模板英文IntroductionThis report presents the findings of the quality inspection conducted at the factory. The purpose of this inspection is to ensure that the products meet the required standards and specifications before they are shipped to the customers. The inspection was carried out on [date] by a team of experienced inspectors.Product Information- Product Name: [Name of the product]- Product Model: [Model number]- Batch Number: [Batch number]- Quantity Inspected: [Number of units]Inspection CriteriaThe inspection was conducted based on the following criteria:- International standards and regulations- Customer specifications and requirements- Industry best practicesInspection Process1. Initial assessment of product documentation2. Visual inspection of the products3. Measurement of product dimensions and specifications4. Testing of product functionalities and performance5. Assessment of packaging and labelingFindingsBased on the inspection conducted, the following findings were identified:1. Visual Inspection- The overall appearance of the products is in conformity with the specified requirements.- No visible scratches or damages were observed on the surface of the products.- The color consistency across the products is satisfactory.2. Measurement of Dimensions and Specifications- All the measured dimensions are within the specified tolerances.- The weight of the products matches the required specifications.- The materials used in the products are of the specified quality.3. Testing of Functionalities and Performance- The products function satisfactorily according to the specified requirements.- All the functions and features of the products were tested and found to be in working order.- The safety features incorporated in the products operate as intended.4. Assessment of Packaging and Labeling- The products were packed securely to prevent any damage duringtransportation.- The labeling on the packaging is clear, accurate, and in accordance with the customer requirements.- The packaging materials used are of good quality and provide adequate protection.ConclusionBased on the findings of the inspection, it is concluded that the products meet the required standards and specifications. The quality of the products is satisfactory and they are suitable for shipment to the customers.RecommendationsNo major issues were identified during the inspection. However, minor improvements in packaging design and labeling clarity are suggested to enhance the overall customer experience.AcknowledgmentWe would like to express our gratitude to the factory management and staff for their cooperation and support during the inspection. Appendix- Photographs of the inspected products- Test results and measurements data。
中英文出厂检验记录
厂
检
验
记
录Delivery Inspection Re
规格型号 Specification 生产数量 Quantity 验 Finished Product Inspection 标 准 要 求Requirements 套(箱) piece (carton)
印刷字体应清晰、内容齐全.Clear printing and full content. 随机附件齐全.(说明书、) Full attachments. (direction) 应耐久、内容清晰,无破损,粘贴性好。 Good durability, clear content, fine adhesion and without breakage. 检 验 标 准 Inspection Standard 长度:按订单实际米数为标准 Length: On the basis of real length of the order
标
晰、内容齐全.Clear printing and full content.
.(说明书、) Full attachments. (direction)
等现象。No significant defect, scratching, damaging and so on.
久、内容清晰,无破损,粘贴性好。 ear content, fine adhesion and without breakage. pection Standard 合格□不合格 □ Qualified □ Unqualified □ 合格□不合格 □ Qualified □ 合格□不合格 □ Qualified □ 合格□不合格 □ Qualified □ 合格□不合格 □ Qualified □ Unqualified □ 合格□不合格 □ Qualified □ Unqualified □ 合格□不合格 □ Qualified □
中英文对照的质检报告

光
学
性
能
检
验
Optics capability inspection
a、最大亮度—符合《标准—sj/t 11281-2003》 5.2.1
There shouldn’t be sundries in the cabinet, such as screws, thrums, iron (aluminum) bits, etc.
E、 屏体内电源线和信号线走线整洁有序、捆扎美观、连接良好无松动,所有螺丝无松动漏打(螺丝不能有滑牙,规格要符合要求),所有电源线端子连接处必须打红胶固定.并且胶不能打在螺牙上
Accord《standard —sj/t 11281-2003》 5.1.1 indoor displayf≥ip31,outdoor display≥ip65
B、拼装
精度
Assemblingprecision
平 整 度—符合《标准—sj/t11281-2003》 5.1.2.1 (b级或c级)
Level-up —accord《standard —sj/t 11281-2003》 5.1.2.1 (b class or c class)
f、Temperature adapt—accord《criterion—sj/t 11141-2003》 5.9.2.1
g、远程上电功能能否正常控制
Whether electricity function can becontrolledremotely or not
结构
检查
工厂中英文对照检讨报告
工厂中英文对照检讨报告中英文对照检讨报告1成品平均肉厚为0.82左右.The average thickness is about 0.82mm.2成品平均肉厚为0.6mm.The average thickness of part is 0.6mm.3成品内厚均匀.The thickness of part is even.4此处肉厚不均,成品易缩水.共六处.请修改.As the figure shows, the thickness is uneven, so it is easy to shrink. Please modify it, 6 areas in total.5成品太薄,成型比较困难,请修改成品.The thickness of part is too thin, so it is difficult to be molded, please modify it.6如图所示,塑件太薄请修改成品,厚度至少0.80mmAs the figure shows, the thickness is too thin, please modify it to 0.8mm at least.7如图所示,塑件太薄,不易充填,请将此处肉厚从0.40mm增加至0.50mm.As the figure shows, the thickness of part is too thin to fill enough, please adding material from 0.4mm to 0.5mm.8如图所示肉厚过厚,容易导致成品缩水.As the figure shows, the thickness is too thick that cause shrinking easily.9此处可能缩水,因此处肉厚较厚.There may be shrinkage, because the thickness is too thick.10平均肉厚0.53mm,最薄处仅0.2mm,有可能滞流,不易成型.The average thickness is 0.53mm, but the thinnest area is only 0.2mm, where the hesitation would exist and the part can’tbe molded easily.11请将周围红色面向公模侧拔模2.0度.Please draft the red surface 2.0 degrees along the core.12为防止成品粘母模,请将图示红色面向公模方向增加拔模到3度.As the figure shows, please draft the red surface 3-degree along the core side to prevent it (from) sticking to the cavity.13以红色线为基准,黄色面向母模侧3度拔模,蓝色面向公模侧2度拔模.Keep the red line as datum, please draft the yellow surface 3-degree along the cavity, and the blue surface 2 degrees along the core.14建议将红色面以蓝色线为基准做公模2度拔模.Keep the blue line as datum, suggest drafting the red surface 2 degrees along the core side.15.请将绿色面向母模侧拔模3度Please draft the green surface 3 degrees along the cavity side.16请将红色面做公模侧拔模!Please draft the red face along the cavity side.17如图:图中红色面,请沿斜销后退方向做3度拔模.As the figure shows, please draft the red surface 3 degrees along the backward direction of the lifter (using the arrow as the direction of lifter)18如图所示,请将红色面拔模在公模侧(全周),以防止粘母模.As the figure shows, please draft the red surface along the core side to prevent the product sticking to the cavity.19请将图示绿色面沿滑块后退方向3度拔模,用红色箭头表示其后退方向.As the figure shows, please draft the green surface 3 degrees along the releasing direction of the slider. ( using the red arrow as the releasing direction of slider.)20请将红色面向公模侧增加拔模,从0.5度加大到2.0度.Please increase the draft angle of the red surface from 0.5 to 2 degrees along the core21如图所示:请将红色面沿滑块后退方向拔模3度!As the figure shows, please draft the red surface 3 degrees along the releasing direction of slider.22为避免模仁尖角,请修改红色面拔模至公模侧.Please draft the red surface along the core side to avoid sharp corner. 23请将此处拔模3.0度,因角度太小会粘滑块. (左右共二处)Because the draft angle is too small, the part would stick to slider, so please draft this surface 3 degrees. (both sides).24红色框内区域必须沿斜销方向拔模0.5~1.0度,以防铲胶.To prevent cutting plastic , the area as the red frame shown must be drafted 0.5~1.0 degree along the lifter’s direction.25请将红色面拔模角度增加至4度以增加模仁插破角度!To increase the shut- off angle between cavity and core, please draft the red surface 4 degrees.26将红色面向母模侧拔模3度(第二次指出)Draft the red surface 3-degree along the cavity side (point out again) 27绿色面未拔模,请确认是否以0度抛光,否则向母模侧增加拔模角5度.As the figure shows, please check whether the green surface must be on zero draft for good polishing , otherwise add 5 degrees on the cavity side.28.绿色面在公模侧未拔模,建议将其做公模2度拔模.The green surface hasn’t been drafted along the core side. Suggest drafting it by 2-degree.29.如图所示,红色面为母模侧.As the figure shows, the red surface is in cavity side.30.如图所示,此处均为铁件与模仁插破封胶,易跑毛边,请将此处插破角增加至5度以上.As the figure shows, it is easy to occur flash, please add drafting angle to 5 degrees.31.建议将红色面公模拔模8度,以便于斜销成型.Suggest drafting the red surface 8 degrees along the core side for being molded by the lifter easily.32.请将图示绿色面沿斜销后退方向2度拔模,用红色箭头表示其后退方向. Please draft the green surface 2 degrees along the backward direction of lifter (using the red arrow as the direction of lifter)33.请将桔色面作斜销后退方向拔模5度.Please draft the orange surface 5 degrees along the backward direction of lifter.34.如图:现有成品外观面在红线处有分模线痕迹.建议将蓝色公模面向母模侧拔模3.0度,这样PL线下移到圆角处.As the figure shows, there will be visible mark on the appearance surfaces, suggest drafting blue surface 3.0 degrees along the cavity side (both sides) to change the PL to the place of radius.35.产品一周红色面在母模侧未拔模,建议将其做母模3度拔模.The red surface around product hasn’t been drafted on the cavity side, suggest drafting it by three degrees.36.红色面在公模侧未拔模,建议将其做公模3度拔模.The red surface hasn’t been drafted on the core side, suggest drafting it by 3- degree.37.请取消断差!Please cancel this step.38.请去掉此断差,避免模仁此处插破!Please delete the step to avoid the shut-off between the cavity and core.39.请照右图取消C角Please modify model according to the right figure.40.方案1: 取消全周R角Proposal 1:Cancel the R(all round)41.方案2: 全周增加断差Proposal 2:add the step(all around)42.建议此边倒圆角Suggestion: blend the edge43.请将红色线倒圆角0.20mm!Please round 0.2mm at the red line.44.如图所示: 请照右图修改!As the figure shows, please modify the model according to the right picture.45.滑块后退方向the releasing direction of slider46.如图示,用红色箭头表示滑块后退方向As the figure shows, use the red arrow as the releasing direction of slider.47.滑块分模线如图所示,箭头所示方向为滑块后退方向The parting line of slider is as the figure shown, the red arrow shows the direction of the slider’s movement.48.成品采用牛角进胶,胶口位置如图所示.Banana-gate is adopted as the figure shown.49.成品采用边式浇口进胶,浇口位置如图所示.To adopt the side gate, and the gate location is as the figure shown 50.成品采用边浇口进胶, 浇口位置如图所示.请确认!Gate type is edge gate and the location is as the figure shown, please confirm it.51.其效果见模流分析,建议采用阀胶口,省料头!Suggest adopting the valve gate to save the material, and refer to the mold flow analysis to see its effect.52.成品采用潜进胶,胶口位置如图所示.Gating type is submarine gate, and the gate location is as the figure shown.53.采用阀针浇口,位置如上图红色圈所示,该方案需修改成品.As the figure shows, to adopt valve gate, please confirm it.54.建议在成品上做于此类似的肋利于进胶,且牛角胶口如图所示.For injecting fluently, suggest adding a rib like this, and using banana gate as shown.55.浇口在成品厚度方向的中间不会影响成品外观.The gate is in the middle of the thickness, which will not affect the appearance of the product.57.成品采用点进浇(进胶位置如图),建议取消胶口处肋,并在浇口处做一小凹坑.To adopt pin gate as the figure shows, suggest canceling the rib in the area of the gate and adding a concave.58.如图示采用点进浇,请确认,如果采用此方案,请照图示修改成品Adopt pin gate as the figure shows, please confirm it. If accept, please t modify the product as shown.59.成品采用边进胶,建议在成品上做5.0~2.0凹槽.To adopt side gate, suggest adding a concave by 5.0mm~2.0mm.60.7支套筒顶针,其余圆顶针和扁销Seven sleeves as the highlighted yellow areas shows, others are ejector pins and flat pins.61.为了保证成品的外观,PL线修改方案→取消一周的红色圆角The first solution is to cancel the red round for getting a good appearance of the product.62.为了保证成品的外观,PL线修改方案二是从最大轮廓减胶产生一个0.03mm的断差.The second solution is adding a step (0.03mm) along the circle of the red round for getting a good appearance of the product.63.采用隧道滑块成型,滑块的分模线如图示.Adopt tunnel slider molding, and the slider’s parting line is as shown.64.由于分模线都在一周的圆角上会影响成品外观,建议修改的二种方案详见P12和P13.The parting lines will affect appearance of the product, there are two methods in P12 and P13.65.如图所示;此处为铁件与模仁插破封胶,易跑毛边,请个修改如右图所示.As the figure shows, it is easy to occur flash, please modify model.66.如图所示;此处铁件与塑件两连接孔错位,请修改As the figure shows, the holes on the steel don’t align with the holes on the plastic, please modify model.67.如图所示;因铁片加铁,此处边接孔需移位(共两处),请修改.As the figure shows, move the holes (two places), please modify model.68.成品此处间隙太小,建议将红色所示特征单边加大0.85mm,以便用斜销成型. The gap is too small, suggest enlarging the red feature by 0.85mm per side for molding by angular lifter.69.成品此处分线不顺滑,建议修改.The parting line here is not smooth, suggest modifying it.70.如图所示,红线处孔用于定位,需精确加工.建议将铁件2的定位孔尺寸做得比铁件1的定位孔大(以免1和2焊接后有微动的错位导致铁位定位不准).The hole of the red zone is precision-machined for locating, suggest enlarging orientation holes of the steel 2, and it is bigger than the steel 1 as shown.71.为避免注射时铁件变形,建议修改成品,如图所示.Suggest modifying the model as shown to reduce warp during injecting process.72.为避免注射时铁件变形,建议修改塑件( 前后加二对应的定位孔),如图所示. Suggest modifying the model as shown to reduce warp during injecting process.73.铁件蓝色面太长侧壁无法定位,建议修改铁件使蓝色面不得超出铁件红色面的延伸面,如图所示.The blue surface is too long to locate, suggest modifying the blue surface of the steel not to overstep the extend surface of the red as shown.74.成品如图所示部位空间太小,所拆滑块强度太弱,请加大到至少1.5mm以上并在上图中圆圈处倒R角.As the figure shows, the space is too small, so intension of the slider will be infirm, please add the dimension to 1.5mmt at least, and add the round in the circle marked.75.请在图示位置加两肋使其强度增加,以免被滑块拉伤.As the figure shows, to avoid dragging the part, please add two ribs on the product to be stronger.76.如图红色面,分模时在模仁上会有倒勾.As the figure shows, there will occur undercut in the red surface of the cavity.77.成品修改尺寸参考Reference of modification78.沿开模方向的拔模分析.Drafting analysis of mold opening directing.79.建议用成品上蓝色面取代红色面.Suggest replacing the red surface with the blue surface.80.利于封胶.The convenience of sealing.81.此处将采用母模入子.Cavity insert will be adopted here.82.此处分模线为曲线,较复杂,请修改成直线.The parting line as shown is curved line, please change it toa straight line.83.为避免模仁尖角,请参照右图修改成品分模线.To avoid the weak-steel, please modify the parting line according to the right figure.84.为避免模仁尖角,请修改如右图所示.The area shown is weak steels in the core. Please modify the model. 85.成品此处太穿孔,有尖角,请修改,共2处.The product has the large bore and tine. Please check it, 2 areas in total.86.如图所示,成品此处有尖角,请修改.As the figure shows, there is sharp corner on the product, please modify it.87.红色箭头为斜销运动方向.The red arrow shows the direction of the lifter.88.顶针位置如图所示.The location of the ejectors is as shown.89.产品顶出位置如上图所示。
出货检验报告 -中英文版之欧阳美创编

Visual Inspection
3
Ontology
3.1color/appearance/cleanliness
Visual Inspection
Visual Inspection
3.2 Seize of the lamp
Check it up with BOM
卡尺
二、测试检验
序号
检验内容
检查方法及标准
实际参数
检验设备
缺点别
检验结果
说明
NG
OK
不接受
4
老化测试
使用老化机冲压状态下﹥4H
老化机
5
耐压测试
使用老化机脉压冲击状态下﹥4H
老化机
6
功率测试
使用功率测试仪+—1W
功率测试仪
6
色温测试
积分球测试与客户所须一致
积分球
7
显指测试
积分球测试与客户所须一致
积分球
Outgoing Quality Control Report
时间:2021.01.01
创作:欧阳美
Inspection Date:
Customer Name
OrderNo.
Product Name
Specification
Total Production Quantity
Result :□NG NOT GOOD □OK
8
角度测试
积分球测试与客户所须一致
积分球
检验员QC:
时间:2021.01.01
创作:欧阳美
Aging Machine
5
Puncture Test
英文版检验报告

In this report requirements valid for EN only are marked with (EN).
General product information:
1.6 (4.4.1)
Integral lampholder
1.6 (4.4.2)
Wiring connection
1.6 (4.4.3)
Lampholder for endtoend mounting
1.6 (4.4.4)
Positioning
- pressure test (N):
- bending test (Nm):
Tails
Unsecured blocks
1.6 (4.7)
Terminals and supply connections
1.6 (4.7.1)
Contact to metal parts
1.6 (4.7.2)
Test 8 mm live conductor
Test 8 mm earth conductor
IEC 60598-2-1 and/or EN 60598-2-1
Part 2: Particular requirements
Section One – Fixed general purpose luminaires
Report Reference No.:
Tested by (name+signature):
Suitability for use indoors
供应商自我验货检查报告英文版
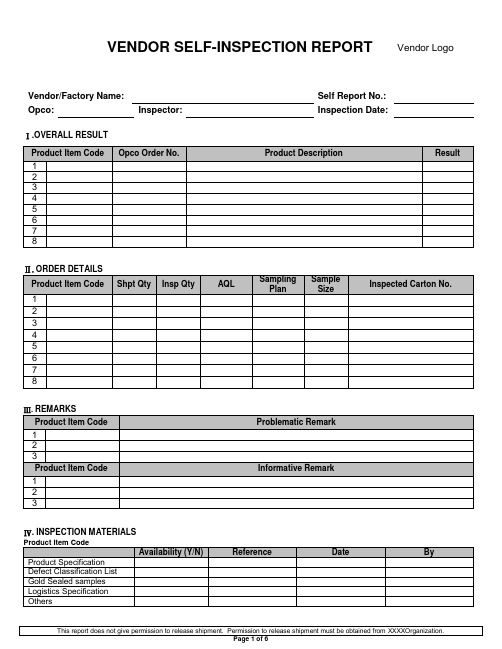
1
2
Defect Allow
0
Defect Found
Product Item Code
Defect Breakdown/Remark
Cri.
Maj.
Min.
1
2
Defect Allow
0
Defect Found
Product Item Code
Defect Breakdown/Remark
Actual Product with GS
Problematic Remark( if applicable)
Informative Remark( if applicable)
Defect (Cri / Maj / Min)
Defect (Cri / Maj / Min)
Ⅸ. PHOTO REFERENCE – ONSITE TESTING(Note: illustrateone type test once)
1) FOB price byond 10 ponds.
2) the sell package size lower 60cm in height X 40cm in depth X 40cm in Width, or heavy box weight lighter 20kg.
Ⅶ. PHOTO REFERENCE(Note: supplier can fine tunetemplateto fit the actual situation)
General test
Sample Size
Result
Comments
1
Packaging Check
2Pcs/item
Item No
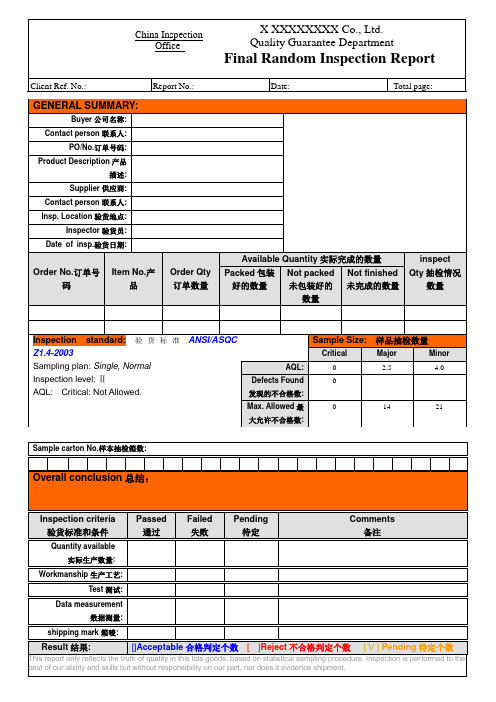
中英文出货检验报告Chinese and English shipment inspection
Productdimension
产品尺寸:
Carton drop test箱子硬度测试:
Tape testing胶带测试:
Color reference卡纸和颜色的对比::
:
LABEL CHECK标签检查:
Label标签
Sample size单个尺寸
Passed通过
Failed失败
Sampling plan:Single, Normal
Inspection level:Ⅱ
AQL: Critical: Not Allowed.
Critical
Major
Minor
AQL:
0
2.5
4.0
Defects Found发现的不合格数:
0
Max. Allowed最大允许不合格数:
0
14
21
Sample carton No.样本抽检箱数:
Overall conclusion总结:
Inspection criteria
验货标准和条件
Passed通过
Failed
失败
Pending
待定
Comments
备注
Quantity available
实际生产数量:
Workmanship生产工艺:
Test测试:
单个产品包装
对比1
对比2
对比3
对比4
对比5
对比6
对比7
对比8
对比9
对比10
对比11
对比12
对比12
对比13(PPS两个颜色
对比13
对比14
对比15
测试
测试1
PE0202-液压站出厂检验报告
合格
功能试验
1.液压站所有电动机和泵起动应平稳,无异常声响和发热。
2.操作各种阀,检查回路功能,符合原理图要求,各阀应在液压站要求的调定值范围重复3次功能无误。如发现某阀有一次失误,则应修复或更换元件,故降排除后进6次重复试验,功能无误。
合格
装配前检查及装配
1.按图纸校对需要安装在阀块上的各液压元件号,规格、数量,是否符合要求,并须具有产品合格证。
2.检查待装液压阀的内部清洁度,如不符合要求应重新清洗。
3.阀块上各液压阀、法兰的连接螺钉、管接头和螺堵都应用测力矩板手拧紧。
4.有定位销的液压阀必须装上定位销。
合格
密封性
检查
1.压力管路按设计压力的1.5倍进行耐压实验。
合格
静密封
试验
1.静密封试验前应先把被试系统可能渗漏部位擦干净,检查时用干净吸水纸贴在静密封处,然后取下,吸水纸如有油迹即为渗油。
合格
耐压试验
1.对压力油管道耐压试验,压力按工作压力1.25倍。
2.对回油管道、泄油管道以1.5MPa作耐压试验压力,如该回,泄油管道中某个元件的额定工作压力(或调定工作在压力)小于1.5MPa,则试验时临时拆去此元件或隔离此元件,以通路块代替(或隔离块隔开)进行试验。
2.将暂不试验的回路用盲板堵住。
3.依次序将P口压力调至试验回路的工作压力,试验各回路的动作功能。
4.要求各回路的动作准确可靠,减压阀在外负荷变化情况下,超调值应符合产品的规定值。调速阀、节流阀、比例阀、伺服阀在额定的负载下,调节上述阀时,输出流量应有明显变化。
5.功能试验后的液压油路块中各开口用塑料防尘盖密封。
液压站出厂检验报告

液压站出厂检验报告
一、检验目的
液压站是一种用于输送液体的工程装置,广泛应用于各行各业的工农业生产中。
为确保液压站在出厂前的质量合格,本次检验旨在对液压站进行全面检测和评估。
二、检验范围
本次液压站出厂检验主要涉及以下方面:
1. 液压站的结构和外观检查;
2. 液压站的油路系统检验;
3. 液压站的动力系统和控制系统检验;
4. 液压站的安全保护装置检验。
三、检验内容及结果
1. 结构和外观检查
通过对液压站的结构和外观进行详细检查,确认液压站的各部件安装完好,外观无明显损伤、锈蚀和变形等情况。
2. 油路系统检验
使用液压油进行液压站的油路系统检验,包括油泵、油箱、管路、滤清器等部件的检查。
确保油路畅通无阻、无泄漏,并验证液
压站的流量和压力性能是否符合设计要求。
3. 动力系统和控制系统检验
检验液压站的动力系统和控制系统,包括电机、液压控制阀、
传动装置等。
确保动力系统正常工作,控制系统灵活可靠,对液压
站的启停、流量调节和压力控制等操作能够准确实施。
4. 安全保护装置检验
对液压站的安全保护装置进行检验,包括压力开关、溢流阀、
过载保护装置等。
确保液压站在使用过程中能够及时发现并处理异
常情况,保证操作人员和设备的安全。
四、检验结论
根据本次液压站出厂检验的结果,结合液压站的设计要求和相
关技术标准,评估液压站的质量合格情况。
经过全面的检测和评估,。
- 1、下载文档前请自行甄别文档内容的完整性,平台不提供额外的编辑、内容补充、找答案等附加服务。
- 2、"仅部分预览"的文档,不可在线预览部分如存在完整性等问题,可反馈申请退款(可完整预览的文档不适用该条件!)。
- 3、如文档侵犯您的权益,请联系客服反馈,我们会尽快为您处理(人工客服工作时间:9:00-18:30)。
HYDRAULIC SYSTEM INSPECTION REPORTDoc. NO:CSD/PE 0202Version No: V1.0Compiled by:Date:client's name project nameDevice Name Hydraulic station DeviceModelZT41856-GO38-XR300-Y3C21Contract No C201604068SerialnumberZTY160517No Test items standard requirement test result1 Assemblyandcleaning ofhydraulicmanifoldblockassemCleaninghydraulicoil block1.The oil on the road P, T test and drain cleaningstation is turned on, pipe or flushing plate A, Bport is turned on.2. The P port pressure at 16MPa, constantlyswitching solenoid valve manifold to be washedon the oil flow wash each oil passage, about15-20 minutes.blyHydraulic circuit blocks Functiontest 1. 1. After flushing hydraulic manifold fitted withclean hydraulic valve mounted on the hydraulic station.2.The test circuit temporarily blocked with ablanking plate.3.By order of the inlet pressure P test circuitadjusted to the working pressure, test the operation of each circuit function.4. 4. requiring accurate and reliable operation ofthe circuit, the external regulator under load changes, overshoot value should meet the specified value of the product. When the control valve, throttle valve, proportional valve, servo valve rated load, adjusting the valve, the output flow should not change significantly.5.Hydraulic circuit block after the function test ineach of the openings sealed with plastic dust cover.Check before assemblyand assembly 1.Hydraulic components 1. Press the drawingproofreading needs to be installed on the valve block, size, quantity, meets the requirements, and must have product certification.2.The respective hydraulic valve block valve,flange connection screws, screw fittings and plug are applied measured torque wrench to tighten.3. Hydraulic valve must be installed on thepositioning pins locating pins.Tightnessan examination 1. 1. Press the line pressure 1.5 times the designpressure will be pressure experiments.2. 2. The return lines, drain line at 3MPa pressureor pressure design requirements, test 5-10minutes, does not allow leakage.3.In the hydraulic circuit block, tonal systempressure relief valve or relief valve when the relief valve seal test or unloading valves shut, re-transferred to the system pressure after sealing test; if the safety valve, then press the indicated pressure adjustment system.2 Cleaningdebuggingandtest ofhydraulicstationOverallcirculationhydrauliccleaning1. 1. Press hydraulic operating requirements, thehydraulic system load running for 30 minutes,checking the entire piping joints shall not leak.Slowly loading pressure not exceeding 18MPa,washing temperature does not exceed 65 ℃.2.Washing process, may be appropriate conversionsystem valve location, change the direction offlushing.3. 3. Drain cleaning fluid injected fluid to meet therequirements. Starting system according to thesystem rules, under no-load hydraulic oil filterfurther purification station itself flush for 2hours. In the washing process, the need tochange the state of the operating system to flushto ensure all parts of the hydraulic station.4.Washing process, pay attention to the senderfilter apparatus, filter clogging occurs when thenow clean or replace the filter. After all flushingis completed, replaced with a new filter.StaticSealstest1.Static seal test subjects should be preceded bythe system may leak site clean, check with aclean absorbent paper attached to the static seal,then remove, absorbent paper, if any traces of oilis oil leakage.Pressuretest1.pressure oil pipeline pressure test, pressureby 1.25 times the working pressure.1. 2. Remove the temporary return oil pipes, drainpipes to 16MPa pressure for pressure test, suchas the back, rated working pressure of a drain pipe element (or set-in pressure) less than 16MPa, the test time this isolates the element or elements to the channel block in place (or isolated blocks separated) test.2.The test pressure should be gradually increased,the regulator should be increased by a 2-3 minutes. Test pressure 10 minutes packing leakage and other abnormal phenomenon does not occur.Functional test 1. All hydraulic motors and pumps should start smoothly without abnormal noise and heat.2. The operation of various valves, check loop function, in line with the requirements of the schematic, the setting value range of each valve in the hydraulic station should be repeated three times required function correctly. I found a valve has a mistake, you should repair or replacement of components, so the drop test was repeated six times to exclude backward function correctly.3.Tank level gauge automatic control, alarm and display test. Set-control points, each point of the test at least three times, and the operation control signal is sent correctly. If one does not meet the requirements, shall repair or replacement element, the points should be retested 6 correct.4. The oil temperature display meter test. Set-control points, each point of the test at least three times, and the operation control signal is sent correctly. If after a period not meet the requirements, repair or replacement of components, the points should be retested 6 correct.5. respectively for each control point of each pressure relay, each point test at least five times, and signals and correct action. If one does not meet the requirements after the repaired or replacement ofcomponents, test points 10 times, should be correct.Noise Test 1.Hydraulic station work properly rated pressureand rated load from the hydraulic station 1.5m to test for noise with noise tester. Gear pumps and hydraulic vane pump station does not exceed 85 decibels, the hydraulic ram pump station does not exceed 100 decibels.Pump running-tes t1. This test shall be conducted all hydraulic pressure test station.2. between pumps reached their maximumpressure, displacement and rated maximum operating speed of work, 8 hours of operation, the output power of more than 30KW hydraulic pump, running-in test can be reduced to two hours, no abnormal phenomenon during operation occur.3testresultInspectorsAuditorInspection dateRem ark。
