Excel 宏(英文)
excel宏命令详细讲解

excel宏命令详细讲解Excel宏命令是一种自动化操作工具,可以用来简化重复性的任务,提高工作效率。
本文将详细讲解一些较为冷门但实用的宏表函数,带你玩转宏命令。
一、自定义宏命令自定义宏命令可以根据个人的需求编写,可用于自动完成一系列复杂的操作。
以下是一个例子:Sub MyMacro'将选定的单元格背景设置为黄色Selection.Interior.Color = RGB(255, 255, 0)End Sub二、输入框函数输入框函数可以用来创建用户交互界面,用户可以在输入框中输入值,作为宏的参数。
以下是一个示例:Sub InputBoxDemoDim Value As StringValue = InputBox("请输入您的姓名:")MsgBox "欢迎您," & ValueEnd Sub三、循环函数循环函数可以重复执行一段代码。
以下是两种常用的循环函数:1. For循环For循环可以让代码块重复执行指定次数。
以下是一个示例:Sub ForLoopDemoDim i As IntegerFor i = 1 To 10Cells(i, 1).Value = iNext iEnd Sub2. Do While循环Do While循环会在条件满足时重复执行代码块。
以下是一个示例:Sub DoWhileLoopDemoDim i As Integeri=1Do While i <= 10Cells(i, 2).Value = i * 2i=i+1LoopEnd Sub四、选择函数选择函数可以用来根据条件选择性地执行不同的代码块。
以下是一个示例:Sub ChooseCaseDemoDim Value As StringValue = InputBox("请输入一个数字:")Select Case ValueCase "1"MsgBox "你输入的是数字1"Case "2"MsgBox "你输入的是数字2"Case ElseMsgBox "你输入的是其他数字"End SelectEnd Sub五、错误处理函数错误处理函数可以捕捉和处理出现的错误。
Excel宏的编写与应用指南

Excel宏的编写与应用指南Chapter 1: 了解Excel宏Excel宏是一种自动化工具,可以帮助用户快速完成重复性的计算和操作任务。
它通过编写一系列的指令来实现这些任务,并可以将这些指令保存为一个宏,随时调用使用。
理解Excel宏的基本知识对于提高工作效率是非常重要的。
在Excel中,宏主要由VBA(Visual Basic for Applications)编写而成。
VBA是一种基于Visual Basic的编程语言,可以集成到所有的Microsoft Office系列软件中,包括Excel、Word、PowerPoint等。
通过编写VBA代码,可以扩展Excel的功能,并自动完成一系列繁琐的操作。
Chapter 2: Excel宏的编写步骤要编写Excel宏,首先需要打开Excel并启用开发工具选项卡。
在开发工具选项卡中,可以找到“Visual Basic”按钮,点击它将打开VBA编程界面。
在VBA界面中,可以输入代码,并通过点击运行按钮来测试和执行宏。
编写Excel宏的基本步骤如下:1. 定义宏的名称和快捷键:为了方便使用,给宏定义一个有意义的名称,并设置一个唯一的快捷键来调用宏。
2. 编写VBA代码:在VBA界面中输入代码,代码的语法和规则与Visual Basic类似。
可以使用各种Excel对象、方法和属性来操作工作表、单元格和数据等。
3. 调试和测试宏:在编写完宏后,进行调试和测试非常重要。
可以通过设置断点、单步执行等方式来检查代码的正确性和逻辑性。
4. 保存宏:将编写好的宏保存在工作簿中,以便后续使用。
Chapter 3: Excel宏的常用功能Excel宏的功能非常丰富,可以根据实际需求编写各种功能。
以下是一些常见的Excel宏功能:1. 数据导入和导出:可以编写宏来实现数据的批量导入和导出。
例如,可以编写一个宏来从外部文件中导入数据到Excel,并按照一定的格式进行整理和处理。
如何在Excel中使用宏实现数据导入和数据处理

如何在Excel中使用宏实现数据导入和数据处理Excel是一款功能强大的电子表格软件,它可以帮助我们进行数据的导入和处理。
而宏(Macro)是一种可以自动化执行任务的功能,在Excel中使用宏可以大大提高工作效率。
本文将介绍如何在Excel中使用宏实现数据导入和数据处理的方法。
一、数据导入1. 打开Excel,点击“开发工具”-“宏”-“录制宏”。
2. 在弹出的窗口中,输入宏的名称,选择存储宏的位置,点击“确定”。
3. 在录制宏的过程中,可以进行各种操作,比如打开文件、复制粘贴等。
在录制过程中要注意每一步的操作,以确保宏的正确性。
4. 录制完成后,点击“开发工具”-“宏”-“宏”按钮,在弹出的窗口中选择刚刚录制的宏并点击“运行”即可实现数据导入。
二、数据处理1. 打开Excel,点击“开发工具”-“Visual Basic”打开宏编辑器。
2. 在宏编辑器中,可以编写各种自定义的宏代码来实现数据处理的功能。
3. 例如,可以编写一个宏来删除重复数据。
在宏编辑器中插入以下代码:```Sub RemoveDuplicates()Columns("A:A").SelectActiveSheet.Range("$A:$A").RemoveDuplicates Columns:=1, Header:=xlYesEnd Sub```上述代码会选择第一列的数据,并删除其中的重复项。
4. 设置好宏的名称和快捷键(可选),保存宏代码。
5. 回到Excel界面,按下快捷键或者点击“开发工具”-“宏”-“宏”按钮,选择刚刚编写的宏并运行,即可实现数据处理。
三、宏的运用技巧1. 使用相对引用:在录制宏过程中,Excel默认使用绝对引用,会将具体的单元格地址固定下来。
可以通过修改宏代码将引用方式改为相对引用,这样宏就可以适应不同的数据范围。
2. 使用循环结构:循环结构可以使宏在一定的条件下重复执行,比如复制粘贴操作。
excel 宏教程

Excel 宏教程
什么是 Excel 宏?
Excel 宏(Macro)是 Excel 中的一种功能,可以通过宏来编写一系列的命令和操作,从而自动化完成重复性的任务。
使用宏可以大大提高工作效率,减少人工操作的错误。
如何创建宏?
在 Excel 中,可以通过以下步骤创建宏:
1.打开 Excel 文件,并选择“开发工具”选项卡。
2.在“开发工具”选项卡中,点击“宏”按钮,弹出“宏”对
话框。
3.在“宏”对话框中,输入宏的名称,并选择“创建”按
钮,进入 Visual Basic for Applications (VBA) 编辑器。
4.在 VBA 编辑器中,可以编辑宏的代码。
5.在代码编辑器中,输入宏的逻辑和命令。
6.编辑完成后,保存宏并退出 VBA 编辑器。
编写宏的语法
在 VBA 编辑器中,编写宏的语法需要遵循一定的规则。
下
面是一些常用的语法要点:
1.宏的代码从Sub关键字开始,以End Sub关键字结
束。
代码位于这两个关键字之间。
2.使用单引号(')作为注释符号,可以在代码中加
入注释,提高代码的可读性。
3.使用空格或缩进来组织代码结构,使代码更加易读。
4.使用变量来存储和操作数据,提高代码的灵活性和
可维护性。
5.使用Range对象来表示 Excel 中的单元格或区域。
可以通过Cells属性或Range方法来操作单元格或区域。
下面是一个简单的宏示例:
```vba Sub HelloWorld() ’ 输出。
excel 命令中英对照
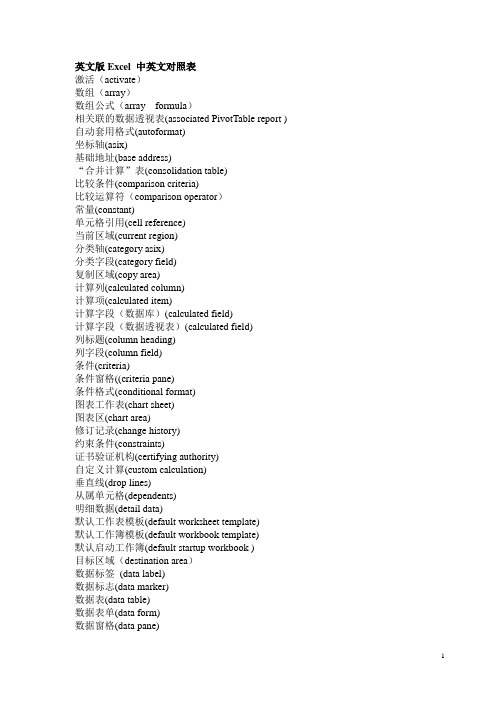
英文版Excel 中英文对照表激活(activate)数组(array)数组公式(array formula)相关联的数据透视表(associated PivotTable report ) 自动套用格式(autoformat)坐标轴(asix)基础地址(base address)“合并计算”表(consolidation table)比较条件(comparison criteria)比较运算符(comparison operator)常量(constant)单元格引用(cell reference)当前区域(current region)分类轴(category asix)分类字段(category field)复制区域(copy area)计算列(calculated column)计算项(calculated item)计算字段(数据库)(calculated field)计算字段(数据透视表)(calculated field)列标题(column heading)列字段(column field)条件(criteria)条件窗格((criteria pane)条件格式(conditional format)图表工作表(chart sheet)图表区(chart area)修订记录(change history)约束条件(constraints)证书验证机构(certifying authority)自定义计算(custom calculation)垂直线(drop lines)从属单元格(dependents)明细数据(detail data)默认工作表模板(default worksheet template)默认工作簿模板(default workbook template)默认启动工作簿(default startup workbook )目标区域(destination area)数据标签(data label)数据标志(data marker)数据表(data table)数据表单(data form)数据窗格(data pane)数据点(data points)数据库(database)数据区域(data region)数据系列(data series)数据有效性(data validation)数据源(data source)数据源驱动程序(data source driver)图表数据表(data table in charts)下拉列表框(drop-down list box)值区域(values area)值字段(value field)表达式(expression)嵌入图表(embedded chart)外部数据(external data)外部数据区域(external data range)外部引用(external reference)误差线(error bars)编辑栏(formula bar)公式(formula)公式选项板(Formula Palette)函数(function)函数筛选(filter)填充柄(fill handle)字段(数据库)(field)字段(数据透视表)(field)单变量求解(goal seek)图表中的网络线(gridlines charts)组(group)冲突日志工作表(history worksheet)高低点连线(high-low lines)插入行(Insert row)迭代(iteration)绝对交集(implicit intersection)内部连接(inner join)输入单元格(imput cell)索引(index)项(item)连接(join)连接线(join line)锁定的字段或记录(locked field or record) 图例(legend)图例项标示(legend keys)合并单元格(merged cell)活动选定框(moving border)矩阵(matrix)移动平均(moving average)映射范围(mapped range)操作数(operand)分级显示(outline)分级显示符号(outline symbols)分级显示数据(outline data)脱机多维数据集文件(offline cube file)外部连接(outer join)运算符(operator)磅(point)保护(protect)报表筛选(reporter filter)参数parameter参数查询parameter query打印标题print totles打印区域print area分页符page break分页预览page break preview绘图区plot area密码password数据透视表PivotTable report数据透视表分类汇总PivotTable sobtotal数据透视表列表PivotTable list数据透视表数据PivotTable data数据透视表总计PivotTable grand totals数据透视图报表Pivotchart report数据透视图分类字段Pivotchart category field 数据透视图系列字段Pivotchart series field透视区域pivot area引用单元格precedents粘贴区域paste area主键primary key属性字段property fields查询queryExcel函数大全数据库和清单管理函数DA VERAGE (daverage) 返回选定数据库项的平均值DCOUNT (dcount) 记算数据库中包含数字的单元格的个数DCOUNTA (dcounta) 记算数据库中非空单元格的个数DGET (dget) 从数据库中提取满足指定条件的单个记录DMAX (dmax) 返回选定数据库项中的最大值DMIN (dmin) 返回选定数据库项中的最小值DPRODUCT (dproduct) 乘以特定字段(此字段中的记录为数据库中满足指定条件的记录)中的值DSTDEV (dstdev) 根据数据库中选定项的示例估算标准偏差DSTDEVP (dstdevp) 根据数据库中选定项的样本总体计算标准偏差DSUM (dsum) 对数据库中满足条件的记录的字段列中的数字求和DV AR (dvar) 根据数据库中选定项的示例估算方差DV ARP (dvarp) 根据数据库中选定项的样本总体计算方差GETPIVOTDATA(getpivotdata)返回存储在数据透视表中的数据日期和时间函数DATE (date) 返回特定时间的系列数DATEDIF (datedif) 计算两个日期之间的年、月、日数DATEV ALUE (datevalue) 将文本格式的日期转换为系列数DAY(day) 将系列数转换为月份中的日DAYS360 (days360) 按每年360天计算两个日期之间的天数EDATE (edate) 返回在开始日期之前或之后指定月数的某个日期的系列数EOMONTH (eomonth) 返回指定月份数之前或之后某月的最后一天的系列数HOUR (hour)将系列数转换为小时MINITE (minite) 将系列数转换为分钟MONTH (month) 将系列数转换为月NETWORKDAYS (networkdays) 返回两个日期之间的完整工作日数NOW (now) 返回当前日期和时间的系列数SECOND (second) 将系列数转换为秒TIME (time) 返回特定时间的系列数TIMEV ALUE (timevalue) 将文本格式的时间转换为系列数TODAY (today) 返回当天日期的系列数WEEKDAY (weekday) 将系列数转换为星期WORKDAY (workday) 返回指定工作日数之前或之后某日期的系列数YEAR(year) 将系列数转换为年YEARFRAC(yearfrac)(返回代表START_DATE(开始日期)和END_DATE(结束日期)之间天数的以年为单位的分数DDE 和外部函数CALL(call) 调用动态链接库(DLL)或代码源中的过程REGISTER.ID(register.id) 返回已注册的指定DLL或代码源的注册IDSQL.REQUEST (sql.request)连接外部数据源,并从工作表中运行查询,然后将结果作为数组返回,而无需进行宏编程。
excel宏的基本逻辑语句

Excel 宏使用的是 Visual Basic for Applications(VBA)语言,基本逻辑语句与常规的编程语言相似。
下面是一些 Excel 宏中常见的基本逻辑语句:
1. 条件语句 - If...Then...Else:
用于根据条件执行不同的代码块。
2. 循环语句 - For...Next:
用于执行循环操作。
3. Do...Loop 语句:
用于执行循环,可以是条件循环或无限循环。
4. Select Case 语句:
用于根据表达式的值执行不同的代码块。
5. 函数调用:
调用内置或自定义的函数。
6. 错误处理 - On Error 语句:
用于处理运行时错误。
这些基本逻辑语句为 Excel 宏提供了编写灵活和功能强大的宏的基础。
在实际使用中,可以根据具体需求组合和嵌套这些语句。
EXCEL中的宏使用实例讲解

EXCEL中的宏使用实例讲解宏(Macro)是Microsoft Excel中的一项功能,用于自动化繁琐重复的操作。
通过使用宏,用户可以录制一系列的操作步骤,并将其保存为宏代码,然后将来可以单击一个按钮或使用快捷键来执行这些操作步骤。
在本文中,我们将讲解一些常见的Excel宏使用实例。
1.插入当前日期:```vbaSub InsertDateActiveCell.Value = DateEnd Sub```2.运行公式:```vbaSub RunFormulaDim ws As WorksheetFor Each ws In ActiveWorkbook.Worksheetsws.ActivateRange("A1").SelectActiveCell.FormulaR1C1 = "=SUM(R2C2:R6C2)"Next wsEnd Sub```3.清除内容:```vbaSub ClearContentCells.ClearContentsEnd Sub```4.格式化单元格:```vbaSub FormatCellsSelection.Font.Color = RGB(255, 0, 0) ' 设置字体颜色为红色Selection.Font.Bold = True ' 设置文本加粗End Sub```5.合并单元格:```vbaSub MergeCellsSelection.Merge ' 合并单元格With Selection.HorizontalAlignment = xlCenter ' 水平居中.VerticalAlignment = xlCenter ' 垂直居中End WithEnd Sub```这些实例只是Excel宏的冰山一角。
Excel宏可以实现更加复杂的操作,包括读取和写入文件、创建自定义对话框等。
excel 命令中英对照
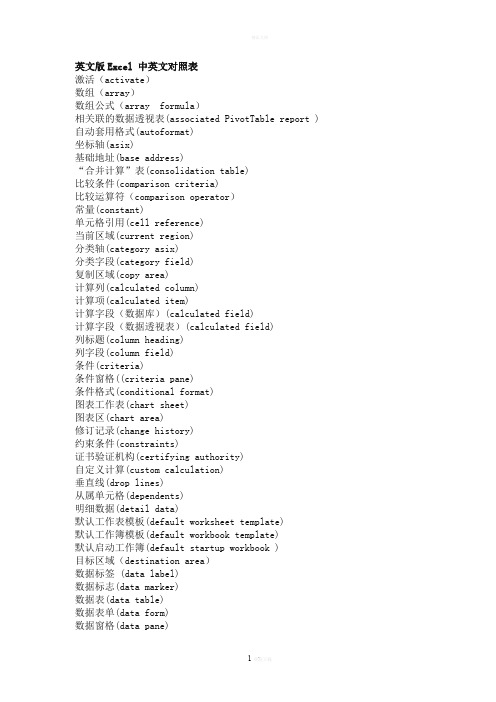
英文版Excel 中英文对照表激活(activate)数组(array)数组公式(array formula)相关联的数据透视表(associated PivotTable report ) 自动套用格式(autoformat)坐标轴(asix)基础地址(base address)“合并计算”表(consolidation table)比较条件(comparison criteria)比较运算符(comparison operator)常量(constant)单元格引用(cell reference)当前区域(current region)分类轴(category asix)分类字段(category field)复制区域(copy area)计算列(calculated column)计算项(calculated item)计算字段(数据库)(calculated field)计算字段(数据透视表)(calculated field)列标题(column heading)列字段(column field)条件(criteria)条件窗格((criteria pane)条件格式(conditional format)图表工作表(chart sheet)图表区(chart area)修订记录(change history)约束条件(constraints)证书验证机构(certifying authority)自定义计算(custom calculation)垂直线(drop lines)从属单元格(dependents)明细数据(detail data)默认工作表模板(default worksheet template)默认工作簿模板(default workbook template)默认启动工作簿(default startup workbook )目标区域(destination area)数据标签 (data label)数据标志(data marker)数据表(data table)数据表单(data form)数据窗格(data pane)数据点(data points)数据库(database)数据区域(data region)数据系列(data series)数据有效性(data validation)数据源(data source)数据源驱动程序(data source driver)图表数据表(data table in charts)下拉列表框(drop-down list box)值区域(values area)值字段(value field)表达式(expression)嵌入图表(embedded chart)外部数据(external data)外部数据区域 (external data range)外部引用(external reference)误差线(error bars)编辑栏(formula bar)公式(formula)公式选项板(Formula Palette)函数(function)函数筛选(filter)填充柄(fill handle)字段(数据库)(field)字段(数据透视表)(field)单变量求解(goal seek)图表中的网络线(gridlines charts)组(group)冲突日志工作表(history worksheet)高低点连线(high-low lines)插入行(Insert row)迭代(iteration)绝对交集(implicit intersection)内部连接(inner join)输入单元格(imput cell)索引(index)项(item)连接(join)连接线(join line)锁定的字段或记录(locked field or record) 图例(legend)图例项标示(legend keys)合并单元格(merged cell)活动选定框(moving border)矩阵(matrix)移动平均(moving average)映射范围(mapped range)操作数(operand)分级显示(outline)分级显示符号(outline symbols)分级显示数据(outline data)脱机多维数据集文件(offline cube file)外部连接(outer join)运算符(operator)磅(point)保护(protect)报表筛选(reporter filter)参数 parameter参数查询 parameter query打印标题 print totles打印区域 print area分页符 page break分页预览 page break preview绘图区 plot area密码 password数据透视表 PivotTable report数据透视表分类汇总 PivotTable sobtotal数据透视表列表 PivotTable list数据透视表数据 PivotTable data数据透视表总计 PivotTable grand totals数据透视图报表 Pivotchart report数据透视图分类字段 Pivotchart category field 数据透视图系列字段 Pivotchart series field 透视区域 pivot area引用单元格 precedents粘贴区域 paste area主键 primary key属性字段 property fields查询 queryExcel函数大全数据库和清单管理函数DAVERAGE (daverage) 返回选定数据库项的平均值DCOUNT (dcount) 记算数据库中包含数字的单元格的个数DCOUNTA (dcounta) 记算数据库中非空单元格的个数DGET (dget) 从数据库中提取满足指定条件的单个记录DMAX (dmax) 返回选定数据库项中的最大值DMIN (dmin) 返回选定数据库项中的最小值DPRODUCT (dproduct) 乘以特定字段(此字段中的记录为数据库中满足指定条件的记录)中的值DSTDEV (dstdev) 根据数据库中选定项的示例估算标准偏差DSTDEVP (dstdevp) 根据数据库中选定项的样本总体计算标准偏差DSUM (dsum) 对数据库中满足条件的记录的字段列中的数字求和DVAR (dvar) 根据数据库中选定项的示例估算方差DVARP (dvarp) 根据数据库中选定项的样本总体计算方差GETPIVOTDATA(getpivotdata)返回存储在数据透视表中的数据日期和时间函数DATE (date) 返回特定时间的系列数DATEDIF (datedif) 计算两个日期之间的年、月、日数DATEVALUE (datevalue) 将文本格式的日期转换为系列数DAY(day) 将系列数转换为月份中的日DAYS360 (days360) 按每年360天计算两个日期之间的天数EDATE (edate) 返回在开始日期之前或之后指定月数的某个日期的系列数EOMONTH (eomonth) 返回指定月份数之前或之后某月的最后一天的系列数HOUR (hour)将系列数转换为小时MINITE (minite) 将系列数转换为分钟MONTH (month) 将系列数转换为月NETWORKDAYS (networkdays) 返回两个日期之间的完整工作日数NOW (now) 返回当前日期和时间的系列数SECOND (second) 将系列数转换为秒TIME (time) 返回特定时间的系列数TIMEVALUE (timevalue) 将文本格式的时间转换为系列数TODAY (today) 返回当天日期的系列数WEEKDAY (weekday) 将系列数转换为星期WORKDAY (workday) 返回指定工作日数之前或之后某日期的系列数YEAR(year) 将系列数转换为年YEARFRAC(yearfrac)(返回代表START_DATE(开始日期)和END_DATE(结束日期)之间天数的以年为单位的分数DDE 和外部函数CALL(call) 调用动态链接库(DLL)或代码源中的过程REGISTER.ID(register.id) 返回已注册的指定DLL或代码源的注册IDSQL.REQUEST (sql.request)连接外部数据源,并从工作表中运行查询,然后将结果作为数组返回,而无需进行宏编程。
4级高频单词excel
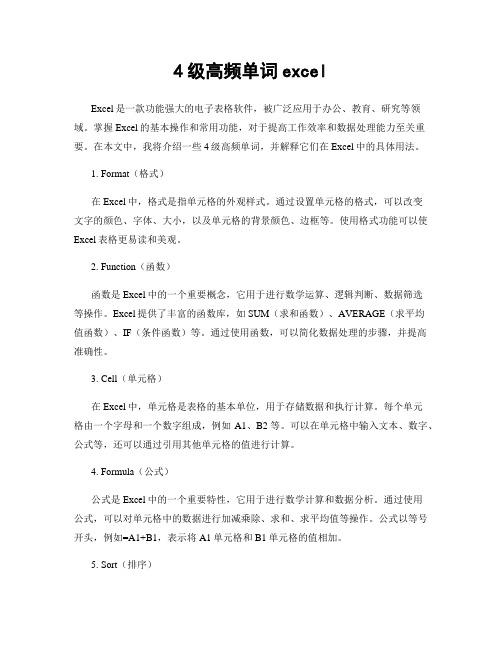
4级高频单词excelExcel是一款功能强大的电子表格软件,被广泛应用于办公、教育、研究等领域。
掌握Excel的基本操作和常用功能,对于提高工作效率和数据处理能力至关重要。
在本文中,我将介绍一些4级高频单词,并解释它们在Excel中的具体用法。
1. Format(格式)在Excel中,格式是指单元格的外观样式。
通过设置单元格的格式,可以改变文字的颜色、字体、大小,以及单元格的背景颜色、边框等。
使用格式功能可以使Excel表格更易读和美观。
2. Function(函数)函数是Excel中的一个重要概念,它用于进行数学运算、逻辑判断、数据筛选等操作。
Excel提供了丰富的函数库,如SUM(求和函数)、AVERAGE(求平均值函数)、IF(条件函数)等。
通过使用函数,可以简化数据处理的步骤,并提高准确性。
3. Cell(单元格)在Excel中,单元格是表格的基本单位,用于存储数据和执行计算。
每个单元格由一个字母和一个数字组成,例如A1、B2等。
可以在单元格中输入文本、数字、公式等,还可以通过引用其他单元格的值进行计算。
4. Formula(公式)公式是Excel中的一个重要特性,它用于进行数学计算和数据分析。
通过使用公式,可以对单元格中的数据进行加减乘除、求和、求平均值等操作。
公式以等号开头,例如=A1+B1,表示将A1单元格和B1单元格的值相加。
5. Sort(排序)排序是Excel中的一项常用功能,用于按照特定的条件对数据进行排序。
通过排序功能,可以将数据按照升序或降序排列,以便更好地分析和理解数据。
在Excel中,可以对单列或多列数据进行排序。
6. Filter(筛选)筛选是Excel中的一项重要功能,用于根据特定的条件对数据进行筛选和过滤。
通过筛选功能,可以只显示满足条件的数据,以便更好地分析和处理数据。
可以对单列或多列数据进行筛选,并可以同时应用多个筛选条件。
7. Chart(图表)图表是Excel中可视化数据的一种方式,通过图表可以更直观地展示数据的趋势、关系和比较。
表格中宏公式
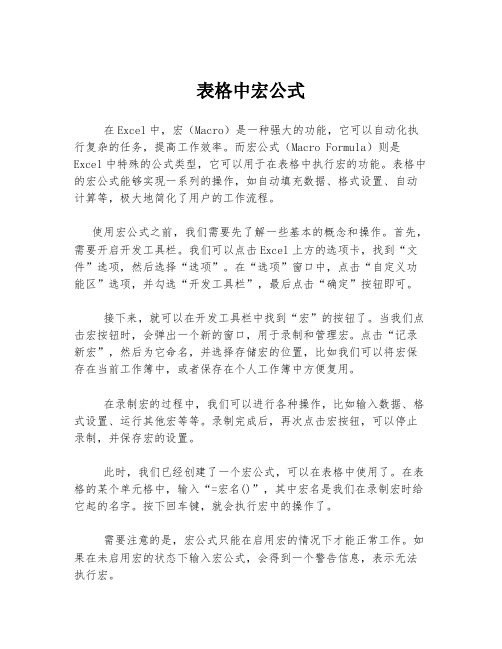
表格中宏公式在Excel中,宏(Macro)是一种强大的功能,它可以自动化执行复杂的任务,提高工作效率。
而宏公式(Macro Formula)则是Excel中特殊的公式类型,它可以用于在表格中执行宏的功能。
表格中的宏公式能够实现一系列的操作,如自动填充数据、格式设置、自动计算等,极大地简化了用户的工作流程。
使用宏公式之前,我们需要先了解一些基本的概念和操作。
首先,需要开启开发工具栏。
我们可以点击Excel上方的选项卡,找到“文件”选项,然后选择“选项”。
在“选项”窗口中,点击“自定义功能区”选项,并勾选“开发工具栏”,最后点击“确定”按钮即可。
接下来,就可以在开发工具栏中找到“宏”的按钮了。
当我们点击宏按钮时,会弹出一个新的窗口,用于录制和管理宏。
点击“记录新宏”,然后为它命名,并选择存储宏的位置,比如我们可以将宏保存在当前工作簿中,或者保存在个人工作簿中方便复用。
在录制宏的过程中,我们可以进行各种操作,比如输入数据、格式设置、运行其他宏等等。
录制完成后,再次点击宏按钮,可以停止录制,并保存宏的设置。
此时,我们已经创建了一个宏公式,可以在表格中使用了。
在表格的某个单元格中,输入“=宏名()”,其中宏名是我们在录制宏时给它起的名字。
按下回车键,就会执行宏中的操作了。
需要注意的是,宏公式只能在启用宏的情况下才能正常工作。
如果在未启用宏的状态下输入宏公式,会得到一个警告信息,表示无法执行宏。
总结一下,表格中的宏公式是一种强大的工具,它可以帮助我们自动化处理大量的工作,提高工作效率。
通过了解和学习如何创建和使用宏公式,我们可以更好地利用Excel的功能,减少手动操作的繁琐,让工作变得更加轻松和高效。
这就是关于表格中宏公式的介绍,在Excel中利用宏公式能够帮助我们完成各种复杂的任务,提高工作效率。
希望通过本文的介绍,能够让您更加了解宏公式的使用方法,从而在日常工作中更加灵活地运用Excel的功能。
Excel宏的使用与编写教程

Excel宏的使用与编写教程第一章:Excel宏的介绍与基本操作Excel宏是一种用Visual Basic for Applications(VBA)语言编写的自动化程序,可以在Excel中执行一系列操作,从而提高工作效率。
在本章中,将介绍Excel宏的基本概念和常用操作,帮助读者快速入门。
1.1 Excel宏的概念Excel宏是一种录制和执行一系列指令的功能,可以用于自动化处理Excel数据和完成重复性任务。
宏可以包含多个操作步骤,并支持用户通过快捷键或按钮来触发执行。
1.2 启用开发工具在开始使用Excel宏之前,首先需要在Excel中启用开发工具选项。
可以通过点击“文件”菜单>“选项”>“自定义功能区”,勾选“开发工具”选项,然后点击“确认”按钮。
1.3 录制宏的操作步骤录制宏可以将用户的操作步骤记录下来,并生成相应的VBA 代码。
录制宏的操作步骤如下:(1)点击“开发工具”选项卡中的“录制宏”按钮。
(2)在弹出的对话框中,输入宏的名称和描述,选择宏的存储位置,然后点击“确定”按钮。
(3)进行需要录制的操作步骤,如数据输入、格式调整、公式计算等。
(4)点击“开发工具”选项卡中的“停止录制”按钮,结束录制。
1.4 执行宏的操作步骤录制完成后的宏可以被执行,执行宏的操作步骤如下:(1)点击“开发工具”选项卡中的“宏”按钮。
(2)在弹出的宏列表中,选择要执行的宏名称,然后点击“运行”按钮。
(3)宏将自动按照录制时的操作顺序执行。
第二章:Excel宏的常用功能Excel宏的功能非常强大,除了录制基本操作外,还支持各种复杂的数据处理和计算。
本章将介绍Excel宏的几个常用功能,帮助读者更好地应用Excel宏解决实际问题。
2.1 数据过滤与筛选Excel宏可以通过VBA代码实现数据的自动过滤和筛选。
通过编写代码,可以根据设定的条件自动筛选出符合条件的数据,并将结果进行展示。
2.2 数据透视表数据透视表是Excel中一个非常有用的功能,可以通过Excel 宏自动创建和更新数据透视表。
EXCEL宏的简单教程

EXCEL宏的简单教程Excel宏是一个非常有用的功能,它可以帮助我们自动执行重复性的任务,提高工作效率。
本教程将向您介绍Excel宏的基本概念、创建和运行宏的步骤以及常用的宏编程技巧。
一、Excel宏的基本概念Excel宏是由VBA(Visual Basic for Applications)编写的一段代码,可以用于自动化执行一系列任务。
通过宏,我们可以将繁琐且重复的操作简化为一次性的操作,节省时间和精力。
在Excel中,可以使用宏录制器来记录我们的操作,然后生成对应的宏代码。
这样,在以后的使用中,我们只需要运行该宏代码即可完成相同的操作。
二、创建和运行宏的步骤1. 打开Excel并进入开发工具栏:首先,我们需要打开Excel,并激活开发工具栏。
如果您没有看到开发工具栏,可以按下Alt+F11键,或在Excel选项中启用显示开发工具栏。
2. 录制宏操作:在开发工具栏中,单击“宏录制器”按钮。
弹出一个对话框,请为宏命名,并选择将宏存储在“这个工作簿”或“个人工作簿”中。
选择存储位置后,单击“确定”按钮开始录制。
现在,您可以开始执行一系列操作来完成您需要自动化的任务。
宏录制器将记录您的每一步操作。
3. 停止录制宏:当您完成任务后,返回开发工具栏,单击“宏录制器”按钮,然后单击“停止录制”或按下Ctrl+Shift+S快捷键停止录制。
4. 运行宏:在需要运行宏的地方,选择“开发工具栏”中的“宏”按钮。
在弹出的对话框中,选择您要运行的宏,然后单击“运行”按钮。
您也可以为宏分配快捷键来方便地运行宏。
只需在录制宏时或通过“宏”对话框中的“选项”按钮分配快捷键即可。
三、常用的宏编程技巧1. 变量和数据类型:在编写宏代码时,我们经常会使用变量和不同的数据类型。
例如,使用整数(Integer)数据类型来存储整数值,使用字符串(String)数据类型来存储文本值等。
2. 条件语句和循环结构:我们可以使用条件语句(如If-Then-Else语句)和循环结构(如For循环和While循环)来控制宏的执行流程。
关于excel“宏”的使用教程,很多人都不知道
关于excel“宏”的使用教程,很多人都不知道说到「宏」,学过Excel 有一段时间的人,估计至少听说过几次。
我们对「宏」的了解包括提高效率、批量操作、无需编程基础等等。
那么,「宏」是否能提高工作效率、是否容易掌握,接下来我们一探究竟。
什么是 Excel 宏?简单来说,Excel 宏指的是,使用Excel 内置的编程语言VBA (Visual Basic for Applications)写的,能在 Excel 环境里运行的一系列操作指令。
我们在Excel 里手动进行的几乎所有操作,宏(VBA)也都可以操作。
在这里,什么是VBA,这篇文章暂不做介绍,简单可以认为宏就是 VBA。
这里我们可能疑惑,我自己可以进行的操作,为什么还需要宏呢?因为,宏具有两个诱人的特性:1. 宏可以帮你自动完成重复、批量的任务。
2. 录制宏不需要其他技术,你只需把任务「演示」给 Excel 即可。
为什么要用宏?想象你平时在洗衣服前的准备工作:①找出脏衣物;②分类;③给洗衣机注水;④倒洗衣液;⑤放入衣服。
如果你每周洗一次衣服,一年就需要重复以上步骤53次。
那么我告诉你,有一个机器人,你只需给他演示一次准备工作,它就能记住所有步骤,并每次帮你在极短的时间内完成,你想不想用这个机器人呢?如果我们把Excel 中数据处理比作是洗衣服,那么准备数据就是洗衣服前烦琐的准备工作。
现实中,准备数据往往会占用我们大量的时间,如果这部分时间能减少,我们的工作效率也会相应的提高。
宏,就是一个自动化完成重复工作的工具。
而且,只要会用 Excel,就可以学会录制并使用宏,提高工作效率。
接下来,一步一步教你如何录制一个简单的宏,并运行它。
开启「开发工具」录制和管理宏,需要使用「开发工具」选项卡。
默认情况下,Excel 不显示此选项卡,需要自定义开启。
开启步骤如下:第一步:在功能区任意一区域点击右键,弹出的菜单中选择「自定义功能区」。
第二步:在右侧选项卡列表中,找到「开发工具」并勾选。
表格中宏的用法
技术报告:宏在Excel中的用法
一、引言
在Excel中,宏是一种强大的自动化工具,可以极大地提高数据处理和报表生成的工作效率。
通过宏,用户可以创建一系列自动执行的命令,以实现数据筛选、格式设置、计算、数据导入导出等操作。
本文将详细介绍Excel中宏的用法,帮助用户更好地理解和掌握这一功能。
二、宏的创建与录制
1.打开Excel,按下Alt + F11键,打开VBA编辑器。
2.在VBA编辑器中,选择“插入”菜单,然后选择“模块”,创建一个新的模块。
3.在新模块中,输入宏的名称,例如“MyMacro”。
4.点击工具栏上的“录制新宏”按钮,开始录制宏。
5.在Excel中执行所需的操作,例如筛选数据、设置格式等。
6.完成操作后,再次点击“录制新宏”按钮停止录制。
三、宏的编辑与修改
1.在VBA编辑器中,打开刚刚录制的宏(MyMacro)。
2.可以看到宏中包含了所有的操作步骤。
可以根据需要进行修改或添加新的步骤。
3.修改完成后,点击工具栏上的“运行子/用户窗体”按钮,测试宏的功能。
4.根据测试结果,对宏进行必要的调整。
四、宏的执行与运行
1.在Excel中,按下Alt + F8键,打开宏对话框。
2.在宏对话框中,选择要运行的宏(MyMacro)。
3.点击“运行”按钮,执行宏。
4.宏将自动执行在录制过程中所记录的所有操作。
五、注意事项与安全问题
1.在使用宏时,应确保计算机处于安全的环境中,避免执行来自不可信来源的宏。
Excel宏(英文)

Excel宏(英⽂)Create or delete a macroApplies to: Microsoft Office Excel 2007 To automate a repetitive task, you can quickly record a macro in Microsoft Office Excel. You can also create a macro by using the Visual Basic Editor in Microsoft Visual Basic to write your own macro script, or to copy all or part of a macro to a new macro. After you create a macro, you can assign it to an object (such as a toolbar button, graphic, or control) so that you can run it by clicking the object. If you no longer use a macro, you can delete it.What do you want to do?Record a macroCreate a macro by using Microsoft Visual BasicCopy part of a macro to create another macroAssign a macro to an object, graphic, or controlDelete a macroRecord a macroWhen you record a macro, the macro recorder records all the steps required to complete the actions that you want your macro to perform. Navigation on the Ribbon is not included in the recorded steps.The Ribbon is a component of the Microsoft Office Fluent user interface.1.If the Developer tab is not available, do the following to display it:1.Click the Microsoft Office Button, and then click Excel Options.2.In the Popular category, under Top options for working with Excel, select the Show Developer tab in the Ribbon check box, and then click OK.2.To set the security level temporarily to enable all macros, do the following:1.On the Developer tab, in the Code group, click Macro Security.2.Under Macro Settings, click Enable all macros (not recommended, potentially dangerous code can run), and then click OK.To help prevent potentially dangerous code from running, we recommend that you return to any one of the settings that disable all macros after you finish working with macros.For more information about how to change the settings, see Change macro security settings in Excel.3.On the Developer tab, in the Code group, click Record Macro.4.In the Macro name box, enter a name for the macro.The first character of the macro name must be a letter. Subsequent characters can be letters, numbers, or underscore characters. Spaces cannot be used in a macro name; an underscore character works well as a word separator. If you use amacro name that is also a cell reference, you may get an error message that the macro name is not valid.5.To assign a CTRL combination shortcut key to run the macro, in the Shortcut key box, type any lowercase letter or uppercase letter that you want to use.The shortcut key will override any equivalent default Excel shortcut key while the workbook that contains the macro is open. For a list of CTRL combination shortcut keys that are already assigned in Excel, see Excel shortcut and function keys.6.In the Store macro in list, select the workbook where you want to store the macro.If you want a macro to be available whenever you use Excel, select Personal Macro Workbook. When you select Personal Macro Workbook, Excel creates a hidden personal macro workbook (Personal.xlsb) if it does not already exist, and saves the macro in this workbook. In Windows Vista, this workbook is saved in the C:\Users\username\AppData\Local\Microsoft\Excel\XLStart folder. In Microsoft Windows XP, this workbook is saved in theC:\Documents and Settings\user name\ApplicationData\Microsoft\Excel\XLStart folder. Workbooks in the XLStart folder are opened automatically whenever Excel starts. If you want a macro in the personal macro workbook to be run automatically in another workbook, you must also save that workbook in the XLStart folder so that both workbooks are opened when Excel starts.7.In the Description box, type a description of the macro.8.Click OK to start recording.9.Perform the actions that you want to record.10.On the Developer tab, in the Code group, click StopRecording.You can also click Stop Recording on the left side of the status bar.TOP OF PAGECreate a macro by using Microsoft Visual Basic1.If the Developer tab is not available, do the following to display it:1.Click the Microsoft Office Button, and then click Excel Options.2.In the Popular category, under Top options for working with Excel, select the Show Developer tab in the Ribbon check box, and then click OK.2.To set the security level temporarily to enable all macros, do the following:1.On the Developer tab, in the Code group, click Macro Security.2.Under Macro Settings, click Enable all macros (not recommended, potentially dangerous code can run), and then click OK.To help prevent potentially dangerous code from running, we recommend that you return to any one of the settings that disable all macros after you finish working with macros.3.On the Developer tab, in the Code group, click Visual Basic.4.If needed, in the Visual Basic Editor, on the Insert menu, click Module.Modules are automatically created for all sheets in the workbook.5.In the code window of the module, type or copy the macro code that you want to use.6.To run the macro from the module window, press F5.7.In the Visual Basic Editor, on the File menu, click Close and Return to Microsoft Excel when you finish writing the macro. TOP OF PAGECopy part of a macro to create another macro1.If the Developer tab is not available, do the following to display it:1.Click the Microsoft Office Button, and then click Excel Options.2.In the Popular category, under Top options for working with Excel, select the Show Developer tab in the Ribbon check box, and then click OK.2.To set the security level temporarily to enable all macros, do the following:1.On the Developer tab, in the Code group, click Macro Security.2.Under Macro Settings, click Enable all macros (not recommended, potentially dangerous code can run), and then click OK.To help prevent potentially dangerous code from running, we recommend that you return to any one of the settings that disable all macros after you finish working with macros.3.Open the workbook that contains the macro that you want to copy.4.On the Developer tab, in the Code group, click Macros.5.In the Macro name box, click the name of the macro that you want to copy.6.Click Edit.7.In the code window of the Visual Basic Editor, select the lines of the macro that you want to copy.To copy the whole macro, include the Sub and End Sub lines in the selection.8.On the Edit menu, click Copy.You can also right-click and then click Copy, or you can press CTRL+C.9.In the Procedure box of the code window, click the module where you want to place the code.10.On the Edit menu, click Paste.You can also right-click and then click Paste, or you can press CTRL+V.You cannot edit your Personal Macro Workbook file (Personal.xlsb) because it is a hidden workbook that is always open. You must first unhide it by using the Unhide command. You can also open it in the Visual Basic Editor by pressing ALT+F11. TOP OF PAGEAssign a macro to an object, graphic, or control1.On a worksheet, right-click the object, graphic, or control to which you want to assign an existing macro, and then click Assign Macro.2.In the Macro name box, click the macro that you want to assign.TOP OF PAGEDelete a macro1.Do one of the following:Open the workbook that contains the macro that you want to delete.If the macro that you want to delete is stored in the personal macro workbook (Personal.xlsb), and this workbook is hidden, do the following to unhide the workbook:1.On the View tab, in the Window group, click Unhide.2.Under Unhide workbooks, click PERSONAL, and then click OK.2.If the Developer tab is not available, do the following to display it:1.Click the Microsoft Office Button, and then click Excel Options.2.In the Popular category, under Top options for working with Excel, select the Show Developer tab in the Ribbon check box, and then click OK.3.On the Developer tab, in the Code group, click Macros.4.In the Macros in list, select the workbook that contains the macro that you want to delete. For example, click This Workbook.5.In the Macro name box, click the name of the macro that you want to delete.6.Click Delete.TOP OF PAGEDid this article help you? YesNoNot what I was looking for。
如何在Excel中使用宏自动化操作
如何在Excel中使用宏自动化操作微软Excel是一款广泛应用于数据处理和分析的电子表格软件。
宏(Macro)是Excel提供的一个十分强大的功能,它可以用来记录和执行一系列的操作步骤,实现自动化处理,提高工作效率。
本文将介绍如何在Excel中利用宏进行自动化操作。
一、什么是宏?宏是一组指令或命令的集合,可以用来执行任务或一系列操作。
通过生成和运行宏,可以实现自动化处理,提高工作效率。
二、如何录制宏1. 打开Excel并创建一个新的工作表。
2. 在“开发工具”栏中找到“宏”,点击“录制宏”按钮。
3. 输入宏的名称和快捷键,选择存储宏的位置。
4. 点击“确定”开始录制宏。
5. 在录制宏期间,执行一系列需要自动化的操作,例如插入数据、格式调整等。
6. 完成录制后,点击“停止录制”按钮。
三、如何编辑和运行宏1. 在Excel的“开发工具”栏中,点击“宏”按钮,选择需要编辑和运行的宏。
2. 点击“编辑”按钮,在弹出的窗口中进行编辑。
3. 编辑完毕后,点击“保存”按钮。
4. 要运行宏,可以通过多种方式,例如按下预设的快捷键,或在菜单栏中选择运行宏的选项。
四、常用的宏操作1. 数据处理:通过宏可以实现数据的自动筛选、排序、过滤等操作。
2. 工作表操作:宏可以实现工作表的自动复制、重命名、删除等操作。
3. 格式调整:宏可以实现自动调整单元格格式、文本格式、颜色等操作。
4. 图表生成:宏可以实现自动创建图表、自动更新图表数据等操作。
5. 文件操作:宏可以实现自动保存、另存为、关闭文件等操作。
五、注意事项1. 在录制宏之前,建议事先规划需要自动化操作的步骤,确保录制的宏能够满足实际需求。
2. 在录制宏期间,尽量避免进行复杂的操作或切换到其他应用程序,以免录制中断或出错。
3. 在编辑宏时,需要小心调整和删除宏的具体操作步骤,以免引发错误或不可预料的结果。
4. 宏中使用的命令和函数需要谨慎选择和使用,确保其功能和效果与预期一致。
Excel中的宏提高工作效率的秘密武器

Excel中的宏提高工作效率的秘密武器随着现代办公环境的不断发展,Excel已经成为了人们工作中必不可少的工具之一。
在Excel中,宏(Macro)是一种强大的功能,可以帮助用户自动执行特定的任务,提高工作效率。
本文将介绍Excel中的宏的基本概念、使用方法和一些实用技巧,帮助读者充分利用宏,从而成为Excel的秘密武器。
一、宏的基本概念和作用Excel的宏是一种可编程的功能,可以记录和执行一系列的操作,以达到自动化处理数据的目的。
宏录制器可以记录用户在Excel中进行的每一个操作,包括键入、选择、复制和粘贴等。
通过录制和执行宏,用户可以将繁琐和重复的任务自动化,从而节省时间和精力。
宏可以应用于各种不同的场景,比如数据处理、图表生成、报表生成等。
无论是对小型公司的数据分析,还是对大型跨国企业的财务分析,宏都能够起到关键的作用。
宏的灵活性和可扩展性使得用户能够根据自己的需求自定义宏的功能,从而实现更高效的工作。
二、宏的使用方法1. 录制宏首先,打开Excel并选择“开发工具”选项卡(如果没有此选项卡,请在“Excel选项”中启用“开发工具”),然后点击“录制宏”。
在弹出的对话框中,输入宏的名称和描述,选择宏的存储位置(个人工作簿或全局工作簿),点击“确定”开始录制。
接下来,你可以执行一系列的操作,比如输入数据、设置格式、编辑公式等。
在录制宏期间,Excel会自动记录你的每一个操作。
完成任务后,点击“停止录制”按钮,宏的录制就完成了。
2. 运行宏完成宏的录制后,你可以随时运行它。
在“开发工具”选项卡中,找到宏的列表,并选择你要运行的宏。
点击“运行”按钮,Excel会自动执行录制的一系列操作,从而完成预定的任务。
3. 分配宏按钮为了更方便地运行宏,你可以在Excel的工具栏或快速访问工具栏中添加一个按钮。
打开“自定义工具栏”对话框,在“命令”选项卡中选择“宏”类别,找到你要分配的宏,并将其拖动到工具栏上。
Excel将数字翻译成英文的宏定义详解
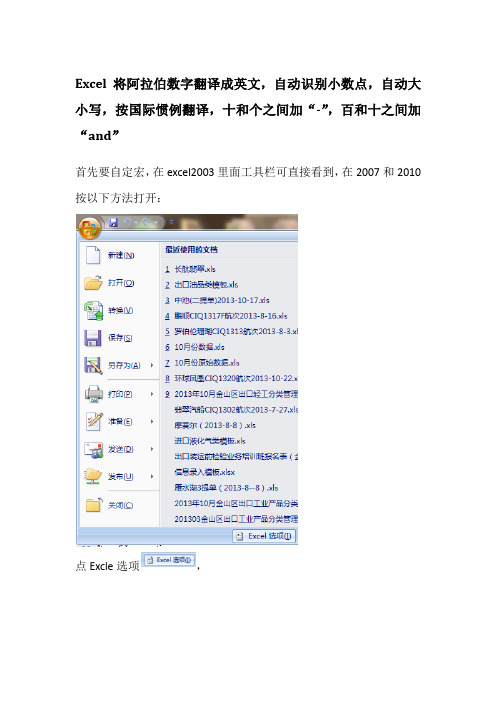
Excel将阿拉伯数字翻译成英文,自动识别小数点,自动大小写,按国际惯例翻译,十和个之间加“-”,百和十之间加“and”首先要自定宏,在excel2003里面工具栏可直接看到,在2007和2010按以下方法打开:点Excle选项,然后勾选“在功能区显示“开发工具选项卡“。
此时在功能区就能看到,开发工具了。
然后点击Visual Basic进入点击插入选择插入模块,默认为模块一在此对话框中输入自定义程序,然后直接关闭,如我们定义函数名为SpellNumber,在Excle中即开直接调用此函数,注意要在而excel设置中启用“宏”哦,小伙伴们可以自己编程实现excle所有工作了,快去试试吧(如有疑问可联系:张小觉qq367315133)附两段程序供参考:不带单位的直译:Function SpellNumber(ByVal MyNumber)Dim Dollars, Cents, TempDim DecimalPlace, CountReDim Place(9) As StringApplication.Volatile TruePlace(2) = " Thousand "Place(3) = " Million "Place(4) = " Billion "Place(5) = " Trillion " ' String representation of amountMyNumber = Trim(Str(MyNumber)) ' Position of decimal place 0 if none DecimalPlace = InStr(MyNumber, ".")'Convert cents and set MyNumber to dollar amountIf DecimalPlace > 0 ThenCents = GetTens(Left(Mid(MyNumber, DecimalPlace + 1) & "000", 3))MyNumber = Trim(Left(MyNumber, DecimalPlace - 1))End IfCount = 1Do While MyNumber <> ""Temp = GetHundreds(Right(MyNumber, 3))If Temp <> "" Then Dollars = Temp & Place(Count) & DollarsIf Len(MyNumber) > 3 ThenMyNumber = Left(MyNumber, Len(MyNumber) - 3)ElseMyNumber = ""End IfCount = Count + 1LoopSelect Case DollarsCase ""Dollars = "No Dollars"Case "One"Dollars = "One Dollar"Case ElseDollars = DollarsEnd SelectSelect Case CentsCase ""Cents = " and No Cents"Case "One"Cents = " and One Cent"Case ElseCents = " Point " & CentsEnd SelectSpellNumber = Dollars & CentsEnd Function'*******************************************' Converts a number from 100-999 into text *'*******************************************Function GetHundreds(ByVal MyNumber)Dim Result As StringIf Val(MyNumber) = 0 Then Exit FunctionMyNumber = Right("000" & MyNumber, 3) 'Convert the hundreds place If Mid(MyNumber, 1, 1) <> "0" ThenResult = GetDigit(Mid(MyNumber, 1, 1)) & " Hundred and "End If'Convert the tens and ones placeIf Mid(MyNumber, 2, 1) <> "0" ThenResult = Result & GetTens(Mid(MyNumber, 2))ElseResult = Result & GetDigit(Mid(MyNumber, 3))End IfGetHundreds = ResultEnd Function'*********************************************' Converts a number from 10 to 99 into text. *'*********************************************Function GetTens(TensText)Dim Result As StringResult = "" 'null out the temporary function valueIf Val(Left(TensText, 1)) = 1 Then ' If value between 10-19Select Case Val(TensText)Case 10: Result = "Ten"Case 11: Result = "Eleven"Case 12: Result = "Twelve"Case 13: Result = "Thirteen"Case 14: Result = "Fourteen"Case 15: Result = "Fifteen"Case 16: Result = "Sixteen"Case 17: Result = "Seventeen"Case 18: Result = "Eighteen"Case 19: Result = "Nineteen"Case ElseEnd SelectElse ' If value between 20-99Select Case Val(Left(TensText, 1))Case 2: Result = "Twenty-"Case 3: Result = "Thirty-"Case 4: Result = "Forty-"Case 5: Result = "Fifty- "Case 6: Result = "Sixty-"Case 7: Result = "Seventy-"Case 8: Result = "Eighty-"Case 9: Result = "Ninety-"Case ElseEnd SelectResult = Result & GetDigit _(Right(TensText, 1)) 'Retrieve ones placeEnd IfGetTens = ResultEnd Function'*******************************************' Converts a number from 1 to 9 into text. *'*******************************************Function GetDigit(Digit)Select Case Val(Digit)Case 1: GetDigit = "One"Case 2: GetDigit = "Two"Case 3: GetDigit = "Three"Case 4: GetDigit = "Four"Case 5: GetDigit = "Five"Case 6: GetDigit = "Six"Case 7: GetDigit = "Seven"Case 8: GetDigit = "Eight"Case 9: GetDigit = "Nine"Case Else: GetDigit = ""End SelectEnd Function带金额单位的翻译:SpellNumberFunction SpellNumber(ByVal MyNumber)Dim Dollars, Cents, TempDim DecimalPlace, CountReDim Place(9) As StringApplication.Volatile TruePlace(2) = " Thousand "Place(3) = " Million "Place(4) = " Billion "Place(5) = " Trillion " ' String representation of amountMyNumber = Trim(Str(MyNumber)) ' Position of decimal place 0 if none DecimalPlace = InStr(MyNumber, ".")'Convert cents and set MyNumber to dollar amountIf DecimalPlace > 0 ThenCents = GetTens(Left(Mid(MyNumber, DecimalPlace + 1) & "00", 2))MyNumber = Trim(Left(MyNumber, DecimalPlace - 1))End IfCount = 1Do While MyNumber <> ""Temp = GetHundreds(Right(MyNumber, 3))If Temp <> "" Then Dollars = Temp & Place(Count) & DollarsIf Len(MyNumber) > 3 ThenMyNumber = Left(MyNumber, Len(MyNumber) - 3)ElseMyNumber = ""End IfCount = Count + 1LoopSelect Case DollarsCase ""Dollars = "No Dollars"Case "One"Dollars = "One Dollar"Case ElseDollars = Dollars & " Dollars"End SelectSelect Case CentsCase ""Cents = " and No Cents"Case "One"Cents = " and One Cent"Case ElseCents = " and " & Cents & " Cents"End SelectSpellNumber = Dollars & CentsEnd Function'*******************************************' Converts a number from 100-999 into text *'*******************************************Function GetHundreds(ByVal MyNumber)Dim Result As StringIf Val(MyNumber) = 0 Then Exit FunctionMyNumber = Right("000" & MyNumber, 3) 'Convert the hundreds place If Mid(MyNumber, 1, 1) <> "0" ThenResult = GetDigit(Mid(MyNumber, 1, 1)) & " Hundred "End If'Convert the tens and ones placeIf Mid(MyNumber, 2, 1) <> "0" ThenResult = Result & GetTens(Mid(MyNumber, 2))ElseResult = Result & GetDigit(Mid(MyNumber, 3))End IfGetHundreds = ResultEnd Function'*********************************************' Converts a number from 10 to 99 into text. *'*********************************************Function GetTens(TensText)Dim Result As StringResult = "" 'null out the temporary function valueIf Val(Left(TensText, 1)) = 1 Then ' If value between 10-19Select Case Val(TensText)Case 10: Result = "Ten"Case 11: Result = "Eleven"Case 12: Result = "Twelve"Case 13: Result = "Thirteen"Case 14: Result = "Fourteen"Case 15: Result = "Fifteen"Case 16: Result = "Sixteen"Case 17: Result = "Seventeen"Case 18: Result = "Eighteen"Case 19: Result = "Nineteen"Case ElseEnd SelectElse ' If value between 20-99Select Case Val(Left(TensText, 1))Case 2: Result = "Twenty "Case 3: Result = "Thirty "Case 4: Result = "Forty "Case 5: Result = "Fifty "Case 6: Result = "Sixty "Case 7: Result = "Seventy "Case 8: Result = "Eighty "Case 9: Result = "Ninety "Case ElseEnd SelectResult = Result & GetDigit _(Right(TensText, 1)) 'Retrieve ones placeEnd IfGetTens = ResultEnd Function'******************************************* ' Converts a number from 1 to 9 into text. *'******************************************* Function GetDigit(Digit)Select Case Val(Digit)Case 1: GetDigit = "One"Case 2: GetDigit = "Two"Case 3: GetDigit = "Three"Case 4: GetDigit = "Four"Case 5: GetDigit = "Five"Case 6: GetDigit = "Six"Case 7: GetDigit = "Seven"Case 8: GetDigit = "Eight"Case 9: GetDigit = "Nine"Case Else: GetDigit = ""End SelectEnd Function。
excel宏的基本逻辑语句
excel宏的基本逻辑语句摘要:1.介绍Excel宏的基本概念2.详述Excel宏的基本逻辑语句3.举例说明如何使用Excel宏进行数据处理4.总结Excel宏在日常办公中的应用场景正文:随着数字化时代的到来,Excel已成为办公桌上必不可少的工具之一。
其强大的数据处理能力,可以帮助我们高效地完成许多日常工作。
而在Excel 中,宏是一种非常重要的功能。
本文将为您介绍Excel宏的基本逻辑语句,并带领您了解如何利用Excel宏提高工作效率。
首先,我们来了解一下Excel宏的基本概念。
Excel宏是一种由VBA (Visual Basic for Applications)编写的自动化程序,它可以实现对Excel表格的各种操作。
通过录制一系列的操作步骤,我们可以将它们转化为宏,以便在后期重复执行。
这样,就可以大大减少我们在Excel中进行重复性操作的时间。
接下来,我们来详述Excel宏的基本逻辑语句。
在Excel宏中,有以下几种常见的逻辑语句:1.顺序执行:按照录制时的顺序执行一系列操作。
2.条件判断:根据指定的条件,执行相应的操作。
例如,如果某个单元格的值大于10,则执行某一操作。
3.循环:重复执行某一操作,直到满足特定条件。
例如,遍历工作表中的所有单元格。
4.数组操作:对数组中的元素进行操作,如求和、平均值等。
了解了Excel宏的基本逻辑语句后,我们来看一个实际应用案例。
假设我们需要对一个包含100个数据的工作表进行求和操作,可以使用以下Excel 宏:```vbaSub 求和()Dim i As IntegerDim sum As Doublesum = 0For i = 1 T o 100sum = sum + Cells(i, 1).ValueNext iMsgBox "求和结果为:" & sumEnd Sub```这段宏首先定义了一个变量i,用于表示工作表中的单元格位置。
excel宏教程

Excel宏教程什么是Excel宏Excel宏是一种代码程序,可用于自动执行任务和操作,从而使日常Excel的工作更加高效和简便。
宏可以记录和重放复杂的操作信息,包括格式设置、单元格赋值、函数计算和图表绘制等。
Excel宏是基于Visual Basic for Applications(VBA)编写的,它是一种功能强大且易于学习的编程语言,可与Excel快速集成,从而实现可自动化的任务和定制化的功能。
如何打开Excel宏要使用和编辑Excel宏,需要先打开Excel的宏视图。
在Excel 2016中,可以通过以下步骤打开宏视图:1.在Excel应用程序中单击“文件”选项卡。
2.在菜单中选择“选项”。
3.打开“自定义功能区”选项卡,勾选“开发者”复选框。
4.点击“确定”保存设置,然后在Excel界面中会看到“开发者”选项卡。
5.在开发者选项卡上选择“宏”按钮,即可打开宏视图。
如何录制Excel宏录制Excel宏是一个快速入门的方法,可以让新手更快地了解Excel宏的功能。
下面是录制Excel宏的步骤:1.打开需要自动化的Excel文件。
2.点击“开发者”选项卡,选择“宏记录器”按钮。
3.在“新建宏”的窗口中,输入宏名称和宏描述。
4.在“宏录制”窗口中,进行需要自动化的操作,包括格式设置、单元格赋值、函数计算和图表绘制等。
5.在完成宏录制后,点击“停止录制”按钮即可。
可以在Excel 2016中通过以下两种方式选择宏录制:1.使用“相对引用”选项:–在“宏录制”窗口中,点击“使用相对引用”按钮。
–记录宏录制期间,Excel会记录相对于当前位置的单元格引用。
2.不使用“相对引用”选项:–在“宏录制”窗口中,不选中“使用相对引用”按钮。
–记录宏录制期间,Excel会记录绝对的单元格引用。
如何编辑Excel宏为Excel宏添加新的功能或扩展其现有功能,需要对宏代码进行编辑。
在Excel 2016中,可以通过以下步骤编辑宏代码:1.打开需要编辑的Excel文件。
- 1、下载文档前请自行甄别文档内容的完整性,平台不提供额外的编辑、内容补充、找答案等附加服务。
- 2、"仅部分预览"的文档,不可在线预览部分如存在完整性等问题,可反馈申请退款(可完整预览的文档不适用该条件!)。
- 3、如文档侵犯您的权益,请联系客服反馈,我们会尽快为您处理(人工客服工作时间:9:00-18:30)。
Create or delete a macroApplies to: Microsoft Office Excel 2007 To automate a repetitive task, you can quickly record a macro in Microsoft Office Excel. You can also create a macro by using the Visual Basic Editor in Microsoft Visual Basic to write your own macro script, or to copy all or part of a macro to a new macro. After you create a macro, you can assign it to an object (such as a toolbar button, graphic, or control) so that you can run it by clicking the object. If you no longer use a macro, you can delete it.What do you want to do?Record a macroCreate a macro by using Microsoft Visual BasicCopy part of a macro to create another macroAssign a macro to an object, graphic, or controlDelete a macroRecord a macroWhen you record a macro, the macro recorder records all the steps required to complete the actions that you want your macro to perform. Navigation on the Ribbon is not included in the recorded steps.The Ribbon is a component of the Microsoft Office Fluent user interface.1.If the Developer tab is not available, do the following to display it:1.Click the Microsoft Office Button, and then click Excel Options.2.In the Popular category, under Top options for working with Excel, select the Show Developer tab in the Ribbon check box, and then click OK.2.To set the security level temporarily to enable all macros, do the following:1.On the Developer tab, in the Code group, click Macro Security.2.Under Macro Settings, click Enable all macros (not recommended, potentially dangerous code can run), and then click OK.To help prevent potentially dangerous code from running, we recommend that you return to any one of the settings that disable all macros after you finish working with macros.For more information about how to change the settings, see Change macro security settings in Excel.3.On the Developer tab, in the Code group, click Record Macro.4.In the Macro name box, enter a name for the macro.The first character of the macro name must be a letter. Subsequent characters can be letters, numbers, or underscore characters. Spaces cannot be used in a macro name; an underscore character works well as a word separator. If you use a macro name that is also a cell reference, you may get an error message that the macro name is not valid.5.To assign a CTRL combination shortcut key to run the macro, in the Shortcut key box, type any lowercase letter or uppercase letter that you want to use.The shortcut key will override any equivalent default Excel shortcut key while the workbook that contains the macro is open. For a list of CTRL combination shortcut keys that are already assigned in Excel, see Excel shortcut and function keys.6.In the Store macro in list, select the workbook where you want to store the macro.If you want a macro to be available whenever you use Excel, select Personal Macro Workbook. When you select Personal Macro Workbook, Excel creates a hidden personal macro workbook (Personal.xlsb) if it does not already exist, and saves the macro in this workbook. In Windows Vista, this workbook is saved in the C:\Users\username\AppData\Local\Microsoft\Excel\XLStart folder. In Microsoft Windows XP, this workbook is saved in theC:\Documents and Settings\user name\ApplicationData\Microsoft\Excel\XLStart folder. Workbooks in the XLStart folder are opened automatically whenever Excel starts. If you want a macro in the personal macro workbook to be run automatically in another workbook, you must also save that workbook in the XLStart folder so that both workbooks are opened when Excel starts.7.In the Description box, type a description of the macro.8.Click OK to start recording.9.Perform the actions that you want to record.10.On the Developer tab, in the Code group, click StopRecording.You can also click Stop Recording on the left side of the status bar.TOP OF PAGECreate a macro by using Microsoft Visual Basic1.If the Developer tab is not available, do the following to display it:1.Click the Microsoft Office Button, and then click Excel Options.2.In the Popular category, under Top options for working with Excel, select the Show Developer tab in the Ribbon check box, and then click OK.2.To set the security level temporarily to enable all macros, do the following:1.On the Developer tab, in the Code group, click Macro Security.2.Under Macro Settings, click Enable all macros (not recommended, potentially dangerous code can run), and then click OK.To help prevent potentially dangerous code from running, we recommend that you return to any one of the settings that disable all macros after you finish working with macros.3.On the Developer tab, in the Code group, click Visual Basic.4.If needed, in the Visual Basic Editor, on the Insert menu, click Module.Modules are automatically created for all sheets in the workbook.5.In the code window of the module, type or copy the macro code that you want to use.6.To run the macro from the module window, press F5.7.In the Visual Basic Editor, on the File menu, click Close and Return to Microsoft Excel when you finish writing the macro.TOP OF PAGECopy part of a macro to create another macro1.If the Developer tab is not available, do the following to display it:1.Click the Microsoft Office Button, and then click Excel Options.2.In the Popular category, under Top options for working with Excel, select the Show Developer tab in the Ribbon check box, and then click OK.2.To set the security level temporarily to enable all macros, do the following:1.On the Developer tab, in the Code group, click Macro Security.2.Under Macro Settings, click Enable all macros (not recommended, potentially dangerous code can run), and then click OK.To help prevent potentially dangerous code from running, we recommend that you return to any one of the settings that disable all macros after you finish working with macros.3.Open the workbook that contains the macro that you want to copy.4.On the Developer tab, in the Code group, click Macros.5.In the Macro name box, click the name of the macro that you want to copy.6.Click Edit.7.In the code window of the Visual Basic Editor, select the lines of the macro that you want to copy.To copy the whole macro, include the Sub and End Sub lines in the selection.8.On the Edit menu, click Copy.You can also right-click and then click Copy, or you can press CTRL+C.9.In the Procedure box of the code window, click the module where you want to place the code.10.On the Edit menu, click Paste.You can also right-click and then click Paste, or you can press CTRL+V.You cannot edit your Personal Macro Workbook file (Personal.xlsb) because it is a hidden workbook that is always open. You must first unhide it by using the Unhide command. You can also open it in the Visual Basic Editor by pressing ALT+F11.TOP OF PAGEAssign a macro to an object, graphic, or control1.On a worksheet, right-click the object, graphic, or control to which you want to assign an existing macro, and then click Assign Macro.2.In the Macro name box, click the macro that you want to assign.TOP OF PAGEDelete a macro1.Do one of the following:∙Open the workbook that contains the macro that you want to delete.∙If the macro that you want to delete is stored in the personal macro workbook (Personal.xlsb), and this workbook is hidden, do the following to unhide the workbook:1.On the View tab, in the Window group, click Unhide.2.Under Unhide workbooks, click PERSONAL, and then click OK.2.If the Developer tab is not available, do the following to display it:1.Click the Microsoft Office Button, and then click Excel Options.2.In the Popular category, under Top options for working with Excel, select the Show Developer tab in the Ribbon check box, and then click OK.3.On the Developer tab, in the Code group, click Macros.4.In the Macros in list, select the workbook that contains the macro that you want to delete. For example, click This Workbook.5.In the Macro name box, click the name of the macro that you want to delete.6.Click Delete.TOP OF PAGEDid this article help you?YesNoNot what I was looking for。
