Symantec-Desktop-and-laptop-7.0--DLO-管理员手册
赛门铁克Symantec_Backup_Exec学习大纲
Symantec Backup Exec 12学习大纲Symantec Backup Exec for Windows Servers 是适用于 Windows 服务器网络的高性能数据管理解决方案,目前软件最高版本12.5。
Backup Exec 通过其客户机/ 服务器设计,为跨网络的服务器和工作站提供快速可靠的备份和恢复能力。
一、Symantec Backup Exec 12软件的架构:1、Backup Exec属于C/S软件构架,软件分为主模块和数据库、应用选(组)件两大部分,购买时也须分别购买许可证。
2、Backup Exec主模块的标准功能如下:磁带设备驱动程序:为挂接到服务器的所有受支持磁带设备安装Symantec 磁带设备驱动程序。
联机文档:安装PDF 文件格式的《Backup Exec 管理员指南》。
启用自动化介质库支持:启动对多个驱动器磁盘或光自动化介质库以及库存储系统的支持。
Tivoli Storage Manager Option:使TSM 服务器的存储资源能够以自动化介质库的形式出现在Backup Exec服务器上的目标设备列表中。
Backup Exec 管理员随后可以通过在提交作业时选择TSM 自动化介质库的名称作为目标,将所有BackupExec 作业的输出定向到TSM 服务器。
创建克隆CD :捕获Backup Exec 安装程序和您的安装设置(如帐户信息、附加选件以及目标目录)。
创建光盘映像后可将其复制到光盘中。
随后可以使用该光盘用同样的设置在其他服务器上安装Backup Exec。
复制服务器:配置使您能够将服务器配置、登录帐户信息、作业、策略和选择列表复制到远程介质服务器。
如果输入CASO 许可证密钥,则将自动选择此功能。
DLO (Backup Exec随带5 用户支持):允许最多五位桌面用户安装Desktop Agent 以提供免费的自动文件保护。
受控介质服务器:将独立介质服务器转变为受中央管理服务器控制的托管介质服务器。
利用Altiris SEPIC部署SWP手册V1 1
Symantec Windows Protection部署手册----------利用Symantec Altiris Endpoint Protection Integration Component推送SYMANTCE WINDOWS PROTECTION作者:广州汉荣计算机科技有限公司设计工程师郭鸣日期: 2009年01月12日文档信息Symantec Windows Protection部署手册文档编号:文档版本:Version 1.0版本日期:2009年01月12日文档状态:制作人:郭鸣审阅人:版本变更记录Symantec Windows Protection部署手册1.1 2009-01-13 郭鸣根据symantec李盛意见做局部修改,增加软件准备,安装服务器先后顺序目录一.安装环境 (4)1.Symantec Endpoint Protection Manager(SEPM) (4)2.Backup Exec System Recovery Manager 8.0 (4)3.Backup Exec Windows Server for Desktop & Laptop Option (5)二.安装软件版本 (6)三.安装前环境准备 (6)3.1.数据库准备: (6)3.2.IIS准备 (7)3.3.AD域准备 (7)3.4.软件准备 (7)四.安装软件步骤 (9)4.1安装Backup Exec Windows Server 12.5 (21)4.2安装Backup Exec System Recovery Manager (29)4.3安装Symantec Endpoint Protection Manager (33)4.4安装Symantec/Altiris Endpoint Protection Integration Component (9)五.推送步骤 (43)5.1安装Altiris代理 (43)5.2推送Desktop and Laptop Option (45)5.3推送Backup Exec System Recover (46)5.4推送Symantec Endpoint Protection (48)5.5更新Altiris客户端策略信息 (50)一.安装环境1.Symantec Endpoint Protection Manager(SEPM)• 支持的操作系统:建议使用Windows2003Symantec Endpoint Protection Manager 控制台• 支持的操作系统:2.Backup Exec System Recovery Manager 8.0支持安装控制台和服务器的 Windows 操作系统操作系统(具有最低 Service Pack)控制台服务器3.Backup Exec Wind ows Server for Desktop & Laptop Option总结:将SWP的控制台安装在Windows 2003 32bit Server上,这样的配置会更加稳定,并且易管理和可扩展性高二.安装软件版本Backup Exec Windows Server 12.5以上Backup Exec System Recovery Manager 8.0以上Symantec Endpoint Protection 11.0.3001 MR3以上Altiris Notification Server 6.5以上三.安装前环境准备3.1.数据库准备:Microsoft SQL 数据库服务器的前提条件使用Microsoft SQL 2000 sp4 或Microsoft SQL 2005,建议使用SQL 2000 sp4 如果将 Microsoft SQL Server 用于策略管理器数据库,则必须在 SQL Server 上启用“SQL Server 和 Windows”验证。
Symantec杀毒软件安装步骤
杀毒软件安装步骤
准备步骤:如果机器上使用的是非Symantec Norton的杀毒软件,必须先卸载已有的杀毒软件。
卸载后,进入下面的正式安装步骤。
第一步:在我的电脑中的地址栏中输入:10.0.20.1/webinstall,或者在IE浏览器中的地址栏输入:10.0.20.1/webinstall。
然后按“回车”键,出现如下界面。
第二步:点击上面界面中的“立即安装”。
如果出现下面的界面,点击“是”,如果不出现,则直接到第三步。
第三步:出现下面界面时,点击“下一步”。
第四步:当出现下面界面是,点击并选择“我接受……”选项后,点击“下一步”。
第五步:当出现下面界面时,选择“完全”,然后点击“下一步”。
第六步:当出现下面界面时,点击“安装”。
第七步:当出现下面界面时,点击“完成”。
第八步:大部分机器,出现下面界面,需要重新启动,点击“是”,重新启动即可。
第九步:安装完成后,桌面的右下角出现黄色盾牌形状的图标(名称为:symantec-antivirus),此即为杀毒软件防护程序。
双击黄色盾牌,显示以下界面。
安装后,界面中的程序应显示为:10.1.X.X,病毒定义文件版本为最近一周内的日期。
今后,所有安装的计算机会自动进行更新病毒定义,不必人工操作。
如果安装后发现病毒的计算机,请点击下面第二个界面中的“全面扫描”进行计算机杀毒扫描。
业务科2006.11.27。
Symantec Endpoint Protection 快速入门说明书
Symantec™ Endpoint Protection 快速入门Updated: October 2022Symantec Endpoint Protection 快速入门指南此指南帮助您下载、安装和配置 Symantec Endpoint Protection,专用于 500 台或更少客户端的默认首次受管安装。
要进行升级,请参阅:升级和迁移到最新版本的 Symantec Endpoint Protection (SEP)安装前:检查系统要求在安装 Symantec Endpoint Protection Manager 或 Symantec Endpoint Protection 客户端前,请执行下列步骤:1.下载SymDiag并运行预安装检查,以确保计算机满足系统要求。
2.查看 Symantec Endpoint Protection 的版本说明和系统要求。
步骤1:下载 Symantec Endpoint Protection 安装文件下载最新版本的 Symantec 软件和工具,检索许可证密钥,并通过Broadcom 支持门户激活您的产品。
请参见:•“Symantec 快速入门”,并向下滚动到“On-Premises Security Products”(内部部署安全产品)。
•下载最新版本的 Symantec 软件如果您无法通过 Broadcom 支持门户找到或下载 Symantec 软件,请联系客户服务中心以寻求帮助。
步骤2:安装 Symantec Endpoint Protection Manager。
1.在您下载 Symantec Endpoint Protection 安装文件的文件夹中,双击文件解压缩所有文件。
如果您看到“打开文件 - 安全警告”提示,请单击“运行”。
文件提取到 C:\Users\用户名\AppData\Local\Temp\7zXXXXXXXXX,其中 XXXXXXXXX 表示字母和数字的随机字符串。
NBU信息系统数据集中备份解决方案
NBU信息系统数据集中备份解决方案1.1 概述ABC客户采用了Symantec VERITAS NetBackup作为信息系统数据集中备份解决方案。
整个方案涉及整个系统的软硬件系统,包括数量众多的Unix 和Windows服务器、磁带库、磁盘阵列、光纤网络和各种数据库系统。
本文档讲述了NetBackup软件在各种服务器的补丁要求、安装、配置和管理,还包括如何配置NetBackup管理下的磁带库机械手和磁带机。
同时还设计了备份系统所需的各种表格,方便用户填写和管理。
服务器补丁安装、磁带库安装配置等不在本文档讨论范围。
1.2 名词解释从技术层面划分,NetBackup采用三层结构进行数据的备份和管理,包括NetBackup Master Server主备份服务器、NetBackup Server备份服务器(包含SAN Media Server)、以及NetBackup Client备份客户端和NetBackup Agent备份代理模块。
其他的还包括各种选件模块。
集中备份方案主要包括以下几个基本模块:●备份主服务器模块:NetBackup Master Server●备份服务器:NetBackup Server●SAN介质服务器模块:NetBackup SAN Media Server●备份客户端:NetBackup Client●数据库联机备份代理:NetBackup Database Agent●手提电脑和桌面机备份模块:Desktop and Laptop Option●Windows智能灾难恢复模块:Intelligent Disaster Recovery Option●磁带库驱动:NetBackup Tape Drive Support●SAN磁带机共享模块:NetBackup Share Storage Option●磁带容灾模块:NetBackup Vault Option●NDMP模块:NDMP OptionNetBackup Master Server是备份系统主控服务器。
symantecdesktopandlaptop0dlo管理员手册
精诚集团大中华技术服务部SYSTEX - Great China Technical Service Division文件名称: Symantec DLO管理员手册更新记录(Change Record)目录1.概述2.部署Desktop Agent2.1远程推送......................................................................................................................................................................................2.2手动安装......................................................................................................................................................................................2.3DLO客户端显示.......................................................................................................................................................................3.DLO备份策略3.1设置全局排除 ............................................................................................................................................................................3.2编辑配置文件 ............................................................................................................................................................................4.还原备份文件1.概述Symantec Desktop and Laptop Option (DLO) 可为台式机和笔记本电脑(统称为桌面)提供自动文件保护.无论计算机是连接到网络上还是处于脱机状态,DLO 都可以提供保护.当桌面未连接到网络上时,文件被备份到桌面上的用户数据文件夹中。
Symantec Endpoint Protection 配置指南说明书
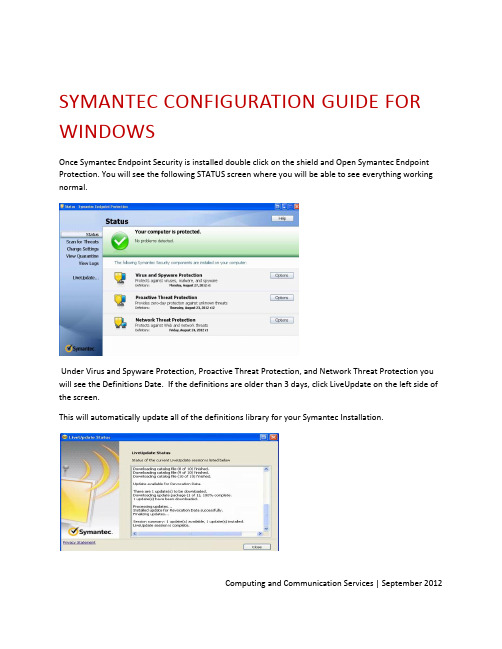
SYMANTEC CONFIGURATION GUIDE FOR WINDOWSOnce Symantec Endpoint Security is installed double click on the shield and Open Symantec Endpoint Protection. You will see the following STATUS screen where you will be able to see everything working normal.Under Virus and Spyware Protection, Proactive Threat Protection, and Network Threat Protection you will see the Definitions Date. If the definitions are older than 3 days, click LiveUpdate on the left side of the screen.This will automatically update all of the definitions library for your Symantec Installation.Computing and Communication Services | September 2012CHANGE SETTINGSUnder “Change Settings” you will see all of the options that are used to configure the Symantec client. You will have the option to configure each component individually, however most of these are set to their installation defaults.Virus and Spyware Protection –Preset to default for security and detection of viruses.Proactive Threat Protection – Application control and heuristic scanning feature that is enabled. It scans files and detects virus according to anomalies and signatures. These are set to theirmost efficient settings by default.Network Threat Protection – These include Intrusion Prevention, Firewall Settings, Notifications and Logs. They have been set by default for maximum protection and no need to configure them. To disable firewall or intrusion features just “uncheck” the box.Computing and Communication Services | September 2012Exceptions – These are exceptions from files and folders and processes that are excluded from being scanned. You have different options to exclude. Security Risk Exception relates to Files,Folders, Extensions, and Specific Web Domain URL’s. Sonar Exclusion is a specific exclusion that will not be touched. DNS or Host File Change is specifically related to Applications.Please See:/business/support/index?page=content&id=HOWTO55204related to Tamper Protection and LiveUpdate.VIEW QUARANTINEView Quarantine displays any virus infections that Symantec detected and quarantined. If there is a file in Quarantine, it is locked and is safe from harming your computer. You must run another FULL SCAN to make sure the computer is clean and eliminate any other risks that may not have been detected. It isalso safe to delete the files from quarantine.Computing and Communication Services | September 2012Computing and Communication Services | September 2012VIEW LOGSUnder “View Logs” you will have several options to view for actions that Symantec took in order to protect your computer from being infected. If you are unsure of something that was detected andactioned you will have the option of reviewing it here:Virus & Spyware Protection –Scan Log/Risk Log/System LogProactive Threat Protection –Threat Log/System LogNetwork Threat Protection –Traffic Log/Packet Log Client Management – Control Log/Security Log/System Log/Tamper Protection LogLIVE-UPDATEUnder “Live Update” is where you will update your Symantec Endpoint Protection. When you click on LiveUpdate another window will open up to automatically and start to download and install the most up to date definitions available for your computer to be protected. By default these options are set to download every 4 -8hrs. If new definitions are available they will be automatically updated.You can setup LiveUpdate Schedule under “Change Settings , “Client Management” and LiveUpdate Tab.。
赛门铁克常见问题及解决办法的操作手册

赛门铁克常见问题及解决办法一、赛门铁克客户端与控制台的连通性1.问题描述:客户端是通过端口号8014链接的,如果通不了,客户端肯定接不到控制台的任何信息。
2.检测方法:在客户端telnet 172.16.10.30 80143.步骤:(1)登陆客户端服务器,如下图所示:(2)开始-运行-cmd,telnet控制台,如下图所示:(注意:ping 172.16.10.30不能说明问题。
)二、赛门铁克病毒定义的下发(也是检测连通性的手段)1.问题描述:是检测客户端是否更新病毒定义,部分客户端的定义时间不会改变。
2.检测方法:在控制台上随便修改一个不重要的策略,然后立即改回来。
在控制台上会有更改的时间变化。
3.实施步骤:(1)首先登陆赛门铁克控制台,计算机-笔记本和台式机,在这和页面找到策略序列号,记录一下。
如下图所示:(2)控制台上修改一个策略,计算机-笔记本和台式机-策略-LiveUpdate策略-任务(后边的三角)-编辑策略(3)在弹出的窗口,windows设置-调度-启用LiveUpdate调度,将其去掉勾选后确定。
然后立即将其勾选确定!(4)查看当前策略序列号,对比一下前后的区别,如果相同就可以测试了。
(5)到客户端服务器上,右下角有一个赛门铁克客户端图标,右击-单击更新策略,等待提示消失,双击图标打开客户端。
在帮助-疑难解答-管理-策略序列号,比对内容是否为控制台更新后的策略序列号。
(6)如果相同则表示:正常不同表示无法更新可能是客户端掉线了,将客户端的赛门铁克服务重启一下。
(7)在客户端服务器上关闭赛门铁克服务,开始-运行-smc –stop(8)在计算机服务里面查看Symantec Endpoint Protection 、Symantec Management Client两个服务状态应该为空,如果发现为停止,需要在任务管理器中强制停止smc.exe进程,再去查看状态。
(9)在客户端服务器上开启赛门铁克服务,开始-运行-smc -start,再确认Symantec Endpoint Protection 、Symantec Management Client服务运行状态为启用。
Symantec Endpoint Protection Windows 客户端指南说明书
Symantec Endpoint Protection Windows 客户端指南Updated: November 2022Table of Contents如何通过 Symantec Endpoint Protection 保护 Windows 计算机? (7)关于用于保护计算机的技术 (9)使用 LiveUpdate 更新定义 (9)警报和通知的类型 (11)关于扫描结果 (11)响应病毒或风险检测 (12)响应询问您是允许还是禁止您尝试下载的文件的下载智能分析消息 (13)响应询问允许或禁止应用程序的消息 (14)响应许可证过期的消息 (14)对更新客户端软件的消息的响应 (15)管理计算机上的扫描 (16)立即扫描客户端计算机 (18)暂停和推迟扫描 (18)在客户端上调度用户定义的扫描 (19)调度扫描,使其按需运行或在计算机启动时运行 (21)管理计算机上的下载智能分析检测结果 (21)自定义下载智能分析设置 (23)自定义病毒和间谍软件扫描设置 (23)配置在检测到恶意软件和安全风险时执行的操作 (24)关于排除扫描项目 (26)排除扫描项目 (27)管理计算机上已隔离的文件 (28)启用自动防护 (29)了解可用于提高计算机防护的 Symantec 提交功能 (29)关于客户端和 Windows 安全中心 (30)管理行为分析 (SONAR) (31)防止行为分析 (SONAR) 的误报检测项 (32)通过主机完整性扫描检查计算机的安全遵从性 (32)对计算机进行补救以使其通过主机完整性检查 (32)启用篡改防护 (33)病毒和间谍软件扫描的工作方式 (34)关于病毒和安全风险 (34)关于扫描类型 (36)关于自动防护的类型 (37)扫描如何响应检测到的病毒或风险 (38)如何使用 Symantec Insight 做出关于文件的决策 (39)管理防火墙防护 (41)防火墙工作原理 (41)在 Windows 客户端上管理防火墙规则 (42)客户端上的防火墙规则的组成部分 (42)Symantec Endpoint Protection 客户端会按什么顺序处理防火墙规则? (43)在客户端上添加防火墙规则 (44)在客户端上导入或导出防火墙规则 (45)启用防火墙设置 (45)安装客户端后启用网络文件和打印机共享 (46)允许或禁止应用程序访问网络 (48)允许或阻止已在客户端上运行的应用程序 (48)当屏幕保护程序处于活动状态或防火墙不运行时阻止通信 (49)入侵防护的工作原理 (51)在 Windows 客户端上配置入侵防护 (51)阻止对易受攻击的应用程序的攻击 (52)通过 Web 和云访问防护允许或阻止恶意网站 (54)什么是 Web 和云访问防护? (54)验证是否已在 Windows 客户端上启用并连接 Web 和云访问防护隧道方法 (54)管理 Windows 客户端 (58)管理 Windows 客户端 (59)了解 Symantec Endpoint Protection 客户端“状态”页面 (60)在客户端上隐藏和显示通知区域图标 (60)关于受管客户端和非受管客户端 (61)检查客户端是受管客户端还是非受管客户端 (62)对防护问题进行故障排除 (63)启用对客户端计算机的防护 (63)关于 Windows 客户端上的日志 (64)查看日志 (65)启用数据包日志 (65)对话框帮助 (66)病毒和间谍软件防护 (66)病毒和间谍软件防护设置:自动防护 (66)病毒和间谍软件防护设置:Outlook 自动防护 (67)病毒和间谍软件防护设置:下载智能分析 (67)病毒和间谍软件防护设置:全局设置 (68)扫描通知选项 (69)下载智能分析操作 (70)下载智能分析通知选项 (71)提前启动反恶意软件 (71)自动防护高级选项 (72)软盘设置 (73)高级扫描选项 (74)网络扫描设置 (75)所选的扩展名 (75)插入警告 (76)发送电子邮件到收件人:消息 (77)向其他人发送电子邮件:其他人 (78)发送电子邮件到收件人电子邮件服务器 (78)扫描操作 (78)创建新扫描 (79)创建新扫描 - 选择文件夹和文件 (80)创建新扫描 - 扫描选项 (80)创建新扫描 - 扫描名称 (80)创建新扫描 - 调度 (81)创建新扫描 - 扫描内容 (82)创建新扫描 - 扫描时间 (82)扫描优化选项 (82)扫描类型或 Symantec Endpoint Protection 检测结果 (83)Outlook 保护高级选项 (84)扫描通知选项 (84)通知选项 (85)主动型威胁防护 (85)行为分析 (85)系统更改检测 (86)采取操作 (87)网络和主机漏洞缓解 (87)网络活动 (87)查看应用程序设置 (88)配置应用程序设置 (88)网络和主机漏洞利用缓解:防火墙 (89)网络和主机漏洞利用缓解:通知 (92)网络和主机漏洞利用缓解设置:Microsoft Windows 网络 (93)配置防火墙规则 (93)添加或编辑防火墙规则:常规 (93)添加或编辑防火墙规则:主机 (94)添加或编辑防火墙规则:端口和协议 (94)添加或编辑防火墙规则:应用程序 (95)添加或编辑防火墙规则:调度 (96)查看防火墙规则 (96)网络和主机漏洞利用设置:入侵防护 (97)内存漏洞利用缓解 (97)Web 和云访问防护 (97)Web 和云访问防护设置 (97)例外 (98)例外:用户定义的例外 (98)已知安全风险例外 (99)安全风险扩展名例外 (100)可信 Web 域例外 (100)隔离区 (100)查看隔离区 (100)清理选项:隔离项 (101)清理选项:备份项目 (101)清理选项:修复项目 (102)客户端管理 (102)客户端管理设置:常规 (102)代理服务器设置 (103)重新启动选项 (103)客户端管理设置:篡改防护 (104)客户端管理设置:LiveUpdate (105)客户端管理设置:LiveUpdate Proxy 服务器设置:HTTP (105)客户端管理设置:LiveUpdate 代理服务器设置:FTP (106)客户端管理设置:发送 (106)疑难解答 (107)疑难解答:管理/云管理 (107)疑难解答:混合管理 (108)疑难解答:版本 (108)疑难解答:调试日志 (108)客户端管理调试日志设置 (109)疑难解答:Windows 帐户 (109)Symantec Endpoint Protection 调试日志设置 (109)疑难解答:计算机 (110)疑难解答:安装设置 (110)故障排除:客户端升级 (110)疑难解答:服务器连接状态或通用云连接状态 (110)疑难解答:订购状态 (111)疑难解答:应用程序加固 (112)疑难解答:EDR 连接状态 (112)疑难解答:Web 和云访问防护 (113)日志 (113)疑难解答:日志 (113)病毒和间谍软件防护日志:扫描日志 (114)病毒和间谍软件防护日志:风险日志 (114)病毒和间谍软件防护日志:系统日志 (115)主动型威胁防护日志:威胁日志 (116)主动型威胁防护日志:系统日志 (117)加固日志 (118)过滤系统日志 (118)客户端管理日志:系统日志 (118)客户端管理日志:安全日志 (119)篡改防护日志 (121)网络和主机漏洞利用缓解设置:日志 (121)客户端管理日志:控制日志 (121)网络和主机漏洞利用缓解日志:通信日志 (122)网络和主机漏洞利用缓解日志:数据包日志 (124)回溯信息 (126)如何通过 Symantec Endpoint Protection 保护 Windows 计算机?适用于 Windows 的 Symantec Endpoint Protection 客户端指南客户端的默认设置可保护您的计算机免受多种类型的安全威胁入侵。
Symantec VIP软令牌安装指南说明书

S YMANTEC VIP:S OFT T OKENS :H OME C OMPUTER (A PPLE M AC )Quick Reference GuideCONTENTSInstall Symantec VIP on your computer ...................... 1Register your computer with Symantec VIP ............... 2Log on to HL Access Portal ......................................... 2Log on to Remote Office ............................................. 3Log on to Outlook Web App (Webmail) ...................... 3Log on to other applications: Chrome River, myChoice and my Financial Wellbeing (3)INTRODUCTIONThis guide explains how to install, register and use the Symantec VIP soft token on your home computer (Apple Mac). With your soft token you can log on to the HL Access Portal , Remote Office , Outlook on the web or other applications such as Chrome River , my Choice and my Financial Wellbeing . The process includes the following steps:1. Download the Symantec VIP app to the computer.2. Register the device with Symantec VIP bycontacting the Technology Support team. 3. Access the HL Access Portal , Remote Office ,Outlook on the web or other applications (for example, my Choice ) using the soft token on your computer.INSTALL SYMANTEC VIP ON YOUR COMPUTER1. Launch the internet browser and go to:https:///2. Click DOWNLOAD .3. From the Choose your options dialog, under VIPAccess for Computer , click Mac .4. From the Dock , click the Downloads icon.5. Double-click VIPAccessSecurityCode.dmg .6. From the VIP Access window, double-click VIPAccess.pkg .7. From the Install VIP Access dialog, clickContinue . 8. From the Software License Agreement dialog,click Continue . 9. Click Agree .10. Click Install .If prompted to enter your Mac User Name andPassword . Enter the information as required and click Install Software .11. A confirmation message will display to confirm thesuccessful installation of the software. Click Close .You will be prompted to move the VIP AccessInstaller file to the Trash folder. To delete the file, click Move to Trash.Soft Tokens: Home Computer (Apple Mac)A DD S YMANTEC VIP A PP PERMANENTLY TO THE D OCKFor easy access, it is recommended that you add the VIP Access application permanently to the Dock . To add the Symantec VIP application permanently to the Dock:1. From the Dock , click the Finder icon to launch theFinder Window ..2. From the left-hand pane, click Applications .3. Click and drag the VIP Access icon to the Dockand let go.The VIP Access application will be addedpermanently to the Dock .REGISTER YOUR COMPUTER WITH SYMANTEC VIPContact the Technology Support team to register your device with Symantec VIP. ∙For International LLP : dial extension 5000 or + 44 (0) 207 296 5000∙For U.S. LLP : dial extension 5911 or +1 202 637 5911.Up to five different devices can be registered.LOG ON TO HL ACCESS PORTALThe Hogan Lovells Access Portal provides easy access to Hogan Lovells remote working and web applications.To log on to HL Access Portal:1. From the Dock , click VIP Access to open theapplication.You will need the six digit Security Code fromyour Symantec VIP token to log on to HL Access Portal .2. Launch the internet browser and go to .The Secure Logon for Hogan Lovells LLPscreen displays.3. Enter the following details to log on:Domain\Username ∙For HLI LLP users: Type adslocal\networkusername, for example,adslocal\millerar ∙ForHLUS LLP users: Type hh\networkusername , for example, hh\smithjo .Password Enter your network password .Security CodeEnter the six digit code from your Symantec VIP token.4. Press Enter or click Sign in .Soft Tokens: Home Computer (Apple Mac) Once logged in, the HL Access Portal Homescreen displays.5. To access an application, click the requiredapplication icon to launch it.LOG ON TO REMOTE OFFICERemote Office (Citrix) enables you to work with manyof the firm's systems (including Outlook, HLGlobal andthe Document Management System) when you areaway from the office.Soft Tokens: Home Computer (Apple Mac)When launching Chrome River for the first time,Adobe Flash Player will need to be installed.The following dialogs will display:a) System Setup dialog: click Next.b) Adobe Flash Player Settings dialog: clickAllow.Once logged on, the Dashboard displays.L OG ON THE RELEVANT URL S1. Launch Internet Explorer.2. Enter the relevant URL for the application you wishto access. Refer to the below table for the URLdetails:URLChrome River(HLI)Chrome River(HLUS)my Choice https://my FinancialWellbeinghttps://myfinancialwellbeing.hoganlovells.comThe Secure Logon for Hogan Lovells screendisplays.3. Enter the following details to log on:Domain\Username ∙For HLI LLP users: Typeadslocal\networkusername, for example,adslocal\millerar∙For HLUS LLP users:Type hh\networkusername, for example,hh\smithjo.Password Enter your networkpassword.Security Code Enter the six digit code fromyour Symantec VIP token.4. Press Enter or click Sign in.The home page for the relevant application willdisplay.When launching Chrome River for the first time,Adobe Flash Player will need to be installed.The following dialogs will display:a) System Setup dialog: click Next.b) Adobe Flash Player Settings dialog: clickAllow.Once logged on, the Dashboard displays.。
戴尔OpenManage管理站软件7.0安装指南说明书
Dell OpenManage Management Station SoftwareVersion 7.0 Installation GuideNotes, Cautions, and WarningsA NOTE indicates important information that helps you make better use of your computer.A CAUTION indicates potential damage to hardware or loss of data if instructions are not followed.A WARNING indicates a potential for property damage, personal injury, or death.Information in this publication is subject to change without notice.© 2012 Dell Inc. All rights reserved.Reproduction of these materials in any manner whatsoever without the written permission of Dell Inc. is strictly forbidden. Trademarks used in this text: Dell™, the Dell logo, Dell Precision™ , OptiPlex™, Latitude™, PowerEdge™, PowerVault™, PowerConnect™, OpenManage™, EqualLogic™, Compellent™, KACE™, FlexAddress™ and Vostro™ are trademarks of Dell Inc. Intel®, Pentium®, Xeon®, Core® and Celeron® are registered trademarks of Intel Corporation in the U.S. and other countries. AMD® is a registered trademark and AMD Opteron™, AMD Phenom™ and AMD Sempron™ are trademarks of Advanced Micro Devices, Inc. Microsoft®, Windows®, Windows Server®, Internet Explorer®, MS-DOS® and Windows Vista® are either trademarks or registered trademarks of Microsoft Corporation in the United States and/or other countries. Red Hat® and Red Hat® Enterprise Linux® are registered trademarks of Red Hat, Inc. in the United States and/or other countries. Novell® and SUSE® are registered trademarks of Novell Inc. in the United States and other countries. Oracle® is a registered trademark of Oracle Corporation and/or its affiliates. Citrix®, Xen®, XenServer® and XenMotion® are either registered trademarks or trademarks of Citrix Systems, Inc. in the United States and/or other countries. VMware®, Virtual SMP®, vMotion®, vCenter® and vSphere® are registered trademarks or trademarks of VMware, Inc. in the United States or other countries. IBM® is a registered trademark of International Business Machines Corporation.Other trademarks and trade names may be used in this publication to refer to either the entities claiming the marks and names or their products. Dell Inc. disclaims any proprietary interest in trademarks and trade names other than its own.2012 - 03Rev. A001 About (4)Managed System and Management Station (4)Dell Systems Management Tools and Documentation DVD (5)Dell Server Updates DVD (6)Dell Management Console DVD (6)Installing Management Station Software on Windows (6)Installing Management Station Software on Microsoft Windows Server 2008 Core and Microsoft Hyper-VServer (6)Installing Management Station Software in CLI Mode (7)Uninstalling Management Station Software in CLI Mode (7)Installing Management Station Software on Supported Red Hat Enterprise Linux, SUSE Linux EnterpriseServer, and VMware ESX Server (8)Contents31About The Dell OpenManage Management Station Software Installation Guide provides an overview of the Dell OpenManage management station software and installation instructions for the same. For information on installing Dell OpenManage Server Administrator, see the Dell OpenManage Server Administrator Installation Guide at /support/edocs/software/omswrels.Dell Systems Management Software DVDsThe Dell systems management software comprises three DVDs, and they are•Dell Systems Management Tools and Documentation DVD•Dell Server Updates DVD•Dell Management Console DVDFor information about various Dell systems that support systems management software, the operating systems supported by these systems, and Dell OpenManage components that can be installed on these systems, see the latest Dell Systems Software Support Matrix at /support/edocs/software/omswrels.Dell OpenManage Subscription Service Kit DVDsThe Dell OpenManage subscription service kit is a collection of two DVDs and they are•Dell Systems Management Tools and Documentation DVD•Dell Server Updates DVDFor more information on the subscription service, see /openmanagesubscription or contact your sales representative. Topics:•Managed System and Management Station•Dell Systems Management Tools and Documentation DVD•Dell Server Updates DVD•Dell Management Console DVD•Installing Management Station Software on Windows•Installing Management Station Software on Microsoft Windows Server 2008 Core and Microsoft Hyper-V Server•Installing Management Station Software on Supported Red Hat Enterprise Linux, SUSE Linux Enterprise Server, and VMware ESX ServerManaged System and Management StationDepending on the way in which you use the Dell systems management tools, a system can be classified into:•Managed SystemA managed system is any system that is monitored and managed using Dell OpenManage Server Administrator (one of the systemsmanagement tools on the Dell Systems Management Tools and Documentation DVD) or Dell Management Console. You can manage systems running Server Administrator locally or remotely through a supported web browser. For more information on ServerAdministrator, see the Dell OpenManage Server Administrator User's Guide on /manuals or on the Dell Systems Management Tools and Documentation DVD.•Management StationA management station can be a laptop, desktop, or server that you can use to remotely manage one or more managed systems from acentral location.4AboutDell Systems Management Tools and Documentation DVDThe Dell Systems Management Tools and Documentation DVD contains the Dell OpenManage systems management software. This software is a suite of applications for your Dell systems that enables you to manage your systems through monitoring systems components, diagnosing issues, notifying you through alerts, and remotely accessing your systems for troubleshooting purposes.Dell OpenManage systems management software can be classified into managed system software and management station software. Managed System SoftwareManaged System SoftwareThe following applications consists of the Dell OpenManage managed system software:•Dell OpenManage Server Administrator•Local Remote Access Controller•Storage Management ServiceManagement Station SoftwareThe following applications comprise the Dell management station software that you can install using the Dell Systems Management Tools and Documentation DVD:•Active Directory Snap-InThe Active Directory Snap-In utility provides an extension snap-in to the Microsoft Active Directory to manage Dell-specific Active Directory objects. The Dell-specific schema class definitions and the installation packages for these definitions are also included on the DVD. You can install the Active Directory Snap-In utility after adding the Dell-specific schema classes to the Active Directory schema.•BMC UtilitiesBMC Management Utility (BMU) is a utility that provides remote management and configuration of systems equipped with a Baseboard Management Controller (BMC) or iDRAC using the IPMI protocol. For more information on BMU, see the DellOpenManage Baseboard Management Controller Utilities User's Guide at /support/edocs/software/omswrels.•DRAC ToolsThe Dell Remote Access Controller (DRAC) console is a management station software designed to provide remote management capabilities for your Dell systems. You can remotely connect to the RAC hardware and access the RAC features either by using a web browser or the RACADM Command Line Interface (CLI). RACADM CLI is the command line user interface to the Remote Access Controller (RAC).You can install DRAC either on the managed system or on the management station.For information on installing DRAC on the managed system, see the Dell OpenManage Server Administrator Installation Guide. For information on installing the Remote Access Controller on the management station, see Installing Management Station Software on Windows.For more information on Remote Access Controller, see the Dell Remote Access Controller User's Guide at / support/edocs/software/omswrels.•IT AssistantDell OpenManage IT Assistant provides a central point of access to monitor and manage systems on a network. By allowing an administrator a comprehensive view across the enterprise, IT Assistant can increase system uptime, automate repetitive tasks, and prevent interruption in critical business operations. IT Assistant can be installed on a 64-bit Windows 7 and Windows Server 2008 R2 systems.For information on using IT Assistant, see the Dell OpenManage IT Assistant User's Guide at /support/edocs/ software/omswrels.•Dell Systems Build and Update UtilityYou can use the Dell Systems Build and Update Utility to:•Update your system firmware and install an operating system.•Update the firmware and BIOS in a pre-operating system environment on multiple systems.•Configure your system hardware.•Customize the Server Update Utility (SUU) and use it to update your system.About5For information on performing these tasks and details on the Dell Systems Build and Update Utility, see the Dell Systems Build and Update Utility User's Guide at /support/edocs/software/omswrels.Dell Server Updates DVDThe Dell Server Updates DVD is a part of the Dell OpenManage subscription service kit along with the Dell Systems Management Tools and Documentation DVD. The Dell Server Updates DVD is available only to those customers who have subscribed to the subscription service.The Dell Server Updates DVD contains Dell Update Packages (DUPs) and Dell OpenManage Server Update Utility (SUU). DUPs allow administrators to update a wide range of system components simultaneously and apply scripts to similar sets of Dell systems to bring system software components to the same version levels.SUU is an application that identifies and applies updates to your system. You can use SUU to update your Dell system or to view the updates available for any system supported by SUU.In addition to helping you install, configure, and update programs and operating systems, the Dell Server Updates DVD also provides newer versions of software for your system.For more information on DUPs and SUU, see the Dell Update Packages User's Guide and the Dell OpenManage Server Update Utility User's Guide respectively at /support/edocs/software/omswrels.For more information on the subscription service, see /openmanagesubscription or contact your sales representative. Dell Management Console DVDThe Dell Management Console is a web-based systems management software that enables you to discover and inventory devices on your network. It also provides advanced functions, such as health and performance monitoring of networked devices and patch management capabilities for Dell systems.The Dell Management Console DVD is available with all Dell PowerEdge XX0X and later systems. You can also download the Dell Management Console from /openmanage.Installing Management Station Software on Windows1.Log on with administrator privileges to the system on which you want to install the management station applications.2.Insert the Dell Systems Management Tools and Documentation DVD into the DVD drive. Or download the web installer from.3.Run autorun.exe.NOTE: If you are using the DVD to install, select the management station application that you want to install, andclick Install.4.Follow the instructions in the InstallShield Wizard.NOTE: You cannot install remote RAC (RAC installed on the management station) and local RAC (RAC installed onthe managed system) on the same system.NOTE: The Dell OpenManage IT Assistant option is displayed only if you have an earlier version of IT Assistantalready installed. In this case, selecting the Dell OpenManage IT Assistant option upgrades IT Assistant to version8.9.1. For more information on upgrading IT Assistant, see the Dell OpenManage IT Assistant User's Guide. Installing Management Station Software on Microsoft Windows Server 2008 Core and Microsoft Hyper-V ServerThe Server Core installation option of the Microsoft Windows Server 2008 and Hyper-V Server operating system provides a minimal environment for running specific server roles that reduces the maintenance and management requirements and the attack surface for those server roles. A Windows Server 2008 Core or Hyper-V Server installation installs only a subset of the binaries that are required by6Aboutthe supported server roles. For example, the Explorer shell is not installed as part of a Windows Server 2008 Core or Hyper-V Server installation. Instead, the default user interface for a Windows Server 2008 Core or Hyper-V Server installation is the command prompt. Windows Server 2008 Core or Hyper-V Server operating system does not support a graphical user interface (GUI) based installation of Dell OpenManage software components. You need to install Dell OpenManage software in the CLI mode on Server Core. For more information on Server Core, see the Microsoft website.You have to be logged in as a built-in Administrator to install systems management software on Windows ServerInstalling Management Station Software in CLI Modemsiexec /i DRAC.msiThe DRAC.msi file is located at SYSMGMT\ManagementStation\windows\DRAC on the Dell SystemsDVD.msiexec /i BMC.msiThe BMC.msi file is located at SYSMGMT\ManagementStation\windows\BMC on the Dell Systems Management DVD.msiexec /i ADSnapIn.msiThe ADSnapIn.msi file is located at SYSMGMT\ManagementStation\windows\ADSnapIn on the Dell SystemsDVD.msiexec /i ITA.msiThe ITA.msi file is located at SYSMGMT\ManagementStation\windows\ITAssistant on the Dell SystemsDVD.To install the localized version of the management station software, in the command prompt type the following command: msiexec / IReplace <language_transform>.mst with the appropriate language file:1031.mst (German)1034.mst (Spanish)1036.mst (French)1041.mst (Japanese)2052.mst (Simplified Chinese)Uninstalling Management Station Software in CLI ModeTo uninstall management station software, run the commands as listed in the table below.Table 1. Commands to Uninstall Management Station SoftwareManagement Station Software CommandDRAC Tools msiexec /x DRAC.msi (or) msiexec /x {48C40D20-6991-497D-B58C-C9DD95929D6E}BMU msiexec /x BMC.msi (or) msiexec /x {8BA29086-5A36-4F78-BD8A-454BB9882E7C}Active Directory Snap-In msiexec /x ADSnapIn.msi (or) msiexec /x {8128AB24-7C61-4FD3-A577-480090C297FA}IT Assistant msiexec /x ITA.msi (or) msiexec /x {519B2CD3-964F-4776-8BB9-A78F2BD2C098}About7Installing Management Station Software on Supported Red Hat Enterprise Linux, SUSE Linux Enterprise Server, and VMware ESX ServerOnly DRAC tools and BMU are supported on the Red Hat Enterprise Linux, SUSE Linux Enterprise Server, and VMware ESX Server operating systems.On systems running Red Hat Enterprise Linux 5 operating system, DVDs are auto-mounted with the -noexec mount option. This option does not allow you to run any executable from the DVD. You must mount the DVD-ROM manually and then run the executables.1.To install BMU, navigate to the SYSMGMT/ManagementStation/linux/bmc directory and install the BMU RPM specific to theoperating system with the following command:•For systems running Red Hat Enterprise Linux, use rpm -ivh osabmcutil*-RHEL-*.rpm•For systems running SUSE Linux Enterprise Server, use rpm -ivh osabmcutil*-SUSE-*.rpm2.To install the latest version of DRAC Tools:a)Query the existing IPMI tool, to query use rpm -qa | grep ipmitoolThe query returns ipmitool-x.x.xx-x.x.xx if the IPMI tool is already installed.b)Uninstall the existing IPMI tool.1.To uninstall the IPMI tool, for SUSE Linux Enterprise Server and VMware ESX Server, use rpm -e ipmitool-x.x.xx-x.x.xx2.To uninstall the IPMI tool, for Red Hat Enterprise Linux 5.x, use rpm –e OpenIPMI-tools3.To uninstall the IPMI tool, for Red Hat Enterprise Linux 6.x, use rpm –e ipmitool3.Navigate to the SYSMGMT/ManagementStation/linux/rac/<OS> directory and execute the following command: rpm -ivh*.rpm8About。
《windows 服务器备份和恢复解决方案》(symantec backup exec 2
《Windows 服务器备份和恢复解决方案》(SymantecBackup Exec 2...中文名: Windows 服务器备份和恢复解决方案英文名: Symantec Backup Exec 2010 R3资源格式: 光盘镜像版本: v13.0.5204发行时间: 2011年制作发行: Symantec Corporation语言: 英文简介: 语言:英语网址:/business/backup-exec-for-wind ows-servers类别:数据保护(from:)Symantec Backup Exec 2010 为不断发展的企业提供了可靠的Windows 服务器备份和恢复解决方案。
通过集成的重复数据删除和归档技术,可以在帮您轻松保护更多数据的同时,降低存储成本和管理成本。
通过这款Windows 服务器备份软件,您不仅可以减少业务中断情况,并且可以确保虚拟或物理系统上的重要信息始终受到保护并可在几秒钟内进行恢复。
主要功能● 为物理和虚拟服务器环境(从台式机到服务器)提供市场领先的数据保护解决方案● 适应性强的集成式重复数据删除功能● 统一归档● 率先上市的虚拟应用程序全面恢复功能● 正在申请专利的全面恢复技术(GRT) 可以在几秒之内恢复关键Microsoft 应用程序数据● 集中的3 层设置、报告和补丁程序管理● 通过远程代理和选件提供可伸缩的异构支持。
● 为Exchange、文件服务器、SQL Server 服务器和台式机数据提供持续的数据保护● 与市场领先的技术进行创新的多产品集成主要优势● 保护更多数据的同时,降低存储成本和管理成本● 借助集成的重复数据删除技术,最大限度提高物理和虚拟环境的网络利用率● 借助有效的归档和备份功能,通过单一控制台轻松实现存储和管理成本节约的自动化● 通过集成式的VMware 和Hyper-V 防护功能消除虚拟环境中Microsoft Exchange、Active Directory 和SQL 的冗余备份● 通过一次性备份恢复单个Exchange 邮件、SharePoint 站点内容或文档以及Active Directory 用户首选项● 通过单个控制台轻松管理本地或分布式备份环境● 通过持续备份保护功能,消除备份时间,同时确保轻松满足恢复点目标Backup Exec 2010 R3 的新功能Backup Exec 的最新版本Backup Exec 2010 R3 于2011 年5 月上市,在虚拟化、归档、安全和可靠性方面进行了重大改进。
BE-Order
Symantec Backup Exec 賽門鐵克BE-企業級備份解決方案請傳真至:04-2381-3000台澎金馬地區-Symantec企業授權方案產品—BE報價/訂購單訂購人: 電話: 分機: 訂購日期: 年/ 月/ 日訂購單位(公司/機關): 傳真::送貨地址: E-MAIL:發票:□二聯式□三聯式發票抬頭:統一編號:本訂購單之產品名稱為: Symantec Backup Exec簡稱:BE 。
以下為本產品相關說明(更詳盡資訊請上網/new_Veritas/BE.asp)S ymantec Backup Exec 2010 為您成長中的企業提供了穩定的備份與復原解決方案。
透過整合式重複資料刪除與歸檔技術,您就能輕鬆保護更多資料,同時還能讓您降低儲存與管理成本。
減少企業停機時間,確保存放在虛擬或實體系統上的重要資訊隨時受到保護,並且能在數秒鐘之內回復。
產品分為新購、續約、升級版三種。
新購為先前未曾購買過、第一次購買的料號。
續約為每年繼續(中間沒有斷約)簽訂合約,享有與新購相同的權利。
升級版為中間有斷約過(超過60天),必需購買的料號。
B E的購買數量的級數(數量的區間)只有一級稱為S級(server 的意思),單一套就能購買。
同一張訂單最多的合約年限為三年(可以為新購或升級加上最多三年的續約、或一次三年的續約)。
所有賽門鐵克的授權產品均需另外購買專屬媒體包(內含光碟與手冊)。
-不建議購買,因為原廠網站就能下載到最新的版本。
而且盡量使用電子檔手冊以減少紙張來源消耗,保護地球。
訂購產品名稱(以下價格未含稅) 單價數量小計BE的購買共分為3大類:分別為n備份主程式或稱為備份伺服主機或媒體伺服主機。
o代理程式(Agent)p選項(Option)。
BE的備份架構為主從式(Client-server Base或Agent-Server Base),所以組成BE的備份架構至少一定有一台伺服主機(Windows Base Server)安裝備份主程式-備份伺服主機或媒體伺服主機,外加至少一部的伺服主機安裝備份的用戶端(Agent),Agent 有分為檔案系統 Base及應用系統Base。
SYMANTEC SEP系统安装配置简易指南1

SEP系统安装配置指南赛门铁克中国公司2008.10目录一.文档介绍 (4)二.SEP安装概述 (5)三.SEP安装前系统检查 (6)四.SEP服务器、控制台安装 (7)五.复制站点的安装 (17)六.SEP策略配置 (22)1. 配置LiveUpdate更新 (22)2. 防配置默认防病毒和防间谍软件策略 (25)3. 配置防火墙策略 (26)4. 配置对应用程序的控制 (34)5. 配置对设备的控制 (42)6. 管理检测到的威胁............................................................. 错误!未定义书签。
七.SEP客户端安装包配置.................................................. 错误!未定义书签。
八.SEP客户端安装.............................................................. 错误!未定义书签。
1.网络共享手工安装SEP .................................................. 错误!未定义书签。
2.推送安装SEP .................................................................. 错误!未定义书签。
3.WEB方式安装SEP ........................................................ 错误!未定义书签。
4.其它安装方式.................................................................. 错误!未定义书签。
九.SEP客户端简单图解...................................................... 错误!未定义书签。
赛门铁克产品中文知识库文档列表
1. 赛门铁克产品中文知识库文档列表.........................2.Symantec Endpoint Protection (SEP) 简体中文文档汇总(持续更新)....................................................3.Symantec Endpoint Protection 主要文章.................Backup (NBU) 简体中文文档汇总(持续更新) ...........5.Backup Exec for Windows Servers (BEWS) 简体中文文档汇总(持续更新)..................................................6.Backup Exec System Recovery (BESR) 简体中文文档汇总(持续更新)....................................................7.Symantec Brightmail Gateway (SBG) 简体中文文档汇总(增加中)......................................................8.Symantec Information Foundation 产品简体中文文档归总(持续更新)..................................................9.Cluster Server (VCS) 简体中文文档汇总(持续更新) ......10.Enterprise Vault (EV) 简体中文文档汇总(持续更新)....11.Storage Foundation (SF) 简体中文文档汇总(持续更新)..12.Volume Manager(VxVM)简体中文文档汇总(持续更新)....13.Volume Replicator (VVR) 简体中文文档汇总(持续更新)..1.赛门铁克产品中文知识库文档列表本文档翻译自英文文档。
symantec backup exec system备份教程
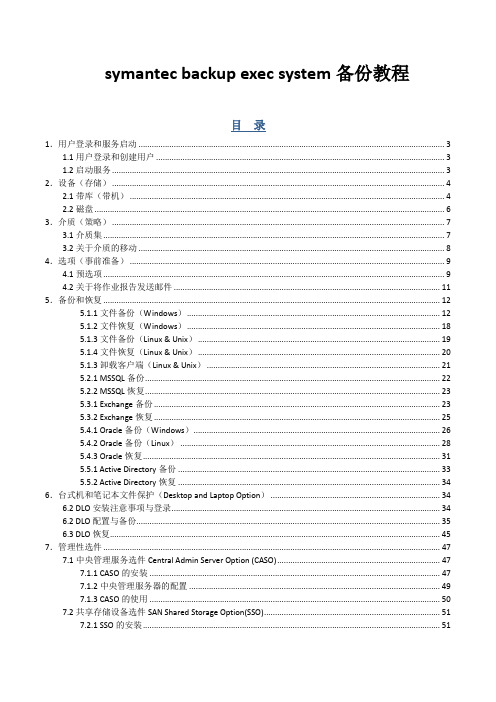
symantec backup exec system备份教程目录1.用户登录和服务启动 (3)1.1用户登录和创建用户 (3)1.2启动服务 (3)2.设备(存储) (4)2.1带库(带机) (4)2.2磁盘 (6)3.介质(策略) (7)3.1介质集 (7)3.2关于介质的移动 (8)4.选项(事前准备) (9)4.1预选项 (9)4.2关于将作业报告发送邮件 (11)5.备份和恢复 (12)5.1.1文件备份(Windows) (12)5.1.2文件恢复(Windows) (18)5.1.3文件备份(Linux & Unix) (19)5.1.4文件恢复(Linux & Unix) (20)5.1.3卸载客户端(Linux & Unix) (21)5.2.1 MSSQL备份 (22)5.2.2 MSSQL恢复 (23)5.3.1 Exchange备份 (23)5.3.2 Exchange恢复 (25)5.4.1 Oracle备份(Windows) (26)5.4.2 Oracle备份(Linux) (28)5.4.3 Oracle恢复 (31)5.5.1 Active Directory备份 (33)5.5.2 Active Directory恢复 (34)6.台式机和笔记本文件保护(Desktop and Laptop Option) (34)6.2 DLO安装注意事项与登录 (34)6.2 DLO配置与备份 (35)6.3 DLO恢复 (45)7.管理性选件 (47)7.1中央管理服务选件Central Admin Server Option (CASO) (47)7.1.1 CASO的安装 (47)7.1.2中央管理服务器的配置 (49)7.1.3 CASO的使用 (50)7.2共享存储设备选件SAN Shared Storage Option(SSO) (51)7.2.1 SSO的安装 (51)7.1.2共享设备服务器的配置 (53)7.1.3共享设备服务器的使用 (55)8.问题集 (56)1.用户登录和服务启动1.1用户登录和创建用户在菜单栏选择“网络”→“登录账户”→“新建”或者“编辑”,弹出“登录凭证”对话框。
卸载SymantecEndpointProtection,无需密码的卸载方法

卸载SymantecEndpointProtection,无需密码的卸载方法最近一次偶然的机会, 被人装了个Symantec在电脑上, 搞得各种报警, 验证, 烦死.然后就自然而然的想卸载掉这个该死的杀毒软件, 没想到这个杀毒软件居然还是个流氓杀毒软件, 卸载还需要密码.悲剧...然后开始在网上搜索卸载方法, 发现网上还是有一些卸载方法的, 不过按照方法一操作, 发现不行, 还是卸载不了, 苦闷中...为了征服这个流氓软件, 我花了大半天. 终于找出一个还算不错的卸载方法, 仅仅是为了让和我一样遇到这个问题的同学能够不像我这样因为老卸载不了而蛋疼,另外也用这个文章分享的方式鄙视下那些将卸载方法写入文档, 然后需要积分下载的家伙. 最可恶的是花了积分下载下来按着操作还是 not work ...言归正传, 说说操作方法:首先我的电脑->管理->服务, 将所有Symantec开头的服务器全部禁用,然后重启, 如果Symantec软件没有启动, 那么可以在控制面板删除Symantec.或者直接用360软件管家等其他工具软件卸载,不用输入密码,直接卸载完成.如果Symantec还是启动了. (!! 这才是重点, 因为第一种情况下的卸载不算啥)再一次重启, 按F8选择进入安全模式进入系统, 在服务里面禁用全部Symantec开头的服务,主要是禁用Symantec ... Manager服务, 因为正常启动Windows是禁用不了的.禁用后, 再启动windows, 再任务栏找不到Symantec程序图标, 那么恭喜, 咱们成功阻止了Symantec杀毒软件的启动, 这时候就可以直接卸载了. 在控制面板->添加/删除程序或者 360等工具软件都可以直接卸载掉了.因为是卸载完了才和大家分享心得, 所以相关的截图也没有, 而且有点乱. 不过我想一般人还是能看懂的. 嘿嘿.仅仅作为提示作用, 大家有不懂的随时和我交流哦. 经验大家一起分享嘛.。
赛门铁克 Netbackup 7.0
销售培训 Phase INetbackup 7.0产品名称及功能描述全名:Netbackup,简称NBU,当前版本7.0。
功能描述:NBU是一套跨平台集中管理的数据保护软件,在市场上处于绝对的领导地位,十几年来市场份额一直高于40%,遥遥领先于其他竞争对手。
NBU的软件架构被设计成三层,分别是Master Server、Media Server和Client,其中,Master Server是整个备份软件的管理中心,所有策略的制定都由Master Server来完成,所有的日志都汇总到Master Server上;Media Server负责操纵备份设备和介质,完成备份数据的写入和读出的工作;而Client则负责将需要备份的数据读出来,通过网络交给Media Server。
这种设计架构和思想也被其他很多竞争友商效仿,虽然名称可能有所不同,但架构基本相同。
相对于二层的备份软件架构,NBU可以支持更大规模的备份域,从而让一个备份管理人员管理更多的备份任务、更多的备份数据、更多的备份客户端。
在备份方式上,NBU除了可以支持传统的本机备份、LAN备份、LAN-FREE备份之外,还可以支持Server-Free备份,通过与Symantec Storage Foundation配合,用户可以非常轻松地摆脱硬件厂商的限制,在任意不同的磁盘阵列之间实现Server-Free备份。
在备份设备的支持方面,NBU是目前市场上支持最好的备份软件,几乎所有主流的备份硬件设备都支持NBU备份软件,包括各种物理磁带库、虚拟磁带库、磁盘设备等等。
在操作系统和数据库支持方面,NBU也是市场上做得最好的,服务器端和客户端都能够安装在所有主流操作系统平台上,包括Windows、Linux、AIX、HP-UX和Solaris等,几乎所有主流的数据库都有专门的代理程序来支持,可以很好地保证备份数据的一致性。
虽然NBU是多年来的市场领导者,但Symantec还在不断推陈出新。
Symantec Endpoint Protection Cloud与EventTracker集成指

Integration GuideIntegrating Symantec Endpoint Protection Cloud with EventTrackerPublication Date:October 28, 2021AbstractThis guide helps you configure the Symantec Endpoint Protection Cloud (SEPC) with EventTracker to receive the Symantec Endpoint Protection Cloud events. In this guide, you will find the detailed procedures required for monitoring the Symantec Endpoint Protection Cloud.AudienceAdministrators who are assigned the task to monitor and manage the Symantec Endpoint Protection Cloud events using the EventTracker.Table of ContentsTable of Contents 31. Overview 42. Prerequisites 43. Obtaining Symantec Endpoint Protection Cloud Credentials 44. Integrating Symantec Endpoint Protection Cloud to EventTracker 55. EventTracker Knowledge Packs 7 5.1 Category 7 5.2 Alerts 7 5.3 Reports 75.4 Dashboards 96. Importing the Knowledge Pack 10 6.1 Category 11 6.2 Alerts 12 6.3 Knowledge Objects 13 6.4 Flex Reports 146.5 Dashboards 167. Verifying the Knowledge Pack 17 7.1 Category 17 7.2 Alerts 18 7.3 Knowledge Objects 18 7.4 Flex Reports 19 7.5 Dashboards 20 About Netsurion 21 Contact Us 211.OverviewThe Symantec Endpoint Protection Cloud is a cloud-based security solution tailored for small and medium-sized businesses.The EventTracker Knowledge Pack (KP) for Symantec Endpoint Protection Cloud provides insight into Threat Detection, Device Management, and other critical events.2.Prerequisites▪EventTracker 9.0 and later should be installed.▪Install the integrator on the machine where the EventTracker Agent/Manager is installed.▪The users should have the administrative credentials for the Symantec Endpoint Protection Cloud console.3.Obtaining Symantec Endpoint Protection Cloud CredentialsTo obtain the Symantec Endpoint Protection Cloud API credentials, follow these steps:1.Go to the Settings.2.Select Client Application Management.3.Click the Add Client Application and create the API keys.4.Copy the Client ID, Client Secret, Customer ID, and the Domain ID.4.Integrating Symantec Endpoint Protection Cloud toEventTracker1.Download the Integrator for the Symantec Endpoint Protection Cloud.2.Save the .exe file and run the executable file ETS_SEP_Integrator.exe.It will launch the ETS SEP Cloud Integrator window.3.Enter the Details and click the Validate Credential button.It will validate the credentials and the following message appears if the credentials are successfully validated and also enables the Finish button.4.Click the Finish button to complete the integration.You will get a success message.5.EventTracker Knowledge PacksAfter the logs are received in the EventTracker, the Alerts and Reports can be configured into EventTracker. The following Knowledge Packs are available in EventTracker to support Microsoft Windows.5.1Category▪SEP Cloud - Threat Detection: This category provides information related to all the threats that are detected by the Symantec Endpoint Protection Cloud.▪SEP Cloud - Audit Events:This category provides information related to all the audit-related activities.▪SEP Cloud - Management Events:This category provides information related to all the device and client management-related activities.▪SEP Cloud - Security Events:This category provides information related to all the security activities such as enabled critical features, disabled critical features, scan details, etc.▪SEP Cloud - System Events:This category provides information related to all the system-related activities.5.2Alerts▪SEP Cloud - Threat detection: This alert generates when the Symantec Endpoint Protection Cloud detects any malware or threats.▪SEP Cloud - Scan aborted: This alert generates when the Symantec Endpoint Protection scan aborts.▪SEP Cloud - Definition update failed: This alert generates when the Symantec Endpoint Protection Cloud detects any failed definition update.▪SEP Cloud - Critical Feature disabled: This alert generates when the Symantec Endpoint Protection Cloud detects any disabled critical feature.5.3Reports▪SEP Cloud - Threat detection - This report provides details about the threat detected by the SEPC on the endpoint. This report contains information about the threat and the endpoint on which itoccurs.▪SEP Cloud - Scan details–This report provides detailed information about the Antivirus (AV) scan on the endpoints, along with the statistical details of the files, process, the registry and the folders which it scans.▪SEP Cloud - Console login logout details- This report provides details about the login and logout activities along with its user details, their roles and their IP address and from where these activities occur.▪SEP Cloud - Management activities - This report provides details about any changes (like policy changes, exceptions, and many more.) done by the administrator using the SEPC console.5.4Dashboards•SEP Cloud –T hreats Detected by the Host Name•SEP Cloud – Login Details by the Source IP Address•SEP Cloud –M anagement Events6.Importing the Knowledge PackNOTE: Import the Knowledge Pack items in the following sequence.▪Category▪Alerts▪Knowledge Objects▪Reports▪Dashboardsunch the EventTracker Control Panel.2.Double click Export-Import Utility.3.Click the Import tab.6.1Category1.Click the Category option, and then click the Browse button.2.Locate the .iscat file, and then click the Open button.3.To import the Categories, click the Import button.4.EventTracker displays a success message.5.Click OK, and then click the Close button.6.2Alerts1.Click the Alert option, and then click the Browse button.2.Locate the .isalt file, and then click the Open button.3.To import the alerts, click the Import button.4.EventTracker displays a success message.5.Click the OK button, and then click the Close button.6.3Knowledge Objects1.Click the Knowledge Objects under the Admin option in the EventTracker Manager page.2.Click the Import button.3.Click Browse.4.Locate the file named .etko.5.Select all the checkboxes and then click the Import option.6.Knowledge Objects are now imported successfully.6.4Flex ReportsOn the EventTracker Control Panel,1.Click the Reports option and select the New (*.etcrx) option.2.Locate the file named .etcrx and select all the checkboxes.3.Click the Import button to import the reports. EventTracker displays a success message.6.5DashboardsNOTE: The following steps given are specific to EventTracker v9.2 and later.1.Open the EventTracker in a browser and log on.2.Navigate to the My Dashboard option.3.Click the Import button.4.Import the dashboard file .etwd and click the Import button to import the Dashlets into theEventTracker Dashboard.You have an option to enable the Available widgets for the required Dashboard.5.Import is now completed successfully.7.Verifying the Knowledge Pack7.1Category1.Logon to EventTracker.2.Click the Admin dropdown, and then click Categories.3.In the Category Tree, scroll down and expand the SEP Cloud group folder to view the importedcategories..7.2Alerts1.Log on to the EventTracker.2.Click the Admin menu, and then click Alerts.3.In the Search box, type SEP Cloud, and then click the Go button.The Alert Management page will display all the imported alerts.7.3Knowledge Objects1.In the EventTracker web interface, click the Admin dropdown, and then click Knowledge Objects.Figure 312.In the Knowledge Object tree, expand the SEP Cloud group folder to view the imported KnowledgeObjects.7.4Flex Reports1.In the EventTracker web interface, click the Reports menu and then select the ReportConfiguration.2.In the Reports Configuration pane, select the Defined option.3.Click the SEP Cloud group folder to view the imported SEP Cloud reports.7.5Dashboards1.In the EventTracker web interface, click the Home button and select My Dashboard.2.Click the Customize dashlets icon and search for the SEP Cloud and verify the following dashlet.© Copyright Netsurion. All Rights Reserved.21 About NetsurionFlexibility and security within the IT environment are two of the most important factors driving business today. Netsurion’s cybersecurity platforms enable companies to deliver on both. Netsurion’s approach of combining purpose-built technology and an ISO-certified security operations center gives customers the ultimate flexibility to adapt and grow, all while maintaining a secure environment.Netsurion’s EventTracker cyber threat protection platform provides SIEM, endpoint protection, vulnerability scanning, intrusion detection and more; all delivered as a managed or co-managed service.Netsurion’s BranchSDO delivers purpose-built technology with optional levels of managed services to multi-location businesses that optimize network security, agility, resilience, and compliance for branch locations. Whether you need technology with a guiding hand or a complete outsourcing solution, Netsurion has the model to help drive your business forward. To learn more visit or follow uson Twitter or LinkedIn . Netsurion is #23 among MSSP Alert’s 2021 Top 250 MSSPs .Contact UsCorporate HeadquartersNetsurionTrade Centre South100 W. Cypress Creek RdSuite 530Fort Lauderdale, FL 33309Contact NumbersEventTracker Enterprise SOC: 877-333-1433 (Option 2)EventTracker Enterprise for MSP’s SOC: 877-333-1433 (Option 3)EventTracker Essentials SOC: 877-333-1433 (Option 4)EventTracker Software Support: 877-333-1433 (Option 5)https:///eventtracker-support。
- 1、下载文档前请自行甄别文档内容的完整性,平台不提供额外的编辑、内容补充、找答案等附加服务。
- 2、"仅部分预览"的文档,不可在线预览部分如存在完整性等问题,可反馈申请退款(可完整预览的文档不适用该条件!)。
- 3、如文档侵犯您的权益,请联系客服反馈,我们会尽快为您处理(人工客服工作时间:9:00-18:30)。
Symantec-Desktop-and-laptop -7.0--DLO-管理员手册
————————————————————————————————作者:————————————————————————————————日期:
精诚集团大中华技术服务部SYSTEX - Great China Technical Service Division
文件名称: Symantec DLO管理员手册
文件类别:操作手册
版号:V 1.0
撰写人员:翟严晋
发行日期:2012-07-18
修订日期:
撰写人员签名:
审核人员签名:
更新记录(Change Record)
版本Version
出版日期
Issue Date
修订章节
Section
Changed
出版修订原因
Reason for Issue
备注/修改人
Remarks/ Modify Person
V1.0 2012/07/10 N/A 文件初版/ 翟严晋
1.目录
1.概述 (1)
2.部署DESKTOP AGENT (1)
2.1远程推送 (1)
2.2手动安装 (4)
2.3DLO客户端显示 (5)
3.DLO备份策略 (5)
3.1设置全局排除 (26)
3.2编辑配置文件 (27)
4.还原备份文件 (32)
1.概述
Symantec Desktop and Laptop Option (DLO) 可为台式机和笔记本电脑(统称为桌面)提供自动文件保护.无论计算机是连接到网络上还是处于脱机状态,DLO 都可以提供保护.当桌面未连接到网络上时,文件被备份到桌面上的用户数据文件夹中。
当计算机重新连接到网络上时,文件便从本地桌面用户数据文件夹备份到指定的网络用户数据文件夹中。
拥有多台计算机的用户可在其计算机之间同步数据,因此在他们的所有计算机上都可以得到最新的文件版本。
本文档主要介绍Symantec Desktop and Laptop Option (DLO)日常操作与设置部分。
2.部署Desktop Agent
在安装DLO 时,Desktop Agent 安装集将被放到安装目录的一个共享位置.可通过UNC 路径访问.有几种方法可将Desktop Agent 从Desktop Agent 安装共享部署到台式机上.
Desktop Agent 部署方法
2.1远程推送
1.启动DLO Administration Console。
2.在工具中,选择在远程计算机上安装代理和维护服务,然后单击下一步.
3.在安装Agent/Maintenance Server 到远程计算机> 选择组件中,选择以下组件:
●Agent - 从管理服务器将Desktop Agent 远程安装到远程计算机.
4.单击添加.
5.在手动输入远程计算机名称中,键入以下内容:
●名称/IP 地址- 输入远程计算机的名称或IP 地址.
●域名–输入远程计算机的域名
●浏览–单击浏览.在选择计算机中,选择所需的远程计算机,然后单击确定.名称/IP 地址和域
名将被更新.同时,还将显示远程计算机登录凭据以及所选的计算机名称和域名
注:远程推送时,客户端需要关闭Windows 防火墙,否则会是无网络连接
6.单击确定.
7.在远程计算机登录凭据中,键入以下内容
●用户名称- 输入在远程计算机上具有管理员权限的帐户的用户名称.
●密码- 输入在远程计算机上具有管理员权限的帐户的密码.
●域名- 将根据您在手动输入远程计算机名称中输入的域名来显示域名.
在安装期间试图连接到附加的计算机时使用此用户名称和密码- 如果您想在下次安装时使用相同的用户名称和密码,请选中此选项.默认情况下,不会选中此选项.
8.针对要远程安装选项的每台远程计算机,重复步骤4 至6.
9.点击“安装”,开始安装过程
10.等待安装完成
2.2手动安装
可以在客户端上访问DLO服务器共享,或者将DLO客户端安装包打包复制到客户端进行安装。
使用具有本地管理员权限的账号登陆客户端,在客户端上访问\\DLO SERVER\DLOAGENT,然后双击Setup.exe进行安装。
2.3DLO客户端显示
客户端安装完之后,会在右下角出现DLO图标,并根据策略进行同步。
3.DLO备份策略
在第一次打开DLO时,默认会运行配置向导,首次配置时,建议根据配置向导完成配置。
1.开始向导配置
2.选择启用新建配置向导
3.显示需要配置的内容,下一步
4.取一个配置名称,此名称任意,下一步
5.选择需要备份的内容,此处先不用过多配置,稍后可以在控制台中设置。
下一步
6.设置备份作业什么时候发起。
●每当文件更改时:选择此选项可在文件更改时备份文件,在NTFS 驱动器上,每当文件更改
时都自动进行备份.对于FAT 驱动器,必须在已更改文件的备份间字段中输入备份间隔.
●按照计划:选择此选项可根据自定义计划备份文件.
由用户启动时:选择此选项允许桌面用户确定何时备份他们的文件.
7.如果硬盘是FAT格式,则不可以选择当文件修改时备份,只能定时发起备份
8.控制磁盘空间使用,限制在客户端本地、存储中客户端所能占用的最大大小。
下一步
9.修改客户端缓存的路径,此处不建议更改,下一步
10.配置带宽限制,此处静态设置只支持低版本中设置,6.3以上的版本支持动态带宽控制,下
一步
11.单击编辑,设置动态带宽控制
12.设置在不同网络带宽环境中,DLO备份所占用的网络带宽
13.设置用于恢复文件时的网络带宽,此处不建议设置,下一步
14.设置客户端DLO的权限,下一步
15.单击完成,完成配置文件配置
16.在管理文件服务器中,选择不,使用现有维护服务器
17.默认选择,启动存储位置向导
18.单击下一步
19.选择存储所在的位置
20.指定备份存放的目录,下一步
21.设置存储的名称。
下一步
22.完成存储位置向导
23.默认选择,启动自动用户分配向导,下一步
24.配置欢迎界面。
下一步
25.设置用户分配策略名称,下一步
26.选择需要匹配的域与用户组,下一步
27.选择需要关联的配置文件,选择刚才我们设置的DLO CONFIG,下一步
28.选择存储所在的位置,下一步
29.完成用户配置,下一步
30.提示客户端安装方法,下一步
31.点击完成,完成所有配置向导。
3.1设置全局排除
在DLO中,我们需要定义一些排除项,比如不备份视频、音频等大容量文件,这样可以减少网络带宽占用。
建议在DLO使用中,只备份办公、设计类文件即可。
1.登陆DLO控制台,选择设置,工具任务,全局排斥
2.除原有的排除项不变外,添加以下排除项
过滤器应用于
%ProgramFiles% 文件和文件夹
%Temp% 文件和文件夹
%windir% 文件和文件夹
Recycler 文件和文件夹
~*.tmp 文件和文件夹
其他如视频、音频类文件的排除,直接在添加中添加即可。
如要排除MP3,则添加*.MP3,应用于文件即可。
3.2编辑配置文件
DLO默认只备份我的桌面、我的文档等C盘的东西,如果我们需要备份D\E等盘符中的文件,需要手动添加。
1.登陆DLO,设置,配置文件,双击需要修改的配置文件
2.浏览到备份选择内容,点击添加
3.输入名称,定义要备份的文件夹。
然后切换到包含\排除选项卡
4.选择仅包含或排除以下列出项目,然后根据需要选择添加包含,即添加需要DLO备份的文
件格式。
如果需要备份东西,则在此处输入*.dox,应用于文件即可。
5.切换到修订版控制,设置修订版寿命,使用默认选项即可。
6.切换到选项选项卡,勾选压缩,以节省备份空间
7.点击确定,完成配置。
如果要添加备份E盘、F盘,则重复上述配置
4.还原备份文件
当有文件需要进行还原时,只需要在DLO中进行还原即可。
方法如下
1.登陆DLO控制台,点击恢复,浏览到之前备份的用户账户,选择要恢复的文件,右击选择
恢复
2.选择恢复选项,是恢复到本机还是恢复到其他计算机或者其他位置
3.点击,确定,开始恢复。
4.提示恢复完成。
5.客户单提示已经恢复完成。
其他设置项,请参考官方管理员手册。
