office系列教程之2013最新更新 (11)
OFFICE2013安装教程
OFFICE2013安装教程安装步骤
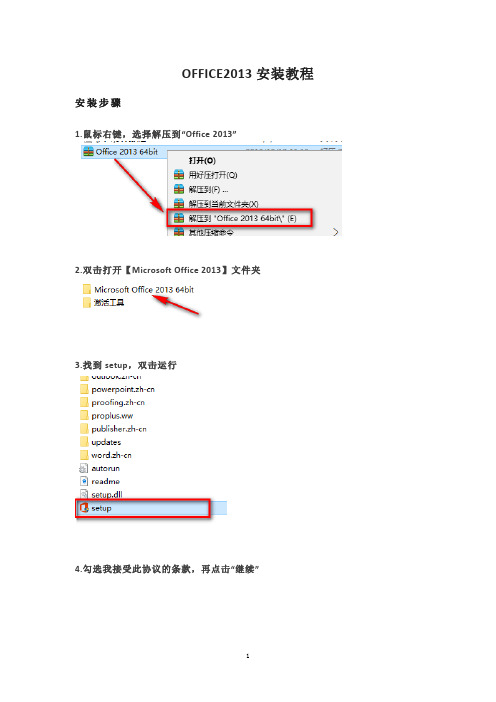
1.鼠标右键,选择解压到“Office 2013”
2.双击打开【Microsoft Office 2013】文件夹
3.找到setup,双击运行
4.勾选我接受此协议的条款,再点击“继续”
5.点击“自定义”
6.点击“文件位置”
7.选择软件安装目录,可安装到C盘以外的磁盘,点击“立即安装”
8.软件正在安装,请耐心等待即可
9.点击“关闭”
10.双击打开【激活工具】文件夹
11.选中KMS激活工具,鼠标右键,选择“以管理员身份运行”
<
温馨提示:若打开没有注册机,说明被电脑杀毒软件隔离了,关闭杀毒软件重新解压即可。
12.点击“激活Office 2010~2019”
13.激活成功,点击“确定”
14.在开始菜单找到刚安装好的软件图标,并打开,点击账户,在产品信息中查看是否激活成功,激活成功如下图,显示为激活的产品
15.安装结束。
office2013使用技巧
office2013使用技巧
当涉及到使用Microsoft Office 2013的技巧时,以下是一些你可能会找到有用的提示:
1. 快捷键:学习并使用Office 2013的快捷键可以提高你的工作效率。
例如,Ctrl+C和Ctrl+V用于复制和粘贴,Ctrl+B和Ctrl+I用于加粗和斜体等。
2. 自定义工具栏:你可以根据自己的需求自定义Office工具栏。
在工具栏上右键单击,选择“自定义工具栏”,然后添加或删除需要的命令。
3. 快速访问工具栏:位于Office应用程序窗口左上角的快速访问工具栏可以让你快速访问常用命令。
你可以自定义它,添加或删除命令。
4. 学习使用快速分析工具:Excel 2013引入了快速分析工具,它可以帮助你快速分析和可视化数据。
选中数据后,你可以在右下角看到快速分析按钮,点击它可以选择不同的分析选项。
5. 利用“画图”工具:Word、Excel和PowerPoint中的“画图”工具可以帮助你创建和编辑图形。
它提供了各种形状、线条和效果,使你能够自定义图形并改善文档的可视化效果。
6. 使用邮件合并:在Word中,你可以使用邮件合并功能来创建个性化的邮件或标签。
它可以帮助你批量发送个性化的邮件,而无需手动一个个输入收件人的信息。
7. 学习使用快速步骤:Office 2013中的应用程序提供了“快速步骤”功能,它可以帮助你自动执行一系列的操作。
你可以创建自定义的快速步骤,以便在需要时快速完成重复的任务。
这些只是一些Office 2013的使用技巧,希望对你有所帮助。
如果你有任何具体
的问题,请随时提问。
Excel2013高级教程

内容提要
1 数据处理与分析基础 P4 2 利用函数进行数据分析 P29 3 利用图表进行数据分析 P42 4 利用透视表(图)进行数据分析 P72 5 构建动态数据分析报表 P96 6 宏与VBA在数据分析中的应用 P114 7 Excel 的数据分析工具简介 P146
3
1、数据处理与分析基础
要找的值
查找区域
第2列
精确比较
12
相关知识:Vlookup函数的使用
格式: Vlookup(查找的值,查找区域,返回的列号,选项)
功能: 在表格或数组的首列查找值 ,并返回表格或数组中其它列的值 。
选项: FALSE:精确匹配,若找不到返回#N/A TRUE或省略:近似匹配,若找不到返回一个小于要找参数的最大值。 (Excel中的函数帮助可能有误,请在编辑栏输入公式时查看选项含义)
学习目标 1 认识Excel的功能与界面 2 学会利用数据条件格式进行数据处理 3 学会利用排序、筛选、分类汇总功能进行数据分
析
4
4
1、数据处理与分析基础 1.1 Excel的功能与界面 1.2 数据的输入、编辑与运算 (案例:销售产品基本信息表、销售记录汇总表) 1.3 利用数据条件格式进行数据处理 1.4 利用排序、筛选、分类汇总功能进行数据分析
7
1.1 Excel的功能与界面
1.1.2 Excel的用户界面
整个界面由功能区和工作表区组成; 功能区有:Office按钮、选项卡、组、快速访问工具栏、标题栏、状态栏。
Office按钮:相当于早期的“文件”菜单; 选项卡:面向 任务,包括功能控件。“开始”有日常操作功能,“页面布局”与打印有
关·······(有书也称主菜单) 组:每个组都与特定任务相关;(有书也称工具栏) 快速访问工具栏:独立显示,默认有“保存”、“撤销”和“恢复“三按钮,可以自定义;
Office2013办公软件应用标准教程第十一章高级应用
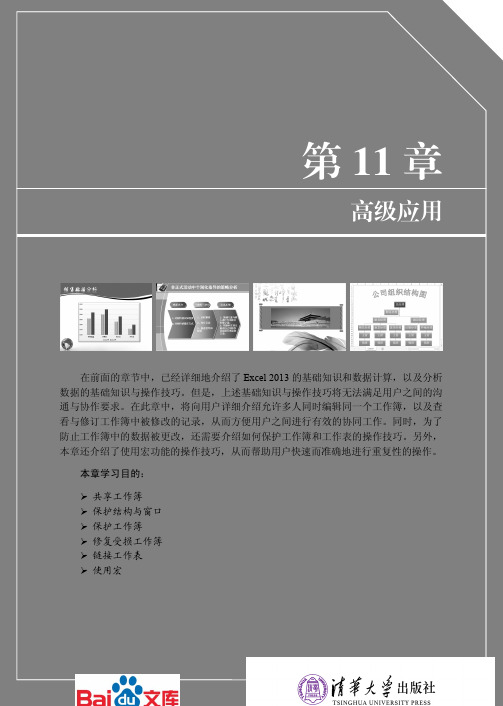
表 11-2 【突出显示修订】对话框中各选项的功能
名称
功能
编辑时跟踪修订信息,同时 共享工作簿
启用该选项,在编辑时可以跟踪修订信息,并可以共享工作簿
时间
启用该选项,可以设置修订的时间
修订人
启用该选项,可以选择修订人
突出显 位置
启用该复选框,可以选择修订的位置
示的修 在 屏 幕 上 突 出 显 启用该复选框,当鼠标停留在修改过的单元格上时,屏幕上将会自动
在【保护结构和窗口】对话框中包括下列 3 种选项: “ 结构 启用该选项,可保持工作簿的现有格式。例
如删除、移动、复制等操作均无效。 “ 窗口 启用该选项,可保持工作簿的当前窗口形式。 “ 密码 在此文本框中输入密码可防止未授权的用
户取消工作簿的保护。 另外,当用户保护了工作簿的结构或窗口后,再次执 行【审阅】|【更改】|【保护工作簿】命令,即可弹出【撤 销工作簿保护】对话框,输入保护密码,单击【确定】 按钮即可撤销保护,如图 11-5 所示。
订选项 示修订
显示修订信息
在 新 工 作 表 上 显 启用该复选框,将自动生成一个包含修订信息的名为“历史记录”的
示修订
工作表
第
11章
2.浏览修订
高
级
当用户发现工作簿中存在修订记录时,便可以执行【审阅】|【更改】|【修订】|【接
应
受/拒绝修订】命令,并执行相应的选项即可接受或拒绝修订,如图 11-3 所示。
202808
Office 2013
2013 中保护工作簿的功能,来保护工作簿、工作表或部分单元格,从而有效地防止数据 被其他用户复制或更改。
11.2.1 保护结构与窗口
执行【审阅】|【更改】|【保护工作簿】命令,在弹出 的【保护结构和窗口】对话框中,选择需要保护的内容, 输入密码即可保护工作表的结构和窗口,如图 11-4 所示。
office2013--自动多级列表及自动编号教程..

Word 2013自动多级列表编号设置步骤2014-9-17Writen By Eric Yan实现效果如下图所示:1.实现右图中的多级分层列表2.实现多级列表的自动编号详细配置步骤如下:1.在样式窗口首先显示标题1、标题2、标题3等。
1)点击样式窗口右下角的箭头图标:2)此时得到如下图所示界面:3)点击从左下角由左向右的第三个图标《管理样式》,打开如下图所示界面:选择“推荐菜单”,通过Shift或者Ctrl选中标题1-N,然后点击左下角的显示,即可在菜单里看到标题1-N了。
4)效果如下:2.根据效果图敲入图中的文字,并根据多级列表的层次关系分别设置几级标题。
从标题1开始,依次类推,此时的设置时没有多级列表前面的数字标示的。
3.设置自动多级列表的数字,并自动生成,选择图中右下角的多级列表菜单1)展开选择“定义新的多级列表”菜单,分别设置1-N级目录标题格式:依次类推,一次性设置完成。
一般在设置方案的时候需要在封页打开后显示目录架构,插入目录架构从“引用”选项卡中插入,如下图所示。
-----→自定义目录---→调整文档要显示的最低目录级别,可以选择“修改“选项卡,根据自己喜好选择自己喜欢的目录结构中文字的字体,间距,排版等。
此时打开“视图“选型卡,选中”导航窗口:选型,在方案左侧即可显示导航的目录等级,整体效果如下!!!第一章概述 (9)1.1 建设背景 (9)1.2 项目定位 (9)1.3 项目内容 (9)第二章现状与需求分析 (9)2.1 发展趋势及挑战 (9)2.1.1 发展趋势 (9)2.1.2 面临的挑战 (9)2.1.2.1 人才 (9)2.1.2.2 技术 (9)2.1.2.3 信息安全 (9)第三章需求分析 (9)3.1 基础设施服务需求 (9)3.2 云计算服务需求 (9)3.3 数据交换服务需求 (9)3.4 数据共享服务需求 (10)3.5 基础数据库需求 (10)3.6 标准规范体系需求 (10)3.7 信息安全体系需求 (10)3.8 运行保障服务需求 (10)第四章总体建设方案 (10)4.1 建设原则 (10)4.2 建设目标 (10)4.3 总体架构设计 (10)4.4 建设内容 (10)4.4.1 基础设施服务 (10)4.4.1.1 数据中心机房建设 (10)4.4.1.2 网络子系统 (10)4.4.1.3 服务器子系统 (10)4.4.1.4 存储子系统 (10)4.4.1.5 容灾备份子系统 (11)4.4.1.6 私有云平台 (11)4.4.2 数据支撑服务 (11)4.4.3 平台支撑服务 (11)4.4.4 标准规范体系 (11)4.4.5 信息安全体系 (11)4.4.6 运行保障体系 (11)第五章项目建设与管理 (11)5.1 项目组织机构 (11)5.2 项目配置管理 (11)5.3 项目需求管理 (11)5.4 质量管理制度 (11)5.5 质量控制 (11)5.6 质量保证 (11)5.7 风险管理制度 (11)第六章项目实施 (12)第一章概述1.1建设背景1.2项目定位1.3项目内容第二章现状与需求分析2.1发展趋势及挑战2.1.1发展趋势2.1.2面临的挑战2.1.2.1人才2.1.2.2技术2.1.2.3信息安全第三章需求分析3.1基础设施服务需求3.2云计算服务需求3.3数据交换服务需求3.4数据共享服务需求3.5基础数据库需求3.6标准规范体系需求3.7信息安全体系需求3.8运行保障服务需求第四章总体建设方案4.1建设原则4.2建设目标4.3总体架构设计4.4建设内容4.4.1基础设施服务4.4.1.1数据中心机房建设4.4.1.2网络子系统4.4.1.3服务器子系统4.4.1.4存储子系统4.4.1.5容灾备份子系统4.4.1.6私有云平台4.4.2数据支撑服务4.4.3平台支撑服务4.4.4标准规范体系4.4.5信息安全体系4.4.6运行保障体系第五章项目建设与管理5.1项目组织机构5.2项目配置管理5.3项目需求管理5.4质量管理制度5.5质量控制5.6质量保证5.7风险管理制度第六章项目实施。
Microsoft Office 2013最新教程 (11)
Overview: Build tables, and the data bill come
• You’re creating a database because the spreadsheet you’ve been using is too big to manage. This course explains how to build the tables for your new database.
1
In Datasheet view, you build a table by entering field names and setting data types manually. All you have to do is click and type.
Table templates are pre-made tables that meet several common business needs.
Build a database II: Create tables for a new Access database
Create a table in Datasheet view
• Datasheet view provides a visual way to create a table. • The picture shows the process.
Create your tablesIn a relational •
database, tables store your data.
• Your data doesn’t “live” anywhere else, and that makes tables the central component of your database. • If you don’t have tables, you don’t have a database.
2013 Office教材(更新)
AUO Proprietary & Confidential
23
数据排序
如果指定多个关键字,需要用到菜单命令具体步骤如下:
1.在数据表任意单元格单击。 2.单击“数据”菜单,选择“排序‖命令,打开“排序”对话框 3.在“主要关键字”下拉列表中选择“总成绩”,次要关键字下拉列表中选择 “数据库”,右边单选框中同选“降序‖,单击“确定”按钮。
7
插入工作表 真的成功了!
多出一页 新建的工作表
AUO Proprietary & Confidential
8
插入批注
批注是对单元格进行注解,它并不直接显示在屏幕上,只是在单元格右上角 出现红色三角形记号。把鼠标指针移到这个单元格任意位置,批注就显示出来。 怎样才能插入批注呢? 1.选中要插入批注的单元格,如图:
工具栏 菜单栏 编辑栏 标题栏
活动单元格
状态栏
AUO Proprietary & Confidential
4
工作薄内常用操作
1. 插入工作表 选择工具栏‖插入”—工作表“即可 2. 插入特殊符号 选择工具栏“插入”—符号“即可选择所需符号 3. 插入批注 • 3.1插入批注
• • • • • • • •
•
在桌面点击右键—‖插入‖--‖插入批注―—在弹出的批注框中输入文本即可 3.2编辑/删除批注 在桌面点击右键—‖插入‖--‖编辑/删除批注―—在弹出的批注框中编辑即可 3.3设置批注的显示/隐藏格式 在桌面点击右键—‖插入‖--‖显示/隐藏批注“—批注框将会呈现/消失 4. 超链接的使用 4.1 文本链接工作表 选中表格中需链接的单元格—鼠标右键—超链接—点击其对话框内的 “文本中的位置”选项并在右侧的列表中选择 需链接的工作表即可
office2013基础课目录
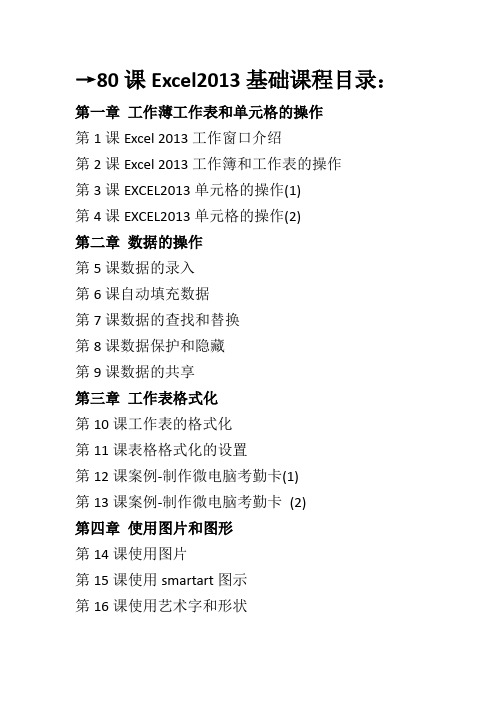
→80课Excel2013基础课程目录:第一章工作薄工作表和单元格的操作第1课Excel 2013工作窗口介绍第2课Excel 2013工作簿和工作表的操作第3课EXCEL2013单元格的操作(1)第4课EXCEL2013单元格的操作(2)第二章数据的操作第5课数据的录入第6课自动填充数据第7课数据的查找和替换第8课数据保护和隐藏第9课数据的共享第三章工作表格式化第10课工作表的格式化第11课表格格式化的设置第12课案例-制作微电脑考勤卡(1)第13课案例-制作微电脑考勤卡(2)第四章使用图片和图形第14课使用图片第15课使用smartart图示第16课使用艺术字和形状第五章数据的处理第17课数据排序第18课数据筛选第19课数据清单第20课数据的分类汇总第21课条件格式分析数据(1) 第22课条件格式分析数据(2) 第六章公式与函数第23课认识公式第24课引用单元格第25课定义名称第26课公式审核第27课创建数组公式第28课认识和使用函数第29课常用函数第30课财务函数第31课日期和时间函数第32课日期推算函数第33课统计函数第34课数学函数第35课数组函数第36课文本函数第37课查找和引用函数第38课统计函数高级应用第七章使用图表分析数据第39课认识和创建图表第40课图表的基本编辑第41课处理图表系列第42课图表元素的添加第43课图表外观的美化第44课添加折线分析第45课趋势线和误差线第46课创建迷你图第47课编辑迷你图第48课组合图表第49课动态图表第50课对比图表第八章使用创建数据透视表第51课创建数据透视表第52课编辑数据透视表第53数据透视表计算分析功能第54课数据透视表分析工具第55课创建数据透视图第九章数据分析工具第56课合并计算第57课数据审核第58课分列显示数据和快速填充第59课模拟运算表第60课使用分析工具库第61课规划求解第62课宏的录制第63课使用控件执行命令第十章打印工作表第64课设置工作表的布局第65课打印工作表第十一章工作薄安全与协作第66课制作销售数据表第67课视图选项卡功能第68课审阅选项卡功能第69课插入各类对象第70课获取外部数据第71课发布工作薄第十二章EXCEL2013综合案例第72课从身份证提取性别和生日第73课从出生日期中提取年龄第74课制作员工工资条第75课加班工资统计表第76课时间函数计算和应用第77课员工业绩成绩第78课应收账款报表第79课科目汇总表第80课银行存款日记账→60课Word2013课程基础目录:第一章WORD2013文档基础操作第1课WORD2013的工作界面第2课WORD2013的视图方式第3课创建和打开文档第4课保护和保存文档第二章输入与编辑文本第5课输入文本对象第6课选择文本第7课编辑文本第8课查找和替换文本第9课拼写和语法检查第三章设置文本格式第10课设置字体格式第11课设置段落格式第12课添加项目符号和编号第13课添加边框和底纹第四章创建与编辑图形第14课使用图片第15课设置图片格式第16课美化图片第17课插入和了解图形第18课插入与编辑图形第19课添加艺术字第20课插入编辑smartart第五章创建与编辑表格第21课插入表格第22课编辑表格布局第23课设置表格样式第24课编辑表格文本第25课表格的高级应用第六章创建与编辑图表第26课插入和编辑图表第27课设置图表的类型第28课设置图表格式第29课制作禁烟牌第七章高级应用和排版第30课设置文档页面背景第31课设置中文版式第32课文档添加页眉页脚第33课设置分栏排版第34课应用其他版式第八章设置页面和打印第35课设置页面第36课在文档提取目录第37课添加脚注和尾注第38课排版页面第39课修改文档第40课调整窗口内容第41课使用样式设置格式第42课重要文档保护第43课文档校对和语言转换第44课打印文档第九章其余功能介绍第45课创建信封第46课邮件合并第47课插入引用功能第48课控件的使用第49课插入各类对象第50课插入视频音频第51课宏讲解和设置第十章WORD2013综合案例第52课制作个性个人简历第53课制作个性信封(1)第54课制作个性信封(2)第55课制作名片正面第56课制作名片背面第57课制作月刊(1)第58课制作月刊(2)第59课制作报纸排版(1)第60课制作报纸排版(2)→60课PPT2013目录:第一章PPT2013基础知识操作第1课工作界面介绍第2课自定义调整界面第3课调整视图模式第4课幻灯片操作第5课分节的操作第二章制作文本型幻灯片第6课输入文本信息方式第7课字体格式的设置第8课设置段落样式(1)第9课设置段落样式(2)第10课艺术字效果第11课更改和提炼文本内容第三章设置幻灯片页面第12课页面的设置第13课背景格式的设置第14课幻灯片母版第15课讲义母版和备注母版第四章图片和图形的应用第16课绘制形状第17课设置形状格式第18课插入图片第19课创建相册第20课设置图片格式第21课美化图片第22课多个图片对象操作第23课调整图片层次第24课旋转和组合图片第五章表格和图表的应用第25课绘制表格第26课设置表格的外观第27课表格布局调整第28课认识和创建图表第29课编辑图表数据第30课图表外观设计第31课创建smart art第32课设置图示外观第六章制作影音幻灯片第33课插入音频的方式第34课音频播放的设置第35课应用视频效果第36课改变视频显示模式第七章添加动画效果第37课为幻灯片添加动画效果第38课编辑动画选项第39课同一个位置放映多个动画第40课自定义动作路径动画第41课幻灯片切换第42课超链接运用第43课动作按钮第44课触发器动画的制作第45课触发器控制视频第八章放映和输出幻灯片第46课幻灯片放映途径第47课放映前期准备第48课幻灯片放映过程的操作第49课演示文稿输出第50课发布调用幻灯片第九章打印幻灯片和控件使用第51课打印幻灯片第52课幻灯片备注运用第53课保护演示文稿第54课开发工具应用第55课视频和flash控件第十章PPT2013综合案例第56课标题文本动画第57课数字倒计时动画第58课卷轴动画的设置第59课拉动式相册动画第60课绘制3D效果图表。
Office 2013新功能

Office 2013新功能秘技1:查看编辑PDF文档秘技简介:可以无视系统中是否已安装PDF文档查看和编辑工具,直接用Word 2013搞定。
秘技招式:由于工作关系,秦英每天都会接收到大量的邮件,其中一些重要的附件多采用PDF格式,虽然很多第三方软件可以支持PDF文档的浏览,但支持编辑PDF文档的免费软件却是不多,价值不菲的Adobe Acrobat自然更不在考虑之列。
现在好了,Word 201提供了PDF文档的查看和编辑功能,她可以轻松地查看、编辑PDF文档。
用她自己的话说:“安装个Microsoft Office就等于同时拥有了免费的Adobe Acrobat,这买卖看上去很划算。
”右击任意一个PDF文档,从快捷菜单依次选择“打开方式→选择默认程序”,选择“Word(桌面)”作为PDF文档的默认打开方式。
以后,只要双击要编辑的PDF文档,该文档就会被自动载入到Word中(如图1),然后按照个人的意愿进行查看、编辑并另存为Word文档即可。
图1秘技点评:Word 2013提供的PDF文档编辑功能,能给我们的日常学习、工作带来了极大便捷,但在实际的使用过程中我发现,该功能其实并非是万能的。
比如用幻灯片转换的PDF文件,用Word打开后,将只能得到一幅图片,而不能对其中的文字进行修改。
此外,Word 2013提供的PDF查看功能很丰富,利用它,我们可轻松地为文档添加注释以及令其高亮标注等,这一点,我们在使用的过程中能够深刻地体会到。
秘技2:触摸模式秘技简介:可以瞬间放大菜单命令和按钮的尺寸。
秘技招式:现在的显示屏越来越大,但是软件上的按钮还是以前的大小,而Word 2013中触摸模式的出现,很好地解决按钮大小一成不变这一问题。
第一步:单击快速访问工具栏右侧的倒三角按钮,在出现的菜单中选择“触摸/鼠标模式”,相应的按钮(手指状)即会出现在快速访问工具栏。
第二步:点击它,然后在出现的下拉菜单中选择“触摸”或“鼠标”,即可在两种模式进行切换。
office系列教程之2013最新更新 (4)

[Your company name] presents:Microsoft ®Office Live Meeting 2007 TrainingGet to know Live MeetingCourse contents •Overview: Communicate, collaborate via the Web•Lesson 1: Join a Live Meeting•Lesson 2: Schedule a Live Meeting with Outlook保险超市•Lesson 3: Start a Live MeetingCourse contents (cont.)•Lesson 4: Show and share files in Live Meeting•Lesson 5: Record and play back a Live Meeting•Most lessons include a list of suggested tasks; each includes a set of questions to test your understanding of the material.Overview: Communicate, collaborate viathe Web•Suppose you work for a companythat has offices around the world.You need to meet with yourcolleagues often, but face-to-faceisn’t possible.•With Microsoft Office Live Meeting2007, you can all share thoughtsand information at the same time,in a virtual conference.•Joining a Live Meeting is quick andeasy. Learn to organize one, andpeople will thank you for bringingthem together.Course goals •Join a Live Meeting.•Schedule a Live Meeting.•Start a Live Meeting.•Lead a Live Meeting.•Record a Live Meeting.Lesson 1 Join a Live MeetingJoin a Live Meeting•Many people firstbecome aware ofLive Meetingwhen co-workerssend them aninvitation, like theone shown herein MicrosoftOffice Outlook®2007.•When this happens to you, how do yourespond? This lesson will tell you.•Here you’ll learn how to install LiveMeeting simply from the Outlook invitation,and how to join a Live Meeting you’vebeen invited to.What is Live Meeting?•First, anintroduction.•Live Meeting is away to move yourconference roomonto the Web.•It offers audio and video, rich media,handout distribution, interactivewhiteboards, and virtual breakout rooms —just like face-to-face meetings, except thatthe participants can be anywhere, and youcan stay in your own office.Join a Live Meeting•When theinvitation to aLive Meetingarrives in yourinbox, all youhave to do is clickJoin the meeting,right in themessage.•If you’ve never used Live Meeting 2007,you can install it, right from the message.Look for the First-Time Users section.Join audio and video in a LiveMeeting•After you join theLive Meeting, youcan see what theparticipants viewtogether.•You can talk with the others in a telephoneconference call or by using your computermicrophone. Click Join Audio in the Voice& Video pane.Join audio and video in a LiveMeeting•After you join theLive Meeting, youcan see what theparticipants viewtogether.•If you have a Webcam and want others tosee you, click the Start My Video link.•To troubleshoot audio and video problems,use the Set Up Audio and Video Wizard inthe Voice & Video pane.Test 1, question 1•How can a group share the most information with the least effort and cost? (Pick one answer.)1. A conference call.2. A Live Meeting.3. A face-to-face meeting.Test 1, question 1: Answer • A Live Meeting.•With Live Meeting, you can share data and discuss it with a group, even see each other, and nobody has to move a step.Test 1, question 2•You must have Live Meeting installed before anyone can invite you to join them in using it. (Pick one answer.)1.True.2.False.Test 1, question 2: Answer •False.•You can install Live Meeting from the invitation itself.Test 1, question 3•To speak to other Live Meeting participants, you can use which of the following? (Pick one answer.)1.Your telephone.2.Your microphone.3.Both of the above.Test 1, question 3: Answer •Both of the above.•You can use your telephone and join a conference call, or you can use your computer microphone by clicking the Audio link.(You’ll want speakers or headphones so you can hear other people talking, too.)Lesson 2 Schedule a Live Meeting with OutlookSchedule a Live Meeting withOutlook•After you haveparticipated in aLive Meeting,you’ll probablywant to scheduleLive Meetingsyourself.•To do that, you use Outlook, the same waythat you schedule other meetings.•There’s one difference: For Live Meeting,you need the Conferencing Add-in forOutlook.Set up the Conferencing Add-infor Outlook•After you haveinstalled theConferencingAdd-in forOutlook on yourcomputer, youneed to set it upbefore you use itthe first time.•Here’s how:1.In Outlook, click Conferencing, and then click UserAccounts.2.In the User Accounts dialog box, you will seesections for Office Communication Server and forLive Meeting Service.Set up the Conferencing Add-infor Outlook•After you haveinstalled theConferencingAdd-in forOutlook on yourcomputer, youneed to set it upbefore you use itthe first time.•Here’s how:3.To use the Office Communication Server, type orconfirm your e-mail sign-in name. Then click TestConnection. After the connection is verified, click OK.•How do youschedule a LiveMeeting in OfficeCommunicationsServer 2007?•Do the following, as shown in the picture:1.In Outlook, click Schedule a Live Meeting to open anew meeting invitation. If you have a choice, selectOffice Communications Server.•How do youschedule a LiveMeeting in OfficeCommunicationsServer 2007?2.In the invitation, type the e-mail address of theattendees, the subject and time of the meeting, andany message that you want to appear in yourinvitation.3.Select other options if you wish, then click Send.•In theConferencinggroup arecommands toselect options forthe Live Meeting.•You can add presenters, select computer ortelephone audio, and set access to controlwho can join.•Anonymous allows wide access; OpenAuthenticated limits access to people atyour company; Closed Authenticated limitsaccess to co-workers you specify.•You can useOutlook toschedule a LiveMeeting on LiveMeeting Service.•The picture shows how:1.Click Schedule a Live Meeting to open a newmeeting invitation. If you have a choice, select LiveMeeting Service.•You can useOutlook toschedule a LiveMeeting on LiveMeeting Service.2.In the invitation, type the e-mail addresses of theattendees, the subject and time of the meeting, andany message that you want to appear in yourinvitation.3.Select other options if you wish, then click Send.•The computeradministrator setssome meetingoptions on LiveMeeting Service.Others are openfor you to choose.•Start by clicking Options.•You can select computer or telephone audio,set access to control who can join, andprovide instant messaging, sharing, evenrecording.Test 2, question 1•You can schedule a Live Meeting as soon as you have the program installed. (Pick one answer.)1.True.2.False.Test 2, question 1: Answer •False.•Before you can schedule a Live Meeting, you also need to install and set up the conferencing add-in. You’ll find a link to it in the lesson.Test 2, question 2•To invite people to a scheduled Live Meeting, which would you use? (Pick one answer.)er Accounts.2.Schedule a Live Meeting.3.Plan a meeting.Test 2, question 2: Answer •Schedule a Live Meeting.•Then send an e-mail message or a telephone invitation.Test 2, question 3•After you install the conferencing add-in, where do you set it up? (Pick one answer.)er Accounts.2.Content Expiration.3.Additional Features.4.Attendees.Test 2, question 3: Answer •User Accounts.•In Outlook, click Conferencing, then User Accounts, and enter your information in the dialog box.Lesson 3 Start a Live MeetingStart a Live Meeting•Sometimes it isconvenient tohave a LiveMeeting rightaway, instead ofscheduling it forlater on.•Suppose you are in a phone call and wantto share documents for discussion.•The Meet Now feature enables you andyour colleagues to collaborate at amoment’s notice.•Do the followingto start a LiveMeeting rightaway.1.Open Live Meeting 2007. If you see the UserAccounts dialog box, sign in using the stepsdescribed in the previous lesson of this course.2.Click Meet Now. You will see a note that you are nowconnecting to the meeting that you have started.•Do the followingto start a LiveMeeting rightaway.3.Click Meeting and then click Invite. You will see twochoices for ways to invite people: by e-mail, or bytelephone.Exit a Live Meeting•The people you have invited can close Live Meeting simply by clicking the Close button at the upper-right corner of the window.1.Click Meeting . Click the >>button (called the Morebutton).2.Click Exit and End Meeting . Click OK to end themeeting.•Because you started the meeting, you need to do a bit more to close it:Suggestions for practice 1.Start a meeting and invite yourself to it.2.Join the Live Meeting you started. •Online practice(requires Outlook 2007)Test 3, question 1•You need to have a Live Meeting with a co-worker right away. How do you do that? (Pick one answer.)1.Open Live Meeting and click Meet Now.2.Schedule a Live Meeting through Outlook.3.Open Live Meeting and click Join.Test 3, question 1: Answer •Open Live Meeting and click Meet Now.•Then send an invitation by e-mail or start a conference call.Test 3, question 2•Which of the following statements is true? (Pick one answer.)1.No one can leave a Live Meeting until the person whoopened the meeting ends it.2.Only the person who opened a Live Meeting can end it.3.Anyone can leave or end a Live Meeting at any time.Test 3, question 2: Answer •Only the person who opened a Live Meeting can end it.•If it’s your meeting, you decide when to end it. However, attendees can leave the meeting whenever they want.Lesson 4 Show and share files in Live MeetingShow and share files in LiveMeeting•Whether youschedule a LiveMeeting or startone in a moment,you can make itmore informativeand moreeffective byadding content tothe meeting. •For instance, how a presentation ordocument to all the other participants, asshown here. Or share files so that peoplecan review and change them during themeeting.•Live Meeting lets you work as a team.Meeting•The power of LiveMeeting is that itlets everyone inthe meeting seethe same thingsat the same time.•Telephoneconference callscan’t do that. •You can upload a Microsoft OfficePowerPoint®presentation, show it to all theparticipants, and get their thoughts aboutit —just as if you were all in one room.Meeting•To upload thepresentation orother file, simplydrag it into themain presentationarea of LiveMeeting.•If this file is the only meeting content, it willautomatically open in the main window. Allthe meeting participants will see it too.•If you have uploaded more than one pieceof content, click Content to see them listedand to select the one you want to appear.Control content viewing in LiveMeeting •When your presentation, document, or other file is in everyone’s view, you probably want to move through it as you discuss it.•Page up and Page down arrows in the lower-leftcorner.•Thumbnails of pages and slides. Click Content andthen click Thumbnails . In the Thumbnails pane, clickthe thumbnail for the item you want to display.•Live Meeting has simple controls for doing that:•Live Meeting doesn’t just let all participants see the same content.•You can share your content with others in the meeting, letting them change the files during the meeting.1.Click Content , and then click Share .2.Point to Share a Program . You will see a list ofprograms that are open on your computer. Select theone that you want to share.•When sharingbegins, the LiveMeeting windowis replaced by thefile that you havechosen to share.•At the top of the file appears the Sharingtoolbar with command icons that you use tocontrol and end the sharing process.•Also on the Share menu are commands tocreate content in Live Meeting, such asWhiteboard, Web Page, Poll Page, TextPage, and Snapshot.。
《Office2013办公软件高级应用立体化教程》教学教案
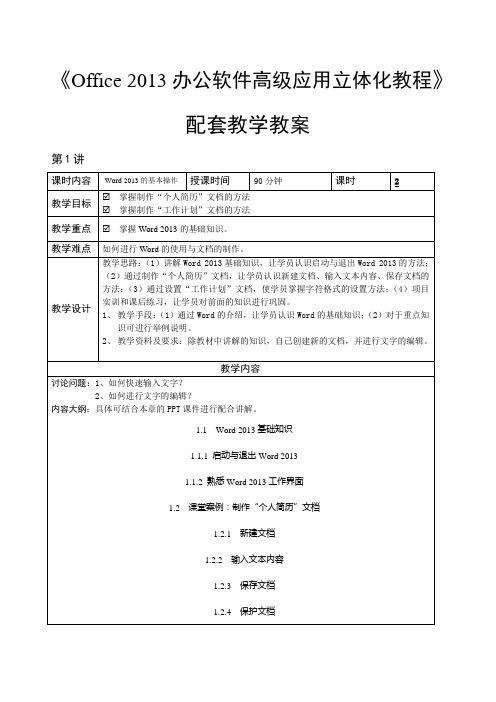
《Office 2013办公软件高级应用立体化教程》配套教学教案第1讲“个人简历”文档“工作计划”文档小结掌握Word的基础知识。
思考及作业想一想:1.如何利用标尺快速对齐文本?2.如何快速切换英文字母大小写?3.如何快速调整Word文档行距?4.如何批量设置文档格式?练一练:练习1:新建“商业信函”文档本练习要求新建一个“商业信函”文档,通过新建模板文档创建文档,然后输入文本完善文档内容。
练习2:编辑“工作总结”文档本练习要求对“工作总结”文档进行编辑,操作时可打开本书提供的素材文件进行操作,参考效果如图所示。
第2讲“活动策划”文档“工作报告”文档小结掌握图文混排的方法思考及作业想一想:1.如何为普通文本设置艺术字?2.制作斜线表头的技巧?练一练:练习1:制作“环境保护宣传海报”文档创建“环境保护宣传海报.docx”文档,在其中插入图片、剪贴画、艺术字、文本框等元素,将其编辑并美化。
:编辑“销售分析报告”文档创建“销售分析报告.docx”文档,在其中插入表格和图表,将其编辑并美化。
第3讲“公司简介”文档“行业策划”文档小结1、掌握文档排版与审校的各种方法。
想一想:1.如何进行页眉页脚的删除?2.批注的删除技巧?3.通过打印奇偶页实现双面打印?练一练:1.练习1:制作“考勤制度”文档本练习要制作一个“考勤制度”文档,要求通过编排文档,完善文档内容结构。
制作时可打开本书提供的素材文件进行操作,参考效果如图所示。
练习2:审校“行为守则”文档本练习要对“行为守则”文档进行审校并打印,操作时可打开本书提供的素材文件进行操作,参考效果如图所示。
第4讲“信封”文档“面试通知单”文档小结1、掌握使用批处理制作信封效果的方法。
思考及作业想一想:如何快速检查信封制作中的错误?如何从数据源中筛选指定的数据记录?练一练:练习1:制作“信封2”文档新建空白文档,在其中根据“客户档案表”数据源制作批量信封的效果如图所示。
office系列教程之2013最新更新 (1)
[Your company name] presents:Microsoft ®OfficeOneNote ®2007 TrainingUse Note tags and Search to keep trackof your notesCourse contents •Overview: Tag, you’re it•Lesson 1: Use note tags•Lesson 2: Search for untagged notes旅游保险/Travel/travel.aspx•Each lesson includes a list of suggested tasks and a set of test questions.Overview: Tag, you’re it •You may be an avid note takerwho’s written down everythingyou need to know.•But the information is useful only if you can find it when you needit later. OneNote has severalfeatures to help you find thenotes you want.•This course shows you how tomark notes with note tags andthen display handy lists of thenotes that you’ve tagged, oruse the powerful search optionsCourse goals•Mark notes with note tags.•Find specific notes quickly using note tags.•Create To Do lists from tagged notes.•Use the Page List task pane to search for notes. •Use the Search box to locate specific words or phrases.Lesson 1 Use note tagsUse note tags•Did you knowthat you can tagnotes as you workin OneNote?•If you’re in a meeting and have an action item assigned to you, or just want to make sure something doesn’t fall through the cracks, tag it as a To Do item, or as Important. OneNote then helps you find any tagged note by grouping note tags and displaying them in a list.•There are 29 note tags available in OneNote.•Using note tagscouldn’t beeasier.•Just click (or tap if you’re using a Tablet PC)on the note you want to tag and then selectthe type of tag you want to use.•You can add tags to typed text, pictures, andhandwriting.•The picture shows five different notetags.1 2 3To do Important Question•The picture showsfive different notetags.Remember for later45Definition•You can mark a note with two or more tags (upto nine) —for example, a To Do and anImportant tag.•You can get tonote tags inseveral ways.•The Insert menu, Tag command.•The Tag button on the Standard toolbar.•Keyboard shortcuts.•All note tags are customizable. Youcan change thename, iconsymbol, and fontor highlight color.•The picture shows how to customizea note tag.12 3Click the arrow on the Tag button, click Customize My Tags, and then click the Modify button at the bottom of the Customize My Tags task pane.In the Modify Tag dialog box, enter a name for your tag. Select a symbol for the icon.•All note tags arecustomizable. Youcan change thename, iconsymbol, and fontor highlight color.•The picture showshow to customizea note tag.Choose a font color.45 6 7Choose a highlight color. Preview your note tag. Click OK.•Once you’vemarked noteswith note tags,you can easilyfind them byusing the TagsSummary taskpane.•On the View menu, click (or tap) All TaggedNotes.•The Tags Summary task pane displays a listof notes that you have tagged.•The task panealso displays theoptions shownhere.1 2Group or sort note tags by tag name, section, title, note text, or date (OneNote automatically dates each page for you as it’s created).Collapse or expand each group of tags by using the plus or minus sign next to the tag group.3Select which parts of a notebook or notebooks to include in the summary.•Note tags in the task pane are linked to the note tags on pages. You can jump straight to a specific note by clicking the note tag link in the task pane.•The task pane also displays the options shown here.•You can quicklycreate a summarypage of certainnote tags.•For example, if you’ve marked your noteswith lots of Important tags that arescattered across several pages, you cancreate a new page with just the Importantnotes on it.•You can even print or e-mail the summarypage.•In the summarypage, you canchoose whichtype of tags toinclude: all ofthem, a selection,or just one.•For example, you could choose to look atjust notes with To Do tags. To really helpyou out you can also choose to display onlythe unchecked ones —no need to includecompleted items in a To Do list.•The summary page makes a copy of all yourtagged notes; it doesn’t remove theRemove note tags•There areoccasions whenyou no longerneed to tag anote —forexample, whenyou’vecompleted a taskand no longerneed a reminder.1 2Right-click the note tag. Click Remove Tag.•Removing a note tag is simple. First click (or tap) the tagged note. Then, as the pictureshows:Suggestions for practice e note tags.2.Open the Note Tags toolbar.3.Customize a note tag.e the Note Tags summary.5.Create a To Do page.6.Remove a note tag.•Online practice(requires OneNote 2007)Test 1, question 1•You want to be able to tag some notes with a Shopping List check box. What do you do? (Pick one answer.)1.Nothing; OneNote comes with a Shopping List note tagpredefined.e the To Do tag and type “shopping” at the start ofeach line.e the Modify button in the Customize My Tags taskpane to modify a tag.4.It’s impossible. You can only use the tags that alreadyexist.Test 1, question 1: Answer •Use the Modify button in the Customize My Tags task pane to modify a tag.•You can modify one of the 29 predefined tags to make your own.Test 1, question 2•You want to create a summary page of note tags, but you only want to include unchecked items. What doyou do? (Pick one answer.)1.Select the Show only unchecked items check box in thetask pane before creating the summary page.2.Create the summary page and then delete the items withchecked note tags.3.Go through your notes and remove all the checked notetags.4.The unchecked and checked items are listed separately soyou can use the minus sign to close the checked itemsbefore creating the summary page.Test 1, question 2: Answer •Select the Show only unchecked items check box in the task pane before creating the summary page.•This check box is extremely useful and can save you lots of time.Test 1, question 3•How do you remove a note tag? (Pick one answer.)1.On the Insert menu, point to Tag, and then click (or tap)Remove Tag.2.On the Standard toolbar, click the arrow next to the Tagbutton, and then click (or tap) Remove Tag.3.Right-click the tag and then click Remove Tag.4.All of the above.Test 1, question 3: Answer •All of the above.•There are several different ways to remove a note tag.Lesson 2 Search for untagged notesSearch for untagged notes•Did you forget totag a note youmade ofsomethingimportant, andnow you can’tfind it?•No problem, there are two powerful search options in OneNote: the Page List task pane and the Search box.•You can search for particular words or phrases, as well as by date, section, or title. Don’t worry; you’ll be able to find thatimportant note again.•If you’researching for aspecific page ofnotes, use thePage List taskpane, where yourpages are listedby title, showingthe section nameand the date ofeach page.1 2 3The section, the page title, and date are listed.You can sort the list by section, title, or date.Sort the list in ascending or descending alphabetical order.•On the View menu, click Pages Sorted By Date. Then:•If you’re searching for a specific page of notes, use the Page List task pane, where your pages are listed by title, showing the section name and the date of each page. Choose which areas to include in the list: this section,this section group, this notebook, or all notebooks.•On the View menu, click Pages Sorted By Date . Then:45You can see a Help topic for some more search tips.Search•Looking for aphrase in yournotes, or lookingfor a note thatcontains a certainword?1 23At the top of the page, locate the Search box.Type the text you’re looking for, then click the magnifying glass.In this case, two references have been found and the pages with the text have been highlighted.Suggestions for practice 1.Search for notes using the task pane.2.Search for notes using the Find command. •Online practice(requires OneNote 2007)Test 2, question 1•What is the best way to search for a note that you know was taken last week? (Pick one answer.)e the Page List task pane and search by date.2.Riffle through all the pages.3.Add a note tag.e the Find command on the Edit menu and search forthe date.Test 2, question 1: Answer •Use the Page List task pane and search by date.•This is the quickest way to search for notes taken by date.Test 2, question 2•The Search box is best used to search for which of the following? (Pick one answer.)1.Page titles.2.Specific words or phrases.3.Note tags.Test 2, question 2: Answer •Specific words or phrases.Test 2, question 3•You can only use the Search box in the section you’re currently working in. (Pick one answer.)1.True.2.False.Test 2, question 3: Answer •False.•You can specify what the search area is by using the drop down arrow next to the Search box.Quick Reference Card •For a summary of the tasks covered in this course, view the Quick Reference Card.。
Office2013经典教程

•
作为一款集成软件,Office 2013由各种功能组件构成,包括 Word 2013、Excel 2013、PowerPoint 2013、Outlook 2013和Publisher 2013等 。
1-3
Word 2013简介 Word 是 Office 组件中使用最为广泛的软件之一,主要用于创 建和编辑各种类型的文档,是一款文字处理软件 Word 2013 拥有强大的文字处理能力,使用它能够方便地创 建各种图文并茂的办公文档,如企业宣传单、招投标书、 各类合同以及行政公文等。同时,Word 2013 可以对创建 的各类办公文档进行排版、编辑和打印等。作为一款文字 处理软件,Word 2013 能够随心所欲地对文字进行编辑, 可制作出各种文字效果。
1-5
PowerPoint 2013简介 PowerPoint 2013是制作和演示幻灯片的软件,主要用于创建 各种具有多种媒体要素的演示幻灯片。 在使用PowerPoint创建幻灯片时,幻灯片可以包含文字、图 形和图像以及各类表格等,也可以在幻灯片中插入声音、 视频和各种动画。使用PowerPoint创建的幻灯片,不仅能 够在计算机屏幕和投影仪上放映,还可以用于网络会议或 在Web上展示。因此,PowerPoint被广泛应用到报告、演 讲、各类会议和产品演示等多种领域。
Publisher 2013简介 Publisher 2013可用于设计、创建和发布各种专业的出版物, 如各种宣传册、新闻稿、明信片和CD/DVD标签等。使用 Publisher 2013创建的出版物可用于桌面打印、商业印刷 、电子邮件分发以及Web页查看等 。 使用Publisher 2013,能够帮助企业快速创建各种专业出版物 。Publisher 2013的操作方便快捷,即使对于初学者也能 完成这些本应由专业设计师才能完成的出版物创建工作。
微软Office 2013 Office新功能详细剖析

更多的模板
Office 2013还带来了更 多亮丽的模板,让我们有 了更多的选择。
谢谢观看
山东师范大学 顾伟平
微软妹人人官网/ 微软创新杯官方微薄/imaginecup
社交功能
Office 20ຫໍສະໝຸດ 3集合了社交功能,可 以通过邮箱链接,邀请同事或好友 共同编辑文档。
好友进入邮箱点击邀请链接后,就 会以浏览器打开SkyDrive,用 Office的在线模式查看文档,如果 你给予了好友可编辑的权限,那他 就可以用在线编辑或者打开Word来 一起编辑文档了。
新阅读模式
微软OFFICE 2013 OFFICE新 功能
山东师范大学
顾伟平
微软发布了新一代Office——Office
2013包含:Word 2013、 PowerPoint 2013、Excel 2013、OneNote和Outlook组件。 Office 2013只支持Win7和Win8系统 面,还加入了Skydrive同步服务、社交协作等新功能。
全新一代Office不仅有为了适应平板电脑操作而重新设计的界
下面我们马上进入OFFICE 2013新功能体验之旅。
一、OFFICE 2013:新界面
Office 2013采用了全新的界面设计风格
各个组件的图标也有了新外观。风格简化
OFFICE 2013主要组件界面
二、WORD 2013新功能详解
关于Skydrive
Office 2013与微软Skydrive网盘服务紧 密结合,到处都可以看到Skydrive或者 Windows Live帐号的身影。 有了SkyDrive同步功能,真正做到了 Office 2013演示短片所展示的:无论在 何时何地,都可以使用Office 2013处理 各种文档。 所以,还没有Windows Live帐号的朋友, 赶快去申请一个吧
Office使用指南 Office 2013操作技巧

使表格中的数字按小数点对齐
设置自定义动画的重复次数 为动画添加声效 直接发送演示文稿 避免演示文稿被修改
1-9
小结
在前面的章节中,已经详细分析了 Office 2013中常见组件 的使用技巧。本章中,笔者将结合自身的经验,介绍使 用常见组件的操作技巧。
1-10
第24章 Office 2013操作技巧
杨章伟
课程内容安排
• • • • Word 2013操作技巧 Excel 2013操作技巧 Powerpoint 2013操作技巧 小结
1-2
Word 2013操作技巧
• 不显示最近使用的文档
•
• • • •
自定义快捷键
快速选择相同样式的文本 在文档中插入商标符号 快速输入大写中文数字 快速输入符号
Excel 2013操作技巧
• 快速切换工作簿
•
• • • •
向工作簿中插入多个工作表
设置新建工作表的个数 隐藏工作薄 输入小数时不输入小数点 自动输入百分比符号
1-6
Excel 2013操作技巧
• 输入分数
•
• • • •
快捷输入平方或立方符号
实现单元格中的文本自动换行 使工作表居中打印 快速输入文本格式的数字 快速对Excel工作表进行隔行颜色填充
1-3
Word 2013操作技巧
• 在文档中显示打开时间
•
• • • •
输入同时带有上标和下标的内容
输入10以上的带圈字符 为文本添加行编号 取消添加的行号 在文档中快速添加横线
1-4
Word 2013操作技巧
• 实现简繁转换
•
• • •
《Office2013从入门到精通案例教程》教学课件 第11章 查看与打印工作表
如果要自定义页眉和页脚,可单击“自定义页眉〞和“自定义页脚〞按钮,在翻 开的对话框进行设置并确定即可。
4.设置打印区域和打印标题行
默认情况下,Excel会自动选择有文字 的最大行和列作为打印区域。如果只 需要打印工作表的局部数据,可以为 工作表设置打印区域,仅将需要的局 部打印出来。
1.设置页面
设置工作表的页面包括纸张大小、纸 张方向。
翻开工作表,单击“页面布局〞选项 卡“页面设置〞组中的“纸张大小〞 按钮,在展开列表中可选择某种规格 的纸张;单击“页面设置〞组中的 “纸张方向〞按钮 ,展开列表,在 其中选择一种纸张方向。
2.设置页边距
页边距是指页面上打印区域之外的空白区域。假设默认的页边距不符合要求,可重新设置。
假设选择列后单击“拆分〞按钮,那么可在所选列的左侧插入拆分线,将窗格左 右拆分,此时可以左右比照查看数据。
假设选定待拆分的单元格,然后单击“拆分〞按钮,那么可以在选定单元格的上 方和左侧拆分窗格,将窗格一分为四。此时可以左右、上下比照查看数据。
双击拆分条或单击“视图〞选项卡“窗口〞组中的“拆分〞按钮,取消拆分。
2.冻结窗格让标题行始终可见
利用冻结窗格功能,可以保持工作表的某一局部数据在其他局部滚动时始终可见。如 在查看过长的表格时保持首行可见,在查看过宽的表格时保持首列可见,或保持某些 行和某些列均可见。
单击工作表中的任意单元格,然后单击“视图〞选项卡“窗口〞组中的“冻结 窗格〞按钮 ,在展开的列表中选择“冻结首行〞选项,被冻结的窗口局部以黑线区 分,当拖动垂直滚动条或滚动鼠标滚轮向下查看时,首行始终显示。
word2013使用技巧
word2013使用技巧Word 2013是一款功能强大的文字处理软件,它能够帮助用户快速、高效地创建和编辑文档。
下面是一些Word 2013的使用技巧,可以帮助您更好地利用该软件。
1. 快速插入文本:在Word 2013中,您可以使用“快速部件”功能来快速插入文本。
只需要在文档中选择并输入“快速部件”,然后选择要插入的文本,就可以快速添加常用的句子或段落。
2. 自动保存:Word 2013的自动保存功能可以帮助您在意外关闭或崩溃时保存文档。
您可以在“文件”选项卡中的“选项”中设置自动保存的频率和保存位置。
3. 智能拼写检查:Word 2013的智能拼写检查功能可以自动检查文档中的拼写错误,并提供纠正建议。
您可以在“文件”选项卡中的“选项”中启用或禁用该功能,并进行相关设置。
4. 快捷键:熟练使用快捷键可以大大提高工作效率。
在Word 2013中,一些常用的快捷键包括Ctrl+C(复制)、Ctrl+V (粘贴)、Ctrl+X(剪切)等。
您可以在“文件”选项卡中的“选项”中找到和自定义快捷键。
5. 文档协作:Word 2013可以与其他用户一起协作编辑文档,包括实时共享、注释、修订等功能。
您可以通过“协作”选项卡中的“共享”按钮来设置和管理文档的协作。
6. 自动编号:Word 2013的自动编号功能可以帮助您快速添加标题、列表等。
只需要选择需要编号的内容,然后点击“开始”选项卡中的“编号”按钮即可。
7. 样式和主题:Word 2013提供了丰富的样式和主题,可以帮助您轻松修改文档的外观。
在“开始”选项卡中的“样式”和“主题”按钮中,您可以选择合适的样式和主题,并进行自定义设置。
8. 目录和引用:Word 2013能够自动生成目录和引用,大大简化了文档的整理和编辑。
只需要在文档中插入标题和引用,然后点击“引用”选项卡中的“目录”按钮即可自动创建目录。
9. 算式编辑器:Word 2013的算式编辑器可以帮助您轻松插入数学公式和符号。
- 1、下载文档前请自行甄别文档内容的完整性,平台不提供额外的编辑、内容补充、找答案等附加服务。
- 2、"仅部分预览"的文档,不可在线预览部分如存在完整性等问题,可反馈申请退款(可完整预览的文档不适用该条件!)。
- 3、如文档侵犯您的权益,请联系客服反馈,我们会尽快为您处理(人工客服工作时间:9:00-18:30)。
[Your company name] presents: Microsoft ®Office Access ®2007 TrainingBuild a database II:Create tables for a newAccess databaseCourse contents •Overview: Build tables, and the data will come•Lesson: Create your tables保险超市•The lesson includes a list of suggested tasks and a set of test questions.Overview: Build tables, and thedata bill come•You’re creating a databasebecause the spreadsheet you’vebeen using is too big to manage.This course explains how to buildthe tables for your new database.•Why tables? They’re the centralcomponent of your database.Without them, you can’t storedata.•If you’re feeling intimidated,relax. We assume you’re abeginner.Course goals•Create a table in Datasheet view.•Set data types for the fields in the table.•Create a table by using a table template.•Create a table in Design view, and set the primary key for the table.•Create a lookup field —a field that provides a list of choices.•Use Design view to change the values in an existing lookup field.Lesson Create your tables•In a relationaldatabase, tablesstore your data.•Your data doesn’t “live” anywhere else,and that makes tables the centralcomponent of your database.•If you don’t have tables, you don’t havea database.•Access gives you several ways tocreate tables, andthis course showsyou how to usethree of them.1 2In Datasheet view, you build a table by entering fieldnames and setting data types manually. All you have todo is click and type.Table templates are pre-made tables that meet severalcommon business needs.•They areDatasheet view,table templates,and Design view.•Access gives you several ways to create tables, and this course shows you how to use three of them. 3Design view lets you control every field and property inthe table. In this course, you’ll learn how to create atable and to change the values in a lookup field —a fieldthat contains a list of choices.•They are Datasheet view, table templates, and Design view.•Datasheet viewprovides a visualway to create atable.•The picture shows the process.1 2You start by creating a new, blank database or by adding a new table to an existing database.The new table opens automatically in Datasheet view. Notice how the new table contains a field called ID. That’s your primary key, so you don’t need to create one.•Datasheet viewprovides a visualway to create atable.•The picture showsthe process.3To add your fields, double-click the first field header andenter the name for the field. When you finish, press ENTER.4Go to the next blank field and enter a name in thatheader. Repeat the process until you’ve entered namesfor all your fields, but with a couple exceptions: don’t addany lookup fields, and don’t add foreign key fields.Create a table in Datasheet view•Datasheet viewprovides a visualway to create atable.•The picture showsthe process.5When you’ve finished, go to the Quick Access Toolbarand click Save. In the Save As dialog box, enter a namefor the table and click OK .•After you enter field names,you’ll need toset the data typefor each field.•Data typescontrol what youcan enter into afield.12 3Select the field that needs a data type. Just click the field header.If it isn’t already selected, click the Datasheet tab.In the Data Type & Formatting group, open the Data Type list and select an option.•After you enterfield names,you’ll need toset the data typefor each field.•Data typescontrol what youcan enter into afield.•If you’re unsure about which data type tochoose, look at your field names.•If you’re unsure about which type to select,stay with the Text data type because it’sthe most flexible.Create a table using a table template•Table templatesare a fast way tobuild a new table.The templatescapture data forcommon businessneeds, and all thefields and datatypes are set upfor you.1 2Click the Create tab.In the Tables group, click Table Templates, and then click the template you want to use.•Design viewallows you tobuild a table fromscratch and set orchange everyavailable propertyfor each field.1 2On the Create tab, in the Tables group, click Table Design.In the Field Name column of the designer, enter the names of your table fields. As a rule, the first field you create should be your primary key field.•Design viewallows you tobuild a table fromscratch and set orchange everyavailable propertyfor each field.3In the Data Type column, use the list next to a fieldname to choose a data type for that field.4Optionally, use the Field Properties pane to setproperties for individual fields.•The first course inthis seriesmentioned thatyou cansometimes use alookup fieldinstead of a table.•Lookup fields can store a list of optionsinternally, or they can look up data fromfields in other tables.•These stepsexplain how tocreate a lookupfield that storesoptions internally,in what Accesscalls a value list.1 2Switch your table to Datasheet view. You can do that by right-clicking the tab for the table and clicking Datasheet view.Click the Datasheet tab, and in the Fields & Columns group, click Lookup Column to start the Lookup Wizard.•These stepsexplain how tocreate a lookupfield that storesoptions internally,in what Accesscalls a value list.3On the first page of the wizard, click I will type in thevalues that I want and click Next.4On the next page of the wizard, make sure the Numberof columns box contains a 1and then enter youroptions in the grid, one option per row.•These stepsexplain how tocreate a lookupfield that storesoptions internally,in what Accesscalls a value list. 5On the third page of the wizard, enter a name for thenew field and click Finish .Suggestions for practice1.Create a table in Datasheet view.2.Create a table using a template.3.Create a table using Design view.4.Create and then alter a lookup field in Datasheet view. •Online practice(requires Access 2007)Test question 1•When you create a new table in Datasheet view, you must define a primary key field. (Pick one answer.)1.True.2.False.Test question 1: Answer •False.•The “ID” field in the new table acts as the primary key. You can change the field name, or replace the field with another primary key, but a new datasheet always contains a primary key.Test question 2•You can’t use the Lookup Wizard to alter an existing value list. (Pick one answer.)1.True.2.False.Test question 2: Answer •True.•You use Design view to alter a value list.Test question 3•When you use a template to create a table, you must set data types for the fields in the new table. (Pick one answer.)1.True.2.False.Test question 3: Answer •False.•You can change the data types if you need to, but they’re set for you.Quick Reference Card •For a summary of the tasks covered in this course, view the Quick Reference Card.•。
