实战:Hyper-V Server 2008 R2安装、配置
WindowsServer2008R2服务器安装及设置教程
WindowsServer2008R2服务器安装及设置教程Windows Server 2008R2服务器安装及设置教程第一篇:系统安装与设置前言:本安装及设置教程适用于使用Windows2008R2为操作系统的服务器,目的是让服务器实现下列环境。
语言脚本环境:ASP、1.1、2.0、3.0、3.5、PHP(FastCGI模式)。
数据库环境:Access、MSSQL、MySQL。
FTP环境:Ser-U常见组件:AspJpeg、Jmail、LyfUpload、动易、ISAPI_ReWrite。
一、系统准备操作系统:Windows2008R2原版安装文件、服务器硬件驱动程序、SQL SERVER 2000安装盘、SQL SERVER 2000 SP4 补丁,MySQL安装包,PHP压缩包,Zend Optimizer安装包,Serv- U 囧.0.6,Aspjpeg 2.0,JMail 4.5,LyfUpload,动易组件 1.8.6,ISAPI_ReWrite,GHOST。
Windows2008R2和SQL SERVER 2000安装文件可以购买正版光盘或其他途径获得。
Windows2008R2最好是原版,SQL SERVER 2000可以选择企业版或者标准版。
SQL SERVER 2000 SP4可以直接从微软网站下载获得。
服务器硬件驱动应该在购买服务器的同时附带了。
MySQL安装文件,PHP安装文件,Zend Optimizer安装文件可以到其官方网站免费下载,或到其他下载网站获得。
Serv_U,Aspjpeg,Jmail,LyfUpload,动易组件,ISAPI_ReWrite和GHOST等均可以通过购买或者其他途径来获得。
二、系统安装分区:服务器的硬盘是320G,分成了4个区,C盘做系统盘(30G),D盘做数据库和软件盘(50G),E盘做网站目录(150G),F盘做备份盘(90G),以NTFS格式对4个区进行格式化。
Windows 2008 R2 终端服务器授权安装配置
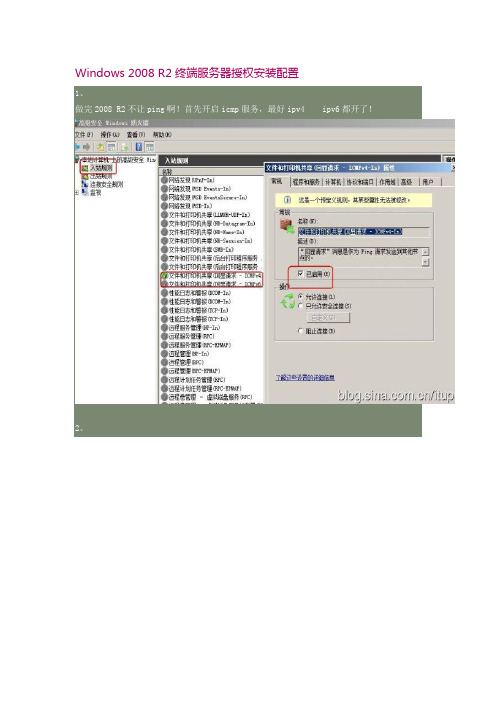
Windows 2008 R2 终端服务器授权安装配置12、添加2个本地远程测试帐号。
默认2008只允许2台主机同时远程进来。
3、现在开始2008 r2远程终端管理授权操作!开始--管理工具----服务器管理器。
4、角色--添加角色。
5、选择默认跳过此页--下一步。
其实无所谓的6、服务器角色---选择远程桌面服务---下一步,出现提示界面,继续点下一步。
7、选择“远程桌面会话主机”和“远程桌面授权”,点下一步。
远程桌面会话主机就是以前的终端服务器。
8、出现一个提示,点下一步,选择不需要使用网络级别身份验证,下一步。
9、授权模式,可以选择每用户也可以选择每设备,但有一点,在后面注册的时候要选择和现在一致才行,一般选择每用户,下一步。
10、选择可以远程桌面的用户或组,也可后期再选择。
11、客户端体验,都给他选上。
音频视屏、录音重定向、桌面元素等。
12、为此许可服务器配发范围。
一般情况都会选择“此域”选项,但是我测试服务器没加入域,就选工作组吧!下一步。
13、点击“安装”。
点击“关闭”系统重启。
系统重启后继续安装。
安装成功后点击关闭终端服务安装成功图三、14、现在来激活“远程终端授权管理器”,当然我这里所讲的激活都是不用钱的哈!点击“开始"---管理工具---远程桌面服务----远程桌面授权管理器。
15、右键--- 激活服务器。
16、提示界面,下一步。
在服务器激活向导窗口中连接方法选择“Web浏览器”点击“下一步”。
17、这会要去一台可以上网的电脑上进行注册,需要记个产品ID号,后面用得着的。
然后打开微软的授权网站。
前提是这个服务器要开通上网权限。
18、在弹出的网页中选择“chinese(simplified)”点击“go”然后变成中文,点击“下一步”。
19、在产品ID处把刚才复制的ID内容粘贴上去,公司信息里面的项目要填完整不要缺项国家为“中国”其它内容随便填点击“下一步”。
20、21、这个时候,相应的许可证服务器ID就出来啦,但这时并没有完成相应的注册,记住id信息,点击【是】。
Hyper-V Server 2008 R2安装、配置、管理
Hyper-V Server 2008 R2安装、配置、管理如今,服务器配件的价格越来越便宜了,3万元的购置成本可以“换来”4核CPU、8GB 内存、3块附带RAID5功能的SAS硬盘、4个甚至更多的网络接口。
如此高端的配置只是应用文件服务器这样简单的配置无疑浪费了服务器的高性能。
因此,为了使服务器的负载更为均衡,很多服务器应用了虚拟化技术。
关于服务器虚拟化我们听到的应该很多了,官方的解释比较繁琐,这里就不再赘述了。
说的简单一点就是在物理服务器上通过虚拟化技术安装、部署多个虚拟的操作系统,这些操作系统相互独立,互不干扰。
在服务器虚拟化的市场中有很多产品,早前接触的是VMware ESX 3i,功能非常强大,但是E文的操作系统让人用起来颇为不爽。
于是,辗转多个虚拟化平台最终选择了微软的Hyper-V Server 2008 R2,经过一段时间的摸索多少总结了一些小的经验,同大家分享一下。
准备条件在安装Hyper-v server 2008 r2 之前需要确认自己的电脑主板支持虚拟化技术。
在安装这个虚拟化平台之前,就和启动Windows Server 2012或Server 2008的Hyper-V角色一样,我们都必须先确认并开启处理器的虚拟化技术。
以我们本次用来安装的伺服器Supermicro SYS-2067R-WRF来看,它采用的处理器是Intel Xeon E5-2650,因此我们在BIOS中就必须开启处理器的VT-D选项。
Hyper-V Server 2008 R2 安装与安装Windows 2008系统相类似,Hyper-V Server 2008 R2的安装相对比较简单,请看操作步骤:A、选择安装语言。
看腻了E文系统,这里毫不犹豫的选择了“我的语言为中文(简体)”;(见图一);图一B、设置语言和其他选项,一般选择默认即可(见图二);图二C、阅读“安装Windows 须知”后即可安装Hyper-V Server 2008 R2(见图三);图三D、接受MICROSOFT软件许可条款(见图四);图四E、选择安装类型,这里选择“自定义(高级)” (见图五);图五F、选择Hyper-V Server 2008 R2的安装位置,选择“驱动器选项(高级)”(见图六);图六G、对硬盘进行分区,其中磁盘0分区1为系统保留,容量为100MB,该分区为Hyper-V Server 2008 R2系统自行建立(见图七);图七H、开始安装Hyper-V Server 2008 R2(见图八);图八稍事片刻系统安装成功,重启电脑后让我们继续探索Hyper-V Server 2008 R2的世界吧。
HyperV安装与配置
Windows server 2008 R2基于Hyper-V下DC 、DNS、File Server、DFS 的安装与配置1.1 安装前的准备hyper-V对硬件和软件有如下一些很特殊的要求:•操作系统是否支持hyper-V运行:hyper-V只能运行在基于x64版本的Windows Server 2008上,如64位版本的Windows Server 2008EnterPrise等。
•处理器是否是64位处理器:只有在64位处理器上,才能正确的安装64。
图2.1 计算机的基本信息网卡的配置信息:如图2.2所示。
图2.2 IP的配置信息2.1.2 Hyper-V角色添加现在就可以在Windows Server 2008中进行Hyper-V角色添加。
添加步骤如下:(1)以管理员账户登录到服务器,依次单击【开始】→【管理工具】→【服务器管理器】。
服务器管理器窗口打开后,点击左侧面板中的【角色摘要】,然后点击右侧面板中的【添加角色】。
如图2.3所示图2.3 选择添加角色(2)在添加角色向导中单击【下一步】按钮,会显示一些注意事项如图2.4所示。
图2.4 注意事项进入【选择服务器角色】对话框,在角色列表中选择【Hpyer-V】,然后单击【下一步】按钮。
如图2.5所示。
图2.5 选择服务器角色(3)在阅读了“Hype-V”简介后,如图2.6所示。
图2.6 Hype-V简介单击【下一步】按钮,然后在“创建虚拟网络”中选择将要创建虚拟网络的网络适配器,选择完毕后单击【下一步】按钮。
如图2.7所示。
图2.7 选择网络适配器(4)在确认选择无误后,单击【安装】按钮,系统将进行所选服务和角色的安装,安装完毕后单击【关闭】按钮,系统将重启以完成最后的安装配置。
如图2.8所示。
图2.8 确认安装选择2.2 建立Hyper-V虚拟机并安装系统当完成最后配置后,我们在【开始】菜单中,打开【管理工具】,选择【Hyper-V 管理器】。
server2008r2安装教程
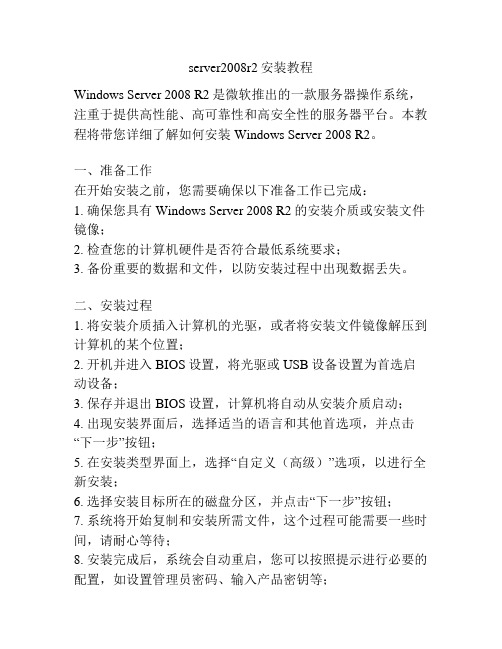
server2008r2安装教程Windows Server 2008 R2是微软推出的一款服务器操作系统,注重于提供高性能、高可靠性和高安全性的服务器平台。
本教程将带您详细了解如何安装Windows Server 2008 R2。
一、准备工作在开始安装之前,您需要确保以下准备工作已完成:1. 确保您具有Windows Server 2008 R2的安装介质或安装文件镜像;2. 检查您的计算机硬件是否符合最低系统要求;3. 备份重要的数据和文件,以防安装过程中出现数据丢失。
二、安装过程1. 将安装介质插入计算机的光驱,或者将安装文件镜像解压到计算机的某个位置;2. 开机并进入BIOS设置,将光驱或USB设备设置为首选启动设备;3. 保存并退出BIOS设置,计算机将自动从安装介质启动;4. 出现安装界面后,选择适当的语言和其他首选项,并点击“下一步”按钮;5. 在安装类型界面上,选择“自定义(高级)”选项,以进行全新安装;6. 选择安装目标所在的磁盘分区,并点击“下一步”按钮;7. 系统将开始复制和安装所需文件,这个过程可能需要一些时间,请耐心等待;8. 安装完成后,系统会自动重启,您可以按照提示进行必要的配置,如设置管理员密码、输入产品密钥等;9. 在系统配置完成后,将出现登录界面,您可以使用管理员帐户登录;10. 至此,Windows Server 2008 R2的安装已经完成。
三、安装后的配置在完成安装后,您还需要进行一些必要的配置以确保服务器的正常运行:1. 更新系统:打开Windows更新,下载并安装最新的安全补丁和更新;2. 配置网络:根据实际情况,设置服务器的IP地址、子网掩码、网关等网络配置;3. 安装和配置防火墙:根据实际需要,安装适当的防火墙软件,并对其进行配置;4. 安装服务器角色和功能:根据实际需求,选择安装适当的服务器角色和功能,如域控制器、DNS服务器等;5. 配置远程访问:如果需要远程管理服务器,您可以启用远程桌面或其他远程访问功能;6. 配置安全策略:根据实际需求,配置服务器的安全策略以保护系统和数据的安全;7. 配置备份和恢复:设置定期备份和恢复计划,确保服务器数据的安全性和可靠性;8. 监控和优化性能:使用性能监视工具和优化工具监控和调整服务器的性能。
Windows Server 2008 R2中创建虚拟机hyper-v的使用步骤
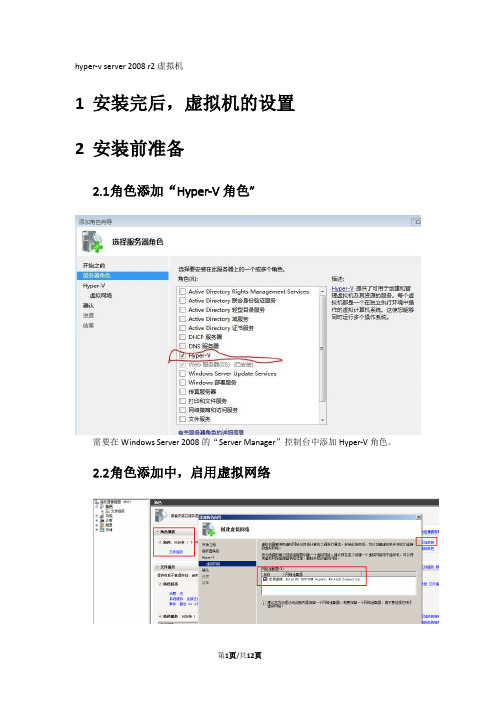
hyper-v server 2008 r2虚拟机1安装完后,虚拟机的设置2安装前准备2.1角色添加“Hyper-V角色”需要在Windows Server 2008的“Server Manager”控制台中添加Hyper-V角色。
2.2角色添加中,启用虚拟网络需要重启两次。
2.3查看网络适配器2.4计算机BIOS中更改”更改计算机中BIOS中的Security\Virtualization\Intel Virtualization的设置,更改为“使能“;3安装步骤3.1启动Hyper-V管理器3.1.1新建1.1.1指定名称和位置:虚拟机的磁盘3.1.2分配内存2G3.1.3配置网络(不支持无线网卡)在这里我们至少要为虚拟机创建一个虚拟网络,钩选创建到虚拟网络的网络器,表示将在虚拟网络中应用这个适配器。
但是建议用户不要将所有网络适配器加入到虚拟网络,至少要留下一个用于远程访问。
不支持无线网卡。
3.1.4连接虚拟硬盘(该名便于区分和容量)3.1.5安装选项3.1.6摘要3.1.7虚拟机创建完成3.2安装系统3.2.1连接3.2.2连接结果3.2.3点击“启动”3.2.4安装XP(32位)的过程3.2.4.1注意虚拟磁盘的分区3.3驱动安装3.3.1网卡和显卡驱动的安装3.4我的设置3.4.1对我来说,不要使用快照,这样会增加硬盘空间3.4.2一定要点“保存”3.4.3Hyper-V服务启动后,无法设置睡眠Hyper-V管理操作详解在Hyper-v管理中,我们会经常使用常见的一些操作,比如Hyper-V的启动操作,Hyper-V删除操作,Hyper-V 暂停操作,Hyper-V关机操作,Hyper-V关机操作等等。
常见的Hyper-V操作介绍如下:删除: 将"关闭"或"已保存"状态的虚拟机删除。
删除虚拟机后,还需要再将磁盘中的数据文件需要手动删除。
启动: Hyper-V启动操作是将"关闭"状态的虚拟机启动,相当于机器开机。
StarWind iSCSI SAN 软件的 Hyper-V Server 2008 R2 安装指南
Copyright © StarWind Software 2008-2011. All rights reserved.StarWind iSCSI SAN Software: Installing StarWindon Hyper-V Server 2008 R2COPYRIGHTCopyright © StarWind Software 2008-2011. All rights reserved. No part of this publication may be reproduced, stored in a retrieval system, or transmitted in any form or by any means, electronic, mechanical, photocopying, recording or otherwise, without the prior written consent of StarWind Software.TRADEMARKS“StarWind”, “StarWind Software” and the StarWind and the StarWind Software logos are trademarks of StarWind Software which may be registered in some jurisdictions. All other trademarks are owned by their respective owners.CHANGESThe material in this document is for information only and is subject to change without notice. While reasonable efforts have been made in the preparation of this document to assure its accuracy, StarWind Software assumes no liability resulting from errors or omissions in this document, or from the use of the information contained herein. StarWind Software reserves the right to make changes in the product design without reservation and without notification to its users.TECHNICAL SUPPORT AND SERVICESIf you have questions about installing or using this software, check this and other documents first - you will find answers to most of your questions here or there. If you need further assistance, please contact us.Table of Contents (4)Getting Started with StarWind (5)Preparing Hyper-V Server 2008 R2....................................................................................................... 8Downloading and Installing . (17)Installing Starwind Management Console onRemote Computer (25)Registering the SoftwareGuideGetting Started with StarWindThis guide is intended for experienced Windows system administrators who will be installing the StarWind iSCSI SAN software on Hyper-V Server 2008 R2.Preparing Hyper-V Server 2008 R2You have to start Microsoft iSCSI service before installing StarWind software on your server. To do so, type the following in the command prompt:sc start msiscsiYou can find the status of the service at any time using the interrogate command. To find the status of the iSCSI service, type the following in the command prompt:sc interrogate msiscsiTo have the service start automatically on boot, type the following in the command prompt:sc config msiscsi start= autoNote: There is no need to configure the Windows Firewall from Hyper-V Server 2008 R2 to allow iSCSI traffic.Downloading and InstallingFirst thing you need to do is obtain StarWind setup executable file from our website./download-free-trialOnce executable setup file downloaded, launch it on the server which you want to turn into SAN storage. In our case the file was downloaded into the G:\Install\. Type the following in the command prompt to change disk:g:To launch the installation type the following: g:\>install\starwind.exeA Setup Wizard window appears:Click the Next button to continue.Read and accept the license agreement.Click the Next button to continue.Read information.When you are ready to continue with setup, click the Next button.Specify location where StarWind iSCSI Server will be installed.Click the Next button to continue.Specify the installation type:StarWind iSCSI Service fits best for installing on a server which will be managed remotely.Click the Next button to continue.Specify the Start Menu folder.Click the Next button to continue.Review the settings you have specified during the installation setup, click the Back button if you need to change anything.Click the Install button to continue.After the installation process is complete, you will see a window confirming that you have successfully installed StarWind iSCSI SAN.Click the Finish button to close the installation wizard.Installing Starwind Management Console on Remote Computer Launch previously uploaded setup file on the remote computer from which you will manage your SAN storage.A Setup Wizard window appears:Click the Next button to continue.Read and accept the license agreement.Click the Next button to continue.Specify location where StarWind Management Console will be installed.Click the Next button to continue.Specify the installation type:StarWind Management Console is the Graphical User Interface (GUI) part of the program, which allows you to create devices on the target servers in your service. Also you have an opportunity to install StarWind Manuals.Click the Next button to continue.Specify the Start Menu folder.Click the Next button to continue.Select the Create a desktop icon checkbox if you need a desktop icon.Click the Next button to continue.Review the settings you have specified during the installation setup, click the Back button if you need to make any changes.Click the Install button to continue.After the installation process is complete, you will see the window confirming that you have successfully installed StarWind iSCSI SAN. Select the Launch StarWind Management Console checkbox if you want to run StarWind Management Console immediately.Click the Finish button to close the installation wizard.Registering the SoftwareOpen the StarWind Management Console by double clicking on the StarWind tray icon. StarWind Management Console allows you to manage multiple StarWind servers from one computer.By default there are no servers in the Management Console.To add a server, click the button.Add New Host window appears.Specify the target server's IP address. In our case IP address of our Hyper-V Server 2008 R2 is 192.168.1.216.Click OK to continue.Now the added server appears in the StarWind Servers section of the StarWind Management Console.Click the button to connect to the server.You will be prompted to enter the login and password.The default login and password are “root” and “starwind”. You can always change them later.Click OK to continue.Now, when you are connected to the StarWind service on the server you have to go through the registration procedure.Select the server you have connected to and click the Configuration tab. Click the Registration link. You will see the information about the license installed on this server.Click the Install link to apply a license.Click the Load button and select the license file you have received.Click OK to continue.You will see a confirmation window saying that you license has been successfully installed:Click OK to close the window.ContactsStarWind Software Inc.40 Mall Rd., BurlingtonMA 01803, USASupport:Support Forum:Sales E-mail:US HeadquartersEMEA, APAC/support /forums **************************Direct phone numbers:+44-0-2071936727+44-0-2071936350Voice Mail:1-866-790-2646Direct phone number:1-617-449-7717Fax:1-617-507-5845。
Windows Server2008 r2安装配置
Windows Server2008 r2安装配置一、登陆及简单设置第一次登陆必须要设置大小写英文字母加数字的8位强密码,账号默认是Administrator。
进入桌面后,系统本身会开启配置服务器的向导,我们也可以从任务栏启动服务器管理器。
两者都可以完成任务。
首先别急着安装功能,我们先设置些无需重启的一些选项:1. 激活Windows。
不激活可以跳过。
2. 配置更新,建议设置为“下载更新,但是让我选择是否安装更新”。
3. 配置IE ESC。
都关了吧,有这个东西IE基本不能上网。
4. 配置Windows防火墙。
在高级Windows防火墙的属性页中,将域、专用、公用配置文件下的自定义设置中的“显示通知”由默认的“否”改为“是”。
5. 设置远程桌面。
根据自己需要打开远程桌面功能。
二、安装功能以个人经验推荐以下功能作参考:1. .Net Framework 3.5.1 功能下的.Net Framework 3.5.1。
这个是微软一个很重要的运行环境,建议装上。
进程激活服务可以不装。
2. 优质Windows音频视频体验3. 桌面体验。
这个自然不必说啦,Windows7的许多特性都得靠这个实现。
当然这里必须把墨迹支持也装上。
4. XPS查看器。
这个小工具很有用,很多时候Word文件要打印出来却没有打印机的时候,很多人会将它转成PDF文档。
麻烦不说,也容易出错。
Vista以后可以很好的支持XPS文件,当然这里就顺便装上吧。
5. 无线LAN服务。
这个根据实际情况安装吧。
台式机基本是用不上的,要用的时候再装也可以。
6. Windows Server Backup 功能。
Ghost?你过时啦!Ghost磁盘效率低下,压缩算法落后,备份和恢复都得在DOS或者PE环境,手动操作麻烦,所谓的“一键还原”有可能因为分区表变动而覆盖了别的分区。
现在我们有了比Ghost更好的选择!别多想了,装上吧。
我后面会讲如何操作。
重启之后会自动安装,安装完成会再次重启。
Windows Server 2008 R2中创建虚拟机hyper-v的使用步骤要点

hyper-v server 2008 r2虚拟机1安装完后,虚拟机的设置2安装前准备2.1角色添加“Hyper-V角色”需要在Windows Server 2008的“Server Manager”控制台中添加Hyper-V角色。
2.2角色添加中,启用虚拟网络需要重启两次。
2.3查看网络适配器2.4计算机BIOS中更改”更改计算机中BIOS中的Security\Virtualization\Intel Virtualization的设置,更改为“使能“;3安装步骤3.1启动Hyper-V管理器3.1.1新建1.1.1指定名称和位置:虚拟机的磁盘3.1.2分配内存2G3.1.3配置网络(不支持无线网卡)在这里我们至少要为虚拟机创建一个虚拟网络,钩选创建到虚拟网络的网络器,表示将在虚拟网络中应用这个适配器。
但是建议用户不要将所有网络适配器加入到虚拟网络,至少要留下一个用于远程访问。
不支持无线网卡。
3.1.4连接虚拟硬盘(该名便于区分和容量)3.1.5安装选项3.1.6摘要3.1.7虚拟机创建完成3.2安装系统3.2.1连接3.2.2连接结果3.2.3点击“启动”3.2.4安装XP(32位)的过程3.2.4.1注意虚拟磁盘的分区3.3驱动安装3.3.1网卡和显卡驱动的安装3.4我的设置3.4.1对我来说,不要使用快照,这样会增加硬盘空间3.4.2一定要点“保存”3.4.3Hyper-V服务启动后,无法设置睡眠Hyper-V管理操作详解在Hyper-v管理中,我们会经常使用常见的一些操作,比如Hyper-V的启动操作,Hyper-V删除操作,Hyper-V 暂停操作,Hyper-V关机操作,Hyper-V关机操作等等。
常见的Hyper-V操作介绍如下:删除: 将"关闭"或"已保存"状态的虚拟机删除。
删除虚拟机后,还需要再将磁盘中的数据文件需要手动删除。
启动: Hyper-V启动操作是将"关闭"状态的虚拟机启动,相当于机器开机。
Windows Server 2008 R2 Hyper-V安装指南

Windows Server 2008 R2 Hyper-V安装指南Windows Server 2008 R2完全安装模式Hyper-V安装步骤:
1、安装Windows Server 2008 R2
2、配置计算机名称和IP地址
3、配置成员服务器(将成员服务器加入域环境中)
4、点击任务栏上的“服务器管理器”图标:
5、点击“服务器管理器”页面中的“角色”后点击“添加角色”:
6、在“添加角色向导”页面上点击“下一步”:
7、选择“Hyper-V”:
8、如下图所示,相关Hyper-V说明信息,点击“下一步”:
9、在“创建虚拟网络”中直接点击“下一步”(将在Hyper-V安装完成后配置虚拟网络):
10、继续如下的安装过程:
11、点击“是”重新启动服务器:
12、再系统重新启动2次后,完成Hyper-V的安装:。
Hyper-V_Server_2008_R2 手动虚拟化搭建平台
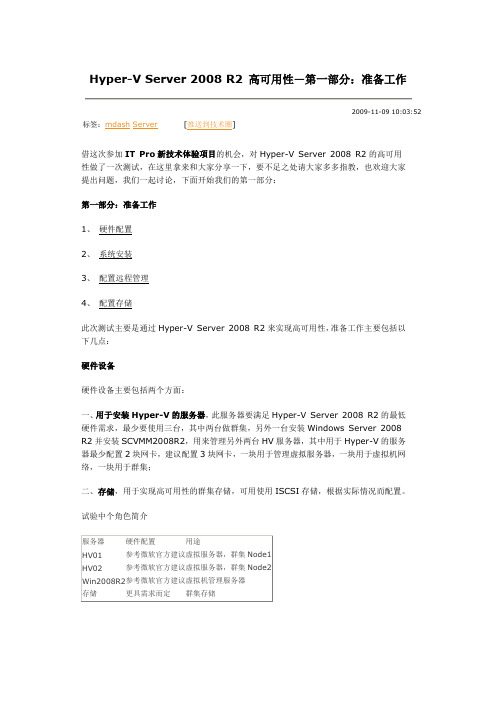
借这次参加IT Pro新技术体验项目的机会,对Hyper-V Server 2008 R2的高可用性做了一次测试,在这里拿来和大家分享一下,要不足之处请大家多多指教,也欢迎大家提出问题,我们一起讨论,下面开始我们的第一部分:第一部分:准备工作1、硬件配置2、系统安装3、配置远程管理4、配置存储此次测试主要是通过Hyper-V Server 2008 R2来实现高可用性,准备工作主要包括以下几点:硬件设备硬件设备主要包括两个方面:一、用于安装Hyper-V的服务器,此服务器要满足Hyper-V Server 2008 R2的最低硬件需求,最少要使用三台,其中两台做群集,另外一台安装Windows Server 2008 R2并安装SCVMM2008R2,用来管理另外两台HV服务器,其中用于Hyper-V的服务器最少配置2块网卡,建议配置3块网卡,一块用于管理虚拟服务器,一块用于虚拟机网络,一块用于群集;二、存储,用于实现高可用性的群集存储,可用使用ISCSI存储,根据实际情况而配置。
试验中个角色简介此次测试所使用硬件系统的安装一、在Win2008R2上安装Win2008,配置网络,加入当前域,并安装SCVMM。
配置远程管理根据sconfig向导配置如下选项一、启用HV01和HV02的远程管理二、启用Powershell配置存储要使用ISCSI链接到ISCSI存储,首先要启动ISCSI服务1、在命令提示符中输入ISCSICPL(要以管理员运行)2、点击是启动服务2、输入ISCSI存储的IP地址,点击“快速链接”4、连接成功之后,如下图所示在两台服务器上完成同样配置,之后就可以使用ISCSI存储了。
存储服务器的配置过程略过,请参考存储服务器商提供的手册。
在此,要说明一点,我在测试的时候,遇到了一个问题,因为安装的是Hyper-V Server 2008 R2操作系统,可能无法安装存储设备商提供的驱动,因此当你在存储服务器上配置完存储后,你可也能会发现多了一个磁盘,例如,我用的是Dell MD3000i的存储,我在存储上分配了两个虚拟磁盘,分别用于仲裁和存储,但是当我使用DiskPart命令查看磁盘时,你会发现多一块磁盘,这一个虚拟磁盘是无法使用的。
Hyper-V下面激活win2008R2虚拟机系统
Hyper-V下面激活win2008 R2虚拟机系统环境:1:物理机器上(也就是服务器)安装了Windows Server Enterprise 2008 的sp2系统。
系统已经安装好,并且成功激活(使用工具oem7F7)。
:2:物理机器上已经搭建好Hyper-V虚拟服务器,并且安装里了Win2008 R2,但是没有激活,现在进行激活,进入系统之后,同样使用激活工具oem7F7激活Win2008,提示激活正常,但是按照提示信息重启之后,虚拟机显示黑屏,无法进入系统。
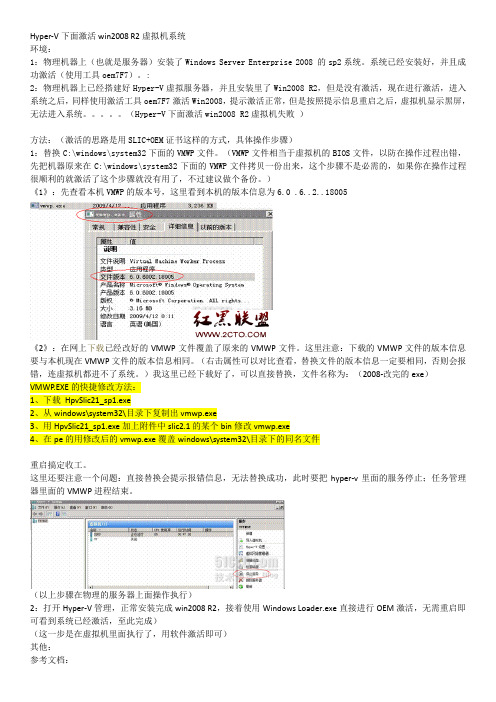
(Hyper-V下面激活win2008 R2虚拟机失败)方法:(激活的思路是用SLIC+OEM证书这样的方式,具体操作步骤)1:替换C:\windows\system32下面的VMWP文件。
(VMWP文件相当于虚拟机的BIOS文件,以防在操作过程出错,先把机器原来在C:\windows\system32下面的VMWP文件拷贝一份出来,这个步骤不是必需的,如果你在操作过程很顺利的就激活了这个步骤就没有用了,不过建议做个备份。
)《1》:先查看本机VMWP的版本号,这里看到本机的版本信息为6.0 .6..2..18005《2》:在网上下载已经改好的VMWP文件覆盖了原来的VMWP文件。
这里注意:下载的VMWP文件的版本信息要与本机现在VMWP文件的版本信息相同。
(右击属性可以对比查看,替换文件的版本信息一定要相同,否则会报错,连虚拟机都进不了系统。
)我这里已经下载好了,可以直接替换,文件名称为:(2008-改完的exe)VMWP.EXE的快捷修改方法:1、下载HpvSlic21_sp1.exe2、从windows\system32\目录下复制出vmwp.exe3、用HpvSlic21_sp1.exe加上附件中slic2.1的某个bin修改vmwp.exe4、在pe的用修改后的vmwp.exe覆盖windows\system32\目录下的同名文件重启搞定收工。
win2008r2安装教程
win2008r2安装教程Windows Server 2008 R2 是微软推出的一款服务器操作系统,具备高性能、可靠性和安全性。
以下是安装Windows Server 2008 R2的教程:1. 准备工作:a. 确保你的计算机满足Windows Server 2008 R2的最低系统要求,如硬件配置和磁盘空间。
b. 获取Windows Server 2008 R2的安装光盘或ISO镜像文件。
2. 启动计算机并进入BIOS设置界面,将引导设备设置为光盘驱动器或USB。
3. 将Windows Server 2008 R2安装光盘插入计算机的光盘驱动器或将ISO镜像文件制作成可引导的USB。
4. 重新启动计算机并按照屏幕上的提示,在引导设备上启动计算机。
5. 在Windows Server 2008 R2的启动菜单中选择“安装操作系统”。
6. 选择安装语言、时间和货币格式等首选项,并点击“下一步”。
7. 在安装程序中选择“安装现场”或“自定义(高级)”。
8. 如果你选择“自定义(高级)”,则需要选择要安装WindowsServer 2008 R2的硬盘分区。
你可以选择一个现有的分区,也可以创建一个新的分区。
9. 选择一个分区后,点击“下一步”开始安装。
安装过程将自动进行,期间可能需要重启计算机。
10. 在安装完成后,系统将自动重启。
你需要设置管理员密码和计算机名称等信息。
11. 在登录界面上输入管理员账户和密码,点击“确定”登录系统。
12. 进入Windows Server 2008 R2后,你可以根据需要进行系统的优化和配置。
总结:以上是Windows Server 2008 R2的安装教程,包括准备工作、磁盘分区、安装过程等内容。
希望这个教程对你安装Windows Server 2008 R2有所帮助。
在安装过程中,注意备份重要数据,确保系统安装成功并能正常运行。
Windows Server 2008 R2虚拟机安装
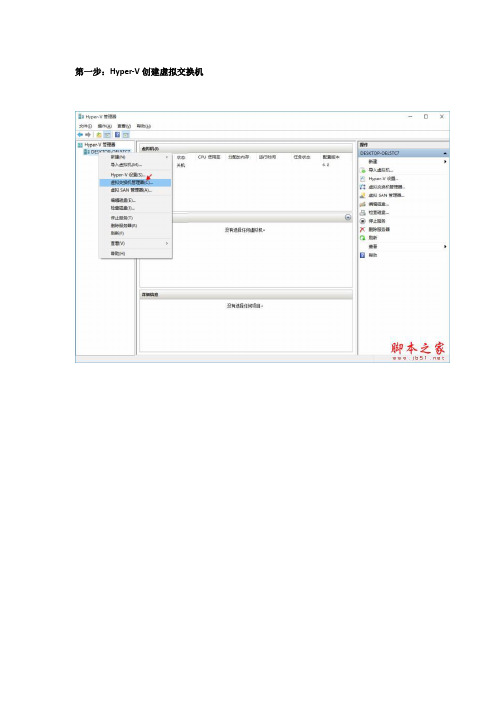
第一步:Hyper-V创建虚拟交换机第二步:虚拟机添加旧版网络适配器好了,试下看可以上网了hyper-v 简介Hyper-V是微软的一款虚拟机产品,部署在win 8.x 64位pro以上版本中,和Wind ows 2008以上服务器的版本中,其功能与VMware及VirtualBox等虚拟机软件类似。
由于H yper-v是微软自己出的软件,所以对windows的支持是最好的。
对于一些需要经常使用不同操作系统的人员来说非常方便,它能让你在一台PC上同时运行多个操作系统,你不需要重新启动系统,只要点击鼠标便可以打开新的操作系统或是在操作系统之间进行切换,从此,你可以把一台机器当做多台使用,彼此互不侵犯。
做web开发的朋友经常要在不同版本的I E浏览器中测试网页兼容性,使用hyper-v就可以在一台机子上装n个操作系统,分别安装不同个IE版本来测试网页,要比用IEtester工具更准确。
安装hyper-v以 Windows Server 2008 R2 为例。
控制面板=》管理工具=》双击打开服务器管理=》在左侧的“控制台树”中选中“角色”=》鼠标右键,选择“添加角色=》弹出“添加角色向导”窗口=》点击下一步=》选择hyper-v角色=》点击下一步=》点击下一步=》选择网络适配器=》点击下一步=》点击“安装”。
开始安装进度。
安装进度完成后,点击“关闭”按钮。
提示必须重新启动才能完成安装,点击“是”,重新启动。
创建虚拟机控制面板=》管理工具=》打开Hyper-V 管理器=》菜单 =》操作=》新建=》虚拟机...弹出“新建虚拟机向导”窗口,点击下一步。
指定虚拟机的名称和存储位置。
这里我们打算安装xp系统,起名为"xp虚拟机(1)",点击下一步。
指定分配给虚拟机的内存容量。
如果安装XP系统的话,512M-1G足够了。
点击下一步。
为虚拟机配置网络,虽然前面添加hyper-v功能时,已经选择了,但系统默认是在“未连接”位置上的,还是得选择一次哦。
Server 2008 Hyper-V虚拟机 安装配置详细教程

Server 2008Hyper-V虚拟机安装配置详细教程Windows Server 2008一大亮点Hyper-V(虚拟机)功能,下面我们就来一步一步根据“w indows 2008 Hyper-V使用指南”来了解Server 2008虚拟机Hyper-V安装配置方法!大纲:一、在windows 2008中安装Hyper-V二、在Hyper-V 管理器中创建虚拟机三、在虚拟机上安装系统四、使用过程中发现的问题及解决方法一、在windows 2008中安装Hyper-V在windows 2008中启用Hyper-V,是通过配置角色进行的,要卸载,也是通过服务器管理器中,删除Hyper-V角色。
打开服务器管理器,点击添加角色!出现添加角色向导!勾选Hyper-V,点下一步创建虚拟网络,选择要使用的网卡安装过程其实很简单,选择一个你需要用的网卡,一般这里是虚拟网卡软件虚拟的网卡!重启后,再运行,等待等待,然后显示角色添加成功。
二. 在Hyper-V 管理器中创建虚拟机进入Hyper-V 管理界面从操作菜单进入–>new –>virtual m achine ->开始创建新虚拟机向导第一步,取名,并设置虚拟机文件位置分配给虚拟机的内存,这台用1G,所以输入1024指定要绑定的网卡选择安装使用的光盘iso,这里用的iso文件是windows sever 2008 64位企业到此就差不多完成了,安装好系统就OK。
到此虚拟机配置完毕!!完成。
三、在虚拟机上安装系统在Hyper-v管理器打开这台虚拟机,我象要剪彩一样,按了绿色的启动按钮。
机器没有按预期启动,而是出现如下提示Hypervisor 没有运行。
根据上次我做vmware server 遇到的不能启动虚拟机的问题,我怀疑又是在BIOS问题,CPU的虚拟技术没有打开,我试着在虚拟机的光驱中放入winserver 2 003 32位版,重新启动,还是提示相同的错误,在vmware server 中,bios 没有开启vis ualization technology的情况下,能够安装32位的系统的,这也是这两软件的不同点之一。
win2008r2系列之二,安装配置Hyper-V
win2008r2系列之二,安装配置Hyper-V虚拟化技术在近年得到了快速发展,各大厂商也都相继推出了一系列虚拟化产品。
这些产品大致可以分为两类,一类是桌面虚拟化,典型产品如VMware公司的VMware WorkStation 和微软公司的Virtual PC;另一类是服务器虚拟化,典型产品如VMware公司的VMware vSphere和微软公司的Hyper-V。
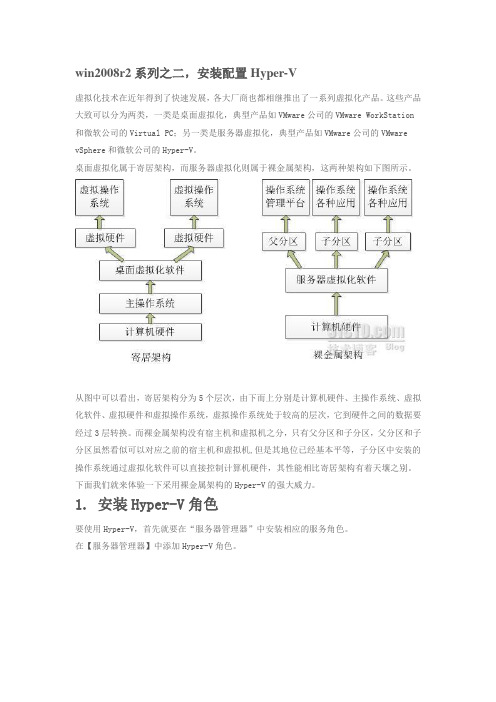
桌面虚拟化属于寄居架构,而服务器虚拟化则属于裸金属架构,这两种架构如下图所示。
从图中可以看出,寄居架构分为5个层次,由下而上分别是计算机硬件、主操作系统、虚拟化软件、虚拟硬件和虚拟操作系统,虚拟操作系统处于较高的层次,它到硬件之间的数据要经过3层转换。
而裸金属架构没有宿主机和虚拟机之分,只有父分区和子分区,父分区和子分区虽然看似可以对应之前的宿主机和虚拟机,但是其地位已经基本平等,子分区中安装的操作系统通过虚拟化软件可以直接控制计算机硬件,其性能相比寄居架构有着天壤之别。
下面我们就来体验一下采用裸金属架构的Hyper-V的强大威力。
1. 安装Hyper-V角色要使用Hyper-V,首先就要在“服务器管理器”中安装相应的服务角色。
在【服务器管理器】中添加Hyper-V角色。
Hyper-V安装完成后,需要重启系统。
2. 配置虚拟网络Hyper-V角色安装完成后,可以通过“Hyper-V管理器”对其进行管理,首先需要做的是配置虚拟网络。
虚拟机与虚拟机之间或与外部网络连接时,都需要通过虚拟网络来实现,因而在创建虚拟机之前必须要先把虚拟网络配置好。
Hyper-V有三种不同模式的虚拟网络:外部模式、内部模式、专用模式。
“外部”网络跟VMWare中的“bridged桥接”模式或Virtual PC中的“物理网卡”模式类似,允许虚拟机通过主机的物理网卡与主机或是与物理网络中的其他计算机进行通信。
生产环境中的Hyper-V虚拟机一般都是使用“外部”虚拟网络模式。
windows Server 2008 r2配置详解
Win2008 Server R2个人PC化设置1、安装驱动安装完系统后首先是安装硬件驱动,可能你的电脑的提供商并没有提供针对windows server 2008的驱动,但一般来讲针对vista或WIN 7的驱动是很容易找到的。
驱动的安装顺序通常是:芯片组、显卡、声卡、网卡或其他设备,有些驱动如网卡等,可能系统已经安装好,就不用另行安装了。
2、安装主题及启用AERO效果首先要安装显卡驱动,才能启用AERO界面特效。
<开始> - <管理工具> - <服务器管理>在左边一栏找到<功能>,然后点击<添加功能>,到<桌面体验>并安装。
之后在服务中开启<THEME>服务。
3、关闭IE增强的安全体验这是微软针对服务器系统安全性要求,对IE浏览器提供的安全限制,但对于桌面使用则影响了我们进行正常的网页浏览,所以我们可以在<服务器管理器>界面中,打开<配置IE SEC>对话框,将针对管理员组和普通用户组的配置都设置成<关闭>状态。
当然,如果你使用的是firefox等非IE内核浏览器,那么这个设置就无关紧要了。
4、去掉登陆密码复杂性限制打开<开始> - <运行>,键入<secpol.msc>,打开<本地安全策略>。
在窗口的左边部分,选择<账户策略> - <密码策略>,在右边窗口双击<密码符合复杂性要求>,在弹出的对话框中选择<已禁用>,然后点<确定>保存后退出。
5、免除登录时按Ctrl+Alt+Del的限制打开<开始> - <运行>,键入<secpol.msc>,打开<本地安全策略>。
在窗口的左边部分,选择<本地策略> - <安全选项>,在右边窗口双击<交互式登录>,不需要按<Ctrl+Alt+Del>在弹出的对话框中选择<已启用>,然后点<确定>保存后退出。
Windows Server 2008 R2 Hyper-V FAQ说明书
Windows Server 2008 R2 Hyper-V FAQContentsNew Functionality in Windows Server 2008 R2 Hyper-V (3)Windows Server 2008 R2 Hyper-V Questions (4)Clustering and Live Migration (6)Supported Guests (7)Hyper-V Upgrade Guidance (8)Windows Server 2008 RTM/SP2 Hyper-V Windows Server 2008 R2 Hyper-V (8)Parent Partition (8)Child Partitions (8)Networking Guidance (9)System Center Virtual Machine Manager (SCVMM) Support (10)Remote Management (10)New Functionality in Windows Server 2008 R2 Hyper-VQ: What is new in Windows Server 2008 R2 Hyper-V (including Service Pack 1) ?A: Windows Server 2008 R2 Hyper-V includes the following new and improved functionality.∙Support for Live Migration∙Support for up to 64host logical processors by hypervisor∙New in SP1: Dynamic Memory∙New in SP1: Microsoft RemoteFX∙Up to 384 VMs on the host, limited by physical resources∙New “Processor Compatibility” option for VMs used in Live and Quick Migration∙Jumbo Frame Support∙Hot Add/Remove of storage (VHDs and Pass Through Disks)∙Second Level Address Translation (SLAT) processor support for both Intel (EPT) and AMD (RVI)∙Core Parking∙Improved VHD performance for dynamic and difference disks∙Improved network performance via VMQ (specific hardware NICs required)Q: When was Windows Server 2008 R2 Hyper-V publicly released?A: Windows Server 2008 R2 Hyper-V was released in October 2009. Service Pack1 will be available in the first half of 2011.Windows Server 2008 R2 Hyper-V QuestionsQ: What does WS08 R2 Hyper-V contain?A: With WS08 R2 Hyper-V, customers get a compelling solution for core virtualization scenarios – Production server consolidation, dynamic datacenter, test & development and business continuity. With the initial version of Hyper-V, we have seen massive customer interest and adoption for Hyper-V with over 1 million downloads of the RTM and the latest IDC report showing that Microsoft has 24% market share in virtualization. Windows Server 2008 R2 provides customers better flexibility with features like live migration and cluster shared volumes for storage flexibility; greater scalability with support for up to 64 logical processors and improved performance with support for enhanced networking support (VMQ support for virtual machines) and support for second level address translation.Q: What’s new in R2?A: The major technology investment areas for WS08R2 are Virtualization, Web, and Management these along with several features that improve Scalability & Reliability and deliver a strong value proposition along with WIN7 Clients. These features include:∙Live Migration – Allows customers to move virtual machines from one host to another in seconds with no loss of performance. This facilitates hardware maintenance andupgrades, manual failover, and the consolidation of workloads on fewer servers.Automation in the datacenter also helps trim IT spending on labor and maintenance.∙DirectAccess – Allows remote workers to securely and seamlessly connect to their work environment as if they are on the corporate network and lets IT administratorscontinually manage the remote workers' personal computers without the use of a VPN.This results in greater flexibility for the remote workers and reduced administrationcosts for the organization.∙Branch Cache – Customers can greatly reduce Wide Area Network (WAN) bandwidth consumption between the datacenter and branch offices. The result is a significantreduction in networking costs because most organizations pay for bandwidth by thebyte.∙New in SP1: Dynamic Memory – Enables organizations to make the most efficient use of available physical memory by pooling memory on a host machine and dynamicallydistributing it to virtual machines as needed. Memory is dynamically added or removed to VMs based on current workloads without service interruption.∙RemoteFX – Introduces a new set of remote user experience capabilities that enable a media-rich user environment for virtual desktops, session-based desktops, and remote applications. It can be deployed to a range of thick and thin client devices, enablingcost-effective, local-like access to graphics-intensive applications, and a broad array ofuser peripherals to improve the productivity of remote usersQ: What is Dynamic Memory, and what are its benefits ?A: Dynamic Memory is a new feature of Hyper-V™ introduced in Service Pack 1 for Windows Server® 2008 R2 that enables Hyper-V hosts to dynamically adjust the amount of memory available to virtual machines in response to changing workloads. The benefits of Dynamic Memory include higher virtual machine consolidation ratios and increased flexibility for managing virtualized workloads.Q: What is the number of logical processors that will be supported by Hyper-V in Windows Server 2008 R2?A: Hyper-V in Windows Server 2008 R2 will support up to 64 logical processors in the physical machine.Q: Why is there a difference between the number of logical processors supported in Windows Server 2008 R2 and the number of logical processors supported by Hyper-V?A: The Windows Server 2008 R2operating system (OS) is designed to run on the widest range of HW from single processor servers to the largest scale-up servers. Hyper-V is designed for the most common hardware configurations that customers will deploy for virtualization. The vast majority of servers that will be deployed for virtualization will be 2 and 4 socket servers. Hyper-V will support up to 64 logical processors in Windows Server 2008 R2 and we will continue to work with our partners to provide solutions to help customers take advantage of future hardware innovations to meet their current and future business needs.Q: How many guest OSes can I run?A: The actual number of guest OSes will depend on the physical hardware and the characteristics of the different virtualized workloads, the supported limit per physical server is 384 virtual machines, up to 1000 VMs per cluster.Clustering and Live MigrationQ: Up to how many nodes on a cluster does Live Migration support?A: Live Migration is supported on up to 16node failover clusters.Q: What is the maximum number of supported VMs per node?A: For production deployment, up to 384 VMs per node / up to 1000 VMs per cluster are supported. Customers must plan for adequate capacity when a failover occurs and VMs from the failed host are brought online on different nodes of the cluster.Q: Will Live Migration work on with a cluster of mixed AMD and Intel host nodes?A: For Live Migration or Quick Migration to work, all cluster nodes must have processors from the same processor vendor, for example Intel or AMD.Q: Assuming host nodes have a virtualization capable processor from the same manufacturer, can I migrate a VM from a host using an older processor to a host with a newer processor?A: It is highly recommended to use identical processors on all nodes of a cluster using Quick or Live Migration.A new functionality introduced in Hyper-V R2 is the “Processor Compatibility Mode” option. This functionality can be enabled for VMs to allow both Live Migration and Quick Migration from newer to older processors from the same manufacturer.The setting is under VM settings > Processor > “Migrate to a physical computer with a different processor version”.Q: Are there any new tools included with Windows Server R2 Server Core to help manage the Hyper-V?A: A new server configuration script is available in the Windows Server 2008 R2 Hyper-V. Type sconfig at the command line to start the server configuration utility.Supported GuestsQ: What operating systems are supported as guests on Windows Server 2008 R2 Hyper-V?A: A list of operating systems that are supported as guests with integration services with Windows Server 2008 R2 Hyper-V is available at /en-us/library/cc794868(WS.10).aspxQ: What Linux guests are supported in Windows Server 2008 R2 Hyper-V?A: The following distributions are officially supported:∙Novell SUSE Linux Enterprise Server 11∙Novell SUSE Linux Enterprise Server 10 SP3∙Red Hat Enterprise Linux 5.2 / 5.3 / 5.4For updated information please see /en-us/library/cc794868(WS.10).aspxQ: What do the Hyper-V Integration Services for Linux include?A: Optimized networking, storage, and fastpath boot drivers for linux. The latest Linux Integration Services 2.1 release also adds:• Timesync: The clock inside the virtual machine will remain synchronized with the clock on the host.• Integrated Shutdown: Virtual machines running Linux can be shut down from either Hyper-V Manager or System Center Virtual Machine Manager, using the “Shut Down” command.• Symmetric Multi-Processing (SMP) Support: Supported Linux distributions can use up to 4 virtual processors (VP) per virtual machine.• Heartbeat: Allows the host to detect whether the guest is running and responsive.• Pluggable Time Source: A pluggable clock source module is included to pro vide a more accurate time source to the guest.The Hyper-V Linux Integration Services are available from this link.Q: Do the Linux Integration Services enable multiprocessor support in supported Linux VMs?A: With version 2.1 of the Linux Integration Services up to 4 virtual processors are supported in Linux VMs.Hyper-V Upgrade GuidanceWindows Server 2008 RTM/SP2 Hyper-V Windows Server 2008 R2 Hyper-VParent PartitionQ: Can I upgrade my existing Windows Server 2008 RTM/SP2 Hyper-V host to Windows Server 2008 R2 Hyper-V?A: Yes. Upgrade of Hyper-V installations from WS2008 Hyper-V RTM to WS2008 R2 Hyper-V is supported. You can perform an in-place upgrade of your machine from Windows Server 2008 to Windows Server 2008 R2 and still have the Hyper-V role enabled on the system.Child PartitionsQ: I have a number of virtual machines that I created using Windows Server 2008 Hyper-V. Can I move these virtual machines to Windows Server 2008 R2 Hyper-V?A: The following methods of moving a VM from WS2008 Hyper-V to WS2008 R2 Hyper-V are supported:1.In-place upgrade of the host from WS2008 Hyper-V to WS2008 R2 Hyper-V.2.Exporting a VM from a machine running WS2008 Hyper-V and importing to a machinerunning WS2008 R2 Hyper-V.3.Backing up a VM from WS2008 Hyper-V and restoring it on WS2008 R2 Hyper-VAt the end of each operation above, the VM configurations that were created in WS2008 Hyper-V will still be registered in WS2008 R2 Hyper-V.Unsupported features when upgrading to Windows Server 2008 R2 Hyper-V:1.Saved statesa.If you keep a VM in saved state through the upgrade/export to a WindowsServer 2008 R2 Hyper-V host, the VM will be registered and will appear to be inthe saved state. However, the VM will not be able to restore from the savedstate. You will need to discard the saved state and then cold start the virtualmachine.2.Online Snapshotsa.You will be able to apply the snapshot and thus get the configuration and storagedata associated with that snapshot. However, you will not be able to restorefrom the associated saved state. You will need to discard the saved state andrestart the VM.Although all guest synthetic devices with continue to function with the older RTM drivers on R2, updating the guest integration services to the latest R2 version is highly recommended to access the optimal performance of the R2 drivers and integration services.Networking GuidanceQ: What is the VMQ feature?A: Windows Server 2008 R2 is being delivered with an new optional optimization to enhance the networking performance of virtual machines. The networking optimization feature is Virtual Machine Queues (VMQ). Depending on the NICs available to you and the traffic types you encounter, this technology may produce substantial improvements in your networking performance, either through greater bandwidth utilization or, in slower NICs, lower CPU utilization to process the same load.VMQ requires hardware support. These features are only available when using specific hardware NICs (please refer to the section below for supported NICs).NICs:For Windows Server 2008 R2,VMQ capable drivers are available on the media:o Intel Kawela (E1Q) 1 Gb/s NICs (also known as Pro/1000 ET NICs)o Intel Oplin NICs (IXE) 10Gb/s NICs (also known as 82598)To determine which NIC(s) your system has, go to the Windows Device Manager andexpand the Network Adapters entry. If one of the above mentioned Network Adapters islisted, then your host should be capable of using the associated networking optimization feature.Drivers for additional NICs that support these features are expected to be available in the RTM timeframe. Some vendors may produce VMQ-capable drivers for their NICs and release them through other channels such as their own support web sites.Feature interactions:∙ A connection will not be offloaded if it is part of an IPSec rule.∙Connections may not be available if the Windows Firewall or any other filter driver that requires packet inspection for that particular connection.∙Currently available NIC teaming drivers do not support the use of these features.System Center Virtual Machine Manager (SCVMM) SupportQ: Can I manage Windows Server 2008 R2 Hyper-V hosts with SCVMM?A: SCVMM 2008 R2 is required to manage Windows Server 2008 R2 Hyper-V hosts with SCVMM. See /scvmm for details.Remote ManagementQ: Can I manage Windows Server 2008 R2 Hyper-V hosts using the Remote Server Administration Tools (RSAT)?A: Yes. All the Hyper-V R2 settings can be managed with RSAT for Win7 or the version of Hyper-V Manager included with Windows Server 2008 R2.Ealier versions of the Remote Server Administration Tools (RSAT) can only manage some of the basic settings of Hyper-V R2 hosts.。
Windows Server 2008安装Hyper-V教程完全图解
Windows Server 2008安装Hyper-V教程完全图解2010-01-07 14:19Hyper-V是什么?在2008年3月份微软发布Windows Server 2008的时候,windows2008其中的部分版本集成了测试版的微软新一代虚拟化技术Hyper-V,2008年6月,微软终于放出了Hyper-V的正式版,目前用户可以通过Windows Update进行自动升级,或者通过微软网站下载Hyper-V升级包独立进行安装。
Hyper-V是微软新一代服务器虚拟化解决方案,构架和微软以往的虚拟化产品如Virtual Server、Virtual PC完全不同,可以说是微软虚拟化技术上的一个突破。
微软Hyper-V构架图Hyper-V是一个只有几百KB的小程序,通过上面的Hyper-V构架图可以看到,Hyper-V介于物理硬件和虚拟机之间,代码非常少,不含任何第三方的驱动,非常的精简,这种构架使得虚拟机和硬件之间只通过很薄的一层进行连接,不像Virtual Server那样虚拟机和硬件之间需要经过多层的转换,因而虚拟机执行效率非常高,可以更加充分的利用硬件资源,使虚拟机系统性能非常的接近真实的操作系统性能。
正式发布的Hyper-V基于32位和64位系统,不过由于32位系统的内存寻址空间只有4GB,所以对于虚拟化应用没有太大的现实意义。
Hyper-V对于硬件的支持大大提升,支持4颗虚拟处理器,支持64GB内存。
Hyper-V提供了对多个操作系统的支持如Windows Server 2003 SP2、Novell SUSE Linux Enterprise Server 10 SP1、Windows Vista SP1 (x86)和Windows XP SP3 (x86)等。
Hyper-V也支持远程管理功能,基于Vista的远程管理补丁目前也已经发布,用户可以在Vista客户端打开Hyper-V 控制台远程对服务器进行操作。
Server2008R2Core安装Hyper-建置手册簿

Server 2008 R2 Core Configure Hyper-V InstallSetting SOP首先說明一下在Server Core上安裝Hyper-V需要透過另一台Server或是Win7 or Win8來做為Hyper-v管理程式因在Server Core上較少人使用Hyper-V管理程式且在Server Core上管理Hyper-V是很不方便的接下來開始使用Server Core上安裝Hyper-V與其它設定這次會已Windows 2008 R2 作為這次的LAB首先2台SERVER安裝Windows2008 R2第一台設定為AD Server(此台為正常版Windows 2008 R2)((這次AD Server 不會做網域的操作但會介紹Hyper-V管理工具的使用))Server name : HyperV-AD-LAB-SOP IP : 172.17.1.100第二台設定為Hyper-V Server(此台為Windows 2008 R2 Server Core)((一開始會先從Server Core做操作說明))Server name : HyperV-LAB-SOP IP : 172.17.1.2002008 R2 Core 安裝完成後1.首先查看目前電腦名稱與更改電腦名稱1.hostname (查看目前電腦名稱)dom renamecomputer WIN-DUURDE4376 /NewName:HyperV-LAB-SOP (更改目前電腦名稱)3.y (是要做更變動作)4.shutdown /r /t 0 (重新啟動Server)2.重啟後再次查看電腦名稱是否已變更完成Hostname (查看電腦名稱)3.更改電腦IP,首先查詢網卡的名稱在做IP設定(Idx 下的編號指的是網卡編號)netsh interface ipv4 show interface (查看目前網卡的編號)4.設定Idx 3 的IP 請打下列指令IP設定為172.17.1.200 網路遮罩255.255.255.0 預設閘道172.17.1.254sh interface ipv4 set address name= “3”source=static address=172.17.1.200mask=255.255.255.0 gateway=172.17.1.254 (設定IP)2.ipconfig /all (查看IP 是否確定設定成功)sh interface ipv4 add dnsserver name="3" address=172.17.1.100 index=1 (設定DNS IP)5.設定完後Ping 一下另外台的IP172.17.1.100 看是不是有互通Ping 172.17.1.100 (ping AD Server)6.關閉Server Core防火牆netsh advfirewall set allprofiles state off (關閉防火牆)7.啟用Server Core防火牆遠端管理1.regedit.exe(開啟系統機碼頁面修改檔案)2.HKEY_LOCAL_MACHINE\SYSTEM\CurrectControlSet\Control\Terminal Server這個機碼3.將fDeny TSConnection這個鍵值的內容修改4.修改0。
- 1、下载文档前请自行甄别文档内容的完整性,平台不提供额外的编辑、内容补充、找答案等附加服务。
- 2、"仅部分预览"的文档,不可在线预览部分如存在完整性等问题,可反馈申请退款(可完整预览的文档不适用该条件!)。
- 3、如文档侵犯您的权益,请联系客服反馈,我们会尽快为您处理(人工客服工作时间:9:00-18:30)。
实战:Hyper-V Server 2008 R2安装、配置
如今,服务器配件的价格越来越便宜了,3万元的购置成本可以“换来”4核CPU、8GB内存、3块附带RAID5功能的SAS硬盘、4个甚至更多的网络接口。
如此高端的配置只是应用文件服务器这样简单的配置无疑浪费了服务器的高性能。
因此,为了使服务器的负载更为均衡,很多服务器应用了虚拟化技术。
关于服务器虚拟化我们听到的应该很多了,官方的解释比较繁琐,这里就不再赘述了。
说的简单一点就是在物理服务器上通过虚拟化技术安装、部署多个虚拟的操作系统,这些操作系统相互独立,互不干扰。
在服务器虚拟化的市场中有很多产品,早前接触的是VMware ESX 3i,功能非常强大,但是E文的操作系统让人用起来颇为不爽。
于是,辗转多个虚拟化平台最终选择了微软的Hyper-V Server 2008 R2,经过一段时间的摸索多少总结了一些小的经验,同大家分享一下。
Hyper-V Server 2008 R2 安装
与安装Windows 2008系统相类似,Hyper-V Server 2008 R2的安装相对比较简单,请看操作步骤:
A、选择安装语言。
看腻了E文系统,这里毫不犹豫的选择了“我的语言为中文(简体)”;(见图一);
图一
B、设置语言和其他选项,一般选择默认即可(见图二);
图二
C、阅读“安装Windows 须知”后即可安装Hyper-V Server 2008 R2(见图三);
图三
D、接受MICROSOFT软件许可条款(见图四);
图四
E、选择安装类型,这里选择“自定义(高级)” (见图五);
图五
F、选择Hyper-V Server 2008 R2的安装位置,选择“驱动器选项(高级)”(见图六);
图六
G、对硬盘进行分区,其中磁盘0分区1为系统保留,容量为100MB,该分区为Hyper-V Server 2008 R2系统自行建立(见图七);
图七
H、开始安装Hyper-V Server 2008 R2(见图八);
图八
稍事片刻系统安装成功,重启电脑后让我们继续探索Hyper-V Server 2008 R2的世界吧。
Hyper-V Server 2008 R2 配置
Hyper-V Server 2008 R2安装完毕后仅相当于在硬件平台上架设了一个操作系统,这个操作系统并没有我们常见的Windows的Shell界面,我们可以使用的只有命令提示行、任务管理器和Hyper-V配置平台,我们要利用这些工具进行配置以满足使用需要。
A、修改Hyper-V Server 2008 R2 IP地址
如果网内存在DHCP服务器,Hyper-V会自动从服务器上获得IP地址,但是我们不建议使用自动分配的IP 地址,同物理服务器一样,我们需要为虚拟服务器手动指定IP,方法为:
在命令提示行状态下输入“sconfig”,启动Hyper-V服务器配置平台(Hyper-V的设置很多都是通过sconfig 来实现,见图九)。
图九
输入数字8,回车,会出现当前Hyper-V所连接的网卡(见图十),这里只有“索引编号”为“5”的网卡连接网络,我们输入数字:5,回车。
接下来出现了这块网卡的IP地址、子网掩码、DNS地址等信息,并提供了IP地址、DNS地址修改的方法。
1) 设置网络适配器IP 地址
2) 设置DNS 服务器
3) 清除DNS 服务器设置
4) 返回主菜单
这些设置比较简单,不再赘述。
图十
B、Hyper-V Server 2008 R2补丁升级
架构在Hyper-V 平台之上的杀毒软件几乎没有,因此为了保证虚拟化服务器的安全我们需要在首次安装后升级系统补丁,并且需要定期进行升级,方法为:
输入“sconfig”,启动Hyper-V服务器配置平台,输入数字:6,回车,弹出提示框“是搜索所有的更新<A>还是仅搜索推荐的更新<R>”,建议选择所有更新,输入字母:a,回车,Hyper-V即开始搜索所有的更新,稍事片刻会列出所有的所有的更新,再次选择字母:a,安装所有更新即可。
也可以将更新设置为“自动”,在服务器配置平台选择“5”即可将Windows Update设置为自动(见图十一),系统将在每天上午3:00检查并安装更新。
图十一
C、Hyper-V Server 2008 R2配置远程管理
如果只是为Hyper-V配置了IP地址并不意味着能够顺利的连接,因为Hyper-V很多策略在阻止用户的一些数据通讯,我们还需要配置一下远程管理。
输入“sconfig”,启动Hyper-V服务器配置平台,输入数字:4,回车,来到配置远程管理界面,这里有4个选项,分别为:
1)允许MMC 远程管理
2)启用Windows PowerShell
3)允许服务器管理器远程管理
4)显示Windows 防火墙设置
分别选择1、2、3项开启相应的远程管理,同时还需要对防火墙进行以下设置,在实验环境下,我们在命令提示符下输入“netsh firewall Set opmode disable”,这将关闭Hyper-V的防火墙,当然这意味着系统存在着潜在风险,我们只需要开启六大规则即可,命令为
1、netsh advfirewall set allprofiles settings remotemanagement enable
2、netsh advfirewall firewall set rule group="远程管理" new enable=yes
3、netsh advfirewall firewall set rule group="远程桌面" new enable=yes
4、cscript %windir%\system32\scregedit.wsf /AR 0
5、cscript %windir%\system32\scregedit.wsf /CS 0
6、winrm quickconfig -q
完成上述操作后,Hyper-V服务器端配置完毕,下面我们开始向Hyper-V安装虚拟操作系统。
D、安装、配置Hyper-V管理器
之前,我们只是在裸服务器上搭建的虚拟化平台,要正常的使用我们还需要安装Hyper-V管理器,下面以Windows Server 2008系统为例安装Hyper-V管理器。
1、依次选择“开始”→“设置”→“控制面板”→“管理工具”→“服务器管理器”;
2、在服务器管理器窗口中,选择“功能”→“添加功能”→“远程服务器管理工具” →“角色管理工
具”→“Hyper-V工具”,勾选前面的复选框,进行安装;
3、安装完毕后,管理工具中就已经有了“Hyper-V管理器”,将其打开,选择“操作”→“连接到服务器”→“另一台计算机”,输入前面已设置完毕的Hyper-V Server 2008 R2的IP地址即可(见图十二);
4、接下来,选择“操作”→“新建”→“虚拟机”即可建立一个虚拟化操作系统了,这里的操作和VMware 基本相似,无非是设置内存、硬盘大小、系统存放位置等信息,较为简单,不再赘述。
图十二
E、安装Hyper-V Server 2008 R2 tool
在Hyper-V 平台之上安装虚拟系统我们会发现,要么鼠标不能使用、要么桌面的分辨率较低、最不方便的就是鼠标和键盘不能与当前系统自由切换,必须按下“Ctrl+Alt+左箭头”进行手动切换,这是因为我们没有安装Hyper-V Server 2008 R2 tool的缘故。
这个工具集成了网卡、显卡、声卡以及虚拟服务器的主机时钟驱动程序,还可以实现鼠标在虚拟服务与控制机之间的自由移动,这个工具为我们提供了便捷的操作,强烈建议安装,方法为:
打开任意一个虚拟化操作系统,选择“操作”→“插入集成服务安装盘”,随后在光驱上点击鼠标右键,选择“安装Hyper-V集成服务”即可(见图十三)。
图十三
结语:
简单介绍了一下Hyper-V Server 2008 R2的安装和配置,通过上述的部署我们已经可以正常的使用这款虚拟化产品了,但是Hyper-V毕竟是一个全新的虚拟化平台,还是无图形界面的操作系统,使用过程中难免会遇到一些奇怪的问题,敬请关注我们的Hyper-V Server 2008 R2的故障排除。
