Cisco交换机配置手册
Cisco思科光纤交换机配置说明及常用命令

Cisco思科光纤交换机配置说明及常⽤命令你还在为不知道Cisco思科光纤交换机配置说明⽽烦恼么?下⾯⼩编为⼤家收集的Cisco思科光纤交换机配置说明教程,希望能帮到⼤家,⼀起来看看吧!Cisco思科光纤交换机配置说明的⽅法1. 初始化信息⾸次设置,必须通过console进⾏连接(需要U⼝转DB9针的接⼝线,专门卖接⼝线的有卖⼤约30元),然后进⾏初始化设计,以后设定IP后可通过LAN进⾏登陆具体步骤:(红⾊字体部分着重注意,需要进⾏设置,⼤部分按照默认设置即可,⽽且设置的部分进⼊管理⼯具软件可以更改)---- System Admin Account Setup ----Enter the password for "admin": passwordConfirm the password for "admin": password--- Basic System Configuration Dialog ---This setup utility will guide you through the basic configuration of the system. Setup configures only enough connectivity for management of the system.Press Enter at any time to skip any dialog. Use ctrl-c at anytime to skip the remaining dialogs.Would you like to enter the basic configuration dialog (yes/no): yCreate another login account (yes/no) [n]:Configure read-only SNMP community string (yes/no) [n]:Configure read-write SNMP community string (yes/no) [n]:Enter the switch name: Pxx-MDS-x (where xx is your pod number and x is the switch number; for example:P01-MDS-1) Continue with Out-of-band (mgmt0) management configuration? (yes/no) [y]:Mgmt0 IPv4 address : <10.0.x.y> (where x is your pod number and y is 5 for MDS-1 and 3 for MDS-2)(客户)0.16Mgmt0 IPv4 netmask : 255.255.255.0Configure the default gateway? (yes/no) [y]:IPv4 address of the default gateway : 10.0.x.254 (where x is your pod number)Configure advanced IP options? (yes/no) [n]:Enable the telnet service? (yes/no) [y]:Enable the ssh service? (yes/no) [n]:Configure the ntp server? (yes/no) [n]:Configure default switchport interface state (shut/noshut) [shut]: (注意⼀下)noshutConfigure default switchport trunk mode (on/off/auto) [on]:Configure default zone policy (permit/deny) [deny]:Enable full zoneset distribution (yes/no) [n]:NOTE:初始设定的配置对新的VSAN起作⽤,即原始VSAN1⽆这些配置解决办法:1 zone default-zone permit VSAN2 新建 NEW VSAN2 将port转移VSAN2⾥⾯。
Cisco路由器交换机配置命令详解-921
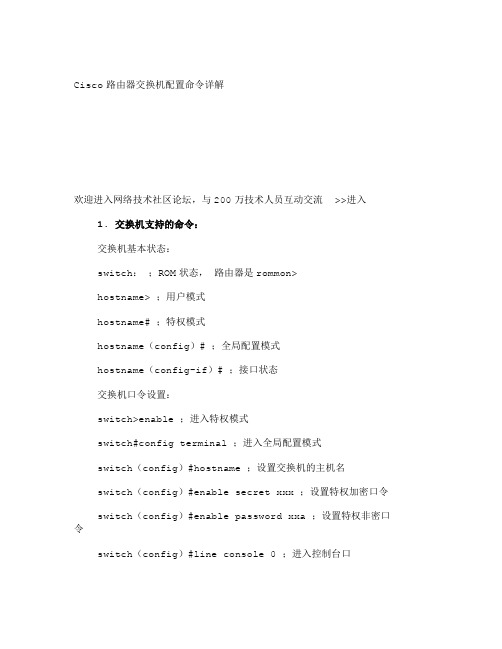
Cisco路由器交换机配置命令详解欢迎进入网络技术社区论坛,与200万技术人员互动交流 >>进入1. 交换机支持的命令:交换机基本状态:switch:;ROM状态,路由器是rommon>hostname> ;用户模式hostname# ;特权模式hostname(config)# ;全局配置模式hostname(config-if)# ;接口状态交换机口令设置:switch>enable ;进入特权模式switch#config terminal ;进入全局配置模式switch(config)#hostname ;设置交换机的主机名switch(config)#enable secret xxx ;设置特权加密口令switch(config)#enable password xxa ;设置特权非密口令switch(config)#line console 0 ;进入控制台口switch(config-line)#line vty 0 4 ;进入虚拟终端switch(config-line)#login ;允许登录switch(config-line)#password xx ;设置登录口令xxswitch#exit ;返回命令交换机VLAN设置:switch#vlan database ;进入VLAN设置switch(vlan)#vlan 2 ;建VLAN 2switch(vlan)#no vlan 2 ;删vlan 2switch(config)#int f0/1 ;进入端口1switch(config-if)#switchport access vlan 2 ;当前端口加入vlan 2switch(config-if)#switchport mode trunk ;设置为干线switch(config-if)#switchport trunk allowed vlan 1,2 ;设置允许的vlanswitch(config-if)#switchport trunk encapdot1q ;设置vlan 中继switch(config)#vtp domain ;设置发vtp域名switch(config)#vtp password ;设置发vtp密码switch(config)#vtp mode server ;设置发vtp模式switch(config)#vtp mode client ;设置发vtp模式交换机设置IP地址:switch(config)#interface vlan 1 ;进入vlan 1switch(config-if)#ip address ;设置IP地址switch(config)#ip default-gateway ;设置默认网关 switch#dir flash:;查看闪存交换机显示命令:switch#write ;保存配置信息switch#show vtp ;查看vtp配置信息switch#show run ;查看当前配置信息switch#show vlan ;查看vlan配置信息switch#show interface ;查看端口信息switch#show int f0/0 ;查看指定端口信息2. 路由器支持的命令:路由器显示命令:router#show run ;显示配置信息router#show interface ;显示接口信息router#show ip route ;显示路由信息router#show cdp nei ;显示邻居信息router#reload ;重新起动路由器口令设置:router>enable ;进入特权模式router#config terminal ;进入全局配置模式router(config)#hostname ;设置交换机的主机名router(config)#enable secret xxx ;设置特权加密口令router(config)#enable password xxb ;设置特权非密口令router(config)#line console 0 ;进入控制台口router(config-line)#line vty 0 4 ;进入虚拟终端router(config-line)#login ;要求口令验证router(config-line)#password xx ;设置登录口令xxrouter(config)#(Ctrl+z);返回特权模式router#exit ;返回命令路由器配置:router(config)#int s0/0 ;进入Serail接口router(config-if)#no shutdown ;激活当前接口router(config-if)#clock rate 64000 ;设置同步时钟router(config-if)#ip address ;设置IP地址router(config-if)#ip address second ;设置第二个IP router(config-if)#int f0/0.1 ;进入子接口router(config-subif.1)#ip address ;设置子接口IProuter(config-subif.1)#encapsulation dot1q ;绑定vlan中继协议router(config)#config-register 0x2142 ;跳过配置文件router(config)#config-register 0x2102 ;正常使用配置文件router#reload ;重新引导路由器文件操作:router#copy running-config startup-config ;保存配置router#copy running-config tftp ;保存配置到tftprouter#copy startup-config tftp ;开机配置存到tftprouter#copy tftp flash:;下传文件到flashrouter#copy tftp startup-config ;下载配置文件ROM状态:Ctrl+Break ;进入ROM监控状态rommon>confreg 0x2142 ;跳过配置文件rommon>confreg 0x2102 ;恢复配置文件rommon>reset ;重新引导rommon>copy xmodem: flash:;从console传输文件rommon>IP_ADDRESS=10.65.1.2 ;设置路由器IPrommon>IP_SUBNET_MASK=255.255.0.0 ;设置路由器掩码rommon>TFTP_SERVER=10.65.1.1 ;指定TFTP服务器IPrommon>TFTP_FILE=c2600.bin ;指定下载的文件rommon>tftpdnld ;从tftp下载rommon>dir flash:;查看闪存内容rommon>boot ;引导IOS静态路由:ip route ;命令格式router(config)#ip route 2.0.0.0 255.0.0.01.1.1.2 ;静态路由举例router(config)#ip route 0.0.0.0 0.0.0.01.1.1.2 ;默认路由举例动态路由:router(config)#ip routing ;启动路由转发router(config)#router rip ;启动RIP路由协议。
CISCO交换机路由器配置手册

CISCO交换机路由器配置手册王国栋编著……………… 目录………………交换机1、cisco 2950 交换机2、cisco 1950 交换机3、VLAN 间的通信路由器一、路由器配置1、路由器基本配置2、路由器的密码恢复3、恢复出厂设置4、备份IOS5、恢复IOS6、备份路由器配置7、静态路由的配置8、RIP路由协义配置9、IGRP路由协议配置10、EIGRP路由协议配置11、ospf路由协议基本配置12、点到点链路上的ospf13、广播链路上的ospf14、基于区域的ospf简单口今及MD5认证15、多区域的OSPF16、OSPF末节区域和完全末节区域17、OSPF命令汇总二、ACL NAT DHCP1、标准访问控制列表(Access Control Iists ) (list 列表)2、扩展访问控制列表(Access Control Iists ) (list 列表)3、命名ACL4、NAT(network address translation)网络地址翻译(1)、静态NAT配置(2)、动态NAT(3)、PAT(端口地址转换)配置5、DHCP (dynamic host configuration protocol) 动态主机配置协议三、远程接入、VPN1、HDLC (高级数据链路控制high-level data link control)2、路由器serial端口的基本配置3、PPP(1)、PPP的PAP认证(2)、PPP的CHAP认证4、帖中继(1)、帧中继基本配置(2)、点对多点帧中继(3)、|点对点帧中继上的RIP协议5、DDN(Digital Data Network 数字数据网)和数字链路6、ISDN7、ADSL Asymmetrical digital subscriber loop 非对称数字用户环路8、VPN 虚专用网络(Virtual Private Networks)交换机部分一、交换机配置图:二、环境说明:S2950-1 S2950-2 为12端口快速以太网交换机三、配置实例:1、cisco 2950 交换机//switch>enable//进入特权模式//switch #configure terminal//进入全局配置模式//switch (config)#hostname s2950-1//给交换机命名为S2950-1enable password 123456//设置密码ip address 192.168.0.1 255.255.255.0ip default-gateway 192.168.0.254ip domain-name //设置IP 、网关和域名ip name-server 200.0.0.1//设置域名服务器interface fastethernet 0/1//进入端口配置模式//s2950-1 (config-if)#speed auto//将接口速率设置成自适应(默认)//speed 100 10 auto//将接口速率设置成10/100自适应duplex full//将接口设置成全双功(默认)//duplex full falf autoend//s2950-1#copy running-config startup-config//保存配置文件valn database//从特权模式进入VLAN配置子模式//s2950-1 (vlan)#vtp server//VTP就是VLAN中继协议//设置交换机为VTP服务模式//vtp server client transparentvtp domain name-vtp-server//设置管理域的域名为name-vtp-server//创建管理域并命名end//s2950-1#configure terminal//s2950-1 (config)#interface fastethernet 0/1//s2950-1 (config-if)#switchport mode trunk//将端口fastethernet0/1设置为主干端口end//s2950-1#vlan database//s2950-1 (vlan)#//进入VLAN 配置模式valn 2 name namevlan-2//创建VLAN 2 并命名为namevlan-2//交换机默认所有未配置VLNA的交换机均为VLAN 1 //所以这里从VLAN 2 开始设置valn 3 name namevlan-3//创建VLAN 3并命名为namevlan-3valn 4 name namevlan-4valn 5 name namevlan-5exit//s2950-1#configure terminal//s2950-1 (config)#interface fastethernet 0/2//s2950-1 (config-if)#switchport mode access//设置当前端口为静态VLAN模式switchport access vlan 2//把当前端口分配给V ALN 2exit//s2950-1 (config)#interface fastethernet 0/3//s2950-1 (config-if)#switchport mode accessswitchport access vlan 3exit//s2950-1 (config)#interface fastethernet 0/4//s2950-1 (config-if)#switchport mode accessswitchport access vlan 4exit//s2950-1 (config)#interface fastethernet 0/5//s2950-1 (config-if)#switchport mode accessswitchport access vlan 5end//s2950-1#copy running-config startup-config//writeshow running-config//show vtp status//show vlan//show interface//show interface brief//show version2、cisco 1950 交换机//switch>enable//switch #configure terminal//switch (config)#hostname s2950-1enable password 123456username text1 password text2ip address 192.168.0.1 255.255.255.0ip default-gateway 192.168.0.254ip domain-name ip name-server 200.0.0.1interface fastethernet 0/1//s1950-1 (config-if)#speed auto//speed 100 10 autoduplex full//duplex full falf autoend//s1950-1#copy running-config startup-config//s1950-1#configure terminal//s1950-1 (config)#vtp server//在配置模式下设置交换机为VTP服务器//vtp server client transparent//也可以根据需要将交换机设置为VTP客户模式,或透明模式vtp domain name-vtpserver//创建VTP管理域并设置域名为name-vtpserverend//S1950VTP这块配置内容和s2950不一样//s1950-1#configure terminal//s1950-1 (config)#interface fastethernet 0/1//s1950-1 (config-if)#trunk on//设置VLAN主干端口//trunk on|off|desirable|autoEnd//trunk 的内容和S2950不一样//s1950-1#vlan database//s1950-1 (vlan)#valn 2 name namevlan-2//创建VLAN 2 并命名为namevlan-2//交换机默认所有未配置VLNA的交换机均为VLAN 1 ,//所以这里从VLAN 2 开始设置valn 3 name namevlan-3valn 4 name namevlan-4valn 5 name namevlan-5exit//s1950-1#configure terminal//s1950-1 (config)#interface fastethernet 0/2//s1950-1 (config-if)#vlan-membership static namevlan-2//划分VLAN端口//将本端口设置为namevlan-4的成员//S1950这块配置内容和s2950不一样exit//s1950-1 (config)#interface fastethernet 0/3//s1950-1 (config-if)#vlan-membership static namevlan-3exit//s1950-1 (config)#interface fastethernet 0/4//s1950-1 (config-if)#vlan-membership static namevlan-4exit//s1950-1 (config)#interface fastethernet 0/5//s1950-1 (config-if)#vlan-membership static namevlan-5end//s1950-1#copy running-config startup-configshow running-config//show vtp status//show vlan//show interface//show ip interface brief//显示所有接口的简短信息//show version3、VLAN间的通信(1)、利用三层交换机实现VLAN间的通信拓朴图:配置实例:S2950#vlan databaseS2950(vlan)#vlan 2 name namevlan-2S2950(vlan)#vlan 3 name namevlan-3S2950(vlan)#exitS2950#configure terminalS2950(config)#interface fastethernet 0/5S2950(config-if)#switchport mode accessS2950(config-if)#switchport access vlan 2S2950(config-if)#exitS2950(config)#interface fastethernet 0/6S2950(config-if)#switchport mode accessS2950(config-if)#switchport access vlan3S2950(config-if)#exitS2950(config)#ip routing//打开三层交换机的路由功能S2950(config)#interface vlan 2//将VLAN当成一个接口进行配置S2950(config-if)#no shutdownS2950(config-if)#ip address 192.168.0.1 255.255.255.0 S2950(config-if)#exitS2950(config)#interface vlan 3S2950(config-if)#no shutdownS2950(config-if)#ip address 192.168.1.1 255.255.255.0S2950(config-if)#endS2950#show ip router//由于是在同一三层交换机上,用show ip router 可以看到自动生存的路由表(2)、利用路由器实现VLAN间的通信配置拓朴图:配置实例:S2950#vlan databaseS2950(vlan)#vlan 2S2950(vlan)#vlan 3S2950(vlan)#exitS2950#configure terminalS2950(config)#interface fastehernet 0/1S2950(config-if)#switchport mode accessS2950(config-if)#switchport access vlan 2S2950(config-if)#exitS2950(config)#interface fastethernet 0/6S2950(config-if)#switchport mode accessS2950(config-if)#switchport access vlan 3S2950(config-if)#exitS2950(config)#(end)RouterA(config)#interface ethernet 0RouterA(config-if)#no shutdownRouterA(config-if)#ip address 192.168.0.1 255.255.255.0 RouterA(config-if)#exitRouterA(config)#interface ethernet 1RouterA(config-if)#no shutdownRouterA(config-if)#ip address 192.168.1.1 255.255.255.0 RouterA(config-if)#endRouterA#show ip route//可以看到由路器自动生成的两条路由表路由器部分一、路由器配置1、路由器基本配置(1)路由器基本的配置拓扑图:(2)、环境说明:Cisco 1605路由器(3)、配置实例://Router>enable//Router#configure terminal//Router(config)#enable password text1//enable secret texe2hostname R1no ip domain lookup//不用DNS 解析主机IPinterface fastethernet 0/1//R1605-1(config-if)#ip address 192.168.0.2 255.255.255.0no shutdownexit//R1605-1 (config)#interface fastethernet 0/2//R1605-1 (config-if)#ip address 192.168.0.2 255.255.255.0no shutdownexit//R1605-1 (config)#ip route 0.0.0.0 0.0.0.0 192.168.1.2//配置默认路由//no ip route 0.0.0.0 0.0.0.0 192.168.1.2ip routing//起动路由功能//R1605-1(config)#line vty 0 4//VTY是路由器给远程登陆准备的虚拟端口//0 4表示可以同时打开5个会话//line vty 0 4是进入VTY端口(也就是同时充许5个会话登陆),对VTY端口//进行配置//R1605-1(config-line)#password 123456//设置telnet登陆时使用的密码//no password 这样就不能从telnet登陆了.(当你no password 取消掉了密码,//telnet会拒绝连接,这样就关闭了telnet)//要想明确禁止从telnet登陆最好使用ACL关闭23端口login//要求输入密码方能从telnet远程登陆,//no login 不使用密码就可以从telnet登陆end//R1605-1#write//copy running-config startup-config ,保存配置end//R1605-1#Show running-config//show version//show interface//show ip interface brief//显示所有接口的简短信息//show ip route//traceroute ip 192.168.3.1//show ip arp//show ip rip database//show runing-configexit2、路由器的密码恢复(1)、密码恢复的基本原理对CISCO的网络设备进行密码恢复的主要武器是配置注册码。
CISCO交换机配置手册

CISCO交换机配置手册V1.0作者:乖乖猪目录前言 (4)第一章交换机配置基础 (5)1.1配置方式 (5)第二章交换机基本配置 (6)2.1用户认证 (6)2.1.1特权口令 (6)2.1.2VTY口令 (7)2.2设备名称 (7)2.3SNMP网管串 (7)2.4交换机管理IP (7)2.5综合实验 (7)第三章交换机高级配置 (8)3.1VLAN(虚拟局域网) (8)3.1.1简介 (8)3.1.2命令 (46)3.1.3案例一(VTP方式) (49)3.1.4案例二(VTP方式) (50)3.2STP(生成树协议) (53)3.2.1简介 (53)3.2.2命令 (68)3.2.3案例一(PVST/PVST+ / Rapid -PVST+ 常用) (69)3.2.4案例二(MST VLAN数量大使用) (72)3.2.5案例三(STP 不常用) (74)3.3E THER C HANNEL (77)3.3.1简介 (77)3.3.2命令 (80)3.3.3案例一(强制模式) (81)3.3.4案例二(PAGP模式) (83)3.3.5案例三(LACP模式) (85)3.3.6案例四(交换机与服务器) (86)3.3.7案例五(三层模式) (95)3.4963.4.1简介 (96)3.4.2命令 (97)3.4.3案例一 (98)3.4.4案例二 (113)3.4.5案例三 (117)3.5VRRP (121)3.5.1简介 (121)3.5.2命令 (126)3.5.3案例一 (127)3.5.4案例二 (135)3.6DHCP (136)3.6.1简介 (136)3.6.2命令 (143)3.6.3案例一 (143)3.6.4案例二 (145)3.6.5案例三 (146)3.7VACL(不常用) (148)3.7.1简介 (149)3.7.2命令 (149)3.7.3案例 (151)3.8端口限速 (155)3.8.1简介 (155)3.8.2案例一(三层交换机QOS) (155)3.8.3案例二(三层交换机风暴控制) (157)第四章日常维护 (159)4.1密码恢复 (159)4.1.1CatOS交换机密码恢复 (159)4.1.2CATALYST 2900,3500XL的密码恢复 (161)4.1.3CATALYST 2940,2950L的密码恢复 (162)4.1.4CATALYST 2955的密码恢复 (162)4.1.5CATALYST 3550,3560,3750的密码恢复 (164)4.1.6CATALYST 6500密码恢复 (165)4.2ISO备份升级 (174)4.2.1TFTP方式 (174)4.2.2Xmodem方式 (176)4.3端口镜像 (178)4.3.1简介 (178)4.3.2命令 (179)4.3.3案例 (182)4.4交换机堆叠 (190)4.4.1简介 (190)4.4.2命令 (194)4.4.3案例一(3750) (196)第五章专业术语解释 (201)5.1冲突域、广播域 (201)5.2CSMA/CD (202)5.3交换机的几种主要技术参数详解和计算 (203)5.4POE (210)前言本手册是作者多年学习整理汇编而成,主要目的是方便大家设备调试使用。
思科交换机基本配置手册

17. 在基于IOS的交换机上修改STP时钟:
switch(config)# spanning-tree [vlan vlan-list] hello-time seconds
switch(vlan)# exit
switch# configure teriminal
switch(config)# interface interface module/number
switch(config-if)# switchport mode access
switch(config-if)# switchport access vlan vlan-num
switch(vlan)# vtp domain domain-name
在基于CLI的交换机上配置VTP管理域:
switch(enable) set vtp [domain domain-name]
11.在基于IOS的交换机上配置VTP 模式:
switch# vlan database
22. 用show vtp domain 显示管理域的VTP参数.
23. 用show vtp statistics显示管理域的VTP参数.
24. 在Catalyst交换机上定义TrBRF的命令如下:
switch(enable) set vlan vlan-name [name name] type trbrf bridge bridge-num[stp {ieee|ibm}]
4.在基于IOS的交换机上启用和浏览CDP信息:
思科Cisco交换机配置手册配置教程
配置接口特性这一章详细说明交换机上的接口和描述怎么配置他们。
这章有以下这些内容:●理解接口类型●使用接口命令●配置二层接口●监控和维护第二层接口●配置第三从接口注意:需要完整的有关该章的语法和应用信息,请参考Catalyst 3550 Multilayer Switch Command Reference和Cisco IOS Interface Command Referencefor Release 12.1.理解接口类型这个部分描述了不同的接口类型,以及其它章节所包括的详细配置这些接口的一些参考内容。
其他章节描述了物理接口特性的配置过程。
这部分包括:•基于端口的VLAN (Port-Based VLANs)•交换端口(Switch Ports)•以太网通道端口组(EtherChannel Port Groups)•交换虚拟接口(Switch Virtual Interfaces)•被路由端口(Routed Ports)•连接接口(Connecting Interfaces)基于端口的VLAN (Port-based Vlans)一个Vlan是一个按功能、组、或者应用被逻辑分段的交换网络,并不考虑使用者的物理位置。
要更多关于Vlan的信息请看“Configuring VLANS”。
一个端口上接受到的包被发往属于同一个Vlan的接收端口。
没有一个第三层的设备路由Vlan间的流量,不同Vlan的网络设备无法通讯。
为了配置普通范围(Normal-range) Vlan(Vlan IDs 1-1005),使用命令:config-vlan模式(global) vlan vlan-id或vlan-configuration模式(exec) vlan database针对Vlan ID 1-1005的vlan-configration模式被保存在vlan数据库中。
为配置扩展范围(extended-range) Vlans (Vlan ID 1006-4094),你必须使用config-vlan模式,并把VTP的模式设为transparent透明模式。
Cisco交换机配置教程

不同型号Cisco交换机特点
适用于中型企业或大型企业分支 机构,提供增强的安全、QoS和 多层交换功能。
适用于大型数据中心和云计算环 境,提供极高的端口密度、低延 迟和先进的虚拟化功能。
2960系列 3750系列 4500系列 Nexus系列
适用于中小型企业分支机构,提 供基本的安全和QoS功能。
Cisco交换机支持命令缩写,可输入部分字母后按Tab键自动补全命令。
查看设备状态和信息
查看设备型号和版本
使用“show version”命令查看交 换机的型号、版本号、硬件配置等信 息。
查看接口状态
使用“show interfaces”命令查看 交换机所有接口的状态、配置和统计 信息。
查看MAC地址表
拓展学习资源推荐(书籍、网站等)
01
02
03
04
书籍推荐
《Cisco交换机配置与管 理》、《网络工程师必 读——交换机/路由器配 置与管理》等。
网站推荐
Cisco官方网站、华为企 业网络学院、网络技术 论坛等。
在线课程推荐
Coursera、网易云课堂、 51CTO学院等在线教育 平台上提供的相关课程。
验证配置
使用`show ip route`命令查看路由表,确认静态路由已正 确添加。
动态路由协议简介及配置示例
动态路由协议概述
动态路由协议能够自动学习和更新网络拓 扑,常见的动态路由协议包括RIP、EIGRP、 OSPF等。
验证配置
使用`show ip ospf neighbor`和`show ip ospf route`命令查看OSPF邻居和路由信息。
应用ACL到接口 将定义好的ACL规则应用到交换机的具体接口上, 实现对进出接口数据流的访问控制。
思科 Cisco 3550 交换机配置手册 配置教程
配置接口特性这一章详细说明交换机上的接口和描述怎么配置他们。
这章有以下这些内容:●理解接口类型●使用接口命令●配置二层接口●监控和维护第二层接口●配置第三从接口注意:需要完整的有关该章的语法和应用信息,请参考Catalyst 3550 Multilayer Switch Command Reference和Cisco IOS Interface Command Reference for Release 12.1.理解接口类型这个部分描述了不同的接口类型,以及其它章节所包括的详细配置这些接口的一些参考内容。
其他章节描述了物理接口特性的配置过程。
这部分包括:∙基于端口的VLAN (Port-Based VLANs)∙交换端口(Switch Ports)∙以太网通道端口组(EtherChannel Port Groups)∙交换虚拟接口(Switch Virtual Interfaces)∙被路由端口(Routed Ports)∙连接接口(Connecting Interfaces)基于端口的VLAN (Port-based Vlans)一个Vlan是一个按功能、组、或者应用被逻辑分段的交换网络,并不考虑使用者的物理位置。
要更多关于Vlan的信息请看“Configuring VLANS”。
一个端口上接受到的包被发往属于同一个Vlan的接收端口。
没有一个第三层的设备路由Vlan间的流量,不同Vlan的网络设备无法通讯。
为了配置普通范围(Normal-range) Vlan(Vlan IDs 1-1005),使用命令:config-vlan模式(global) vlan vlan-id或vlan-configuration模式(exec) vlan database针对Vlan ID 1-1005的vlan-configration模式被保存在vlan数据库中。
为配置扩展范围(extended-range) Vlans (Vlan ID 1006-4094),你必须使用config-vlan模式,并把VTP的模式设为transparent透明模式。
cisco 思科 Catalyst 9300 系列交换机 产品手册

产品手册思科公开信息思科 Catalyst 9300 系列交换机目录专为安全性、物联网、移动性和云打造3产品概述:特性4平台详细信息5平台优势13软件要求18许可18规格21保修39思科环境可持续性40思科服务41订购信息41 Cisco Capital 47文档历史记录48专为安全性、物联网、移动性和云打造思科® Catalyst® 9300 系列交换机是思科专为安全性、物联网、移动性和云打造的主打可堆叠企业交换平台,是业界部署最广泛的下一代交换平台。
Catalyst 9300 系列交换机是思科领先的企业架构“软件定义接入” (SD-Access) 的基本组件。
这款产品是业内密度一流的堆叠带宽解决方案,带宽最高可达480 Gbps,而且拥有无比灵活的上行链路架构。
Catalyst 9300 系列是首批面向高密度 Wi-Fi 6 和第二代 802.11ac 技术优化的平台,刷新了网络规模的上限。
该系列交换机还为支持未来的技术做好了准备,凭借 x86 CPU 架构和更大的内存,它们能够承载容器并在交换机内部本地运行第三方应用和脚本。
Catalyst 9300 系列面向 Cisco StackWise®技术而设计,由于支持具有状态切换的无中断转发 (NSF/SSO),部署十分灵活,是恢复能力极强的可堆叠(低于 50 微秒)解决方案。
恢复能力强、效率高的电源架构采用 Cisco StackPower®技术,提供高密度思科通用型以太网供电(思科 UPOE®)和增强型以太网供电 (PoE+) 端口。
该系列交换机基于思科统一接入™数据平面 (UADP) 2.0 架构,不仅可以保护您的投资,还能扩大规模并提高吞吐量。
交换机采用可自行编程的 Cisco IOS® XE,这款现代化操作系统可提供高级安全功能和物联网 (IoT) 融合。
软件定义接入的基础高级持续性安全威胁、物联网 (IoT) 设备的指数级增长、无处不在的移动性、云的采用,要应对所有这些趋势,必须采用一种集高级硬件和软件创新于一身的网络交换矩阵,在保护和简化客户网络的同时,使客户网络实现自动化。
Cisco核心交换机配置手册

65xx系列交换机配置手册(Native IOS)中软网络技术股份有限公司2004年4月65xx系列交换机配置手册(Native IOS)目录1. 6509介绍 (2)2. 连接设备 (3)2.1. 从CONSOLE连接 (3)2.2. 远程TELNET连接 (6)3. 基本信息配置 (7)3.1. 交换机软件版本 (7)3.2. 查看交换机基本配置 (7)3.3. 配置机器名、TELNET、密码 (10)3.4. 配置SNMP网管串 (11)3.5. 启动三层功能 (11)3.6. 查看和配置系统环境变量 (11)4. 端口设置 (12)4.1. 端口基本设置 (12)4.2. 配置二层交换接口 (12)4.3. 配置三层路由端口 (13)4.4. 配置端口TRUNK (13)4.5. ETHERNAET CHANNEL (14)4.6. 查看端口配置 (15)5. 配置VLAN (15)5.1. 配置VTP (15)5.2. 配置VLAN端口 (15)5.3. 创建VLAN (15)5.4. 给VLAN分配端口 (16)5.5. 配置VLAN地址 (16)6. 配置HSRP (17)7. 配置NTP (18)8. 配置镜像端口 (18)9. 升级配置 (19)9.1. 交换机IOS保存和升级 (19)9.2. 配置从另外一个版本的IOS启动 (20)1.6509介绍Cisco Catalyst 6500系列交换机提供3插槽、6插槽、9插槽和13插槽的机箱,以及多种集成式服务模块,包括数千兆位网络安全性、内容交换、语音和网络分析模块。
Catalyst 6500系列中的所有型号都使用了统一的模块和操作系统软件,形成了能够适应未来发展的体系结构,由于能提供操作一致性,因而能提高IT基础设施的利用率,并增加投资回报。
从48端口到576端口的10/100/1000以太网布线室到能够支持192个1Gbps或32个10Gbps骨干端口,提供每秒数亿个数据包处理能力的网络核心,Cisco Catalyst 6500系列能够借助冗余路由与转发引擎之间的故障切换功能提高网络正常运行时间。
Cisco(思科)交换机常用配置
…………………………………………………………………Cisco交换机相关设置…………………………………………………………………一、常用设置SW 〉用户模式SW 〉enable 进入特权模式SW # 特权模式SW # config terminal 进入全局配置模式SW(config)# 全局配置模式SW(config)# enable password 123 设置特权非加密密码为123 SW(config)# enable secret 123 设置特权加密密码为123 SW # show running-config (或sh run )查看当前配置SW # wr 保存当前配置SW(config)#no ip domain lookup 关闭域名查找SW(config)# hostname huarun 将交换机名改为huarun SW # reload 重启交换机二、端口配置1,基本配置(以端口1为例)SW(config)# interface fastethernet 0/1 进入交换机1端口(百兆)SW(config-if) # speed 10/100/auto 速率为10M/100M/自动SW(config-if) # duplex full/half/auto 模式为全双工/半双工/自动SW(config-if) # description caiwu 对端口描述SW(config-if) # end 退出端口配置SW# sh interface fastethernet 0/1 查看端口1的配置情况2,端口与主机MAC地址绑定(以端口1为例)SW(config)# interface fastethernet 0/1SW(config-if)# switchport mode accessSW(config-if)# switchport port-securitySW(config-if)# switchport port-security maximum 1SW(config-if)# switchport port-security mac-address mac地址3,端口镜像(端口1为目的端口——即监听端口;端口2和端口3为源端口——即被监听端口)SW(config)# interface fastethernet 0/1SW(config-if)# port monitor fastethernet 0/2SW(config-if)# port monitor fastethernet 0/34,端口汇聚(又叫做端口聚合)(以交换机的1口和2口为例)SW(config)# interface fastethernet 0/1SW(config-if)# switchport mode trunk(如果有多个vlan,需要配置,没有的话就不用了)SW(config-if)# speed 100SW(config-if)# duplex fullSW(config-if)# channel-group 1 mode onSW(config)# interface fastethernet 0/2SW(config-if)# switchport mode trunkSW(config-if)# speed 100SW(config-if)# duplex fullSW(config-if)# channel-group 1 mode on或者SW(config)#interface range fastethernet 0/1 -2SW(config-range-if)# speed 100SW(config-range-if)# duplex fullSW(config-range-if)# channel-group 1 mode on三、HSRP配置(hot standby router protocol)以华润地产为例:2台3750交换机,就一个vlan——默认的vlan1,路由器接2台3750交换机(做HSRP),每台3750都与内网汇聚交换机(huawei)相连接。
CISCO交换机配置操作学习教程(2024)

通过命令`interface <端口类型> <端口号 >`进入端口配置模式。
设置端口属性
可设置端口的速率、双工模式、流控等属性 。
2024/1/27
启用/禁用端口
通过命令`no shutdown`或`shutdown`启用 或禁用端口。
14
VLAN概念及划分方法
2024/1/27
01
20
04
路由配置与IP地址规划
2024/1/27
21
静态路由配置方法
配置静态路由基本命令
使用`ip route`命令配置静态路由 ,指定目标网络和下一跳地址或 出口接口。
静态路由的优缺点
优点是配置简单、占用资源少; 缺点是缺乏灵活性,当网络拓扑 发生变化时需要手动更新路由表 。
静态路由适用场景
适用于小型、稳定的网络环境, 或者作为动态路由协议的补充, 用于特定路由的精确控制。
02 进入全局配置模式
在特权EXEC模式下输入 `configure terminal`命令,进 入全局配置模式,此时可以对 交换机进行各种配置。
03
配置主机名
在全局配置模式下输入 `hostname <hostname>`命令 ,为交换机配置主机名,方便识 别和管理。
04
配置接口
在全局配置模式下输入 `interface <interface-type> <interface-number>`命令,进 入接口配置模式,然后可以对该 接口进行各种配置,如设置IP地 址、启用/禁用接口等。
防止DoS攻击
通过限制特定流量的速率或数量,防 止DoS攻击对交换机造成影响。
思科交换机简单配置(通用教程)

端口镜像配置
• Cisco 3560G配置
全局配置下:
Switch(config)#monitor session 1 destination interface gigabitEthernet 0/1 Switch(config)#monitor session 1 source interface gigabitEthernet 0/2 both Switch(config)#monitor session 1 source interface gigabitEthernet 0/3 both
• 双工模式: Switch(config-if)#duplex ? auto Enable AUTO duplex configuration full Force full duplex operation half Force half-duplex operation
Switch(config-if)#duplex auto Switch(config-if)# • 端口描述 Switch(config-if)#description vlan 10 trunk Switch(config-if)#
• 全局模式下进入端口后,可以对端口进行配置。 Switch#conf t Switch(config)#interface gigabitEthernet 0/1 Switch(config-if)# 批量修改端口 range命令
端口速率: Switch(config-if)#speed ? 10 Force 10 Mbps operation 100 Force 100 Mbps operation 1000 Force 1000 Mbps operation auto Enable AUTO speed configuration Switch(config-if)#speed auto Switch(config-if)#
Cisco交换机详细配置及命令说明

Cisco交换机的概述交换机根据OSI层次通常可分为第2层交换机和多层交换机。
通常所说的交换机指第2层交换机也叫LAN交换机(第二层MAC地址进行交换);多层交换机与第2层交换机工作方式类似,除了使用第二层MAC地址进行交换之外,还使用第3层网络地址。
交换机的基本配置3、电缆连接及终端配置如图11-8所示,接好PC机和交换机各自的电源线,在未开机的条件下,把PC机的串口1(COM1)通过控制台电缆线与交换机的Console端口相连,即完成设备连接工作。
交换机Console端口的默认参数如下:端口速率:9600b/s;数据位:8;奇偶校验:无;停止位:1;流控:无。
3、交换机的启动启动过程未用户提供了丰富的信息,我们可以对交换机的硬件结构和软件加载过程有直观的认识,这些信息对我们了解该交换机以及对她做相应的配置很有帮助,另外部件号、序列号、版本号等信息再产品验货时都是非常重要的信息。
3、交换机的基本配置在默认情况下,所有接口处于可用状态并且都属于VLAN1,这种情况下交换机就可用正常工作了,为了方便管理和使用,首先应对交换机做基本的配置,最基本的配置可以通过启动时的对话框配置模式完成,也可以在交换机启动后再进行配置。
(1)配置Enable口令和主机名。
在交换机中可以配置使能口令(Enable password)和使能密码(Enable secret),一般情况下只需配置一个就可以,当两者同时配置时,后者生效。
这两者的区别是使能口令以明文显示而使能密码以密文形式显示。
Switch> (用户执行模式提示符)Switch>enable (进入特权模式)Switch # (特权模式提示符)Switch # config termianal (进入配置模式)Switch (config) # (配置模式提示符)Switch (config) # enable password cisco 设置enable password 为cisco)Switch (config) # enable secret cisco1 (设置enable secret 为cisco1)Switch (config) # hostname C2950 (设置主机名为C2950)C2950 (config) # end (退回到特权模式)C2950 #(2)配置交换机IP地址、默认网关、域名、域名服务器。
CISCO交换机配置手册

CISCO交换机配置手册V1.0作者:乖乖猪目录前言 (4)第一章交换机配置基础 ......................................... 错误!未定义书签。
1.1配置方式 ................................................ 错误!未定义书签。
第二章交换机基本配置 .. (4)2.1用户认证 (5)2.1.1特权口令 (5)2.1.2VTY口令 (6)2.2设备名称 (6)2.3SNMP网管串 (6)2.4交换机管理IP (6)2.5综合实验 (7)第三章交换机高级配置 (7)3.1VLAN(虚拟局域网) (7)3.1.1简介 (7)3.1.2命令 (46)3.1.3案例一(VTP方式) (49)3.1.4案例二(VTP方式) (50)3.2STP(生成树协议) (53)3.2.1简介 (53)3.2.2命令 (67)3.2.3案例一(PVST/PVST+ / Rapid -PVST+ 常用) (68)3.2.4案例二(MST VLAN数量大使用) (71)3.2.5案例三(STP 不常用) (72)3.3E THER C HANNEL (75)3.3.1简介 (75)3.3.2命令 (79)3.3.3案例一(强制模式) (80)3.3.4案例二(PAGP模式) (82)3.3.5案例三(LACP模式) (84)3.3.6案例四(交换机与服务器) (85)3.3.7案例五(三层模式) (94)3.4HSRP(思科私有) (95)3.4.1简介 (95)3.4.2命令 (96)3.4.3案例一 (97)3.4.4案例二 (111)3.4.5案例三 (116)3.5VRRP (119)3.5.1简介 (119)3.5.2命令 (124)3.5.3案例一 (125)3.5.4案例二 (132)3.6DHCP (133)3.6.1简介 (133)3.6.2命令 (139)3.6.3案例一 (140)3.6.4案例二 (141)3.6.5案例三 (143)3.7VACL(不常用) (145)3.7.1简介 (145)3.7.2命令 (145)3.7.3案例 (148)3.8端口限速 (151)3.8.1简介 (151)3.8.2案例一(三层交换机QOS) (151)3.8.3案例二(三层交换机风暴控制) (153)第四章日常维护 (155)4.1密码恢复 (155)4.1.1CatOS交换机密码恢复 (155)4.1.2CATALYST 2900,3500XL的密码恢复 (159)4.1.3CATALYST 2940,2950L的密码恢复 (159)4.1.4CATALYST 2955的密码恢复 (159)4.1.5CATALYST 3550,3560,3750的密码恢复 (163)4.1.6CATALYST 6500密码恢复 (164)4.2ISO备份升级 (178)4.2.1TFTP方式 (178)4.2.2Xmodem方式 (180)4.3端口镜像 (182)4.3.1简介 (182)4.3.2命令 (183)4.3.3案例 (185)4.4交换机堆叠 (193)4.4.1简介 (193)4.4.2命令 (198)4.4.3案例一(3750) (199)第五章专业术语解释 (204)5.1冲突域、广播域 (204)5.2CSMA/CD (205)5.3交换机的几种主要技术参数详解和计算 (206)5.4POE (213)前言本手册是作者多年学习整理汇编而成,主要目的是方便大家设备调试使用。
(完整版)思科交换机配置维护手册

思科交换机配置维护手册目录一、端口配置1.1 配置一组端口当使用interface range命令时有如下的规则:•有效的组范围:o vlan从1 到4094o fastethernet槽位/{first port} - {last port}, 槽位为0o gigabitethernet槽位/{first port} - {last port},槽位为0o port-channel port-channel-number - port-channel-number, port-channel号从1到64•端口号之间需要加入空格,如:interface range fastethernet 0/1 – 5是有效的,而interface range fastethernet 0/1-5是无效的.•interface range命令只能配置已经存在的interface vlan•所有在同一组的端口必须是相同类别的。
见以下例子:Switch# configure terminalSwitch(config)# interface range fastethernet0/1 - 5Switch(config-if-range)# no shutdown以下的例子显示使用句号来配置不同类型端口的组:Switch# configure terminalSwitch(config)# interface range fastethernet0/1 - 3, gigabitethernet0/1 - 2 Switch(config-if-range)# no shutdown1.2 配置二层端口1.2.1 配置端口速率及双工模式Switch# configure terminalSwitch(config)# interface fastethernet0/3 Switch(config-if)# speed 10Switch(config-if)# duplex half1.2.2 端口描述1.2.3 配置三层口Catalyst 3750支持三种类型的三层端口: •SVIs: 即interface vlan•三层以太网通道口(EtherChannel)•.路由口:路由口是指某一物理端口在端口配置状态下用no switchport命令生成的端口所有的三层都需要IP地址以实现路由交换配置步骤如下:配置举例如下:Switch# configure terminalEnter configuration commands, one per line. End with CNTL/Z.Switch(config)# interface gigabitethernet0/2Switch(config-if)# no switchportSwitch(config-if)# ip address 192.20.135.21 255.255.255.0 Switch(config-if)# no shutdownSwitch(config-if)# endshow ip interface命令:Switch# show ip interface gigabitethernet0/2 GigabitEthernet0/2 is up, line protocol is upInternet address is 192.20.135.21/24Broadcast address is 255.255.255.255Address determined by setup commandMTU is 1500 bytesHelper address is not setDirected broadcast forwarding is disabled<output truncated>1.3 监控及维护端口1.3.1 监控端口和控制器的状态主要命令见下表:举例如下:Switch# show interfaces statusPort Name Status Vlan Duplex Speed TypeGi0/1 connected routed a-full a-100 10/100/1000Base TXGi0/2 wce server 20.20.2 disabled routed auto auto 10/100/1000Base TX Gi0/3 ip wccp web-cache notconnect routed auto auto 10/100/1000Base TX Gi0/4 notconnect routed auto auto 10/100/1000Base TX Gi0/5 notconnect routed auto auto 10/100/1000Base TX Gi0/6 disabled routed auto auto 10/100/1000Base TX Gi0/7 disabled routed auto auto 10/100/1000Base TX Gi0/8 disabled routed auto 100 10/100/1000Base TX Gi0/9 notconnect routed auto auto 10/100/1000Base TX Gi0/10 notconnect routed auto auto 10/100/1000Base TX Gi0/11 disabled routed auto auto unknownGi0/12 notconnect routed auto auto unknownSwitch# show interfaces fastethernet 0/1 switchportName: Fa0/1Switchport: EnabledAdministrative Mode: static accessOperational Mode: downAdministrative Trunking Encapsulation: dot1qNegotiation of Trunking: OffAccess Mode VLAN: 1 (default)Trunking Native Mode VLAN: 1 (default)Trunking VLANs Enabled: ALLPruning VLANs Enabled: 2-1001Protected: falseUnknown unicast blocked: disabledUnknown multicast blocked: disabledVoice VLAN: dot1p (Inactive)Appliance trust: 5Switch# show running-config interface fastethernet0/2Building configuration...Current configuration : 131 bytes!interface FastEthernet0/2switchport mode accessswitchport protectedno ip addressmls qos cos 7mls qos cos overrideend1.3.2 刷新、重置端口及计数器Clear命令目的clear counters [interface-id] 清除端口计数器.clear interface interface-id重置某一端口的硬件逻辑clear line [number | console 0 | vty number] 重置异步串口的硬件逻辑Note clear counters 命令只清除用show interface所显示的计数,不影响用snmp得到的计数举例如下:Switch# clear counters fastethernet0/5Clear "show interface" counters on this interface [confirm] ySwitch#*Sep 30 08:42:55: %CLEAR-5-COUNTERS: Clear counter on interface FastEthernet0/5by vty1 (171.69.115.10)可使用clear interface或clear line命令来清除或重置某一端口或串口,在大部分情况下并不需要这样做:Switch# clear interface fastethernet0/51.3.3 关闭和打开端口使用no shutdown命令重新打开端口.举例如下:Switch# configure terminalSwitch(config)# interface fastethernet0/5Switch(config-if)# shutdownSwitch(config-if)#*Sep 30 08:33:47: %LINK-5-CHANGED: Interface FastEthernet0/5, changed state to a administratively downSwitch# configure terminalSwitch(config)# interface fastethernet0/5Switch(config-if)# no shutdownSwitch(config-if)#*Sep 30 08:36:00: %LINK-3-UPDOWN: Interface FastEthernet0/5, changed state to up二、配置VLAN2.1 VLAN论述一个VLAN就是一个交换网,其逻辑上按功能、项目、应用来分而不必考虑用户的物理位置。
cisco网络交换机配置手册 061201
cisco网络交换机配置手册 061201cisco网络交换机配置手册-061201思科网络交换机配置手册目录一、网络拓扑3 II。
连接设备31的方法。
从控制台连接:32。
远程telnet连接3。
Cisco交换机41的基本配置方法。
配置设备特权模式密码42。
配置虚拟终端线路vty(虚拟终端)43。
定义、删除(恢复初始)设备名称44。
配置SNMP网络管理字符串55。
创建、修改、删除VLAN,并将VLAN命名为56。
将一个或一组端口划分为VLAN 57。
配置端口工作模式68。
配置端口速率69。
配置一个或多个VLAN网关610。
配置的交换机设备611的管理地址。
为端口612配置一个或多个地址。
将设备互联端口设置为中继,让其传递VLAN 信息713。
创建一个新的端口通道,并将多个端口分成这个端口通道714。
删除端口通道,并删除端口通道715下的端口。
在第3层交换机716上配置静态路由。
将源端口的流入或流出流镜像到目标端口717。
使用show命令8i18.限流方式:1119。
ACL 1120的应用方法。
在两台6509 1221上配置HSRP。
配置端口13的MAC端口设置IV.交换机13的日常维护ii一、网络拓扑参见三地网络拓扑图。
二、连接设备的方法1、从console连接:使用控制台电缆和适配器将交换机的控制台端口与电脑的串行端口连接起来,如下所示:设置如下图(默认设置):2.远程telnet连接给交换机配置了管理地址,就可以直接采用远程telnet登陆进入交换机了,但是必须先配置linevty的密码和enable密码才能允许远程登陆。
三三、cisco交换机基本配置的方法1.配置设备特权模式密码telnet*.*.*.*开关>进入用户模式switch>enable从用户模式进入特权模式switch#configterminal从特权模式进入全局配置模式switch#exit退出所有配置模式switch#end退出配置模式switch#wr保存配置开关(配置)#enablesecretcisco123dd设置权限模式加密密码(机房使用)开关(配置)#enablepasswordcisco123dd设置权限模式不加密密码开关(配置)#服务密码加密DD加密所有密码2、配置虚拟终端线路vty(virtualtypeterminal)开关(配置)#linevty04switch(config-line)#login--让设备回显一个要求输入口令的提示switch(config-line)#passwordciscoddtelnet统一密码开关(配置行)#exec timeout100dd设备超时为10分零秒switch(config)#linevty04开关#(配置行)#loginlocaldd设置本地身份验证模式开关(配置)#用户名ZhangXYPassword****开关(配置)#nousernamezhangxy3、定义、删除(恢复初始)设备名称开关(配置)#主机名测试-29504test-2950(配置)#nohostname4、配置snmp网管串5.创建、修改、删除VLAN,并命名VLANswitch#vlandatabaseswitch(vlan)#vlan100交换机(VLAN)#vlan100namexx(名称通常定义为客户名称或共享网段ID)交换机(VLAN)#novlan100或交换机#conftswitch(config)#vlan100交换机(配置VLAN)#名称xx(名称通常定义为客户名称或共享网段ID)交换机(配置)#novlan1006、将某个端口或者一组端口,划分到vlan交换机(配置)#接口EF0/13(进入单端口配置模式)交换机(配置)#接口AGEF0/1-5(进入一组端口配置模式)交换机(配置)#接口AGEF0/1-5、F0/8-10(进入一组端口配置模式)交换机(配置如果)#(端口描述)description客户名称拼音的全拼(首字母大写)ip=地址带宽操作日期switch(如果配置)#switchportmodeaccessswitch(如果配置)#SwitchPortAccessVLAN100 switch(如果配置)#noshutdownswitch(config-if)#noswitchport(删除端口相关配置)五。
- 1、下载文档前请自行甄别文档内容的完整性,平台不提供额外的编辑、内容补充、找答案等附加服务。
- 2、"仅部分预览"的文档,不可在线预览部分如存在完整性等问题,可反馈申请退款(可完整预览的文档不适用该条件!)。
- 3、如文档侵犯您的权益,请联系客服反馈,我们会尽快为您处理(人工客服工作时间:9:00-18:30)。
2950交换机简明配置维护手册目录说明 (3)产品特性 (3)配置端口 (4)配置一组端口 (4)配置二层端口 (6)配置端口速率及双工模式 (6)端口描述 (7)监控及维护端口 (8)监控端口和控制器的状态 (8)刷新、重置端口及计数器 (10)关闭和打开端口 (10)配置VLAN (11)理解VLAN (11)可支持的VLAN (12)配置正常范围的VLAN (12)生成、修改以太网VLAN (13)删除VLAN (14)将端口分配给一个VLAN (15)配置VLAN Trunks (16)使用STP实现负载均衡 (19)配置Cluster (23)说明本手册只包括日常使用的有关命令及特性,其它未涉及的命令及特性请参考英文的详细配置手册。
产品特性2950是只支持二层的交换机支持VLAN∙到250 个VLAN∙支持VLAN ID从1到4094(IEEE 802.1Q 标准)∙支持ISL及IEEE 802.1Q封装安全∙支持IOS标准的密码保护∙支持标准及扩展的访问列表来定义安全策略∙支持基于VLAN的访问列表监视∙交换机LED指示端口状态∙SPAN及远端SPAN (RSPAN) 可以监视任何端口或VLAN的流量∙内置支持四组的RMON监控功能(历史、统计、告警及事件)配置端口配置一组端口当使用interface range命令时有如下的规则:∙有效的组范围:o vlan从1 到4094o fastethernet槽位/{first port} - {last port}, 槽位为0o gigabitethernet槽位/{first port} - {last port},槽位为0o port-channel port-channel-number - port-channel-number, port-channel号从1到64∙端口号之间需要加入空格,如:interface range fastethernet 0/1 – 5是有效的,而interface range fastethernet 0/1-5是无效的.∙interface range命令只能配置已经存在的interface vlan∙所有在同一组的端口必须是相同类别的。
见以下例子:Switch# configure terminalSwitch(config)# interface range fastethernet0/1 - 5Switch(config-if-range)# no shutdownSwitch(config-if-range)#*Oct 6 08:24:35: %LINK-3-UPDOWN: Interface FastEthernet0/1, changed state to up*Oct 6 08:24:35: %LINK-3-UPDOWN: Interface FastEthernet0/2, changed state to up*Oct 6 08:24:35: %LINK-3-UPDOWN: Interface FastEthernet0/3, changed state to up*Oct 6 08:24:35: %LINK-3-UPDOWN: Interface FastEthernet0/4, changed state to up*Oct 6 08:24:35: %LINK-3-UPDOWN: Interface FastEthernet0/5, changed state to up*Oct 6 08:24:36: %LINEPROTO-5-UPDOWN: Line protocol on Interface FastEthernet0/05, changed state to up*Oct 6 08:24:36: %LINEPROTO-5-UPDOWN: Line protocol on Interface FastEthernet0/3, changedstate to up*Oct 6 08:24:36: %LINEPROTO-5-UPDOWN: Line protocol on Interface FastEthernet0/4, changedstate to up以下的例子显示使用句号来配置不同类型端口的组:Switch# configure terminalSwitch(config)# interface range fastethernet0/1 - 3, gigabitethernet0/1 - 2Switch(config-if-range)# no shutdownSwitch(config-if-range)#*Oct 6 08:29:28: %LINK-3-UPDOWN: Interface FastEthernet0/1, changed state to up*Oct 6 08:29:28: %LINK-3-UPDOWN: Interface FastEthernet0/2, changed state to up*Oct 6 08:29:28: %LINK-3-UPDOWN: Interface FastEthernet0/3, changed state to up*Oct 6 08:29:28: %LINK-3-UPDOWN: Interface GigabitEthernet0/1, changed state to up *Oct 6 08:29:28: %LINK-3-UPDOWN: Interface GigabitEthernet0/2, changed state to up *Oct 6 08:29:29: %LINEPROTO-5-UPDOWN: Line protocol on Interface GigabitEthernet0/ 1, changed state to up*Oct 6 08:29:29: %LINEPROTO-5-UPDOWN: Line protocol on Interface FastEthernet0/ 2, changed state to up*Oct 6 08:29:29: %LINEPROTO-5-UPDOWN: Line protocol on Interface FastEthernet0/ 3, changed state to up配置二层端口2950的所有端口缺省的端口都是二层口,如果此端口已经配置成三层端口的话,则需要用switchport来使其成为二层端口。
配置端口速率及双工模式可以配置快速以太口的速率为10/100Mbps及千兆以太口的速率为10/100/1000-Mbps; 但对于GBIC端口则不能配置速率及双工模式,有时可以配置nonegotiate,当需要联接不支持自适应的其它千兆端口时Switch# configure terminalSwitch(config)# interface fastethernet0/3Switch(config-if)# speed 10Switch(config-if)# duplex half端口描述Use the no description interface configuration command to delete the description.This example shows how to add a description on Fast Ethernet interface 0/4 and to verify the description:Switch# config terminalEnter configuration commands, one per line. End with CNTL/Z.Switch(config)# interface fastethernet0/4Switch(config-if)# description Connects to MarketingSwitch(config-if)# endSwitch# show interfaces fastethernet0/4 descriptionInterface Status Protocol DescriptionFa0/4 up down Connects to Marketing 监控及维护端口监控端口和控制器的状态主要命令见下表:举例如下:Switch# show interfaces statusPort Name Status Vlan Duplex Speed TypeGi0/1 connected routed a-full a-100 10/100/1000Base TXGi0/2 wce server 20.20.2 disabled routed auto auto 10/100/1000Base TX Gi0/3 ip wccp web-cache notconnect routed auto auto 10/100/1000Base TX Gi0/4 notconnect routed auto auto 10/100/1000Base TX Gi0/5 notconnect routed auto auto 10/100/1000Base TX Gi0/6 disabled routed auto auto 10/100/1000Base TX Gi0/7 disabled routed auto auto 10/100/1000Base TX Gi0/8 disabled routed auto 100 10/100/1000Base TX Gi0/9 notconnect routed auto auto 10/100/1000Base TX Gi0/10 notconnect routed auto auto 10/100/1000Base TX Gi0/11 disabled routed auto auto unknownGi0/12 notconnect routed auto auto unknownSwitch# show interfaces fastethernet 0/1 switchportName: Fa0/1Switchport: EnabledAdministrative Mode: static accessOperational Mode: downAdministrative Trunking Encapsulation: dot1qNegotiation of Trunking: OffAccess Mode VLAN: 1 (default)Trunking Native Mode VLAN: 1 (default)Trunking VLANs Enabled: ALLPruning VLANs Enabled: 2-1001Protected: falseUnknown unicast blocked: disabledUnknown multicast blocked: disabledVoice VLAN: dot1p (Inactive)Appliance trust: 5Switch# show running-config interface fastethernet0/2Building configuration...Current configuration : 131 bytesinterface FastEthernet0/2switchport mode accessswitchport protectedno ip addressmls qos cos 7mls qos cos overrideend刷新、重置端口及计数器Note clear counters 命令只清除用show interface所显示的计数,不影响用snmp得到的计数举例如下:Switch# clear counters fastethernet0/5Clear "show interface" counters on this interface [confirm] ySwitch#*Sep 30 08:42:55: %CLEAR-5-COUNTERS: Clear counter on interface FastEthernet0/5by vty1 (171.69.115.10)可使用clear line命令来清除或重置某一端口或串口,在大部分情况下并不需要这样做:Switch# clear interface fastethernet0/5关闭和打开端口使用no shutdown命令重新打开端口.举例如下:Switch# configure terminalSwitch(config)# interface fastethernet0/5Switch(config-if)# shutdownSwitch(config-if)#*Sep 30 08:33:47: %LINK-5-CHANGED: Interface FastEthernet0/5, changed state to a administratively downSwitch# configure terminalSwitch(config)# interface fastethernet0/5Switch(config-if)# no shutdownSwitch(config-if)#*Sep 30 08:36:00: %LINK-3-UPDOWN: Interface FastEthernet0/5, changed state to up 配置VLAN理解VLAN一个VLAN就是一个交换网,其逻辑上按功能、项目、应用来分而不必考虑用户的物理位置。
