宾得pentax-fa645镜头使用说明书翻译
Carl Zeiss Planar T 2 80 64 镜头说明书

Planar® T*2/80CONTAX® 645The Carl Zeiss Planar® lens is the most successfulcamera lens design ever created. This nearlysymmetrical layout provides the lens designer withnumerous means to correct aberrations extraordinarilywell, even for wide open apertures. The ideal basis forhigh-performance lenses with great color correction,high speed, flat image plane (this is where the namecomes from) and low distortion. The Planar® design isthe basis for nearly all professional ’workhorse’lenseson earth and in space today.At f/2 the Planar® T* 2/80 lens is the fastest optic inthe Contax® 645 system. There is no faster Planar®lens in medium format photography anywhere. Even atfull aperture the performance of the Planar® T* 2/80lens is so high that professional quality images arereached.Especially so since the Contax® 645autofocus provides for quick and accurate focusing,where manual focusingwould have been too slow or not accurate enough forf/2. So the Planar® T* 2/80 lens is the ideal tool forhandheld photography with decent shutter speeds atlow light levels, like in people photography indoors,celebrity portraits, wedding coverage and similardemanding tasks.With its focal length of 80 mm the Planar® T* 2/80lens records an image with a perspective (sizerelationship between foreground and background) thatis pretty much the way we see the scene with our eyes,like a fast 50 mm lens on a 35 mm SLR. So it is suitedfor almost any task in general photography, whichmakes it a powerful and versatile standard lens in theContax® 645 system.Preferred use: all-purpose, travel, editorial, people,celebrities, candid weddingsCat. No. of lens:10 22 19Entrance pupil*:Number of elements:6Position:40.1mm behind the first lens vertex Number of groups:5Diameter:39.9mmMax. aperture:1:2Exit pupil*:Focal length:80.0mm Position:27.8mm in front of the last lens vertex Negative size:41.5 x 56mm Diameter:45.2mmAngular field 2w:47°Position of principal planes:Mount:Contax 645 Mount H:47.1mm behind the first lens vertexFilter connection:screw-in type, thread M72x0.75H':20.0mm in front of the last lens vertex Focusing range:infinity to 0.7m Back focal distance*:60.0mmAperture scale: 2 - 2.8 - 4 - 5.6 - 8 - 11 - 16 - 22Distance between firstWeight:approx. 524 g and last lens vertex:55.0mm*at infinityPerformance data:Planar® T* 2/80Cat. No. 10 22 191. MTF Diagramsimage center - is entered in mm on the horizontal axis of the graph. TheTransfer Factor) is entered on the vertical axis. Parameters of the graph are the spatial frequencies R in cycles (line pairs) per mm given at the top of this page.The lowest spatial frequencycorresponds to the upper pair of curves, pair. Above each graph, the f-number k is given for which the measurement was made. "White" light means that the measurement was made with a subjectillumination having the approximate spectral distribution of daylight.Unless otherwise indicated, theperformance data refer to large object distances, for which normalphotographic lenses are primarily used.2. Relative illuminanceIn this diagram the horizontal axis gives the image height u in mm and thevertical axis the relative illuminance E, both for full aperture and a moderately and natural light decrease.3. Distortionon the horizontal axis in mm. Thethe relevant image height. A positive value for V means that the actual image point is further from the image center than with perfectly distortion-free imaging (pincushion distortion); a negative V indicates barrel distortion.Subject to change.Printed in Germany 12.07.2001Carl ZeissCamera LensesD-73446 OberkochenTelephone ++49-7364-20-6175Fax ++49-7364-20-4045eMail:**************http://www.zeiss.de/photo。
PENTAX电子下消化道内窥镜中文操作手册

如果您对本说明书中的信息由任何疑问,或存在设备安全性和(或)使用方面的问题,请与当地PENTAX经销商联系。
灭菌说明
本手册中介绍的仪器为可重复使用的次级关键医疗器械。因为此类设备未采用无菌包装,所以在初次使用之前,必须进行严格的 消毒或灭菌。在进行下一个操作过程之前,必须进行正确的清洗和严格的消毒及灭菌程序。
目录
1. 部件名称和功能 .......................................................................................................................................... 1 1-1. 电子内窥镜 ....................................................................................................................................... 1 1-2. 附件 .................................................................................................................................................. 3 1-3. 影像处理机 ....................................................................................................................................... 4
关于宾得手动镜头的使用以及机身设置细节

关于宾得手动镜头的使用以及机身设置细节遇到了好多朋友,都是第一次尝试使用手动镜头。
可以说踏出这一步,是绝对值得的,因为这会让你明白你每按一次快门,是需要付出多少的努力。
尊重你手中的相机,不要认为啪啪啪的乱按快门是一件很潇洒的事情。
也不用太心疼你的相机,这本来就是拿来用的大玩具。
有时候,用这些手动镜头,会带给人一种还在用胶片的错觉。
选景,构图,调试光圈,测光。
憋着一口气,然后慢慢的转动对焦环,看着景物在你的取景器内慢慢清晰,最后落下快门。
这种感觉真是太美妙了。
废话说完,接下来说一说第一次使用时的一些技巧和注意事项。
其实我接下来要说的,在宾得相机的说明书上能找到一部分,在网上的帖子里也能找到一部分。
我现在所做的,充其量就是将这些资料整理一下,然后加上一些自己的见解,再用简单易懂的语言来复述一遍。
如过我有什么遗漏,或者是错误的地方,还望大家不吝指教,非常感谢,再次感谢!一、宾得数码机身使用P K口的手动镜头宾得口数码机身:通常我们所见的就是K10D,K20D,KR,K5,K-01,二傻这些,此外就是三星的G X10.PK口手动镜头:常见的有原厂的K,M,A,系列。
副厂的有腾龙百搭口系列,理光,蔡司ZK,确善能,威达,凤凰等等这些。
通常,我们所接触到的,都是原厂的K,M,A系列,K和M,都是第一代的PK卡口,光溜溜的屁股,什么触点都没有,属于全手动镜头,光圈和对焦,都需要手动设定。
而A系列的镜头,在屁股上出现了电子触点,电子触点的出现,使机身可以读取镜头的光圈信息,并且可以由机身波轮来控制光圈,非常的实用。
先谈一下K和M这一类的全手动镜头,在机身上使用的操作步骤。
宾得全站仪使用教程共26页PPT

4、打开和关闭电源
按电源键[POWER],显示初始画面 (电源键[POWER]同样用于关闭电源。)
几秒钟后,出现电子气泡用整平螺丝将气泡居中,按 [ENT]进入测角测距屏幕。
三、角度测量
按两次该键锁定当前显示水平角
F4
调出改变目标长数:温度、气压设置的屏幕
F5
A B 模式屏转换
F1
光标左移
F2
光标右移
F1
屏幕上向后移5项
F2
屏幕上向前移5项
F3
光标上移
F4
光标下移
F3
按下照明键,十字丝照明
F4
按下照明键,改变LCD的对比度
改变LCD的照明状态(按下照明键)
F5
清除数值
F5
打开选择窗口
1、对中整平
2、十字丝调整
① 取下望远镜的盖子。 ② 将望远镜对准一个明亮的目标,旋转目镜调焦环。 ③ 从目镜中看出去,调节目镜调焦环,直到目镜中的十字
丝最清晰为止。
3、照准目标
①松开望远镜制动螺旋及水平制动螺旋。 ②用瞄准器对准目标。 ③将水平制动螺旋及垂直制动螺旋拧紧。 ④调节目镜。 ⑤通过望远镜瞄准目标,旋转对焦环AF环,当目标能看清
5. LD激光导向
① 当按下[LD 点]键时,激光导向功能打开,并且激 光符号在屏幕的左方显示.
② 如果[激光]键按下,并且[LD 点]按下时,当激光 功能已打开时,激光功能关闭.
• 在太阳光十分强的户外,很难发现激光点 • 激光束不能穿过望远镜 • 请在激光束中心做标志 • 不要对着激光看。
二、测前准备
震撼5140万像素中画幅宾得645Z评测首发

震撼5140万像素中画幅宾得645Z评测首发震撼5140万像素中画幅宾得645Z评测首发2014-09-11 05:17:00 [中关村在线原创] 作者:陈帅责编:商皛15140万像素中画幅传感器画幅是目前数码相机最核心的一个指标,它的大小决定了相机的定位与素质。
普通卡片相机的画幅大小是1/2.3英寸;微单以及入门级单反相机采用的是APS-C画幅的感光元件;而佳能、尼康的旗舰级单反相机则采用了更大尺寸的全画幅的感光元件。
全画幅就到头了吗?当然不是。
在今年4月份,宾得发布了一款中画幅的数码相机——宾得645Z。
该机采用了一块中画幅43.8mm×32.8mm的CMOS传感器,其面积是全画幅传感器的1.7倍。
更大的感光元件可以为相机带来更好的画面解析力与高感控噪。
今天这款相机伴随着4支高品质镜头来到了我们的评测中心,到底这套组合能给我们带来怎样的使用体验呢?我们拭目以待。
宾得645Z实际上是其上一代产品宾得645D的升级版本,二者在本质上并没有太大的差别,不过它却使用了CMOS传感器。
要知道在2014年以前,还没有一台中画幅相机使用CMOS传感器。
那为何宾得645Z会使用这样一块传感器呢?笔者认为原因有二,首先这块传感器的提供商应该是我们非常熟悉的索尼半导体,不出意外的话它是目前价格最低的中画幅传感器。
除此之外,由于它是CMOS传感器,所以其拥有非常完整的降噪电路,这样一来相机在暗光环境中就可以获得比CCD相机更加干净、纯粹的画质。
一机四镜评测即将开始鉴于本篇评测的内容量实在是过于庞大,因此笔者特意给出了相关页面的传送门,无论你是想先看外观还是先看样张,都可以方便的通过下方的传送门直达跳转。
首先笔者还是先列出宾得645Z的详细性能参数,好让大家对这款产品有一个大概的了解。
·全新的5140万像素CMOS传感器尺寸为43.8mm×32.8mm无光学低通滤镜·每秒3张连拍带有追焦最多一次拍摄30张JPEG文件·总共拥有27个对焦点其中25个十字形·86000点测光系统·支持1080/30p视频支持4K延迟视频·单向翻转屏分辨率720×480 3.2寸·双SD卡槽支持UHS-1标准支持Wi-Fi SD卡·最高快门速度1/4000秒 10万次寿命·ISO范围 100-204800·铝合金防滴防尘机身产品:645Z(单机) 宾得数码相机2全镁铝合金外壳设计·全镁铝合金外壳设计既然是中画幅相机,那外观方面自然要比全画幅相机霸气不少。
宾得胶片单反使用说明书

宾得胶片单反使用说明书文档冲亿季,好礼乐相随mini ipad移动硬盘拍立得百度书包包里来尽量减小温度快速改变所带来的影响。
极低的温度将会降低电池的使用效率。
因此相机在低温下工作时应采取保护措施。
在拍摄前才放入电池。
在极低的温度下使用新的电池。
Page 41 相机维护清洁:.始终确保取景器目镜,镜头,滤镜干净。
首先,使用气吹和镜头刷去除表面的浮尘,不要尝试用力去除颗粒状的灰尘—这极有可能划伤玻璃。
.像指印一样的污迹可以使用镜头纸或者是薄布小心清理,最好是干净的,洗过几次的柔软棉手帕。
可以在擦拭前向镜头上吹口气,但要确保完全擦除水汽。
商业镜头清洁工具也是非常有效的。
.不要触碰反光镜和快门叶片,反光镜上的灰尘或污点不影响你拍出来好的照片。
.小心不要让相机与任何固体发生磕碰,意外或者粗心的使用可能会损坏机器的内部结构,尽管外面看起来没有损伤。
Page42保持相机干燥:.你的相机是不防水的。
相机上有几个地方可能会进水而导致巨大的损坏。
当下雨或者是碰到喷溅的水的时候注意保护好相机和镜头。
如果你的相机被弄湿了,立刻用干的洁净的布将它弄干。
如果你的相机被水浸透,它可能会出现故障,这种情况下,请尽可能早的将它送到宾得公司的维修中心。
储藏:.当你不使用相机时,相机的放置也是很重要的。
最好存放在凉爽,干燥,清洁,通风的地方。
存放在壁橱或者柜子里可能会因为其湿度太大而对相机造成损害,将相机放在包或者箱子里也是不错的选择。
电池维护:.在装入电池前使用干布将电池擦干净,同时捏住电池的边缘进行操作。
油质的接触可能会导致电池轻微的腐蚀。
.在冰点以下的温度,电池可能会由于温度太低而出现故障。
在这种情况下,使用已经温暖的备用电池,直到原来的电池回复室温。
.养成随时准备备用电池在手边的习惯以便有时电池用完了。
另外使用Eveready S76E或者Mallory MS76H或者equvalent。
.不要让孩子玩相机快门按钮。
经常激活测光将大幅度减少电池寿命,同时不要让小孩子玩弄电池。
宾得镜头讲解
宾得镜头讲解:A:A系列手动对焦镜头。
AF/MF:手动/自动对焦全程切换。
AL:Aspherical非球面镜片。
CF Micro:continue focus micro全程微距。
DA:DA镜头是宾得专为APS-C画幅的数码单反相机设计的数码专用镜头,用绿圈标识,无法用在全画幅机型上。
ED:Extra-low Dispersion超低色散镜片。
F:宾得早期的AF镜头卡口。
FA:也是宾得的AF镜头卡口,比F卡口多了两个电子触点。
IF:Inter Focus内对焦。
Limited:限量版镜头,也是宾得高性能、高档次的镜头。
M:M系列手动对焦镜头。
M.O.D:Minimum Object Distance 最近对焦距离。
PowerZoom:电动变焦。
SMC:Super Mluti Coating超级多层镀膜,宾得特有的镜头镀膜技术,抗炫光能力比较强。
Soft Focus:柔焦镜头。
SDM:超声波马达*:*镜是宾得的高档专业镜头,就像佳能的L头一样,俗称星镜。
实例说明:FA* 80-200 F2.8 ED镜头表示焦距为80-200mm、最大光圈恒定F2.8、使用了ED超低色散镜片的宾得专业星镜;而FA31mm F1.8 AL Limited镜头表示焦距为31mm定焦、光圈F1.8、使用了非球面镜片的Limited限量版镜头。
戏说P家镜头群(不包括为数码做优化之DA头)一游侠:轻轻松松,焦段合理,适合云游四方,据说用了LE的FREE技术,色彩出众,两端有歧变,不过变焦头也在所难免,只是价格稍高(3000以上),还据说不是本国人氏(OEM产品)...此将名:民用变焦FA24-90/3.5-4.5 (备选FA28-200)二力士:二力士身怀P家陈年绝技千斤顶POWER ZOOM,可惜身不逢时,空有力量,因为多余且导致体重增加,甚至身价也偏高(2500左右了)。
其实其中的28-105素质很不错的,所以还很有市场。
Pentax LX 快捷使用指南 参考手册说明书
Quick Help/Reference Guide for LX Winder CONTENTSFour 1.5-volt AA-size batteries are required to operate the winder. Alkaline, manganese or rechargeable Nickel Cadmium (Nicad) types may be used• Press the battery cartridge lock release button (BATT.) at the base of the winder until the cartridge pops out slightly• Remove the cartridge from the chamber and insert the four AA-size batteries into the cartridge in accordance with the (+) (-) diagrams on the sides of the cartridge.• Place the loaded cartridge inside the battery chamber by sliding it all the way inside until it locks in place.Battery Care* Battery performance tends to vary in accordance with the brand and type. When doing a lot of shooting with the winder, high performance alkaline batteries are recommended, Rechargeable Nicad batteries are also convenient when used in conjunction with a commercially available battery charger, * When replacement is required, replace all four batteries at the same time with equivalent 1.5-volt batteries.* Protect the winder from battery leakage by removing the batteries whenever the winder will not be in use for long periods of time.IMPORTANT! NEVER THROW USED BATTERIES INTO FIRE OR EXCESSIVE HEAT TO PROTECT AGAINST EXPLOSION: ALWAYS KEEP BATTERIES OUT OF THE REACHOF CHILDREN.ATTACHING/DETACHING THE WINDERAttaching the Winder• Hold the base of the camera away from the light and remove the caps covering the camera film transport and auto rewind couplings. Screw both caps into the cap holders on top of the winder to prevent loosing them.CAUTION: When attaching the winder with film already loaded in the camera, be sure to hold the base of the camera away from sunlight or other bright lighting sources. Until the winder is fully coupled with the camera, there is possibility that bright lighting seeping through the auto rewind coupling could adversely affect your exposures. Likewise, when detaching the winder before the film roll has been completed and rewound, be sure to replace the auto rewind coupling cap on the camera immediately.• Set the winder C/S dial to OFF. Attach the winder to the camera by lining up the attachment screw with the tripod socket at the base of the camera. Making sure that all contact points line up properly, secure the winder to the camera by turning the thumbscrew clockwise. Be sure to tighten the screw firmly to ensure proper electrical contact.To Detach the WinderLoosen the screw and separate the winder and the camera. Replace the coupling caps over the couplings at the base of the camera immediately. Be sure to replace the auto rewind cap immediately to avoid the danger of ruining future exposures when shooting without the winderFilm Loading/Blank Exposures (With Unloaded Cameras):Set the camera shutter dial to a manual shutter speed and load the film in the usual manner by extending the film leader and inserting it between the magic needles of the take-up sPool. At this point, you may continue by making blank exposures in the usual manner (provided the winder C/S dial is set to OFF) or you can make them with the winder as follows:• Set the winder C/S dial to S, and press the shutter button so that the film wraps around the take-up spool. Then, press the shutter button again until the film perforations engage both sides of the sprocket. Close the back cover and take up slack with the film rewind crank. Press the shutter button successively until the dot representing "1" registers in the exposure counter window. Make your exposures as described in the "Shooting" on the next page.Praparations with Loaded Cameras:If the shutter is uncocked, temporarily set the C/S dial to''S" and press the shutter button once to cock the shutter: proceed to the "Shooting" section beginning on the next page. If the shutter is already cocked (the shutter cocked indicator on top of the camera wili be red) proceed directly to the "Shooting" section on the next page.SHOOTINGThe Winder LX features two modes of film advance which are controlled by the C/S dial on the back of the winder. The S setting permits single-frame film advance, and the "C" setting, consecutive or sequential film advance. When the dial is set to OFF, the automatic film advance system disengagesfrom the camera."S" (Single-Frame) Setting:If you wish only to use the winder to advance the film after each individual exposure, set the winder C/S dial to S and press the shutter button: when the exposure is completed, the film advances automaticaliv to the next exposure and prepares the shutter for shooting. Press the shutter button again for each additional exposure. (It is not necessary to hold the shutter button depressed for the duration of the exposure with long exposures.)NOTE: If the shutter is not cocked when you set the dial to "S" it will be necessary to press the shutter button twice before you can take the picture: once to cock the shutter (the shutter cocked indicator on top of the shutter will turn red) and again to release the shutter."C" (Consecutive Exposure) Setting:When you wish to use the winder to capture the action in sequence as it happens, set the dial to "C" and release the shutter: the winder advances the film continuously in sequence until you let go of the shutter button or the film runs out. Film advance rate varies in synchronization with shutter operation and battery condition; synchronization is not featured at the "B" shutter speed setting~ When shutter speeds in excess of 1/60 sec. are used the top film advance rate of 2 frames-per-second is possible.NOTE: If the shutter is not cocked when you set the dial to "C' shutter release will be delayed when you press the shutter button until the film advances. To avoid this delay, press the shutter button once quickly and let go before beginning the shooting sequence (the shutter is cocked if the shutter cocked indicator on top of the camera turns red).Exposure Check:When the winder is attached to the camera the stroke required for shutter release is shortened somewhat. As a precaution against accidental shutter release while checking the exposure with the winder attached press the shutter button very lightly. (If you; fingers aren't steady, temporarily set the C/S dial to OFF before checking the exposure.)LED Indicator:The LED Indicator on the back of the winder flickers each time the take-up spool turns and again when you release the shutter as a signal that the winder is functioning properly. When you reach the end of the film, it glows continuously to indicate that it's time to rewind the film (see page 16).IMPORTANT: Although the LED flickers when the take-up spool rotate', it does not confirm that the film is taking up. For this reason, when you make your blank exposures after loading the camera be sure to check that the film rewind knob is rotating.SHOOTING PRECAUTIONSThe OFF-SettingWhen the CIS dial is set to OFF, the winder is disengaged from the camera, so it's a good idea to keep the dial set to "C" or "S" while shooting so as not to miss shooting opportunities, However, when storing the camera and the winder, the dial should be set to OFF.Also, when not using the winder for long periods of time, set the dial to OFF and remove the battery cartridge to guard against battery leakage.IMPORTANT: When you reach the end of the film roll and do not intend to rewind the film immediately, promptly set the C/S dial to OFF. Batteries wili deplete with the C/S dial set to "C" or "S" while the LED is continuously lit.Self-TimerTo use the self-timer with the winder attached, set the C/S dial to OFF beforehand. The self-timer does not function while the automatic film advance system is engaged.Multiple ExposuresTo make multiple exposures with the winder attached, set the C/S dial to OFF before releasing the shutter. Make the exposure in the same manner as you would without the winder attached, but by pressing the winder film rewind release button once for each additional exposure on the same frame. The C/S dial may be set back to C or S before the last multiple exposure for automatic advance to the next frame. NOTE: Do not use the automatic film rewind system to make multiple exposures on previously exposed frames (see page 19).TripodWhen required, a tripod may be affixed swiftly to the tripod socket at the base of the winder, Be sure that the length of the tripod screw does not exceed the depth of the socket: if the screw is too long and tightened tightly it could damage the camera's internal mechanism.Shooting in Cold ClimatesBattery performance tends to deteriorate when temperatures drop to near or below freezing, Although normal functioning will return when the batteries have been subjected to warmer temperatures for sometime, when shooting in cold climates, it's a good idea to have spare sets of batteries on hand wrapped or stored in a pocket etc., to keep warm.Low BatteriesWhen the film advance rate becomes sluggish, it indicates that batteries are low. When this occurs, change all four batteries promptly to ensure uninterrupted winder operation. If batteries become too weak to advance the film, the winder will stop in-between frames and the LED indicator will glow continuously. Normal operation will resume when you change the batteries. If this should occur and you are caught without spares, set the C/S dial to OFF and wind the film manually the rest of the way for the frame in use.Shooting Without Camera BatteriesShould camera battery failure occur while operating the camera in the automatic mode or within the electronically controlled manual shutter speed range (1/60 sec. - 4 sec.), the mirror will lock up as a warning. To continue picture-taking, leave the Winder C/S dial where it is, and turn the shutter speed dial to any of the mechanically operated shutter speeds (112000 sec. to "X").AUTOMATIC FILM REWINDWinder LX is equipped with a convenient automatic film rewind mechanism that enables you to rewind a complete 36-exposure film roll in just seconds.• When you reach the end of the film, the winder will cease to operate and the LED indicator on the back will light continuously as a signal that it's time to rewind the film. As a precaution, however, double check by glancing at the exposure counter to make sure that it has reached the last exposure (this is because the LED also lights continuously when battery voltage is low).• Keeping the C15 dial set either to S or C, press the film rewind button at the base of the winder and slide the film rewind lever clockwise. The LED indicator will go out and the film will rewind automatically. When the film is rewound inside its cartridge, the motor will stop and the film rewind lever will disengage. Glance at the exposure counter to make sure that the film is rewound all the way back; then, open the camera back to remove the cartridge.NOTE: If the film fails to rewind when you slide the film rewind lever clockwise, you may have pressed the battery chamber lock release instead of the film rewind button by mistake. If so, push the battery cartridge back in, press the film rewind button and try again.Manual Film Rewind: The film also may be rewound manually during emergencies such as battery failure. In this instance, set the C/S dial to OFF and press the film rewind button. Keeping the button depressed, rewind the film with the camera film rewind crank all the way back into the cartridge.CAUTION: During automatic film rewind, synchronization with the camera's two-way exposure counter is not sufficiently accurate to permit use of the random access multiple exposure feature of the LX as described in the,camera instruction manual. If you wish to make random access multiple exposures while the winder is attached, set the CiS dial to OFF, and keeping the film rewind button depressed, rewind the film manually, Make the multiple exposure as described in the camera instruction manual.REMOTE CONTROL OPERATION(with optional Remote Control Cord)The winder may be used both for single-frame and consecutive remote control shutter release when it is used in conjunction with the optional Remote Control Cord.Cord Hook-up:• Remove the cap over the remote controlsocket at the side of the winder by grasping itbeneath the rim with your fingernail and pullingit off. Place the cap over the remote releasebutton of the Remote Control Cord to preventloss• Connect the plug of the Remote Control Cordto the winder remote control socket by liningthe plug up with the guides on the terminal andplugging it in.• Other instructions for remote control operationare identical to those for operating the winderwith the camera shutter release. The remoterelease button operates in the same manner asthe camera shutter release button, except thatexposure readings are made with the camerashutter release.• Replace the cap over the winder remotecontrol terminal when no longer using theRemote Control Cord.。
相機使用說明書说明书

可充電電池在使用前需要充電。
購買電池時,未對其充電。
本使用說明書記載使用本產品進行攝影和重播的方法和使用上的注意事項。
使用前,請閱讀完本說明書,以便您能充分地靈活運用本產品的功能。
閱讀後請妥善保管,以便在您需要的時候,能夠立即查閱。
關於安全警示為確保安全使用相機,請務必在使用前詳細閱讀安全警示。
關於攝影測試請務必預先進行攝影測試,確認相機能夠正常地進行記錄。
關於著作權以著作權為目的的書籍、雜誌、音樂等作品,限定在個人或家庭內以及基於此類目的的範圍內使用。
除此之外,禁止擅自進行複製和改動。
關於使用萬一因本產品的問題導致無法記錄和重播時,不負責記錄內容的補償,敬請諒解。
關於保用證在海外使用時,萬一出現故障、問題時,關於在當地的售後服務及相關費用不負責任,敬請諒解。
關於電波故障和其他電子設備進行連接設置時,可能會出現相互產生不良影響的情況。
特別是近處有電視機或收音機時會出現雜音。
此時,請進行如下處置。
• 盡可能的遠離電視機或收音機。
• 改變電視機或收音機等的天線方向。
• 使用其他的插座。
嚴禁擅自轉載本書的部分或全部內容。
© 2010所有版權歸所有。
關於本書內容,將來若有變更,恕不另行通知。
本書內容的作成過程中力求圓滿,萬一發現不明點及錯誤、記載遺漏等,請按照卷末的通訊方式和我們聯繫。
Microsoft、Windows、Windows Vista、Windows 7™、Internet Explorer是美國Microsoft Corporation在美國及其他國家登錄的註冊商標。
Macintosh及Mac OS為Apple Inc.在美國與其他國家的註冊商標。
Adobe、Adobe標誌和Adobe Reader是Adobe Systems Incorporated在美國與其他國家的商標。
公司名稱及產品名稱是各公司的商標或註冊商標。
警告符號在本操作說明書和相機上的各種符號是為了您安全正確地使用本機以避免您和他人的人身安全以及財產受到損害。
宾得645D评测报告

4000万像素中画幅宾得645D评测报告宾得645D是一台4000万像素的中画幅单反,套机售价大约7万多,是目前最便宜的中画幅单反相机。
与35mm全画幅单反相比,宾得645D拥有更高的像素值,而且传感器面积也要大很多,不仅可以满足高质量商片的输出需求,亦是风光摄影方面的顶级利器。
今天,就让我们来全面了解一下这款“最便宜”中画幅单反相机的魅力!·“最便宜”中画幅单反相机宾得645D外观非常“彪悍”,不管走到哪里,它都是吸引眼球的亮点。
作为一款中画幅单反相机,宾得645D采用了不可换后背设计,因此该机在体积控制方面做得比较到位,机身设计紧凑而且拥有中画幅相机中绝无仅有的防护性能(防尘防水防冻,包括镜头),是户外风光拍摄的顶级设备。
转播到腾讯微博外观彪悍的宾得645D在核心配置方面,宾得645D拥有秒杀所有35mm全画幅单反的实力(当然,价格也是一样)。
该机采用了一块柯达产4000万像素CCD传感器,尺寸为44×33mm,其感光面积是35mm全画幅相机(比如无敌兔、索尼A900、尼康D3X)的1.7倍。
与硕大机身配套的是一支全新设计的DFA645 55mm F2.8 AL [IF] SDM AW镜头,等效焦距为43mm,是一颗645系统的标准镜头。
至于新镜配牛机的画质如何,后文会有详细测试。
首先,我们来看看宾得645D的外观及细节设计。
·整体外观设计:霸气十足!与普通的单反相机相比,宾得645D块头硕大,拿在手上分量十足。
该机外观四四方方,厚度颇为可观,在机身底部和侧面都设有三脚架快装板的接口,不论横拍竖拍都可以很方便的固定。
宾得645D手柄的手柄非常宽大,手持握感很舒适。
宾得645D手持示意图宾得645D手持示意图宾得645D做工扎实,机身外壳由铝镁合金制成,轻巧便携并且非常坚固。
不仅如此,该机机身及镜头都采用了防尘防水设计,即便在恶劣环境下也能很好的完成拍摄任务。
毫不夸张的说,在防护性能方面,宾得645D绝对是中画幅相机中的战斗机。
PENTAX645系列简评

PENTAX645系列简评无论你是仍在坚持胶片摄影的老法师,还是刚入门的小白,胶片摄影那种实打实的感觉都会让你着迷。
反光板升降的机械感,部件“咔哒咔哒“的声音乃至新鲜定影液的味道,这些都是使用数码相机体验不到的。
在低端市场,有着许许多多价格合理的二手135胶片相机;在高端市场,有又大又贵的大画幅胶片相机,甚至有的用的是8×10 Velvia 底片,拍一张起码得70多块钱!当然还有折中的解决方案:中画幅。
如果你痴迷于135胶卷,但又想体验一下中画幅,那Pentax 645不失为一个很好的选择,让你在这二者之间有一个适应的过程。
PENTAX 645 - 伟大的一步中画幅开启了更高成像质量的大门。
正如其名,Pentax 645使用的是6×4.5厘米规格的底片,成像面积比135胶卷大了2.7倍。
与其他非135规格一样,中画幅的拍摄成本较高,这也就使人得慢下来去仔细盘算拍摄的每一张照片。
用645规格拍摄每卷只能拍15张,而135规格可以拍36张,这么一比较,拍摄的时候我们就不得不去考虑成本问题。
Pentax 645–底片成像面积对比Pentax645功能强大而且用到了很多现代化的技术。
有许多用在今天的数码单反上的自动化功能,也有着过去老相机上更加可靠的手动功能。
实际上Pentax 645至今仍在生产,用作一款5000万像素固定后背的中画幅数码相机。
这个下面再说。
我的PENTAX 645之旅我和我妻子已经认识了三十多年,当时她一眼就看出我十分热衷于摄影。
当时我已经有了一套135的设备,还有一台4×5画幅的Graflex Crown Graphic,在家里的自制暗房(一个无窗浴室)中自己冲印照片。
1991年我们的第一个孩子出生了,我终于可以以记录孩子成长为借口,说服我妻子买一台更高画质的相机。
几周后,我们花了1400美元,买了一台在当时最为先进的Pentax 645,配了一颗45mm广角镜头和一颗75mm的标头。
跨越画幅的界限宾得645Z中画幅相机评测

跨越画幅的界限宾得645Z中画幅相机评测一直以来,中画幅数码单反相机与135画幅相比,有着较大的差别。
无论是拍摄方式、机身构造以及操控方式,还有可更换后背(感光元件),中画幅给我们带来了一个全新的体验。
作为一家在胶片时代就推出数款中画幅相机的宾得,更名为理光映像后,在今年发布了旗下第二款也是首款采用CMOS规格感光元件的中画幅数码单反相机——宾得645Z。
上一代产品宾得645D发布还是2010年,当时645D 凭借4000万像素44×33mm的CCD传感器、PRIME IIt图像处理引擎、TTL 相位匹配11点自动对焦系统、7万多元人民币的售价一跃成为了当时售价最偏的中画幅相机。
间隔四年之后的,这款产品的升级产品宾得645Z诞生,在改进了上一代产品的诸多不足之后又增加了很多新的功能,但是就目前的中画幅相机市场而言,全新发布的宾得645Z仍然是最便宜的中画幅相机。
这款产品与其说是120中画幅系统产品,更不如说是一款跨越了120和135两个系统的跨界者。
宾得645Z在操控方式、对焦及测光系统,高ISO性能方面,与135画幅数码单反相机有着较为接近的表现,同时其配备的约5140万有效像素中画幅感光元件(尺寸为43.8×32.8mm)则可以获得相对于135系统更加出色的画质表现。
宾得645Z基本延续了前作645D的外观设计风格,在细节有所改进与飞思、哈苏和玛米亚利图等中画幅产品相比,宾得645Z采用了不可更换后背设计,拍摄者只能使用机身标配的约5140万有效像素中画幅感光元件。
此外,理光映像成为继飞思和哈苏之后,第三个推出CMOS形式感光元件中画幅相机的厂商。
宾得645Z采用了一块约5140万有效像素的CMOS中画幅感光元件,尺寸为43.8×32.8mm。
此外,这款产品还配备了与宾得K-3数码单反相机相同的SAFOX 11自动对焦系统,具备27个相位差检测自动对焦点(中央25点为十字形对焦点、中央3点具备F2.8光圈精度)。
宾得ME super说明书(中文翻译版)
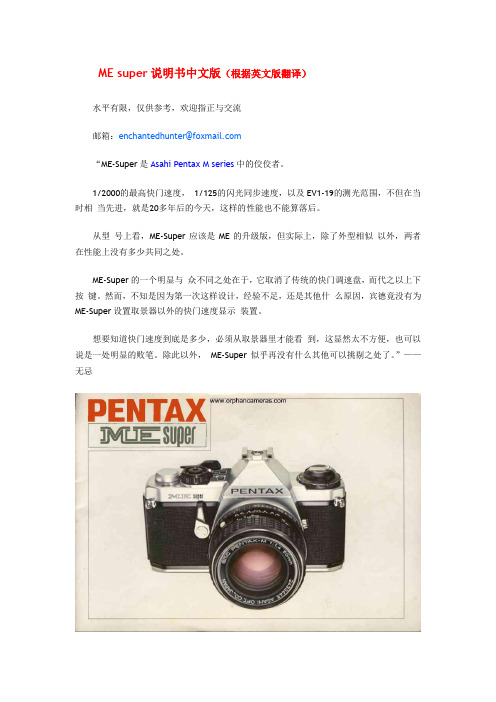
ME super说明书中文版(根据英文版翻译)水平有限,仅供参考,欢迎指正与交流邮箱:enchantedhunter@“ME-Super是Asahi Pentax M series中的佼佼者。
1/2000的最高快门速度,1/125的闪光同步速度,以及EV1-19的测光范围,不但在当时相当先进,就是20多年后的今天,这样的性能也不能算落后。
从型号上看,ME-Super应该是ME的升级版,但实际上,除了外型相似以外,两者在性能上没有多少共同之处。
ME-Super的一个明显与众不同之处在于,它取消了传统的快门调速盘,而代之以上下按键。
然而,不知是因为第一次这样设计,经验不足,还是其他什么原因,宾德竟没有为ME-Super设置取景器以外的快门速度显示装置。
想要知道快门速度到底是多少,必须从取景器里才能看到,这显然太不方便,也可以说是一处明显的败笔。
除此以外,ME-Super似乎再没有什么其他可以挑剔之处了。
”——无忌重要所有宾得镜头及相关系列产品均由宾得公司精心制作。
然而,市面上许多其他公司制作的镜头及相关产品不能保证与宾得产品完全兼容,可能会损坏宾得产品。
因此,宾得公司不承担任何由于使用其他公司的镜头或附件而造成损失的责任。
. 目录基本操作说明“你的ME SUPER 快速教程” (2)部件描述 (4)镜头安装 (6)装入电池 (7)装片和转片 (8)设定胶卷感光速度 (9)曝光模式盘 (10)光圈设置.................................................................:.. (13)对焦和拍摄 (14)在"AUTO"模式下拍摄 (15)曝光补偿 (18)手动曝光.................................:.. (20)握持相机 (26)卸下底片 (27)自动闪光拍摄(AF 200S/AF 160) (28)其他闪光单元 (29)自拍定时/多重曝光 (30)在“Bulb”下使用三脚架/自拍定时拍摄 (31)拍摄指示 (32)景深控制 (34)景深表 (35)测光表耦合范围 (36)红外摄影 (37)使用螺口takumar镜头 (38)光圈全开和自动收缩测光镜头 (40)耐温情况 (41)相机维护 (42)取景器图示 (44)主要规格 (46)欢迎来到我们成长的宾得大家庭!我们知道你即将开始使用你的宾得ME SUPER,我们在2页和3页提供一个“ME SUPER 快速教程”,其中包含“AUTO”模式(也是主要的操作模式)下的基本操作指南,所以你可以马上开始你的摄影之行。
宾得pentax-fa645镜头使用说明书翻译
①对焦环①对焦模式开关②光圈环③光圈锁④滤光镜安装螺纹⑤焦距刻度⑥景深刻度⑦光圈刻度①645A镜头卡口②镜头信息触点③645F镜头卡口④镜头信息触点⑤AF马达⑥关于镜头卡口的名称:FA镜头的镜头卡口,在原来的A卡口上追加了可以自动变焦的AF马达。
故称之为AF卡口。
⑦关于镜头名称与卡口名称:FA镜头的卡口名称为645A F卡口A镜头的卡口名称为645A卡口⑧关于卡口的兼容性:将FA镜头安装于645相机上,或者反之将A镜头安装于645N.645NII相机上的话。
除了无法使用自动变焦功能以外,其他功能无影响。
⑨注意:由于镜头卡口面上附有镜头信息触点以及AF马达,如被划伤或弄脏将导致故障。
请尽量注意。
镜头的安装/更换1.将镜头的红点对准相机上的红点,插入机身,向右旋转,听到“咔嚓”一声表示镜头已固定。
2.取下镜头时,请安住取镜钮,向左旋转镜头。
☆安装镜头时请勿按住取镜钮,否则将导致镜头安装不完全。
☆安装好镜头后,请沿着反方向轻轻回旋,以确保镜头安装完成。
对焦模式切换75mmF2.8镜头①AF模式:如将对焦模式开关推向AF一侧则调为AF模式②MF模式:如将对焦模式开关推向MF一侧则调为MF模式☆切换模式的过程中,有可能旋转到对焦环,请尽可能避免触碰到对焦环。
非75mm2.8的镜头AF模式:将对焦环向外拉动,看到“AUTO FOCUS”标识时即为MF模式☆注意先固定好对焦环MF模式:将对焦环向后拉动,盖住“AUTO FOCUS”标识市即为MF模式光圈使用方法如需使用光圈A(自动)时,请一边按着光圈自动锁定钮,一边把有带A标识的光圈转向白色指标并对齐。
如需从A位置上转开时,请按着光圈自动锁定钮,同时再左旋转。
在相机和镜头之的间隔,如没有携带镜头信息触点并且与螺旋微拍环之类的附件同用时,请吧镜头光圈调开A的位置。
☆如需645N.645NII和FA或是A镜头组合时,即使光圈在A位置以外,光圈值的焦点在取景器内表显示。
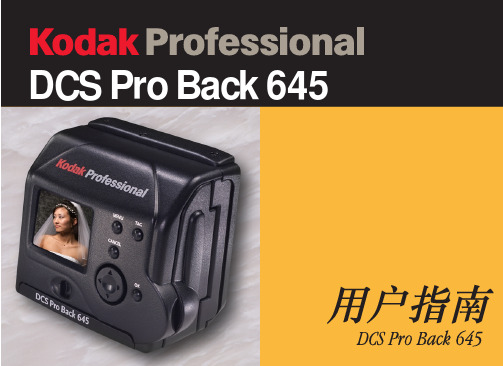
KODAK DCS Pro Back 645数码相机 说明书
目录
Hale Waihona Puke 上一页下一页索引
目录 - 2
目录
特殊情形验证 编辑图像
拍摄工作流程 在相机已连接到计算机时 连接到计算机和电源 启动撷取软件 设备和介质准备工作 撷取和评估 测试图像 撷取图像
使用附送的软件
包含于软件光盘中 .2'$. 352)(66,21$/ '&6 &DSWXUH 6WXGLR '&6 &DSWXUH 6WXGLR .2'$. 352)(66,21$/ '&6 &DPHUD 0DQDJHU '&6 &DPHUD 0DQDJHU .2'$. 352)(66,21$/ '&6 3KRWR 'HVN '&6 3KRWR 'HVN KODAK PROFESSIONAL DCR File Format Module '&6 文件格式模块
宾得镜头
宾得镜头参数小贴士:A:A系列手动对焦镜头。
AF/MF:手动/自动对焦全程切换。
一般长焦镜头在镜身上往往有个AF/MF的转换装置,这样可以通过这个装置而不是去找机身上的AF/MF转换键去控制对焦方式。
AL:Aspherical非球面镜片。
非球面镜片一般用来解决广角和变焦镜头中的眩光和边缘变形等问题,在长焦镜头中也能提高光学素质。
CF Micro:continue focus micro全程微距。
DA:DA镜头是宾得专为APS-C画幅的数码单反相机设计的数码专用镜头,用绿圈标识,无法用在全画幅机型上。
ED:Extra-low Dispersion超低色散镜片。
PENTAX在一些高级的FA*镜头上采用低色散玻璃,尽量减低色散的影响,从而可以大大提高长焦镜头的成像质量。
F:宾得早期的AF镜头卡口。
FA:也是宾得的AF镜头卡口,比F卡口多了两个电子触点。
IF:Inter Focus内对焦。
Limited:限量版镜头,也是宾得高性能、高档次的镜头。
M:M系列手动对焦镜头。
M.O.D:Minimum Object Distance 最近对焦距离。
PowerZoom:电动变焦。
是宾得KAF2卡口镜头的一个与众不同的特点。
镜头内置变焦马达,可以代替手动变焦,有3种变焦速度。
SMC:Super Mluti Coating超级多层镀膜,宾得特有的镜头镀膜技术,抗炫光能力比较强。
Soft Focus:柔焦镜头。
*:*镜是宾得的高档专业镜头,就像佳能的L头一样,俗称星镜。
实例说明:FA* 80-200 F2.8 ED镜头表示焦距为80-200mm、最大光圈恒定F2.8、使用了ED超低色散镜片的宾得专业星镜;而FA31mm F1.8 AL Limited镜头表示焦距为31mm定焦、光圈F1.8、使用了非球面镜片的Limited限量版镜头。
“三公主”: 在宾得粉丝心目中,下面三只镜头是他们的梦中情人。
只要是宾得用户没有不想拥有“三公主”的,毕竟大家都想做“驸马爷”。
宾得镜头详解
常见名词缩写A:A系列手动对焦镜头。
AF/MF:手动/自动对焦全程切换。
AL:Aspherical非球面镜片。
CF Micro:continue focus micro全程微距。
DA:DA镜头是宾得专为APS-C画幅的数码单反相机设计的数码专用镜头,用绿圈标识,无法用在全画幅机型上。
ED:Extra-low Dispersion超低色散镜片。
F:宾得早期的AF镜头卡口。
FA:也是宾得的AF镜头卡口,比F卡口多了两个电子触点。
IF:Inter Focus内对焦。
Limited:限量版镜头,也是宾得高性能、高档次的镜头。
M:M系列手动对焦镜头。
M.O.D:Minimum Object Distance 最近对焦距离。
PowerZoom:电动变焦。
SMC:Super Mluti Coating超级多层镀膜,宾得特有的镜头镀膜技术,抗炫光能力比较强。
Soft Focus:柔焦镜头。
*:*镜是宾得的高档专业镜头,就像佳能的L头一样,俗称星镜。
实例说明:FA* 80-200 F2.8 ED镜头表示焦距为80-200mm、最大光圈恒定F2.8、使用了ED 超低色散镜片的宾得专业星镜;而FA31mm F1.8 AL Limited镜头表示焦距为31mm定焦、光圈F1.8、使用了非球面镜片的Limited限量版镜头。
DA★:内置超声波马达的数码单反相机专用镜头,优异的防尘防滴设计和宾得独创的SP超级防护涂层。
DA:是表示这枚镜头属于数码单反相机专用的意思,并用绿圈标识。
F:是宾得的AF镜头卡口。
FA:也是宾得的AF镜头卡口,多了两个触点。
FA★:是宾得的高档AF镜头,就像佳能的L头一样,俗称星镜。
Limited限量版,是宾得赋予具有高性能、高档次镜头的专用名词,是宾得镜头产品中最为高级的一个镜头产品系列。
SMC(Super Mluti Coating)超级多层镀膜英文全称,标识有SMC的镜头表示它使用了宾得特有的镜头镀膜技术,对画质的提升有帮助,抗眩光能力比较强。
- 1、下载文档前请自行甄别文档内容的完整性,平台不提供额外的编辑、内容补充、找答案等附加服务。
- 2、"仅部分预览"的文档,不可在线预览部分如存在完整性等问题,可反馈申请退款(可完整预览的文档不适用该条件!)。
- 3、如文档侵犯您的权益,请联系客服反馈,我们会尽快为您处理(人工客服工作时间:9:00-18:30)。
①对焦环
①对焦模式开关
②光圈环
③光圈锁
④滤光镜安装螺纹
⑤焦距刻度
⑥景深刻度
⑦光圈刻度
①645A镜头卡口
②镜头信息触点
③645F镜头卡口
④镜头信息触点
⑤AF马达
⑥关于镜头卡口的名称:
FA镜头的镜头卡口,在原来的A卡口上追加了可以自动变焦的AF马达。
故称之为AF卡口。
⑦关于镜头名称与卡口名称:
FA镜头的卡口名称为645A F卡口
A镜头的卡口名称为645A卡口
⑧关于卡口的兼容性:
将FA镜头安装于645相机上,或者反之将A镜头安装于645N.645NII相机上的话。
除了无法使用自动变焦功能以外,其他功能无影响。
⑨注意:由于镜头卡口面上附有镜头信息触点以及AF马达,如被划伤或弄脏将导致故障。
请尽量注意。
镜头的安装/更换
1.将镜头的红点对准相机上的红点,插入机身,向右旋转,听到“咔嚓”一声表示镜头已固定。
2.取下镜头时,请安住取镜钮,向左旋转镜头。
☆安装镜头时请勿按住取镜钮,否则将导致镜头安装不完全。
☆安装好镜头后,请沿着反方向轻轻回旋,以确保镜头安装完成。
对焦模式切换
75mmF2.8镜头
①AF模式:如将对焦模式开关推向AF一侧则调为AF模式
②MF模式:如将对焦模式开关推向MF一侧则调为MF模式
☆切换模式的过程中,有可能旋转到对焦环,请尽可能避免触碰到对焦环。
非75mm2.8的镜头
AF模式:将对焦环向外拉动,看到“AUTO FOCUS”标识时即为MF模式
☆注意先固定好对焦环
MF模式:将对焦环向后拉动,盖住“AUTO FOCUS”标识市即为MF模式
光圈使用方法
如需使用光圈A(自动)时,请一边按着光圈自动锁定钮,一边把有带A标识的光圈转向白色指标并对齐。
如需从A位置上转开时,请按着光圈自动锁定钮,同时再左旋转。
在相机和镜头之的间隔,如没有携带镜头信息触点并且与螺旋微拍环之类的附件同用时,请吧镜头光圈调开A的位置。
☆如需645N.645NII和FA或是A镜头组合时,即使光圈在A位置以外,光圈值的焦点在取景器内表显示。
2.如图箭头所示进行左右旋转。
3.当停止使用相机时,如图上箭头所示方向进行闭合。
☆摄影时,为了确保遮光效果达到最佳,可以使用此方法。
关于光圈值与间隔点:
每个镜头的最大光圈值旁都有一个白色的点,该点表示的是光圈可调整的最小幅度。
例如左图中F2.8旁边的白点表示的是F4的光圈值。
光圈环上没有白点间隔标记的数字就是中间光圈值。
并且,由于光圈刻度的两端较为狭窄,因此没有标注上中间光圈值。
调节光圈时,请勿把光圈设置在没有标注刻度的位置上。
遮光罩
请务必使用与镜头尺寸吻合的遮光罩。
安装了喇叭形遮光罩的情况下,仍然可以在内侧安装滤镜。
遮光罩型号一览表
圆形遮光罩
RH=喇叭形遮光罩
专用遮光罩
关于专业遮光罩:
第13、14页所提及的专业遮光罩全部都是卡口式的。
安装时,请将遮光罩插入镜头前端,向右旋转并固定。
在固定位置上有锁扣,听到咔嚓一声,表示已经固定好了。
取下遮光罩的操作则与上述相反。
镜头前端及遮光罩上有白色点的镜头,请对齐其白点,将遮光罩安装上。
*FA45mmF2.8及FA45~85mmF4.5镜头上安装遮光罩时,请务必将遮光罩上的白点与镜头上的白点对齐后安装。
否则有可能出现重影。
*不使用遮光罩的时候,可将其反置扣在镜头上。
向右旋转固定。
镜头前端及遮光罩上标有白点的情况下,请对齐白点安装。
关于PL滤镜窗口
安装圆形偏光滤镜时,为了能够更容易的安装遮光罩,在部分镜头的专用遮光罩上设有“PL滤镜窗口”。
使用方法:1. 将PL滤镜窗上的滤镜沿着箭头方向滑动取下。
附有“PL滤镜窗口”的镜头型号:
FA35mmF3.5AL(IF)
FA150mmF2.8(IF)
FA300mmF5.6AED(IF)
FA150~300mmF5.6AED (IF)
FA33~55mmF4.5AL
FA55~110mmF5.6
滤光器
安装与镜头尺寸相吻合的滤光器
滤光器使用注意点
若滤光器又出现污渍、碰伤等,请采用与镜头相同的处理方法。
若使用两片滤光器的情形,则有可能出现画面周围变暗的情况,请注意。
(p16~p17)
圆偏光滤光器与画面的明暗度
圆偏光滤光器较一般的滤光器更厚一些。
因此根据安装镜头和使用条件的变化,画面四周可能会有变暗的情况。
☆由于一般的偏光滤光器在自动调焦等情况下精度偏低,请使用圆偏光滤光器。
变焦镜头
●焦距调节按钮向左转则画面范围变大,向右转则远处景物变大。
●进行焦距调节时,中心可能会有轻微的偏离。
因此在确定焦距之后还请再进行画面中心的微调。
关于FA80~160mmF4.5
图片中滤光器回转操作部位请在安装圆偏光滤光器时使用。
在进行滤光器卸装时,在焦点距离80mm侧开始对图中A位置进行拆装。
(p18~p19)
望远镜头
a.∞刻度
FA.300mmF4ED (IF) 等。
距离调节时只能最大到∞处。
根据温度的变化,焦点的位置会发生变化。
在∞刻度调节前会和中心相符。
在使用
∞照相时请确认中心位置。
b.FA300mmF4ED(IF)以及FA400mmF5.6ED(IF)镜头有纵横变换的功能。
在进行纵横变换功能的时候,要将图中的键旋松,之后向调好的方向将相机进行90°的旋转,通过图中的键进行固定。
长镜头
长镜头120mmF4,可以近距离放大摄影,该镜头使自动调焦达到更好的效果,特配调焦。
详情请参照第22页。
(p20~p21)。
