DB-MARK XCA音箱处理器中文说明书
最新dbx处理器中文说明书

DBX DriveRack PA数字音频工作站(中文操作手册)0.1 Drive Rack PA的定义dbx Drive Rack PA是控制扩声系统的扬声器各方面最有效的手段,该仪器成为混频器和功放间唯一必需的设备。
以下是该设备的一些特征:●用12个反馈切口过滤器进行立体声反馈消除●双28波段图解式的均衡●经典的DBX压缩机●120A分谐波合成器●2*3、2*4、2*5、2*6交叉配置●立体声多滤段限定均衡●立体声输出限制器●线性延时●粉红噪声发生器●自动均衡(28波段RTA)●JBL音箱和CROWN功放调节安装向导●25个用户程序/25个厂方程序●2个XLR输入和6个XLR输出●前控制面板RTA-M XLR 幻像电源输入●24比特ADC/24比特DAC,大于110dB的动态范围●TypeIV 变换系统●全部图解式的液晶显示第一部分1.1 后面板连接IEC电源容量Drive Rack PA电源可接受100-120V,50HZ-60HZ的范围。
一条IEC线包含在其中。
EU 类型的可接受220-240V,50HZ-60HZ。
1-6输出输出部分提供6个平衡的XLR接口1-2输入输入部分提供2个平衡的XLR接口+4/-10dBv 开关这个开关可+4dBv、-10dBv两档接地提升开关该开关可提升XLR输入插脚1的机架接地1.2 前面板连接RTA输入口这个平衡的XLR输入口是用来连接一个RTA话筒的,它允许用户优化平衡设置,用户可以使用自平衡的向导安装辅助。
RTA话筒输入选择器按下RTA话筒输入键将前面板RTA输入XLR接口数据选择钮数据选择钮用来在程序菜单中滚动选择,加载程序、选择范围和修改范围值。
LCD液晶显示有背景光的液晶显示提供给用户全部的操作信息包括:信号线路,有效限制修改和向导安装功能。
如果任何内部削波在内部单元发生,显示屏同样会提醒用户,以下的信息将出现:削波。
功能键功能键可以让用户直接进行所有修改和导航功能,按钮的功能如下:〈PREV PG〉用来向后引导不同部件单元块〈NEXT PG〉用来向前引导不同部件单元块〈EQ〉用来切换EQ单元,可以让你从输入部分的EQ单元到输出部分的EQ单元〈SUBHARMONIC〉这个按钮用来切换至分谐波合成模式〈XOVER〉用来进入交换模式〈FEEDBACK〉启用反馈消除模式〈COMP/LIMITER〉用来转换压缩或限制模式〈DELAY〉用来切换至延时模式〈PROGRAM〉按下后进入程序模式〈UTILITY〉用来存取“UTILITY实用程序”菜单〈STORE〉存储任何程序变动〈WIZARD〉用来进入向导部分,包括:系统安装、自平衡向导及高级反馈抑制向导。
DPA d vice MMA-A 数字音频接口用户手册说明书

User’s ManualThe d:vice™ MMA-A Digital Audio Interface is a high-quality dual-channel microphone preamplifier and A/D converter. It allows you to capture crystal-clear audio via your favorite recording / broadcasting apps. The d:vice™ can be used with most DPA microphones.C a b l e l e n g t h : 30 c m (11.8 i n )Two cables are supplied with the d:vice™ MMA-A: One Micro USB-B to iOS (Lightning)and one Micro USB-B to PC / Mac (USB-A).C a b l e l e n g t h : 100 c m (39.4 i n )Getting startedConnect your DPA microphone(s) to the MicroDot input(s) on the d:vice™, denoted I and II. (If only one mic is connected to either input, the signal will be interpreted as MONO and automatically sent to both output I and II.)Download the d:vice™ AppDownload and install the d:vice™ App from the Apple App Store.Please note that the d:vice™ willwork with most 3rd-party apps andtherefore can be used in varioussituations including live broadcasts, aswell as audio and video recordings.The d:vice™ MMA-A can be used right out of the box but to take full advantage of it, please refer to these instructions to get started using the d:vice™ App.GAINUse the GAIN slider to adjust input levels. Slide to the right to increase amplification, to the left to decrease. Make sure to keep an eye on the level meters when you are adjusting gain. The meters should stay in the green and yellow areas. FILTERThe FILTER button (low cut / high pass) cuts out unwanted, low-end frequencies (rumble) that can decrease the intelligibility of your recorded audio. In most cases we suggest using the FILTER button and if, for example, you are recording outside near a road with traffic, this setting is essential.MONITORUse the MON button to send audio to your headphones so you can hear what you are recording. Please note that a headphone must be connected to the iOS device, otherwise the button will not activate and you’ll be prompted to connect a headset. If the headset includes a microphone it must be connected prior to connecting the d:vice™ via the Lightning connector. This is due to the iOS ‘last entry active’ nature of operation. (We recommend using a wireless headset when using an iPhone 7.)LOCKUse the LOCK button to block 3rd party apps from controlling gain. G ain settings can be controlled and saved on the d:vice™ for use in your favorite recording / broadcasting apps. The lock button also controls the setting of the low cut / high pass filter. Saved locked settings are automatically activated the next time you connect to the d:vice™.MONOIf only one microphone is connected to either input I or II, MONO is chosen automatically. The mic input will be routed to both left and right output. Only one GAIN slider and FILTER button will be available in this mode.STEREOUse STEREO when you need to capture sound sources in stereo. Both microphones are controlled with one GAIN slider. Example: Ambiance sounds can be recorded in stereo using two mics that have the same sensitivity.Important: When using STEREO you must use two mics that are optimized for stereo recording, for instance the specially-selected d:screet™ 4060 pair included in the d:vice™ Kit VIDMK-4060-S.Other available kits include: SMK4060, ST4006*, ST4011*, ST2006*, ST2011** Must be used with DPA MMP-G amplifiers for connection to MicroDot.DUALUse DUAL when the gain must be set individually for input I and II (for example, with two different microphone types or in situations where two people with different voice levels are to be recorded). The FILTER buttons are also individual in this situation.PRESETSPresets store your preferred settings for specific microphone(s) and make your set up easier. After choosing your settings, create the preset by pushing the numbered preset button of your choice for three seconds. The next time you plug in the same mics, push your preset button and you are ready to go – no adjustmentsnecessary.Microphone placement and usagePlease refer to the manual(s) for the specific microphone included within the package.For use with PC / MacConnect the d:vice™ MMA-A to the USB input on your PC / Mac. The d:vice™ will now work as a normal external soundcard and you can use your regular programs to record or broadcast the audiofrom the connected microphones.CleaningThe black surface of the d:vice™ is fairly scratch resistant, but is sensitive to detergents. Avoid using solvents (such as: gasoline, acetone, alcohol, turpentine, etc) for cleaning purposes. A damp clothwith warm water is recommended.Made foriPhone 7 Plus, iPhone 7, iPhone 6s, iPhone 6, iPhone 5, iPad Pro (12.9-inch), iPad Air, iPad Air 2, iPad mini 4, iPod touch (6th gen).Compatible with Mac / PC / iOS RequirementsiOS version: 10 or laterConnection / Power: Lightning & USB 2.0SpecificationsNoise floor-114 dBFS, A-weightedFrequency range20-22 kHz ±0.2 dB (Fs = 48 kHz)20-40 kHz ±0.2 dB (Fs = 96 kHz)T otal harmonic distortion (THD) THD < -100 dB, 0.001% @ 1 kHz @ -10 dBFs Dynamic rangeTyp. 114 dBFull Scale Output1 Vrms @ 0 dB GainSupported sample rates44.1, 48 (default), 88.2, 96 kHzSample rates can be set by 3rd-party app Resolution24 bitFilter (low cut / high pass)2. Order @ 80 Hz, individual per channel Weight50 g (1.8 oz)Diameter56 mm (2.2 in)T emperature range0°C to 45°C (32°F to 113°F)Current consumption<100 mA(The d:vice™ gains power via the apparatus it is connected to. This equates to approx. 6-7 hours of audio capture tested on a new iPhone 6 or 7.)Service & repairIf you are not satisfied with the characteristics exhibited by this product, please go to dpa /service for instructions.WarrantyThe d:vice™ Digital Audio Interface is covered by a two-year limited warranty.CE markingThis product conforms to all relevant directives approved by the European Commission.© February, 2017. DPA Microphones A/SProduct features and specifications are subject to change without further notice.。
dbxDriveRackTMPA处理器中文用户手册

一旦完成了全部连接并给机器加电,可通过DriveRackTMPA的前面板对全部信号途径进行领航。显示器提供从输入到输出的每个信号途径的清晰、简明的浏览。
DriveRackTMPA前面板按RTA话筒输入从左到右按排,XLR输入端作为RTA话筒的输入。
用功放参数设置限幅器防止信号削波和平衡电子分频器的输出电平,根据体验和音乐节目的类型可以寻找需要重新调整的分频器电平。
自动EQ奇才设置
·完成了特定的系统设置后,现在可以处理系统EQ了,自动EQ奇才设置通过产生的粉红
噪声自动调整系统的频率响应和调整图示EQ直到RTA匹配一种被选的频响特性。从
DriveRackTMPA奇才菜单,旋转<DATA>轮直到出现下面的显示:
·根据程序模式按<WIZARD>键,显示屏出现下列信息:
Auto EQ WIZARD
AFS WIZARD
DriveRack PA WIZARD
System Setup
系统设置
·箭头显示被选的奇才(Wizard)设置,选择三个选项中的任何一个,旋转<DATA>数据轮,如果执行系统设置,按<NEXT PG>键或<DATA>数据轮,出现下面的显示:
Select Input as MONO
or STEREO.
>STEREO
Input Setup
·简单地旋转<DATA>数据轮,选择单声道或立体声输入配置。选择输入选项后,按<NEXT PG>键,出现如下显示:
Select GEQ as Dual
佛山双木三林科技有限公司音响系统使用说明书

使用说明书请将本音响系统安装在通风良好、阴凉、干燥、干净的位置,远离直射阳光热源、振动、灰尘、 潮湿或寒冷。
只能使用本机指定的电压。
使用高于指定数值的电压很危险,而且可能导致火灾,损坏本机或造成人身伤害。
对于使用高于指定电压造成的任何损害,我司将不负任何责任。
不要试图自行改造或修理本机。
如果需要任何服务,请与销售或者我司客服人员联系。
不管有任何理由,都没有打开机壳的必要。
如果打算长时间不使用本机(比如度假时),请从墙壁交流电源插座上断开电源线的连接。
重要提示:本说明书所提到的产品规格和资讯仅供参考。
如有内容更新,恕不另行通知。
一、服务期限佛山双木三林科技有限公司承诺产品的良好品质,产品自售出之后7天内正常使用情况下出现故障,客户可以选择退货或者保修(不影响二次销售才可退货)。
正常使用一年内出现故障可以免费保修。
二、购买日期以销售商开出的购机发票或收据日期为准,网购可以交易截图为准。
三、有以下情况都不能享受“三包”服务1.一切人为因素损坏,包括非正常工作环境下使用或不按照说明书使用。
2.用户私自拆机、改装、维修。
3.使用非指定或许可的配件造成损坏的。
4.机身的QC或保修贴损毁。
5.不能出示有效购机凭证。
6.不属于本公司产品。
四、保修方式为送修此条款只适于中国大陆,其它地区请参考当地销售代理商的规定和国家法规。
支持MQA全解码;旗舰DAC芯片AK4499, 业界最高性能。
失真度低至惊人的0.000068%(-123dB)!在使用A计权测量时, 更是低至0.000058%(-124dB)!动态范围高达131dB!USB使用XMOS第二代16核处理器XU216, 支持到原生DSD512和32位768kHz!时钟系统使用2颗美国ACCUSILICON超低相噪。
使用ALTERA的高速CPLD对时钟进行处理,降低JITTER。
特别设计和强化的电源系统,提供超低噪声的电源,输出底噪低至1.5uVrms!最新蓝牙支持LDAC,APTX/HD,SBC,AAC和业界最高规格的24bit/192kHz的UAT格式!支持LVDS电平的I2S传输(使用HDMI接口),可以最低JITTER地传输数字音频!固件升级功能,用户可以自行升级系统和USB的固件。
专业音响 - C-MARK 雅马哈100数字效果器使用说明
C-MARK专业音响 【专业音响工程综合技术能力一级资质】0755-83088547(厂家) 18202012588雷经理 官网
于电垫类乐声 63 合成 延迟到人声 适合于垫类弦乐 64 人声1 延迟到人声 预制64号效果和65号效果有一个紧延迟混响较长,适合一个人声,预制66号效果混响短,延迟加重 65 人声2 延迟到大厅 66 人声3 延迟加房间 67 亮人声 延迟到平面 亮混响,具有轻微延迟 68 合唱 延迟加平面 延迟混响各占一半 69 鼓器1 延迟加房间 鼓器环境效果 70 鼓器2 延迟到平面 同上 混响/调制效果 71 软镶边1 大厅加镶边 将镶边与小音调变化,混响效果组合适合于垫类合成音色 72 软镶边2 大厅加镶边 73 环境镶边1 房间到镶边镶边效果加入短混响 74 环境镶边2 房间到镶边 同上 75 短混响镶边 房间到镶边 短混响加入镶边及大音调变化效果 76 管风琴室1 平面到镶边 镶边效果适合于管风琴音色 77 管风琴室2 大厅到谐音 同上 78 谐音混响1 大厅加谐音基于混响的效果音 79 谐音混响2 人声加谐音 同上 80 镶边房间1 人声到镶边 用这些效果将鼓器做特殊效果处理 81 镶边房间2 平面加镶边 同上 82滚动镶边1 平面加镶边 同上,但效果程度更大 83 滚动镶边2 平面加镶边 同上 84 大镶边 人声加镶边 喷气飞机效果 85 合唱混响1 大厅加合唱 预制85和86为正常合唱/混响效果,可以作为许多场合如电钢琴效果 86 合唱混响2平面加合唱 87 合唱混响3 大厅加合唱 同上 88 合唱混响4 人声加合唱同上 89 颤音混响1 大厅加颤音 在声向调制效果中带有颤音效果 90 颤音混响2 房间到颤音 同上 91 颤音混响3 平面加颤音 同上 92 颤音混响4 人声加颤音 同上 93 颤音混响5 人声加颤音同上 94 颤音混响6 大厅加颤音 同上 95 颤音混响7 大厅加颤音 同上 96 环境慢声向1 大厅加颤音 具有短混响并在左右之音产生音向效果 97 环境慢声向2 房间加颤音 同上 98 顺序声向1房间加颤音 您可以加入声向效果到一个乐曲中,其速度为120左右,可调 99 顺序声向2 房间加颤音编辑方式RV100的效果都具有一些参数,其中三个最有效的参数都可以用转动钮来进行简单操作,编辑一个程序。
Dbx-中文说明书

dbx专业音响产品DriveRack TM PA系统的完全均衡和扬声器控制系统用户手册DriveRack PA目录引言---------------------------------------------------------------30.1 Drive Rack TM PA说明---------------------------------------------30.2 服务联系信息---------------------------------------------------40.3 保证-----------------------------------------------------------4第一节启动-------------------------------------------------------61.1 后面板连接-----------------------------------------------------61.2 前面板---------------------------------------------------------61.3 快捷启动-------------------------------------------------------8第二节编辑功能-------------------------------------------------162.1 基本领航方式--------------------------------------------------162.2 按键配置纵览--------------------------------------------------162.3 EQ部分领航(GEQ/PEQ)----------------------------------------17 2.4 分谐波合成器领航----------------------------------------------172.5 电子分频器领航----------------------------------------------182.6 反馈抑制器领航----------------------------------------------18 2.7 压缩/限幅器领航--------------------------------------------19 2.8 扬声器延时调整领航--------------------------------------------19 2.9 多用途领航----------------------------------------------------202.10 奇才程序领航-------------------------------------------------20第三节Drive Rack PA运行---------------------------------------22 3.1 程序定义------------------------------------------------------223.2 工厂程序领航--------------------------------------------------223.3 工厂程序编辑--------------------------------------------------23第四节详细参数-------------------------------------------------25 4.1 前置分频的图像式EQ--------------------------------------------25 4.2 先进的反馈抑制器-----------------------------------------------25 4.3 分谐波合成器---------------------------------------------------27 4.4 分频器------------------------------------------------------274.5 后置分频的参数PEQ-------------------------------------------28 4.6 压缩器/限幅器----------------------------------------------294.7 扬声器延时调整----------------------------------------------31第五节应用指南----------------------------------------------335.12×6 分频器----------------------------------------------335.22×5分频器-----------------------------------------------345.32×4分频器-----------------------------------------------355.42×3分频器-----------------------------------------------35附录-----------------------------------------------------------37A.1 重新设置工厂程序-------------------------------------------37A.2 快捷键的选择-----------------------------------------------37A.3 技术特性---------------------------------------------------38A.4 自动EQ的最佳点--------------------------------------------39A.5 分频器图形-------------------------------------------------40A.6 方框图-----------------------------------------------------41A.7 程序表/扬声器调整/功率放大器调整-------------------------42 A.8 系统设置和增益结构-----------------------------------------43Dbx专业产品登记卡----------------------------------------------46引言用DriveRack TM PA的全部均衡和扬声器控制系统把PA系统驱动到完全新的表演水平。
佛山双木三林科技有限公司音响系统说明书 Ver 1.0

使用说明书Ver 1.0本说明书的内容可能会随版本更改, 如有变动, 恕不另行通知请将本音响系统安装在通风良好、阴凉、干燥、干净的位置,远离直射阳光热源、振动、灰尘、 潮湿或寒冷。
只能使用本机指定的电压。
使用高于指定数值的电压很危险,而且可能导致火灾,损坏本机或造成人身伤害。
对于使用高于指定电压造成的任何损害,我司将不负任何责任。
不要试图自行改造或修理本机。
如果需要任何服务,请与销售或者我司客服人员联系。
不管有任何理由,都没有打开机壳的必要。
如果打算长时间不使用本机(比如度假时),请从墙壁交流电源插座上断开电源线的连接。
一、服务期限 佛山双木三林科技有限公司承诺产品的良好品质,产品自售出之后7天内 正常使用情况下出现故障,客户可以选择退货或者保修(不影响二次销售 才可退货)。
正常使用一年内出现故障可以免费保修。
二、购买日期以销售商开出的购机发票或收据日期为准,网购可以交易截图为准。
三、有以下情况都不能享受“三包”服务 1.一切人为因素损坏,包括非正常工作环境下使用或不按照说明书使用。
2.用户私自拆机、改装、维修。
3.使用非指定或许可的配件造成损坏的。
4.机身的QC或保修贴损毁。
5.不能出示有效购机凭证。
6.不属于本公司产品。
四、保修方式为送修 此条款只适于中国大陆,其它地区请参考当地销售代理商的规定和国家法规。
重要提示:本说明书所提到的产品规格和资讯仅供参考。
如有内容更新,恕不另行通知。
迷你尺寸设计,非常适合桌面使用;CNC一体化铣削工艺,简约时尚;采用第二代异步XMOS方案支持到32位768kHz和DSD512;日本超低相噪时钟,大幅降低系统JITTER;两片AKM新款AK4493S,并且精心调校使其达到了前所未有的0.00011%;最新蓝牙支持LDAC,APTX/HD,SBC,AAC!内置高性能电源过滤系统!阳极氧化CNC铝合金外壳;日本电子音频协会Hi-Res认证;全功能遥控。
罗克福德 频响耐强声音系统书面说明书

T5652-SInstallation & Operation4Dear Customer,Congratulations on your purchase of the world’s finest brand of car audio products. At Rockford Fosgate we are fanatics about musical reproduc-tion at its best, and we are pleased you chose our product. Through years of engineering expertise, hand craftsmanship and critical testing procedures, we have created a wide range of products that reproduce music with all the clarity and richness you deserve.For maximum performance we recommend you have your new Rockford Fosgate product installed by an Authorized Rockford Fosgate Dealer, as we provide specialized training through Rockford Technical Training Institute (RTTI). Please read your warranty and retain your receipt and original carton for possible future use.Great product and competent installations are only a piece of the puzzle when it comes to your system. Make sure that your installer is using 100% authentic installation accessories from Rockford Fosgate in your installation. Rockford Fosgate has everything from RCA cables and speaker wire to power wire and battery connectors. Insist on it! After all, your new system deserves nothing but the best.To add the finishing touch to your new Rockford Fosgate image order your Rockford accessories, which include everything from T-shirts to jackets.Visit our web site for the latest information on all Rockford products ; or, in the U.S. call 1-800-669-9899 or FAX 1-800-398-3985. For all other countries, call +001-480-967-3565 or FAX +001-480-966-3983.Table of Content If, after reading your manual, you still have questions regarding this prod-uct, we recommend that you see your Rockford Fosgate dealer. If you need further assistance, you can call us direct at 1-800-669-9899. Be sure to have your serial number, model number and date of purchase available when you call.Safety This symbol with “WARNING” is intended to alert the user to the presence of important instructions. Failure to heed the instructions will result in severe injury or death.This symbol with “CAUTION” is intended to alert the user to the presence of important instructions. Failure to heed the instructions can result in injury or unit damage.• To prevent injury and damage to the unit, please read and follow the instructions in this manual. We want you to enjoy this system, not get a headache.•If you feel unsure about installing this system yourself, have it installed by a qualified Rockford Fosgate technician.• Before installation, disconnect the battery negative (-) terminal to prevent damage to the unit, fire and/or possible injury.Introduction©2011Rockford Corporation.All Rights Reversed.ROCKFORD FOSGATE and associated logos where applicable are registered trademarks of Rockford Corporation in the United States and/or other countries. All other trademarks are the property of their respective owners. Specifications subject to change without notice.Continuous exposure to sound pressure levels over 100dB may cause permanent hearing loss. High powered auto sound systems may produce sound pressure levels well over 130dB. Use common sense and practice safe sound.4Introduction 5-7Specifications8-9InstallationInstallation ConsiderationsMountingWiring10System Setup11Troubleshooting12-15Additional LanguagesFrenchSpanishGermanItalian16Limited Warranty InformationFrequency responce includes summed Far-Field and Near-Field IEC60268-5 baffle measurements.Vas0.81ft3 (23.0L)Sensitivity (1W/1M)88.5dBSensitivity (2.83V/1M)91.5dBXmax0.28” (7.0mm)Mounting Diameter 5.67” (144.0mm)Mounting Depth 2.79” (71.0mm)Grille/Trim Ring YESAdaptor Plate N/ASee pages 6-7 for additional dimensions ArrayCEA 2006Power ratings on Rockford Fosgate amplifiers conform to CEA-2006 industry standards. These guidelines meanyour amplifier’s output power ratings are REAL POWER numbers, not inflated marketing ratings.56Specificationsillus.-1.1T5 - Mid-Bass6.18"(157.0mm)Diameter0.63"(17.0mm)T5 - TweeterSpecificationsT5 - Crossoverillus.-1.278• (1) Power T5 stereo crossover• (1) Pair of grilles/trim rings• Tweeter mounting hardware with surface/angle, and flush mounts • Remote Tuning Module tethering cable• Power/Ground harness• Stacking clip (for optional multiple T5 component installation)• Mounting hardwareInstallation ConsiderationsBefore beginning any installation, follow these simple rules:1. Be sure to carefully read and understand the instructions before attempting to install these speakers.2. For safety, disconnect the negative lead from the battery prior to beginning the installation.3. For easier assembly, we suggest you run all wires prior to mounting your speakers in place.4. Use high quality connectors for a reliable installation and to minimize signal or power loss.5. Think before you drill! Be careful not to cut or drill into gas tanks, fuel lines, brake or hydraulic lines, vacuum lines or electrical wiring when working on any vehicle. If installation in a boat, take care not to cut or drill through the main hull.6. Never run wires underneath the vehicle. Running the wires inside the vehicle or hull area provides the best protection.7. Avoid running wires over or through sharp edges. Use rubber or plastic grommets to protect any wires routed through metal, especially the firewall.MountingMid-Bass1. Determine where the speakers will be mounted. Ensure an area large enough for the speaker to mount evenly. Be sure that the mounting location is deep enough for the speaker to fit; if mounting in a door, operate all functions (windows, locks, etc.) through their entire operating range to ensure there is no obstruction.2. Refer to the specification chart to determine the proper diameter hole to cut for your speaker model. Cutting and mounting templates can be found at .3. Mark the locations for the mounting screws. Drill the holes with a 1/8” bit.4. Feed the speaker wires through the cutout and connect to the speaker terminals. Be sure to observe proper polarity when connecting the wires. The speaker’s positive terminal is indicated with a “+”. 6. Tighten the screws until the speaker is snug in place to prevent rattling. Do not over tighten the screws.Tweeter - Discreet Dual Clamp (DDC™)1. Determine where the speakers will be mounted. Ensure an area large enough for the speaker to mount evenly. Be sure that the mounting location is deep enough for the speaker to fit; if mounting in a door, operate all functions (windows, locks, etc.) through their entire operating range to ensure there is no obstruction.2. Mark the location for the mounting hole. Drill the hole with a standard 1.75 inch (45mm) hole saw.3. With a single center screw secure the inner cup from the front of the door panel to the outer cup from back of the door panel. Tighten the screw until balanced pressure is applied to both faces of the mounting surface. 4. Feed the speaker wires through the cutout and connect to the speaker terminals. Be sure to observe proper polarity when connecting the wires. The speaker’s lead wires are indicated with a RED wire “+” and a BLACK wire “-”.5. Simply snap the tweeter into place and secure with a snap-on trim TM )InstallationStandard1. Use illustration for proper connection and be sure to maintain speaker911TroubleshootingTroubleshootingNOTE: If you are having problems after installation follow the Trouble-shooting procedures below.No LED’s illuminated on the Remote Tuning Module when docked.1. Verify Remote Tuning Module is properly seated in crossover housing.2. Verify that Ground connection is connected to clean metal on the vehicle’s chassis. Repair/replace if necessary.3. Verify there is 9 to 14.4 Volts present at the power source. Verify quality connection at power source. Repair/replace if necessary.4. Check fuse(s) on power source. Replace if necessary.No LED’s illuminated on the Remote Tuning Module when tethered .1. Verify that Remote Tuning Module functions correctly when docked. See Step 1.2. Verify tethering cable is securely connected at the Remote Tuning Module as well as at the crossover connection port. Repair/replace if necessary.All the LED’s are illuminated on the Remote Tuning Module when docked.1.simultaneously for 5 seconds, then release.All the LED’s are illuminated on the Remote Tuning Module when tethered.1. Verify that Remote Tuning Module functions correctly when docked. See Step 3.2. With the crossover power on re-dock the Remote Tuning Module. Allow to remain docked for 5 seconds, then attempt to tether again.The LED’s of the Remote Tuning Module remain illuminated withvehicle turned off.1. Ensure use of a switched 12 Volt source for power source of the Remote Tuning Module.No sound from 1 or more of the component speakers.1. Verify quality connections for the speaker wires at amplifier, crossover, and speaker terminal.2. Verify the crossover jumpers are all installed for standard wiring option or all removed for bi-amp wiring option. See installation-wiring.12Rockford Corporation offers a limited warranty on Rockford Fosgate products on the following terms:Length of WarrantySpeakers, Signal Processors, PRIME and PUNCH Amplifiers – 1 Year POWER Amplifiers – 2 Years Any Factory Refurbished Product – 90 days (receipt required)What is CoveredThis warranty applies only to Rockford Fosgate products sold to consumers by Authorized Rockford Fosgate Dealers in the United States of America or its possessions. Product purchased by consumers from an Authorized Rockford Fosgate Dealer in another country are covered only by that country’s Distribu-tor and not by Rockford Corporation.Who is CoveredThis warranty covers only the original purchaser of Rockford product purchased from an Authorized Rockford Fosgate Dealer in the United States. In order to receive service, the purchaser must provide Rockford with a copy of the receipt stating the customer name, dealer name, product purchased and date of purchase.Products found to be defective during the warranty period will be repaired or replaced (with a product deemed to be equivalent) at Rockford’s discretion.What is Not Covered 1. Damage caused by accident, abuse, improper operations,water, theft, shipping.2. Any cost or expense related to the removal or reinstallation of product.3. Service performed by anyone other than Rockford or an Authorized Rockford Fosgate Service Center.4. Any product which has had the serial number defaced, altered, or removed.5. Subsequent damage to other components.6. Any product purchased outside the U.S.7. Any product not purchased from an Authorized Rockford Fosgate Dealer.Limit on Implied WarrantiesAny implied warranties including warranties of fitness for use and merchantability are limited in duration to the period of the express warranty set forth above. Some states do not allow limitations on the length of an implied warranty, so this limitation may not apply. No person is authorized to assume for Rockford Fosgate any other liability in connection with the sale of the product.How to Obtain ServiceContact the Authorized Rockford Fosgate Dealer you purchased this product from. If you need further assistance, call 1-800-669-9899 for Rockford Cus-tomer Service. You must obtain an RA# (Return Authorization number) to return any product to Rockford Fosgate. You are responsible for shipment of product to Rockford.EU WarrantyThis product meets the current EU warranty requirements, see your Authorized dealer for details.WarrantyInstallation assistance availible at:/rftechR O C K F O R D F O S G A T E.C O M600 South Rockford Drive • Tempe, Arizona 85281 United States Direct: (480) 967-3565 • Toll Free: (800) 669-9899。
SEMAN PRO DAP音箱处理器中文说明书
当 机器不 作 任何操 作 一段 时 间,显 示 屏自动 返 回此待 机 画面。
输 入控 制功 能设 置:
输入控制功能键( 4个键分别对应4个输入通道:INA - IND,可短按和长按): 1) 短 按:静 音/非 静音切 换(静 音时, 相 应通道 最 下面的 红色灯 亮 ;非静 音 时,红 色 灯灭)。 2) 长 按:进 入 输入编 辑 功能 界 面(相应通 道 最上面 的 红色灯 亮)。 INA - IND输入 设 置方法 相 同。以INA输入设 置 作为示 例 ,介绍 设 置参 数 的过程 : 长按(按压 时 间约2秒)面 板左边INA键 ,可进 入 到输入 编 辑功能 界 面,按 功 能菜单 中 的Polarity , Gain , Delay和EQ编 辑 键可进 行 设置各 参 数。 1 .按 功能菜 单 中Polarity编 辑键可 进 入到极 性 设置, 界 面显示 为:
接地 所 有音 频 接口的 接 地脚都 直 接与电 源 插座的 接 地脚直 接 相连, 机箱 也 与 此点 相 连。本 机 的电源 必 须有可 靠 的接地 。 信号地( 0V )将连 接 到机 箱 的 地线 上 。为避 免 形成接 地 环路, 信 号电缆 的 屏蔽层 只 能在一 端接地 。 通 常 的规 则 是只在 输 出端的XLR接口 处 接地。
功能编辑参数使用方法
功能编辑参数使用方法
编 辑界 面:
开 机界面 : 接通电 源 ,液 晶 屏显示 为 机器当 前 工作模 式 ,如图 示 :
Mode:8 Name:USER1
3 .按功 能菜单 中Delay编辑 键 可进入 到 延时设 置 ,界面 显 示为:
InA Delay Dly=178.992ms
P R OF E S S I ON A L AU DI O& K A R AOK E S Y S T E M
威法Diamond 220 书架音箱说明书
"…quite simply they are one of the best budget speakers around."What Hi-Fi review, October 2014Diamond 220Best Stereo Speakers up to £200HeritageBritain has long been recognised as being the home of loudspeaker technology in terms of innovation and quality. Gilbert Briggs’ first loudspeaker was manufactured in 1932 through a passion for music and an ear for detail – in a sleepy little market town of Yorkshire Wharfedale was born. After winning multiple awards, his work is still much admired and respected throughout the hi-fi world today and our speakers are still driven by the same passion for music. Wharfedale’s Diamond series has a long history of achievement. The first Diamond was born in 1982 in the form of a rear ported hi-fi speaker. A combination of a 19mm dome tweeter, 120mm long throw polypropylene bass/mid driver and a simple yet highly effective crossover in a compact hi-fi speaker took the industry by storm. The speaker produced an impeccable stereo image, quickly becoming a best seller and a permanent fixture in the Wharfedale product range. Since then, every Wharfedale Diamond Series has been a best-seller.From 1982 Wharfedale Diamond has meant one thing – impeccable performance at an affordable price. Today we are pleased to bring you the latest series of loudspeakers from Wharfedale that aspires to this tradition – Diamond 200.Diamond Re-EngineeredThe Diamond 200 boasts the latest in hi-fi technology to produce a thoroughly enjoyable listening experience. Foremost in the design criteria for Diamond 200 is the ongoing research into loudspeaker driver sound quality. The Diamond Series utilises our famous woven Kevlar cone drawing influence from the flagship Jade Series. Semi-elliptical ‘break-up’ areas on the kevlar woofer smooth the response through the audible range and the cone edges are treated with a unique diamond pattern moulding.For Diamond 200 series Wharfedale’s engineers have refined and updated this design and drive unit motor systems have been redefined with more power with greater efficiency. Larger magnets for instance on the Diamond 220 create a greater sensitivity compared with previous loudspeakers.The treble unit uses a sheer fabric dome and advanced ferrite magnet system, surrounded by a carefully crafted wave guide that encourages outstanding midrange performance too.Improved Cabinet ConstructionCabinet materials have taken a leaf out of the extensive research that resulted in the advanced Jade series. Even the appearance is improved with new, lacquered front baffles and cosmetically enhanced veneers.Cabinet walls and internal bracing developed using Wharfedale’s latest ‘Virtual Speaker ’ software, with the help of Delayed Cumulative Spectral Analysis that ruthlessly reveals panel coloration in all its forms. Using this technique Wharfedale engineers updated the cabinet combining layers of particle board and MDF bonded in a unique structure to damp annoying High-Q resonances and block internal sound leakage. The effect is that the ‘noise’ from cabinet walls is buried more than 35dB below the driver output. The same computer modeling also assists in fine tuning the crossover while ensuring the speaker projects both on and off-axis for an enjoyable, room-filling experience.Tuned For Your Living RoomHundreds of hours of listening tests have resulted in refinements to the crossover systems to yield greater attack, dynamics and musical enjoyment in conjunction with the neutrality and startling realism that is a Wharfedale tradition. Although computer modeling is a valuable tool in modern loudspeaker production, it is a combination of our engineers experience and passion for music that results in such an enjoyable loudspeaker.In the final evaluation weeks are spent fine tuning the acoustic performance using a wide variety of music in Wharfedale’s five listening rooms, each of which mimics the kind of domestic environments the Diamond Series are likely to be used in. Only when the acoustic tests are deemed truly satisfying are the loudspeaker designs signed-off for production, ensuring that each speaker model fulfils its eventual owner’s dreams of musically enjoyable reproduction from Britain’s Most Famous Loudspeakers.SPECIFICATIONS:General description2-way bookshelf speaker2-way bookshelf speaker 2.5-way floorstanding speaker Enclosure type bass reflex bass reflex bass reflexTransducer complement2-way2-way 2.5-wayBass driver100mm Woven Kevlar Cone130mm Woven Kevlar Cone165mm Woven Kevlar Cone Midrange driver165mm Woven Kevlar Cone Treble driver25mm Soft Dome25mm Soft Dome25mm Soft DomeAV shield No No NoSensitivity(2.83V @ 1m)86dB86dB88dBRecommended amplifier power15-75W25-100W25-150WPeak SPL 90dB95dB102dBNominal impedance 8Ω Compatible8Ω Compatible8Ω CompatibleMinimum impedance 4.1Ω 4.1Ω 3.7ΩFrequency response (+/-3dB)68Hz - 20kHz56Hz - 20kHz40Hz - 20kHzBass extension (-6dB)58Hz45Hz37HzCrossover frequency 2.3kHz 2.2kHz 2.3kHzCabinet Volume (in litres) 3.2L7L35LDimensions (mm)Height (on plinth & spikes) 232mm315mm(938+25)mmWidth 143mm174mm196mmDepth (with terminals) (165+5)mm(227+28)mm(306+28)mmCarton size415x260x330mm495x320x410mm420x310x1060mmNet weight 2.6kg/pcs 5.3kg/pcs17.8kg/pcsGross weight 6.5kg/ctn12.6kg/ctn21.2kg/ctnFinish Rosewood /Walnut Pearl/Whitesandex/Blackwood Vinyl Rosewood /Walnut Pearl/Whitesandex/Blackwood VinylRosewood /Walnut Pearl/Whitesandex/Blackwood VinylStandard accessories spike/spike seat Optional accessories3-way floorstanding speaker3-way floorstanding speaker2-way centre speakerbass reflex bass reflex bass reflex3-way3-way2-way165mm Woven Kevlar Cone x 2200mm Woven Kevlar Cone x 2130mm Woven Kevlar Cone x 2 130mm Woven Kevlar Cone130mm Woven Kevlar Cone25mm Soft Dome25mm Soft Dome25mm Soft DomeNo No Yes89dB89dB89dB25-150W25-200W25-150W102dB110dB95dB4Ω6Ω 8Ω Compatible3.0Ω 3.1Ω4Ω40Hz - 20kHz35Hz - 20kHz60Hz - 20kHz35Hz32Hz65Hz470Hz & 2.7kHz350Hz & 2.5kHz 2.3kHzMid internal 10.6L Mid internal 8L11.8LBass internal 37.2L Bass internal 66.3L(998+25)mm(1103+25)mm(174+16)mm204mm250mm470mm(366+28)mm(396+28)mm(236+28)mm480x320x1120mm510x365x1225mm560x3320x280mm21.6kg/pcs29.4kg/pcs8.5kg/pcs25.2kg/ctn34.5kg/ctn10kg/ctnRosewood /Walnut Pearl/White sandex/ Blackwood Vinyl Rosewood /Walnut Pearl/White sandex/Blackwood VinylRosewood /Walnut Pearl/White sandex/Blackwood Vinylspike/spike seat spike/spike seat rubber feetcentre base。
可明X8数码音响说明书 可明X8插卡音箱说明书 插卡音响说明书 音响说明
感谢你选用可明科技LB-X8数码音响,为了你能尽快正常使用本产品,请在使用前祥细阅读此手册。
主要功能参数:(1)支持TF卡手机/U盘MP3音频格式播放(2)支持FM立体声调频收音(广播电台)天线插孔,让收音效果更好体现。
(3) LED数码屏显示,电台收音频率/介质/状态指示,电池充电指示,电池容量指示。
(4) AUX输入/耳机输出可方便接驳手机,MP3,电脑,IPHONE等设备。
亦可耳机输出。
(5)外置锂电池设计可拆卸更换电池,兼容诺基亚BL-5C电池。
(6)一键开关机,数字调音,低音辅射技术,时向外型,UV环保油漆。
(7) USB一线通,USB声卡功能,可控电脑音乐播放器。
操作说明:(1)开机打开音响背后电池盖装上BL-5C电池,轻按音响暂停播放键开机/关机,此时音响LED数码屏显示数字,进入收音状态。
(2)插卡播放:TF卡手机卡/U盘播放在音响后侧面插入TF卡手机卡/U盘会自动认别播放卡内的MP3 格式音乐。
(3)AUX输入播放:接手机/电脑AUX输入播放把随机增送的音频线(2个圆的 3.5音频线)一头连在音响背后 AUX插孔,另一头插在需要接驳的音乐设备输出孔上。
然后回到音响按键面按"M" 键切换模式(FM收音-SD/U盘--AUX输入)按到LED数码屏显示AUX 长按上下曲键可增减声音大小(4)FM调频收音播放:正常开机状态下进入收音,想进入收音状态可按M键切换模式选择到FM收音,然后按暂停播放键自动搜电台,搜完后按上下曲键选择需要的电台播放。
(注意请等搜完台后才操作其它)(5)充电请在一般情况下用万能充电器给电池充电,在电脑使用本机时,可用USB充电线连接DC5V/ 耳机孔作本机作供电,建议将电池取出。
电脑USB充电电流过小和不稳定会对电池寿命和充电不满有影响。
(6)USB一线通功能:在电脑使用本机时,可用USB对USB线连接电脑作下载/读卡器和音频连接功能注意事项:(1)如不能正常播放SD卡/U盘,请确认卡内是否有音乐,或是否是MP3音频格式的音乐,如还不能播放请把SD/U盘资料备份后格式化在下载歌曲重试。
Audiocodes媒体网关中文手册
快速安装配置手册MGCP, MEGACO, H.323 & SIPVersion 4.41快速启动 (3)2安装MEDIANT 2000 (4)2.1 拆包 (5)2.2 包中物品 (5)2.3 安装M EDIANT 2000 (5)2.3.1在桌上安装Mediant 2000 (5)2.3.2将其安装在19英寸机架中 (6)2.4 连接M EDIANT 2000电缆 (7)2.4.1连接E1/T1 中继接口 (8)2.4.2安装以太网接口 (9)2.4.3连接电源线 (10)3配置MEDIANT 2000 (12)3.1 分配IP地址 (12)3.1.1分配一个IP地址用做HTTP服务 (12)3.1.2分配一个IP地址用做BootP 服务 (13)3.2 恢复出厂的网络参数 (14)3.3 通过WEB页面访问 (14)3.4 设置基本控制协议参数 (15)3.4.1设置基本的MGCP/MEGACO参数 (15)3.4.2配置基本的H.323参数 (17)3.4.3配置基本的SIP参数 (19)3.5 配置中继线路 (20)4改变MEDIANT 2000用户名和密码 (23)5恢复和备份MEDIANT 2000配置 (24)6监控MEDIANT 2000 (25)6.1 监控M EDIANT 2000颜色变化 (25)6.1.1Mediant 2000机箱LED指示灯 (26)6.1.2TP-1610前面板LED指示灯 (26)6.2 监控M EDIANT 2000中继和B信道 (27)7软件升级 (29)7.1 软件升级向导 (29)7.2 更新辅助文件 (31)1快速启动这个快速安装向导将帮助你第一次安装Mediant 2000。
安装前需要了解一定的IP网络常识。
请参考图1-1完成快速设置,详细的网关配置信息请参考Mediant 2000用户手册。
图1-1: Mediant 2000 安装步骤打开Mediant 2000包装盒安装Mediant 2000连接Mediant 2000电缆线分配Mediant 2000 IP 地址配置MGCP/MEGACO/H.323/SIP参数配置PSTN参数2安装Mediant 2000图2.1显示了Mediant 2000网关的前视图。
XA Series音箱控制器简易使用说明-new
XA Series Loudspeaker Management System QUICK START GUIDE 快捷控制设置XILICA Audio Design如何可以方便快捷控制设置您的XA 音箱控制器史力卡音频设计公司设计开发的XA 控制器在操控方面极之方便及简单,用户可以透过XA 本机面板控制或是透过随机的PC 计算机软件控制:如通过XA 面板控制控制,主是分为两部份操控(一)是主系统方面(面向面板LCD显示屏右手面的2行X 3 键)即是关于主体控制方面,按下ENTER 使可进入主系统控制部份,内里包括- Recall 呼叫节目,Store 储存节目,Config 分频设置,(如2、3、4 分频),Copy 通道复制设置,General 系统通用单位设置,Secure 锁定设置等。
用户可按一下右下边的Enter, 再按一下上方<< Menu >> (菜单键) 选择以上各项目的设置,之后按中间行两个<< Cursor >> 键,选择需要设置的项目,再转动右面大圆旋钮便可设置各项目。
(二)通道参量设置(有关各通道自己的参数)以右手按下在右面大圆旋钮键旁的<< Menu Control>>菜单控制键同时,左手按下需要修改的通道,便可以对各通道进行设置。
正进行修改的通道下面的绿色LED灯会发亮,表示通道正在修改中。
( 如果需要两个或以上通道一起连锁设置,用户可以按下右手按下在右面大圆旋钮键旁的Menu Control的同时,再按下各个需要修改参量的通道Mute键),之后按下<< Menu >>或<< Cursor >> 键到需要修改参量项目中,转动大圆旋钮键便可对各通道作如下的设置:各通道参量可修正如下:-音量设置 Level +15 至-40 db, 再按<< Cursor >> 向右,相位+ / - 再>>向右,延时0 – 40 ms-再按一下<< Menu>>、<< Control>>及大圆旋钮键,便可设置均衡器EQ 1 至8 的参量-再按一下<< Menu >>便进入XOVER 分频器设置,按下<< Cursor >> 及大圆旋钮键,便可设置滤波器类型(或OFF 直通),低端分频频率FRQL,分频斜度SLPL、FTRH高频端滤波器类型,FRQH 分频频率、分频斜度SLPL。
玛田音箱中文文档1.0
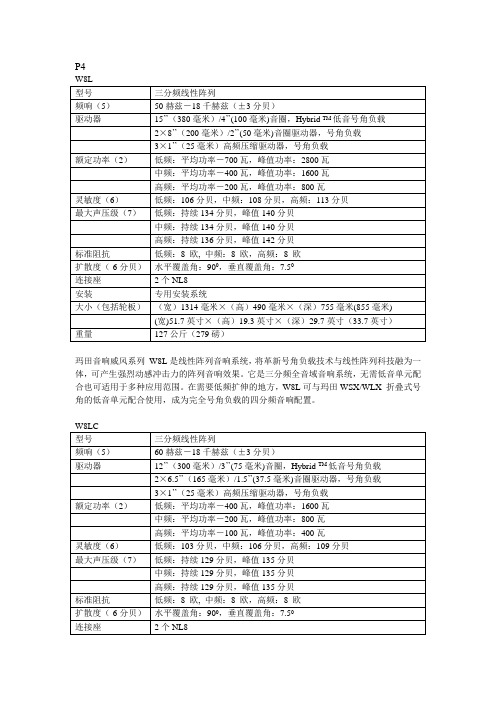
P4玛田音响威风系列W8L是线性阵列音响系统,将革新号角负载技术与线性阵列科技融为一体,可产生强烈动感冲击力的阵列音响效果。
它是三分频全音域音响系统,无需低音单元配合也可适用于多种应用范围。
在需要低频扩伸的地方,W8L可与玛田WSX/WLX 折叠式号角的低音单元配合使用,成为完全号角负载的四分频音响配置。
W8LC是紧凑型线性阵列系统,专为演唱会、剧院和商业宣传活动提供超级新生代线性阵列音响效果而设计。
它可以满足大功率、强劲的低音冲击效果系统的需要,应用范围相当广泛,可应用于现场播音、团体活动和固定安装。
W8LC的网格结构还可根据需要进行吊挂安装或地面叠放安装。
它是全频音响系统,在许多应用情况中,不需要配合低音单元也能使用。
它还可以配合吊挂式的WLX或地面叠放式WLX/WSX低音单元使用。
P5W8LM迷你型线性阵列外围设备,专为需要阵列效果的中小型规模应用而设计。
它是用途广泛、可升级的音响系统,可用作吊挂安装或地面叠放,适用于团体活动、剧院和室内活动;同时也可作为大规模户外音响系统的声音延迟系统。
继承W8L和W8LC的恒定指向号角设计,W8LM是三分频音响系统,将创新号角技术与小型线性阵列技术融为一体,可充分发挥小型线性阵列音响的最大动感震憾效果,产生新一代音响效果。
它可与WLX号角负载的低音单元配合,吊挂安装使用。
加W8L的低频音响输出而设计。
W8LS的大小与W8L相同,并且具备相同的专用安装系统,为吊挂安装提供快捷安全的安装方案。
它具备1000瓦18“双驱动单元,磁性结构和吊挂驱动可产生最大的线性振幅,从而产生低沉浑厚的低音。
P6术。
是WSX的附属音响,WLX体积较小、重量较轻,可与W8线性阵列系统配合使用,既可吊挂安装也可于地面叠放,可以低频延展拥有高输出的音质效果。
单独特长距振幅18”(460毫米)/4”(100毫米)音圈驱动器是通过低flare rate 的双曲线号角在箱体前部负载。
驱动器后面是反射负载,可将低频输出延展低于号角的分频点。
dbx处理器说明书

dbx处理器说明书1 后面板连接IEC电源连接器DriveRack TM PA使用的电源范围为100V~120V,50Hz~60Hz,包括一根IEC电源线。
EU版本(欧洲标准)的电源范围为220V~240V,50Hz~60Hz。
输出1-6Drive Rack TM PA的输出部分提供6个电子平衡的XLR连接器。
输入1-2Drive Rack TM PA的输入部分提供2个电子平衡的XLR连接器。
+4/-10dB开关开关改变的电平范围,或者是+40dB,或者是-10dBV。
接地脱开开关接地脱开开关使两个输入XRL连接器的1脚机架接地与地脱离。
1.2 前面板RTA输入插口XLR平衡输入插座用于连接一个RTA话筒,这个话筒可用“粉红噪声”在“Wizard(奇才)”设置的帮助下通过自动EQ优化任何房间的EQ调节。
RTA话筒输入选择器按前面板上的RTA话筒输入键选择RTA输入的XLR连接器。
数据轮用旋转的DriveRack TM PA数据轮通过程序菜单装载程序、选择参数和编辑参数值。
LCD显示Drive Rack TM PA的背景光LCD显示器给用户提供DriveRack TM PA全部重要的处理信息,包括信号路径、效果模块编辑和奇才(Wizard)设置功能。
如果机内产生内部信号削波,显示器还向用户发出通知,在LCD上显示“CLIP(削波)”信息。
功能键Drive Rack TM PA的功能按键允许直接存取Drive Rack TM PA的全部编辑和领航功能。
上述键的功能如下:<PREV PG>通过任何模块的各页面进行反向领航。
<NEXT PG>通过任何模块的各页面进行向前领航。
<EQ> 用于移动EQ模块。
连续按下时,把EQ模块从输入部分移到输出部分。
<SUBHARMONIC> 此键用于移到分谐波合成器模块。
<XOVER> 用来移到分频器模块。
<FEEDBACK> 用于移到反馈抑制模块。
布塞朋克单体扬声器说明书

TECHNICAL DATADesignMax DM6SEsurface-mounted loudspeakerTechnical SpecificationsProduct OverviewWith coaxial two-way drivers, the 125-watt DesignMax DM6SE loudspeaker offers rich lows and clear, intelligible highs — along with premium aesthetics that complement any commercial sound installation. The DM6SE features a 6.5-inch woofer and a 1.25-inch coaxial tweeter mounted within the Dispersion Alignment system, delivering a frequency range of 59 Hz – 20 kHz. The DM6SE is surface-mounted, IP55 outdoor-rated, and locks onto a hidden QuickHold U-bracket for fast, secure installation.Key FeaturesCombine DesignMax models to complete any design, big or small — 12 loudspeakers to mix and match, from 2-inch, low-profile models to 8-inch, high-SPL compression-driver loudspeakers and outdoor-rated options.Deliver rich lows and clear, intelligible highs with coaxial two-way drivers — no DSP or EQ required. For even better sound, use select Bose DSPs and amplifiers to enable Bose loudspeaker EQ and SmartBass processing, which expands performance and response at any listening level.Ensure a consistent listening experience throughout the room with the Dispersion Alignment system, which matches the acoustic pattern of the woofer to the pattern of the tweeter.Blend with any room design with elegant form factors, minimum-bezel grilles available in black or white, and removable logos.Reduce installation time with the patented QuickHold mounting system, which also reduces strain, hassle, and the chance of product damage.Install easily with industry-standard accessories — all models include Euroblock connectors; in-ceiling models include plenum-rated backcans, tile bridges, and front-access audio wiring that makes installation and troubleshooting easier.Install DM6SE outside — IP55 rating with standard aluminum grille for outdoor use.Footnotes(1) Frequency response and range measured on-axis in half-space environment with Bose EQ voicing(2) Sensitivity measured on-axis in half-space environment averaged 100 Hz – 10 kHz using recommended High-Pass protection(3) Maximum SPL calculated from sensitivity and power handling specifications, exclusive of power compression(4) AES standard 2-hour duration with IEC system noise(5) Bose extended-lifecycle test using pink noise filtered to meet IEC268-5, 6-dB crest factor, 500-hour duration(6) Measured in whole-space environmentOn-Axis Frequency Response。
音箱处理器中文说明

Eraseaxover:删除 一个 已存储模 式。
二 、通 道复 制设 置(CopyToolsSub-Menu)
1.按 菜单键 (MENU)进 入主 菜单(如 图二所示) ,用 BACK 键 ,操 作 选择 通道 复制(CopyToolsSub-Menu) 子菜单。
-24
CLIP 0 -6 -12 -18
-24
OUTPUTS
GAIN
G A IN MUTE
A
B
CLIP 0 -6 -12 -18
- 24
INPUTS
GAIN MUTE
1
2
3
4
5
6
CLIP 0 -6 -12 -18
- 24
CLIP 0 -6 -12 -18
-24
CLIP 0 -6 -12 -18
-24
频 、3+1路分频 、4路 分频和2路超 低音分 频,并 带有限 幅器 。
※ 方 便灵活 多分 频模式 ,2路 输入6路 输出的 ,可 设置成5种模 式,包 括2X2+2路 分 频、 2X3路 分频、4+2路 分频、5+1路 分频和6路分频 ,并 带有限 幅器。
※ 每 个参数 段的 增益调 整范围 为+15dB至-30dB, 中心频 率范 围为20HZ-20KHZ, Qs范围为0.4到128, 每个通 道输入 均带 有3段参 量均衡 ,输 出均带 有5段 参量 均 衡,均 衡器 (PEQ) 带宽 范围为1/36到4倍频 程(Oct), 参数可 进行大 范 围调整,用于优化系统的频率响应。
Copy Input Section Copy InpA to InpB
dbx处理器中文说明书

DBX DriveRack PA 数字音频工作站 ( 中文操作手册 )0.1 Drive Rack PA的定义dbx Drive Rack PA 是控制扩声系统的扬声器各方面最有效的手段,该仪器成为混频器和功放间唯一必需的设备。
以下是该设备的一些特征:用12 个反馈切口过滤器进行立体声反馈消除双 28 波段图解式的均衡经典的 DBX压缩机120A 分谐波合成器2*3 、2*4 、2*5 、2*6 交叉配置立体声多滤段限定均衡立体声输出限制器线性延时粉红噪声发生器自动均衡( 28 波段 RTA)JBL 音箱和 CROWN功放调节安装向导25 个用户程序 /25 个厂方程序2 个 XLR输入和 6 个 XLR输出前控制面板 RTA-M XLR幻像电源输入24 比特 ADC/24比特 DAC,大于 110dB的动态范围TypeIV 变换系统全部图解式的液晶显示第一部分1.1 后面板连接IEC 电源容量Drive Rack PA电源可接受 100-120V,50HZ-60HZ的范围。
一条 IEC 线包含在其中。
EU 类型的可接受 220-240V,50HZ-60HZ。
1-6 输出输出部分提供 6 个平衡的 XLR接口1- 2输入输入部分提供 2 个平衡的 XLR接口+4/-10dBv开关这个开关可 +4dBv、 -10dBv 两档接地提升开关该开关可提升 XLR输入插脚 1 的机架接地1.2 前面板连接RTA输入口这个平衡的 XLR输入口是用来连接一个RTA话筒的,它允许用户优化平衡设置,用户可以使用自平衡的向导安装辅助。
RTA话筒输入选择器按下 RTA话筒输入键将前面板RTA输入 XLR接口数据选择钮数据选择钮用来在程序菜单中滚动选择,加载程序、选择范围和修改范围值。
LCD液晶显示有背景光的液晶显示提供给用户全部的操作信息包括:信号线路,有效限制修改和向导安装功能。
如果任何内部削波在内部单元发生,显示屏同样会提醒用户,以下的信息将出现:削波。
