纹身机安装
SQ型 激光去纹身机指导说明书
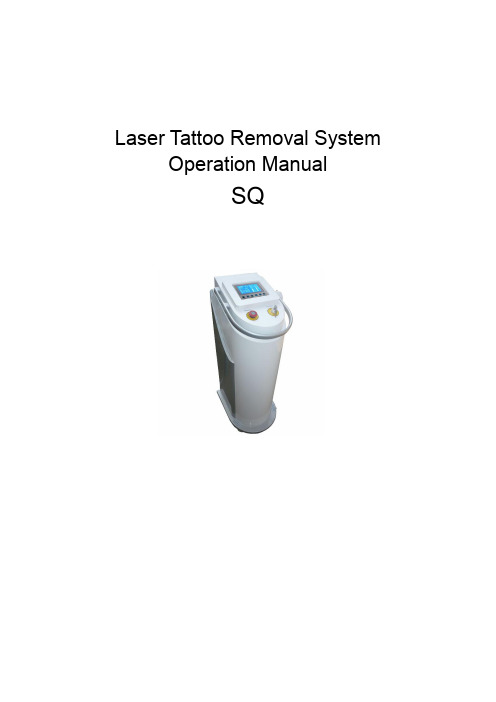
Laser Tattoo Removal System Operation ManualSQImportant Notes❑Users must be trained in medical techniques and safety precautions for laser radiation.❑Users must be fully and constantly aware of the hazards that may be caused by Laser radiation.❑All repair and maintenance should be performed by LANGUN or LANGUN-authorized technical personnel.❑Personnel operating or servicing LANGUN must be thoroughly familiar with all safety requirements and operating procedures❑In the case of reflecting laser beams, metal apparatus should not be used. If metal apparatus has to be used, avoid directing the laser beam onto the surface.❑As the fragile and precision laser system is located in the hand piece, avoid dropping it when using or putting it down.❑ A precision optical system is located in the hand piece and is easily broken.Assure the optical system is not dropped or knocked in any way.WarningFor safety, SQ is especially designed to minimize the damage and effects of laser radiation to persons and the environment in the vicinity of the system. However, as the maximum energy of the machine may reach 1500mJ, improper use may result in severe damage to the operator, patient and the environment, such as burning, blindness, fire and/or explosion.The Nd: YAG laser has an invisible infrared beam with a wavelength of 1100nm. All personnel, including the patient, must wear protective eyewear.CONTENTS1. Pre-Treatment Preparation2. Technical Specifications3. Application Range4. Product Features5. Working Principles6. SQ Operation7. Treatments For Laser Tattoo Removal8. Operator Requirements Before Treatment9. Before & After Treatment10. Maintenance11. Common Questions And Answers12. Special IllustrationAppendix A – Case History1. Pre-Treatment Preparation1. Firstly check the power supply is connected correctly before using the machine.2. Before using the machine, fill up the water-tank with distilled water from theAffusion orifice.3. Water must be distilled, not mineral or tap water.4. Before using the machine, fill with distilled water to the standard line on thewater-tank. After starting the machines allow one minute for the coolant water to circulate properly, please make sure power off ,and fill with distilled water to the standard line on the water-tank again, then restart the machine to operate.The machine will not operate unless sufficient coolant water is present. Otherwise, it will cause the laser head to shatter and may cause physical harm to the operator and/or patient.5. Avoid direct irradiation to the eyes.6. Do not attempt to disassemble the machine without the manufacturer‟spermission.7. Place the hand piece on the cradle after use to avoid possible damage.8. Change the coolant water every month. Depending on the purity.9. After starting the machine allow one minute for the coolant water to circulateproperly.10. Ensure the machine power supply is properly grounded.IMPORTANT NOTICE:If cold weather, water inside the machine has been drain out before shipment, so it can not be use immediately!Due to the temperature difference between indoor and outdoor, When carry the machine from outside into house,please firstly put it in a cooler place,avoiding any condensated water in the Optics parts,circuit board of machine, Must ensure to keep staying 24 hours quietly ,after that starts to use machine .Note : Before starting ,must put the PURIFIED water inside firstly.2. Technical SpecificationsAccording to the classification of the protection against laser radiation, SQ belongs to Class 4 Laser Equipment.Type of Laser: Solid-state Q-switch Nd: YAG LaserWavelength: 1064nm, 532nmOutput Energy: Single-pulse>280mJDual-pulse>560mJMulti-pulse>1500mJPulse duration: 8ns-10nsFrequency: 1, 2, 3, 4, 5, 6HzSpot size: 1-7mm2Power supply: AC 220V/110V, 50/60HzPower Output: 500WOperating ConditionsAmbient T emperature: 10℃~30℃;Relative Humidity: ≤70%;Atmospheric Pressure: 860hPa~1060hPh;Storage ConditionsAmbient T emperature: 4℃~55℃Relative Humidity: ≤93%Atmospheric Pressure: 860hPa~1060hPh;3. Application Range❑The removal of black &blue pigment on eyebrow, eye line and lip line. Scour off tattoo, freckle, lentigines, old aged marks, vascular expansion and types of blood vessel lesions etc.❑There is no damage to the follicles and normal skin, leaving no scar, only to lustrate pigment.❑To lustrate melanin, not being eliminated by medicament and other means.❑There is no need of anesthesics.❑Quick recovery time and no negative effects to the patient.4. Product Features❑Improves the efficiency of treatments.❑Long lifetime Xenon Lamp.❑More stability with the hand-piece structure plus improved internal components.❑Infrared guide light for the correct aiming of target tissue.❑Portable design and easy operation for mobile Tattooists.❑Lower cost and wider usage enables quick return on investment.5. Working PrinciplesLaser eradiation emitted by the system has a strong penetration ability, which allows it to reach deep into the layers of the dermis.The pigment particles absorb the light energy and explode sharply, bursting into tiny pieces, thus removing the pigment.This process can also effectively do away with mutant pigmentations and vascular tissue without damaging the ambient tissue. This is called …Selective heat absorption‟principle in medical field.❑Never stare directly into the Laser beam emitted from the end of the hand piece, or any reflected laser beam.❑Keep ignitable and explosive stupefacient, liquid and gas, including alcohol, ether, nitrous oxide and oxygen, away from Laser beam path. Stringent safety measures should always be taken in this respect❑Never direct the Laser beam to places other than the skin to be treated or the target used for calibration. When moving the hand piece in the operation or replacing the hand piece in the cradle after the operation, ensure that the front-end is not directed at anybody‟s eyes.❑Treatment with SQ must not be carried out for patients with tattoos containing pigments of iron ion, because after exposing to Laser radiation, the pigments with iron ion will be transformed into durable black oxidized iron ion, leading to the failure of the treatment.6. SQ Operation6.1 Installation Program:1.Installation environment: SQ should be installed in the treatment room with ambient temperature between 5℃ to 30℃ and relative humidity no more than 70%.2.Affusion waterAffusion distilled water 1.8 L until it reaches the water level, the coolant water must be de-ionized distilled water not tap water or mineral water.After two to three months‟ use, check the water level from the observation window,when the machine is turned off, if the level of coolant water is lower than required, fill coolant water from the hole in the perforated reservoir plug.3. Treatment laser heads option:532nm is the Square longer one for the red, brown and coffee colors.1064nm is the Round short one for the black, blue and other pigment.Screw on/off the mechanical pointer onto the handpiece;When screwing the converter tight, ensure that the sign on it is aligned with the centerline on the handpiece. Because at the position, optimal laser can be emitted..WarningThe green laser with a wavelength of 532nm is dangerous to epidermis.4. Installing :A. Footswitch Installing:Keep the jag up and Insert the footswitch into the connection port and screw the nut tightly according to the clock wise..B.Power Socket Installing:Connect one side with the body machine, the other side insert into the power supply socket.5. Connection Power supply:After all such above steps ,Turn on the key switch clock wise direction, then the machine is power on ,the infred light lights on .Check all the installation properly, and ensure the sufficient affustion water inside and the working condition .6.2 Operation Program:6.2.1 Control Panel Introduction:(Pic.1)Energy: 300mJ 600mJ 1500mJFrequency:1-6HzStart/Stop: start or stop machineWavelenght: 1064nm (Black, Blue) or 532 nm (Red, Brown and coffee colors)6.2.2 System OperationStart the machine to display the welcome interface, lights on the infred light, 3 seconds later ,it will enter to the treatment interface(Pic.2)(Pic.2)The system supply 3 parameters to adjust, all the data have to be adjusted under the working condition, however it must be done only after release the foot-switch, here belows the detail.6.2.2.1 Wavelength option:Enter into the treatment screen, press “START/STOP” into the setting state(These two functions can be changeable under the working state or Stop state),as Pic.3 shown ,press “WAVELENGTH” button can choose the 532nm(Green Light) or 1064nm (White Light) with its separately laser shots heads.(Pic.3)6.2.2.2 Energy SettingEnter into the treatment interface, press …‟ key increase the energy output. Press…‟ key, it will be decreased. Wavelength under 532nm ,each time increase or decrease it by 50mJ, the adjustable range is from 100mJ to 400mJ. Wavelength under 1064nm,It will change 100mJ each step ,the range is adjustable from 200mJ-800mJ Voltage(RANGE:800-1200V)energy700~800V 300-350MJ900~1000V 580-650MJ1000v~1100V 900~1500MJ6.2.2.3 Frequency SettingEnter into the treatment interface, press …‟ key increase the Frequency output. Press…‟ key, it will be decreased. The adjustable range is from 1Hz to 6Hz. Each steps increase or decrease1Hz,Item Freq. Interval NotesEyebrow 1~2 30-60day Remove eyebrow hair and protect eyeballs Eyelid 1~3 45-60day Remove eyebrow hair and protect eyeballs Lip line 1~3 15-45day Use 532 nm mirrorBody tattoo 1~4 30-60day Exudes blood is effectiveFlecks, aged spot 1~5 15-30day Exudes blood is effectiveBirth mark 3~7 45-90day Exudes blood is effective7. Operator requirement before treatment1) The Operator should make records for each patient, fully understanding customers‟skin condition and choosing the correct laser mirror, at the same time communicate with your customer freely to let she or he feel relaxed.2) Clear treatment area of skin and wait until it is totally dry and sterilize all apparatus.3) Energy referenceapplication best frequency distanceeyebrow5Hz1-2cmcover layer5Hz2-4cmeyelid 5Hz2-3cmlip outline5Hz2-4cmbody tattoo 5Hz 3Hz3-4cmnaevi5Hz 3Hz3-4cmbirth mark 5Hz 3Hz3-4cm8. Before & After TreatmentA. 1064nm(round mirror)for blue and black colorsB. 532nm(square mirror)for red and brown color1. Thoroughly clean surface of skin and shave body hair around treatment area soas to avoid hair be charred and skin burning.2. Set the correct parameters in the system according to different body area.3. Ensure there is no inflammation in the treatment area.4. Do not treat pregnant woman.5. Avoid skin dehydration.6. Ensure there are no cosmetics left on the treatment area.7. Take a photo before treatment and compare the effect after the treatment. During Treatment1. The patient may feel a little pain during the treatment, however this is a normalresponse to laser treatment.2. In the ordinary course of events the thicker the tattoo is, the greater the pain will beat the same time the better the therapeutic result will be.3. Decrease power density if the patient can‟t stand the pain, tries from the lowestpower density to higher ones.4. Overlapping laser spots on the same body area will not hurt the patient.5. According to clinical experience, Lasers with higher energy density can cause celldamage, however this gives better results.Skin appearance after treatment1. Reddish swelling on the treatment area will disappear quickly.2. In some patients, when you set the voltage too high, a scab will form, however itwill drop off naturally after 7 days. Inform the patient not to scratch it. The skin becomes normal after about 2 days.3. Taking some Vitamins can lighten the pigment inflammation. Usually there is afeeling of scorching or slight bleeding, however this is normal and no scar will form.4. When the scab fades away, the treatment part exhibits a pink hue, after 2-3 weeksit appears a coffee color and 1-2 months later it will return to its normal colour.Care after treatmentA few small swellings or little red spots on the skin which usually itches or burns is an accepted phenomenon indicating the parameters of the Laser were set correctly. The red spots will fade away in 24 hours and the burning feeling will disappear in 4-6 hours.After every treatment, check the lens that is located at the end of the hand piece to see whether anything has been splashed onto it. If so, set the hand piece upright, screw off the mechanical pointer and clean the lens with cotton tipped applicator, dipped in dehydrated alcohol.After two to three months use, check the water level. When the machine is turned off, if the level of coolant water is lower than required, fill coolant water into reservoir to the standard level by using an injector.Notes1. The patient can wash the skin with water or Non-stimulator after treatment.2. If there is slight bleeding when the voltage setting is high, wipe off and smear thearea with antiphlogistin (such as Illotycin) until the scar drops off. Do not use cosmetics or other medicines.3. If the treatment area is flush and uncomfortable, use an ice compress.4. Before the scab drops off, the treatment area should not touch water and not bescratched. Avoid certain foods including coffee, Coco Cola etc. Keep to a minimum smoking and drinking .Let the scabs desquamate naturally, do not remove by force.5. Avoid of sweat infection.6. After the scab is desquamating, there is no need to coat with Illotycin(erythromycin) again, just smear with suntan lotion (SPF15 upwards). This prevents exposure to UVA/UVB. Maintain this treatment for 3 to 6 months to reduce skin sensitivity to the sunlight. Using suntan lotion can reduce the healing time.7. Different treatment areas and pigment type determine the intervals and frequencyfor each laser treatment, however normally 1-2 times, every 20-30 days. If there is no undue effect, then treatments can be every 2-4 weeks, if there is anything abnormal, please consult your doctor.8. Pigment fade away is a slow process and normally it is 1-3 months. In order to geta more favorable effect, repeated treatment should be at 1-3 months intervals.9. Maintenance1. Always use purified water or de-ionized water, not the mineral water or tap water.2. Be careful not to irradiate the machine surface.10. Common Questions & Answers❑No signal after power on. Please replace the fuse with 5A/220V AC.❑No signal on the screen. Please lift the Emergency-stop switch up.❑Touch-off light is in off state when pressing the button on the screen when the machine is on pre-ignition. One reason is that the Xenon Lamp is damaged or that the lifespan for Xenon Lamp has ceased. Please change to a new one.❑Water is leaking out of machine, because of the impact during shipment. There may be a breakage in the water tube joint. Please call service personnel.❑If you consider the machine settings are incorrect for the treatment or the effects of the treatment are not sufficient, the reason maybe the temperature is to high, there is no water in the machine or the machine is damaged. Please switch off the machine, after half an hour start the machine again.11.CONTACT USBEIJING HUAWEI Technology Co. Ltd.Tel: 86-10-67343498MSN: weifencheng@E-mail: weifencheng1978@Web: Appendix ACase HistoryName Sex Age NO. Telephone AddressParametersTimes Date Energy Level Post-Operation Return Visit After aWeekRemarkFirst / Second / Third / Forth / Fifth / Sixth /。
刻字机安装教程
刻字机安装教程
刻字机的安装步骤如下:
1、拆开包装箱,先清理掉刻字机小车固定胶带和防撞物;
2、用随机提供的电源电缆先连接刻字机与电源插座;
3、用随机提供的通信电缆联接刻字机与计算机;
4、将刀座或笔座插入刻字机小车刀架,拧紧固定刀座或笔座;
5、打开电源;
6、放置介质,放下压轮(注意:压轮位置应在介质边沿,并保证位置不偏离工作区域);
7、设定参数(电脑部分设定:a、选择机型;b、选定端口和设定流制方式。
刻字机设定:a、设定坐标原点;b、调整刀具深浅等);
8、刻字机自检测试;
9、通过计算机传送数据检测刻字机,能正常输出即为就绪。
现在,您就可以通过电脑发送指令刻绘工作了。
安装纹身针

安装纹身针
第一步 调试纹身机至最佳状态A声音响亮而密且稳定B转速高、扭力大。
第二步 检查纹身针针尖是否受损。
第三步 以专用设备卸下“针嘴固定螺丝”取下针头。
第四步 自针管上端入口处插入纹身针杆 将纹身针杆上部挂在“针杆固定钮”上固定好。纹身时容易出现的问题
1.纹身操作时出现跳针的现象
答 :跳针是在操作时出现针尖有些挂肉的现象 这是因为机器没有测试好 一个是因为纹ቤተ መጻሕፍቲ ባይዱ机的行程太短 针尖没有足够的伸缩空间 导致针尖在原位振动致使行针不利 二是针尖伸出太短 入针太深 使缩回时的针尖直接接触到皮肤上阻碍行针 再是因为机器的速度调节得不够快 走针太快导致挂肉 使线条出现跳点。
2.导致脱色或不上色的原因有哪些
答 :一是针刺太浅 入针深度只达到表皮基底层以上 皮肤的弹性纤维不能有效的锁定色素颗粒 由于皮肤的新陈代谢 一层层脱落 导致色素变淡 二皮肤的表层打磨得太碎 也就是伤口创尹六妹:面太大 弹性纤维过多破损 伤口不易恢复 不能有效锁定色素颗粒 所以纹身时不是上色的遍数 颜色越鲜艳 而是用最少的遍数 最小的创面达到最饱和的色泽。
新款纹身机
岳飞纹身机历史
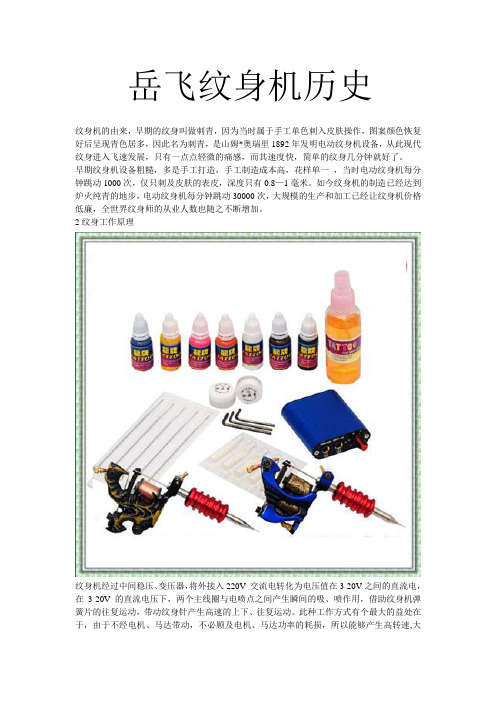
纹身机的由来,早期的纹身叫做刺青,因为当时属于手工单色刺入皮肤操作,图案颜色恢复好后呈现青色居多,因此名为刺青,是山姆*奥瑞里1892年发明电动纹身机设备,从此现代纹身进入飞速发展,只有一点点轻微的痛感,而其速度快,简单的纹身几分钟就好了。
早期纹身机设备粗糙,多是手工打造,手工制造成本高,花样单一,当时电动纹身机每分钟跳动1000次,仅只刺及皮肤的表皮,深度只有0.8—1毫米。
如今纹身机的制造已经达到炉火纯青的地步,电动纹身机每分钟跳动30000次,大规模的生产和加工已经让纹身机价格低廉,全世界纹身师的从业人数也随之不断增加。
2纹身工作原理
纹身机经过中间稳压、变压器,将外接入220V 交流电转化为电压值在3-20V之间的直流电,在3-20V的直流电压下,两个主线圈与电喷点之间产生瞬间的吸、喷作用,借助纹身机弹簧片的往复运动,带动纹身针产生高速的上下、往复运动。
此种工作方式有个最大的益处在于,由于不经电机、马达带动,不必顾及电机、马达功率的耗损,所以能够产生高转速,大
扭力。
工作时纹身针高速而均匀的穿刺表皮层,纹刺色素植入表皮层的基底层,让色素永固于表皮,形成各种色素组合的精美图案和文字,达到修饰皮肤,遮盖表皮疤痕的作用。
纹身机由纹身机身架(有冲压,铸造,线切割,手工焊接的区别),磁力线圈,电容,震动悬铁,弹片,调节顶杆螺丝等主要部件组成,缺一不可。
32纹身设备套装
纹身机如何工作:一台纹身机需要有纹身电源,踏板,钩线等附属设备连接电路后挂上纹身机带动启动,其他手柄,纹身针,针嘴,色料等在纹身工作中缺一不可;这些附属设备加在一起就被称为纹身机套装。
小纹身机器操作方法
小纹身机器操作方法
小纹身机器的操作方法如下:
1. 准备工具和材料:小纹身机器、纹身墨水、纹身针头、橡皮手套等。
2. 设置机器:将纹身针头插入机器中,调整机器电源和转速,根据需要选择不同的纹身针头。
3. 准备皮肤:在皮肤上涂抹一层透明的润滑剂,以便刺穿皮肤。
4. 开始纹身:将纹身机器的刺针放在皮肤上,开始刺穿皮肤,并在皮肤上绘制出所需纹身图案。
5. 完成纹身:在完成纹身之后,将皮肤上的剩余纹身墨水擦拭干净,涂抹抗菌药膏,以防止感染。
6. 保养皮肤:在接下来的几天内,避免接触水、避免敲打皮肤、保持干爽卫生等,以促进皮肤愈合和纹身保持美观。
刺绣机安全操作规程
刺绣机安全操作规程1. 引言本安全操作规程旨在确保使用刺绣机时的安全性,减少操作失误和事故的发生。
请所有操作人员在使用刺绣机之前仔细阅读并遵守本规程。
2. 操作人员要求在操作刺绣机之前,操作人员必须具备以下要求:- 掌握刺绣机的基本操作知识;- 熟悉刺绣机的各部件名称和功能;- 熟悉刺绣机的安全操作规程;- 具备良好的安全意识和职业道德。
3. 刺绣机安全操作步骤步骤一:准备工作- 确保刺绣机所在的区域整洁、干燥且通风良好;- 前往操作刺绣机之前,操作人员应佩戴个人防护设备,如手套和护目镜。
步骤二:开机前检查- 检查刺绣机的电源线是否完好;- 确认各部件安装是否牢固、无松动。
步骤三:开机操作- 打开刺绣机电源,并根据操作手册正确启动机器;- 验证刺绣机的正常运行状态,确认所有指示灯正常工作。
步骤四:进行刺绣任务- 在进行任何刺绣任务之前,操作人员应仔细阅读并遵照刺绣任务的工作指导书;- 根据工作指导书进行刺绣任务,确保操作的准确性和安全性。
步骤五:刺绣完成后的操作- 刺绣任务完成后,操作人员应立即关闭刺绣机,并断开电源;- 清理刺绣机周围的杂物,确保整洁;- 将机器设备和材料归位,妥善保管。
4. 应急措施- 如果在操作过程中出现异常情况或故障,请立即停止操作,并通知维修人员进行检修;- 如遇火灾或其他紧急情况,请按照安全逃生程序进行撤离。
5. 总结刺绣机的安全操作对于保障操作人员的安全和保证刺绣任务的质量至关重要。
请所有操作人员严格按照本规程进行操作,并不断提高安全意识,确保工作安全。
皮肤科常用操作规范
皮肤科常用操作规范第一节色素激光(MEDLITE C6激光治疗仪)操作常规【适应症】主要用于治疗皮肤色素增加性病变,如太田痣、咖啡斑、纹身、雀斑、黄褐斑、褐青色痣。
【禁忌】1、禁止用激光照射人体眼部、非病变部位皮肤。
2、禁止用激光照射光亮表面,以防反射光造成意外损伤。
3、禁止用激光照射易燃、易爆物品(如酒精、棉花等)。
4、治疗相对禁忌症包括:孕妇、光过敏者、癫痫症、光敏药物治疗者、有瘢痕疙瘩史、活动性传染病、外伤、待治区域有疱疹、维A酸治疗者。
【操作步骤】1、开机(1)打开机器后面开关,接通电源,面板上灯亮起。
(2)经过数分钟预热,当控制面板上显示OFF,把钥匙旋转到ON的位置,面板上显示CK KEY。
(3)机器开始自检,直至面板上显示ON STB,按下按钮进入准备模式。
READY.(4)将导光臂取下,准备治疗。
(5)根据病变选择合适的激光波长、能量、光斑大小、频率。
(6)踩脚踏开关发射激光至治疗部位,至治疗完毕。
(7)治疗时对患者眼睛进行避光保护,操作人员戴防护镜。
2、关机(1)把钥匙旋转到OFF的位置, 控制面板上显示OFF。
(2)关闭机器后面开关,关闭电源,面板上灯熄灭。
(3)合拢及放好导光臂。
【日常维护】1、用目视观察治疗头内镜片表面是否被污染,如污染用镜头纸加无水酒精将其擦拭干净。
2、保持房间内干燥无尘,定期室内消毒。
3、尽量少移动机器,减少震动。
第二节 NB-UVB(Waldmam UV-100)紫外光疗仪操作规范【适应症】银屑病、白癜风、玫瑰糠疹、湿疹、斑秃、掌跖脓庖病、毛囊炎、带状疱疹、泛发性扁平苔癣等【禁忌症】、活动性肺结核、甲亢、心肝肾功能衰竭、光感性1.皮肤病(红斑狼疮、着色性干皮病及其它光敏感性皮肤病)、皮肤癌、白内障和无晶体者、接受放疗或同位素治疗者。
2、有黑色素瘤病史或家族史、严重光损伤和以前使用过离子辐射或砷剂者、免疫功能低下者。
【光疗期间注意事项】1、告知病人在治疗期间不宜食用酸橙、无花果、香菜、野菜、芥菜、莴苣等有光敏作用的蔬菜和水果,以及四环素、磺胺、异丙嗪、冬眠灵、炔诺酮等具有光敏作用的药物。
制作纹身针的操作方法
制作纹身针的操作方法
制作纹身针的操作方法如下:
1. 准备材料:需要准备的材料包括一根针尖、一个纹身机手柄、一根导线、一个插头、一根线缆、一块胶带、一把剪刀和一片消毒纸。
2. 制作针尖:将针尖的两头剪掉,使其留下约1.5-2厘米的针尖。
然后用火机或火烧炉将针尖加热至红色,然后迅速用消毒纸擦拭干净,以达到消毒的目的。
3. 连接导线和插头:将一头的导线剥去一小段绝缘层,然后将剥开的导线用胶带固定在纹身机手柄上的电极处。
再将插头的另一端剥去一段绝缘层,然后将导线的裸露部分与插头的金属接触处紧密连接。
4. 连接线缆和插头:将线缆的一端剥去一小段绝缘层,然后将剥开的线缆通过插头的小孔穿过,直到插头与线缆的金属接触处紧密连接。
5. 测试:将插头插入一部电源,打开电源开关,然后用手触碰针尖的另一端,如果可以感受到一点电流震动,则表示制作的纹身针工作正常。
注意事项:
- 在制作和使用纹身针时,一定要保持严格的卫生操作,以免造成感染和其他危害。
- 纹身针的使用需要专业人士进行,非专业人士不建议自行制作和使用。
刺绣机使用方法详解
刺绣机使用方法详解刺绣是一门古老而精美的手工艺术,而如今的科技发展使得刺绣机成为了刺绣师们的得力助手。
刺绣机的出现不仅提高了刺绣的效率,还使得刺绣作品更加精细和美观。
本文将详细介绍刺绣机的使用方法,帮助刺绣爱好者更好地运用刺绣机进行创作。
一、准备工作在使用刺绣机之前,首先要做好准备工作。
首先,将刺绣机放置在平整的工作台上,并确保机器稳定不会晃动。
其次,将刺绣机的电源线插入电源插座,并打开电源开关。
接下来,将刺绣机的刺绣针装好,确保其安装牢固。
最后,将刺绣线穿过刺绣针的眼孔,并将线头固定在刺绣机上。
二、选择刺绣图案刺绣机内置了各种各样的刺绣图案,可以根据自己的喜好选择合适的图案。
有些刺绣机还支持自定义图案,可以通过将图案上传到机器中进行刺绣。
在选择图案时,可以考虑刺绣的尺寸、颜色和复杂度等因素,以便更好地适应刺绣机的工作。
三、调整刺绣机设置在开始刺绣之前,需要根据刺绣的需求调整刺绣机的设置。
首先,调整刺绣机的线张力,确保线不会过松或过紧。
其次,选择适当的刺绣速度,根据自己的经验和刺绣图案的复杂度来调整速度。
最后,选择合适的刺绣针头和刺绣线,以确保刺绣效果的质量和美观。
四、开始刺绣当准备工作和设置完成后,就可以开始刺绣了。
将待刺绣的物品平放在刺绣机的工作台上,并将其固定好,以防止移动。
将刺绣机的刺绣针移动到刺绣的起始位置,并将机器调整到刺绣模式。
根据刺绣图案的要求,将刺绣针移动到相应的位置,并开始刺绣。
在刺绣的过程中,要保持手稳定,控制好刺绣机的速度和力度,以确保刺绣的质量和准确性。
五、刺绣后处理刺绣完成后,需要进行相应的后处理工作。
首先,将刺绣线的线头修剪整齐,以免影响刺绣作品的美观。
其次,将刺绣作品进行整理和熨烫,以使其更加平整和光滑。
最后,根据需要,可以将刺绣作品进行装裱或制作成其他物品,如抱枕、挂毯等,以展示刺绣的艺术价值。
六、刺绣机的保养刺绣机是一种精密的设备,需要定期进行保养和维护,以保证其正常运行和延长使用寿命。
纹身机的正确使用方法

纹身机的正确使用方法
1. 准备工作:先确保纹身机的部件完整,细节清洁,无损坏。
还需要准备所需要的纹身墨水、纹身针头、纹身纸、消毒液、柔软的纹身床等。
2. 洗手和消毒:在纹身过程之前,务必洗手,并使用消毒液消毒双手和纹身机的部件。
3. 设定纹身机:根据设计要求,安装适当的纹身针头,调整纹身机的速度和深度。
根据不同的部位、肤质或纹身风格,可以适当调整机器的速度和震动频率。
4. 准备肌肤:将纹身部位清洁干净,并使用无刺激的消毒酒精进行消毒。
可先在纹身纸上绘制好纹身图案,然后将纹身纸贴在肌肤上,用纹身机按照图案进行纹身。
5. 开始纹身:将纹身机的针头轻轻插入皮肤表层,开始纹身。
纹身时要保持手部稳定,以免造成画面模糊或错误。
6. 纹身时注意:在纹身过程中要时刻注意纹身机的角度和深度,确保纹身过程中的卫生和安全。
根据需要,可以调整纹身机的速度和力度。
7. 纹身完成后:纹身完成后,使用无刺激的清洁剂清洁纹身部位,并覆盖纹身膏或药膏。
嘱咐被纹身者正确保护纹身,并告知纹身后的护理方法和注意事项。
8. 清洁和消毒:纹身工具和设备在使用后必须进行清洁和消毒,以确保下次使用前的卫生。
可以使用专业的消毒液进行清洁和消毒,并将工具储存在干燥和清洁的地方。
轧纹机设备安全操作规程
轧纹机设备安全操作规程在使用轧纹机设备时,安全操作是保障人身和设备安全的重要措施。
以下是轧纹机设备的安全操作规程。
一、设备安装与验收1.1 设备安装必须符合国家及行业的安全标准,设备及设备配件的安装必须经过专业人员认真检验完毕后才能使用。
1.2 设备安装过程中,禁止在轧纹机设备附近操作其他机械设备和工具,确保设备附近环境干燥,没有易燃物品,确保操作安全。
1.3 设备调试前必须按照设备说明书规定检查,包括设备、电气及液压部分等的初次验收,确保无问题后方可进入调试阶段。
二、设备操作2.1 车间的操作人员及工人必须具备相应的工作技能和经验,对相关操作和设备本身有深入的了解,必须严格遵循以下操作规范:2.1.1 操作人员必须穿戴适合的工作服装、手套、鞋子等安全装备,确保工作时没有施加过度的力量或行动。
2.1.2 操作环境必须干燥整洁,电气设备和主机的接头要牢固,确保设备运行稳定。
2.1.3 操作前必须先对设备进行检查,如果发现不稳定或损坏情况立即报告。
2.1.4 操作前必须对于设备执行紧急停机、常规停机、长时间停机等操作,加强对设备的保护。
2.1.5 操作人员必须严格遵守工作规程,切勿操作不熟悉的设备或随意更改设备操作参数。
2.1.6 设备操作完成后,必须切断工作电源并清理设备,确保设备出现故障时尽快修复。
三、设备维护和保养3.1 设备在日常生产中需要进行保养和维修,以保证设备运行的正常和稳定。
3.2 设备保护措施及维护规则必须符合国家及行业的相关标准和规定。
3.3 在设备维修和保养时,必须先切断所有设备的电源以免因错误的操作而导致意外触电。
3.4 在设备保养和维修时,必须使用专业的工具和设备,切勿随意强行试图修复设备。
3.5 设备定期保养,及时更换损坏部件,保证设备的运转和正常维护。
四、紧急救援流程4.1 即使已经遵守了设备的操作规程,也有可能因故障或其他原因导致设备操作不当或出现危险;4.2 如果出现这些紧急情况,操作人员必须立即按照工厂紧急救援流程,采取适当的措施。
去纹身机型号R16,R2型使用说明书
Laser Tattoo Removal EquipmentR16 Manual(FF)(F12)ChapterⅠ Introduction of Laser Eyebrow & Tattoo Removal Equipment 1.Treatment principle:Depending on the Q-Switched Nd, the instrument breaks pigment in injured tissue by means of high energy delivered instantly from laser. The principle of demolishment by laser: specific-wavelength laser gathers high energy instantly and shoots to penetrate cuticle in a cutty time (6 nm) and reaches injured tissue in order to break pigment into fragments. As a result, the pigment agglomerates expand in high speed because of heat and explode into particles instantly.Part of particles (in shallow cuticle) is discharged from the body and the other part (in deep tissue) is broken into grains small enough to be absorbed and digested by macrophage and removed out of the body by lymph system. Accordingly, the color of pigment in injured tissue fades and up to the color of normal skin. Since this specific wavelength can only be absorbed by pigment particles, no injury happens to normal skin and normal tissues.2.Application:The sapphire Q-switch laser tattoo & eyebrow removal equipment can effectively cure pathological changes of endogenous and exogenous pigment formed by mixed pigment--pigment deposit cause by operative errors on dark embroider eyebrow, embroider lip, soak lip, embroider eye line, lip line, tattoo (including traumatic tattoo), allergy source pigment, such as black, blue, green, purple, brown and red color in freckles, cafe-au-lait spots, age pigment, black naevus, etc.3.Reference table of all kinds of treatment period of case history:ChapterⅡ Safety Attentionsser safety:(1)According to laser radicalization safety, laser eyebrow & tattoo removal equipment belong tothe fourth laser product;(2)Laser is invisible infrared light, wherein, the 532nm laser is a light that is green, dazzling visiblelight. Accordingly, any operator shall wear a pair of goggles with wavelength range 200~1080nm;(3)The laser window is located at the bottom of the treatment head. Anyone must avoid radiation;(4)Anyone should never look directly at the bottom of the treatment head or any reflecting laserlight;(5)Keep combustible and explosive stupefacient, liquid, gas (for example: ethanol aether laughinggas oxygen and so on away far from laser radiation area and defend measures should be taken;(6)Don’t irradiate laser to metal devices, or laser is reflected and is dangerous to anyone around;(7)No reflecting things worn, such as watch, necklace, bracelet, etc;(8)Must offer safety sound safeguard to sufferer’s eyes, when removal eye line, the worker mustkeep out sufferer’s eyeballs by gauze, the worker should have ophthalmic clinic experience and strict according to company training way.(9)Different pigment assimilate different laser, the choice of dosage must from small to big.(10)O ur company advice you prepare special laser room and prepare air-condition or xeranticmachine and paste treatment notice matter.(11)N otice: big facula relative lesser power density, small facula relative biggish power density.Power density = power big or small / facula acreage2.Eye safety:(1)Any operator in operation area shall wear goggles (200—1080nm) and any sufferer’s eyes shallbe protected strictly and effectively;(2)Never look directly at laser or reflected laser even wearing goggles;(3)Using gauze or eyelid plate to cover eyes, wearing goggles are all effective to protect sufferer’seyes. Wherein, humid gauze to cover eyes is more effective, but treatment part should be dry; (4)The equipment should be off power when debugging laser or clean laser lens.3、Electric safety :a)According to electric shock egis sort, the laser eyebrow and tattoo removal series belong toⅠ- B model general equipment.b)When 220V electrical source, capacitance no under 200W.c)Connect measure up international monomial three line electrical outlet, the spec 10Aupwards.d)Steady voltage.e)After stop the machine, it inside still leave behind remnant voltage, so can’t optionally takeapart machine.4、Carry safety :a)The machine is portable equipment, move easy.b)Must not hit the light head of treatment, because it has exact optics system.c)Keep water pipe expedite and treatment handle should be packaged by sprung materials.d)Before carrying, must take away apertured cover of water tank, instead of imperforatecover of water tank.Chapter Ⅲusing of the laser machine1.Notice when operating⑴Make sure the operation room clear when operator handles the equipment.⑵Operators must wear white or tint work clothes in order to reduce radiation to body.⑶The illumination of the operation room must strong enough in order to enlarge indooroccupants’ pupil.⑷Don’t use the specular reflection articles while you use the laser machine.⑸The operator must know about the diseases and symptoms of the sufferers and tell them thepossible normal responses during and after operation.⑹Operators who are professional must keep the laser beam away from non-treated areas.⑺Operators must make sure the safe of the eyes of sufferer when treating the embroider eye line,because the harm to eye is irreversible.2.Installation procedure⑴To place: Place the equipment steadily in the operation room or treatment room which the temperature is between 22—28℃ and the humidity is below 10%.⑵ To inject Water: Inject 600ml medical distilled water and pure water from the water injection hole on the top of the equipment. From the water hole you can see water level flat to the first heat dissipation hole which is in side of the crate, so called standard level.⑶To choose treatment light head and wear glasses: To choose the relevant light head according your need and tighten the light head follows the threads direction. 1064nm gets rid of black, blue and cyanine pigment, and 532nm gets rid of red, coffee and brown pigment.⑷To change the imperforation tank cap into perforated tank cap to make sure the water cycle normally.⑸ To install: To connect the power supply line and food switch pedal in the condition that there is no endosmosis and external leakage.a) To install food switch pedal: to make sure the orifice be tightened according to the clockwise.b) To install the electric outlet: one side to connect the line to the tail of the machine, and theother side to connect to the three holes outlet.(6)To electrify: You can insert the key right-lateral to the opening position, and whole of the machine electrify right away.3. Operation methods⑴ Operation methods for touching interface①ExaminationExamine the equipment completely if installed according to the requirement, and make sure the water level is normal and the working environment is suitable.②to run machineStep one: insert the key and right-lateral to the opening position. At that time whole of the machine electrify and you can hear the normal sound of the water cycle. (The red hurry-up switch must be lifted.) And now you must examine the water cycle in the water tank if there is water column inject.You can go into next step if you make sure that the water cycle is normal.Step two: touch the key “simmer ” and the machine goes into the preparation working state.You can hear crisped sound as you touch this key, and the indication light is on. At that time the X-light of the laser lumen is lighted and this equipment goes into pre-igniting state, you must pay attention that you make the light head towards to the ground in case to hurt eyes .Step three: to touch the key “work” and the machine goes into the working state.The equipment can go into the working state; the energy on the upper-right of the control panel will be adjusted to positive automatically in seconds.Step four: to to uch the key “Freg” and to choose the light frequency that you needAcquiescent value is 1Hz as you open the machine. If touch this key circularly, you can choose the treatment special need. You can choose 5Hz if you are professional, because it can speed up the light speed and relieve the sufferer’s pains.Step five: to adjust suitable number in the non-treatment areaOperators can test between dark magazines and dorsum of hand, at the same time the operator tread the kick pedal with food and hold the pickstaff with your right hand. Making the light head towards to the testing area to examine the light which out, you can see the shining light and hear the sound “ba ba”. The distance to testing area is about 2ms( means right to left) and the paper turn to wh ite, and you can feel pinprick. Press the direction key of the energy to change the number of energy (light strength ).Step six: moving the light head to the treatment area and choosing the right energy and frequency. ③ to suspenda 、 F irst you loosen the kick pedal and press “work” if you need to pause the machine, then pressthe hurry-up key. You should make the coefficient to pause state; the machine will be safe condition. The laser light will not output if you touch the kick pedal.b 、If you need to continue to operate this machine, please press the pre-combustion key, workingkey, adjusting key, then you tread the kick pedal and it can work.④ to close the machinea 、 L oosing the kick pedal and making the light head away from the treatment area to stop treating.b 、Closing the working key and the indicating light is off.c 、 C losing the pre-combustion and the indicating light is off.d 、Closing the key switch, and keeping key safely to a certain person.e 、 C losing power supply.⑵ liquid crystal controlling laser operationOperating manual① treatment interface(picture one)Like picture two, the interface display: status indication; treatment mode and the current treatment mode; the general counter and the current counter; treatment frequency; treatment energy; operating key-press indication.Press “ITEM” by order to choose treatment mode, the words turned white means the current treatment mode. Different mode, different frequency and energy according to that you choose different treatment mode.Press “POWER-” or “POWER+” to change the treatment energy.Press “FREQ” to adjust the treatment frequenc y circularly.You can press “SIMM” to preignite the machine if the water temperature and water flow is normal. At the same time the key-press indication changes while the machine preignites, just like picture three.(picture two)The key “SIMM” turns t o “QUIT”; the treatment mode “ITEM” turns to “READY” and the controller goes into the stand by. At the same time you can press “QUIT” to away, also you can press “READY” to charge the machine, like picture four.(picture three)The key “READY” turns to “STANDBY”, the system status also change and the controlling goes into working state. It can work if you tread kick pedal.During the treatment, the counter of the controlling can record automatically according to the treatment frequency. The counter includes current counter and general counter. The current counter can record from 000000—999999, the counter records the number which exceeds 000000. The general counter can record the number from 00000000—99999999, and the counter records thenumber which 00000000.During the treatment, if you need stop you can press “STANDBY” and it can turn to “READY”, then the controlling returns to standby. You can press “READY” and then it turns to “STANDBY”if you need continue to treatment.If you need to quit the tre atment, one is that you can press “STANDBY” and the key becomes “READY” so as to the controlling returns to the standby, then you can press “QUIT”. The other one is that you can press “QUIT” directly.Treatment energy adjusting scope: 0~1000mj, and be chan ged by “power+” and “power-”. The treatment frequency adjusting scope is from 1 to 6Hz.The settled parameter in different treatment item is saved even if you close the power supply. You can change it only you change it to new parameter.(picture four)There is error protection function for water temperature and water flow in the treatment controlling. It will display “ERROR” in the relevant function area, and it provides sound indication; in the protection state, the controlling can not goes into treatment; it can not work if you tread the kick pedal when it appears protection, and the controlling will exit when you touch any key, and turn to the opening picture plane; the protection function will rescission automatically after you get rid of the relevant error, or you can make the protection function invalid in the controlling project mode (this operation will not open to the customer, so we will not describe it ).Chapter Ⅳ The Operation of Laser Instrument1、Notice⑴first you should ask the customer if he\her is scar physique, if had changed skin, if he\her is allergic skin, if he\her is shaded eyebrow or removed eyebrow, tattoo by other ways. You should examine that if the treatment area already has scar, and you should tell the sufferer that maybe there is pigmentation some times later after you remove the pigment, and these pigment is caused by sunshine and he\her can get treatment one and a half months later.⑵、the operator should tell the sufferer that may happened situation and treatment principle during the treatment using the 1064nm to treat the black and blue pigment in case the unnecessary bothers.You can shave the eyebrow before removing the eyebrow with machine in order to examine the effect. We advise you that you should treat the big area tattoo and nevus little by little and time by time in case uncomfortable of the sufferer. You can also help the sufferer to build the confidence according to the contrast between before and after the operation.⑶、There maybe the sound of the pigment breaking when you treat the deep tissue of the tattoo because of the strong absorption to laser energy with 1064nm. The tint color of the pigment can comes out the cuticle after absorbing the energy. Some people may have some drops of drain blood because of thin cuticle. In the first time treatment, the color of the tissue may become thin, but later the color may recover about ten minutes later. This kind of effect is normal. The function of digesting and transportation of the macrophage can continue long time, and the color can become thin during this period. We advise you take the second treatment one and a half months later of the first time. The eye is more sensitive, so it tears to influence the effect; generally we take two times to get into the effect.⑷、The hair may exfoliated after operating as you remove black and blue pigment with 1064nm, but the new hair can tend to normal. There may ooze blood and tint edema in the treatment area. It will be normal if there is the feeling of itch and the tissue is a little hard. All these feeling will disappear in two weeks or about a month, and the time is different according to different people.⑸、Hemoglobin of the tissue absorbs certain wavelength of the 532nm when you remove brown, red pigment with 532nm. The surface of the skin irradiated by laser may turn white, so as to making the pigment drops and pigmentation.(6)、The capillary may break and form congestion as absorbing the wavelength of 532nm, if serious can cause scab. But it is well in about 20-60 days according to different people.⑺、The sufferer will be forbidden drawing eyebrow, bathing and touching in the blood oozing area, and avoid shinning in case causing pigmentation. If serious, the sufferer can take some medicine and erytheromycin ointment which external used followed by doctor. You also will not allowed to take pepper food and alcohol.2、operation skill and technique⑴、demands before operation①Cosmetologist should build file for customer in order to well know about the real disease andchoose the needed energy; at the same time the cosmetologist should explain the advantages of laser machine in order to make the customer to relax and cooperate.②Clean the treatment area, disinfect utensil, shave the eyebrow, and wipe affected part withphysiological saline. You must pay attention that the affected part must be dry, and the treatment will be affected if there is water in the affected part.③The worker should wear white clothes and relevant wavelength glasses. Keep the operationroom clean and illumination is bright enough. You should keep the temperature is between 22 and 28℃, and avoid the laser irradiating non treatment area.⑵ Demands during the operationNotice:① 1064nm gets rid of blue, black and cyanine pigment.② 532nm gets rid of red, coffee and brown pigment.③ the light head should form right angle with treatment area in order to reduce the energy losing. The light spots should fold and translation to a line when you remove eyebrow, eye line and lip line. You should remove the spot and naevus time by time in the little area. The treatment area should ooze blood when you treat the little area.B、o perating technique introduction for different disease①tattoo removala、r emoving single blue and black eyebrow:The operator chooses the needed energy according to the depth of the pigment and move slowly to the skin with light head so as to making the sufferer has a mentality reception process, at the same time the sufferer should close eyes when accepting the treatment. You should settle the light speed to 5Hz; the distance from light head to skin is one or two digit space distance. You may treat from the head or may from the tail of the eyebrow. You can take the second treatment if there is color restoration. The energy can add 20-40 and the light head can drive up 2-3 digit space distance in order to making the effect becomes well.b、shaded eyebrow removal ( the shaded eyebrow can be removed clearly 2 or 3 times)You can settle the light speed is 3Hz and the energy can be settled according to the above form. First you can treat with 1064nm in 2-3 digit space distances, and then you can treat with 532nm in the second time. The brown pigment belongs to mixed pigment, so you should take more than two times, the period is from 45 to 90 days. You can choose different light head according to the left color.② Eye line removalThe light speed can be settled to 5Hz, and the energy is settled to the lowest point. It is about 2-3digit space distance from light head to the treatment area, and the light will be seen as reference. The sufferer’s eyes should be prote cted with thick medical cloth. First you remove the sufferer’s lower eye line, and the sufferer should close his/her eyes, at the same time the eyeball looks up. The operator presses the cloth with index finger, and peels away the lower eyelid with middle finger. The light speed can be settled to 5Hz. When you remove the upper eye line the sufferer should close his/her eyes with eyeball down gaze. The operator presses the cloth with middle finger and pulls the eyelid with index finger. The light speed can be settled to 5Hz.③ Lip line removalThe light speed can be settled to 5Hz, and the energy can be settled according to the reference form above. The distance from light head to the treatment area is 3-4 digit space. You can remove the black, coffee and deep red with 1064nm for the first time and then use 532nm for the second time. You can use 532nm to remove thin red, red, thin coffee and thin brown. You must pay attention that you accept the second treatment of removing lip line, soak lip and the lip’s tat too only half one year. The course of treatment is from 45 to 60 days until it is clear.④Tattoo removalThe light speed can be settled to 3Hz/5Hz, and you can settle the energy according to the reference form above. The distance between light head to treatment area is 3 or 4 digit space. The effect will be best if there is blood oozing point. The light head of 1064nm gets rid of blue and black pigment while 532nm gets rid of red and coffee pigment. The course of treatment is from 45 to 90 days until it is clear.⑤Speckle and naevi removalThe light speed can be settled to 3Hz/5Hz, and you can settle the energy according to the reference form above. The distance between light head to treatment area is 3 or 4 digit space. The effect willbe best if there is blood oozing point. The light head of 532nm gets rid of red pigmentation while 1064nm gets rid of speckle and naevi. The course of treatment is from 15 to 30 days until it is clear.⑥Birthmark and nevus of Ota removalThe light speed can be settled to 3Hz/5Hz, and you can settle the energy according to the reference form above. The distance between light head to treatment area is 3 or 4 digit space. The effect will be best if there is blood oozing point. The light head of 532nm gets rid of red pigmentation while 1064nm gets rid of birthmark. The course of treatment is from 45 to 90 days until it is clear.⑶The reaction during the operation and recovery after the operationThe pigment of the lesion tissue is broken into gains small enough to be absorbed and digested by macrophage. Part of the particles which in the superficial is discharged from the body and the other part which in deep tissue is regularly permutated in superficial, so the tattoo can return in short time. It will be normal if part of the skin becomes red swelling, blister and even blood oozing because the black pigment absorbs the energy strongly when you treat the deep tattoo. The degree is different according to different people, and you can feel a little itch and hard of the tissue. Generally speaking, the uncomfortable will disappear in 3-7days, but it may take 1-3 months for some special constitution.You will not be allowed to draw eyebrow, take shower and get sunshine after getting treatment. You also should change the bad dietary habit fol lowed the doctor. You can’t take alcohol in 3-7days. We suggest that you should take antibiotic if blood too more and serious swelling after treatment. You can daub erythromycin ointment to help to heal in the recovery period.⑷ the determinants for which pigment is different to dispel①The quality of the texture of the pigment, the pigment divided into plants pigment, mixturepigment, and chemical pigment. The plants pigment is dispelled easiest while the chemical pigment is most difficult to dispel. Generally, there are iron and lead in the mixture and chemical pigment, so it is different to remove.②The depth of the pigment. Generally speaking, the deeper of the pigment, the more difficultto remove. And it also takes many times to dispel. It will easy to dispel if the depth of the pigment is thin. The effects will not well if the pigment is chemical even the depth of the pigment is thin.③The different physique of people. The factors include age, skin, and body immunity and soon.3、The knowledge collection of eye brow removal⑴ The differences between the first and the second eye brow removal:You should use the energy which near the focus energy. It is farther than the first time and the energy is bigger than the first time.⑵ The reason that the coffee turns to blue and black:It is normal reaction if the coffee turns to blue and black because the coffee is a mixture pigment which includes iron, lead ion, iron ion. And all these ion can produces pigmentation, so we advice you remove the pigment with 1064nm for the first time and then use 532nm.You can examine the effect half one month later. You can use 1064nm to remove if the color turns to blue, and use 532nm if it turns to red.⑶Why does some red eyebrow have no reaction after removing?The pigment does not belong to plant pigment but the chemical pigment, and the iron ion has reached in to derma, so it is difficult to remove. You should use the focus energy of 1064nm to break up the pigment until it appears the oozing blood, and then you remove it with 532nm.⑷ How to remove the speckle of the face?There are good effects on removing drought spot and butterfly speckle which caused by climate.The deep and hereditary speckles are difficult to remove while shallow and formed by acquired factors. You can use the focus energy to remove the senile plaque until it appears oozing blood. There are three treatment courses with 45 days as a interval period.⑸ The treatment ways to remove naevi.Using the focus energy to remove the naevi until it appears oozing blood.(6)Can the scar constitution be removed?A few people can be removed but the effect is not well. You should not use the focus energy, but to use the big facula and little energy.⑺ Can the pregnant woman be removed the eyebrow?It is not allowed to accept the eyebrow removal.⑻ how to remove the red blood streak and what degree will be ok?We don’t suggest that you remove the red blood streak, because the 532nm can absorb the hemoglobin in the blood. It can form the purpura to cause the operation fail.Chapter Ⅴ The Maintenance of Laser Instrument1、Ordinary maintenance of the machine⑴ Clean the output lens: You should clean the lens regularly after using some times. The spatter matters of the pigment which splash into the lens in the treatment period may influence the light energy and make the laser become hot. You can loosen off the lens with screwdriver and clean the lens with anhydrous alcohol through lens paper and cotton swab. You must keep the gleaming convex surface towards to the inside. Otherwise, it can break if the direction is wrong.⑵ It needs to change in to the pure water after some times. You can immit the same capability water after you take out the 2/3 of the water. After immitting, you should examine the water level until the water flow unblocked. You can press the preheating key after the water flows 5 minutes.⑶the cooling water must be distilled water or pure water, and we advice you use preparation distilled water or pure water which is saled in the market. Mineral water and tap water will not be allowed to use in case the impurity influence the normal work.⑷ You will be not allowed to take down the machine secretly.2、the guide for examining the malfunction⑴the whole machine can not open①If the power supply has electricity and if the attaching plug is ok.②If the red switch is on the open position, you should turn the hurry-up switch right and theswitch is lifted.③ To examine the fuse, and you must change it if the fuse is burnt down.⑵ The water is not flow as you open the machine①malfunction phenomena:The water is not f low or it doesn’t flow smooth. In order to make the machine safe, we adopt the close transportation way and reserve 1/5 volume of the water. Using the imperforation water tank in case leak water in the transportation, and at the same time the indication light is on but the purple X-light is not on when you press the preheating key.②The correct processing methods:Loosen off the imperforation water cap and add the water until to the standard the water level and then change into the perforation water cap if the lever is too low. Restart the machine and press the preheating key. The key’s adsorption is ok if you hear the sound“pa”and the water flows normal and the machine is going to the state of “stand up”.⑶There is no laser output when you kick the pedal.①To examine if the machine goes into the prepare state.②To examine if the pedal is normal and it will be ok if it is damaged.③To examine if the working key is pressed.④To examine if low energy is output. You can improve the energy through adjust the energy key.⑷The energy becomes weak or there is no light comes out.①The machine can not work as normal if the voltage is too low.②The lens is dirty. You should clean the lens according to the right operation.③The X-light is burnt down; you should change the laser gun.④You must stop working and use the machine in 30 minutes if the apparatus.⑤Loosen off the light head and examine if the former lens is damaged.⑥To examine the handle and the light head carefully if these parts is leak water. You must changethem if there is leak phenomenon.⑸ You may get an electric shock when you touch the machine.①Because the weather is dry and we advice you wear as less chemical fiber clothes as possible.②You should use the three grounding plugs and the electrical outlet must have grounding line.③ the voltage is unstable, you should collocate a voltage stabilizer(6)the machine leaks water① Manipulation handle leaks water.② Water leak because of the strong shake in the transportation.③The water tank and the water pump leak water.Please send the equipment to the company at once or counterclaim from the freight company according to the above situation.⑺ There is noise in the operating process when you press the preheating key.①If you don’t use the instrument for a long time, the instrument will simmer slowly. Please repeatthe boot.②Please raise the temperature appropriately if indoor temperature is too low. You can install theair condition.③If the lines of the instrument lights appear to be imaginary or stopped, please check the linesimmediately.④Please keep indoor dry if indoor humidity is too high.⑤If the xenon is burnt out, please replace the xenon lamps.⑻ Energy will be weaken in the use of instrument①If there is impurities adhered to the treatment head lens, it will lead to block the light. At themoment, please check the lens. If there is pigmentation, please use ethanol to wash it.②If the humidity of the operation handle is hot, please let the instrument rest for 30 minutes orreplace the cooling water.③Check the lens. If it is smashed, please contact with the manufacturers immediately.Chapter Ⅵ The Reference of Laser (Eyebrow) Beauty1、The knowledge of laser beauty⑴ What is laser eyebrow?Laser can produce high-energy and gather accurate single color light. It has a (strong) penetration and target. It will produce high-calorie at the local area while working at human disease。
纹身机怎么组装
纹身机怎么组装纹身机是一个用于在人体上进行纹身的工具。
它由一系列组件组成,包括机架、针杆、电机和踏板等。
纹身机的组装需要一些基本的工具和技能,同时也需要一定的耐心和细心。
在本文中,我们将为你详细介绍如何组装纹身机。
材料准备在开始组装纹身机之前,你需要准备以下材料和工具:1. 纹身机套件:包括机架、针杆、电机和踏板等组件。
2. 纹身针:用于在人体上进行刺绣的针头。
3. 纹身颜料:用于绘制纹身图案的颜料。
4. 铝箔纸:用于保护纹身机免受细碎的油墨和其他污物的污染。
5. 扳手:用于拧紧螺丝。
6. 打火机:用于点燃纹身机的电机。
步骤一:安装机架首先,你需要将机架组件安装到纹身机工作台上。
确保机架稳固地固定在工作台上,以确保在使用过程中不会晃动或移动。
步骤二:安装针杆针杆是将纹身针固定在机架上的部件。
将针杆插入机架的针管中,并使用扳手将其拧紧,以确保针杆安全地固定在机架上。
步骤三:连接电机将电机连接到机架的电机座上。
确保电机正确安装,并且可以自由地旋转。
使用扳手拧紧电机座上的螺丝,以确保电机牢固地固定在机架上。
步骤四:连接踏板踏板是控制纹身机开关的部件。
将踏板连接到电机座上的插头上。
确保插头连接牢固,不会在使用过程中松动。
步骤五:安装纹身针从纹身机套件中取出纹身针。
将针头插入针杆顶部,并适当调整针头的深度。
使用扳手拧紧针杆上的螺丝,以确保针头安全地固定在针杆上。
步骤六:调整纹身机使用扳手调整纹身机的张力和速度。
根据个人需要,调整螺丝的松紧程度和电机的转速,以获得最佳的纹身效果。
步骤七:测试纹身机在开始使用纹身机之前,确保对其进行测试。
将纹身机插入电源,并使用踏板控制开关。
确保纹身机可以正常运行,并且电机可以自由旋转。
步骤八:清洁和维护完成纹身机的组装后,注意定期清洁和维护纹身机。
清洁针杆和机架,确保它们没有任何细碎的油墨或其他污物。
定期检查螺丝和连接部件,确保它们没有松动。
总结组装纹身机可能需要一些时间和耐心,但随着经验的积累,你将更加熟练和自信。
关于纹身机器的调试与方法

关于纹身机器的调试与方法-岳飞纹绣商城提供一直以来都想将自己对机器的了解和心得与大家分享,但总觉得自己还在摸索中,所以未能成文。
经过近段时间对机器的深入了解颇有心得,写下来与大家讨论,但这只是我现在的感受,我一直都在变,我以后也会变,写出来只是想给大家借鉴与参考。
还是那句话功无定法,希望我的这些文字能帮到你。
一台纹身机拿到手里,能够让我们去调整的只有以下环节:前弹片、后弹片、后间距、触点螺丝、减震圈、线圈的位置、橡皮筋、衔铁。
而线圈,铁芯,机架,电容基本上我们是不能动的。
所有的调整都围绕着两个因素——频率与力量,我会在下面将其中的规律一一道来。
前弹片:长短宽窄厚薄软硬及弯折的角度都会影响机器的频率和力量。
长、窄、薄、软、弯折角度低都会让机器频率变慢,力量变大。
反之频率变快,力量变小。
减震圈:粗细软硬,细、软让频率变慢,力量变大。
反之亦然。
其实减震圈就是前弹片的延伸,好的前弹片甚至可以不要减震圈,那样前弹片的功率发挥到最大值,力量最大。
触点螺丝:接触点的位置越靠近前弹片的尖端,频率越慢,力量越大,反之亦然。
触点螺丝压得越紧力量越小,频率越快。
建议触点螺丝尽量靠前,轻触弹片,顶多再下旋一到两圈,这样弹片发挥其最大的功率。
后弹片:宽窄软硬及弯折的角度都会影响机器的频率、力量和出针的长短。
窄、薄、软都会让机器频率变慢,力量变大。
反之频率变快,力量变小。
弯折角度越大出针越长,机器的力量越大,频率越慢,反之亦然。
后间距:是指机器后座与衔铁的距离,其实这个距离就是改变后弹片的长短,可以通过几种方式来实现,调整衔铁的长短、后弹片压板的大小、后弹片的前移、这三者都可以改变后间距。
后间距越大力量越大,频率越慢,反之亦然。
线圈的位置:前线圈(靠近针的那个线圈)越靠前力量越大,前后线圈之间的距离越大力量越大。
建议前线圈尽量靠前,后线圈不要动。
衔铁:衔铁的材料、长短轻重,衔铁越长、越重力量越大,频率越慢。
材质方面暂时我只知道断磁性越好的衔铁越好。
- 1、下载文档前请自行甄别文档内容的完整性,平台不提供额外的编辑、内容补充、找答案等附加服务。
- 2、"仅部分预览"的文档,不可在线预览部分如存在完整性等问题,可反馈申请退款(可完整预览的文档不适用该条件!)。
- 3、如文档侵犯您的权益,请联系客服反馈,我们会尽快为您处理(人工客服工作时间:9:00-18:30)。
二、纹身机调节方法:
1.将变压器接上110V(220V)交流电(请注意电源背后110V转220V的开关,选择你要用的交流电)打开电源开关POWER(1表示接通,0表示断开)指示灯亮红色,调节按钮VOLTAGF,顺时针慢慢转动,V表(数显表显数)也会跟着慢慢转动(A表示只有在纹身机工作时才会动),把V表指针调至6-12V(注意:电压调高,输出功率越大,转速越快。看工作时所需要而调节)然后将连接线的插头插入电源孔,再将脚踏开关插上另一个电源孔。
纹 身 流 程
一般流程:
选择图案→ 器具消毒→ 调配色彩→ 绘画 → 调节纹身机 →肤表消毒→开始纹身操作→ 擦拭肤表颜料→ 复纹
本篇文章将简述纹身操作流程,希望能带给你帮助。
先学会调整机器和色彩的搭配,当您的上帝选择好图案后,您要把创作的位置用消毒火酒彻底清理干净(或用术前消毒剂)。
第七步:纹身机至最佳状态时,右脚离开“脚踏开关”即 —断掉电源,纹身机处于停机状态,以右手大拇 指和食指调节“调节固定钮”至最紧状态,锁定“调 压钮”。
说明:完成以上七大步骤后,重新启动纹身机,试机!工作状态最佳!即完成纹身机调试。纹身机在使用专业型稳压器时,割线使用的电压为9-12V,上色或打雾时使用12-14V。
三、安装纹身机:
1.纹身机空载调试完毕,感觉声音,力度都理想,先装上手柄稍微拧紧螺丝,接下来就安装纹身针了。
2.检查纹身针是否完好,在针杆的圆环处套入T型橡胶圈(随机配送),从手柄的上端插入纹身针,再将橡胶圈套入四方铁的圆柱位置上。
3.装上针管,调节手柄位置。用左手握住纹身机,大拇指按住四方铁的圆柱用力向下压,令四方铁触到线圈的铁心面,用右手调整手柄令纹身针露出针管嘴长约1-1.5mm(即一元硬币的一半厚左右)。
最后的一步也是到关紧要的一步,您创作好的作品 要用杆菌肽药膏涂在伤口处,在用纱布处理表面,防止感染,24小时后全新换过直到完全好为止,千万防止感染,否则您的作品将前功尽弃,您的上帝会遗憾终生。好了,您的作品就这样在您的精雕细刻之下完成了史无前例的创举。
无痛膏用法:
1.将无痛膏均匀的涂在准备纹身的地方,
2.将连接线的另一端弹勾勾在纹眉机尾部小孔上(插入纹身机的插座上),再脚踩脚踏开关,纹身机就启动了。电源灯亮红色,V表在6-10V,但纹身机未能启动(A.可能弹片触点未到位;B.可能纹身机线路断开),如果是A则需要重新调试纹身机:把弹力杆先调离弹片触点,再将弹力杆慢慢按顺时针调至弹片触点,同时启动脚踏开关,令纹身机刚好启动,然后松开脚踏开关,把弹力杆按顺时针转动180°-360°跟着拧紧螺丝把弹力杆锁住。(变压器具有过载保护,当指示灯亮绿色时,电压为零,示意出现短路,变压器自动跳闸,这时要把POWER开关打O后重新打1,就会重新启动电源,电压表恢复正常)。如是B,有几种可能:1.电源孔内部短路;②连接线短路,检查插头,弹勾;③脚踏开关短路.线,插头,开关则要维修或退回供应商处理。
安装纹身针:
第一步:调试纹身机至最佳状态 A:声音响亮而密且稳定;B:转速高、扭力大。
第二步:检查纹身针针尖是否受损。
第三步:以专用设备卸下“针嘴固定螺丝”取下针头。
第四步:自针管上端入口处插入纹身针杆,将纹身针杆上部挂 在“针杆固定钮”上固定好。
工作注意事项:
工作时注意针头不要碰到皮肤以外的任何物体,上药水时、针头一定要停止颤作,防止碰到药水盒,如针尖弯曲就无法工作,可用细砂纸按顺针走方向轻轻拉顺,然后,用有厚茧皮肤试针,不钩皮肤为好。
纹身机的好坏决定纹身工作是否轻松?
--- 世界各地的纹身机,款式不一,但工作原理大同小异。工作性能就存在天壤之别,针频、针波
就不一样,工作时间长短也不一,耗材易损程度也不一。
--- 一台性能好的机器,它每秒钟刺入皮肤的次数高(针频高);在每秒钟内每次刺入皮肤的深浅保持在同一深度的次数高(针波低);其次是连续工作时间长。再次是机器设计是否适合人们的一些操作习惯(则是否存在科学性与合理性)。
机器每次用完以后, 要擦拭触点防止污物产生, 针头、针管消毒, 机身擦净,机身上下两块磁点防止生锈。 如触点接触不良,轻则可用纸币擦拭、重则可用砂纸打磨调整螺杆。长时间使用触点折片会向下无力,这时可用手向上折起。
常见故障:
A:如针在肉里走不动有以下问题
1 调整不当 (调节调频三客)
2 针尖弯曲 (带钩)
第五步:右手大拇指和食指调节“调压钮”时,注意右手一直不可离开或放松“调压钮”,直至纹身机产生最佳速度和声音。同时以左手大拇指肚触摸磁力条的前端,针杆固定钮的下方。以左手大拇指触感是否是最大振动(以感到麻木、痒为止)此时,纹身机为最佳工作状态。
第六步:在调试纹身机时,我们需注意纹身机的行程,(行程意为纹身机的磁力条和磁力线圈的间距)该行程必须保证最少为2.5MM。因为这样才能保证针有足够的伸缩距离,以确保针在伸出时能扎入表皮底层,而缩回时又能缩入针管中沾到色素。
纹身机使用说明书 无痛膏用法 绿皂的用法 转印油的用法
JBP系列纹绣机专业研究、开发各类美容仪器用品,产品质量上乘,多功能纹身机实行三包,免用户后顾之忧,马力强劲,29000转,进口电源可调控转速,输出功率可大可小,可用于纹身、纹眉、漂唇,易上色。
一、纹身工作原理:
变压器接入220V(转110V)50HZ交流电,转变为直流电,再接进纹身机,工作电压为6-10V。两个主线圈与四方铁产生磁场,起喷、吸作用,四方铁借助弹片弹力产生高速上下往复运动,四方铁带动纹身针工作,纹身针刺进皮肤表层,将颜料带进皮肤表层。
第二步是,学会图案的设计与图案的修改,用转印油把图案印在清洁的皮肤上,不妥的地方可用修改笔添加,或用修改液去掉不如意的地方,当您的上帝与您都百分百的满意后、您就可以雕刻史无前例的作品
第三步是,学会用针,先用细针(三根针)纹刺图案的边缘,这时会有少量出血,请别紧张,这是正常现象,这时应该注意色彩的搭配,粗的地方可用排针(5 —15针)雕刻出边缘的主体、轮廓,相接的地方可以用上色针(5-40针)刻出不同的暗色修改。最后可以用百分之七十的消毒液清除多余的色料,不满意的地方可以用刀具修改。您的一切用具在使用前要彻底消毒(用高性能压力锅蒸20分钟,或用消毒液浸泡,或用沸水煮30分钟)。
2.用保鲜膜包一小时,
3.取下保鲜膜,搽干净即可
绿皂的用法:
将绿皂1:8兑水,灌进喷壶使用
可以配合转印纸起到转印作用,可以清洗纹身时的皮肤
转印油的用法:
1.把要纹的图案复印好,就是说转印油可以转印复印件
2.把转印油装进喷壶备用,用酒精清洁皮肤以后,将转印油均匀的喷在皮肤上面
3.把复印件放在转印油喷过的皮肤上面,用手在上面平按半分钟,手不要抖动
4.用“橡皮筋”(女孩子扎头发用的软胶圈)在针杆的圆环底往下约8毫米处把针杆和机身拦腰捆扎住,松紧适中,防止工作时纹身针脱出,太紧会影响转速。这样就可以开机工作了!
技术支持:
四、纹身机不启动的原因:
故障原因解决办法
1,弹力杆没有碰到斜弹片的触点上,将弹力杆螺丝松开令弹力杆往下旋转碰到,触点,再旋转合适位置,拧紧螺丝锁住弹力杆。
2,电源开关没有开,接通电源,打开电源开关,指示灯亮红色
3,调节按钮(VOLTAGE)在零位置上,同时V表指针也在零位上,调节按钮顺时针慢慢旋转,同时V表指针也
在旋转,V表指针应停在6-10V。
Hale Waihona Puke 4,弹力杆碰前弹片触点,碰得太过紧,起动不了,更可能产生电源短路,打电源开关,指示灯就亮绿色无电压将弹力杆螺丝松开,把弹力杆往上松离弹片触点重新调弹力杆碰到触点上,重新启动电源,调整弹力杆至合适位置。
纹身机的工作原理及调试方法:
纹身机经过中间稳压、变压器,将外接入220V 交流电转化为电压值在3-20V之间的直流电,在3-20V的直流电压下,两个主线圈与电喷点之间产生瞬间的吸、喷作用,借助纹身机弹簧片的往复运动,带动纹身针产生高速的上下、往复运动。此种工作方式有个最大的益处在于,由于不经电机、马达带动,不必顾及电机、马 达功率的耗损,所以能够产生高转速,大扭力。工作时纹身针高速而均匀的穿刺表皮层,纹刺色素植入表皮层的基底层,让色素永固于表皮,形成各种色素组合的精美图案和文字,达到修饰皮肤,遮盖表皮疤痕的作用。
调试纹身机的步骤细则
第一步:左手握住纹身机针管,以食指顶住“主机座”底 部,大拇指压住“针管固定纽”处位置。
第二步:接通交流电源,将连接线接入纹身机插孔。
第三步:以右手大拇指和食指捏住“调节固定钮”调至“松弛”状态。
第四步:以右手大拇指和食指捏住“调压钮”,调节“调压钮”的同时用右脚踩“脚踏开关”,启动纹身机。
5,工作时停机:往往在工作时,不小心也不清楚什么时候拉了一拉电源线,离开了接合的位置。
检查脚踏开关,电源线的插头有没有到位
6,在工作完毕后,清洗消毒纹身机时,把机器上的线拉断了(脱位),检查纹身机上的线头有没有脱位(断掉),要找电工,把线焊上
7,打开电源就跳指示灯亮绿色,检查电源线上的插头和脚踏开关上的插头,有没有断掉,断掉可能碰线(短断),断掉了线头,要用烙铁焊上,就OK!
4.取下转印油就可以看见皮肤上面清晰的图案
3 针尖过长 (调节手柄握杆)
4 频率过低 (调节调频锣丝)
5 电压过低 (调电源) B:如有时工作有时不工作有以下问题
1 触点不良
2 调整不当
3 机器过热 (休息几分钟)
4 电源线触点脏 (土钩)
5 电压过低
创作一副好的纹身作品有几大先决要素:
一、好的纹身机器;二、高品质颜料;三、熟练的手法;四、对美学的艺术欣赏高低
