spring MVC配置详解
SpringMVC使用MultipartFile文件上传配置,多文件上传

SpringMVC使用MultipartFile文件上传配置,多文件上传,.基本的SpringMVC的搭建在我的上一篇文章里已经写过了,这篇文章主要说明一下如何使用SpringMVC进行表单上的文件上传以及多个文件同时上传的步骤一、配置文件:SpringMVC 用的是的MultipartFile来进行文件上传所以我们首先要配置MultipartResolver:用于处理表单中的file1.<!-- 配置MultipartResolver 用于文件上传使用spring的CommosMultipartResolver -->2.<beans:bean id="multipartResolver"class="org.springframework.web.multipmonsMultipartResolver"3.p:defaultEncoding="UTF-8"4.p:maxUploadSize="5400000"5.p:uploadTempDir="fileUpload/temp"6.>7.</beans:bean>其中属性详解:defaultEncoding="UTF-8"是请求的编码格式,默认为iso-8859-1maxUploadSize="5400000"是上传文件的大小,单位为字节uploadTempDir="fileUpload/temp"为上传文件的临时路径二、创建一个简单的上传表单:1.<body>2.<h2>文件上传实例</h2>3.4.5.<form action="fileUpload.html"method="post"enctype="multipart/form-data">6.选择文件:<input type="file"name="file">7.<input type="submit"value="提交">8.</form>9.10.11.</body>注意要在form标签中加上enctype="multipart/form-data"表示该表单是要处理文件的,这是最基本的东西,很多人会忘记然而当上传出错后则去找程序的错误,却忘了这一点三、编写上传控制类1、创建一个控制类: FileUploadController和一个返回结果的页面list.jsp2、编写提交表单的action:1.//通过Spring的autowired注解获取spring默认配置的request2.@Autowired3.private HttpServletRequest request;4.5./***6. * 上传文件用@RequestParam注解来指定表单上的file为MultipartFile7. *8. * @param file9. * @return10. */11.@RequestMapping("fileUpload")12.public String fileUpload(@RequestParam("file") MultipartFile file) {13.// 判断文件是否为空14.if (!file.isEmpty()) {15.try {16.// 文件保存路径17. String filePath = request.getSession().getServletContext().getRealPath("/") + "upload/"18. + file.getOriginalFilename();19.// 转存文件20. file.transferTo(new File(filePath));21. } catch (Exception e) {22. e.printStackTrace();23. }24. }25.// 重定向26.return"redirect:/list.html";27. }28.29./***30. * 读取上传文件中得所有文件并返回31. *32. * @return33. */34.@RequestMapping("list")35.public ModelAndView list() {36. String filePath = request.getSession().getServletContext().getRealPath("/") + "upload/";37. ModelAndView mav = new ModelAndView("list");38. File uploadDest = new File(filePath);39. String[] fileNames = uploadDest.list();40.for (int i = 0; i < fileNames.length; i++) {41.//打印出文件名42. System.out.println(fileNames[i]);43. }44.return mav;45. }3、使用SpringMVC注解RequestParam来指定表单中的file参数;4、指定一个用于保存文件的web项目路径5、通过MultipartFile的transferTo(File dest)这个方法来转存文件到指定的路径。
基于spring-mvc.xml和application-context.xml的配置与深入理解

基于spring-mvc.xml和application-context.xml的配置与深⼊理解⽬录前沿1、application-context.xml是全局的2、spring-mvc.xml 是spring mvc的配置(1)application-context.xml配置1、⾸先介绍⼀下启动⼀个项⽬的整体流程:2、现在开始正式讲解applicationContext.xml中的配置内容⾸先准备db.properties 配置⽂件SqlSessionTemplate介绍:applicationContext.xml配置:Spring和Mybatis整合有两种⽅式事务管理的两种⽅式:(2)sping-mvc.xml的配置1.⾃动扫描2.注解驱动3.静态资源处理4.避免IE执⾏AJAX时,返回JSON出现下载⽂件5.启动SpringMVC的注解功能,完成请求和注解POJO的映射6.配置⽂件上传7.配置viewResolver视图解析8.定义跳转的⽂件的前后缀,视图模式配置前沿1、application-context.xml是全局的应⽤于多个serverlet,配合listener⼀起使⽤,web.xml中配置如下:<!-- 配置监听器 --><listener><listener-class>org.springframework.web.context.ContextLoaderListener</listener-class></listener><context-param><param-name>contextConfigLocation</param-name><param-value>classpath:applicationContext.xml</param-value></context-param>2、spring-mvc.xml 是spring mvc的配置web.xml中配置如下:<!--配置springmvc DispatcherServlet--><servlet><servlet-name>springMVC</servlet-name><servlet-class>org.springframework.web.servlet.DispatcherServlet</servlet-class><init-param><param-name>contextConfigLocation</param-name><param-value>classpath:config/spring-mvc.xml</param-value></init-param><load-on-startup>1</load-on-startup><async-supported>true</async-supported></servlet>application-context.xml这个⼀般是采⽤⾮spring mvc架构,⽤来加载Application Context。
spring MVC原理及配置
spring MVC原理及配置springmvc原理及配置springmvc原理及配置1.springmvc详述:springmvc就是spring提供更多的一个强悍而有效率的web框架。
借助注释,springmvc提供更多了几乎就是pojo的研发模式,使控制器的研发和测试更加直观。
这些控制器通常不轻易处置命令,而是将其委托给spring上下文中的其他bean,通过spring的倚赖转化成功能,这些bean被转化成至控制器中。
springmvc主要由dispatcherservlet、处理器映射、处理器(控制器)、视图解析器、视图组成。
他的两个核心是两个核心:处理器映射:选择使用哪个控制器来处理请求视图解析器:选择结果应该如何渲染通过以上两点,springmvc确保了如何挑选掌控处置命令和如何挑选视图展现出输入之间的松耦合。
2.springmvc运行原理这里写图片描述(2)找寻处理器:由dispatcherservlet控制器查阅一个或多个handlermapping,找出处置命令的controller。
(3)调用处理器:dispatcherservlet将请求提交到controller。
(4)(5)调用业务处置和回到结果:controller调用业务逻辑处置后,回到modelandview。
3.springmvc接口解释(1)dispatcherservlet接口:spring提供的前端控制器,所有的请求都有经过它来统一分发。
在dispatcherservlet将请求分发给springcontroller 之前,需要借助于spring提供的handlermapping定位到具体的controller。
(2)handlermappingUSB:能够完成客户请求到controller映射。
(3)controller接口:须要为mammalian用户处置上述命令,因此同时实现controllerUSB时,必须确保线程安全并且可以器重。
Spring MVC 简明教程
Spring框架从创建伊始就致力于为复杂问题提供强大的、非侵入性的解决方案。
Spring 2.0当中为缩减XML配置文件数量引入定制命名空间功能,从此它便深深植根于核心Spring框架(aop、context、jee、jms、 lang、tx和util命名空间)、Spring Portfolio项目(例如Spring Security)和非Spring项目中(例如CXF)。
Spring 2.5推出了一整套注解,作为基于XML的配置的替换方案。
注解可用于Spring管理对象的自动发现、依赖注入、生命周期方法、Web层配置和单元/集成测试。
探索Spring 2.5中引入的注解技术系列文章由三部分组成,本文是其中的第二篇,它主要讲述了Web层中的注解支持。
最后一篇文章将着重介绍可用于集成和测试的其它特性。
这个系列文章的第一部分论述了Java注解(annotation)是如何代替XML来配置Spring管理对象和依赖注入的。
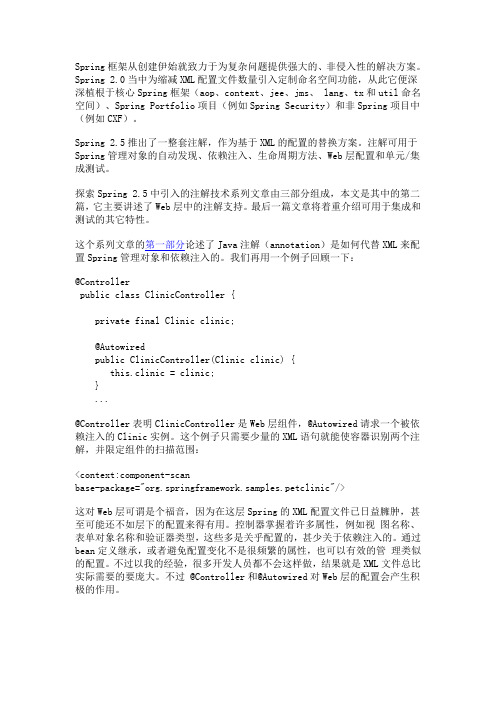
我们再用一个例子回顾一下:@Controllerpublic class ClinicController {private final Clinic clinic;@Autowiredpublic ClinicController(Clinic clinic) {this.clinic = clinic;}...@Controller表明ClinicController是Web层组件,@Autowired请求一个被依赖注入的Clinic实例。
这个例子只需要少量的XML语句就能使容器识别两个注解,并限定组件的扫描范围:<context:component-scanbase-package="org.springframework.samples.petclinic"/>这对Web层可谓是个福音,因为在这层Spring的XML配置文件已日益臃肿,甚至可能还不如层下的配置来得有用。
Spring-MVC基本pom依赖及配置文件

Spring-MVC基本pom依赖及配置⽂件Spring MVC 基本pom依赖<dependencies><dependency><groupId>junit</groupId><artifactId>junit</artifactId><version>4.12</version></dependency><dependency><groupId>org.springframework</groupId><artifactId>spring-webmvc</artifactId><version>5.1.19.RELEASE</version></dependency><dependency><groupId>javax.servlet</groupId><artifactId>servlet-api</artifactId><version>2.2</version></dependency><dependency><groupId>javax.servlet</groupId><artifactId>jstl</artifactId><version>1.2</version></dependency><dependency><groupId>org.projectlombok</groupId><artifactId>lombok</artifactId><version>1.18.18</version></dependency><dependency><groupId>com.fasterxml.jackson.core</groupId><artifactId>jackson-core</artifactId><version>2.11.0</version></dependency><dependency><groupId>com.fasterxml.jackson.core</groupId><artifactId>jackson-databind</artifactId><version>2.11.0</version></dependency><dependency><groupId>com.fasterxml.jackson.core</groupId><artifactId>jackson-annotations</artifactId><version>2.11.0</version></dependency></dependencies>application.xml<?xml version="1.0" encoding="UTF-8"?><beans xmlns="/schema/beans"xmlns:xsi="/2001/XMLSchema-instance"xmlns:context="/schema/context"xmlns:mvc="/schema/mvc"xsi:schemaLocation="/schema/beans/schema/beans/spring-beans.xsd/schema/contexthttps:///schema/context/spring-context.xsd/schema/mvchttps:///schema/mvc/spring-mvc.xsd"><!-- ⾃动扫描指定的包,下⾯所有注解类交给IOC容器管理 --><context:component-scan base-package="controller"/><!--静态资源过滤--><mvc:default-servlet-handler /><!--JSON乱码问题配置--><mvc:annotation-driven><mvc:message-converters register-defaults="true"><bean class="org.springframework.http.converter.StringHttpMessageConverter"><constructor-arg value="UTF-8"/></bean><bean class="org.springframework.http.converter.json.MappingJackson2HttpMessageConverter"><property name="objectMapper"><bean class="org.springframework.http.converter.json.Jackson2ObjectMapperFactoryBean"><property name="failOnEmptyBeans" value="false"/></bean></property></bean></mvc:message-converters></mvc:annotation-driven><!-- 视图解析器 --><bean class="org.springframework.web.servlet.view.InternalResourceViewResolver"id="internalResourceViewResolver"><!-- 前缀 --><property name="prefix" value="/WEB-INF/jsp/" /><!-- 后缀 --><property name="suffix" value=".jsp" /></bean></beans>web.xml<?xml version="1.0" encoding="UTF-8"?><web-app xmlns="/xml/ns/javaee"xmlns:xsi="/2001/XMLSchema-instance"xsi:schemaLocation="/xml/ns/javaee /xml/ns/javaee/web-app_4_0.xsd" version="4.0"><servlet><servlet-name>springmvc</servlet-name><servlet-class>org.springframework.web.servlet.DispatcherServlet</servlet-class><init-param><param-name>contextConfigLocation</param-name><param-value>classpath:application.xml</param-value></init-param><load-on-startup>1</load-on-startup></servlet><servlet-mapping><servlet-name>springmvc</servlet-name><url-pattern>/</url-pattern></servlet-mapping><!-- 乱码过滤器--><filter><filter-name>encoding</filter-name><filter-class>org.springframework.web.filter.CharacterEncodingFilter</filter-class><init-param><param-name>encoding</param-name><param-value>utf-8</param-value></init-param></filter><filter-mapping><filter-name>encoding</filter-name><url-pattern>/*</url-pattern></filter-mapping></web-app>。
springmvc框架搭建之xml配置说明(spring4+hibernate4)
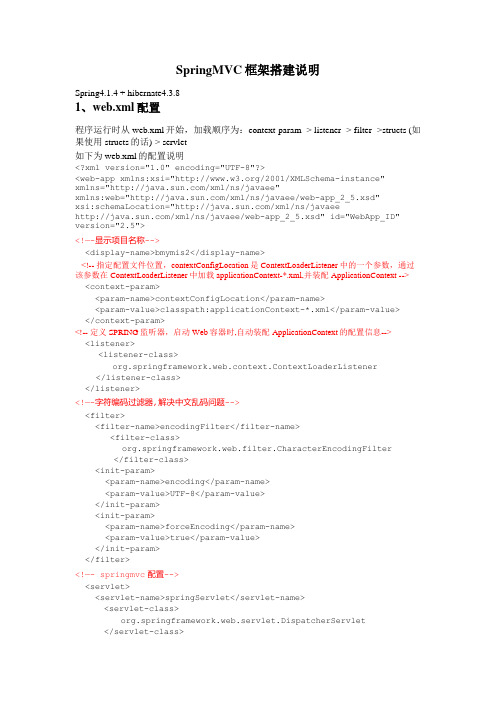
SpringMVC框架搭建说明Spring4.1.4 + hibernate4.3.81、web.xml配置程序运行时从web.xml开始,加载顺序为:context-param -> listener -> filter ->structs (如果使用structs的话)-> servlet如下为web.xml的配置说明<?xml version="1.0" encoding="UTF-8"?><web-app xmlns:xsi="/2001/XMLSchema-instance"xmlns="/xml/ns/javaee"xmlns:web="/xml/ns/javaee/web-app_2_5.xsd"xsi:schemaLocation="/xml/ns/javaee/xml/ns/javaee/web-app_2_5.xsd" id="WebApp_ID" version="2.5"><!—-显示项目名称--><display-name>bmymis2</display-name><!-- 指定配置文件位置,contextConfigLocation是ContextLoaderListener中的一个参数,通过该参数在ContextLoaderListener中加载applicationContext-*.xml,并装配ApplicationContext --> <context-param><param-name>contextConfigLocation</param-name><param-value>classpath:applicationContext-*.xml</param-value></context-param><!-- 定义SPRING监听器,启动Web容器时,自动装配ApplicationContext的配置信息--><listener><listener-class>org.springframework.web.context.ContextLoaderListener </listener-class></listener><!—-字符编码过滤器,解决中文乱码问题--><filter><filter-name>encodingFilter</filter-name><filter-class>org.springframework.web.filter.CharacterEncodingFilter</filter-class><init-param><param-name>encoding</param-name><param-value>UTF-8</param-value></init-param><init-param><param-name>forceEncoding</param-name><param-value>true</param-value></init-param></filter><!—- springmvc配置--><servlet><servlet-name>springServlet</servlet-name><servlet-class>org.springframework.web.servlet.DispatcherServlet </servlet-class><init-param><param-name>contextConfigLocation</param-name><param-value>classpath*:/spring-mvc.xml</param-value></init-param><load-on-startup>1</load-on-startup> //容器启动时首先初始化该servlet </servlet><servlet-mapping><servlet-name>springServlet</servlet-name><url-pattern>/</url-pattern> //表示所有页面都由springmvc处理</servlet-mapping><!—-浏览器输入到项目名,默认打开如下配置页面--><welcome-file-list><welcome-file>/web/login.jsp</welcome-file></welcome-file-list><!—-错误跳转页面--><error-page><error-code>404</error-code><location>/404.html</location></error-page></web-app>2、applicationContext-common.xml配置:<?xml version="1.0" encoding="UTF-8"?><beans xmlns="/schema/beans"xmlns:context="/schema/context"xmlns:xsi="/2001/XMLSchema-instance"xmlns:tx="/schema/tx"xmlns:aop="/schema/aop"xsi:schemaLocation="/schema/beans/schema/beans/spring-beans-4.0.xsd/schema/context/schema/context/spring-context-4.0.xsd/schema/aop/schema/aop/spring-aop-4.0.xsd/schema/tx/schema/tx/spring-tx-4.0.xsd"><!-- 加载资源文件其中包含变量信息,必须在Spring配置文件的最前面加载,即第一个加载--><context:property-placeholder location="classpath:application.properties"/><!—-扫描包路径选项,使用annotation 自动注册bean,并保证@Required,@Autowired的属性被注入,有了该配置,那么<context:annotation-config/>这个配置就可以省略(以下配置包含了<context:annotation-config/>配置)--><context:component-scan base-package="xxx.xxx.xxx"/><!-- 数据源配置,使用应用内的DBCP数据库连接池 --><bean id="dataSource" class="mons.dbcp.BasicDataSource"destroy-method="close"><!-- 定义数据库连接池数据源bean destroy-method="close"的作用是当数据库连接不使用的时候,就把该连接重新放到数据池中,方便下次使用调用--><property name="driverClassName" value="${jdbc.driverClassName}"/><property name="url" value="${jdbc.url}"/><property name="username" value="${ername}"/><property name="password" value="${jdbc.password}"/></bean><!—Hibernate的注解配置 --><bean id="sessionFactory"class="org.springframework.orm.hibernate4.LocalSessionFactoryBean"><property name="dataSource" ref="dataSource"/><property name="hibernateProperties"><props><prop key="hibernate.hbm2ddl.auto">${hibernate.hbm2ddl.auto}</prop><prop key="hibernate.dialect">${hibernate.dialect}</prop><prop key="hibernate.show_sql">${hibernate.show_sql}</prop></props></property><property name="packagesToScan" value="xxx.xxx.xxx.model" /></bean><!-- 配置Hibernate事务管理器 --><bean id="transactionManager"class="org.springframework.orm.hibernate4.HibernateTransactionManager"> <property name="sessionFactory" ref="sessionFactory"/></bean><!-- 配置事务异常封装 --><bean id="persistenceExceptionTranslationPostProcessor"class="org.springframework.dao.annotation.PersistenceExceptionTranslationPost Processor"/><!-- 声明式容器事务管理 ,transaction-manager指定事务管理器为transactionManager --> <tx:advice id="txAdvice" transaction-manager="transactionManager"><tx:attributes><tx:method name="add*" propagation="REQUIRED"/><tx:method name="get*" propagation="REQUIRED"/><tx:method name="*" read-only="true"/></tx:attributes></tx:advice><aop:config expose-proxy="true"><!-- 只对业务逻辑层实施事务 --><aop:pointcut id="txPointcut"expression="execution(*xxx.xxx.xxx.service..*.*(..))"/><!-- Advisor定义,切入点和通知分别为txPointcut、txAdvice --><aop:advisor pointcut-ref="txPointcut" advice-ref="txAdvice"/> </aop:config></beans>3、application.properties配置jdbc.driverClassName=org.postgresql.Driverjdbc.url=jdbc:postgresql://ip:5432/数据库名ername=postgresjdbc.password=123hibernate.dialect=org.hibernate.dialect.PostgreSQLDialecthibernate.show_sql=truehibernate.format_sql=false4、spring-mvc.xml配置<?xml version="1.0"encoding="UTF-8"?><beans xmlns="/schema/beans"xmlns:context="/schema/context"xmlns:mvc="/schema/mvc"xmlns:p="/schema/p"xmlns:xsi="/2001/XMLSchema-instance"xmlns:tx="/schema/tx"xsi:schemaLocation="/schema/beans/schema/beans/spring-beans-3.0.xsd/schema/context/schema/context/spring-context-3.0.xsd/schema/mvc/schema/mvc/spring-mvc-3.0.xsd/schema/tx/schema/tx/spring-tx-4.0.xsd"><!-- 启用spring mvc 注解 --><mvc:annotation-driven><!-- 自动扫描且只扫描@Controller --><context:component-scan base-package="xxx.xxx.xxx "use-default-filters="false"></context:component-scan><!-- 定义JSP文件的位置 --><beanclass="org.springframework.web.servlet.view.InternalResourceView Resolver"><property name="prefix"value="/jsp/"/><property name="suffix"value=".jsp"/></bean><!-- 容器默认的DefaultServletHandler处理所有静态内容与无RequestMapping处理的URL--> <mvc:default-servlet-handler/><!-- 定义无需Controller的url<->view直接映射 --><mvc:view-controller path="/"view-name="login"/></beans>。
SpringMVC框架搭建流程(完整详细版)
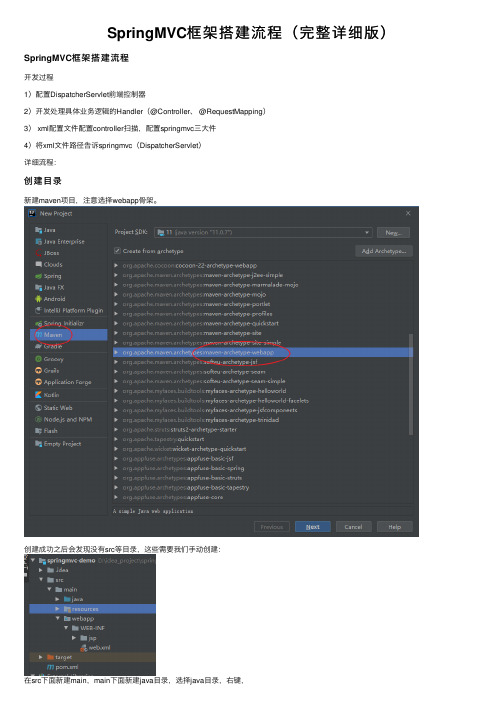
SpringMVC框架搭建流程(完整详细版)SpringMVC框架搭建流程开发过程1)配置DispatcherServlet前端控制器2)开发处理具体业务逻辑的Handler(@Controller、 @RequestMapping)3) xml配置⽂件配置controller扫描,配置springmvc三⼤件4)将xml⽂件路径告诉springmvc(DispatcherServlet)详细流程:创建⽬录新建maven项⽬,注意选择webapp⾻架。
创建成功之后会发现没有src等⽬录,这些需要我们⼿动创建:在src下⾯新建main,main下⾯新建java⽬录,选择java⽬录,右键,在main下⾯继续新建resource⽬录,选择resource⽬录,右键,pom.xmlpom.xml<?xml version="1.0" encoding="UTF-8"?><project xmlns="/POM/4.0.0"xmlns:xsi="/2001/XMLSchema-instance"xsi:schemaLocation="/POM/4.0.0 /xsd/maven-4.0.0.xsd"> <modelVersion>4.0.0</modelVersion><groupId></groupId><artifactId>springmvc-demo</artifactId><version>1.0-SNAPSHOT</version><packaging>war</packaging><properties><project.build.sourceEncoding>UTF-8</project.build.sourceEncoding><piler.source>11</piler.source><piler.target>11</piler.target></properties><dependencies><!--引⼊spring webmvc的依赖--><dependency><groupId>org.springframework</groupId><artifactId>spring-webmvc</artifactId><version>5.1.12.RELEASE</version></dependency></dependencies><build><plugins><plugin><groupId>org.apache.tomcat.maven</groupId><artifactId>tomcat7-maven-plugin</artifactId><version>2.2</version><configuration><port>8080</port><path>/</path></configuration></plugin></plugins></build></project>注意Tomcat7插件是⽤来运⾏项⽬的,右侧运⾏:springmvc相关配置main⽂件夹下⾯新建webapp⽂件夹,webapp下⾯新建WEB-INF,下⾯新建web.xml<!DOCTYPE web-app PUBLIC"-//Sun Microsystems, Inc.//DTD Web Application 2.3//EN""/dtd/web-app_2_3.dtd" ><web-app><display-name>Archetype Created Web Application</display-name><servlet><servlet-name>springmvc</servlet-name><servlet-class>org.springframework.web.servlet.DispatcherServlet</servlet-class><init-param><param-name>contextConfigLocation</param-name><param-value>classpath:springmvc.xml</param-value></init-param></servlet><servlet-mapping><servlet-name>springmvc</servlet-name><!--⽅式⼀:带后缀,⽐如*.action *.do *.aaa该种⽅式⽐较精确、⽅便,在以前和现在企业中都有很⼤的使⽤⽐例⽅式⼆:/ 不会拦截 .jsp,但是会拦截.html等静态资源(静态资源:除了servlet和jsp之外的js、css、png等)为什么配置为/ 会拦截静态资源因为tomcat容器中有⼀个web.xml(⽗),你的项⽬中也有⼀个web.xml(⼦),是⼀个继承关系⽗web.xml中有⼀个DefaultServlet, url-pattern 是⼀个 /此时我们⾃⼰的web.xml中也配置了⼀个 / ,覆写了⽗web.xml的配置为什么不拦截.jsp呢?因为⽗web.xml中有⼀个JspServlet,这个servlet拦截.jsp⽂件,⽽我们并没有覆写这个配置,所以springmvc此时不拦截jsp,jsp的处理交给了tomcat如何解决/拦截静态资源这件事?⽅式三:/* 拦截所有,包括.jsp--><!--拦截匹配规则的url请求,进⼊springmvc框架处理--><url-pattern>/</url-pattern></servlet-mapping></web-app>⾥⾯配置了springmvc相关的配置,引⼊了springmvc.xml:在resource⽬录下新建springmvc.xml:<?xml version="1.0" encoding="UTF-8"?><beans xmlns="/schema/beans"xmlns:xsi="/2001/XMLSchema-instance"xmlns:context="/schema/context"xmlns:mvc="/schema/mvc"xsi:schemaLocation="/schema/beanshttps:///schema/beans/spring-beans.xsd/schema/contexthttps:///schema/context/spring-context.xsd/schema/mvchttps:///schema/mvc/spring-mvc.xsd"><!--开启controller扫描--><context:component-scan base-package=".controller"/><!--配置springmvc的视图解析器--><bean class="org.springframework.web.servlet.view.InternalResourceViewResolver"><property name="prefix" value="/WEB-INF/jsp/"/><property name="suffix" value=".jsp"/></bean><!--⾃动注册最合适的处理器映射器,处理器适配器(调⽤handler⽅法)--><mvc:annotation-driven/></beans>在java⽬录下新建包.controller,下⾯新建DemoController:package .controller;import org.springframework.stereotype.Controller;import org.springframework.web.bind.annotation.RequestMapping;import org.springframework.web.servlet.ModelAndView;import java.util.Date;/*** @author lyj* @Title: DemoController* @ProjectName springmvc-demo* @Description: TODO* @date 2020/6/9 21:21*/@Controller@RequestMapping("/demo")public class DemoController {/*** http://localhost:8080/demo/handle01*/@RequestMapping("/handle01")public ModelAndView handle01(){Date date=new Date();ModelAndView modelAndView=new ModelAndView();modelAndView.addObject("date",date);modelAndView.setViewName("success");return modelAndView;}}在WEB-INF下⾯新建jsp⽂件夹,下⾯新建success.jsp:<%@ page language="java" isELIgnored="false" contentType="text/html; charset=utf-8" pageEncoding="utf-8"%> <html lang="en"><head><meta charset="UTF-8"><title>Title</title></head><body>当前时间 ${date}</body></html>完毕后整个项⽬结构如下:测试:浏览器访问:。
SpringMVC目录结构配置
SpringMVC目录结构配置SpringMVC是一种常见的Java Web框架,它遵循MVC(Model-View-Controller)设计模式,用于构建灵活可扩展的Web应用程序。
SpringMVC的目录结构对于项目的开发和维护非常重要,下面会详细介绍SpringMVC的标准目录结构以及配置方式。
1.标准目录结构1.1 src/main/java:主要用于存放Java源代码。
1.2 src/main/resources:主要用于存放配置文件和资源文件。
1.3 src/main/webapp:主要用于存放Web应用的静态资源。
1.4 src/test/java:主要用于存放测试用例的Java源代码。
1.5 src/test/resources:主要用于存放测试用例的配置文件和资源文件。
2.详细解析2.1 src/main/java目录src/main/java目录是存放Java源代码的默认目录,它包括以下几个子目录:- config:用于存放Spring配置类,如配置数据库连接、配置事务管理等。
- interceptor:用于存放SpringMVC的拦截器。
- model:用于存放数据模型相关的实体类。
- util:用于存放工具类。
- web:用于存放SpringMVC的控制器。
2.2 src/main/resources目录src/main/resources目录是存放配置文件和资源文件的默认目录,它包括以下几个子目录:- static:用于存放静态资源文件,如CSS、JavaScript、图片等。
- templates:用于存放模板文件,如HTML、Thymeleaf模板等。
- application.properties:存放项目的配置信息,如数据库配置、端口配置等。
- logback.xml:存放日志配置,如日志级别、输出路径等。
- mapper:存放MyBatis的Mapper.xml文件。
SpringMVC+Spring+Mybatis框架配置详细步骤(eclipse普通版)
SSI框架搭建SpringMVC3.1.2+Spring3.1.2+Mybatis3.2.6编号:SSI-SMVC3-S3-I3版本:V1.0级别:公开编写时间:2016-02-17目录1 导言 (1)1.1 目的 (1)1.2 范围 (1)1.3 说明 (1)2 搭建SpringMVC (2)2.1 搭建所需jar包 (2)2.2 其他依赖包 (3)2.3 搭建步骤 (4)2.3.1 创建项目 (4)2.3.2 导入jar包 (6)2.3.3 配置web.xml (7)2.3.4 配置spring-servlet.xml (9)2.3.5 配置applicationContext.xml (10)2.3.6 配置log4j.properties (10)3 整合mybatis (11)3.1 整合所需jar包 (11)3.2 其他依赖包 (11)3.3 整合步骤 (11)3.3.1 导入jar包 (11)3.3.2 配置config.properties (12)3.3.3 配置spring-dataSource.xml (12)3.3.4 配置applicationContext.xml (15)3.3.5 配置mybatis-config.xml (16)3.3.6 创建实体model (17)3.3.7 创建实例化dao (19)3.3.8 创建业务服务service (21)3.3.9 创建控制层controller (23)3.3.10 页面代码 (28)3.3.11 启动项目 (37)1导言1.1 目的本文档是根据个人的工作经验搭建的轻量级SSI框架,也是实际应用中比较全面的基础框架,用于指导SSI框架初学者学习搭建SSI框架,希望能给各位使用者提供帮助,同时也希望朋友们尽量去帮助其他人。
1.2 范围本次框架搭建的版本是SpringMVC3.1.2+Spring3.1.2+Mybatis3.2.6,数据库采用的是mysql,在eclipse开发工具下搭建直接搭建的web项目,页面采用的是h5,ajax实现数据访问,如果页面为jsp等,则修改controller的返回类型即可。
SpringMVC框架知识点详解
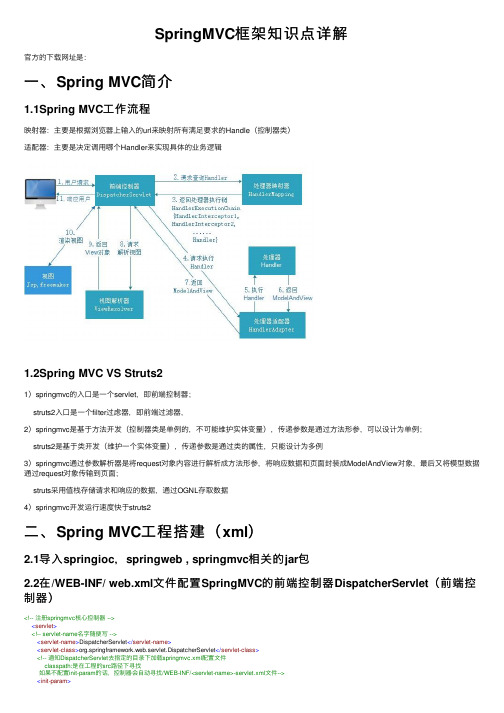
SpringMVC框架知识点详解官⽅的下载⽹址是:⼀、Spring MVC简介1.1Spring MVC⼯作流程映射器:主要是根据浏览器上输⼊的url来映射所有满⾜要求的Handle(控制器类)适配器:主要是决定调⽤哪个Handler来实现具体的业务逻辑1.2Spring MVC VS Struts21)springmvc的⼊⼝是⼀个servlet,即前端控制器;struts2⼊⼝是⼀个filter过虑器,即前端过滤器,2)springmvc是基于⽅法开发(控制器类是单例的,不可能维护实体变量),传递参数是通过⽅法形参,可以设计为单例;struts2是基于类开发(维护⼀个实体变量),传递参数是通过类的属性,只能设计为多例3)springmvc通过参数解析器是将request对象内容进⾏解析成⽅法形参,将响应数据和页⾯封装成ModelAndView对象,最后⼜将模型数据通过request对象传输到页⾯;struts采⽤值栈存储请求和响应的数据,通过OGNL存取数据4)springmvc开发运⾏速度快于struts2⼆、Spring MVC⼯程搭建(xml)2.1导⼊springioc,springweb , springmvc相关的jar包2.2在/WEB-INF/ web.xml⽂件配置SpringMVC的前端控制器DispatcherServlet(前端控制器)<!-- 注册springmvc核⼼控制器 --><servlet><!-- servlet-name名字随便写 --><servlet-name>DispatcherServlet</servlet-name><servlet-class>org.springframework.web.servlet.DispatcherServlet</servlet-class><!-- 通知DispatcherServlet去指定的⽬录下加载springmvc.xml配置⽂件classpath:是在⼯程的src路径下寻找如果不配置init-param的话,控制器会⾃动寻找/WEB-INF/<servlet-name>-servlet.xml⽂件--><init-param><!-- 值是固定的,相当于键值对 --><param-name>contextConfigLocation</param-name><param-value>classpath:springmvc.xml</param-value></init-param></servlet><servlet-mapping><servlet-name>DispatcherServlet</servlet-name><url-pattern>*.action</url-pattern>//拦截请求</servlet-mapping>注:在默认情况下:springmvc框架的配置⽂件必须叫<servlet-name>-servlet.xml且必须放在/WEB-INF/⽬录下,我们可以在web.xml⽂件中,为DispatcherServlet配置⼀个初始化参数,让它去我们指定的⽬录下加载springmvc.xml配置⽂件2.3配置springmvc.xml注:该配置⽂件的命名规则遵循web.xml⽂件中核⼼控制器配置。
springMVC配置(XML配置详解)
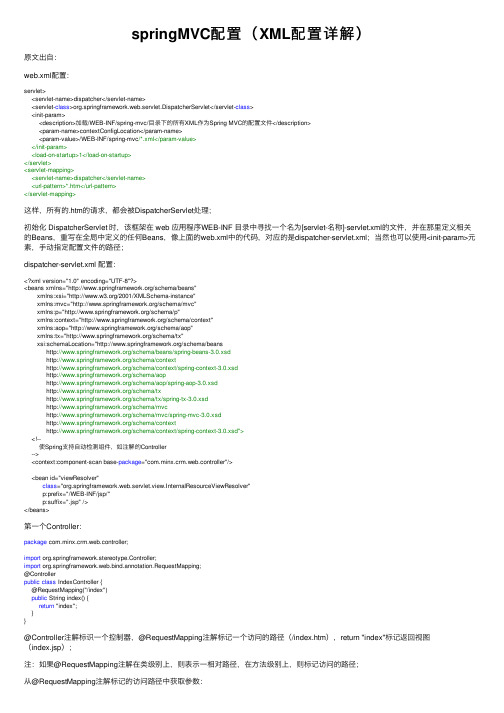
springMVC配置(XML配置详解)原⽂出⾃:web.xml配置:servlet><servlet-name>dispatcher</servlet-name><servlet-class>org.springframework.web.servlet.DispatcherServlet</servlet-class><init-param><description>加载/WEB-INF/spring-mvc/⽬录下的所有XML作为Spring MVC的配置⽂件</description><param-name>contextConfigLocation</param-name><param-value>/WEB-INF/spring-mvc/*.xml</param-value></init-param><load-on-startup>1</load-on-startup></servlet><servlet-mapping><servlet-name>dispatcher</servlet-name><url-pattern>*.htm</url-pattern></servlet-mapping>这样,所有的.htm的请求,都会被DispatcherServlet处理;初始化 DispatcherServlet 时,该框架在 web 应⽤程序WEB-INF ⽬录中寻找⼀个名为[servlet-名称]-servlet.xml的⽂件,并在那⾥定义相关的Beans,重写在全局中定义的任何Beans,像上⾯的web.xml中的代码,对应的是dispatcher-servlet.xml;当然也可以使⽤<init-param>元素,⼿动指定配置⽂件的路径;dispatcher-servlet.xml 配置:<?xml version="1.0" encoding="UTF-8"?><beans xmlns="/schema/beans"xmlns:xsi="/2001/XMLSchema-instance"xmlns:mvc="/schema/mvc"xmlns:p="/schema/p"xmlns:context="/schema/context"xmlns:aop="/schema/aop"xmlns:tx="/schema/tx"xsi:schemaLocation="/schema/beans/schema/beans/spring-beans-3.0.xsd/schema/context/schema/context/spring-context-3.0.xsd/schema/aop/schema/aop/spring-aop-3.0.xsd/schema/tx/schema/tx/spring-tx-3.0.xsd/schema/mvc/schema/mvc/spring-mvc-3.0.xsd/schema/context/schema/context/spring-context-3.0.xsd"><!--使Spring⽀持⾃动检测组件,如注解的Controller--><context:component-scan base-package="com.minx.crm.web.controller"/><bean id="viewResolver"class="org.springframework.web.servlet.view.InternalResourceViewResolver"p:prefix="/WEB-INF/jsp/"p:suffix=".jsp" /></beans>第⼀个Controller:package com.minx.crm.web.controller;import org.springframework.stereotype.Controller;import org.springframework.web.bind.annotation.RequestMapping;@Controllerpublic class IndexController {@RequestMapping("/index")public String index() {return "index";}}@Controller注解标识⼀个控制器,@RequestMapping注解标记⼀个访问的路径(/index.htm),return "index"标记返回视图(index.jsp);注:如果@RequestMapping注解在类级别上,则表⽰⼀相对路径,在⽅法级别上,则标记访问的路径;从@RequestMapping注解标记的访问路径中获取参数:Spring MVC ⽀持RESTful风格的URL参数,如:@Controllerpublic class IndexController {@RequestMapping("/index/{username}")public String index(@PathVariable("username") String username) {System.out.print(username);return "index";}}在@RequestMapping中定义访问页⾯的URL模版,使⽤{}传⼊页⾯参数,使⽤@PathVariable 获取传⼊参数,即可通过地址:http://localhost:8080/crm/index/tanqimin.htm 访问;根据不同的Web请求⽅法,映射到不同的处理⽅法:使⽤登陆页⾯作⽰例,定义两个⽅法分辨对使⽤GET请求和使⽤POST请求访问login.htm时的响应。
SpringMVC+Mybatis+extjs4项目配置
SpringMVC+Mybatis+extjs4项目配置1)软件准备:1.Jdk6:这个需要统一一下,如果用高于jdk6得版本开发,到发布到tomcat服务器后可能运行不正常,在ide上的高版本到低版本的话,也可能出现编译错误的问题,这个要跟生产环境统一起来;2.Tomcat6(7):这个好像关系不太大,主要看生产环境,但如果页面使用了el表达式的话,则需要用高一点的tomcat服务器,低版本的tomcat对el表达式不支持;3.springsource-tool-suite:开发的ide,推荐使用zip安装包,版本2.9的吧,现在的3.1不是很稳定,占用内存很高,经常不响应2)springMVC相关库(jar)配置1.jar的引用主要配置在maven的pom.xml文件了,整个项目都是用pom.xml文件来组织的,如下图:实际项目的结果如:有点不同,所有的代码是放在src文件夹里的,main/webapp文件夹则对应于发布到tomcat 应用的文件夹,所有如果要提交svn,则只需要提交src里的代码,如果改动了非*.java代码,也只要更新webapp目录里改动文件至tomcat相应目录就行了;2.配置pom.xml可能用到的jar包:1)Mybatis:数据库持续层;<dependency><groupId>org.mybatis</groupId><version>1.1.1</version></dependency>2)Mysql:数据库的jdbc的jar包;<dependency><version>5.1.21</version></dependency>3)其他可能用得到的jar包:zip(org.apache.ant),json转换(com.alibaba),文件上传组件(commons-fileupload,commons-io)<dependency><groupId>com.alibaba</groupId><version>1.1.22</version></dependency><dependency></dependency><!-- File Upload --><dependency><version>1.2.2</version></dependency><dependency><version>2.0.1</version></dependency><dependency><groupId>org.codehaus.jackson</groupId><version>1.4.2</version></dependency>4)当改动pom.xml文件后,maven会自动更新项目的jar包,并更新至项目里的引用,如下图:3.项目里配置当把需要用到的jar包引用之后,spring框架里可以使用jar包里面的类,但有些jar包时需要spring的运行时自动加载到mvc运行环境中的,比如数据库持续层mybatis1)Mybatis配置:<bean id="dataSource"class="org.springframework.jdbc.datasource.DriverManagerDataSource"> <property name="driverClassName" value="com.mysql.jdbc.Driver" />rEncoding=UTF-8&useUnicode=true" /><property name="password" value="123456" /></bean><!-- 配置SqlSessionFactoryBean --><bean id="sqlSessionFactory"class="org.mybatis.spring.SqlSessionFactoryB ean"><property name="dataSource"ref="dataSource"/><property name="configLocation"value="classpath:mybatis.xml"/> </bean><!-- 配置事务管理器 --><bean id="transactionManager"class="org.springframework.jdbc.datasource. DataSourceTransactionManager"><property name="dataSource"ref="dataSource"/></bean><!-- 配置事务的传播特性 --><bean id="baseTransactionProxy"class="org.springframework.transaction.in terceptor.TransactionProxyFactoryBean"abstract="true"><property name="transactionManager"ref="transactionManager"/><property name="transactionAttributes"><props><prop key="add*">PROPAGATION_REQUIRED</prop><prop key="edit*">PROPAGATION_REQUIRED</prop><prop key="remove*">PROPAGATION_REQUIRED</prop><prop key="insert*">PROPAGATION_REQUIRED</prop><prop key="update*">PROPAGATION_REQUIRED</prop><prop key="del*">PROPAGATION_REQUIRED</prop><prop key="*">readOnly</prop></props></property></bean><!-- 通过扫描的模式,扫描目录 --><bean class="org.mybatis.spring.mapper.MapperScannerConfigurer"> <property name="basePackage"value="com.spring.wlanmis.data.mapper"/></bean>上面的配置主要是:数据库连接,mybatis.xml,MapperScannerConfigurer(数据库Mapping扫描目录,项目的包结构如下:可以这样看,entity里的类一般要配置在mybatis.xml里,mapper里的文件是成对的,一个是xxx.xml文件,另一个是xxx.java(接口)文件,并mapper必须在配置root-content.xml 里的org.mybatis.spring.mapper.MapperScannerConfigurer中,不然mybatis组件就不能实例化2)其他的配置配置文件上传,详细代码可以查看FileUploadController.java<bean id="multipartResolver"class="monsMultipartResolv er"><property name="maxUploadSize"value="8000000"/></bean>剩下的就只是一些普通的javabean配置了,只是为了配置项目的全局参数,类似于ftpScanRunner3)前端extjs的配置:前端比较简单,只是在页面里设置引用,修改后也不用编译代码,发布时可以直接更新到服务器里相应目录进行覆盖,一般引用如下图项目里文件目录结构如下:具体的extjs4的前端mvc框架,还是参照官网/deploy/ext-4.1.0-gpl/examples/,可以先了解一下它的运行机制,项目的所有视图切换都在menu.json文件里。
springMVC详解以及注解说明

springMVC详解以及注解说明基于注释(Annotation)的配置有越来越流行的趋势,Spring 2.5 顺应这种趋势,提供了完全基于注释配置Bean、装配Bean 的功能,您可以使用基于注释的Spring IoC 替换原来基于XML 的配置。
本文通过实例详细讲述了Spring 2.5 基于注释IoC 功能的使用。
概述注释配置相对于XML 配置具有很多的优势:∙ 它可以充分利用Java 的反射机制获取类结构信息,这些信息可以有效减少配置的工作。
如使用JPA 注释配置ORM 映射时,我们就不需要指定PO 的属性名、类型等信息,如果关系表字段和PO 属性名、类型都一致,您甚至无需编写任务属性映射信息——因为这些信息都可以通过Java 反射机制获取。
∙ 注释和Java 代码位于一个文件中,而XML 配置采用独立的配置文件,大多数配置信息在程序开发完成后都不会调整,如果配置信息和Java 代码放在一起,有助于增强程序的内聚性。
而采用独立的XML 配置文件,程序员在编写一个功能时,往往需要在程序文件和配置文件中不停切换,这种思维上的不连贯会降低开发效率。
因此在很多情况下,注释配置比XML 配置更受欢迎,注释配置有进一步流行的趋势。
Spring 2.5 的一大增强就是引入了很多注释类,现在您已经可以使用注释配置完成大部分XML 配置的功能。
在这篇文章里,我们将向您讲述使用注释进行Bean 定义和依赖注入的内容。
Spring2.5的注释Spring 2.5 提供了AutowiredAnnotationBeanPostProcessor、CommonAnnotationBeanPostProcessor、PersistenceAnnotationBeanPostProcessor 和RequiredAnnotationBeanPostProcessor这四个主要的关于Annotation 的BeanPostProcessor。
详解springmvc常用5种注解

详解springmvc常⽤5种注解⼀、组件型注解:1、@Component 在类定义之前添加@Component注解,他会被spring容器识别,并转为bean。
2、@Repository 对Dao实现类进⾏注解 (特殊的@Component)3、@Service ⽤于对业务逻辑层进⾏注解, (特殊的@Component)4、@Controller ⽤于控制层注解, (特殊的@Component)以上四种注解都是注解在类上的,被注解的类将被spring初始话为⼀个bean,然后统⼀管理。
⼆、请求和参数型注解:1、@RequestMapping:⽤于处理请求地址映射,可以作⽤于类和⽅法上。
●value:定义request请求的映射地址●method:定义地request址请求的⽅式,包括【GET, POST, HEAD, OPTIONS, PUT, PATCH, DELETE, TRACE.】默认接受get请求,如果请求⽅式和定义的⽅式不⼀样则请求⽆法成功。
●params:定义request请求中必须包含的参数值。
●headers:定义request请求中必须包含某些指定的请求头,如:RequestMapping(value = "/something", headers = "content-type=text/*")说明请求中必须要包含"text/html", "text/plain"这中类型的Content-type头,才是⼀个匹配的请求。
●consumes:定义请求提交内容的类型。
●produces:指定返回的内容类型,仅当request请求头中的(Accept)类型中包含该指定类型才返回@RequestMapping(value="/requestTest.do",params = {"name=sdf"},headers = {"Accept-Encoding=gzip, deflate, br"},method = RequestMethod.GET) public String getIndex(){System.out.println("请求成功");return "index";}上⾯代码表⽰请求的⽅式为GET请求,请求参数必须包含name=sdf这⼀参数,然后请求头中必须有 Accept-Encoding=gzip, deflate, br这个类型头。
springMVC配置文件详解
web.xml的配置web.xml应该是整个项目最重要的配置文件了,不过servlet3.0中已经支持注解配置方式了。
在servlet3.0以前每个servlet必须要在web.xml中配置servlet及其映射关系。
但是在spring框架中就不用了,因为Spring中是依赖注入(Dependency Injection)的也叫控制反转(Inversion of Control)。
但是也要配置一个重要的servlet,就是前端控制器(DispatcherServlet)。
配置方式与普通的servlet基本相似。
配置内容如下:<!-- 配置前端控制器--><servlet><servlet-name>spring</servlet-name><servlet-class>org.springframework.web.servlet.DispatcherServlet</servlet-class><init-param><!-- ContextconfigLocation配置springmvc加载的配置文件适配器、处理映射器等--><param-name>contextConfigLocation</param-name><param-value>WEB-INF/classes/spring/springmvc.xml</param-value></init-param></servlet><servlet-mapping><servlet-name>spring</servlet-name><!-- 1、.action访问以.action结尾的由DispatcherServlet进行解析2、/,所有访问都由DispatcherServlet进行解析--><url-pattern>/</url-pattern></servlet-mapping>这里需要注意,springmvc.xml是spring配置文件,将在后面讨论。
springmvc拦截器(定义、配置以及执行流程)

springmvc拦截器(定义、配置以及执⾏流程)⼀、拦截器概念springmvc中的拦截器(interceptor)类似于Servlet中的过滤器(Filter),它主要⽤于拦截⽤户请求并做相应的处理。
在实际项⽬中会经常使⽤到拦截器,例如在购物⽹站中通过拦截器可以拦截未登录的⽤户,禁⽌其购买商品,或者使⽤它来验证已登录⽤户是否有相应的操作权限(即权限验证),记录请求信息的⽇志等应⽤。
所谓拦截器,就是能够在进⾏某个操作之前拦截请求,如果请求符合条件就允许在往下执⾏。
⽐如说,海关就是⼀个拦截器,他拦截进出⼝的货物,如果货物满⾜进出⼝条件,则放⾏,否则就拦截,退回处理。
⼆、拦截器定义和配置使⽤在springmvc中要使⽤拦截器,就需要对拦截器类进⾏定义和配置,通常拦截器类可以通过两种⽅式来定义。
第⼀种通过实现HandleInterceptor接⼝,或者继承HandleInterceptor接⼝的实现类HandleInterceptorAdapter来定义;第⼆种通过实现WebRequestInterceptor接⼝,或继承WebRequestInterceptor接⼝的实现类来定义。
1、拦截器的定义:以实现HandleInterceptor接⼝为例public class LoginInterceptor implements HandlerInterceptor {@Overridepublic boolean preHandle(HttpServletRequest request, HttpServletResponse response, Object handler) throws Exception {//做⼀些操作⽅法返回类型为布尔值return false;}@Overridepublic void postHandle(HttpServletRequest request, HttpServletResponse response, Object handler, ModelAndView modelAndView) throws Exception {//做⼀些操作}@Overridepublic void afterCompletion(HttpServletRequest request, HttpServletResponse response, Object handler, Exception ex) throws Exception {//做⼀些操作}}从以上可以看出,⾃定义的拦截器类实现了HandlerInterceptor接⼝,并且实现了接⼝中的三个⽅法。
SpringMVC的配置文件
SpringMVC的配置⽂件⼀、root标签跟spring配置⼀样,root标签是beans,毕竟springmvc是spring的⼀个模块在springmvc⾥,⾃动扫描主要是配置controller:⼆、⾃动扫描:⼆、⾃动扫描:在<context:component-scan base-package="com.xxx.controller"/>三、解析器Resolver:解析器有很多种,⽐较重要的是ViewResolverViewResolver也有很多种,其中⽐较重要和常⽤的是InternalResourceViewResolver(内部资源视图解析器)代码:<bean id="viewResolver" class="org.springframework.web.servlet.view.InternalResourceViewResolver"><property name="prefix" value="/WEB-INF/jsp/" /><property name="suffix" value=".jsp" /></bean>如果没有视图解析器,我们在controller⾥⾯的代码是这样的:@Controllerpublic class LoginActionController {@RequestMapping("/index")public String toIndex(HttpServletRequest request, ModelMap map, HttpSession session) {return "/WEB-INF/jsp/index.jsp";}⽽使⽤了视图解析器,我们的代码是这样的:@Controllerpublic class LoginActionController {@RequestMapping("/index")public String toIndex(HttpServletRequest request, ModelMap map, HttpSession session) {return "index";}区别在最后⼀句,我们不需要给出⽬标视图的全路径了。
springmvc+druid+dataSource配置的两种方式
springmvc+druid+dataSource配置的两种⽅式⼀、⼀般的配置⽅式数据库连接配置在jdbc.properties⽂件中,这种⽅式有⼀个最⼤的缺点,数据库的配置信息对开发⼈员是完全可见的,⼗分⽅便程序员删库跑路。
spring配置具体如下:1、jdbc.properties⽂件:driver=com.mysql.jdbc.Driverurl=jdbc:mysql://127.0.0.1:3306/test_table?useUnicode=true&characterEncoding=UTF-8&zeroDateTimeBehavior=convertToNull&allowMultiQueries=true& username=rootpassword=root2、spring和druid配置:<!-- 引⼊配置⽂件 --><bean id="propertyConfigurer"class="org.springframework.beans.factory.config.PropertyPlaceholderConfigurer"><property name="location" value="classpath:jdbc.properties"/></bean><!-- JDBC Data Source. It is assumed you have MySQL running on localhostport 3306 with username root and blank password. Change below if it's notthe case --><bean id="dataSource" class="com.alibaba.druid.pool.DruidDataSource" init-method="init" destroy-method="close"><property name="driverClassName" value="${driver}"/><!-- 基本属性 url、user、password --><property name="url" value="${url}"/><property name="username" value="${username}"/><property name="password" value="${password}"/><!-- 配置初始化⼤⼩、最⼩、最⼤ --><property name="initialSize" value="1"/><property name="minIdle" value="1"/><property name="maxActive" value="20"/><!-- 配置获取连接等待超时的时间 --><property name="maxWait" value="60000"/><!-- 配置间隔多久才进⾏⼀次检测,检测需要关闭的空闲连接,单位是毫秒 --><property name="timeBetweenEvictionRunsMillis" value="60000"/><!-- 配置⼀个连接在池中最⼩⽣存的时间,单位是毫秒 --><property name="minEvictableIdleTimeMillis" value="300000"/><property name="validationQuery" value="SELECT 'x'"/><property name="testWhileIdle" value="true"/><property name="testOnBorrow" value="false"/><property name="testOnReturn" value="false"/><!-- 打开PSCache,并且指定每个连接上PSCache的⼤⼩ --><property name="poolPreparedStatements" value="false"/><property name="maxPoolPreparedStatementPerConnectionSize" value="20"/><!-- 配置监控统计拦截的filters --><property name="filters" value="stat"/></bean>以上简单的配置就好了。
SpringMVC集成LogBack,相关配置
SpringMVC集成LogBack,相关配置最近在做项⽬中需要⽤到⽇志,本来选取的是Log4j,最后经过对⽐之后还是发现LogBack在性能上⽐Log4j有优势。
⾄于有什么好处,请参考下⾯这篇⽂章。
下⾯废话不多说了,就看⼀下,如何来把LogBack集成到我们的web项⽬中吧。
本⼈前台⽤的是SpringMVC。
jar包配置如果要使⽤LogBack做为⽇志的插件的话,需要的jar包有如下,直接看⼀下Maven依赖1. <span style="font-family:Comic Sans MS;font-size:18px;"><dependency>2. <groupId>org.slf4j</groupId>3. <artifactId>slf4j-api</artifactId>4. <version>1.7.12</version>5. </dependency>6. <dependency>7. <groupId>ch.qos.logback</groupId>8. <artifactId>logback-classic</artifactId>9. <version>1.1.3</version>10. <scope>compile</scope>11. <exclusions>12. <exclusion>13. <artifactId>slf4j-api</artifactId>14. <groupId>org.slf4j</groupId>15. </exclusion>16. </exclusions>17. </dependency>18.19. <dependency>20. <groupId>ch.qos.logback</groupId>21. <artifactId>logback-core</artifactId>22. <version>1.1.3</version>23. <exclusions>24. <exclusion>25. <groupId>org.slf4j</groupId>26. <artifactId>slf4j-api</artifactId>27. </exclusion>28. </exclusions>29. <scope>compile</scope>30. </dependency>31.32. <dependency>33. <groupId>ch.qos.logback</groupId>34. <artifactId>logback-access</artifactId>35. <version>1.1.3</version>36. <exclusions>37. <exclusion>38. <groupId>org.slf4j</groupId>39. <artifactId>slf4j-api</artifactId>40. </exclusion>41. </exclusions>42. <scope>compile</scope>43. </dependency></span>Web.xml在web项⽬中需要通过web.xml来加载我们所需要的LogBack.xml具体如下1. <span style="font-family:Comic Sans MS;font-size:18px;"><?xml version="1.0" encoding="UTF-8"?>2. <web-app version="2.5" xmlns="/xml/ns/javaee"3. xmlns:xsi="/2001/XMLSchema-instance"4. xsi:schemaLocation="/xml/ns/javaee5. /xml/ns/javaee/web-app_2_5.xsd">6.7.8.9.10. <!-- logback-begin -->11. <context-param>12. <param-name>logbackConfigLocation</param-name>13. <param-value> classpath:logback.xml</param-value>14. </context-param>15. <listener>16. <listener-class>com.util.LogbackConfigListener</listener-class>17. </listener>18. <!-- logback-end -->19.20.21. <filter>22. <filter-name>encodingFilter</filter-name>23. <filter-class>org.springframework.web.filter.CharacterEncodingFilter</filter-class>24. <init-param>25. <param-name>encoding</param-name>26. <param-value>UTF-8</param-value>27. </init-param>28. <init-param>29. <param-name>forceEncoding</param-name>30. <param-value>true</param-value>31. </init-param>32. </filter>33. <filter-mapping>34. <filter-name>encodingFilter</filter-name>35. <url-pattern>/*</url-pattern>36. </filter-mapping>37.38. <servlet>39. <servlet-name>springMVC</servlet-name>40. <servlet-class>org.springframework.web.servlet.DispatcherServlet</servlet-class>41. <init-param>42. <param-name>contextConfigLocation</param-name>43. <param-value> classpath:springMVC-servlet.xml</param-value>44. </init-param>45. <load-on-startup>1</load-on-startup>46. </servlet>47. <!-- 这⾥⼀定要是/根据Servlet规范来的 -->48. <servlet-mapping>49. <servlet-name>springMVC</servlet-name>50. <url-pattern>/</url-pattern>51. </servlet-mapping>52.53. </web-app></span>上⾯的XML中⽤到了⾃定义的监听器,分别是三个类,如下所⽰LogbackConfigListener类1. <span style="font-family:Comic Sans MS;font-size:18px;">package com.util;2.3. import javax.servlet.ServletContextEvent;4. import javax.servlet.ServletContextListener;5.6. public class LogbackConfigListener implements ServletContextListener {7.8. public void contextInitialized(ServletContextEvent event) {9. LogbackWebConfigurer.initLogging(event.getServletContext());10. }11.12. public void contextDestroyed(ServletContextEvent event) {13. LogbackWebConfigurer.shutdownLogging(event.getServletContext());14. }15. }16. </span>LogbackConfigurer类1. <span style="font-family:Comic Sans MS;font-size:18px;">package com.util;2.3. import java.io.File;4. import java.io.FileNotFoundException;5. import .URL;6.7. import org.slf4j.LoggerFactory;8. import org.springframework.util.ResourceUtils;9. import org.springframework.util.SystemPropertyUtils;10.11. import ch.qos.logback.classic.LoggerContext;12. import ch.qos.logback.classic.joran.JoranConfigurator;13. import ch.qos.logback.core.joran.spi.JoranException;14.15. public abstract class LogbackConfigurer {16.17. /** Pseudo URL prefix for loading from the class path: "classpath:" */18. public static final String CLASSPATH_URL_PREFIX = "classpath:";19.20. /** Extension that indicates a logback XML config file: ".xml" */21. public static final String XML_FILE_EXTENSION = ".xml";22.23. private static LoggerContext lc = (LoggerContext) LoggerFactory24. .getILoggerFactory();25. private static JoranConfigurator configurator = new JoranConfigurator();26.27. /**28. * Initialize logback from the given file location, with no config file29. * refreshing. Assumes an XML file in case of a ".xml" file extension, and a30. * properties file otherwise.31. *32. * @param location33. * the location of the config file: either a "classpath:"34. * location (e.g. "classpath:mylogback.properties"), an absolute35. * file URL (e.g.36. * "file:C:/logback.properties), or a plain absolute path in the file system (e.g. "37. * C:/logback.properties")38. * @throws FileNotFoundException39. * if the location specifies an invalid file path40. */41. public static void initLogging(String location)42. throws FileNotFoundException {43. String resolvedLocation = SystemPropertyUtils44. .resolvePlaceholders(location);45. URL url = ResourceUtils.getURL(resolvedLocation);46. if (resolvedLocation.toLowerCase().endsWith(XML_FILE_EXTENSION)) {47. // DOMConfigurator.configure(url);48. configurator.setContext(lc);49. lc.reset();50. try {51. configurator.doConfigure(url);52. } catch (JoranException ex) {53. throw new FileNotFoundException(url.getPath());54. }55. lc.start();56. }57. // else {58. // PropertyConfigurator.configure(url);59. // }60. }61.62. /**63. * Shut down logback, properly releasing all file locks.64. * <p>65. * This isn't strictly necessary, but recommended for shutting down logback66. * in a scenario where the host VM stays alive (for example, when shutting67. * down an application in a J2EE environment).68. */69. public static void shutdownLogging() {70. lc.stop();71. }72.73. /**74. * Set the specified system property to the current working directory.75. * <p>76. * This can be used e.g. for test environments, for applications that77. * leverage logbackWebConfigurer's "webAppRootKey" support in a web78. * environment.79. *80. * @param key81. * system property key to use, as expected in logback82. * configuration (for example: "demo.root", used as83. * "${demo.root}/WEB-INF/demo.log")84. * @see org.springframework.web.util.logbackWebConfigurer85. */86. public static void setWorkingDirSystemProperty(String key) {87. System.setProperty(key, new File("").getAbsolutePath());88. }89.90. }91. </span>LogbackWebConfigurer类1. <span style="font-family:Comic Sans MS;font-size:18px;">package com.util;2.3. import java.io.FileNotFoundException;4.5. import javax.servlet.ServletContext;6.7. import org.springframework.util.ResourceUtils;8. import org.springframework.util.SystemPropertyUtils;9. import org.springframework.web.util.WebUtils;10.11. public abstract class LogbackWebConfigurer {12.13. /** Parameter specifying the location of the logback config file */14. public static final String CONFIG_LOCATION_PARAM = "logbackConfigLocation";15.16. /**17. * Parameter specifying the refresh interval for checking the logback config18. * file19. */20. public static final String REFRESH_INTERVAL_PARAM = "logbackRefreshInterval";21.22. /** Parameter specifying whether to expose the web app root system property */23. public static final String EXPOSE_WEB_APP_ROOT_PARAM = "logbackExposeWebAppRoot";24.25. /**26. * Initialize logback, including setting the web app root system property.27. *28. * @param servletContext29. * the current ServletContext30. * @see WebUtils#setWebAppRootSystemProperty31. */32. public static void initLogging(ServletContext servletContext) {33. // Expose the web app root system property.34. if (exposeWebAppRoot(servletContext)) {35. WebUtils.setWebAppRootSystemProperty(servletContext);36. }37.38. // Only perform custom logback initialization in case of a config file.39. String location = servletContext40. .getInitParameter(CONFIG_LOCATION_PARAM);41. if (location != null) {42. // Perform actual logback initialization; else rely on logback's43. // default initialization.44. try {45. // Return a URL (e.g. "classpath:" or "file:") as-is;46. // consider a plain file path as relative to the web application47. // root directory.48. if (!ResourceUtils.isUrl(location)) {49. // Resolve system property placeholders before resolving50. // real path.51. location = SystemPropertyUtils52. .resolvePlaceholders(location);53. location = WebUtils.getRealPath(servletContext, location);54. }55.56. // Write log message to server log.57. servletContext.log("Initializing logback from [" + location58. + "]");59.60. // Initialize without refresh check, i.e. without logback's61. // watchdog thread.62. LogbackConfigurer.initLogging(location);63.64. } catch (FileNotFoundException ex) {65. throw new IllegalArgumentException(66. "Invalid 'logbackConfigLocation' parameter: "67. + ex.getMessage());68. }69. }70. }71.72. /**73. * Shut down logback, properly releasing all file locks and resetting the74. * web app root system property.75. *76. * @param servletContext77. * the current ServletContext78. * @see WebUtils#removeWebAppRootSystemProperty79. */80. public static void shutdownLogging(ServletContext servletContext) {81. servletContext.log("Shutting down logback");82. try {83. LogbackConfigurer.shutdownLogging();84. } finally {85. // Remove the web app root system property.86. if (exposeWebAppRoot(servletContext)) {87. WebUtils.removeWebAppRootSystemProperty(servletContext);88. }89. }90. }91.92. /**93. * Return whether to expose the web app root system property, checking the94. * corresponding ServletContext init parameter.95. *96. * @see #EXPOSE_WEB_APP_ROOT_PARAM97. */98. private static boolean exposeWebAppRoot(ServletContext servletContext) {99. String exposeWebAppRootParam = servletContext100. .getInitParameter(EXPOSE_WEB_APP_ROOT_PARAM);101. return (exposeWebAppRootParam == null || Boolean102. .valueOf(exposeWebAppRootParam));103. }104.105. }106. </span>logback.XML配置下⾯来看⼀下这个xml是如何配置的1. <span style="font-family:Comic Sans MS;font-size:18px;"><?xml version="1.0" encoding="UTF-8"?>2. <!-- ROOT 节点 -->3. <!-- 属性描述 scan:性设置为true时,配置⽂件如果发⽣改变,将会被重新加载,默认值为true scanPeriod:设置监测配置⽂件是否有修改的时间间隔,如果没有给出时间单位,默认单位是毫秒。
- 1、下载文档前请自行甄别文档内容的完整性,平台不提供额外的编辑、内容补充、找答案等附加服务。
- 2、"仅部分预览"的文档,不可在线预览部分如存在完整性等问题,可反馈申请退款(可完整预览的文档不适用该条件!)。
- 3、如文档侵犯您的权益,请联系客服反馈,我们会尽快为您处理(人工客服工作时间:9:00-18:30)。
牧涛--<-<-<@态度决定一切→_→。
∙博客园∙首页∙新闻∙新随笔∙联系∙管理∙订阅随笔- 171 文章- 3 评论- 79 spring MVC配置详解现在主流的Web MVC框架除了Struts这个主力外,其次就是Spring MVC了,因此这也是作为一名程序员需要掌握的主流框架,框架选择多了,应对多变的需求和业务时,可实行的方案自然就多了。
不过要想灵活运用Spring MVC来应对大多数的Web开发,就必须要掌握它的配置及原理。
一、Spring MVC环境搭建:(Spring 2.5.6 + Hibernate 3.2.0)1. jar包引入Spring 2.5.6:spring.jar、spring-webmvc.jar、commons-logging.jar、cglib -nodep-2.1_3.jarHibernate 3.6.8:hibernate3.jar、hibernate-jpa-2.0-api-1.0.1.Final.jar、a ntlr-2.7.6.jar、commons-collections-3.1、dom4j-1.6.1.jar、javassist-3.12.0.GA.jar、jta-1.1.jar、slf4j-api-1.6.1.jar、slf4j-nop-1.6.4.jar、相应数据库的驱动jar包SpringMVC是一个基于DispatcherServlet(分发器)的MVC框架,每一个请求最先访问的都是DispatcherServlet,DispatcherServlet负责转发每一个Request请求给相应的Handler,Handler处理以后再返回相应的视图(View)和模型(Model),返回的视图和模型都可以不指定,即可以只返回Model或只返回View或都不返回。
DispatcherServlet是继承自HttpServlet的,既然SpringMVC是基于DispatcherSe rvlet的,那么我们先来配置一下DispatcherServlet,好让它能够管理我们希望它管理的内容。
HttpServlet是在web.xml文件中声明的。
<!-- Spring MVC配置 --><!-- ====================================== --><servlet><servlet-name>spring</servlet-name><servlet-class>org.springframework.web.servlet.DispatcherServlet< /servlet-class><!-- 可以自定义servlet.xml配置文件的位置和名称,默认为WEB-INF目录下,名称为[<servlet-name>]-servlet.xml,如spring-servlet.xml<init-param><param-name>contextConfigLocation</param-name><param-value>/WEB-INF/spring-servlet.xml</param-value> 默认</init-param>--><load-on-startup>1</load-on-startup></servlet><servlet-mapping><servlet-name>spring</servlet-name><url-pattern>*.do</url-pattern></servlet-mapping><!-- Spring配置 --><!-- ====================================== --><listener><listenerclass>org.springframework.web.context.ContextLoaderListener </listener-class></listener><!-- 指定Spring Bean的配置文件所在目录。
默认配置在WEB-INF目录下 --> <context-param><param-name>contextConfigLocation</param-name><param-value>classpath:config/applicationContext.xml</param-value> </context-param>spring-servlet.xml配置spring-servlet这个名字是因为上面web.xml中<servlet-name>标签配的值为s pring(<servlet-name>spring</servlet-name>),再加上“-servlet”后缀而形成的spring-servlet.xml文件名,如果改为springMVC,对应的文件名则为springMVC-se rvlet.xml。
<?xml version="1.0" encoding="UTF-8"?><beans xmlns="/schema/beans"xmlns:xsi="/2001/XMLSchema-instance" xmlns:p= "/schema/p"xmlns:context="/schema/context"xsi:schemaLocation="/schema/beans ht tp:///schema/beans/spring-beans-3.0.xsd/schema/aop http://www.springfra /schema/aop/spring-aop-3.0.xsd/schema/tx http://www.springfram /schema/tx/spring-tx-3.0.xsd/schema/context <a href="http:// /schema/context/spring-context-3.0.xsd">http:/ //schema/context/spring-context-3.0.xsd</a>"><!-- 启用spring mvc 注解 --><context:annotation-config /><!-- 设置使用注解的类所在的jar包 --><context:component-scan base-package="controller"></context:compo nent-scan><!-- 完成请求和注解POJO的映射 --><bean class="org.springframework.web.servlet.mvc.annotation.Annot ationMethodHandlerAdapter"/><!-- 对转向页面的路径解析。
prefix:前缀, suffix:后缀 --><bean class="org.springframework.web.servlet.view.InternalResourc eViewResolver" p:prefix="/jsp/" p:suffix=".jsp"/></beans>DispatcherServlet会利用一些特殊的bean来处理Request请求和生成相应的视图返回。
关于视图的返回,Controller只负责传回来一个值,然后到底返回的是什么视图,是由视图解析器控制的,在jsp中常用的视图解析器是InternalResourceViewResovler,它会要求一个前缀和一个后缀在上述视图解析器中,如果Controller返回的是blog/index,那么通过视图解析器解析之后的视图就是/jsp/blog/index.jsp。
主要是说说Controller.一个类使用了@Controller进行标记的都是Controllerpackage controller;import javax.servlet.http.HttpServletRequest;import org.springframework.stereotype.Controller;import org.springframework.web.bind.annotation.RequestMapping;import org.springframework.web.bind.annotation.RequestParam;import er;@Controller //类似Struts的Actionpublic class TestController {@RequestMapping("test/login.do") // 请求url地址映射,类似Strut s的action-mappingpublic String testLogin(@RequestParam(value="username")String use rname, String password, HttpServletRequest request) {// @RequestParam是指请求url地址映射中必须含有的参数(除非属性required=false)// @RequestParam可简写为:@RequestParam("username")if (!"admin".equals(username) || !"admin".equals(password)) { return "loginError"; // 跳转页面路径(默认为转发),该路径不需要包含spring-servlet配置文件中配置的前缀和后缀}return "loginSuccess";}@RequestMapping("/test/login2.do")public ModelAndView testLogin2(String username, String password, int age){// request和response不必非要出现在方法中,如果用不上的话可以去掉// 参数的名称是与页面控件的name相匹配,参数类型会自动被转换if (!"admin".equals(username) || !"admin".equals(password) || age < 5) {return new ModelAndView("loginError"); // 手动实例化Mode lAndView完成跳转页面(转发),效果等同于上面的方法返回字符串}return new ModelAndView(new RedirectView("../index.jsp")); / / 采用重定向方式跳转页面// 重定向还有一种简单写法// return new ModelAndView("redirect:../index.jsp");}@RequestMapping("/test/login3.do")public ModelAndView testLogin3(User user) {// 同样支持参数为表单对象,类似于Struts的ActionForm,User不需要任何配置,直接写即可String username = user.getUsername();String password = user.getPassword();int age = user.getAge();if (!"admin".equals(username) || !"admin".equals(password) || age < 5) {return new ModelAndView("loginError");}return new ModelAndView("loginSuccess");}@Resource(name = "loginService") // 获取applicationContext.xml中bean的id为loginService的,并注入private LoginService loginService; //等价于spring传统注入方式写get和set方法,这样的好处是简洁工整,省去了不必要得代码@RequestMapping("/test/login4.do")public String testLogin4(User user) {if (loginService.login(user) == false) {return "loginError";}return "loginSuccess";}}以上4个方法示例,是一个Controller里含有不同的请求url,也可以采用一个url访问,通过url参数来区分访问不同的方法,代码如下:package controller;import org.springframework.stereotype.Controller;import org.springframework.web.bind.annotation.RequestMapping;import org.springframework.web.bind.annotation.RequestMethod;@Controller@RequestMapping("/test2/login.do") // 指定唯一一个*.do请求关联到该C ontrollerpublic class TestController2 {@RequestMappingpublic String testLogin(String username, String password, int age) {// 如果不加任何参数,则在请求/test2/login.do时,便默认执行该方法if (!"admin".equals(username) || !"admin".equals(password) || age < 5) {return "loginError";}return "loginSuccess";}@RequestMapping(params = "method=1", method=RequestMethod.POST) public String testLogin2(String username, String password) { // 依据params的参数method的值来区分不同的调用方法// 可以指定页面请求方式的类型,默认为get请求if (!"admin".equals(username) || !"admin".equals(password)) { return "loginError";}return "loginSuccess";}@RequestMapping(params = "method=2")public String testLogin3(String username, String password, int ag e) {if (!"admin".equals(username) || !"admin".equals(password) || age < 5) {return "loginError";}return "loginSuccess";}}其实RequestMapping在Class上,可看做是父Request请求url,而RequestMap ping在方法上的可看做是子Request请求url,父子请求url最终会拼起来与页面请求u rl进行匹配,因此RequestMapping也可以这么写:package controller;import org.springframework.stereotype.Controller;import org.springframework.web.bind.annotation.RequestMapping;@Controller@RequestMapping("/test3/*") // 父request请求urlpublic class TestController3 {@RequestMapping("login.do") // 子request请求url,拼接后等价于/ test3/login.dopublic String testLogin(String username, String password, int age) {if (!"admin".equals(username) || !"admin".equals(password) || age < 5) {return "loginError";}return "loginSuccess";}}在SpringMVC中常用的注解还有@PathVariable,@RequestParam,@PathVariabl e标记在方法的参数上,利用它标记的参数可以利用请求路径传值,看下面一个例子@RequestMapping(value="/comment/{blogId}", method=RequestMethod.POST) public void comment(Comment comment,@PathVariable int blogId, HttpSes sion session, HttpServletResponse response) throws IOException {}在该例子中,blogId是被@PathVariable标记为请求路径变量的,如果请求的是/blog/c omment/1.do的时候就表示blogId的值为1. 同样@RequestParam也是用来给参数传值的,但是它是从头request的参数里面取值,相当于request.getParameter("参数名")方法。