SpetrumOne软件使用手册
Quattro Micro中文操作手册
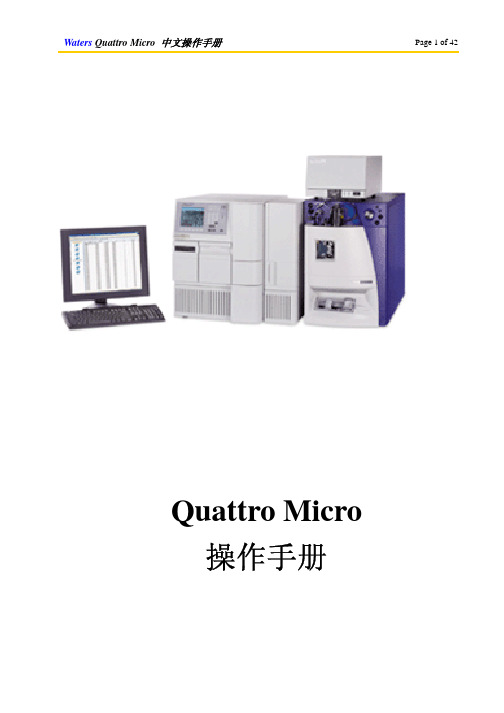
Quattro Micro 操作手册目录开启控制软件MassLynx二、以设定溶液开始质谱调谐,确定质谱仪的状态三、信号提取四、查看文件五、液相色谱操作程序六、测试送检样品之标准操作程序七、子离子扫描模式八、质量校正九、当长时间停电或移机必须关机时,关闭电源,和泄真空的程序一、开启控制软件MassLynx:1. 从桌面以鼠标左键双击MassLynx图示打开文件。
2. 开启后将自动开启的预设页面,如图示:3. 单击质谱调谐图示(MS Tune)以开启质谱控制页面4. 开启后质谱调谐页面如下:5. 该画面即为调谐和信号提取的主要画面。
二、以设定溶液(setup solution)开始质谱调谐,确定质谱仪的状态1. 在质谱调谐页面(MS Tune)选择扫描模式和扫描离子质量范围:选中全部四个扫描功能,选择全扫描(MS Scan),设定扫描质量(Mass)为175.1、609.3、1080.8、2034.6,扫描范围(Span)为10(或5)。
2. 以注射针筒抽取设定溶液(setup solution),以直接进样(infusion)的方式连接注射针和管路,让样品得以被注射针泵推送,直接进入质谱仪分析。
3. 在质谱调谐页面(MS Tune)以鼠标左键单击氮气(API GAS)和注射针的图示,接着单击开始操作键(Press for Operate),直到原本红灯的图标显示为绿灯(此时该图标所显示的文字为Press for Standby)。
单击注射针图示则注射针泵会开始运作而推送样品;单击氮气会开始供应三方面的氮气:雾化气体(nebulizing gas)、去溶剂气体(desolvation gas)、气帘气体(cone gas),可以确保样品的气化;而单击操作键之后会开始供应电压,使得样品带电形成离子并使离子通过质谱仪分析。
4. 在质量分析器页面(Analyzer)设定以下的数值,括号内的数值即为设定值:LM Resolution 1(15.0)、HM Resolution 1(15.0)、Ion Energy 1(0.0)、Entrance(50)、Collision(2)、Exit(50)、LM Resolution 2(15.0)、HM Resolution 2(15.0)、Ion Energy 2(3.0),此为配合质谱扫描的参数。
Speexmanul手册中文版
在VOIP的音频算法中,回音处理已经成为一个关系通话质量的主要问题。
回声的产生在IP网络主要有两种:1.声学回声2.电路回声声学回声主要又分成以下几种:a ) 直接回声:由扬声器产生的声音未经任何反射直接进入麦克风b ) 间接回声: 由扬声器发出的声音经过多次反射后,再进入Mic对于第二种回声,拥有多路径,时变性的特点.是比较难处理的.由于IP网络下的传输的延迟较大,而一般情况下,对于人耳,如果声音延迟达到了10ms以上的话,那么回声就会越来越明显.一般来讲,VOIP中的声音延迟主要来自于几个方面:1. 编码延迟: 一般情况下编码算法在声音压缩时都会产生延迟,就我们采用的Speex来讲,延迟大概在20ms 左右2. 处理延迟, 封装时延, 缓冲时延等3. 在IP网络中数据的传输过程也会照成延时.这由当前的网络状况决定.回声消除的模型:a) 建立远端声音模型,进行回声估计, 从采集的值中减去估计值b) 声学模型Speex是一套专门用于压缩声音的库,由于其专门针对声音,所以压缩声音的性能非常高.Speex由于其压缩性能,及0.80版后的跨平台的性能,所以在网络声音的传输中有很大的价值.但是需要注意的是speex只能对声音进行压缩,不支持音乐的压缩,如果你需要音乐的压缩你或许需要用vorbis库.但是的speex资料像其它大都数专用库一样,并没有大多的中文资料.所以在这里我决定将里面最核心的编程技术翻译出来.一来是练习练习自己翻译资料的能力,二来是方便一些英语水平较差的朋友.由于本人能1,speex的介绍(略)2特征描述这个章节展示了speex的主要特征,以衣一些关于对话(speech)编码的一个概念,以便帮助我们更好的了解下一章节.取样率(Sampling rate)Speex主要是设计了三种不同的取样率:8kHz,16kHz,32kHz.这些分别代表了窄宽(narrowband),多频率,超声.质量Speex编码大都数时间是被一个范围为0到10的质量参数来控制的.在一个比特率为常量(CBR)的操作中,质量参数是一个整数,而对于变动的比特率(VBR)参数是一个float;复杂性(变量)用speex,你可以将编码设置成允许的复杂度.这由一个范围为1到10的整数来控制完成,就像你用选项-1到-9来控制gzip和bzip2的压缩质量.在通常的运用中,噪声级别的复杂度1是在1到2d B之间,比复杂度10要高,但是CPU需要复杂度10大概5倍高行复杂度1.在实践中,最好的是设置在2到4之间,尽管更高的设定通常有用,当编码一个非对话声音(non-speech sounds)像DTMF语调(tones).变波特率(VBRVariable bit-rate (VBR) allows a codec to change its bit-rate dynamically to adapt to变波特率(VBR)允许编码动态地改变它的波特率以适应声音编码的”难度”.在speex举例来说,像元音(vowel)和瞬间高音(high-enenrg transients)需要个高的比特率来取得一个不错的质量,而摩擦音(fricative)可以被充分地用相对较少的字节来进行编码.由于上面这个原因,VBR可以调节到一个低的比特率却达到一个同样的质量,或者用某个比特率达到更好的质量.尽管有上面这些优点,但是VBR也有两个主要的缺点.首先,仅仅靠指定质量值,这里没有一个关于最后平均比特率的保证.(译者注:作者大概是想说没有什么明确的方法知道质量值)此外,对一些即时通信,像IP电话(VoI P)这种包含着最大的比特率的,必须把比特率设为足够低以适应传输通道.平均比特率(ABR)平均比特率通过动态地调节VBR质量去得到一个确定的目标的比特率,从而解决了VBR中的一个问题..因为质量/比特率被即时的调整了,整体质量将会稍稍低于由VBR对一个设置得和目标平均比特率非常接近的质量数编码得到的结果.声音生动性检测(VAD)声音生动性检测将会发觉音频正在被编码成对话,静音,或背景噪音.VAD总在用VBR进行编码时暗中起作用,因此选项仅仅对一个不是VBR的操作起作用.对于不是VBR的操作来说,speex察觉出一个不属于对话的周期,然后对它用足够的字节重新生成为背景噪音.不这叫做舒适的噪音生成(C NG).不连续传输(DTX)不连续传输是VAD/VBR操作的一个额外选项,当背景噪音一定时,它可以完整地传输.因为在基于文件的操作中,我们不能停止对文件进行写入,所以只有5字节被这种帧所运用.(给250bps通信)Algorithmic delay迟时算法每一个声音编码导致了在传输上的延时.对于speex,这种延时等于frame的大小加上一些数量的需要对每一帧进行的前瞻(”look-adhead”).在窄宽操作中(8kHz),迟时是30ms,而对于多频率(2-44 Hz),迟时是34ms.这些值不包括CPU编码,解码帧的时间.4.1 Encoding4.1压缩为了用Speex压缩对话,你首先需要引用头文件:#include <speex.h>然后你需要定义一个Speex的位采集(bit-packing)结构SpeexBits bits;and a Speex encoder state以及定义一个speex编码器状态量void *enc_state;上面定义的这样被初始化:The two are initialized by:speex_bits_init(&bits);enc_state = speex_encoder_init(&speex_nb_mode);为了支持多频率的压缩,speex_nb_mode将被sppex_wb_mode取代.在大都数情况下,你需要知道你用的模式(mode)的帧(frame)的大小,你可以得到在frame_size变量里得到这值:speex_encoder_ ctl(enc_state,SPEEX_GET_FRAME_SIZE,&frame_size);一但初始化完毕,对于每一个输入帧:speex_bits_reset(&bits);speex_encode(enc_state, input_frame, &bits);nbBytes = speex_bits_write(&bits, byte_ptr, MAX_NB_BYTES);上面input_frame是一个指向对话(speech)帧(frame)的float指针(pointing);byte_ptr是指向编码帧开始写的地方的char指针,MAX_NB_BYTES是能写进byte_ptr而不会造成溢出的最大数.nbBytes 是一个实际写入btye_ptr的数,即编码的实际大小在调用speex_bits_write前,可能你需要调用spe ex_bits_nbytes(&bits)得到需要写入(write)的字节大小.在你已经编码后,释放所有的资源.speex_bits_destroy(&bits);speex_encoder_destroy(enc_state);That’s about it for the encoder.这就是关于编码的方面.Speex manul中文版三附源代码的翻译:B Sample codeB例程源代码这个章节演示了一段用speex编码,解码对话(speech)的源代码.可以如下用api命令来编码并解码一个文件:译者注:这里说的api命令是指unix的用”|”进行管道写入读出.在windows下这样并不能实现.% sampleenc in_file.sw | sampledec out_file.swnatural endianness).B.1 sampleenc.cSameleenc用一个未加工的16比特率(bits)文章,给它编码并产生一个speex流(steam)给标准输出.如何使用Speex中的AEC模块,提高声音质量?在Speex()的最新版本中,开始集成了回音消除的模块,而回音消除一直是Voip之中亟待解决的主要问题。
密理博便携式多参数中文操作手册
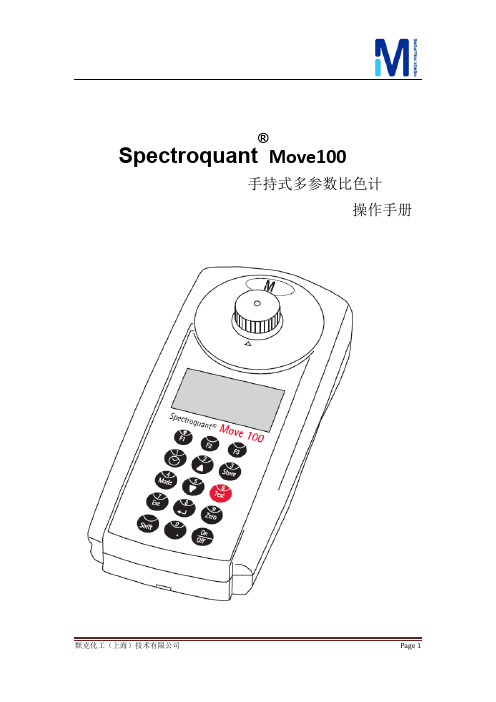
Spectroquant ®Move100手持式多参数比色计操作手册目录1 准备工作. . . . . . . . . . . . . . . . . . . . . . . . . . . . . . . . . . . . . . . . . . . . . . . . . .31.1 包装内容. . . . . . . . . . . . . . . . . . . . . . . . . . . . . . . . . .. . . . . .. . . . . . . . . . . . . . 31.2 装入可充电电池. . . . . . . . . . . . . . . . . . . . . . . . . . . . . . . . . . . . . . . . . . . . . . .31.2.1 更换电池组. . . . . . . . . . . . . . . . . . . . . . . . . . . . . . . . . . . . . . . . . . . .41.2.2 储存数据-重要信息. . . . . . . . . . . . . . . . . . . . . . . . . . . . . . . . . . . . 41.3 键盘说明. . . . . . . . . . . . . . . . . . . . . . . . . . . . . . . . . . . . . . . . . . . . . . . . . . . . .41.4 首次启动MOVE100 多参数比色计. . . . . . . . . . . . . . . . . . . . . . . . . . . . . . . .51.5 模式Mode 菜单一览. . . . . . . . . . . . . . . . . . . . . . . . . . .. . . . . . . . . . . . . . . . .121.6 设置语言. . . . . . . . . . . . . . . . . . . . . . . . . . . . . . . . . . . . . . . . . . . . . . . . . . . . .131.7 删除数据. . . . . . . . . . . . . . . . . . . . . . . . . . . . . . . . . . . . . . . . . . . . . . . . . . . . .141.8 设置时间日期. . . . . . . . . . . . . . . . . . . . . . . . . . . . . . .. . . . . . . . . .. . . . . . . . . 141.9 显示日期时间. . . . . . . . . . . . . . . . . . . . . . . . . . . . . . .. . . . . . . . . . . . . . . . . . .151.10 自动关机功能. . . . . . . . . . . . . . . . . . . . . . . . . . . . . . . . .. . . . . . . . . . . . . . . .151.11 屏幕背景光. . . . . . . . . . . . . . . . . . . . . . . . . . . . . . . . .. . . . . . . . . . . . . . . . . .152 工作状态. . . . . . . . . . . . . . . . . . . . . . . . . . . . . . . . . . . . . . . . . . . . . . . . . . .162.1 选择测试方法. . . . . . . . . . . . . . . . . . . . . . . . . . . . . . . . . . . . . . . . . . . . . . . . . 162.2 使用测试试剂进行测试. . . . . . . . . . . . . . . . .. . . . . . . . . . . . . . . . . . . . . . . . . .182.3 多层次测试. . . . . . . . . . . . . . . . . . . . . . . . . . . . . . . . . . . . . . . . . . . . . . . . . . . 222.4 更改测试结果参考当量. . . . . . . . . . . . . . . . . . . . . .. . . . . . . . . . . . . . . . . . . . .232.5 测试吸光度. . . . . . . . . . . . . . . . . . . . . . . . . . . . .. . . . . . . . . . . . . . . . . . . . . . . 242.6 用户反应时间倒计时(计时器功能) . . . . . . . . . . . . . . . . . . . . . . . . . . . . . . . . .252.7 储存测试结果. . . . . . . . . . . . . . . . . . . . . . . . . . . . .. . . . . . . . . . . . . . . . . . . . . 262.8 调用储存的测试信息. . . . . . . . . . . . . . . . . . . . .. . . . . . . . . . . . . . . . . . . . . . . . 272.8.1 调用储存的所有测试结果. . . . . . . . . . . . . .. . . . . . . . . . . . . . . . . . . . 272.8.2 调用一定日期范围内的测试结果. . . . . . . . . . . . . . . . . . . . . . . . . . . . . 282.8.3 调用一定储存代码范围内的测试结果. . . . . . . . . . . . . . . . . . . . . . . . . 292.8.4 调用一定测试方法范围的储存结果. . . . . . . . . . . . . . . . . . . . . . . . . . . 31 2.9 删除储存的测试结果. . . . . . . . . . . . . . . . .. . . . . . . . . . . . . . . . . . . . . . . . . . . . . . . . . . . . . . .32准备工作1.1 包装内容Spectroquant® Move100多参数比色计的标准包装包含以下内容:•1个装在塑料便携箱里的多参数比色计•1套可充电电池包(型号AA/LR6)(a)•1个16mm圆形比色皿适配器(b)•1个16mm圆形比色皿适配器盖子(c)•1个24mm圆形比色皿适配器盖子(d)•1把螺丝刀(e)•英文操作手册•质量证明1.2 装入可充电电池/锂电池在初次使用仪器之前,可充电电池要先进行安装。
新帕泰克WINDOX 5 SUCELL 软件操作手册

严正说明对该文件和软件的拷贝,不管是整体拷贝还是部分拷贝,都是不允许的,除非经过了正式的书面授权。
德国新帕泰克公司(Sympatec GmbH)保留对软件和文件的所有拷贝的权利。
目录1. 概述___________________________________________________52. 软件操作_______________________________________________5 2.1. 预热和仪器启动_______________________________________________5 2.2. 软件应用_____________________________________________________62.2.1. 样品信息的输入(Product)____________________________________________62.2.2. 镜头的选择(Range)_________________________________________________62.2.3. 触发条件的设定(Trigger Condition)___________________________________72.2.4. 分散条件的设定(Disperser)___________________________________________82.2.5. 工作参数(Parameter)_______________________________________________122.2.6. 备注(Comment)___________________________________________________132.2.7. 测试 (Run)__________________________________________________________132.2.8. 结果输出(Out put)_________________________________________________152.2.9. 工具栏按键说明_____________________________________________________162.2.10. 菜单介绍__________________________________________________________173. 信号检测窗口(Signal test window)______________________18 3.1. 认识信号检测窗口____________________________________________183.2. 信号检测窗口的作用__________________________________________214. 报告和图形格式的修改(Template Edit)__________________22 4.1. 图形格式修改(Graph Configuration Edit)_______________________224.1.1. 增加特定数值_______________________________________________________224.1.2. 边界和显示调整_____________________________________________________26 4.2. 报告格式修改(Template Edit)_________________________________26 4.3. 报告电子文档导出(Report export)_____________________________295. 报告解释(Explanation of Nomenclature)_________________31 5.1. 参数定义依据_______________________________________________31 5.2.参数定义___________________________________________________325.3. Q3(x)和q3lg(x)的关系和计算方法______________________________32 5.4. SMD 和VMD的定义和计算方法_______________________________33 5.5. Sv 和Sm的定义和计算方法___________________________________35 5.6. 详解_______________________________________________________366. WINDOX数据库_______________________________________36 6.1. 数据库管理(Database Administration)__________________________366.1.1. 数据库的建立、注册和取消(Create, Register & unregistered)______________366.1.2. 数据库维护(Maintenance)___________________________________________416.1.3. 数据维护提醒信息___________________________________________________446.1.4. 数据备份(Back up)_________________________________________________456.1.5. 备份数据的重新启用_________________________________________________47 6.2. 数据转移(Database Explorer )_________________________________49 6.3. 数据库转换__________________________________________________50 6.4. 用户权限管理(User Administration)____________________________517. 请求服务(Service Request Report)______________________528. 服务机构______________________________________________571. 概述本手册详细介绍了如何来通过新帕泰克公司的标准WINDOX软件,来操作SUCELL系统。
海德收银软件操作说明
精选可编辑ppt
6
安装流程—— 点击“浏览”,选择安装路径,点击“下一步”
软 件 安 装 流 程
精选可编辑ppt
7
安装流程—— 点击“浏览”,确认快捷方式的路径,点击“下一步”
软 件 安 装 流 程
精选可编辑ppt
8
安装流程—— 如果需要桌面显示快捷方式,点击“下一步 ”
可为销售订单提供 依据
操作方法同其他单 据,录入号表头信 息,点击“新增”, 在表体录入货号或 进入商品选择器进 行选择,对商品数 量、报价进行修改, 保存,审核即可
精选可编辑ppt
33
后台管理——销售管理——销售订货单
进入订单页面,如手动添加新的订单,完 善表头信息,点击新增,维护好表体信息 后,保存、审核即可
此处提供模糊查询功能,只需要知道 某条单据的某一项内容,便可点击 “查询”,选择条件栏目进行条件的 录入,点击“确定”即可
精选可编辑ppt
28
后台管理——采购管理——采购入库单
进入该单,首先点击货商的空白处,这时会出现"▼",点击此符 号,选择一个货商(一定要选择)如果已有订单,直接点击取订 单,选择相应的订单即可;如果没有订单选择货商后,进行选择 相应仓库,接着用鼠标点击左上方的〖增加〗按扭,会出现一条 空白记录,输入商品条码即可调出商品内容。 如果在不知道商品的编号或者条码,可双击条码栏,系统会自动 弹出选择商品的界面,在此界面的左边〖商品选择器〗中选择需 要入库的商品类别,然后点击商品类别,右边会出现该类别下相 对应的商品,在右边的界面中选择需要入库的商品框,并点击该 商品前面的方框,会出现一个红勾,然后按确定便将商品调入到 入库单中,在入库单界面中的"数量"处输入商品的实际数量。 如果需删除某行,可点击最上面的〖删除〗按扭,系统会自动弹 出对话框,选择"是"该商品就被删除。 将所有的商品都入库完 以后按保存,系统会提示保存成功,如需查询其中的某一张单, 可在进行入采购入库单后 ,直接点击〖浏览〗功能按钮即可
OneStep软件包的说明文档说明书
Package‘OneStep’October12,2022Type PackageTitle One-Step EstimationVersion0.9.2Author Alexandre Brouste,Darel Noutsa Mieniedou,Christophe DutangMaintainer Christophe Dutang<****************************>Contact Alexandre Brouste,Darel Noutsa Mieniedou,Christophe Dutang<**********************>Description Provide principally an eponymic function that numerically computes the Le Cam one-step estimator which is asymptotically efficient(see e.g.L.Le Cam(1956)<https:///euclid.bsmsp/1200501652>)and can be com-puted faster than the maximum likelihood estimator for large observation samples.License GPL(>=2)Encoding UTF-8Dependsfitdistrplus,numDeriv,parallelSuggests actuarNeedsCompilation noRepository CRANDate/Publication2021-01-1521:50:02UTCR topics documented:OneStep-package (2)benchonestep (3)onestep (4)Index912OneStep-packageOneStep-package One-Step EstimationDescriptionProvide principally an eponymic function that numerically computes the Le Cam one-step estimatorwhich is asymptotically efficient(see e.g.L.Le Cam(1956)<https:///euclid.bsmsp/1200501652>)and can be computed faster than the maximum likelihood estimator for large observation samples.DetailsThe DESCRIPTIONfile:Package:OneStepType:PackageTitle:One-Step EstimationVersion:0.9.2Author:Alexandre Brouste,Darel Noutsa Mieniedou,Christophe DutangMaintainer:Christophe Dutang<****************************>Contact:Alexandre Brouste,Darel Noutsa Mieniedou,Christophe Dutang<**********************>Description:Provide principally an eponymic function that numerically computes the Le Cam one-step estimator which is as License:GPL(>=2)Encoding:UTF-8Depends:fitdistrplus,numDeriv,parallelSuggests:actuarIndex of help topics:benchonestep Performing benchmark of one-step MLE againstother methodsonestep Executing Le Cam s one-step estimationOneStep-package One-Step EstimationAuthor(s)Alexandre Brouste,Darel Noutsa Mieniedou,Christophe DutangMaintainer:Christophe Dutang<****************************>ReferencesL.LeCam(1956).On the asymptotic theory of estimation and testing hypothesis.In:Proceedingsof3rd Berkeley Symposium I,pages355-368.See AlsoSee fitdistrplus for classic MLE,MME,...benchonestep3 benchonestep Performing benchmark of one-step MLE against other methodsDescriptionbenchonestep performs a benchmark of one-step MLE against other methods on a given dataset.benchonestep.replicate repeats several times the procedure:data random generation and bench-mark through benchonestep.Usagebenchonestep(data,distr,methods,init,weights=NULL,...)benchonestep.replicate(nsample,nbsimu,distr,methods=NULL,echo=FALSE,ncpus=1,...) Argumentsdata A numeric vector of length ndistr A character string"name"naming a distribution for which the correspondingdensity function dname and the corresponding distribution function pname mustbe classically defined.methods A vector of methods:character among"mme","mle","onestep"(can be ab-breviated).init A named list for the intial guess method.weights An optional vector of weights to be used in thefitting process.Should be NULLor a numeric vector with strictly positive integers(typically the number of oc-curences of each observation).If non-NULL,weighted MLE is used,otherwiseordinary MLE....unused for benchonestep;true parameters passed to rdistr for benchonestep.replicate nsample a numeric for the sample size.nbsimu a numeric for the replication number.echo a logical to display or not some traces of benchmarking.ncpus Number of processes to be used in parallel operation:typically one wouldfix itto the number of available CPUs.ValueA matrix with estimate and time in seconds per method for benchonestep;an array with estimates,times,errors in seconds per method,per simulation for benchonestep.replicate.Author(s)Alexandre Brouste,Darel Noutsa Mieniedou,Christophe DutangReferencesL.LeCam(1956).On the asymptotic theory of estimation and testing hypothesis.In:Proceedings of3rd Berkeley Symposium I,pages355-368.Examplesn<-1000set.seed(1234)x<-rbeta(n,3,2)benchonestep(x,"beta",c("mle","one"))onestep Executing Le Cam’s one-step estimationDescriptionExecuting Le Cam’s one-step estimation based on Le Cam(1956)and Kamatani and Uchida(2015). Usageonestep(data,distr,method,init,weights=NULL,keepdata=TRUE,keepdata.nb=100,control=list(),...)Argumentsdata A numeric vector of length ndistr A character string"name"naming a distribution for which the corresponding density function dname and the corresponding distribution function pname mustbe classically defined.method A character string coding for thefitting method:"closed formula"for explicit one-step and"numeric"for numeric computation.The default method is the"closed formula".init A named list for the user initial guess estimation.weights an optional vector of weights to compute thefinal likelihood.Should be NULL or a numeric vector with strictly positive integers(typically the number of oc-curences of each observation).keepdata a logical.If TRUE,dataset is returned,otherwise only a sample subset is returned.keepdata.nb When keepdata=FALSE,the length(>1)of the subset returned.control a list of control parameters.Currently,param_t is used when the characteris-tic function is needed,delta is used when the subsample of size n^delta israndomly selected for the initial guess in the generic Le Cam’s one step method....further arguments passe to mledist in case it is used.DetailsThe Le Cam one-step estimation procedure is based on an initial sequence of guess estimators anda Fisher scoring step or a single Newton step on the loglikelihood function.For the user,the func-tion onestep chooses automatically the best procedure to be used.The function OneStep presents internally several procedures depending on whether the sequence of initial guess estimators is in a closed form or not,and on whether the score and the Fisher information matrix can be elicited ina closed form."Closed formula"distributions are treated with explicit score and Fisher informa-tion matrix(or Hessian matrix).For all other distributions,if the density function is well defined, the numerical computation(NumDeriv)of the Newton step in Le Cam’s one-step is proposed with an initial sequence of guess estimators which is the sequence of maximum likelihood estimators computed on a subsample.Valueonestep returns an object of class"onestep"inheriting from"fitdist"So,it is a list with the following components:estimate the parameter estimates.method the character string coding for thefitting method:"closed formula"for closed-form MLE or closed-form one-step,"numeric"for numeric computation of theone-step estimation.sd the estimated standard errors,NA if numerically not computable or NULL if not available.cor the estimated correlation matrix,NA if numerically not computable or NULL if not available.vcov the estimated variance-covariance matrix,NULL if not available.loglik the log-likelihood.aic the Akaike information criterion.bic the the so-called BIC or SBC(Schwarz Bayesian criterion).n the length of the data set.data the data set.distname the name of the distribution.dots the list of further arguments passed in...to be used.convergence an integer code for the convergence:0indicates successful convergence(from explicit formula or not).10indicates an error.discrete the input argument or the automatic definition by the function to be passed to functions gofstat,plotdist and cdfcomp.weights the vector of weigths used in the estimation process or NULL.Generic functions inheriting from"fitdist"objects:print The print of a"onestep"object shows few traces about thefitting method and thefitted distribution.summary The summary provides the parameter estimates of thefitted distribution,the log-likelihood, AIC and BIC statistics and when the maximum likelihood is used,the standard errors of theparameter estimates and the correlation matrix between parameter estimates.plot The plot of an object of class"onestep"returned by fitdist uses the function plotdist.An object of class"onestep"or a list of objects of class"onestep"corresponding to variousfits using the same data set may also be plotted using a cdf plot(function cdfcomp),a den-sity plot(function denscomp),a density Q-Q plot(function qqcomp),or a P-P plot(functionppcomp).logLik Extracts the estimated log-likelihood from the"onestep"object.vcov Extracts the estimated var-covariance matrix from the"onestep"object.coef Extracts thefitted coefficients from the"onestep"object.Author(s)Alexandre Brouste,Christophe Dutang,Darel Noutsa MieniedouReferencesL.Le Cam(1956).On the asymptotic theory of estimation and testing hypothesis,In:Proceedings of3rd Berkeley Symposium I,355-368.I.A.Koutrouvelis(1982).Estimation of Location and Scale in Cauchy Distributions Using theEmpirical Characteristic Function,Biometrika,69(1),205-213.U.Grenander(1965).Some direct estimates of the mode,Annals of Mathematical Statistics,36, 131-138.K.Kamatani and M.Uchida(2015).Hybrid multi-step estimators for stochastic differential equa-tions based on sampled data,Stat Inference Stoch Process,18(2),177-204.Ye and Chen(2017).Closed-Form Estimators for the Gamma Distribution Derived From Likelihood Equations,The American Statistician,71(2),177-181.See AlsoSee Also as mledist and fitdist infitdistrplus.Examplesn<-1000set.seed(1234)##1.Gammatheta<-c(2,3)o.sample<-rgamma(n,shape=theta[1],rate=theta[2])#Default methodonestep(o.sample,"gamma")#User initial sequence of guess estimator#See:Ye and Chen(2017)qtmp<-sum(o.sample*log(o.sample))-sum(log(o.sample))*mean(o.sample) alphastar<-sum(o.sample)/qtmpbetastar<-qtmp/length(o.sample)thetastar<-list(shape=alphastar,rate=1/betastar)onestep(o.sample,"gamma",init=thetastar)#Numerical method(for comparison)onestep(o.sample,"gamma",method="numeric")##2.Betatheta<-c(0.5,1.5)o.sample<-rbeta(n,shape1=theta[1],shape2=theta[2])onestep(o.sample,"beta")##3.Cauchytheta<-c(2,3)o.sample<-rcauchy(n,location=theta[1],scale=theta[2])onestep(o.sample,"cauchy")#User initial sequence of guess estimator#See Koutrouvelis(1982).t<-1/4Phi<-mean(exp(1i*t*o.sample))S<-Re(Phi)Z<-Im(Phi)thetastar<-list(location=atan(Z/S)/t,scale=-log(sqrt(S^2+Z^2))/t) onestep(o.sample,"cauchy",init=thetastar)##Chi2theta<-5o.sample<-rchisq(n,df=theta)onestep(o.sample,"chisq")#User initial sequence of guess estimator#See Grenander(1965).p<-n^(2/7)k<-floor(n^(3/5))Dstar<-sort(o.sample)Dk1<-Dstar[(1+k):n]Dk2<-Dstar[1:(n-k)]sigma.star<-1/2*sum((Dk1+Dk2)*(Dk1-Dk2)^(-p))/sum((Dk1-Dk2)^(-p))+2 onestep(o.sample,"chisq",init=list(df=sigma.star))#Negative Binomialtheta<-c(1,5)o.sample<-rnbinom(n,size=theta[1],mu=theta[2])onestep(o.sample,"nbinom")#Generic(dweibull2)theta<-c(0.8,3)dweibull2<-function(x,shape,scale,log=FALSE)dweibull(x=x,shape=shape,scale=scale,log=log)o.sample<-rweibull(n,shape=theta[1],scale=1/theta[2]) onestep(o.sample,"weibull2",method="numeric",init=list(shape=1,scale=1))Index∗distributionbenchonestep,3onestep,4∗packageOneStep-package,2 benchonestep,3cdfcomp,5,6denscomp,6fitdist,6fitdistrplus,2gofstat,5mledist,4,6OneStep(OneStep-package),2onestep,4OneStep-package,2plotdist,5,6ppcomp,6qqcomp,69。
ICPMS软件基本操作NexION300
NexION300基本操作手册(软件版本1.4版)铂金埃尔默仪器(上海)有限公司维修部1.基本操作—方法的建立File—new定量分析Sweeps/Reading—每次跳跃读数时间(直接关系到分析时间的长短)。
Replicates—重复次数,一般3次。
选择所需质荷比。
Scanning 指每个质量峰可以选择1-20任意采样点反应气,KED需加载碰撞气He。
Detector在测量中保存了模拟级和脉冲级两份数据。
超过2000000cps脉冲级计数将显示S(饱和)。
选择哪个数据作为测量结果。
当选择Dual时,首选脉冲级结果,饱和时选用模拟级数据。
Auto Lens 推荐 ONInterference 指对同位数测量可能的干扰。
•标准模式时,对于单元素同位素干扰,软件在Corrections栏内自动列出干扰元素和扣干扰公式,测量时自动扣除。
在DRC模式时,用户必须手动清除全部扣干扰公式。
标准曲线可以选用过零线性,简单线性(至少两个标样)和权重线性(至少三个标样)。
填入样品单位和标准单位,输入标准溶液的浓度。
设定样品冲洗时间,读数延迟时间和冲洗时间。
根据自己实际情况,Au,Hg,I,Th请延长冲洗时间,且使用专门的冲洗液进行冲洗。
保存方法,并命名。
方法设定基本完成。
2.QC设定将QC选项进行勾选。
在进行大批量或者大批量自动进样时,推荐使用。
QC页面出现,点击进入QC页面。
(Calibration页面可不填写)输入QC的浓度,在QC Std Lower下右键,点击相对百分比并输入可接受的下限值。
输入QC的浓度,在QC Std Lower下右键,点击相对百分比并输入可接受的上限值。
在Action下选择继续。
自动进样器下酌情选择。
样品。
EVERY SAMPLES下输入期望每隔多少个样品进行一次QC测试,可输入20,30等。
点击右侧Report,报告输出模板选择为quant summary.rop。
点击文件,保存方法,并命名。
帕顿1110用户手册.pdf说明书
All warranty and non-warranty repairs must be returned freight prepaid and insured to Patton Electronics. All returns must have a Return Materials Authorization number on the outside of the shipping container. This number may be obtained from Patton Electronics Technical Service at (301) 975-1007. Packages received without an RMA number will not be accepted.
Like all fiber optic modems, the Model 1110 is inherently immune to RFI/EMI noise, ground loops and transient surges. The carrier may be switch selected as either “Continuously On” or “Controlled by RTS”, while an easily accessible DCE/DTE switch eliminates the need for cumbersome RS-232 crossover cables. Two easy-to-read LED indicators monitor the status of carrier detect and fiber optic output. Drawing all necessary power from the RS-232 interface, the Model 1110 requires no AC power or batteries to operate.
PowerINSPECT4.0--使用手册(中文)

曲面
23
曲面:综述 ...................................................................................... 23 单击鼠标选择曲面 ....................................................................... 23 突出显示背面曲面 ....................................................................... 24 反转曲面的方向 ........................................................................... 26
显示标注
18
显示标注: 综述 ............................................................................. 18 显示环绕标注 ............................................................................... 18 操作 CAD 查看时查看环绕标注................................................. 20 显示定位标注 ............................................................................... 21
Actaris Neptune Type S 流量计操作和维护手册说明书
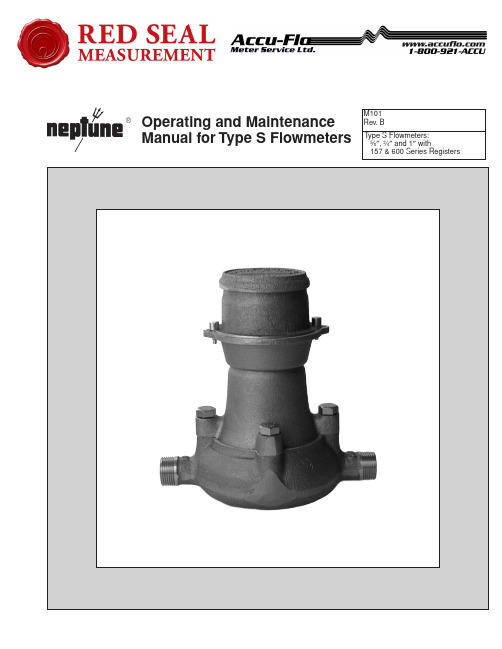
TYPE S FLOWMETERS
INSTALLATION & OPERATION
For correct installation of Type S Flowmeters, the experience of Actaris Neptune is always available for your assistance. Do not hesitate to call the nearest Actaris Neptune authorized distributor.
MATERIALS OF CONSTRUCTION • Main Case: Bronze (ASTM B145 Alloy 844) Other metal components • Nutating Disk: Glass Phenolic Laminate
(Ryton or equivalent) • Diaphragm and Shafts: 304 SS • Gaskets: Viton “A”, Main Case Gaskets are Klingersil C4401
Piping • Coupling sets are provior ease in installation and removal during start-up system flushing.
TrueTime 1p5 使用指南 中文手册
TrueTime 1.5 使用指南Martin OhlinDan HenrikssonAnton CervinDepartment of Automatic ControlLund UniversityJanuary 2007目录目录 (2)1 介绍 (4)2 开始 (4)2.1 软件要求 (4)2.2 安装 (4)2.3 编译 (4)3 仿真器使用 (4)4 函数代码编写 (5)4.1 Matlab函数代码编写 (5)4.2 C++函数代码编写 (6)4.3 调用Simulink模块对话框 (6)5 初始化 (6)5.1 编写Matlab初始化脚本文件 (6)5.2 编写C++初始化脚本文件 (7)6 编译 (7)7 TrueTime Kernel (7)7.1 动态电压范围 (8)8 TrueTime Network (8)8.1 CSMA/CD (Ethernet)—以太网 (10)8.2 CSMA/AMP (CAN) (10)8.3 Round Robin (Token Bus) —轮询(令牌总线) (10)8.4 FDMA—频分 (10)8.5 TDMA (TTP)—时分 (10)8.6 Switched Ethernet—交换式以太网 (11)9 TrueTime Wireless Network (11)10 TrueTime Battery (11)11 TrueTime Standalone Network Blocks (11)12 例程 (11)12.1 PID-control of a DC-servo (12)12.2 Task Scheduling and Control (13)12.3 Distributed Control System (13)12.4 Deadline Overrun Handling (14)12.5 Task Synchronization Using Monitors (14)12.6 Distributed Wireless Control System (15)12.7 Control and Coordination of Mobile Motes (15)12.8 Wireless Ad-hoc Routing Using AODV (15)12.9 Mote Soccer (15)12.10 ttSendMsg/ttGetMsg stand-alone network blocks (15)13 Kernel执行技术细节 (15)13.1 Kernel的数据结构 (16)13.2 任务模型(Task Model) (18)13.3 Kernel的函数 (19)13.4 时序(Timing) (19)14 TrueTime命令列表 (19)14.1 命令解析 (22)ttAnalogIn (TH) (22)ttAnalogOut (TH) (22)ttCallBlockSystem (TH) (22)ttCreateInterruptHandler (I) (23)ttCreatePeriodicTask (I) (23)ttGetMsg (TH) (24)ttInitNetwork (I) (24)ttSendMsg (TH) (24)1 介绍本文为基于Matlab/Simulink仿真工具TrueTime的说明。
spe法的操作流程
spe法的操作流程下载温馨提示:该文档是我店铺精心编制而成,希望大家下载以后,能够帮助大家解决实际的问题。
文档下载后可定制随意修改,请根据实际需要进行相应的调整和使用,谢谢!并且,本店铺为大家提供各种各样类型的实用资料,如教育随笔、日记赏析、句子摘抄、古诗大全、经典美文、话题作文、工作总结、词语解析、文案摘录、其他资料等等,如想了解不同资料格式和写法,敬请关注!Download tips: This document is carefully compiled by theeditor. I hope that after you download them,they can help yousolve practical problems. The document can be customized andmodified after downloading,please adjust and use it according toactual needs, thank you!In addition, our shop provides you with various types ofpractical materials,such as educational essays, diaryappreciation,sentence excerpts,ancient poems,classic articles,topic composition,work summary,word parsing,copy excerpts,other materials and so on,want to know different data formats andwriting methods,please pay attention!1. 活化:需要活化固相萃取柱。
这通常是通过使用适当的溶剂冲洗柱子来完成的,以去除可能存在的杂质并使柱子表面湿润。
SPE-SMT编程专家使用说明CN
图 3-8
图 3-9
图 3-10
3.9、两份 BOM 表对比,先把需要对比的 BOM 表整理好,点“打开 BOM”打开第一份 BOM 表,选择进行对比的列,再点“两份 BOM 表对比”读入第二份 BOM 表,对比后自动区分 出相同部份和不同部份。并可以导出到 EXECL 文件。
图 3-2
第 7 页,共 22 页
SPE-《SMT/AI 编程专家》使用手册
技术支持:黄若春 E-MAIL: twokf@ TEL:13714703536
3.2、选择安装位置所在列,输入间隔符号,点整理 BOM 即可把所有安装位置分解成单 一的,支持单个的间隔符号(任意符号),和连续的间隔符号(如:R1-R5 或 R1-5)。
图 4-1
4.1、导入客户原始 CAD,支持支持 EXCEL 与文本文件格式,如果客户有其它格式的可再 增加。
4.1.1、导入 EXCEL 格式 CAD 表,可导入 EXCEL 中第一个工作表中的内容,如果在其它 工作表中可先复制内容再点“粘贴 EXCEL 文本”。
4.1.2、导入文本格式 CAD 表,需指定 BOM 表的间隔符号,才能自动分列。
SPE 为电子制造业提供最经济实惠的软件解决方案,为电子制造企业改善生产制造 工艺,提高生产制造效率,降低生产成本,创造更多生产利润!
软件特点:全中文操作介面,支持简繁体操作系统,WIN98/ME/2K/XP/2003 完全按 SMT/AI 工厂实际需要编写,简单易用,即使没有编过程式的人经过 1 天的学习 也可轻松编出 SMT 程式。 配置要求:简体、繁体操作系统,OFFICE2000、XP、2003,屏幕分辩率 1024*768 功能模块:图像处理器、PCB 图像取坐标、BOM 整理、坐标整理、BOM 坐标合成、生成 SMT 程式、重画 PCB 图、高速机优化、生成 AI 程式、SMT 程式转换、AI 程式转换 支持机型:CASIO 、FUJI、JUKI、MIRAE、PANASONIC、PHILIPS、SANYO、SAMSUNG、 SIEMENS 、SONY、TDK、UNIVERSAL、YAMAHA 等,各种机型的程式可相互转换,可根据客 户需要定制开发新机型,支持所有程式为文本格式的机器。 软件安装:软件采用绿色软件风格,免安装、不写注册表,直接解压缩即可使用。建议 解压缩到 D:\SPE 目录下面。
腾Regex 腾盾软件合集说明书

PhilipsLCD monitorAutostereoscopic 3DFull HDBDL4251VSA full 3D experiencewithout the need for special glassesDeliver your messages in stunning 3D, with excellent picture quality and no need forspecial glasses. With 28 views you can deliver jaw dropping images that will amaze youraudience.Operational flexibility•Autostereoscopic 3D•Smart insert in the backcover to place a small pc•Designed for 24/7 operationStunning 3D experience•3D content visualization•3D & 2D dual mode display•3D system solutionOptimized for public viewing•Slim bezel design for a stylish look•Full HD LCD display, 1920x1080pLower total cost of ownership•SmartPower for energy savingHighlightsAutostereoscopic 3DEnjoy a stunning 3D experience with no need for special glasses thanks to theautostereoscopic 3D effect. Using lenticular technology, it gives excellent clarity and depth, making your 3D experience even more lifelike and enjoyable.3D content visualizationSoftware tools are provided with the display to play-out 3D content and control the 3D and 2D visualization parameters. The actual 3D content can be created via plug-ins available for popular 3D animation software packages. Existing 2D or stereo content can beconverted into 2D-plus-Depth format. The 2D-plus-Depth format is compatible with existing compression tools, as the additional bandwidth of the depth is small.3D system solutionThe system solution is designed for maximum reuse of content / concepts from the 2D signage industry. The key enabler for this is the flexible 2D-plus-Depth format that allows decoupling of content creation and content visualization. The rendering core integrated in the autostereoscopic 3D displays supports theunique Declipse image format which enables a true look-around 3D effect.3D & 2D dual mode displayThe display can be applied in a broad range of applications since it can be operated in in both 2D and 3D mode. The 4K UHD resolution panel enables great picture quality and true color representation in 2D and 3D mode. The integrated rendering core offers content creators and end-users full control over the quality and depth-effect characteristics of the picture.Smart InsertProfessional PC's are part of most publicsignage installations. Quite often they increase the overall depth to the display and cause a lot of cable clutter. So we have designed this display with Smart insert in the back cover which is ideal for the integration of aprofessional small form factor PC. On top of that, the cable management system offers a great solution to keep your cables neat and professional looking.Slim bezelA slim bezel design adds a stylish look to a public display to nicely blend in just about anyenvironment. Furthermore this design makes the display ideal for tiled matrix video walls.SmartPowerThe backlight intensity can be controlled and pre-set by the system to reduce the power consumption by up to 50%, which saves substantially on energy costs.Full HD LCD display 1920x1080pThis display has a resolution that is referred to as Full HD. The state-of-the-art LCD screen technology has the full high-definitionwidescreen resolution of 1080 progressive lines, each with 1920 pixels. This allows the best possible picture quality for HD input signals with up to 1080 lines. It produces brilliant flicker-free progressive scan pictures with optimum brightness and superb colors. This vibrant and sharp image will provide you with an enhanced viewing experience.Designed for 24/7 operationBecause business never sleeps, our signage displays are designed for 24/7 use. Taking advantage of superior components to ensure a higher level of quality, you can count on this range of models for complete around-the-clock reliability.Slim BezelIssue date 2017-07-06Version: 3.2.212 NC: 8670 000 85188EAN: 87 12581 62670 9© 2017 Koninklijke Philips N.V.All Rights reserved.Specifications are subject to change without notice. Trademarks are the property of Koninklijke Philips N.V. or their respective SpecificationsPicture/Display•Diagonal screen size: 42 inch / 107 cm •Panel resolution: 1920x1080p•Optimum resolution: 1920 x 1080 @ 60Hz •Brightness: 700 cd/m²•Contrast ratio (typical): 1100:1•Response time (typical): 9 ms •Aspect ratio: 16:9•Viewing angle (H / V): 150 / 150 degree •Pixel pitch: 0.485 x 0.485•Display colors: 1.06 Billion colors•3D Technology: Autostereoscopic 3D display, Fixed Lenticular 3D Technology, Input Format: 2D plus depth•Picture enhancement: 3/2 - 2/2 motion pull down, 3D Combfilter, Motion compens. deinterlacing, Progressive scan, 3D MA deinterlacing, Dynamic contrast enhancementSupported Display Resolution•Computer formats Resolution Refresh rate 640 x 480 60, 67, 72, 75Hz 800 x 600 56, 60, 72, 75Hz 1024 x 768 60Hz 1280 x 768 60Hz 1280 x 800 60Hz 1360 x 768 60Hz 1366 x 768 60Hz 1440 x 900 60Hz 1600 x 1200 60Hz 1920 x 1080 60Hz 1920 x 1200 60Hz •Video formatsResolutionRefresh rate 480i 60Hz 480p 60Hz 576p 50Hz 576i 50Hz 720p 50, 60Hz 1080i 50, 60Hz 1080p 50, 60HzConnectivity•PC: VGA-in D-Sub 15HD, VGA-out D-Sub 15HD, DVI-D x1, RS232 D-Sub9, RS232 D-sub9 output, 3.5 mm PC audio input x1•AV input: HDMI x1, Composite (RCA) x1,Composite (BNC) x1, S-video x1, Audio (L/R) x2, Component (YPbPr) x1•AV output: Composite (BNC) x1, Audio (L/R) x1•Other connections: AC-out, External loudspeaker connectorConvenience•Placement: Landscape•Picture in picture: PBP, PIP, POP•Screen saving functions: Pixel shift, Low bright •Signal Loop Through: RS232, VGA •Keyboard control: Hidden, Lockable •Remote control signal: Lockable•Ease of installation: AC Out, Carrying Handles, Smart Insert•Energy saving functions: Ambient light sensor, Smart Power•Safety control functions: Heat Control, Temperature Sensor•Picture performance: Advanced color control •Packaging: Reusable box•Network controllable: RS232Dimensions•Bezel thickness: 1.6 cm / 0.63 inch•Smart Insert mount: 160 x 300 x 55 mm•Smart insert in inch (WxHxD): 6.30 x 11.81 x 2.17 inch•Set dimensions (W x H x D): 968 x 559 x 132 mm •Set dimensions in inch (W x H x D): 38.1 x 22 x 5.1 inch•Set dimensions with stand (H x D): 606 x 405 mm •Set dimensions with stand in inch (H x D): 23.9 x 15.9 inch•Product weight: 37 kg •Product weight (lb): 81.6•VESA Mount: 200x200mm, 400x200mm (Set), 100x100mm (Smart insert)Operating conditions•Temperature range (operation): 0 - 40 °C •Relative humidity: 5 - 90 %•MTBF: 50.000 hour(s)Power•Mains power: 90-264 VAC, 50/60 Hz •Consumption (On mode): Typ. 133W •Standby power consumption: < 1WSound•Built-in speakers: 2 x 5 W (8 ohm)Accessories•Included accessories: Remote Control, Batteries for remote control, AC Power Cord, VGA cable, User manual on CD-ROM, Quick start guide •Optional accessories: Fixed wall mount, Flexible wall mount, Ceiling mount •Stand: BM05211Miscellaneous•Bezel: metallic anthracite•Warranty: Europe/North America: 1 year•On-Screen Display Languages: English, French, German, Italian, Polish, Turkish, Russian, Simplified Chinese•Regulatory approvals: CE, RoHS。
Pepperstone智能交易工具说明书
Why every trader should use Smart Trader ToolsSmart Trader Tools is a set of more than 29 expert-like tools and indicators designed to help you take your trading to the next level. They’re easy to use, install and access and are exclusive to the world’s most popular and powerful trading platforms, MetaTrader 4 and MetaTrader 5.What’s included?The Smart Trader Tools package is a suite of expert advisor tools and indicators to help enhance your trade execution and management. It also supports decision-making systems and strategies. You can access sophisticated alarms and broadcast facilities, with up-to-date market data and functions integrated within the MetaTrader interface, helping make your trading experience easier and more enjoyable.Where to beginWe’ve pulled together a list of our trader and analyst favourites here for you, outlining exactly what each tool is and why you should use it. If you have any questions, just let us know.Our top four Smart Trader Tools to help you trade like a proTradeSimulator1.2. Mini Terminal and Smart LinesMatrixCorrelation3.Feature4.Connect1. Trade SimulatorWhat is it?Our best traders are known to regularly practise their strategies as a way to improve their trading ability. Even though it’s an integral step in every expert trader’s regime, it can take up a lot of time, which is something that should be taken into account especially when you’re balancing life and trading. Enter Trade Simulator: a revolution in strategy testing designed with manual traders in mind. This tool can replay candles on your preferred currency pair and timeframes while running an actual trading simulator on your MT4 platform, helping you analyse your strategy in reasonable depth and within a reasonable timeframe. Trade Simulator can simulate real market conditions while replaying the same period multiple times so you can review how different strategies would have performed in real-time. The best part about this simulator is that you can adjust how fast candles are replayed so if you wanted, you could test years of data in an hour.Trade SimulatorWhy use it?Trade simulator allows you to use historic data to test your strategy. This allows traders to manually test an indicator, risk/reward structure, or general approach to trading based on real market data. While testing a new approach could typically mean months in a Demo Account, you can compact this learning into one session with the ability to pause, rewind or fast-forward the pricing as you like.Once you’re finished, you can review and analyse all your results in one place, perfecting your approach before you repeat the process with a new strategy or two. Available on MT4 only at the moment, this is a great tool to help you learn and improve your trading so you can do so on a Live Account with confidence.2. Mini Terminal and Smart LinesWhat is it?Despite its name, the Mini Terminal is anything but mini when it comes to functionality. The tool is part of the Smart Trader expert advisors suite and provides a range of functionality. Our favourite is the ability to enhance the efficiency of one-click trading, which comes with a lot of automatic calculations specified by the trader. This tool alone brings an extra level of clarity to your trading to keep you informed.Another great feature of the Mini Terminal is Smart Lines, a feature that turns any horizontal, vertical or diagonal line into a stop-loss, take-profit or pending order type. You can take this to the next level by having multiple lines to layer into a trade or layer out of a trade, exiting various percentages with multiple lines. Using Smart Lines allows you to trade off a trendline, a previously unheard of order type.Why use it?One of the most popular features of the Mini Terminal is its ability to select a predefined template with your specified calculations and settings built in. Once you define your settings, the system is then able to automatically set up a trade size based on your risk preference and predefined stop-loss and take-profit distance, allowing you to structure the trade and execute it quickly. If you see an opportunity in the market, you don’t need to spend valuable time calculating position size or a risk per trade, you can simply select your predefined template with your preferences all set up. You can even name these to further customise them for easy reference for example, #scalpersetup.Mini Terminal3. Correlation MatrixWhat is it?Correlation studies use historical data to help traders to understand the relationship between currency pairs, as well as how these move in relation to each other. This can be a valuable indication of opportunity for many technical traders and is something Smart Trader Tools has done very well to support. The Correlation Matrix is an essential tool for any trader who intends to have multiple positions opened at the same time while being able to see how relevant pairs are positively or negatively correlated to help make more informed trading decisions.Why use it?Let’s say that a currency pair X is moving higher and it has a positive correlationof 100 to a currency pair Y. This positive correlation would indicate that when the price of X went up, 100% of the time the price of Y would also go. On the other hand, if X had 100 negative correlation with Z then when the price of X rises, the price ofZ would fall. This is particularly important when you trade multiple currency pairs.The last thing you want is to be trading positively correlated pairs in the opposite direction. Why? This would mean that whatever profit you make on one pair, you would have lost on the other pair.As you can see below, EURUSD and GBPUSD have 96 positive correlation which means they move almost perfectly together. If you’re long EURUSD and long GBPUSD you’re potentially doubling your EURUSD exposure, perhaps without even knowing. Correlation Matrix4. Connect FeatureWhat is it?The Connect Feature is an expert advisor that connects straight to your MT4 and MT5 platform interface. It’s a simple, easy-to-use and extremely powerful additionto your armoury. In a simple user interface, it displays an interesting summary of your past performance, clearly showing areas where your trading was strong and where you could improve. It also displays an economic calendar and customisable newsfeed tailored to your trading interests. Undoubtedly, one of Connect’s best features is the Trade Analysis tab (shown below). Here you can examine the most interesting details of your trades including which day of the week you generally make money, the currency pair that’s making you the most profit, and even which instruments you should consider taking a break from.Why use it?Every trader, regardless of their style or analysis type, should be more than familiar with economic and market information. Connect encourages you to keep your finger on the pulse with access to an economic calendar plus the ability to customise news you’re interested in, delivered to you within the platform itself. Want to take a position based on something you’ve read or learnt from reviewing your own performanceon the dashboard? Simply manage your account by connecting straight into your Pepperstone Secure Client area straight from the platform, saving you time and keeping you within your trading platform so you can spend more time focusing on your trade.Connect FeatureOver to youNo one’s born with Forex trading skills. The best traders take their time learning the ropes. They do the research, test their strategies and use any resource they can to get an upper hand. The key is to surround yourself with trusted advisors and the right information, tools and support to help you on your trading journey, wherever youfind yourself. Whether you decide to take a position based on correlation data from Correlation Matrix or set up some predefined risk, take-profit and stop-losses with Mini Terminal, using Smart Trader Tools helps put you on the fast-track to trading like pro.Speak to your Trading Specialist today and take your trading to the next level.Local Call 1300 033 375 Phone +61 3 9020 0155 Fax +61 3 8679 ***********************。
赵宏展one的用法
赵宏展one的用法
赵宏展one是一款非常实用的手机应用程序,它可以帮助用户完成各种生活中常见的任务。
下面就来介绍一下赵宏展one的用法。
1. 记录日程安排
赵宏展one可以轻松帮助用户记录自己的日程安排,包括工作、学习和生活中的各种任务。
用户可以设置提醒功能,避免忘记重要的任务。
2. 健康管理
赵宏展one还可以帮助用户管理自己的健康,记录体重、运动情况,以及饮食习惯等。
用户可以通过这些数据来了解自己的健康状况,制定健康计划。
3. 财务管理
赵宏展one还具有财务管理功能,用户可以记录自己的收入和支出,制定预算计划,以及查看自己的账单。
这样可以帮助用户更好地管理自己的财务状况。
4. 学习工具
赵宏展one还可以作为一个学习工具,用户可以记录自己的学习计划、备忘录和笔记等,以便随时查阅。
5. 旅行助手
赵宏展one还可以帮助用户规划旅行,包括查找景点、酒店和餐厅等信息,以及记录旅行路线和费用等。
总之,赵宏展one是一个非常实用的手机应用程序,可以帮助用
户更好地管理自己的生活,提高生活品质。
Spectrum One软件使用手册范本
FTIR SPECTROMETER 用户培训教材2000年十二月FTIR 原理(略)Spectrum 3.0红外应用软件主菜单常用功能简介本简介是为了帮助记忆主菜单常用功能而写的,菜单功能的详细使用说明请参照使用说明书和在线帮助一、FILE 文件菜单Status…状态。
显示软件自动记录的光谱状态参数,包括时间、仪器和校正情况等。
Copy to Report 拷贝光谱到报告模板。
二、EDIT 编辑菜单。
剪切、复制和粘贴光谱到其他窗口或其他Windows应用软件三、VIEW 视图菜单Optima 优化显示Format View…显示格式,设定显示光谱纵、横坐标范围、颜色、字体等。
Overlay/Split Display 叠合/分列方式显示光谱Cursor 光标Vertical-Continuous 连续垂直光标Vertical-Peak 峰值垂直光标Horizontal 水平光标Radar Display 雷达光谱,窗口显示的光谱全图Previous Range 恢复前一显示范围Autorange X 自动优化X轴显示范围Autorange Y 自动优化Y轴显示范围Autoscale Y 自动优化Y轴标尺Cancer Autoscale 取消自动优化Y轴标尺Cancer Offset 取消重置标尺Full Scale 自动全范围优化标尺显示Label Cursor 标记光标,在当前光标所在处标示纵、横坐标值。
Label peaks 标记峰值,标记吸收峰的纵、横坐标值。
Clear All Peak Labels 清除峰值标记Add/Edit Text 加入/编辑文字四、PROCESS 光谱处理菜单UndoDate turn-up 专家系统光谱处理,可包括基线校正、平滑处理和扣空白。
Absorbance 转换为吸光度Transmittance 转换为透过率Kubelka-Munk K-M漫反射校正转换Convert X…X轴坐标转换Difference 差谱Baseline Correction 基线校正。
SPE操作规程(付立叶红外)
SPE操作规程(付立叶红外)
1 编辑Configuration及Tray/Rack。
Configuration 及Tray/Rack 分别描述仪器结构和托盘构成,无须重新编辑。
2 编辑Methods。
点击Methods按钮,按Sequential单击右键New按钮出现,按New键打开方法编辑菜单,选择设置和托盘名字后按OK键;按照柱预处理(老化、
活化)样品添加柱淋洗柱内水分清除洗脱编辑方法并存档。
3 编辑Application。
点击Application按钮,单击右键,出现New按钮,按new,编辑托盘/构造菜单打开,输入托盘/构造名字,后按OK按钮,方法菜单打开;先点List Entry按钮,后按Step,Step Entry编辑菜单便出现,按Method之▼按钮,点选DEC柱位置,后按Insert 键作输入。
完成,保存。
4 运行。
选Execute之Run键,计算机会自动仿真一次程序如何运作。
当程序仿真运作中,若发现有错误指令时,托盘构造图下方会显示错误字句。
若程序正式执行时,先把Option中之Simulate点一下。
当Simulate之勾删除后,再选Execute 之Run键,计算机会正式执行程序。
5 关机。
程序运行完毕后依次关闭工作软件、电脑、仪器、稳压电源。
6 填写使用记录。
Turbo使用指南
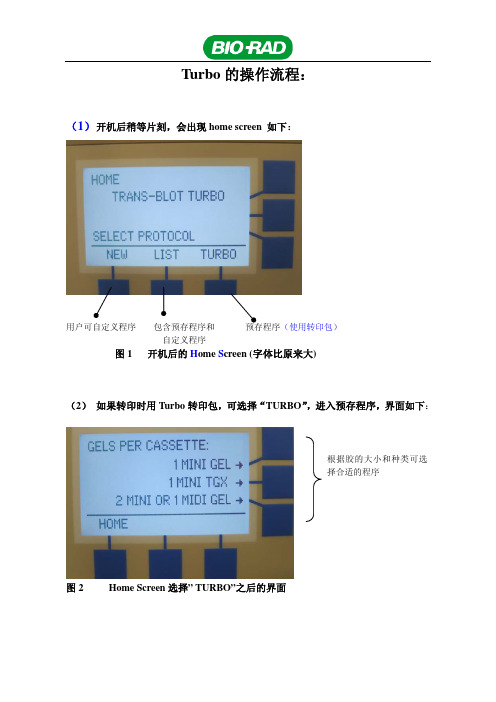
Turbo的操作流程:(1) 开机后稍等片刻,会出现home screen 如下:用户可自定义程序包含预存程序和预存程序(使用转印包)自定义程序图1 开机后的H ome S creen (字体比原来大)(2) 如果转印时用Turbo转印包,可选择“TURBO”,进入预存程序,界面如下:图2 Home Screen选择” TURBO”之后的界面根据胶的大小和种类可选择合适的程序(A)1Mini Gel (指原本使用手灌胶类型:(Mixed MW, 25V,1.3A 7min)图3 “TURBO”——〉“1MINI GEL”之后的界面(B) 1 Mini TGX胶(指原本使用预制胶):(Mixed MW,25V,2.5A,3min)图4 “TURBO”——〉“1MINI TGX”之后的界面(C)2mini or 1midi胶:(Mixed MW,25V,2.5A,7min)图5 “TURBO”——〉“2MINI or 1MIDI GEL ”之后的界面(3) 如果在开机后,选择了“NEW”,用户可以自定义程序,并把自定义的程序储存起来(在List 位置)。
TURBO可以同时储存25个用户自定义的程序。
图6 Home screen中选择“NEW”之后的界面在此界面,用户可以输入电压值(图7-b),电流值(图7-c),和转印的时间(图7-d):图7-a用户可以选择恒压或恒流模式图7-b可以输入电压值图7-c可以输入电流值图7-d 设转印时间当程序设置好后,可以把程序保存下来,如下图:图8 程序保存界面(4) 如果在H ome S creen 的时候选择“LIST “,可以使用预存和自定义程序,界面如下:图9 Home screen 选择” LIST”之后的界面(A ) 如果选择Bio-Rad 公司预存的程序, 则在 “BIO-RAD” ,之后界面如下:图10 “LIST ”——〉“BIO-RAD ” 之后的界面, 需选择胶的大小和数量预存的程序 用户自定义的程序需要转印1块小型胶,则选择“1 MINI GEL“,如下(左图):需要转印两块小型胶或一块中型胶,则选择“2MINI OR 1 MIDI GEL”,如下(右图):图11 “LIST”——〉“BIO-RAD”——〉1MINI GEL(左)or——〉2MINI or 1MIDI GEL(右)然后可以根据自己的需求选择程序:1)标准的半干转印;2)1,5mm Gel的转印;3)高分子量蛋白质转印;4)低分子量蛋白质转印;5)混合分子量的蛋白质的转印;6)1mini TGX Gel的转印。
SPAN_OUTUM_V8.10操作手册
V1.00
大唐移动通信设备有限公司
SPAN OutumV8.0 操作手册
文档更新记录
日期
更新人
版本 备注
2012-11-06 Outum项目测试组 2012-12-26 2013-3-13 徐世豪 2013-4-12 徐世豪 2013-4-13 张李
V 0.01 V1.00 V1.00 V1.00 V1.00
创建文档 根据评审意见修改 更新报表功能操作 根据重构版本,修改操作手册 添加单小区覆盖图/TDL优化模拟预测
2
大唐移动通信设备有限公司
目录
SPAN OutumV8.0 操作手册
1 概述...............................................................................................................4 2 功能介绍...................................................................................................................................4
SPAN OutumV8.0 操作手册
IE 栏中包括各制式 IE 及 Common IE:
事件栏中包括各制式事件、Common 事件、EvevtDef(自定义事件)、Application 事件、Script 事件:
资源管理器可进行前台测试盒后台分析的切换
6
大唐移动通信设备有限公司
SPAN OutumV8.0 操作手册
3
大唐移动通信设备有限公司
- 1、下载文档前请自行甄别文档内容的完整性,平台不提供额外的编辑、内容补充、找答案等附加服务。
- 2、"仅部分预览"的文档,不可在线预览部分如存在完整性等问题,可反馈申请退款(可完整预览的文档不适用该条件!)。
- 3、如文档侵犯您的权益,请联系客服反馈,我们会尽快为您处理(人工客服工作时间:9:00-18:30)。
FTIR SPECTROMETER 用户培训教材2000年十二月FTIR 原理(略)Spectrum 3.0红外应用软件主菜单常用功能简介本简介是为了帮助记忆主菜单常用功能而写的,菜单功能的详细使用说明请参照使用说明书和在线帮助一、FILE 文件菜单Status…状态。
显示软件自动记录的光谱状态参数,包括时间、仪器和校正情况等。
Copy to Report 拷贝光谱到报告模板。
二、EDIT 编辑菜单。
剪切、复制和粘贴光谱到其他窗口或其他Windows应用软件三、VIEW 视图菜单Optima 优化显示Format View…显示格式,设定显示光谱纵、横坐标范围、颜色、字体等。
Overlay/Split Display 叠合/分列方式显示光谱Cursor 光标Vertical-Continuous 连续垂直光标Vertical-Peak 峰值垂直光标Horizontal 水平光标Radar Display 雷达光谱,窗口显示的光谱全图Previous Range 恢复前一显示范围Autorange X 自动优化X轴显示范围Autorange Y 自动优化Y轴显示范围Autoscale Y 自动优化Y轴标尺Cancer Autoscale 取消自动优化Y轴标尺Cancer Offset 取消重置标尺Full Scale 自动全范围优化标尺显示Label Cursor 标记光标,在当前光标所在处标示纵、横坐标值。
Label peaks 标记峰值,标记吸收峰的纵、横坐标值。
Clear All Peak Labels 清除峰值标记Add/Edit Text 加入/编辑文字四、PROCESS 光谱处理菜单UndoDate turn-up 专家系统光谱处理,可包括基线校正、平滑处理和扣空白。
Absorbance 转换为吸光度Transmittance 转换为透过率Kubelka-Munk K-M漫反射校正转换Convert X…X轴坐标转换Difference 差谱Baseline Correction 基线校正。
自动和交互方式Smooth 平滑处理。
自动和交互方式及自行设定Deconvo lution…去卷积,增加光谱分辨率Spectral Calculator 光谱计算器,对光谱进行四则运算Normalize…归一化,以100%T为基线,将光谱最大吸收峰扩展/缩小至设定的吸光度值Abex…吸光度扩展,以100%T为基线,将光谱最大吸收峰比例扩展至设定的吸光度值Derivative 导数光谱,增加光谱分辨率Interpolate…数据间隔,改变光谱数据点分辨率Blank…扣空白Kramers-K ronig…镜面反射校正ATR Correction…ATR校正Compare 比较IR Search 红外检索Interactive Interpretation…交互式光谱解析Quant Prediction 定量分析Peak Area/Height…峰高/峰面积测定Peak Table…峰值表五、INSTUMENT 仪器控制Scan 扫描Monitor 仪器状态显示Validate 仪器认证六、SETUP 设定Login 登录,设定登录名和密码。
Instrument 仪器设定Validation 仪器认证设定IR Search…检索设定Compare…Compare比较设定Quant…定量设定Area / Height 峰高/峰面积设定Report Template 报告格式设定Learn 光谱学习功能开关。
Option 选项,本软件的各种设定Toolbar 工具栏设定Toolbox 工具盒设定七、Procedures 预定程序菜单八、WINDOW 窗口菜单九、HELP 帮助菜单Conte nts and Index…在线帮助Learn Spectrum…在线教程Visit the Perkin-Elmer Web Site…IR Assistant…红外助手软件AboutSpectrum One软件常用操作指南Spectrum One的操作软件Spectrum 3.0红外应用软件是一个Windows下的软件,它的所有操作方式都与Windows操作相似。
在此,我们将简单介绍该软件的常用操作和菜单功能,详细的使用说明请参照使用说明书、在线教程和在线帮助。
一、开机与仪器状态检查开机时先后打开Spectrum One主机电源和计算机电源,待进入Windows界面后,打开<PE Applications>下的<Spectrum>或双击建立于桌面的<Spectrum>快捷图标进入Spectrum 3.0。
软件将显示登录页面,提示输入登录名和密码,用鼠标在栏目内选择相应的项目,下方的Activate IR Assistant选项询问是否要直接进入“红外助手软件”系统,我们也可以在Spectrum主程序界面下进入“红外助手软件”。
点击<OK>就进入了Spectrum的主程序界面。
与所有Windows软件一样,中间是显示区,上面是下拉菜单和工具栏,下面是状态栏。
联机成功以后,程序会立即要求采集背景光谱,并要求确认样品舱内是空的。
确认以后仪器开始采集背景,采集结束以后会弹出一个字体为绿色的确认窗口,表示仪器一切正常,可以工作了。
按惯例开机后可以先检查一下仪器的当前状态如光源能量等。
打开〈Instrument〉菜单,选择〈Monitor 〉,显示出Monitor页面。
在Monitor页面中,上方有四个图标,分别对应于不同的监测项目:Energy 能量:监测红外能量Sample 样品图监测样品谱图(已扣除背景)Single Beam 单光束图监测对干涉图作傅立叶变换后得到的单光束图Interferogram 干涉图监测干涉图默认显示能量项目,显示的是红蓝两条棒状图,分别代表当前和最大的能量值,点击〈Reset〉会重置能量最大值;对于其他选项,点击图标以后就会显示指定监测项目对应的图。
点击〈Stop〉中止监测,切换到扫描窗口。
点击〈Exit〉退出Monitor页面。
Spectrum One主机每次开机仪器都会进行自检,可以听到马达声,需要稍等一会。
二、谱图的采集通常由于傅立叶变换红外光谱仪是单光束仪器,因此我们必须先采集背景然后再采集样品光谱。
但在Spectrum One中,由于采用了Look Ahead技术,仪器会智能化地判断是否需要重新采集背景,因此使用Spectrum红外软件采集谱图变得非常方便,通常可以直接采集样品光谱:点击〈Instrument〉菜单下的〈Scan 〉命令,就会出现扫描窗口。
在Sample页中我们设定一个谱图文件名(Filename),建议根据样品情况填写描述(Description),如果需要你还可酌情填写注解〈Comments〉;在Scan页面可以根据需要设定扫描范围(Range)和扫描次数或扫描时间,选择扫描样品还是背景或单光束图或干涉图,还可以设定纵坐标的单位。
注意如果要自行采集背景,背景扫描的范围必须与将要进行的样品扫描的范围一致。
在Instrument页面你可以设定分辨率(Resolution),点击<Advanced>以后,你可以选择是否使用自动扣除大气背景校正功能、AVI功能和Look Ahead技术;点击<Quality Checks>可以设定光谱质量检查选项;你还可以选择采样间隔(Date Interval)和扫描速度〈Scan Speed〉。
如果你觉得显示的默认值符合你的需要的话,除了文件名和描述外可以不加任何更改(大部分时候我们会全部采用默认值)。
点击<Apply>确认设定值,按钮切换为<Scan>,再点击<Scan>执行扫描。
屏幕会显示谱图采集窗口,完成后自动存储文件并返回主程序界面,显示谱图。
如果在自动存储文件时,有同名文件存在,会出现窗口提示询问是否覆盖(Overwrite)或给待存储的文件一个新文件名(New Name),根据情况选择即可。
在扫描窗口中,上方有五个图标,你可以使用它们来切换到监测窗口,或者打开、存储、复制和打印后缀名为.set的设置文件,该文件包含了当前的所有仪器设定和扫描参数。
三、谱图的显示用FILE菜单的OPEN命令或工具栏上的快捷图标打开谱图,或者直接用扫描命令得到一张红外谱图以后,我们可以改变该谱图的显示方式以符合我们的需要。
在打开谱图时,系统会自动按照谱图的大小调整显示的纵、横坐标范围。
然后你可以用VIEW菜单里的各项命令来改变谱图的显示方式。
VIEW 视图菜单Optimize 优化显示Format View…定制显示格式Overlay/Split Display 叠合方式/分列方式显示光谱Cursor 光标Radar Display 雷达光谱,窗口显示的光谱全图Previous Range 恢复前一显示范围Autorange X 自动优化X轴显示范围Autorange Y 自动优化Y轴显示范围Autoscale Y 自动优化Y轴标尺Cancer Autoscale 取消自动优化Y轴标尺Cancer Offset 取消重置标尺Full Scale 自动全范围优化标尺显示Select All 全选Label Cursor 标记当前光标所在处纵坐标值。
Label peaks 标记所有吸收峰的纵、横坐标值。
Clear All Peak Labels 清除峰值标记Add/Edit Text 加入/编辑文字Spectrum Browser…光谱浏览器1) 观察光谱细部你可以用鼠标拉出一个矩形框,然后双击选定区域观看放大的局部;用〈Radar Display〉可以显示全图。
用〈Previous Range〉可以恢复前一显示范围。
2) 定制显示格式〈Format View〉是定制显示中最主要的命令。
点击〈Format View〉出现定制显示页面。
首先是范围〈Range〉,你可以在这里设定横坐标(Abscissa)波数值范围和纵坐标(Ordinate)吸光度值范围。
“标准”的中红外谱图的横坐标范围是4000~400波数,吸光度值范围是0~100T%。
标注(Annotations)页面设定纵、横坐标的显示方式,〈File〉是模板文件的设定显示值,选择〈User〉可以自行设定显示在图上的纵、横坐标单位;〈Ordinate Orientation〉指定纵坐标的显示方向;〈Grid〉设定是否要在图纸上打格;〈Scale Change〉设定是否在2000波数以后采用较大的坐标间隔(增加一倍)。
默认值通常是符合常规的设置。
