WebSphere Portal v8.5 安装截图
WAS8.5安装部署手册

Was8.5linux安装部署手册一、环境要求1.本人安装环境linux环境Redhat6.5版本2.java环境:jdk1.7.09(至少安装1.6以上版本)3.需要软件was nd与IM两个文件夹4.安装时,不要使用等工具,此类工具不支持弹出页面,应使用这个工具。
二、安装1、root安装a)用root用户进入IM文件夹中(cd命令)b)./install即可进入安装页面c)选择首选项d)将没有用的点掉即可,连接was nd 中的repository.config文件e)点击安装,下一步下一步即可f)点击第一个单选按钮,完成。
跳出概要管理工具g)创建一个节点,下一步h)典型,启用管理安全性即可设置密码i)下一步,创建完成操作2、其他用户安装a)使用其他用户需要执行./userinstb)其余与root用户一样3、Was内存设置a)位置/IBM/WebSphere/AppServer/profiles/AppSrv01/config/cells/localhostNode01Cell/nodes/localhostNode01/servers/server1目录下的server.xml文件b)修改jvmEntries标签,添加initialHeapSize="512" maximumHeapSize="2048" 这个根据自己的内存大小来设定4、注意a)执行./install和./userinst的时候报权限不足,执行chmod -R 777 *b)chmod -R 777 *只能在IM(xt)文件夹下执行,根目录下执行会导致系统不能连接c)需要修改install.xml文件。
三、部署1.进入已在生产环境上安装好的websphere服务器的首页,输入用户名和密码(均为admin)登录。
2.进入页面中以后点击应用程序,再点击新建应用程序然后选择新建企业应用程序准备应用程序安装/点击应用程序类型选择websphere企业应用程序选择安装包进行安装准备。
was8.5在linux单机安装及部署

WebSphere(was8.5)安装及部署-单应用系统集成部1. 业务分析及安装思路 (3)2. 环境 (3)3. 安装 (3)3.1 安装包准备 (4)3.2 简介 (4)3.3 上传介质 (5)3.4 LINUX 环境基本参数检查 (5)3.5 jdk包安装 (6)3.6 Installation Manager 的安装 (7)3.7 WAS的安装 (10)3.8 创建Dmgr管理概要文件 (18)3.8.1 使用概要管理工具创建概要文件 (18)3.8.2 通过命令行启动概要管理服务器 (27)3.8.3 通过浏览器验证Deployment Manager启动成功及管理正常 (27)3.9 创建应用程序服务器概要文件 (28)3.9.1 使用概要管理工具创建概要文件 (29)3.8.2 通过命令行启动概要应用程序服务 (41)3.8.3 通过浏览器验证Deployment Manager启动成功及管理正常 (41)4. 发布应用 (42)4.1 配置数据源 (42)4.1.1 建立JDBC提供程序 (42)4.1.2 配置数据源 (45)4.1.3 数据源的优化 (53)4.2 发布应用 (55)4.3 防火墙端口开启 (61)1.业务分析及安装思路经过相应的对客户需求分析,对于商业营销系统来说承受的最高在线用户数在200-500之间;对于安徽烟草各个地市的商业营销系统的最高在线用户数应该处于400以下,这种压力对于较新版本的WebSphere Application Server (如WebSphere Application Server 8.5 来说)建立一个应用服务器实例即可没有做集群的任何必要。
所以,我们将安装WebSphere Application Server ND 8.5 版本,并且建立DM 和AppServer Profile,在AppServer Profile 中建立一个应用服务器实例且给这个应用服务器实例配置的JVM Heap 内存大小在4G左右。
Webspehre8.5.5_集群_安装配置操作说明文档

Websphere安装报告修订历史记录目录目录 (2)第1章总体概述 (4)1.1服务器列表 (4)1.1.1操作系统及帐号信息 (4)1.1.2主机及IP地址 (4)1.2应用服务器部署架构及规划 (4)1.2.1集群应用1架构 (4)1.2.2独立应用1架构(callcenter) (5)1.2.3独立应用2架构(interface) (5)第2章安装Websphere基本软件 (6)2.1介质准备 (6)2.2安装路径 (6)2.3安装Installation Manager (7)2.3.1启动安装界面 (7)2.3.2选择安装位置并完成安装 (8)2.4WebSphere ND (9)2.4.1启动IM安装程序 (9)2.4.2配置安装资源文件位置 (10)2.4.3选择安装选项并完成安装 (11)2.5安装HttpServer和Plugin插件 (13)2.5.1启动IM安装程序 (13)2.5.2配置安装资源文件位置 (14)2.5.3执行安装 (14)第3章配置概要文件 (17)3.1配置管理概要文件 (17)3.1.1启动概要管理 (17)3.1.2选择概要类型【Management】 (18)3.1.3执行默认选项完成配置 (20)3.2配置应用服务器概要 (22)3.2.1启动概要管理 (22)3.2.2选择概要类型【Application Server】 (23)3.2.3执行默认选项完成配置 (26)3.2.4启动管理单元 (27)3.2.5把节点加入到管理单元 (28)第4章集群配置 (28)4.1创建集群 (28)4.2加入集群成员 (31)4.3完成集群创建 (32)第5章Web服务器配置 (33)5.1创建Web服务器 (33)5.2选择HttpServer地址和插件地址 (34)5.3配置httpd.conf【需要手工配置】 (35)第6章共享目录配置过程 (36)6.1共享服务器端配置 (36)6.1.1NFS的安装 (36)6.1.2创建共享目录 (36)6.1.3配置共享文件夹 (36)6.1.4刷新配置和重启服务 (38)6.2客户端配置 (39)6.2.1创建目录 (39)6.2.2映射共享 (39)第7章服务启停及访问 (40)7.1集群应用停止方法 (40)7.1.1停止node01节点 (40)7.1.2停止node02节点 (40)7.1.3停止node03节点 (40)7.1.4停止node04节点 (40)7.1.5停止管理节点 (40)7.1.6停止HttpServer (41)7.2集群应用启动方法 (41)7.2.1启动管理节点 (41)7.2.2启动node01节点 (41)7.2.3启动node02节点 (42)7.2.4启动node03节点 (42)7.2.5启动node04节点 (42)7.2.6停止HttpServer (42)7.3应用安装和测试 (43)7.3.1启动安装 (43)7.3.2服务映射选择 (44)7.3.3服务访问路径 (44)7.3.4启动应用 (45)7.3.5生成插件并传播插件 (45)7.3.6重启动Web服务 (47)7.3.7测试查看 (48)第1章总体概述1.1 服务器列表1.1.1 操作系统及帐号信息操作系统:RedHat6.5 Linux帐号信息:root/****1.1.2 主机及IP地址192.168.1.121 XXXXsystem1192.168.1.122 XXXXsystem2192.168.1.123 XXXXsystem3192.168.1.124 XXXXsystem4192.168.1.125 XXXXcallcenter192.168.1.126 XXXXinterface1.2 应用服务器部署架构及规划1.2.1 集群应用1架构1.2.2 独立应用1架构(callcenter)1.2.3 独立应用2架构(interface)第2章安装Websphere基本软件2.1 介质准备基本介质包括如下:1、Installation Manager:IBM的安装工具文件2、WebSphere Application Server Network Deployment:Was主文件3、WebSphere Application Server Network Deployment Supplyment:附属文件,包括HIS、WCT等;如下图所示,已经上传到/tmp目录中的三个文件目录。
was8.5集群安装部署全攻略
本文为个人学习was8.5集群的学习总结,内容包括:集群的安装和配置、应用的发布、多版本部署等。
仅供参考。
1、准备三台机器,A、B、C,A作为dmgr1,主节点,B、C作为副节点,IHS、ODR服务器。
在三台机上安装websphere相关软件,具体步骤参见“/archives/508”但是这个文档是在一台机上安装和配置集群,和我们下面要做的不一样,所以接下来我们从定制概要表开始做。
2、补充一点安装文档没提到的,要在所有的机器的hosts文件里面加上IP和服务器名,否则可能会出现一些节点不同步的奇怪问题。
修改hosts文件不需要重启的方法是:可以打开命令提示符窗口执行以下命令:ipconfig /displaydns//显示DNS缓存内容ipconfig /flushdns//删除DNS缓存内容这样,系统就会清空本机的DNS缓存,从而不必重启,就能使Hosts文件生效。
3、创建定制概要表要将服务器B的节点加到服务器A上,必须在B上创建一个定制概要表。
定制概要文件是一个空节点,必须将它联合到DM单元中才能运行(也就是说以后祥谦虚拟机上安装的webshpere都要手工去创建一个定制概要表)。
与独立服务器概要文件比较起来,定制概要文件的节点上没有缺省服务器。
定制节点上也没有任何缺省应用程序。
通过联合定制概要文件,就会将它变成受管节点。
在联合之后,定制概要文件将具有节点代理程序进程,但是没有服务器进程。
必须使用DM的管理控制台来定制空节点以用于生产或者其他用途。
在启动节点代理程序之后,它就会对从DM 中发出的命令作出响应。
创建定制概要表的步骤如下:在概要管理工具中点击创建选择定制概要文件选高级概要文件创建起个名字,注意红线这句话,就是说本机上不能有叫这个名字的节点。
选择稍后联合此节点(试了三次在这个地方联合节点都失败,不知道为什么)默认还是默认点击创建(设置密码的时候要注意,不要用!@#¥%……这样的密码,在命令行输入时会有问题)创建成功之后,再联合节点。
Websphere 集群安装步骤
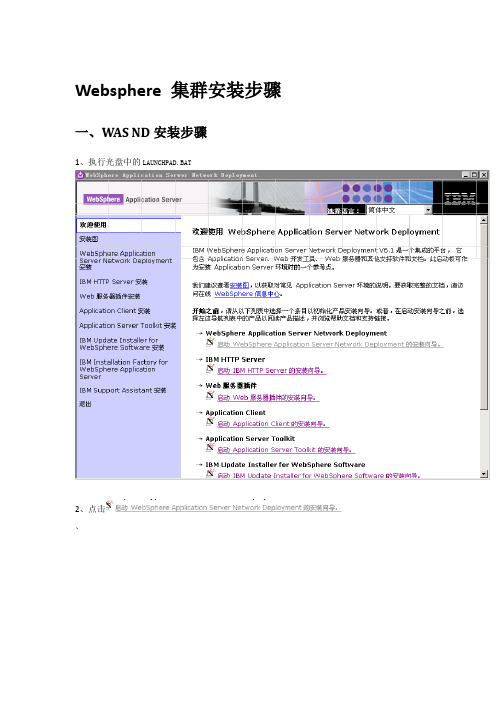
Websphere 集群安装步骤一、WAS ND安装步骤1、执行光盘中的LAUNCHPAD.BAT2、点击、3、点击下一步4、选择,然后点击5、点击6、点击7、设置安装目录后,点击8、选择列表中的(如上图)后点击9、设置管理工具的用户名和密码(在当前示例中我们设置的用户名和密码都是admin)10、点击11、点击12、点击,系统会弹出一个窗口,如下图所示:13、关闭安装验证窗口14、点击进入管理工具二、节点服务器创建步骤(创建两个以上)完成WAS ND的安装后,点击(如上图所示)1、点击2、在列表中选择“应用程序服务器”,然后点击3、选择“典型概要文件创建”,然后点击4、输入该节点的用户名和密码,然后点击5、点击6、选择,然后点击7、点击,系统会弹出一个窗口,如下图所示:8、关闭窗口,点击三、IBM Http Server安装步骤1、在安装窗口中点击2、点击3、选择,然后点击4、点击5、设置安装目录,然后点击6、设置Http Server的端口(推荐默认)然后点击7、输入操作系统密码,如下图所示:8、点击9、输入Http Server的用户名和密码,然后点击10、输入web服务器的名称和主机名或IP(推荐默认),然后点击11、点击12、点击四、Web服务器插件安装步骤1、点击安装向导窗口中的2、点击3、选择,然后点击4、点击5、选择,然后点击6、如果web服务器和WAS安装在同一台机器上,就选择本地,否则选择远程,然后点击7、选择插件安装目录(建议不要和Http Server的plugins目录相同,以避免和HttpServer冲突),然后点击8、选择WAS安装目录,然后点击9、Dmgr01是管理工具的概要,选择此概要,然后点击10、输入web服务器定义名,此名称要和HttpServer的名称一样,然后点击11、点击12、点击13、点击14、点击15、点击五、将Web Server加入配置管理服务器1. 开启IHS的admin管理: 在<IHS-install>/bin目录下运行htpasswd -cm <install_dir>\conf\admin.passwd admin(admin 是以后管理IHS的用户名). 接着输入两次密码.2. 在开始程序菜单的服务管理面板中启动IBM HTTP Server 和 IBM HTTP Administration Server.3. 将<wasplugin-install>/bin/ configure webserver1.bat文件拷贝到<was-install>/bin目录.(webserver1是安装HIS是设置的)4. 启动DM服务 < was-install >/profiles/profiles/Dmgr01/bin/ startManager.bat.5. 打开一个命令行窗口,运行<was-intall>/bin/configurewebserver1.bat.6. 到配置管理控制台确认Web Server被成功加入.六、将节点服务器加入到集中管理单元1. 通过菜单启动各节点服务器,如下图所示:2、执行< was-install >/ profiles/AppSrv01/bin/addNode.sh <DM machineName> <DM soap port>把节点1加入到集中管理单元. soap端口号为8879.3. 在另外一台节点(AppSrv02)上重复2至3步将此节点也加入到集中管理单元.4. 在配置管理控制台确认节点已加入到集中管理单元,在控制台左边菜单栏中点系统管理->选择节点,如下图:两个节点已成功加入七、创建集群1、点击开始->程序->IBM WebShpere->Application Server Network Deployment V6.1->概要文件->Dmgr01->管理控制台,如下图所示:输入用户名和密码(安装WAS ND时第8步所设置的用户名和密码),点击登录2、点击左边菜单栏中的【服务器】,选择【集群】,如下图所示:3、点击【新建】然后输入集群名称,点击下一步,如下图所示:4、将打开,并存到D盘5、点击【浏览】,从D盘中选择creatorepp.war,并在【上下文根】中输入:creatorepp,如下图所示,然后点击【下一步】6、在窗口中输入安装应用程序的目录,如:d:\webapps,然后点击【下一步】然后点击【下一步】9、点击【下一步】10、点击【完成】11、点击【保存到主配置】12、选中creatorepp应用前的复选框,然后点击【启动】,系统将启动该集群13、输入地址,查看creatorepp下的test.html是否能正常访问,如果能正常访问则表示安装成功,再用creatorepp.rar替换掉安装目录中的creatorepp.war即可,然后将web.xml复制到各节点服务器的缓存目录,如:<install_dir>\profiles\AppSrv02\config\cells\chinacre-ioylx9Cell01\applications\creatorepp.ea r\deployments\creatorepp\creatorepp.war\WEB-INF。
Websphere8.5安装
1、从IBM官方网站下载下列软件包,官方上提供的是压缩包,本人将各个分包解压合并,制作成ISO文件。
2、IBM Installation Manager for windows的安装2.1、运行IBM Installation Manager安装包中的install.exe2.2、IBM Installation Manager安装界面中,选中要安装选项。
2.3、选中接受许可协议。
IBM Installation ManagerWebsphere 8.5,、IHS8.5、IHS forWebsphere 插件2.4、设置要安装的路径。
2.5、安装确认页面。
2.6、执行IBM Installation Manager安装。
系统默认安装路径是:C:\Program Files\IBM\Installation Manager\eclipse2.7、安装完成,重启Installation Manager。
3、安装Websphere8.53.1、虚拟光驱中,装载整理好的Websphere8.5的安装文件。
3.2、启动Installation Manager,打开菜单【文件>首选项】。
3.3、首选项对话框中,添加存储库(如果有之前添加的存储库信息,首先除去所有存储库信息)。
3.4、选择respository.config文件。
3.5、测试选择的存储库文件。
3.6、Installation Manager界面选择【安装】按钮。
3.7、选择要安装的Websphere安装包。
3.8、接受许可协议。
3.9、选择共享资源目录。
系统默认目录是:C:\ProgramFiles\IBM\IMShared3.10、创建新的软件包组,并选择安装目录。
3.11、选择安装的翻译语言。
3.12、选择要安装的功能部件。
3.13、确认安装部件信息。
系统默认目录是:C:\Program Files\IBM\WebSphere\AppServer3.14、安装完成。
websphere8.5安装手册(完整操作以及简单优化)

Websphere8.5安装部署规范2017年07月目录1 WEBSPERE8.5 64位安装 (3)1.1 介质 (3)1.2 安装环境 (3)1.3 部署前准备 (3)1.4 安装程序 (4)1.4.1 Installation Manager的安装 (4)1.4.2 WAS 的安装 (7)1.4.3 新建节点 (18)1.5 设置 (22)1.5.1 开启高速缓存 (22)1.5.2 JVM设置 (23)约定:✓要求所有软件均安装在/data目录下。
✓所有中间件安装后,不可关闭日志记录功能,日志文件确保至少是半年以上的日志记录。
1Webspere8.5 64位安装1.1介质介质下载地址:ftp介质软件名称版本Websphere8.5 64位WAS8501_allplatform.part1.rarWAS8501_allplatform.part2.rarV8.5JDK WAS8_SDK1.7.zip Jdk1.7 其他agent.installer.linux.gtk.x86_64_1.6.2000.20130301_2248.zip1.2安装环境规格参数服务器型号64位操作系统CENTOS 6.9内存4G1.3部署前准备一、在/data/soft下新建websphere安装包解压文件[root@redhat64 ~]# cd /data/soft/[root@redhat64 soft]# mkdir websphere8.5[root@redhat64 soft]# mkdir install[root@redhat64 soft]# mkdir sdk二、上传安装文件将WebSphere的安装包和补丁包上传到/data/soft/目录下:三、确认服务器已安装了firefox浏览器、linux版本的rar和zip解压工具。
四、Websphere只能使用自带的jdk。
1.4安装程序一、赋可执行权限并解压缩安装包[root@localhost ~]# cd /data/soft/[root@localhost soft]# chmod 775 *[root@localhost soft]# unzipagent.installer.linux.gtk.x86_64_1.6.2000.20130301_2248.zip -d intall/ [root@localhost soft]# unzip WAS8_SDK1.7.zip -d sdk/[root@localhost soft]# unrar x WAS8501_allplatform.part1.rar websphere8.5/1.4.1Installation Manager的安装[root@localhost soft]# cd intall/[root@localhost intall]# ./consoleinst.sh输入“N”,回车输入“A”,回车输入“N”,回车输入“L”,按回车,修改存放路径为“/data/IBM/InstallationManager/eclipse”,回车输入“N”,回车输入“I”,开始安装,等待安装完成,输入“R”重启Install Manager。
WAS8.5.5集群部署安装
WAS8.5.5集群部署安装WAS集群有一个优点,就是使用同步的内存作为会话保持,无需使用特殊的回话保持方案,就可以实现多个节点负载均衡的效果。
同一个用户登录后,他的session会在所有节点的内存中都拥有相同的拷贝,所以无需担心轮训造成的登录状态失效的问题。
另外WAS集群可以使用图形化的WEB页面进行各个节点的管理,同一个WAR包只需部署一次就会在各个节点中进行同步,十分的方便。
要使用WAS集群,首先要向IBM购买相关的软件包、光盘和授权。
然后会收到一些安装文件。
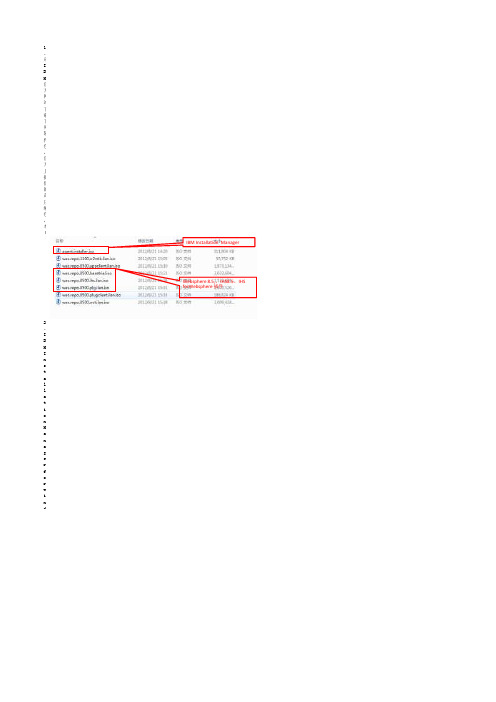
主要的安装文件有如下几个1、IM(Install Manager)安装包,zip格式,大小为163MB左右2、WAS主程序,分为3个zip包,每隔压缩包900M左右,共2.77GB3、WAS补丁包,是WAS8.5.5累积的一些补丁,由3个zip包组成,分别为872MB,1.65GB,1.57GB,三个一共4.08GB注:本次介绍的为WAS8.5.5 ND版,也只有ND版有集群功能,社区版和普通版是没有集群功能的,除了上面这些安装文件以外,还需要证书和授权,多数授权都集成在安装文件里面了,不需要单独的证书,可以联系IBM商务来购买。
这些安装文件是全平台通用的(基于JAVA的嘛),在Linux和Windows下都可以安装部署,当然都用上集群了肯定是用Linux的比较多was158.5.5-WS-WAS-FP015-part1.zip 2.84Gwas168.5.5-WS-WAS-FP016-part1.zip 2.87Gwas8.5.5.0-8.5.5.128.5.5-WS-WAS-FP012-part1.zip 4.08GWASND_v8.5.5_1of3.zip 2.77G现在搭建一个由3台设备组成的集群,其中第一台设备安装控制台用于部署,其余两台设备作为纯slave机器使用第一步:将安装包拷贝到服务器上,并解压这一步非常简单,将所有的zip包放到服务器上,使用scp或者sftp都可以,注意权限的问题解压的时候,三台机器都要解压IM,WAS安装包和补丁包。
手把手教你去IBM官网下载WAS8.5并安装
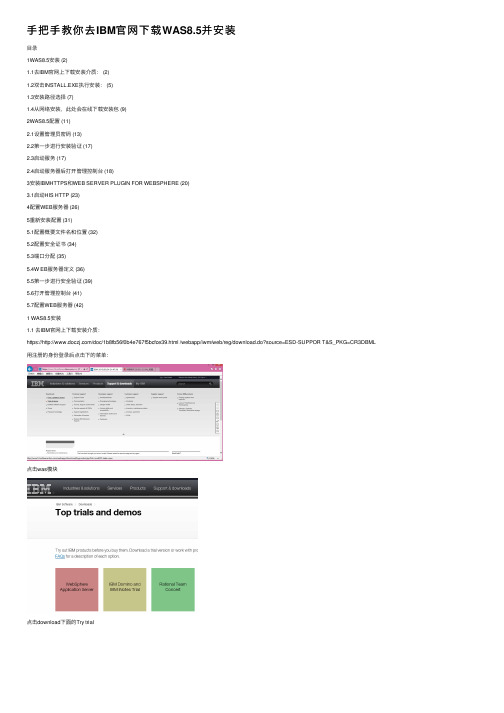
⼿把⼿教你去IBM官⽹下载WAS8.5并安装⽬录1WAS8.5安装 (2)1.1去IBM官⽹上下载安装介质: (2)1.2双击INSTALL.EXE执⾏安装: (5)1.3安装路径选择 (7)1.4从⽹络安装,此处会在线下载安装包 (9)2WAS8.5配置 (11)2.1设置管理员密码 (13)2.2第⼀步进⾏安装验证 (17)2.3启动服务 (17)2.4启动服务器后打开管理控制台 (18)3安装IBMHTTPS和WEB SERVER PLUGIN FOR WEBSPHERE (20)3.1启动HIS HTTP (23)4配置WEB服务器 (26)5重新安装配置 (31)5.1配置概要⽂件名和位置 (32)5.2配置安全证书 (34)5.3端⼝分配 (35)5.4W EB服务器定义 (36)5.5第⼀步进⾏安全验证 (39)5.6打开管理控制台 (41)5.7配置WEB服务器 (42)1 WAS8.5安装1.1 去IBM官⽹上下载安装介质:https:///doc/1b8fb56f0b4e767f5bcfce39.html /webapp/iwm/web/reg/download.do?source=ESD-SUPPOR T&S_PKG=CR3DBML ⽤注册的⾝份登录后点击下的菜单:点击was模块点击download下⾯的Try trial选择⼀下必填项,然后I confirm然后就在下⾯的页⾯上选择符合⾃⼰设备的安装包吧。
4我⽤的win32版,下载的是:BASETRIAL.agent.installer.win32.win32.x86.zip解压开:5 1.2 双击install.exe执⾏安装:默认已经选择was8.5.5,点击下⼀步安装。
WebSphere Portal 8 Cluster 集群安装手册

Portal8集群门户配置/opt/IBM/WebSphere/wp_profile/bin/startServer.sh WebSphere_Portal登录到主节点门户并删除下面两个服务/opt/IBM/WebSphere/wp_profile/bin/stopServer.sh WebSphere_Portal -username wpsadmin -password password修改配置文件/opt/IBM/WebSphere/wp_profile/PortalServer/jcr/lib/com/ibm/icmjcr.textsearch.enabled=true 改成jcr.textsearch.enabled=false然后执行下面的命令cd /opt/IBM/WebSphere/wp_profile/ConfigEngine./ConfigEngine.sh enable-profiles -DWasPassword=password./ConfigEngine.sh package-profiles -DWasPassword=passwordDM安装注意:选择安装IBM WebSphere Application Server Network Deployment V8.0 如果DM是和portal安装在同一台服务器则再安装一次一直下一步安装完成后停止DM./stopManager.sh -user <admin user> -password <admin password>Portal1节点相关配置收集portal1节点信息找到/opt/IBM/WebSphere/PortalServer/filesForDmgr/filesForDmgr.zip将文件下载下来解压将filesForDmgr\profiles\Dmgr01\config\.repository\metadata_wkplc复制到/opt/IBM/WebSphere/DM/profiles/Dmgr01/config/.repository将filesForDmgr/bin/ProfileManangement/plugins/com.ibm.wp.dmgr.pmt_7.0.5复制到/opt/IBM/WebSphere/DM /bin/ProfileManagement/plugins将/lib/p.registry.jar and wp.wire.jar复制到/opt/IBM/WebSphere/DM/lib将/plugins/com.ibm.patch.was.plugin.jar, com.ibm.wp.was.plugin.jar, and the wp.base.jar复制到/opt/IBM/WebSphere/DM/plugins将/profileTemplates/management.portal.augment复制到/opt/IBM/WebSphere/DM/profileTemplates执行下面命令cd /opt/IBM/WebSphere/DM/bin/./manageprofiles.sh-augment-templatePath/opt/IBM/WebSphere/DM/profileTemplates/management.portal.augment -profileName Dmgr01 启动DM./startManager.sh访问DM如果门户已经进行安全性迁移那么还需进行下图的操作使DM与Portal使用同一个LDAP 存储库重启DM将portal1加到新节点cd /opt/IBM/WebSphere/wp_profile/bin./addNode.sh 8879 -username wpsadmin -password password –includeapps重启DM/opt/IBM/WebSphere/wp_profile/ConfigEngine/properties目录下的wkplc.properties,修改如下属性执行下面的命令./ConfigEngine.sh cluster-node-config-post-federation -DWasPassword=password./ConfigEngine.sh cluster-node-config-cluster-setup -DWasPassword=passwordPortal1加入集群成功配置副节点portal2将主节点中的<PortalServer root>/profileTemplates/profileTemplates.zip注释:profileTemplates.zip不能复制到指定目录,因为指定目录没有写的权限,用Chmod u+w –R /opt/IBM/WebSphere/PortalServer/profileTemplates对目录授予写的权限复制到副节点的<PortalServer root>/profileTemplates执行下面命令cd /opt/IBM/WebSphere/PortalServer/profileTemplatesunzip profileTemplates.zip./installPortalTemplates.sh /opt/IBM/WebSphere/AppServercd /opt/IBM/WebSphere/AppServer/bin/./manageprofiles.sh -create -templatePath/opt/IBM/WebSphere/PortalServer/profileTemplates/managed.portal -profileName wp_profile -profilePath /opt/IBM/WebSphere/wp_profile -cellName portal8TwoCell -nodeNameportal8TwoNode -hostName 修改/opt/IBM/WebSphere/PortalServer/wps.properties在后面增加下面属性:ProfileName=wp_profileProfileDirectory=/opt/IBM/WebSphere/wp_profilecd /opt/IBM/WebSphere/wp_profile/bin将ojdbc6.jar 放到./opt/IBM/WebSphere/wp_profile/jbdc/oracle下./addNode.sh 8879 -username wpsadmin -password password修改/opt/IBM/WebSphere/wp_profile/ConfigEngine/properties/wkplc.properties./startNode.shcd /opt/IBM/WebSphere/wp_profile/ConfigEngine./ConfigEngine.sh cluster-node-config-cluster-setup-additional -DWasPassword=password修改/opt/IBM/WebSphere/wp_profile/ConfigEngine/properties/wkplc.properties PortalAdminId=<your Full DN LDAP ID>PortalAdminGroupId=<your Full DN LDAP ID>./ConfigEngine.sh update-jcr-admin -DWasPassword=password。
WAS8.5-安装配置(Linux)
WAS8.5-安装配置(Linux)WerbSphere Application Server V8.5安装(Linux)一、安装所需要的软件包及安装步骤 (1)1 安装Installation Manager (1)2 安装Websphere8.5 (5)3 创建概要文件 (13)4配置服务 (29)二、常见安装问题分析 (37)1 Deployment Manager启动报错 (37)2 服务器本机可以访问控制台,远程无法通过IE访问控制台 (38)一、安装所需要的软件包及安装步骤WAS安装器agent.installer.linux.gtk.x86_64_1.6.0.zipWAS核心程序包WAS_ND_V8.5_1_OF_3.zipWAS_ND_V8.5_2_OF_3.zipWAS_ND_V8.5_3_OF_3.zipIHS程序包(搭建集群时需要安装)安装方法与WAS核心程序包安装方法相同WAS_V8.5.5_SUPPL_1_OF_3.zipWAS_V8.5.5_SUPPL_2_OF_3.zipWAS_V8.5.5_SUPPL_3_OF_3.zip1 安装Installation Manager1.1 解压软件包unzip agent.installer.linux.gtk.x86_64_1.6.0.zip1.2 执行安装程序./install注意:如果使用./install命令无法调起安装程序,在调用客户化图形界面(export display=本机IP:0.0 再输入./install)1.3 Installation Manager安装界面中,选中要安装选项。
1.4 接受许可协议。
最新使用Linux安装WebSphere8.5-详细安装手册
使用L i n u x安装W e b S p h e r e8.5-详细安装手册WebSphere 8.5安装手册使用RHEL5.8安装WebSphere8.51准备WebSphere Application Server 8.5的安装需要红帽5.6及后续版本。
以下操作假设64位的红帽Linux5.8已经安装好,并打开服务器上的FTP服务,允许root用户上传文件。
首先到/projects/xming/下载Windows下的X Server,运行配置并启动。
在Putty中设定远程Linux服务器连接确定X11 forwarding选中,然后保存,打开ssh连接。
将InstalMgr1.5.2_LNX_X86_WAS_8.5.zip通过Ftp传输到Linux虚拟机中。
注意,不要在Windows下解压后传送,否则会丢失Linux下文件的执行权限,导致后续安装失败。
执行was8.5安装器下的install脚本2安装管理器将WAS8.5的安装文件WAS_ND_V8.5_1_OF_3.zip、WAS_ND_V8.5_2_OF_3.zip、WAS_ND_V8.5_3_OF_3.zip通过ftp传输到Linux服务器,并解压到~/was目录安装完毕后,进入安装管理器的eclipse目录,执行./launcher安装完毕后,可看到安装好的两个Profile后续可进入WebSphere Application Server安装目录执行服务的启动、停止等操作。
重启Linux服务器后,进入WebSphere Application Server依次启动管理服务器和AppSrv01的节点代理等待服务器启动后,即可访问管理控制台。
登录管理控制台http://192.168.1.111:9060/admin,输入安装过程中设置的用户名和密码:在管理控制台启动服务器:访问默认安装的应用http://192.168.1.115:9080/snoop,检查服务器是否正确启动:3升级WAS在需要的时候可以从8.5.0.0向上升级,例如升级到8.5.5.8版本。
WebSphere Application Server for z OS 8.5概述和演示说明书

BPM:PS V7.5
("IBM Business Process Manager Advanced: Process Server") V. 7.5 - Still pre-req'd the Feature Packs for XML, SCA, & SDO. - Dropped the "WebSphere" name. Included WLE - WebSphere Lombardi Edition
Uploading and running the jobs is the easy part.
The real challenge is coming up with all the names and values and ports the PMT is going to ask for.
Without a plan for those names you’ll very quickly get confused.
wassmpe = /shared/phere/V8R5
/shared zWebSphere
/V8R5
Configuration HFSes for each node – Read/Write:
Mount Points (WAS_HOME directories):
Dmgr: /wasv8config/b8cell/b8dmnode/DeploymentManager NodeA: /wasv8config/b8cell/b8nodea/AppServer
4
Reviewing HFS Directories, Roots & Homes
WAS8.5安装部署文档(AIX图形化安装)

WAS8安装部署文档(图形化安装)二〇一二年十二月文档信息变更历史目录1安装前的准备工作 (3)1.1安装环境: (3)1.2主机名不能带”-”等非法字符 (3)1.3集群环境,各服务器的时间相差不要超过2分钟 (4)1.4防火墙要开放相应的端口(实际环境可能不一要,登录WAS控制台查看各个应用服务器及NODEAGENT的端口) (4)1.5关闭LINUX的增强安全策略SELINUX ........ 错误!未定义书签。
1.6创建was用户及组 (5)2集成环境约定 (5)2.1磁盘规划 (5)3部署结构图 (5)4安装IM和WAS (6)4.1安装IM (6)4.2通过IM安装WAS (8)4.3安装WAS补丁............................ 错误!未定义书签。
5创建概要文件 (20)5.1.1192.111.1.48服务器上创建DM概要文件 (20)5.1.2192.111.1.107、192.111.1.48服务器上创建应用服务器概要文件并将节点联合到WAS控制台中 (21)5.1.2.1192.111.1.107服务器: (21)5.1.2.2192.111.1.48服务器: (24)6创建数据源 (8)6.1创建JDBC提供程序....................... 错误!未定义书签。
6.2创建J2C认证............................ 错误!未定义书签。
6.3创建数据源.............................. 错误!未定义书签。
7WAS优化 . (33)7.1Jvm内存设置 (33)7.2Web container (34)7.3JDBC连接池 (34)8日常维护 (34)8.1192.111.1.48服务器 (34)8.2192.111.1.107服务器 (35)1安装前的准备工作1.1安装环境:操作系统AIX6.1,中间件:websphere 8.5Was8.5操作系统要求/infocenter/prodguid/v1r0/clarity-reports/report/html/osForProduct?deliverableId=13185220736031.2操作系统检查,相关组件是否安装∙atk-1.12.3-2.aix5.2.ppc.rpm∙cairo-1.8.8-1.aix5.2.ppc.rpm∙expat-2.0.1-1.aix5.2.ppc.rpm∙fontconfig-2.4.2-1.aix5.2.ppc.rpm∙freetype2-2.3.9-1.aix5.2.ppc.rpm∙gettext-0.10.40-6.aix5.1.ppc.rpm∙glib2-2.12.4-2.aix5.2.ppc.rpm∙gtk2-2.10.6-4.aix5.2.ppc.rpm∙libjpeg-6b-6.aix5.1.ppc.rpm∙libpng-1.2.32-2.aix5.2.ppc.rpm∙libtiff-3.8.2-1.aix5.2.ppc.rpm∙pango-1.14.5-4.aix5.2.ppc.rpm∙xcursor-1.1.7-3.aix5.2.ppc.rpm∙xft-2.1.6-5.aix5.1.ppc.rpm∙xrender-0.9.1-3.aix5.2.ppc.rpm∙zlib-1.2.3-3.aix5.1.ppc.rpm∙pixman-0.12.0-3.aix5.2.ppc.rpmrpm -ivh expat-2.0.1-1.aix5.2.ppc.rpmrpm -ivh zlib-1.2.3-3.aix5.1.ppc.rpmrpm -ivh freetype2-2.3.9-1.aix5.2.ppc.rpmrpm -ivh fontconfig-2.4.2-1.aix5.2.ppc.rpmrpm -ivh gettext-0.10.40-6.aix5.1.ppc.rpmrpm -ivh glib2-2.12.4-2.aix5.2.ppc.rpmrpm -ivh libjpeg-6b-6.aix5.1.ppc.rpmrpm -ivh libpng-1.2.32-2.aix5.2.ppc.rpmrpm -ivh libtiff-3.8.2-1.aix5.2.ppc.rpmrpm -ivh xcursor-1.1.7-3.aix5.2.ppc.rpmrpm -ivh xft-2.1.6-5.aix5.1.ppc.rpmrpm -ivh xrender-0.9.1-3.aix5.2.ppc.rpmrpm -ivh pixman-0.12.0-3.aix5.2.ppc.rpmrpm -ivh cairo-1.8.8-1.aix5.2.ppc.rpmrpm -ivh pango-1.14.5-4.aix5.2.ppc.rpmrpm -ivh atk-1.12.3-2.aix5.2.ppc.rpmrpm -ivh gtk2-2.10.6-4.aix5.2.ppc.rpm1.3主机名不能带”-”等非法字符编辑HOSTS文件,添加相应的主机名和IP,修改好后,PING主机名,是否使相通。
WAS 8.5安装过程
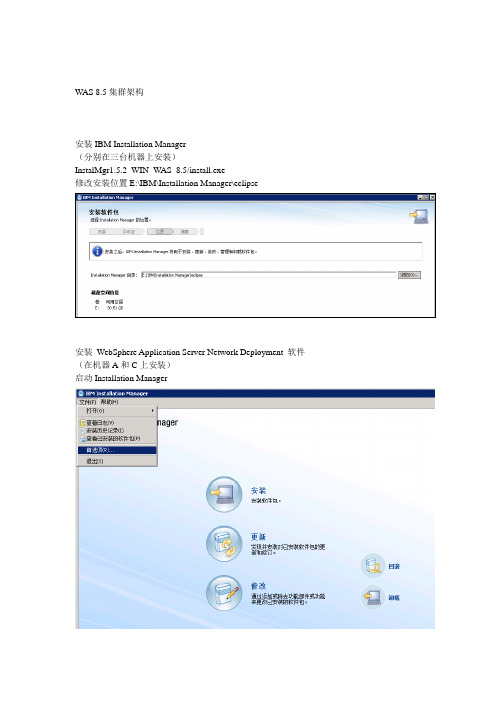
WAS 8.5集群架构安装IBM Installation Manager(分别在三台机器上安装)InstalMgr1.5.2_WIN_WAS_8.5/install.exe修改安装位置E:\IBM\Installation Manager\eclipse安装WebSphere Application Server Network Deployment 软件(在机器A和C上安装)启动Installation Manager添加W AS软件包存储库点击“安装”选择W AS软件包修改W AS共享资源的安装位置E:\IBM\IMShared修改W AS软件安装位置E:\IBM\WebSphere\AppServer根据需要选择要安装的W AS组件(下图中是默认选择,JDK版本可根据当前操作系统自动选择32位或64位)创建Deployment Manager 服务器类型的管理概要文件并启动Deployment Manager(在机器A上安装)使用命令行方式创建Profile# cd E:\IBM\WebSphere\AppServer# bin\manageprofiles.bat -create -profileName Dmgr01 -profilePath E:\IBM\WebSphere\AppServer\profiles\Dmgr01 -templatePath E:\IBM\WebSphere\AppServer\profileTemplates\dmgr启动Deployment Manager# cd E:\IBM\WebSphere\AppServer\profiles\Dmgr01# bin\startManager在浏览器中打开WAS管理控制台页面http://10.203.25.169:9060/ibm/console创建应用程序服务器概要文件(在机器A和C上安装)使用命令行方式创建Profile# cd E:\IBM\WebSphere\AppServer# bin\manageprofiles.bat -create -profileName Custom01 -profilePath E:\IBM\WebSphere\AppServer\profiles\Custom01 -templatePath E:\IBM\WebSphere\AppServer\profileTemplates\managed增加节点到Deployment Manager 的单元IOSQA02是Deployment Manager 所在服务器的主机名。
websphere8.5安装以及创建简单的应用实例
准备安装文件打开IBM网站下载websphere,需要下载的文件如下:IBM WebSphere Application Server Network Deployment Trial, including Liberty Profile v8.5 (Part 1 of 3)IBM WebSphere Application Server Network Deployment Trial, including Liberty Profile v8.5 (Part 2 of 3)IBM WebSphere Application Server Network Deployment Trial, including Liberty Profile v8.5 (Part 3 of 3)WebSphere Customization Toolbox v8.5 (Part 1 of 2)WebSphere Customization Toolbox v8.5 (Part 2 of 2)Web Server Plug-ins for IBM WebSphere Application Server v8.5 (Part 1 of 2)Web Server Plug-ins for IBM WebSphere Application Server v8.5 (Part 2 of 2)IBM HTTP Server for WebSphere Application Server v8.5 (Part 1 of 2)IBM HTTP Server for WebSphere Application Server v8.5 (Part 2 of 2)Installation Manager 1.6.2 for Windows安装Installation Manager解压Installation Manager 1.6.2 for Windows,直接下一步安装,这个没什么好说的、1.双击Installation Manager 1.6.2 for Windows解压之中的install.exe,进入下面图片:2.直接点击下一步,进入下图3.接着选中我接受许可协议中的条款,点击下一步,进入下图4.调节图中的安装位置为自己所希望的位置,单击下一步。
Windows7平台安装IBM WebSphere Portal Express 7.0,从下载到安装步步截图

1、下载要有一个ibm的帐号,没有的话可以自己注册一个,这个地址可以下载的版本是Express V7.0 https:///webapp/iwm/web/reg/pick.do?source=ESD-PORTALEXPRESS &S_TACT=109HD0SW&S_CMP=web_dw_rt_swd&lang=en_US点击下面的continue按钮,在接下来的页面选择I agree,然后就来到文件下载的这个页面:https:///webapp/iwm/web/reg/download.do?source=ESD-PORTALEXP RESS&S_TACT=109HD0SW&S_CMP=web_dw_rt_swd&lang=en_US&S_PKG=CRDQ6ML& cp=UTF-8共有六个文件,都要下载,最好下班前下载,第二天一上班就可以看到下载下来的文件。
列表如下:至此,你就可以着手安装了。
2、安装1.1 解包首先要将这六个zip文件解包,一定要解到同一个目录下,如下:我刚开始解成对应的6个文件夹,后来安装的时候中间老是让我指定介质目录,搞了几次竟然提示让我提供许可证文件,试了N多次都没安装成功,为此我还在论坛里求助:/club/thread-50603-1-1.html。
1.2 安装点击SETUP.exe开始安装:选择左边的“安装”,再点击右边的“启动Windows的安装向导”,指定一个安装目录上面这一步需要根据自己的IP在hosts里配置:10.1.23.112 ,最要截图记下这个页面备查。
我用的是最容易的密码:password点击下一步开始安装,从此开始会长达几个小时的安装,一定要有耐心,我用了大概6个小时。
出现上面这个界面,进度条都100%居然很长时间没反应了,我都想点“取消”结束它了。
后来一想都弄了好几个小时了,就再耐心等等,过了一段时间就出现来下面这个界面,然后又是很长时间的等待。
WebSphere(was8.5)安装及部署-集群
1.业务分析及安装思路。
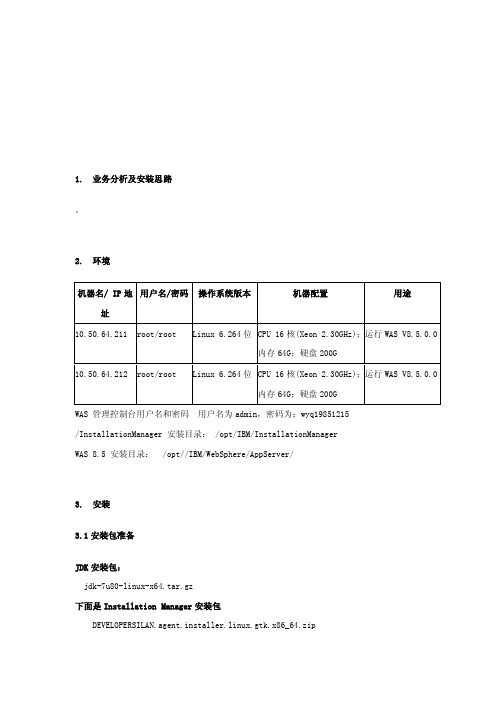
2.环境用户名/密码操作系统版本机器配置用途机器名/ IP地址10.50.64.211 root/root Linux 6.264位CPU 16核(Xeon 2.30GHz);运行WAS V8.5.0.0内存64G;硬盘200G运行WAS V8.5.0.0 10.50.64.212 root/root Linux 6.264位CPU 16核(Xeon 2.30GHz);内存64G;硬盘200GWAS 管理控制台用户名和密码用户名为admin,密码为:wyq19851215/InstallationManager 安装目录: /opt/IBM/InstallationManagerWAS 8.5 安装目录:/opt//IBM/WebSphere/AppServer/3.安装3.1安装包准备JDK安装包:jdk-7u80-linux-x64.tar.gz下面是Installation Manager安装包DEVELOPERSILAN.agent.installer.linux.gtk.x86_64.zip下面三个是支持所有平台的应用服务器安装介质包WAS_ND_V8.5.5_1_OF_3.zipWAS_ND_V8.5.5_2_OF_3.zipWAS_ND_V8.5.5_3_OF_3.zip下面三个是支持所有平台的Websphere应用服务器supplements安装介质包,其中包含了IBM HTTPServer,IBM Server plug-ins 和 toolboxWAS_V8.5.5_SUPPL_1_OF_3.zipWAS_V8.5.5_SUPPL_2_OF_3.zipWAS_V8.5.5_SUPPL_3_OF_3.zip下面两个是支持所有平台的Websphere应用服务器补丁包8.5.5-WS-WAS-FP0000008-part1.zip8.5.5-WS-WAS-FP0000008-part2.zip下面两个是支持所有平台的Websphere应用服务器supplements补丁包8.5.5-WS-WASSupplements-FP0000008-part1.zip8.5.5-WS-WASSupplements-FP0000008-part2zip3.2简介1. 此安装仅仅是单机环境,仅仅安装WAS 8.5 ND的 AppServer,不安装IBM HTTP Server 和Plug-Ins.2. 此安装将采用root用户安装,并且将采用root用户进行启动。
AIX操作系统安装Websphere8

AIX操作系统安装Websphere8 Dc) d)e)一、安装WAS8.51)解压缩安装包(三个都需要解压)2)启动安装包3)设置资源库4)选择需要安装的程序5)输入共享目录6)选择安装路径备注:注意安装路径是否是自己需要的安装路径.7)选择安装语言8)确认安装包9)安装完毕二、创建服务1)启动a)在路径“/opt/IBM/WebSphere/IBM/bin/ProfileManagement”下面执行“./pmt.sh”2)点击创建3)选择创建“Application Server”4)选择“Advanced profile creation”5)确认两个都要选择.6)显示创建的Server名称和路径7)输入对应的主机名称.备注:如果主机名称下面有”_”,请输入主机对应的IP地址a)主机名称b)IP地址8)输入用户名称和密码9)其他默认选择:10)如果需要“IHS”,则需要勾选。
这里暂时不需要。
默认选择即可11)确认并创建12)安装结束。
三、服务验证:1)点击启动2)浏览器输入地址,并登陆3)登陆成功后,确认安装版本和服务器状态四、常见问题处理1)执行/pmt.sh 时报错:1.swt-pi-gtk (Not found in java.library.path)/tmp/swtlib-64/libswt-pi-gtk-3659.a(A file or directory in the path namedoes not exist.)/tmp/swtlib-64/libswt-pi-gtk.a (A file or directory in the path name does not exist.)/tmp/swtlib-64/libswt-pi-gtk-3659.a(A file or directory in the path namedoes not exist.)解决方式:/yulimin/article/details/8476433五、WAS8.5卸载一. 找到InstalMgr安装路径二. 执行./launcher 弹出页面,后选择卸载三.四. 卸载IM路径:a)/var/ibm/InstallationManager/uninstall/uninstall。
- 1、下载文档前请自行甄别文档内容的完整性,平台不提供额外的编辑、内容补充、找答案等附加服务。
- 2、"仅部分预览"的文档,不可在线预览部分如存在完整性等问题,可反馈申请退款(可完整预览的文档不适用该条件!)。
- 3、如文档侵犯您的权益,请联系客服反馈,我们会尽快为您处理(人工客服工作时间:9:00-18:30)。
包括内容: portal server 8.5 数据库 db2 ldap服务器 wcm8.5
数据库 db2 安装
2
3
4
5
6
7
8
9
10
11
12
13
14
15
16
17
18
安装数据库补丁
19
Stop all running DB2 processes
To stop all DB2 server processes:
– “su – db2inst1” – db2stop – exit – “su – dasusr1” – db2admin stop – exit
Running a “ps –ef | grep –i db2” should result in no processes running.
69
Need to register license or else DB2 will stop working after a certain period …
Note: Got license from the following download package: IBM DB2 Enterprise Server Edition - PVU Option - Quick Start and Activation V10.5.0.1 for Linux, UNIX and Windows Multilingual (CIPH3ML)
Lastly, the server is a lightweight/small version and only needs to be started if/when we want to manage the LDAP server via the web admin console.
35
36
1) su – idsldap 2) db2start 3) db2 upgrade database ldapdb user idsldap using <password> 4) db2rbind ldapdb –l bind.log –u idsldap –p <password> 5) db2 activate database ldapdb
•
•
52
At this point, the LDAP Server has been configured. Next I will upgrade DB2 to V10.5 so that MediaBeacon can be installed later. I have to go through this extra step as the IBM Directory Server would only install with DB2 V10.1 and not V10.5
20
Start the DB2 Fixpack Installer ….
ices are Running …
To start DB2:
– “su – db2inst1” – db2start – “su – db2admin” – db2admin start
37
Directory Server installed – Now to Configure ….
38
39
40
41
42
43
44
45
46
47
48
49
50
51
Import users from LDIF file …
• The LDIF file I used matched what we use on our Softlayer and POT images There is a main LDIF for normal showcase users named “showcaseportal85.ldif” There is a second and smaller LDIF named “showcase-portal85ext.ldif“. This second file defines “external” users. These users are used by Connections to show integration with external users/customers.
24
安装 IBM Directory Server V6.3.1
25
Install ksh shell ….
IMPORTANT NOTE: The IBM Directory Server install requires the ksh shell. Without it, the install will fail with a “Directory Server licenses cannot be installed” error message. See following technote for additional details: /support/docview.wss?uid=swg2166 5599
85
NOTE: Since we will later be moving to LDAP as the user registry, and our normal „wpadmin‟ id already exists in LDAP, I am just using „admin‟ here. This id does not exists in LDAP so I will not run into conflicts during the LDAP xfer. Once the LDAP xfer is done, „wpadmin‟ will become my primary portal/was administrative id.
95
96
97
98
Note: Since I sometimes had problems in the past when doing the DB transfer, I choose NOT to click the “Start Configuration” button, which would cause the wizard to automatically run each step. I prefer to go through them one by one so I can do extra checking/validating.
70
Uninstall DB2 V10.1
Now that we have everything moved to DB2 V10.5 we can uninstall DB2 V10.1 by running the following command as root
– /opt/IBM/db2/V10.1/install/db2_deinstall -a
26
Start Directory Server V6.3.1 Installer …
27
28
29
30
31
32
33
34
I find it‟s easier to have the LDAP Server have its own embedded WAS Server for running the LDAP Admin Console. In doing so the admin console web app is automatically setup and I don‟t need to manually deploy it. Plus it will not conflict or rely on any other existing WAS Server to be running.
86
87
88
Transfer Portal Database to DB2
89
90
91
92
93
94
NOTE: If you choose the “Yes create my databases for me” the “ConfigEngine createdatabase” command will end up running. For some reason, not all the tablespaces in the JCR gets created and as a result the database-transfer task will end up failing. From searches online it seems this problem has showed up on previous versions. Resolution was to manually create the database using the DB commands.
71
安装 IBM WebSphere Portal V8.5 and WCM V8.5
72
Verify ulimit
As describe in the InfoCenter, we should verify the ulimit is set to unlimited:
73
Start the Installer …
74
75
76
77
78
79
80
81
82
83
84
NOTE: Since we will later be moving to LDAP as the user registry, and our normal „wpadmin‟ id already exists in LDAP, I am just using „admin‟ here. This id does not exists in LDAP so I will not run into conflicts during the LDAP xfer. Once the LDAP xfer is done, „wpadmin‟ will become my primary portal/was administrative id.