Wonderware sql入门手册
Wonderware帮助文档SQLDataGrid
ArchestrA™ SQLDataGrid Symbol User’s GuideInvensys Systems, Inc.Revision ALast Revision: 3/18/08Copyright© 2008 Invensys Systems, Inc. All Rights Reserved.All rights reserved. No part of this documentation shall be reproduced, stored in a retrieval system, or transmitted by any means, electronic, mechanical, photocopying, recording, or otherwise, without the prior written permission of Invensys Systems, Inc. No copyright or patent liability is assumed with respect to the use of the information contained herein. Although every precaution has been taken in the preparation of this documentation, the publisher and the author assume no responsibility for errors or omissions. Neither is any liability assumed for damages resulting from the use of the information contained herein.The information in this documentation is subject to change without notice and does not represent a commitment on the part of Invensys Systems, Inc. The software described in this documentation is furnished under a license or nondisclosure agreement. This software may be used or copied only in accordance with the terms of these agreements.Invensys Systems, Inc.26561 Rancho Parkway SouthLake Forest, CA 92630 U.S.A.(949) 727-3200For comments or suggestions about the product documentation, send an e-mail message to productdocs@.TrademarksAll terms mentioned in this documentation that are known to be trademarks or service marks have been appropriately capitalized. Invensys Systems, Inc. cannot attest to the accuracy of this information. Use of a term in this documentation should not be regarded as affecting the validity of any trademark or service mark. Alarm Logger, ActiveFactory, ArchestrA, Avantis, DBDump, DBLoad, DT Analyst, Factelligence, FactoryFocus, FactoryOffice, FactorySuite, FactorySuite A2, InBatch, InControl, IndustrialRAD, IndustrialSQL Server, InTouch, MaintenanceSuite, MuniSuite, QI Analyst, SCADAlarm, SCADASuite, SuiteLink, SuiteVoyager, WindowMaker, WindowViewer, Wonderware, Wonderware Factelligence, and Wonderware Logger are trademarks of Invensys plc, its subsidiaries and affiliates. All other brands may be trademarks of their respective owners.3SQLDataGrid Symbol User’s GuideContentsWelcome (5)Documentation Conventions (5)Technical Support (6)Chapter 1 Configuring the SQLDataGrid Symbol (7)Using the SQLDataGrid Symbol (8)Configuring Authentication Modes (9)Windows Authentication (9)SQL Server (9)Configuring the Database Connection (10)Configuring SQLDataGrid Symbol Custom Properties (10)Using Scripts with the SQLDataGrid (12)Associating Grid Control Actions to InTouch Scripts and Animations (12)Accessing Data from a Selected Row in the SQLDataGrid (13)Chapter 2 Working with the SQLDataGrid in Run Time 15Viewing Data (16)Populating the Table, View or Query List (16)Solving Hide and Show Window Issues (16)Moving Columns (17)Grouping Columns (17)4 ContentsSQLDataGrid Symbol User’s Guide Viewing Aggregate Values (19)Using Progressive Column Filtering (20)Discarding Changes (22)Viewing Errors (23)Writing Changes to the Database (23)Views and Updates (24)Database Connection Management (26)Connection Sharing and Pooling (26)Appendix A Custom Properties for the SQLDataGridSymbol (27)Index (35)5WelcomeThis guide describes configuring and using the SQLDataGridsymbol. The SQLDataGrid is delivered as an ArchestrASymbol and is used as an InTouch graphic.You can view this document online or you can print it, in partor whole, by using the print feature in Adobe Acrobat Reader.This guide assumes you know how to use Microsoft Windows,including navigating menus, moving from application toapplication, and moving objects on the screen. If you needhelp with these tasks, see the Microsoft online help.This guide also assumes that you know how to use MicrosoftSQL Server. For help with SQL Server, see the Microsoftonline help.In some areas of the Application Server, you can alsoright-click to open a menu. The items listed on this menuchange, depending on where you are in the product. All itemslisted on this menu are available as items on the mainmenus.Documentation ConventionsThis documentation uses the following conventions:Convention Used forInitial Capitals Paths and file names.Bold Menus, commands, dialog box names,and dialog box options.Monospace Code samples and display text.SQLDataGrid Symbol User’s Guide6SQLDataGrid Symbol User’s GuideTechnical SupportWonderware Technical Support offers a variety of supportoptions to answer any questions on Wonderware productsand their implementation.Before you contact Technical Support, refer to the relevantsection(s) in this documentation for a possible solution to theproblem. If you need to contact technical support for help,have the following information ready:•The type and version of the operating system you are using. For example, Microsoft Windows XP, SP1.•Details of how to recreate the problem.•The exact wording of the error messages you saw.•Any relevant output listing from the Log Viewer or any other diagnostic applications.•Details of what you did to try to solve the problem(s) and your results.•If known, the Wonderware Technical Support casenumber assigned to your problem, if this is an ongoingproblem.7 Chapter 1Configuring the SQLDataGridSymbolThe SQLDataGrid is a symbol that enables you to interactwith data stored in SQL databases. You can use theSQLDataGrid symbol in an InTouch application that youcreate in a published or managed mode.The following graphic shows the main components associatedwith the SQLDataGrid.SQLDataGrid Symbol User’s Guide8 Chapter 1 Configuring the SQLDataGrid SymbolSQLDataGrid Symbol User’s GuideYou can perform the following activities with theSQLDataGrid symbol:•Insert or modify data in selected database tables and views.•Delete rows from a database table (select the row and press the Delete key).•Select data from existing tables and views.•Run a custom SQL query.This section provides the following information:•The minimum configuration required by theSQLDataGrid symbol to retrieve data from a SQLdatabase.•The set of custom properties that must be configured toauthenticate users and connect to the database.•A list of the custom properties that define the parameters associated with a specific database and query to being the SQLDataGrid SymbolThe SQLDataGrid symbol appears in the Graphic T oolbox of the ArchestrA IDE. Embed the symbol in an existing window or a new window. When you double-click the symbol, the Edit Custom Properties dialog box appears.For detailed information on working with symbols, see the ArchestrA and InTouch Integration Guide.Using the SQLDataGrid Symbol 9SQLDataGrid Symbol User’s GuideConfiguring Authentication ModesThis section describes how to use the custom properties of the SQLDataGrid symbol to authenticate a user to the database. You can assign static values to these custom properties or link them to attributes or tag names in your application.Note The value fields are not case sensitive.T o configure an authentication mode for the SQLDataGridsymbol1In the Custom Properties pane, select Authentication_dg .2In the Default Value box, type the name of a valid securitytype. Acceptable values are:•Windows•SQL ServerA more detailed description of these authenticationmodes follows this procedure.3In the Custom Properties pane, select ConfiguredUser_dg .4In the Default Value box, type a user name.5In the Custom Properties pane, select ConfiguredPassword_dg .6In the Default Value box, type the password associatedwith the user name.Windows AuthenticationIf you use Windows as a value for the Authentication_dgcustom property and do not designate custom properties for a domain, user, or password, the SQLDataGrid symbol uses the credentials of the user who is currently logged on to the node running InTouch.If you select Windows as a value for the Authentication_dg custom property and designate custom properties for adomain, user, and password, the SQLDataGrid symbol uses the specified Windows domain name, user name, andpassword to connect to the SQL Server database.SQL ServerThis authentication mode uses the specified SQL Server user name and password to connect to the SQL Server database.10 Chapter 1 Configuring the SQLDataGrid SymbolSQLDataGrid Symbol User’s Guide Configuring the Database ConnectionThis section describes the procedure to configure the custom properties required to establish a connection to a specific database and its associated data. You can assign staticvalues to these custom properties or link them to attributes or tag names in your application.Note The value fields are not case sensitive.T o configure the database connection1In the Custom Properties pane, select ConfiguredServer_dg .2In the Default Value box, type the network name of the computer hosting the database. 3In the Custom Properties pane, select ConfiguredDatabase_dg .4In the Default Value box, type the name of the target database. 5In the Custom Properties pane, select SQLQuery_dg .6In the Default Value box, type the name of the targettable, view or query.To populate the SQLDataGrid, click Runtime , and then click Retrieve .Configuring SQLDataGrid Symbol Custom PropertiesThis section lists custom properties in functional groups. For a detailed description of each custom property, see Appendix A, Custom Properties for the SQLDataGrid Symbol.The default run-time window shows the complete symbol. However, you can hide the interface controls and display only the grid.You can use custom properties to display additionalinformation about the status of the query, the dataset, or to provide interactive buttons that initiate specific actionsIn addition to the table, view, and query input, you canspecify additional parameters by using custom properties and control them with scripting.Using the SQLDataGrid Symbol 11The following table lists the various custom properties youcan insert in your scripts by functional groups.Authentication Authenticate users to databasesAuthentication_dgConfiguredDomain_dgConfiguredPassword_dgConfiguredUser_dgDatabase Connectivity Designate database connectivity functionsAutoRefresh_dgAutoRefreshDuration_dgCmdCancel_dgCmdRefresh_dgCmdRetrieve_dgCmdTestConnection_dgCmdWrite_dgComboBoxListString_dgConfiguredDatabase_dgConfiguredReadOnly_dgConfiguredServer_dgRowCount_dgRowLimit_dgSelectedRowNumber_dgSQLQuery_dgSQLQueryCurrent_dgSQLQueryPassThrough_dgSQLQueryPending_dgDiagnostic Perform diagnostic functionsCmdLogDiagnostics_dgCmdResetDiagnostics_dgErrorPanelDisable_dgStatusDesc_dgStatusError_dgStatusIsError_dgAppearance Modify the appearance of the run-time SQLDataGrid thatcontains data from the databaseButtonPanelHide_dgCmdPageFirst_dgCmdPageLast_dgCmdPageNext_dg12 Chapter 1 Configuring the SQLDataGrid SymbolUsing Scripts with the SQLDataGridWhen you use the SQLDataGridUserCtl to create a new symbol,you can script all the properties and events of the control.Associating Grid Control Actions to InTouchScripts and AnimationsYou can hide the buttons of the SQLDataGrid symbol andtrigger data retrieval from outside the grid interface. Forexample, you can configure a button to generate a datasetfrom an InTouch application.To do this, use the CmdRetrieve_dg property and associate itto an InTouch tag. The tag is linked to the InTouch button.T o configure dataset retrieval from InT ouch1In WindowMaker, open the InTouch window.2Double-click the SQLDataGrid symbol. The Edit Custom Property dialog box appears.3In the Custom Properties panel, select the ButtonPanelHide_dg property.4In the Default Value field, type True .5Select the CmdRetrieve_dg property.6In the Default Value field, select an InTouch tag by one ofthe following actions:aType a tag name. If the tag does not exist, you are prompted to define a new tag.b Click the ellipsis to open the Tagname Dictionary andselect a tag.For this example, type CmdRetrieve in the field.7Click OK and define the tag as a Memory Discrete tag.CmdPagePrev_dgColumnAggregateEnable_dgColumnFiltering_dgColumnGroupingEnable_dgComboBoxPanelHide_dgFontBold_dgFontName_dgFontSize_dgSupportThemes_dgWriteButtonHide_dgUsing Scripts with the SQLDataGrid 138When you finish defining the tag, close the TagnameDictionary and click OK on the Custom Properties panel.9Create a button on your InTouch window. For thisexample, its caption is Retrieve.10Link the CmdRetrieve tag to the button.11Switch to run-time mode and click Retrieve.Accessing Data from a Selected Row in the SQLDataGridYou can use the SQLDataGrid symbol to read the content ofa selected row and associate it to attributes outside thesymbol. You can configure scripts to read the data from aselected row and programmatically associate that data totags in an InTouch application or to attributes in the Galaxy.The following script example shows how to retrieve data froma selected row. Notice that the SelectedRowData property isavailable in the SQLDataGrid client control and not in theSQLDataGrid symbol.dim rd1 as System.Data.DataRow;rd1 = SQLDataGridUserCtrl1.SelectedRowData;if(rd1 <> null) thenInTouch:Text9 = rd1.ItemArray[4].ToString();'This assigns the 4th column value for the selectedrow, to the InTouch "Text9" tag.endif;14 Chapter 1 Configuring the SQLDataGrid Symbol15 Chapter 2Working with the SQLDataGrid inRun TimeDuring run time, you can select the database table, view, orquery that will populate the SQLDataGrid symbol andchange the appearance of the data.You can use the run-time application to perform thefollowing tasks:•Move columns•Group columns•Aggregate column values•Filter columns•Sort columnsIf you have the appropriate permissions, you can also makethe following changes to the database:•Change the order of columns in an existing row.•Insert a row into a table.•Update a row in a table.•Delete a row from a table.Note You cannot update or delete a row in a table unless thattable has a primary key defined. You can add new rows to a tablewithout a primary key as long as that is the only action you areperforming on the table.16 Chapter 2 Working with the SQLDataGrid in Run TimeViewing DataYou can use the run-time version of the SQLDataGridsymbol to view data in the following formats:•Data from a specific table•Data from a specific view•Data that is retrieved by a SQL queryYou can resize the column width of any table, view, or queryresult.T o view specific data from a SQL query1In the Table, View or Query box, type a SQL query.2Click Retrieve. The appropriate dataset appears.Populating the Table, View or Query ListYou can also populate the Table, View or Query box withitems that you frequently use, so that you do not repeatedlyhave to type entries.T o populate the Table, View or Query box1In the Edit Custom Propertie s dialog box, clickComboBoxListString_dg.2In the Default Value box, type any of the following items,separated by semicolons (;):•Multiple table names•Multiple SQL statements• A combination of table names and SQL statements3Click OK.4When you go to run time, click the arrow to the right ofthe Table, View or Query box. Each item that you enteredis displayed on a separate line.Solving Hide and Show Window IssuesIf you hide the InTouch window that contains theSQLDataGrid and then show it again, the last data valuescontained in the window might not appear. Use the followingprocedure to ensure that the data values always appear.T o Ensure that Grid Values Appear When You Hide and Show theInT ouch WIndow1In WindowMaker, click Special > Configure >WindowViewer.2Under WindowViewer Memory, clear the check box Alwaysload windows from disk.Viewing Data 17 Moving ColumnsYou can rearrange the order of the columns to meet yourviewing needs.T o move columns1Click the heading of the column that you want to move.2Holding your mouse key down, drag the column headingto another position within the table.Grouping ColumnsThe group-by function lets you sort data at more specificlevels. This example shows a view that groups customernames and their business addresses.Note The ColumnGroupingEnable_dg custom property must beTrue before you can use this function.T o use the Group-by function1In the Table, View or Query box, type the name of a tableor view or click the arrow to display a list ofpre-determined items. For details about pre-determineditems, see Viewing Data on page16.2Click Group-by. The Drag a column header area appears.18 Chapter 2 Working with the SQLDataGrid in Run Time3Drag a column heading to the upper area.4To view the data groups, press Enter to expand any of theStateProvince items.5To see a more specific sorting of the data, drag anothercolumn heading to the upper sorting area.6If you want to sort the data at an even finer level, you canrepeat steps 3 and 4 and drag another column heading tothe sort area.Viewing Data 197If you want to remove one of the column headings fromthe sorting area, drag it down to the data area.8To return the original dataset, click Group-by.Viewing Aggregate ValuesYou can perform a numeric operation on data within a singlecolumn of the table by clicking the Aggregate button.Note Before you can use this function, theColumnAggregateEnable_dg custom property must be True.You can perform the following functions on column data. Notall operations may be available for a column because of thedata type.•Average: Calculates the average number of items in thecolumn.•Count: Lists the number of rows in the column.•Maximum: Lists the highest number in the column.•Minimum: Lists the lowest number in the column.•Sum: Adds the numbers in each row and provides a total.T o view aggregate values1Click Aggregate. The summation sign (Σ) appears at thehead of each column.2Click the summation sign at the top of the OrderQtycolumn. The Select Summaries dialog box appears.20 Chapter 2 Working with the SQLDataGrid in Run Time3Select Average and click OK. The value appears just belowthe Grand Summaries row. You can re-size the columnwidth to view the entire number This following figureshows the average value for OrderQty.4To hide the Grand Summaries row follow these steps:a Click the summation sign.b Clear the Average check box in the Select Summariesdialog boxc Click OK.5To hide the summation signs, click Aggregate.Using Progressive Column FilteringYou can configure the SQLDataGrid to support progressivecolumn filtering. Type the first letters of your search, and thematching values appear in the grid.T o configure and use progressive filtering1Switch your SQLDataGrid window to WindowMakermode.2Double-click the symbol and select the custom propertyColumnFiltering_dg.3Set the ColumnFiltering_dg default value to True.4Click OK and run the InTouch application.Viewing Data 215To return a dataset, click Retrieve. In this example, the dataset contains a table view of customer names andaddresses.6Move your cursor over the field below the LastName column heading. A list arrow appears.7You can filter the values by any of the following actions:•Click the list arrow and type the first letter of the value If you type additional letters, your sort is moreprecise.•Click the list arrow and select an item from the list.22 Chapter 2 Working with the SQLDataGrid in Run Time•If you select the (Custom) item from the list, you canfurther refine your search in the Custom dialog box.This example shows a search for two different areacodes.8To perform a different search, clear your search criteriaby clicking the cancel icon at the left of the filtering row.Discarding ChangesIf you need to discard the changes made to grid values, clickRetrieve. This action reloads the table values from thedatabase and discards any changes. You can also initiate theaction by using a script that sets the CmdRetrieve_dgproperty to True.Viewing Errors 23 Viewing ErrorsYou can manually display or close the Status panel in thelower part of the grid display area. The status panel can alsoautomatically appear when an error occurs. However, afterthe panel appears, it remains on view.If a command object is successful, the message "Success"appears in the Status panel. If the panel is closed, "Success"messages do not appear for successful command objects.To close the panel, click the double-arrow icon at the right ofthe panel. To open the panel on demand, right-click andselect Show Status.Note The error panel display does not change the overall areaoccupied by the grid symbol.Writing Changes to the DatabaseYou can write changes to the database if the followingconditions are met:•The database query (or table) can be updated.•The ConfiguredReadOnly_dg custom property value isFalse.•SQL Server security allows the security mode configuredat the grid to perform an update.•Changes made in the grid are consistent with thedatabase schema.Changes made in the grid are written to the database usingthe Write command. Changes are handled as a singledatabase transaction. If any change fails, the entire set ofchanges is rolled back.If you have sufficient privileges, you can change a value andclick Write. You can also use a script to set the CmdWrite_dgproperty. This action causes the grid contents to be evaluatedfor changes and for the changes to be written to the database.24 Chapter 2 Working with the SQLDataGrid in Run TimeTip After you modify cells in the grid and write them back to thedatabase, you should also verify that the data is correctly written.In certain cases, such as a database table with an automaticallyincrementing primary key or interdependent cells, the grid doesnot show the true contents of the database table after you writeback to it. Also, no error message is shown. It is recommendedthat you execute a retrieve or auto refresh command after writingto the database to make sure it is showing the current data.Views and UpdatesSome views cannot be updated for the following reasons:•The views contain table joins on keys other than primarykeys.•The views include security settings that prohibit updates.If the write process fails, you can view the status in the Errorpanel. You can also monitor the StatusDesc_dg, andStatusError_dg properties by using text fields on the InTouchwindow for run-time display.T o make a change to data in the data grid1Ensure that the ConfiguredReadOnly_dg custom propertyvalue is False.2Click Runtime.3Enter a SQL statement or the name of a database table orview.4Click Retrieve. This example shows data from thecustomer table in AdventureWorks. You will modify aphone number.Writing Changes to the Database 255Select the phone number that you must modify. The area becomes editable.6Change the last four digits of the phone number to 0122. 7Click an area outside the edit area. The Write button becomes enabled.8Click Write.9To verify the change, click Retrieve.26 Chapter 2 Working with the SQLDataGrid in Run TimeDatabase Connection ManagementAn important feature of the SQLDataGrid is the ability tooptimize the management of multiple simultaneousconnections to the database. This section describes how theinfrastructure handles the database connection pool andsharing for the SQLDataGrid.Connection Sharing and PoolingMultiple instances of the SQLDataGrid configured withidentical connection strings use a shared connection pool andSQL command queue when they are active in the sameinstances of the InTouch WindowViewer. To limit the size ofthe shared pool, you can use the connection pool propertyMaxConnections. For configuration options, see theMaxConnections_dg on page32.Physical connections to the SQL database are opened basedon command requests and are closed when no requests arepending. All SQL commands are queued and processed basedon availability of connections and processing time.The SQLDataGrid asynchronously processes all SQLcommands. Asynchronous command processing ensuresavailability of interaction with the InTouch WindowViewerduring time-consuming command processing.Any database connection that is established in a scriptwithin a symbol using the SQLData Script Library also takesadvantage of connection pooling. Similar connection stringsfrom either the SQLDataGrid or the script in the sameInTouchView application share a common pool.Note Connection sharing and connection pooling require that thesame security mode and user credentials be used for allSQLDataGrid symbols within the InT ouchView application thatshares the connection or the pool.27 Appendix ACustom Properties for theSQLDataGrid SymbolThe following table lists all available Custom Properties.Data types are shown in the Custom Properties panel andare not included in this table.Property Name DescriptionAuthentication_dg Designates whether database userauthentication is SQL Server or Windows.Writable at Run Time: YesDefault: WindowsAutoRefresh_dg Automatically refreshes data appearing in theSQLDataGrid. When True, the query thatrepopulates the SQLDataGrid runs after theAutoRefreshDuration time elapses.Writable at Run Time: YesDefault: FalseAutoRefreshDuration_dg Designates the requested time interval inseconds for AutoRefresh.The actual refresh rate can be slower than thespecified rate.Writable at Run Time: YesDefault: 6028 Appendix A Custom Properties for the SQLDataGrid SymbolProperty Name DescriptionButtonPanelHide_dg Hides grid buttons when the value is True.Writable at Run Time: YesDefault: FalseCmdCancel_dg Cancels the last database query.Writable at Run Time: YesDefault: FalseCmdClear_dg Clears the contents of the SQLDataGrid.Writable at Run Time: YesDefault: FalseCmdCopy_dg When True, copies the current selection to theclipboard.Writable at Run Time: YesDefault: FalseCmdLogDiagnostics_dg Writes the current DCM diagnostic values to theArchestrA logger.Writable at Run Time: YesDefault: FalseCmdPageFirst_dg Moves the SQLDataGrid display to the first row.Writable at Run Time: YesDefault: FalseCmdPageLast_dg Moves the SQLDataGrid display to the last row.Writable at Run Time: YesDefault: FalseCmdPageNext_dg Moves the SQLDataGrid display down one page.Writable at Run Time: YesDefault: FalseCmdPagePrev_dg Moves the SQLDataGrid display up one page.Writable at Run Time: YesDefault: FalseCmdPaste_dg When True, pastes the current text contained onthe clipboard to the grid.Writable at Run Time: YesDefault: False。
wonderware培训教学提纲

w o n d e r w a r e培训Wonderware培训Wonderware公司推出旗舰级 InTouch软件,这是第一个基于微软Windows®操作系统的人机界面(HMI)。
Wonderware只能在windows环境下运行,支持32位及64位操作系统,但wonderware公司建议使用32位操作系统因为64位操作系统部是很稳定,系统容易崩溃带来不必要的损失。
Wonderware软件架构:Intouch等可视部分客户端 Active factory分析部分Information Server CAL等第3方认可软件即符合(微软技术标准,工业标准) App Server发布数据三个服务器 Historian历史数据Information Server实时数据DAServer/I/OserverPLC等第三方软件Daserver/ioserver :收到采集命令,采集数据,发广播包,工作完成后,各机从DAseerver堆栈中提取数据。
概念:1.Archestry 只是一个名字2.Application server:应用程序服务器。
类似于I/Osever 客户端(阀门,泵,开关等运行配置,控制配置,run_time部分)3.Galaxy:数据库4.Galaxy Repostistory:配置的指令存储在此可以用这台机器进行开发。
5.GR是装Galaxy数据库的机器一个(工程)网络只能有一个Galaxy。
安装前准备:APPLICATION SERVER 的同时还可以安装I/OserverGR SQLSERVER可单独也可与APPLICATION 一起装。
Historation > 安装SQL server2005数据库需要建立防火墙,需专门一台机器。
Information server >安装SQL server2005数据库需要建立防火墙,需专门一台机器。
步骤1:1.每台机器装BOOTSTAP(需要主动对GR访问取数据的必须安装不是主动对GR 访问被动的接收数据的不用安装)。
InTouch SQL 用户指南
第 3 章 : 配置 SQL Access Manager ................15
SQL Access Manager 综述 ....................................................... 15 配置绑定列表 ......................................................................... 16 使用特殊分隔符 ......................................................................... 19 配置表格模板 ............................................................................. 20 SQL.DEF 文件 ........................................................................... 23
索引 ....................................................................51
InTouch SQL Access Manager 用户指南
SQL Access Manager
5
第
1
章
SQL Access Manager
Wonderware FactorySuite SQL Access Manager 可供您访问、修改、创 建及删除数据库中的表格。数据库在表格中存储共享公共属性或字段的 信息。 “结构化查询语言” (Structured Query Language,简称 SQL)是 用于访问该类信息的语言。
InTouchSQL用户指南

修订版 2001 年 6 月
Wonderware Corporation
保留所有权利 未经 Wonderware 公司的事先书面许可 不得以电子 机械 影印 录制或其它的任何方式复制 传输本说明文件的任何部分或将其储存 在检索系统中 使用此处包含的信息不应承担版权或专利责任 虽然在本说 明文件编制过程中采取了一切预防措施 错误或疏漏在所难免 出版商和作 者不对此承担任何责任 亦不对因使用此处包含的信息而引起的任何损害 负责 本说明文件的信息如有变更 恕不另行通知 亦不代表 Wonderware 公司一 方的承诺 本说明文件所述的软件在遵守许可证或许可协议的前提下提供 本软件的使用或复制须遵从这些协议规定的条款 2001Wonderware 公司 100 Technology Drive Irvine, CA 92618 U.S.A. (949) 727-3200 商标 本书所有作为商标或服务标志的专门名词均采用大写字母印刷 Wonderware 公司并不保证本书信息的准确性 使用本书中的任何术语不应视为影响任何 商标或服务标志的有效性 Wonderware FactorySuite 和 InTouch 是 Wonderware 公司的注册商标 WindowMaker WindowViewer SQL Access Manager Recipe Manager SPCPro DBDump DBLoad HDMerge HistData Wonderware Logger Alarm Logger InControl InBatch IndustrialSQL FactoryOffice FactoryFocus License Viewer SuiteLink SuiteVoyager 和 NetDDE 是 Wonderware 公司的商标 版权所有
wonderware ide 培训的手册文档第11章
Lab 11 –Adding Auto Reconnect to DDESuiteLinkClientIntroductionIn this lab, you will configure the $gDDESuiteLinkClient to automatically reconnect to the data source when the connection is lost. You will do so by extending the objects with UDAs with scripts.Using a UDA/script combination, you will also add additional diagnostic information that will indicate the number of disconnects the object has experienced since it last went on scan.ObjectivesUpon completion of this lab, you will be able to:Create scripts in an objectCreate scripts with multiple execution typesAdd reconnect functionality to the $gDDESuiteLinkClient objectAdd the Auto Reconnect FunctionalityIn the following steps, you will create a script that will automatically reconnect to the data source when the connection is lost.1.In the Template Toolbox,Global toolset, double-click $gDDESuiteLinkClient to open theconfiguration editor.2.On the Scripts tab, click the Add Script button. the new script Reconnect and press Enter.4.Configure the Reconnect script as follows:Aliases:lockedDeclarations:lockedScripts: Execution type:Execute(default) and lockedBasics lockedExpression: Me.Connectionstatus<>2Trigger Period:00:00:05.0000000Script body Me.Reconnect=true;This script will attempt to reconnect every 5 seconds when not connected to the data source.Now, you will validate the script syntax by using the Validate feature. If the script has a syntax error, it will appear in the yellow bar just above the script body area.5.To the right of the Execution type drop-down list, click the Validate button.6.In the UDAs tab, click the Add button.7.Rename the new UDA t and press Enter.8.Configure the t UDA as follows:Data type:IntegerCategory:Calculated9.In the Scripts tab, click the Add button. the new script Disconnect.Monitor and press Enter.11.Configure the Disconnect.Monitor script as follows:Aliases:lockedDeclarations:lockedScripts: Execution type:Execute(default) and lockedBasics lockedExpression: Me.Connectionstatus<>2Trigger type:OnTrueScript body t=t+1;This script will increase a counter by one every time the condition is true.12.Click the Validate button.You will now add code within the same script under a different execution type that will run when the object goes on scan.13.While still in the Disconnect.Monitor script, change the Execution type to OnScan.14.In the script body, type t=0;.This script will reset the counter to zero every time the object goes on scan.15.Save and close the configuration editor.16.In the Comment field of the Check In dialog box, type Reconnect script and click OK.17.When the Check In progress displays Object 1 or 1 completed, click Close.18.Redeploy PLCSim, leaving the default options.19.When the Deploy progress displays 100% completed, click Close.View the Scripts in RuntimeNext, you will use Object Viewer to view the runtime data of the scripts.20.In the Deployment view, right-click PLCSim and select View in Object Viewer.21.Click on the PLCSim tab.Add the following attributes to the watch window:tDisconnect.Monitor.ExecutionCntReconnect.ExecutionCnt22.Save the watch window.Note:Your instructor will now disconnect your connection to the Device Integration server, and then reconnect the connection so that you can observe the behavior.Your Watch List now displays that there was a disconnect, but the connection has been restored.。
wonderware系统平台 安装指导手册

上海蓝鸟科技股份有限公司系统平台2012安装指导手册2012-12-5赵若君目录1 ArchestrA System Platform 2012安装前注意事项 (2)2 SQL Server安装步骤 (4)3 Wonderware InTouch HMI 2012安装步骤 (15)4 Wonderware Application Server 2012安装步骤 (21)5 Wonderware Historian Server 2012安装步骤 (21)6 Wonderware Historian Client 2012安装步骤 (24)7 Wonderware Information Server 2012安装步骤 (24)8 驱动安装步骤 (25)9 配置Windows® SharePoint Services 3.0™ (28)10 授权安装 (29)11 Configurator (34)11.1 配置Information (34)1.2 配置Historian (43)12 设置网络账户 (44)1 ArchestrA System Platform 2012安装前注意事项1、系统是正版软件。
2、软件安装前,起好计算机名称。
否则软件安装好后,更改计算机名称,程序运行会不正常。
3、安装软件案件时登陆的用户要有管理员权限,并且有密码。
4、如果是服务器,并且要重新安装系统,要用服务器的引导盘先安装必要的组件,再通过引导盘安装系统。
5、安装Microsoft Office软件Information:Microsoft Office 2007 SP2 or Microsoft Office 2010 (32-bit only) Historian Client:Microsoft Office XP SP3, 2003 SP3, 2007 SP2 or 2010 (32-bit only)具体可见ArchestrA System Platform 2012的readme。
初学者必读的SQL数据库基础教程

初学者必读的SQL数据库基础教程SQL数据库是一种常用的数据库管理系统,广泛应用于各种软件开发和数据管理领域。
对于初学者来说,掌握SQL数据库的基础知识是非常重要的。
本文将从数据定义语言、数据操作语言、数据查询语言和数据控制语言等方面,为初学者提供一份必读的SQL数据库基础教程。
第一章数据定义语言(DDL)数据定义语言(DDL)是SQL数据库中用来定义数据库结构的语言。
它包括创建、修改和删除数据库、表、列以及其他对象的操作。
在SQL中,创建数据库使用CREATE DATABASE语句,创建表使用CREATE TABLE语句,修改表结构使用ALTER TABLE语句,删除表使用DROP TABLE语句等。
初学者在学习时应该了解这些常用的DDL语句,并能够正确地使用它们。
第二章数据操作语言(DML)数据操作语言(DML)是SQL数据库中用来对数据库中的数据进行操作的语言。
它包括插入、更新和删除数据的操作。
在SQL中,插入数据使用INSERT INTO语句,更新数据使用UPDATE语句,删除数据使用DELETE FROM语句等。
初学者需要熟悉这些基本的DML语句,并能够通过它们来操作数据库中的数据。
第三章数据查询语言(DQL)数据查询语言(DQL)是SQL数据库中用来查询数据库中的数据的语言。
它包括SELECT语句和一些用于过滤、排序和聚合数据的函数。
初学者需要掌握SELECT语句的基本用法,了解如何使用WHERE子句进行条件过滤,如何使用ORDER BY子句进行排序,以及如何使用GROUP BY子句进行数据聚合。
第四章数据控制语言(DCL)数据控制语言(DCL)是SQL数据库中用来控制数据库访问权限和事务处理的语言。
它包括GRANT和REVOKE语句用于授权和撤销权限,以及BEGIN TRANSACTION、COMMIT和ROLLBACK语句用于管理事务。
初学者需要了解如何使用DCL语句来管理数据库的安全性和事务一致性。
wonderware ide 培训的手册文档第20章,共21章
Lab 20 –Configuring RedundancyIntroductionIn this lab, you will configure a second network connection in Windows for use as the Redundancy Message Channel. Then, you will configure the Galaxy platforms and engines for redundancy. Finally, you will create the hosting relationship, deploy the changes, and force a failover to confirm the functionality.ObjectivesUpon completion of this lab, you will be able to:Configure a secondary network connection in Windows as the Redundancy Message Channel Configure WinPlatform and AppEngine objects for redundancyCreate a deployment model for redundant enginesForce a failover on a redundant systemConfigure Windows for RedundancyIn the following steps, you will configure a second network connection in Windows as the Redundancy Message Channel (RMC). This will need to be done on both computers, where the first is the computer where GRPlatform is deployed and the second is the computer where AOSPlatform1is deployed.1.Connect to the machine where the GRPlatform is installed [for the remote computer, this will be themachine where the AOSPlatform1in installed].2.Open Network Connections(Start | Control Panel | Network and Sharing Center).3.Click Change adapter settings.The Network Connections window appears.4.Right-click Local Area Connection and select Rename.5.Rename the connection ArchestrA.6.Right-click Local Area Connection 2and select Rename.7.Rename the connection RMC.8.Press Alt+N to unhide the Menu bar.9.On the Advanced menu, select Advanced Settings.The Advanced Settings dialog box appears.10.In the Connections area, select ArchestrA and click the Up Arrow button.The ArchestrA connection is now listed first.11.Click OK.12.In the Network Connections window, right-click RMC and select Properties.The RMC Properties dialog box appears.13.In the This connection uses the following items area, select Internet Protocol Version 4(TCP/IPv4).14.Click the Properties button.The Internet Protocol Version 4 (TCP/IPv4) Properties dialog box appears.15.Click the Use the following IP address option.16.In the IP address field, enter 192.168.1.1. [For the remote computer, this will be 192.168.1.2]17.Click in the Subnet mask field to automatically assign the subnet mask.18.In the bottom-right of the window, click the Advanced button.The Advanced TCP/IP Settings dialog box appears.19.On the DNS tab, uncheck the Register this connection’s addresses in DNS check box.20.Click OK.21.In the Internet Protocol Version 4 (TCP/IPv4) Properties dialog box, click OK.22.In the RMC Properties dialog box, click Close.23.Repeat Steps 1to 22on the remote computer where AOSPlatform1is deployed. The IP address thatwill be used on the remote computer will be 192.168.1.2.Configure the Platforms for RedundancyYou will now return to the ArchestrA IDE and configure the platforms for redundancy.24.In the Deployment view, open the GRPlatform configuration editor.25.In the Redundancy area, Redundancy message channel IP address field, enter 192.168.1.1.26.Save and close the configuration editor.27.In the Check In dialog box,Comment field, enter Redundancy configuration and click OK.28.Open the AOSPlatform1configuration editor.29.In the Redundancy group, Redundancy message channel IP address field, enter 192.168.1.2.30.Save and close the configuration editor.31.In the Check In dialog box,Comment field, enter Redundancy configuration and click OK.The Deployment view now displays that both platforms have pending changes.You will redeploy the platforms later in this lab.Configure AppEngine1 for RedundancyYou will now configure AppEngine1for redundancy. Since AppEngine1is currently deployed, you must first undeploy it.32.Right-click AppEngine1and select Undeploy.33.In the Undeploy dialog box, keep the default options and click OK.34.When the Undeploy progress is complete, click Close.35.Open the AppEngine1 configuration editor.36.On the Redundancy tab, check the Enable Redundancy check box.The Redundancy configuration settings auto populate with the default values.37.Keep the defaults and click Save and close.38.In the Check In dialog box,Comment field, enter Redundancy configuration and click OK.The Deployment view now displays the AppEngine1icon with the primary redundant engine icon.39.Expand the Unassigned Host folder to reveal the new backup application engine instance.This was automatically created when redundancy was enabled in AppEngine1.You will now have GRPlatform host the new AppEngine1 (Backup) object.40.Drag and drop AppEngine1 (Backup)onto GRPlatform.Now, you will redeploy the platforms.41.Select both the AOSPlatform1and the GRPlatform.42.Right-click either platform and select Deploy.43.Keep the default options and click OK.44.When the Deploy progress is complete, click Close.45.Return to Object Viewer.Because the platforms redeployed, you will get the following error in Object Viewer.46.Click OK.Object Viewer closes.You will now deploy the application engines using the Include Redundant Partner option.47.In the Deployment view, right-click AppEngine1and select Deploy.48.In the Deploy dialog box, check the Include Redundant Partner check box.49.Click OK.50.When the Deploy progress is complete, click Close.The Deployment view now displays that all objects have been deployed.View the Redundancy Functionality and Data in RuntimeYou will now use Object Viewer and observe selected AppEngine1attributes in the runtime environment. You will then force a failover and observe the changes.51.In the Deployment view, right-click AppEngine1and select View in Object Viewer.52.On the File menu, select Load Watch List.53.Navigate to C:\Training and select MyWatchWindow.54.Click Open.55.Add the following attributes to the watch window:HostRedundancy.IdentityRedundancy.StatusRedundancy.PartnerPlatformRedundancy.PartnerStatusRedundancy.FailoverOccurredRedundancy.ForceFailoverCmdThe watch window displays that AOSPlatform1is currently hosting AppEngine1and the redundancy status is active. Additionally, the GRPlatform is the partner platform and is currently in a Standby mode.56.Save the watch window.You will now force a failover to trigger redundancy and observe the changes.57.In the watch window, double-click AppEngine1.Redundancy.ForceFailoverCmd.The Modify Boolean Value dialog box appears.58.Click the True option and click OK.After a few seconds, the watch window displays GRPlatform as the host platform andAOSPlatform1as the partner platform.You will now refresh Object Viewer to view the changes.59.In the console tree pane, collapse and expand AOSPlatform1and GRPlatform.The pane now displays that AOSPlatform1is no longer hosting any objects and GRPlatform is now hosting all of the objects.60.Click the Mixer1tab.The watch window displays that all attributes are still running and producing good quality data.Lab 20–Configuring Application Redundancy 9-33Application Server 201261.On the Mixer2watch window, observe the same behavior.You will now force another failover to return to the primary redundancy configuration.62.In the Redundancy watch window, double-click AppEngine1.Redundancy.ForceFailoverCmd .63.In the Modify Boolean Value dialog box, click the True option and click OK .After a few seconds, the watch window displays AOSPlatform1as the host platform andGRPlatform as the partner platform.You can also observe what happens when the connection to the remote computer loses connectivity.64.Disable the RMC network connection.After a few seconds, the watch window now displays that the Standby Status isActive –Standbynot Available.9-34Module 9–RedundancyInvensys Learning Services 65.Reenable the RMC connection.After a few seconds, the watch window displays the Standby Statusis back to Active .。
InSQL_Wonderware培训
存储算法: Storage
•
节省大量的存储空间
SwingDoor – 存储策略
9 10 11 12 13 14 8 7 6 17 1 2 3 4 5 18 19 15
16
Value Deadband Swinging Door
Swinging Door
• 动态配置
• 配置导入/导出 • 高可用性功能 • 企业版
IndustrialSQL Server„ 更多 特定功能
• 更加方便地满足政府或行业法规
• 支持Windows 2003
• 客户端应用 - 工厂智能
动态配置
• 当 InSQL运行 时更改标记和对象的配置
– 无需停机或重起 – 对客户端没有影响No interruptions for clients – 没有数据间隔*
数据查询?采用结构化查询语言sql来查询insql数据而不采用专用的查询系统或方式?sql是一个行业的超级标准被行业内广泛采用允许任意的查询能很好地与其它的工厂信息系统集成有上百的现有sql查询工具sql数据读取扩展?数据读取模式?bestfit?counter?cyclic?delta?full?integral?interpolation?maximun?minimum?slope?timeinstate?timeweightedaveragewonderwaresql时序扩展?时间序列的分辨率控制对于时序数据采用基于时基采样的查询避免采用传统行计数的办法?循环增量检索wwretrievalmodecyclicewwretrievalmodedelta?分辨率控制wwresolution1000?基于行的检索wwrowcount100?基于边缘的检索wwedgedetectionleadinganaloghistory日期时间值标记名质量sql数据读取扩展cyclicmodeselectdatetimetagnamevaluequalitydetailfromvanaloghistorywheretagnameinreactlevelandwwretrievalmodecyclicandwwrowcount1000日期时间值标记名质量查询分辨率1秒但它能达到3毫秒
入门级SQL数据库操作指南
入门级SQL数据库操作指南章节一:概述SQL数据库SQL数据库是一种结构化查询语言(Structured Query Language)的数据库管理系统,用于存储和管理数据。
其主要用途是处理大量数据,提供高效的数据访问和操作方法。
SQL数据库操作指南旨在帮助入门级用户快速熟悉SQL数据库,掌握常用的数据库操作技巧。
章节二:数据库的基本结构数据库由表(Tables)组成,每个表由列(Columns)和行(Rows)组成。
列定义了不同的数据类型,每一行包含了表中的一个记录。
在开始操作数据库之前,需要先创建数据库,创建表并定义每个表的列。
章节三:插入、查询和更新数据在SQL数据库中,可以通过INSERT命令插入新的数据到表中,通过SELECT命令查询数据,通过UPDATE命令更新数据。
用户可以根据具体需求构建相应的SQL语句,实现对数据的插入、查询和更新操作。
章节四:删除和修改表结构除了对数据的操作,用户还可以使用DELETE命令删除表中的数据,使用ALTER命令修改表的结构,例如添加新的列、删除列或者修改列的数据类型。
这些操作可以根据具体需求来实现对表结构的调整。
章节五:条件查询与排序在查询数据时,用户可以通过WHERE子句添加条件来限定查询结果的范围,例如查询年龄大于30岁的员工信息。
此外,还可以使用ORDER BY子句对查询结果进行排序,例如按照姓名的字母顺序升序或降序排列。
章节六:数据聚合与分组为了得到更有价值的数据分析结果,SQL数据库提供了一些聚合函数,如SUM、AVG、COUNT等,用户可以利用这些函数对数据进行聚合计算。
同时,用户还可以通过GROUP BY子句将数据分组,实现按照特定属性对数据进行分组统计。
章节七:连接和合并表当数据分散在不同的表中时,用户可以使用JOIN命令将多个表连接起来。
JOIN操作通过表中的共同列来建立关联,从而实现对多个表进行联合查询。
此外,还可以使用UNION命令将多个查询的结果合并为一个结果集。
sql入门教程

sql入门教程SQL是Structured Query Language的缩写,它是用于管理和操作关系型数据库的标准语言。
SQL具有简单易学、灵活性强、功能丰富等特点,广泛被应用于各种数据库管理系统(DBMS)中,如MySQL、Oracle、SQL Server等。
SQL入门教程主要包括以下几个方面:语法、数据定义语言(DDL)、数据操作语言(DML)、数据查询语言(DQL)以及数据控制语言(DCL)。
首先,我们需要掌握SQL的基本语法,包括大小写敏感、语句分隔符、注释等。
SQL语句通常以分号(;)作为语句的结束,注释可以使用“--”或“/* */”。
其次,DDL是用于创建和管理数据库、表、索引等对象的语言。
通过DDL语句,我们可以创建数据库和表,定义表的结构、约束和索引等。
常见的DDL语句有CREATE、ALTER和DROP等。
CREATE用于创建数据库和表,ALTER用于修改数据库和表的结构,DROP用于删除数据库和表。
接下来是DML,用于对数据库中的数据进行操作,包括插入、更新和删除数据。
插入数据使用INSERT语句,更新数据使用UPDATE语句,删除数据使用DELETE语句。
DML是SQL中最常用的部分,通过DML语句,我们可以实现数据的增删改操作。
DQL是用于查询数据库中的数据的语言,使用SELECT语句。
通过SELECT语句,我们可以根据条件查询数据库中的数据,并可以进行排序、分组、聚合等操作。
SELECT语句的结果可以是一个或多个表的数据,可以使用各种条件和逻辑运算符进行筛选。
最后是DCL,用于对数据库中的用户权限进行管理。
通过DCL语句,我们可以授权、撤销权限,管理用户的访问权限。
常用的DCL语句有GRANT、REVOKE和DENY等。
在学习SQL时,除了掌握以上几个方面的内容外,还需要实践和练习。
可以通过编写SQL语句来操作实际的数据库,进一步加深对SQL的理解和掌握。
同时,还可以利用一些在线SQL学习平台和教程来提升自己的SQL技能。
Wonderware_培训资料

Wonderware_培训资料Wonderware 培训资料在当今的工业自动化领域,Wonderware 系统凭借其强大的功能和卓越的性能,成为了众多企业的首选。
为了让大家更好地了解和掌握Wonderware 系统,本文将为您提供一份详细的培训资料。
一、Wonderware 系统概述Wonderware 是一套功能强大的工业自动化软件套件,它涵盖了从数据采集、监控到过程控制和管理的各个环节。
其主要特点包括:1、强大的可视化功能:能够以直观、清晰的方式呈现生产过程中的各种数据和状态。
2、高度的可扩展性:可以轻松适应不同规模和复杂程度的工业系统。
3、丰富的通信协议支持:能够与各种现场设备和控制系统进行无缝连接。
二、Wonderware 系统的安装与配置1、系统要求在安装 Wonderware 之前,您需要确保您的计算机满足以下最低要求:(1)操作系统:Windows 7 及以上版本。
(2)处理器:Intel Core i5 或更高。
(3)内存:8GB 及以上。
(4)硬盘空间:至少 50GB 的可用空间。
2、安装步骤(1)下载安装文件:从官方网站或授权渠道获取 Wonderware 的安装文件。
(2)运行安装程序:双击安装文件,按照向导的提示进行操作。
(3)选择安装组件:根据您的需求选择要安装的组件,如InTouch、Historian 等。
(4)配置安装选项:设置安装路径、数据库连接等选项。
(5)等待安装完成:安装过程可能需要一些时间,请耐心等待。
3、配置系统安装完成后,您需要进行一些基本的配置,如设置用户权限、连接数据库等。
三、Wonderware 软件组件介绍1、 InTouchInTouch 是 Wonderware 的人机界面(HMI)软件,它允许用户创建直观、交互式的操作界面,以监控和控制工业过程。
(1)图形设计:使用丰富的图形库和绘图工具创建精美的界面。
(2)数据连接:轻松连接到各种数据源,实时获取数据。
SQL Server 常用操作手册

SQL Server 常用操作手册目录一、建库操作 (1)二、建表操作 (1)三、设主键操作 (2)四、设外键操作 (3)五、备份数据库操作 (4)六、还原数据库操作 (5)七、导入/导出数据操作 (6)一、建库操作1、打开企业管理器2、选中数据库节点,进行新建二、建表操作1、打开企业管理器2、选中数据库节点,新建数据库3、选中新建数据库文件,单击右键出现新建下拉框,在出现的菜单中打开所有任务,找到表选项三、设主键操作1、打开企业管理器2、选中新建数据库文件,单击右键出现新建下拉框,在出现的菜单中打开所有任务,找到表选项,进行新建表3、将新建好的表打开后,单击图表空白处单击右键出现下拉框,单击要设置主键名称4、置成功的主键钱会有一个钥匙的形状四、设外键操作1、打开企业管理器2、选择表,在表表上右键菜单中选择设计表3、然后我们就可以在属性前鼠标右键,选择索引/键4、在属性对话框中选择关系,在类型中我们选择新建按钮,然后设置我们需要的外键1、打开企业管理器2、找到我们需要备份的数据库,点击备份数据库3、在备份中我们可以选择完全备份或差异备份,备份到的地址我们通过添加完成4、写入要备份的文件名及地址,确定后就可以完成备份操作了1、打开企业管理器2、找到我们需要还原的数据库,点击还原数据库3、在还原数据库中,我们在还原中选择从设备,然后点击选择设备4、点击添加按钮来选择要还原的数据库,添加完成后点击确定后就可以完成还原操作了七、导入/导出数据操作1、打开企业管理器2、找到我们要导入/导出的数据库3、出现转换服务导入/导出向导的对话框,我们点击下一步4、我们选择数据源下边的QL Server身份验证,在数据库后边的下拉框中我们选择要导入/导出的数据库,然后点击下一步5、我们看到又弹出了一个跟上面一样的对话框,我们继续选择数据源下边的QL Server身份验证,在数据库后边的下拉框中我们选择要导入/导出的数据库,然后点击下一步6、我们选择要导入/导出的数据库文件,点击下一步7、点击下一步8、我们看到完成了数据库之间的导入/导出,点击完成按钮9、数据库之间的导入/导出操作完成。
WonderWare安装指南
安装指南
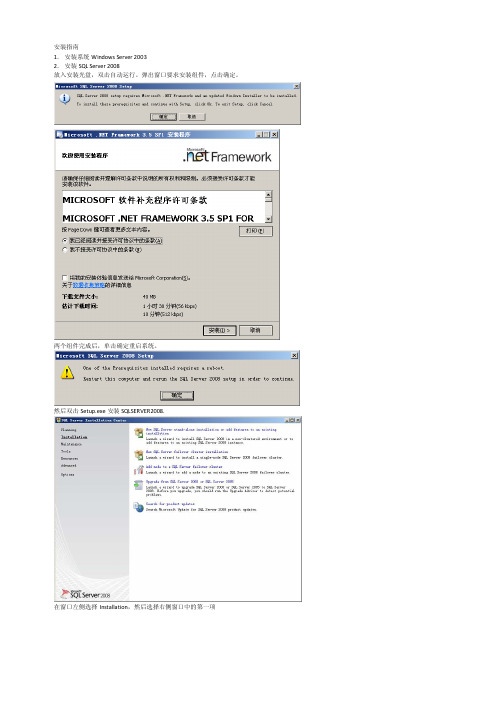
1.安装系统Windows Server 2003
2.安装SQL Server 2008
放入安装光盘,双击自动运行。
弹出窗口要求安装组件,点击确定。
两个组件完成后,单击确定重启系统。
然后双击Setup.exe安装SQLSERVER2008.
在窗口左侧选择Installation,然后选择右侧窗口中的第一项
单击OK继续安装
单击Install安装支持文件。
完成后单击Next
单击Select All 选中全部,并继续
单击Use the same account for all SQL Server services
选中帐户名称点击OK并继续
选择Mixed Mode (SQL Server authentication and windows authentication) 填写password : baosight
填写confirm password :baosight
单击Add Current User 并继续
单击Add Current User 并继续
单击Install 安装
单击确定重启电脑
3.安装WonderWare平台软件
将AppServer安装光盘放入,双击自动安装
单击安装必备组件
安装完成后单击下一步
创建本地帐户用于GR服务器,并继续
安装完成后重启电脑
4.安装Intouch
放入安装光盘,双击自动运行
单击Finish完成安装并重启计算机。
sql常用手册

sql常用手册以下是SQL常用手册的一些要点:1. 数据定义语言(DDL):用于创建和修改数据库和表的语句。
常见的DDL语句包括CREATE TABLE、ALTER TABLE和DROP TABLE。
2. 数据操作语言(DML):用于对数据库中的数据进行操作的语句。
常见的DML语句包括SELECT、INSERT、UPDATE和DELETE。
3. 数据查询语言(DQL):用于从数据库中检索数据的语句。
常见的DQL语句包括SELECT、FROM、WHERE和ORDER BY。
4. 数据控制语言(DCL):用于控制数据库用户权限和访问的语句。
常见的DCL语句包括GRANT和REVOKE。
5. 数据完整性约束:用于保护数据库中数据完整性的规则。
常见的完整性约束包括主键、唯一约束、外键和检查约束。
6. 数据库连接:用于将两个或多个表按照一定条件关联起来的操作。
常见的连接操作包括内连接、外连接和交叉连接。
7. 聚合函数:用于对数据进行汇总和计算的函数。
常见的聚合函数包括COUNT、SUM、AVG、MIN和MAX。
8. 子查询:在一个查询语句内嵌套另一个查询语句的操作。
常见的子查询包括IN、NOT IN、ANY和ALL。
9. 索引:用于提高查询效率的数据库对象。
常见的索引包括唯一索引、非唯一索引和聚簇索引。
10. 视图:用于简化复杂查询和保护数据的虚拟表。
常见的视图包括基本视图、可更新视图和联接视图。
11. 事务:用于对数据库进行一系列操作的单个逻辑单位。
常见的事务操作包括BEGIN TRANSACTION、COMMIT和ROLLBACK。
这只是SQL常用手册的一小部分内容,SQL语言非常广泛和强大,可以进行更多复杂的操作和功能。
如果您需要详细了解SQL语句和特性,请参考相关数据库的官方文档或专业数据库教材。
IO服务器Wonderwaer产品安装说明书V1.1
单位简称分发列表修改列表修订版本列表目录1.概述 (4)2. I/OSERVER FSGATEWAY 2.0的安装 (5)3. WONDERWARE INSQL 9.0 组件IDAS (11)4. WONDERWARE INSQL 9.0 SP2 (15)5.授权的安装 (17)1.概述本文件是I/O服务器Wonderwaer产品安装说明书的流程及具体方法,为了保证软件安装的正确性,未来工作的顺利进行和有效维护,以及便于工作人员之日常操作,特此做出如下的操作指引。
I/O服务器主要是12台服务器的2台一主一备,进行数据的采集。
操作员站的具体配置如下:操作系统:Windows 2008 Server应用软件:Wonderware InSql 9.0 组件IDAS和I/Oserver FSGateWay 2.02.I/OServer FSGateWay 2.0的安装FSGateWay 2.0是Wonderware I/O、DA Server的一个,根据该服务器的需要我们在该计算机只安装这一个软件即可。
下面介绍具体安装过程:步骤1:将Device Integration安装盘放入计算机中(或者是在计算机上找到Device Integration 的文件夹,点击安装运行),会自动弹出如下画面。
步骤2:如下图所示进行选择。
步骤3:点击右侧画面中的“FSGateway”,出现如下所示的提示画面。
步骤4:点击运行,出现如下所示的提示画面。
步骤5:点击运行,出现如下画面。
此过程是安装产品时的所需的必备组件列表,如果没有准备其中的一些产品或功能,它们所需的必备组件也可以不必安装,必备组件一旦安装将无法卸载。
点击对话框下方的安装必备组件按钮,开始安装必备组件。
完成后出现如下画面。
步骤6:点击运行,出现如下画面。
步骤7:点击下一步,出现如下画面。
步骤8:点击下一步,出现如下画面。
步骤9:进行用户账户及密码的设定,设置用户名及密码供节点及数据服务器间通讯使用。
万网SQL数据库用户使用手册
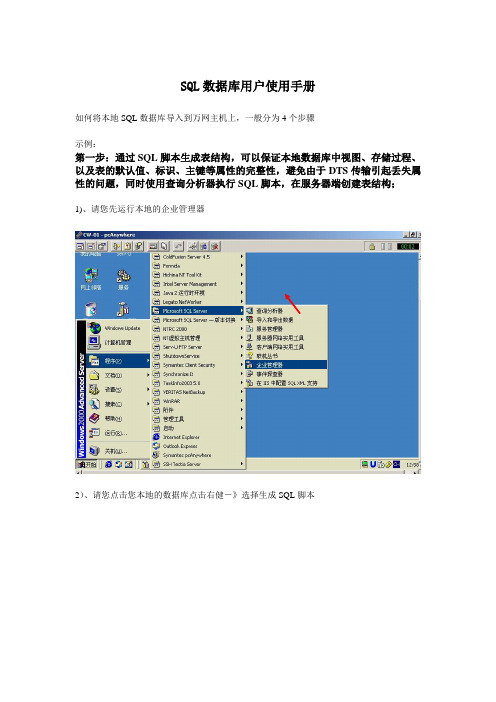
SQL数据库用户使用手册如何将本地SQL数据库导入到万网主机上,一般分为4个步骤示例:第一步:通过SQL脚本生成表结构,可以保证本地数据库中视图、存储过程、以及表的默认值、标识、主键等属性的完整性,避免由于DTS传输引起丢失属性的问题,同时使用查询分析器执行SQL脚本,在服务器端创建表结构;1)、请您先运行本地的企业管理器2)、请您点击您本地的数据库点击右健-》选择生成SQL脚本3)、选择常规-》点击全部显示,选择您想导出的脚本对象4)、点击选项-》表脚本选项,把您所用到的脚本选中然后点击确定5)为自己导入的.sql脚本文件命名,并保存在本地6)、找到刚才我们保存在本地的.sql脚本文件,使用记事本打开陆名,更换完成后保存关闭记事本连接到万网的主机服务器上,然后选择查询分析器9)、点击打开选择刚才编辑过的.sql脚本,然后点击运行第二步:在本地创建一个和万网主机相同权限的SQL数据库1)、完成上面操作后,请您选择数据库点击右键选择新建数据库,由于您在万网申请的是虚拟主机,万网分配的权限都是user的而不是dbo的权限,因此需要您在本地也创建一个与服务器一样的配置,以便正常完成导入操作2)、在常规-》名称处输入万网开通通知中告知您的数据库库名,然后点击确定。
例如:cw01001_db3)、选择安全性-》新建登陆建的数据库5)、在数据库访问中选中刚刚您创建的数据库,然后点击确定6)、现在我们再回到刚才我们创建的数据库,然后点击右键-》属性7)、选择权限,然后把相应权限赋予新建的用户名,现在我们新的数据库就已经创建完成了。
下一步就是如何把老数据库中的文件导入到我们的新数据库中第三步:将原数据库备份并还原到新创建的数据库中1)、选择老数据库点击右键-》所有任务-》备份数据库2)、在常规选项中-》目的中点击添加选择您需要备份出文件的位置3)、等备份完成后,我们重新选择新数据库点击右键-》所有任务-》还原数据库4)、在常规中选择从设备,并在参数设备中点击选择设备5)、点击添加选择我们刚刚从老数据库中备份出来的文件,然后点击确定6)、现在我们在还原数据库中再点击选项,把在现有数据库上强制还原选中,点击确定进行还原操作,等还原完毕后我们新数据库就已经与老数据库的内容一样了,最后一步操作就是把数据从新数据库中使用DTS 导出协议导入到万网服务器上1)、找到您新的数据库2)、点击右健-》所有任务-》导出数据3)、进入DTS导入/导出界面,直接点击下一步4)、从选择数据源窗口中选择您本地的数据库用户名和密码,等连接成功后选择万网给您开通的数据库,然后点击下一步6)、在指定复制或查询中,您可以选择您需要导入的类型,一般为默认7)、在选择源表和视图中,点击全选,点击下一步,这样就把您本地数据库中的文件导入到服务器上了,现在我们的导入数据库工作就已经全部完成了。
sql技术手册
sql技术手册【实用版】目录1.SQL 技术手册概述2.SQL 的基本语法3.数据库的创建和管理4.数据表的创建和管理5.数据查询和操作6.索引和约束7.存储过程和触发器8.数据库的安全性和性能优化9.SQL 技术的发展趋势正文1.SQL 技术手册概述SQL(Structured Query Language,结构化查询语言)是一种用于管理关系型数据库的编程语言。
它被广泛应用于各种数据库管理系统,如MySQL、Oracle、SQL Server 等。
SQL 技术手册旨在为广大数据库开发者和管理者提供全面的 SQL 技术指南,帮助他们更加高效地使用 SQL 语言进行数据库操作。
2.SQL 的基本语法SQL 语言的基本语法包括数据定义、数据操作和数据查询等。
其中,数据定义主要用于创建和管理数据库对象,如表、视图、索引等;数据操作主要用于对数据库中的数据进行增加、删除和修改等操作;数据查询则用于从数据库中检索所需的数据。
3.数据库的创建和管理在 SQL 中,可以使用 CREATE DATABASE 语句来创建一个新的数据库,使用 ALTER DATABASE 语句来修改数据库的名称、大小等属性。
此外,还可以使用 DROP DATABASE 语句来删除数据库。
4.数据表的创建和管理数据表是数据库中存储数据的基本单位。
在 SQL 中,可以使用CREATE TABLE 语句来创建一个新的数据表,使用 ALTER TABLE 语句来修改表的结构、添加或删除列等,使用 DROP TABLE 语句来删除数据表。
5.数据查询和操作SQL 语言提供了丰富的数据查询和操作功能。
其中,SELECT 语句用于查询数据,INSERT 语句用于向表中插入数据,UPDATE 语句用于更新表中的数据,DELETE 语句用于删除表中的数据。
6.索引和约束为了提高数据库的查询效率,可以使用 CREATE INDEX 语句创建索引。
此外,为了保证数据的完整性和一致性,可以使用 CREATE CONSTRAINT 语句创建约束,如主键约束、外键约束、唯一约束等。
wonderware ide 培训的手册文档第12章
Lab 12 –Configuring Automatic ReferenceIntroductionIn this lab, you will use the scripting language to configure the mixer template to automatically configure the input and output references based on the naming conventions established in the Galaxy.ObjectivesUpon completion of this lab, you will be able to:Create a script that will automatically generate and configure I/O references in runtimeAdd the Automatic Reference FunctionalityIn the following steps, you will use a script to configure $Mixer to automatically configure the attribute references when mixer instances are deployed to runtime.1.In the Template Toolbox,Working toolset, double-click $Mixer to open the configuration editor.2.In the Scripts tab, click the Add button, name the new script AssignIO, and press Enter.3.In the Execution type drop-down list, select OnScan.4.Open Windows Explorer and navigate to the C:\Training folder.5.Double-click the Lab12_Configuring Automatic Reference text file.6.Copy and paste the entire file contents into the AssignIO script body.This script assigns all of the attribute references for the mixer instances at runtime.7.Click the Validate button.8.Configure the AssignIO script as follows:Aliases:lockedDeclarations:lockedScripts:locked9.Save and close the configuration editor.10.In the Check In dialog box,Comment field, enter Dynamic referencing script and click OK.The Check In progress displays that the changes have been propagated to Mixer_001andMixer_002.11.Click Close.Modify the MixersBecause the script uses for the name of the mixers to be in the form of MXXX, you will now change the name of the mixer instances.12.In the Model view, expand the Unassigned Area folder, if it is not already.13.Right-click Mixer_002and select Rename.14.Rename the instance M2XX, where XX represents your student number.The ArchestrA IDE dialog box appears.15.Click Yes.The mixer instance now displays the new name, where 00is the student number.You will now do the same for the Mixer_001instance, but since it is currently deployed, you will first need to undeploy it.16.Right-click Mixer_001and select Undeploy.The Undeploy dialog box appears.17.Keep the default options and click OK.18.When the Undeploy progress displays 100% completed, click Close.19.Right-click Mixer_001and select Rename.20.Rename the instance M1XX.21.When the ArchestrA IDE dialog box appears, click Yes.22.Assign M2XX to Line2.23.Select both mixers and all of their contained objects.24.Right-click on any of the highlighted instances and select Deploy.25.Keep the default options and click OK.26.When the Deploy progress displays 100% completed, click Close.View the Script Results in RuntimeNow, you view the runtime results in Object Viewer.27.Right-click M1XX and select View in Object Viewer.28.Click on the Mixer tab.Since the mixer object was renamed, the previously added attributes that reference Mixer_001now display as having bad quality.This may take a few moments.You will now delete these attributes and add the attributes that reflect the new naming convention.29.Select all of the attributes that reference Mixer_001and press the Delete key.The attributes are no longer displayed in the watch window.30.In the instance list, under Line1, ensure that M1XX is selected.31.In the details pane, add the following to the watch window:LT.PVTT.PVTP1.CmdTP1.PV.MsgTP2.CmdTP2.PV.MsgThe watch window displays the attributes with good quality data.32.Rename the watch list tab Mixer1.33.Add a new watch list named Mixer2.34.Add the following attributes to the watch window:The watch window now displays all of the added attributes.35.Save the watch window.In the ArchestrA IDE, the Model view now displays that M2XX still has configuration warnings.Note: Your instructor will now demonstrate how to utilize the Upload Runtime Changes, which you will also perform on your workstation.Refer to Appendix B for the recommended alternative version of the Automatic Reference script.。
sql技术手册

sql技术手册摘要:1.SQL简介与历史2.SQL基本概念与语法3.数据表的创建与管理4.数据查询与筛选5.数据插入与更新6.数据删除与恢复7.数据库的安全性与优化8.常见SQL问题与解决方案9.实战案例与应用正文:一、SQL简介与历史SQL(Structured Query Language,结构化查询语言)是一种用于管理关系型数据库的编程语言。
自20世纪70年代以来,SQL已成为数据库领域的标准查询语言。
它具有简洁、易学、功能强大的特点,被广泛应用于各种行业。
二、SQL基本概念与语法1.基本概念:- 数据库:存储和组织数据的容器。
- 表:数据库中的基本单元,用于存储数据。
- 字段:表中的列,用于表示数据的属性。
- 记录:表中的行,用于表示具体的数据。
2.基本语法:- 关键字:表示数据库操作的词语,如SELECT、FROM、WHERE 等。
- 运算符:用于实现数据比较、计算等操作的符号。
- 注释:对代码进行解释说明的部分,以提高代码的可读性。
三、数据表的创建与管理1.创建表:使用CREATE TABLE语句,指定表名、字段名、数据类型、主键等。
示例:```CREATE TABLE `employee` (`id` INT(11) NOT NULL AUTO_INCREMENT,`name` VARCHAR(50) NOT NULL,`age` INT(11) NOT NULL,`gender` CHAR(1) NOT NULL,PRIMARY KEY (`id`)) ENGINE=INNODB DEFAULT CHARSET=UTF8;```2.管理表:使用ALTER TABLE、DROP TABLE等语句对表进行修改、删除等操作。
四、数据查询与筛选1.基本查询:使用SELECT语句,从指定表中获取数据。
示例:```SELECT * FROM employee;```2.条件筛选:使用WHERE子句,根据条件筛选数据。
- 1、下载文档前请自行甄别文档内容的完整性,平台不提供额外的编辑、内容补充、找答案等附加服务。
- 2、"仅部分预览"的文档,不可在线预览部分如存在完整性等问题,可反馈申请退款(可完整预览的文档不适用该条件!)。
- 3、如文档侵犯您的权益,请联系客服反馈,我们会尽快为您处理(人工客服工作时间:9:00-18:30)。
1Wonderware InSQL Server 8.0IndustrialSQL Server1IndustrialSQL ServerMicrosoft SQL ServerMicrosoft SQL Server=IndustrialSQL ServerMicrosoft SQL Server-=IndustrialSQL ServerIndustrialSQL Server?=FactorySuiteIndustrialSQL ServerSQLWonderware InSQL Server 8.01-WonderwareFactorySuiteInTouchIndustrialSQL ServerIndustrialSQL ServerWonderware I/O serversIndustrialSQL Serverout of the boxTagIndustrialSQL ServerMicrosoft ExcelIndustrialSQL Trend3Wonderware InSQL Server 8.0IndustrialSQL Server1==SQL,10,0005,000OracleWonderware InSQL Server 8.01IndustrialSQL ServerMicrosoft SQL Serverloss-less=IndustrialSQLServerI/O Server5Wonderware InSQL Server 8.0IndustrialSQL Server=AnalogHistory, DiscreteHistory, StringHistoryWonderware InSQL Server 8.01====OLE DB=Microsoft SQL Server 2000=SP2 for MS SQL Server =Industrial SQL Server 8.0=InControlIndustrialSQL ServerMicrosoft SQL Server 2000InSQL Console7Wonderware InSQL Server 8.0IndustrialSQL Server=Runtime DatabaseRun80dat.Mdf30 MB10 MB10%Microsoft SQL ServerIndustrialSQL Server 7.0Wonderware InSQL Server 8.01IndustrialSQL Server50%Windows30,0001225=P2 400=256 MB RAM =100 MBService Pack 2=270 MB22250=P3 866=256 MB RAM =100 MBService Pack 2=270 MB3112509Wonderware InSQL Server 8.0IndustrialSQL ServerService Pack 2=Microsoft SQL Server 2000IndustrialSQL Server100,0005,000Service Pack 2=270 MBIndustrialSQL Server=Microsoft Windows NT 4.0, Service Pack 6a=Internet Explorer 5.5 =20 MBPDFWonderware InSQL Server 8.01IDAS:IDASWindows 2000Windows NTIndustrialSQL ServerSQL ServerIDASIDASIndustrialSQL ServerIDASIDAS==Microsoft SQL Server=11Wonderware InSQL Server 8.0IndustrialSQL ServerPerformance MonitorInSQLWonderware InSQL Server 8.02IndustrialSQL ServerIndustrialSQL ServerIndustrialSQL Server1MS SQL ServerSP2MS SQL ServerMicrosoft SQL 200013Wonderware InSQL Server 8.0MS SQL Server 2000 CD-ROMSQL Server 2000 ComponentsInstall ComponentsWonderware InSQL Server 8.02IndustrialSQL Server3.Computer NameInstallation SelectionSQL ServerUpgrade, remove or add components...5.15Wonderware InSQL Server 8.0User InformationWonderware InSQL Server 8.02IndustrialSQL Server9.CD KeyCD-KeyInstallation Definition17Wonderware InSQL Server 8.014.16.Wonderware InSQL Server 8.02IndustrialSQL Server17.Next18.studentNext19Wonderware InSQL Server 8.020.21.NextWonderware InSQL Server 8.02IndustrialSQL Server27.pro-cessors1Continue21Wonderware InSQL Server 8.0Windows 2000 Server-SP2Welcome2.Wonderware InSQL Server 8.02IndustrialSQL Server4.23Wonderware InSQL Server 8.08.Wonderware InSQL Server 8.02IndustrialSQL Server11.Next25Wonderware InSQL Server 8.0Instance NameNext15.Wonderware InSQL Server 8.02IndustrialSQL Server16.Finish27Wonderware InSQL Server 8.0CD-ROMsetup2.Wonderware InSQL Server 8.02IndustrialSQL ServerTypicalCompactCustomlActive Event29Wonderware InSQL Server 8.0User Information6.7.Wonderware InSQL Server 8.02IndustrialSQL Server8.31Wonderware InSQL Server 8.0Username<blank>Wonderware InSQL Server 8.02IndustrialSQL ServerHoldingSelect Program FolderNext33Wonderware InSQL Server 8.0Next15.Wonderware InSQL Server 8.02IndustrialSQL ServerCommon Componentssa35Wonderware InSQL Server 8.0Wonderware InSQL Server 8.02IndustrialSQL ServerSetup CompleteFinish37Wonderware InSQL Server 8.0- LicensingInSQL 8.0License ValidationTag CountEnforcementLicense ValidationWonderwareTag Count EnforcementMicrosoft SQL Server Query AnalyzerIndustrialSQL ServerWonderware InSQL Server 8.02IndustrialSQL Server1.2.3.39Wonderware InSQL Server 8.0OKLicense UtilityWindowsX\ Program Files\ FactorySuite\ Common\ License\Wonderware InSQL Server 8.033- InSQL Console3TagTagsI n S QLConfigure41Wonderware InSQL Server 8.0InSQL ConsoleWindowsIndustrialSQLServerIndustrialSQL ServerIndustrialSQL ServerInSQL ConsoleQuery AnalyzerInSQLWonderware InSQL Server 8.03-52HeadroomIndustrialSQL Server2.Configuration EditorInSQL Con-s o le43Wonderware InSQL Server 8.0:10040HeadroomString PropertiesWonderware InSQL Server 8.010,000Value15OKInSQL Console45Wonderware InSQL Server 8.0TimeSyncMasterProperties1.2.SQL ServerOKWonderware InSQL Server 8.0Management ConsoleAll Tasks/Review License Information...7.8.InSQLDisplay InSQL Server state inconsole10.Configuration Editor2.Start InSQL...47Wonderware InSQL Server 8.0StatusInSQLItem3InTouchInSQL 81. Configuration ManagerWonderware InSQL Server 8.0Import Tags...Tag Importer Wizard-WelcomeNext4.49Wonderware InSQL Server 8.0OpenNextWonderware InSQL Server 8.0Bypass Uniqueness StringNextOK。
