(Openfiler的安装)使用Openfiler为VMware ESX设置一个免费的iSCSI或NAS储存系统
Openfiler安装手册

Graphical InstallationThis How-to applies to: 2.2, 2.3This How-to is intended for: End userInstallation of Openfiler using the standard graphical-based installation method.IntroductionThis document describes the process of installing Openfiler using the default graphical installation interface. If you experience any problems with the graphical install track, such as a garbled screen due to the installer not being able to auto-detect your graphics hardware, please try a text-based install. The text-based install track is described here.Total time for installation is about 15 - 20 minutes including software installation to disk.System RequirementsOpenfiler has the following hardware requirements to be successfully installed:1、x86 or x64 based computer with at least 512MB RAM and 1GB storage for the OS image.2、At least one supported network interface card3、A CDROM or DVD-ROM drive if you are performing a local install4、A supported disk controller with data drives attached.Please see full system requirements information here.InstallationThe installation process is described with screenshots for illustrative purposes. If you are unable to proceed at any point with the installation process or you make a mistake, use the Back button to return to previous points in the installation process. Any errors or intractable problems with the installation process should be reported either to the Openfiler Users mailing list or, alternatively, if you feel you have found a bug please use the bug tracking system. If you report a bug, be sure to enter a valid email address so that you can keep track of any updates to it right up to resolution. You *must* first register with the bug tracker in order to be able to post a new bug.Starting the InstallationTo begin the installation, insert the Openfiler disk into your CD/DVD-ROM drive and ensure your system is configured to boot off the CD/DVD-ROM drive. After the system POSTs, the installer boot prompt will come up. At this point, just hit the Enter key to proceed.After a few moments, the first screen of the installer will be presented. If at this point your screen happens to be garbled, it is likely that the installer has been unable to automatically detect your graphics subsystem hardware. You may restart the installation process in text-mode and proceed accordingly in that case. The first screen of the installer is depicted below. The next step is to click on the Next button to proceed with the installation.Keyboard SelectionThis screen deals with keyboard layout selection. Use the scroll bar on the right to scroll up and down and select your desired keyboard layout from the list. Once you are satisfied with your selection, click the Next button to proceed.Disk Partitioning SetupNext comes the disk partitioning. You must select manual disk partitioning as it ensures you will end up with a bootable system and with the correct partitioning scheme. Openfiler does not support automatic partitioning and you will be unable to configure data storage disks in the Openfiler graphical user interface if you select automatic partitioning. Click the Next button once you have selected the correct radiobutton option.Disk SetupOn the disk setup screen, if you have any existing partitions on the system, please delete them. DO NOT DELETE ANY EXISTING OPENFILER DATA PARTITIONS UNLESS YOU NO LONGER REQUIRE THE DATA ON THEM. To delete a partition, highlight it in the list of partitions and click the Delete button. You should now have a clean disk on which to create your partitions.You need to create three partitions on the system in order to proceed with the installation:"/boot" - this is where the kernel will reside and the system will boot from"swap" - this is the swap partition for memory swapping to disk"/"- this is the system root partition where all system applications and libraries will be installedCreate /boot PartitionProceed by creating a boot partition. Click on the New button. You will be presented with a form with several fields and checkboxes. Enter the partition mount path "/boot" and the select the disk on with to create the partition. In the illustrated example, this disk is hda (the first IDE hard disk). Your setup will very likely be different as you may have several disks of different types. You should make sure that only the first disk is checked and no others. If you are installing on a SCSI-only system, this disk will be designated sda. If you are installing on a system that has both IDE and SCSI disks, please select hda if you intend to use the IDE disk as your boot drive.The following is a list of all entries required to create the boot partition:Mount Point: /bootFilesystem Type: ext3Allowable Drives: select one disk only. This should be the first IDE (hda) or first SCSI disk (sda)Size(MB): 100 (this is the size in Megabytes, allocate 100MB by entering "100")Additional Size Options: select Fixed Size radiobutton from the options.Force to be a primary partition: checked (select this checkbox to force the partition to be created as a primary partition)After configuration, your settings should resemble the following illustration:Once you are satisfied with your entries, click the OK button to create the partition.Create / (root) PartitionProceed by creating a root partition. Click on the New button. You will be presented with the same form as previously when creating the boot partition. The details are identical to what was entered for the /boot partition except this time the Mount Point: should be "/" and the Size(MB): should be 2048MB or at a minimum 1024MB.Once you are satisfied with your entries, click the OK button to proceed.Create Swap PartitionProceed by creating a swap partition. Click on the New button. You will be presented with the same form as previously when creating the boot and root partitions. The details are identical to what was entered for the boot partition except this time the Mount Point: should swap. Use the drop down list to select a swap partition type. TheSize(MB): of the partition should be at least 1024MB and need not exceed 2048MB.Once you are satisfied with your entries, proceed by clicking the OK button to create the partition. Y ou should now have a set of partitions ready for the Openfiler Operating System image to install to. Your disk partition schemeshould resemble the following:You have now completed the partitioning tasks of the installation process and should click Next to proceed to the next step.Network ConfigurationIn this section you will configure network devices, system hostname and DNS parameters. You will need to configure at least one network interface card in order to access the Openfiler web interface and to serve data to clients on a network. In the unlikely event that you will be using DHCP to configure the network address, you can simply click Next and proceed to the next stage of the installation process.If on the other hand you wish to define a specific IP address and hostname, click the Edit button at the top right corner of the screen in the Network Devices section. Network interface devices are designated eth X where X is a number starting at 0. The first network interface device is therefore eth0. If you have more than one network interface device, they will all be listed in the Network Devices section.When you click the Edit button, a new form will popup for you to configure the network device in question. As you do not wish to use DHCP for this interface, uncheck the Configure Using DHCP checkbox. This will then allow you to enter a network IP address and Netmask in the appropriate form fields. Enter your desired settings and click OK to proceed.Once you have configured a network IP address, you may now enter a hostname for the system. The default hostname localhost.localdomain is not suitable and you will need to enter a proper hostname for the system. This will be used later when you configure the system to participate on your network either as an Active Directory / Windows NT PDC client or as an LDAP domain member server. You will also, at this point, need to configure gateway IP address and DNS server IP addresses. To complete this task you will need the following information: Desired hostname - this is the name you will call the system. Usually this will be a fully qualified hostname e.g .Gateway IP address - this is the IP address of your network gateway to allow routing to the InternetPrimary DNS Server - this is the DNS server on your network. Note that if you intend to use Active Directory or LDAP as your authentication mechanism, you will need to assign a functional DNS IP address so that the authentication mechanism is able to resolve the authentication server hostnames.Secondary/Tertiary DNS Server - enter a second and third DNS server if they are available on your network.The following illustration shows an example where a hostname has been assigned, and gateway IP, primary and secondary DNS information has also been entered.Once you are satisfied with your entries, please proceed by clicking the Next button.Time Zone SelectionSet the default system time zone. You can achieve this by following the instructions on the left side of the screen. If your system BIOS has been configured to use UTC, check the UTC checkbox at the bottom of the screen andclick Next to proceed.Set Root PasswordYou need to configure a root password for the system. The root password is the superuser administrator password. With the root account, you can log into the system to perform any administrative tasks that are not offered via the web interface. Select a suitable password and enter it twice in the provided textboxes. When you are satisfied with your entries, click Next to proceed with the installation process.NB: the root password is meant for logging into the console of the Openfiler server. The default username and password for the Openfiler web management GUI are: "openfiler" and "password" respectively.About To InstallThis screen informs you that installation configuration has been completed and the installer is awaiting your input to start the installation process which will format disks, copy data to the system and configure system parameters such as setting up the boot loader and adding system users. Click Next if you are satisfied with the entries you have made in the previous screens.NoteYou cannot go back to previous screens once you have gone past this point. The installer will erase any data on thepartitions you defined in the partitioning section.InstallationOnce you have clicked Next in the preceding section, the installer will begin the installation process. The following screenshots depict what happens at this point.Installation CompleteOnce the installation has completed, you will be presented with a congratulatory message. At this point you simply need to click the Reboot button to finish the installer and boot into the installed Openfiler system.NoteAfter you click Reboot remove the installation CD from the CD/DVD-ROM drive.Once the system boots up, start configuring Openfiler by pointing your browser at the host name or IP address of the Openfiler system. The interface is accessible from https port 446. e.g.. https://:446. Management Interface: https://<ip of openfiler host>:446Administrator Username: openfilerAdministrator Password: passwordYou can learn how to manage the Openfiler system by browsing the administrator guide online which can be found here.CongratulationsCongratulations! Thank you for choosing to use Openfiler.。
openfiler存储配置
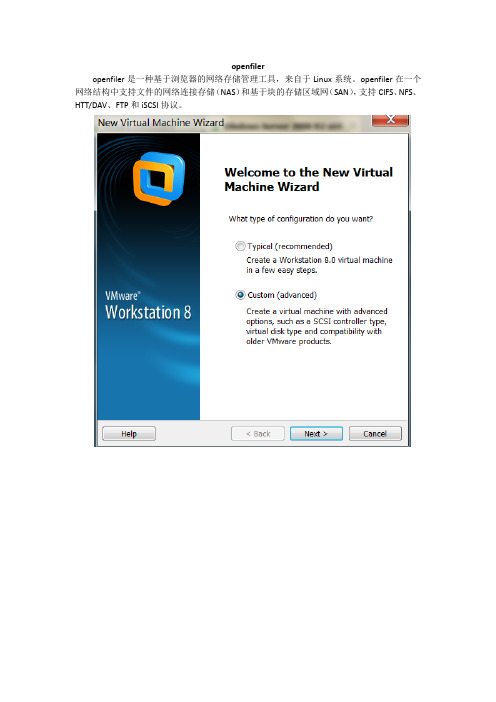
openfileropenfiler是一种基于浏览器的网络存储管理工具,来自于Linux系统。
openfiler在一个网络结构中支持文件的网络连接存储(NAS)和基于块的存储区域网(SAN),支持CIFS、NFS、HTT/DAV、FTP和iSCSI协议。
添加一个200GB的虚拟硬盘:管理openfiler服务器:openfiler是在远程使用Web界面进行管理的,其管理地址是https://192.168.1.30:446,其管理用户名是openfiler(小写的),密码是password,可以在登录之后,修改这个密码。
启用iSCSI服务:在安装完openfiler之后,iSCSI服务默认是停用的,需要启用该服务。
网络访问配置-添加VMware ESX Server服务器地址:注:在添加地址的时候,子网掩码均设置为255.255.255.255,用来定义一个具体的主机的地址。
为openfiler配置存储器:前面设置中,为openfiler服务器配置了两块硬盘,其中20GB的硬盘已经用来安装openfiler操作系统,而200GB的硬盘则会用做数据存储。
为VMware ESX Server服务器分配新创建的卷:在VMware ESX Server中添加iSCSI存储:1、添加VMkernel端口要在VMware ESX Server中使用iSCSI存储,还要添加一个VMkernel端口,并为其分配一个地址,将地址192.168.1.40分配给VMkernel。
单击属性:单击添加:添加openfiler地址:添加iSCSI存储:单击属性:选择动态发现:选择是:添加或扩展存储器:扩充iSCSI分配的卷的容量:登录openfiler存储服务器。
全部重新扫描:点击属性:单击增加:修改VMware ESX Server的管理地址:修改网关:。
OpenFiler安装与基本配置

OpenFiler安装与基本配置⼀、安装篇
1.插⼊安装盘
2.选择键盘输出
3.对硬盘进⾏分区
4.删除所有数据并重新分区
5.配置IP地址等信息
6.可以不⽤指定⽹关和dns
7.设定时区
8.设置root账户的密码
9.下⼀步
10.⾃动进⾏磁盘分区
11.安装中
12.安装完成并需要重启
⼆、配置
(⼀)创建卷组
1.打开浏览器进⾏地址访问
2.输⼊⽤户和密码登陆
3.登录后如下
4.然⽽我们使⽤管理员来登陆进⾏操作(默认密码password)
5.登录后的界⾯管理如下
6.选择卷
7.查看系统硬盘呢信息
8.对sdb硬盘进⾏分区的创建,⾸先点击它
9.创建卷组(默认分区类型,点击create)
10.同样⽅式创建sdc硬盘
11.选择卷,然后创建卷组
12.创建完成
(⼆)创建iSCSI逻辑卷
1.查看服务(并启⽤iSCSI TarGet)
2.创建新的卷
3.根据⾃⼰的需求创建
4.创建完成
5.选择系统,然后配置⽹络访问,配置完需要更新
6.选择卷⾥的iSCSI Targets
7.选择添加
8.添加后如下
9.映射创建的卷
10.现在便能使⽤刚刚创建的my-sicsi卷
(三)创建多路径访问iSCSI存储
因为对于存储来说,单路径访问⽆法实现冗余以及负载均衡,要避免单点故障,就需要配置存储的多路径访问。
1.点击系统
2.配置eth1⽹卡使⽤静态IP
3.配置IP地址和⼦⽹
4.完成配置。
3.3 搭建openfiler 存储服务器

的麻烦,单击Eidt按钮,填写IP地址为192.168.1.100/24,默
认网关为 192.168.1.1 , DNS 为 8.8.8.8 ,然后确认,如图 3-39 所示。
主讲人:杨海艳
搭建openfiler 存储服务器
Share you ideas and experiments with the world
第8步:创建卷组(VG) 单击右侧的Volume Groups,填写Volume group name 单击Add volume group,创建卷组,如图3-49所示。
(此处为 iscsi-vg ),选中刚创建的 RAID5 设备 /dev/md0 ,
项目实施总体情况
主讲人:杨海艳
搭建openfiler 存储服务器
项目实施总体情况
பைடு நூலகம்
主讲人:杨海艳
搭建openfiler 存储服务器
单击其中的/dev/sdb,进入到磁盘编辑界面,可
以看到已经分配磁盘分区信息。创建一个新的分 区,在Partition Type处选择RAID array member,输 入Ending cylinder值(此处默认,所有剩余空间划 为一个分区),单击Create按钮,如图3-46所示。
项目实施总体情况
主讲人:杨海艳
搭建openfiler 存储服务器
Share you ideas and experiments with the world
配置网络属性,设置hostname和IP地址,建议设为固定IP, 因为Openfiler安装完成之后没有图形界面,所有的配置都通 过Web方式完成,没有固定的IP会给以后的配置造成不必要
主讲人:杨海艳
搭建openfiler 存储服务器
esx安装手册

懒得去截图就在网上找的4.0的图片,4.1安装步骤都一样哈(我是用4.1做的测试)。
ESX的安装:安装准备1、确认服务器是否支持虚拟化。
2、在服务器的BIOS上开启CPU的VT功能3、分析现有服务器的网络设置,构建ESX Server网络安装1、在ESX Server主机上放入磁盘,开机后进行磁盘引导2、直接回车,进入如下模式3、单击NEXT,此时将显示接受vmware许可协议,选择I ACCEPT THE TERMS OF THELICENCE AGREEMENT4、选择键盘类型,在册我们选择默认类型,然后单击next[next][no],然后单击6、弹出确认框,选择[yes]系统将加载ESX所需的驱动7、显示加载驱动进度条,当显示100%Complete后,单击[Next]继续。
8、输入序列号,也可安装vCenter server来设定。
输入正确的序列号,然后单击[next]9、出现[network configureation]界面,选择ESX server 控制台使用的网络接口,如果需要设置vlan ,则选中[this adapter requires a vlan id ]并在[vlan id ]中填入vlan 号,然后单击[next ]序列号可以以后填写。
10、配置ESX server 主机网络ip 地址和esx server 主机名称。
根据需要键入包括域在内的完整计算机名。
11、选择安装类型Standart setup :在单个硬盘或lun 中安装ESX ,分区安默认进行 Advanced setup :有多个硬盘或需要定制分区 此处以[advanced setup ]为例,单击[next ]12、在[esx storage device]界面,将列出esx检测到的存储设备或lun。
选择要安装esx server的存储设备,单击Next。
13、弹出警告信息,提示选中的存储空间中的数据将被清除,确认后按[ok]13、弹出警告信息,提示选中的存储空间中的数据将被清除,确认按[ok].14、系统默认将创建新的datastore,此处可更改名称。
Openfiler操作手册
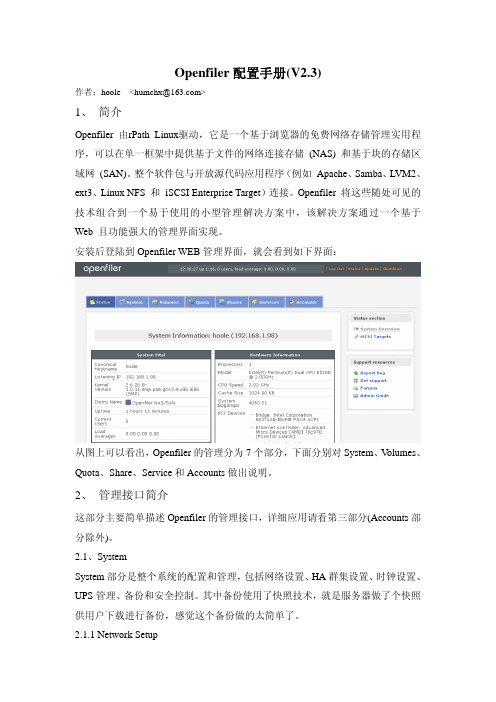
Openfiler配置手册(V2.3)作者:hoole <humchx@>1、简介Openfiler 由rPath Linux驱动,它是一个基于浏览器的免费网络存储管理实用程序,可以在单一框架中提供基于文件的网络连接存储 (NAS) 和基于块的存储区域网 (SAN)。
整个软件包与开放源代码应用程序(例如 Apache、Samba、LVM2、ext3、Linux NFS 和iSCSI Enterprise Target)连接。
Openfiler 将这些随处可见的技术组合到一个易于使用的小型管理解决方案中,该解决方案通过一个基于Web 且功能强大的管理界面实现。
安装后登陆到Openfiler WEB管理界面,就会看到如下界面:从图上可以看出,Openfiler的管理分为7个部分,下面分别对System、V olumes、Quota、Share、Service和Accounts做出说明。
2、管理接口简介这部分主要简单描述Openfiler的管理接口,详细应用请看第三部分(Accounts部分除外)。
2.1、SystemSystem部分是整个系统的配置和管理,包括网络设置、HA群集设置、时钟设置、UPS管理、备份和安全控制。
其中备份使用了快照技术,就是服务器做了个快照供用户下载进行备份,感觉这个备份做的太简单了。
2.1.1 Network Setup网络设置分为三部分:Network Configuration、Network Interface Configuration和Network Access Configuration。
其中Network Configuration是配置网络信息的,如DNS服务器和网关等信息。
Network Interface Configuration是配置网卡的,你有两种选择,一种是DHCP,另一种是Static。
如果你选择了Static那么就需要填写IP地址和子网掩码。
OpenFiler安装配置手册
OpenFiler安装配置⼿册OpenFiler2.3安装配置⼿册⼀、初始化OpenFiler·⾸先我们从OpenFiler的官⽅⽹站下载OpenFiler的虚拟机⽂件,下载地址:/community/download/,下载回来的⽂件解压后直接⽤虚拟机打开即可。
·启动虚拟机后,我们⾸先需要配置⼀些参数信息。
(1)修改⽹卡初始的⽹卡是⾃动获取IP地址,在此,我们需要修改为固定的IP地址。
#cd/etc/sysconfig/network-scripts#viifcfg-eth0DEVICE=物理设备名IPADDR=IP地址NETMASK=掩码值NETWORK=⽹络地址——–可不配BROADCAST=⼴播地址——–可不配GATEWAY=⽹关地址ONBOOT=[yes|no](引导时是否激活设备)USERCTL=[yes|no](⾮root⽤户是否可以控制该设备)——–可不配BOOTPROTO=[none|static|bootp|dhcp](引导时不使⽤协议|静态分配|BOOTP协议|DHCP协议)HWADDR=你的MAC地址——–可不配修改后重起⽹卡⽅能实现:#servicenetworkrestart(2)停⽌不必要的服务#cd/etc/rc3.d这⾥我们采取重命名的⽅式进⾏:可以停⽌的服务:(3)查看⽇志:#cd/var/log#moremessages⼆、配置OpenFiler进⾏完上述初始化,我们可以使⽤IE的⽅式打开OpenFiler的控制台,访问地址:https://192.168.253.98:446(注意添加446的端⼝)打开页⾯后,输⼊初始的⽤户名openfiler,密码:password成功登录后,⾸先在Status项中,可以看到安装了OpenFiler服务器的⼀些信息。
1、启动相关的服务需要启动的服务可以根据⾃⼰的实际情况来决定,在这⾥我主要启动了以下⼏个服务SMB/CIFSserverNFSv3serveriSCSItargerserveriSCSIinitiator2、配置机器名、DNS等信息3、添加NetworkAccessConfiguration这⾥可以添加单个IP、整段IP、多⽹段或者全部,可以根据需要进⾏设置4、设置时间、时区和时间服务器地址三、Volumes在配置Volumes前,先简单介绍下整个OpenFiler的配置过程以及架构图:1、设置Share⽅式的⽂件共享(1)设置Device的PartitionType“Volumes-BlockDevices”,选择需要设置的Disk,然后选择Create,选择“Mode”为“Primary”,选择“PartitionType”为“Physicalvolume”,如果还要划分⼤⼩,这⾥还需要设置“Endingcylinder”,这⾥我将整个Disk划为单独的⼀个Physicalvolume(2)创建VolumeGroup⾸先是输⼊Volumegroupname,这⾥我输⼊我的物理卷的名称“Physical-volume-1”,接下来是选择物理卷到这个组中,这⾥的物理卷是我们在设置PartitionType时设置的PhysicalType,我们可以选择⼀个,也可以同时选择多个(3)增加Volume完成上述操作后,接下来就是在VolumeGroup中创建Volume,并设置⽂件系统或者卷类型,针对我们作为共享⽅式的磁盘,我们可以选择“XFS”和“Ext3”XFS⽂件系统的介绍:XfS⽂件系统是SGI开发的⾼级⽇志⽂件系统,XFS极具伸缩性,⾮常健壮。
openfiler的建立,配置,及挂载
第一步:建立openfiler的主机过程
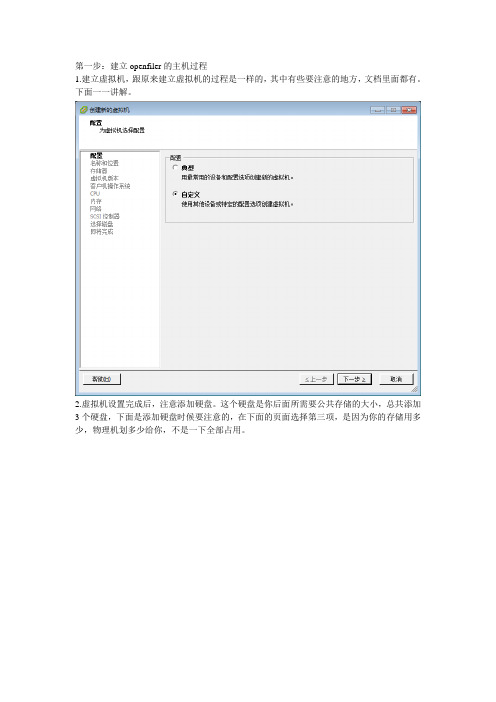
1.建立虚拟机,跟原来建立虚拟机的过程是一样的,其中有些要注意的地方,文档里面都有。
下面一一讲解。
2.虚拟机设置完成后,注意添加硬盘。
这个硬盘是你后面所需要公共存储的大小,总共添加3个硬盘,下面是添加硬盘时候要注意的,在下面的页面选择第三项,是因为你的存储用多少,物理机划多少给你,不是一下全部占用。
3.openfiler开始安装,基本上都是直接点击“next”,其中注意的地方,在做详细的讲解。
4.下面是配置:openfiler的网络,网关,主机名,DNS等。
点击“edit”进入配置页面
第二步:openfiler的配置
1.注意下面的ip地址:这是你通过浏览器进入openfiler配置的网络地址。
下面使用root账
户进入openfiler进行网络的检测和硬盘的检测。
第四步(重要):通过浏览器进入openfiler 进行配置
1.下面是另外一台虚拟机对openfiler 进行检测。
看网络是否畅通,需不需要进行配置
2.进入配置页面,账户为:openfiler 密码:password
3.点击“volumes”,进入下面页面,点击红色字体,对硬盘进行创建
行同样的操作。
5.点击右边的“volume groups”进行一个公共存储的建立。
如下图所示
6.下面是服务的iscsi的开启,如下图所示
7.如下图。
进行“map”
第五步:在物理主机上进行存储的挂载。
下图为建立成功的效果图。
Openfiler安装及配置笔记
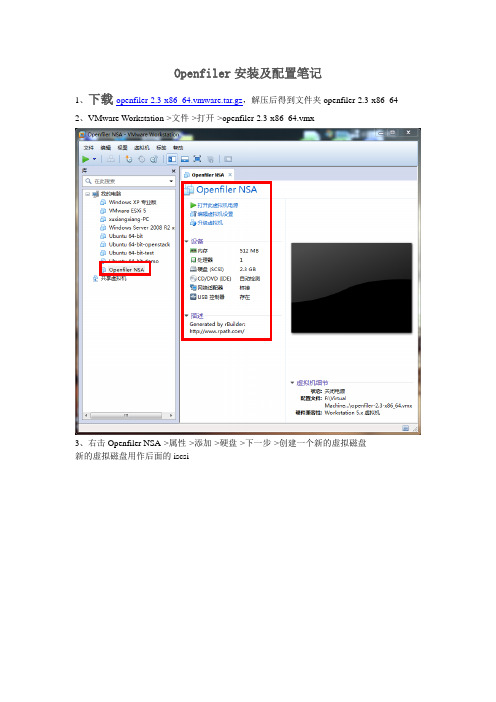
Openfiler安装及配置笔记1、下载openfiler-2.3-x86_64.vmware.tar.gz,解压后得到文件夹openfiler-2.3-x86_642、VMware Workstation->文件->打开->openfiler-2.3-x86_64.vmx3、右击Openfiler NSA->属性->添加->硬盘->下一步->创建一个新的虚拟磁盘新的虚拟磁盘用作后面的iscsi4、修改虚拟机网络适配器为NA T,视各人情况可以有不同设置。
以上为用vmware虚拟机镜像文件直接配置openfiler,也可以下载openfiler iso镜像文件一步一步安装,可以参考/p-34164281.html5、接下来,我们打开虚拟机电源,出现初始界面,提示通过https://192.168.217.136:446/进行web管理界面6、打开GUI:https:192.168.217.136:446/7、Openfiler的默认用户名为openfiler,密码为password。
登陆成功后显示如下:和网关。
9、在System标签页下面Network Access Configuration中添加要开放的客户端IP。
类型选择share。
此步骤必不可少,否者客户端将访问不到服务。
10、点击V olumes出现如下页面11、点击右侧的菜单block devices ,列出硬盘/dev/sda ,如果您有多块硬盘,还会列出其余的硬盘,点击/dev/sdb,出现如下界面:12、在partition type 中选择physical volume ,然后点击create .创建成功后,显示刚创建的物理卷的信息13、创建成功后,点击右侧的volume groups ,出现如下界面:在卷组名中填入一个名字,选中下面我们刚才创建的物理卷,然后点击添加卷组。
如果这里有多个物理卷,也可以一并选中,将多个硬盘、多个分区添加到一个卷组中。
使用Openfiler自制虚拟机环境的SAN
使用Openfiler自制虚拟机环境的SAN一、Openfiler简介Openfiler 由rPath Linux驱动,它是一个基于浏览器的免费网络存储管理实用程序,可以在单一框架中提供基于文件的网络连接存储(NAS) 和基于块的存储区域网(SAN)。
整个软件包与开放源代码应用程序(例如Apache、Samba、LVM2、ext3、Linux NFS 和iSCSI Enterprise Target)连接。
Openfiler 将这些随处可见的技术组合到一个易于使用的小型管理解决方案中,该解决方案通过一个基于Web 且功能强大的管理界面实现。
Openfiler是一个免费的NAS.iSCSI的SAN服务器操作系统,主要目的就是提供LAN主机的独立存储系统。
Openfiler提供了iSCSI Target,并且有NFS文件系统、SMB文件系统(给windows使用),更可以使用HTTP来分享文件。
主机可以使用iSCSI Initiator来做直接连接,也可以使用共享文件夹或是挂载的方式来访问Openfiler 上的数据,对于想要进行虚拟化评估的中小企业来说,是Provisioning阶段最好用的工具。
二、Openfiler下载地址/community/download/下载完成后用虚拟机加载运行openfiler是标准的Linux,正常的Linux操作就OK了。
密码设置:第一次登入后用root登入,用passwd命令设置密码。
网络配置:如果你不想DHCP分配,那么就进入/etc/sysconfig/network-scripts ,编辑ifcfg-eth0文件照图中所示进行配置。
:使用Openfiler的操作:(LUN)的操作三、实体硬盘到逻辑硬盘实体硬盘到逻辑硬盘(装好Openfiler后,那么就要把你的磁盘分享出来给虚拟机或网络上的其他主机使用了。
1、登入Openfiler主页https://192.168.1.110:446/用户名:openfiler 密码:password (这是默认的)登入界面:2、在Openfiler里创建VG假设你有两块硬盘,首先得创建VG。
Openfiler_使用指南

使用指南2017Openfiler目录前言 (5)0.1NAS(源于互联网) (5)0.2SAN(源于互联网)......................................................................................... 50.3当前各类存储技术优缺点(源于互联网) (6)一、Openfiler安装 (9)1.1创建虚拟机 (9)1.2启动安装 (17)1.3Keyboard Configuration选择键盘布局 (18)1.4Disk Partitioning Setup设置磁盘分区 (18)1.5Disk Setup 磁盘设置 (19)1.6Network Configuration 网络设置 (21)1.7Time Zone Selection 选择时区 (22)1.8Set Root Password 设置系统管理员密码 (23)1.9About to Install 确认系统安装 (23)1.10安装完成 (24)1.11WEB管理、设置............................................................................................ 251.12Openfiler汉化 (25)二、SMB/CIFS服务配置 (26)2.1建立分区 (26)2.2建立Software Raid (28)2.3建立卷组Volume Groups (29)2.4建立share-1逻辑卷 (29)2.5开启SMB / CIFS server服务 (30)2.6建立共享文件夹 (31)2.7设置共享 (31)三、本地LDAP Accounts设置 (35)3.1LDAP简介(源自互联网) (35)3.2开启LDAP (37)3.3建立用户组和用户 (38)3.4应用Openfiler帐户,进行访问控制 (40)3.5Openfiler LDAP Accounts控制特点 (42)四、FTP (43)五、Quota(磁盘配额) (45)5.1组配额 (45)5.2用户配额 (45)5.3Openfiler文件服务功能总结 (47)六、Windows Server 活动目录Account设置 (47)6.1部署Win2003服务器域控制器 (47)6.2在Openfiler中启用AD认证 (47)6.3用户和用户组 (49)6.4应用AD帐户,进行访问控制 (50)6.5Openfiler帐户特性总结 (51)七、iSCSI设置 (51)7.1iSCSI简介(源自互联网) (51)7.2创建vol-2 (52)八、Raid同步测试 (60)8.1了解Raid(源自互联网) (60)8.2调整配额并上传文件 (62)8.3移除一个Raid成员。
Openfile存储安装

Openfile存储安装⽤Openfiler打造iSCSI SAN系统2010-10-07王春海《微型计算机》2010年9⽉上当企业⽤户准备尝试虚拟化解决⽅案时,往往会发现现有的存储系统性能⽆法满⾜需要。
⽽基于硬件的iSCSI SAN成本较⾼、使⽤限制较多。
有没有适合企业⽤户采⽤的低成本解决⽅案呢?基于软件的iSCSI 服务器是不错的选择。
微软的Windows Storage Server 2008与开源的Openfiler,可以将普通的服务器配置成iSCSI服务器,为其他应⽤服务器提供⾼性能的⽹络存储功能。
王春海王春海:河北经贸⼤学实验师,MCSE、MCDBA、MVP(微软最有价值专家);计算机图书作家,在⼈民邮电、清华⼤学、电⼦⼯业、机械⼯业、科学、铁道等多家出版社出版20余本⽹络类、数据恢复类、虚拟机类图书。
熟悉VMware、微软系列虚拟机、虚拟化技术,熟悉Windows操作系统、微软的Exchange、ISA、OCS、MOSS等服务器产品,对组建⼤、中型⽹络有丰富的经验,主持组建过若⼲⼴域⽹、局域⽹⼯程,多次主持税务系统、政府、企业的⽹络组建、⽹络改造、⽹络安全与维护⼯程。
Tips:存储设备存储设备就像⼀个外挂的“移动硬盘”,可以为服务器、⼯作站提供额外的存储空间。
这些外接的存储空间在⽬标计算机上以“本地硬盘”的模式⼯作。
最初的存储设备只能通过光纤、SCSI数据线或者其他的专⽤线缆、专业接⼝卡连接到服务器,供服务器(或⼯作站)使⽤。
由于是专⽤线缆连接,所以存储设备的接⼝有限,⼀般只能同时为两台服务器提供存储。
⽽现在的存储设备更多的是“⽹络”存储,可以通过IP⽹络为多台服务器提供额外的存储空间。
专业存储设备是为⽹站、数据库、操作系统等需要⾼可⽤性群集、负载均衡与容错的⽹络环境中的必需设备,IBM、惠普、思科、华为等⼚商都有专业的⽹络存储设备,但这些存储设备造价较⾼,⼀般的企业很能承受。
现在,随着企业⽤户对⽹络的依赖越来越⾼,构建永不间断⽹站、数据库系统的需求也越来越多,扣除⽹站与数据库系统的费⽤,专业存储设备可能会占⽤较⼤的硬件投资,并且随着数据量的增加,⽤户花费在增⼤存储容量⽅⾯的使⽤费⽤也会越来越⾼。
12.1.2 OpenFiler的下载及安装
12.1.2 OpenFiler的下载及安装(1)OpenFiler目前最新的版本为2.3,在官方网站上提供了原始安装的ISO档和已经安装完毕的虚拟机使用,包括VMware的 Workstation、Server和ESX Server、Xen、Virtual Iron和Parallels等虚拟机产品。
如果你想将OpenFiler安装在一台有多个硬盘的机器上,可以下载ISO来安装,如果你只想测试 OpenFiler,可以下载VMware的虚拟硬盘直接在Workstation版本的VMware上直接使用。
读者们可以到/community/download的网址选择需要的版本下载,ISO文件的大小约328MB,而VMware的压缩文件大小约为202MB。
1. 安装VMware版本的OpenFiler将OpenFiler安装到VMware ESX Server或Hyper-V下意义并不大,因为我们使用OpenFiler的目的就是要给这些虚拟机产品使用。
一般来说,如果你的目的只是测试SAN和 iSCSI,我们会将OpenFiler的虚拟机安装在VMware的Workstation这一类寄居架构的虚拟机产品上。
" OpenFiler将安装在VMware Workstation或Server上1.先将下载回来的压缩文件解压,其中包括两个文件的文件夹,一个是OpenFiler的硬盘文件,一个是VMware的配置文件。
2.解压缩完毕之后,直接开始以VMware Workstation或是Server来运行OpenFiler。
3.选择Open Existing VM or Team。
4.选择刚才解开的OpenFiler文件夹中的openfiler-2.3-x86_64.vmx。
5.开启之后,这个虚拟机其实已经可以直接使用,但这虚拟机并无任何硬盘可供分享。
我们必须创建硬盘给OpenFiler使用。
6.在VMware的主画面中,选择Edit virtual machine settings。
openfiler安装配置
openfiler安装配置下载文件:openfileresa-2.99.1-x86_64-disc1.iso安装类似红帽的安装,只要1G内存,10G存储,其它默认就可以了;账号:openfiler/password创建卷组及卷;调整系统访问权限:打开iscsi服务:添加iscsi-target:(设置CHAP密码长度要复杂点,最好大于15位,要不验证不通过,大家其实都不配置这个CHAP)然后,重启一下ISCSI服务;LINUX客户端去连接OPENFILER:1,安装客户端工具:[root@rac1 yum.repos.d]# cd /media/CentOS/[root@rac1 CentOS]# cd Packages/[root@rac1 Packages]# rpm -ivh iscsi-initiator-utils-6.2.0.873-13.el6.x86_64.rpm warning: iscsi-initiator-utils-6.2.0.873-13.el6.x86_64.rpm: Header V3 RSA/SHA1 Signature, key ID c105b9de: NOKEYPreparing... ########################################### [100%] 1:iscsi-initiator-utils ########################################### [100%][root@rac1 Packages]#rm -rf /var/lib/iscsi/nodes/ rm -rf /var/lib/iscsi/send_targets/**2,编辑客户端配置(不配置CHAP,则不配置下面的内容)vim /etc/iscsi/iscsid.conf #将相关项前面的注释符#删除掉node.session.auth.authmethod = CHAP //开启CHAP认证1. To set a CHAP username and password for initiator# authentication by the target(s), uncommentthe following lines:ername = openfilernode.session.auth.password =123456789012345# To set a CHAP username and password for target(s)# authentication by the initiator, uncomment the following lines:ername_in =openfilernode.session.auth.password_in = 123456789012345#discovery#discovery.sendtargets.auth.authmethod = CHAP# To set a discovery session CHAP username and password for the initiator# authentication by the target(s), uncomment the followinglines:#ername = openfiler#discovery.sendtargets.auth.password = 123456789012345# To set a discovery session CHAP username and password for target(s)#authentication by the initiator, uncomment the followinglines:#ername_in =openfiler#discovery.sendtargets.auth.password_in = 123456789012345[root@rac1 Packages]# /etc/init.d/iscsid restart Stopping iscsid:[ OK ] iscsid: [ OK ]3,RAC1来发现ISCSI存储:[root@rac1 ~]# iscsiadm -m discovery -t st -p 10.10.10.25410.10.10.254:3260,1 iqn.2006-.openfiler:tsn.1030bbcbea9c[root@rac1 ~]# iscsiadm -m discovery -t sendtargets -p10.10.10.254 (上面的命令其实是简写)10.10.10.254:3260,1 iqn.2006-.openfiler:tsn.1030bbcbea9c[root@rac1 ~]# iscsiadm -m node -T .openfiler:tsn.1030bbcbea9c -p 10.10.10.254 -l Logging in to [iface: default, target: .openfiler:tsn.1030bbcbea9c, portal: 10.10.10.254,3260] (multiple)Login to [iface: default, target: iqn.2006-.openfiler:tsn.1030bbcbea9c, portal: 10.10.10.254,3260] successful.-l (登录)-u断开存储参考(设置开机自动映射[root@qionghai11g ~]# iscsiadm -m node -T .storbridge:block02-wt -p 192.16.10.188:3260 --op update -n node.startup -v automatic[root@qionghai11g ~]# iscsiadm -m node -T .storbridge:block01-wt -p 192.16.10.188:3260 --op update -n node.startup -v automatic这两个是开机自动映射)[root@rac1 ~]# fdisk -l ....................................................Disk /dev/sdb: 21.5 GB, 21474836480 bytes64 heads, 32 sectors/track, 20480 cylindersUnits = cylinders of 2048 * 512 = 1048576 bytesSector size (logical/physical): 512 bytes / 512 bytesI/O size (minimum/optimal): 512 bytes / 512 bytesDisk identifier: 0x00000000 Disk /dev/sdc: 183.3 GB, 183307862016 bytes255 heads, 63 sectors/track, 22285 cylindersUnits = cylinders of 16065 * 512 = 8225280 bytesSector size (logical/physical): 512 bytes / 512 bytesI/O size(minimum/optimal): 512 bytes / 512 bytesDisk identifier: 0x00000000接下来用fdisk /dev/sdb ; fdisk /dev/sdc 来分区,再格式化,结果如下(自建挂载目录/data /install-file):[root@rac1 /]#mkfs.ext4 /dev/sdb1[root@rac1 /]#mkfs.ext4 /dev/sdc1[root@rac1 /]# partprobe[root@rac2 /]# partprobe[root@rac2 /]# mount /dev/sdb1 /install-file/[root@rac2 /]# mount /dev/sdc1 /data4,设置自动挂载[root@rac1 /]# blkid /dev/sdb1 /dev/sdc1/dev/sdb1: UUID="c419526c-468a-443b-a244-0b8782ff8639" TYPE="ext4"/dev/sdc1: UUID="a54e2c7b-4754-4ba0-b35d-036ea22e742b"TYPE="ext4"[root@rac2 /]# blkid /dev/sdb1 /dev/sdc1/dev/sdb1: UUID="c419526c-468a-443b-a244-0b8782ff8639" TYPE="ext4"/dev/sdc1: UUID="a54e2c7b-4754-4ba0-b35d-036ea22e742b"TYPE="ext4"修改 /etc/fstab[root@rac1 /]# cat /etc/fstab## /etc/fstab# Created by anaconda on Wed Mar 2 16:56:31 2016## Accessible filesystems, by reference, are maintained under '/dev/disk'# See man pages fstab(5), findfs(8), mount(8) and/or blkid(8) for more info#/dev/mapper/vg_rac1-lv_root/ ext4 defaults 1 1UUID=68997162-bec2-44b1-b18c-ee67d1f51323/boot ext4 defaults 1 2/dev/mapper/vg_rac1-lv_home/home ext4 defaults 1 2/dev/mapper/vg_rac1-lv_swapswap swap defaults 00tmpfs /dev/shm tmpfs defaults 00devpts /dev/pts devpts gid=5,mode=620 00sysfs /sys sysfs defaults 00proc /proc proc defaults 0 0UUID=c419526c-468a-443b-a244-0b8782ff8639 /install-file ext4 _netdev 0 0UUID=a54e2c7b-4754-4ba0-b35d-036ea22e742b /data ext4 _netdev 0 05,用tune2fs修改文件系统的属性,去掉自动检查的属性:tune2fs -c -1 -i 0 /dev/sdb1tune2fs -c -1 -i 0 /dev/sdc1[root@rac1 ~]# tune2fs -c -1 -i 0 /dev/sdb1tune2fs 1.41.12 (17-May-2010)Setting maximal mount count to -1Setting interval between checks to 0 seconds[root@rac1 ~]# tune2fs -c -1 -i 0/dev/sdc1tune2fs 1.41.12 (17-May-2010)Setting maximal mount count to -1Setting interval between checks to 0 seconds6,确认iscsi服务随系统启动而启动[root@rac1 ~]# chkconfig --list |grepiscsi iscsi 0:off 1:off 2:off 3:on 4:on 5:on 6:offiscsid 0:off 1:off 2:off 3:on 4:on 5:on 6:off如果iscsid和iscsi没有随系统的启动而启动,则用chkconfig设置这两个服务在系统运行级别为3和5时随系统启动而启动chkconfig iscsi --level 35 onchkconfig iscsid --level 35 on7,用service iscsi status及service iscsid status查看iscsi相关服务的运行状态service iscsi status*********************** Attached SCSI devices:*********************** Host Number: 3 State: runningscsi3 Channel 00 Id 0 Lun: 0Attached scsi disk sdb State: runningscsi3 Channel 00 Id 0 Lun: 1Attached scsi disk sdc State: running8,Open-iSCSI是通过以下iSCSI数据库文件来实现永久配置的:Discovery (/var/lib/iscsi/send_targets):在/var/lib/iscsi/send_targets目录下包含iSCSI portals的配置信息,每个portal对应一个文件,文件名为"iSCSI portal IP,端口号"(例如"200.200.10.200,3260")。
ESXServer使用Openfiler搭建ISCSI网络存储
ESXServer使用Openfiler搭建ISCSI网络存储随缘目录第一章简单介绍 (2)1.1让ESX server发挥最大功效 (2)1.2 Openfiler简介 (2)1.3 配置过程简介 (2)第二章测试环境 (3)第三章 Openfiler 安装 (4)第四章 Openfiler 配置 (13)第五章在ESX Server上使用iSCSI磁盘 (20)第一章简单介绍1.1让ESX server发挥最大功效如果ESX Server没有共享存储做基础,就会失色不少,使用网络的共享存储之后,我们就可享用HA、DRS、VMotion等高级功能了。
如果条件有限,可以考虑采用软件实现共享存储功能,下面以 Openfiler为例,配置iSCSI网络磁盘,并链接到ESX Server上。
1.2 Openfiler简介Openfiler是一款建立通过WEB集中管理的iSCSI或NAS网络存储系统。
可以到/communitys/download/中下载合适的版本,更多内容参见/。
1.3 配置过程简介整个配置过程分为三大步骤:◆在虚拟机(或物理机)上安装Openfiler。
◆通过Web方式远程配置Openfiler。
◆配置ESX Server连接Openfiler存储设备。
第二章测试环境1. ESX Server 服务器信息安装在IBM 物理机上(详细硬件配置不在此列出)IP 地址:172.168.1.30用户名:root密码:PASSWD版本:ESX Server 3.5 U42. Openfiler 服务器信息安装在虚拟机上(详细硬件配置不在此列出)IP 地址:172.168.1.33用户名:root密码:passwd版本:Openfiler 2.33. 供网络存储使用地址:172.168.1.34第三章Openfiler 安装1.新建虚拟机,操作系统选择Linux,版本选择Red Hat Linux(其他根据自己需要定义),如下图:2.选择从iso镜像启动,从光驱引导后是典型的Linux安装界面,直接回车进入图形化安装界面。
- 1、下载文档前请自行甄别文档内容的完整性,平台不提供额外的编辑、内容补充、找答案等附加服务。
- 2、"仅部分预览"的文档,不可在线预览部分如存在完整性等问题,可反馈申请退款(可完整预览的文档不适用该条件!)。
- 3、如文档侵犯您的权益,请联系客服反馈,我们会尽快为您处理(人工客服工作时间:9:00-18:30)。
使用Openfiler为VMware ESX设置一个免费的iSCSI或NAS储存系统
所有在此文章中提到的工具都是免费的,你不需要在软件上花一分钱来设置本系统。
最终你能够建立一个集中管理的iSCSI或NAS存储系统用来存放所有ESX的客户文件、允许使用VMotion、HA和DRS服务。
VMware ESXi现在可以免费在这里下载/products/esxi/。
Openfiler NAS/iSCSI可以在这里免费下载/community/download/。
一切准备就绪,现在开始。
首先,我们使用Openfiler来设置一个iSCSI或NAS设备。
你可以从上面的链接来下载Openfiler,他的安装非常的简单(类似于VMware ESX)。
以下是具体的步骤:
OpenFiler的安装
开始安装
插入Openfiler盘到你的CD/DVD-ROM中并确认系统从CD/DVD-ROM启动。
回车继续。
启动
按回车开始图形化安装模式
安装
现在出现在你面前的是初始安装画面。
按Next继续。
键盘布局
选择适合你的键盘布局。
按Next继续。
磁盘分区
我们需要在这里做手动设置。
选择’Manual partition with Disk Druid’。
在系统上建立3个分区来完成Openfiler的安装:
“/boot” - 系统及核心文件所在的启动分区
“swap” - 用于内存到磁盘的交换分区
“/” - 系统的主分区,所以的系统文件和库都将被安装到这里
创建/boot分区
单击’New’,在出现的对话框中输入分区挂接路径”/boot”及在所选的磁盘上建立该分区(确定该磁盘是你想要安装Openfiler的,不是要给ESX服务器使用的)
创建boot分区所需填写的资料如下:
1. Mount Point: /boot
2. Filesystem Type: ext3
3. Allowable Drives: 就像之前说的,确定该硬盘是你想要安装Openfiler的。
4. Size(MB): 100
5. Additional Size Options: 选择‘Fixed Size’
6. Force to be a primary partition: 打勾(选择该选项把该分区创建为主分区)
创建/(root)主分区
单击’New’,在出现的对话框中输入分区挂接路径‘/’ 和大小:必须2048MB或最小1024MB.
创建交换分区
单击’New’,在出现的对话框中输入分区挂接路径’swap’。
大小:至少为1024MB或不超过2048MB。
单击’OK’来创建该分区。
现在所有为安装Openfiler操作系统的分区都已建好。
你所创建的磁盘分区表应该与下面类似。
网络配置
现在我们来配置你的网卡(IP地址等),系统hostname和DNS参数。
我们必须配置至少一个网卡用于访问Openfiler的网页界面和在网络上为ESX客户传送数据。
(在此阶段,你也可以选择DHCP来设置网络地址,然后简单的单击下一步进入到下一个安装画面)。
在’Network Devices’部分单击’Edit’,设置一个IP地址和主机名。
网卡设备被设置为ethX, X从数字0开始。
因此第一个网络设备是eth0。
当设置了IP地址后,你需要输入一个主机名hostname。
默认的主机名为localhost.localdomain,你需要输入一个更有代表意义的名称,如’’
时区选择
设置默认的系统时区。
设置root系统管理员密码
你必须设置一个root系统管理员密码。
开始正式安装
单击’Next’,等待安装完成。
现在我们完成了Openfiler的安装,下一步是设置给ESX提供一些磁盘空间。
登入到Openfiler的网页管理界面
打开浏览器,并输入https//openfiler的IP:446。
登入的用户名是openfiler, 密码是password
开启一些必须的服务
在默认情况下,Openfiler的iSCSI和NAS服务是被禁止的。
我们必须开启这些服务以便于接下来的设置。
单击’Services’选项,开启iSCSI target, NFSv3 和SMB/CIFS服务。
下一步我们需要创建一个用于ESX服务器磁盘分区
单击’Volumes’选项,然后单击’Block Devices’。
下一步,选择你安装了Openfiler的硬盘(应该有一些空余的空间)。
在屏幕的底部你可以看到’create a partition in /dev/磁盘名’。
在我的硬盘上有65GB的空余空间,所以我使用下面的属性建立了一个50GB的分区。
点击’Create’。
创建一个卷组(Volume Group)
我们需要建立一个卷组,然后把上一步建立的分区加到组里。
单击’Volumes’选项,创建一个卷组’ESX’并把之前建立的分区加到组里。
选择’Add volume group’。
在ESX卷组中创建一个iSCSI卷
单击’Volumes’页面选择’Add volumes’。
选择卷组ESX,然后建立一个新的总量。
设定你所希望的磁盘大小及iSCSI文件系统。
点击’Create’
建立一个iSCSI目标
再次单击’Volumes’页面选择’iSCSI Targets’。
该设置将会被描述为目标IQN,选择’Add’。
现在我们建立了一个默认的iSCSI目标,接下来需要映射在上一步建立的iSCSI LUN。
选择’Lun Mapping’,确认之前建立的LUN然后单击’map’。
在Network ACL页面,单击所提供的链接,它将会把ESX服务器加入到ACL列表中。
下一步添加ESX主机列表。
然后把主机加到LUN并确认设置为允许’Allow’。
好,我们现在可以移到VMware Virtual Infrastructure Client,在那里我们可以增加iSCSI卷并格式化成VMFS以便用于做虚拟机。
配置一个ESX服务器用于Openfiler iSCSI LUN
假设你现在已经安装了ESX 3.x并且设置了vmotion接口和开启了该功能。
配置ESX防火墙允许iSCSI软件访问。
登入到VI客户,选择你所以配置的ESX服务器,点击’configuration’页面。
选择’security profile’,’properties’。
确定选择iSCSI。
开启iSCSI软件
在同一个’configuration’页面,选择’storage adapters’, ‘iSCSI Software Adapter’, 然后’properties’。
在’general’页面,选择’configure’和’enable’该适配器。
在’Dynamic Discovert’页面,添加Openfiler服务器的地址(使用默认端口)。
查找新的iSCSI LUN
在同一个’configuration’页面,选择’storage adapters’,然后’Rescan’。
为VMFS分区和HBA同时选’options’。
当查找完成后,你应该可以在’storage’部分看到新的卷。
格式化iSCSI卷到VMFS
在同一个’configuration’页面,选择’add storage’。
选择‘Disk/Lun’并单击下一步。
你现在应该可以看到刚建立的iSCSI,以每块1mb大小格式化磁盘。
