Dell OptiPlex 780台式机
Dell OptiPlex 780-USFF AIO 支架用户指南说明书

______________________________________________________________________________________
͉˖档ʕٙࢹڦ䔼㯞时䕇更dࢶ不̤行ஷٝf © 2009 Dell Inc. ڭ留הϞ权利f ͊䕟 Dell Inc. 书ࠦ许̙d严ຫ˸ОҖόՓ͉˖档ʘ内࢙f ͉˖ʕԴٙ͜ਠ标jDell, DELL 标қ,ձ OptiPlex ே݊ Dell Inc.ٙਠ标f ͉˖ʕ͜ՑٙՉ̴ਠ标ձۜΤ称ѩ㵧ՉІ䘽ϞɛהϞfDell Inc. 对ɲІʉʘ̮ٙਠ标ձۜΤ称没ϞО专Ϟ利ूf
4/15
10 把手 11 主机线缆盖锁开关 12 主机标签载板 13 主机缆线盖 14 挂锁环 15 网络缆线插槽 16 墙壁电源线插槽 17 主机锁开关 18 Kensington 安全插槽
5/15
τ㠠 %FMM0QUJ1MFY64''"*0 ˕ݖ
2
组
AIO ˕ݖe䕡线㽕e主机外套eVGA / USB 䕚䕡
π ׳-40oF 至 149℉ (-40oC 至 +69oC)
䢮䜲
-40oF 至 149℉ (-40oC 至 +69oC)
䕚๕ʱ级 䜲ɝ 100-120 V~, 50/60 HZ, 3.5 A 220-240 V~, 50/60 HZ, 1.75 A 䜲̈ 显ͪኜ၌ɹ 100-120 V~, 50/60 HZ, 1.5 A 220-240 V~, 50/60 HZ, 0.75 A 计ၑ၌ɹ 100-120 V~, 50/60 HZ, 2.0 A 220-240 V~, 50/60 HZ, 1.0 A τΌ̌ঐ ,FOTJOHUPO 安全插槽 ̙Դ͜标ࡘ ,FOTJOHUPO ᑛۨ .JDSP4BWFS 挂锁环 ̙Դ͜轴ٜ径为 NN ٙ݀锁
产品管理-OptiPlex台式机产品系列介绍

Windows 8触控界面搭配使用 • 针对Microsoft Lync进行了优化 • 易于使用的原生USB 3.0端口,实现快速数据传输 • 通过HDMI/VGA端口支持第二台显示器/投影仪
Dell OptiPlex 9020一体机
Dell客户端 产品新成员
Dell OptiPlex
适用于IT部门和 员工的企业级台式 机
世界上最安全、最易于管理的商用 台式机,可为员工提供可靠的工作 效率。
Dell OptiPlex台式机
最易于管理
高度安全
出色的可靠性
• 配备英特尔®博锐™和戴尔 独有的管理扩展功能,是 最易于管理的台式机产品 组合
• 7010
MT、DT(卧式机)、 SFF和USFF
• 3010
MT、DT和SFF
• 3011 AIO
OptiPlex 产品组合
3010
及OptiPlex 3011一体机
7010
9020
及OptiPlex 9020一体机
XE2
凭借卓越的工作 效率和20个月
的稳定生命 周期,实现顶级
业务价值
功能丰富, 可提高性能、 安全性、能效, 并实现有效的
• OptiPlex台式机和戴尔服务 旨在帮助IT部门节省时间和 资金,能够带来可观的投 资回报
• 尖端的安全技术和解决 方案
• 最高级别的FIPS加密 (中国 不提供)
• 借助TPM和外围设备实现 强大的身份验证(中国不 提供)
• 针对专业化环境的单点登 录解决方案
• OptiPlex 9020是我们迄今 最强大的台式机
DELL电脑(760、780、630等Optiplex和VOSTRO系列塔式主机)报警详解
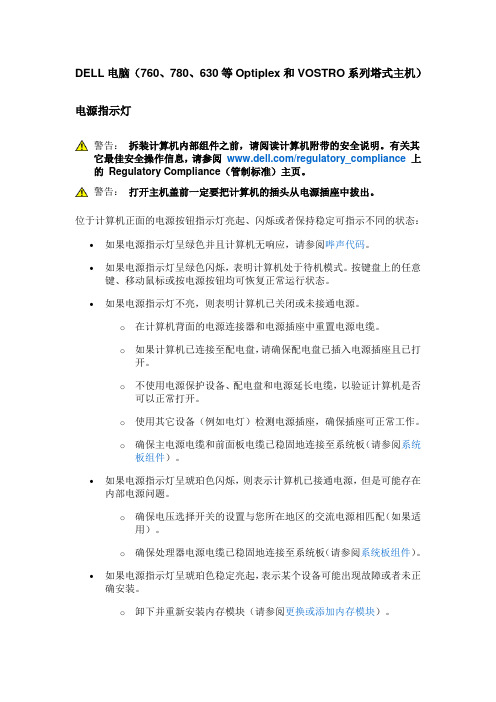
DELL电脑(760、780、630等Optiplex和VOSTRO系列塔式主机)电源指示灯警告:拆装计算机内部组件之前,请阅读计算机附带的安全说明。
有关其它最佳安全操作信息,请参阅/regulatory_compliance上的Regulatory Compliance(管制标准)主页。
警告:打开主机盖前一定要把计算机的插头从电源插座中拔出。
位于计算机正面的电源按钮指示灯亮起、闪烁或者保持稳定可指示不同的状态:∙如果电源指示灯呈绿色并且计算机无响应,请参阅哔声代码。
∙如果电源指示灯呈绿色闪烁,表明计算机处于待机模式。
按键盘上的任意键、移动鼠标或按电源按钮均可恢复正常运行状态。
∙如果电源指示灯不亮,则表明计算机已关闭或未接通电源。
o在计算机背面的电源连接器和电源插座中重置电源电缆。
o如果计算机已连接至配电盘,请确保配电盘已插入电源插座且已打开。
o不使用电源保护设备、配电盘和电源延长电缆,以验证计算机是否可以正常打开。
o使用其它设备(例如电灯)检测电源插座,确保插座可正常工作。
o确保主电源电缆和前面板电缆已稳固地连接至系统板(请参阅系统板组件)。
∙如果电源指示灯呈琥珀色闪烁,则表示计算机已接通电源,但是可能存在内部电源问题。
o确保电压选择开关的设置与您所在地区的交流电源相匹配(如果适用)。
o确保处理器电源电缆已稳固地连接至系统板(请参阅系统板组件)。
∙如果电源指示灯呈琥珀色稳定亮起,表示某个设备可能出现故障或者未正确安装。
o卸下并重新安装内存模块(请参阅更换或添加内存模块)。
o卸下并重新安装所有插卡(请参阅插卡)。
消除干扰。
某些可能的干扰因素包括:o电源延长电缆、键盘延长电缆和鼠标延长电缆o配电盘上设备过多o多个配电盘连接至同一个电源插座哔声代码如果显示器不能显示错误或问题,计算机在启动过程中可能发出一连串哔声。
这一系列哔声(称为哔声代码)可标识问题。
例如哔声代码1-3-1(一种可能的哔声代码)由一声哔声、三声急促的哔声和一个哔声组成。
在Dell Optiplex 980780380MTDTSUFF台式电脑安装Win2000Win2003的驱动下载
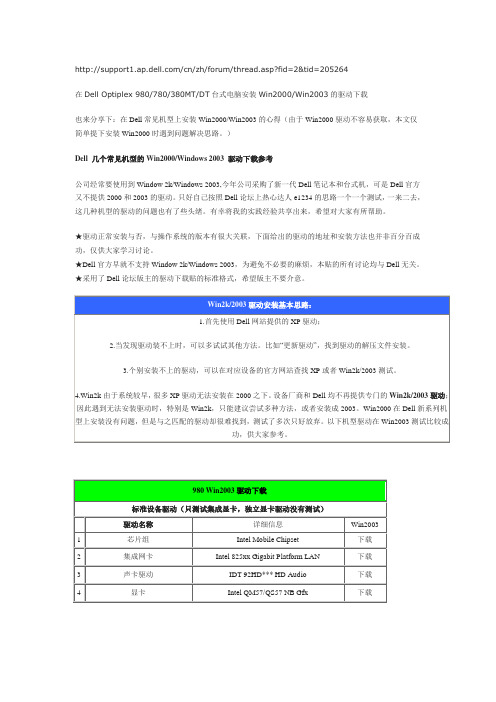
/cn/zh/forum/thread.asp?fid=2&tid=205264在Dell Optiplex 980/780/380MT/DT台式电脑安装Win2000/Win2003的驱动下载也来分享下:在Dell常见机型上安装Win2000/Win2003的心得(由于Win2000驱动不容易获取,本文仅简单提下安装Win2000时遇到问题解决思路。
)Dell 几个常见机型的Win2000/Windows 2003 驱动下载参考公司经常要使用到Window 2k/Windows 2003,今年公司采购了新一代Dell笔记本和台式机,可是Dell官方又不提供2000和2003的驱动。
只好自己按照Dell论坛上热心达人e1234的思路一个一个测试,一来二去,这几种机型的驱动的问题也有了些头绪。
有幸将我的实践经验共享出来,希望对大家有所帮助。
★驱动正常安装与否,与操作系统的版本有很大关联,下面给出的驱动的地址和安装方法也并非百分百成功,仅供大家学习讨论。
★Dell官方早就不支持Window 2k/Windows 2003,为避免不必要的麻烦,本贴的所有讨论均与Dell无关。
★采用了Dell论坛版主的驱动下载贴的标准格式,希望版主不要介意。
安装系统,可能遇到的问题:1.安装Win2000 或Win 2003,系统出现蓝屏。
一般Win2000 或Win 2003系统光盘,都不带SATA驱动,因此,我们需要把默认的SATA Operation选项改为ATA模式。
2.我在E5410/E5510上安装双系统,Win2000和Win7 系统,系统提示没有格式化的硬盘。
如果是先安装Win7系统,再通过Win7下压缩分区,有可能导致Win2000不识别Win7的压缩分区,才会导致该问题。
即使通过Win2000光盘引导,删除所有分区,再安装也将出现相同提示信息,无法安装。
鉴于该问题,请不要安装Win2000;或者使用Dell随机带的驱动光盘(目前新机器不再提供该光盘了)引导到Dos状态,对硬盘进行Debug 操作。
戴尔商用台式电脑780开机故障处理一例

戴尔商用台式电脑780开机故障处理一例
单位上有一台戴尔商用台式机,型号OPTIPLEX 780,2009年12月出厂。
最近该机无法开机,具体现象是,按下电源开关按钮,电源灯闪一下,DEBUG灯3号闪一下,电源风扇无动作,主板上的电源指示灯亮。
经过检测,主板上未发现明显烧坏的痕迹,主机电源后面有一个黑色小按钮,按下去之后,电源风扇转动,再按下电源开关按钮,可以正常开机。
疑似电源故障。
拆下电源,打开后,发现内部多处电容爆浆。
更换同型号电容后,装上电源,开机恢复正常。
戴尔OptiPlex 780 DT

耳机输出接口,麦克风输入接口
视频接口
VGA
网络接口
RJ45(网络接口)
其它参数
电源
纠错100V-240V 90W自适应交流电源供应器
键盘
戴尔USB输入键盘
鼠标
戴尔USB光电鼠标
扩展插槽
纠错1×PCIe x16插槽
1×PCIe x1插槽
2×PCI插槽
机箱类型
纠错立式
戴尔OptiPlex 780 DT(T329780DTCN)
产品类型
商用电脑
操作系统
无
处理器
CPU系列
纠错英特尔酷睿2双核
CPU型号
Intel酷睿2双核E7500
CPU频率
纠错2930MHz
总线
纠错1066MHz
二级缓存
纠错3MB
核心数
纠错双核
制程工艺
45纳米
存储设备
内存容量
纠错2.000
内存类型
纠错DDR3 1333MHz
硬盘容量
纠错320GB
硬盘描述
纠错SATA
光驱类型
纠错DVD-ROM
光驱描述
纠错16倍速DVD光驱
显卡
显卡类型
集成显卡
显卡芯片
Intel GMA X4500 HD
显存容量
共享内存容量
音频
声卡描述
集成声卡
音箱描述
立体声音箱
网络通信
网卡描述
1000Mbps以太网卡
接口USΒιβλιοθήκη 接口8×USB2.0,1×eSATA
Dell OptiPlex 780 成功开启slic2.1 安装win7

Dell OptiPlex 780 成功开启slic2.1 安装win7-U版
Dell OptiPlex 780 成功开启slic2.1 安装win7-U版
之前查看了论坛上的帖子,还需要相关工具ASSET才能开启slic2.1,现在不需要相关工具即可直接开启slic2.1,具体步骤如下:(操作前请断网)
1、开机按F2进入dell的bios设置程序,选择《Maintenance》项目;
2、进入后选择《Asset Tag》项目,在右侧空白中填入命令《PASS:12/31》(注
意不带《》号,且要大写);
3、之后选《Maintenance》项目,出现提示选择《yes》,再选择apply应用,
保存bios后退出重启;
4、重启后不要按任何键,出现《Alt-F》的提示后,按键盘上的《Alt+F》键后
重启计算机;
5、重启后按F2进入dell的bios设置程序读bios的《标准设置》,并选择《Drives》项目里的《SATA Operation》项目中的第二项《……ATA》,保存后
重启;
6、进入系统后选择查看slic2.1的相关工具即可发现已经成功开启slic2.1;
上图如下:
1 分钟前
其他dell的2009年年底到现在的机器可以参照使用,不过修改有风险,责任自负!!!
重要提示:bios版本是A03,oem table id 是B10K!!!。
Dell Optiplex主流台式机驱动安装指南
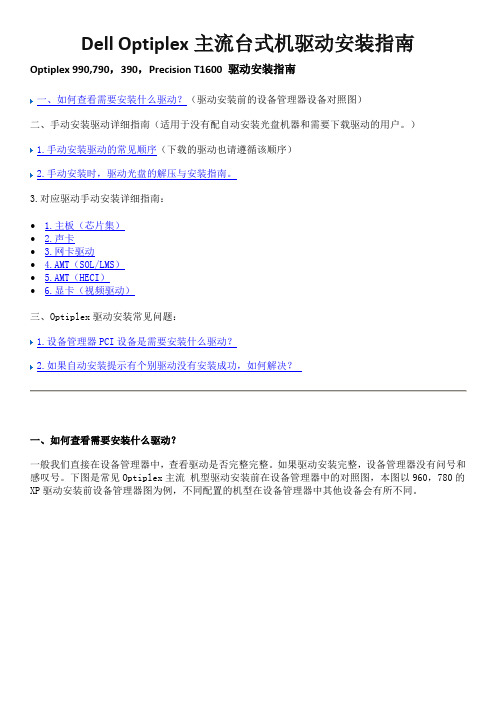
Dell Optiplex主流台式机驱动安装指南Optiplex 990,790,390,Precision T1600 驱动安装指南一、如何查看需要安装什么驱动?(驱动安装前的设备管理器设备对照图)二、手动安装驱动详细指南(适用于没有配自动安装光盘机器和需要下载驱动的用户。
)1.手动安装驱动的常见顺序(下载的驱动也请遵循该顺序)2.手动安装时,驱动光盘的解压与安装指南。
3.对应驱动手动安装详细指南:∙1.主板(芯片集)∙2.声卡∙3.网卡驱动∙4.AMT(SOL/LMS)∙5.AMT(HECI)∙6.显卡(视频驱动)三、Optiplex驱动安装常见问题:1.设备管理器PCI设备是需要安装什么驱动?2.如果自动安装提示有个别驱动没有安装成功,如何解决?一、如何查看需要安装什么驱动?一般我们直接在设备管理器中,查看驱动是否完整完整。
如果驱动安装完整,设备管理器没有问号和感叹号。
下图是常见Optiplex主流机型驱动安装前在设备管理器中的对照图,本图以960,780的XP驱动安装前设备管理器图为例,不同配置的机型在设备管理器中其他设备会有所不同。
下表是:XP系统下设备管理器未知设备与对应的需安装的驱动:在Windows7的系统下,很多驱动都是自带,无需特别安装,初装好的Windows7,780和960等机器在设备管理器中仅需安装AMT的两个驱动。
在所有驱动安装完成后,我们右击”我的电脑“,“管理”,点击”设备管理器“,如果这里没有问号或感叹号,表示驱动已经安装成功。
返回二、手动安装驱动详细指南(适用于没有配自动安装光盘机器和需要下载驱动的用户。
)1.手动安装驱动的常见顺序(下载的驱动也请遵循该顺序):使用手动安装驱动时,请严格按照以下数字顺序安装驱动。
(图片以960,780驱动光盘为例)。
1.芯片集驱动(Intel Mobile Chipset)主题默认是“我的系统”,语言为”中文“,我们找到”芯片集驱动程序“,Intel Mobile Chipset。
Dell电脑出现PrivacyIconClient.exe – 应用程序错误解决方法

欢迎批评指正 Email :zhuliangping@ 或 zdhzlp@
浙大中控 祝亮平 第 1 页 共 1 页 技术总结2010-3-26
PrivacyIconClient.exe – 应用程序错误解决办法
Dell 电脑由于内在的硬件配置上的原因,经常会出现下面描述的问题情况,这在江西项目上Dell 型号为Optiplex 780的台式电脑出现过。
PrivacyIconClient.exe –
应用程序错误,应用程序正常初始化(0xc0000135)失败。
请单击“确定”,终止应用程序,如下图1所示。
图1
对于这个问题,其实安装.net framework 2.0,如果不行,就安装其3.5版本。
对于这个问题,下面提供一个微软的链接,关于您提到的错误信息,您可以尝试安装以下组件解决:
/downloads/details.aspx?familyid=39C8B63B-F64B-4B68-A774-B64ED0C32AE7&displaylang=zh-cn
当然也可以自行下载net framework 。
其实,如果上位机安装的IFIX 的话,这个问题也可以自行解决,因为IFIX 安装自带该文件。
在此,提供Optiplex 780 型号电脑的驱动下载地址:
/cn/zh/forum/Thread.asp?fid=16&tid=259721
同时,提供一个经验,如果遇到驱动在官方网站上不能下载到的话或者遇到一些莫名其妙的问题,可以在线咨询Dell 的技术工程师。
相信很快就能够解决。
以上希望能对大家有些帮助。
optiplex 790机箱图解
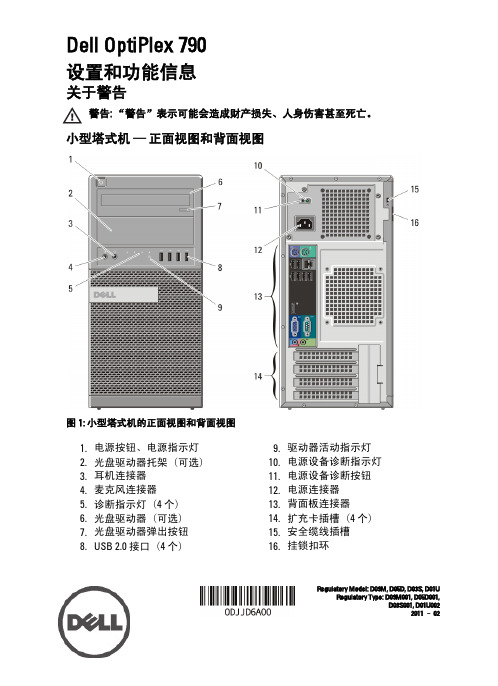
台式机 — 正面视图和背面视图
图 2: 台式机的正面视图和背面视图
1. 光盘驱动器 2. 光盘驱动器弹出按钮 3. 电源按钮、电源指示灯 4. USB 2.0 接口(4 个) 5. 麦克风连接器 6. 耳机连接器 7. 驱动器活动指示灯 8. 诊断指示灯(4 个)
9. 挂锁扣环 10. 安全缆线插槽 11. 电源连接器 12. 背面板连接器 13. 扩充卡插槽(4 个) 14. 电源设备诊断指示灯 15. 电源设备诊断按钮
图 9: VGA 至 DVI 适配器
图 10: DVI 至 DisplayPort 适配器
图 11: VGA 至 DisplayPort 适配器 6
2. 连接 USB 键盘或鼠标(可选)。
图 12: USB 连接
3. 连接网络电缆(可选)。
图 13: 网络连接
4. 连接调制解调器(可选)。
图 14: 调制解调器连接
• Intel Core i5,i7 Quad Core • Intel Core i3 Dual Core • Intel Pentium Dual Core • Intel Celeron Dual Core
视频 类型:
集成
独立 集成视频内存
• Intel HD Graphics • Intel HD Graphics 2000
Information in this publication is subject to change without notice. © 2011 Dell Inc. All rights reserved. Reproduction of these materials in any manner whatsoever without the written permission of Dell Inc. is strictly forbidden.
戴尔 OptiPlex XE 服务手册 — 台式机说明书

Dell™ OptiPlex™ XE 服务手册 — 台式机注、警告和严重警告如果您购买的是 Dell™ n 系列计算机,则本说明文件中有关 Microsoft ® Windows ® 操作系统的任何参考信息均不适用。
本说明文件中的信息如有更改,恕不另行通知。
© 2010 Dell Inc. 版权所有,翻印必究。
未经 Dell Inc. 书面许可,严禁以任何形式复制本材料。
本文中使用的商标:D e l l 、D E L L 徽标和 OptiPlex 是 Dell Inc. 的商标;I n t e l 、Pentium 、Celeron 和 C o r e 是 Intel Corporation 的商标或注册商标;Bluetooth 是 Bluetooth SIG, Inc. 拥有的注册商标,并许可 Dell 使用;TouchStrip 是 Zvetco Biometrics, LLC 的商标;B l u-ray Disc 是 Blu-ray Disc Association 的商标;Microsoft 、Windows 、Windows Server 、Windows Vista 和 Windows Vista 开始按钮是 Microsoft Corporation 在美国和/或其他国家和地区的商标或注册商标;A d o b e 、Adobe 徽标和 Adobe Flash Player 是 Adobe Systems Incorporated 的商标;W i-F i 是 Wireless Ethernet Compatibility Alliance, Inc. 的注册商标。
本说明文件中述及的其他商标和商品名称是指拥有相应标记和名称的公司或其制造的产品。
Dell Inc. 对其他公司的商标和商品名称不拥有任何所有权。
2010 年 3 月 Rev. A00拆装计算机卸下和装回部件规格诊断程序系统设置程序系统板布局注:“注”表示可帮助您更好地使用计算机的重要信息。
Dell OptiPlex 780 服务手册说明书
,系统信息芯片组Intel® Q45 Express 芯片组(带ICH10DO)DMA 通道八个中断级别24BIOS 芯片 (NVRAM)64 Mb扩充总线总线类型PCI 2.3PCI Express 2.0SATA 1.0A 和 2.0eSATAUSB 2.0总线速率PCI: 133 MB/sPCI Express:x1 插槽双向速率 — 250 MB/sx16 插槽双向速率 — 8 GB/sSATA: 1.5 Gbps 和 3.0 GbpseSATA: 3.0 GbpsUSB: 480 Mbps插卡PCI小型塔式计算机台式计算机超小型计算机最多两个全高插卡无提升卡 — 最多两个小型插卡带有提升卡 — 最多两个全高插卡一个小型插卡PCI Express x1小型塔式计算机台式计算机超小型计算机一个全高插卡无无PCI Express x16小型塔式计算机台式计算机超小型计算机一个全高插卡无提升卡 — 一个小型插卡带有提升卡 — 一个全高插卡一个小型插卡注:当显示器连接至集成视频连接器时,PCI Express x16 插槽被禁用。
驱动器外部可抽换5.25 英寸驱动器托架小型塔式计算机对于 SATA DVD-ROM、DVD+/–RW 或 CD +/–RW 驱动器台式计算机超小型计算机两个托架一个托架一个纤薄型托架3.5 英寸驱动器托架小型塔式计算机台式计算机超小型计算机对于19 合 1 多媒体读卡器一个托架一个托架一个纤薄型托架内部可抽换3.5 英寸驱动器托架小型塔式计算机台式计算机超小型计算机对于硬盘驱动器两个托架一个托架一个托架注:您的计算机最多支持两个 2.5 英寸带支架的硬盘驱动器。
外部连接器音频背面板两个用于输入、连接麦克风和输出的连接器前面板两个用于连接耳机和麦克风的前面板连接器eSATA一个 7 针连接器网络一个 RJ45 连接器并行一个 25 针连接器(双向)串行一个 9 针连接器;兼容 16550CUSB前面板两个连接器背面板六个连接器视频一个 15 孔连接器一个 20 针 DisplayPort 连接器系统板连接器PCI 2.3小型塔式计算机台式计算机超小型计算数据宽度(最大)— 32 位两个 120 针连接器两个 120 针连接器一个 120 针连接器PCI Express x1小型塔式计算机台式计算机超小型计算机数据宽度(最大)— 一个 PCI Express 通道一个 36 针连接器不适用不适用PCI Express x16一个 164 针连接器数据宽度(最大)— 16 个 PCI Express 信道串行 ATA小型塔式计算机台式计算机超小型计算机四个 7 针连接器三个 7 针连接器三个 7 针连接器内存四个 240 针连接器内部 USB 设备一个 10 针连接器(支持两个 USB 端口)处理器风扇一个 5 针连接器硬盘驱动器风扇一个 5 针连接器前面板控件一个 40 针连接器处理器一个 775 针连接器电源 12V一个 4 针连接器电源一个 24 针连接器控制按钮和指示灯计算机正面电源按钮按钮电源指示灯呈绿色闪烁 — 表示计算机处于睡眠状态呈绿色稳定亮起 — 表示计算机处于开机状态呈琥珀色闪烁 — 表示系统板出现问题。
戴尔OptiPlex一体机底座安装指南说明书

Dell OptiPlex All-in-One Stand Installation GuideNotes, cautions, and warningsNOTE: A NOTE indicates important information that helps you make better use of your product.CAUTION: A CAUTION indicates either potential damage to hardware or loss of data and tells you how to avoid the problem.WARNING: A WARNING indicates a potential for property damage, personal injury, or death.© 2018 Dell Inc. or its subsidiaries. All rights reserved. Dell, EMC, and other trademarks are trademarks of Dell Inc. or its subsidiaries. Other trademarks may be trademarks of their respective owners.2018 - 11Rev. A001 Before you begin (4)Safety instructions (4)Before working inside your computer (4)Safety precautions (5)After working inside your computer (5)2 Basic stand for Dell OptiPlex 5260 and 7460 All-in-One (6)Installing the basic stand (6)Removing the basic stand (7)Basic stand tilt (8)3 Height adjustable stand for Dell OptiPlex 5260, 7460, and 7760 All-in-One (9)Installing the height adjustable stand (9)Removing the height adjustable stand (10)Height adjustable stand transform (12)4 Height adjustable stand with optical disk drive for Dell OptiPlex 5260 and 7460 All-in-One (13)Installing the height adjustable stand with optical disk drive (13)Removing height adjustable stand with optical disk drive (14)Height adjustable stand with optical drive transform (16)5 Articulating stand for Dell OptiPlex 5260,7460, and 7760 All-in-One (17)Installing the articulating stand (17)Removing the Articulating Stand (17)Articulating stand tilt transform (18)6 Getting help (19)Contacting Dell (19)Contents3Before you begin Safety instructionsUse the following safety guidelines to protect your computer from potential damage and to ensure your personal safety. Unless otherwise noted, each procedure included in this document assumes that the following conditions exist:•You have read the safety information that shipped with your computer.•A component can be replaced or, if purchased separately, installed by performing the removal procedure in reverse order. WARNING: Disconnect all power sources before opening the computer cover or panels. After you finish working inside thecomputer, replace all covers, panels, and screws before connecting to the power source.WARNING: Before working inside your computer, read the safety information that shipped with your computer. For additional safety best practices information, see the Regulatory Compliance HomepageCAUTION: Many repairs may only be done by a certified service technician. You should only perform troubleshooting and simple repairs as authorized in your product documentation, or as directed by the online or telephone service and support team.Damage due to servicing that is not authorized by Dell is not covered by your warranty. Read and follow the safety instructions that came with the product.CAUTION: T o avoid electrostatic discharge, ground yourself by using a wrist grounding strap or by periodically touching an unpainted metal surface at the same time as touching a connector on the back of the computer.CAUTION: Handle components and cards with care. Do not touch the components or contacts on a card. Hold a card by its edges or by its metal mounting bracket. Hold a component such as a processor by its edges, not by its pins.CAUTION: When you disconnect a cable, pull on its connector or on its pull-tab, not on the cable itself. Some cables have connectors with locking tabs; if you are disconnecting this type of cable, press in on the locking tabs before you disconnect the cable. As you pull connectors apart, keep them evenly aligned to avoid bending any connector pins. Also, before you connect acable, ensure that both connectors are correctly oriented and aligned.NOTE: The color of your computer and certain components may appear differently than shown in this document.Before working inside your computerT o avoid damaging your computer, perform the following steps before you begin working inside the computer.1 Ensure that you follow the Safety Instruction.2 Ensure that your work surface is flat and clean to prevent the computer cover from being scratched.3 Turn off your computer.4 Disconnect all network cables from the computer.CAUTION: To disconnect a network cable, first unplug the cable from your computer and then unplug the cable from thenetwork device.5 Disconnect your computer and all attached devices from their electrical outlets.6 Press and hold the power button while the computer is unplugged to ground the system board.NOTE: To avoid electrostatic discharge, ground yourself by using a wrist grounding strap or by periodically touching anunpainted metal surface at the same time as touching a connector on the back of the computer.1 4Before you beginSafety precautionsThe safety precautions chapter details the primary steps to be taken before performing any disassembly instructions.Observe the following safety precautions before you perform any installation or break/fix procedures involving disassembly or reassembly:•Turn off the system and all attached peripherals.•Disconnect the system and all attached peripherals from AC power.•Disconnect all network cables, telephone, and telecommunications lines from the system.•Use an ESD field service kit when working inside any desktop to avoid electrostatic discharge (ESD) damage.•After removing any system component, carefully place the removed component on an anti-static mat.•Wear shoes with non-conductive rubber soles to reduce the chance of getting electrocuted.Standby powerDell products with standby power must be unplugged before you open the case. Systems that incorporate standby power are essentially powered while turned off. The internal power enables the system to be remotely turned on (wake on LAN) and suspended into a sleep mode and has other advanced power management features.Unplugging, pressing and holding the power button for 15 seconds should discharge residual power in the system board. .After working inside your computerAfter you complete any replacement procedure, ensure that you connect any external devices, cards, and cables before turning on your computer.1 Connect any telephone or network cables to your computer.CAUTION: To connect a network cable, first plug the cable into the network device and then plug it into thecomputer.2 Connect your computer and all attached devices to their electrical outlets.3 Turn on your computer.4 If required, verify that the computer works correctly by running ePSA diagnostics.Before you begin5Basic stand for Dell OptiPlex 5260 and 7460 All-in-OneTopics:•Installing the basic stand •Removing the basic stand •Basic stand tiltInstalling the basic stand1Follow the procedure in Before working inside your computer .2Insert the stand base into the slot on the basic stand.3 Tighten the captive screw to secure the stand base to the basic stand.26Basic stand for Dell OptiPlex 5260 and 7460 All-in-One4 To install the basic stand onto the computer:a Align the tabs on the basic stand with the slots on the back cover [1].b Snap the basic stand into place on the back cover [2].5 Follow the procedure in After working inside your computer.Removing the basic stand1 Follow the procedure in Before working inside your computer.2 T o avoid damaging the display, place the system on a flat, soft, and clean surface.3 T o remove the basic stand:a Slide the release tab forward to release the basic stand from the back cover [1].b Hold the tab in the release position and lift the basic stand upward [2].Basic stand for Dell OptiPlex 5260 and 7460 All-in-One7c Slide and lift the basic stand off the back cover [3].4 Follow the procedure in After working inside your computer. Basic stand tilt8Basic stand for Dell OptiPlex 5260 and 7460 All-in-OneHeight adjustable stand for Dell OptiPlex 5260,7460, and 7760 All-in-OneTopics:•Installing the height adjustable stand•Removing the height adjustable stand•Height adjustable stand transformInstalling the height adjustable stand1 Follow the procedure in Before working inside your computer .2Insert the stand base into the slot on the height adjustable stand.3 Tighten the captive screw to secure the stand base to the height adjustable stand.3Height adjustable stand for Dell OptiPlex 5260, 7460, and 7760 All-in-One 94 To install the height adjustable stand onto the computer:a Align the tabs on the height adjustable stand with the slots on the back cover [1].b Snap the height adjustable stand into place on the back cover [2].5 Follow the procedure in After working inside your computer.Removing the height adjustable stand1 Follow the procedure in Before working inside your computer.2 T o avoid damaging the display, place the system on a flat, soft, and clean surface.3 T o remove the height adjustable stand:a Slide the release tab forward to release the height adjustable stand from the back cover [1].10Height adjustable stand for Dell OptiPlex 5260, 7460, and 7760 All-in-Oneb Hold the tab in the release position and lift the height adjustable stand upward [2].c Slide and lift the height adjustable stand off the back cover [3].4 Follow the procedure in After working inside your computer.Height adjustable stand for Dell OptiPlex 5260, 7460, and 7760 All-in-One11Height adjustable stand transform12Height adjustable stand for Dell OptiPlex 5260, 7460, and 7760 All-in-OneHeight adjustable stand with optical disk drive forDell OptiPlex 5260 and 7460 All-in-OneTopics:•Installing the height adjustable stand with optical disk drive •Removing height adjustable stand with optical disk drive •Height adjustable stand with optical drive transformInstalling the height adjustable stand with optical disk drive1Follow the procedure in Before working inside your computer .2 T o install the height adjustable stand:aAlign the tabs on the height adjustable stand with the slots on the back cover [1].bSnap the height adjustable stand into place on the back cover [2].3 Connect the optical drive cable to the USB slot on the back cover.4Height adjustable stand with optical disk drive for Dell OptiPlex 5260 and 7460 All-in-One 134 Follow the procedure in After working inside your computer.Removing height adjustable stand with optical disk drive1 Follow the procedure in Before working inside your computer.2 To avoid damaging the display, place the system on a flat, soft, and clean surface.3 Disconnect the optical drive cable from the USB slot on the back cover.14Height adjustable stand with optical disk drive for Dell OptiPlex 5260 and 7460 All-in-One4 To remove the height adjustable stand:a Slide the release tab forward to release the height adjustable stand from the back cover [1].b Hold the tab in the release position and lift the height adjustable stand upward [2].c Slide and lift the height adjustable stand off the back cover [3].Height adjustable stand with optical disk drive for Dell OptiPlex 5260 and 7460 All-in-One15Height adjustable stand with optical drive transform16Height adjustable stand with optical disk drive for Dell OptiPlex 5260 and 7460 All-in-OneArticulating stand for Dell OptiPlex 5260,7460,and 7760 All-in-OneTopics:•Installing the articulating stand•Removing the Articulating Stand•Articulating stand tilt transformInstalling the articulating stand1 Follow the procedure in Before working inside your computer .2 T o install the articulating stand:a Align the tabs on the articulating stand with the slots on the back cover [1].bSnap the articulating stand into place on the back cover [2].3 Follow the procedure in After working inside your computer .Removing the Articulating Stand1 Follow the procedure in Before working inside your computer .2 T o avoid damaging the display, place the system on a flat, soft, and clean surface.5Articulating stand for Dell OptiPlex 5260,7460, and 7760 All-in-One 173 To remove the articulating stand:a Slide the release tab forward to release the articulating stand from the back cover [1].b Hold the tab in the release position and lift the articulating stand upward [2].c Slide and lift the articulating stand off the back cover [3].4 Follow the procedure in After working inside your computer. Articulating stand tilt transform18Articulating stand for Dell OptiPlex 5260,7460, and 7760 All-in-OneGetting helpContacting DellNOTE: If you do not have an active Internet connection, you can find contact information on your purchase invoice, packing slip, bill, or Dell product catalog.Dell provides several online and telephone-based support and service options. Availability varies by country and product, and some services may not be available in your area. T o contact Dell for sales, technical support, or customer service issues:1Go to /support.2Select your support category.3Verify your country or region in the Choose a Country/Region drop-down list at the bottom of the page.4 Select the appropriate service or support link based on your need.6Getting help 19。
DELL optiplex 780 bios英文翻译
DELL optiplex 780 bios中的英文翻译1、Settings:设置(子目录)System Board:系统板(主板)Date/Time:日期/时间(设置系统日期和时间的地方)BOOT Sequence:启动顺序(设置启动的驱动器顺序,在调整系统启动顺序时用)2、Drives:硬盘(子目录)Diskette Drive:磁盘驱动器(应该是查看系统现有硬盘信息的)SATA Operatron:SATA操作(Operating?)SMART Reporting:SMART 报告(S.M.A.R.T.是一项硬盘自我检测及分析的技术,可对硬盘的各重要部分,如磁头、磁片和马达等进行监控,以了解硬盘体质的真实情况。
)Drives:驱动器3、System Configuration:系统配置(子目录)integrated NIC:集成的NIC (网卡)USB Controller:USB控制器Parallel Port:并行端口Parallel Port Address:并行端口地址Serial Port:串行端口Miscellaneous Devices:其他设备4、Video:视频(子目录)Primary Video:基本的视频5、Perfomance优化子目录Multi Core Support:多核心支持intel@ SpeedStep:英特尔增强型SpeedStep 技术利用两种动态转换性能模式提供了台式机级性能和所有移动性优势。
当您连接交流电源时,最高性能模式可提供台式机级的性能;而电池优化模式可提供出色电池使用时间。
C States Control:Limit CPUID Value:限制CPUID的值HDD Acoustic Mode:硬盘声音模式6、Virtualization Support虚拟化支持子目录VirtualizationVT for Direct I/O7、Security:安全(子目录)Administrator password:管理员密码System password:系统密码Password Changes:修改密码CPU XD Support:CPU XD支持性SATA-O password:SATA-O密码8、Power Management电源管理子目录AC Recovery:交流电恢复Auto On Time:自动开机时间Low Power Mode:低功耗模式Remote Wake Up:远程唤醒Fan Control Override:风扇控制改写9、Maintenance维护子目录Service Tag:服务标签Asset Tag:资产标签SERR Messages:SERR讯息10、ImageServer图像服务器子目录LOOKup Method:ImageServer IP:ImageServer Port:Client DHCP:客户端的DHCPClient IP:客户端的IPClient SubnetMask:客户端子网掩码Client Gateway:客户端网关License Status:授权状态11、Post Behavior发布行为子目录Fast Boot:快速启动Numlock LED:NUMLOCK指示灯POST:发表12、System Logs系统日志子目录bios evenls:BIOS事件其他未译的内容基本上用得很少。
dell 拆机图解
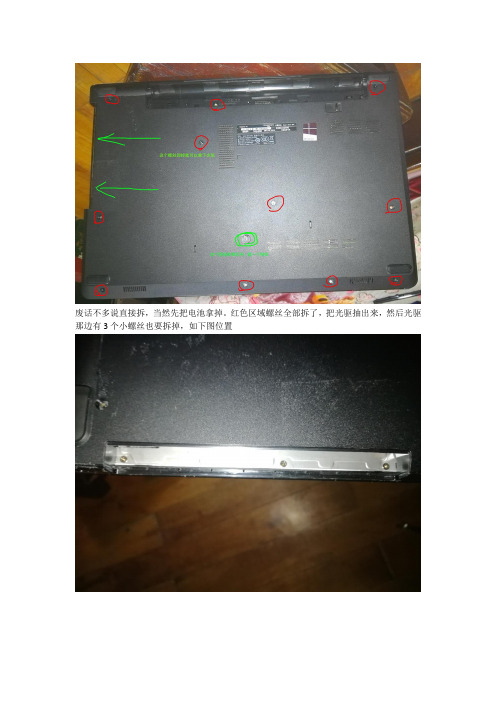
废话不多说直接拆,当然先把电池拿掉。
红色区域螺丝全部拆了,把光驱抽出来,然后光驱那边有3个小螺丝也要拆掉,如下图位置
后面螺丝全拆了,光驱也拆了,然后就是键盘了,根据图上提示拆拆拆翻开键盘看下图,拔掉排线,卸掉螺丝
拿掉键盘就这样子了,接下来从背面把底部的盖子沿边上一圈撬开,注意温柔点,当心有螺丝没拆,硬搞会坏的!!!!!
三下五除二,盖子打开了。
看看里面布局吧,往下就不多说了,大家应该都会了吧
改光驱位硬盘后电池装不上,把电池上一个卡位的脚锯了吧!!或者另想办法
内存12G 开机13秒就这样吧。
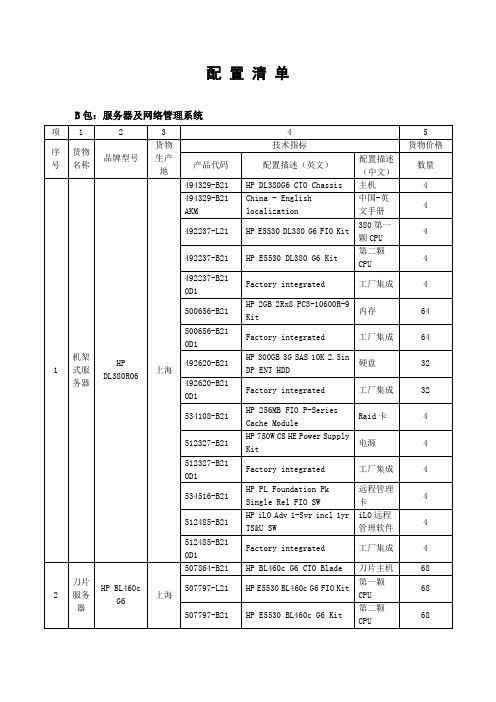
配置清单
4
数码相机
索尼a550
中国
机身类型:单反数码相机;有效像素:1420万;最高分辨率:4274*2848;显示屏尺寸:3英寸,92万象素TFT液晶显示屏,标配镜头
2
5
便携式彩色喷墨打印机
佳能IP100
中国
最高分辨率:4800*1200dpi;黑白打印速度:16ppm;彩色打印速度:12ppm;最大打印幅面:A4
5
412140-B21
HP BLc-class机箱一个风扇模块
30
499243-B21
HP 2400W高效电源(带2m IEC C20-C19电源线)
20
252663-B33
HP 32A Core Only Corded PDU(输入IEC 309,输出4*IEC 320 C19)
10
438030-B21
1
8
黑白激光打印机
佳能LASER SHOTLBP3250
中国
黑白打印速度:23ppm;缓存:8MB;打印最大副面:A4;最大分辨率:2400×600dpi;
1
9
投影设备
日立投影仪6680X
中国
★投影仪:3500流明(ISO21118标准);对比度750:1;标准分辨率:1024*768,120英寸遥控电动幕,吊装支架(含吊装安装)
显卡:256MB独立显卡;
网卡:10/100/1000M自适应网卡;
显示器:22LCD宽屏;服务:三年完全免费的原厂商售后服务(包括原厂商免费电话支持、所有部件的原厂商备件、第二工作日原厂商售后服务工程师上门)
12
2
笔记本电脑
DELL
Latitue E6400
中国
CPU:双核T9600,前端总线1066MHz,缓存6M,主频2.66GHz,Intel PM45芯片组;内存:4GBDDR2 800MHz内存;
戴尔 OptiPlex 780-USFF 安装支架 用户指南说明书

1 of 14Dell™ OptiPlex™ 780-USFF Mounting BracketThe Dell OptiPlex 780-USFF Mounting Bracket supports the Systemin vertical or horizontal orientations.Under Desk MountWall with Wood Stud Mount/regulatory_complianceUser’s Guide 2 of 14Hazard Symbols ReviewThese symbols alert the user about a safety condition that demands attention. All users of the product should be able to recognize and understand the signifi cance of the following safety hazards if encountered on the product or within product documentation.Information in this document is subject to change without notice.© 2009 Dell Inc. All rights reserved. Printed in China.Reproduction of these materials in any manner whatsoever without the written permission of Dell Inc. is strictly forbidden.Trademarks used in this text: and the logo are trademarks of Dell Inc.Other trademarks and trade names may be used in this document to refer to either the entities claiming the marks and names or their products. Dell Inc. disclaims any proprietary interest in trademarks and trade names other than its own.Model ARWALOctober 2009 Rev. A00 2 of 14Contents1 About your Dell OptiPlex 780-USFF Mounting Bracket (4)2 Setting up your Dell OptiPlex 780-USFF Mounting Bracket (4)3Specifi cations (14)4Finding Information (14)3 of 141122334 of 14About your Dell OptiPlex 780-USFF Mounting Bracket1Setting up the Dell OptiPlex 780-USFF Mounting Bracket 2Under Desk MountWall MountMounting Bracket, System Sleeve, two Lag ScrewsComponentsNOTE: Refer to the System Instruction Guides, packaged separately.1 System Mounting Bracket2 System Sleeve3System Chassis (ordered separately)WARNING: Because surfaces vary widely and the ultimatemounting method is out of DELL’s control, it is imperative that you consult with an appro-priate engineering, architecturalor construction professional to ensure that your DELL mount-ing solution can support 50 lbs (23 kg) and is mounted prop-erly.1 Ensure the system sleeve is unlocked, (orange tab will show).2 Extend the system label carrier.5 of 146 of 14Under Desk MountInsert the system into the systemCAUTION: Do not reverse the insertion order. The system must be inserted in the orientation specifi ed to ensure proper functioning of the CD tray!3Insert the system into the system sleeve in the orientation appropriateto the mounting method as illustrated below.Wood Stud Wall Mount7 of 145Determine the mounting method (Wall or Under Desk), then followthe appropriate instructions on the pages noted below.Mount Steps4Push the system label carrier into the system sleeve, then slide the switch to lock.CAUTION: Mounting fasteners are not included with bracket. Use appropriate fasteners to attach to a solid mountingsurface that can support 50 lbs. (23 kg). At a minimum, the mounting surface should be 1/2” (1.25 cm) thick wood and mount using 4 metal wood screws (M4 x 12mm).4x8 of 14Wall Mount Clearance - Back ViewCeiling≥6.0” (152.4 mm)≥8.0” (203.2 mm)≥13” (330.2 mm)Left Wall Left WallRight WallRight Wall9 of 1410 of 146Mark the mounting hole locations using the measurementsprovided on the next pages.NOTE: The following tools are required for installation to the desk: measuring tape, pencil, level.Under Desk Mount Steps abTo remove the system from the mounting bracket:a Push the quick release tab backward.bLift the system upward until it is free of the bracket.≤Under Desk Clearance - during assemblyUnder Desk Clearance - after assembly≥6.0” (152.4 mm)≥6.0” (152.4 mm)≥6.0” (152.4 mm)≤4.25” (108 mm)≤4.25” (108 mm)≤ .5” (12.7 mm)≤ .5” (12.7 mm)≥6.0” (152.4 mm)Wall / DeskWall / DeskWall / DeskWall / DeskEdge of DeskEdge of DeskbSlide the system into place on the desk-mounted bracket.aCAUTION: Mounting fasteners are not included with bracket. Use appropriate fasteners to attach to a solid mounting surface that can support 50 lbs. (23 kg). At a minimum, the mounting surface should be 1/2” (1.25 cm) thick wood and mount using 4 metal wood screws (M4 x 12mm).Under Desk ClearanceWall / DeskCAUTION: Make sure the wall mount bracket is level, fl ush and snuggly fi tted to the wall surface.≥ 1/2”CAUTION: The system should have at least 6” (152.4 mm) of clearance on all vented sides to permit the airfl ow required for proper ventilation. Restricting airflabTo remove the system from the mounting bracket:a Push the quick release tab upward.bSlide the system toward the right until it is free of the bracket.3 Specifi cationsSystem Weight CapacityDell System: OptiPlex 780-USFF ≤ 7 lbs (3.2 kg)TemperatureOperating 32°F to 95°F (0°C to 35°C )Storage-40°F to 149°F (-40°C to +69°C)Transportation-40°F to 149°F (-40°C to +69°C)Finding InformationIf you need to:See:Find safety best practices information for your computer, review Warranty information, Terms and Conditions (U.S. only), Safety instructions, Regulatory information, Ergonomics information, and End User Agreement The safety and regulatory documents that shipped with your computer and the Regulatory Compliance Homepage at /regulatory_compliance.4。
目前个人计算机的主要机型

目前个人计算机的主要机型PC (Personal Computer) 个人计算机:一种设计用于一次由一个人使用的计算机,PC (personal computer),个人计算机一词源自于1978年IBM的第一部桌上型计算机型号PC,在此之前有Apple II的个人用计算机。
能独立运行、完成特定功能的个人计算机。
个人计算机不需要共享其他计算机的处理、磁盘和打印机等资源也可以独立工作。
今天,个人计算机一词则泛指所有的个人计算机、如桌上型计算机、笔记型计算机、或是兼容于IBM系统的个人计算机。
台式计算机:联想家悦E 3600外观上采取黑色调,整机大气稳重。
在配置上,该机采用目前较流行的Intel 酷睿2双核 E7400 2.8GHz处理器,搭配主流的2GB内存,320GB高速硬盘。
显示卡搭配了主流中端的NVIDIA GeForce G100的独立显卡,另外在显示屏蔽配置了21.5寸宽屏液晶全高清显示器,对于家庭游戏及娱乐是不错的选择。
这是一款适用于家庭及商业办公的目前较主流的产品。
DELL OptiPlex 780DELL OptiPlex 780是一款主流的商务型台式电脑,其在中小企业用户是非常受欢迎的一款主流机。
在性能上,DELL OptiPlex 780采用E7500高频酷睿2双核处理器,主频高达2.8GHz,搭配Intel Q45芯片组,标配了2G DDR3内存和320G的7200转SATA硬盘集成有ATI RADEON HD 3450显卡,在屏幕方面配置了19寸宽屏显示器,对于中小企业的日常办公及工作非常适合。
海尔轰天雷T9海尔轰天雷T9是一款为娱乐游戏量身定做的一款主流配置的家用休闲娱电脑。
在配置上,海尔轰天雷T9充分显示游戏的特性了,其采用的是目前高端的inteli5-750处理器,搭载一枚独立的高性能Geforce 9800GT显卡,是目前在游戏上非常流行的显卡。
4GB DDR3内存,1TB大容量硬盘,大屏幕22寸液晶显示器让您玩游戏时视野非常好。
戴尔 OptiPlex 780 说明书

. ون إ ر
ا ت ها
.
ا قDell Inc. 2007 ©
. رDell Inc.
ون إذن
إ دة ا ج ي
؛Dell Inc. آ
تر
هVostro وDell و رDell إن
. أي اه م ص ت وأ ء ت أ ىDell و
Reproduction in any manner whatsoever without the written permission of Dell Inc. is strictly forbidden.
Dell, the DELL logo, and Vostro are trademarks of Dell Inc. Dell disclaims proprietary interest in the marks and names of others.
2007
|
(optional) 7. headphone connector 8. microphone connector 9. speaker connectors
ك1.
ل ا ر2.
ا ري
ك3.
رئ و/ ك ص ن4.
()ا ري
(8) 2.0 م
و ت5.
Setting Up Your Computer
CAUTION: Before you set up and operate your Dell™ computer, see the safety instructions in the Product Information Guide. See your Owner's Manual for a complete list of features.
- 1、下载文档前请自行甄别文档内容的完整性,平台不提供额外的编辑、内容补充、找答案等附加服务。
- 2、"仅部分预览"的文档,不可在线预览部分如存在完整性等问题,可反馈申请退款(可完整预览的文档不适用该条件!)。
- 3、如文档侵犯您的权益,请联系客服反馈,我们会尽快为您处理(人工客服工作时间:9:00-18:30)。
Dell OptiPlex 780台式机
Dell OptiPlex 780 易于维护,具有标准化配置和高级远程管
理功能,可以帮助IT人员更有效地工作,不论您的员工是分布
在本地、国内还是全球。
特性包括:
∙高级远程管理:英特尔®博锐™技术可以减少与软件
相关的桌面端维护需求,甚至在台式机关机时也可进行系统管
理1。
∙全局标准平台: IT人员可以在购买时将OptiPlex台
式机标准化为全局配置,从而使以后解决问题和订购更换部件
变得轻松。
∙轻松的日常维护:采用免工具机箱设计使维护变得简
单,同时具备DirectDetect故障诊断指示灯,可快速诊断诊断
问题。
∙“随心所至”的设计: OptiPlex 780 超小型机外形规格,采用纤薄的机箱,提供安全的台式机性能,适合在任何环境使用。
集成式电源和优化的电缆管理可以简化部署和操作。
OptiPlex 780MT配置参数:
处理器: 英特尔®酷睿TM 2四核Q8400(2.66GHz,4M,1333MHZ)
芯片组:英特尔®Q45高速芯片组(采用ICH10DO)
显卡: INTEL X4500HD显示芯片
内存: 2G*1 DDR3 1333MHZ
硬盘: 500 GB SATA硬盘 (7200RPM)
光驱:DVDRW/16X
连接:MT/DT/SFF - 集成英特尔® 82567LM以太网LAN 10/100/1000;
键盘:戴尔USB入门级键盘、DellTM QuietKey™键盘、戴尔多媒体专业键盘
鼠标:戴尔USB光电鼠标、戴尔激光鼠
系统:正版Ubuntu系统
机箱:MT大机箱
显示器:P190S 19正液晶显示器(数字接口)
售后:三年第二个工作日上门服务。
