Citrix安装部署文档
Citrix桌面虚拟化项目手册-XenDesktop服务器安装和部署
杭州华三通信技术有限公司Citrix项目开局指南基础环境05-XenDesktop服务器安装和部署V1.0liuhui2016/7/8目录Citrix XenDesktop规划 (2)主要步骤 (2)安装参数及注意事项一览表 (2)准备虚拟机 (2)DDC服务器的安装部署 (3)配置DDC控制器 (16)Citrix XenDesktop规划Desktop Delivery Controller虚拟桌面控制器即虚拟桌面调度服务器,负责所有的VDA注册和管理分配虚拟桌面,为用户与虚拟桌面建立连接的一个统一平台,它是XenDesktop的核心组件,对整个Citrix桌面平台至关重要,在生产环境中我们推荐部署高可用环境。
主要步骤本章节介绍了Citrix虚拟化环境下DDC服务器安装的基本过程。
其包括了:a)XenDesktop服务器基本安装b)XenDesktop服务器高可用环境配置c)XenDesktop服务器环境确认检查安装参数及注意事项一览表b)备DDC服务器:HZ-DDC02准备虚拟机在本次试验中,我们将从模板生成DDC虚拟机,并且配置DDC主机名和IP地址,加入活动目录,为了规范,我们使用hzadmin做为DDC Server的管理员。
如果未建此账号,请参考《开局指导手册02-微软基础构架环境规划和部署1.0》在活动目录中,新建此账号,并加入Account operator组中。
注意:不能将任何新建账号加入到域管理员组(Domain Admin)中。
●请确认您的DDC虚拟机是否通过模板创建的,需要确保该计算机的SID已经更新;●为DDC配置固定IP地址,同时指定DNS地址,并再次确认您的DDC虚拟机是否已经加入域●安装DDC前,当前登陆用户是否使用的是域帐户登录,该用户为hzadmin,(确保此账号拥有在指定OU创建、删除计算机账号的权限)确认hzadmin帐号已经拥有DDC这台服务器的本地管理员组权限。
Citrix桌面虚拟化系统项目用户说明书
Citrix桌面虚拟化系统项目用户说明书Citrix桌面虚拟化系统项目用户说明书1目录一. 软件部署 (3)二. 安装Citrix系统前的准备工作 (4)三. 安装Citrix License服务 (7)四. 安装Citrix WEB服务 (12)五. 安装Citrix PS服务 (15)六. 建立Citrix for Windwos平台Web站点 (23)七. 发布Windows应用 (30)八. 更改发布的Windows应用的用户 (35)九. Citrix PS for Solaris安装维护 (36)十. 发布UNIX应用 (42)十一. Linux应用发布 (46)十二. Citrix for UNIX管理命令 (49)一. 软件部署如上图,采用Citrix系统发布研究院生产办公应用软件。
其中包含Windows 和UNIX两种系统平台上的应用。
采用1台Windows系统服务器安装Citrix Web服务和License 服务,并安装SQL数据库和配置Windows域控制器。
二. 安装Citrix系统前的准备工作1.在Citrix服务器上构建Windows域2.将需要安装Citrix PS和发布应用的服务器加入Windows域3.使用administrator在Citrix服务器上安装SQL数据库,并为Citrix建立数据库。
4.安装Windows IIS和5.安装终端服务和终端服务授权,并激活三. 安装Citrix License服务1.Citrix的License是与License服务器的主机名帮定的。
如果你的License不能与服务器名匹配License将失效。
注意:主机名是区分大小写2.插XenApp for Windows 2003光盘,选择产品安装。
3.选择安装License服务4.安装过程中需要重新启动IIS服务5.安装完成后,在程序中运行License管理器6.选择Configure Linense Server7.选择,倒入License文件8.通过Current Usage查看被激活的License和License的使用情况。
完整版)部署Citrix桌面虚拟化环境文档
完整版)部署Citrix桌面虚拟化环境文档部署Citrix桌面虚拟化文档为了部署Citrix桌面虚拟化,需要先安装XenServer服务器虚拟化系统。
以下是安装步骤:1.安装XenServer操作系统A)将XenServer 6.5系统安装光盘放入光驱,进入BIOS 选择光盘启动。
B)选择“US”,直接回车。
C)选择默认下一步“OK”,直接回车。
D)选择“接受Citrix的许可协议”,确认【Enter】。
E)确认【OK】,直接选择回车【Enter】进下一步。
F)选择要安装的服务器硬盘,“一般选择安装在服务器本地硬盘”,【下一步】。
G)选择XenServer系统安装方式,“使用本地光盘”,下一步。
H)确认选择“OK”,进行下一步。
I)直接【下一步】,进入系统安装界面。
J)现在系统正在安装。
K)选择【OK】L)设置XenServer管理员密码,注意:密码要满足复杂性要求。
M)设置服务器的IP地址,选择静态IP地址【安装空格键选中】。
N)设置主机名和dns地址。
O)默认下一步,直接回车。
P)如果虚拟化环境中还没有NTP服务器,可以不选择NTP。
如果环境中有ntp服务器,可以选择ntp服务器,设置ntp服务器地址。
Q)选择“Install XenServer”R)系统安装完成,在这里选择跳过“Skip”,继续。
S)设置服务器的本地时间。
设置完成后选择“OK”。
T)系统已经安装完成了,需要重新启动服务器。
【OK】。
U)重启完成后会进入XenServer系统界面。
2.下载并安装XenCenter客户端管理软件。
(安装在管理端PC上)为了管理XenServer服务器,需要下载并安装XenCenter客户端管理软件。
以下是安装步骤:A)使用浏览器访问服务器IP地址。
B)安装XenCenter客户端软件。
双击运行已经下载的软件。
插件程序。
(插件时,计算机需要保证在联网的环境下)C)正在安装D)插件已经安装完成。
E)点击完成后会自动弹出安装XenCenter的界面。
citrix环境部署系列教程 (一)
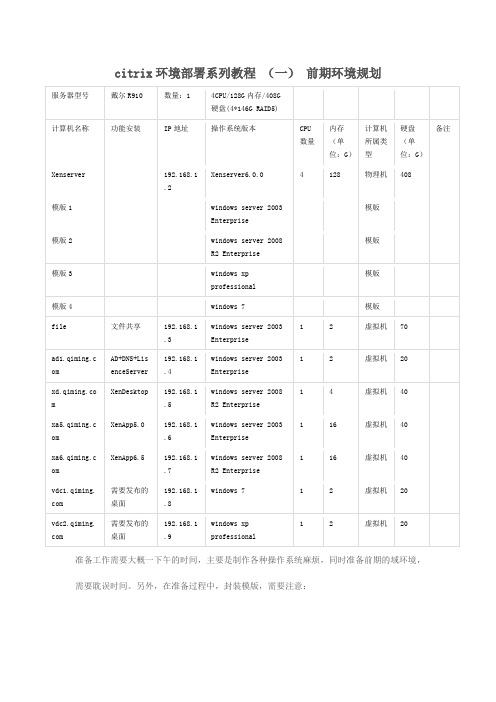
citrix环境部署系列教程(一)前期环境规划服务器型号戴尔R910 数量:1 4CPU/128G内存/408G硬盘(4*146G RAID5)计算机名称功能安装IP地址操作系统版本CPU数量内存(单位:G)计算机所属类型硬盘(单位:G)备注Xenserver 192.168.1.2Xenserver6.0.0 4 128 物理机408模版1 windows server 2003Enterprise模版模版2 windows server 2008R2 Enterprise模版模版3 windows xpprofessional模版模版4 windows 7 模版file 文件共享192.168.1.3 windows server 2003Enterprise1 2 虚拟机70ad1.qiming.c om AD+DNS+LisenceServer192.168.1.4windows server 2003Enterprise1 2 虚拟机20xd.qiming.co m XenDesktop 192.168.1.5windows server 2008R2 Enterprise1 4 虚拟机40xa5.qiming.c om XenApp5.0 192.168.1.6windows server 2003Enterprise1 16 虚拟机40xa6.qiming.c om XenApp6.5 192.168.1.7windows server 2008R2 Enterprise1 16 虚拟机40vdc1.qiming. com 需要发布的桌面192.168.1.8windows 7 1 2 虚拟机20vdc2.qiming. com 需要发布的桌面192.168.1.9windows xpprofessional1 2 虚拟机20准备工作需要大概一下午的时间,主要是制作各种操作系统麻烦,同时准备前期的域环境,需要耽误时间。
citrix环境部署系列教程 (二)
citrix环境部署系列教程(二)前期环境准备首先,Xenserver的安装注意要点:安装过程中需要设置时间,如果安装的是Xenserver 6.0.0版本的,在设置时间位置不允许超过30分钟。
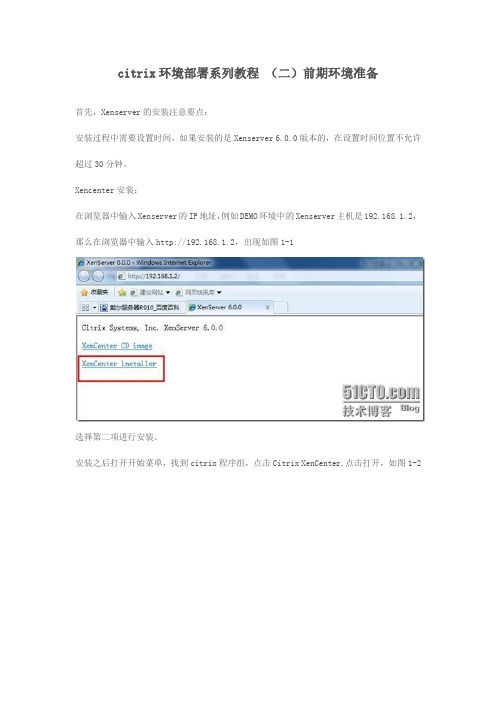
Xencenter安装:在浏览器中输入Xenserver的IP地址,例如DEMO环境中的Xenserver主机是192.168.1.2,那么在浏览器中输入http://192.168.1.2,出现如图1-1选择第二项进行安装。
安装之后打开开始菜单,找到citrix程序组,点击Citrix XenCenter,点击打开,如图1-2全新安装的Xencenter首先需要添加主机点击红线标注部分,进行添加主机,也就是已经安装了Xenserver的服务器。
输入Xenserver的IP地址,下方输入当时安装Xenserver时候的密码。
添加成功之后如下图添加主机之后需要添加一个共享存储,这里我使用的是本机的共享文件夹,通过建立一个共享文件,将一些必须的镜像进行共享。
在server名称也就是图中的xenservertest右键,选择新建New SR。
由于我本机使用的是Windows 7共享文件夹,所以使用的为图中红色标注选项。
名称默认即可标注部分必须进行填写。
这里的sharename就是共享文件的机器,之后finish就可以成功添加之后可以查看一下。
添加了共享存储之后需要添加虚拟机,同样在服务器名称选择右键,选择New VM从中选择需要创建的系统。
这里需要先建立一个文件服务器,选择的是windows server 2003系统,来作为文件服务器,共享所有需要使用的介质与软件。
这里需要注意的是下面的红色标注部分,如果没有特殊需求,不建议勾选之后进行下一步输入新建立的虚拟机的名称,这里使用的是默认的,现在创建的是模版,所以建议名称就使用默认的名称,因为可以看到创建出来的虚拟机具体系统与位数。
之后下一步这里选择从哪里启动,也就是加载的镜像。
citrix安装配置文档
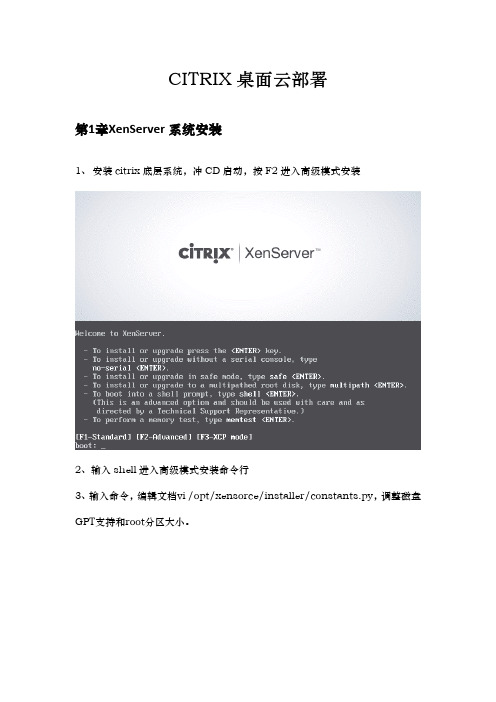
CITRIX桌面云部署第1章XenServer系统安装1、安装citrix底层系统,冲CD启动,按F2进入高级模式安装2、输入shell进入高级模式安装命令行3、输入命令,编辑文档vi /opt/xensorce/installer/constants.py,调整磁盘GPT支持和root分区大小。
4、浏览到大约60%左右,把GPT_SUPPORT = True 修改成GPT_SUPPORT =False#,用来关闭GPT磁盘支持,使用MBR磁盘模式;root_size = 4096 修改成root_size = 20480,把root分区修改成20480MB。
修改完后按ESC,输入如下文本:wq;保存并退出。
5、输入exit,回到安装界面,选择[qwerty] us6、点OK7、选择Accept EULA8、选择0k9、选择Enable thin provisioning(使用空格键选择),为XenDesktop部署做优化,注:如果之前安装过其他版本的XenServer,选择“Perform clean installation”。
10、选择Local media11、Supplemental Packs选择No,不安装帮助文档12、选择Skip verification,跳过安装介质检测13、设置XenServer登录密码14、选择一个网口作为管理网口,并配置IP地址15、输入主机名Host-name:starsino,DNS地址DNS Server 1:XXXX16、选择时区亚洲Asia ,上海17、选择手动时间输入Manual time entry18、选择Install XenServer进行安装19、最后设置时间20、重启安装完成第2章客户端安装登入1、输入服务器网卡地址登入web页面http://172.16.1.139;选择XenCenter installer 下载客户端,进行安装;注:中文版要到官网上下载1、打开客户端,选择add,添加服务器;注:如果添加服务器后,右上角出现“系统报警”,就要对系统进行打补丁包,整体步骤看citrix官网文档。
Citrix XenDeskTop 5.6虚拟桌面系统部署文档
Citrix XenDeskTop 5.6虚拟桌面系统部署手册曙光信息产业(北京)有限公司杨龑骄2013-5-21一、环境介绍1.1 物理环境此次部署环境较为简单,利用一台TC3600刀片作为主机,另一台TC3600作为NFS服务器;1.2 软件环境1.3 环境配置二、环境部署2.1XenServer安装安装过程与装普通操作系统一样。
2.2 存储配置及ISO镜像上传Citrix虚拟桌面环境中支持ISO有三种方式,一是主机本地的光驱;二是NFS共享存储中的ISO镜像文件;三是Windows共享文件夹中的ISO镜像文件;环境中采用NFS服务器中的ISO镜像文件;第一步:登录XenCenter添加主机登录XenCenter登录以后添加主机完成添加第二步:配置NFS存储(已经在环境中建立NFS服务器)查看当前存储点击“New SR。
”选择NFS VHD后下一步点击“next”填写NFS服务器共享出来的路径(必须严格一致)添加完成利用相同的方法,再添加一个NFS ISO存储,即在ISO library中选择NFS ISO。
然后利用其它上传工具往NFS存储中上付ISO镜像文件第三步:创建虚拟机选择操作系统命名虚拟机为虚拟机选择安装ISO启动虚拟机完成安装安装完成之后,为虚拟机安装Tools提示需要安装.net framework 3.5 在功能选项中,点击“添加功能”选中第一个选项安装完成之后重新运行Tools安装完成安装后重启虚拟机第四步:配置sysprep以生成具有新的SSID的虚拟机运行中打开“sysprep”双击“sysprep”勾选“通用”;关机选项可以随便选,如果不需要继续其它配置可以直接选择关机完成配置后会自动关机!最后在XenCenter中将刚才配置好的虚拟机转换为模板!2.3功能服务器配置此次部署涉及的功能服务器主要有两个:AD服务器和DDC服务器。
2.3.1 AD服务器安装配置使用之前创建好的模板快速生成虚拟机,由于配置了sysprep因此虚拟机就和新创建的一样,需要进行一些必要的配置设置密码完成创建!在“角色”中添加AD角色完成之后,在运行中输入“dcpromo”默认选项即可同时安装DNS选择“是”输入系统管理员密码等待其完成创建之后,重启虚拟机!启动之后,配置DHCP服务器添加服务器角色-DHCP添加IP段!禁用DHCP V6使用当前凭据完成配置2.3.2 DDC服务器安装配置由模板生成一个新的虚拟机。
Citrix系列三 XenApp6.5安装文档
CITRIXXenapp6.5安装文档编写:星期八不打球yilijun_yy@1测试环境概述1.1测试环境本测试方案使用1台IBM X3550安装XenServer6.0和一台SONY笔记本安装装XenCenter.。
由于之前部署过XenDesktop5.6,测试环境全部搭建好了,所以这里我只需要在xenserver上创建一台win2008 r2系统的虚拟机。
1.2 安装部署与设置概述在XenApp应用环境的安装部署中,将采用以下流程:1.安装XenServer2.安装配置XenCenter3.利用XenCenter在XenServer中创建虚拟机4.配置AD服务器5.安装配置XenApp6.56.部署分发应用2安装XenServer3 安装XenCenter4 在XenServer中创建虚拟机这里就不多做介绍了,域服务器用的是之前做XenDesktop环境时建好的,5 配置AD域控制器AD域配置在这里就不详细描述了。
之前做系二XenDesktop的测试实验有简单的介绍,不懂的朋友可以去下载看看。
6 安装配置Xenapp 6.56.1配置安装环境在之前虚拟机中安装好的Windows 2008 r2操作系统,修改计算机名APP,配置DNS,并加入域。
安装.NET 3.5组件6.2 安装Xenapp 6.51 加载XenApp6.5安装盘或ISO并运行安装程序,点击安装Xenapp服务器:2 点击添加服务器角色3 这里我安装Platinum版4 点击接受,下一步5 选择xenapp和web interface,点击下一步6 直接下一步7 点击安装8 点击完成9 点击重新引导10 点击继续安装11 安装12 安装完后,配置web interface13 右击xenapp web站点,点击创建站点,选择设置为ISS站点的默认页面14 默认直接下一步15 下一步16 直接下一步17 点击添加,输入app服务器的IP地址,修改XML服务端口为808019 默认下一步,这里也可以设置域限制,以后访问应用输入用户名和密码时不用再输入域。
Citrix产品安装部署文档(XenServer-XenDesktop-XenApp)
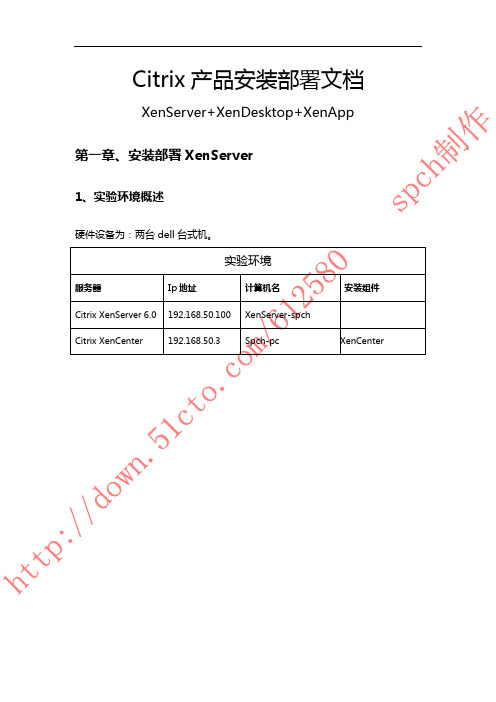
Citrix产品安装部署文档XenServer+XenDesktop+XenApp 第一章、安装部署XenServer1、实验环境概述硬件设备为:两台dell台式机。
2、安装XenServer 6.02.1 使用U盘安装xenserver系统,插上U盘,开机按F12(机器不同启动项不同)选择U盘启动:按‘回车’键2.2 直接默认第一个US,点击OK2.3 直接点击OK2.4 点击Accept EULA2.5 点击OK2.6 默认选项,点击OK2.7 默认第一个,点击OK2.8 点击Yes2.9选择‘Skip verification’跳过验证,点击‘OK’2.10 设置密码,点击OK2.11 选择静态IP,设置IP,然后点击’OK’2.12 设置DNS,点击OK2.13选择‘Asia’,点击’OK’2.14 选择’Shanghai’点击’OK’继续:2.15选择‘Manual time entry’点击’OK’(实验环境没有NTP服务器,一般企业都没有)2.16 选择’Install XenServer’安装进行,2.17 点击Skip2.18 设置时间,点击OK2.19点击OK,重启服务器2.20 安装系统完成3、安装XenCenter3.1 在IE,输入xenserver服务器的IP地址3.2下载安装XenCenter3.3运行‘XenCenter’开始---所有程序—citrix---Citrix XenCenter3.4 连接XenServer服务器3.5点击Accept3.5连接成功,Citrix XenServer实验结束!!第二章、安装部署XenDesktop1、实验环境概述1.1实验环境该实验使用2台dell台式机,一台安装XenServer6.0和另一台安装装XenCenter.。
由于是测试环境Xendesktop5.6+AD+Windows 7全部在xenserver虚拟机上创建运行。
Citrix安装文档
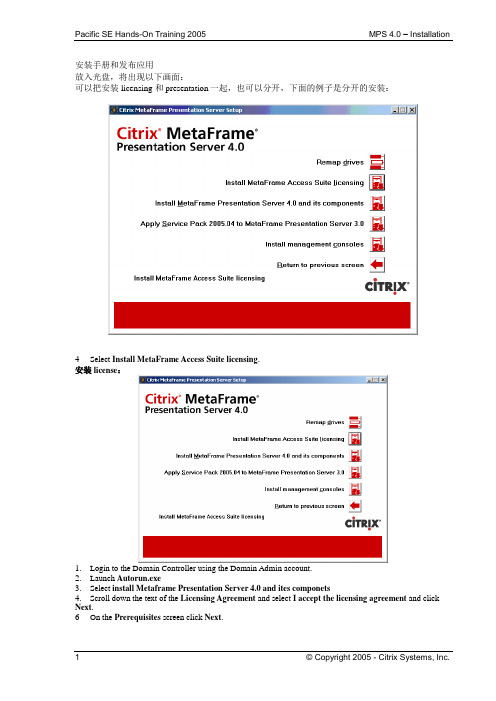
安装手册和发布应用放入光盘,将出现以下画面:可以把安装licensing 和presentation一起,也可以分开,下面的例子是分开的安装:4 Select Install MetaFrame Access Suite licensing.安装license:1.Login to the Domain Controller using the Domain Admin account.unch Autorun.exe3.Select install Metaframe Presentation Server4.0 and ites componets4.Scroll down the text of the Licensing Agreement and select I accept the licensing agreement and click Next.6 On the Prerequisites screen click Next.7 On the Component Selection screen leave the defaults selected and click Next. The JRE will then install first.8 After the install of the JRE, the install of the license server begins. On the Welcome page click Next.9 On the Destination Folder screen leave the defaults and click Next.10 On the Select Features screen leave the defaults and click Next.11 On the License Files Locations screen leave the defaults and click Next.12 On the Web Server Selection screen select Microsoft internet Information service and click Next.13 On the IIS Server screen select OK to restart IIS Server and click Next.14 On the Ready to Install Application screen click Next to install the License Server and the License Management Console.15 After the install is complete click Finish.Step-by-Step Task 3 – Install a Citrix License.In this section you will install a Citrix License on the License Server.Step Action1 Login to the Domain Controller using the Domain Admin account.2 Launch the Citrix License Management Console from Start → Programs → Citrix → Management Consoles → License Management Console.3 After the License Management Console (LMC) launched select Configure License Server.4 Select Step 2: Copy license file to this license server.5 On the Upload license file screen click Browse and browse to the license file and click Open.6 Click Upload.7 You should now return automatically to the License Files screen where the message Copy Completeappears on the page.8 Click on the Current Usage tab to verify if the licenses are installed.9 Close the browser.Step-by-Step Task 1 – Install Citrix Presentation Server 4 and components.In this section you will install Presentation Server and its components on the Presentation Server.1 Login to the Presentation Server using the Domain Admin account.2 Launch Autorun.exe.3 Select Product installation and updates.4 Select Install MetaFrame Presentation Server 4.0 and it’s components.5 Scroll down the text of the Licensing Agreement and select I accept the licensing agreement and click Next.6 On the Prerequisites screen click Next.7 On the Component Selection screen leave the defaults selected and click Next.8 On the next screen select I already have a license server, or will use the product CD to install one later and click Next.9 The installer will now first install the MetaFrame Presentation Server Administration Snap-in (Access Suite Console).10 Take the following steps:1.Welcome screen click Next;2.Select Destination folder screen leave default and click Next;3.Select snap-ins screen leave the default snap-ins selected and click Next;4.Ready to Install the Application screen click Next;5.After the installation click Finish.11 The installer will now install the Web Interface.11 Take the following steps:1.Welcome screen click Next;mon Components screen leave default and click Next;3.Clients screen leave Don’t install the Clients from the Components CD-ROM selected and click Next;4.Ready to Install the Application screen click Next;5.After the installation click Finish.12 The installer will now install MetaFrame Presentation Server.13 Take the following steps:1.Welcome screen click Next;2.Product Edition screen select Enterprise and click Next;ponent Selection screen leave the defaults and click Next;4.Pass-though Authentication screen select Yes and click Next;5.Create or Join a Server Farm screen select Create and click Next;6.Create a Server Farm screen name the farm MPS4DEMO, use Access as the data store, and click Next;7.Assign Farm Administrator screen leave defaults and click Next;8.MetaFrame Access Suite Licensing screen point to ATLSRV1 and click Next;9.Shadowing screen select Allow shadowing and click Next;10.Configure Citrix XML Service Port select Use separate port choose 8080 and click Next;11.Add users to Remote Desktop Users group screen leave defaults (Add users from the group) and click Next;12.Review screen click Finish;13.When the Installer Information window pops up click Yes;14.After the installation uncheck View the Readme file and click Close.14 The installer will now install the Presentation Server Management Console.15 Take the following steps:1.Welcome screen click Next;2.Ready to Install the Application screen click Next;3.After the installation click Finish.16 The installer will now install the Document Center.Take the following steps:1.Welcome screen click Next;2.Destination folder screen leave default and click Next;3.After the installation click Finish.17 When all installations are finalized click Finish.18 Reboot the server.Step-by-Step Task 1 – Run Discovery.In this section you will run the Access Suite Console for the first time and run the discovery.1 Login to the Domain on Presentation Server using the Domain Admin account.2 Launch the Citrix Access Suite Console from Start →Programs → Citrix → MetaFrame Presentation Server → Access Suite Console or from the Citrix taskbar on the right of the screen.3 The Configure and run discovery wizard will start automatically.Take the following steps:1.Welcome screen click Next;2.Select Components screen leave defaults and click Next;3.Configuration Server screen select Contact the following Web Interface configuration servers and click Add, fill in the name of the Presentation Server and click OK, click Next;4.Select Server screen click on Add local Computer to discover your farm and click Next;5.Preview Discover screen verify your settings and click Next to start the discovery process;6.After Discovery Progress is finalized click Finish.Step-by-Step Task 2 – Create Web Interface Site.In this section you will create a Web Interface site in the Access Suite Console.1 Login to the Domain on the Presentation Server using the Domain Admin account.2 Launch the Citrix Access Suite Console from Start →Programs → Citrix → MetaFrame Presentation Server → Access Suite Console or from the Citrix taskbar on the right of the screen.3 In the Access Suite Console click on Web Interface in the left pane and click Create site in the middle pane.4 Select MetaFrame Presentation Server and click Next.5 On the IIS Hosting screen select the following:1.IIS site: Default Web Site;2.Path: /Citrix/MetaFrame/;3.Check Set as the default page for the IIS site;4.Check Use site IIS path;5.Click Next.6 On the Configuration Source screen select Use local configuration file(s) and click Next.7 On the Server farm screen enter the following:1.Farm name: leave default farm name Farm12.Click Add and enter the name of a MPS server in the farm (in our lab we only have one)3.XML service port:enter port number (8080);4.Click Next.8 Review the New Site Summary screen and click Next.9 After creation is finalized click Finish.10 The newly created WI site should be listed in the Access Suite Console.Step-by-Step Task 3 – Create a Program Neighborhood Agent Service.In this section you will create a Program Neighborhood Agent Service in the Access Suite Console.1 Login to the Domain on the Presentation Server using the Domain Admin account.2 Launch the Citrix Access Suite Console from Start →Programs → Citrix → MetaFrame Presentation Server → Access Suite Console or from the Citrix taskbar on the right of the screen.3 In the Access Suite Console click on Web Interface in the left pane and click Create site in the middle pane.4 Select Program Neighborhood Agent Services and click Next.5 On the IIS Hosting screen select the following:1.IIS site: Default Web Site;2.Path: /Citrix/PNAgent/;3.Check Use site IIS path;4.Click Next.6 On the Configuration Source screen select Use local configuration file(s) and click Next.7 On the Server farm screen enter the following:5.Farm name: leave default farm name Farm16.Click Add and enter the name of a MPS server in the farm7.XML service port:enter port number (8080);8.Click Next.Note: PN Agent no longer takes the WI configuration settings. It points to a farm independently of Web Interface8 Review the New Site Summary screen and click Next.9 After creation is finalized click Finish.10 The newly created PN Agent Service should be listed in the Access Suite Console.Step-by-Step Task 1 – Publish Notepad.In this section you will publish Notepad.exe from the Presentation Server Management Console.Step Action1 Login to the Domain on Presentation Server using the Domain Admin account.2 Launch the Presentation Server Console from Start → Programs → Citrix → Management Consoles → Presentation Server Console or from the Citrix taskbar on the right of the screen.3 In the left pane of the Presentation Server Console right-click on Applications and select Publish Application.4 In the first screen type Notepad as the Display Name and click Next.5 In the Specify what to Publish screen click Browse and browse to C:\WINDOWS\NOTEPAD.EXE and click OK. Click Next.6 Complete the rest of the publishing wizard as normal. Grant user demo1access to this published application.7 Close the Presentation Server Console.Step-by-Step Task 2 – Test Published Application with Web Interface.In this section you will test your published application Notepad from the Client device with Web Interface.Step Action1 Login to the Domain on the Domain Controller using the domain admin account. Verify that the ICA client has been installed. If not, install the ICA client, reboot, then login using the demo1 user account.2 Launch a browser.3 Enter http://[Presentation Server Name]in the address bar and press Enter.4 Fill in your credentials:Click Log In.5 After logging in click on the Notepad icon.6 Verify that the application launches successfully.7 Close Notepad.Step-by-Step Task 3 – Test Published Application with Program Neighborhood Agent.In this section you will test your published application Notepad from the Client device with the Program Neighborhood Agent Client.Step Action1 Login to the Domain on the Domain Controller using the demo1 user account.2 Launch the Program Neighborhood Agent from the desktop.3 If this is the first time you use the PN Agent, you will have to specify the Server URL. Right-click on the PN Agent System Tray icon.The following message appears. Click Yes.3 Enter http://[Presentation Server Name] in the address bar and click Update.4 Fill in your credentials:Click OK.21 © Copyright 2005 - Citrix Systems, Inc.22© Copyright 2005 - Citrix Systems, Inc. 5Right-click on the PN Agent System Tray icon and select Notepad from the Applications .6 Verify that the application launches successfully.7 Close Notepad.23 © Copyright 2005 - Citrix Systems, Inc.。
安装和配置Citrix
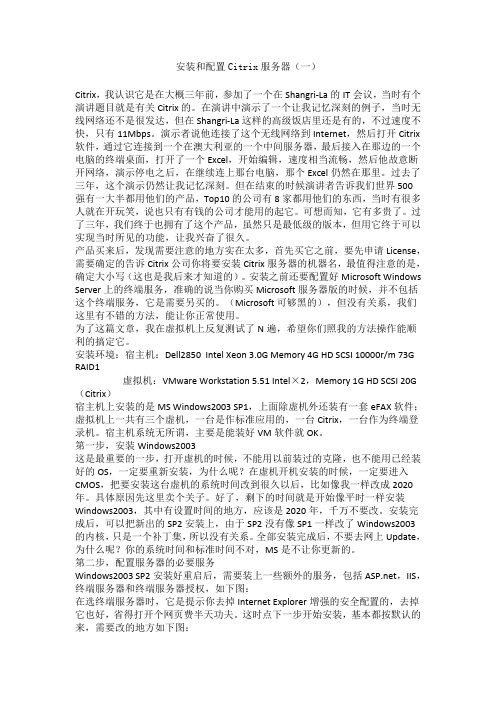
安装和配置Citrix服务器(一)Citrix,我认识它是在大概三年前,参加了一个在Shangri-La的IT会议,当时有个演讲题目就是有关Citrix的。
在演讲中演示了一个让我记忆深刻的例子,当时无线网络还不是很发达,但在Shangri-La这样的高级饭店里还是有的,不过速度不快,只有11Mbps。
演示者说他连接了这个无线网络到Internet,然后打开Citrix 软件,通过它连接到一个在澳大利亚的一个中间服务器,最后接入在那边的一个电脑的终端桌面,打开了一个Excel,开始编辑,速度相当流畅,然后他故意断开网络,演示停电之后,在继续连上那台电脑,那个Excel仍然在那里。
过去了三年,这个演示仍然让我记忆深刻。
但在结束的时候演讲者告诉我们世界500强有一大半都用他们的产品,Top10的公司有8家都用他们的东西,当时有很多人就在开玩笑,说也只有有钱的公司才能用的起它。
可想而知,它有多贵了。
过了三年,我们终于也拥有了这个产品,虽然只是最低级的版本,但用它终于可以实现当时所见的功能,让我兴奋了很久。
产品买来后,发现需要注意的地方实在太多,首先买它之前,要先申请License,需要确定的告诉Citrix公司你将要安装Citrix服务器的机器名,最值得注意的是,确定大小写(这也是我后来才知道的)。
安装之前还要配置好Microsoft Windows Server上的终端服务,准确的说当你购买Microsoft服务器版的时候,并不包括这个终端服务,它是需要另买的。
(Microsoft可够黑的),但没有关系,我们这里有不错的方法,能让你正常使用。
为了这篇文章,我在虚拟机上反复测试了N遍,希望你们照我的方法操作能顺利的搞定它。
安装环境:宿主机:Dell2850 Intel Xeon 3.0G Memory 4G HD SCSI 10000r/m 73G RAID1虚拟机:VMware Workstation 5.51 Intel×2,Memory 1G HD SCSI 20G (Citrix)宿主机上安装的是MS Windows2003 SP1,上面除虚机外还装有一套eFAX软件;虚拟机上一共有三个虚机,一台是作标准应用的,一台Citrix,一台作为终端登录机。
CITRIX安装和配置指南
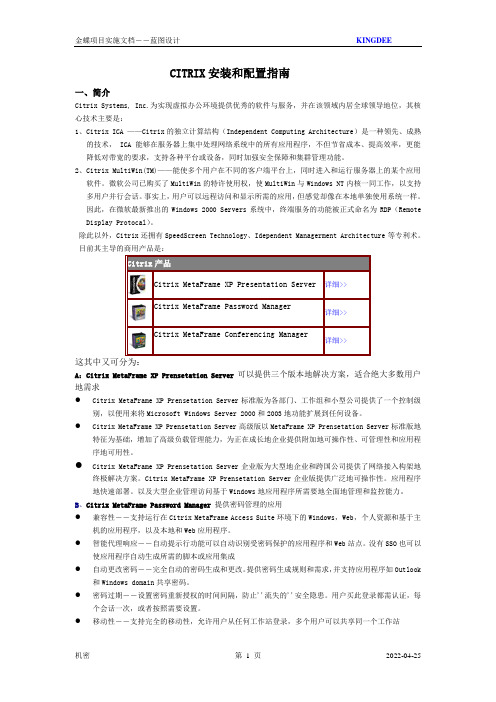
CITRIX安装和配置指南一、简介Citrix Systems, Inc.为实现虚拟办公环境提供优秀的软件与服务,并在该领域内居全球领导地位,其核心技术主要是:1、Citrix ICA ——Citrix的独立计算结构(Independent Computing Architecture)是一种领先、成熟的技术, ICA能够在服务器上集中处理网络系统中的所有应用程序,不但节省成本、提高效率,更能降低对带宽的要求,支持各种平台或设备,同时加强安全保障和集群管理功能。
2、Citrix MultiWin(TM)——能使多个用户在不同的客户端平台上,同时进入和运行服务器上的某个应用软件。
微软公司已购买了MultiWin的特许使用权,使MultiWin与Windows NT内核一同工作,以支持多用户并行会话。
事实上,用户可以远程访问和显示所需的应用,但感觉却像在本地单独使用系统一样。
因此,在微软最新推出的Windows 2000 Servers系统中,终端服务的功能被正式命名为RDP(Remote Display Protocal)。
除此以外,Citrix还拥有SpeedScreen Technology、Idependent Managerment Architecture等专利术。
目前其主导的商用产品是:Citrix产品Citrix MetaFrame XP Presentation Server详细>>Citrix MetaFrame Password Manager详细>>Citrix MetaFrame Conferencing Manager详细>>这其中又可分为:A:Citrix MetaFrame XP Prensetation Server可以提供三个版本地解决方案,适合绝大多数用户地需求●Citrix MetaFrame XP Prensetation Server标准版为各部门、工作组和小型公司提供了一个控制级别,以便用来将Microsoft Windows Server 2000和2003地功能扩展到任何设备。
-Citrix部署文档
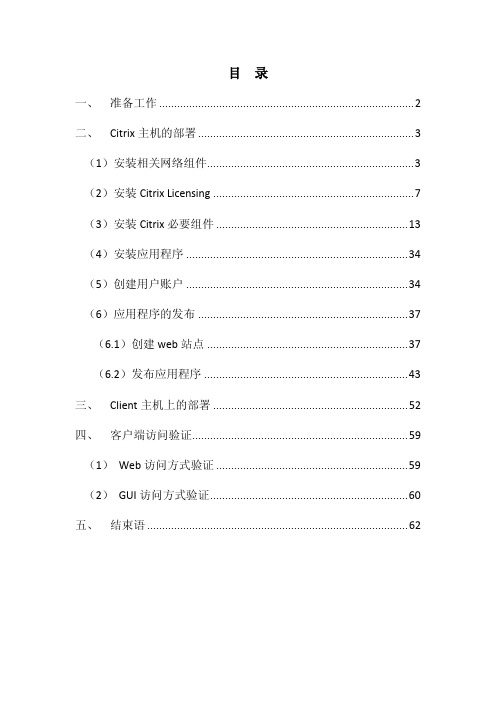
目录一、准备工作 (2)二、Citrix主机的部署 (3)(1)安装相关网络组件 (3)(2)安装Citrix Licensing (7)(3)安装Citrix必要组件 (13)(4)安装应用程序 (34)(5)创建用户账户 (34)(6)应用程序的发布 (37)(6.1)创建web站点 (37)(6.2)发布应用程序 (43)三、Client主机上的部署 (52)四、客户端访问验证 (59)(1)Web访问方式验证 (59)(2)GUI访问方式验证 (60)五、结束语 (62)Citrix安装部署文档一、准备工作此次Citrix的安装部署是在虚拟机上进行模拟的,所以在正式部署之前需要对虚拟机进行相应的安装和配置。
(1)安装虚拟机。
(2)在虚拟机上创建两台主机,操作系统均为Windows Serve 2003.为便于部署,我们将其中的一台主机命名为Citrix(即计算机名为Citrix),另外一台主机命名为Client(即计算机名为Client)。
(3)配置两台主机在同一个局域网内。
A.Citrix主机配置如下:注意:Citrix服务器将会配置成DNS服务器,这在后面将会提到。
B.Client主机配置如下:C.验证两主机在同一局域网内。
在Citrix主机上ping客户机Client,如果能够ping通,则证明网络配置无误。
(4)网络环境配置拓扑图如下:二、Citrix主机的部署以下操作均在Citrix主机上进行。
其大体部署步骤为:安装相关网络组件->安装Citrix Licensing->安装Citrix必选组件->应用程序(ERP系统等)的安装->创建用户账户->应用程序的发布。
其详细步骤如下:(1)安装相关网络组件打开:开始->设置->控制面板->添加或删除程序->添加/删除windows网络组件,此时会出现Windows组件向导,在该向导中,取消Internet Explorer增强的安全配置,和更新根证书(防止影响Citrix的安装,如若需要可在Citrix安装完毕后再对此进行安装)。
Citrix vGPU部署文档
Citrix vGPU 部署方案福建升腾资讯有限公司Fujian Centerm Information Co.,Ltd第一章概述本文档主要是指导区域支持进行Citrix vGPU环境搭建,本文档主要是涉及到在搭建过程中需要注意点,在整体部署过程,可以参考《VDBOX生产部署文档》。
第二章部署前准备2.1 硬件准备参考视图名称备注防静电手套用于插拔单板、手拿单板或其他精密仪器等,可防止静电放电服务器搭配NVIDIA GRID 显卡(K1,K2)笔记本电脑用于部署使用2.2软件准备软件准备包括:NVIDIA GIRD卡管理驱动,WIN7桌面vGPU驱动以及Citrix整体环境搭建需要的软件包。
NVIDIA软件包:注:该软件包在NVIDIA官网可以下载,需要注意相应的版本。
Citrix 安装包:XenServer:vGPU的解决方案中,服务器虚拟化目前只支持XenServer 6.2 SP1版本(如果之前XenServer有安装过XSE62TP001 hotfix,请重装XenServer 6.2),推荐采用XenServer 6.5 XenDesktop:vGPU的解决方案中XenDesktop 版本必须是XenDesktop 7.1(2013.10.26发布版,Product version 7.1.0.4033 )或XenDesktop 7.5以后发布的版本。
推荐采用XenDesktop7.6SP1.第三章硬件部署3.1 GRID显卡认证服务器型号注:由于支持Citrix vGPU类型的服务器在递增,故如果需要了解相应服务器是否支持Citrix vGPU,可以向总部反馈,进行查询。
3.2 服务器BIOS设置以及供电部分早期生产的服务器,由于Bios相对较旧,故可能出现兼容等问题,建议参考列表对照,以确保服务器的bios要新于HCL列表所列。
确保物理服务器上,性能已经设定为Max Performance(每家服务器设定不同,请联系对应厂商)BIOS 设定中“Enable >4G Decode”或“Enable 64-bit MMIO”,选择“禁用”。
Citrix安装部署文档
1安装清单(1)装虚拟机:(2)在虚拟机上装两个操作系统:Window2003SP1.ISO或Window2003SP2.ISO注:装系统时,记得双击虚拟机的Network Adapter选项,把Network connection 选为Bridged将其中一个操作系统的计算机名改为citrix。
(与license中的机器名一致)(3)Citrix软件:XA5_EN_COM_W2k3.zip(组件)SXA5_EN_W2K3.zip把这两个软件都拷到两个操作系统的C盘中,并解压。
(4)Citrix license文件License文件要靠你自己找了!注:以下安装过程用到的固定IP设置可根据您的实际IP进行替换。
2部署域环境(citrix机器)(1)安装windows组件先在citrix机器上安装DNS:开始->设置->控制面板->添加或删除程序->添加/删除windows组件:添加域名系统添加应用程序服务添加终端服务器授权,下一步安装过程中要求设置IP(如下图),确定,安装结束注:首选DNS服务器与IP地址要一致(2)终端服务器授权开始->程序->管理工具->终端服务器授权,选中citrix右击->激活服务器选择Web浏览器,下一步点击https://,选择中文简体,点go,点下一步填写相关信息,下一步获得许可证服务器ID输入许可证服务器ID,下一步下一步在之前的获取许可证服务器ID的页面选择“是”。
在许可证程序中选择“Enterprise Agreement”,下一步在接下来的界面中,“产品类型”选“Windows2003终端服务客户端访问许可证(每设备)”,“数量”为你欲连接的最大用户数(比为“9999”);在“注册号码”中输入6565792,4954438,6879321或者5296992,再“下一步”;获得的许可证密钥包ID把许可证密钥包ID输入安装向导,安装完成。
Citrix XenDesktop 安装部署手册-SkyCloud
Citrix XenDesktop 安装部署手册天云融创科技有限公司目录1实验环境说明 (3)1.1 应用发布环境整体架构 (3)1.2 安装部署与设置概览 (3)2安装XENSERVER (4)3安装XENCENTER (4)4在XENSERVER中创建虚拟机 (4)5配置AD域控制器 (4)6安装配置DDC服务器 (6)6.1 配置安装环境 (6)7.1 安装Citrix Desktop Delivery Controller (6)7.2 配置License Server (17)7安装PVS服务器 (20)7.1 安装前环境配置 (20)7.2 开始安装PVS服务器 (20)7.3 配置PVS服务器 (24)7.4 安装XenDesktop Setup Wizard (31)7.5 配置PVS的虚拟磁盘 (34)7.6 配置DHCP项 (43)7.7 安装虚拟桌面组件 (45)7.7.1 安装Virtual Desktop Components(XP客户端) (45)7.7.2 部署分发虚拟桌面(PVS服务器) (49)7.7.3 安装配置Target Device(XP客户端) (53)7.7.4 创建Windows XP虚拟机的Image到PVS服务器的Virtual Disk上 (58)7.7.5 修改Virtual Desktop的访问方式 (60)7.8 配置XenDesktop Setup Wizard (61)7.8.1 创建虚拟机模板 (61)7.8.2 创建多个Virtual Desktop (66)1实验环境说明1.1 应用发布环境整体架构1.2 安装部署与设置概览在XenDesktop应用环境的安装部署中,将采用以下流程:1.安装XenServer2.安装配置XenCenter3.利用XenCenter在XenServer中创建虚拟机4.配置AD服务器5.安装配置DDC服务器6.安装配置PVS服务器7.安装配置XP客户端(虚拟桌面镜像)操作系统8.部署分发虚拟桌面2安装XenServer3安装XenCenter4在XenServer中创建虚拟机我们需要3台Windows 2003 Server的虚拟机分别用于AD,DDC,PVS服务器,1台5配置AD域控制器因为AD域控制器的安装与配置已经在XenApp的教程中涉及,所以这里不再详细描。
citrix和vmware架构安装文档

目录文档信息---------------------------------------------- 错误!未定义书签。
版本记录---------------------------------------------- 错误!未定义书签。
一、ESX SERVER系统安装------------------------------------------------ 2二、安装应用虚拟机--------------------------------------------------- 12三、安装VCENTER SERVER ----------------------------------------------- 203.1V CSERVER安装----------------------------------------------------------- 20 3.2V CSERVER配置----------------------------------------------------------- 25四、安装AD服务器---------------------------------------------------- 31五、安装LICENSE SERVER ----------------------------------------------- 385.1 LICENSE SERVER安装------------------------------------------------------ 38 5.2 LICENSE SERVER配置------------------------------------------------------ 43六、安装XENAPP SERVER------------------------------------------------ 45七、安装DESKTOP DELIVERY CONTROLLER服务器------------------------------ 56八、安装XENAPP WEB INTEFACE服务器------------------------------------- 61九、应用程序发布----------------------------------------------------- 79一、E SX Server系统安装数据安全操作中心系统三台物理服务器,分别为ESX server 2,ESX server 3,ESX server 4安装VMware ESX server系统。
- 1、下载文档前请自行甄别文档内容的完整性,平台不提供额外的编辑、内容补充、找答案等附加服务。
- 2、"仅部分预览"的文档,不可在线预览部分如存在完整性等问题,可反馈申请退款(可完整预览的文档不适用该条件!)。
- 3、如文档侵犯您的权益,请联系客服反馈,我们会尽快为您处理(人工客服工作时间:9:00-18:30)。
1安装清单(1)装虚拟机:(2)在虚拟机上装两个操作系统:Window2003 SP1.ISO或Window2003 SP2.ISO注:装系统时,记得双击虚拟机的Network Adapter选项,把Network connection 选为Bridged将其中一个操作系统的计算机名改为citrix。
(与license中的机器名一致) (3)Citrix软件:XA5_EN_COM_W2k3.zip(组件)SXA5_EN_W2K3.zip(4)Citrix license文件License文件要靠你自己找了!注:以下安装过程用到的固定IP设置可根据您的实际IP进行替换。
2 部署域环境(citrix机器)(1)安装windows组件先在citrix机器上安装DNS:开始->设置->控制面板->添加或删除程序->添加/删除windows组件:添加域名系统添加应用程序服务添加终端服务器授权,下一步安装过程中要求设置IP(如下图),确定,安装结束注:首选DNS服务器与IP地址要一致(2)终端服务器授权开始->程序->管理工具->终端服务器授权,选中citrix右击->激活服务器选择Web浏览器,下一步点击https://,选择中文简体,点go,点下一步填写相关信息,下一步获得许可证服务器ID输入许可证服务器ID,下一步下一步在之前的获取许可证服务器ID的页面选择“是”。
在许可证程序中选择“Enterprise Agreement”,下一步在接下来的界面中,“产品类型”选“Windows 2003终端服务客户端访问许可证(每设备)”,“数量”为你欲连接的最大用户数(比为“9999”);在“注册号码”中输入6565792,4954438,6879321或者5296992,再“下一步”;获得的许可证密钥包ID把许可证密钥包ID输入安装向导,安装完成。
(3)安装Active Directory打开:开始->运行,输入dcpromo,确定点下一步选择“新域的域控制器”:选择“在新林中的域”输入你想要的域名,格式:×××.com,下一步:下一步下一步下一步下一步下一步密码可不填(如要求填写,则填上),下一步:点下一步至安装结束安装完后要求重启计算机,重启后登陆域:(4)设置Active Directory开始->管理工具->Active Directory用户和计算机”,对着“”点右键,选择“新建->组织单位”,新建一个名为“citrix”的OU(组织单位)。
右击新建的“citrix”组织单位-〉属性,在“组策略”中新建一个名为“policy”的组策略。
在“citrix”的OU中右击新建->用户,用户名和密码都为test,如果密码有复杂性要求,则根据提示进行设置。
(如果是域的环境,一般Citrix Server上Remote Desktop User组已包括Domain User用户;如果是非域环境,则在Citrix Server 上“本地用户与组”中建立新帐号,并且需要手动添加到Remote Desktop User组,才具有ICA或RDP协议使用权限。
)(5)安装Citrix Licensing Server运行C:\XA5_EN_W2K3\1978\CPS45_EN_W2K3\Autorun.exe,选择“Product installations and updates”;选择“Install Citrix Licensing”把授权说明右侧的下拉菜单拉至最下面,然后选择“I accept the license agreement”,点击“Next”点击“Next”点击“Next”。
提示安装路径,点击“Next”。
点击“Next”。
提示License文件存储的位置,无需更改,点击“Next”。
选择“Microsoft Internet Information Services(IIS)”,点击“Next”。
选择“OK to restart Microsoft IIS Server”,点击“Next”点击“Next”,至到提示Citrix Licensing安装成功,点击“Finish”。
(6)上传license文件打开IE浏览器,访问http://localhost/lmc/index.jsp,选择Configure License Server。
选择“Copy license file to this license server”。
把license 文件上载到license server。
点“Current Usage”,可以查看License信息是否正确。
(7)检查IP(因为IP可能变动)右击网络邻居->属性->本地连接->属性->Internet协议->属性,查看IP地址是否是之前设好的IP,如有变动,则再把其设为(1)中所设的IP。
至此,citrix机器上的配置完成。
3 部署Citrix 服务器环境(另一操作系统)(1)把另一台机子加入之前设置的域右击网络邻居->属性->本地连接->属性->Internet协议->属性中,设置固定IP (注:首选DNS服务器与citrix机子相同),确定右击我的电脑->属性->计算机名->更改,加入之前设置的wwj域(citrix机的用户名、密码),确定后重启计算机。
(2)安装windows组件在172.17.7.75上,使用域管理员帐号登录wwj域: Username: Administrator Password: password打开:开始->控制面版->添加删除程序->Windows组件:取消Internet Explorer 增强的安全配置,取消更新根证书(防止后面安装出现死机,待安装结束后如需要可再进行安装),选择应用程序服务器和终端服务器两个组件安装;应用程序服务器应包括(如图);选中“下一步”。
选择“完整安全模式”,下一步。
选择“使用下列许可证服务器”,并输入“172.17.7.74”(终端服务器授权安装的机器IP地址或机器名);“下一步”。
选择“每设备授权模式”。
(至于每设备还是每用户,要根据用户购买的license 类型选择),“下一步”;开始组件安装过程,组件安装完以后,点击“完成”。
选择“是”重新启动服务器。
(3)安装Citrix Presentation Server在172.17.7.75上以管理员身份登陆wwj域,运行:C:\XA5_EN_W2K3\1978\CPS45_EN_W2K3\Autorun.exe选择“Product installations and updates”选择“Install Citrix Presentation Server 4.5 and its components”把授权说明右侧的下拉菜单拉至最下面,然后选择“I accept the license agreement”,点击“Next”提示安装所需要的组件;点“Next”进入下一步。
取消Citrix Licensing(已经在另外一台装过),可取消Document Center。
点击“Next”。
选择“I already have a license server, or will use the product CD to install one later.”,点击“Next”点击“下一步”。
这里复选所有的组件,然后点击“下一步”。
此部分安装完成后,会自动安装Web InterfaceWeb Interface安装路径,点击“Next”。
选择客户端所在的位置,如C:\XA5_EN_COM_W2k3\clients\,然后点击“Next”。
此部分安装完成,点击“Finsih”。
接下来安装Presentation Server,点击“Next”,进入如下界面。
点击“Next”。
点击“Next”。
点击“Next”。
整个Server Farm(服务器群)的第一台Citrix Server,选择Create a new farm,点击“Next”。
如果是Farm中第二或更多台,请选择Join an existing farm。
在Farm name框中输入一个容易记的名字,Data Store可以选择Access/ MSDE/ SQL Server/ Oracle等类型,服务器数量较少时均可以选择Access数据库,点击“Next”。
默认建立管理Citrix的管理员帐号,点击“Next”。
默认情况下,如果用此帐号以外的用户登录系统,无权限使用Citrix的管理控制台。
点Next。
在Host name框中输入已安装Citrix Licensing的机器名,点击“Next”。
是否允许Shadow,点击“Next”。
选择“Use a separate port”,然后在TCP/IP Port框中输入8080,点击“Next”。
意思为指定运行XML Service的端口为8080。
选择“Add the list of users from the Users group now”,点击“Next”。
这步安装时间较长,请耐心等待。
Presentation Server组件安装完成后,取消View the Readme file选项,点击Close。
接下来全部默认安装,直到安装结束后,重新启动服务器。
