移康智能二郎神系列可视门铃说明书
门铃设备与通信设备连接指南说明书
SYSTEM REQUIREMENTS•DoorBird IP Video Door Station D10x/D11x/D20x/D21x-Series or DoorBird IP Upgrade D301A (Audio only)•Yealink SIP-T58 (A/V) IP Video Telephone or SIP-T42S/T48S IP Telephone (Audio only)ADDITIONAL INFORMATIONThe following guide will take you through the steps of setting up a DoorBird IP Video Door Station in connection with a Yealink IP Telephone.Please make sure that the Yealink IP Telephone receives an IP address and is connected to your network via LAN socket. Please also make sure that your DoorBird IP Video Door Station is online, using this service:https:///checkonlineThe local IP address of your DoorBird Door Station is available from the same page.Note: the DoorBird IP Video Door Station is capable of both peer-to-peer communication, as well as client-server-based communication. This manual will focus on setting up a peer-to-peer connection between your DoorBird IP Video Door Station and your Yealink IP Telephone. If you are using a SIP service provider to handle communication between the devices, the principal setup remains the same, though the SIP configuration will require the connection information provided to you by your SIP service provider.Note: The Yealink SIP-T48S does not support video calls and will function with voice call only.FIRMWARE INFORMATIONThis manual was tested using the following firmware versions:DoorBird IP Video Door Station: 000122Yealink T42S: 66.84.0.15Yealink T48S: 66.84.0.15Yealink T58A: 58.83.0.151. SETTING UP THE YEALINK IP TELEPHONE1.Login to the Yealink web interface by entering the IP address of the Yealink phone into yourbrowser.2.If you are using a SIP service provider for the communication between your devices, create a newprofile on your Yealink IP Telephone by going into the account settings and filling out the fields according to the information provided to you by your SIP service provider.Click “Confirm” to store the settings.3.From the“Account”-Section,go to“Codec”and scroll down to“Video Codec”.Make sure allnecessary codecs are enabled.4.Click on the “Features”-Section and navigate to “General Information”. Make sure “Accept SIP TrustServer Only” is switched OFF and “Allow IP Call” is switched ON.5.To make use of the built-in doorcom feature of the Yealink IP Telephone, navigate to “Features →Door Phone”.Note: if you are unable to locate this setting, make sure the installed firmware of the Yealink IP Telephone is up to date. Please refer to the user manual of your Yealink IP Telephone for details on the update process.Please also note that this feature is not available on the Yealink SIP-T48S IP Telephone.6.For“Device Type”, select“Custom”and choose an arbitrary“Display Name”for the DoorBird IPVideo Door Station, e.g. “DoorBird”. Set the “Phone Number” to the SIP id provided by your PBXservice provider to be assigned to your DoorBird IP Video Door Station.Set the “Unlock PIN” to an arbitrary number, making sure to terminate it with a “#”-symbol. Takenote of the number itself which will be required for the setup of the DoorBird IP Video DoorStation.Set the following toggle switches to your preference, though it is recommended to activate “SendAudio in Call” and “Send Video in Call”.7.Click “Confirm” to store the settings.2. SETTING UP THE DOORBIRD IP VIDEO DOOR STATIONFor the DoorBird IP Video Door Station to be properly able to communicate with the Yealink IP Telephone, the DoorBird device’s SIP-settings must be adjusted accordingly.1.Open the DoorBird App and log into the administration area under“Settings → Administration”using the administrator user and password credentials from the “DIGITAL PASSPORT” documentthat was shipped with your DoorBird IP Video Door Station.2.Choose “SIP Settings” from the menu and activate the “SIP active” switch.3.Since the connection between the Yealink IP Telephone and your DoorBird IP Video Door Stationwill be peer-to-peer, no further settings are required on this screen, and the following fields shouldbe left blank.Note: if you are using a SIP service provider for the communication between your devices, fill inthe IP address or URL of your SIP service provider into the “SIP Proxy” field and enter the SIP userid and password designated for your DoorBird IP Video Door Station.4.Go back to the main administration area and tap on “SIP Calls”, then tap “Add”.5.In the subsequent screen, enter an arbitrary name in the “Name” field, e.g. “Yealink”. For the SIPaddress, enter the IP address of your Yealink IP Telephone.Note: if you are using a SIP service provider for the communication between your devices, fill inthe IP address or URL of your SIP service provider into the “SIP address” field and prefix it with theSIP user id of your Yealink IP Telephone and an “@”-symbol, e.g. *******.3.4.If you want to make use of the DTMF-functionality of the DoorBird IP Video Door Station in order to control the built-in light and door relay of the DoorBird IP Video Door Station using your Yealink IP Telephone, do the following:1.In the main administration area, choose “SIP Settings”.2.Toggle the “DTMF” switch on, and set the “Light PIN” and “Relay 1 PIN” to arbitrary PIN numbers ofyour preference.Make sure to terminate these PIN numbers with a“#”symbol when entering them on yourYealink IP Telephone.Note:The transmission of DTMF signals only happens during an active call between theDoorBird IP Video Door Station and the Yealink IP Telephone.For calls from the DoorBird IP Video Door Station to be forwarded to the Yealink IP Telephone, a schedule for the doorbell needs to be properly set up. Depending on the model of the DoorBird IP Video Door Station, choose one of the following options:A)For all devices with a single door chime(e.g.D10x,D20x,D2101V etc.) find the settings inquestion under “Schedule for doorbell”. From this screen, tap the bell symbol in the upper leftcorner, choose “SIP call” and fill out the schedule per your requirements.B)For all devices with multiple door chimes (e.g. D2102V, D2103V, etc.) find the settings in questionin the administration area under“Key Configuration”from the settings menu.Select theappropriate button and tap “Schedule for actions”. From this screen, tap the bell symbol in theupper left corner, choose “SIP call” and fill out the schedule per your requirements.C)For all devices outfitted with a keypad(e.g.D21DKV) find the settings in question in theadministration area under“Keypad”in the settings menu.Select the appropriate keycombination and go to “Schedule for actions”. From this screen, tap the bell symbol in the upperleft corner, choose “SIP call” and fill out the schedule per your requirements.Hint:by tapping the button in the upper right corner it is possible to fill or empty the entireschedule.3.Return to the main administration area and save the settings. Wait for about five minutes for thenew settings to take place.It is also possible to make calls to the DoorBird IP Video Door Station from your Yealink IP Telephone. This behavior is deactivated by default and can be set up using the following steps.1.From the “SIP Settings” page, scroll down to the “Allow incoming calls” setting and switch it on.2.Tap on the newly appeared “Allowed SIP Users” setting and on the following page tap “ADD”.3.Enter the IP address of your Yealink IP Telephone into the prompt and tap “OK”.Note: if you are using a SIP service provider for the communication between your devices, fill inthe IP address or URL of your SIP service provider into the “SIP address” field and prefix it with theSIP user id of your Yealink IP Telephone and an “@”-symbol, e.g. *******.3.4.4.Navigate back to the main “SIP Settings” page and tap “Save” to activate the changes.For questions and problems regarding the product “Yealink IP Telephone” please contact the manufacturer online: /?language=enFor questions and problems regarding our devices (DoorBird IP Video Door Station) please use the contact for to get In touch with our technical support: https:///contact。
智能家居产品使用说明手册

智能家居产品使用说明手册第一章:产品概述 (2)1.1 产品简介 (3)1.2 产品特点 (3)第二章:开箱与安装 (3)2.1 开箱准备 (3)2.2 设备安装 (4)2.3 连接电源 (4)第三章:设备连接与配置 (4)3.1 连接WiFi (4)3.1.1 准备工作 (4)3.1.2 连接步骤 (5)3.2 配置智能家居系统 (5)3.2.1 添加设备 (5)3.2.2 设置设备名称 (5)3.2.3 设定设备场景 (5)3.3 绑定设备 (5)3.3.1 绑定设备至账户 (5)3.3.2 解绑设备 (6)第四章:基本操作 (6)4.1 智能家居APP使用 (6)4.1.1 与安装 (6)4.1.2 注册与登录 (6)4.1.3 主界面功能介绍 (6)4.1.4 添加设备 (6)4.1.5 控制设备 (6)4.2 语音操作 (6)4.2.1 开启语音 (6)4.2.2 语音唤醒 (7)4.2.3 语音命令 (7)4.3 设备控制 (7)4.3.1 开关控制 (7)4.3.2 调节控制 (7)4.3.3 定时控制 (7)4.3.4 场景控制 (7)4.3.5 联动控制 (7)第五章:场景设置 (7)5.1 创建场景 (7)5.2 添加设备 (8)5.3 触发条件设置 (8)第六章:安全与隐私 (8)6.1 数据加密 (8)6.1.1 加密技术概述 (8)6.1.2 加密算法 (8)6.1.3 加密密钥管理 (8)6.2 账号管理 (9)6.2.1 账号创建与认证 (9)6.2.2 账号权限管理 (9)6.2.3 账号安全保护 (9)6.3 隐私保护 (9)6.3.1 用户信息保护 (9)6.3.2 数据存储与处理 (9)6.3.3 数据共享与使用 (9)6.3.4 用户隐私设置 (9)第七章:智能家居设备维护 (10)7.1 设备保养 (10)7.1.1 清洁保养 (10)7.1.2 定期检查 (10)7.2 软件升级 (10)7.3 故障处理 (10)7.3.1 常见故障及处理方法 (10)7.3.2 故障处理注意事项 (11)第八章:智能家居系统扩展 (11)8.1 添加新设备 (11)8.1.1 设备连接 (11)8.1.2 设备配置 (11)8.1.3 设备调试 (12)8.2 系统兼容性 (12)8.2.1 设备兼容性 (12)8.2.2 系统兼容性升级 (12)8.3 系统升级 (12)8.3.1 升级方式 (12)8.3.2 升级步骤 (12)8.3.3 注意事项 (12)第九章:售后服务 (13)9.1 售后政策 (13)9.2 联系客服 (13)9.3 常见问题解答 (13)第十章:用户反馈与建议 (14)10.1 反馈渠道 (14)10.2 意见收集 (14)10.3 改进与发展 (15)第一章:产品概述1.1 产品简介本智能家居产品是一款集成了现代科技与人性化设计的高科技产品,旨在为用户提供舒适、便捷、安全的居住环境。
智能门禁管理系统使用说明书
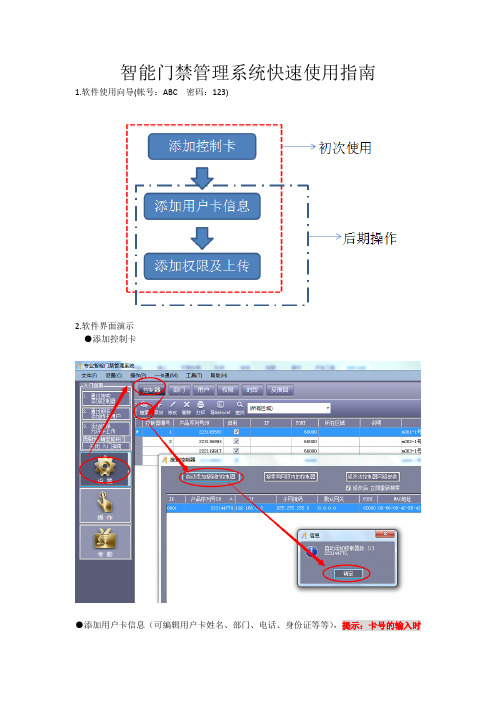
智能门禁管理系统快速使用指南
1.软件使用向导(帐号:ABC 密码:123)
2.软件界面演示
●添加控制卡
●添加用户卡信息(可编辑用户卡姓名、部门、电话、身份证等等),提示:卡号的输入时
用我们配的发卡器,连接电脑USB接口后,使用卡片接触即可录入对应卡号。
●快速添加卡片(对卡片无姓名、性别、部门等要求使用,只做开门权限,或者是批量添加卡号后再修改卡信息)
●添加权限并上传。
提示:上传权限时确保电脑与闸机的网络是连通的,否则无法上传。
备注:本说明书只适用于简单的卡片授权,如需要更详细的软件使用说明,请点击软件“帮助”界面的“使用说明书。
智能防盗报警器使用说明书

智能防盗报警系统使用说明书概述本产品是利用电话线路传递报警信息的智能设备。
本系统采用微处理器为控制核心,通过电话线路与接警中心进行通讯;且安装简单,操作方便;还可选配紧急呼叫器,实现紧急拨号求救。
主要适用于家庭、写字楼、营业场所等需要防止他人非法入侵的场所。
产品主要功能简章1.智能语音提示。
操作简单。
工作状态直观明了。
2.内置90分贝警笛。
也可增加外置警号。
3.主机可以登录10个遥控器;4.主机有9个无线防区与4个有线防区,其中每个无线防区可以登录5个探测器,主机会自动识别防区所登录的探测器是否为烟感或煤感;可自动区分紧急事件、盗窃、火灾、煤气泄漏警情类型等等。
5.探测器与主机之间采用学习式自动登录识别,扩充更加简单、方便,可任意删除某个防区的探测器。
6.信息保护功能,所有信息设置必须在输入密码后才能进行设置,避免信息被有意或无意更改。
安全系数高。
7.主机所设置的内容信息,均储存在记忆元件内,掉电后不丢失。
8.紧急情况下可按下遥控器的紧急报警键,发出求救信息。
9.支持多种布控模式。
10.可以通过电话异地拨号,对主机进行远程控制。
可实现家居控制功能。
11.可以与标准CID协议格式的联网报警中心联网。
12.剪线提示/报警功能。
13.个性化设置、各参数恢复出厂设置功能。
14.智能学习码,电脑滚动数据、防破解功能,设备具有防破坏功能。
简易操作流程1.进入主机设置状态(只有进入主机设置状态,才能对主机的各个功能进行操作)按“*1234”(默认的4位密码为1234);输入完后便可以进入设置状态。
2.修改密码:进入主机设置状态→按一下“*”→输入“4位新密码”→按一下“#”→再次输入“4位新密码”→再按一下“#”3.设置普通报警电话号码(第1~第5组为普通报警电话号码)进入主机设置状态(默认*1234)→按一下“1”→输入“1~5”中的一个数→“电话号码”→按一下“#”4.联网报警中心电话号码的设置(第六组为联网报警中心号码,当没有联网时,则不需要设置)进入主机设置状态→“1”→“6”→“中心电话号码”→“*”→“4位ID码”→按一下“#”。
可视门铃的工作原理
可视门铃的工作原理嘿,朋友们!今天咱来唠唠可视门铃这玩意儿的工作原理,可有意思啦!你想啊,可视门铃就像是你家门口的小卫士。
它主要由这么几个部分组成,就像人的身体器官一样各有各的用处。
那个摄像头呀,就好比是眼睛,能帮你看清门外是谁在晃悠呢。
然后还有个小喇叭,这就像嘴巴,能让你和门外的人说话。
当有人按门铃的时候,那摄像头就开始工作啦,“咔嚓”一下就把门外的画面拍下来了,这速度,比你眨眼还快呢!然后这画面就顺着线啊,就跟小老鼠钻洞似的,传到你家里的那个显示屏上。
你呢,就可以舒舒服服地坐在沙发上,看着屏幕,嘿,外面是谁一目了然。
这还不算完呢,要是大晚上的,黑乎乎的看不清咋办?别担心,可视门铃还有个小秘密武器,那就是红外灯。
这红外灯啊,就像夜里的小灯笼,能照亮门外的情况,让那些想偷偷摸摸的人无处可藏。
再说那小喇叭,你在屋里一说话,声音就通过它传到门外去了,这多方便呀!就好像你在跟门外的人面对面聊天似的。
你说这可视门铃是不是特别神奇?就像变魔术一样,把门外的情况都变到你眼前了。
它可不单单是个门铃哦,它还是你的安全小助手呢!有了它,你就不用担心会有陌生人随便闯进你的家啦。
要是没有可视门铃,那可就麻烦咯。
你想想,有人敲门,你还得跑过去透过猫眼瞄一眼,万一眼花了没看清咋办?或者大冬天的,你还得哆哆嗦嗦地去开门看。
有了可视门铃,这些问题都迎刃而解啦!而且啊,可视门铃安装也不难,就跟你给手机贴个膜差不多。
只要找个合适的位置,把它固定好,接上电,就大功告成啦!总之呢,可视门铃这东西真是太好用啦!它让我们的生活变得更加方便、安全。
咱家里要是还没有装,那可真得赶紧安排一个,你说是不是呀?。
可视门玲-用户手册
2 )如在1 秒内收到信号,则进入监视室外门口机,如在4 秒没有收到信号,则自 动退出监视状态。 3 )在监视状态下再按一下“ 视。监视时间为一分钟。 ”则退出监视室外门口机,若按“ ”键开夜
一拖二,二拖二:
1 )室内任意一台机在待机状态,轻按“ ”监视键屏幕显示“monitoring 01 ”,
■振 铃声设 定
eive code ”,然后松开两键该机进入“收码”状态。 3 )2 号门口机在待机状态下按住呼叫键直到红色状态指示灯点亮并连续发出“嘀 嘀”两声(该状态在对码状态后),该机进入接码状态(收码成功的室外机为 2号室外机)。(一台门口机带两台室内机则不需此步骤。) 4 )在 16 秒内如果接码成功,则响“嘀嘀嘀”三声并自动退出接码状态,室内机 显示“ Successed ”;如果在16 秒内接码失败,则无提示自动退出,室内机 显示“ Failed ”。 5 )所有的收码都成功后按1 号室内机的“ ”键返回到待机状态。
6 )对码、给码、收码完成后,室外机在上电的时候会以“嘀”声提示ID 号,室 内机会在开机的时候在屏幕的左上角显示“NO 01 ”或“NO 02 ”提示ID 号。
■ 监视 功能
一拖一:
1 )室内任意一台机在待机状态,轻按“ ”,屏幕显示“ monitoring ”。
■清 码
室内机在关机状态下同时按住“ ”键和“ ”键,然后按“ON/OFF” 键直到屏幕显示“clear code ”并响“嘀”一声,即清码成功。松开按键后仍为 关机状态。 门口机在待机状态下按清码键(位于门口机背部接线下方)直到发出一声 “嘀”音,即清码成功。
■ 基本 操 作
一拖一:
室外机呼叫室内机: 1 )在待机状态下,室外机按呼叫键,状态指示灯红灯长亮。 2 )a. 如4 秒内没有收到应答信号,则不响“嘟”音,并响四声“嘀”之后退出呼 叫状态并返回待机状态。 b. 如室内机有收到信号,屏幕显示“talking ”,室外机一直响“嘟”音,室 内机则 状态 指示灯红灯长亮同时响选定的音乐。 3 )a.如此时室内机没有人摘机,则持续 60 秒之后进入待机状态。 b.如此时室内机有人摘机,则停止所有响铃并进入通话状态(室内机红灯转换 成绿灯长亮),通话时间 2 分钟。 4 )在通话过程中,按“ ”开锁键则开锁,屏幕显示“unlock”提示开锁(开
2.4G 数字无线可视对讲门铃 说明书

2.4G数字无线可视对讲门铃使用说明书阿域网络技术(北京)有限公司目录1. 产品简介 (2)2. 功能特点 (2)3. 标准套装配件 (3)4. 室外门前机 (4)5. 室内可视机 (5)6. 室外门前机安装 (7)7. 操作说明 (10)8. 故障诊断 (12)9. 工作环境 (13)10. 机器维护 (13)11. 注意事项 (13)12. 技术支持 (14)为了更好地发挥产品的优异性能, 请仔细阅读本产品使用说明书, 以便正确掌握安装和操作方法。
(4) 机器应放在牢固, 通风良好, 空气干燥, 没有阳光直射, 没有强磁场和灰尘的地方; 11. 注意事项(1) 室内可视机有第一次充电时间应在5小时以上, 以后每次充电时间为2~3小时, 待机时间为100小时。
(2) MIC, 扬声器通话时要注意不要有物体遮住。
(3) 应使用指定的电源适配器; 或同种型号(相同额定电压、电流)的电源适配器, 非指定的电源适配器则可能导致机器内部电路及元件的损坏;(4) 请勿私自拆开机器, 如有故障需要进行检修, 请与经销商或本公司技术员联系。
12. 技术支持(1) 本产品在整个销售过程中坚持售前、售中、售后跟踪服务方式, 客户在安装使用前首先要详细阅读本用户手册;(2) 客户在安装调试本产品前, 应严格按照用户手册进行, 客户在安装使用过程中如有疑问, 请致电我公司技术支持与服务中心咨询;附注:(1) 本手册中所采用的插图、屏幕显示, 是为了更详细直接地阐述本产品的操作, 由于版本升级和生产批次的不同, 他们可能会与您实际使用的机器稍有不同。
若本手册所述内容与您的机器不符, 请以产品为准!(2) 该使用说明书只适用一台室内可视机对一台室外门前机操作, 不适用一台室外门前机对多台室内可视机或者多台室外门前机对一台室内可视机的操作。
(3) 本产品最终解释权归本公司所有, 如有质量问题请返还本公司, 任何公司和个人无权擅自撕毁本产品的标签, 否则一切后果自负。
电子门铃系列说明书

For more information, call 1-800-888-4784 (4STI) or visit KEY FEATUrESGeneral Information· All chimes are compatible with each other.· Up to 500’ operating range.· Ideal for the home, store or office.· One year limited warranty. Construction· U L/cUL Listed, FCC and IC Certified. Installation· Quick and easy to install – no wiring needed.· receiver plugs into 120 VAC outlet. Ele ctronics· r eceiver has a low and high volume adjustment.· Supervised low battery alert. Options· 10 sound options with the push of a button on the sensor (excludes STI-3331).· S TI-3300 can distinguish between a front and back door by adding another sensor. The first doorbell will play “ding-dong” and the second will play “dong.”Wireless Chime (STI-3350)Mount the wireless button next to your door, plug the receiver into any 120 VAC indoor electrical outlet and the chime is ready to operate. Entry Alert ® Chime (STI-3360)Mount the small transmitter and magnet to any door and plug the remote receiver unit into any electrical outlet. That’s it. No wiring required. When a monitored door opens, the Entry Alert Chime sends a signal to the receiver announcing the entrance with one of ten selectable melodies or alarm.Wireless Motion-Activated Chime (STI-3610)Mount the motion sensor and plug chime receiver into any electrical outlet within operating range. Alerts when someone enters the transmitter’s detection zone. The weather sealed transmitter has 140° x 40 ft. detection zone. Includes adjustable mounting bracket.Wireless Doorbell Extender (STI-3300)This doorbell chime connects to your existing traditional hard wired doorbell system and extends a new chime to hard-to-hear areas. Once the unit is wired into existing system, the included receiver can be plugged into any standard electrical outlet. This allows you to hear when someone is at your front door when in remote areas. Normally open switch, 16 VAC.STI WIrELESSCHIMESSTI-3350STI-3610STI-3300STI-3360PrOdUCT OVErVIEWSTI Wireless Chimes greet your visitors with a pleasant chime and lets you know when the door opens or a person enters the detection zone. All chimes are compatible with each other. distinguish between front and back doors by adding sensors and selecting a different chime on each. Transmitters have up to 500’ operating range.HOW IT WOrKSTel: 248-673-9898Taylor House09/15Subject to change without notice.APPrOVALS & WArrANTYTESTINGIt has been tested and approved or listed by: · UL/cUL Listed No. S7255 · FCC and IC CompliantWARRANTYOne year limited warranty within normal use.SPECIFICATIONSFrequency: 433 MHzPower Source: receiver plugs into 120 VAC outlet (minimum 110 VAC)Sensors include:STI-3301Wireless Doorbell Chime Sensor One CR2032 batterySTI-3551 Wireless Entry Alert®SensorOne AAA battery STI-3601Wireless Motion-Activated Sensor One Lithium CR123 batterySTI-3331 Wireless Doorbell Extender Sensor n/aSTI Wireless Chimesdimensions and Technical InformationMOdELS AVAILAbLESTI-3350 Wireless doorbell Chime with receiver STI-3360 Wireless Entry Alert ® Chime with receiverSTI-3610 Wireless Motion-Activated Chime with receiver STI-3300 Wireless doorbell Extender with receiverAccessories STI-3301 Wireless doorbell Chime Sensor STI-3551 Wireless Entry Alert ® SensorSTI-3601 Wireless Motion-Activated Sensor STI-3331 Wireless doorbell Extender Sensor STI-3353Wireless Chime receiverSelectable Soundsding dongding-dongWestminster – 4 note Westminster – 8 note Knock Knock Jingle bells barking dogs bicycle bell buzzer“Jingle Bells”door Entry “Westminster Chime”doorbell“Ding Dong”doorbell Extender “Ding”Motion detectorAll accessories work together!Make each a different sound and know the exact transmitting source.。
2.4GHz 全数字 无线猫眼可视对讲门铃 说明书
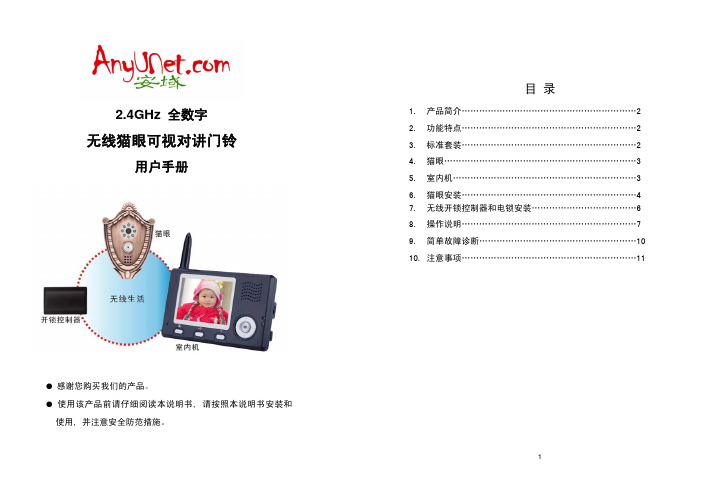
2.4GHz 全数字无线猫眼可视对讲门铃用户手册● 感谢您购买我们的产品。
● 使用该产品前请仔细阅读本说明书, 请按照本说明书安装和使用, 并注意安全防范措施。
目 录1. 产品简介............................................................2 2. 功能特点 (2)3. 标准套装............................................................2 4. 猫眼..................................................................3 5. 室内机...............................................................3 6. 猫眼安装............................................................4 7. 无线开锁控制器和电锁安装....................................6 8. 操作说明............................................................7 9. 简单故障诊断......................................................10 10. 注意事项 (11)1. 产品简介该产品广泛用于单元家庭, 酒店, 别墅, 办公室等场所,由猫眼、室内 机、无线开锁控制器三个单元组成。
猫眼在结构上设计独特,可以安装在各类门上(门厚度35~110mm, 猫眼孔径14~38mm),室内机设计精巧,可手持,可放置在桌面上,可挂在墙壁上;无线开锁控制器设计灵活,与电锁连接简单, 三者之间均是无线连接,安装简单,不需布线;使用方便,轻松完成可视对讲,一键开锁。
智能门锁使用说明书_指纹锁
目录1 指纹锁介绍 (4)1.1 产品特征 (4)1.1.1 产品介绍 (5)1.1.2 产品功能介绍 (5)1.2 尺寸 (5)1.3 技术参数 (6)2 操作使用 (7)2.1 放置手指的方式 (7)2.2 操作说明 (8)2.3 警示 (8)2.4 安装/更换电池 (9)3 安装步骤图 (10)3.1 侧条和锁体尺寸图 (10)3.2 确认开门方向 (14)3.3 门板开孔图 (15)3.4 门扣盒开孔图 (15)3.5 安装步骤 (15)3.5.1 安装锁芯 (15)3.5.2 安装前后面板 (16)3.5.3 安装门框盒和扣板 (17)4 锁的维护及保养 (19)4.1 日常维护及保养 (19)4.2 使用须知 (19)5 售后服务 (20)5.1 售后服务相关说明 (21)5.2 装箱清单 (24)5.3 配件表……………………………………………………………24A/1(2016年5月)重要提示1指纹锁作为高科技产品,安装的好坏直接影响到门锁的正常操作及使用寿命,建议您聘请对锁具有相当经验的师傅进行安装,并根据产品附件中门板开孔图样板进行开孔,凿支承窝,锁扣板及锁扣盒孔;确认所开凿的孔准确无误,然后严格按照产品说明书中的步聚进行操作,如果安装后发现锁开关不灵活或不能开启,请及时和当地的经销商或本公司的售后服务部门联系,以便问题快速得以解决。
2如果您的房间正在装修中,我们建议您在产品安装及经检查没问题后将产品卸下,待装修完成后再把产品重新装上,这样做的目的是:1.避免装修过程中出现腐蚀性物质粘在锁体上,影响外观,如果门的油漆未干会影响传动不灵活;2.装修时会使用酒精、油漆等化学物质,这些化学物质在未干透时会向空气中散发腐蚀性气体或灰尘,加速产品表面处理生变,影响外观及降低产品使用寿命。
3在门锁安装前,请您先接通所有连接线并装好电池后,按门锁线路板上的初始化按钮,第一时间对门锁进行初始化,恢复到出厂状态。
可视系统使用说明书

TSVL深圳震声智能电子有限公司震声智能SHENZHENG ZHENSHENG ELECTRONIC CO.,LTD安装使用手册中国●震声深圳震声智能电子有限公司SHENZHEN ZHENSHENG TECHNOLOGY CO.,LT D总部地址:深圳市龙华新区龙华街道时代金銮大厦1109工厂地址:佛山市顺德区乐从镇乐从大道西9号兆安楼5层联系电话:0757--23811158深圳震声智能电子有限公司智能楼宇对讲安装使用手册特别警告凡安装本公司楼宇对讲系列:工程布线应远离交流市电等强干扰源以免影响对讲系统的正常工作!ZS3000型数码可视对讲系统◆功能特点★适用于多层建筑,最大容量9999户★数码可视主机内置LED摄像头,无论白天、黑夜均可摄取清晰图像★主机至分机采用四芯加视频总线联接★直按数码主机都可使用,数码可密码开锁,联网部分可呼叫管理机★铝合金面板,美观耐用,主机按键为透明自动夜光按键★电源待机时功率大、电流小、省电★主机户数可灵活变化,可视和非可视混合安装,灵活方便◆配置清单★直按主机★集中电源★室内分机★电控锁(有多种品牌可选)★闭门器(有多种品牌可选)★四芯线+视频线◆布线方式和线径要求●主干线:RVV4*0.5护套线+SYV75-3视频线●入户线:RVV4*0.3护套线+SYV75-3视频线●开锁线:RVV2*0.5护套线◆主机安装尺寸★直按可视主机300×110×35(mm)★各款主机安装尺寸不同,请开孔前联系本厂技术◆主机安装位置:顶部距离地面1.5米左右,或根据使用者要求和楼宇实际情况而定。
◆使用说明:★当有来访客时,客人按主机面板上对应房门号键,室内分机即发出振铃声,同时可视分机屏幕清晰显示来访者图像(当夜间时,主机夜光键作照明)户主提机与客人对讲后,可通过室内分机的开锁键遥控开启大门的电控锁★客人进入大门后,闭门器使大门自动关闭★当停电时,系统可由不间断电源维持工作(需加装后备电池)★若住户需监视楼下情况时,可按下“监视”键分机屏幕显示楼下画面★★★主机编码/使用方法一、单元主机号编码:多台主机同时使用时必须设置主机号,以区分那台主机在使用;单元主机号编码方法:空闲状态下主机上按一下“#”号键,数码管上显示PASS,直接输入“00002003”然后输入4位编码,4位编码的前2位代表单元号,后两位代表主机号,例:当前1单元有2台机机在工作,第1台应编码为0101,第2台应编码为0102,依次类推。
门铃说明书

别墅型WiFi远程可视门铃快速安装指南尊敬的用户,欢迎您选用本产品,在使用本品之前,请务必详细阅读操作指南,并保存此操作指南以备后续参考说明:产品图片具体以实物为准,我们将根据产品功能的增加或升级,定期更新本说明书,更新内容将在本说明的新版本中印刷,恕不另行通知。
产品介绍采用Ti/Hisilicon方案,H264压缩格式,高清(130万)、标清D1、流畅(VGA)可选支持Onvif协议,能对别主流厂家NVR采用军工级3.6mm,130度广角进口镜头,带五颗LED智能夜视灯多录像模式可选,报警录像、定时录像、手动录像支持802.11b/g/n协议,标配WiFi功能,独创空中发包专利技术设置WiFi学习型433频率无线报警器接入,可推送报警信息到邮箱、手机,并可一键布防/撤防支持远程遥控开启智能锁(选配)集成智能门铃按键,夜间按键灯自动开启(门铃需联网)内置ECM麦克风与高频扬声器,采用3D降噪与回音消除技术,保证双向语音对讲纯真效果自带TF卡插口,最大支持64G/TF卡不间断录像,并可远程通过手机高清流畅回放一台设备最多可与8部手机/PAD/智能终端视频对讲可分别设置管理者与访问者密码,用户安全更有保障1包装清单打开产品包装后,请确认可视门铃是否完好(以下简称“设备”),同时检查列表中物品是否齐全,如发现有缺失,请及时与销售商取得联系。
附:出厂默认配置POE电源适配器。
如需AC100-220V供电,另购电源适配器。
您可以通过工程具体布线施工情况选择合适的供电方式。
供电描述说明AC220V供电门铃可无线连接家庭路由器,当路由器信号较弱无法覆盖到安装地点时请选择POE有线供电,或者选购居得安大功率路由器(可覆盖空旷800米周边范围)DC12V供电门铃可无线连接家庭路由器POE供电(推荐)POE供电方式是通过一条网线同时解决门铃供电和数据传输的一种低成本施工方式。
(需选用8芯线,4芯进行数据传输,4芯用于供电)3软件安装1、若您使用手机客户端手机/apad/ipad用户可扫描包装盒二维码下载。
ltaa寸无线可视门铃操作说明书无线可视对讲门铃【直接打印】

无线可视对讲门铃使用手册7寸无线可视对讲门铃是一款2.4G无线的具有门铃、拍照、对讲、监视、开锁为一体的高科技家居智能产品。
特别是其独有的人体感应功能,任何进入其探测范围的来访者,它都会自动显示于室内机中并拍照保存,即使你不在家,你仍能知道谁曾拜访过你,本智能门铃帮助我们提高居家安全。
本产品安装方便,使用起来更加简单。
室外机与室内机装上电池开机直接使用,是一款专为别墅用户设计,可支持一台室外机与三个室内机配套使用,空旷距离可达600米。
本产品采用最新的节能技术与2100mA超大电池,省电与超长待机并配备7寸TFT彩屏,其稳定的性能和时尚的外观设计是您高品质的智能生活的第一选择。
请注意:本款产品外机必须扣进防雨罩中才能呼叫,外机防雨罩中带有一个磁铁,跟室外机之前有一个磁场感应!听到报警声音可以按内机通话键两次,消除报警声!引言感谢您选择本公司的无线可视对讲门铃。
请仔细阅读本说明书,充分了解它的用法,功能完善,操作简单。
本公司保留修改本手册的权利,恕不另行通知。
安全警告及注意事项1.警告●不要将本产品放置不平或不稳定的台面,以防止坠落造成的故障或损坏。
●本产品只可使用本公司指定的电池和充电器。
使用其他产品可能会导致电池漏电,过热,爆裂和火灾。
●不要猛烈撞击,震动或摔扔本无线可视对讲门铃,以免引起产品故障和火灾。
●不要把电池,充电器或无线可视门铃在微波炉或高压设备旁,否则,可能会造成电路短路或者火灾。
●不要使用在易燃易爆气体的地方使用本产品,否则,大量的灰尘,会造成产品无法使用。
2. 本产品操作注意事项●不要用力按压液晶屏或敲打液晶屏,否则,将造成LCD面板断裂和损坏从而导致结晶液体渗漏。
如果结晶的液体进入您的眼睛,请立即用水冲洗你的眼睛(一定不要用手揉眼睛),并立即去看医生。
●不要拆除或改造本产品,否则,会造成本产品的损坏及电气故障。
●不要用针,钢笔/铅笔笔尖和其他铦物体按下按键,否则,将造成产品按键的损坏。
智能门铃的安装说明
智能门铃的安装说明智能门铃的安装说明智能门铃成为我们家居生活中的一种智能设备,通过与手机连接,我们可以实时查看门外的情况,并能与访客进行语音对话。
想要安装智能门铃,只需按照以下步骤进行操作。
1. 准备工作在开始安装智能门铃之前,我们需要先准备一些工具和材料。
首先,确认你已经买好了智能门铃设备,并确保它包含了所需的所有配件。
接下来,准备一个螺丝刀、一个电钻、一套螺丝和一个固定支架,这些都是安装门铃时常用到的工具。
最后,确保你的门外有一个稳定的Wi-Fi信号,这对于智能门铃的正常运行至关重要。
2. 安装门铃主体首先,找到你想要安装门铃的理想位置。
这通常是在门口的侧壁或门框附近。
然后,使用电钻在门铃所需位置钻孔。
请确保钻孔的直径和门铃的螺丝匹配。
接下来,将门铃的固定支架安装在钻好的孔上。
使用螺丝刀将支架固定在墙壁上,确保它牢固稳定。
3. 连接电源和Wi-Fi拿起门铃主体,找到电源接口。
使用提供的电源线连接门铃主体和电源插座。
确保插头连接牢固,然后接通电源。
门铃通常会通过指示灯或声音来确认是否成功接通电源。
接下来,打开手机的Wi-Fi设置界面,在可用WiFi列表中找到门铃设备对应的WiFi网络名称,并将其连接。
一旦你成功连接上WiFi,智能门铃就可以正常工作了。
4. 配置门铃设置下载并安装智能门铃应用程序,并根据应用程序的指导,连接门铃和手机应用程序。
通常,这涉及到输入一些基本的信息,例如门铃的位置和你的个人设置偏好。
确保你按照应用程序的指示完成所有设置步骤。
在门铃设置完成后,你可以开始享受智能门铃带来的便利。
当有人按下门铃时,你将会收到手机的推送通知,并能通过手机应用程序看到门铃前的状况。
你可以选择通过手机与访客进行语音对话,或者查看门外的实时画面。
总结:通过按照以上步骤进行智能门铃的安装,您将能够轻松地享受到智能门铃带来的便利。
确保准备好所需的工具和材料,并遵循每个步骤的指引。
如果安装过程中遇到任何问题,建议查看门铃设备的安装手册或联系厂家的技术支持团队寻求帮助。
vt可视对讲门铃说明书
vt可视对讲门铃说明书
VT可视对讲门铃同轴共缆一线通可视对讲是主干线采SYWV75-5射频线,入户线采用一根rvv20、5或以上的二芯线即可。
它与传统的可视对讲门铃系统采用多芯线加视频或如今的网线
加电源线传输相比具有以下几个特点:
1、施工及维护简单;
2、图像、声音更佳,控制稳定,系统稳定性更强;
3、传输距离远;
4、联网更方便;
5、比传统的省钱;
6、住户完全户户隔离。
主干线是射频线(有线电视线传输),楼宇住户分机线是两芯电源线,对讲分机不分正负极连接,安装免调试。
大大节省了人工、线材。
可视对讲非可视对讲同轴共缆两线制旧工程改造等。
业主端使用方法:
1、听到门铃响拿起话机。
2、先按话机边上最上面的键确认底下的人是否认识,然后按“中间的键”对话,最后按最下面的键“开门”。
(话机边上有三个按键,最上面的是视频,中间的是对讲,最下面的是开门)。
安全家居产品:Home Sentinel视频门铃系统说明书

Protecting the Important Things in Your Life.Video DoorphoneNew Product Information: VI 300An easy way to improve the security at your home… replace the doorbell with a Home Sentinel video doorphone system.It adds convenience and security with one simple-to-install product, re-placing an existing doorbell with a camera outside where the push button was, and a video monitor inside. Visitors press the call button to an-nounce themselves with a doorbell chime, and their image and voice ap-pear on the monitor. You can see who’s there before answering. The hands-free intercom lets you talk with your visitor, and by adding an op-tional electric door release and sensor you can even open the door by the push of a button and confirm when it has been closed again.Designed for easy installation by the do-it-yourselfer, the Home Sentinel Video Door Intercom uses standard doorbell wiring to connect the cam-era to the monitor - there is no re-wiring needed!bySimple 2-WireHookupSpecifications:Camera:Monitor:Image sensor:1/3" B/W CCD Screen: 4" diagonal CRT, flat type Resolution: >380 TV lines TV system: NTSC No. of pixels: 251,000 pixelsResolution: >420 linesLens: Wide angle >120°, F2.7 Audio: Hands free with 2 way semi duplex Illumination: Infrared LED Auto timer: 90 seconds TV system:NTSC Operating Temp: 0 ~ 40˜CUsable sensitivity: 0 luxPower supply: 110 VAC, 60 Hz, 16W adapter Operating Temp: -25°C ~ +50°C Dimensions: 6.75” (W) x 8”(H) x 2.125” (D) Dimensions:4" (W) x 5.25" (H) x 1.375" (D)Wiring distance:325’ with AWG #18 wireNote: Due to continuing product improvement, design and specifications are subject to change at any time without prior notice.310 Alden RoadMarkham, Ontario, Canada L3R 4C1 T: 800-268-9852 F: 800-413-8864 E:***************************MEI Inc.VI 300Video DoorphoneCamera♦Rugged weatherproof ABS enclosure ♦High-resolution image sensor ♦Infrared night vision♦Extreme wide-angle lens (>120°) ♦Backlit call button♦Audio intercom with adjustable vol-umeFeatures:Monitor♦Camera monitor and answer functions ♦30/90 second auto shut-off timers ♦Hands free audio intercom♦Brightness and sharpness controls ♦Separate bell and audio volumes ♦Remote door open function (requiresoptional electric door release)♦Door open/closed indicator (requiresoptional NC/NO contact switch) ♦Handy instruction guideOptional Optional Accessories AccessoriesModel EDS 300 Electric Door StrikeHandy user instructions concealed behind flip-downpanelVolume control at the camera to ensure clear intercom operationDoor status light indicatorMagnetic switchMonitor if the door is open or closed using anoptional NO/NC contact switch POWERPower for the lockElectric lockLock release buttonOpen the door remotely using either an electricdoor strike or magnetic lock。