Windows下通过cygwin架设sshd服务
cygwin的使用
Cygwin使用cygwin使用心得1.在cygwin里访问Windows盘cd /cygdrive/ccd c:2.整合cygwin命令到Windows中假设cygwin安装在d:/develop/cygwin,则将d:/develop/cygwin/bin添加到系统变量PATH 中(最好加在windows前面,这样的话,有些相同的命令的话,是先执行cygwin的命令,而不是windows命令,比如find)就可以直接在cmd.exe下面执行tar czvf xxx.tgz ./基本上所有的命令都可以用了,包括ls,more,less,find,grep等。
3.使用TGZ备份将cygwin的BIN加入到PATH建一个BAT文件:@echo offd:cd d:\website\8thmanagetar czvf 8thmanage.tgz 8thmanage4.Windows使用SHELL脚本将cygwin的BIN加入到PATH在$CYGWIN的目录/var/下面建一脚本t.sh,注意,t.sh里面的路径,都是相对于$CYGWIN 的,里面需要访问C盘的,请用/cygdrive/c/在Windows下执行:d:\cygwin\bin\bash d:\cygwin\var\t.sh(可以定期执行)5.同步Windows系统用户mkpasswd -l > /etc/passwdmkgroup -l > /etc/group如果有Domain的话,需要加上-d domainname6.安装系统服务cygrunsrv7.cygwing下使用rsynca.安装rsync组件b.进入cygwin,配置服务器vi /etc/rsyncd.conf...screts file=/etc/tom.ipaddr.pas配置文件,参考我写的另外一篇rsync的文章,注意:密码文件权限必须是0400chmod 0400 /etc/tom.ipaddr.pasc.启动服务端rsync --daemond.客户端同步在客户端的cygwin下面,运行rsync同步,具体命令,请参考另外一篇rsync的文章。
OpenSSH for Windows 配置
OpenSSH for Windows 配置1.下载openssh并安装。
安装很简单,就像其它windows下的软件一样,双击即可。
2. 配置。
第一、打开一个ms-dos终端,进入openssh/bin目录。
第二、将计算机上的组导入group文件中。
这里分两种情况,第一种是本地,第二种是在域中。
分别运行-l和-d参数。
如果想将两种组都导入,可以先运行-l的参数再运行-d参数的命令。
下面是原文:Use mkgroup to create a group permissions file. For local groups, use the "-l" switch. For domain groups, use the "-d" switch.For both domain and local, it is best to run the command twice (remember to use >>, not >). If you use both, make sure to edit the file to remove any duplicate entires.mkgroup -l >> ..\etc\group 这是加入本地组的命令。
mkgroup -d >> ..\etc\group 这是加入域组的命令。
(注意执行位置的路径)第三、将计算机的用户与其密码导入passwd文件中。
与上面的组一样,也是分本地和域两种情况。
如果没有该文件或没有导入用户的信息。
作为server的话,将不能被登陆。
下面是原文:Use mkpasswd to add authorized users into the passwd file. For local users, use the "-l" switch. For domain users, use the "-d" switch.For both domain and local, it is best to run the command twice (remember to use >>, not >). If you use both, make sure to edit the file to remove any duplicate entires.mkpasswd -l [-u <username>] >> ..\etc\passwd 这是加入本地用户的命令。
Windows上模拟Linux环境的软件Cygwin

Windows上模拟Linux环境的软件CygwinCygwin是一个用于在Windows上模拟Linux环境的软件。
它可以作为那些虚拟机软件的一个部分替代品。
运行Cygwin后,你会得到一个类似Linux的Shell环境,在其中你可以使用绝大部分Linux软件和功能。
如Gcc,Make,Vim,Emacs等等。
总之如果你想使用某个Linux 下的功能,而windows上又找不到好的替代品的话,你就可以用Cygwin。
我使用的最频繁的是Gcc和Make。
我经常用它们来编译一些我从网上下载的开源的工程。
这些工程在Windows上编译往往很麻烦。
使用Cygwin访问windows的文件Cygwin安装后,其根目录位于你的安装目录下。
所以使用cd /,只能访问到你的安装目录,要访问硬盘上的其他文件,可以使用mount:mount D:/testdir ~/testdir这样,你就可以在~/testdir里访问到D:/testdir里的内容了。
使用Cygwin作为X Server现在的Linux服务器一般都提供X,要从Windows上使用Linux的X,需要在Windows上运行一个X Server。
有一些专门为windows开发的软件可以做这个,但是Cygwin自带的X server就可以胜任。
下面举例说明如何使用:首先你必须安装X11包,然后运行Cygwin shell,输入x&。
这时候你的桌面上出出现一个布满斜纹大窗口,这就是我们的X server 了,回头Linux机器上的X 程序就会显示在这里安装设置cygwin安装要安装网络版的cygwin,可以到/site/install/,点击”Install Cygwin Now!”。
这样会先下载一个叫做setup.exe的GUI 安装程序,用它能下载一个完整的cygwin。
按照每一屏的指示可以方便的进行安装。
环境变量开始运行bash之前,应该设置一些环境变量。
Cygwin + OpenSSH FOR Windows的安装配置
在windows操作系统中,使用Cygwin + OpenSSH开源软件来作为远程连接的安全工具,是一个非常好的方法,得到许多网管人员的青睐。
然而要想顺利安装配置好这套软件,对于初学者来说,是有一定难度的。
为了使同道们少走弯路,特将本人摸索的经验陈列于此,以供需要者参考。
建议在安装配置这套软件之前,最好要初步掌握一些Linux终端操作技能及其技术概念。
以下所述是在Windows XP系统中实践完成,其它Windows系统可参照此文实施。
一、安装Cygwin + OpenSSH首先打开网页,点击如下链接:将会下载一个安装Cygwin的setup.exe文件,然后在欲安装Cygwin + OpenSSH软件的磁盘上创建Cygwin目录,在此我们假定为:C:"Cygwin,运行setup.exe后打开图一:图一图一主要提供关于Cygwin软件安装的一些信息,点击下一步后打开图二:图二图二提供了三个选项:第一选项:从Internet上下载并安装所需软件。
第二选项:从Internet上下载所需软件安装包到本地磁盘。
第三选项:从本地磁盘安装包的目录中安装所需软件。
此处选择从Internet上下载并安装所需软件,点击下一步后打开图三:图三图三为指定软件安装的目标路径,其它按图上默认的选项选择。
点击下一步后打开图四:图四图四为指定软件安装包的本地存放路径。
点击下一步后打开图五:图五图五是选择连接Internet的方式,照图点选Use IE5 Settings,点击下一步后打开图六:图六图六是选择下载Cygwin的网站,尽量选离我国近的网站,以提高安装速度。
点下一步打开图七:图七图七为软件包的选择界面,All所在行是选择全部软件包的位置,其它各行是软件组的选择位置,点击软件组前部的+号,可以打开软件组来选择所属软件项。
点击所选软件项的循环箭头,可以选择对相应项目的操作方式,每点一次,该项目的操作方式就变化一次。
windows2003+cygwin+ssh

在Windows2003中配置ssh服务在vm里成功做了一个ssh服务器,以下对这个过程做个总结。
步骤一:在vm win2k3里安装cygwin环境,虚拟机上不了外网,所以就在我的工作机上下载了一个cygwin的安装包,完整的,640M。
把这个包拷贝到虚拟机里面,完全安装,安装的中间出现很奇怪的进度显示,如下所示。
安装了很长时间,至少有1h,完成之后,双击cygwin无法使用。
在另一台虚拟机里也试着安装了一下,也是没有成功。
很郁闷。
步骤二:把我自己的工作机(winxp)上的cygwin的安装包压缩后传到vm上,1,8G,上传之后解压到C盘。
到cygwin目录下,双击Cygwin.bat,成功打开bash环境。
在桌面上做了一个快捷键。
如下。
步骤三:配置ssh服务器。
1)添加环境变量CYGWIN和path。
2)授权。
chmod +r /etc/groupchmod +r /etc/passwdchmod +rwx /var3)安装sshd服务$ ssh-host-config # 引导SSH服务配置*** Info: Generating /etc/ssh_host_key*** Info: Generating /etc/ssh_host_rsa_key*** Info: Generating /etc/ssh_host_dsa_key*** Info: Creating default /etc/ssh_config file*** Info: Creating default /etc/sshd_config file*** Info: Privilege separation is set to yes by default since OpenSSH 3.3.*** Info: However, this requires a non-privileged account called 'sshd'.*** Info: For more info on privilege separation read /usr/share/doc/openssh/READ ME.privsep.*** Query: Should privilege separation be used? (yes/no) yes #输入yes*** Info: Updating /etc/sshd_config file*** Warning: The following functions require administrator privileges!*** Query: Do you want to install sshd as a service?*** Query: (Say "no" if it is already installed as a service) (yes/no) yes #输入yes*** Info: Note that the CYGWIN variable must contain at least "ntsec"*** Info: for sshd to be able to change user context without password.*** Query: Enter the value of CYGWIN for the daemon: [ntsec] ntsec #输入ntsec*** Info: On Windows Server 2003, Windows Vista, and above, the*** Info: SYSTEM account cannot setuid to other users -- a capability*** Info: sshd requires. You need to have or to create a privileged*** Info: account. This script will help you do so.*** Info: You appear to be running Windows 2003 Server or later. On 2003 and*** Info: later systems, it's not possible to use the LocalSystem account*** Info: for services that can change the user id without an explicit password*** Info: (such as passwordless logins [e.g. public key authentication] via sshd).*** Info: If you want to enable that functionality, it's required to create a new*** Info: account with special privileges (unless a similar account already exists).*** Info: This account is then used to run these special servers.*** Info: Note that creating a new user requires that the current account have*** Info: Administrator privileges itself.*** Info: No privileged account could be found.*** Info: This script plans to use 'cyg_server'.*** Info: 'cyg_server' will only be used by registered services.*** Query: Do you want to use a different name? (yes/no) no #输入no,不指定启动用户*** Query: Create new privileged user account 'cyg_server'? (yes/no) no #输入no,不指定启动用户*** ERROR: There was a serious problem creating a privileged user.*** Query: Do you want to proceed anyway? (yes/no) yes #输入yes*** Warning: Expected privileged user 'cyg_server' does not exist.*** Warning: Defaulting to 'SYSTEM'*** Info: The sshd service has been installed under the LocalSystem*** Info: account (also known as SYSTEM). To start the service now, call*** Info: `net start sshd' or `cygrunsrv -S sshd'. Otherwise, it*** Info: will start automatically after the next reboot.*** Info: Host configuration finished. Have fun!4)Net start sshd # 启动SSH服务5)注意: 使用windows 用户本地认证mkpasswd -l > /etc/passwd 使用windows 用户的密码mkgroup -l > /etc/group 使用windows 用户组6)启动完成之后ssh Administrator@localhost提示输入密码,输入正确的密码,可以成功登陆,则ssh配置成功。
cygwin使用手册
**Cygwin使用手册****一、安装**1. 访问Cygwin官方网站,下载最新版本的安装程序。
2. 运行安装程序,按照提示进行安装。
在安装过程中,您可以选择下载安装所需的文件的方式。
推荐选择Http和Ftp方式,将文件全部下载回来后再进行本地安装。
3. 在安装界面,可以选择安装的版本,推荐选择Curr版本。
然后单击View按钮,在可用的安装文件之间进行选择性的安装。
**二、基本使用**1. **启动Cygwin**:在Windows系统中,双击Cygwin图标即可启动Cygwin。
2. **命令行操作**:Cygwin提供了一个类Unix的命令行界面,您可以在此输入并执行各种命令。
3. **文件操作**:使用`cd`命令可以改变当前目录,使用`ls`命令可以列出当前目录下的文件和文件夹。
4. **网络操作**:Cygwin支持网络操作,您可以使用`ping`命令来测试网络连接,使用`ftp`或`sftp`命令来进行文件传输等。
**三、高级功能**1. **环境变量设置**:在Cygwin中,您可以设置环境变量,以便在命令行中直接访问Windows 系统的某些目录或文件。
2. **窗口管理**:Cygwin支持多个窗口管理,您可以使用各种命令和工具来进行窗口的切换、排列和管理。
3. **进程管理**:您可以使用各种命令来查看和管理Windows系统中的进程。
**四、常见问题与解决方案**1. **无法启动Cygwin**:检查Cygwin是否正确安装,确保路径和环境变量设置正确。
2. **命令无法执行**:检查命令是否正确输入,或者是否缺少必要的库或工具。
3. **文件操作出错**:检查路径是否正确,或者是否具有足够的权限进行操作。
请注意,Cygwin是一个强大的工具,但也需要一定的学习和实践才能熟练使用。
建议您参考官方文档和教程,以便更好地掌握Cygwin的使用方法。
libssh2 windows编译
libssh2 windows编译W i n d o w s下编译l i b s s h2是为了在该操作系统上使用l i b s s h2库实现S S H协议的支持,从而能够进行安全远程登录和文件传输等功能。
本文将一步一步回答如何在W i n d o w s上编译l i b s s h2库。
第一步:安装编译工具在W i n d o w s上编译l i b s s h2库需要用到一些编译工具。
首先,我们需要安装C y g w i n(具有G C C 编译器的开发环境)和C M a k e(用于构建项目的工具),并将它们添加到系统的环境变量中。
1.下载C y g w i n并安装打开C y g w i n的官方网站(2.下载C M a k e并安装打开C M a k e的官方网站(3.将C y g w i n和C M a k e添加到系统环境变量中打开系统的环境变量设置界面,将C y g w i n和C M a k e的安装目录添加到系统的"P a t h"变量中。
第二步:下载l i b s s h2源码在编译l i b s s h2之前,我们需要从官方网站(第三步:使用C y g w i n编译l i b s s h21.打开C y g w i n终端打开C y g w i n的安装目录,并运行"C y g w i nT e r m i n a l"以启动终端。
2.进入l i b s s h2源码目录使用"c d"命令进入您下载的l i b s s h2源码的所在目录。
3.创建一个构建目录使用以下命令在l i b s s h2源码目录下创建一个名为"b u i l d"的新目录:s h e l lm k d i r b u i l dc d b u i l d4.使用C M a k e生成构建文件在C y g w i n终端中,使用以下命令生成构建文件:s h e l lc m a k e ..5.编译l i b s s h2使用以下命令编译l i b s s h2:s h e l lm a k e6.安装l i b s s h2使用以下命令将l i b s s h2安装到系统中:s h e l lm a k e i n s t a l l第四步:配置V i s u a l S t u d i o项目如果您想在Vi s u a l S t u d i o中使用l i b s s h2库,您需要进行一些额外的配置步骤。
Windows下的SSH安装之Cygwin

Cygwin是许多自由软件的集合,最初由Cygnus Solutions开发,用于各种版本的Microsoft Windows上,运行UNIX类系统。
Cygwin的主要目的是通过重新编译,将POSIX系统(例如Linux、BSD,以及其他Unix系统)上的软件移植到Windows上。
Cygwin移植工作在Windows NT、Windows 2000、Windows XP以及Windows Server 2003上比较好,在Windows 95和Windows 98上,相对差劲一些。
目前Cygwin由Red Hat等负责维护。
从上下载Cygwin安装程序setup.exe到本地。
点击图标,出现下面运行画面。
安装可以选择从网络安装,也可以选择从本地目录安装或者不安装只下载。
(1) Admini 中选择:cygrunsrv(2) DOC 中选择:cygwin-doc(3) Net 中选择:openssh如果没有网络连接的时候选择本地安装,在该安装之前需要先将要安装的package下载到本地。
(1) Admini 中选择:cygrunsrv(2) DOC 中选择:cygwin-doc(3) Net 中选择:openssh双击Windows上安装好的快捷图标,启动Cywin。
出现下面字样:Copying skeleton files.These files are for the user to personalisetheir cygwin experience.These will never be overwritten.`./.bashrc' -> `/home/Administrator//.bashrc'`./.bash_profile' -> `/home/Administrator//.bash_profile' `./.inputrc' -> `/home/Administrator//.inputrc'表示CYGWIN启动成功。
Windows下连接Linux的ssh工具有哪些
在Windows 系统下连接Linux 的SSH 工具有很多选择,其中比较流行的SSH 工具包括:
1. PuTTY:这是一个自由软件,可以在Windows 系统上实现远程SSH 访问。
PuTTY 可以在官方网站上免费下载,安装后运行即可使用。
2. MobaXterm:这是一个功能强大的终端软件,提供了类似PuTTY 的SSH 客户端以及其他有用的工具,例如远程桌面(Remote Desktop)和FTP 客户端。
MobaXterm 可以在其官方网站上免费下载。
3. Windows PowerShell:这是Windows 系统自带的命令行界面。
通过安装OpenSSH 的支持,Windows PowerShell 可以成为一个可靠的SSH 客户端。
要连接到Linux 机器,请在Windows PowerShell 中使用ssh 命令。
4. Git Bash:这是Git 版本控制系统所附带的Bash shell。
除了Git 命令,它还支持SSH 客户端,可用于连接到Linux 和其他远程系统。
以上这些SSH 工具都很成熟,并被广泛使用。
你可以根据
自己的需求和偏好选择其中的一个。
cygwin下完整工作环境的搭建(转)
cygwin下完整工作环境的搭建(转)这算是一个变态的嗜好:力求在纯文本模式下完成一切可能的工作,并且还要在windows下工作。
下面的配置未特意说明的地方,要么是太简单不值得说明,要么是顺应了对应软件的默认配置行为。
1.基本环境从 下载cygwin.exe ,按其默认选择安装即可。
以后逐步根据需要添加软件包。
根据本人需求,额外添加软件包:unzip,zip,attr,shutdown 2.文字阅读/编辑/处理从cygwin选择下载安装:vim , xpdf , texmacs3.文本模式的Web浏览器从cygwin选择下载安装:w3m ,这是款类似vim的Web浏览器。
4.安装配置Cygwin X环境详见:/docs/ug/setup.html#setup-cygwin-x-in stalling通过cygwin选择安装: 必选:xorg-server , xinit建议选择:xorg-docs , X-start-menu-icons 启动X11环境: 可以从Windows的开始菜单启动Cygwin X5.添加ssh登录支持(并且支持通过putty访问Cygwin X) 可以用putty.exe等远程控制系统访问本地cygwin. 哦,这不是多此一举?用cygwin.bat直接启动不就得了?原因有三:1)在cygwin.bat启动模式下,用户视觉感受没有通过putty.exe登录访问的感受好,你试试便知。
2)在cygwin.bat启动模式下,无法进行屏幕取词,而通过putty.exe登录访问可以屏幕取词,这点对英文不太好的人很重要。
3)在cygwin.bat 启动模式下,输入法提示框总下左下角,并且是纯黑白模式,感受不好,但是在putty.exe登录访问时,输入法提示框是跟随的。
首先在cygwin中选择安装openssh 然后用命令ssh-host-config 配置SSH 注意配置过程中一定要将sshd安装成Windows服务,已方便开机自动启动生成ssh1的公钥和密钥:ssh-keygen -t rsa1 生成ssh2的公钥和密钥:生成公钥:ssh-keygen -t rsa生成密钥:ssh-keygen -t dsa 启动sshd服务(如果你需要重启机器的话,此步可免)cygrunsrv -S sshd 为配置为putty.exe支持X11而做的配置服务端:在/etc/sshd_config中配置为:X11Forwarding yes在/etc/profile 中添加配置:export DISPLAY=:0.0 在客户端putty中配置:window -> Translation 中character set 选为UTF-8在Connection -> X11 中勾选上:Enable X11 forwarding 在X display location 中填入:localhost:0.0 这样你就可以用类似putty.exe功能远程登录访问本地cygwin系统。
OpenSSHforWindows配置
OpenSSHforWindows配置OpenSSH for Windows 配置1.下载openssh并安装。
安装很简单,就像其它windows下的软件一样,双击即可。
2. 配置。
第一、打开一个ms-dos终端,进入openssh/bin目录。
第二、将计算机上的组导入group文件中。
这里分两种情况,第一种是本地,第二种是在域中。
分别运行-l和-d参数。
如果想将两种组都导入,可以先运行-l的参数再运行-d参数的命令。
下面是原文:Use mkgroup to create a group permissions file. For local groups, use the "-l" switch. For domain groups, use the "-d" switch.For both domain and local, it is best to run the command twice (remember to use >>, not >). If you use both, make sure to edit the file to remove any duplicate entires.mkgroup -l >> ..\etc\group 这是加入本地组的命令。
mkgroup -d >> ..\etc\group 这是加入域组的命令。
(注意执行位置的路径)第三、将计算机的用户与其密码导入passwd文件中。
与上面的组一样,也是分本地和域两种情况。
如果没有该文件或没有导入用户的信息。
作为server的话,将不能被登陆。
下面是原文:Use mkpasswd to add authorized users into the passwd file. For local users, use the "-l" switch. For domain users, use the "-d" switch.For both domain and local, it is best to run the command twice (remember to use >>, not >). If you use both, make sure to edit the file to remove any duplicate entires.mkpasswd -l [-u ] >> ..\etc\passwd 这是加入本地用户的命令。
在windows下架构git服务器及其应用+2012-8-3

在windows下架构git服务器及其应用Gitosis 是一个使用SSH管理Git仓库的服务端工具,该软件用来添加用户和设定权限的界面不是网页,而是一个特殊的Git 仓库。
你只需要设定好某个项目,然后推送,Gitosis 就会随之改变服务器设定!在Windows下的安装则花了我不少功夫,有时候碰到问题无从入手,所以以下将整个安装过程详细记录下来,给以后的需要者参考。
总体分为如下几大步骤:第一步:安装Git简单来说Git是一个免费的、开源的版本控制软件,从功能上讲,跟Subversion(SVN)这类版本控制软件没什么两样。
由于工作的需求,需要在WinXP下安装git配合团队完成相应的工作,以前一直在别的系统下使用,今天经Drupal花园的龙马指点终于安装成功了,特意贴出来与有需要的童鞋一起分享。
获取Git软件:大家可以通过两种方式获取Git的软件,一个是在官网上获取,另一个可以点击这里下载。
只是有一点需要说明就是需要下载支持WinXp系统的版本。
Git在WinXP安装过程在WinXP下安装Git详细步骤参考如下安装示意图:点击上图的“Finish”后Git的安装就完成了,安装完成后需要在进行一下环境变量的设置,改变环境变量的具体步骤可以参考下图:右键点击我的电脑:生成ssh公钥双击桌面上的git运行程序:启动git的运行程序:在程序中依次输入:1、配置全局的name 和email,命令如下:$git config --global "your name" $git config --global user.email "your@email.address" 其中"your name"换成你的名字,""换成你的邮箱地址。
2、生成公钥,用于身份认证:ssh-keygen.exe -C "your@email.address" -t rsa这样就可以在你的用户下取得需要的公钥匙,公钥位于你的电脑中“C:\Documents and Settings\Airen\.ssh”的“id_rsa.pub”文件下:你使用文本编辑器打开“id_rsa.pub”就可以看到公钥的内容:ssh-rsaAAAAB3NzaC1yc2EAAAABIwAAAQEAs1c3zL3IbjhMbSCwooZ7WHlkga7xq+5inQUCTqmZ 7xqBclvEwofDd4BYts99X+xfNXgGSlil85wrOfXX9ZH27ZmPR3Z8KWp3pekFOvk7iLmt0b9lZ qhgpUll76Q7D2KED8se9gV4FNxg05ZK6AUZm70cBj9sZqjV//weE7ufkibcqd3ngHsTKB+0Js8 NcMwldHmxIxZEwufxgT/D4EGQCA6ijjuj9ILIydzzLwWzKoH1wuGDU5LAE1qptIpAt50uWx PNlsBPoqZnbJjHg+As9If6tRkG4YzkwzSBTP725bJDcWkArhWRRkJ2cwUgcJYRyCY+8jI2oxD awYjWQ+w9HQ== airenliao@此时只要把你的公钥放进你项目的服务中就可以进行git的相关操作。
Windows平台上安装Hadoop-0.20.203.0版本方法
Windows平台上安装Hadoop-0.20.203.0版本方法 目的这篇文档的目的旨在说明在Windows平台上、利用Cygwin模拟Linux环境下,完成单机上Hadoop-0.20.203.0版的安装与使用。
同时也旨在解决你在安装hadoop过程中出现JA V A_HOME is not set或是bin/java No such file or directory错误的问题。
先决条件1支持平台。
Win32平台是作为开发平台支持的。
由于分布式操作尚未在Win32平台上充分测试,所以还不作为一个生产平台被支持。
2所需软件2.1Java TM1.6.x,必须安装且版本要为1.6及以上,建议选择Sun公司发行的Java版本。
2.2Cygwin,提供Shell支持。
本文使用最新版1.7.x,要选择安装Openssh、Openssl等。
2.3Hadoop-0.20.203.0 最新的稳定版。
安装支持软件1安装Java安装下载的Java 1.6.x,使用jdk-6u27-windows-i586.exe安装,安装路径比如为:C:\Java\jdk1.6.0_27。
安装完成后,配置环境变量如下:设置JA V A_HOME变量值为:C:\Java\jdk1.6.0_27设置CLASSPATH 变量值为:.;%JA V A_HOME%\lib\dt.jar;%JA V A_HOME%\lib\tools.jar向path变量中添加路径,添加%JA V A_HOME%\bin;%JA V A_HOME%\jre\bin2安装Cygwin安装Cygwin,可以从官网上下载最新的cygwin1.7.9-1进行安装。
本人把下载的setup.exe 放在C:\Cygwin-localPackage文件夹中,该文件用于存储安装选项网络下载的源文件,双击setup.exe进行安装。
安装流程如下:图1 图2注:图2 中选择install from internet图3 图4注:图3确定安装路径如C:\cygwin;图4选择下载文件存放的路径如C:\Cygwin-localPackage图5 图6图6 选择下载安装文件的站点,本文选择默认的第一个站点。
Windows上模拟Linux环境的软件Cygwin
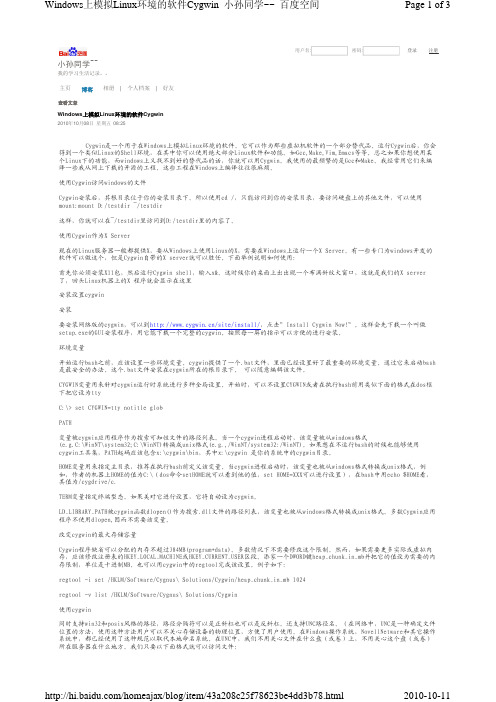
注册 用户名: 密码:登录 查看文章Windows 上模拟Linux 环境的软件Cygwin2010年10月08日 星期五 08:25Cygwin是一个用于在Windows上模拟Linux环境的软件。
它可以作为那些虚拟机软件的一个部分替代品。
运行Cygwin后,你会得到一个类似Linux的Shell环境,在其中你可以使用绝大部分Linux软件和功能。
如Gcc,Make,Vim,Emacs等等。
总之如果你想使用某个Linux下的功能,而windows上又找不到好的替代品的话,你就可以用Cygwin。
我使用的最频繁的是Gcc和Make。
我经常用它们来编译一些我从网上下载的开源的工程。
这些工程在Windows上编译往往很麻烦。
使用Cygwin访问windows的文件Cygwin安装后,其根目录位于你的安装目录下。
所以使用cd /,只能访问到你的安装目录,要访问硬盘上的其他文件,可以使用mount:mount D:/testdir ~/testdir这样,你就可以在~/testdir里访问到D:/testdir里的内容了。
使用Cygwin作为X Server现在的Linux服务器一般都提供X,要从Windows上使用Linux的X,需要在Windows上运行一个X Server。
有一些专门为windows开发的软件可以做这个,但是Cygwin自带的X server就可以胜任。
下面举例说明如何使用:首先你必须安装X11包,然后运行Cygwin shell,输入x&。
这时候你的桌面上出出现一个布满斜纹大窗口,这就是我们的X server 了,回头Linux机器上的X 程序就会显示在这里安装设置cygwin安装要安装网络版的cygwin,可以到/site/install/,点击”Install Cygwin Now!”。
这样会先下载一个叫做setup.exe的GUI安装程序,用它能下载一个完整的cygwin。
windows下搭建hadoop开发环境(Eclipse)

public class WordCount { public static class TokenizerMapper extends Mapper<Object, Text, Text, IntWritable>{ private final static IntWritable one = new IntWritable(1); private Text word = new Text(); public void map(Object key, Text value, Context context ) throws IOException, InterruptedException { StringTokenizer itr = new StringTokenizer(value.toString()); while (itr.hasMoreTokens()) { word.set(itr.nextToken()); context.write(word, one);
} } } public static class IntSumReducer extends Reducer<Text,IntWritable,Text,IntWritable> { private IntWritable result = new IntWritable(); public void reduce(Text key, Iterable<IntWritable> values, Context context ) throws IOException, InterruptedException { int sum = 0; for (IntWritable val : values) { sum += val.get(); } result.set(sum); context.write(key, result); } } public static void main(String[] args) throws Exception { Configuration conf = new Configuration(); String[] otherArgs = new GenericOptionsParser(conf, args).getRemainingArgs(); if (otherArgs.length != 2) { System.err.println("Usage: wordcount <in> <out>"); System.exit(2); } Job job = new Job(conf, "word count"); job.setJarByClass(WordCount.class); job.setMapperClass(TokenizerMapper.class); job.setCombinerClass(IntSumReducer.class); job.setReducerClass(IntSumReducer.class); job.setOutputKeyClass(Text.class); job.setOutputValueClass(IntWritable.class); FileInputFormat.addInputPath(job, new Path(otherArgs[0])); FileOutputFormat.setOutputPath(job, new Path(otherArgs[1])); System.exit(job.waitForCompletion(true) ? 0 : 1); } } 5.2 配置运行参数 Run As -> Open Run Dialog... 选择 WordCount 程序,在 Arguments 中配置运行参数:
[转]Cygwin教程
![[转]Cygwin教程](https://img.taocdn.com/s3/m/703a7ea81b37f111f18583d049649b6648d70936.png)
[转]Cygwin教程windows和linux各有其优越性,可以安装在同⼀台电脑上,但切换要重启。
同时拥有两台电脑,⼀台装win,⼀台装linux,⾃然⾮常好,但具备此条件的不多。
本⽂介绍cygwin,它可以让你在win下拥有linux开发环境,并且不⽤切换。
简单的讲述⼀下cygwin的安装和配置,⼊门级教程,还请各位⼀⼆。
点击运⾏,Next->选Install from Internet,Next->填写Root Directory,如X:\cygwin,Next->填写Local Package Directory,如X:\cygwin\ftp,Next->选Direct Connection,Next->选⼀个较快的ftp,Next->到了关键步骤,如果仅想安装基本系统,直接Next;如果想完整安装,则点击All旁边的旋转状图标,将Default切换⾄Install;如果和我⼀样,仅想在命令⾏下写写程序,则只要将 gcc、make等开发⼯具选上,还有openssh等;选好后,Next->开始下载,Take a coffee break。
回来后,Next->选择需不需要创建快捷⽅式。
->END点击快捷⽅式或X:\cygwin\cygwin.bat打开控制台,如果是域⽤户,按照提⽰makepasswd和makegroup即可。
下⾯说⼀些简单的调整和配置。
⼀、ssh的安装cygwin⾃带的控制台可调参数很少,舒适度较低。
有没有办法⽤熟悉的putty或secureCRT来操控cygwin呢?办法有⼆:1、⽤puttycyg。
cygwin bash shell能做的,puttycyg基本上都能实现,本地操作的话,极⼒推荐这款好软件。
2、安装sshd,然后本机登陆。
如果安装时已选择openssh,按照下⾯的操作继续。
如果忘了安装,点击setup.exe,选上openssh,再装⼀次即可。
Windows上SSH服务器的配置以及客户端的连接
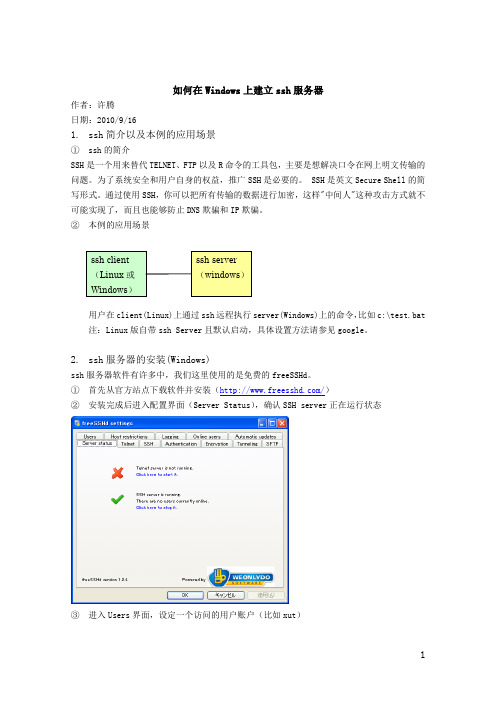
如何在Windows上建立ssh服务器作者:许腾日期:2010/9/161.ssh简介以及本例的应用场景①ssh的简介SSH是一个用来替代TELNET、FTP以及R命令的工具包,主要是想解决口令在网上明文传输的问题。
为了系统安全和用户自身的权益,推广SSH是必要的。
SSH是英文Secure Shell的简写形式。
通过使用SSH,你可以把所有传输的数据进行加密,这样"中间人"这种攻击方式就不可能实现了,而且也能够防止DNS欺骗和IP欺骗。
②本例的应用场景用户在client(Linux)上通过ssh远程执行server(Windows)上的命令,比如c:\test.bat 注:Linux版自带ssh Server且默认启动,具体设置方法请参见google。
2.ssh服务器的安装(Windows)ssh服务器软件有许多中,我们这里使用的是免费的freeSSHd。
①首先从官方站点下载软件并安装(/)②安装完成后进入配置界面(Server Status),确认SSH server正在运行状态③进入Users界面,设定一个访问的用户账户(比如xut)这里我们建立一个叫xut的用户,认证有3种方式可以选择。
从以后通过ssh运行命令的方便(无需输入密码)考虑,我们选择Public key认证方式。
选择Password方式的话,每次访问需要输入密码,此种方式较为繁琐而且安全性不高。
然后开放其Shell权限。
④ 进入认证界面,确认Public key 认证方式属于激活状态(选择Allowed 或Required )此时ssh 服务器端的基本设置已经OK ,可进一步进行更加详细的设置(比如访问限定等),此处不再介绍。
注意:服务器端如果有防护墙时应该开发TCP 22号端口最为ssh 连接使用。
3. ssh 客户端的设置(Linux)由于我们的客户端采用的是Linux ,所以不用安装客户端软件,系统自带的就有。
window ssh访问原理
window ssh访问原理
Windows SSH访问的原理涉及到SSH(Secure Shell)协议和Windows操作系统的交互。
SSH是一种加密的网络协议,用于在不安全的网络中安全地进行远程访问和数据交换。
在Windows系统中,SSH访问通常涉及以下几个方面的原理:
1. SSH协议,SSH协议通过加密和认证机制确保数据传输的安全性。
在Windows系统中,SSH客户端和服务器之间的通信遵循SSH 协议的规范,包括密钥交换、加密通信和身份验证等步骤。
2. SSH客户端,在Windows系统中,SSH客户端可以是第三方软件,也可以是Windows 10内置的OpenSSH客户端。
当用户使用SSH客户端连接到远程SSH服务器时,客户端会发起与服务器的连接请求,并进行密钥交换和身份验证等过程。
3. SSH服务器,远程的SSH服务器接受来自SSH客户端的连接请求,并进行身份验证、会话建立和数据传输等操作。
在Windows 系统中,可以通过安装第三方SSH服务器软件或者使用Windows Server中的内置功能来实现SSH服务器的部署和配置。
4. 加密和认证,SSH访问的原理还涉及到加密算法和身份验证机制。
在Windows系统中,SSH通信使用的加密算法包括AES、3DES 等,而身份验证可以通过密码、公钥、证书等方式进行。
总的来说,Windows SSH访问的原理是基于SSH协议的加密通信和身份验证机制,通过客户端和服务器之间的交互实现远程访问和数据交换的安全性保障。
这些原理的理解有助于配置和管理Windows系统上的SSH访问,以确保系统和数据的安全性。
- 1、下载文档前请自行甄别文档内容的完整性,平台不提供额外的编辑、内容补充、找答案等附加服务。
- 2、"仅部分预览"的文档,不可在线预览部分如存在完整性等问题,可反馈申请退款(可完整预览的文档不适用该条件!)。
- 3、如文档侵犯您的权益,请联系客服反馈,我们会尽快为您处理(人工客服工作时间:9:00-18:30)。
sshd服务是一种安全连接,它能让你访问服务器上的命令行界面。
Windows本身没有提供该服务,所以我们可以通过cygwin来进行安装。
安装 cygwin
首先安装 cygwin。
安装时间为 2006-10-8,Cygwin DLL版本为 1.5.21-1。
除了默认的软件包之外,又增加了以下软件包。
∙Admin
o cron-3.0.1-19
o cygrunsrv-1.17-1
o shutdown-1.7-1
o syslog-ng-1.6.11-1
∙Archive
o unzip-5.50-5
o zip-2.3-6
∙Devel
o subversion-1.3.2-1
∙Editors:
o vim-7.0.076-1
∙Interpreters
o gawk-3.1.5-4
o perl-5.8.7-5
o expat-1.95.8-1
∙Libs
∙Net
o lftp-3.5.1-1
o openssh-4.4p1-1
o openssl-0.98d-1
o openssl097-0.9.7l-1
o ping-1.0-1
o netcat-1.10-2
∙Shells
o ash-20040127-3
o bsah-3.1-9
o bash-completion-20060301-1
o mc-4.6.1-2
∙Utils
o patch-2.5.8-8
o time-1.7-1
∙Web
o wget-1.10.2-1
安装
用管理员用户登录,启动 cygwin 命令行,执行以下命令。
$ ssh-host-config
Generating /etc/ssh_host_key
Generating /etc/ssh_host_rsa_key
Generating /etc/ssh_host_dsa_key
Generating /etc/ssh_config file
Privilege separation is set to yes by default since OpenSSH 3.3. However, this requires a non-privileged account called 'sshd'.
For more info on privilege separation read
/usr/doc/openssh/README.privsep.
Shall privilege separation be used? (yes/no) yes
Warning: The following function requires administrator privileges! Shall this script create a local user 'sshd' on this machine? (yes/no) yes
Generating /etc/sshd_config file
Added ssh to /cygdrive/c/WINDOWS/system32/drivers/etc/services
Do you want to install sshd as service?
(Say "no" if it's already installed as service) (yes/no) yes
Which value should the environment variable CYGWIN have when
sshd starts? It's recommended to set at least "ntsec" to be
able to change user context without password.
Default is "ntsec". CYGWIN=binmode ntsec tty
The service has been installed under LocalSystem account.
To start the service, call `net start sshd' or `cygrunsrc -S ssdh'. Host configuration finished. Have fun!
配置 sshd
在 cygwin 的命令行中输入以下命令:
$ cd /etc
$ chmod 666 sshd_config
$ vi sshd_config
修改 sshd_config 的以下配置。
PermitRootLogin no # 禁止root登录
StrictModes yes # CYGWIN=ntsec时的安全配置RhostsRSAAuthentication no # 禁止 rhosts 认证
IgnoreRhosts yes # 禁止 rhosts 认证
PasswordAuthentication no # 禁止密码认证ChallengeResponseAuthentication no # 禁止密码认证PermitEmptyPasswords no # 禁止空密码用户登录
最后将 sshd_config 的权限修改回 644。
$ chmod 644 sshd_config
启动 sshd 服务器。
$ cygrunsrv -S sshd
生成公钥和密钥
由于我们上面的设置仅允许密钥方式认证,所以要为我们的用户生成一对公钥和密钥。
在 cygwin 的控制台中执行以下命令,生成 ssh1 的公钥和密钥。
$ ssh-keygen -t rsa1
Generating public/private rsa1 key pair.
Enter file in which to save the key (/home/charlee/.ssh/identity): Enterpassphrase (empty for no passphrase): 输入密码
Enter same passphrase again: 再次输入密码
Your identification has been sabed in /home/charlee/.ssh/identity Your public key has been saved in /home/charlee/.ssh/identity.pub
类似的方法,使用下面的命令生成 ssh2 的公钥和密钥。
$ ssh-keygen -t rsa
$ ssh-keygen -t dsa
将公钥导入到认证公钥中:
$ cd .ssh
$ cat identity.pub >> authorized_keys
$ cat id_rsa.pub >> authorized_keys
$ cat id_dsa.pub >> authorized_keys
因为我们在 /etc/sshd_config 的配置中使用了 StrictModes yes 的设置,所以要修改目录权限,命令如下。
$ chmod 755 /home/charlee
然后将密钥 identity、id_rsa、id_dsa 文件用某种方式复制到客户端。
我使用的客户端是 Linux,因此只要将这三个文件复制到客户端的 $HOME/.ssh 目录下即可。
登录服务器。
在客户端上输入以下命令,即可登录服务器。
$ ssh 192.168.0.2
常见问题
2008-12-11更新
Q: cygrunsrv -S sshd不能启动,报告
cygrunsrv: Error starting a service: QueryServiceStatus: Win32 error 1062:
The service has not been started.
A: 很可能是/var/log的权限设置不正确。
首先执行 mkpasswd 和 mkgroup 重新生成权限信息,再删除sshd服务,重新配置:
$ mkpasswd -l > /etc/passwd
$ mkgroup -l > /etc/group
$ cygrunsrv -R sshd
$ ssh-host-config -y
$ cygrunsrv -S sshd
Q: 用公钥登录时老是说Permission denied (publickey).,怎么办?
A: 可以在Windows的事件日志(我的电脑->右键->管理->事件查看器)中看到sshd产生的错误信息。
常见的问题是 .ssh/authorized_keys权限设置不正确,该文件必须设置为 0644 才能正常登录。
