HP ProLiant DL170e G6 服务器安装说明
HP ProLiant服务器系列驱动器密钥引导实用程序指南说明书
HP drive key boot utility for ProLiant serversIntroduction (2)Replacement for the floppy drive (2)BIOS support for USB devices (2)Operating system support for USB devices (2)Usage for the drive key boot utility (3)Installing the web component (4)Maintaining system firmware images (11)Supported servers and devices (13)Additional Information (14)IntroductionThe HP drive key boot utility is a Smart Component that can be downloaded from the HP website to create a bootable drive key. Some ProLiant servers support the ability to boot a drive key in the system BIOS. For those products, this Smart Component can also be used to make the drive key capable of flashing firmware or booting floppy images that already exist. This white paper focuses on uses that would be beneficial to the customer for booting a drive key, and details the process for implementing those uses.Replacement for the floppy driveSome ProLiant servers do not include a floppy drive as a standard component, or may not offer a floppy drive as an option. As HP transitions to a floppy-less ProLiant server, other utilities and devices will become available that will allow the customer to do those tasks that used to be accomplished using a floppy drive. The drive key is a logical replacement for a floppy drive because it is small,easy to transport, supports various capacities, and in many cases, does not require a separate driver under the operating system.BIOS support for USB devicesThe system BIOS (ROM) requires additional functionality to support initializing and booting a USB drive key, as well as any other USB device. This is termed “legacy USB support” by HP. Basically, the system BIOS will attempt to boot the drive key as a mass storage device, thereby enabling the full capacity of the device. However, most drive key devices do not come properly formatted, meaning there is nothing for the system to boot. This is similar to attempting to boot a blank floppy diskette. The system BIOS would support initializing and booting that device, but no boot files are available to execute. The HP drive key Smart Component lands bootable files that the system BIOS can execute. This means that to boot a drive key, the server requires system BIOS support, as well as drive key support.The system BIOS will handle booting and executing files from the drive key until an operating system loads and the USB driver is loaded. At this point, the system BIOS is no longer involved in the support for the device.Operating system support for USB devicesNot all operating systems support USB drive key or USB devices. Check with the operating system vendor to determine if that specific OS supports USB devices. There are different levels of support by the vendor. Some operating systems load a USB driver once the OS installation is complete and the kernel has loaded. Other operating systems include support for use of USB devices during installation. For example, Microsoft® Windows® 2000 Server does not natively support generic USB devices during installation, but does support generic USB devices during runtime. “Native USB support” means that the OS supports those devices inherently, and does not require additionaldrivers/firmware for support. Since Windows 2000 does not natively support generic USB, a usercan only insert a USB drive key and use it at runtime, once the installation is complete. However, a drive key cannot be used during installation for any use, such as providing an updated driver during the F6 prompt. HP provides some alternatives for some operating systems to allow customers to useUSB devices during installation. For more information on this and other related topics, refer to the USB ProLiant homepage.Usage for the drive key boot utilityHP supports the use of a drive key as a premier method of transporting data, flashing firmware, and deploying operating systems. HP developed the drive key boot utility primarily to provide a newer method to maintain system firmware. On previous servers, the method of flashing firmware consisted of downloading an image to a floppy diskette from either the SmartStart CD or from the HP website. Each floppy diskette contained the firmware image for a single component (ROM, iLO, Smart Array controllers, etc.). See figure 1, below.Figure 1. Firmware flash using floppy diskettesML350 G4More recently, HP released an online version (meaning it runs when the server is up) of a ROM flash utility that allowed customers to setup a single server as an image repository. Each server ran a component that would communicate with the master server and receive updates as necessary. In this application, each component is flashed independently, and a reboot is still required for the new firmware image to become active. This is still a supported and efficient method of maintaining firmware images.HP also released an offline version of the ROM flash utility, meaning it requires the server to be shut down. The benefit of the offline ROM flash utility is that all components are flashed at the same time, increasing the speed to maintain firmware images. This utility is packaged on the Firmware Maintenance CD and includes firmware images updated at a certain point in time. If a newer (or older) image is available that is desired for flash, there is no method currently to download the image and create a custom CD.With the drive key boot utility, one of the primary features is the ability to flash and maintain system firmware. The drive key creates a boot environment and loads the offline ROM flash utility. By using this utility on a drive key, the user is able to control what firmware images are desired for flashing. Figure 2 shows how flashing firmware has transitioned from using floppy diskettes to using a drive key.Figure 2. Flashing firmware using HP drive key boot utilityDL380 G4DL360 G4ML370 G4ML350 G4Another feature of the drive key boot utility, is the ability to boot a floppy image that already exists. This allows the drive key to behave as a potential replacement for a floppy, depending upon the image being used. HP does not test the various images that could be used with this feature, but does test and support that the imaging engine is working properly. This feature should be sanity tested in each datacenter to ensure compatibility with your environment. There are some known cases where this feature does not work. For example, there is no support for booting a series of floppy images. This means that if your application consists of a series of floppies, this feature will not work for your environment because it only supports the capability to boot a single image at a time. Currently, there is no support for creating a ROMPaq diskette and booting the image on the drive key. This is a current limitation of the floppy emulation software.Installing the web componentTo install the web component, go to and download the image to a client. Oncedownloaded, run the file and install the application to the client by extracting the downloaded file. This will install an application to the client machine that can be run to make the drive key bootable.Running the applicationThe application includes a series of menu screens that will prompt the user for input on how to format the drive key. A radio button will be selected on each page, by default, to guide the user on on HP recommendations.Insert the drive key and run the application by going to the extracted directory and running hpdkbu.exe. This is the drive key boot utility executable file, and will load the welcome screen shown in Figure 3.Click Next to go to the next screen.Figure 3. Welcome screenFrom the Drive Letter dropdown menu, select the drive being used for the drive key. The drive letter you select refers to the drive that the running operating system has assigned to the drive key. Click Next.Figure 4. Select drive in use for drive key.The Task screen allows the user to select what task they would like to perform using the drive key boot utility. There are three options:• Create New or Replace Existing Configuration: If this option is selected, the contents of the drive key will be completed erased, and you can select a checkbox item that will back up the contents on the drive key to a file. This can be restored at a later time, if desired, and requires the exact same type and capacity drive key, but it does not have to be the exact same physical drive key.• Add Configuration to Existing Key: An example when this might be preferred is when a user wants to add a new floppy image to the boot choices.• Backup / Restore: This feature will restore the data from the file (see option 1 above) to the drive key.After you make your selection, click Next.Figure 5. Task selectionThe next screen is the Filesystem screen. The drive key does not have to be reformatted, but there are some operating systems that may not work properly with the filesystem that is on the drive key by default. For this reason, it is recommended that you select Create New Filesystem.After you make your selection, click Next.Figure 6. Filesystem selectionThe following menu provides the utility with information on drive geometry,and allows the user to select whether or not a partition is desired. The recommended path is to create a primary partition because this is the most compatible with the majority of operating systems. The user can also select not create a partition. This will allocate all available space on the key without creating a partition.Once Next is clicked, the drive key will be formatted and the boot environment will be created for the drive key. The user can select the Back tab at any point prior to this screen without modifying the data on the drive key. Once the next screen is shown, the drive key is formatted.After you make your selection, click Next.Figure 7. Drive Geometry SelectionThe following screen will prompt the user for what usage model they plan to use. There are two options:• HP Firmware Flash Package: This option will prepare the drive key for firmware flashing using the Offline ROM Flash utility as described in this document. This is the recommended usage for the boot utility.• Floppy Image: This option will add a floppy image and place it in the boot menu on the drive key. If this option is selected, the user will be required to provide the floppy to image. In the Short name field, the user should input a unique short name (8 or less characters) to type at the boot menu to boot the image. In the Long name field, the user should input a verbose one-line description to distinguish the floppy image from others.After making your selection, click Next.Figure 8. Configuration ScreenIf the previous steps were completed properly, the user will be prompted with a completion screen. Figure 9. Completion ScreenThe drive key is now capable of flashing firmware, but still requires offline ROM flash components from the HP website.Maintaining system firmware imagesTo maintain system firmware images, run the application to make the drive key capable of flashing firmware. This will make the drive key bootable and install the application to flash firmware. Proceed to and go to Support and Drivers. Select the server that you wish to maintain firmware and download the Offline ROM Flash component for each component you wish to flash. Supported components consist of system firmware, integrated Lights-Out, Smart Array controllers, and hard drives. Download the components for all devices to the drive key and place the image in the components’ directory.NoteThis utility uses the Offline ROM Flash components that correspond to theOffline ROM flash utility. This utility is supported on most ProLiant servers.However, the system BIOS does not support the ability to boot the drive keyon every server. Reference the “Supported servers and devices” section ofthis document to ensure that the servers and components you wish to flashfirmware from a drive key actually support booting the drive key.Once the drive key is bootable, capable of flashing firmware ,and the components are downloaded, the drive key can be inserted into the supported server. Power on the server and the utility will be loaded as shown in figure 10, below. By default, the area that shows “System ROM” (on figure 10, below), will display all firmware for which the utility finds a newer version and will also display the currently installed version. Select the Available Firmware tab to display all supported components that are capable of being flashed. Once ready to flash firmware, click Update Now and all components will be flashed at the same time. Then click Exit.The drive key can be removed and the system can be rebooted via a power cycle. A power cycle is required for the new firmware images to take effect. Simply rebooting the server may not load the new firmware images.Figure 10. HP drive key boot utility firmware update utility menuIf the component that is desired for flash does not show up on the detected components screen, select the Components tab. This will display all component images that are on the drive key and available for firmware flash. Verify that the component is actually available, meaning the correct image was downloaded. This will also display the current and available versions of firmware. If the firmware version is the latest, it will not show up on the home screen because it does not need to be flashed.Supported servers and devicesAll ProLiant servers do not support booting a USB drive key. Refer to the USB homepage for additional information on what servers support this functionality, and what minimum ROM is required for this support.The Offline ROM flash utility currently supports the ability to flash system BOIS, Integrated Lights-Out (iLo) firmware, Smart Array controllers, and hard drives. Other components may release components for offline firmware flash. Refer to the software and drivers section of to determine if there is a ROM flash component available for the device you wish to flash.The HP server team works closely with the HP desktop team to ensure that the drive key devices they support work on ProLiant servers. However, we cannot guarantee that every HP branded drive key will work properly in every ProLiant server. Part numbers for supported devices are available on the product QuickSpecs and are listed on the USB home page. Please refer to these documents for supported part numbers.Since there are various implementations for USB devices, not all USB devices work properly with ProLiant servers. Due to fast-changing roadmaps and the number of USB vendors, HP only claims support for HP branded drive key devices listed on the QuickSpecs and USB homepages. There is nothing in the drive key boot utility that prevents a different vendor drive key from working. However, HP cannot guarantee complete integration of the drive key boot utility with non-supported devices.Additional InformationPlease refer to the USB home page at/products/servers/platforms/usb-support.html for additionalfor additional information regarding USB support on HP ProLiant servers.© 2004 Hewlett-Packard Development Company, L.P. The information containedherein is subject to change without notice. The only warranties for HP products andservices are set forth in the express warranty statements accompanying suchproducts and services. Nothing herein should be construed as constituting anadditional warranty. HP shall not be liable for technical or editorial errors oromissions contained herein.Microsoft and Windows are U.S. registered trademarks of Microsoft Corporation.374482-001, 7/2004。
HP ProLiant DL360 G6服务器 说明书
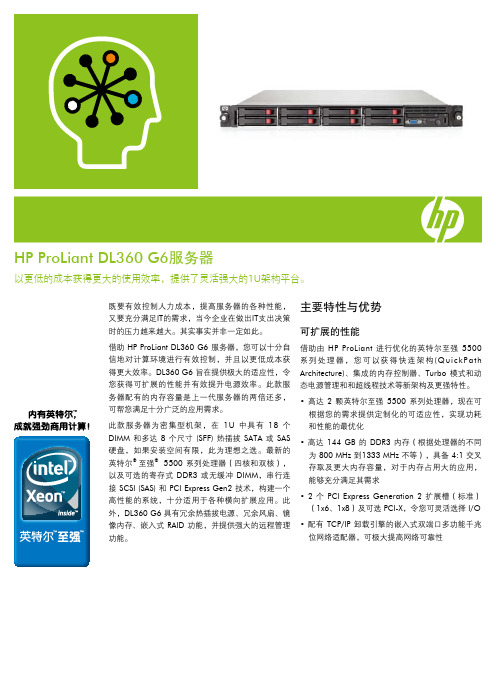
HP ProLiant DL360 G6服务器既要有效控制人力成本,提高服务器的各种性能,又要充分满足IT 的需求,当今企业在做出IT 支出决策时的压力越来越大。
其实事实并非一定如此。
借助 HP ProLiant DL360 G6 服务器,您可以十分自信地对计算环境进行有效控制,并且以更低成本获得更大效率。
DL360 G6 旨在提供极大的适应性,令您获得可扩展的性能并有效提升电源效率。
此款服务器配有的内存容量是上一代服务器的两倍还多,可帮您满足十分广泛的应用需求。
此款服务器为密集型机架,在 1U 中具有 18 个 DIMM 和多达 8 个尺寸 (SFF) 热插拔 SATA 或 SAS 硬盘,如果安装空间有限,此为理想之选。
最新的英特尔® 至强® 5500 系列处理器(四核和双核),以及可选的寄存式 DDR3 或无缓冲 DIMM ,串行连接 SCSI (SAS) 和 PCI Express Gen2 技术,构建一个高性能的系统,十分适用于各种横向扩展应用。
此外,DL360 G6 具有冗余热插拔电源、冗余风扇、镜像内存、嵌入式 RAID 功能,并提供强大的远程管理功能。
主要特性与优势可扩展的性能借助由 HP ProLiant 进行优化的英特尔至强 5500 系列处理器,您可以获得快连架构(Q u i c k P a t h Architecture)、集成的内存控制器、Turbo 模式和动态电源管理和和超线程技术等新架构及更强特性。
• 高达 2 颗英特尔至强 5500 系列处理器,现在可根据您的需求提供定制化的可适应性,实现功耗和性能的最优化• 高达 144 GB 的 DDR3 内存(根据处理器的不同为 800 MHz 到1333 MHz 不等),具备 4:1 交叉存取及更大内存容量,对于内存占用大的应用,能够充分满足其需求• 2 个 PCI Express Generation 2 扩展槽(标准)(1x6、1x8)及可选 PCI-X ,令您可灵活选择 I/O • 配有 TCP/IP 卸载引擎的嵌入式双端口多功能千兆位网络适配器,可极大提高网络可靠性以更低的成本获得更大的使用效率,提供了灵活强大的1U架构平台。
HPE ProLiant服务器安装与启动服务说明书
Service overviewHPE Installation and Startup of HPE ProLiant servers provides for the installation of your new HPE ProLiant server and eligible operating system. This service will assist you in bringing your new HPE ProLiant server and operating system into operation in a timely and professional manner.Service benefitsThis service provides a trained HPE service specialist to perform an installation that meets HPE quality standards, for:• Delivery of the service at a mutually scheduled time convenient to your organization• Helps you effectively utilize HPE products from the knowledge gained during on-site delivery of the service• Custom installation as detailed in “Delivery specifications’’ or in a Statement of Work (SOW)• Verification prior to installation that all service prerequisites are metService feature highlights• Service planning• Service deployment• Installation verification tests (IVTs)• Customer orientation sessionHPE Installation and Startup of HPE ProLiant servers HPE Support ServicesData sheetTable 1. Service featuresFeature Delivery specificationsService planning An HPE service specialist will confirm with the Customer that the prerequisites have been met and schedule the delivery of theservice at a time mutually agreed upon by HPE and the Customer, which shall be during local HPE standard business hoursexcluding HPE holidays, unless otherwise agreed by HPE. Any services provided outside of HPE standard business hours may besubject to additional charges.Service deployment The deployment activities will include:Hardware• Installation of the server: Unpacking the server, inspecting it for damage, and installing it according to the product specifications(If the server is part of a rack system, it will be inserted into the rack.)• Installation of hardware options: System hardware options purchased with the system will be installed at the same time• Physical connection of the product to a LAN, as appropriate• Consolidation of all packaging material and notification to the Customer that the materials are ready for removalSoftwareInstallation of one eligible Operating System. Eligible Operating Systems are defined below:• For Microsoft® Windows Server®:–Installation of the operating system and the appropriate network protocols, as required–Creation of a Windows Server account with up to three user accounts–Creation and setup of one Windows Server file share on a local disk–For ProLiant DL380 Packaged Cluster only, installation and configuration of Microsoft Cluster software according to theproduct installation guide• For Linux® server operating systems:*–Installation of the operating system and the appropriate network protocols, as required–Installation of HPE drivers, as applicable–Creation of a Linux server account with up to three user accountsThe supported Linux distributions for installation as part of this service are Red Hat® Enterprise Linux (RHEL) and SUSE LinuxEnterprise Server (SLES).*For systems with multiple servers per chassis, one operating system (OS) image will be installed on one server node within thechassis. If an established HPE Insight Cluster Management Utility (CMU) or Microsoft WDS environment exists with a functionalPXE boot environment and server provisioning capabilities to load an OS image, then the HPE installation engineer will load oneOS image to all server nodes within the chassis.Enable remote support to allow for automatic case creation for hardware failures, and for proactive deliverables provided underapplicable service levels. This enablement is for supported devices only and is conditional on the existence of a foundationalHPE remote support application already established in the Customer’s server environment.For more information on remote support, go to /services/getconnected.Installation verification tests (IVTs)HPE will run the appropriate installation verification tests required for this service, such as Power-On Self-Tests (POSTs) specificto the product being installed, verification of product operation, and verification that the current device software and firmwareare loaded.Customer orientation session Upon completion of the deployment activities, the HPE service specialist will provide an orientation session, up to one hour, on theproduct and/or technology, to include information on basic hardware product usage and hardware features.Service eligibilityThe Customer must meet the following prerequisites for the delivery of this service:• Have a new HPE ProLiant server and a supported version of Microsoft or Linux operating system and valid licenses• Have no earlier version of the operating system installed on the new HPE ProLiant server for which this service is to be applied• Have all cabling and network connections installed and functionalService limitationsExcluded from this service are activities such as, but not limited to, the following:• Service deployment on hardware not covered by an HPE warranty or HPE support agreement• Service deployment on hardware covered by a third-party maintenance contract• Operating system provisioning with a third-party or customized software tool• Installation of ineligible operating systems or more than one operating system• Planning, design, implementation, or assessment of the Customer’s overall SAN or fabric architecture• Services that, in the opinion of Hewlett Packard Enterprise, are required due to unauthorized attempts by non-HPE personnel to install, repair, maintain, or modify hardware, firmware, or software• Site inspection activities such as a comprehensive analysis of the Customer facility’s power, cooling humidity, airborne contaminant, vibration levels, and determination of whether the data center’s raised floor has sufficient structural capability to accommodate the weight of newly installed equipment• Environmental compliance or site preparation• External cabling• Application integration or integration of third-party products or peripherals not included with the system• Assembly of external storage devices• Assembly of racks or other computer room site preparation• Software training, troubleshooting, repair, tuning, or customization• Any services not clearly specified in this documentCustomer responsibilitiesThe Customer will:• Contact an HPE specialist within 90 days of date of purchase to schedule the delivery of the service• Coordinate service deployment on third-party-maintained products (if applicable) with Hewlett Packard Enterprise• Designate a person from the Customer’s staff who, on behalf of the Customer, will grant all approvals, provide information, and otherwise be available to assist HPE in facilitating the delivery of this service• Ensure that all service prerequisites as identified under “Service eligibility’’ are met• Ensure that all site preparation, power supply compatibility requirements, network cabling and configuration, and other specified service prerequisites, as listed in the “Service eligibility” section have been met• Allow Hewlett Packard Enterprise full and unrestricted access to all locations where the service is to be performed• Provide a suitable work area for delivery of the service, including access to an outside telephone line, power, and any network connections required• Be responsible for all data backup and restore operationsGeneral provisions/other exclusionsHPE reserves the right to charge, on a time and materials basis, for any additional work over and above this service package pricing that may result from work required to address service prerequisites or other requirements that are not met by the Customer.HPE reserves the right to reprice this service if the Customer does not schedule and provide for subsequent delivery within 90 days of purchase.HPE’s ability to deliver this service is dependent upon the Customer’s full and timely cooperation with HPE, as well as the accuracy and completeness of any information and data the Customer provides to HPE.Travel charges may apply; please consult your local office.Learn more at /services/support Data sheet© Copyright 2005, 2007, 2014, 2016–2017 Hewlett Packard Enterprise Development LP. The information contained herein is subjectto change without notice. The only warranties for Hewlett Packard Enterprise products and services are set forth in the express warrantystatements accompanying such products and services. Nothing herein should be construed as constituting an additional warranty.Hewlett Packard Enterprise shall not be liable for technical or editorial errors or omissions contained herein.This data sheet is governed by the Hewlett Packard Enterprise current standard sales terms, which include the supplemental data sheet,or, if applicable, the Customer’s purchase agreement with Hewlett Packard Enterprise.Microsoft and Windows Server are either registered trademarks or trademarks of Microsoft Corporation in the United States and/or othercountries. Red Hat is a registered trademark of Red Hat, Inc. in the United States and other countries. Linux is the registered trademarkMake the right purchasedecision. Chat with ourpresales specialists.。
HP_ProLiant_DL160_G6

当今,高性能计算需要内存更大、处理性能更强的服务器基础架构,同时又不影响可靠性。
此外,它还必须能够解决Web 2.0应用(如云主机)负载不断增加的难题。
要保证运行效率最佳,又要符合预算的要求,这似乎是一个相当具有挑战性的要求。
HP ProLiant DL160 G6正好可以满足这一需求。
它是一个高性能、经济型、超高密度的机架式服务器节点,可供内存密集的高性能计算环境使用。
它的设计特点是高质量、高性能和部署的高度灵活性,可以满足中小企业以及公司扩展部署的高性能计算需要。
DL160 G6是实现高性能、高密度、最大计算能力,同时又符合低预算要求的上佳选择。
利用最新的16GB 内存,您可以获得最高192GB 的内存容量,并利用18 DIMM 插槽来实现大量的低成本内存部署。
DL160 G6所具备的灵活性和可扩展能力能够满足各种计算任务的需求。
另外,1U 外形还可以实现对服务器机架和数据中心空间的最佳利用,特别适合中小型企业和成长型企业、Web 2.0用户以及大型数据中心。
简单、灵活、可管理——适用于内存密集型、Web 2.0以及高性能计算环境的理想平台便捷的使用和部署DL160方便使用的机箱和内部组件标签可以加快和简化维护、机架内维修以及扩展• 简便:HP ProLiant DL160配备了一个“Easy Setup CD ”,可实现快速和方便的安装和部署• 可管理:机架经过优化的1U 机箱可实现对大型集群和网格解决方案的快速部署和高效的管理。
所具备的SNMP 代理可以进一步加强综合性管理。
• 灵活性:便于进入的机箱和内部组件标签可以让用户在需要的时候非常灵活地扩展数据中心HP ProLiant DL160 G6服务器处理器类型英特尔®至强®处理器5500和5600系列可用处理器英特尔®至强®四核处理器E5603 (1.6GHz/4-core/4MB/80W)英特尔®至强®四核处理器E5606 (2.13GHz/4-core/8MB/80W)英特尔®至强®四核处理器L5630 (2.13GHz/4-core/12MB/40W)英特尔®至强®四核处理器E5607 (2.26GHz/4-core/8MB/80W)英特尔®至强®四核处理器E5620 (2.40GHz/4-core/12MB/80W)英特尔®至强®四核处理器X5672 (3.20GHz/4-core/12MB/95W)英特尔®至强®四核处理器X5687 (3.60GHz/4-core/12MB/130W)英特尔®至强®六核处理器L5640 (2.26GHz/6-core/12MB/60W)英特尔®至强®六核处理器E5645 (2.40GHz/6-core/12MB/80W)英特尔®至强®六核处理器E5649 (2.53GHz/6-core/12MB/80W)英特尔®至强®六核处理器X5650 (2.66GHz/6-core/12MB/95W)英特尔®至强®六核处理器X5660 (2.80GHz/6-core/12MB/95W)英特尔®至强®六核处理器X5675 (3.06GHz/6-core/12MB/95W)英特尔®至强®六核处理器X5690 (3.46GHz/6-core/12MB/130W)处理器内核六核或者四核处理器缓存4MB、8MB或者12MB三级缓存最高处理器速度 3.60GHz最多处理器数量2最高前端总线速度1333内存类型无缓冲DDR3内存或寄存式DDR3内存最大内存192 GB内存插槽18高级内存保护高级ECC存储类型热插拔2.5英寸SAS热插拔2.5英寸SATA热插拔3.5英寸SAS热插拔3.5英寸SATA非热插拔3.5英寸SATA热插拔2.5英寸固态硬盘热插拔3.5英寸固态硬盘最大硬盘数量8可移动光驱槽位1扩展插槽2存储控制器集成SATA RAID控制器;可选Smart Array控制器联网嵌入式HP NC362i集成双端口千兆服务器适配器远程管理Lights-Out 100i冗余电源1个内置电源质保三年部件,三年人工,三年现场,7x24全天候响应,4小时到场科技以推动业务成效为本欲了解惠普更多信息,请电话垂询:惠普售前支持热线:800-820-2255 分机125 400-820-2255 分机125惠普售后支持热线:800-810-3888惠普客户反馈/投诉热线:800-810-0039欲知更多惠普工业标准服务器(ISS)产品信息,请访问:/ISS© Copyright 2011 Hewlett-Packard Development Company,L.P.本文所含信息如有更改,恕不另行通知。
HP ProLiant服务器系列产品Service Pack 2014.09说明书
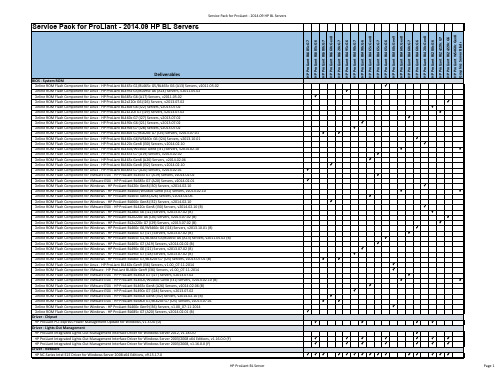
Service Pack for ProLiant - 2014.09 HP BL Servers
HP ProLiant BL685c G7 HP ProLiant BL685c G6 HP ProLiant BL680c G7 HP ProLiant BL660c Gen8 HP ProLiant BL620c G7 HP ProLiant BL495c G6 HP ProLiant BL490c G7 HP ProLiant BL490c G6 HP ProLiant BL465c Gen8 HP ProLiant BL465c G7 HP ProLiant BL465c G6 HP ProLiant BL460c Gen9 HP ProLiant BL460c Gen8 HP ProLiant BL460c G7 HP ProLiant BL460c G6 HP ProLiant BL420c Gen8 HP ProLiant BL280c G6 HP ProLiant BL2x220c G7 HP ProLiant BL2x220c G6 HP ProLiant WS460c Gen8 Graphics Server Blade
Driver - Chipset HP ProLiant PCI-express Power Management Update for Windows, v1.3.0.0 (D)
Driver - Lights-Out Management HP ProLiant Integrated Lights-Out Management Interface Driver for Windows Server 2012, v1.18.0.0 HP ProLiant Integrated Lights-Out Management Interface Driver for Windows Server 2003/2008 x64 Editions, v1.16.0.0 (F) HP ProLiant Integrated Lights-Out Management Interface Driver for Windows Server 2003/2008, v1.16.0.0 (F)
DL160G6服务器通过EasySetup安装Windows2003步骤
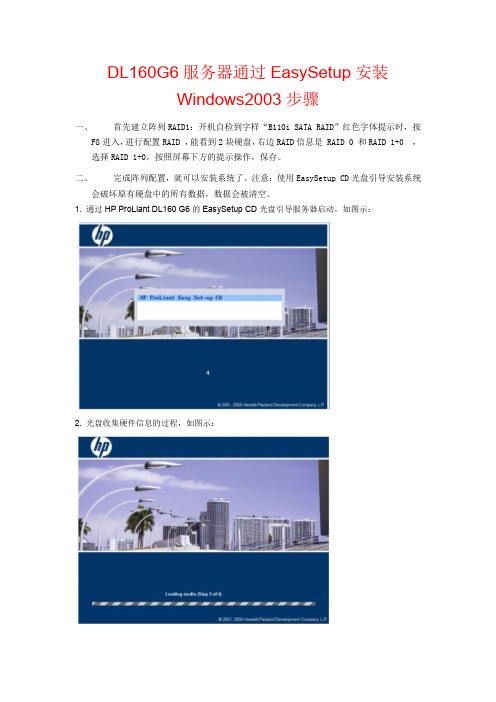
DL160G6服务器通过EasySetup安装Windows2003步骤一、 首先建立阵列RAID1:开机自检到字样“B110i SATA RAID”红色字体提示时,按F8进入,进行配置RAID ,能看到2块硬盘,右边RAID信息是 RAID 0 和RAID 1+0 ,选择RAID 1+0,按照屏幕下方的提示操作,保存。
二、 完成阵列配置,就可以安装系统了。
注意:使用EasySetup CD光盘引导安装系统会破坏原有硬盘中的所有数据,数据会被清空。
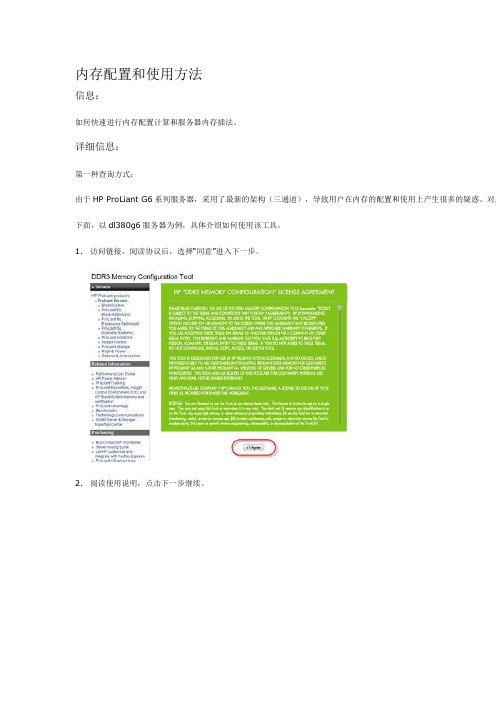
1. 通过HP ProLiant DL160 G6的EasySetup CD光盘引导服务器启动,如图示:2. 光盘收集硬件信息的过程,如图示:3. 选择操作界面语言English。
4. 同意协议并继续。
5. 进入Easy Set-Up光盘引导主界面,可以看到四个选项(Install、Maintenance、System Erase、Reboot),选择Install开始进入安装系统过程。
6. 引导安装界面可以看到机器使用的阵列卡型号,如板载B110i SATA Raid Controller及下挂的硬盘。
7. Next 选择需要安装的操作系统版本。
(这里是选择Windows2003企业版32位)注意:选择Retail Media下的系统列表,选择Enterprise Edition。
8. 指定安装的光盘源和安装媒体,通常保持默认即可。
量都划分给系统盘。
10. 选择地区时间。
(Windows2003企业版32位序列号:JCGMJ-TC669-KCBG7-HB8X2-FXG7M)11. 之前的配置完成后,引导光盘开始配置服务器。
12. 在这个过程中,引导光盘会提示换入操作系统光盘并拷贝数据。
13. 拷贝完成后,设备会从操作系统引导启动,并继续安装,这个过程中可能会有几次重启。
14. 操作系统安装完成后,用设备管理器查看,发现所有驱动已经被驱动起来。
三、 对硬盘剩余空间进行划分:我的电脑---右击选择“管理”---选择“磁盘管理”---划分磁盘空间。
内存配置和使用方法
内存配置和使用方法信息:如何快速进行内存配置计算和服务器内存插法。
详细信息:第一种查询方式:由于HP ProLiant G6系列服务器,采用了最新的架构(三通道),导致用户在内存的配置和使用上产生很多的疑惑。
对此下面,以dl380g6服务器为例,具体介绍如何使用该工具。
1.访问链接,阅读协议后,选择“同意”进入下一步。
2.阅读使用说明,点击下一步继续。
NOTE: DDR3内存分为2种:RDIMM和UDIMM。
RDIMM内存在服务器上的最大配置容量为144GB,而UDIMM的最了解自身需要配置的内存种类,在稍后的配置中进行选择。
3.如果当前已经拥有服务器的具体产品号码,可以在下图中的红色圈中填入,点击下一步继续。
4.配置工具会自动显示出当前机型和已经配置了的内存容量。
我们只需要调整最终的内存容量,并选择服务器使用类型,5. 配置工具会列出推荐添加使用的内存种类,与HP的选件号码,选中并点击下一步即可。
6. 配置工具会显示出内存在服务器的内存槽位中的具体插法。
第二种查询方式:1.首先接受协议。
2.进入下一步。
3.如果您有part number请在此输入。
4.选择没有part number,进入手动选择模式。
5.选择具体机型。
6.询问处理器数,内存是否安装。
7.通过滑块调整需要的内存容量。
8.给出配置信息。
9.可以查看到槽位布局。
®版权所有2010 Hewlett-Packard Development Company, L.P.Hewlett-Packard 公司对本文档包含的技术性或编辑性错误或遗漏之处不承担任何责任。
本信息以"维持原状"的方式提供时更改,恕不另行通知。
本文中所涉及的Hewlett-Packard 公司和Hewlett-Packard 产品名称是Hewlett-Pack ar提供反馈。
HP Proliant服务器安装Windows 2003(软盘加载驱动)

按回车继续
按回车开始安装
按F8同意,剩下的步骤就和普通PC安装2003过程一致了。
首先将导航光盘放入有系统的PC中,自动运行,选择so意键继续
启动服务器,将2003安装盘放入服务器光驱,在出现安装画面时注意屏幕下方的F6提示,按F6
按S键继续
选择正确的卡的驱动,本例是使用HP DL560服务器,集成5I阵列卡,选择5X and 6X
首先将导航光盘放入有系统的pc中自动运行选择software如图如图示选择创建2003驱动软盘插入软盘按任意键继续启动服务器将2003安装盘放入服务器光驱在出现安装画面时注意屏幕下方的f6提示键继续选择正确的卡的驱动本例是使用hpdl560服务器集成5i阵列卡选择5x继续按回车继续按回车开始安装f8同意剩下的步骤就和普通pc安装2003过程一致了
HP服务器安装上架(精校版本)

HP服务器的安装上架2013年06月目录1接收CSAE单安装前以下问题进行确认 (3)1.1:咨询销售及负责人提供相关服务信息: (3)1.2:安装地点及环境条件: (3)1.3:确认实施时间 (3)1.4:送货前设备硬件检测 (3)1.5:技术配置要求以及相关文档 (3)2客户现场 (3)2.2:开箱检验 (4)2.3:机房确认机柜组成,机柜摆放及设备安装位置 (4)2.4:服务器上架及原则: (6)2.5:理线要求以及相关工具 (11)2.6:标签规格及作用: (12)2.7:上电,现场硬件检测(HP工具)有流程: (13)2.8:根据客户要求安装及配置 (17)2.9:清场验收。
(17)3.0:客户确认通知销售结单离开 (17)1接收CSAE单安装前以下问题进行确认1.1:咨询销售及负责人提供相关服务信息:1.1.1服务器的数量、型号以及选件(如:硬盘的大小和数量),服务器详细单。
1.1.2操作系统确认:安装配置要求。
1.2:安装地点及环境条件:1.2.1 机柜电流,温度、湿度及UPS品牌和供电电流。
1.2.2机柜所在机房确切位置,设备安装所在机柜位置。
1.3:确认实施时间1.4:送货前设备硬件检测1.5:技术配置要求以及相关文档2客户现场2.1:工作流程图客户现场清场验收确定操作系统开箱检验服务器上架Windows 操作系统安装Windows 操作系统配置Linux 操作系统安装Linux 操作系统配置硬件设备装机服务报告整改是否存在缺陷是否客户确认结束理线贴标签硬件检测2.2:开箱检验2.2.1:根据公司送货设备清单和邮件附注设备清单核对,一一点清验货注意相关配件。
2.3:机房确认机柜组成,机柜摆放及设备安装位置 2.3.1:机柜组成(19英寸标准机柜有24U ,42U 等类型)2.3.2:机柜准备2.3.2.1:调平机柜:机柜必须安放在一个稳固的地方,调节机柜底部的四个调节支脚,使机柜平稳的安放于地面。
HPE ProLiant服务器系列产品服务包 - 2017.10.1说明书

nmlx4_en driver component for VMware 6.0, v2016.07.19 nmlx4_en driver component for VMware 6.5, v2016.08.17 VMware ESX 6.0 MST Drivers Offline Bundle for Mellanox Adapters, v4.6.0.101 VMware ESX 6.5 MST Drivers Offline Bundle for Mellanox Adapters, v4.6.0.101 HPE Broadcom NetXtreme-E Driver for Windows Server 2012 R2, v20.6.123.0 HPE Broadcom NetXtreme-E Driver for Windows Server 2016, v20.6.123.0 HPE Broadcom NetXtreme-E Drivers for Red Hat Enterprise Linux 6, v1.8.1-1 HPE Broadcom NetXtreme-E Drivers for Red Hat Enterprise Linux 7, v1.8.1-1 HPE Broadcom NetXtreme-E Drivers for SUSE Linux Enterprise Server 11 x86_64, v1.8.1-1 HPE Broadcom NetXtreme-E Drivers for SUSE Linux Enterprise Server 12 x86_64, v1.8.1-1 HPE Broadcom NetXtreme-E RoCE Library for Red Hat Enterprise Linux 6 Update 9, v20.6.3.3 HPE Broadcom NetXtreme-E RoCE Library for Red Hat Enterprise Linux 7 Update 3, v20.6.3.3 HPE Broadcom NetXtreme-E RoCE Library for Red Hat Enterprise Linux 7 Update 4, v20.6.3.3 HPE Broadcom NetXtreme-E RoCE Library for SUSE Linux Enterprise Server 11 SP4, v20.6.3.3 HPE Broadcom NetXtreme-E RoCE Library for SUSE Linux Enterprise Server Server 12 SP2, v20.6.3.3 HPE Broadcom NetXtreme-E RoCE Library for SUSE Linux Enterprise Server Server 12 SP3, v20.6.3.3 HPE Broadcom NX1 1Gb Driver for Windows Server x64 Editions, v20.6.0.5 HPE Broadcom tg3 Ethernet Drivers for Red Hat Enterprise Linux 7 x86_64, v3.137s-1 HPE Broadcom tg3 Ethernet Drivers for SUSE Linux Enterprise Server 12 x86_64, v3.137s-1 HPE Emulex 10/20GbE Drivers for Red Hat Enterprise Linux 6 x86_64, v11.2.1263.16-1 HPE Emulex 10/20GbE Drivers for Red Hat Enterprise Linux 7 x86_64, v11.2.1263.16-1 HPE Emulex 10/20GbE Drivers for SUSE Linux Enterprise Server 11 x86_64, v11.2.1263.16-1 HPE Emulex 10/20GbE Drivers for SUSE Linux Enterprise Server 12 x86_64, v11.2.1263.16-1 HPE Emulex 10/20GbE iSCSI Driver for VMware vSphere 6.5, v2017.09.25 HPE Emulex 10/20GbE iSCSI Drivers for Red Hat Enterprise Linux 6 x86_64, v11.2.1263.16-1 HPE Emulex 10/20GbE iSCSI Drivers for Red Hat Enterprise Linux 7 x86_64, v11.2.1263.16-1 HPE Emulex 10/20GbE iSCSI Drivers for SUSE Linux Enterprise Server 11 x86_64, v11.2.1263.16-1 HPE Emulex 10/20GbE iSCSI Drivers for SUSE Linux Enterprise Server 12 x86_64, v11.2.1263.16-1 HPE Intel i40e Driver for VMware vSphere 6.0/6.5, v2017.09.25 HPE Intel i40e Drivers for Red Hat Enterprise Linux 6 x86_64, v2.0.29-3 HPE Intel i40e Drivers for Red Hat Enterprise Linux 7 x86_64, v2.0.29-3 HPE Intel i40e Drivers for SUSE Linux Enterprise Server 11 x86_64, v2.0.29-3 HPE Intel i40e Drivers for SUSE Linux Enterprise Server 12 x86_64, v2.0.29-3 HPE Intel i40eb Driver for Windows Server 2012 R2, v1.6.104.0 (B) HPE Intel i40eb Driver for Windows Server 2016, v1.6.104.0 (B) HPE Intel i40evf Drivers for Red Hat Enterprise Linux 6 x86_64, v2.0.28-3 HPE Intel i40evf Drivers for Red Hat Enterprise Linux 7 x86_64, v2.0.28-3 HPE Intel i40evf Drivers for SUSE Linux Enterprise Server 11 x86_64, v2.0.28-3 HPE Intel i40evf Drivers for SUSE Linux Enterprise Server 12 x86_64, v2.0.28-3 HPE Intel igb Drivers for Red Hat Enterprise Linux 6 x86_64, v5.3.5.9-3 HPE Intel igb Drivers for Red Hat Enterprise Linux 7 x86_64, v5.3.5.9-3 HPE Intel igb Drivers for SUSE Linux Enterprise Server 11 x86_64, v5.3.5.9-3
HP ProLiant DL380 G6 服务器系列 - IRS 工具介绍和使用方法介绍
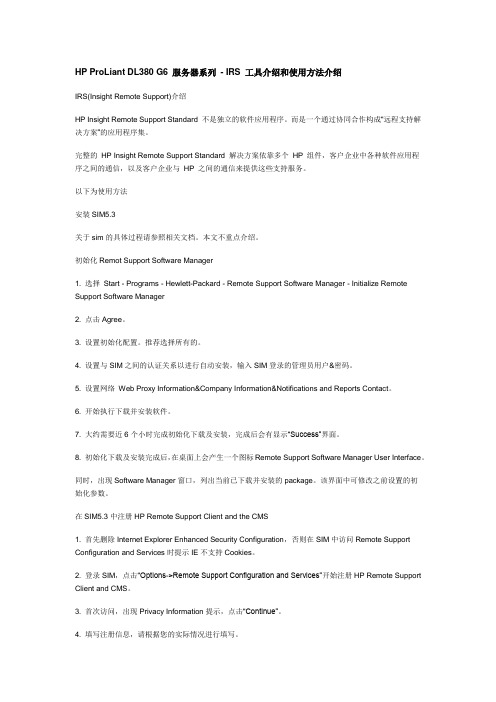
HP ProLiant DL380 G6 服务器系列- IRS 工具介绍和使用方法介绍IRS(Insight Remote Support)介绍HP Insight Remote Support Standard 不是独立的软件应用程序。
而是一个通过协同合作构成“远程支持解决方案”的应用程序集。
完整的HP Insight Remote Support Standard 解决方案依靠多个HP 组件,客户企业中各种软件应用程序之间的通信,以及客户企业与HP 之间的通信来提供这些支持服务。
以下为使用方法安装SIM5.3关于sim的具体过程请参照相关文档。
本文不重点介绍。
初始化Remot Support Software Manager1. 选择Start - Programs - Hewlett-Packard - Remote Support Software Manager - Initialize Remote Support Software Manager2. 点击Agree。
3. 设置初始化配置。
推荐选择所有的。
4. 设置与SIM之间的认证关系以进行自动安装,输入SIM登录的管理员用户&密码。
5. 设置网络Web Proxy Information&Company Information&Notifications and Reports Contact。
6. 开始执行下载并安装软件。
7. 大约需要近6个小时完成初始化下载及安装,完成后会有显示“Success”界面。
8. 初始化下载及安装完成后,在桌面上会产生一个图标Remote Support Software Manager User Interface。
同时,出现Software Manager窗口,列出当前已下载并安装的package。
该界面中可修改之前设置的初始化参数。
在SIM5.3中注册HP Remote Support Client and the CMS1. 首先删除Internet Explorer Enhanced Security Configuration,否则在SIM中访问Remote Support Configuration and Services时提示IE不支持Cookies。
ILO方式在hp服务器上安装操作系统

公司有台HP的DL320服务器,没有光驱,一直想重装却没有想到好办法。
今天终于下决心做掉他,于是打hp 的售后服务电话询问。
注:HP惠普售后支持热线800-810-3888 直线电话:问:对这种无光驱的服务器如何安装操作系统?答:可使用USB外置光驱或PXE网络安装,也可使用ILO方式,可给你一个60天的试用licenseok,留下email,收信,得到ILO的序列号,然后先配置ILO:开机自检时按F8,然后配置网络,分别设置IP 地址和DNS。
IP应在同一个网段中,注意子网掩码的一致。
(只有在DHCP被设为Disable时,才能设置IP address/Subnet Mask/Gateway IP address)。
IP必须是静态的,所以DHCP需设置为OFF。
设置用户密码后保留其余默认值,保存。
具体操作如附件所示:/然后可以用HP服务器ilo安装,记得一定要把网线连在ILO的端口上啊,我刚开始就没注意这个一直连不上,后来看到服务器屁股上还有个网口一样的接口,换到那个上面一下就ping通了哈。
后来还有一个小插曲,就是dl320在win2003下的网卡驱动用:“cp005949.exe”,嘿。
下面是一个安装window2000的文章:适用范围: HP Proliant ML , DL 系列服务器详细信息:使用设备: HP ML 370 G4 服务器具体步骤:1 连接ML 370 g4 ILO address (该IP 地址可根据实际情况更改)2 虚拟光驱,如图选中local cd –rom 下拉菜单D: 点击connect (虚拟软驱操作一样)3 放入smart start cd 开机通过ilo 可以看到开机的画面。
4 选择语言接受协议。
5 进入smart start 安装主界面,点击setup 。
6 确认阵列信息没有问题后,选择win2000 server 下一步。
7 输入partition 大小,输入用户名和密码。
HP ProLiant DL385 G6服务器 说明书

HP ProLiant DL385 G6坚持虚拟化设计理念,并且搭配了最新的AMD Opteron TM2400系列六核处理器,非常适用于对性能要求苛刻的工作负载。
DL385 G6配备了更大的内存容量、集成网卡、内置USB 端口以及充足的PCI 扩展插槽和内置存储容量,是适用于各种应用和环境的理想平台。
另外,DL385 G6在可扩展性和灵活性方面同样表现卓越。
它支持多种硬盘选择,内置存储容量最高可达4.8 TB (16块SFF 硬盘)或6 TB (6块LFF 硬盘)。
而且,这款服务器还支持10 GB 网卡和4个PCI riser 板卡(可选择两个),可实现出色的I/O 灵活性。
最新的模块化智能阵列控制器的性能是前代产品的两倍,而且能够无缝添加高速缓存和BBWC 。
1与之前一样,ProLiant G6产品系列同样提供了业界一流的标准管理组件,包括HP Systems Insight Manager 、HP Onboard Administrator 、HP Insight Control suite (ICE)以及Trusted Platform Module 。
所有这些组件能够帮助您信心百倍地开展业务,同时最大程度地提升服务器基础设施的效率。
此外,惠普还提供了HP Power Regulator (功率调节器)、Power Manager (功率管理器)以及Dynamic Power Capping (动态功率封顶)等技术,可帮助您的IT 环境实现出众的电源效率。
ProLiant 服务器经过11,000多次的设计与质量测试,能够在长期范围内保持最高的效率。
因此,尽管DL385 G6服务器是实施虚拟化解决方案的得力助手,但它同样能够满足从小型企业到复杂、动态的大型环境等任何业务需求。
DL385 G6在性价比、灵活性、可扩展性、可靠性和能源效率等方面达到了完美的平衡,可帮助您实现最高的投资回报。
主要特性和优势增强的性能DL385 G6服务器现在可支持具备6 MB 三级高速缓存的高性能AMD Opteron 六核处理器。
DL160G6 服务器图

注意:处理器上的插针 1 应对准处理器插槽上的插针 1,否则会损坏插针。
注意:HP 推荐使用为 ProLiant 服务器配制的 Shin-Etsu X-23-7783D 热导油脂。在处理器的顶部涂抹油脂时,应 采用“5 点式”或“S 形”。确保油脂分布均匀。
安装散热片: 1. 正确地将散热片的弹簧承载螺钉对准主板安装孔。 2. 顺时针拧紧弹簧承载螺钉,将散热片固定到主板上。 图 18 安装散热片
4. 合上固定板。 5. 锁上压杆。 6. 取下散热片上保护热导接触物质的保护盖。
要卸下处理器,请按照与上述安装步骤相反的顺序进行操作。
注意:松开压杆和固定板,拿住处理器边缘并将其置于 空处理器插槽的正上方。确保正确地将处理器与插槽上 的方向凹槽对齐。 注意:为防止过热或可能发生系统崩溃,请仅使用为 HP ProLiant DL160 G6 服务器指定的散热片型号。
注意:如果操作不当,可能会损坏 DIMM。在触摸 DIMM 之前,始终都应戴上防静电腕带和使用接地衬垫 以释放静电。
注释:有关 DIMM 位置的信息,请参阅本文档中的“主 板组件”。
2. 将处理器安装工具与插槽对齐,然后安装处理器。 图 17 插入处理器
3. 用力向下按直到处理器安装工具发出喀哒一声并同时与处理器 分离,然后卸下处理器安装工具。
3. 如安装有硬盘挡板,请将其从系统前端卸下。 4. 将硬盘推入硬盘托架,直到推不动为止。 图 11 安装非热插拔硬盘
6. 使用提供的电缆,将主板上的 SAS 接口电缆连接到硬盘上。
安装内存
• 1P 配置安装指南: o 在安装内存时,请按照相应处理器的安装顺序进行操作(依 次为 3A、6B、9C、2D、5E、8F、1G、4H 和 7I)。
惠普服务管理器 9.20 版安装指南说明书
HP Service Manager适用于 Windows®和 UNIX®操作系统软件版本:9.20安装指南文档发行日期:2010 年 6 月软件发行日期:2010 年 6 月法律声明随产品和服务提供的货品质量保证声明中阐明了 HP 产品和服务的唯一担保。
本文所含信息不得视为构成额外担保。
HP 对于本文所包含的技术、编辑错误或遗漏概不负责。
此处包含的信息如有更改,恕不另行通知。
受限权利声明机密计算机软件。
必须具有 HP 的有效许可证才能拥有、使用或复制。
按照 FAR 12.211 和 12.212,并根据供应商的标准商业许可的规定,“商业计算机软件”、“计算机软件文档”和“商品技术数据”的使用权属于美国政府。
商业项目根据供应商的标准商业许可授权给美国政府使用。
版权声明© 版权所有 1996-2010 Hewlett-Packard Development Company, L.P.商标声明Java™ 是 Sun Microsystems,Inc. 在美国的商标。
Microsoft® 和 Windows® 是 Microsoft Corporation 在美国的注册商标。
Oracle® 是 Oracle Corporation 和/或其附属机构的注册商标。
UNIX® 是 The Open Group 的注册商标。
2文档更新本文档的标题页包含了下列标识信息:• 软件版本号,用于指示软件版本。
• 文档发行日期,该日期在每次更新文档时改变。
• 软件发行日期,用于指示该软件版本的发行日期。
要查看最新的更新或验证您所使用的文档是否为最新版本,请访问:/selfsolve/manuals此站点要求您以 HP Passport 用户的身份注册和登录。
要注册 HP Passport ID,请访问:/passport-registration.html或在“HP Passport”登录页面上单击“New users - please register”链接。
HPProLiantDL系列PC服务器维护手册

HPProLiantDL系列PC服务器维护手册HP PC服务器维护手册(v 20110730)目录第1章硬件状态指示灯 (4)1.1HP P RO L IANT DL580G7指示灯状态: (4)1.2HP P RO L IANT DL380G7指示灯状态: (14)1.3HP P RO L IANT DL980G7指示灯状态 (25)第2章常见硬件部件故障处理 (37)2.1硬盘故障的处理方法 (37)2.2RAID卡故障的处理方法 (38)第1章硬件状态指示灯1.1HP ProLiant DL580 G7指示灯状态:➢Item Description Status1 UID 开关和指示灯蓝色= 活动状态蓝色闪烁= 服务器在被远程控制不亮= 处于非活动状态2 建康指示灯绿色= 正常(系统在正常运行)橙色闪烁= 系统降级红色闪烁= 系统健康出现严重问题不亮= 正常(系统关闭)3 NIC 1 链路/ 活动指示灯(针对主板集绿色= 联接到网络成)绿色闪烁= 联接到网络并处于活动状态不亮= 没有网络联接4 NIC 2 链路/ 活动指示灯(针对主板集绿色= 联接到网络成)绿色闪烁= 联接到网络并处于活动状态不亮= 没有网络联接5 NIC 3 链路/ 活动指示灯(针对主板集绿色= 联接到网络成)绿色闪烁= 联接到网络并处于活动状态不亮= 没有网络联接6 NIC 4 链路/ 活动指示灯(针对主板集绿色= 联接到网络成)绿色闪烁= 联接到网络并处于活动状态不亮= 没有网络联接7 加电/ 待机按钮以及指示灯橙色= 有交流电并且服务器处于待机状态绿色= 有交流电并处于开机状态不亮= 没有交流电源➢Code Component Status01 电源线系统板到电源线: 线有故障或者线没有安装04 风扇板电源线风扇板电源或者信号线没有安装05 内存板基本内存错误( 内存板1 没有安装或者存在不正确的内存配置)06 SAS 背板电源线SAS 背板或者线没有安装08 系统锁指出了一个没有在代码01 到07 所包含的故障t1 Processor 1不支持Processor 1 不支持,更换一个系统支持的处理器 .t2 Processor 2不支持Processor 2 不支持,更换一个系统支持的处理器 .t3 Processor 3不支持Processor 3 不支持,更换一个系统支持的处理器 ..t4 Processor 4不支持Processor 4 不支持,更换一个系统支持的处理器 .P1 Processor 1没有安装Processor 1 没有安装,需要重新启动系统, 安装处理器1. 如果处理器 4 安装了并且系统正在启动, P1 代码和Port 84/85 将显示1 秒钟以表示系统正在启动U1 PPM 1 没有安装处理器 1 没有安装PPM1 ,需要安装U2 PPM 2 没有安装处理器 2 没有安装PPM2 ,需要安装U3 PPM 3 没有安处理器 .3 没有安装PPM3 ,需要安装装U4 PPM 4 没有安处理器 4 没有安装PPM4 ,需要安装装A0 Pre POST 代码Standby 模式P5 电源电源没有输出信号_5 电源背板电源背板没有5V 电压输出33 电源背板电源背板没有3.3V 电压输出15 1.5-V 调压器主板的电压调整器没有1.5-V 电压输出Ut Vtt 调整器Vtt 没有电源输出5U PPM 故障PPM 没有电源输出nb 没有启动系统处于未启动状态➢内存板组成部分以及指示灯状态➢Item Description Status1 释放锁2 弹出杆3 旋转开关4 可移动的绿色= 可以拔该内存板➢热插拔电源指示灯➢Item Description1 电源LED ( 主电源)2 故障LED ( 主电源)3 电源LED ( 冗余电源)4 故障LED ( 冗余电源) ➢Power LED ( 绿色) Failure LED ( 橙色)Status灭灭 2 个电源都没有交流电输入灭亮没有交流电到该电源或者电源故障( 包括电压过高或者温度过高)闪烁灭有交流电/ 标准输出状态亮灭直流输出电源正常灭闪烁电源故障➢热插拔风扇指示灯➢Status绿色= 正常状态橙色= 故障不亮= 没有电源HP Proliant 服务器 - 热插拔硬盘指示灯状态说明1.2HP ProLiant DL380 G7指示灯状态:➢成分标识➢项目描述状态➢1个网卡链路/活动的网络连接➢闪光绿色=网络链接和活动➢关闭=没有连接到网络。
HP服务器系统安装教程
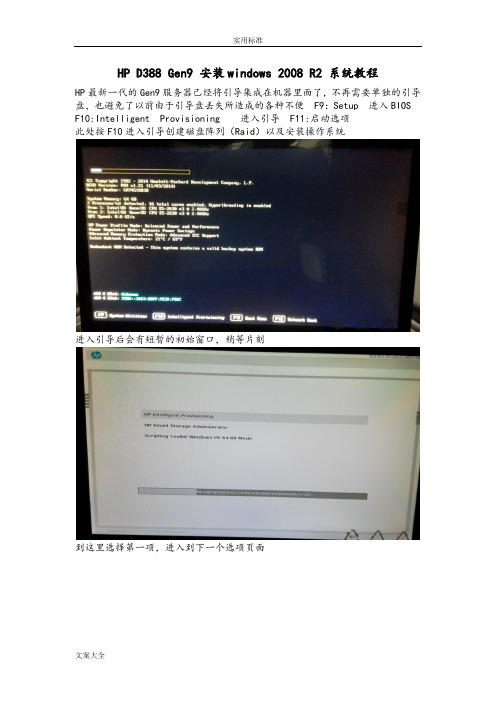
HP D388 Gen9 安装windows 2008 R2 系统教程
HP最新一代的Gen9服务器已经将引导集成在机器里面了,不再需要单独的引导盘,也避免了以前由于引导盘丢失所造成的各种不便F9:Setup 进入BIOS F10:Intelligent Provisioning 进入引导F11:启动选项
此处按F10进入引导创建磁盘阵列(Raid)以及安装操作系统
进入引导后会有短暂的初始窗口,稍等片刻
到这里选择第一项,进入到下一个选项页面
到这里选择第二个,进入维护模式
在这里选择SSA,进入后,可以看到阵列卡信息P440ar
创建阵列
将硬盘全选
选择创建Raid1
确认信息,创建成功
返回配置和安装,安装操作系统
进入安装系统步骤
第二步,这里选用的是用优盘安装,光盘安装选择Disc即可
选择镜像
进行系统配置选择
确认信息,进入安装
等待进度条走完
系统重启,进入系统安装界面
系统自动安装
提醒:注意细节选项,根据自己的需求进行选择更改。
- 1、下载文档前请自行甄别文档内容的完整性,平台不提供额外的编辑、内容补充、找答案等附加服务。
- 2、"仅部分预览"的文档,不可在线预览部分如存在完整性等问题,可反馈申请退款(可完整预览的文档不适用该条件!)。
- 3、如文档侵犯您的权益,请联系客服反馈,我们会尽快为您处理(人工客服工作时间:9:00-18:30)。
注意:前面板图使用 8 个大尺寸驱动器型号作为示例。
后面板组件
图 3:后面板组件 / 1U 节点
编号 1 2 3
说明 PCIe Gen2 半高扩展卡插槽 PCIe Gen2 全高、半长扩展卡插槽 PCIe Gen2 全高、全长扩展卡插槽
图 5:后面板组件 / 4 个节点的编号
编号 1 2 3 4 5 6 7 8 9
打开服务器
注意:下面的产品图仅供参考,并不反映实际配置。您 的服务器的外观可能与此不同。 顶盖是可拆卸的。请按照下面的步骤进行操作以卸下顶盖: 1. 将锁定装置逆时针旋转到解除锁定符号的位置。(图 12 中的 步骤 1) 2. 将锁定器从打开位置拉起。(图 12 中的步骤 2) 3. 朝着设备后部滑动顶盖,然后提起顶盖,将其从机箱中卸下。 (图 12 中的步骤 3) 图 12:卸下顶盖
1. 确保所有组件是按照所介绍的分步指南安装的。 2. 检查以确保服务器内部没有任何松动的工具或部件。 3. 重新安装已卸下的 PCI 笼、隔气罩、外围设备和系统电缆。 4. 重新安装顶盖。 5. 重新将服务器装入机架。 6. 将所有外部电缆和交流电源线连接到系统上。 7. 按下前面板上的电源按钮打开服务器。
6G、3H
o 处理器插槽 2 的 DIMM 安装顺序:8A、5B、2C、7D、4E、1F、
6G、3H
图 14:DIMM 插槽的安装顺序
注意:任何空的 DIMM 插槽上都应该安装 DIMM 空闲挡 板,以便保持正常散热。
注意:DIMM 插槽的结构设计可以确保正确安装。将 DIMM 插入插槽时如果感觉很费力,则可能插装不正 确。将 DIMM 调换方向,然后再次插入。
服务器配置概述
下列步骤概述了使 HP ProLiant DL170e G6 服务器正常运行所需的安 装准备过程。
1. 连接交流电源线和外围设备。 2. 打开服务器电源。 3. 按“F10”进入 BIOS 设置程序。 4. 请查看服务器的 BIOS 版本。 5. 对照所列的此服务器的最新 BIOS 版本,验证服务器 BIOS
• 高达 48GB,使用 PC3-10600E DDR3 非缓冲 (UDIMM) 内存, 在 1,333MHz 下运行(当以每个通道 2 个 DIMM 的布局插装 到 12 个插槽中时)
• 16 个 DIMM,每个处理器 8 个 DIMM 插槽,前 2 个通道各 3 个,第 3 个通道仅 2 个
• 支持的配置:
安装硬盘
此服务器支持 SAS 和 SATA 硬盘,下面的安装图使用大尺寸热插拔 硬盘作为示例。
注意:硬盘可能会受到静电损害。在拿放硬盘之前, 应先通过接触未涂漆的金属表面释放静电。 在机箱中安装硬盘: 1. 如安装有硬盘空闲挡板,请将其从系统前端卸下。 2. 将硬盘推入硬盘托架,直到推不动为止。(图 13 中的步骤 1) 3. 将硬盘托架锁定器向里按,直到听到喀哒一声。(图 13 中的 步骤 2)
1
电源 2
2
电源 1
图 6:2 个节点的编号
图 8:驱动器编号 / 12 个大尺寸硬盘型号
支持的驱动器配置
HP Proliant DL170e G6 服务器可以容纳多达 8 个大尺寸、12 个大 尺寸、16 个小尺寸或 24 个小尺寸硬盘,具体取决于所选的硬盘笼 选件。不同类型的节点配置(4 个节点和 2 个节点)支持不同类型 的驱动器配置。
图 17:重新插入处理器
图 19:取下工具
3. 将处理器安装工具与插槽对齐,然后安装处理器。主板上的插 针极为脆弱,容易损坏。
图 18:安装处理器
5. 合上处理器插槽固定支架和处理器锁定杆。处理器插槽盖会自 动弹出。卸下插槽盖。
图 20:合上支架和压杆,卸下插槽盖
注意:主板上的插针极为脆弱,容易损坏。为避免损坏 主板,请注意以下事项:
主板组件
图 11:主板组件
编号 1 2
说明 TPM 接口(可选) Riser 接口
编号 3 4 5 6 7 8 9 10 11 12 13 14 15 16 17 18
说明 处理器 2 处理器 1 DIMM 插槽 1F 处理器 1 DIMM 插槽 8A RPS 接口 处理器 1 处理器 2 DIMM 插槽 1F 处理器 2 DIMM 插槽 8A 内置 USB 2.0 端口 SATA 0 接口 SATA 1 接口 SATA 2 接口 SATA 3 接口 专用管理端口 (L0100i)(可选) SATA 4 接口 SATA 5 接口 电池
图 13:安装热插拔硬盘
图 15:安装内存
安装内存
增加或更换内存时,必须遵循以下准则:
• 高达 192GB,使用 PC3-8500R DDR3 寄存 (RDIMM) 内存,在 800MHz 下运行(当以每个通道 2 个 DIMM 的布局插装到 12 个插槽中时)
• 高达 128GB,使用 PC3-10600R DDR3 寄存 (RDIMM) 内存, 在 800MHz 下运行(当完全插装到 16 个插槽中时)
图 7:驱动器编号 / 8 个大尺寸硬盘型号
12 个大尺寸硬盘型号支持的驱动器配置: 4 个节点(1、2、3 和 4),每个节点各 3 个硬盘:
2 个节点(1 和 3),每个节点各 6 个硬盘:
图 9:驱动器编号 / 16 个小尺寸硬盘型号
8 个大尺寸硬盘型号支持的驱动器配置: 4 个节点(1、2、3 和 4),每个节点各 2 个硬盘:
注意:如果操作不当,可能会损坏 DIMM。在触摸 DIMM 之前,始终都应戴上防静电腕带和使用接地衬垫 以释放静电。
安装处理器
安装处理器:
注意:如果在安装过程中未完全打开处理器锁定杆, 则无法固定处理器,从而会导致硬件损坏。
1. 打开处理器锁定杆和处理器插槽固定支架。请勿卸下处理器插 槽盖。
图 16 打开压杆和支架
• 切勿在不使用处理器安装工具的情况下安装或卸下处 理器。
• 请勿接触处理器插槽触点。 • 请勿在将处理器放低到插槽中时,倾斜或滑动处理器。
4. 按动处理器安装工具上的卡舌,使其与处理器分离,然后取下 工具。
注意:在合上处理器锁定杆之前,确保合上处理器插槽
固定支架。锁定杆应在没有任何阻力的情况下合上。强 行合上锁定杆可能会损坏处理器和插槽,就会需要更换 主板。
1. 关闭本服务器及所有与之连接的外围设备。 2. 拔下服务器后面板电源插孔中的交流电源线,以降低触电风险。 3. 如果服务器安装在机架中,请拆下服务器并将其放在一个平
面上。 4. 按照后面“打开服务器”部分中说明的步骤卸下顶盖。
安装后步骤
主板上各个组件(处理器、DIMM,等等)的安装后步骤:
1. 安装 PCIe 笼和隔气罩。 2. 将节点装入机箱。 3. 将所有外部电缆和交流电源线连接到节点上。 4. 按前面板上的节点电源按钮以打开相应的节点。 机箱中各个组件(风扇、硬盘背板,等等)的安装后步骤:
版本。
6. 如果使用的不是最新的 BIOS,应立即加以更新。请参阅 HP ProLiant DL170e G6 Server Maintenance and Service Guide(HP ProLiant DL170e G6 服务器维护与维修指南)。
7. 安装您所选的支持的操作系统。有关详细步骤,请参阅由操作 系统供应商提供的文档。
2 个节点(1 和 3),每个节点各 4 个硬盘:
16 个小尺寸硬盘型号支持的驱动器配置: 4 个节点(1、2、3 和 4),每个节点各 4 个硬盘:
2 个节点(1 和 3),每个节点各 8 个硬盘: 图 10:驱动器编号 / 24 个小尺寸硬盘型号
24 个小尺寸硬盘型号支持的驱动器配置: 4 个节点(1、2、3 和 4),每个节点各 6 个硬盘: 2 个节点(1 和 3),每个节点各 12 个硬盘:
说明 PCIe Gen2 半高扩展卡插槽 服务器运行情况 LED 指示灯 共享 1GbE NIC2/管理端口 (L0100i) USB 2.0 端口 1 专用管理端口 (L0100i)(可选) USB 2.0 端口 0 1GbE NIC1 端口 服务器电源按钮 服务器 UID LED 指示灯按钮
编号 说明
• 有关选件安装的安全信息和详细步骤,请参阅随选件提供的安装 说明文档以及 HP ProLiant DL170e G6 Server Maintenance and Service Guide(HP ProLiant DL170e G6 服务器维护与维修指 南)。
• 有关“配置服务器”部分中列出的其余步骤的安全信息和详细步 骤,请参阅 HP ProLiant DL100 Series Server User Guide(HP ProLiant DL100 系列服务器用户指南)中的相关章节。
图 2:前面板组件 / 2 个节点,8 个大尺寸硬盘笼型号
编号 说明
10Biblioteka 串行端口11VGA 端口
图 4:后面板组件 / 2U 节点
编号 1 2 3 4 5
说明 节点 1 的电源按钮/LED 指示灯 节点 1 的运行状况 LED 指示灯 节点 3 的运行状况 LED 指示灯 机箱 UID 按钮/LED 指示灯 节点 3 的电源按钮/LED 指示灯
安装内存:
1. 将内存底边上的凹槽与 DIMM 插槽的键槽面对齐,然后将内存 完全按入插槽,直到固定夹卡入到位。(图 15 中的步骤)
切记:处理器一定要保留在处理器安装工具内。
2. 若处理器已与安装工具分离,请小心地将处理器重新插入安装 工具中。仅拿住处理器边缘,不要接触处理器底部,尤其是触 点区域。
• 有关系统 BIOS 配置和操作系统安装的信息,请参阅 HP ProLiant DL170e G6 Server Software Configuration Guide(HP ProLiant DL170e G6 服务器软件配置指南)中的相关部分。