网易云音乐ncm格式怎么转换成mp3格式
如何将课件转换成MP3格式的

如何将课件转换成MP3格式的文件第一步:如果是wma和asx格式的课件可以直接将后缀名wma或asx改为asf格式的。
第二步:将课件录音.asf文件转换成mp3首先请点击此下载"千千静听软件",然后按下列步骤进行操作:*软件的安装和使用:1、双击运行下载成功的tt psetu p.exe,按照默认的步骤一步步的在本机安装软件.2、软件安装完毕后,在程序菜单或桌面上双击"千千静听"快捷图标,软件正常运行后出现使用界面。
见下图:3、打开软件后打开你想转换的课件,打开后,在你想转化的课件上点击右键,在界面中选择转化格式,见下图:4、点击转换格式后,会出现转化格式的界面在输出格式中选择mp3编码器(lame v3.90.3)v1.02 ,然后点击该选项在转换之前可以右边点击菜单中“配置”按钮,设置mp3文件格式的编码质量等属性,见下图:免责声明:本站提供的Window s Mediaplayer、 asftom p3.exe 等相关软件,版权属原著作者,本站是从其它软件下载网站公开下载获取的,仅为方便网友使用而提供免费下载,如有涉及版权问题请与我们联系。
警告!!本站录音课件版权所有,无论是asf文件还是转成.mp3文件未经允许任何单位和个人都不得公开进行复制、传播、下载、共享和销售,一经发现将追究其法律责任。
课堂中的学习内容(录音、讲义文本、习题及答案)用户下载后仅只能做为自己学习之用,不得转发给他人共享使用或进行销售,一经发现用户有此行为立即关闭其课堂(不退还学费)!。
电脑上怎么把m4a转mp3?教你两种m4a转mp3的方法
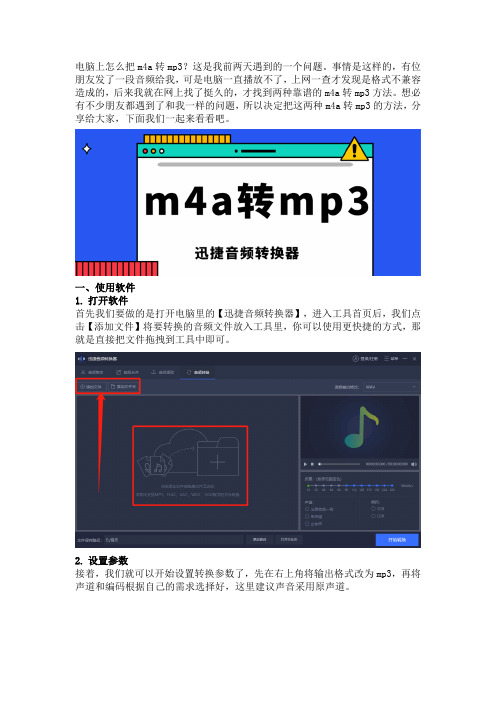
电脑上怎么把m4a转mp3?这是我前两天遇到的一个问题。
事情是这样的,有位朋友发了一段音频给我,可是电脑一直播放不了,上网一查才发现是格式不兼容造成的,后来我就在网上找了挺久的,才找到两种靠谱的m4a转mp3方法。
想必有不少朋友都遇到了和我一样的问题,所以决定把这两种m4a转mp3的方法,分享给大家,下面我们一起来看看吧。
一、使用软件
1.打开软件
首先我们要做的是打开电脑里的【迅捷音频转换器】,进入工具首页后,我们点击【添加文件】将要转换的音频文件放入工具里,你可以使用更快捷的方式,那就是直接把文件拖拽到工具中即可。
2.设置参数
接着,我们就可以开始设置转换参数了,先在右上角将输出格式改为mp3,再将声道和编码根据自己的需求选择好,这里建议声音采用原声道。
3.开始转换
最后我们通过【更改路径】把音频保存的位置修改一下,然后就可以点击【开始转换】,等几秒就能转换完成。
二、在线转换
1.进入网站
我们在电脑浏览器里打开【迅捷视频官网】,再从网站首页导航栏中找到【在线转换】,然后在【音频转换】里找到“m4a转mp3”功能。
2.上传音频
接下来,我们点击中间的【选择文件】,把要转换的文件上传到该网站。
然后在将转换的格式设置为mp3,就可以点击【开始转换】了。
3.保存文件
等待一会儿转换完成之后,我们点击中间的【立即下载】,就可以把转换完成的音频文件保存到电脑里。
这就是用电脑将m4a转mp3的两种方法了,经过我的多次对比,发现这两种方法是较为靠谱的,不仅转换效果好,而且操作也相对简单一些。
如果你平时遇到其他音频格式的转换问题,也是可以用上面这两种方法的。
MP3怎么转换m4r格式?
声长度了。 五、之后会回到转换界面,继续点击顶部的“确定”,如下图所示: 五、最后会看到如下初始的音频转换界面,在右侧可以看到一个任
务,此时我们点击顶部的开启,就会自动将MP3音乐转换成 M4RG格式的铃声,并且是我们刚刚截取的片段,如下图所示。
开始转换 点击开始
后,等待几秒就可以转换完成,如下图所示。
MP3转换m4r格式完成 最后我们可以在E盘的FFOutpu文件夹中,看到已经转换成个 的铃
声片段,格式为m4r,如下图所示。
MP3转换m4r格式铃声完成 以上就是MP3音乐转换成适合iPhone手机使用的m4r铃声方法,
转换成功后,就可以将m4r铃声通过iTunes工具,将转换 好的铃声,导入到iPhone手机铃声库了,最后在iPhone手 机中,就可以设置此铃
mp3怎么转m4r?我们知道iPhone手机的铃声格式是m4r格 式,而我们最常见的音乐格式是mp3格式,如果 iPhone4s/5/6手机要设
ቤተ መጻሕፍቲ ባይዱ
置自定义铃声,那么必须先将mp3音频文件件转换成m4r 格式的文件,之后在导入到iPhone铃声库中。
一、首先在电脑中下载安装“格式化
工厂”转换工具,下载安装后直接打开运行,然后点击 左侧的“音频”之后在点击“M4R”如下图所示。
段】,如下图所示。
四、接下来会进入音乐截取片段界面,你可以试听,在听到 需要开头的地方点击“开始时间”之后在一播放一小段时间 后,再点击
结束时间即可。注意iPhone铃声需要控制在40s内,因此 开始时间和结束时间一定要调整好,截图好片段时间后, 点击“确定”,如下图所示。
选取截取片段时间 如上图,笔者选择的开始时间是:1分05秒,结束的时间 为1分40秒,这个片段的时间为35s,这样就可以符合 iPhone铃
Bongo官方教程中文版
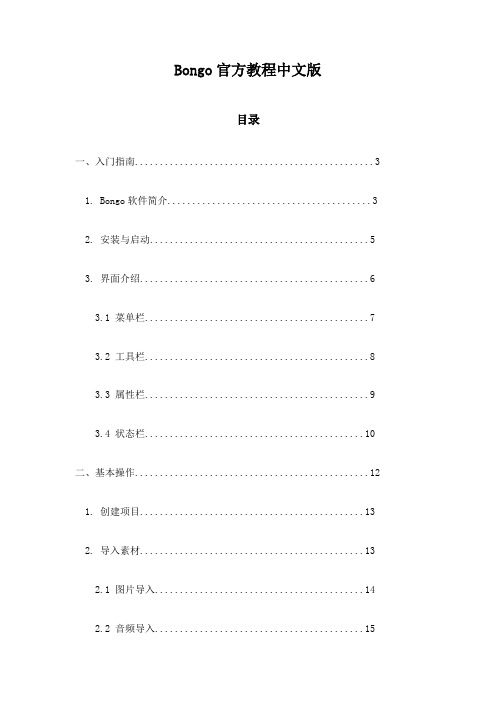
Bongo官方教程中文版目录一、入门指南 (3)1. Bongo软件简介 (3)2. 安装与启动 (5)3. 界面介绍 (6)3.1 菜单栏 (7)3.2 工具栏 (8)3.3 属性栏 (9)3.4 状态栏 (10)二、基本操作 (12)1. 创建项目 (13)2. 导入素材 (13)2.1 图片导入 (14)2.2 音频导入 (15)3. 项目管理 (17)3.1 项目设置 (18)3.2 文件管理 (19)3.3 版本控制 (20)三、功能使用 (21)1. 绘图工具 (23)1.1 画笔工具 (25)1.2 形状工具 (26)1.3 颜色填充工具 (27)1.4 文本工具 (28)2. 音频编辑 (29)2.1 音频剪辑 (30)2.2 音频混合 (31)2.3 音频效果处理 (32)3.1 视频剪辑 (36)3.2 视频特效制作 (37)3.3 视频输出设置 (38)4. 动画效果制作 (40)4.1 创建动画层 (41)4.2 动画路径制作 (42)4.3 动画效果预览与调整 (43)四、高级功能进阶篇 (45)1. 交互设计功能应用与实现 (47)2. 图像优化处理技术解析与应用案例分享 (49)一、入门指南Bongo是一款强大的开源引擎,用于构建沉浸式交互式3D体验。
无论是游戏开发、动画制作,还是虚拟现实应用,Bongo都能提供丰富的工具和功能,帮助您轻松实现创意。
本部分将为您提供Bongo的基本概念和操作指南,帮助您快速入门:Bongo是一个轻量级且高效的3D引擎,支持Web平台和移动端,并以其灵活性和易于使用而闻名。
Bongo采用C++开发,并提供了丰富的API,让您可以轻松控制场景、对象、动画和互动效果。
本教程将提供详细的安装步骤,并指导您如何启动Bongo并创建您的第一个项目。
1. Bongo软件简介Bongo是一款功能强大、用户友好的Java编程教育工具,专为初学者和进阶开发人员设计。
我国数字版权保护趋势探析——从流媒体音乐版权谈起
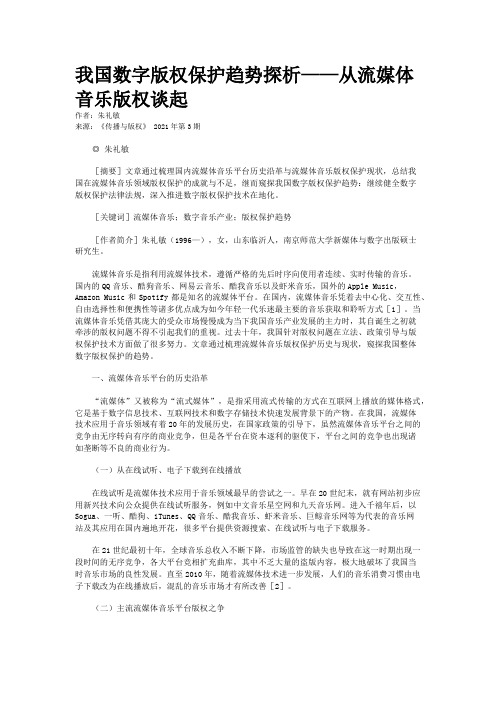
我国数字版权保护趋势探析——从流媒体音乐版权谈起作者:朱礼敏来源:《传播与版权》 2021年第3期◎ 朱礼敏[摘要]文章通过梳理国内流媒体音乐平台历史沿革与流媒体音乐版权保护现状,总结我国在流媒体音乐领域版权保护的成就与不足,继而窥探我国数字版权保护趋势:继续健全数字版权保护法律法规,深入推进数字版权保护技术在地化。
[关键词]流媒体音乐;数字音乐产业;版权保护趋势[作者简介]朱礼敏(1996—),女,山东临沂人,南京师范大学新媒体与数字出版硕士研究生。
流媒体音乐是指利用流媒体技术,遵循严格的先后时序向使用者连续、实时传输的音乐。
国内的QQ音乐、酷狗音乐、网易云音乐、酷我音乐以及虾米音乐,国外的Apple Music,Amazon Music和Spotify都是知名的流媒体平台。
在国内,流媒体音乐凭着去中心化、交互性、自由选择性和便携性等诸多优点成为如今年轻一代乐迷最主要的音乐获取和聆听方式[1]。
当流媒体音乐凭借其庞大的受众市场慢慢成为当下我国音乐产业发展的主力时,其自诞生之初就牵涉的版权问题不得不引起我们的重视。
过去十年,我国针对版权问题在立法、政策引导与版权保护技术方面做了很多努力。
文章通过梳理流媒体音乐版权保护历史与现状,窥探我国整体数字版权保护的趋势。
一、流媒体音乐平台的历史沿革“流媒体”又被称为“流式媒体”,是指采用流式传输的方式在互联网上播放的媒体格式,它是基于数字信息技术、互联网技术和数字存储技术快速发展背景下的产物。
在我国,流媒体技术应用于音乐领域有着20年的发展历史,在国家政策的引导下,虽然流媒体音乐平台之间的竞争由无序转向有序的商业竞争,但是各平台在资本逐利的驱使下,平台之间的竞争也出现诸如垄断等不良的商业行为。
(一)从在线试听、电子下载到在线播放在线试听是流媒体技术应用于音乐领域最早的尝试之一。
早在20世纪末,就有网站初步应用新兴技术向公众提供在线试听服务,例如中文音乐星空网和九天音乐网。
ncm转mp3格式转换器有哪些?
ncm转mp3格式转换器有哪些?
说到.ncm格式,可能还有很多人不知道这是啥,但要说到网易云音乐大家肯定不陌生。
小编一直都是抠抠搜搜的,使用网易云那么久,还是头一次开通会员,然后当我将一首歌下载到电脑,并想导到iTunes里时,发现格式不对无法导入????什么情况?噢,仔细一看才发现这个音频文件是.ncm格式的。
.ncm是我们不常见的音频格式,只能由网易云音乐软件播放的ncm音乐文件、且会员到期将无法播放的VIP歌曲。
那么就需要将这种格式进行转换了,那该如何转成MP3这种通用且常用的格式呢?
要想将ncm文件转化为mp3文件的方法并不困难,今天给大家介绍下详细的实现方法。
操作步骤:
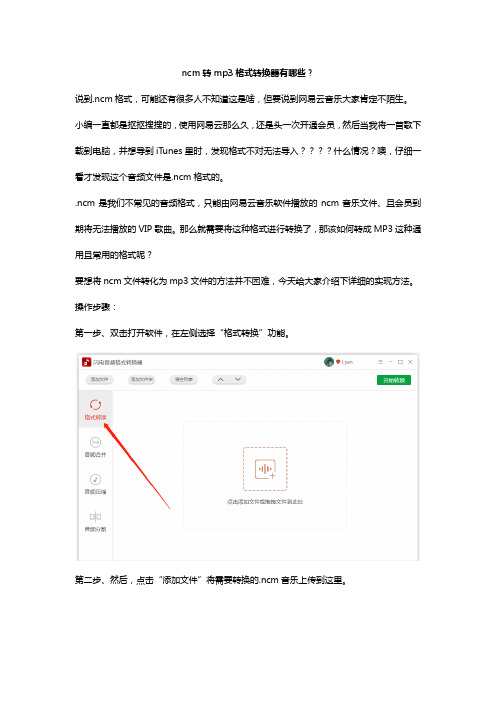
第一步、双击打开软件,在左侧选择“格式转换”功能。
第二步、然后,点击“添加文件”将需要转换的.ncm音乐上传到这里。
第三步、上传后,在右下角的“设置中”,找到格式,点击下拉按钮,可选择需要的格式,这里选择的是MP3格式。
第四步、点击输出目录可选择文件导出位置。
第五步、最后,点击“开始转换”就可以啦!
第六步、得到以下提示后,说明已成功转换并导出,点击“前往导出文件夹”可浏览音乐文件。
第七步、找到文件后,打开属性查看,是MP3没错吧!没骗你们呢!。
ncm转mp3原理
ncm转mp3原理
NCM是一种音频文件格式,专门用于网易云音乐。
它的原理是通过加密和压缩将音频文件进行保护,以防止非法传播和使用。
NCM文件中并不包含真正的音频数据,而是包含了一个加密的音频密钥和一个压缩的音频文件。
要将NCM文件转换为MP3格式,需要先解密NCM文件,获取音频密钥。
解密音频密钥的过程是通过解析NCM文件的头部和尾部数据,或者通过调用网易云音乐API获取相应的密钥。
解密得到音频密钥后,就可以解压缩音频文件。
解压缩过程是将压缩的音频文件还原为原始的音频数据。
根据NCM文件的格式和压缩算法,可以选择合适的解压缩算法进行操作。
当音频文件解压缩完成后,就可以将其转换为MP3格式。
MP3是一种常见的音频格式,具有较好的音质和普遍的兼容性。
可以使用音频转换软件或者编码库将解压缩后的音频数据编码为MP3格式文件。
总结起来,将NCM转换为MP3的原理包括解密获取音频密钥、解压缩音频文件和将解压缩后的音频数据编码为MP3格式。
M4A音频怎样在线转换成MP3音频

M4A音频怎样转换成MP3音频格式呢?音频格式转换的问题无论是在生活中还是在工作中,都是会经常用到的问题。
那么当我们遇到了M4A音频格式转MP3的问题,我们应该如何快速实现呢?下面我们就一起来看一下吧。
步骤一:首先我们需要先准备一台电脑,因为音频格式转换的问题,需要借助电脑来进行实现。
步骤二:电脑准备好后,我们就可以通过电脑浏览器搜索迅捷PDF在线转换器,来帮助我们解决音频格式的转换问题了。
步骤三:通过电脑浏览器搜索进入到转换页面后,在页面上方一排的功能选项导航栏中,我们需要从音视频转换的功能栏中,找到M4A转MP3的选项。
步骤四:M4A转MP3的转换选项进来后,我们就可以通过页面中心的点击选择文件按钮,将需要进行转换的M4A音频文件添加进来。
步骤五:音频文件添加进来后,我们就可以听过开始转换按钮,对音频文件进行转换了。
步骤六:音频文件转换开始后,根据转换所需要的时间,等待音频转换结束,就可以将转换后的音频文件保存到电脑上进行使用了。
上面便是可以实现M4A音频转MP3的方法了,希望可以对大家有所帮助啊。
朝华 MP3 MH-128M 神曲 i 系列 说明书

朝华MP3说明书MH-128M 神曲i系列朝华数码科技有限责任公司出品地址:北京市朝阳区麦子店街36号龙宝大厦二层电话:010-********,传真:010-********,公司网址: 800免费电话:8008105996,Email:digital@感谢购买朝华MP3数码随身听,请确认如下部件是否齐全:1. MP3主机2. 挂绳式立体声耳机3. USB连接线4. 安装光盘5. 使用说明书6. 联保卡7.合格证8.一节AAA(7号)碱性电池前言感谢您选择朝华数码科技有限责任公司的产品。
请在使用本产品前仔细阅读说明书。
若使用中发生故障,请与购买处或与朝华数码科技有限责任公司联系。
注 意 事 项 :● 请勿自行对本产品进行拆修或变更。
● 若对本产品使用操作不当,或产品受到静电、电流等冲击,产品内部分或全部数据内容有变更或损坏的可能性。
请把重要内容和数据备份到记事簿,笔记本或个人电脑上。
● 对产品内储存数据的损失或其变更,朝华数码不负有任何责任,请谅解。
● 请勿使产品掉进水里或使水进入,并且请勿将本产品放置在潮湿的地方。
● 为了提高并改善本产品的性能,说明书的内容可能会有所变更,恕不另行通知。
● 说明书中的产品图片仅供参考,实际产品与图片可能有所出入,请注意。
有关版权的注意事项● 通过MP3转换功能而得到的MP3文件的使用范围只限于个人用途,不得以商业上的、服务业上的目的而使用。
违反此项内容就如同违反了国内的保护版权法,请注意。
● 录音内容只用于在个人的娱乐用途,擅自拷贝并且宣传的行为将受到法律的制裁。
注意事项1、若长时间不使用本机,请取出电池,以避免因电池的滲漏和腐蚀引起主机的损坏。
2、请勿在过热、过冷、多尘或潮湿的环境中使用本机。
3、使用前请确认按键锁处于解锁位置。
4、请勿将本机与坚硬物体撞击,否则可能会导致主机表面磨损、电池脱落或其它硬件损坏。
5、在下列状况下请注意及时更换电池。
a) 电池电量图标为空,并闪动。
网易云音乐ncm格式怎么转换成mp3格式

网易云音乐ncm格式怎么转换成mp3格式网易云音乐ncm格式怎么转换成mp3格式方法一:借助360安全浏览器或者qq浏览器1.电脑版网易云音乐选择要下载播放的会员曲目,右键复制链接,2.在360浏览器或者qq浏览器中打开链接,把鼠标移到播放键,点击右键,选择审查元素,点击network,f5刷新一下3.点击播放,type那栏找到media(或者audio),或者直接在size那栏寻找最大一个文件4.复制mp3文件链接,新建下载,就能下载到你想要的mp3格式文件了。
方法二:格式工厂转换:1、首先,下载安装格式工厂,打开格式工厂软件。
2、打开格式工厂窗口后,选择音频选项3、在音频选项窗口中,选择MP3按钮。
4、MP3窗口中,选择添加文件选项。
5、打开ncm格式音乐所在的目录后,选择文件名后的文件格式为All Files。
6、我们要转换的文件,就显示在窗口中了,点击选中后单击打开。
7、回到MP3窗口后,单击确定按钮。
8、单击开始按钮,音乐格式就开始转换了。
9、打开转换文件保存的目录,ncm格式音乐文件已转换为Mp3格式了。
方法三:BesLyric:1、选择 ncm 文件点击“选择”弹出对话框后,可以看到可以选择 ncm文件2、点击匹配ID播放ncm文件前,需要先匹配该文件对应的网易云音乐中的音乐ID。
因为ncm文件是网易云独家加密的,所以这里需要间接的获得可以播放的文件(mp3),这里需要的是,网易云里对应的音乐ID。
3、匹配 ncm 文件对应在网易云音乐的ID这里匹配ID有2种可用的选择,一种是使用软件的“ID搜索”功能,另一种是自己“自己动手”去网易云复制歌曲分享链接,得到IDa) 软件搜索ID搜索后“选用”一个ID,然后点击“确定匹配”即可完成匹配。
但有多个搜索结果时,可以点击“查看”、“试听”,根据此进一步确认ID。
值得注意的是,如果无法“试听”,意味着网易云音乐可能已经没有该歌曲的版权,将无法匹配该ID。
m4a转mp3格式怎么转?教你两种m4a转mp3的方法

m4a转mp3格式怎么转?m4a格式是一种较为少见的音频格式,播放器通常不支持该音频格式,导致音频无法正常播放。
如果想播放m4a格式文件,就需要将m4a格式转换成常见的mp3格式,那m4a格式怎么转换成mp3音频呢?下面就教你两种m4a快速转mp3格式的方法。
方法二:在线转换
第一步:在浏览器中打开【迅捷视频网站】,将鼠标移动至在线转换选项,拓展开在线转换功能后,点击“M4A转换MP3”功能。
第二步:进入编辑页面后,点击“点击选择文件”按钮添加需要转换的m4a音频文件,音频默认的输出格式为mp3格式,当然你也可以根据需要进行修改。
第三步:文件导入成功后,直接点击“开始转换”按钮等待m4a音频文件转换成功,下载至桌面即可。
方法一:软件转换
第一步:首先在电脑上打开【迅捷音频转换器】,进入音频转换页面后,点击“添加文件”按钮导入需要转换的m4a音频文件,如果需要转换的文件较多,还可以事先将音频文件放在同一个文件夹中,在点击“添加文件夹”按钮,批量导入文件。
第二步:文件导入成功后,点击选择输出格式方框,将默认输出的mav格式修改成我们需要的mp3格式,然后在下方修改音频输出的声道和编码。
第三步:点击“更改路劲”按钮,修改文件的输出位置,再点击“开始转换
”按钮,等待音频文件转换完成即可。
这就是将m4a转mp3音频两种的全部内容了,其实两种方法都很好用,那么你更喜欢方法一,还是方法二呢?感兴趣的小伙伴两种方法都可以进行尝试。
ncmmp3格式

NCMmp3格式
NCM格式是网易云音乐的专属音乐格式,将音乐以特殊的编码方式加密在ncm文件中。
如果想要将ncm格式转换为MP3格式,可以按照以下步骤进行:方法一:使用嗨格式视频转换器
1.打开嗨格式视频转换器,选择【音频转换】功能。
2.点击【添加文件】或【添加文件夹】,将需要转换的ncm文件添加到
软件中。
3.在右侧设置中选择需要转成的格式,这里点击选择“MP3”格式。
4.点击软件界面右上角的【全部转换】按钮,等待转换完成。
5.转换完成后,点击右侧的“打开文件”便可以看到转换好的MP3文件。
方法二:使用审查元素或检查界面
1.进入审查元素或者检查界面之后,先点击【Network】,再点击【Media】,
然后按快捷键“F5”进行刷新。
2.等几秒钟,在下面的位置就会出现正在播放的音乐文件,在文件上
点击鼠标右键,然后点击【Open in new tab】。
以上两种方法都可以将NCM格式转换为MP3格式,可以根据个人需求选择合适的方法进行操作。
M Audio CO3 数字音频格式转换器说明书
Introduction (2)Features (2)Panel Description (2)Front Panel (3)Back Panel (3)Basic Operation (3)Installation and Setup (4)Advanced Information (5)SCMS Modes (5)SCMS “Pass Thru” Mode (5)Input Source Modes (7)Mode Summary (7)Lifetime Limited Warranty (8)IntroductionThank you for purchasing the CO3™ Digital Audio Format Converter from M Audio. The CO3™ converts between AES/EBU, S/PDIF Optical, and Coaxial S/PDIF digital formats. A precision instrument, the CO3 does more than just convert an unbalanced signal to balanced and vice versa. The CO3 gives you several options to manage the copy protection bits present in S/PDIF signals as well as creating the SCMS (Serial Copy Management System) bits required when converting AES/EBU to S/PDIF. Feel confident in the integrity of your digital format conversions with your CO3™from M Audio.Features•Converts between 3 digital audio formats: AES/EBU, Coaxial S/PDIF, and TOSlink optical.•Converts to ALL3 outputs simultaneously while allowing original signal to pass through.•Front panel SCMS button selects between copy protection modes: no copy protection, pass-thru, force "original", and force "1st generation."•Built-in jitter correction.•All 3 digital audio input and output ports on rear panel, allowing for easy hook-up.•One-third rack sized chassis. 9v DC wall wart power adapter.Panel DescriptionFront Panel1. Source selection LEDs. These LEDs indicate which one of the threeinput jacks is selected as the source of incoming digital audio. Only one of the LEDs is lit at a time.2. Source selection button. This pushbutton selects one of the three inputjacks to be the source of incoming digital audio. Repeatedly pressing this button will cycle through the three available selections.3. Source Valid LED. This LED indicates the state of the currently selectedsource input. When lit, the LED indicates the input data is recognizable and has valid format. When not lit, the LED indicates invalid or no data at the selected input.4. SCMS Mode Select button. Repeatedly pressing this button will cyclethrough the four SCMS mode selections. Some SCMS modes may not be available, depending on which input format is currently selected as the source.5. SCMS Mode selection LEDs. These LEDs indicate which one of the fourof the SCMS modes is selected. Only one of the LEDs is lit at a time.6. Power button. Pressing this button to the "in" position will turn the CO3on. Pressing and releasing to the "out" position will turn the CO3 off. Back Panel1.9V DC input jack. The CO3’s power adapter plugs in here.2.Digital Audio Input jacks. These jacks accept three different formats ofdigital audio data input. Whichever jack is selected as the CO3’s source will be converted to one or more of the available output formats.3. Digital Audio Output jacks. These jacks output converted data from theCO3, in the three formats supported by the CO3.Basic OperationThe CO3 Digital Audio Format Converter has three digital audio inputs: 1. Optical S/PDIF, labeled "TOSlink," is input via the TOSlink connector.This is the default setting when the CO3 powers up.2. Coaxial S/PDIF, labeled "S/PDIF," is input via the RCA jack.3. AES/EBU, labeled "AES/EBU," is input via the female XLR jack.Only one of the inputs to the CO3 is active at any time and the user selects this input, called the "Source" input, from the front panel. Once selected as the source, the input is constantly analyzed by the CO3 to determine if its digital audio stream is present and has a valid format. The status of this input is displayed by the CO3’s "Source Valid" LED.Once valid incoming data is detected, the digital data from the source input is converted to three digital audio outputs:1. Optical S/PDIF, labeled "TOSlink," is output via the TOSlink connector.2. Coaxial S/PDIF, labeled "S/PDIF," is output via the RCA jack.3. AES/EBU, labeled "AES/EBU," is output via the male XLR jack.While the source input stream is being converted to the three output streams, the CO3 is also capable of processing the SCMS (Serial Copy Management System) data, also known as the "copy protection bits." SCMS bits are present in S/PDIF data streams (on the CO3’s RCA and TOSlink connectors) only. The AES/EBU specification does not define any SCMS capability and therefore the digital streams at the CO3’s AES/EBU jacks carry no SCMS information.The CO3 has four different modes of SCMS operation:1. None. Regardless of what the input SCMS bits are, the SCMS outputbits are forced to the "no copy protection" setting.2. Pass-Thru. The SCMS bits from the input are passed through untouchedto the outputs. This is the default setting when the CO3 powers up.3. Original. Regardless of what the input SCMS bits are, the SCMS outputbits are forced to the "original copy" setting.4. 1st Generation. Regardless of what the input SCMS bits are, the SCMSoutput bits are forced to the "1st generation copy" setting.Installation and SetupTypical User Setup figure(s) here.Your CO3 box should contain this manual, the CO3, and its "wall-wart" DC power adapter. With the CO3’s power button in the outward "off" position, plug the appropriate end of the power adapter into the CO3’s power jack, and the other end into a live wall socket or power strip. Leave the CO3 powered off until all connections are made.NOTE: All CO3 inputs and outputs are transformer isolated or optically isolated except for the coaxial S/PDIF Input (the RCA input jack). This allows devices to be plugged into and unplugged from the CO3 while power is on, except for the coaxial S/PDIF Input jack -- CO3 power should be turned off before connecting to or disconnecting from the coax-ial S/PDIF Input jack.Connect one end of the proper cable to the output of your digital audio "source" and plug the other end into the matching CO3 input jack. Then connect one end of another appropriate cable between the desired CO3 out-put jack and the input jack of some receiving digital audio device(s).Turn on your digital audio source device, then turn on the CO3 by pressing in the "Power" button. The CO3 will always power on with TOSlinkOptical S/PDIF as the source selection, and "Pass-Thru" selected as the SCMS setting. From the front panel of the CO3, select the input source set-ting that matches the format of your input source. Optionally, set the SCMS mode to its desired setting (more specific information about this is coming later in the manual).NOTE: Although it is acceptable to change the various settings of the CO3 while power is turned on, you might hear small bursts of noise while switching. This is normal as it takes a small amount of time for external devices to "lock on" to a digital data stream after the switching takes place.Now, depending on what input you are using, and what the SCMS setting is, the CO3 will automatically convert the input stream to the output stream(s). Making sure the volume control on your receiving digital device is set low, power up the device. It should now lock onto the converted digi-tal stream from the CO3. Depending on the product, the receiving device may require some configuration in order to accept data at its digital input port.Advanced InformationInside the CO3, there are many different conversions to be made depending on the front panel settings and the characteristics of the actual incoming digital data stream. This section describes the various actions taken by the CO3 in various circumstances. The various CO3 modes are also summa-rized in the table at the end of the manual.SCMS ModesSCMS or "copy protection" bits are present in S/PDIF data streams (on the CO3’s RCA and TOSlink connectors) only. The AES/EBU specification does not define an SCMS capability and therefore the digital streams at the CO3’s AES/EBU jacks carry no SCMS information. When converting from S/PDIF to AES/EBU, the SCMS bits must be removed from the digital stream because there is no place for them in the AES/EBU output stream. When converting from AES/EBU to S/PDIF, the CO3 must create SCMS bits (as selected by the user) in the outgoing S/PDIF stream because the source AES/EBU stream did not include them. With this said, let’s go over the four SCMS modes and how they behave in each situation.SCMS "Pass-Thru" ModePass-Thru mode merely passes all SCMS information received at the inputsource to the output sources with no modification. Pass-Thru is available in all modes except when the input source is AES/EBU -- because an AES/EBU input carries no SCMS data, there is nothing to pass through when AES/EBU is selected as the input source.SCMS "None" ModeWhen SCMS mode is set to None, the outgoing SCMS bits are set to indicate that there is no copy protection asserted (the material may be copied). If the source is coaxial or optical S/PDIF, then the CO3 actually strips the SCMS material out of the incoming stream and replaces it with bits that indicate no copy protection. Also, in this case the "None" LED will blink to indicate that the AES/EBU output is not valid.If the source is AES/EBU, there is no incoming SCMS data. Therefore this SCMS mode will add the "no copy protection" information to the outgoing S/PDIF streams for you.SCMS "Original" ModeWhen SCMS mode is set to Original, the outgoing SCMS bits are set to indi-cate that the source material is the original master and not a copy. Therefore most receiving units will accept this material. Similar to "None" mode, if the source is coaxial or optical S/PDIF, then the CO3 actually strips the SCMS material out of the incoming stream and replaces it with bits that indicate original material. Also, in this case the "Original" LED will blink to indicate that the AES/EBU output is not valid.If the source is AES/EBU, there is no incoming SCMS data. Therefore this SCMS mode will add the "original" information to the outgoing S/PDIF streams for you.SCMS "1st Generation" ModeWhen SCMS mode is set to 1st Generation, the outgoing SCMS bits are set to indicate that the source material is a copy. Therefore receiving units that include SCMS will not accept this material -- this can be useful for protect-ing the copyright of commercial material. Similar to "None" and "Original" modes, if the source is coaxial or optical S/PDIF, then the CO3 actually strips the SCMS material out of the incoming stream and replaces it with bits that indicate 1st generation material. Also, in this case the "1st Generation" LED will blink to indicate that the AES/EBU output is not valid.If the source is AES/EBU, there is no incoming SCMS data. Therefore thisSCMS mode will add the "1st Generation" information to the outgoing S/PDIF streams for you.Input Source ModesDepending on the type of input selected, the CO3 functions will differ according to what conversions can be done, and which cannot. The SCMS mode settings behave the same way for both TOSlink (Optical S/PDIF) and S/PDIF (Coaxial) source signals, and whichever is chosen as the source, that signal is output to both the optical and coaxial S/PDIF output jacks. The AES/EBU signals require special handling since they don’t carry SCMS information – more specific information is available below.Coaxial or TOSlink (optical) S/PDIF Input ModesWhen the source is set to coaxial (RCA-type jack) or optical (TOSlink jack) S/PDIF, "Pass-Thru" becomes the default SCMS mode. Since an S/PDIF input signal carries SCMS information, all four SCMS modes are available. When SCMS Pass-Thru mode is selected, the data bits coming into the CO3 S/PDIF inputs are directly copied to the S/PDIF RCA and TOSlink output jacks unaltered, and the CO3 does a true conversion to the AES/EBU for-mat (minus the SCMS bits of course). This is the only setting in which true S/PDIF to AES/EBU conversion takes place – Source set to either S/PDIF input, and SCMS set to Pass-Thru.When SCMS modes other than Pass-Thru are used, the associated SCMS LED will blink. This indicates that the unit is in a SCMS stripping mode and therefore the AES/EBU output is invalid; only the coaxial and optical S/PDIF outputs are valid.AES/EBU Input ModeWhen the source is set to AES/EBU, "None" becomes the default SCMS mode. Since an AES/EBU input signal carries no SCMS information, only three of the four SCMS modes are available. SCMS Pass-Thru mode becomes nonsensical because the AES/EBU source has no SCMS data to pass through. Therefore, Pass-Thru mode is not available from the front panel when AES/EBU is selected as the source.In all three SCMS modes, the data bits coming into the CO3 AES/EBU input are directly copied to the AES/EBU output jack unaltered, and the CO3 does a true conversion to the two S/PDIF format output jacks. Because there is no SCMS data in the incoming stream, the CO3 places SCMS data in the S/PDIF output streams according to the SCMS setting on the front panel.Mode SummaryHere’s a quick reference table for your convenience:SOURCE SCMS MODE TOSlink Out S/PDIF Out AES/EBU OutTOSlink Pass-Thru (default)No conversion (exact duplicate)No Conversion (exact duplicate)True signal, SCMS discarded Original SCMS forced to original (master)SCMS forced to original (master)Invalid1st Gen SCMS forced to 1st Generation (copy)SCMS forced to 1st Generation (copy)InvalidNone SCMS forced to "no copy protection"SCMS forced to "no copy protection"InvalidS/PDIF Pass-Thru (default)No conversion (exact duplicate)No Conversion (exact duplicate)True signal, SCMS discarded Original SCMS forced to original (master)SCMS forced to original (master)Invalid1st Gen SCMS forced to 1st Generation (copy)SCMS forced to 1st Generation (copy)InvalidNone SCMS forced to "no copy protection"SCMS forced to "no copy protection"InvalidAES/EBU None (default)SCMS forced to "no copy protection"SCMS forced to "no copy protection"No Conversion (exact duplicate) Original SCMS forced to original (master)SCMS forced to original (master)No Conversion (exact duplicate)1st Gen SCMS forced to 1st Generation (copy)SCMS forced to 1st Generation (copy)No Conversion (exact duplicate)Limited Lifetime WarrantyMIDIMAN warrants that this product is free of defects in materials and workmanship under nor-mal use so long as the product is: owned by the original purchaser; the original purchaser has proof of purchase from an authorized MIDIMAN dealer; and the purchaser has registered his/her ownership of the product by sending in the completed warranty card.This warranty explicitly excludes power supplies any included cables which may become defec-tive as a result of normal wear and tear.In the event that MIDIMAN receives written notice of defects in materials or workmanship from such an original purchaser, MIDIMAN will either replace the product, repair the product, or refund the purchase price at its option. In the event any repair is required, shipment to and from MIDIMAN and a nominal handling charge shall be born by the purchaser. In the event that repair is required, a Return Authorization number must be obtained from MIDIMAN. After this number is obtained, the unit should be shipped back to MIDIMAN in a protective package with a description of the problem and the Return Authorization clearly written on the package.In the event that MIDIMAN determines that the product requires repair because of user misuse or regular wear, it will assess a fair repair or replacement fee. The customer will have the option to pay this fee and have the unit repaired and returned, or not pay this fee and have the unit returned unrepaired.The remedy for breach of this limited warranty shall not include any other damages. MIDIMAN will not be liable for consequential, special, indirect, or similar damages or claims including loss of profit or any other commercial damage, even if its agents have been advised of the possibility of such damages, and in no event will MIDIMAN's liability for any damages to the purchaser or any other person exceed the price paid for the product, regardless of any form of the claim. MIDIMAN specifically disclaims all other warranties, expressed or implied. Specifically, MIDI-MAN makes no warranty that the product is fit for any particular purpose.This warranty shall be construed, interpreted, and governed by the laws of the state of California. If any provision of this warranty is found void, invalid or unenforceable, it will not affect the validity of the balance of the warranty, which shall remain valid and enforceable according to its terms. In the event any remedy hereunder is determined to have failed of its essential purpose, all limitations of liability and exclusion of damages set forth herein shall remain in full force and effect.If you have any questions, comments or suggestions about this product or any M Audio or MIDIMAN product, we invite you to contact us directly at: MIDIMAN U.S.45 East Saint Joseph StreetArcadia, CA 91006-2861U.S.A.Sales Information:626-445-2842Sales Information (email):****************Tech Support:626-445-8495Tech Support (email):********************Fax:626-445-7564Internet Home Page:MIDIMAN U.K.Unit 22, Harrogate Business ParkFreemans WayHarrogateN YorksHG3 1DHEnglandSales Information:01423 886692Sales Information (email):************************Technical Support:01309 671301Technical Support (email):************************Fax:01423 886693MIDIMAN Deutschland (Germany)Kuhallmand 34D-74613 Ohringen GermanySales Information:***********Sales Information (email):***************Technical Support:************Technical Support (email):******************Fax:************Internet Home Page:http://www.midiman.deA U D I O。
ncm转mp3格式转换器有哪些?

ncm转mp3格式转换器有哪些?在日常生活中,我们经常会遇到需要将ncm格式的音乐文件转换为mp3格式的需求。
然而,由于ncm格式具有较高的音频保护性,因此在转换过程中需要使用专门的转换器。
在本文中,我们将介绍一些常用的ncm转mp3格式转换器,帮助您快速、方便地完成音乐文件格式的转换。
1. AnyMP4 ncm转mp3转换器。
AnyMP4 ncm转mp3转换器是一款功能强大的音频转换工具,可以帮助用户将ncm格式的音乐文件转换为mp3格式。
该软件支持批量转换,用户可以一次性转换多个音乐文件,节省时间和精力。
此外,该软件还提供了多种输出设置,用户可以根据自己的需求调整音频的参数,如比特率、采样率等。
同时,AnyMP4 ncm转mp3转换器还具有直观的界面和简单的操作步骤,即使是初学者也可以轻松上手。
2. Bigasoft ncm转mp3转换器。
Bigasoft ncm转mp3转换器是另一款优秀的音频转换工具,可以帮助用户快速、高效地将ncm格式的音乐文件转换为mp3格式。
该软件支持多种输入格式,包括ncm、flac、wav等,用户可以根据自己的需求选择合适的输入格式。
此外,Bigasoft ncm转mp3转换器还具有强大的编辑功能,用户可以对音频文件进行剪辑、合并、增加音效等操作,满足不同用户的个性化需求。
同时,该软件还支持批量转换和快速转换,大大提高了转换效率。
3. AudFree ncm转mp3转换器。
AudFree ncm转mp3转换器是一款专业的音频转换工具,可以帮助用户将ncm格式的音乐文件转换为mp3格式。
该软件具有直观的界面和简单的操作步骤,用户可以轻松上手。
此外,AudFree ncm转mp3转换器还支持多种输出设置,用户可以根据自己的需求调整音频的参数,如比特率、采样率等。
同时,该软件还具有快速转换和高质量转换的特点,可以保证转换后的音频文件保持原始音质,满足用户对音质的高要求。
ncm格式如何转换为mp3?音频格式一键转换
ncm格式如何转换为mp3?音频格式一键转换
音频文件有各种格式和尺寸,除了我们常见的MP3之外,还有AAC、FLAC、OGG、WM A、NCM等。
其中NCM格式是网易云音乐使用的下载格式,它需要在会员期间播放,此格式的音乐在其他播放器上不可用。
不仅如此,其他音乐平台中也有其对应的音频格式,格式特殊完全影响了使用。
所以,当务之急肯定是将格式进行转换,那么如何将ncm格式转换为mp3格式呢?本文就分享具体的实现方法,快速帮大家一键搞定格式的难题,快来看看吧!
方法步骤:
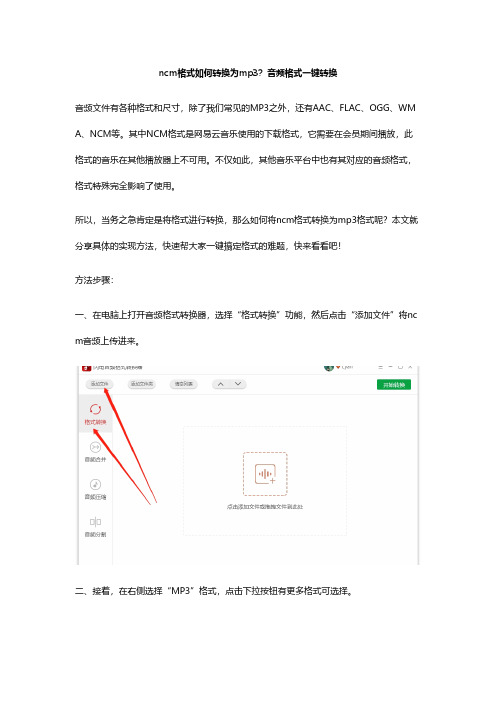
一、在电脑上打开音频格式转换器,选择“格式转换”功能,然后点击“添加文件”将nc m音频上传进来。
二、接着,在右侧选择“MP3”格式,点击下拉按钮有更多格式可选择。
三、需要更改音频文件导出位置,点击此处可更改。
四、最后,直接点击“开始转换”就可以了。
五、转换并导出成功后,点击“前往导出文件夹”可浏览音频文件。
六、如图,以下就是转换好的MP3文件啦!。
ncm格式转换方法
ncm格式转换方法摘要:一、ncm格式简介二、为何需要将ncm格式转换为mp3三、使用格式工厂进行ncm格式转换步骤四、其他转换方法及注意事项正文:一、ncm格式简介CM格式是网易云音乐所使用的音频文件编码格式,这种格式下的音频文件在网易云音乐APP中可以正常播放,但在其他音频播放软件或音频设备上无法播放。
由于其局限性,许多用户需要将NCM格式转换为其他如MP3等通用格式。
二、为何需要将ncm格式转换为mp3CM格式音频文件只能在网易云音乐APP中播放,若想在其他音频播放软件或设备上使用,如汽车音响、MP3播放器等,则需要将文件转换为MP3格式。
此外,MP3格式具有更高的兼容性和更广泛的传播途径,便于用户在不同场景下欣赏音乐。
三、使用格式工厂进行ncm格式转换步骤1.下载并安装格式工厂软件。
2.打开格式工厂,点击“音频”选项。
3.在输出格式中选择“MP3”,输入文件名并设置保存路径。
4.添加需要转换的NCM格式文件,点击“开始转换”按钮。
5.等待转换完成,即可得到MP3格式的音频文件。
四、其他转换方法及注意事项1.使用在线转换工具:网络上有一些在线NCM转MP3的工具,如“FormatConverter”、“Online-Convert”等。
用户只需将NCM文件上传,选择MP3格式,即可完成转换。
但在线转换工具可能存在速度较慢、安全性不高的问题。
2.使用音频编辑软件:如Audacity、Adobe Audition等专业音频编辑软件,也可以实现NCM格式向MP3格式的转换。
但这类软件需要一定的操作技巧,适合有一定经验的用户使用。
注意事项:1.在进行NCM格式转换时,请确保拥有音频文件的合法使用权。
2.转换过程中,注意备份原始文件,以防意外丢失。
ncm转mp3原理
ncm转mp3原理NCM是一种音频格式,由网易云音乐使用,以保护音乐版权。
然而,有些用户可能会希望将NCM文件转换为MP3格式以在其他设备上播放。
在这篇文章中,我们将介绍NCM转MP3的原理。
首先,为了理解NCM转MP3的原理,我们需要了解NCM文件格式的特点。
NCM文件是一种加密的音频格式,不支持其他设备或播放器直接识别。
这是网易云音乐为了保护音乐版权的一种措施。
因此,我们需要解密NCM文件才能将其转换为MP3格式。
解密NCM文件的过程需要使用到网易云音乐客户端。
用户需要拥有收费会员账号,并将所需的音乐添加到播放列表中。
然后,在最新版本的网易云音乐客户端中,我们可以找到一个特殊的“离线下载”选项。
通过点击该选项,我们可以将音乐文件下载到本地存储设备中。
下载的音乐文件是以NCM格式存储的。
然而,这个NCM文件实际上是一个加密的容器,包含了音频文件和相关的版权信息。
为了获得原始的音频文件以及解密NCM文件,我们需要破解它。
目前,有一些第三方工具可以用于解密NCM文件。
这些工具可以通过破解NCM文件中的加密算法,还原出原始的音频文件。
用户只需将NCM文件拖入工具中并选择解密选项,工具会迅速处理文件并输出一个解密后的MP3文件。
需要注意的是,虽然网易云音乐允许用户下载和解密NCM文件,但这可能侵犯了音乐版权。
用户应该遵守法律法规,并仅下载和转换属于自己合法拥有的音乐文件。
这就是NCM转MP3的基本原理。
通过解密NCM文件,我们可以还原出原始的音频文件并将其转换为MP3格式,以便在其他设备上播放。
然而,在进行此类操作时,请务必遵守相关的版权法律。
Linux下ffmpeg转换工具配置(MP3和AMR格式文件互转)
Linux下ffmpeg转换工具配置(MP3和AMR格式文件互转)修订记录:目录Linux下ffmpeg转换工具配置(MP3和AMR格式文件互转) (1)一、ffmpeg安装配置 (4)二、特殊说明 (5)一、ffmpeg安装配置1.首先安装系统基础环境RHEL & CentOS 系列# yum install -y automake autoconf libtool gcc gcc-c++2.下载并解压安装包yasm:/Download.html(汇编器,新版本的ffmpeg增加了汇编代码)lame:/download.php(Mp3音频解码)OpenCore AMR (fdk-aac-0.1.3 ):/projects/opencore-amr FFMpeg:/download.html使用tar命令解压相关包3.编译并安装所需源码包1)安装yasm# cd yasm-1.3.0# ./configure# make# make install2)安装lame# cd ../lame-3.99.5# ./configure# make# make install3)安装opencore# cd ../opencore-amr-0.1.3# ./configure# make# make install4)安装ffmpeg# cd ../ffmpeg-2.5.3# ./configure --enable-libmp3lame --enable-version3 --enable-shared# make# make install# ldconfig4.测试执行ffmpeg命令,如出现帮助信息则表示安装成功。
上传一个mp3文件,并执行如下命令,执行完后把test.amr下载下来,听下转换后是否跟mp3文件内容一致,一致则代表转换成功。
# ffmpeg -i test.mp3 test.amr二、特殊说明1.64位操作系统配置64位的操作系统运行ffmpeg命令时,可能会报找不到/usr/lib/libavdevice错误,这个时候就要创建一些文件链接。
- 1、下载文档前请自行甄别文档内容的完整性,平台不提供额外的编辑、内容补充、找答案等附加服务。
- 2、"仅部分预览"的文档,不可在线预览部分如存在完整性等问题,可反馈申请退款(可完整预览的文档不适用该条件!)。
- 3、如文档侵犯您的权益,请联系客服反馈,我们会尽快为您处理(人工客服工作时间:9:00-18:30)。
网易云音乐ncm格式怎么转换成mp3格式
方法一:借助360安全浏览器或者qq浏览器
1.电脑版网易云音乐选择要下载播放的会员曲目,右键复制链接,
2.在360浏览器或者qq浏览器中打开链接,把鼠标移到播放键,点击右键,选择审查元素,点击network,f5刷新一下
3.点击播放,type那栏找到media(或者audio),或者直接在size 那栏寻找最大一个文件
4.复制mp3文件链接,新建下载,就能下载到你想要的mp3格式文件了。
方法二:格式工厂转换:
1、首先,下载安装格式工厂,打开格式工厂软件。
2、打开格式工厂窗口后,选择音频选项
3、在音频选项窗口中,选择MP3按钮。
4、MP3窗口中,选择添加文件选项。
5、打开ncm格式音乐所在的目录后,选择文件名后的文件格式为All Files。
6、我们要转换的文件,就显示在窗口中了,点击选中后单击打开。
7、回到MP3窗口后,单击确定按钮。
8、单击开始按钮,音乐格式就开始转换了。
9、打开转换文件保存的目录,ncm格式音乐文件已转换为Mp3格式了。
方法三:BesLyric:
1、选择ncm 文件
点击“选择”弹出对话框后,可以看到可以选择ncm文件
2、点击匹配ID
播放ncm文件前,需要先匹配该文件对应的网易云音乐中的音乐ID。
因为ncm文件是网易云独家加密的,所以这里需要间接的获得可以播放的文件(mp3),这里需要的是,网易云里对应的音乐ID。
3、匹配ncm 文件对应在网易云音乐的ID
这里匹配ID有2种可用的选择,一种是使用软件的“ID搜索”功能,另一种是自己“自己动手”去网易云复制歌曲分享链接,得到ID
a) 软件搜索ID
搜索后“选用”一个ID,然后点击“确定匹配” 即可完成匹配。
但有多个搜索结果时,可以点击“查看”、“试听”,根据此进一步确认ID。
值得注意的是,如果无法“试听”,意味着网易云音乐可能已经没有该歌曲的版权,将无法匹配该ID。
b) 自己动手(推荐使用a 方法)
另一种方法是:“自己动手”去网易云复制歌曲分享链接,得到ID可以参照软件的提示页面获得即可,得到ID后,点击“确定匹配”
4、选择“歌词”等开始制作
“选择” 歌词,(在这之前可以尝试使用音乐文件后面的“搜词”功能先下载歌词),然后点击“载入最新”。
之后便可以开始播放制作歌词了!
5、得到MP3和制作的结果
继续操作完成整个过程。
其实这个时候,为了能够方便用户制作歌词,Beslyric 已经将每一首播发过的ncm 文件对应的mp3 存放在运行目录下了(这些mp3是从网易云音乐下载的,
音质较低,不过不影响本软件功能——制作歌词)。