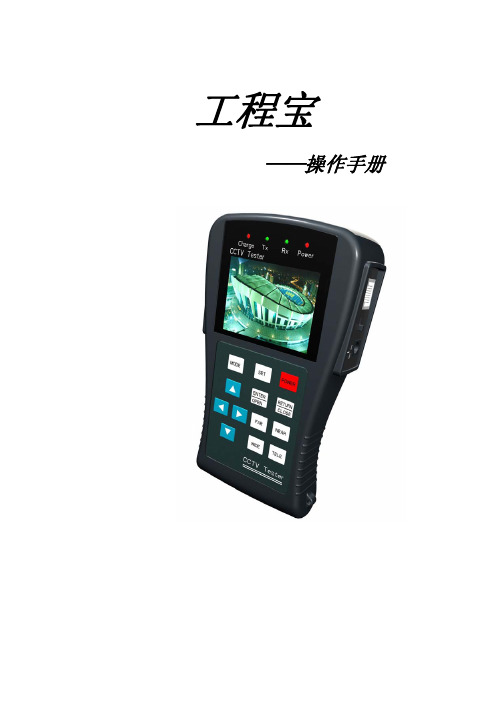
CCTV testerPRO-891和896视频监控测试仪说明书
视频分析仪功能说明

智慧网络 深度业务感知
9
视频分析仪功能说明
支持多种视频流获取方式:被动方式(镜像口接入,分光器接入),主动方式 (IGMP加入组播)
智慧网络 深度业务感知
目录
视频分析仪概述 视频分析仪功能介绍 视频分析仪指标介绍
智慧网络 深度业务感知
11
视频分析仪指标介绍
视频质量自动化监测分析流程图
智慧网络 深度业务感知
视频分析仪指标介绍
视频质量体系分层
视频 内容
原始像素矩阵 RGB 像素矩阵 YUV(由RGB变换得到) 宏块集合(像素矩阵做宏块划分)
视 频 编 码
宏块残差信息(帧内/帧间预测) 残差信息变换结果(DCT变换) 变换信息的量化结果(量化)
熵编码数据(熵编码进一步压缩)
智慧网络 深度业务感知
所选内容的PCR精度不在 +/-500ns之间
严重时可能引起机顶盒偶尔跳帧,或图象停顿。但如果间隔 超时不严重可能不会有什么影响 PCR抖动如果均值偏差很大会引起解码器的节目参考时钟和编 码参考时钟严重误差,造成图象偶尔跳帧或者停顿。如果抖 动均值不大,在机顶盒的容忍范围则对解码影响不大。另外 PCR精度可能引起机顶盒色度载波生成不良,从而导致部分品 牌电视机只能显示黑白图象
智慧网络 深度业务感知
16
视频分析仪指标介绍
RTP/RTSP层质量监测(流传输控制层) RTP/RTSP层参数列表 RTP:RTP报文丢失率、RTP报文到达时延、RTP报文到达抖动、RTP报文乱 序率、RTP报文重传率 RTSP:RTSP会话次数、RTSP心跳间隔 RTP/RTSP层相关标准 RTP协议由RFC 3550定义。RTSP则由RFC 2326定义。同时作为补充RFC 3605定义了RTCP标准以通过交互的方式实现RTP实时流传输控制(RTP延时的测量 依赖于该协议)。 而RTP重传率3550中没有直接定义,一般使用RFC 2890中对于乱序的定 义。中对于乱序的定义,而丢包被定义为:期望得到的包数-实际得到的包数 RTP/RTSP层参数实现 RFC 3550 定义了RTP流的抖动定义,重传与延时需要依赖于RTCP协议获取, 在某一个报文被判定为丢失后,终端会发起一个RTCP请求重传该报文。这一交互 可以以和网络层相同的方式通过交互得到网络延时的信息和重传次数的信息。
IDEAL 33-891安防测试仪说明书

33-891 SecuriTEST TM ——安防闭路电视/摄像头测试仪用户手册目录使用测试仪之前1.安全信息警示电池充电与注意事项2.33-891仪器介绍特点主要功能标准配置各部分名称与功能3.仪器技术指标一般指标仪表参数4.仪器的使用开关机开机后OSD设置模式设置视频测试数字万用表云台与变焦控制UTP数据线缆的测试查看信息主设置警告确认在使用33-891前已通读“安全信息”。
本手册介绍33-891的使用,包括:说明仪器操作、如何与被测设备连接、按钮的使用及系统设置。
强烈建议,使用过类似设备或第一次使用本设备的用户,在使用之前详细阅读本手册,特别是注意事项。
当在使用中遇到问题,或仪器出现损坏时,请与美国理想工业公司联系。
第一章“安全信息”,是对用户使用33-891的安全警告与注意事项。
第二章“33-891仪器介绍”,介绍仪器功能与特点。
第三章“33-891技术指标”,介绍仪器各种参数。
第四章“功能使用”,便于用户可掌握仪器的使用警告以下内容对安全使用33-891十分重要。
在使用仪器前请通读“安全注意事项”连接仪器各输入、输出接口前,检查其输入、输出电压及电流范围,以放置系统过载。
设置测量电压、电流及电阻量程,或使用最大量程测量未知参量,防止设备损坏。
保证仪器满足以下使用环境要求:温度:-10℃~50℃相对湿度:30%~90%充电电压:12V±10%,超过1A警告不要在潮湿或含有可燃气体的环境中使用。
不要用湿手触摸仪器。
使用过程中避免振动仪器。
不要用于强电磁干扰环境防止仪器暴露部分接触灰尘或液体使用第三章规定的保险丝不要私自拆卸仪器仪器或测试线损坏时不要使用不要带电测量电阻连接被测电路前不要忘记打开仪器电源测量电阻前要关闭被测设备电源并将设备内所有高压电容放电,防止33-891损坏使用测试表笔时,保持手指握在保护套上。
警告电池充电与注意事项装入6节镍氢充电电池,用直流12V 1A电源充电,充电时间至少8小时。
STEST-896视频监控测试仪

工程宝TM视频监控测试仪---STest-896第V代,3.5英寸大屏幕,中文全功能版光纤通信功率计测试NEW第V代工程宝TM STest-896,内置了高精度光纤通信功率计。
仪表的光功率测试功能,用于测量视频光端机、光收发器等光通信设备的光功率值,测试光纤通信中光纤的衰减等,是光纤传输的必备仪器。
测试波长850nm/1300nm/1310nm/1490nm/1550nm,测试范围-70—+10dBm或-50—+26dBm,中文操作界面,使用简单,适用于各种光通信工程。
安防监控工程中,采用光纤通信来解决视频监控的传输通道已经越越普遍,STest-896可以测试安防系统中的光传输通道、视频和云台控制等,从而可以更加完善地维护、安装前端监控设备。
STest-896是多功能综合手提式测试仪,适用于监控工程商的安装、维护等。
专业的外观设计;轻触型按键,手感更好;沉金工艺,按键更加灵敏、耐用。
·视频监控工程安装和维护·光纤通信安装维护·光纤CATV工程安装维护·光纤通信实验测试·安防设备维修·快球、摄像头检测·视频传输通道检测· PTZ云台协议控制·中文操作介面,菜单友好、简洁、美观、易用· 3.5英寸大屏幕高清晰TFT-LCD显示屏new· LCD显示屏的亮度、对比度、色彩饱和度可调· LCD显示屏的背光亮度可调· NTSC,PAL自动识别,自动适应,视频制式显示·视频信号衰减测量·高精度光纤通信光功率测量new·DC12V 1A电源输出,为摄像机提供应急电源·音频测试,测试前端拾音器的音频信号·图像发生器,发送多种制式彩色图型条(白、黄、青、绿、粉、红、蓝、黑)·首创地址扫描功能,快速寻找RS485通信地址·云台续转测试,测试云台连续转动是否正常new·低功耗,工作时间长达12小时· PTZ控制协议代码捕捉和显示·支持Pelco-D、Pelco-P、SAMSUNG等二十多种控制协议·可调用快球的菜单,对其进行设置及复位·支持RS232和RS485接口,速率可调·网线测试功能(真正测试2线和2线以上的各种接法,并显示测试编号)·电池电量图型化实时显示,直接简洁·可直接充电,可使用外接电源·有自动省电(低功耗模式)功能,使用时间更长·简单易用,操作者几乎可免培训迅速上手1.高精度光纤通信光功率测量STest-896集成的光功率计采用国际最先进的手持式仪表专用集成芯片,实现超低功耗运行。
工程宝3500中文说明书
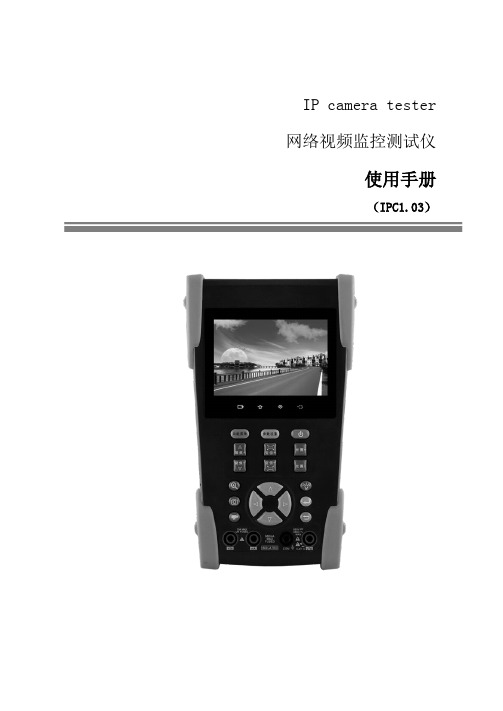
IP camera tester 网络视频监控测试仪使用手册(IPC1.03)⏹感谢您购买工程宝安防监控视频测试仪。
使用前请务必阅读使用说明书,并正确使用。
⏹为了能安全地使用本仪器,请您先仔细阅读使用说明书上的「安全注意事项」。
⏹说明书阅读后请妥善保管,以便随时查阅、参考。
⏹附有的保修凭证或机身的保修封贴,请勿损坏。
⏹使用中遇到问题,或仪器出现损坏时,请与公司技术部联系。
目录一、安全事项--------------------------------------------------------- 1二、IP网络视频监控测试仪简介 ------------------------------------------- 22.1 概述------------------------------------------------------- 22.2 产品特点---------------------------------------------------- 22.3 产品功能---------------------------------------------------- 42.4 产品配件--------------------------------------------------- 102.5 仪表各部位名称和功能: --------------------------------------- 11三、操作说明-------------------------------------------------------- 153.1 电池安装及充电说明------------------------------------------- 153.2 仪器连接--------------------------------------------------- 163.2.1 网络摄像机连接---------------------------------------- 163.2.2 模拟摄像机连接---------------------------------------- 173.3.3 SDI数字摄像机连接------------------------------------- 183.3 功能菜单操作------------------------------------------------ 193.3.1 视频监控--------------------------------------------- 213.3.1.1 云台控制器参数设置------------------------------ 223.3.1.2 色彩及存储设置--------------------------------- 243.3.1.3 视频图像放大----------------------------------- 253.3.1.4 拍照截图-------------------------------------- 263.3.1.5 录像功能-------------------------------------- 263.3.1.6 相片浏览-------------------------------------- 273.3.1.7 录像回放-------------------------------------- 283.3.1.8 视频信号测量*(*定制功能型号见附表)--------------- 293.3.2 图像发生器 TV OUT ------------------------------------ 313.3.3 ONVIF网络摄像机测试----------------------------------- 323.3.4 IP网络摄像机测试-------------------------------------- 393.3.5 SDI摄像机测试 *(*定制功能型号见附表)------------------- 423.3.6 IP地址扫描 ------------------------------------------ 433.3.7 PING连通性测试--------------------------------------- 443.3.8 网线测试器------------------------------------------- 453.3.9 寻线器*(*定制功能型号见附表) -------------------------- 453.3.10 端口闪烁-------------------------------------------- 473.3.11 串口工具-------------------------------------------- 483.3.12 激光功率计*(*定制功能型号见附表)---------------------- 493.3.13 可见红光源*(*定制功能型号见附表)---------------------- 503.3.14 高精度数字万用表*(*定制功能型号见附表)----------------- 523.3.15 视频播放器------------------------------------------ 593.3.16 音乐播放器------------------------------------------ 603.3.17 手电筒--------------------------------------------- 603.3.18 PoE/PSE电压测试功能--------------------------------- 613.3.19 TDR线缆故障测量*(*定制功能型号见附表)----------------- 613.3.20 计算器--------------------------------------------- 643.3.21 浏览器--------------------------------------------- 653.3.22 IPC viewer 移动客户端 ------------------------------ 663.3.23 DC12V电源输出--------------------------------------- 673.3.24 应用工具-------------------------------------------- 693.3.25 APPS工具夹----------------------------------------- 763.3.26 系统设置-------------------------------------------- 773.3.27 更新----------------------------------------------- 803.4 DC12V 1A供电输出-------------------------------------------- 803.5音频测试功能 ------------------------------------------------ 81四、技术参数-------------------------------------------------------- 824.1 技术参数总表------------------------------------------------ 824.2 万用表技术参数---------------------------------------------- 844.3 光功率计技术参数 -------------------------------------------- 864.4可见红光源技术参数-------------------------------------------- 87一、安全事项⏹使用本仪器时,请遵守当地的电气使用相关规则,避免于医院、加油站等不可使用电气的地方使用。
STest-896使用说明书-OEM

CCTV TesterPRO视频监控测试仪使用手册CCTV testerPRO User’s Manual⏹感谢您购买工程宝安防监控视频测试仪。
使用前请务必阅读使用说明书,并正确使用。
⏹为了能安全地使用本仪器,请您先仔细阅读使用说明书上的「安全注意事项」。
⏹说明书阅读后请妥善保管,以便随时查阅、参考。
⏹附有的保修凭证或机身的保修封贴,请勿损坏。
⏹使用中遇到问题,或仪器出现损坏时,请与公司技术部联系。
第2页目录一、安全事项---------------------------------------------------------------------------------------------------------------4二、工程宝TM视频监控测试仪简介-------------------------------------------------------------------------------------52.1 概述---------------------------------------------------------------------------------------------------------------52.2 产品的特点------------------------------------------------------------------------------------------------------52.3 产品功能介绍--------------------------------------------------------------------------------------------------62.4 产品配件-----------------------------------------------------------------------------------------------------82.5 仪器各部位名称与功能---------------------------------------------------------------------------------------9三、操作说明-------------------------------------------------------------------------------------------------------------123.1 电池安装及充电说明----------------------------------------------------------------------------------------123.2 仪器连接-------------------------------------------------------------------------------------------------------133.3 功能菜单操作-------------------------------------------------------------------------------------------------143.3.1 云台控制器-----------------------------------------------------------------------------------------14⑴云台控制器参数设置----------------------------------------------------------------------------14⑵云台持续转动测试-------------------------------------------------------------------------------16⑶设置和调用球机预置位-------------------------------------------------------------------------16⑷调用球机主菜单----------------------------------------------------------------------------------173.3.2 视频设置--------------------------------------------------------------------------------------------173.3.3 彩条发生器-----------------------------------------------------------------------------------------183.3.4 网线测试器-----------------------------------------------------------------------------------------193.3.5 数据监视器-----------------------------------------------------------------------------------------203.3.6 测试仪设定-----------------------------------------------------------------------------------------213.3.7 云台地址扫描--------------------------------------------------------------------------------------223.3.8 激光功率计-----------------------------------------------------------------------------------------233.4 DC12V/1A电源输出----------------------------------------------------------------------------------------243.5 音频测试功能-------------------------------------------------------------------------------------------------25四、技术参数--------------------------------------------------------------------------------------------------------------264.1 总体技术参数--------------------------------------------------------------------------------------264.2 激光功率计技术参数---------------------------------------------------------------------------------27第3页一、安全事项⏹使用本仪器时,请遵守当地的电气使用相关规则,避免于医院、加油站等不可使用电气的地方使用。
(完整word版)监控工程宝STest-891功能说明与使用介绍
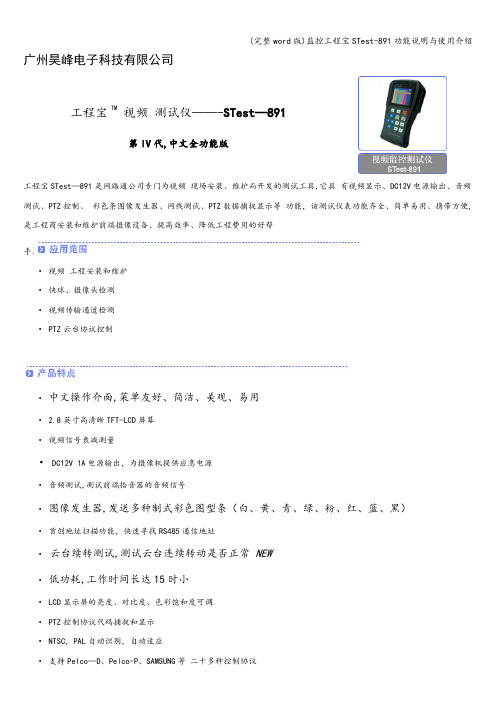
广州昊峰电子科技有限公司工程宝TM视频测试仪——-STest—891第IV代,中文全功能版工程宝STest—891是网路通公司专门为视频现场安装、维护而开发的测试工具,它具有视频显示、DC12V电源输出、音频测试、PTZ控制、彩色条图像发生器、网线测试、PTZ数据捕捉显示等功能,该测试仪表功能齐全、简单易用、携带方便,是工程商安装和维护前端摄像设备、提高效率、降低工程费用的好帮手.· 视频工程安装和维护· 快球、摄像头检测· 视频传输通道检测· PTZ云台协议控制· 中文操作介面,菜单友好、简洁、美观、易用· 2.8英寸高清晰TFT-LCD屏幕· 视频信号衰减测量· DC12V 1A电源输出,为摄像机提供应急电源· 音频测试,测试前端拾音器的音频信号· 图像发生器,发送多种制式彩色图型条(白、黄、青、绿、粉、红、蓝、黑)· 首创地址扫描功能,快速寻找RS485通信地址·云台续转测试,测试云台连续转动是否正常NEW· 低功耗,工作时间长达15时小· LCD显示屏的亮度、对比度、色彩饱和度可调· PTZ控制协议代码捕捉和显示· NTSC,PAL自动识别,自动适应· 支持Pelco—D、Pelco-P、SAMSUNG等二十多种控制协议· 可调用快球的菜单,对其进行设置· 支持RS232和RS485接口,速率可调150—19200bps· 网线测试功能(真正测试2线和2线以上的各种接法,并显示测试编号)· 电池电量图型化实时显示,直接简洁· 可直接充电,可使用外接电源· 有自动省电(低功耗模式)功能,使用时间更长· 简单易用,操作者几乎可免培训迅速上手1. 2.8英寸高清晰LCD监视器,显示摄像机图像STest-891视频测试仪,内置高清晰大屏幕数字LCD监视器,通过该仪表的VIDEO IN 接口连接前端摄像机,可直观方便地看出摄像机图像效果.LCD监视器亮度、对比度、色彩饱和度可调,适合野外施工和维护.2.多制式图像发生器发送彩色条,检测传输通道STest-891可通过视频OUT端口,发送多种制式(PAL,NTSC)彩色图型条,图型条有:白、黄、青、绿、粉、红、蓝、黑共八种颜色,通过中心的监视器是否接收到彩色图型条来判断视频通道是否正常传输,同时,通过中心接收到的彩色图型条,可以判断是否因为传输有衰减或干扰造成颜色偏差。
STest-891说明书
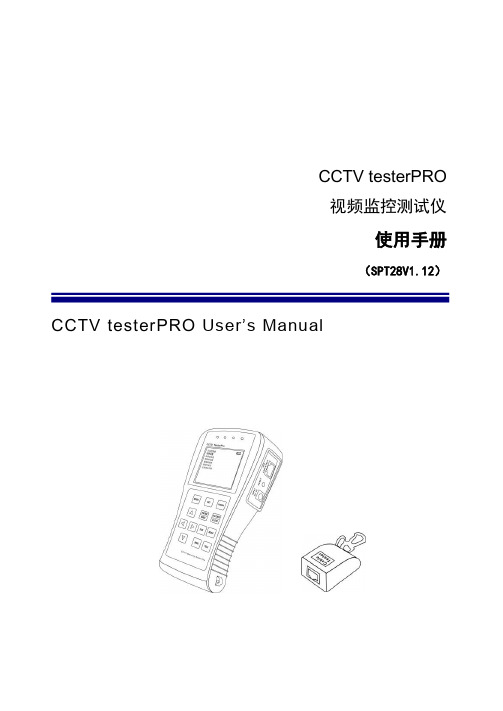
CCTV testerPRO视频监控测试仪使用手册(SPT28V1.12)CCTV testerPRO User’s Manual⏹感谢您购买工程宝安防监控视频测试仪。
使用前请务必阅读使用说明书,并正确使用。
⏹为了能安全地使用本仪器,请您先仔细阅读使用说明书上的「安全注意事项」。
⏹说明书阅读后请妥善保管,以便随时查阅、参考。
⏹附有的保修凭证或机身的保修封贴,请勿损坏。
⏹使用中遇到问题,或仪器出现损坏时,请与公司技术部联系。
2目录一、安全事项---------------------------------------------------------------------------------------------------------------4二、工程宝TM视频监控测试仪简介-------------------------------------------------------------------------------------52.1 概述---------------------------------------------------------------------------------------------------------------52.2 产品的特点------------------------------------------------------------------------------------------------------52.3 产品功能介绍--------------------------------------------------------------------------------------------------62.4 产品配件-------------------------------------------------------------------------------------------------------72.5 仪器各部位名称与功能---------------------------------------------------------------------------------------8三、操作说明-------------------------------------------------------------------------------------------------------------113.1 电池安装及充电说明----------------------------------------------------------------------------------------113.2 仪器连接-------------------------------------------------------------------------------------------------------133.3 功能菜单操作-------------------------------------------------------------------------------------------------133.3.1 云台控制器-----------------------------------------------------------------------------------------14⑴云台控制器参数设置--------------------------------------------------------------------------------14⑵设置和调用球机预置位-----------------------------------------------------------------------------16⑶调用球机主菜单--------------------------------------------------------------------------------------173.3.2 视频设置--------------------------------------------------------------------------------------------173.3.3 彩条发生器-----------------------------------------------------------------------------------------183.3.4 网线测试器-----------------------------------------------------------------------------------------193.3.5 数据监视器-----------------------------------------------------------------------------------------203.3.6 测试仪设定-----------------------------------------------------------------------------------------213.3.7 云台地址扫描--------------------------------------------------------------------------------------223.4 DC12V/1A电源输出----------------------------------------------------------------------------------------233.5 音频测试功能-------------------------------------------------------------------------------------------------24四、技术参数--------------------------------------------------------------------------------------------------------------253一、安全事项⏹使用本仪器时,请遵守当地的电气使用相关规则,避免于医院、加油站等不可使用电气的地方使用。
CCTV视频监控仪使用手册
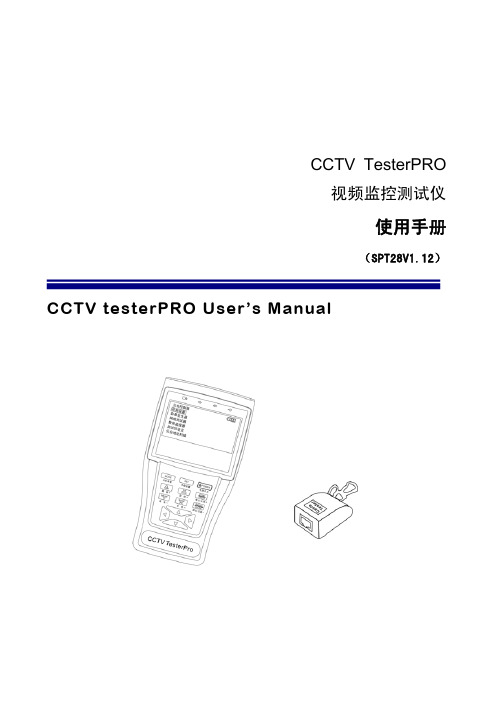
CCTV TesterPRO视频监控测试仪使用手册(SPT28V1.12) CCTV testerPRO User’s Manual感谢您购买工程宝安防监控视频测试仪。
使用前请务必阅读使用说明书,并正确使用。
为了能安全地使用本仪器,请您先仔细阅读使用说明书上的「安全注意事项」。
说明书阅读后请妥善保管,以便随时查阅、参考。
附有的保修凭证或机身的保修封贴,请勿损坏。
使用中遇到问题,或仪器出现损坏时,请与公司技术部联系。
2目录一、 安全事项---------------------------------------------------------------------------------------------------------------4二、 视频监控测试仪简介-------------------------------------------------------------------------------------52.1 概述---------------------------------------------------------------------------------------------------------------52.2 产品的特点------------------------------------------------------------------------------------------------------52.3 产品功能介绍--------------------------------------------------------------------------------------------------62.4 产品配件-----------------------------------------------------------------------------------------------------72.5 仪器各部位名称与功能---------------------------------------------------------------------------------------8三、 操作说明-------------------------------------------------------------------------------------------------------------113.1 电池安装及充电说明----------------------------------------------------------------------------------------113.2 仪器连接-------------------------------------------------------------------------------------------------------123.3 功能菜单操作-------------------------------------------------------------------------------------------------133.3.1 云台控制器-----------------------------------------------------------------------------------------13⑴云台控制器参数设置--------------------------------------------------------------------------------13⑵设置和调用球机预置位-----------------------------------------------------------------------------15⑶调用球机主菜单--------------------------------------------------------------------------------------163.3.2 视频设置--------------------------------------------------------------------------------------------163.3.3 彩条发生器-----------------------------------------------------------------------------------------173.3.4 网线测试器-----------------------------------------------------------------------------------------183.3.5 数据监视器-----------------------------------------------------------------------------------------193.3.6 测试仪设定-----------------------------------------------------------------------------------------203.3.7 云台地址扫描--------------------------------------------------------------------------------------213.4 DC12V/1A 电源输出----------------------------------------------------------------------------------------223.5 音频测试功能-------------------------------------------------------------------------------------------------22四、技术参数--------------------------------------------------------------------------------------------------------------233一、安全事项使用本仪器时,请遵守当地的电气使用相关规则,避免于医院、加油站等不可使用电气的地方使用。
视频监控系统视频测试仪使用说明工程宝

视频监控系统视频测试仪使用说明
班级:交控D121 教师:谢之鑫
视频监控系统视频测试仪使用说明
班级:交控D121 教师:谢之鑫
视频监控系统视频测试仪使用说明
班级:交控D121 教师:谢之鑫
视频监控系统视频测试仪使用说明
班级:交控D121 教师:谢之鑫
视频监控系统视频测试仪使用说明
班级:交控D121 教师:谢之鑫
视频监控系统视频测试仪使用说明
班级:交控D121 教师:谢之鑫
视频监系统视频测试仪使用说明
班级:交控D121 教师:谢之鑫
视频监控系统视频测试仪使用说明
班级:交控D121 教师:谢之鑫
视频监控系统视频测试仪使用说明
班级:交控D121 教师:谢之鑫
视频监控系统视频测试仪使用说明
班级:交控D121 教师:谢之鑫
视频监控系统视频测试仪使用说明
班级:交控D121 教师:谢之鑫
视频监控系统视频测试仪使用说明
班级:交控D121 教师:谢之鑫
视频监控系统视频测试仪使用说明
班级:交控D121 教师:谢之鑫
视频监控系统视频测试仪使用说明
班级:交控D121 教师:谢之鑫
视频监控系统视频测试仪使用说明
班级:交控D121 教师:谢之鑫
视频监控系统视频测试仪使用说明
班级:交控D121 教师:谢之鑫
视频监控系统视频测试仪使用说明
班级:交控D121 教师:谢之鑫
视频监控系统视频测试仪使用说明
班级:交控D121 教师:谢之鑫
视频监控系统视频测试仪使用说明
班级:交控D121 教师:谢之鑫
视频监控系统视频测试仪使用说明
班级:交控D121 教师:谢之鑫
视频监控系统视频测试仪使用说明
洛雷CCTV摄像头系统产品说明书

Troubleshooting theRemote ControlSERIES:SG17LD800 & SG19LD800Copyright © 2007 LOREX Technology Inc.The Remote Has Stopped WorkingThe remote control has been working properly, however it has suddenly stopped functioning. Outlined below are several techniques to help diagnose the problem:1. Point your remote control at one of your cameras, and press and hold the RETURN button. The camera is able to detect the Infrared signal from the Remote Control, and will display on the Observation Screen as a flashing light.If the remote control light does not FLASH onscreen, then the batteries in the Remote Control will need to be replaced.2. The remote control has the ability to control several Observation Systems at one time with the push of a button. This is useful if you have several systems installed at one location - each system can be set to a different ID.By default, the Observation System is set to System ID #1. If the remote is NOT set to control System ID #1, it will not function with the unit. To reset the remote control:I. Confirm that the R is white on the bottom onscreen status bar. If the R is blue, please proceed to Step II.II. Press the REMOTE ID button (see next page for Remote Control diagram). The status bar will display a GEAR symbol indicating that the remote is in Program Mode .III. Press the number 1 button on the remote control.IV. Press the ENTER button on the remote control.V. Press the RETURN button on the remote control.For advanced setup of multiple systems, please refer to the Users’ Manual provided with yourproduct.• Indicates the remote is active with the System• Indicates the remote is notactive with the System.Remote ControlListed below is a quick reference for the Remote Control. CHANNEL BUTTONS - P ress to select a specific camera by numberRETURN BUTTON - Returns to the previous selection in Menu Mode. Exits the Menu Setup when in the Main Menu.DISP BUTTON -Changes the Screen Mode to Single, Quad, 6 or 8 camera views.SEQUENCE -Turns camera Sequence Mode ON/OFF.POWER BUTTON - Turns the system power ON/OFFSETUP BUTTON -Opens the Main Menu (system setup)ENTER BUTTON -Applies a configuration change in Menu Mode. SEARCH BUTTON -Enters the Search Menu.ZOOM -Zooms in on the current imageNAVIGATION AND PLAYBACK -Controls the playback of video.Navigates in MENU and SEARCH mode.Adjusts the zoomed area in ZOOM mode.NOTE: All Buttons described above function the same as the Front Panel buttons - see pages 10-13 of the Observation System Manual for detailed information. Buttons without descriptions do not provide functionality to this unit.REMOTE ID* -Configure when using multiple systems.** If the REMOTE ID button is set incorrectly, the remote will not function. To reset the Remote ID (when using only one system), Press the ID button, and then select the number 1. Press ENTER to reset the remote, and press RETURN to exit the ID Screen.AUDIO SELECT - Press to select an audio channel. P ress the Audio select button, then a channel 1~4.VOLUME + VOLUME -PTZ -Controls PTZ CamerasIt’s all on the webProduct InformationUser Manuals Quick Start GuidesSpecification Sheets Software Upgrades Firmware UpgradesLorex Technology Inc.VISIT。
视频测量仪操作规范

视频测量仪操作规程
一、操作方法
1.自动模式(Auto mode),可以迅速而又自动地完成标准视频传输测量,这些
测量包括CCIR REP.624-1,Rec.567和Rec.569等规定的项目。
2.仪器的测量模式(Measure mode)可以自动地用图形实时显示测量结果。
场消隐期或全场测量的各个项目。
包括噪声频谱,群时延。
K因子,微
分增益和微分相位等均能以清楚,直观,易于了解的形式呈现在屏幕上,并可以给出数字关系的测量显示。
3.视频测量仪的其他操作与使用方法见操作手册和使用说明书。
二、注意事项
1.仪器保存:仪器用完后应妥善放回仪器箱内,应存放在空气通风、干燥、
无腐蚀性气体及强磁场的房间里,应保证温度在一定的范围之内
(-40°~+45°);
2.系统运输:仪器长途运输时,应切实做好防碰撞、防震工作。
装车时务必
使仪器箱正放,不可倒置;
三、维护保养
1.仪器使用人必须精通仪器使用知识,必须遵循仪器生产厂家列出的安全须
知;
2.不可自行拆卸、装配或改装仪器;
3.操作前应先熟悉仪器,一切操作均应手轻、心细、动作柔稳;
4.仪器开箱前,应将仪器箱平放在地上,开箱后注意看清楚仪器在箱中安放
的状态,以便在用完后按原样安放;
5.仪器应尽量避免日晒、雨淋,烈日下或在雨中测量时,应给仪器打伞;
6.仪器应有专人负责管理,根据仪器工作状态,使用频率、精确程度、放置
地点等情况,经常保持清洁。
全自动摄像测量仪操作指导书[模板]
![全自动摄像测量仪操作指导书[模板]](https://img.taocdn.com/s3/m/4677106dd4d8d15abf234e66.png)
1. 目的为使本公司对所有制品尺寸能够有很好管控标准,同时能够指引测量员按本标准来进行操作,特制定此项标准规范化。
2. 术语3. 具体内容3.1. 职责测量员:负责实行监督工作及《实验室产品测试报告》之输出并对该设备进行点检及保养。
测量工程师:负责对厂内所有的仪器之运作及技术指导进行监控及维护。
经理/测量工程师:负责操作员所提交之报告进行审核。
当检测仪器出现异常时,请及时知会测量工程师/经理以免造成工作之不便。
3.2. 工作内容3.2.1.仪器操作前:3.2.1.1.员接受相应的在职培训,并熟练测量仪器及测量设备的测量方法和测量要求,具有实行经验。
3.2.1.2.维护仪器作业指导书,做好检测仪器的日常保养的维护工作,按仪器作业指导书进行作,如有异常请及时知会技术员和上级管理人员。
3.2.1.3.相关测量资料方可对下一步工作展开。
3.2.2.仪器操作过程:3.2.2.1.电源总开关,先开电箱后开电脑再开软件,进行复位,操镜头倍数与软件设置倍数是否一致。
3.2.2.2.测量把产品放在测量平台上,建立座标系,按图纸进行编程,并保存编程下次CNC测量时可按程序调出相应测量编程。
3.2.2.3.测量时可选择手动测量与建立座标系按图纸进行测量。
3.2.2.4.表单,测量员把测量后的数据进行导入客户指定的表单中。
3.2.2.5.保持仪器5S,关闭软件与开机顺序相反,先关闭软件后关闭电脑主机再关闭总电箱。
3.2.3.测试标准:3.2.3.1.条件:✓800-1200Lux荧光灯(能清晰看出缺陷但不刺眼)✓观察角度:被检测样区与视线在45度范围内旋转,左右转动15度范围。
✓观察距离:人眼的被测物表面距离为30cm左右。
✓操作员视力:裸视或矫正视力在1.0以上且无色盲。
3.2.3.2.公司目前所有制品尺寸测量均按此标准进行。
3.2.4.结果:按客户图纸进行测量,如测量结果数据在范围内为合格,超出为NG,除仪器本身误差外。
CCTV testerPRO-891和896视频监控测试仪说明书

CCTV testerPRO视频监控测试仪使用手册(SPT28V1.12)CCTV testerPRO User’s Manual⏹感谢您购买工程宝安防监控视频测试仪。
使用前请务必阅读使用说明书,并正确使用。
⏹为了能安全地使用本仪器,请您先仔细阅读使用说明书上的「安全注意事项」。
⏹说明书阅读后请妥善保管,以便随时查阅、参考。
⏹附有的保修凭证或机身的保修封贴,请勿损坏。
⏹使用中遇到问题,或仪器出现损坏时,请与公司技术部联系。
目录一、安全事项---------------------------------------------------------------------------------------------------------------4二、工程宝TM视频监控测试仪简介-------------------------------------------------------------------------------------52.1 概述---------------------------------------------------------------------------------------------------------------52.2 产品的特点------------------------------------------------------------------------------------------------------52.3 产品功能介绍--------------------------------------------------------------------------------------------------62.4 产品配件-------------------------------------------------------------------------------------------------------72.5 仪器各部位名称与功能---------------------------------------------------------------------------------------8三、操作说明-------------------------------------------------------------------------------------------------------------113.1 电池安装及充电说明----------------------------------------------------------------------------------------113.2 仪器连接-------------------------------------------------------------------------------------------------------133.3 功能菜单操作-------------------------------------------------------------------------------------------------133.3.1 云台控制器-----------------------------------------------------------------------------------------14⑴云台控制器参数设置--------------------------------------------------------------------------------14⑵设置和调用球机预置位-----------------------------------------------------------------------------16⑶调用球机主菜单--------------------------------------------------------------------------------------173.3.2 视频设置--------------------------------------------------------------------------------------------173.3.3 彩条发生器-----------------------------------------------------------------------------------------183.3.4 网线测试器-----------------------------------------------------------------------------------------193.3.5 数据监视器-----------------------------------------------------------------------------------------203.3.6 测试仪设定-----------------------------------------------------------------------------------------213.3.7 云台地址扫描--------------------------------------------------------------------------------------223.4 DC12V/1A电源输出----------------------------------------------------------------------------------------233.5 音频测试功能-------------------------------------------------------------------------------------------------24四、技术参数--------------------------------------------------------------------------------------------------------------25一、安全事项⏹使用本仪器时,请遵守当地的电气使用相关规则,避免于医院、加油站等不可使用电气的地方使用。
CCTV Tester 说明书
2.1 功能特点介绍 .........................................................................................................................2 2.2 产品包装配件 .........................................................................................................................3 2.3 产品结构介绍 .........................................................................................................................4 2.4 功能参数 .................................................................................................................................6
2.2 产品包装配件
项目
工程宝主机 3.6V 锂电池 网线测试器
变压器 RS485 排线接头
BNC 连接线 操作手册
数量
1 2 1 1 1 1 1
Extech BR50 视频内窥镜和 CCTV 测试仪使用说明说明书

User's GuideVideo Borescope and CCTV Tester Model BR50IntroductionCongratulations on your purchase of the Extech BR50 Video Borescope. This instrument was designed for use as a remote inspection device and a CCTV camera alignment/inspection tool. Typical applications include HVAC inspection, automotive inspection, and cable routing. The BR50 is also useful for automotive, boat, and aircraft inspection. This meter is shipped fully tested and, with proper use, will provide years of reliable service.Featuresz Real time video inspectionz Supports closed circuit TV inputz Bright LEDs to illuminate the area to be inspectedz Built-in rechargeable lithium battery, with AC charging or USB chargingz Supports NTSC and PAL formatsSafetyBefore using the instrument, please read all safety and specification information carefullyDangerous electrical voltages may exist behind walls and inside machinery. Be careful notto make contact with electrical cables, wires, and circuits with the gooseneck; electricalshock could result.Double insulation in accordance with CE standards1. The meter should only be opened and serviced by qualified and authorized personnel2. Do not handle the meter in a rough or careless manner. The meter houses sensitiveinstrumentation and should not be dropped or impacted in any way3. The camera is water-proof; however the scope body is not water-proof. Do not expose theinstrument to rainy or wet areas, and do not operate the meter in moist locations.4. Do not aim the camera directly toward the sun from an indoor or an outdoor perspective. Donot operate the unit under a spotlight or other unusually strong light.5. Operate the camera under the specified temperature, humidity and power supply conditionsonly.Meter Description1. Camera connection jack2. External AV input jack3. LCD Display4. Status LED5. Power / Brightness button6. Charging cable connector7. Flexible Gooseneck8. Camera connection plug9. Camera and LED lights10. System reset button (rear view)11. Four (4) housing screws (rear view)OperationPower the Meter1. Power Switch: Press and hold the Power button and the display will illuminate if the internalbattery is charged. Press and hold the Power button again to switch off the Video Borescope.2. Charging the Battery:a. Before charging, make sure the meter is switched off.b. Connect the smaller end of the charging cable to the meter.c. Connect the other end of the charging cable to the AC plug or a PC USB port.d. A flashing red Status LED indicates the battery is charging. A solid green Status LEDindicates a fully charged meter.Borescope Operation1. Connect the camera and gooseneck to the meter2. Power on the meter3. The camera image will appear on the display.4. The camera is now ready for inspectionsLight Source level adjustment1. There are six levels of light brightness adjustments (the default is level 3).2. Press the power button momentarily to step through the brightness levels.CCTV Operation1. Connect the output of a CCTV camera to the AV input connector on the meter.2. Power on the meter3. After a few seconds, the camera image will appear on the display.4. The CCTV camera is now ready for alignment.Notes:Signal Switching: The meter defaults to the borescope input. If a signal is applied to the AV jack the unit will automatically switch to that mode within 5 seconds. When the AV signal is removed, the meter automatically switches to the borescope mode within 2 seconds.Signal format conversion: The borescope mode defaults to PAL format. The AV input signal is converted to NTSC / PAL format automatically.Auto Power off: If no input is detected, the LCD displays the NO SIGNAL message, the LED flashes green and the meter enters standby mode.Reset: Large magnetic fields or other disturbances could “lock up” the meter. If this occurs, press the RESET button on the rear of the meter.Battery Power Indication1. Low Power: When the battery voltage falls below 3.3V, the LCD display shows the symbolin the upper right hand corner, indicating a low battery condition.2. Recharging: The charging indication indicates that the battery ischarging.3. Full Charge: When the battery voltage is greater than4.0V, the battery symbol will be full.Battery ReplacementThe meter contains a rechargeable battery which is not user replaceable. Contact Extech or your distributor for replacement details.All EU users are legally bound by the battery ordinance to return all used batteries tocollection points in your community or wherever batteries / accumulators are sold!Disposal in the household garbage is prohibited!SpecificationsCameraSensor size ¼” CMOSSensor pixels 300,000Maximum frame rate 30 FPSColor resolution 24 BitFocusing method Fixed focus 15cm to 25cm (5.9” to 9.8”)Gooseneck length 1m (39”)Camera diameter 17mm (0.66”)LCD Display 2.4” Color LCDDisplay resolution 480 (W) X 234 (H) pixelsActive area 48mm x 35.6mm (1.9 x 1.4”)Light Source 4 LEDsAdjustable light intensity 6 illumination levelsVideo format NTSC/PAL (automatic conversion)Power Rechargeable 1800mAH lithium batteryCurrent consumption 400mA max.Standby current 5mA max.Low battery warning Voltage falls below 3.3VEnviormentalOperating Temperature 32°F ~ 122°F (0°C ~ 50°C)Relative Humidity 85% max.Copyright © 2011 Extech Instruments Corporation (a FLIR company) All rights reserved including the right of reproduction in whole or in part in any form.。
北京数字电视国家工程实验室手持数字电视测量仪使用说明书

手持数字电视测量仪 使用说明书北京数字电视国家工程实验室感谢您使用本产品,您可以通过阅读说明书,全面地了解此测量仪的使用,领略其完善的功能和简洁的操作方法。
本产品适用于地面数字电视及有线数字电视广播系统的用户端性能指标测量,是技术安装人员调试必备工具。
说明书中的图片仅供参考,如果有个别图片与产品不符,请以产品实物为准。
重要提示:本机设置了5V输出口(标准USB接口),可为其他设备供电。
使用本机为其他设备充电,必须在本机电源关闭状态下进行,否则5V输出口没有电压输出。
1目 录一、包装及外观说明 (4)1.1包装说明 (4)1.2 测量仪外观 (4)1.3指示灯说明 (5)二.单机操作说明 (6)2.1 设置频点 (6)2.2 选择测量频点 (6)2.3 信号测量 (7)2.4 主菜单 (8)2.4.1 设置频点 (9)2.4.2 频点列表 (9)2.4.3模式切换 (9)2.4.4查看电量 (10)2.4.5背光设置 (10)2.4.6版本信息 (10)三.智能手机APP操作说明 (11)3.1下载安装软件 (11)3.2 连接蓝牙 (13)3.3 频点设置 (14)3.3.1手动设置频点 (14)3.3.2全频点扫描 (15)23.4 选择频点 (16)3.5 信号测试主界面 (17)3.6 误码界面 (18)3.7 信道界面 (19)3.8 更换频点 (20)3.9 系统参数设置 (21)3.9.1设置频点 (22)3.9.2设置门限值 (22)3.9.3设置单位 (23)3.9.4电量信息 (24)4.1 蓝牙连接问题 (25)4.2 门限设置问题 (26)4.3 切换不同设备的问题 (26)4.4 微信扫描二维码问题 (26)34一、包装及外观说明1.1包装说明测量仪包装盒内包含:测量仪主机1个、充电器1个、USB 电源线1根、使用说明书 1册。
1.2 测量仪外观正面示意图 6 外围接口: 1、电源开关 2、天线接头 3、5V 充电接口 4、5V 放电接口5、LED 点阵屏按键及指示灯: 6、状态指示灯 7、向上翻页 8、确定/切换状态 9、菜单10、向下翻页11、返回/取消11 10 1 2 4 35 7 8 91.3指示灯说明1)电源指示灯打开电源开关,电源指示灯亮。
CCTV 双摄像头外围 Wi-Fi 系统 V3.2 文档说明书

001FR2276CCTVKit 2CAMERAS WI FIEXTÉRIEURES Documentversion V3.2–27-Février-2017*Test de portée Wifi conseillé.(cabler les caméras en «volant »pour faire un test)Etape 1:Raccordement et controles préliminairesTV (HDMI)ou Ecran PC (VGA)Non fournie(Box ADSL ou switch sur réseau connectésur Internet)Option L A N W A NAlim 12V 500mA Alim 12V 2AAlim 12V 500mAAvant de fixer les caméras définitivement,s’assurer que les transmission Wifi soient stables aux emplacements choisis (il est donc conseilléde cabler les caméras en «volant »pour faire un test)Usage d’un moniteur obligatoire Brancher la souris sur un port USB La mise en service simplifiée doit se faire avec un écran branchésur le port HDMI ou VGA de l’enregistreur.OU Etat du CANAL VIDEO:D’origine,les 2caméras du kit sont déjàappairées sur les canaux 1et 2(leur position clignote sur le routeur).Si les positions (led)sont allumées fixes,les cameras ne sont pas «visible »dans le champ du routeur Wifi.Vérifier qu’elles ne soient pas trop éloignées,non alimentées ou interférées OU alors elles ne sont pas appairées (principalement,dans le cas de caméras supplémentaires).NE PASSEZ PAS A L’ÉTAPE SUIVANTE AVANT QUE LES CAMÉRAS SOIENT APPAIRÉES !(voir annexe en dernière page)Au démarrage un assistant de programmation se lance automatiquement en anglais.Nous réglerons la langue française plus loin.Cliquer «next »Vérifier que «DHCP »soit sélectionnéEtape 2:OBTENIR LES IMAGES SUR L’ENREGISTREUR (ÉCRAN)Sélectionner tout Cliquer sur «channel delete »Confirmer «OK ».Puis attendre que la fenêtre suivante s’affiche (environs 10s)Cliquer sur «auto assign IP to caméra »Confirmer «OK ».Puis attendre que la fenêtre suivante s’affiche (environs 10s)Attendre encore quelques secondes pour que les images arrivent Cliquer sur «next »Cliquer «next »Noter la IP adress pour une étape ultérieure _____._____._____._____Dans certains cas cette fenêtre n’apparait pas (vous passer directement àla suivante)Info:Le système est réglépar défaut pour enregistreruniquement sur détection de mouvement d’image.Cecipermet d’augmenter significativement la duréed’enregistrement.Cliquer sur nextCliquer sur«save»puis«OK»Passeràla3èmeétape:obtenir les images sur le Smartphone•Télécharger et Ouvrir l’appli«RXCAMVIEW»•Veillezàavoir une connection internet(3G)•Ouvrir le menu de l’Application et aller dans«Gestion des périphériques»•Ajouter un système en cliquant«+»puis«Manual adding»•Scanner le QR Code de l’enregistreur puis sauvegarder«save»Scanner le QR Code de l’enregistreurEtape3:OBTENIR LES IMAGES SUR LE SMARTPHONE(3G)La LED présence tension doit être éclairée fixea)Sélection du CANAL WIFI :Le CANAL WIFI par défaut est le canal L .En cas de présence d’autres routeurs Wifi àproximité,ou dans le cas d’interférence avec la box wifi domestique,choisir un autre canal Wifi afin d’éliminer toute interférence.Sinon,passer directement àb)(page suivante)A chaque pression sur le bouton CH-SEL ,l’indicateur CH bascule sur H-M-ou L ,la led clignote lentement durant 5sec.Pendant cette période,un appui long sur CH-SEL engendre un clignotement rapide de la led qui confirme le changement de canal Wifi CH(H-M-L).FIXE FIXE FIXE FIXELe routeur Wifib)Etat du CANAL VIDEO:D’origine,les 2caméras du kits sont déjàappairées sur les canaux 1et 2Si les caméras sont «visibles »dans le champs du routeur ,leur position clignote sur le routeur.Si les cameras sont trop éloignées,non alimentées ou interférées,leur position (led)est fixe sur le routeur.Si les positions(led)sont allumées fixes,aucune caméra n’est programmée sur le canal .Clignotement lentClignotement lent Clignotement lent Clignotement rapideCAMERA 3(Appui court)(Appui long 2sec)(Appui court)-Chaque impulsion sur la touche PAIRING sélectionne le canal vidéo LED CAM clignote lentement).-Valider le canal choisi par un appui long sur PAIRING (2sec).,la LED CAM du canal sélectionnése met àclignoter rapidement.-Faire un appui bref (0,5s)sur le bouton d’apprentissage de la caméra.Attendre la fin du clignotement des caméra est «connecté».Réitérer la procédure pour tous les canaux selon le nombre de cameras (4max par routeur).ATTENTION :Pas de fonction Reset,pour échanger une camera de canal,appairer une nouvelle camera c)Appairage des caméras :Le CD-ROM livrédans le kit contient la documentation complète du kit (anglais)d)Accéder au menu principal Rentrer dans le menu principal :-Clic droit sur la souris (une barre de symboles apparait en bas)-Cliquer sur le symbole de droite «menu principal »e)Passer en langue et format date français Rentrer dans le menu principal :-Cliquer sur le symbole «system »Mettre la date au format «JJ/MM/AAA »Mettre la langue en «Français »f)Mot de passe par défautDans certains cas le système vous demandera le mot de passe «administrateur »Utilisateur (user):admin Mot de passe :«laisser vide »Pour des raisons de sécuritéévidentes nous vous conseillons vivement de personnaliser votre mot de passe.Notes________________________________________________ ________________________________________________ ________________________________________________ ________________________________________________ ________________________________________________ ________________________________________________ ________________________________________________ ________________________________________________ ________________________________________________ ________________________________________________ ________________________________________________ ________________________________________________ ________________________________________________ ________________________________________________Fin。
4.3英寸AHD1080p CCTV测试监视器用户手册说明书

AC/DC Adapter (1A/5V)
Network line
3
Introduction: ◎ Portability
This product’s compact design eliminates the need for complicated equipment that hinders inspection and repair. ◎ Monitor 4.3″ high resolution monitor shows clear images. ◎ Long run time Equipped with a high charge Lithium battery offering 7 working hours with a 6 hour recharge time. ◎ Design Hand-held design for portability and easy operation. ◎ DC power output for cameras Power your camera through the DC output to adjust the angles and focus as you go.
this to avoid potential permanent damage to the product. Caution: Common notice ◎Do not disassemble this device by yourself. Please contact supplier for repair service. Protection against moisture ◎ This product is not waterproof. Please avoid any contact with liquid, and keep the product stored in a dry environment. Temperature caution 1. Do not place this product near a high heat source. High temperature might cause damage to this product, or personal injury. 2. Operate in temperatures between 0~60°C. 3. Immediate change of temperature can cause damage to this product. Do not shift product from low temperatures to high temperatures quickly; User Caution ◎ Before using this product, please read instructions and check the recharge operation.
网络视频监控测试仪3500操作说明书
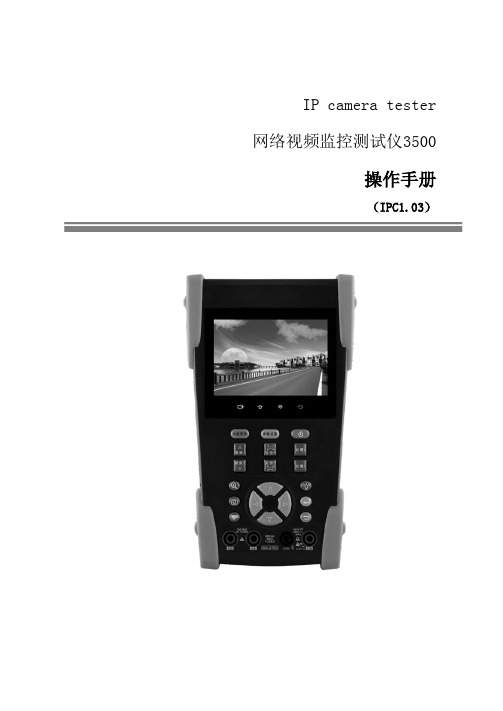
IP camera tester 网络视频监控测试仪3500操作手册(IPC1.03)⏹感谢您购买工程宝安防监控视频测试仪。
使用前请务必阅读使用说明书,并正确使用。
⏹为了能安全地使用本仪器,请您先仔细阅读使用说明书上的「安全注意事项」。
⏹说明书阅读后请妥善保管,以便随时查阅、参考。
⏹附有的保修凭证或机身的保修封贴,请勿损坏。
⏹使用中遇到问题,或仪器出现损坏时,请与公司技术部联系。
目录一、安全事项--------------------------------------------------------- 1二、IP网络视频监控测试仪简介 ------------------------------------------- 22.1 概述------------------------------------------------------- 22.2 产品特点---------------------------------------------------- 22.3 产品功能---------------------------------------------------- 42.4 产品配件--------------------------------------------------- 102.5 仪表各部位名称和功能: --------------------------------------- 11三、操作说明-------------------------------------------------------- 153.1 电池安装及充电说明------------------------------------------- 153.2 仪器连接--------------------------------------------------- 163.2.1 网络摄像机连接---------------------------------------- 163.2.2 模拟摄像机连接---------------------------------------- 173.3.3 SDI数字摄像机连接------------------------------------- 183.3 功能菜单操作------------------------------------------------ 193.3.1 视频监控--------------------------------------------- 213.3.1.1 云台控制器参数设置------------------------------ 223.3.1.2 色彩及存储设置--------------------------------- 243.3.1.3 视频图像放大----------------------------------- 253.3.1.4 拍照截图-------------------------------------- 263.3.1.5 录像功能-------------------------------------- 263.3.1.6 相片浏览-------------------------------------- 273.3.1.7 录像回放-------------------------------------- 283.3.1.8 视频信号测量*(*定制功能型号见附表)--------------- 293.3.2 图像发生器 TV OUT ------------------------------------ 313.3.3 ONVIF网络摄像机测试----------------------------------- 323.3.4 IP网络摄像机测试-------------------------------------- 393.3.5 SDI摄像机测试 *(*定制功能型号见附表)------------------- 423.3.6 IP地址扫描 ------------------------------------------ 433.3.7 PING连通性测试--------------------------------------- 443.3.8 网线测试器------------------------------------------- 453.3.9 寻线器*(*定制功能型号见附表) -------------------------- 453.3.10 端口闪烁-------------------------------------------- 473.3.11 串口工具-------------------------------------------- 483.3.12 激光功率计*(*定制功能型号见附表)---------------------- 493.3.13 可见红光源*(*定制功能型号见附表)---------------------- 503.3.14 高精度数字万用表*(*定制功能型号见附表)----------------- 523.3.15 视频播放器------------------------------------------ 593.3.16 音乐播放器------------------------------------------ 603.3.17 手电筒--------------------------------------------- 603.3.18 PoE/PSE电压测试功能--------------------------------- 613.3.19 TDR线缆故障测量*(*定制功能型号见附表)----------------- 613.3.20 计算器--------------------------------------------- 643.3.21 浏览器--------------------------------------------- 653.3.22 IPC viewer 移动客户端 ------------------------------ 663.3.23 DC12V电源输出--------------------------------------- 673.3.24 应用工具-------------------------------------------- 693.3.25 APPS工具夹----------------------------------------- 763.3.26 系统设置-------------------------------------------- 773.3.27 更新----------------------------------------------- 803.4 DC12V 1A供电输出-------------------------------------------- 803.5音频测试功能 ------------------------------------------------ 81四、技术参数-------------------------------------------------------- 824.1 技术参数总表------------------------------------------------ 824.2 万用表技术参数---------------------------------------------- 844.3 光功率计技术参数 -------------------------------------------- 864.4可见红光源技术参数-------------------------------------------- 87一、安全事项⏹使用本仪器时,请遵守当地的电气使用相关规则,避免于医院、加油站等不可使用电气的地方使用。
保安TEST IP漫威 Digital HD Coax Analog 系统 CCTV 相机测控仪说明
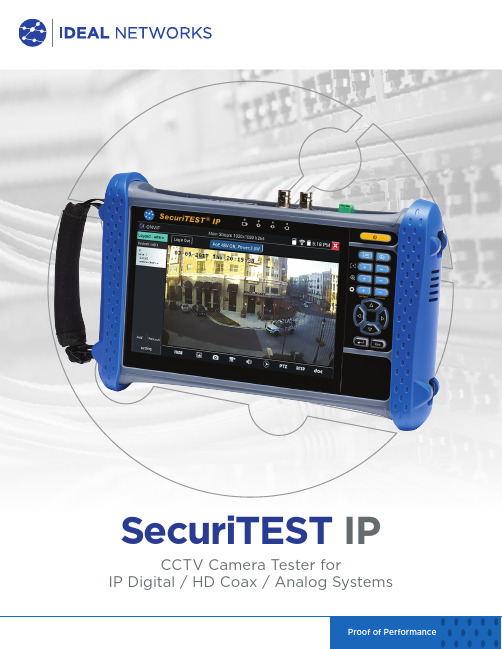
SecuriTEST IPCCTV Camera Tester forIP Digital / HD Coax / Analog SystemsProof of Performance2SecuriTEST IPCCTV Camera Tester for IP Digital / HD Coax / Analog Systems SecuriTEST IP is an installation and troubleshooting tester for digital/IP, HD coax and analog CCTV camera systems. With a single tester that can power, configure and document, SecuriTEST IP increases productivity from start to finish. Supply power to cameras via PoE/PoE+ (Power over Ethernet) or standard 12V DC power using its internal Li-Ion battery, eliminating the need for external power adapters and injectors. The QuickIP™ feature allows installers who are new to IP camera systems to quickly and easily connect to cameras without being network experts.Create professional test reports including video screen shots to verify the job has been completed successfully and reduce unpaid call backs.Physically connectcameraConnect camera to the tester using RJ-45, BNCor Wi-Fi.Send reports from the jobsite using email or preferred filesharing service.Power cameraPower the camera using: PoE+ (tester battery or network pass through), 12V DCpower (tester battery).DocumentCreate PDF installation reports with video images, statisticsand camera settings.Camera setupComprehensive setup options including aim, focus, PTZ presets, network settings (IP),video settings.Physically Connect CameraConnect to any IP or analog camera using RJ-45,BNC connections or Wi-Fi via network.Wi-Fi CameraAnalog CameraIP CameraPower CameraWhether you are installing or troubleshooting cameras, SecuriTEST IP supports all your power requirements for IP and analog cameras.No need for separate power injectors – SecuriTEST IPincludes the following power outputs:Power the camera using Power overEthernet (PoE+), up to 24 watts from thetester - RJ-45 port.Power the camera using 12V DC from the tester - 2.5mm to 3.5mm barrelconnector.Power the camera by passing PoE+ from the network and through the tester - RJ-45 port.Camera Identification and LoginQuickIP™ automates the process of connecting to IP cameras, allowing novice technicians to configure IP cameras as easily as analog cameras. For instances where dynamic IP addresses are required by the camera, SecuriTEST IP has a built-in DHCP server making setup easy and eliminating the need for additional network hardware.A suite of networking troubleshooting tools are available to pinpoint and solve network connectivity issues.• Display Network Configuration • Ping / TraceRoute• Hub blink for Port Identification• IP network Scan - check for IP address conflictsIP Camera SetupSecuriTEST IP offers a comprehensive range of ONVIF and non-ONVIF camera setup tools to ensure the camera is installed correctlyAnalog and HD Camera SetupEasily setup analog cameras.1. C onfigure camera – update camera information and network settings.2. A im and focus - use the high-resolution touchscreen or the hard keys when wearing gloves.3. P rogram presets for PTZ cameras – Program PTZ camera presets for users to automatically look at predefined areas.4. T ake snapshot – save video snapshots including preset locations for your installation reports.5. R ecord video clip – record video clips to demonstrate complete coverage for PTZ cameras.Video adjustment PTZ protocol settingsTest pattern generator to adjust screens4Professional Reports*Easily transfer reports from the jobsite – Using the built-in Wi-Fi and the web browser, test reports can be sent directly from the tester using email, your preferred file sharing service or be exported on microSD card.Convert unpaid call backs to billable service calls – Generate professional PDF reports that provide proof of installation to the client.No more spreadsheets – Today security engineers waste time manually filling in excel documents to create reports. SecuriTEST IP is the first camera tester to capture camera image(s), network configuration and automate documentation.Reduce troubleshooting time – Reportscapture as-built configuration that will help to reduce troubleshooting on future call backs.18GB of combined storage –10GB of internal memory and 8GB available on the SD memory card included.* Only applicable when using the ONVIF protocolExample ReportEliminate guess work troubleshooting cabling faults – SecuriTEST IP is used in combination with the “Cable Tracer/Remote Tool” to pinpoint cabling faults such as cross overs, miswires, shorts and opens. The length of the cabling is also provided.Determine water ingress in data cabling – Many cables are run outside or in underground conduit and exposed to moisture. Moisture ingress through the cable jacket, which is impossible to see, leads to a number of performance problems.Data Cable Test (UTP) – WiremapSecuriTEST IP includes the ability to identify and trace cables using the digital tone generator and the “Cable Tracer/Remote Tool”. Choose from four tones and use the “Cable Tracer/Remote Tool” with variable sensitivity settings to trace either large cable bundles from a distance or pinpoint a single cable within a bundle.Cable Tracing – Search for CablingSecuriTEST IPFast access to key features –Short cut menu to instantly launchyour most used tools.Long battery life – Up to 10 hours continuous usage with a lithium-ion battery. Ease of use – High resolution 7”capacitive touchscreen with 1920 x1200 resolution display.One hand operation – Pan/Tilt/Zoom (PTZ) the camera usingeither the touchscreen or the hardkeys.Accurate setup of 4kcameras – Digital zoom displaysfull detail of high resolution videoon the 7” touchscreen.RS485 interface –Control and program Pan/Tilt/Zoom (PTZ) cameras and monitor incoming PTZ control signals to assist in troubleshooting analog cameras.Setup security monitors – Use theanalog Video Out port on the tester with the testpattern generator function to setup security monitors.Camera audio testing using audio in port – Test microphone equipped cameras using the tester’s internal speaker.Troubleshooting HDMI – Use the HDMI Inport, connect to any HDMI source to isolate Network Video Recorder (NVR) vs monitor problems.HDMI In – Eliminatesthe need for a separate monitor.HDMI output – Displaytester screen on a larger monitor using HDMI for greater clarity.Analog/AHD/CVI/TVI video input -Connect to all common analog and HD-over-coax cameras for maximum versatility.Camera audiotesting using audio out port – Listento the camera audio through the tester usingexternal headphones/earbuds. Useful in noisyenvironments.Power up camera with PoE+ – RJ-45network port provides PoE+ (up to 24 watts) to the camera using the internal batterywhen network power is unavailable.USB charging – Highpower 2A USB port to quickly charge devices such as mobile phones and tablets. (Please note this port does not support data transfer).PoE+ troubleshooting– Display the PoE+ consumption of theattached camera in real-time using the power monitor tool. Displays voltage by pair and total wattage drawn.Data cable testing– RJ-45 port to perform wiremap testing ofunshielded twisted pair (UTP) data cabling. Automatically identify cross over cables and common wiremap faults using the Tracer/Remote.microSD slot – Transfertest reports, screencaptures and video clips, or update software using microSD card.12V DC power supply – Power any camera using the built-in 12V/2A DC power supply.Flashlight – Bright LEDflashlight with 5/10/30/60 minute auto-off options.7Proof of PerformanceOrdering InformationOptional AccessoriesBasic Specifications*Battery life is dependent on the load being drawn.CCTV Camera Tester forIP Digital / HD Coax / Analog Systems Proof of Performance SecuriTEST IPAll Rights Reserved. IDEAL NETWORKS, SecuriTEST, and the QuickIP logos are trademarks or registered trademarks of IDEAL INDUSTRIES Networks Limited.Specification subject to change without notice. E&OE © IDEAL Networks 2019Publication no.: 171819, Rev. 3P-5549IDEAL Networks North America 300 Roundhill Drive, Suite 1, Rockaway, NJ 07866, USA Tel. 973-957-7700***************************。
- 1、下载文档前请自行甄别文档内容的完整性,平台不提供额外的编辑、内容补充、找答案等附加服务。
- 2、"仅部分预览"的文档,不可在线预览部分如存在完整性等问题,可反馈申请退款(可完整预览的文档不适用该条件!)。
- 3、如文档侵犯您的权益,请联系客服反馈,我们会尽快为您处理(人工客服工作时间:9:00-18:30)。
CCTV testerPRO视频监控测试仪使用手册(SPT28V1.12)CCTV testerPRO User’s Manual⏹感谢您购买工程宝安防监控视频测试仪。
使用前请务必阅读使用说明书,并正确使用。
⏹为了能安全地使用本仪器,请您先仔细阅读使用说明书上的「安全注意事项」。
⏹说明书阅读后请妥善保管,以便随时查阅、参考。
⏹附有的保修凭证或机身的保修封贴,请勿损坏。
⏹使用中遇到问题,或仪器出现损坏时,请与公司技术部联系。
目录一、安全事项---------------------------------------------------------------------------------------------------------------4二、工程宝TM视频监控测试仪简介-------------------------------------------------------------------------------------52.1 概述---------------------------------------------------------------------------------------------------------------52.2 产品的特点------------------------------------------------------------------------------------------------------52.3 产品功能介绍--------------------------------------------------------------------------------------------------62.4 产品配件-------------------------------------------------------------------------------------------------------72.5 仪器各部位名称与功能---------------------------------------------------------------------------------------8三、操作说明-------------------------------------------------------------------------------------------------------------113.1 电池安装及充电说明----------------------------------------------------------------------------------------113.2 仪器连接-------------------------------------------------------------------------------------------------------133.3 功能菜单操作-------------------------------------------------------------------------------------------------133.3.1 云台控制器-----------------------------------------------------------------------------------------14⑴云台控制器参数设置--------------------------------------------------------------------------------14⑵设置和调用球机预置位-----------------------------------------------------------------------------16⑶调用球机主菜单--------------------------------------------------------------------------------------173.3.2 视频设置--------------------------------------------------------------------------------------------173.3.3 彩条发生器-----------------------------------------------------------------------------------------183.3.4 网线测试器-----------------------------------------------------------------------------------------193.3.5 数据监视器-----------------------------------------------------------------------------------------203.3.6 测试仪设定-----------------------------------------------------------------------------------------213.3.7 云台地址扫描--------------------------------------------------------------------------------------223.4 DC12V/1A电源输出----------------------------------------------------------------------------------------233.5 音频测试功能-------------------------------------------------------------------------------------------------24四、技术参数--------------------------------------------------------------------------------------------------------------25一、安全事项⏹使用本仪器时,请遵守当地的电气使用相关规则,避免于医院、加油站等不可使用电气的地方使用。
⏹使用本仪器时,敬请使用原厂所附配件,以免因使用未经认证之配件造成产品损害。
⏹本仪器所附配件仅满足自身设备使用,请勿用作其他用途,以免造成不可预料的事故。
⏹请勿让本产品淋雨或受潮,以免造成性能下降或损坏。
⏹请勿让仪器暴露部分接触灰尘或液体。
⏹运输和使用过程中,勿剧烈碰撞、摇动设备,以免导致元件损坏,使本品不能正常工作。
⏹设备充电时,请不要离开,如发现电池发热严重,应马上断电,充电时间不要超过八小时。
⏹请勿在开机状态下,带电接插本仪器各接口。
⏹请勿在湿度高的地方使用。
如果设备受潮,应马上断开电源和其它连接线。
⏹请勿在含有易燃气体的环境中使用。
⏹请勿自行拆卸本仪器,机内无用户能自行维修的零件,如确需拆卸,请与本公司技术人员联系。
⏹请勿用于强电磁干扰环境中。
⏹请勿用湿手或湿物触摸仪器。
⏹请勿用洗洁剂清洗,请使用干布擦去污物。
如果污物很难除去,则可将软布沾有水或中性洗涤剂,充分拧干后轻擦。
二、工程宝TM视频监控测试仪简介2.1 概述本仪器是为视频监控现场安装、维护而开发的测试工具,它具有视频显示、PTZ控制、DC12V电源输出、音频测试、图像发生器、RS485 数据捕捉、网线测试等功能。
本测试仪功能齐全、简单易用、携带方便,是工程商安装和维护前端摄像设备、提高效率、降低工程费用的好帮手。
2.2 产品特点✧中文、英文两种语言可设置。
✧ 2.8英寸960x240分辨率,262K色的高清晰LCD显示屏幕。
✧LCD屏幕亮度/对比度/色彩饱和度可调;背光亮度可调。
✧视频制式NTSC、PAL自动适应和显示。
✧视频信号强度测量,测试视频信号电平是否衰减。
✧DC12V 1A电源输出,为摄像机提供应急电源。
✧音频输入测试,测试拾音器等音频信号。
✧多制式彩条图型发生器(七制式可切换视频测试信号发生器),发送/接收全球七种制式的彩条图像。
✧球机地址快速扫描寻找功能,帮助用户查找球机地址。
✧超强型网线、电话线测试功能,线头寻找、线序排列显示。
✧支持RS232/RS485/RS422接口,速率150 - 19200bps可调。
✧支持PELCO-P、PELCO-D、SAMSUNG等二十多种控制协议。
✧PTZ协议捕捉分析功能,控制协议指令显示,帮助工程人员判断RS485传输是否正常,更容易地找出故障设备。
✧PTZ(云台与变焦)控制,可控制云台转动方向、摄像机变倍、聚焦、光圈及球机菜单参数设置,预置位的设定与调用等。
✧电池电量图形显示,电池供电或外接电源供电同时给电池充电,先进电源控制保护电路,低功耗工作节能环保,一次充电4小时,可正常使用15小时。
2.3 产品功能2.3.1 视频信号测试功能视频监控测试仪,内置高清晰2.8英寸数字LCD监视器,直观方便地显示摄像机图像质量。
支持PAL/NTSC制式的图像信号。
仪表LCD显示屏的亮度、对比度、色彩饱和度可调整,LCD的背光亮度可调,适合于野外施工和维护式作。
2.3.2 视频信号强度测试功能视频监控测试仪的视频信号强度测量功能,测试视频信号强度是否衰减或过高。
视频信号由于视频线缆过长会造成信号衰减,视频信号的衰减会造成图像暗淡,降低图像动态范围;视频信号过强,会造成虚影,降低图像的清晰度。
CCTV testerPRO的视频信号测量功能,实时显示视频信号的电平值,如果超出范围,仪器的屏幕会有提示信息显示。
2.3.3 云台控制功能视频监控测试仪内置Pelco-D/P,SAMSUNG,Panasonic等二十多种PTZ控制协议,通过自身的RS485或RS232接口,用户可以控制云台的上、下、左、右转动,以及调整一体机的变焦、聚焦、光圈大小。
视频监控测试仪支持水平转动速度、垂直转动速度调整;以及预置位设置、预置位调用功能,可调用快球的菜单,编辑球机各项参数。
2.3.4 多制式图像发生器功能多制式图像发生器通过视频OUT端口,发送多种制式(PAL,NTSC)标准彩色图型条,图型条有:白、黄、青、绿、粉、红、蓝、黑共八种颜色,通过监控中心的监视器是否接收到彩色图型条来判断视频通道是否正常传输,同时,通过监控中心接收到的彩色图型条,可以判断是否因为传输有衰减或干扰造成颜色偏差。
