ILI9325初始化代码
ILI9325中文完整版-望星天涯整理

控制器ILI9325 中文6、ILI9325 模块介绍MPU 系统接口( MPU System Interface )ILI8325 有一个16位的变址寄存器(IR)、一个18位的写数据寄存器(WDR)和一个18位的读数据寄存器(RDR)。
变址寄存器(IR)存储来自控制寄存器和内部的GRAM的指令信息。
写数据寄存器(WDR)用来暂时存储要被写到控制寄存器和内部的GRAM中的数据。
读数据寄存器(RDR)用来暂时存储从GRAM中读取的数据。
MPU中要写入内部GRAM的数据,首先写到写数据寄存器(WDR),然后再又内部操作自动的写到内部的GRAM 中。
要读取的数据要通过读数据寄存器(RDR)从内部GRAM 中读取。
因此无效数据将被读到数据总线,当ILI9325从内部的GRAM中读取第一个数据的时候,有效数据将在ILI9325进行了第二次读操作之后被读出。
寄存器在寄存器执行时间中会被连续的写入数据,除非在振荡器起震的时候执行了0个循环。
并行RGB接口( Parallel RGB Interface )ILI9325根据外部的接口和显示移动图片的情况提供了并行的RGB接口和VSYNC(垂直同步)接口。
当RGB 接口被选择,显示操作将和外部提供的信号 VSYNC,HSYNC,DOTCLK 同步.在RGB模式,根据使能信号的极性(高电平或是低电平)数据(DB17-0)将会根据这些同步信号被写入来阻止在数据更新的时候屏幕闪烁。
在VSYNC模式,显示操作和内部的时钟同步,除了帧同步之外,帧同步操作是是和VSYNC信号同步的。
显示数据经过系统接口被写入内部GRAM,在这种情况下,有写入数据到内部RAM 中的方法和速度,详细情况见“外部显示接口”(External Display Interface)。
ILI9325可以通过指令允许在外部显示接口和系统接口之间切换,所以最合适的接口可以根据屏幕上显示的图片的种类(静止的或移动的)来选择。
LCD初始化

LCD初始化改用新的LCD控制器HX8347stm32, 硬件设计 Add comments五 062012业务请联系*****************野火LCD控制器之前采用的是ili9325,但是LCD控制器这东西更新换代比较快,ili9325现在缺货了,所以新购的这批货控制器换成了HX8347。
对于一块新的控制器,其实我们比较关注的是以下几个部分:1 初始化函数(即使俩控制器是请兄弟,我想初始化函数多少也是要改改的,O(∩_∩)O哈!)2 设置GRAM指针函数(比如SetCursor(u16 x,u16 y))3 开窗函数(比如:SetWindows(u16 StartX,u16 StartY,u16 EndX,u16 EndY))4 清屏函数(其实清屏函数和开窗函数差不了多少)5获取指定位置的像素信息函数 (比如u16 GetPoint(u16 x,u16 y))6 在指定位置描写指定颜色的点 SetPoint(u16 x,u16 y,u16 point)7其它在野火例程中,为了保持对ili9325的兼容性,我们采用“选择性编译”来选择不同的控制器(用户大可不必担心^^)。
打开lcd.h文件,我们可以看到有个宏定义“#define HX8347”,如果我们手上的LCD 采用的是HX8347控制器,我们则需要保留这个宏定义;如果我们手上的LCD采用的是ili9325控制器,我们则将这个宏定义去掉或注释掉即可。
当让接下来的开发板都是采用HX8347咯~~在这里就说说HX8347,一次只把该控制器的驱动部分抽出来,至于ili9325部分,大家可看野火资料例程。
首先是LCD初始化函数。
/*•* 函数名:LCD_Init•* 描述:LCD 控制 I/O 初始化•* LCD FSMC 初始化•* LCD 控制器 ILI9325C 初始化•* 输入:NONE•* 输出:NONE•* 调用:外部调用•*/•void LCD_Init(void)•{•unsigned long i;•LCD_GPIO_Config(); //管脚初始化•LCD_FSMC_Config(); //FSMC配置•LCD_Rst(); //复位•//Driving ability Setting•LCD_WR_CMD(0xEA,0×00); //PTBA[15:8] •LCD_WR_CMD(0xEB,0×20); //PTBA[7:0] •LCD_WR_CMD(0xEC,0x3C); //STBA[15:8] •LCD_WR_CMD(0xED,0xC4); //STBA[7:0] •LCD_WR_CMD(0xE8,0×48); //OPON[7:0] •LCD_WR_CMD(0xE9,0×38); //OPON1[7:0] •LCD_WR_CMD(0xF1,0×01); //OTPS1B •LCD_WR_CMD(0xF2,0×08); //GEN•//Gamma 2.2 Setting•LCD_WR_CMD(0×40,0×01); //•LCD_WR_CMD(0×41,0×07); //•LCD_WR_CMD(0×42,0×09); //•LCD_WR_CMD(0×43,0×19); //•LCD_WR_CMD(0×44,0×17); //•LCD_WR_CMD(0×45,0×20); //•LCD_WR_CMD(0×46,0×18); //•LCD_WR_CMD(0×47,0×61); //•LCD_WR_CMD(0×48,0×00); //•LCD_WR_CMD(0×49,0×10); //•LCD_WR_CMD(0x4A,0×17); //•LCD_WR_CMD(0x4B,0×19); //•LCD_WR_CMD(0x4C,0×14); //•LCD_WR_CMD(0×50,0x1F); //•LCD_WR_CMD(0×51,0×28); //•LCD_WR_CMD(0×52,0×26); //•LCD_WR_CMD(0×53,0×36); //•LCD_WR_CMD(0×54,0×38); //•LCD_WR_CMD(0×55,0x3E); //•LCD_WR_CMD(0×56,0x1E); //•LCD_WR_CMD(0×57,0×67); //•LCD_WR_CMD(0×58,0x0B); //•LCD_WR_CMD(0×59,0×06); //•LCD_WR_CMD(0x5A,0×08); //•LCD_WR_CMD(0x5B,0x0F); //•LCD_WR_CMD(0x5C,0x1F); //•LCD_WR_CMD(0x5D,0xCC); //••//Power Voltage Setting•LCD_WR_CMD(0x1B,0x1B); //VRH=4.65V•LCD_WR_CMD(0x1A,0×01); //BT (VGH~15V,VGL~-10V,DDVDH~5V)•LCD_WR_CMD(0×24,0×70); //VMH(VCOM High voltage ~4.2V)•LCD_WR_CMD(0×25,0×58); //VML(VCOM Low voltage -1.2V)•//****VCOM offset**///•LCD_WR_CMD(0×23,0x6E); //for Flicker adjust //can reload from OTP•//Power on Setting•LCD_WR_CMD(0×18,0×36); //I/P_RADJ,N/P_RADJ, Normal mode 70Hz•LCD_WR_CMD(0×19,0×01); //OSC_EN=’1′, start Osc•LCD_WR_CMD(0×01,0×00); //DP_STB=’0′, out deep sle ep •LCD_WR_CMD(0x1F,0xD0);// GAS=1, VOMG=10, PON=1, DK=0, XDK=0, DDVDH_TRI=0, STB=0•LCD_WR_CMD(0×17,0×05); //default 0×06 262k color // 0×05 65k color•//SET PANEL•LCD_WR_CMD(0×36,0×09); //SS_P, GS_P,REV_P,BGR_P•LCD_WR_CMD(0×28,0x3F); //GON=1, DTE=1, D=1100•LCD_WR_CMD(0×16,0×50); //左上到右下竖屏•//LCD_WR_CMD(0×16,0X70); //•LCD_WR_CMD(0×02,0×00);•LCD_WR_CMD(0×03,0×00); //Column Start•LCD_WR_CMD(0×04,0×00);•LCD_WR_CMD(0×05,0xEF); //Column End•LCD_WR_CMD(0×06,0×00);•LCD_WR_CMD(0×07,0×00); //Row Start•LCD_WR_CMD(0×08,0×01);•LCD_WR_CMD(0×09,0x3F); //Row End••LCD_WR_REG(0×22);••for(i=0; i<(320*240); i++)•{•LCD_WR_Data(RED); //清屏•}••}•初始化函数中,大家比较熟悉的是LCD_Rst();这个函数可要注意了,要留意一下datasheet,是高电平复位还是低电平复位,决不能机械地凭经验断定,datasheet是这么说的“NRESET Reset pin.Setting either pin low initializes the LSI. Must be reset after power is supplied.”。
ILI9325常用tft彩屏控制器中文资料

ILI9325 TFT驱动中文资料TFT 9325驱动学习1、寄存器03HAM : 控制GRAM更新方向的控制位AM = 0: 在水平方向更新地址AM = 1: 在垂直方向更新地址这个地方对A M的选择将直接影响i mg2lc d软件的扫描方式控制项,这一位就是控制扫描方式的。
I/D[1:0] : 当更新显示区域的一个像素点的时候,控制AC是增加1还是减少1,具体参考下图I/D[1:0] 的正确设置才能正确的显示图片,比如有时候发现显示出来的图片和输入img2lcd的图片方向是左右方向是反的,或者上下或者都是反的,那就是需要修改这个的地方了,可以根据上面的方向来选择合适的I/D.ORG : 当一个窗口的地址区域确定以后,根据上面I/D的设置,来移动原始地址。
当高速写窗口地址域时,这个功能将被使能。
ORG = 0: 原始地址是不移动的。
这种情况下,是通过指定地址来启动写操作的,这个地址是根据窗口显示区域的GR AM的地址表。
ORG = 1:原始地址是更加I/D的设置相应的移动的。
注意:1、当ORG =1 的时候,设置R20H,R21H,的原始地址的时候,只能设置0x00002、在RAM读操作时,要保证ORG = 0;BGR 交换写数据中红和蓝BGR = 0 : 根据RGB顺序写像素点的数据。
BGR = 1: 交换RGB数据为BGR,写入GRAMTRI: 当TRI = 1的时候,在8位数据模式下是以8bit * 3传输的,也就是传输三个字节到内部的RAM,同样也支持16位数据的模式,和使用SPI模式显示26万色,也就是说当R TI = 1 的时候,传输的字节数基本上都是三个。
这一位在显示26万色的时候有用的,或者使用8位数据接口的时候,这个要看具体的应用来设置,但是注意如果不需要的时候,要设置为0.DFI : 设置像内部R AM传输数据的的模式。
MTK 白屏

1)屏本身已经坏了
2)FPC接触不良或者屏焊接不良也可能造成白屏
3)PN硬件接线是否正确(跟屏的规格一致),/RD,/WR,/CS,D/C连接异常
软件问题:
1)平台timing与LCD driver Ic timing不匹配导致initial不成功,需调整平台 timing
2)LCD reset延时不够导致复位不成功,需增加reset延时
1. 延长LCD INIT时,Reset的Delay时间;
2. 如果是多屏自适应,可能是ID读取不稳定,可以完善LCD ID判定算法
1、LCD接口没有配置好,表现为开机就白,在BB加挂BackendIC的时候比较容易出现。这个只能调整LCD时序。
2、LCD的工作没有稳定,比如LCD起振时间不足,DriverIC内部电路没有稳定下来,这个比较好解决,但是有可能加长开机时间
LCD_CtrlWrite_ILI9325(0x00110x0012, 0x0000);
LCD_CtrlWrite_ILI9325(0x0013, 0x0000);
这段,保证初始化IC 放电完全
针对开机小概率白屏:
3、LCD工作过程受干扰,表现为使用中(例如来电话的时候)就白掉,这个可能是DataBus上面有杂波导致DriverIC接受了垃圾数据所致,估计只能硬件保护了。
睡眠-唤醒 时的白屏:表象为再刚刚关背光(实际要LCD进入睡眠)的时候,用按键激活背光(实际时LCD从睡眠中唤醒),小概率白屏。
原因: 睡眠到唤醒时间太短,LCD没有准备好。
手机放置十几分钟后,开机白屏,然后不管进入SLEEP后再退出,也一直是白屏;
按PowerKey关机重开机,屏显示正常;
ILI9335 含初始化程序
Version :0; Date : 2009. 9. 9■ 一般事项 □ 特殊事项特殊事项内容:MODEL COG A BTL242432-226L 2/24PRODUCT SPECIFICATIONPageDateprepared by* Records of Revision *Original VersionLi guohua09. 9. 9oAllDescription of changesRev.* Contents *1. General Description2. Absolute Maximum Ratings3. Electrical Characteristics4. Optical Characteristics5. Block Diagram6. Power Supply Sequence7. Read/Write Timing characteristics (80 series MPU)8. COG Type OLB Pin Connection _ILI93359. Recommended Software Setting Value (Initial code)10. Recommended Schematic Drawing11. Panel Drawing12. External Dimension13. Package14. LCD Module Out-Going Quality Level15. BHL&BMDT Customer Quality Service Process16. LCD Module Operation InstructionMODEL COG A BTL242432-226L3/24PRODUCT SPECIFICATION1. General Description1.1 Introduction2.41”QVGA is a color active matrix TFT LCD Panel using amorphous silicon TFT's (ThinFilm Transistors) as an active switching devices. This panel has a 2.41 inch diagonallymeasured active area with QVGA resolutions (240 horizontal by 320 vertical pixel array).Each pixel is divided into RED, GREEN, BLUE dots which are arranged in verticalstripe and this panel can display 262,144 colors.1.2 Features. Thin and light weight. Gate Design for 3-side free. COG Design. 0.5t Glass. With out POL1.3 General SpecificationsActive Screen Size 2.4 Inch DiagonalOutline Dimension40.50±0.2(W) ×57.26±0.2(V) ×1.0(D)mmActive area36.72 (H) ×48.96 (V)mmPixel Pitch0.153 (H) ×0.153 (V)mmPixel Format240(RGB)*320 (RGB Stripes Arangement)Color Gamut50% (typ.), Only CFTransmittance14.4% (typ.)Rubbing Direction COG PAD at 12 O'clockViewing Direction(Human Eye)COG PAD at 6 O'clockD-IC ILI9335(ILITECH)Display Operating Mode Transmissive Mode, Normally WhiteMODEL COG A BTL242432-226L4/24PRODUCT SPECIFICATION2. Absolute maximum ratingsMODEL COG A BTL242432-226L5/24PRODUCT SPECIFICATION1.652.512-120.8IOVCC--0.2IOVCC-TBD3.33.3--18-74. Optical CharacteristicsMODEL COG A BTL242432-226L7/24PRODUCT SPECIFICATIONTr6. Power Supply Sequence(ILI9335)MODEL COG A BTL242432-226L10/24PRODUCT SPECIFICATION7. Read/Write Timing characteristics (80 series MPU)2)Reset Timing characteristics8. COG Type OLB Pin Connection _ILI9335(FPC Pin 定位参考 IC SPEC)9. Recommended Software Setting Value (Initial Code)NOTE: BOE requires the customer to follow the above instructions strictly. If customer would like to change the above instructions,the customer should inform BOE and get re-check from BOE, or the customer will be responsible for any unexpected result because of the change.MODEL COG A BTL242432-226L14/24PRODUCT SPECIFICATION10. Recommended Schematic Drawing11. Panel Drawing(84.Reliability Test - Module Middle Reliability5. Criteriaa. No changes for indication and appearance.b. Leave the all samples under room temperature 4 hours after reliability test ends.MODEL COG A BTL242432-226L 22/24PRODUCT SPECIFICATIONS-20℃ ↔ 70℃3Sample Quantity Creteria 60℃,90% RH 48 hrs 30/130/1Note(Acc/Rej)No.ItemCondition Duration 1High Temp Operation 70 ± 2℃48 hrs 2Low Temp Operation -20 ± 2℃48 hrs 0/1High Humidity Storage4Thermal Shock30min Stage 10cycles/30/13High Temp and15. BHL&BMDT Customer Quality Service ProcessIn order to provide better service for Customer, BHL&BMDT shall apply the after-sales product qualityservice process as below:1> According to the P/O from Customer, BHL&BMDT should deliver required product to the right placeappointed by Customer.2> Customer shall apply inspection to the incoming procuct.3> Inspection standard should be provided by BHL&BMDT, and it will become effective after confirmed byCustomer. Inspection and Defects determination should be carried out according to the standard agreed by both Parties.4> In order to guarantee in-time communication of product quality situation and effective service, QA staffon Customer side should send Weekly Quality Report to the appointed CS staff in BHL&BMDT.5> After BHL&BMDT get related information, both sides should arrange time and place to determin thenon-performing products found by Customer.6> BHL&BMDT should cooperate with Customer in case of special quality requirement.7> After confirmed by both side, BHL&BMDT should be responsible for the defect part caused by our qualityproblem. BHL&BMDT take back the confirmed defect products and return normal goods to customer.8> BHL&BMDT agree to provide related training of LCD product technology and usage.9> Customer should use the LCD product according to the instruction. BHL&BMDT will not be responsible forthe defect product caused by violation of Users' Instruction.10> Both parties should deal with the quality problem under the principle of mutual consultation andcooperation.And both parties should negotiate to handle the defect products of which the cause isn'tclear.MODEL COG A BTL242432-226L23/24PRODUCT SPECIFICATIONS16. LCD Module Operation Instruction1.Cautions for storage1> Avoid hitting the LCD Panel in any way because the LCD is made of glass.2> Physical status of liquid crystal will change under extrem temperature, and it can not be resumed when thetemperature returns to normal. So LCD module should be stored in required temperature. Same reason, LCD module should be stored in required humidity. Low hymidity may add static, while high humidity may corrode the ITO circuit of LCD product. The suitable storage environment is: temperature: 22±5℃, humidity: 55%±10%.3> Avoid exposing LCD module under sunshine, strong fluorescence or ultraviolet radiation for a long time. It shouldbe stored in dark area.4> Chemical liquid is forbidden to clean the LCD, such as alcohol, acetone and IPA. Because all of these can dodamage to the LCD. Water on the LCD surface must be cleaned as soon as possible, or it will cause POL color change or other defect.5> LCD products should be stored in static-protective polythene bag under certain requirement.2. Cautions for installing and assembling1> Please make sure that operators wear static-protective bands correctly and working tables are effectively groundedduring operation.2> Please place LCD module on the tray provided by BHL&BMDT while moving it, in order to avoid mechanicaldamage. Hold the module's side frames to avoide damage during moving.Please move and assemble LCD very carefully during assembly, and avoid pushing or twisting it.3> Avoid disassembling LCD module or damage the FPC or permanent defect may happen.4> Avoid cleaning the LCD surface with hard materials. Please clean LCD with Air-gun or very soft cloth whennecessary. The protective film on the POL is prohibited to be removed until assembly, otherwise,dust,spit or other foreign matter may fall on the LCD surface. After the protective film is removed, only air-gun can be applied to remove any dust or foreign matter. Fingure or cloth MUST NOT be used in such cases.5> Avoid twisting, disassembling, squeezing or hitting the PCB. It will damage the circuit or component on PCB andcause functional defect.6> Please use the connector according to the instruction provided by BHL&BMDT.7> Please place dual module with the sub-panel upward. Trays should be placed in contrary direction. An empty trayshould be placed on the top.8> Sealing operation on PCB must be very careful to avoid short or cutting the original circuit on PCB. Otherwise,permenant damage to the LCD may happen.9> Please take great care to use connector. Defect caused by wrong or careless operation on Customer side are notwithin the compensation range.3. Cautions for operation1> Avoid adding direct DC or high voltage to LCD panel. It will cause functional damage to the LCD or shorten thelife of LCD product.2> LCD may respond slowly or display abnormally in extrem temperature (lower than -20℃ or higher than 50℃).But this doesn't mean LCD functional defect. LCD will display normally in regular temperature. Therefore, avoid using LCD product in extrem temperature.3> Avoid pushing the display area of LCD panel which may cause abnormal display. This doesn't mean LCD functionaldefect, neither. LCD will display normally in regular temperature.4> The black tape on IC on LCD product is used to protect the IC from light. Please do NOT remove it.5> Electrical inspection for LCD product is carried out by using mobile phone provided by Customer. Special testequipment could be applied under mutual consent.MODEL COG A BTL242432-226L24/24 PRODUCT SPECIFICATIONS。
TFT彩屏使用说明书
入口参数:无
出口参数:无
说明:厂家提供的液晶初始化代码
示例代码:
ILI9325_Initial();//初始化LCD
函数名:LCD_SetPos
功能:定义显示窗体
函数原型:static void LCD_SetPos
(unsigned int x0,
示例代码:
PutGB1616(0,0,"华",RED,BLUE);//显示汉字“华”
16*16汉字取模说明
16*16字模由 软件取模得到,具体操作如下
点击“参数设置”中的“其它选项”,设置如下图
然后输入文字,按“Ctrl+Enter组合键”结束文字输入
点击“取模方式”选择“C51格式”,此时会在“点阵生成区”输出取模数据
采用1个16位二进制数来表达一个彩色点
常用颜色码表
红:0xf800
黄:0xffe0
绿:0x07e0
青:0x07ff
蓝:0x001f
紫:0xf81f
0x0000
白: 0xffff
灰:0x7bef
四、硬件接口介绍
图4-1 彩屏模块原理图
彩屏模块引脚连接说明
| | | | | | | | | | | | | | | | | | | |
RET----P2.1 LEDA---P2.2 CS-----P2.3
DB-----P0口
图4-2 彩屏模块元件布局图
跳线说明:
一:R1处:1.默认不焊接,需5V输入经AMS1117后转换为3.3V。
2.短接后,模块由VCCIN接口供电。方便接3.3V电源。
二:R6处:背光控制。1.默认焊接,背光端固定接高电平。
TFT彩屏使用说明书
G V N R W R D D D D D D D D R L C N
N C C S R D B B B B B B B B S E S C
D C 0 1 2 3 4 5 6 7 T D
IA
N
| | | | | | | | | | | | | | | | | | | |
CLR_Screen(BLUE);//清屏蓝色
函数名:Put_pixel
功能:在屏幕上画点
函数原型:void Put_pixel(uchar x,uchar y,unsigned int color);
入口参数:x,y 需要画点的坐标,color为点的颜色
出口参数:无
说明:在屏幕上指定的坐标画指定颜色的点
unsigned int forecolor,
unsigned intbkcolor);
入口参数:x 横坐标,y 纵坐标
bColor 字符背景颜色
出口参数:无
说明:需包含"8X16.h",显示数字、大小写英文字符和一些符号等
示例代码:
LCD_PutChar8x16(0,0,'Z',RED,BLUE);//显示英文字符Z
函数名:PutGB1616
功能:显示16*16汉字
函数原型:void PutGB1616
(uR_Screen
功能:清屏
函数原型:void CLR_Screen(unsigned intbColor);
入口参数:bColor清除屏幕的的颜色
出口参数:无
说明:使用背景色清除屏上所有内容
示例代码:
CLR_Screen(0xf800);//清屏红色
STM32单片机ILI9325系列TFT的驱动原理解析
#define Set_RstnRstPin_Port-》BSRR = nRstPin// GPIO_SetBits(nRstPin_Port,nRstPin)
#define Set_nWrnCsPin_Port-》BSRR = nWrPin // GPIO_SetBits(nWrPin_Port,nWrPin)
#define Clr_nWrnCsPin_Port-》BRR = nWrPin // GPIO_ResetBits(nWrPin_Port,nWrPin)
void Lcd_Configuration(void); //初始化GPIO
void LCD_ili9320_IniTIalizTIon(void); //初始化ILI9320---uCGUI需要使
void LCD_ili9320_BackLight(u8 status); //背光
#define Set_Rs RsPin_Port-》BSRR = RsPin// GPIO_SetBits(RsPin_Port,RsPin)
#define Clr_Rs RsPin_Port-》BRR = RsPin // GPIO_ResetBits(RsPin_Port,RsPin)
#define Set_nRdnRdPin_Port-》BSRR = nRdPin// GPIO_SetBits(nRdPin_Port,nRdPin)
STM32单片机ILI9325系列TFT的驱动原理解析
为了更好,更深入学习了解ILI9325系列TFT的驱动原理,自己做了一块TFT板子。为了方便测试,在上面集成了STM32芯片,到时候做实验的时候就焊接STM32测试,如果只是使用,就直接焊接TFT就行了。板子还在做,先上原理图与PCB。
tft_ili9325
/** 文档说明:ILI9325的驱动文件,字符数组的定义在str_array.h中*/#ifndef TFT_ILI9325_H_#define TFT_ILI9325_H_//字符数组的所在文件#include "str_array.h"//外部函数extern void delay_us(alt_u16 Dly);extern void delay_ms(alt_u16 Dly);//宏定义#define Display_ON() LCD_CmdWrite(0x07,0x0173)#define Display_OFF() LCD_CmdWrite(0x07,0x0000)alt_u16 const Color[]={0xf800,0x07e0,0x001f,0xffe0,0x0000,0xffff,0x07ff,0xf81f};//对应颜色红绿蓝黄黑白浅绿粉红enum RGB{red=0,green,blue,yellow,black,white,light_green,pink};/** 函数说明:延时函数*/void delay(alt_u16 dly){for(;dly>0;dly--);}/** 函数说明:tft写指令*/void LCD_CmdWrite(alt_u8 index,alt_u16 val){IOWR_TFT_RD_SET();IOWR_TFT_CS_CLR();IOWR_TFT_RS_CLR();IOWR_TFT_DB_OUT(index);IOWR_TFT_RW_CLR();delay(1);IOWR_TFT_RW_SET();IOWR_TFT_RS_SET();IOWR_TFT_DB_OUT((alt_u8)(val>>8));IOWR_TFT_RW_CLR();delay(1);IOWR_TFT_RW_SET();IOWR_TFT_RS_SET();IOWR_TFT_DB_OUT((alt_u8) (val));IOWR_TFT_RW_CLR();delay(1);IOWR_TFT_RW_SET();IOWR_TFT_CS_SET();}/** 函数说明:tft写数据*/void WriteRegister (alt_u16 RegisterValue){IOWR_TFT_CS_CLR();IOWR_TFT_RS_CLR();IOWR_TFT_DB_OUT((alt_u8)(RegisterValue>>8));IOWR_TFT_RW_CLR();delay(1);IOWR_TFT_RW_SET();IOWR_TFT_DB_OUT((alt_u8)(RegisterValue));IOWR_TFT_RW_CLR();delay(1);IOWR_TFT_RW_SET();IOWR_TFT_CS_SET();}/** 函数说明:LCD复位*/void LCD_Reset(void){IOWR_TFT_CS_CLR();IOWR_TFT_RST_SET();IOWR_TFT_RD_SET();delay(10);IOWR_TFT_RST_CLR();delay(5000);IOWR_TFT_RST_SET();}/** 函数说明:设置水平和垂直的GRAM起始位置*/void LCD_SetXY(alt_u16 x, alt_u16 y){LCD_CmdWrite(0x20,x); //设置水平GRAM起始位置LCD_CmdWrite(0x21,y); //设置垂直GRAM起始位置}/** 函数说明:设置窗口的范围*/void LCD_SetWindow(alt_u16 startX,alt_u16 startY,alt_u16 endX,alt_u16 endY){LCD_SetXY(startX,startY); //设置GRAM起始位置LCD_CmdWrite(0x50,startX); //设置水平地址起始LCD_CmdWrite(0x52,startY); //设置垂直地址起始LCD_CmdWrite(0x51,endX); //设置水平地址结束LCD_CmdWrite(0x53,endY); //设置垂直结束}/** 函数说明:全屏范围*/void LCD_SetWindowToFullScreen(void){LCD_SetXY(0,0);LCD_CmdWrite(0x50,0x0000);LCD_CmdWrite(0x52,0x0000);LCD_CmdWrite(0x51,0x00ef);LCD_CmdWrite(0x53,0x013f);}/** 函数说明:tft初始化*/void LCD_Init(void){LCD_Reset();delay(5000);LCD_CmdWrite(0x00,0x0001); //开启内部晶振delay(5000);LCD_CmdWrite(0x0001,0x0100);LCD_CmdWrite(0x0002,0x0700);LCD_CmdWrite(0x0003,0x1030);LCD_CmdWrite(0x0004,0x0000);LCD_CmdWrite(0x0008,0x0207);LCD_CmdWrite(0x0009,0x0000);LCD_CmdWrite(0x000A,0x0000);LCD_CmdWrite(0x000C,0x0000);LCD_CmdWrite(0x000D,0x0000);LCD_CmdWrite(0x000F,0x0000);//power on sequence VGHVGLLCD_CmdWrite(0x0010,0x0000);LCD_CmdWrite(0x0011,0x0007);LCD_CmdWrite(0x0012,0x0000);LCD_CmdWrite(0x0013,0x0000);//vghLCD_CmdWrite(0x0010,0x1290);LCD_CmdWrite(0x0011,0x0227);//delay_ms(100);//vregioutLCD_CmdWrite(0x0012,0x001d); //0x001b //delay_ms(100);//vom amplitudeLCD_CmdWrite(0x0013,0x1500);//delay_ms(100);//vom HLCD_CmdWrite(0x0029,0x0018);LCD_CmdWrite(0x002B,0x000D);//gammaLCD_CmdWrite(0x0030,0x0004);LCD_CmdWrite(0x0031,0x0307);LCD_CmdWrite(0x0032,0x0002);// 0006 LCD_CmdWrite(0x0035,0x0206);LCD_CmdWrite(0x0036,0x0408);LCD_CmdWrite(0x0037,0x0507);LCD_CmdWrite(0x0038,0x0204);//0200 LCD_CmdWrite(0x0039,0x0707);LCD_CmdWrite(0x003C,0x0405);// 0504 LCD_CmdWrite(0x003D,0x0F02);//ramLCD_CmdWrite(0x0050,0x0000);LCD_CmdWrite(0x0051,0x00EF);LCD_CmdWrite(0x0052,0x0000);LCD_CmdWrite(0x0053,0x013F);LCD_CmdWrite(0x0060,0xA700);LCD_CmdWrite(0x0061,0x0001);LCD_CmdWrite(0x006A,0x0000);//LCD_CmdWrite(0x0080,0x0000);LCD_CmdWrite(0x0081,0x0000);LCD_CmdWrite(0x0082,0x0000);LCD_CmdWrite(0x0083,0x0000);LCD_CmdWrite(0x0084,0x0000);LCD_CmdWrite(0x0085,0x0000);//LCD_CmdWrite(0x0090,0x0010);LCD_CmdWrite(0x0092,0x0600);LCD_CmdWrite(0x0093,0x0003);LCD_CmdWrite(0x0095,0x0110);LCD_CmdWrite(0x0097,0x0000);LCD_CmdWrite(0x0098,0x0000);LCD_CmdWrite(0x0007,0x0133);// Write_Cmd_Data(0x0022);//delay(5000);}/** 函数说明:MCU->TFT 写数据*/void LCD_WriteStart(void) //开始{IOWR_TFT_CS_CLR();IOWR_TFT_RS_CLR();IOWR_TFT_DB_OUT(0x00);IOWR_TFT_RW_CLR();delay(2);IOWR_TFT_RW_SET();IOWR_TFT_DB_OUT(0x22); //写数据到GRAMIOWR_TFT_RW_CLR();delay(2);IOWR_TFT_RW_SET();IOWR_TFT_RS_SET();}void LCD_WriteData(alt_u16 val) //数据{IOWR_TFT_DB_OUT((alt_u8)(val>>8));IOWR_TFT_RW_CLR();delay(2);IOWR_TFT_RW_SET();IOWR_TFT_DB_OUT((alt_u8)(val));;IOWR_TFT_RW_CLR();delay(2);IOWR_TFT_RW_SET(); }void LCD_WriteEnd() //结束{IOWR_TFT_CS_SET();}/** 函数说明:显示8色彩条,测试液晶屏是否正常工作*/void LCD_test(void){unsigned int i,j;LCD_WriteStart();for(i=0;i<320;i++)for(j=0;j<240;j++){if(i>279)LCD_WriteData(Color[white]);else if(i>239)LCD_WriteData(Color[light_green]);else if(i>199)LCD_WriteData(Color[pink]);else if(i>159)LCD_WriteData(Color[red]);else if(i>119)LCD_WriteData(Color[green]);else if(i>79)LCD_WriteData(Color[blue]);else if(i>39)LCD_WriteData(Color[black]);else LCD_WriteData(Color[yellow]);}LCD_WriteEnd();}/** 函数说明:将屏幕填充成指定的颜色,如清屏,则填充0xffff*/void LCD_ClearScreen(alt_u16 Full_Clr){alt_u16 Clr_x,Clr_y; //240*320;LCD_SetWindowToFullScreen();LCD_WriteStart();for(Clr_x=0;Clr_x<240;Clr_x++)for(Clr_y=0;Clr_y<320;Clr_y++)LCD_WriteData(Full_Clr);LCD_WriteEnd();}/** 函数说明:在指定座标画点*/void LCD_SetPoint(alt_u16 x, alt_u16 y, alt_u16 point){if ( (x>240)||(y>320) ) return; //超范围退出LCD_SetXY(x,y); //设置屏幕坐标LCD_WriteStart();LCD_WriteData(point);LCD_WriteEnd();}/** 函数说明:tft画线程序*/void GUI_Line(alt_u16 x0,alt_u16 y0,alt_u16 x1,alt_u16 y1,alt_u16 RGB_Color) {alt_16 temp;alt_16 dx,dy; //定义起点到终点的横、纵坐标增加值alt_16 s1,s2,status,i;alt_16 Dx,Dy,sub;dx = x1 - x0;if(dx >= 0) //X的方向是增加的s1 = 1;else //X的方向是降低的s1 = -1;dy = y1 - y0; //判断Y的方向是增加还是降到的if(dy >= 0)s2 = 1;elses2 =- 1;//Dx = abs(x1-x0); //计算横、纵标志增加值的绝对值//Dy = abs(y1-y0);if(x1 >= x0) Dx = x1-x0; //针对没有数学函数库的文件求绝对值else Dx = x0-x1;if(y1 >= y0) Dy = y1-y0;else Dy = y0-y1;if(Dy > Dx){ //以45度角为分界线,靠进Y轴是status=1,靠近X轴是status=0 temp = Dx;Dx = Dy;Dy = temp;status = 1;}elsestatus = 0;/*********Bresenham算法画任意两点间的直线********/sub = Dy + Dy - Dx; //第1次判断下个点的位置for(i = 0;i < Dx;i ++){LCD_SetPoint(x0,y0,RGB_Color); //画点if(sub >= 0){if(status == 1) //在靠近Y轴区,x值加1x0 += s1;else //在靠近X轴区,y值加1y0 += s2;sub -= (Dx + Dx); //判断下下个点的位置}if(status == 1)y0 += s2;elsex0 += s1;sub += Dy + Dy;}}/** 函数说明:tft画图程序,高位在前,水平扫描,16位真彩,R:5 G:6 B:5*/alt_u8 LCD_DrawPicture(alt_u16 startX, alt_u16 startY, const alt_u8 *pic, alt_u16 sizeX, alt_u16 sizeY){alt_u16 i,j,k=0;alt_u16 tmp;if((startX+sizeX)>240 || (startY+sizeY)>320) return(1);for (j = 0; j<sizeY; j++){LCD_SetXY(startX,startY);//先确定每行的起始点的位置LCD_WriteStart();for(i = 0; i<sizeX; i++){tmp = pic[k];tmp = tmp<<8;k++;tmp = tmp+pic[k];k++;LCD_WriteData(tmp);}startY++;//换行}LCD_WriteEnd();return(0);}/** 函数说明:tft画图程序,画矩形.*/void LCD_Rectangle(alt_u16 x0,alt_u16 y0,alt_u16 x1,alt_u16 y1,alt_u16 RGB_Color ,alt_u8 fill){if(fill){alt_u16 i;if(x0>x1){i=x1;x1=x0;}else{i=x0;}for(;i<=x1;i++){GUI_Line(i,y0,i,y1,RGB_Color);}return;}GUI_Line(x0,y0,x0,y1,RGB_Color);GUI_Line(x0,y1,x1,y1,RGB_Color);GUI_Line(x1,y1,x1,y0,RGB_Color);GUI_Line(x1,y0,x0,y0,RGB_Color);}/** 函数说明:8X16点阵的字符显示函数*/void DisplayChar(alt_u8 casc,alt_u16 x,alt_u16 y,alt_u16 charColor,alt_u16 bkColor) {alt_u8 i,j,b;const alt_u8 *p=ASCII;p+=casc*16;for(j=0;j<16;j++){b=*(p+j);for(i=0;i<8;i++){if(b&0x80){LCD_SetPoint(x+i,y+j,charColor); // 字符颜色}else{LCD_SetPoint(x+i,y+j,bkColor); // 背景颜色}b=b<<1;}}}/** 函数说明:英文字符串显示*/void DisplayString(alt_u8 *s,alt_u16 x,alt_u16 y,alt_u16 charColor,alt_u16 bkColor) {while (*s){DisplayChar(*s,(x*8),y,charColor,bkColor);if(++x>=30){x=0;if(++y>=20){y=0;}}s++;}}#endif /*TFT_ILI9325_H_*/。
TFT彩屏使用说明书..

2.4寸TFT彩屏使用说明书彩屏驱动IC:ILI9325实验板:LY-51S实验板编写:侯瑞阳2013年01月一、彩屏模块简介屏幕尺寸:2.4寸TFT彩屏分辨率:320x240 262K色接口类型:8位数据接口,接口兼容12864液晶接口,①脚对齐电源类型:5V电源接口,板上有3.3V稳压芯片,不需要电平转换SD卡模式:SPI模式触摸IC:XPT2046图1-1 2.4寸TFT彩屏模块二、彩屏结构组成及原理TFT屏(Thin Film Transistor)是薄膜晶体管型液晶显示屏,它的每一个象素点都是由集成在其后的薄膜晶体管来驱动的,这样不仅提高了显示屏的响应速度,同时可以精确控制显示色阶,所以TFT液晶的色彩更逼真。
TFT屏主要的构成包括:背光源、导光板、偏光板、滤光板、玻璃基板、配向膜、液晶材料、薄膜晶体管等。
图2-1 彩屏的基本结构图2-2 TFT彩屏内部结构TFT液晶模块可以显示数字、中英文字符和图案。
彩色,图案分辨率较高。
由于TFT显示器成本日渐降低,并且人们越来越渴望拥有用户友好程度更高的图形界面,因此有越来越多的工程师把TFT显示器设计到他们的产品中去。
TFT模块尺寸指屏幕的对角线长度。
常用有:1.6、1.8、2.0、2.2、2.4 、2.6、2.8、3.0、3.2、3.4、3.6、4、4.3、5.7 、8.4 、10.4 、15 、17 、19 、21 英寸等。
屏幕高宽比小尺寸TFT模块一般是3:4,大尺寸的也有16:9的。
分辨率指水平像素和垂直像素的数量。
三、学习彩屏的准备知识1、什么是图形和图像图形:如一段直线,在单片机内存储时只需要存储起点X、Y坐标和终点X、Y 坐标,存储量极小,但在显示器上显示时,和图像的显示是一致的,也是通过像素点的组合来显示的。
图3-1 像素点组成图形图像:如一张人物照片,在单片机内存储时需要存储所有像素点的信息,存储量极大,在显示器上显示时,通过像素点的点阵组合来完成显示的图3-2 像素点组成图像2、什么是像素像素:图像的最小组成单位。
ILI9320中文资料含指令规格说明
习题 2 将 LCD 清屏成蓝色,在屏幕中间画一红
色点 CPU_Init(); ili9320_Inilization(); ili9320_Clear(Blue); ili9320_SetPoint(160,120,Red);
20:39 嵌入式系统原理与应用 1
LCD 库函数:ili9320_PutChar
20:39 嵌入式系统原理与应用 2
函数原型 void GUI_Rectangle(u16 x0, u16 y0, u16 x1, u16 y1, u16 color, u8 fill); 功能描述 在指定坐标矩形 输入参数 x0:A 点 行坐标,y0:A 点列坐标 x1:B 点行坐标,y1:B 点列坐标 color:线的颜色, fill:0/1(不填充/填充) 输出参数 无 返回值 无 先决条件 无
20:39 嵌入式系统原理与应用 1
);
LCD 库函数: ili9320_PutChar_16x24
函数原型 void ili9320_PutChar_16x24(u16 x,u16 y,u8 c, u16 charColor, u16 bkColor); 功能描述 在指定坐标显示一个 16X24 点阵的 ascii 字符 输入参数 x:行坐标,y:列坐标,c:字符, charColor:字符颜色,bkColor:背景颜色
20:39 嵌入式系统原理与应用 2
习题 4
将 LCD 清屏成蓝色,分别显示小号、中号和大号的“温州大学” CPU_Init(); ili9320_Inilization(); ili9320_Clear(Blue); ili9320_PutHz12(124,90,0,Red,Blue);…….. ili9320_PutHz16(124,110,0,Red,Blue);…….. ili9320_PutHz24(124,90,0,Red,Blue);……..
ILI9325驱动程序,8位数据模式

ILI9325 STM32驱动程序 8位数据传输模式LCD.C#include "lcd.h"#include "stdlib.h"#include "font.h"#include "usart.h"#include "delay.h"u16 POINT_COLOR=0x0000; //u16 BACK_COLOR=0xFFFF; //void LCD_Writ_Bus(u8 VH,u8 VL) //{u16 temp1,temp2;temp1=VH*256;temp2=VL*256;GPIO_Write(GPIOB,temp1);LCD_WR_CLR;LCD_WR_SET;GPIO_Write(GPIOB,temp2);LCD_WR_CLR;LCD_WR_SET;}void LCD_WR_DATA8(u8 VH,u8 VL) //{LCD_RS_SET;LCD_Writ_Bus(VH,VL);}void LCD_WR_DATA(int da){LCD_RS_SET;LCD_Writ_Bus(da>>8,da);}void LCD_WR_REG(int da){LCD_RS_CLR;LCD_Writ_Bus(da>>8,da);}void LCD_WR_REG_DATA(int reg,int da){LCD_WR_REG(reg);LCD_WR_DATA(da);}void Address_set(unsigned int x1,unsigned int y1,unsigned int x2,unsigned int y2) {LCD_WR_REG(0x0020);LCD_WR_DATA8(x1>>8,x1);//ÉèÖÃX×ø±êλÖÃLCD_WR_REG(0x0021);LCD_WR_DATA8(y1>>8,y1); //ÉèÖÃY×ø±êλÖÃLCD_WR_REG(0x0050);LCD_WR_DATA8(x1>>8,x1); //¿ªÊ¼XLCD_WR_REG(0x0052);LCD_WR_DATA8(y1>>8,y1); //¿ªÊ¼YLCD_WR_REG(0x0051);LCD_WR_DATA8(x2>>8,x2); //½áÊøXLCD_WR_REG(0x0053);LCD_WR_DATA8(y2>>8,y2); //½áÊøYLCD_WR_REG(0x0022);}void LCD_Init(void){GPIO_InitTypeDef GPIO_InitStructure;RCC_APB2PeriphClockCmd(RCC_APB2Periph_GPIOC|RCC_APB2Periph_GPIOB, ENABLE); //ʹÄÜPORTB,CʱÖÓºÍAFIOʱÖÓGPIO_InitStructure.GPIO_Pin =GPIO_Pin_10|GPIO_Pin_9|GPIO_Pin_8|GPIO_Pin_7|GPIO_Pin_6|GPIO_Pin_5;///PORTC6~10¸´ÓÃÍÆÍìÊä³öGPIO_InitStructure.GPIO_Mode = GPIO_Mode_Out_PP;GPIO_InitStructure.GPIO_Speed = GPIO_Speed_50MHz;GPIO_Init(GPIOC, &GPIO_InitStructure); //GPIOCGPIO_SetBits(GPIOC,GPIO_Pin_10|GPIO_Pin_9|GPIO_Pin_8|GPIO_Pin_7|GPI O_Pin_6|GPIO_Pin_5);GPIO_InitStructure.GPIO_Pin =GPIO_Pin_10|GPIO_Pin_9|GPIO_Pin_8|GPIO_Pin_10|GPIO_Pin_11|GPIO_Pin_12|GPI O_Pin_13|GPIO_Pin_14|GPIO_Pin_15; // PORTBÍÆÍìÊä³öGPIO_Init(GPIOB, &GPIO_InitStructure); //GPIOBGPIO_SetBits(GPIOB,GPIO_Pin_10|GPIO_Pin_9|GPIO_Pin_8|GPIO_Pin_10|GP IO_Pin_11|GPIO_Pin_12|GPIO_Pin_13|GPIO_Pin_14|GPIO_Pin_15);LCD_RD_SET;LCD_WR_SET;LCD_RST_CLR;delay_ms(20);LCD_RST_SET;delay_ms(20);LCD_WR_REG_DATA(0x0001,0x0100);LCD_WR_REG_DATA(0x0002,0x0700);LCD_WR_REG_DATA(0x0003,0x1030);LCD_WR_REG_DATA(0x0004,0x0000);LCD_WR_REG_DATA(0x0008,0x0202); //0207LCD_WR_REG_DATA(0x0009,0x0000);LCD_WR_REG_DATA(0x000A,0x0000);LCD_WR_REG_DATA(0x000C,0x0000);LCD_WR_REG_DATA(0x000D,0x0000);LCD_WR_REG_DATA(0x000F,0x0000);//power on sequence VGHVGLLCD_WR_REG_DATA(0x0010,0x0000);LCD_WR_REG_DATA(0x0011,0x0007);LCD_WR_REG_DATA(0x0012,0x0000);LCD_WR_REG_DATA(0x0013,0x0000);//vghLCD_WR_REG_DATA(0x0010,0x1290);LCD_WR_REG_DATA(0x0011,0x0227);//delay_ms(100);//vregioutLCD_WR_REG_DATA(0x0012,0x001d); //0x001b //delay_ms(100);//vom amplitudeLCD_WR_REG_DATA(0x0013,0x1500);// delay_ms(100);//vom HLCD_WR_REG_DATA(0x0029,0x0018);LCD_WR_REG_DATA(0x002B,0x000D);//gammaLCD_WR_REG_DATA(0x0030,0x0004);LCD_WR_REG_DATA(0x0031,0x0307);LCD_WR_REG_DATA(0x0032,0x0002);// 0006 LCD_WR_REG_DATA(0x0035,0x0206);LCD_WR_REG_DATA(0x0036,0x0408);LCD_WR_REG_DATA(0x0037,0x0507);LCD_WR_REG_DATA(0x0038,0x0204);//0200LCD_WR_REG_DATA(0x0039,0x0707);LCD_WR_REG_DATA(0x003C,0x0405);// 0504 LCD_WR_REG_DATA(0x003D,0x0F02);//ramLCD_WR_REG_DATA(0x0050,0x0000); LCD_WR_REG_DATA(0x0051,0x00EF); LCD_WR_REG_DATA(0x0052,0x0000); LCD_WR_REG_DATA(0x0053,0x013F); LCD_WR_REG_DATA(0x0060,0xA700); LCD_WR_REG_DATA(0x0061,0x0001); LCD_WR_REG_DATA(0x006A,0x0000); //LCD_WR_REG_DATA(0x0080,0x0000); LCD_WR_REG_DATA(0x0081,0x0000); LCD_WR_REG_DATA(0x0082,0x0000); LCD_WR_REG_DATA(0x0083,0x0000); LCD_WR_REG_DATA(0x0084,0x0000); LCD_WR_REG_DATA(0x0085,0x0000); //LCD_WR_REG_DATA(0x0090,0x0010); LCD_WR_REG_DATA(0x0092,0x0600); LCD_WR_REG_DATA(0x0093,0x0003); LCD_WR_REG_DATA(0x0095,0x0110); LCD_WR_REG_DATA(0x0097,0x0000); LCD_WR_REG_DATA(0x0098,0x0000); LCD_WR_REG_DATA(0x0007,0x0133); }void LCD_Clear(u16 Color){u8 VH,VL;u16 i,j;VH=Color>>8;VL=Color;Address_set(0,0,LCD_W-1,LCD_H-1);for(i=0;i<LCD_W;i++){for (j=0;j<LCD_H;j++){LCD_WR_DATA8(VH,VL);}}}void LCD_DrawPoint(u16 x,u16 y,u16 Color){Address_set(x,y,x,y);LCD_WR_DATA(Color);}//»-Ò»¸ö´óµã//POINT_COLOR:´ËµãµÄÑÕÉ«void LCD_DrawPoint_big(u16 x,u16 y){LCD_Fill(x-1,y-1,x+1,y+1,POINT_COLOR);}//ÔÚÖ¸¶¨ÇøÓòÄÚÌî³äÖ¸¶¨ÑÕÉ«//ÇøÓò´óС:// (xend-xsta)*(yend-ysta)void LCD_Fill(u16 xsta,u16 ysta,u16 xend,u16 yend,u16 color) {u16 i,j;Address_set(xsta,ysta,xend,yend); //ÉèÖùâ±êλÖÃfor(i=ysta;i<=yend;i++){for(j=xsta;j<=xend;j++)LCD_WR_DATA(color);//ÉèÖùâ±êλÖà }}//»-Ïß//x1,y1:Æðµã×ø±ê//x2,y2:ÖÕµã×ø±êvoid Draw_Circle(u16 x0,u16 y0,u8 r){int a,b;int di;a=0;b=r;di=3-(r<<1); //ÅжÏϸöµãλÖõıêÖ¾while(a<=b){LCD_DrawPoint(x0-b,y0-a,POINT_COLOR); //3LCD_DrawPoint(x0+b,y0-a,POINT_COLOR); //0LCD_DrawPoint(x0-a,y0+b,POINT_COLOR); //1LCD_DrawPoint(x0-b,y0-a,POINT_COLOR); //7LCD_DrawPoint(x0-a,y0-b,POINT_COLOR); //2LCD_DrawPoint(x0+b,y0+a,POINT_COLOR); //4LCD_DrawPoint(x0+a,y0-b,POINT_COLOR); //5LCD_DrawPoint(x0+a,y0+b,POINT_COLOR); //6LCD_DrawPoint(x0-b,y0+a,POINT_COLOR);a++;//ʹÓÃBresenhamËã·¨»-Ô²if(di<0)di +=4*a+6;else{di+=10+4*(a-b);b--;}LCD_DrawPoint(x0+a,y0+b,POINT_COLOR);}}void LCD_DrawLine(u16 x1, u16 y1, u16 x2, u16 y2){u16 t;int xerr=0,yerr=0,delta_x,delta_y,distance;int incx,incy,uRow,uCol;delta_x=x2-x1; //¼ÆËã×ø±êÔöÁ¿delta_y=y2-y1;uRow=x1;uCol=y1;if(delta_x>0)incx=1; //ÉèÖõ¥²½·½Ïòelse if(delta_x==0)incx=0;//´¹Ö±Ïßelse {incx=-1;delta_x=-delta_x;}if(delta_y>0)incy=1;else if(delta_y==0)incy=0;//ˮƽÏßelse{incy=-1;delta_y=-delta_y;}if( delta_x>delta_y)distance=delta_x; //Ñ¡È¡»ù±¾ÔöÁ¿×ø±êÖáelse distance=delta_y;for(t=0;t<=distance+1;t++ )//»-ÏßÊä³ö{LCD_DrawPoint(uRow,uCol,POINT_COLOR);//»-µãxerr+=delta_x ;yerr+=delta_y ;if(xerr>distance){xerr-=distance;uRow+=incx;}if(yerr>distance){yerr-=distance;uCol+=incy;}}}void LCD_DrawRectangle(u16 x1, u16 y1, u16 x2, u16 y2){LCD_DrawLine(x1,y1,x2,y1);LCD_DrawLine(x1,y1,x1,y2);LCD_DrawLine(x1,y2,x2,y2);LCD_DrawLine(x2,y1,x2,y2);}void LCD_ShowChar(u16 x,u16 y,u8 num,u8 size,u8 mode){u16 temp,t1,t;u16 y0=y;u16 csize=(size/8+((size%8)?1:0))*(size/2);//µÃµ½×ÖÌåÒ»¸ö×Ö·û¶ÔÓ¦µãÕó¼¯ËùÕ¼µÄ×Ö½ÚÊý//ÉèÖô°¿Únum=num-' ';//µÃµ½Æ«ÒƺóµÄÖµfor(t=0;t<csize;t++){if(size==12)temp=asc2_1206[num][t]; //µ÷ÓÃ1206×ÖÌåelse if(size==16)temp=asc2_1608[num][t]; //µ÷ÓÃ1608×ÖÌåelse if(size==24)temp=asc2_2412[num][t]; //µ÷ÓÃ2412×ÖÌåelse return;//ûÓеÄ×Ö¿âfor(t1=0;t1<8;t1++){if(temp&0x80) LCD_DrawPoint(x,y,POINT_COLOR);else if(mode==0) LCD_DrawPoint(x,y,0X7D7C);temp<<=1;y++;if(x>=240)return; //³¬ÇøÓòÁËif((y-y0)==size){y=y0;x++;if(x>=240)return; //³¬ÇøÓòÁËbreak;}}}}u32 LCD_Pow(u8 m,u8 n){u32 result=1;while(n--)result*=m;return result;}void LCD_ShowNum(u16 x,u16 y,u32 num,u8 len,u8 size){u8 t,temp;u8 enshow=0;for(t=0;t<len;t++){temp=(num/LCD_Pow(10,len-t-1))%10;if(enshow==0&&t<(len-1)){if(temp==0){LCD_ShowChar(x+(size/2)*t,y,' ',size,0);continue;}else enshow=1;}LCD_ShowChar(x+(size/2)*t,y,temp+'0',size,0);}}void LCD_ShowString(u16 x,u16 y,u16 width,u16 height,u8 size,u8 *p) {u8 x0=x;width+=x;height+=y;while((*p<='~')&&(*p>=' '))//ÅжÏÊDz»ÊÇ·Ç·¨×Ö·û!{if(x>=width){x=x0;y+=size;}if(y>=height)break;//Í˳öLCD_ShowChar(x,y,*p,size,0);x+=size/2;p++;}}LCD.H#ifndef __LCD_H#define __LCD_H#include "sys.h"#include "stdlib.h"#define LCD_W 240#define LCD_H 320extern u16 BACK_COLOR, POINT_COLOR; //±³¾°É«£¬»-±ÊÉ«#define LCD_CS_SET GPIO_SetBits(GPIOC,GPIO_Pin_9) //Ƭѡ¶Ë¿ÚPC9 //Ó²¼þ½ÓµØ ûÓÃ#define LCD_RS_SET GPIO_SetBits(GPIOC,GPIO_Pin_8) //Êý¾Ý/ÃüÁîPC8#define LCD_WR_SET GPIO_SetBits(GPIOC,GPIO_Pin_7) //дÊý¾ÝPC7#define LCD_RD_SET GPIO_SetBits(GPIOC,GPIO_Pin_6) //¶ÁÊý¾ÝPC6#define LCD_RST_SET GPIO_SetBits(GPIOC,GPIO_Pin_5) //RSTPC5#define LCD_CS_CLR GPIO_ResetBits(GPIOC,GPIO_Pin_9) //Ƭѡ¶Ë¿ÚPC9 //Ó²¼þ½ÓµØ ûÓÃ#define LCD_RS_CLR GPIO_ResetBits(GPIOC,GPIO_Pin_8) //Êý¾Ý/ÃüÁîPC8#define LCD_WR_CLR GPIO_ResetBits(GPIOC,GPIO_Pin_7) //дÊý¾Ý PC7#define LCD_RD_CLR GPIO_ResetBits(GPIOC,GPIO_Pin_6) //¶ÁÊý¾Ý PC6#define LCD_RST_CLR GPIO_ResetBits(GPIOC,GPIO_Pin_5) //RSTPC5//PB10~15,×÷ΪÊý¾ÝÏß#define DATAOUT(x) GPIO_Write(GPIOB,x);#define DATAIN GPIO_ReadInputData(GPIOB)void Lcd_Init(void);void LCD_Clear(u16 Color);void Address_set(unsigned int x1,unsigned int y1,unsigned int x2,unsigned int y2); void LCD_WR_DATA8(u8 VH,u8 VL); //·¢ËÍÊý¾Ý-8λ²ÎÊývoid LCD_WR_DATA(int da);void LCD_WR_REG(int da);void LCD_DrawPoint(u16 x,u16 y,u16 Color);//»-µãvoid LCD_DrawPoint_big(u16 x,u16 y);//»-Ò»¸ö´óµãu16 LCD_ReadPoint(u16 x,u16 y); //¶Áµãvoid Draw_Circle(u16 x0,u16 y0,u8 r);u32 LCD_Pow(u8 m,u8 n);void LCD_DrawLine(u16 x1, u16 y1, u16 x2, u16 y2);void LCD_DrawRectangle(u16 x1, u16 y1, u16 x2, u16 y2);void LCD_Fill(u16 xsta,u16 ysta,u16 xend,u16 yend,u16 color);void LCD_ShowChar(u16 x,u16 y,u8 num,u8 size,u8 mode);void LCD_ShowNum(u16 x,u16 y,u32 num,u8 len,u8 size);//ÏÔʾÊý×Övoid LCD_Show2Num(u16 x,u16 y,u16 num,u8 len);//ÏÔʾ2¸öÊý×Övoid LCD_ShowString(u16 x,u16 y,u16 width,u16 height,u8 size,u8 *p);//ÏÔʾһ¸ö×Ö·û´®,16×ÖÌåvoid showhanzi(unsigned int x,unsigned int y,unsigned char index);//»-±ÊÑÕÉ«#define WHITE 0xFFFF#define BLACK 0x0000#define BLUE 0x001F#define BRED 0XF81F#define GRED 0XFFE0#define GBLUE 0X07FF#define RED 0xF800#define MAGENTA 0xF81F#define GREEN 0x07E0#define CYAN 0x7FFF#define YELLOW 0xFFE0#define BROWN 0XBC40 //×ØÉ«#define BRRED 0XFC07 //×غìÉ«#define GRAY 0X8430 //»ÒÉ«//GUIÑÕÉ«#define DARKBLUE 0X01CF //ÉîÀ¶É«#define LIGHTBLUE 0X7D7C //dzÀ¶É«#define GRAYBLUE 0X5458 //»ÒÀ¶É«//ÒÔÉÏÈýɫΪPANELµÄÑÕÉ«#define LIGHTGREEN 0X841F //dzÂÌÉ«#define LGRAY 0XC618 //dz»ÒÉ«(PANNEL),´°Ìå±³¾°É«#define LGRAYBLUE 0XA651 //dz»ÒÀ¶É«(Öмä²ãÑÕÉ«)#define LBBLUE 0X2B12 //dz×ØÀ¶É«(Ñ¡ÔñÌõÄ¿µÄ·´É«)#endif。
STM32驱动ILI9325显示字符串的方法

煤矿机械Coal Mine Machinery Vol.32No.10 Oct.2011第32卷第10期2011年10月0引言STM32是ST(意法半导体)公司的基于Cortex-M3核心的ARM芯片,基于该核心的芯片是ARM 公司近年主推的芯片之一,以其功能强大、使用方便和价格适中得到了广泛的应用。
ILI9325是台湾奕力公司的一款专门用在320*240分辨率液晶屏的驱动IC。
以配置简单、性能稳定、价格低廉而受到工程师的青睐。
介绍了基于8位数据传输模式的ARM芯片STM32F103驱动液晶主控ILI9325的初始化过程。
并重点介绍了一种显示字符串的方法,在关键步骤给出了的程序源代码。
该方法简单可靠,且有较好的通用性,对其他的MCU驱动ILI9325也有一定的参考价值。
1ILI9325控制时序图液晶主控芯片ILI9325有8、9、16、18位并行和SPI串行,共5种数据传输方式。
传输方式由引脚IM [3:0]的高低电平决定。
当IM0=1、IM1=1、IM2=0、IM3=0时是8位数据传输模式,该方式所用引脚较少,是一种较为常用的方式,所用引脚为DB10~ DB17。
控制引脚主要包含RD、WR、RS、CS共4个数据口。
其中RD是读数据口,下降沿有效;WR是写数据口,上升沿有效;RS是数据、地址选择口,低电平时把数据赋给地址指针寄存器,高电平时写到数据口的数据被放进相应寄存器;CS是片选信号口,低电平有效。
图1是数据读写时序图。
图1数据读写时序图2STM32的初始化驱动ILI9325只用到普通的IO口,STM32只要初始化时钟和IO口就可以了。
这里是使用官方固件库3.4进行配置的。
首先,要在工程(以MDK为例)中加入启动文件startup_stm32f10x_hd.s。
该文件是以汇编形式存在,主要用来设置堆栈指针SP和程序计数器PC,并配置中断和时钟,是必不可少的一个文件。
其次,还要加入外设接入层函数system_stm32f10x.c,以及时钟和IO驱动函数stm32f10x_rcc.c和stm32f10x_gpio.c。
ILI9325 指令说明

8.2.Instruction Descriptions指令说明8.2.1.Index(IR)指数(IR)或是电阻指数该指数寄存器指定寄存器地址(R00h RFFh)或将被访问的RAM。
8.2.2.Status Read(RS)状态读取(RS)该SR位代表了ILI9325内部状态。
L[7:0]指示目前正在驱动TFT面板的驱动线位置。
8.2.3.Start Oscillation(R00h)启动振荡振荡周率当读取该寄存器时,该器件代码“9325”H被读出。
8.2.4.Driver Output Control(R01h)驱动器输出控制SS:从源驱动器选择输出的转变方向。
When SS=0,输出转变方向是从S1到S720When SS=1,输出转变方向是从S720到S1除了改变方向,SS和BGR位的设置都需要更改R,G,B三个点的分配到源驱动引脚。
从S1到S720指定R,G,B点到源驱动引脚,设置SS=0。
从S720到S1指定R,G,B点到源驱动引脚,设置SS=1。
When changing SS or BGR bits,RAM data must be rewritten.(当改变SS或BGR位时,RAM数据必须被再次写入)设置栅极驱动器引脚排列与GS位(R60h)相结合,以为模块选择最佳扫描模式。
8.2.5.LCD Driving Wave Control(R02h)LCD驱动波形控制.B/C0:帧/场倒位1:线反转EOR:EOR=1和B/C=1设置行反转。
8.2.6.Entry Mode(R03h)进入模式AM控制GRAM更新的方向。
When AM=“0”,地址在水平写入方向得以更新。
When AM=“1”,地址在垂直写入方向得以更新。
当一个窗口区域是由寄存器R50h R53h来设置时,基于I/D[1:0]和AM位只有编址的GRAM区得以更新。
当更新一个像素显示数据时,I/D[1:0]控制的地址计数器(AC)将自动增加或减少1,。
STM32用IO口驱动8位2.4TFT

Stm32 用IO口驱动8位液晶程序#include "stm32f10x.h"#include "ILI9320.h"int main(void){SystemInit();GPIO_Config();ILI9325_Initial(); //初始化LCD//delayms(100);//绘制矩形平面// Show_RGB(0,120,0,64,Blue2);// Show_RGB(120,240,0,64,Black);// Show_RGB(0,120,64,128,White);// Show_RGB(120,240,64,128,Blue);// Show_RGB(0,120,128,192,Red);// Show_RGB(120,240,128,192,Magenta);// Show_RGB(0,120,192,256,Green);// Show_RGB(120,240,192,256,Cyan);// Show_RGB(0,120,256,320,Yellow);// Show_RGB(120,240,256,320,Red);//// LCD_PutString(0,0,"专业电子论坛",White,Blue2); // LCD_PutString(0,16,"",White,Blue2); // LCD_PutString(0,32,"专业开发板",White,Blue2);// LCD_PutString(0,48,"浩豚电子科技",White,Blue2);while(1){CLR_Screen(Red); //用背景色清屏CLR_Screen(Yellow);CLR_Screen(Green);}}/*----------------------------------------------------------------320x240彩屏液晶驱动程序----------------------------------------------------------------*/#include"ILI9320.h"#include"stm32f10x.h"void GPIO_Config(){GPIO_InitTypeDef GPIO_InitStructure;RCC_APB2PeriphClockCmd(LCD_GPIO_DATA_CLK|RCC_APB2Periph_GPIOA,ENABLE); GPIO_InitStructure.GPIO_Pin=LCD_GPIO_DATA_PIN;GPIO_InitStructure.GPIO_Mode=GPIO_Mode_Out_PP;GPIO_InitStructure.GPIO_Speed=GPIO_Speed_50MHz;GPIO_Init(LCD_GPIO_DATA_PORT ,&GPIO_InitStructure);GPIO_InitStructure.GPIO_Pin=GPIO_Pin_0|GPIO_Pin_1|GPIO_Pin_2|GPIO_Pin_3|GPIO_Pin_4 ;GPIO_InitStructure.GPIO_Mode=GPIO_Mode_Out_PP;GPIO_InitStructure.GPIO_Speed=GPIO_Speed_50MHz;GPIO_Init(GPIOA,&GPIO_InitStructure);}/*----------------------------------------------------------------清屏函数输入参数:bColor 清屏所使用的背景色----------------------------------------------------------------*/void CLR_Screen(unsigned int bColor){unsigned int i,j;LCD_SetPos(0,239,0,319);//320x240for (i=0;i<320;i++){for (j=0;j<240;j++)Write_Data_U16(bColor);}}/*----------------------------------------------------------------显示英文字符输入参数:x 横坐标y 纵坐标c 需要显示的字符fColor 字符颜色bColor 字符背景颜色----------------------------------------------------------------*//*#include "8X16.h"void LCD_PutChar8x16(unsigned short x, unsigned short y, char c, unsigned int fColor, unsigned int bColor){unsigned int i,j;LCD_SetPos(x,x+8-1,y,y+16-1);for(i=0; i<16;i++) {unsigned char m=Font8x16[c*16+i];for(j=0;j<8;j++) {if((m&0x80)==0x80) {Write_Data_U16(fColor);}else {Write_Data_U16(bColor);}m<<=1;}}}*//*----------------------------------------------------------------显示英文字符输入参数:x 横坐标y 纵坐标c 需要显示的字符fColor 字符颜色bColor 字符背景颜色----------------------------------------------------------------*//*void LCD_PutChar(unsigned short x, unsigned short y, char c, unsigned int fColor, unsigned int bColor) {LCD_PutChar8x16( x, y, c, fColor, bColor );} *//*----------------------------------------------------------------显示汉字输入参数:x 横坐标y 纵坐标c 需要显示的汉字码fColor 字符颜色bColor 字符背景颜色----------------------------------------------------------------*//*#include "GB1616.h" //16*16汉字字模void PutGB1616(unsigned short x, unsigned short y, unsigned char c[2], unsigned int fColor,unsigned int bColor){unsigned int i,j,k;LCD_SetPos(x, x+16-1,y, y+16-1);for (k=0;k<64;k++) { //64标示自建汉字库中的个数,循环查询内码if ((codeGB_16[k].Index[0]==c[0])&&(codeGB_16[k].Index[1]==c[1])){for(i=0;i<32;i++) {unsigned short m=codeGB_16[k].Msk[i];for(j=0;j<8;j++) {if((m&0x80)==0x80) {Write_Data_U16(fColor);}else {Write_Data_U16(bColor);}m<<=1;}}}}} *//*----------------------------------------------------------------显示字符串可以中英文同时显示输入参数:x 横坐标y 纵坐标*s 需要显示的字符串fColor 字符颜色bColor 字符背景颜色----------------------------------------------------------------*//*void LCD_PutString(unsigned short x, unsigned short y, char *s, unsigned int fColor, unsigned int bColor){unsigned char l=0;while(*s) {if( *s < 0x80){LCD_PutChar(x+l*8,y,*s,fColor,bColor);s++;l++;}else{PutGB1616(x+l*8,y,(unsigned char*)s,fColor,bColor);s+=2;l+=2;}}}*//*----------------------------------------------------------------显示RGB颜色输入参数:x0,y0 起始坐标x1,y1 结束坐标Color 背景颜色----------------------------------------------------------------*//*void Show_RGB (unsigned int x0,unsigned int x1,unsigned int y0,unsigned int y1,unsigned int Color){unsigned int i,j;LCD_SetPos(x0,x1,y0,y1);//坐标for (i=y0;i<=y1;i++) //有两个for{for (j=x0;j<=x1;j++)Write_Data_U16(Color);//写颜色}}*//*----------------------------------------------------------------显示图片图片必须是320x240,否则不能正确识别----------------------------------------------------------------*//*void show_photo(void){unsigned char j;unsigned int i;unsigned long s=0;LCD_SetPos(0,240,0,320);//320x240for (i=0;i<75;i++){for (j=0;j<240;j++)Write_Data(0xff,0xff);}for (i=0;i<170;i++){for (j=0;j<55;j++)Write_Data(0xff,0xff);for (j=0;j<130;j++)Write_Data(pic[s++],pic[s++]);for (j=0;j<55;j++)Write_Data(0xff,0xff);}for (i=0;i<75;i++){for (j=0;j<240;j++)Write_Data(0xff,0xff);}}*//*----------------------------------------------------------------写命令、写数据输入参数:x 需要输入的命令16位y 需要输入的数据16位----------------------------------------------------------------*/ void Write_Cmd_Data (unsigned char x,unsigned int y) {Write_Cmd(x);//八位的命令Write_Data_U16(y);}/*----------------------------------------------------------------写16位数据----------------------------------------------------------------*/void Write_Data_U16(unsigned int y){unsigned char m,n;m=y>>8;n=y;Write_Data(m,n);}/*------------------------------------------------------------------------------ 写16位命令---------------------------------------------------------------------------------*/ void Write_Cmd(unsigned int y){unsigned char m,n;m=y>>8;n=y;Write_Cmd1(m,n);}/*----------------------------------------------------------------写命令(双八位)----------------------------------------------------------------*/void Write_Cmd1(unsigned char DH,unsigned char DL){LCD_CS_CLR;LCD_RS_CLR;LCD_RD_SET;LCD_RW_CLR;WriteData(DH);LCD_RW_SET;LCD_CS_SET;LCD_CS_CLR;LCD_RS_CLR;LCD_RD_SET;LCD_RW_CLR;WriteData(DL);LCD_RW_SET;LCD_CS_SET;}/*----------------------------------------------------------------写数据双8位----------------------------------------------------------------*/void Write_Data(unsigned char DH,unsigned char DL){LCD_CS_CLR;LCD_RS_SET;LCD_RW_CLR;LCD_RD_SET;WriteData(DH);LCD_CS_CLR;LCD_RW_SET;LCD_CS_CLR;LCD_RS_SET;LCD_RW_CLR;LCD_RD_SET;WriteData(DL);LCD_RW_SET;LCD_CS_SET;}/*----------------------------------------------------------------延时函数----------------------------------------------------------------*/void delay_us(int time) //延时微秒级函数{do{time--;}while(time>1);}void delayms(uint time) //延时毫秒级函数{while(time!=0){delay_us(1000); time--;}}/*----------------------------------------------------------------液晶初始化----------------------------------------------------------------*/void ILI9325_Initial(void){LCD_RS_SET;LCD_RW_SET;LCD_CS_SET;LCD_RES_SET;delayms(1);LCD_RES_CLR;delayms(10);LCD_RES_SET;delayms(50);Write_Cmd_Data(0x00E5, 0x8000); // Set internal timingWrite_Cmd_Data(0x0000, 0x0001); // 启动振荡Write_Cmd_Data(0x002b, 0x0010); // Set internal timingWrite_Cmd_Data(0x0001,0x0100);Write_Cmd_Data(0x0002,0x0700);Write_Cmd_Data(0x0003,0x1030);Write_Cmd_Data(0x0004,0x0000);Write_Cmd_Data(0x0008,0x0207);Write_Cmd_Data(0x0009,0x0000);Write_Cmd_Data(0x000A,0x0000);Write_Cmd_Data(0x000C,0x0000);Write_Cmd_Data(0x000D,0x0000);Write_Cmd_Data(0x000F,0x0000);//power on sequence VGHVGLWrite_Cmd_Data(0x0010,0x0000);Write_Cmd_Data(0x0011,0x0007);Write_Cmd_Data(0x0012,0x0000);Write_Cmd_Data(0x0013,0x0000);//vghWrite_Cmd_Data(0x0010,0x1290);Write_Cmd_Data(0x0011,0x0227);delayms(100);//vregioutWrite_Cmd_Data(0x0012,0x001d); //0x001b delayms(100);//vom amplitudeWrite_Cmd_Data(0x0013,0x1500); delayms(100);//vom HWrite_Cmd_Data(0x0029,0x0018);Write_Cmd_Data(0x002B,0x000D);//gammaWrite_Cmd_Data(0x0030,0x0004);Write_Cmd_Data(0x0031,0x0307);Write_Cmd_Data(0x0032,0x0002);// 0006 Write_Cmd_Data(0x0035,0x0206);Write_Cmd_Data(0x0036,0x0408);Write_Cmd_Data(0x0037,0x0507);Write_Cmd_Data(0x0038,0x0204);//0200 Write_Cmd_Data(0x0039,0x0707);Write_Cmd_Data(0x003C,0x0405);// 0504 Write_Cmd_Data(0x003D,0x0F02);//ramWrite_Cmd_Data(0x0050,0x0000);Write_Cmd_Data(0x0051,0x00EF);Write_Cmd_Data(0x0052,0x0000);Write_Cmd_Data(0x0053,0x013F);Write_Cmd_Data(0x0060,0xA700);Write_Cmd_Data(0x0061,0x0001);Write_Cmd_Data(0x006A,0x0000);//Write_Cmd_Data(0x0080,0x0000);Write_Cmd_Data(0x0081,0x0000);Write_Cmd_Data(0x0082,0x0000);Write_Cmd_Data(0x0083,0x0000);Write_Cmd_Data(0x0084,0x0000);Write_Cmd_Data(0x0085,0x0000);//Write_Cmd_Data(0x0090,0x0010);Write_Cmd_Data(0x0092,0x0600);Write_Cmd_Data(0x0093,0x0003);Write_Cmd_Data(0x0095,0x0110);Write_Cmd_Data(0x0097,0x0000);Write_Cmd_Data(0x0098,0x0000);Write_Cmd_Data(0x0007,0x0133);Write_Cmd_Data(0x0000,0x0022);//}/*----------------------------------------------------------------画点输入参数:x,y 需要画点坐标color 点的颜色----------------------------------------------------------------*//*void Put_pixel(uchar x,uchar y,unsigned int color){LCD_SetPos(x,x,y,y);Write_Data_U16(color);}*//*----------------------------------------------------------------设置坐标----------------------------------------------------------------*/static void LCD_SetPos(unsigned int x0,unsigned int x1,unsigned int y0,unsigned int y1) {Write_Cmd_Data(WINDOW_XADDR_START,x0);Write_Cmd_Data(WINDOW_XADDR_END,x1);Write_Cmd_Data(WINDOW_Y ADDR_START,y0);Write_Cmd_Data(WINDOW_Y ADDR_END,y1);Write_Cmd_Data(GRAM_XADDR,x0);Write_Cmd_Data(GRAM_Y ADDR,y0);Write_Cmd (0x0022);//LCD_WriteCMD(GRAMWR);}/*----------------------------------------------------------------在屏幕上画线输入参数:起始坐标X0,Y0,终止坐标X1,Y1color 线颜色----------------------------------------------------------------*//*void Line( uchar X0,uchar Y0,uchar X1,uchar Y1,unsigned int color){int dx = X1 - X0;int dy = Y1 - Y0;int P = 2 * dy - dx;int dobDy = 2 * dy;int dobD = 2 * (dy - dx);int PointX = 0,PointY = 0;int incx = 0,incy = 0;int distance = 0,xerr = 0,yerr = 0;unsigned int i = 0;if(dx == 0) //k=1斜率为1{PointX = X0;if(Y0 < Y1){PointY = Y0;}else{PointY = Y1;}for(i = 0;i <= ((Y0<Y1) ? (Y1-Y0) : (Y0-Y1));i++) {Put_pixel(PointX,PointY,color);PointY++;}return;}if(dy == 0) //k=0斜率为0{PointY = Y0;if(X0 < X1){PointX = X0;}else{PointX = X1;}for(i = 0;i <= ((X0<X1) ? (X1-X0) : (X0-X1));i++) {Put_pixel(PointX,PointY,color);PointX++;}return;}if(dx > 0)incx = 1;else if(dx == 0)incx = 0;elseincx = -1;if(dy > 0)incy = 1;else if(dy == 0)incy = 0;elseincy = -1;dx = ((X0>X1) ? (X0-X1) : (X1-X0));dy = ((Y0>Y1) ? (Y0-Y1) : (Y1-Y0));if(dx>dy) distance=dx;else distance=dy;PointX = X0;PointY = Y0;for(i=0;i<=distance+1;i++){Put_pixel(PointX,PointY,color);xerr+=dx;yerr+=dy;if(xerr>distance){xerr-=distance;PointX+=incx;}if(yerr>distance){yerr-=distance;PointY+=incy;}}}*//*---------------------------------------------------------------------------绘制矩形框输入参数:矩形的起始位置left,top矩形的结束位置right,bottom矩形框的颜色color-----------------------------------------------------------------------------*/ /*void Rectangle( uchar left,uchar top,uchar right,uchar bottom,unsigned int color){Line(left,top,right,top,color);Line(left,top,left,bottom,color);Line(right,top,right,bottom,color);Line(left,bottom,right,bottom,color);}*//*---------------------------------------------------------------------------绘制平面矩形输入参数:矩形的起始位置left,top矩形的结束位置right,bottom矩形框的颜色color-----------------------------------------------------------------------------*/ /*void Bar( uchar left,uchar top,uchar right,uchar bottom,unsigned int color){uchar i = 0,k = 0;for(k = top;k < bottom;k++){for(i = left+1;i <= right;i++){LCD_SetPos(i,i,k,k);Write_Data_U16(color);}}}*//*---------------------------------------------------------------------------向LCD发送一个0--255的数值-----------------------------------------------------------------------------*/ /*void LCDShow_uCharNumber( uchar x,uchar y,uchar uCharNumber,unsigned int forecolor,unsigned int bkcolor){LCD_PutChar(x,y,uCharNumber/100+'0',forecolor,bkcolor);LCD_PutChar(x+8,y,uCharNumber/10%10+'0',forecolor,bkcolor);LCD_PutChar(x+16,y,uCharNumber%10+'0',forecolor,bkcolor); }*/。
FSMC工程 ILI9325驱动LCD
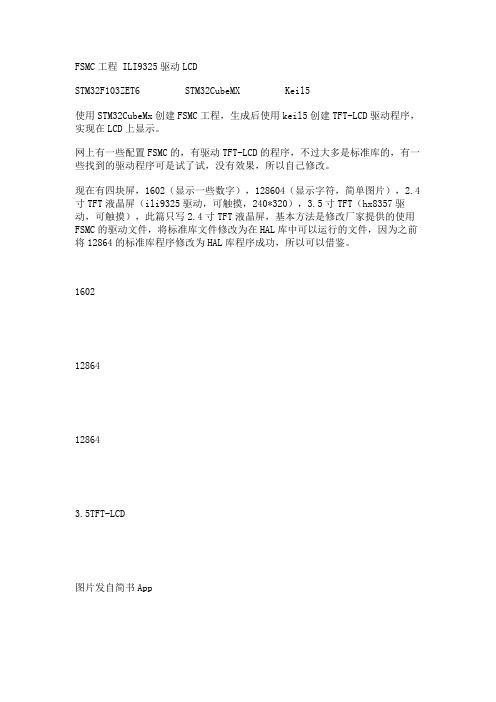
FSMC工程 ILI9325驱动LCDSTM32F103ZET6 STM32CubeMX Keil5使用STM32CubeMx创建FSMC工程,生成后使用keil5创建TFT-LCD驱动程序,实现在LCD上显示。
网上有一些配置FSMC的,有驱动TFT-LCD的程序,不过大多是标准库的,有一些找到的驱动程序可是试了试,没有效果,所以自己修改。
现在有四块屏,1602(显示一些数字),128604(显示字符,简单图片),2.4寸TFT液晶屏(ili9325驱动,可触摸,240*320),3.5寸TFT(hx8357驱动,可触摸),此篇只写2.4寸TFT液晶屏,基本方法是修改厂家提供的使用FSMC的驱动文件,将标准库文件修改为在HAL库中可以运行的文件,因为之前将12864的标准库程序修改为HAL库程序成功,所以可以借鉴。
160212864128643.5TFT-LCD图片发自简书App图片发自简书App图片发自简书App在网上使用STM32CubeMx配置FSMC的工程有一些,不过存在问题使用STM32CubeMx配置FSMC,GPIOFSMC介绍1. STM32CubeMx如何配置FSMC按照上一篇的方法创建一个工程后,在引脚设置页面的左侧有FSMC的配置,不过STM32CubeMx的版本不同,STM芯片的选择不同,FSMC配置选项也不同,FSMCFSMC(16位)主要配置的引脚为CS 液晶屏片选 NE4RS 即LCD Register Select PG0 (A10)WR 写信号 PD5RD 读信号 PD4以及16位数据总线,高八位和第八位不过液晶屏会有BL背光控制和RST复位引脚,需要在配置完FSMC后再添加两个输出引脚。
那么问题来了,FSMC配置中的内存类型怎么选,是选SRAM还是其他?我觉得选图中所示可以直接选择寄存器数据选择信号引脚为A10即PG0,这符合我的彩屏的实际情况,具体怎么选要先看一下自己彩屏正常工作时配置了那些引脚。
ILI9325_TFT驱动中文资料

ILI9325TFT驱动中文资料TFT9325驱动学习1、寄存器03HAM:控制GRAM更新方向的控制位AM=0:在水平方向更新地址AM=1:在垂直方向更新地址这个地方对AM的选择将直接影响img2lcd软件的扫描方式控制项,这一位就是控制扫描方式的。
I/D[1:0]:当更新显示区域的一个像素点的时候,控制AC是增加1还是减少1,具体参考下图I/D[1:0]的正确设置才能正确的显示图片,比如有时候发现显示出来的图片和输入img2lcd的图片方向是左右方向是反的,或者上下或者都是反的,那就是需要修改这个的地方了,可以根据上面的方向来选择合适的I/D.ORG:当一个窗口的地址区域确定以后,根据上面I/D的设置,来移动原始地址。
当高速写窗口地址域时,这个功能将被使能。
ORG=0:原始地址是不移动的。
这种情况下,是通过指定地址来启动写操作的,这个地址是根据窗口显示区域的GRAM的地址表。
ORG=1:原始地址是更加I/D的设置相应的移动的。
注意:1、当ORG=1的时候,设置R20H,R21H,的原始地址的时候,只能设置0x00002、在RAM读操作时,要保证ORG=0;BGR交换写数据中红和蓝BGR=0:根据RGB顺序写像素点的数据。
BGR=1:交换RGB数据为BGR,写入GRAMTRI:当TRI=1的时候,在8位数据模式下是以8bit*3传输的,也就是传输三个字节到内部的RAM,同样也支持16位数据的模式,和使用SPI模式显示26万色,也就是说当RTI=1的时候,传输的字节数基本上都是三个。
这一位在显示26万色的时候有用的,或者使用8位数据接口的时候,这个要看具体的应用来设置,但是注意如果不需要的时候,要设置为0.DFI:设置像内部RAM传输数据的的模式。
这一位是要和TRI联合起来使用的。
具体的参看下图。
2、寄存器R04寄存器图如下RSZ[1:0]:设置调整参数(RSZ的意思就是resizeing)当设置了RSZ后,ILI9325将会根据RSZ设置的参数来调整图片的大小,这个时候水平和垂直方向的区域都会改变。