NBU异机恢复_Oracle
NBU异机恢复Oracle操作步骤

NBU异机恢复Oracle操作步骤NBU 异机恢复Oracle操作步骤Hehuyi_In 于 2020-05-15 22:36:22 发布 1507 收藏 5分类专栏: Oracle 备份还原版权Oracle同时被 2 个专栏收录206 篇⽂章4 订阅订阅专栏备份还原31 篇⽂章0 订阅订阅专栏⼀、准备⼯作1. DBA恢复服务器安装与原库相同版本的数据库软件、NBU客户端双向开通到NBU备份服务器的1556、13724、13720、13782、13790端⼝的防⽕墙策略(应该只要1556和13724,但为避免还原时出现其他异常,建议都开)/etc/hosts⽂件添加NBU备份服务器主机名及原库主机名,ping 主机名测试能否解析成功确保恢复服务器磁盘空间⾜够2. NBU管理员/etc/hosts⽂件添加待恢复服务器主机名,ping 主机名测试能否解析成功,若不成功可使⽤bpclntcmd -clear_host_cache清除nbu端dns缓存配置恢复授权,确保备份机器和还原机器都在列表中,且允许还原Host Properties->Mater server->Client Attributes若是异机恢复,需在NBU给备份机器和恢复机器增加异机恢复的权限cd /usr/openv/netbackup/db/altnamestouch 主机名检查异机恢复参数NBUInstallPath/NetBackup/bin/admincmd/bpgetconfig | grep "DISALLOW_CLIENT"#输出DISALLOW_CLIENT_LIST_RESTORE = NODISALLOW_CLIENT_RESTORE = NO#若如上两个参数为YES,则表⽰禁⽌进⾏异机恢复,需要将两个参数改成NO,为保证参数⽣效,建议修改后重启主服务器上的NBU服务NBUInstallPath/NetBackup/bin/bp.kill_allNBUInstallPath/NetBackup/bin/bp.start_all⼆、数据恢复以下均在待恢复服务器操作1. 检查备份⽂件情况/usr/openv/netbackup/bin/bplist -C iZwz94g9fehswlnzd19jv2Z -t 4 -b -l -R /# -C后跟备份库主机名;-t后跟还原类型,4是oracle标志;-b指列出备份⽂件的⽇期和时间;-l指列出备份⽂件的详细信息;-R以递归的⽅式显⽰⼦⽬录。
63NBU备份系统恢复方案v1.1

NBU备份系统恢复方案v1.1X年7月25日目录一、文档信息 (5)1.1文档属性 (5)二、应急恢复预案体系的建立 (6)2.1信息系统突发事件的分级 (6)2.2应急预案启动流程 (7)2.3信息系统数据恢复处理流程规划 (9)2.3.1 数据灾难的一般性处理方法 (9)2.3.2 灾难恢复措施 (9)2.3.3 应用服务器故障处理流程 (10)2.3.4 服务器硬件故障处理流程 (11)三、恢复演练及数据验证工作内容 (12)3.1恢复演练工作内容 (12)3.1.1 数据恢复测试要求 (12)3.1.2 数据恢复抽检策略 (13)3.1.3 灾备演练要求........................................................................................................................................ 错误!未定义书签。
3.1.4 双机演练要求........................................................................................................................................ 错误!未定义书签。
3.2数据恢复工作内容 (13)3.2.1 数据恢复要求 (13)3.2.2 数据恢复记录表格 (13)四、恢复演练标准化 (15)4.1演练目的 (15)4.2环境介绍....................................................................................................................................................... 错误!未定义书签。
NBUoracle备份配置

NBUoracle备份配置1、建⽴连接[root@localhost ~]# su - oracle[oracle@localhost ~]$ cd /usr/openv/netbackup/bin[oracle@localhost bin]$ ./oracle_link2012年 08⽉ 25⽇星期六 09:43:28 CSTAll Oracle instances should be shutdown before running this script.Please log into the Unix system as the Oracle owner for running this scriptDo you want to continue? (y/n) [n] yLIBOBK path: /usr/openv/netbackup/binORACLE_HOME: /orcl/oracleOracle version: 10.2.0.1.0Platform type: i686Linking LIBOBK:ln -s /usr/openv/netbackup/bin/libobk.so /orcl/oracle/lib/libobk.soDonePlease check the trace file located in /tmp/make_trace.4459to make sure the linking process was successful.2、创建备份脚本[root@localhost ~]# mkdir -p /usr/openv/netbackup/script[root@localhost ~]# cd /usr/openv/netbackup/ext/db_ext/oracle/samples/rman[root@localhost rman]# lscold_database_backup.sh database_restore.sh hot_tablespace_backup.sh cold_duplex_database_backup_full.sh hot_database_backup.sh pit_database_restore.sh [root@localhost rman]# cp hot_database_backup.sh /usr/openv/netbackup/script/[root@localhost rman]# cd /usr/openv/netbackup/script/[root@localhost script]# lshot_database_backup.sh[root@localhost script]# mv hot_database_backup.sh rman.sh[root@localhost script]# chmod o+x rman.sh[root@localhost script]# vi rman.sh#!/bin/sh# $Header: hot_database_backup.sh,v 1.2 2002/08/06 23:51:42 $#bcpyrght#***************************************************************************#* $VRTScprght: Copyright 1993 - 2008 Symantec Corporation, All Rights Reserved $ * #***************************************************************************#ecpyrght## ---------------------------------------------------------------------------# hot_database_backup.sh# ---------------------------------------------------------------------------# This script uses Recovery Manager to take a hot (inconsistent) database# backup. A hot backup is inconsistent because portions of the database are# being modified and written to the disk while the backup is progressing.# You must run your database in ARCHIVELOG mode to make hot backups. It is# assumed that this script will be executed by user root. In order for RMAN# to work properly we switch user (su -) to the oracle dba account before# execution. If this script runs under a user account that has Oracle dba# privilege, it will be executed using this user's account.# ---------------------------------------------------------------------------# ---------------------------------------------------------------------------# Determine the user which is executing this script.# ---------------------------------------------------------------------------CUSER=`id |cut -d"(" -f2 | cut -d ")" -f1`# ---------------------------------------------------------------------------# Put output in <this file name>.out. Change as desired.# Note: output directory requires write permission.# ---------------------------------------------------------------------------RMAN_LOG_FILE=${0}.out# ---------------------------------------------------------------------------# You may want to delete the output file so that backup information does# not accumulate. If not, delete the following lines.# ---------------------------------------------------------------------------if [ -f "$RMAN_LOG_FILE" ]rm -f "$RMAN_LOG_FILE"fi# -----------------------------------------------------------------# Initialize the log file.# -----------------------------------------------------------------echo >> $RMAN_LOG_FILEchmod 666 $RMAN_LOG_FILE# ---------------------------------------------------------------------------# Log the start of this script.# ---------------------------------------------------------------------------echo Script $0 >> $RMAN_LOG_FILEecho ==== started on `date` ==== >> $RMAN_LOG_FILEecho >> $RMAN_LOG_FILE# ---------------------------------------------------------------------------# Replace /db/oracle/product/ora81, below, with the Oracle home path. # ---------------------------------------------------------------------------ORACLE_HOME=/u01/app/oracle/product/11.2.0/export ORACLE_HOMEOracle HOME⽬录,可通过env命令查出# ---------------------------------------------------------------------------# Replace ora81, below, with the Oracle SID of the target database. # ---------------------------------------------------------------------------ORACLE_SID=orclexport ORACLE_SIDOracle实例名# ---------------------------------------------------------------------------# Replace ora81, below, with the Oracle DBA user id (account).# ---------------------------------------------------------------------------ORACLE_USER=oracleOracle系统账户# ---------------------------------------------------------------------------# Set the target connect string.# Replace "sys/manager", below, with the target connect string.# ---------------------------------------------------------------------------TARGET_CONNECT_STR=sys/Qweasd123Sys⽤户及其密码# ---------------------------------------------------------------------------# Set the Oracle Recovery Manager name.# ---------------------------------------------------------------------------RMAN=$ORACLE_HOME/bin/rman# ---------------------------------------------------------------------------# Print out the value of the variables set by this script.# ---------------------------------------------------------------------------#中间代码不⽤更改,此处略CMD_STR="ORACLE_HOME=$ORACLE_HOMEexport ORACLE_HOMEORACLE_SID=$ORACLE_SIDexport ORACLE_SID$RMAN target $TARGET_CONNECT_STR nocatalog msglog $RMAN_LOG_FILE append << EOFRUN {ALLOCATE CHANNEL ch00 TYPE 'SBT_TAPE';ALLOCATE CHANNEL ch01 TYPE 'SBT_TAPE';echo send 'NB_ORA_POLICY=your_policy, NB_ORA_SERV=your_serverí';发送备份信息给相对应的备份策略,当每⼀台Oracle只有⼀个NBU备份策略时,次句可以不写BACKUP$BACKUP_TYPESKIP INACCESSIBLETAG hot_db_bk_level0FILESPERSET 5# recommended formatFORMAT 'bk_%s_%p_%t'DATABASE;sql 'alter system archive log current';RELEASE CHANNEL ch00;RELEASE CHANNEL ch01;# backup all archive logsALLOCATE CHANNEL ch00 TYPE 'SBT_TAPE';ALLOCATE CHANNEL ch01 TYPE 'SBT_TAPE';echo send 'NB_ORA_POLICY=your_policy, NB_ORA_SERV=your_serverí';发送备份信息给相对应的备份策略,当每⼀台Oracle只有⼀个NBU备份策略时,次句可以不写BACKUPfilesperset 20FORMAT 'al_%s_%p_%t'ARCHIVELOG ALL;RELEASE CHANNEL ch00;RELEASE CHANNEL ch01;ALLOCATE CHANNEL ch00 TYPE 'SBT_TAPE';DELETE NOPROMPT ARCHIVELOG ALL COMPLETED BEFORE 'SYSDATE-7'; RELEASE CHANNEL ch00;原脚本备份后直接删除归档⽇志,可以如上编写,删除7天前的归档⽇志## Note: During the process of backing up the database, RMAN also backs up the# control file. This version of the control file does not contain the# information about the current backup because "nocatalog" has been specified.# To include the information about the current backup, the control file should# be backed up as the last step of the RMAN section. This step would not be# necessary if we were using a recovery catalog.#ALLOCATE CHANNEL ch00 TYPE 'SBT_TAPE';BACKUP# recommended formatFORMAT 'cntrl_%s_%p_%t'CURRENT CONTROLFILE;RELEASE CHANNEL ch00;}EOF"# Initiate the command stringif [ "$CUSER" = "root" ]thensu - $ORACLE_USER -c "$CMD_STR" >> $RMAN_LOG_FILERSTAT=$?else/usr/bin/sh -c "$CMD_STR" >> $RMAN_LOG_FILERSTAT=$?fi# ---------------------------------------------------------------------------# Log the completion of this script.# ---------------------------------------------------------------------------if [ "$RSTAT" = "0" ]thenLOGMSG="ended successfully"elseLOGMSG="ended in error"fiecho >> $RMAN_LOG_FILEecho Script $0 >> $RMAN_LOG_FILEecho ==== $LOGMSG on `date` ==== >> $RMAN_LOG_FILEecho >> $RMAN_LOG_FILEexit $RSTAT3、创建备份策略3.1 选择策略类型和存储位置3.2 创建备份策略Frequency: 备份周期 Retention: 保留周期策略时间表,默认的Default-Application-Backup不要随意更改,⼀般只更改保留周期。
NBU异机恢复windows oracle11g

2) 查看归档日志是否开启
archive log list
这里显示归档日志未开启。
3) 开启归档日志
关闭数据库:shutdown immediate;
启动数据库为 mount 状态:startup mount;
开启归档模式:alter database archivelog;
打开数据库查询:alter database open; archive log list;
2) 登录 RMAN rman target / nocatalog;
3) 关闭数据库 shutdown immediate;
4) 启动数据库为 nomount 状态 startup nom需要和源端 wxf-wos 的 dbid 一样:1763780182) set dbid=1763780182;
NBU 异机恢复 oracle
1. 相关信息表 一、网络信息
名称 NBU Master Server Oracle 源客户端 Oracle 目标客户端 主机名 wxf-wns wxf-wos wxf-wog IP 172.16.202.204 172.16.202.205 172.16.202.206 操作系统 Windows server 2008 R2 standard Windows server 2008 R2 standard Windows server 2008 R2 standard
二、 查看源端(wxf-wos)一些相关信息
查看 SID:select name from v$database;
查看 dbid:select dbid from v$database;
三、 查看目标端(wxf-wog)一些相关信息
1) 查看 oracle 的 SID
NBU恢复测试
NBU恢复测试NBU裸机恢复RedHat 4.7,ORACLE 10G数据库备份恢复测试方案田方2011.5.28目录方案概述 (3)测试环境 (3)裸机恢复 (4)裸机恢复的定义及实现裸机恢复的定义 (4)裸机恢复的实现 (5)RedHat Linux 下Oracle 10g数据库数据备份恢复 (7)备份步骤: (7)恢复步骤 (9)方案概述服务器突发故障,如:主机物理损坏、系统盘物理损坏、操作系统不能启动等都可能整个业务系统长时间中止服务、数据库服务器数据丢失,无数的重要资料无法访问。
那么这时候,你就需要一个能快速解决相遇问题的方法,而Symantec NetBackup 7.0 (简称 NBU)将能为您提供一种快速而有效的解决方案。
对于系统故障,你可能通过使用是NBU其中一个非常重要的功能:裸机恢复(Bare Metal Restore 简称BMR来快速延续对用户提供业务功能和访问数据。
一但发生故障,你可以使用一张NBU预先生成的光盘引导系统启动,或者配置您的服务器从网络启动,这台坏掉的机器就可以和NBU的裸机恢复服务联系起来,引导系统启动,将备份过的数据拷贝到该机器,使之恢复到最新备份时候的状态,这个所耗的时间仅仅与用户本地的网络速度和恢复文件大小有关系,一般来说不会超过30分钟,您的机器就又可以正常使用了。
而且您还可以在BMR 配置中指定好了您操作系统所需要的系统补丁和一些重要的程序,NBU在恢复系统的时候,也会自动将这些系统补丁文件和重要程序安装到新的机器上,让您可以在最短的时间内,恢复系统到您需要的状态。
对于数据库数据的丢失,则您可以通过使用NBU的另一个功能:NBU for Oracle.测试环境主机用途主机名称/简称IP地址操作系统系统软件概况备注NBU备份服务器NBU-Server/Server192.168.0.2 REEL5.4Master serverMedia serverBMR serverBMR Boot server数据库服务器Orcl-client/Client192.168.0.13REEL4.7ORACLE 10G 数据库NBU For Oracle代理裸机恢复裸机恢复的定义及实现裸机恢复的定义裸机恢复(Bare Metal Restore 简称BMR),是NBU其中一个非常重要的功能,目的是提供给用户裸机恢复的功能。
Linux_oracle数据库的备份与恢复

Linux_oracle数据库的备份与恢复1 数据库备份和恢复(备份和恢复均已做成脚本自动运行,下列操作供参考,请不要在生产机上做测试) 1)数据库备份:◆将dbexp.parm,dbexp.sh 拷贝至/home/oracle/backup/.以oracle用户登录系统$ cd /home/oracle/backup$ dos2unix *$ chmod 755 dbexp.sh◆手工执行备份,用oracle用户登录:$ cd /home/oracle/backup$ ./dbexp.sh◆自动执行备份,用root用户登录:#crontab -e 00 01 * * * su - oracle -c "/home/oracle/backup/dbexp.sh"2)数据库恢复:以oracle用户登录系统◆删除用户:sqlplus /nolog>connect / as sysdba;>drop user center cascade;>create user center identified by center;>grant connect,resource,dba to center◆恢复数据库$imp center/center full=y grants=y INDEXES=y constraints=y LOG=/tmp/backup.log rows=y ignore=y file=xxx(xxx--为以前备份的数据文件,如checkid_20041123.dat)oracle数据库的备份与恢复原理及方法:导出(备份)exp 用户名/密码@服务名file=d:daochu.dmp (rows=no(导出空结构)) 导入(恢复)imp 用户名/密码@服务名file=d:daochu.dmp fromuser=原用户名touser=新用户名---- 当我们使用一个数据库时,总希望数据库的内容是可靠的、正确的,但由于计算机系统的故障(包括机器故障、介质故障、误操作等),数据库有时也可能遭到破坏,这时如何尽快恢复数据就成为当务之急。
oracle数据库还原的详细流程

oracle数据库还原的详细流程
Oracle数据库还原的详细流程如下:
1. 关闭Oracle数据库服务:在开始还原之前,需要确保Oracle数据库服务已经关闭。
这样可以避免在还原过程中发生数据冲突或损坏。
2. 确认数据库备份:在开始还原之前,需要确认数据库的备份情况。
数据库的备份可以分为完全备份和增量备份两种。
完全备份是指对整个数据库进行备份,而增量备份是在完全备份的基础上,对新增或修改的数据进行备份。
可以通过查看备份记录或者与负责备份的人员进行沟通来确认备份情况。
3. 选择合适的还原方式:根据备份文件的位置和可用资源,选择适合的还原方式。
例如,如果备份文件在本地磁盘上,可以选择磁盘还原;如果备份文件在云端,可以选择云存储还原。
4. 执行还原操作:根据选择的还原方式,执行相应的操作。
例如,在磁盘还原中,需要将备份文件复制到目标磁盘中。
在云存储还原中,需要将备份文件从云存储下载到本地或直接在云平台上进行还原。
5. 启动Oracle数据库服务:完成还原后,启动Oracle数据库服务,验证数据是否正确加载并可用。
请注意,以上步骤仅供参考,具体操作可能因实际情况而有所不同。
在进行数据库还原时,建议参考Oracle官方文档或咨询专业人士以获取更准确的信息和指导。
oracle备份如何到异机还原

oracle备份如何到异机还原作者:ocpyang情景描述:有朋友问,MSSQLSERVER将数据库备份还原到其它机器很方便,基本就是傻瓜式操作,oracle有控制文件、参数文件一堆东西,觉得还原很复杂;其实不然,我抽出了点时间,简单演示下案例,朋友们,参考下!为了简单快速,我才用RMAN备份和还原--说明:(1).RMAN备份到异机恢复的时候,db_name需要相同。
如果说要想改成其他的实例名,可以在恢复成功后,用nid命令修改。
实例名的信息会记录到控制文件里,所以如果在恢复的时候,如果实例名不一致,恢复的时候会报错。
(2).恢复的路径和源库不一致时,就需要在restore命令中使用set 命令指定新位置,并且使用switch datafile all将变更信息更新的到控制文件中。
测试环境:源数据库服务器A,安装在E,备份目录已在E盘;源数据库服务器B,安装在F盘.------------------------------------一、源数据库准备工作--------------------------------------1. 查询DBIDSQL> select name,dbid from v$database;NAME DBID--------- ----------ORCL 1320546556--2. 备份源数据DBrun {configure retention policy to recovery window of 14 days;configure controlfileautobackup on; --自动开启控制文件备份configure controlfileautobackup format for device type disk to'E:\backup\controlfile\bak_%F';allocate channel c1 device type disk format 'E:\backup\data\bak_%u'; allocate channel c2 device type disk format 'E:\backup\data\bak_%u'; sql 'alter system archive log current';backup incremental level=0 database skip inaccessibleplus archivelogfilesperset 20delete all input;release channel c1;release channel c2;}allocate channel for maintenance device type disk;crosscheck backupset;delete noprompt obsolete;--或run {configure retention policy to recovery window of 14 days;allocate channel c1 device type disk format 'E:\backup\data\bak_%u'; allocate channel c2 device type disk format 'E:\backup\data\bak_%u'; sql 'alter system archive log current';backup incremental level=0 database skip inaccessibleplus archivelogfilesperset 20delete all input;--手动直接指明备份文件名和路径backup current controlfile tag='bak_ctrollfile'format='E:\backup\controlfile\bak_ctl_file_%U_%T';backup spfile tag='bak_spfile' format='E:\backup\controlfile\bak_spfile_%U_%T'; release channel c1;release channel c2;}allocate channel for maintenance device type disk;crosscheck backupset;delete noprompt obsolete;--3.手动备份spfilecreatepfile='E:\backup\inittest.ora' from spfile;------------------------------------二、目标库准备工作:---------------------------------------步骤1. 创建口令文件--如果有就不需要新建.orapwd file=F:\app\Administrator\product\11.2.0\dbhome_1\database\PWDorcl.ora password=password--步骤2.恢复参数文件--方法1.源数据库spfile并拷贝到B数据库服务器\\192.168.2.25\e$\backup\inittest.ORA复制到E:\bk\inittest.ORA--步骤3.编辑参数文件中的文件路径如路径和原来一样,则不需修改eg:- *_DUMP_DEST- LOG_ARCHIVE_DEST*- CONTROL_FILES---实例:orcl.__db_cache_size=939524096orcl.__java_pool_size=16777216orcl.__large_pool_size=16777216orcl.__oracle_base='F:\app\Administrator'#修改路径orcl.__pga_aggregate_target=855638016orcl.__sga_target=2550136832orcl.__shared_io_pool_size=0orcl.__shared_pool_size=1526726656orcl.__streams_pool_size=16777216*.audit_file_dest='F:\app\Administrator\admin\orcl\adump' #修改路径*.audit_trail='db'*.compatible='11.2.0.0.0'#修改路径*.control_files='F:\app\Administrator\oradata\orcl\control01.ctl','F:\app\Administrator\orada ta\orcl\control02.ctl','F:\app\Administrator\oradata\orcl\control03.ctl'*.db_block_size=8192*.db_domain=''*.db_name='orcl'*.db_recovery_file_dest='F:\arch' #修改路径*.db_recovery_file_dest_size=6442450944*.diagnostic_dest='F:\app\Administrator' #修改路径*.dispatchers='(PROTOCOL=TCP) (SERVICE=orclXDB)'*.log_archive_dest_1='location=f:\arch' #修改路径*.nls_date_format='yyyy-mm-ddhh:mi:ss'*.open_cursors=300*.optimizer_capture_sql_plan_baselines=TRUE*.pga_aggregate_target=845152256*.processes=150*.remote_login_passwordfile='EXCLUSIVE'*.sga_target=2536505344*.skip_unusable_indexes=TRUE*.undo_tablespace='UNDOTBS1'--步骤4.重启实例,使用已编辑好的参数文件将用pfile将B数据库服务器启动到nomout状态rman target /startupnomountpfile='e:\bk\inittest.ora'--步骤5.恢复控制文件,装载数据库rman target /setdbid 1320546556restorecontrolfile from 'e:\bk\controlfile\BAK_CTL_FILE_6LO6SON4_1_1_20130412';启动restore 于2013-04-11 13:58:58使用目标数据库控制文件替代恢复目录分配的通道: ORA_DISK_1通道ORA_DISK_1: SID=129 设备类型=DISK通道ORA_DISK_1: 正在还原控制文件通道ORA_DISK_1: 还原完成, 用时: 00:00:01输出文件名=F:\APP\ADMINISTRATOR\ORADATA\ORCL\CONTROL01.CTL输出文件名=F:\APP\ADMINISTRATOR\ORADATA\ORCL\CONTROL02.CTL输出文件名=F:\APP\ADMINISTRATOR\ORADATA\ORCL\CONTROL03.CTL完成restore 于2013-04-11 13:59:00--步骤6.将DB启动到mout状态alter database mount;数据库已装载释放的通道: ORA_DISK_1--加载备份目录CATALOG START WITH 'E:\bk';搜索与样式E:\bk 匹配的所有文件数据库未知文件的列表====================================文件名: E:\bk\controlfile\BAK_C-1320546556-20130411-03文件名: E:\bk\controlfile\BAK_CTL_FILE_65O6QILO_1_1_20130411 文件名: E:\bk\controlfile\BAK_SPFILE_66O6QILQ_1_1_20130411文件名: E:\bk\data\BAK_60O6QIGV文件名: E:\bk\data\BAK_61O6QIGV文件名: E:\bk\data\BAK_62O6QIH1文件名: E:\bk\data\BAK_63O6QIH1文件名: E:\bk\data\BAK_64O6QILM是否确实要将上述文件列入目录(输入YES 或NO)? yes正在编制文件目录...目录编制完毕已列入目录的文件的列表======================文件名: E:\bk\controlfile\BAK_C-1320546556-20130411-03文件名: E:\bk\controlfile\BAK_CTL_FILE_65O6QILO_1_1_20130411 文件名: E:\bk\controlfile\BAK_SPFILE_66O6QILQ_1_1_20130411文件名: E:\bk\data\BAK_60O6QIGV文件名: E:\bk\data\BAK_61O6QIGV文件名: E:\bk\data\BAK_62O6QIH1文件名: E:\bk\data\BAK_63O6QIH1文件名: E:\bk\data\BAK_64O6QILM--步骤7.restore 数据库7.1 恢复目录不同的情况:到Target 库查询一下:SQL> select trim(file_id),trim(file_name) from dba_data_files ORDER BY FILE_ID ASC;1 E:\APP\ADMINISTRATOR\ORADATA\ORCL\SYSTEM01.DBF2 E:\APP\ADMINISTRATOR\ORADATA\ORCL\SYSAUX01.DBF3 E:\APP\ADMINISTRATOR\ORADATA\ORCL\UNDOTBS01.DBF4 E:\APP\ADMINISTRATOR\ORADATA\ORCL\USERS01.DBF6 E:\APP\ADMINISTRATOR\ORADATA\ORCL\VPAY02.DBF7 E:\APP\ADMINISTRATOR\ORADATA\ORCL\VPAY03.DBF8 E:\APP\ADMINISTRATOR\ORADATA\ORCL\VPAY04.DBF9 E:\APP\ADMINISTRATOR\ORADATA\ORCL\VPAY05.DBF11 E:\APP\ADMINISTRATOR\ORADATA\ORCL\VPAY06.DBF12 E:\APP\ADMINISTRATOR\ORADATA\ORCL\VPAY07.DBF13 E:\APP\ADMINISTRATOR\ORADATA\ORCL\VPAY08.DBF14 E:\APP\ADMINISTRATOR\ORADATA\ORCL\VPAY09.DBF15 E:\APP\ADMINISTRATOR\ORADATA\ORCL\VPAY10.DBF16 E:\APP\ADMINISTRATOR\ORADATA\ORCL\VPAY01.DBF17 E:\APP\ADMINISTRATOR\ORADATA\ORCL\VPAY11.DBF18 E:\APP\ADMINISTRATOR\ORADATA\ORCL\VPAY12.DBF19 E:\APP\ADMINISTRATOR\ORADATA\ORCL\VPAY13.DBF20 E:\APP\ADMINISTRATOR\ORADATA\ORCL\VPAY14.DBF21 E:\APP\ADMINISTRATOR\ORADATA\ORCL\VPAY15.DBF22 E:\APP\ADMINISTRATOR\ORADATA\ORCL\VPAY16.DBF23 E:\APP\ADMINISTRATOR\ORADATA\ORCL\VPAY17.DBF24 E:\APP\ADMINISTRATOR\ORADATA\ORCL\VPAY18.DBF25 E:\APP\ADMINISTRATOR\ORADATA\ORCL\VPAY19.DBF26 E:\APP\ADMINISTRATOR\ORADATA\ORCL\VPAY20.DBFSQL>select trim(file_id),trim(file_name) from dba_temp_files;1 E:\APP\ADMINISTRATOR\ORADATA\ORCL\TEMP01.DBFselect 'SET NEWNAME FOR DATAFILE'|| ' '||file_id||' '||'TO'|| ' '||''''||trim(file_name)||'''' ||';' from dba_data_files ORDER BY FILE_ID ASC;---如下实例:RUN{# rename the datafilesSET NEWNAME FOR DATAFILE 1 TO'F:\APP\ADMINISTRATOR\ORADATA\ORCL\SYSTEM01.DBF'; SET NEWNAME FOR DATAFILE 2 TO'F:\APP\ADMINISTRATOR\ORADATA\ORCL\SYSAUX01.DBF'; SET NEWNAME FOR DATAFILE 3 TO'F:\APP\ADMINISTRATOR\ORADATA\ORCL\UNDOTBS01.DBF'; SET NEWNAME FOR DATAFILE 4 TO'F:\APP\ADMINISTRATOR\ORADATA\ORCL\USERS01.DBF'; SET NEWNAME FOR DATAFILE 6 TO'F:\APP\ADMINISTRATOR\ORADATA\ORCL\VPAY02.DBF'; SET NEWNAME FOR DATAFILE 7 TO'F:\APP\ADMINISTRATOR\ORADATA\ORCL\VPAY03.DBF'; SET NEWNAME FOR DATAFILE 8 TO'F:\APP\ADMINISTRATOR\ORADATA\ORCL\VPAY04.DBF'; SET NEWNAME FOR DATAFILE 9 TO'F:\APP\ADMINISTRATOR\ORADATA\ORCL\VPAY05.DBF'; SET NEWNAME FOR DATAFILE 11 TO'F:\APP\ADMINISTRATOR\ORADATA\ORCL\VPAY06.DBF'; SET NEWNAME FOR DATAFILE 12 TO'F:\APP\ADMINISTRATOR\ORADATA\ORCL\VPAY07.DBF'; SET NEWNAME FOR DATAFILE 13 TO'F:\APP\ADMINISTRATOR\ORADATA\ORCL\VPAY08.DBF'; SET NEWNAME FOR DATAFILE 14 TO'F:\APP\ADMINISTRATOR\ORADATA\ORCL\VPAY09.DBF'; SET NEWNAME FOR DATAFILE 15 TO'F:\APP\ADMINISTRATOR\ORADATA\ORCL\VPAY10.DBF'; SET NEWNAME FOR DATAFILE 16 TO'F:\APP\ADMINISTRATOR\ORADATA\ORCL\VPAY01.DBF'; SET NEWNAME FOR DATAFILE 17 TO'F:\APP\ADMINISTRATOR\ORADATA\ORCL\VPAY11.DBF';SET NEWNAME FOR DATAFILE 18 TO'F:\APP\ADMINISTRATOR\ORADATA\ORCL\VPAY12.DBF';SET NEWNAME FOR DATAFILE 19 TO'F:\APP\ADMINISTRATOR\ORADATA\ORCL\VPAY13.DBF';SET NEWNAME FOR DATAFILE 20 TO'F:\APP\ADMINISTRATOR\ORADATA\ORCL\VPAY14.DBF';SET NEWNAME FOR DATAFILE 21 TO'F:\APP\ADMINISTRATOR\ORADATA\ORCL\VPAY15.DBF';SET NEWNAME FOR DATAFILE 22 TO'F:\APP\ADMINISTRATOR\ORADATA\ORCL\VPAY16.DBF';SET NEWNAME FOR DATAFILE 23 TO'F:\APP\ADMINISTRATOR\ORADATA\ORCL\VPAY17.DBF';SET NEWNAME FOR DATAFILE 24 TO'F:\APP\ADMINISTRATOR\ORADATA\ORCL\VPAY18.DBF';SET NEWNAME FOR DATAFILE 25 TO'F:\APP\ADMINISTRATOR\ORADATA\ORCL\VPAY19.DBF';SET NEWNAME FOR DATAFILE 26 TO'F:\APP\ADMINISTRATOR\ORADATA\ORCL\VPAY20.DBF';SQL "ALTER DATABASE RENAME FILE''E:\app\Administrator\oradata\orcl\REDO01.LOG''TO ''F:\app\Administrator\oradata\orcl\REDO01.LOG'' ";SQL "ALTER DATABASE RENAME FILE''E:\app\Administrator\oradata\orcl\REDO02.LOG''TO ''F:\app\Administrator\oradata\orcl\REDO02.LOG'' ";SQL "ALTER DATABASE RENAME FILE''E:\app\Administrator\oradata\orcl\REDO03.LOG''TO ''F:\app\Administrator\oradata\orcl\REDO03.LOG'' ";RESTORE DATABASE;SWITCH DATAFILE ALL;}对switch datafile all的说明:--对于nocatalog模式下,rman备份的信息是保存在控制文件里的,包括文件的路径信息。
NBU oracle rac 异机恢复到单机(11G)
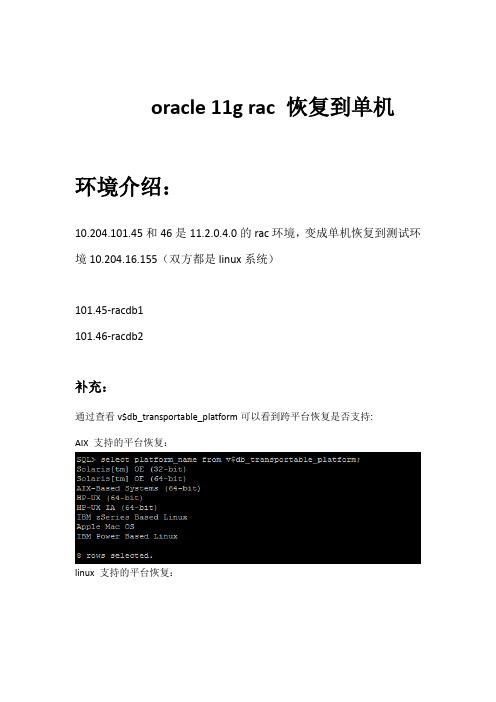
oracle 11g rac 恢复到单机环境介绍:10.204.101.45和46是11.2.0.4.0的rac环境,变成单机恢复到测试环境10.204.16.155(双方都是linux系统)101.45-racdb1101.46-racdb2补充:通过查看v$db_transportable_platform可以看到跨平台恢复是否支持:AIX 支持的平台恢复:linux 支持的平台恢复:一、16.155环境准备1、安装数据库软件2、安装nbu:二、恢复1、新建参数文件:到101.45上面把参数文件down下来修改下,修改后内容如下:cd $ORACLE_HOME/dbs/vi initracdb.oraracdb.__db_cache_size=369098752racdb.__java_pool_size=16777216racdb.__large_pool_size=33554432racdb.__oracle_base='/oracle/app/oracle'racdb.__pga_aggregate_target=553648128racdb.__sga_target=1056964608racdb.__shared_io_pool_size=0racdb.__shared_pool_size=620756992racdb.__streams_pool_size=0*.audit_file_dest='/oracle/app/admin/racdb/adump'*.audit_trail='FALSE'#*.cluster_database=true //单机去掉*.compatible='11.2.0.4.0'*.control_files='/oracle/app/oradata/racdb/ctl01.ctl'*.db_block_size=8192*.db_create_file_dest='/oracle/app'*.db_domain=''*.db_name='racdb'*.diagnostic_dest='/oracle/app'*.dispatchers='(PROTOCOL=TCP) (SERVICE=racdbXDB)'racdb.instance_number=1racdb.log_archive_dest_1='LOCATION=/oracle/arch'*.memory_target=1606418432*.open_cursors=300*.processes=500*.remote_login_passwordfile='exclusive'*.sessions=555racdb.thread=1racdb.undo_tablespace='UNDOTBS1'注意事项:1>把racdb2的删除掉,把racdb1替换成racdb2>把涉及到路径的替换成实际环境的,有些目录得手工创建。
使用NBU备份集恢复数据库(单机-RAC)

一、配置环境介绍新搭建了一套RAC环境(没有安装实例),文档中称作目标端,配置信息如下:Oracle版本:11.2.0.4SID :RAC1、RAC2此次恢复实验取总部OA(10.0.1.128)生产库备份数据,OA在文档中称作源端二、在新环境安装NBU客户端具体方法参考《01-隆基硅NBU实施文档.docx》1.执行oracle_link在client上的oracle账户下,执行oracle_link,将NBU与Oracle的tape库进行链接$ /usr/openv/netbackup/bin/oracle_link2.查看备份集在需要恢复的client上,利用bplist检查oracle以往备份的备份集[root@rac1 ~]# cd /usr/openv/netbackup/bin/[root@ bin]# ./bplist -C (源端主机名) -t 4 -R -l /./bplist -C -t 4 -R -l /3.修改用户属组查看目标端的Oracle用户属组ID是否与源端一致,如果不一致,需要修改(只需要用户一致,组不影响)groupmod -g 601 dbausermod -u 1002 oracle查找并修改文件(1001为Oracle用户原来的uid,602为文件原来的gid)。
RAC环境慎用,有部分软链接修改不了find /u01 -user 1001find / -user 1001 -exec chown oracle {} \;find / -group 602 -exec chgrp dba {} \;relink all三、在源端创建pfile文件SQL> create pfile='/tmp/ekp_init.ora' from spfile;修改目标端两个节点的Oracle环境变量四、创建必要的目录1. 修改导出来的pfile文件,创建必要目录(所有节点执行)[oracle@rac1 ~]$ mkdir -p /u01/app/oracle/admin/EKP/adump2.使用grid用户下在共享设备创建必要的目录[grid@rac1 ~]$ asmcmdASMCMD> lsARCH/DATA/OCR/ASMCMD> cd DATAASMCMD> mkdir EKPASMCMD> cd EKPASMCMD> mkdir TEMPFILEASMCMD> mkdir DATAFILEASMCMD> mkdir ONLINELOGASMCMD> mkdir PARAMETERFILEASMCMD> mkdir controlfile五、创建口令文件[oracle@rac1~]$ orapwd file=$ORACLE_HOME/dbs/orapw$ORACLE_SID password=oracle force=y[oracle@rac2~]$ orapwd file=$ORACLE_HOME/dbs/orapw$ORACLE_SID password=oracle force=y六、用源端 pfile 创建目标端数据库 spfile1.根据实际内存调整pfile文件注意adump路径,dbname,增加instance_number,undo参数,控制文件2.在目标端用 pfile.ora 在共享设备上创建spfileSQL> create spfile='+DATA/TMSPROD/spfileTMSPROD.ora' from pfile='/tmp/tms_pfile.ora';3.在所有节点上创建 pfile 内容指向共享设备上的spfile文件Vi /u01/app/oracle/product/11.2.0/db_1/dbs/initTMSPROD1.ora SPFILE='+DATA/TMSPROD/spfileTMSPROD.ora'七、还原控制文件1.启动数据库到nomountSQL> startup nomount pfile = '/tmp/ekp_init.ora';2.恢复控制文件,启动到mountrun{allocate channel c1 TYPE SBT_TAPE;SEND 'NB_ORA_SERV=LONGI-XA-NBU,NB_ORA_CLIENT=ekp-db2';restore controlfile from '/c-3745138837-20180806-02';release channel c1;}启动数据库到mount状态RMAN> alter database mount;八、还原数据文件1.set newnameset linesize 1000set pagesize 10002.还原run{allocate channel c1 type SBT_TAPE;allocate channel c2 type SBT_TAPE;allocate channel c3 type SBT_TAPE;allocate channel c4 type SBT_TAPE;set newname for datafile ... ...send 'NB_ORA_SERV=LONGI-XA-NBU,NB_ORA_CLIENT=ekp-db2';restore database;switch datafile all;recover database;release channel c1;release channel c2;release channel c3;release channel c4;}九、打开数据库SQL> alter database open resetlogs;删除dblink(根据实际情况选做)SQL> set lines 160set pagesize 500col db_link for a70select owner,db_link from dba_db_links ;select 'drop public database link '|| db_link|| ';' from dba_db_links where owner = 'PUBLIC';二、调整redo,undo1.redo1,删除还原的redo信息alter database drop logfile group #;2,增加新的redoalter database add logfile thread 1 group 1 '+DATA' size 50m;alter database add logfile thread 1 group 2 '+DATA' size50m;alter database add logfile thread 1 group 3 '+DATA' size50m;alter database add logfile thread 2 group 4 '+DATA' size50m;alter database add logfile thread 2 group 5 '+DATA' size50m;alter database add logfile thread 2 group 6 '+DATA' size50m;使新添加的redo生效SQL> alter database enable THREAD 2;3,查看redo信息select a.group#,a.THREAD#,a.status,b.member from v$log a,v$logfile b where a.group#=b.group#;2.undo1,增加undo表空间create undo tablespace UNDOTBS2 datafile '+DATA' size 500M autoextend on next 1g maxsize 10G;2,查看增加参数文件中undo_tablespace参数如果不需要修改数据库名称,则下面步骤可省略,直接检查修改参数文件中rac相关参数,然后修改环境变量,注册数据库信息十、调整数据库其他信息1.关闭数据库所有实例关闭实例检查参数文件,设置*.cluster_database=false然后把其中一个实例启动到mount状态下SQL> startup mount pfile ='/tmp/mes_pfile.ora'2.使用nid修改数据库名称nid target=system/oracle dbname=RAC3.修改参数文件修改环境变量实例名称和参数文件名称, cluster_database等SQL> startup mount pfile = '/tmp/ekp_init.ora';SQL> alter database open resetlogs;SQL> create spfile='+DATA' from pfile='/tmp/ekp_init.ora';修改pfile内容$ORACLE_HOME/dbs/initEKP1.ora然后修改其他节点的数据库的环境变量,参数文件,然后启动数据库SQL> alter database enable thread 2;SQL> alter system set cluster_database=true scope=spfile sid='*';4.修改TEMP表空间清除并建立tempfileselect TABLESPACE_NAME,FILE_NAME,status from dba_temp_files;select 'alter database tempfile '''||name||''' offline;' from v$tempfile;select 'alter database tempfile '''||name||''' drop;' from v$tempfile;alter tablespace TEMP_NAME add tempfile '+DATA' size 2G reuse autoextend on next 128m maxsize 30g;十一、将其他的信息注册到CRS里关闭所有节点数据库SQL> shutdown immediate[oracle@rac1 ~]$ srvctl add database -d EKP -o $ORACLE_HOME -p +data/ekp/PARAMETERFILE/spfile.3375.983445137[oracle@rac1 ~]$ srvctl add instance -d EKP -i EKP1 -n rac1[oracle@rac1 ~]$ srvctl add instance -d EKP -i EKP2 -n rac2[oracle@rac1 ~]$ srvctl start database -d EKP -o open十二、验证1.查看数据库启动情况[oracle@rac1 ~]$ srvctl status database -d EKP2.数据库配置信息[oracle@rac1 ~]$ srvctl config database -d EKP3.集群配置信息[grid@rac1 ~]$ crsctl stat res -t。
NBU恢复手册V1.0

NBU集中备份系统恢复手册文档信息文档修订记录---------------------- 着县vizmf-------- ----- ----------------------目录1. 文档说明 (4)2. 文件或文件系统恢复 (4)3.0racle数据库恢复 (7)3.1准备环境描述 (7)3.2恢复测试步骤 (9)3.2.1检查备份信息 (9)3.2.2建立口令文件 (9)3.2.3 恢复控制文件 (9)3.2.4恢复数据文件 (15)3.2.5 恢复归档日志 (17)3.2.6 Recover 数据库 (17)3.2.7尝试打开数据库 (18)3.2.8重建临时表空间 (18)4.SQL Server 恢复 (18)⑧I U M ] hJU|l|W4|rtH1.文档说明本文档描述NBU 集中备份系统的文件系统和 Oracle 数据库的恢复步骤,可作为备份系统管理员做恢复时的指导性文档。
2.文件或文件系统恢复打开 Netbackup java con sole ,点击左侧树形下拉表中的"Backup,Archive and Restore ”| hMln 1 ?7 i.>l[ Villiqjj...... i - in乌 SyvunlEE HrE&Achujp 111flit £«rL L'rtk^i jfWlil4- S3 B]魅蛋ihlhn. arvI faitK. gm* Tisk iRi»fn-SS i 骨壬中"1_£ rri iPlij-rl-Rri rlwr^rwY R^rHiip Fiile-s RprLdri!1Miwarfl.liiwc lilihn-hr mi-FiF«>y 点击窗口中的 Actio ns -> Specify Netbackup Machi nes and Policy Type选择备份数据的查找日期,或者从菜单中选择 Action-> “Set Data Range ”下的Calender 或者Backup History 。
NBU-Oracle备份恢复配置手册

NBU-Oracle备份恢复配置手册NBU ORACLE备份恢复配置手册Version 1.0Contents1安装前准备 ............................................................... 错误!未定义书签。
2安装配置NBU Oracle agent软件 (4)3创建Oracle备份脚本 (11)4配置备份Policy (25)5如何手工立即发起备份 (34)6Oracle恢复 (40)12安装配置NBU Oracle agent软件root@QC_P550_731:/mnt/install/NB_65_UOptions_20070723/vDBA>./install **********There are two ways to install database agent software.1. Remote Installation: Loads the software on a server withthe intent of pushing database software out to affected clients.2. Local Installation: Loads and installs the software only to thislocal machine.**********Do you want to do a local installation? [y,n] (n) y**********NetBackup Database Agent InstallationChoose the Database Agents you wish to installone at a time or select Install All Database Agents.1) NetBackup for DB22) NetBackup for Informix3) NetBackup for Lotus Notes4) NetBackup for Oracle5) NetBackup for SAP6) NetBackup for Sybase7) Install All Database Agentsq) Done Selecting Agentsx) Exit from this ScriptChoose an option: 4Choose an option: qYou have chosen to install these Database Agents:NetBackup for OracleIs this list correct? [y,n] (y)**********Of the agents selected, the following are supportedon this platform and will be installed:OracleNOTE: A license key for each of these selected agentswill be required on the master server in order for theagent to function properly.Loading the Database Agent packages into the/usr/openv/netbackup/dbext directory and installing.**********Installing NetBackup for OracleInstalling NetBackup for Oracle...Extracting files from /usr/openv/netbackup/dbext/OEBU.rs6000_51.tar.Z ... x usr/openv/netbackupx usr/openv/netbackup/binx usr/openv/netbackup/bin/bpubsora, 137444 bytes, 269 tape blocksx usr/openv/netbackup/bin/bpdbsbora, 128302 bytes, 251 tape blocksx usr/openv/netbackup/bin/libobk.a, 108793 bytes, 213 tape blocksx usr/openv/netbackup/bin/oracle_link, 32260 bytes, 64 tape blocksx usr/openv/netbackup/bin/bporaexp, 150370 bytes, 294 tape blocksx usr/openv/netbackup/bin/bporaimp, 162223 bytes, 317 tape blocksx usr/openv/netbackup/bin/libobk.a64, 117484 bytes, 230 tape blocksx usr/openv/netbackup/bin/bporaexp64, 164480 bytes, 322 tape blocksx usr/openv/netbackup/bin/bporaimp64, 177322 bytes, 347 tape blocksx usr/openv/netbackup/dbextx usr/openv/netbackup/dbext/OEBU.rs6000_51.version, 24 bytes, 1 tape blocksx usr/openv/netbackup/extx usr/openv/netbackup/ext/db_extx usr/openv/netbackup/ext/db_ext/oraclex usr/openv/netbackup/ext/db_ext/oracle/samplesx usr/openv/netbackup/ext/db_ext/oracle/samples/rmanx usr/openv/netbackup/ext/db_ext/oracle/samples/rman/cold_database_backup.sh, 11875 bytes, 24 tape blocksxusr/openv/netbackup/ext/db_ext/oracle/samples/rman/cold_duplex_database_backup_full .sh, 12789 bytes, 25 tape blocksx usr/openv/netbackup/ext/db_ext/oracle/samples/rman/database_restore.sh, 7155 bytes, 14 tape blocksx usr/openv/netbackup/ext/db_ext/oracle/samples/rman/hot_database_backup.sh, 11538 bytes, 23 tape blocksx usr/openv/netbackup/ext/db_ext/oracle/samples/rman/hot_tablespace_backup.sh, 11154 bytes, 22 tape blocksx usr/openv/netbackup/ext/db_ext/oracle/samples/rman/pit_database_restore.sh, 10307 bytes, 21 tape blocksx usr/openv/netbackup/ext/db_ext/oracle/samples/rman/hot_database_backup_proxy.sh, 9983 bytes, 20 tape blocksxusr/openv/netbackup/ext/db_ext/oracle/samples/rman/hot_tablespace_backup_proxy.sh, 8575 bytes, 17 tape blocksx usr/openv/netbackup/ext/db_ext/oracle/samples/bpend_notify.oracle_bli.sh, 27764 bytes, 55 tape blocksx usr/openv/netbackup/ext/db_ext/oracle/samples/bpstart_notify.oracle_bli.sh, 31867 bytes, 63 tape blocksx usr/openv/netbackup/ext/db_ext/oracle/samples/post_checkpoint_notify.oracle_bli.sh, 21844 bytes, 43 tape blocksx usr/openv/netbackup/ext/db_ext/oracle/samples/bporaexpx usr/openv/netbackup/ext/db_ext/oracle/samples/bporaexp/data_archiver_export.sh, 5124 bytes, 11 tape blocksx usr/openv/netbackup/ext/db_ext/oracle/samples/bporaexp/data_archiver_export64.sh, 5130 bytes, 11 tape blocksx usr/openv/netbackup/ext/db_ext/oracle/samples/bporaexp/bporaexp_help.param, 733x usr/openv/netbackup/ext/db_ext/oracle/samples/bporaexp/bporaexp_partitions.param, 1605 bytes, 4 tape blocksxusr/openv/netbackup/ext/db_ext/oracle/samples/bporaexp/bporaexp_table_to_files.param, 1652 bytes, 4 tape blocksx usr/openv/netbackup/ext/db_ext/oracle/samples/bporaexp/bporaexp_tables.param, 1669 bytes, 4 tape blocksxusr/openv/netbackup/ext/db_ext/oracle/samples/bporaexp/bporaexp_tables_rows.param, 1868 bytes, 4 tape blocksx usr/openv/netbackup/ext/db_ext/oracle/samples/bporaimpx usr/openv/netbackup/ext/db_ext/oracle/samples/bporaimp/data_archiver_import.sh, 5044 bytes, 10 tape blocksx usr/openv/netbackup/ext/db_ext/oracle/samples/bporaimp/data_archiver_import64.sh, 5050 bytes, 10 tape blocksx usr/openv/netbackup/ext/db_ext/oracle/samples/bporaimp/bporaimp_archive.param, 1242 bytes, 3 tape blocksxusr/openv/netbackup/ext/db_ext/oracle/samples/bporaimp/bporaimp_archive_schema_to_ files.param, 1317 bytes, 3 tape blocksxusr/openv/netbackup/ext/db_ext/oracle/samples/bporaimp/bporaimp_archive_to_users.pa ram, 1510 bytes, 3 tape blocksx usr/openv/netbackup/ext/db_ext/oracle/samples/bporaimp/bporaimp_bfile_table.param, 1604 bytes, 4 tape blocksx usr/openv/netbackup/ext/db_ext/oracle/samples/bporaimp/bporaimp_help.param, 733 bytes, 2 tape blocksxusr/openv/netbackup/ext/db_ext/oracle/samples/bporaimp/bporaimp_ignore_rows_table.p aram, 1530 bytes, 3 tape blocksx usr/openv/netbackup/ext/db_ext/oracle/samples/bporaimp/bporaimp_large_table.param, 1542 bytes, 4 tape blocksx usr/openv/netbackup/ext/db_ext/oracle/samples/bporaimp/bporaimp_list.param, 1594 bytes, 4 tape blocksxusr/openv/netbackup/ext/db_ext/oracle/samples/bporaimp/bporaimp_old_archive.param, 1556 bytes, 4 tape blocksx usr/openv/netbackup/ext/db_ext/oracle/samples/bporaimp/bporaimp_partitions.param, 1513 bytes, 3 tape blocksxusr/openv/netbackup/ext/db_ext/oracle/samples/bporaimp/bporaimp_table_from_files.par am, 1370 bytes, 3 tape blocksxusr/openv/netbackup/ext/db_ext/oracle/samples/bporaimp/bporaimp_table_to_files.param , 1301 bytes, 3 tape blocksxusr/openv/netbackup/ext/db_ext/oracle/samples/bporaimp/bporaimp_table_to_user.param , 1656 bytes, 4 tape blocksx usr/openv/netbackup/ext/db_ext/oracle/samples/bporaimp/bporaimp_tables.param, 1289x usr/openv/netbackup/ext/db_ext/oracle/binx usr/openv/netbackup/ext/db_ext/oracle/bin/setup_bli_scripts, 18091 bytes, 36 tape blocksx usr/openv/libx usr/openv/lib/libdbsbrman.so, 2029485 bytes, 3964 tape blocksx usr/openv/lib/libbpora.so.8.0, 257994 bytes, 504 tape blocksx usr/openv/lib/libbpora.so.9.0, 258010 bytes, 504 tape blocksx usr/openv/lib/libbpora64.so.9.0, 288345 bytes, 564 tape blocksx usr/openv/lib/libnbberman.so, 161051 bytes, 315 tape blocksLiveUpdate is not installed, skipping registration step...NetBackup for Oracle installation completed.**********Execution of ./install_dbext is complete.Execution of ./install is complete.File /usr/openv/tmp/install_addon_trace.2761086 contains a trace of this install.root@QC_P550_731:/mnt/install/NB_65_UOptions_20070723/vDBA>配置NBU Oracle Agentroot@QC_P550_731:/mnt/install/NB_65_UOptions_20070723/vDBA>su - oracle [YOU HAVE NEW MAIL]QC_P550_731:/home/oracle$cd /usr/openv/netbackup/binQC_P550_731:/usr/openv/netbackup/bin$./oracle_linkFri Apr 3 10:07:28 BEIST 2009All Oracle instances should be shutdown before running this script.Please log into the Unix system as the Oracle owner for running this scriptDo you want to continue? (y/n) [n] yLIBOBK path: /usr/openv/netbackup/binORACLE_HOME: /oracle/app/oracle/product/9.2.03创建Oracle备份脚本数据库全备份脚本/usr/openv/rman/hot_database_backup_zjcj2.sh,其中红色字体部分根据oracle修改#!/bin/sh# $Header: hot_database_backup.sh,v 1.2 2002/08/06 23:51:42 $##bcpyrght#***************************************************************************#* $VRTScprght: Copyright 1993 - 2007 Symantec Corporation, All Rights Reserved $ * #***************************************************************************#ecpyrght## ---------------------------------------------------------------------------# hot_database_backup.sh# ---------------------------------------------------------------------------# This script uses Recovery Manager to take a hot (inconsistent) database# backup. A hot backup is inconsistent because portions of the database are# being modified and written to the disk while the backup is progressing.# You must run your database in ARCHIVELOG mode to make hot backups. It is# assumed that this script will be executed by user root. In order for RMAN# to work properly we switch user (su -) to the oracle dba account before# execution. If this script runs under a user account that has Oracle dba# privilege, it will be executed using this user's account.# ---------------------------------------------------------------------------# ---------------------------------------------------------------------------# Determine the user which is executing this script.# ---------------------------------------------------------------------------CUSER=`id |cut -d"(" -f2 | cut -d ")" -f1`# ---------------------------------------------------------------------------# Put output in <this file name>.out. Change as desired.# Note: output directory requires write permission.# ---------------------------------------------------------------------------RMAN_LOG_FILE=${0}.`date +%Y%m%d%H%M%S`.out# ---------------------------------------------------------------------------# You may want to delete the output file so that backup information does # not accumulate. If not, delete the following lines.# ---------------------------------------------------------------------------if [ -f "$RMAN_LOG_FILE" ]thenrm -f "$RMAN_LOG_FILE"fi# -----------------------------------------------------------------# Initialize the log file.# -----------------------------------------------------------------echo >> $RMAN_LOG_FILEchmod 666 $RMAN_LOG_FILE# ---------------------------------------------------------------------------# Log the start of this script.# ---------------------------------------------------------------------------echo Script $0 >> $RMAN_LOG_FILEecho ==== started on `date` ==== >> $RMAN_LOG_FILEecho >> $RMAN_LOG_FILE# ---------------------------------------------------------------------------# Replace /db/oracle/product/ora81, below, with the Oracle home path.# ---------------------------------------------------------------------------ORACLE_HOME=/oracle/app/oracle/product/9.2.0export ORACLE_HOME# ---------------------------------------------------------------------------# Replace ora81, below, with the Oracle SID of the target database.# ---------------------------------------------------------------------------ORACLE_SID=zjcj2export ORACLE_SID# ---------------------------------------------------------------------------# Replace ora81, below, with the Oracle DBA user id (account).# ---------------------------------------------------------------------------ORACLE_USER=oracle# ---------------------------------------------------------------------------# Set the target connect string.# Replace "sys/manager", below, with the target connect string.# ---------------------------------------------------------------------------TARGET_CONNECT_STR=/# ---------------------------------------------------------------------------# Set the Oracle Recovery Manager name.# ---------------------------------------------------------------------------RMAN=$ORACLE_HOME/bin/rman# ---------------------------------------------------------------------------# Print out the value of the variables set by this script.# ---------------------------------------------------------------------------echo >> $RMAN_LOG_FILEecho "RMAN: $RMAN" >> $RMAN_LOG_FILEecho "ORACLE_SID: $ORACLE_SID" >> $RMAN_LOG_FILEecho "ORACLE_USER: $ORACLE_USER" >> $RMAN_LOG_FILE echo "ORACLE_HOME: $ORACLE_HOME" >> $RMAN_LOG_FILE# ---------------------------------------------------------------------------# Print out the value of the variables set by bphdb.# ---------------------------------------------------------------------------echo >> $RMAN_LOG_FILEecho "NB_ORA_FULL: $NB_ORA_FULL" >> $RMAN_LOG_FILE echo "NB_ORA_INCR: $NB_ORA_INCR" >> $RMAN_LOG_FILE echo "NB_ORA_CINC: $NB_ORA_CINC" >> $RMAN_LOG_FILE echo "NB_ORA_SERV: $NB_ORA_SERV" >> $RMAN_LOG_FILE echo "NB_ORA_POLICY: $NB_ORA_POLICY" >> $RMAN_LOG_FILE# ---------------------------------------------------------------------------# NOTE: This script assumes that the database is properly opened. If desired,# this would be the place to verify that.# ---------------------------------------------------------------------------echo >> $RMAN_LOG_FILE# ---------------------------------------------------------------------------# If this script is executed from a NetBackup schedule, NetBackup# sets an NB_ORA environment variable based on the schedule type.# The NB_ORA variable is then used to dynamically set BACKUP_TYPE# For example, when:# schedule type is BACKUP_TYPE is# ---------------- --------------# Automatic Full INCREMENTAL LEVEL=0# Automatic Differential Incremental INCREMENTAL LEVEL=1# Automatic Cumulative Incremental INCREMENTAL LEVEL=1 CUMULATIVE ## For user initiated backups, BACKUP_TYPE defaults to incremental# level 0 (full). To change the default for a user initiated# backup to incremental or incremental cumulative, uncomment# one of the following two lines.# BACKUP_TYPE="INCREMENTAL LEVEL=1"# BACKUP_TYPE="INCREMENTAL LEVEL=1 CUMULATIVE"## Note that we use incremental level 0 to specify full backups.# That is because, although they are identical in content, only# the incremental level 0 backup can have incremental backups of# level > 0 applied to it.# ---------------------------------------------------------------------------if [ "$NB_ORA_FULL" = "1" ]thenecho "Full backup requested" >> $RMAN_LOG_FILEBACKUP_TYPE="INCREMENTAL LEVEL=0"elif [ "$NB_ORA_INCR" = "1" ]thenecho "Differential incremental backup requested" >> $RMAN_LOG_FILEBACKUP_TYPE="INCREMENTAL LEVEL=1"elif [ "$NB_ORA_CINC" = "1" ]thenecho "Cumulative incremental backup requested" >> $RMAN_LOG_FILEBACKUP_TYPE="INCREMENTAL LEVEL=1 CUMULATIVE"elif [ "$BACKUP_TYPE" = "" ]thenecho "Default - Full backup requested" >> $RMAN_LOG_FILEBACKUP_TYPE="INCREMENTAL LEVEL=0"fi# ---------------------------------------------------------------------------# Call Recovery Manager to initiate the backup. This example does not use a# Recovery Catalog. If you choose to use one, replace the option 'nocatalog'# from the rman command line below with the# 'rcvcat <userid>/<passwd>@<tns alias>' statement.## Note: Any environment variables needed at run time by RMAN# must be set and exported within the switch user (su) command.# ---------------------------------------------------------------------------# Backs up the whole database. This backup is part of the incremental# strategy (this means it can have incremental backups of levels > 0# applied to it).## We do not need to explicitly request the control file to be included# in this backup, as it is automatically included each time file 1 of# the system tablespace is backed up (the inference: as it is a whole# database backup, file 1 of the system tablespace will be backed up,# hence the controlfile will also be included automatically).## Typically, a level 0 backup would be done at least once a week.## The scenario assumes:# o you are backing your database up to two tape drives# o you want each backup set to include a maximum of 5 files# o you wish to include offline datafiles, and read-only tablespaces,# in the backup# o you want the backup to continue if any files are inaccessible.# o you are not using a Recovery Catalog# o you are explicitly backing up the control file. Since you are# specifying nocatalog, the controlfile backup that occurs# automatically as the result of backing up the system file is# not sufficient; it will not contain records for the backup that# is currently in progress.# o you want to archive the current log, back up all the# archive logs using two channels, putting a maximum of 20 logs# in a backup set, and deleting them once the backup is complete.## Note that the format string is constructed to guarantee uniqueness and# to enhance NetBackup for Oracle backup and restore performance.### NOTE WHEN USING TNS ALIAS: When connecting to a database# using a TNS alias, you must use a send command or a parms operand to# specify environment variables. In other words, when accessing a database # through a listener, the environment variables set at the system level are not # visible when RMAN is running. For more information on the environment # variables, please refer to the NetBackup for Oracle Admin. Guide.## ---------------------------------------------------------------------------CMD_STR="ORACLE_HOME=$ORACLE_HOMEexport ORACLE_HOMEORACLE_SID=$ORACLE_SIDexport ORACLE_SID$RMAN target $TARGET_CONNECT_STR rcvcat rman/rman@qcrman msglog $RMAN_LOG_FILE append << EOFRUN {resync catalog;allocate channel t1 type 'SBT_TAPE';send 'NB_ORA_POLICY=$NB_ORA_POLICY';send 'NB_ORA_CLIENT=QC_P550_732';backuptag controlfformat 'cf_%s_%p'(current controlfile);release channel t1;#allocate channel t1 type 'SBT_TAPE' parms 'BLKSIZE=131072';allocate channel t2 type 'SBT_TAPE' parms 'BLKSIZE=131072';send 'NB_ORA_POLICY=$NB_ORA_POLICY';send 'NB_ORA_CLIENT=QC_P550_732';set maxcorrupt for datafile 1 to 0;backuptag bcktbs1filesperset 10format 'df_t%s_p%p'(tablespace system,users,tools,indx,undotbs1,undotbs2,id_user,id_user_ind);sql 'alter system archive log current';release channel t1;release channel t2;}EOF"# Initiate the command stringif [ "$CUSER" = "root" ]thensu - $ORACLE_USER -c "$CMD_STR" >> $RMAN_LOG_FILE RSTAT=$?else/usr/bin/sh -c "$CMD_STR" >> $RMAN_LOG_FILERSTAT=$?fi# ---------------------------------------------------------------------------# Log the completion of this script.# ---------------------------------------------------------------------------if [ "$RSTAT" = "0" ]thenLOGMSG="ended successfully"elseLOGMSG="ended in error"fiecho >> $RMAN_LOG_FILEecho Script $0 >> $RMAN_LOG_FILEecho ==== $LOGMSG on `date` ==== >> $RMAN_LOG_FILEecho >> $RMAN_LOG_FILEexit $RSTAT数据库归档备份脚本/usr/open/rman/hot_database_backup_zjcj2.sh,其中红色字体部分根据oracle修改#!/bin/sh# $Header: hot_database_backup.sh,v 1.2 2002/08/06 23:51:42 $##bcpyrght#***************************************************************************#* $VRTScprght: Copyright 1993 - 2007 Symantec Corporation, All Rights Reserved $ * #***************************************************************************#ecpyrght## ---------------------------------------------------------------------------# hot_database_backup.sh# ---------------------------------------------------------------------------# This script uses Recovery Manager to take a hot (inconsistent) database# backup. A hot backup is inconsistent because portions of the database are# being modified and written to the disk while the backup is progressing.# You must run your database in ARCHIVELOG mode to make hot backups. It is # assumed that this script will be executed by user root. In order for RMAN# to work properly we switch user (su -) to the oracle dba account before# execution. If this script runs under a user account that has Oracle dba# privilege, it will be executed using this user's account.# ---------------------------------------------------------------------------# ---------------------------------------------------------------------------# Determine the user which is executing this script.# ---------------------------------------------------------------------------CUSER=`id |cut -d"(" -f2 | cut -d ")" -f1`# ---------------------------------------------------------------------------# Put output in <this file name>.out. Change as desired.# Note: output directory requires write permission.# ---------------------------------------------------------------------------RMAN_LOG_FILE=${0}.`date +%Y%m%d%H%M%S`.out# ---------------------------------------------------------------------------# You may want to delete the output file so that backup information does # not accumulate. If not, delete the following lines.# ---------------------------------------------------------------------------if [ -f "$RMAN_LOG_FILE" ]thenrm -f "$RMAN_LOG_FILE"fi# -----------------------------------------------------------------# Initialize the log file.# -----------------------------------------------------------------echo >> $RMAN_LOG_FILEchmod 666 $RMAN_LOG_FILE# ---------------------------------------------------------------------------# Log the start of this script.# ---------------------------------------------------------------------------echo Script $0 >> $RMAN_LOG_FILEecho ==== started on `date` ==== >> $RMAN_LOG_FILEecho >> $RMAN_LOG_FILE# ---------------------------------------------------------------------------# Replace /db/oracle/product/ora81, below, with the Oracle home path.# ---------------------------------------------------------------------------ORACLE_HOME=/oracle/app/oracle/product/9.2.0export ORACLE_HOME# ---------------------------------------------------------------------------# Replace ora81, below, with the Oracle SID of the target database. # ---------------------------------------------------------------------------ORACLE_SID=zjcj2export ORACLE_SID# ---------------------------------------------------------------------------# Replace ora81, below, with the Oracle DBA user id (account).# ---------------------------------------------------------------------------ORACLE_USER=oracle# ---------------------------------------------------------------------------# Set the target connect string.# Replace "sys/manager", below, with the target connect string.# ---------------------------------------------------------------------------TARGET_CONNECT_STR=/# ---------------------------------------------------------------------------# Set the Oracle Recovery Manager name.# ---------------------------------------------------------------------------RMAN=$ORACLE_HOME/bin/rman# ---------------------------------------------------------------------------# Print out the value of the variables set by this script.# ---------------------------------------------------------------------------echo >> $RMAN_LOG_FILEecho "RMAN: $RMAN" >> $RMAN_LOG_FILEecho "ORACLE_SID: $ORACLE_SID" >> $RMAN_LOG_FILEecho "ORACLE_USER: $ORACLE_USER" >> $RMAN_LOG_FILE echo "ORACLE_HOME: $ORACLE_HOME" >> $RMAN_LOG_FILE# ---------------------------------------------------------------------------# Print out the value of the variables set by bphdb.# ---------------------------------------------------------------------------echo >> $RMAN_LOG_FILEecho "NB_ORA_FULL: $NB_ORA_FULL" >> $RMAN_LOG_FILEecho "NB_ORA_INCR: $NB_ORA_INCR" >> $RMAN_LOG_FILEecho "NB_ORA_CINC: $NB_ORA_CINC" >> $RMAN_LOG_FILEecho "NB_ORA_SERV: $NB_ORA_SERV" >> $RMAN_LOG_FILEecho "NB_ORA_POLICY: $NB_ORA_POLICY" >> $RMAN_LOG_FILE# ---------------------------------------------------------------------------# NOTE: This script assumes that the database is properly opened. If desired, # this would be the place to verify that.# ---------------------------------------------------------------------------echo >> $RMAN_LOG_FILE# ---------------------------------------------------------------------------# If this script is executed from a NetBackup schedule, NetBackup# sets an NB_ORA environment variable based on the schedule type.# The NB_ORA variable is then used to dynamically set BACKUP_TYPE# For example, when:# schedule type is BACKUP_TYPE is# ---------------- --------------# Automatic Full INCREMENTAL LEVEL=0# Automatic Differential Incremental INCREMENTAL LEVEL=1# Automatic Cumulative Incremental INCREMENTAL LEVEL=1 CUMULATIVE ## For user initiated backups, BACKUP_TYPE defaults to incremental# level 0 (full). To change the default for a user initiated# backup to incremental or incremental cumulative, uncomment# one of the following two lines.# BACKUP_TYPE="INCREMENTAL LEVEL=1"# BACKUP_TYPE="INCREMENTAL LEVEL=1 CUMULATIVE"## Note that we use incremental level 0 to specify full backups.# That is because, although they are identical in content, only# the incremental level 0 backup can have incremental backups of# level > 0 applied to it.# ---------------------------------------------------------------------------if [ "$NB_ORA_FULL" = "1" ]thenecho "Full backup requested" >> $RMAN_LOG_FILEBACKUP_TYPE="INCREMENTAL LEVEL=0"elif [ "$NB_ORA_INCR" = "1" ]thenecho "Differential incremental backup requested" >> $RMAN_LOG_FILEBACKUP_TYPE="INCREMENTAL LEVEL=1"elif [ "$NB_ORA_CINC" = "1" ]thenecho "Cumulative incremental backup requested" >> $RMAN_LOG_FILEBACKUP_TYPE="INCREMENTAL LEVEL=1 CUMULATIVE"elif [ "$BACKUP_TYPE" = "" ]thenecho "Default - Full backup requested" >> $RMAN_LOG_FILEBACKUP_TYPE="INCREMENTAL LEVEL=0"fi# ---------------------------------------------------------------------------# Call Recovery Manager to initiate the backup. This example does not use a# Recovery Catalog. If you choose to use one, replace the option 'nocatalog'# from the rman command line below with the# 'rcvcat <userid>/<passwd>@<tns alias>' statement.## Note: Any environment variables needed at run time by RMAN# must be set and exported within the switch user (su) command.# ---------------------------------------------------------------------------# Backs up the whole database. This backup is part of the incremental# strategy (this means it can have incremental backups of levels > 0# applied to it).## We do not need to explicitly request the control file to be included# in this backup, as it is automatically included each time file 1 of# the system tablespace is backed up (the inference: as it is a whole# database backup, file 1 of the system tablespace will be backed up,# hence the controlfile will also be included automatically).## Typically, a level 0 backup would be done at least once a week.## The scenario assumes:。
RMAN 异机恢复

NBU Rman异机恢复Oracle2009-05-12 00:30背景:HostA上oracle通过NBU进行RMAN备份至带库,从HostB上恢复该库;目的:在丢失了一部分数据的情况下,但因为没有足够的空间不能做整库恢复,只想恢复部分表;so假设:源主机HostA,目标主机HostB,NBUMaster主机Po,Oracle_sid均为test,Oracle用户均为ora。
步骤:1、增加Po主机上文件[Po:root]#touch /usr/openv/netbackup/db/altnames/No.Restrictions//取消nbu的异机恢复限制2、修改Po主机上文件,修改参数[Po:root]#vi /usr/openv/netbackup/bp.confFORCE_RESTORE_MEDIA_SERVER = HostA HostB这步需要重启netbackup下面开始恢复步骤(均为ora用户操作)3、copy spfile在HostA上test数据库的pfile(create pfile from spfile)ftp至HostB中的$ORACLE_HOME/db下4、HostB上,密码文件、相应的dump目录[HostB:ora]#orapwd file=<fname> password=<password> entries=<users>[HostB:ora]#mkdir $admin/test/*dump5、启动数据库至nomount[HostB:ora]#sqlplus / as sysdbaConnected to an idle instance.SQL> startup nomountORACLE instance started.Total System Global Area 1526726656 bytesFixed Size 2191720 bytesVariable Size 1430245016 bytesDatabase Buffers 83886080 bytesRedo Buffers 10403840 bytes6、登录catalog,进行rman恢复[HostB:ora]#rman target / catalog user/pwd@rmanconnected to target database: TEST (not mounted)connected to recovery catalog database7、set dbid(HostA上test库的dbid)RMAN> set dbid=2091611406executing command: SET DBIDdatabase name is "TEST" and DBID is 20916114068、恢复control fileRMAN> RUN {2> ALLOCATE CHANNEL D1 TYPE 'sbt_tape';3> send 'NB_ORA_SERV=Po,NB_ORA_CLIENT=HostA'; //一定需要NB_ORA_CLIENT,否则找不到介质4> RESTORE CONTROLFILE;5> RELEASE CHANNEL D1;6> }allocated channel: D1channel D1: sid=166 devtype=SBT_TAPEchannel D1: VERITAS NetBackup for Oracle - Release 6.0 (2006110304)sent command to channel: D1Starting restore at 2009-05-11:21:24:58channel D1: starting datafile backupset restorechannel D1: restoring control filechannel D1: reading from backup piece c-3381955389-20090511-02channel D1: restored backup piece 1piece handle=c-3381955389-20090511-02 tag=TAG20090511T170809channel D1: restore complete, elapsed time: 00:01:47output filename=/test/control01.ctloutput filename=/test/control02.ctloutput filename=/test/control03.ctlFinished restore at 2009-05-11:21:26:56released channel: D19、控制文件修复成功,将库alter至mount状态RMAN> alter database mount;database mounted10、恢复数据库RMAN> run {2> ALLOCATE CHANNEL D1 TYPE 'SBT_TAPE';3> send 'NB_ORA_SERV=Po,NB_ORA_CLIENT=HostA';4> restore database skip tablespace users;//屏蔽不想恢复的users表空间6> recover database SKIP FOREVER TABLESPACE users;5> RELEASE CHANNEL D1;7> }allocated channel: D1channel D1: sid=44 devtype=SBT_TAPEchannel D1: VERITAS NetBackup for Oracle - Release 6.0 (2006110304)sent command to channel: D1Starting restore at 2009-05-11:21:46:50channel D1: starting datafile backupset restorechannel D1: specifying datafile(s) to restore from backup setrestoring datafile 00003 to /test/sysaux01.dbfchannel D1: reading from backup piece bk_2_1_686595521channel D1: restored backup piece 1piece handle=bk_2_1_686595521 tag=HOT_DB_BK_LEVEL0channel D1: restore complete, elapsed time: 00:02:26channel D1: starting datafile backupset restorechannel D1: specifying datafile(s) to restore from backup setrestoring datafile 00001 to /test/system01.dbfchannel D1: reading from backup piece bk_1_1_686595521channel D1: restored backup piece 1piece handle=bk_1_1_686595521 tag=HOT_DB_BK_LEVEL0channel D1: restore complete, elapsed time: 00:02:57channel D1: starting datafile backupset restorechannel D1: specifying datafile(s) to restore from backup setrestoring datafile 00002 to /test/undotbs01.dbfchannel D1: reading from backup piece bk_3_1_686595521channel D1: restored backup piece 1piece handle=bk_3_1_686595521 tag=HOT_DB_BK_LEVEL0channel D1: restore complete, elapsed time: 00:01:55Finished restore at 2009-05-11:21:54:23Starting recover at 2009-05-11:21:54:24starting media recoverychannel D1: starting archive log restore to default destinationchannel D1: restoring archive logarchive log thread=1 sequence=5channel D1: reading from backup piece al_8_1_686595863channel D1: restored backup piece 1piece handle=al_8_1_686595863 tag=TAG20090511T170423channel D1: restore complete, elapsed time: 00:01:57archive log filename=/oracle10/app/oracle/product/10.2.0/dbs/arch1_5_686569151.dbf thread=1 sequence=5unable to find archive logarchive log thread=1 sequence=6released channel: D1RMAN-00571: ===========================================================RMAN-00569: =============== ERROR MESSAGE STACK FOLLOWS ===============RMAN-00571: ===========================================================RMAN-03002: failure of recover command at 05/11/2009 21:56:39RMAN-06054: media recovery requesting unknown log: thread 1 seq 6 lowscn 608603recover成功,因为没有恢复归档,所以会报一些错,这里忽略。
NBU相关数据库备份和恢复

2. 点击VERITAS MS SQL CLIENT组件。点击ACTIONS→Restore,出
现以下界面,选择备份的时间,点击ok即可。如下图所示:
ZHEJIANG COLLABORATION DATA SYSTEM LTD.
MS SqlServer的备份与恢复
ZHEJIANG COLLABORATION DATA SYSTEM LTD.
8. 在client端生成MSSQL的脚本 选择需要备份的数据库,也可以选多个数据库(temp数据库不会出 现),在backup script一栏中,选择Save later for execute,点击 OK,选择脚本保存的目录,默认的脚本后缀名是.bch。(假设保存的 脚本名字为sqltest.bch)。 9. 修改NetBackup Client Service运行权限 进入MSSQL服务器上的管理工具->服务,点击NetBackup Client Service的属性,点击登录,修改登录身份,需要用administrator用 户登录,输入密码。重起该服务。
备份类型说明,如下图所示:
ZHEJIANG COLLABORATION DATA SYSTEM LTD.
Domino Lotus的备份与恢复
Domino Lotus的备份
完全备份 使用此备份类型备份在“备份选择”列表和可用的事务日志范围中标识的所 有 Lotus 数据库。不活动的事务日志范围在成功备份之后,将被标记 为可以回收。 累积增量式备份 如果在“备份选择”列表中指定了”BACKUP_TRANSACTION_LOGS”指令,则累 积增量式备份将备份被Domino Server标识为可用于备份的所有事务日 志范围。在备份成功完成后,事务日志范围将不被标记为可以回收。 差异增量式备份 如果在“备份选择”列表中指定了”BACKUP_TRANSACTION_LOGS”指令,差异 增量式备份将备份被 Domino Server 标识为可用于备份的所有事务日 志范围。备份的不活动事务日志范围在备份成功完成后,将被标记为 可以回收。
oracle数据丢失恢复数据方法
oracle数据丢失恢复数据方法在使用Oracle数据库过程中,数据丢失是一种常见的问题。
当数据库中的数据丢失时,我们需要及时采取措施来进行数据恢复,以避免数据的长期丢失。
本文将介绍一些常用的Oracle数据丢失恢复方法,帮助我们有效地处理这个问题。
1. 数据库备份与恢复数据库备份是一种常见的防范措施,它可以帮助我们在数据丢失后快速恢复数据库。
在Oracle中,我们可以使用RMAN(Recovery Manager)工具来实现数据库备份和恢复。
RMAN可以备份整个数据库或者特定的表空间、数据文件等,同时也支持增量备份,大大减少了备份所需的时间和空间。
当数据库发生数据丢失时,我们可以使用RMAN来恢复备份的数据库文件,确保数据的完整性。
2. 闪回技术Oracle提供了闪回技术,可以帮助我们恢复数据库到某个历史时间点的状态。
通过闪回技术,我们可以将数据库中的数据、表结构等回滚到特定的时间点,从而实现数据的恢复。
闪回技术相比于传统的数据恢复方法,具有更高的效率和更少的风险。
我们可以使用闪回查询(FLASHBACK QUERY)来查看历史数据,使用闪回表(FLASHBACK TABLE)来恢复特定表的状态,使用闪回数据库(FLASHBACK DATABASE)来恢复整个数据库。
3. 日志文件恢复Oracle数据库在运行过程中会生成大量的日志文件,这些日志文件记录了数据库的操作、变更等信息。
当数据库发生数据丢失时,我们可以通过日志文件的恢复来还原数据。
在Oracle数据库中,我们可以使用归档日志文件(Archive Log)或在线重做日志文件(Online Redo Log)来进行数据恢复。
归档日志文件可以将数据库中的所有变更操作记录下来,当数据丢失时,我们可以将归档日志文件应用到数据库中,恢复数据的完整性。
同时,我们也可以使用在线重做日志文件来进行数据恢复,将重做日志文件中的操作应用到数据库中。
4. 数据库导入导出数据库导入导出是一种常见的数据恢复方法。
netbackup 异机器恢复
netbackup oracle 异机器恢复:1. 环境异机恢复涉及2台oracle服务器,说明如下:192.168.1.40 (ora ) <===原主机192.168.1.51(ora40) <===执行恢复任务的主机Red Hat Enterprise Linux Server release 6.2 (Santiago)Oracle Database 11g Release 11.2.0.3.02.准备工作2.1 恢复192.168.1.40 (ora )数据库软件到192.168.1.51(ora40)ORACLE软件安装位置:export ORACLE_HOME=/u01/app/oracle/product/11.2.0/dbhome_1 export ORACLE_BASE=/u01/app/oracle备份192.168.1.40 (ora )主机数据库软件安装目录:恢复备份文件到192.168.1.51(ora40)主机:3.备份192.168.1.40 (ora )数据库数据在192.168.1.51(ora40)查询备份情况(bplist):3.恢复数据库数据到异机启动到nomount-> 恢复控制文件-> MOUNT-> RESTORE-> recover->OPEN [oracle@ora40 ~]$ rman target /Recovery Manager: Release 11.2.0.3.0 - Production on Wed Jan 7 13:42:26 2015Copyright (c) 1982, 2011, Oracle and/or its affiliates. All rights reserved.connected to target database (not started)RMAN> startup nomount 启动数据库到nomount状态Oracle instance startedTotal System Global Area 839282688 bytesFixed Size 2233000 bytesVariable Size 499125592 bytesDatabase Buffers 335544320 bytesRedo Buffers 2379776 bytesRMAN> run{ALLOCATE CHANNEL ch00 TYPE 'SBT_TAPE';SEND 'NB_ORA_SERV=ser,NB_ORA_CLIENT=ora';RESTORE CONTROLFILE from '/cntrl_50_1_868313413';release channel ch00;}2> 3> 4> 5> 6> 恢复控制文件using target database control file instead of recovery catalogallocated channel: ch00channel ch00: SID=19 device type=SBT_TAPEchannel ch00: Veritas NetBackup for Oracle - Release 7.5 (2012020801)sent command to channel: ch00Starting restore at 07-JAN-15channel ch00: restoring control filechannel ch00: restore complete, elapsed time: 00:00:15output file name=/u01/app/oracle/oradata/orcl/control01.ctloutput file name=/u01/app/oracle/fast_recovery_area/orcl/control02.ctl Finished restore at 07-JAN-15released channel: ch00RMAN> alter database mount;mount阶段database mountedRMAN> run{ALLOCATE CHANNEL ch00 TYPE 'SBT_TAPE';SEND 'NB_ORA_SERV=ser,NB_ORA_CLIENT=ora';RESTORE DATABASE;release channel ch00;}2> 3> 4> 5> 6> RESTOREallocated channel: ch00channel ch00: SID=19 device type=SBT_TAPEchannel ch00: Veritas NetBackup for Oracle - Release 7.5 (2012020801)sent command to channel: ch00Starting restore at 07-JAN-15Starting implicit crosscheck backup at 07-JAN-15Finished implicit crosscheck backup at 07-JAN-15Starting implicit crosscheck copy at 07-JAN-15Finished implicit crosscheck copy at 07-JAN-15searching for all files in the recovery areacataloging files...no files catalogedchannel ch00: starting datafile backup set restorechannel ch00: specifying datafile(s) to restore from backup setchannel ch00: restoring datafile 00001 to /u01/app/oracle/oradata/orcl/system01.dbf channel ch00: restoring datafile 00003 to /u01/app/oracle/oradata/orcl/undotbs01.dbf channel ch00: reading from backup piece bk_44_1_868313194channel ch00: piece handle=bk_44_1_868313194 tag=HOT_DB_BK_LEVEL0channel ch00: restored backup piece 1channel ch00: restore complete, elapsed time: 00:00:35channel ch00: starting datafile backup set restorechannel ch00: specifying datafile(s) to restore from backup setchannel ch00: restoring datafile 00002 to /u01/app/oracle/oradata/orcl/sysaux01.dbf channel ch00: restoring datafile 00004 to /u01/app/oracle/oradata/orcl/users01.dbf channel ch00: reading from backup piece bk_45_1_868313300channel ch00: piece handle=bk_45_1_868313300 tag=HOT_DB_BK_LEVEL0channel ch00: restored backup piece 1channel ch00: restore complete, elapsed time: 00:00:25Finished restore at 07-JAN-15released channel: ch00RMAN> run{ALLOCATE CHANNEL ch00 TYPE 'SBT_TAPE';SEND 'NB_ORA_SERV=ser,NB_ORA_CLIENT=ora';recover database;release channel ch00;}2> 3> 4> 5> 6> recoverallocated channel: ch00channel ch00: SID=19 device type=SBT_TAPEchannel ch00: Veritas NetBackup for Oracle - Release 7.5 (2012020801)sent command to channel: ch00Starting recover at 07-JAN-15starting media recoverychannel ch00: starting archived log restore to default destinationchannel ch00: restoring archived logarchived log thread=1 sequence=28channel ch00: restoring archived logarchived log thread=1 sequence=29channel ch00: reading from backup piece al_49_1_868313397channel ch00: piece handle=al_49_1_868313397 tag=TAG20150106T220941channel ch00: restored backup piece 1channel ch00: restore complete, elapsed time: 00:00:07archived log file name=/u01/app/oracle/fast_recovery_area/ORCL/archivelog/2015_01_07/o1_mf_1_28_bbskz2f t_.arc thread=1 sequence=28channel default: deleting archived log(s)archived log file name=/u01/app/oracle/fast_recovery_area/ORCL/archivelog/2015_01_07/o1_mf_1_28_bbskz2f t_.arc RECID=17 STAMP=868369506archived log file name=/u01/app/oracle/fast_recovery_area/ORCL/archivelog/2015_01_07/o1_mf_1_29_bbskz2g q_.arc thread=1 sequence=29channel default: deleting archived log(s)archived log file name=/u01/app/oracle/fast_recovery_area/ORCL/archivelog/2015_01_07/o1_mf_1_29_bbskz2g q_.arc RECID=18 STAMP=868369506unable to find archived logarchived log thread=1 sequence=30released channel: ch00RMAN-00571: ===========================================================RMAN-00569: =============== ERROR MESSAGE STACK FOLLOWS ===============RMAN-00571: ===========================================================RMAN-03002: failure of recover command at 01/07/2015 13:45:10RMAN-06054: media recovery requesting unknown archived log for thread 1 with sequence 30 and starting SCN of 260861RMAN> alter database open resetlogs; opendatabase opened。
使用NBU备份集恢复数据库(RAC-单机)

一、配置环境介绍新搭建了一套数据库环境(没有安装实例),文档中称作目标端,配置信息如下:Oracle版本:11.2.0.4SID :ORCL此次恢复实验取TMS生产库备份数据,TMS在文档中称作源端二、在新环境安装NBU客户端具体方法参考《01-隆基硅NBU实施文档.docx》1.执行oracle_link在client上的oracle账户下,执行oracle_link,将NBU与Oracle的tape库进行链接$ /usr/openv/netbackup/bin/oracle_link2.查看备份集在需要恢复的client上,利用bplist检查oracle以往备份的备份集[root@rac1 ~]# cd /usr/openv/netbackup/bin/[root@ bin]# ./bplist -C (源端主机名) -t 4 -R -l / ./bplist -C -t 4 -R -l /3.修改用户属组查看目标端的Oracle用户属组ID是否与源端一致,如果不一致,需要修改(只需要用户一致,组不影响)groupmod -g 1031 dbausermod -u 1106 oracle查找并修改文件(1101为Oracle用户原来的uid,1000为文件原来的gid)find / -user 1101 -exec chown oracle {} \;find / -group 1000 -exec chgrp dba {} \;relink all三、用spfile创建pfile文件SQL> create pfile='/tmp/tms_pfile.ora' from spfile;修改目标端Oracle环境变量:export ORACLE_SID=TMSPROD1四、关闭RAC选项cd $ORACLE_HOME/rdbms/libmake -f ins_rdbms.mk rac_offmake -f ins_rdbms.mk ioracle五、创建必要的目录修改导出来的pfile文件,创建必要目录[oracle@rac1 ~]$ mkdir -p /u01/app/oracle/admin/TMSPROD/adump六、使用新的pfile,启动数据库到nomountSQL> startup nomount pfile = '/tmp/tms_pfile.ora';七、还原控制文件run{allocate channel c1 TYPE SBT_TAPE;SEND'NB_ORA_SERV=LONGI-XA-NBU,NB_ORA_CLIENT=';restore controlfile from '/c-4178200174-20180621-02';release channel c1;}启动数据库到mount状态RMAN> alter database mount;八、还原数据文件1.set newnameset linesize 1000set pagesize 1000select 'set newname for datafile '''|| name ||''' to'||'''/u01/TEST/oratest/db/apps_st/data/'|| substr(name,21) ||''';' from v$datafile order by name;2.还原run{allocate channel c1 type SBT_TAPE;allocate channel c2 type SBT_TAPE;allocate channel c3 type SBT_TAPE;allocate channel c4 type SBT_TAPE;set newname for datafile ... ...send'NB_ORA_SERV=LONGI-XA-NBU,NB_ORA_CLIENT=';restore database;switch datafile all;recover database;release channel c1;release channel c2;release channel c3;release channel c4;}九、打开数据库1.修改redo信息set linesize 1000set pagesize 1000select 'alter database rename file '''||member||''' to'||'''/u01/TEST/oratest/db/apps_st/data'||substr(member,21) ||''';'from v$logfile;SQL> select group#,member from v$logfile;2.resetlogs方式启动数据库SQL> alter database open resetlogs;3.删除dblinkSQL> set lines 160set pagesize 500col db_link for a70select owner,db_link from dba_db_links ;select 'drop public database link '|| db_link|| ';' from dba_db_links where owner = 'PUBLIC';4.清理从RAC环境恢复过来,仍残留的instance2对应的Redo log信息SQL> select thread#,group# from v$log;select group#,bytes/1024/1024||'M',status from v$log;SQL> alter database disable thread 2;alter database drop logfile group 16;alter database drop logfile group 17;alter database drop logfile group 18;alter database drop logfile group 19;alter database drop logfile group 20;5.查看默认undo tbs , 删除多余的另一组undo APPS_UNDOTS2SELECT tablespace_name, SUM (bytes) / 1024 / 1024 "TOTAL(MB)" FROM dba_undo_extents GROUP BY tablespace_name;alter tablespace UNDOTBS2 offline;drop tablespace UNDOTBS2 including contents AND DATAFILES CASCADE CONSTRAINTS ;十、修改数据库名称1.重启数据库到mountSQL> startup mount pfile = '/tmp/tms_pfile.ora';2.使用nid修改数据库名称nid target=system/oracle dbname=ORCL3.修改参数文件修改环境变量实例名称和参数文件名称修改参数文件内容,包括数据库名称,再次确认参数文件中目录是否存在SQL> startup mount pfile='/u01/app/oracle/product/11.2.0/db_1/dbs/initORCL.ora ';SQL> alter database open resetlogs;十一、验证1.查看数据库启动情况Select name,open_mode from v$database;2.数据库监听Lsnrctl status。
NBU对SQL的异机恢复

SQL异机恢复文档恢复前提:1.确认源主机和目的主机,安装相同的操作系统,版本和补丁都要相同;2.确认源主机和目的主机的SQL数据库的版本相同包括补丁3.确认Server服务器、源主机和目的主机的NBU的版本以及补丁相同;操作过程:注意:以下工作均在目的主机上执行,非源主机1.确认NetBackup Client Services服务的权限在SQL数据库服务器上的两个服务NetBackup Client Service点击右键->属性->登录->此帐户选择administrator用户。
重新启动服务。
2.如果MS Sql Server服务器采用标准安全模式(standard security)连接,那么需要启动系统的"remote registry service"服务。
方法如下:打开”控制面板”-->”管理工具”-->”服务”,然后启动"remote registry service"服务,并设置成随机启动。
3.在开始菜单里选择veritas后选择sql client。
打开界面,第一次出现以下窗口,点击ok即可。
4.配置参数,界面如下:在界面中,输入sql server主机名(本主机),instance选default,点击apply。
5.点击VERITAS MS SQL CLIENT组件。
点击ACTIONS->Restore,出现以下界面,其中sqlhost选择源主机,选择备份的时间,点击ok即可。
6.就可以看到源主机上已经成功备份的所有数据库。
选择需要恢复的数据库名称以及备份的项目,Recovery option选择recovered。
界面如下:7.生成异名数据库恢复脚本在以上界面中,选择create a retore scripts和save later for execute选项,点击OK,生成脚本。
对生成的脚本进行修改,修改database的名字为新的数据库名,并且修改数据文件和日志文件的路径,修改完毕后,保存脚本。
- 1、下载文档前请自行甄别文档内容的完整性,平台不提供额外的编辑、内容补充、找答案等附加服务。
- 2、"仅部分预览"的文档,不可在线预览部分如存在完整性等问题,可反馈申请退款(可完整预览的文档不适用该条件!)。
- 3、如文档侵犯您的权益,请联系客服反馈,我们会尽快为您处理(人工客服工作时间:9:00-18:30)。
通过NBU将Oracle恢复到异机上 (2)1.1备份任务检查: (2)1.2数据库空间检查 (2)1.3恢复服务器(testdb)软件安装: (3)1.4NBU 配置更改: (3)1.5数据库恢复初始 (3)1.6确定数据文件路径: (4)1.7实现数据库恢复: (5)1.7.1重新创建temporary tablespace (6)1.7.2创建listener.ora和tnsnames.ora文件 (6)通过NBU将Oracle恢复到异机上本文描述的是使用VERITAS的备份软件,将备份的Oracle数据库数据,恢复到另一台服务器上。
整个恢复过程的时间,与备份数据库的数据量大小相关、与恢复前的准备工作相关,包括如下几个过程:这里设定:NBU master Server: fzjc原服务器为:YXDB_A_MEDIA恢复主机为:testdb任务设定如下:通过NBU master server fzjc,将备份的YXDB_A_MEDIA上的Oracle,恢复到到testdb上。
1.1 备份任务检查:1.首先YXDB_A_MEDIA 的Oracle在NBU上备份成功。
打开fzjc 上NBU Console,查看YXDB_A_MEDIA相关Oracle 备份的策略和定时备份任务情况,确定Oracle备份任务执行成功无误。
2.确认备份Master Server能够操作磁带库,能够备份数据到磁带上。
1.2 数据库空间检查1.为了将数据数据恢复到其他服务器上,必须确定原数据库整个数据库占用磁盘空间大小:在YXDB_A_MEDIA上以系统管理员身份登录:A = select sum(bytes)/1024/1024 "Total redo size in MB" from v$logfile;B = select sum(bytes)/1024/1024 "Total DB file size in MB" from v$datafile;C > 归档日志目录(/arch)空间大小(该空间应尽可能大)2. 确定testdb上的可用磁盘空间:(1)NBU 软件安装需要>500M(2)Oracle 软件安装需要>1000M可用空间> A + B + C + 2G1.3 恢复服务器(testdb)软件安装:1. 在testdb上创建oracle用户、dba组,该用户的uid、gid必须与YXDB_A_MEDIA上的oracle用户相同。
2.安装与YXDB_A_MEDIA上同版本的Oracle软件(9.2.05),不创建instance,确认$ORACLE_HOME。
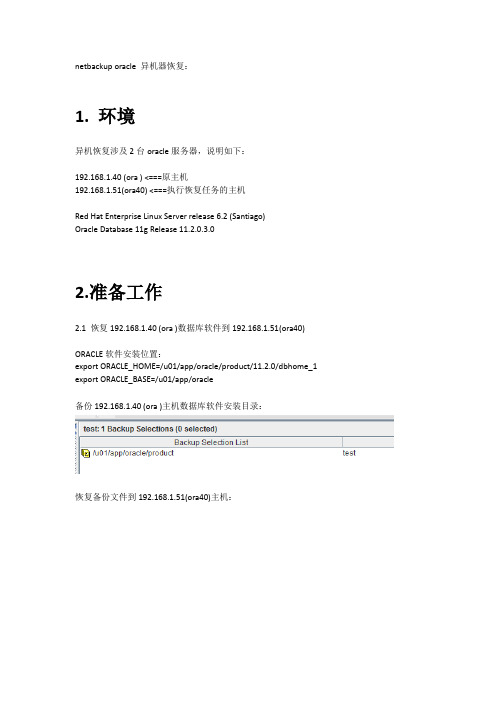
3.安装NBU Client 端,在fzjc上建立测试策略,能够备份该客户端上的文件系统数据。
4.安装NBU Oracle Agent,以oracle 用户登陆,执行:/usr/openv/netbackup/bin/oracle_link。
1.4 NBU 配置更改:1. 在NBU master服务器fzjc上创建文件install_path/netbackup/db/altnames/No.Restrictions2. 在testdb上,在$ORACLE_HOME/bp.conf 中设置SERVER=fzjc。
3. 在testdb上,设置环境变量ORACLE_SID = STGD; export ORACLE_SIDNB_ORA_CLIENT = YXDB_A_MEDIA; export NB_ORA_CLIENT1.5 数据库恢复初始1. 拷贝YXDB_A_MEDIA上的$ORACLE_HOME/dbs/initSTGD.ora到testdb服务器上$ORACLE_HOME/dbs/initSTGD.ora2.修改$ORACLE_HOME/dbs/initSTGD.ora :(1) control_files = ("/data/oradata/STGD/control01.ctl ")(2) log_archive_dest="/arch"(3) sort_area_size=200000003. 创建相关目录:(1) 设置$ORACLE_BASE=/data/oradata(2) 创建$ORACLE_BASE/STGD/bdump、$ORACLE_BASE/STGD/cdump、$ORACLE_BASE/STGD/udump、/arch目录4.创建testdb上的数据库启动control file:(1) 以sysdb登陆YXDB_A_MEDIA上的oracle(STGD):SQL>alter database backup controlefile to ‘/tmp/control01.ctl’;(2) 拷贝该文件(control01.ctl)到testdb服务器上的$ORACLE_BASE/STGD/control01.ctl ;5. 设置oracle数据库口令文件:在testdb上以oracle用户登陆,$orapwd file=$ORACLE_HOME/dbs/orapwSTGD password=oracle1.6 确定数据文件路径:由于原服务器YXDB_A_MEDIA上,所有数据文件都使用裸设备,而在testdb 上则使用数据文件(*.dbf),因此需要确定数据文件与裸设备的对应关系;在testdb上,以oracle用户登陆,以sysdba登陆oracle:SQL>start mount;SQL>echo on;SQL>spool /tmp/dbfile.txtSQL>select file#,name from v$datafile;SQL>quit;1.7 实现数据库恢复:在testdb上,以oracle用户登陆:$rman nocatalog target / cmdfile restore.rcv msglog restore.log其中restore.rcv 参见下文,该文件中的“set newname for datafile 1 to '/data/oradata/STGD/system01.dbf';”等修改于1.6中的dbfile.txt。
附一:restore.rcv脚本:#### This file to used rman to restore databaserun {allocate channel ch00 type 'sbt_tape'parms="ENV=(NB_ORA_SERV=fzjc,NB_ORA_CLIENT=YXDB_A_MEDIA)";allocate channel ch01 type 'sbt_tape'parms="ENV=(NB_ORA_SERV=fzjc,NB_ORA_CLIENT=YXDB_A_MEDIA)";SEND 'NB_ORA_SERV=fzjc,NB_ORA_CLIENT=YXDB_A_MEDIA';set newname for datafile 1 to '/data/oradata/STGD/system01.dbf';set newname for datafile 2 to '/data/oradata/STGD/undotbs01.dbf';set newname for datafile 3 to '/data/oradata/STGD/indx01.dbf';set newname for datafile 4 to '/data/oradata/STGD/user01.dbf';set newname for datafile 5 to '/data/oradata/STGD/tools01.dbf';set newname for datafile 6 to '/data/oradata/STGD/yd_data01.dbf';set newname for datafile 7 to '/data/oradata/STGD/yd_lrob01.dbf';set newname for datafile 8 to '/data/oradata/STGD/yd_hstr01.dbf';set newname for datafile 9 to '/data/oradata/STGD/undotbs02.dbf';set newname for datafile 10 to '/data/oradata/STGD/yd_data02.dbf';set newname for datafile 11 to '/data/oradata/STGD/drsys01.dbf';set newname for datafile 12 to '/data/oradata/STGD/xdb01.dbf';set newname for datafile 13 to '/data/oradata/STGD/yd_data07.dbf';set newname for datafile 14 to '/data/oradata/STGD/yd_hstr09.dbf';set newname for datafile 15 to '/data/oradata/STGD/yd_hstr10.dbf';set newname for datafile 16 to '/data/oradata/STGD/yd_data08.dbf';set newname for datafile 17 to '/data/oradata/STGD/yd_hstr02.dbf';set newname for datafile 18 to '/data/oradata/STGD/yd_data03.dbf';set newname for datafile 19 to '/data/oradata/STGD/undotbs03.dbf';set newname for datafile 20 to '/data/oradata/STGD/yd_data04.dbf';set newname for datafile 21 to '/data/oradata/STGD/yd_hstr03.dbf';set newname for datafile 22 to '/data/oradata/STGD/yd_data05.dbf';set newname for datafile 23 to '/data/oradata/STGD/yd_hstr04.dbf';set newname for datafile 24 to '/data/oradata/STGD/yd_data06.dbf';set newname for datafile 25 to '/data/oradata/STGD/apm.dbf';set newname for datafile 26 to '/data/oradata/STGD/indx02.dbf';set newname for datafile 27 to '/data/oradata/STGD/yd_hstr05.dbf';set newname for datafile 28 to '/data/oradata/STGD/yd_hstr06.dbf';set newname for datafile 29 to '/data/oradata/STGD/yd_hstr07.dbf';set newname for datafile 30 to '/data/oradata/STGD/yd_hstr08.dbf';set until time "to_date('02/13/06 06:00:00','MM/DD/YY HH24:MI:SS')";restore database;switch datafile all;recover database;sql 'alter database open resetlogs';}1.7.1重新创建temporary tablespace由于rman备份的时候并不备temporary tablespaces,所以恢复完毕后,要重新创建它们。