Moldflow2012安装说明
moldflow6.1安装教程
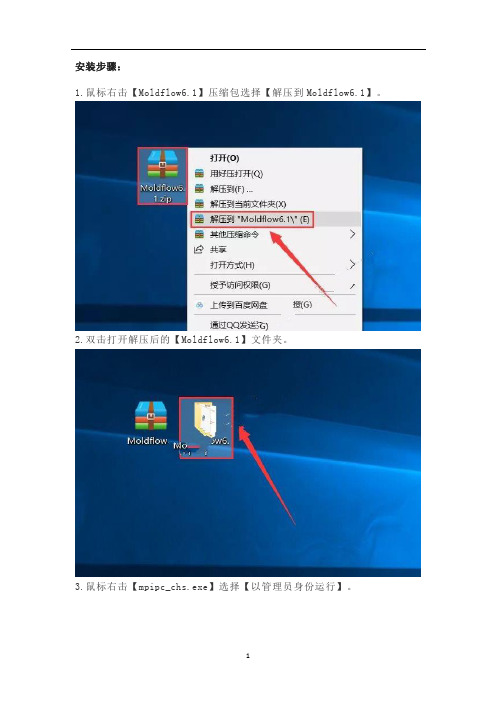
安装步骤:1.鼠标右击【Moldflow6.1】压缩包选择【解压到Moldflow6.1】。
2.双击打开解压后的【Moldflow6.1】文件夹。
3.鼠标右击【mpipc_chs.exe】选择【以管理员身份运行】。
4.点击【Next】。
5.点击【Next】。
6.点击【Next】。
7.点击【Browse…】更改安装路径,建议安装在除C盘之外的其它磁盘内,可选择安装在D盘或其它磁盘内,选择磁盘后会自动生成一个【Plastics Insight 6.1】文件夹,然后点击【Next】。
8.点击【Browse…】更改项目文件储存位置,建议储存在除C盘之外的其它磁盘内,可在D盘或其它磁盘内新建一个【My MPI 6.1 Projects】文件夹,然后点击【Next】。
9.点击【Browse…】更改文件临时储存位置,建议临时储存在除C盘之外的其它磁盘内,可在D盘或其它磁盘内新建一个【MPI 6.1 Temporary Files】文件夹,然后点击【Next】。
10.点击【Install】。
11.正在安装中(大约需要2分钟)。
12.点击【下一步】。
13.点击【浏览】更改安装路径,建议安装在除C盘之外的其它磁盘内,可选择安装在D盘或其它磁盘内,选择磁盘后会自动生成一个【Product Security】文件夹,然后点击【下一步】。
14.点击【下一步】。
15.点击【下一步】。
16.点击【安装】。
17.正在安装中(大约30秒)。
18.取消勾选【获取许可证密钥】然后点击【完成】。
19.点击【Finish】。
20.双击打开安装包解压后的【Moldflow6.1】文件夹中的【crack】文件夹。
21.鼠标右击【MF2007_fix.exe】选择【复制】。
22.鼠标右击【Plastics Insight 6.1】软件图标选择【打开文件所在的位置】。
23.鼠标右击空白处选择【粘贴】。
24.鼠标右击粘贴后的【MF2007_fix.exe】选择【以管理员身份运行】。
Moldflow 2012教程
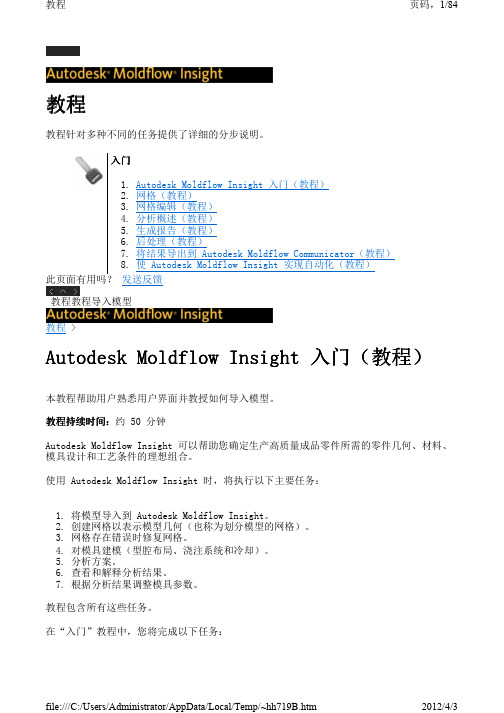
用户界面 - 工具栏
屏幕的整个顶部是显示工具栏的面板。 工具栏面板
file:///C:/Users/Administrator/AppData/Local/Temp/~hh719B.htm
2012/4/3
教程
页码,7/84
7. 旋转模型(请参阅步骤 1)。模型绕面板的中心旋转。 8. 可通过单击 (“视图”选项卡 > “导航”面板 > “中心”)选择轴心点。单击模
型的右上角,然后再次旋转零件。 此功能用于帮助研究局部状态。 9. 要将模型返回到原始状态,可使用 ViewCube 选择“主视图”,然后单击 (“视 图”选项卡 > “导航”面板 > “全部缩放”)。 单击下方的下一主题链接即可跳转至教程的下一任务。 上一主题: 导入模型 下一主题: 用户界面 - 模型窗格 此页面有用吗? 发送反馈 模型操作Autodesk Moldflow Insight 入门(教程)用户界面 - 工具栏 教程 > Autodesk Moldflow Insight 入门(教程) >
发送反馈用户界面工具栏autodeskmoldflowinsight入门教程用户界面层面板教程autodeskmoldflowinsight入门教程用用用户户户户界面界面界面界面工程面板工程面板工程面板工程面板工程面板显示有关正在进行分析的模型的信息
教程
页码,1/84
教程
教程针对多种不同的任务提供了详细的分步说明。
1. 将模型导入到 Autodesk Moldflow Insight。 2. 创建网格以表示模型几何(也称为划分模型的网格)。 3. 网格存在错误时修复网格。 4. 对模具建模(型腔布局、浇注系统和冷却)。 5. 分析方案。 6. 查看和解释分析结果。 7. 根据分析结果调整模具参数。
Autodesk Moldflow Design Link 2012导入模型文件提示找不到许可证解决方法
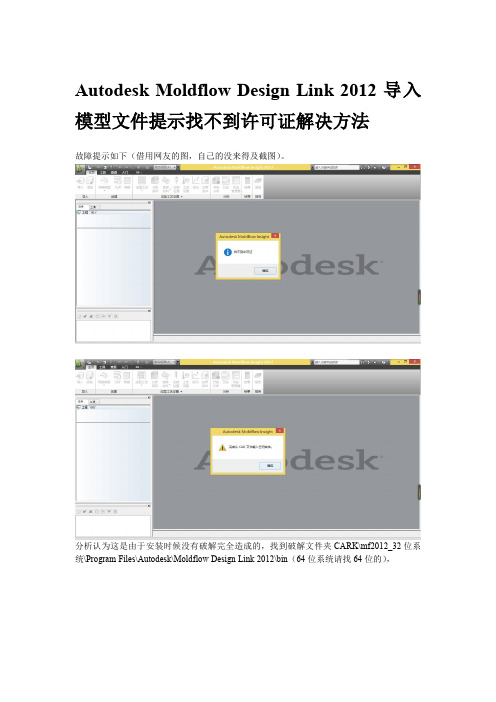
Autodesk Moldflow Design Link2012导入模型文件提示找不到许可证解决方法
故障提示如下(借用网友的图,自己的没来得及截图)。
分析认为这是由于安装时候没有破解完全造成的,找到破解文件夹CARK\mf2012_32位系统\Program Files\Autodesk\Moldflow Design Link2012\bin(64位系统请找64位的),
复制adlmint.dll文件到相应的安装文件夹(如安装文件在D:\Program Files\Autodesk\Moldflow Insight2012\bin)替换源文件即可,本人亲测有效。
建议同学们破解时候把整个破解包复制到相应的安装文件夹,合并并替换即可,不用一项一项复制替换,破解包都有各个模块的破解文件。
勾选此项,即可。
楼主的情况就是怎么解决的,不能保证包治百病,希望能帮到您,亲。
MoldFlow2012安装破解与故障处理必读-匡唐清
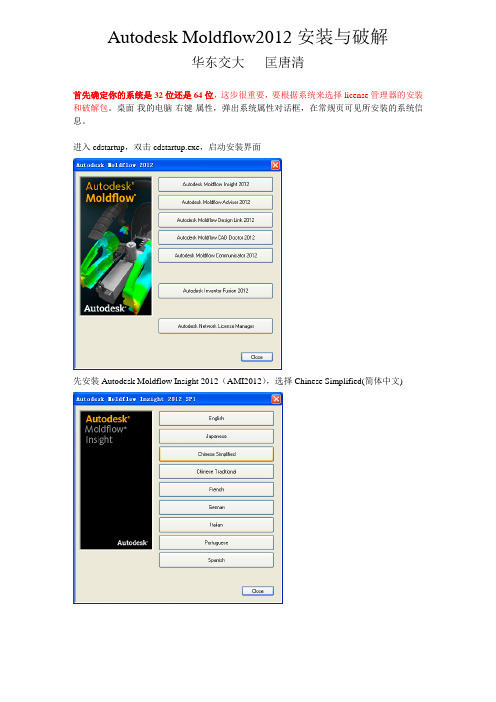
Autodesk Moldflow2012安装与破解华东交大匡唐清首先确定你的系统是32位还是64位,这步很重要,要根据系统来选择license管理器的安装和破解包。
桌面-我的电脑-右键-属性,弹出系统属性对话框,在常规页可见所安装的系统信息。
进入cdstartup,双击cdstartup.exe,启动安装界面先安装Autodesk Moldflow Insight 2012(AMI2012),选择Chinese Simplified(简体中文)安装AMI用户界面(Install Autodesk Moldflow synergy-User Interface)填写Moldflow2012序列号(495-89744521)及Synergy产品号579D1注:Moldflow2012序列号SN: 495-89744521产品号Product Key如下:566D1 - Autodesk Moldflow Design Link CA TIA V5 2012(CATIA 转档模块)567D1 - Autodesk Moldflow Design Link Pro/ENGINEER 2012(Pro/ENGINEER 转档模块)568D1 - Autodesk Moldflow Design Link Parasolid 2012(Parasolid 转档模块)570D1 - Autodesk Moldflow Adviser Design 2012571D1 - Autodesk Moldflow Adviser Manufacturing 2012572D1 - Autodesk Moldflow Adviser Advanced 2012——AMA求解器,完整版(推荐安装)573D1 - Autodesk Moldflow Insight Basic 2012574D1 - Autodesk Moldflow Insight Performance 2012575D1 - Autodesk Moldflow Insight Advanced 2012——AMI求解器,完整版(推荐安装)577D1 - Autodesk Moldflow CAD Doctor 2012 CAD模型的修复与简化579D1 - Autodesk Moldflow Synergy 2012 Autodesk Moldflow Insight (AM)界面选择在本地主机上安装网络License管理器,更改其安装路径到D盘选择单License服务器,主机名为通用主机名localhost,适于机房统一安装更改安装路径到D盘更改临时文件放置位置到D盘主机名默认为前面设置的localhost选择功能区用户界面方式(ribbon UI)Classic UI为经典/旧用户界面,请选择Classic UI(老师熟悉该界面,教学视频也是基于该界面)去除在线注册于激活安装AMI求解器填写Moldflow2012序列号(495-89744521)及Autodesk Moldflow Insight Advanced 2012产品号575D1(Advanced功能最全,Basic为基本功能,Performance功能比Advanced略少)其他默认安装中文语言包安装完成,close退出查看安装路径中是否有文件夹“Autodesk Network License Manager”,若无,点击“Install Autodesk Network License Manager”安装license管理器,根据系统选择32位或64位,点击accept接受协议,若没连上网络可能会弹出对话框(需要下载文件),连上网络后点击Retry(重试),自动下载文件后完成该管理器的安装。
Autodesk Moldflow Design Link 2012导入模型文件提示找不到许可证解决方法

Autodesk Moldflow Design Link2012导入模型文件提示找不到许可证解决方法
故障提示如下(借用网友的图,自己的没来得及截图)。
分析认为这是由于安装时候没有破解完全造成的,找到破解文件夹CARK\mf2012_32位系统\Program Files\Autodesk\Moldflow Design Link2012\bin(64位系统请找64位的),
复制adlmint.dll文件到相应的安装文件夹(如安装文件在D:\Program Files\Autodesk\Moldflow Insight2012\bin)替换源文件即可,本人亲测有效。
建议同学们破解时候把整个破解包复制到相应的安装文件夹,合并并替换即可,不用一项一项复制替换,破解包都有各个模块的破解文件。
勾选此项,即可。
楼主的情况就是怎么解决的,不能保证包治百病,希望能帮到您,亲。
moldflow6.1安装教程
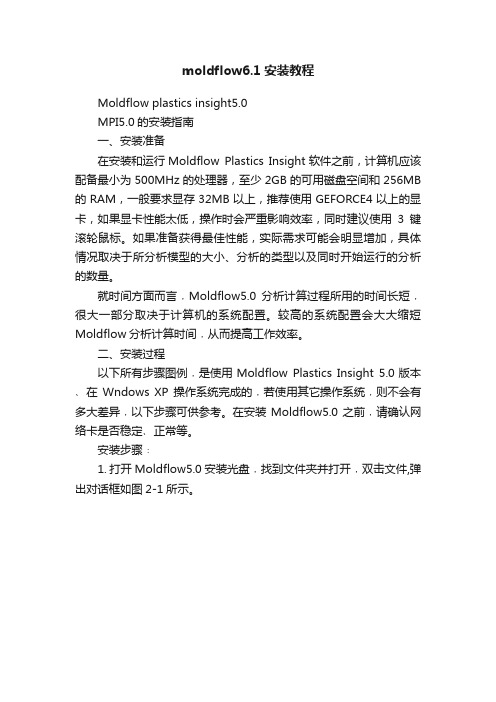
moldflow6.1安装教程Moldflow plastics insight5.0MPI5.0的安装指南一、安装准备在安装和运行Moldflow Plastics Insight软件之前,计算机应该配备最小为500MHz的处理器,至少2GB的可用磁盘空间和256MB 的RAM,一般要求显存32MB以上,推荐使用GEFORCE4以上的显卡,如果显卡性能太低,操作时会严重影响效率,同时建议使用3键滚轮鼠标。
如果准备获得最佳性能,实际需求可能会明显增加,具体情况取决于所分析模型的大小、分析的类型以及同时开始运行的分析的数量。
就时间方面而言﹐Moldflow5.0分析计算过程所用的时间长短﹐很大一部分取决于计算机的系统配置。
较高的系统配置会大大缩短Moldflow分析计算时间﹐从而提高工作效率。
二、安装过程以下所有步骤图例﹐是使用Moldflow Plastics Insight 5.0版本﹑在Wndows XP操作系统完成的﹐若使用其它操作系统﹐则不会有多大差异﹐以下步骤可供参考。
在安装Moldflow5.0之前﹐请确认网络卡是否稳定﹑正常等。
安装步骤﹕1. 打开Moldflow5.0安装光盘﹐找到文件夹并打开﹐双击文件,弹出对话框如图2-1所示。
图2-1 安装对话框2. 单击按钮即可进入如图2-2所示安装界面。
图2-2 安装界面3. 单击按钮开始安装4. 单击按钮5.单击按钮6.单击按钮四次,安装进程如图2-3所示。
图2-3 安装进程7.出现提示重启计算机界面时(如图2-4),单击按钮重新启动计算机。
图2-4 安装信息框8.重新开机后,在桌面“我的电脑”图标上单击右键,并选择“管理”项,如图2-5所示。
图2-5 右键菜单9.弹出如图2-6所示计算机管理对话框后,单击左栏“+”号展开项,然后单击项。
此时对话框会如图2-7所示图2-7 计算机管理对话框10.找到并双击图示2-7中的项,弹出对话框如图2-8所示。
MoldFlow2012使用经验
一、概述
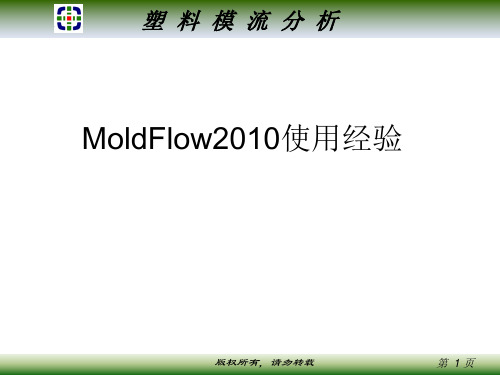
中面流技术 简单的办法,导入MOLDFLOW用 FUSION格式,在FUSION下进行简单 处理后,直接转化成MIDPLANE 格式
中面流技术的应用始于20世纪80年代。其数值方法主要采用基于中面的 有限元/有限差分/控制体积法。所谓中面是需要用户提取的位于模具型腔面和型 芯中间的层面,其模拟过程如图1所示。 基于中面流技术的注塑流动模拟软件应用的时间最长、范围也最广,其 典型代表如国外Moldflow公司的MF软件、原AC-Tech公司(被Moldflow公司并购 )的C-Mold软件,国内华中科技大学国家模具技术国家重点试验室的HSCAE- F3.0软件。实践表明,基于中面流技术的注塑成型流动软件在应用中具有很大的 局限性,具体表现为:(1)用户必须构造出中面模型,采用手工操作直接由实体/ 表面模型构造中面模型十分困难;(2)独立开发的注塑成型流动模拟软件(如上述 的MF、C-Mold和HSCAE-F3.0软件)造型功能较差,根据产品模型构造中面往往 需要花费大量的时间;(3)由于注塑产品的千变万化,由产品模型直接生成中面 模型的CAD软件的成功率不高、覆盖面不广;(4)由于CAD阶段使用的产品模型和 CAE阶段使用的分析模型不统一,使二次建模不可避免,CAD与CAE系统的集成也 无法实现。 由此可见,中面模型已经成为了注塑模CAD/CAE/CAM技术发展的瓶颈, 采用实体/表面模型来取代中面模型势在必然,在20世纪90年代后期基于双面流 技术的流动模拟软件便应运而生。
环境变量 : UF_MF_PA_PATH=(Moldflow安装目录)\Moldflow Plastics Advisers 6.0\bin 启动UG--Application--Moldflow Part Adviser--选择实体--有License错误提 示-- OK两次即可使用MPA
MoldFlow6[1].1安装图解
![MoldFlow6[1].1安装图解](https://img.taocdn.com/s3/m/dde988be69dc5022aaea0024.png)
Moldflow2007安装详解把杀毒软件关掉。
解压安装压缩包第1步:打开Moldflow Plastics Insight 6.1文件夹。
双击MPI 6.1.exe进入安装,如下图:第2步:,点击“Next”如下图:第3步:,点击“Next”如下图:第4步:,点击“Next”如下图:第5步:,点击“Next”如下图:第6步:,点击“Next”如下图:第7步:,点击“Next”如下图:第8步:,点击“Install”如下图:第9步:,点击“Next”如下图:第10步:,点击“Next”如下图:第11步:,点击“Next”如下图:第12步:,点击“Next”如下图:第13步:,点击“Instal”如下图:第14步:,把“Obtain License Keys”的勾选去掉,再点击“Finsh”如下图:第15步:点击“Finsh”如下图第16步在我的电脑,右击。
在快捷菜单中选择“服务”第17步“找到Moldflow Product Security”停止其服务,找到”Plastics Insight 6.1 Job Manager”停止其服务第18步选中桌面图标选择属性第19步点击“查找目标”用于打开“C:\Program Files\Moldflow\Plastics Insight 6.1\bin “文件夹第20步把安装文件解压文件夹中的拷贝到上面的“bin“文件夹中,并双击它第21步。
直接”向上”找到选择进入C:\Program Files\Moldflow\Product Security文件夹。
把刚复制的文件再次粘贴在其中并双击第22步再将Moldflow 2007 含MPI 6.1等\MAGNiTUDE中的keyfile和mfpsd.exe拷贝到上述文件夹第23步启动在17步关闭的两个服务。
第24步:等待一分钟点击桌面的“Plastics Insight 6.1”图标启动MoldFlow6. 到此就安装完成了。
MoldFlow2012安装破解与故障处理必读

MoldFlow2012安装破解与故障处理必读Autodesk Moldflow2012安装与破解首先确定你的系统是32位还是64位,这步很重要,要根据系统来选择license管理器的安装和破解包。
桌面-我的电脑-右键-属性,弹出系统属性对话框,在常规页可见所安装的系统信息。
进入cdstartup,双击cdstartup.exe,启动安装界面先安装Autodesk Moldflow Insight 2012(AMI2012),选择Chinese Simplified(简体中文)安装AMI用户界面(Install Autodesk Moldflow synergy-User Interface)填写Moldflow2012序列号(495-89744521)及Synergy产品号579D1注:Moldflow2012序列号SN: 495-89744521产品号Product Key如下:566D1 - Autodesk Moldflow Design Link CATIA V5 2012(CATIA 转档模块)567D1 - Autodesk Moldflow Design Link Pro/ENGINEER 2012(Pro/ENGINEER 转档模块)568D1 - Autodesk Moldflow Design Link Parasolid 2012(Parasolid 转档模块)570D1 - Autodesk Moldflow Adviser Design 2012 571D1 - Autodesk Moldflow Adviser Manufacturing 2012572D1 - Autodesk Moldflow Adviser Advanced 2012——AMA求解器,完整版(推荐安装)573D1 - Autodesk Moldflow Insight Basic 2012 574D1 - Autodesk Moldflow Insight Performance 2012575D1 - Autodesk Moldflow Insight Advanced 2012——AMI求解器,完整版(推荐安装)577D1 - Autodesk Moldflow CAD Doctor 2012 CAD模型的修复与简化579D1 - Autodesk Moldflow Synergy 2012 Autodesk Moldflow Insight (AM)界面选择在本地主机上安装网络License管理器,更改其安装路径到D盘选择单License服务器,主机名为通用主机名localhost,适于机房统一安装更改安装路径到D盘更改临时文件放置位置到D盘主机名默认为前面设置的localhost选择功能区用户界面方式(ribbon UI)Classic UI 为经典/旧用户界面,请选择Classic UI(老师熟悉该界面,教学视频也是基于该界面)去除在线注册于激活安装AMI求解器填写Moldflow2012序列号(495-89744521)及Autodesk Moldflow Insight Advanced 2012产品号575D1(Advanced功能最全,Basic为基本功能,Performance功能比Advanced略少)其他默认安装中文语言包安装完成,close退出查看安装路径中是否有文件夹“Autodesk Network License Manager”,若无,点击“Install Autodesk Network License Manager”安装license管理器,根据系统选择32位或64位,点击accept接受协议,若没连上网络可能会弹出对话框(需要下载文件),连上网络后点击Retry(重试),自动下载文件后完成该管理器的安装。
Moldflow 2012教程

用户界面 - 工具栏
屏幕的整个顶部是显示工具栏的面板。 工具栏面板
file:///C:/Users/Administrator/AppData/Local/Temp/~hh719B.htm
2012/4/3
教程
页码,7/84
每个工具栏都可以“显示”或“隐藏”。 现在将检查可用的工具栏选项。
1. 如果未打开,可打开以前使用的 tutorial_model.sdy 文件。 2. 单击菜单中的“视图” > “工具栏”。
将勾选当前显示的工具栏。 3. 如果未选择,可勾选“建模”菜单项。
此时,“工具栏”面板中会显示长“建模”工具栏。为了适应此工具栏,“工具栏”面 板可能已自动向屏幕下方延伸。 4. 再次勾选“视图” > “工具栏” > “建模”。工具栏将消失,“工具栏”面板将恢复 到其原来大小。 为了便于使用,工具栏功能按功能进行了分组。在后面的教程中,假设至少选择了“标准” 工具栏、“查看器”工具栏、“动画”工具栏、“结果”工具栏和“视角”工具栏。 确保勾选这些工具栏,然后单击下面的下一主题链接继续教程的下一个任务。 上一主题: 用户界面 - 模型窗格 下一主题: 用户界面 - 工程面板 此页面有用吗? 发送反馈 用户界面 - 工具栏Autodesk Moldflow Insight 入门(教程)用户界面 - 层面板
请确保已选择“任务”选项卡。它位于窗口左侧的白色“工程”面板的顶部。这时,刚刚创 建的 Getting Started 工程会在此部分列出。
接下来将向刚刚创建的工程导入方案。
导入方案
4. 单击 (“主页”选项卡 > “导入”面板 > “导入”)。 5. 选择“文件类型”下拉列表。将显示直接支持的文件类型列表。选择“方案文件
MoldFlow6.1安装图解
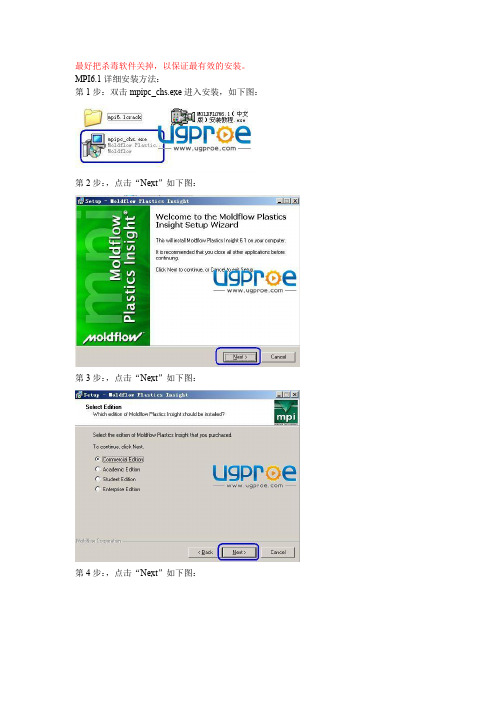
最好把杀毒软件关掉,以保证最有效的安装。
MPI6.1详细安装方法:第1步:双击mpipc_chs.exe进入安装,如下图:第2步:,点击“Next”如下图:第3步:,点击“Next”如下图:第4步:,点击“Next”如下图:第5步:,点击“Next”如下图:第6步:,点击“Next”如下图:第7步:,点击“Next”如下图:第8步:,点击“Install”如下图:第9步:,点击“下一步”如下图:第10步:,点击“下一步”如下图:第11步:,点击“下一步”如下图:第12步:,点击“下一步”如下图:第13步:,点击“安装”如下图:第14步:,把“获取许可证密钥”的勾选去掉,再点击“完成”如下图:第15步:复制mpi6.1crack文件夹中的MF2007_fix.exe文件分别粘贴到安装路径C:\Program Files\Moldflow\Product Security与C:\Program Files\Moldflow\Plastics Insight 6.1\bin下再双击运行MF2007_fix.exe,运行结束后按任意键退出!如下图:第16步:点击“开始-设置-控制面板”如下图:第17步:点击“管理工具”如下图:第18步:点击“服务”如下图:第19步:分别点击“Moldflow Product Security”与“Plastics Insight 6.1 Job Manager”进入后点击“停止”如下图:第20步:复制mpi6.1crack文件夹中的mfpsd.exe 与keyfile到C:\Program Files\Moldflow\Product Security路径下,如下图:第21步:分别点击“Moldflow Product Security”与“Plastics Insight 6.1 Job Manager”进入后点击“启动”如下图:第22步:点击桌面的“Plastics Insight 6.1”图标启动MoldFlow6.1中文版,到此就安装完成了。
SolidWorks Education Edition 2012 安装指南说明书
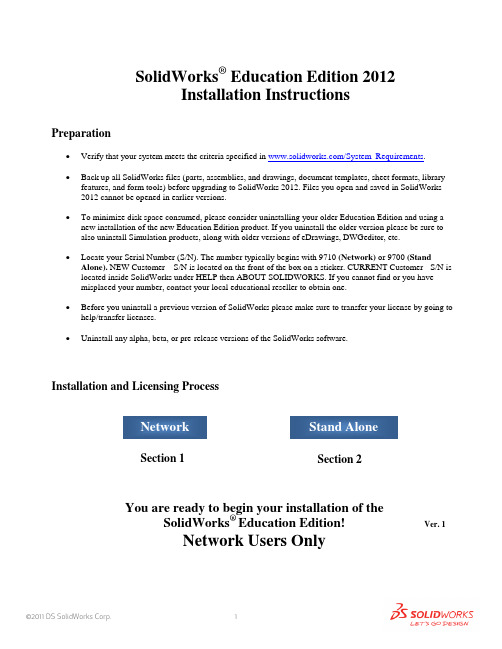
SolidWorks ® Education Edition 2012Installation InstructionsPreparation• Verify that your system meets the criteria specified in /System_Requirements .• Back up all SolidWorks files (parts, assemblies, and drawings, document templates, sheet formats, libraryfeatures, and form tools) before upgrading to SolidWorks 2012. Files you open and saved in SolidWorks 2012 cannot be opened in earlier versions.• To minimize disk space consumed, please consider uninstalling your older Education Edition and using anew installation of the new Education Edition product. If you uninstall the older version please be sure to also uninstall Simulation products, along with older versions of eDrawings, DWGeditor, etc.• Locate your Serial Number (S/N). The number typically begins with 9710 (Network) or 9700 (StandAlone). NEW Customer – S/N is located on the front of the box on a sticker. CURRENT Customer - S/N is located inside SolidWorks under HELP then ABOUT SOLIDWORKS. If you cannot find or you have misplaced your number, contact your local educational reseller to obtain one.• Before you uninstall a previous version of SolidWorks please make sure to transfer your license by going tohelp/transfer licenses.• Uninstall any alpha, beta, or pre-release versions of the SolidWorks software.Installation and Licensing ProcessYou are ready to begin your installation of theSolidWorks ® Education Edition!Network Users OnlySection 2Section 1Ver. 1STEPS FOR SECTION 1: NETWORK INSALLATION:1.Remove previous SolidNetWork License Managers2.Remove previous SolidWorks software3.Install 2012 SolidNetWork License Manager4.Activate 2012 Network License5.Install SolidWorks software on individual clientsSection 1 | SolidWorks® Education Edition Installation (Network)Note:If you are installing SolidWorks on a Network with Restricted Rights, please go to the Customer Portal for additional documentation or contact your local reseller for assistance.This step is only for users who are on NETWORK. If you purchased a Stand Alone, proceed to Section 2 in the installation process.Note:•All previous SolidWorks License Managers must be removed from your computer before beginning the installation of the new SolidWorks License Manager (i.e. 2011 must be removed before installing 2012).•The SolidWorks License Manager must be installed on the machine that will be used to distribute SolidWorks licenses on your network.•The SolidWorks License Manager for 2012 will license all SolidWorks EDU applications., including SolidWorks Simulaton, SolidWorks Sustainability, eDrawings and PhotoView 360.Remove previous SolidNetWork License Managers1.Stop the Licensing Service onthe host machine.For Window XP, open the TaskManager from the Control Paneland select the Processes tab andclick the Image Name header tosort in alphabetical order. LocateImgrd.exe process and selectEnd Process.unch Add/Removeprograms and uninstall theprevious version of theinstallation Manager.Access Add/Removeprograms from Start >Control Panel >Add/Remove Programs.Locate the SolidWorksSolidNetWork LicenseManager and selectRemove.-Once the remove option is selected you will beprompted to confirm theproducts to uninstall.-The product will thenuninstall itself. A progressonly box will appear.-After the product uninstall iscomplete, close theAdd/Remove program swindow and launchWindows Explorer. Locatethe folder in which thelicense manager waspreviously installed to anddelete it. By default thelicense manager is installedto: C:\ProgramFiles\SolidWorksSolidNetWork LicenseManager.Remove previous SolidWorks Software1.If required, uninstall SolidWorks using Add/Remove Programs.2.If required, Delete SolidWorks folders located in C:\ Program Files\SolidWorks CorpBegin 2012 SolidNetWork License Manager Installation1.Insert your 2012 SolidWorks DVD in your local DVD Drive to begin the softwareinstallation process. If SolidWorks Master Setup does not come up automatically, select My Computer and double click the DVD drive, this is generally your D: drive. You may alsolaunch the Installation Manager downloaded from the SolidWorks Customer Portal.Note: Once DVD is placed in your local DVD Drive, the SolidWorks 2012 SP2.0 Installation Manager will appear. Select Server products and then select “Install SolidNetWork License Manager (distributed licensing) on this computer.”Click Next.2.The next screen will prompt you for your SolidWorks and associated products serial number.Enter your product serial number. Click Next.3.Confirm the Summary page and click “Install Now”.Note: Server Installation Progress will appear. Once done checking for Updates, the SolidWorks SolidNetWork License Manager Setup will appear. Click Next.4.After the installation is complete there will be a confirmation of the successful install. Oncecompleted the Installation Manager confirms the product(s) are installed correctly.5.Select Finish and close the installation manager. This completes the installation of theSolidWorks SolidNetWork License Manager. If you choose to tell us your installation experience, the following Survey will be displayed in your Internet Browser. Thank you for your feedback.Activate 2012 SolidNetWork LicenseStarting with SolidWorks 2010 release, a new licensing method has been introduced for network licenses. The new process will require internet connectivity to ‘activate’ the license on the SolidWorks server.What does this mean for the user? The end user will no longer need a license file or existing dongle. The dongle must be returned to your value added reseller.1.To activate the newly installed software go to Start > All programs > SolidWorks 2012 >SolidWorks License Manager > SolidNetWork License Manger.A server information dialog will appear that will allow you to choose the license server port(s)and apply an options file if desired. It is recommended that you select the option for firewall in use on this server. Select Next to continue.Note: You will need to add exceptions in your firewall software, example shown in Windows XP andWindows 7 Firewall settings on the next page. For Windows 7, skip the Windows XP firewall section and go to Windows 7 settings.For Windows XP Firewall1.Select Security Center from the Control Panel.2.Click Windows Firewall and then selectExceptions Tab. Select the Add Programbutton.For Windows XP Firewall3.Browse to the folder where you installedthe SolidWorks SolidNetwork LicenseManager and select both Lmgrd.exe andsw_d.exe.If lmgrd.exe is added successfully,lmgrd.exe will appear in the list of programs.If sw_d.exe is added successfully, sw_d.exe willappear in the list of programs.Continue with SolidnetWork License Installation go to Page 171.Add program exceptions to the Windows 7 Firewall. In SNL Server setup, change image toshow that the windows firewall option is selected.2.Bring up the Control Panel and Select System and Security3.Allow programs through the firewall.4.Click “allow another program”And Browse to the folder where you installed theSolidWorks SolidNetwork License Manager. Add both executables. Lmgrde.exe and sw_d.exeWhen lmgrd.exe is added successful to the exceptions list, it will appear as Accresso Software Inc in the list of Allowed programsWhen sw_d is allowed successfully, it will as sw_dn in the allowed programs list.Continue with SolidnetWork License InstallationThe SolidWorks Product Activation window will appear and you will be required to fill out an email to associate to the activation. Enter an email address and select Next. Note: If you do not have internet access, please contact your Value Added Reseller.The product will now activate via internet.After a successful activation there will be a succeeded message which will show all the products associated with your serial number.Select Finish, completing activation. The license manager will appear and you can close it out to complete the activation process.NOTE:You have now finished installing the SolidWorks License Manager. You must now go to your client computers and proceed as follows on steps.Before beginning the installation process, please be sure to close out of all SolidWorks programs currently open on your computer.You can also install SolidWorks on your server machine. Follow the instructions in the next section.Section 2 | SolidWorks® Education Edition Installation (Stand Alone) Note:For SolidWorks Network install, the software does not get installed on the network machine (Server) by default. Normally SolidWorks should be installed on the user machines (Client).Before beginning the installation process, please be sure to close out of all SolidWorks programs currently open on your computer.1.On the CLIENT Machine Insert DVD or launch the Installation Manager downloaded fromthe SolidWorks Customer Portal. Select Individual (on this computer). Click Next in lower right corner.2.For new installation enter your serial number below (24 digits). Click Next.Note: The message in the center of the window under the green bar, “Connecting to SolidWorks”will appear. You may see a screen stating that a newer version is available, ALWAYS selectcontinue installing from DVD and click Next.3.After you have clicked Next, the SolidWorks 2012 SP2.0 Installation Manager will guide youthrough the installation. Accept Defaults on the screen (DO NOT change anything) Click Install Now to continue installation.Note: For the client installation of a network license, you will be asked for your license server name as below. Please enter your license server and the port number that you specified in the server ***************************************************************************“OK”4. Installation is Complete! Confirm if you would like to tell us your installation experience in a survey or participate in the Customer Experience program, then click Finish.Note: Depending upon your computer configuration you may or may not need to restart your computer. Installing SolidWorks will also install Simulation and Sustainability products automatically. You do not have to re-install Simulation after the SolidWorks installation is complete.For client installation of a network license, your SolidWorks is ready now since your network license server has been activated in Section 1 and your client SolidWorks is connected with your license server.For standalone license installation, when you start SolidWorks Education Edition for the first time, the SolidWorks Product Activation dialog will appear to guide you through the activation process. Click Next, to continue with activation.To activate you SolidWorks product you must enter a serial number from SolidWorks. The SolidWorks Product Activation will help you collect the information necessary to activate your product. Choose which method for how you would like to activate. Type in email address and then click Next.Now you are done registering your SolidWorks Education Edition. Click Finish.YOU CAN NOW RUNSOLIDWORKS EDUCATION EDITION!。
Moldflow安装及常见软件许可有问题的解决

Autodesk Moldflow 2011 安装注册向导变化概述:•产品名称:Moldflow Plastic Insight (MPI) 转变为Autodesk Moldflow Insight (AMI)Moldflow Plastic Adviser (MPA) 转变为 Autodesk Moldflow Adviser (AMA) •FlexLM 用于license管理. 安装license manager的步骤请参考第10步.•支持平台已经变化,请参考DVD上的安装向导.•DVD光盘包括所有的Autodesk Moldflow产品和语言文件.•模块整合为三种不同的软件包(AMI 和AMA). 如下所示:1. Autodesk Moldflow Insight Basic2. Autodesk Moldflow Insight Performance3. Autodesk Moldflow Insight Advanced1. Autodesk Moldflow Adviser Design2. Autodesk Moldflow Adviser Manufacturing3. Autodesk Moldflow Adviser Advanced•所有的license现在都是浮动license。
关于安装的更多的信息包含在DVD中。
安装步骤:以下为Autodesk Moldflow Insight 2011 (AMI) 在Windows XP 64位机器上的安装步骤. Autodesk Moldflow Adviser和其它产品的安装都参考此步骤.1.选择你需要安装的产品.2.开始Autodesk Moldflow Insight (AMI)的安装.3.接受license协议.4.选择安装路径. 建议安装在默认路径.5.设定默认的项目路径。
可以选择用户的“My Documents” 文件夹. 建议设定特定的客户路径,如(c:\My_AMI_2011_Projects)。
moldflow 2012下载与安装图文教程
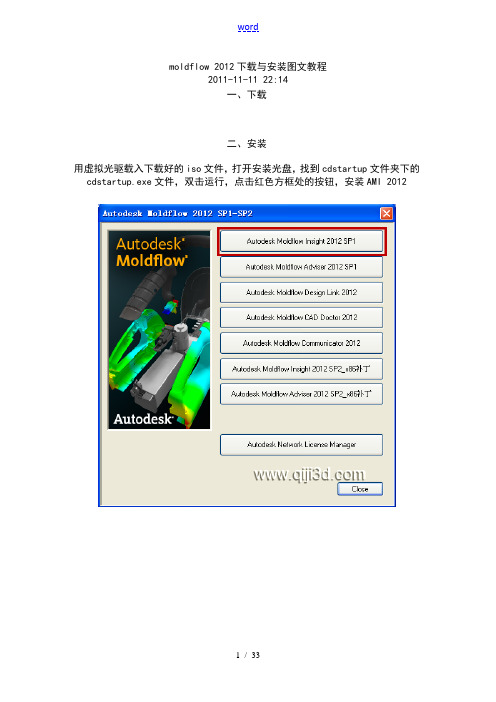
moldflow 2012下载与安装图文教程2011-11-11 22:14一、下载二、安装用虚拟光驱载入下载好的iso文件,打开安装光盘,找到cdstartup文件夹下的cdstartup.exe文件,双击运行,点击红色方框处的按钮,安装AMI 2012打开cark文件夹下的序列号.txt文件,将序列号和密钥填入输入计算机名称,计算机名可以通过鼠标右键点击桌面上的我的电脑图标,选择属性,选择计算机名来查询点击next,勾选承受协议,点击next输入序列号和密钥点击close关闭AMI安装向导,点击close关闭语言选择窗口,打开主安装界面,安装MDL2012点击next直到Install,完成后点击finish退出安装界面点击next直到Install,完成后点击finish退出安装界面点击next直到Install,完成后点击finish退出三、破解打开安装光盘CARK文件夹,根据你的计算机找到32位或64位的破解文件,复制到安装目录相对应的位置,粘贴并替换原有的文件复制安装光盘CARK文件夹下license文件夹里的license.dat文件,找到许可证服务器的安装位置,默认为C:\Program Files\Autodesk Network License Manager,粘贴,并双击lmtools.exe文件,打开许可证服务器窗口2.imgrd.exe文件路径,默认为C:\Program Files\Autodesk Network LicenseManager先点击stop server ,再点击start server双击桌面上的AMI快捷图标打开AMI,选项中修改下互联网选项接下来更改下CAD Doctor的语言为简体中文,找到CAD Doctor安装目录下的config文件夹,找到CadDoctor.ini文件,用记事本打开,更改ENG JPN为CHS。
Moldflow2012安装详细图示-全面指导安装参考教程

Moldflow2012安装详细图示-全面指导安装参考教程一准备工作看到下面文件,开始做操作工作1-对于---解压对里面的压缩包都接压,然后删除压缩包2-双击--Install这个过程需要点时间—请耐心等待.. 出现安装画面—开始正式安装二开始安装1-2-3-选择语言—一般汉语选择- 4-5-6-请等待………………………7-8-SN----------------------- 495-89744521 Product Key:----------- 579D19-10-11-12-13-14-15-16-17-上图选项为—软件使用界面的选择—根据自己爱好选择!18-19-20-需要等待点时间……………….检查系统环境21-22-下来继续安装23-24-请等待……. 25-26-SN----------------- 495-89744521 Product Key:----- 575D127-28-29-30-31-32-33-安装汉语简体语言包—其它语言不需要安装34-35-36-37-38-三破解软件1-开始破解软件---------我安装了2次,最后安装在接压----X86为32位破解文件X64为64为破解文件根据你电脑位数情况,选择解压------以前的电脑基本都是32位的.我32位,解压找到找到—复制该文件打开—安装目录—粘贴该文件,覆盖原文件2-3-粘贴--OK复制---到安装目录--- 粘贴---最后一步设置服务器4-5-6-7-8-最重要的9-10-11-12-Ok,破解结束.等3分钟…………………. 恭喜您,安装破解成功!运行软件。
moldflow 2012下载与安装图文教程
moldflow 2012下载与安装图文教程2011-11-11 22:14一、下载下载地址:/bbs.php二、安装用虚拟光驱载入下载好的iso文件,打开安装光盘,找到cdstartup文件夹下的cdstartup.exe文件,双击运行,点击红色方框处的按钮,安装AMI 2012打开cark文件夹下的序列号.txt文件,将序列号和密钥填入输入计算机名称,计算机名可以通过鼠标右键点击桌面上的我的电脑图标,选择属性,选择计算机名来查询点击next,勾选接受协议,点击next输入序列号和密钥点击close关闭AMI安装向导,点击close关闭语言选择窗口,打开主安装界面,安装MDL 2012点击next直到Install,完成后点击finish退出安装界面点击next直到Install,完成后点击finish退出安装界面点击next直到Install,完成后点击finish退出三、破解打开安装光盘CARK文件夹,根据你的计算机找到32位或64位的破解文件,复制到安装目录相对应的位置,粘贴并替换原有的文件复制安装光盘CARK文件夹下license文件夹里的license.dat文件,找到许可证服务器的安装位置,默认为C:\Program Files\Autodesk Network License Manager,粘贴,并双击lmtools.exe文件,打开许可证服务器窗口1.新建服务器名称为moldflow20122.imgrd.exe文件路径,默认为C:\Program Files\Autodesk Network LicenseManager3.许可证文件路径,默认为C:\Program Files\Autodesk Network LicenseManager\license.dat4.在刚才的文件夹新建文本文件,修改名称为moldflow2012.log,默认路径为C:\Program Files\Autodesk Network License Manager\moldflow2012.log5.勾选6.勾选7.保存服务器先点击stop server ,再点击start server双击桌面上的AMI快捷图标打开AMI,选项中修改下互联网选项接下来更改下CAD Doctor的语言为简体中文,找到CAD Doctor安装目录下的config文件夹,找到CadDoctor.ini文件,用记事本打开,更改ENG JPN为CHS。
- 1、下载文档前请自行甄别文档内容的完整性,平台不提供额外的编辑、内容补充、找答案等附加服务。
- 2、"仅部分预览"的文档,不可在线预览部分如存在完整性等问题,可反馈申请退款(可完整预览的文档不适用该条件!)。
- 3、如文档侵犯您的权益,请联系客服反馈,我们会尽快为您处理(人工客服工作时间:9:00-18:30)。
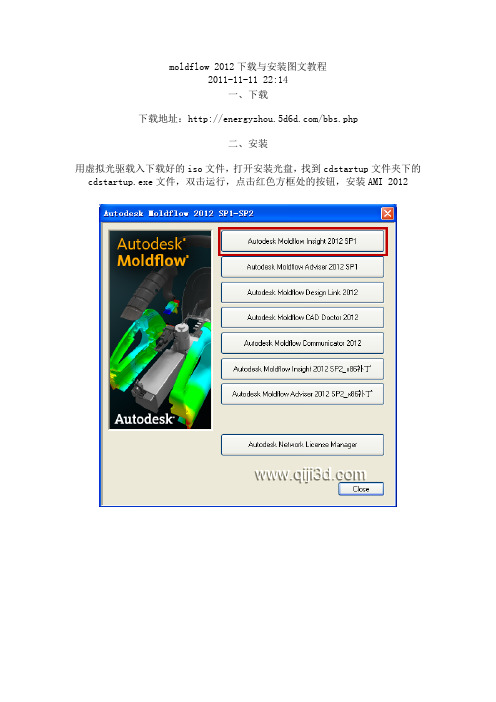
idoumoldflow 2012下载与安装图文教程
2011-11-11 22:14
一、下载
下载地址:/html/download/2011/1111/355.html
二、安装
用虚拟光驱载入下载好的iso文件,打开安装光盘,找到cdstartup文件夹下的cdstartup.exe文件,双击运行,点击红色方框处的按钮,安装AMI 2012
打开cark文件夹下的序列号.txt文件,将序列号和密钥填入
输入计算机名称,计算机名可以通过鼠标右键点击桌面上的我的电脑图标,选择属性,选择计算机名来查询
点击next,勾选接受协议,点击next
输入序列号和密钥
点击close关闭AMI安装向导,点击close关闭语言选择窗口,打开主安装界面,安装MDL 2012
点击next直到Install,完成后点击finish退出安装界面
点击next直到Install,完成后点击finish退出安装界面
点击next直到Install,完成后点击finish退出
三、破解
打开安装光盘CARK文件夹,根据你的计算机找到32位或64位的破解文件,复制到安装目录相对应的位置,粘贴并替换原有的文件
复制安装光盘CARK文件夹下license文件夹里的license.dat文件,找到许可证服务器的安装位置,默认为C:\Program Files\Autodesk Network License Manager,粘贴,并双击lmtools.exe文件,打开许可证服务器窗口
1.新建服务器名称为moldflow2012
2.imgrd.exe文件路径,默认为C:\Program Files\Autodesk Network License Manager
3.许可证文件路径,默认为C:\Program Files\Autodesk Network License Manager\license.dat
4.在刚才的文件夹新建文本文件,修改名称为moldflow2012.log,默认路径为C:\Program Files\Autodesk Network License Manager\moldflow2012.log
5.勾选
6.勾选
7.保存服务器
先点击stop server ,再点击start server
双击桌面上的AMI快捷图标打开AMI,选项中修改下互联网选项
接下来更改下CAD Doctor的语言为简体中文,找到CAD Doctor安装目录下的config文件夹,找到CadDoctor.ini文件,用记事本打开,更改ENG JPN为CHS。
