本田电脑检测仪资料--HDS操作说明共117页
SDE-28S测深仪操作流程
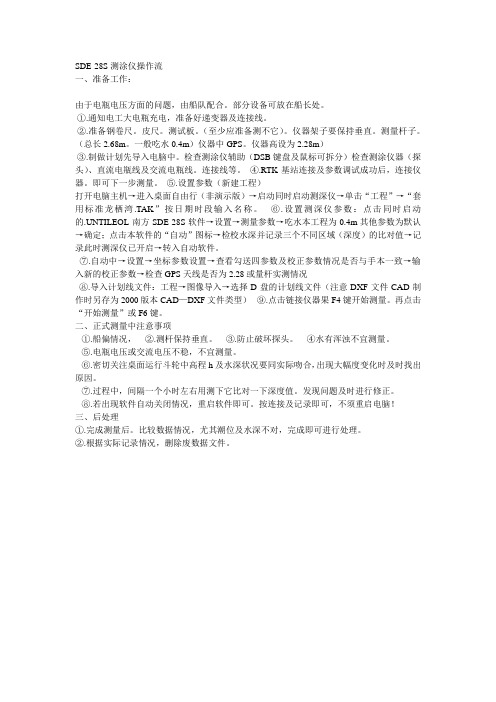
SDE-28S测涂仪操作流一、准备工作:由于电瓶电压方面的问题,由船队配合。
部分设备可放在船长处。
①.通知电工大电瓶充电,准备好递变器及连接线。
②.准备钢卷尺。
皮尺。
测试板。
(至少应准备测不它)。
仪器架子要保持垂直。
测量杆子。
(总长2.68m。
一般吃水0.4m)仪器中GPS。
仪器高设为2.28m)③.制做计划先导入电脑中。
检查测涂仪辅助(DSB键盘及鼠标可拆分)检查测涂仪器(探头)、直流电瓶线及交流电瓶线。
连接线等。
④.RTK基站连接及参数调试成功后,连接仪器。
即可下一步测量。
⑤.设置参数(新建工程)打开电脑主机→进入桌面自由行(非演示版)→启动同时启动测深仪→单击“工程”→“套用标准龙栖湾.TAK”按日期时段输入名称。
⑥.设置测深仪参数:点击同时启动的.UNTILEOL-南方SDE-28S软件→设置→测量参数→吃水本工程为0.4m其他参数为默认→确定;点击本软件的“自动”图标→检校水深并记录三个不同区域(深度)的比对值→记录此时测深仪已开启→转入自动软件。
⑦.自动中→设置→坐标参数设置→查看勾送四参数及校正参数情况是否与手本一致→输入新的校正参数→检查GPS天线是否为2.28或量杆实测情况⑧.导入计划线文件:工程→图像导入→选择D盘的计划线文件(注意DXF文件CAD制作时另存为2000版本CAD—DXF文件类型)⑨.点击链接仪器果F4键开始测量。
再点击“开始测量”或F6键。
二、正式测量中注意事项①.船偏情况,②.测杆保持垂直。
③.防止破坏探头。
④水有浑浊不宜测量。
⑤.电瓶电压或交流电压不稳,不宜测量。
⑥.密切关注桌面运行斗轮中高程h及水深状况要同实际吻合,出现大幅度变化时及时找出原因。
⑦.过程中,间隔一个小时左右用测下它比对一下深度值。
发现问题及时进行修正。
⑧.若出现软件自动关闭情况,重启软件即可。
按连接及记录即可,不须重启电脑!三、后处理①.完成测量后。
比较数据情况,尤其潮位及水深不对,完成即可进行处理。
本田电脑检测仪资料--HDS操作说明讲述

2018/11/21
17
ECM/PCM重置/CKP模式清除 DTC消除 DTC和冻结数据的消除 DTC、冻结数据和ECM/PCM的校准值消 除
2018/11/21
18
执行器的检查
程序控制电磁阀/开关或设备 ECM/PCM校准
2018/11/21
7
安装HDS的注意事项
关闭屏幕保护程序
安装过程中关闭所有应用程序
安装过程的演示
[本田故障诊断系统/HDS]
此处插入产品照片
HDS的特点
ห้องสมุดไป่ตู้
操作简单,界面友好
相关帮助资料丰富,便于故障排查
功能更强,易于升级
HDS的登录
车架号
里程表数
车型和生产年份
2018/11/21
– 自定义列表 – 显示从数据列表中选定的数据
图形功能
– 条形图 – 折线图 – 选定的数据也作为表中的数字显示在图形下方
2018/11/21
15
完全数据列表
LED功能
– 绿色和红色LED显示项目的ON或Off状态
标准数据作为参考显示在比较数据旁边
2018/11/21
16
快摄(Snapshot)
2018/11/21 12
故障码(DTCS)
DTC的显示 DTC帮助 DTC复位 显示保存的数据
2018/11/21
13
冻结数据帧(Freeze data)
车辆出现故障时,记 录在ECM内的车辆的 各种参数。
本田电脑检测仪资料 HDS操作说明
79
09.03.2020
80
09.03.2020
81
09.03.2020
82
09.03.2020
83
09.03.2020
84
09.03.2020
85
09.03.2020
86
09.03.2020
87
09.03.2020
88
09.03.2020
89
09.03.2020
90
09.03.2020
18
执行器的检查
程序控制电磁阀/开关或设备 ECM/PCM校准
09.03.2020
19
设置(Setup)
设置详情 单位换算
09.03.2020
20
09.03.2020
21
帮助
系统界面
系统信息
DLC位置 独立模式
HIM初始化
09.03.2020
22
09.03.2020
23
09.03.2020
91
09.03.2020
92
09.03.2020
93
09.03.2020
94
09.03.2020
95
09.03.2020
96
09.03.2020
97
09.03.2020
98
09.03.2020
99
09.03.2020
100
09.03.2020
101
09.03.2020
102
09.03.2020
57
09.03.2020
58
09.03.2020
59
09.03.2020
60
Honda Odyssey 头部显示器说明书

Instrument PanelHead-Up Display *Shows the current mode for ACC with Low Speed Follow and LKAS, tachometer, traffic sign recognition system, shift position indicator, M (sequential mode*/7-speed manual shift mode*) Indicator/Gear Selection Indicator, compass or turn-by-turn directions along with the vehicle speed. You can choose which item to be displayed using the (HUD) button on the steering wheel. They are displayed when the power mode is in ON.To turn the head-up display on and off : Press the HUD button on the driver side control panel.The display can be moved up and down to become level with your eyes.To raise or lower the head-up display : Press the or button until the desired position is reached.1Head-Up Display *When you unlock and open the driver’s door with a remote transmitter or keyless access system, the head-up display adjusts automatically to one of the two preset positions.34HUDButtonPress the button to lowerthe display.4Instrument Panel The display also shows the following warnings.•Lane Departure Warning: When your vehicle is too close to the traffic lane lines, the lane departure warning appears.2Lane Keeping Assist System (LKAS) P.486•Head-up Warning Lights:Flash when the BRAKE message appears on the driver information interface.2Collision Mitigation Braking System TM (CMBS TM) P.4562Adaptive Cruise Control (ACC) with Low Speed Follow P.4702Low Speed Braking Control* P.465Instrument Panel Each time you press the (HUD) button on the steering wheel, the head-up display content will change.■To Change Head-Up Display Content Current Mode for ACC with Low Speed Follow and the LKAS, Vehicle Speed, Traffic Sign Recognition System Vehicle Speed, Traffic Sign Recognition System Tachometer, Shift Position Indicator, (sequential mode */7-speed manual shift mode *) Indicator/Gear SelectionIndicator, Vehicle Speed, Traffic SignRecognition System Traffic Sign Recognition System, Vehicle Speed Turn-by-Turn Directions, Vehicle Speed, Traffic Sign Recognition SystemCompass, Vehicle Speed, Traffic Sign Recognition System(HUD)ButtonInstrument Panel Shows your driving speed in mph or km/h.Shows the number of engine revolutions as a bar graph.Shows the current shift position.2Shift Position Indicator P.88Shows the current mode for the sequential mode*/7-speed manual shift mode*.Shows the current mode for ACC with Low Speed Follow and LKAS.2Adaptive Cruise Control (ACC) with Low Speed Follow P.4702Lane Keeping Assist System (LKAS) P.486■Vehicle Speed■Tachometer■Shift Position Indicator■M (sequential mode*/7-speed manual shift mode*)Indicator/Gear Selection Indicator■Current Mode for ACC with Low Speed Follow and LKAS1Vehicle SpeedSwitch between mph and km/h by using the driverinformation interface or customized features on theaudio/information screen.2Speed/Distance Units P.1512Customized Features P.351Instrument Panel ■Compass Shows the compass screen.■Turn-by-Turn Directions When driving guidance is provided by the navigation system, Android Auto or Apple CarPlay, turn-by-turn directions to your destination appear.2Refer to the Navigation System Manual2Android Auto P.3202Apple CarPlay P.313Shows the traffic sign recognition system.2Traffic Sign Recognition System P.498■Navigation ■Traffic Sign Recognition System1Navigation You can select whether the turn-by-turn display comes on during the route guidance.2Customized Features P.351Turn-by-turn directions may not be available for allapps.。
汽车检测电脑使用方法
汽车检测电脑使用方法
使用汽车检测电脑需要遵循以下步骤:
1. 确认汽车适应性:首先要确定所使用的汽车检测电脑是否适用于你的汽车品牌和型号。
不同的汽车品牌和型号可能需要不同的检测电脑。
2. 连接汽车检测电脑:将汽车检测电脑的数据线插入汽车的OBD II插口。
通常,OBD II插口位于驾驶员侧踏板下方的某
个位置。
确保汽车的电源已打开。
3. 打开汽车检测电脑:按照使用说明,将汽车检测电脑打开。
检测电脑可能会需要进行一些设置,如选择所使用的语言。
4. 进行汽车检测:根据使用说明,在汽车检测电脑上选择要进行的检测项目。
这些项目可能包括故障码读取、实时数据流监视、传感器检测等。
5. 分析检测结果:检测电脑会显示汽车的检测结果。
根据显示的结果,分析汽车的工作状态和存在的问题。
如果有故障码出现,可以通过故障码表或在线查询来了解故障的含义和可能的解决方案。
6. 清除故障码(可选):如果发现了故障码并已解决相应问题,可以选择清除故障码。
但在清除故障码之前,建议先确保问题已得到解决,并且保存好相关的检测数据。
7. 断开汽车检测电脑:在完成所有需要的检测后,按照使用说明,安全地断开汽车检测电脑的数据线。
请注意,具体的操作步骤可能因汽车检测电脑的型号和品牌而有所不同。
因此,在使用之前,请仔细阅读所购买的汽车检测电脑的使用说明。
本田专用检测仪HDS
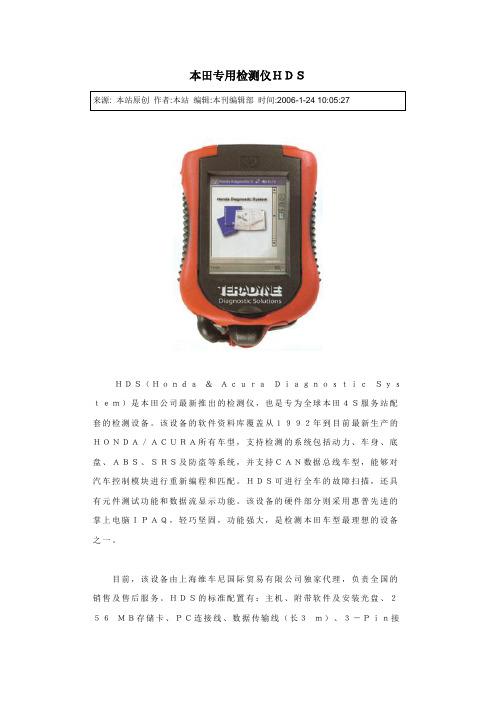
本田专用检测仪HDSHDS(Honda&AcuraDiagnosticSystem)是本田公司最新推出的检测仪,也是专为全球本田4S服务站配套的检测设备。
该设备的软件资料库覆盖从1992年到目前最新生产的HONDA/ACURA所有车型,支持检测的系统包括动力、车身、底盘、ABS、SRS及防盗等系统,并支持CAN数据总线车型,能够对汽车控制模块进行重新编程和匹配。
HDS可进行全车的故障扫描,还具有元件测试功能和数据流显示功能。
该设备的硬件部分则采用惠普先进的掌上电脑IPAQ,轻巧坚固,功能强大,是检测本田车型最理想的设备之一。
目前,该设备由上海维车尼国际贸易有限公司独家代理,负责全国的销售及售后服务。
HDS的标准配置有:主机、附带软件及安装光盘、256MB存储卡、PC连接线、数据传输线(长3m)、3-Pin接线(5-Pin接线为选配件)、触摸笔、自检适配器及其电源线、12V电源线及AC充电器。
汽车发动机水泵水泵是发动机冷却系统的重要部件,它的作用是泵送冷却液,使冷却液在发动机的冷却水道内快速流动,以带走发动机工作时产生的热量,保持发动机正常工作温度。
水泵的泵水量很大,例如一台V8发动机的水泵,怠速时的泵水量大约是750L/h。
水泵的分类图1 机械水泵根据驱动方式的不同,水泵一般分为机械水泵(图1)和电动水泵(图2)。
目前大多数发动机采用机械水泵,在一些新开发的技术含量较高的发动机上已经使用了电动水泵,例如宝马6系(E63)搭载的发动机。
图2 电动水泵及安装位置(1)机械水泵机械水泵由发动机曲轴通过传动胶带驱动,它的转速和发动机的转速成正比。
机械水泵的工作方式有优点也有缺点。
当发动机在高速大负荷工况下工作时,发动机产生的热量多,水泵的高转速使冷却液的循环流量增大,这样正好能够提高发动机的冷却能力;当发动机在低速大负荷工况下工作时,例如牵引其他车辆或开空调,此时发动机的转速低导致水泵的转速也低,这样就降低了发动机的冷却能力。
Honda 车型说明书:快速参考指南仪表盘(P87)系统指示器故障指示灯

Immobilizer System Indicator/Security System Alarm IndicatorLights IndicatorsLights On Indicator High Beam Indicator Fog Light Indicator Lane Keeping Assist System (LKAS) Indicator (Green/Amber/White)Driver Information Interface Gear Position Indicator/Transmission System Adaptive Cruise Control (ACC) with Low Speed Follow Indicator (Green/Amber/White)U.S.CanadaSystem IndicatorsAuto High-Beamuu Gauges and Driver Information Interface u Driver Information InterfaceInstrument Panel Driver Information InterfaceThe driver information interface displays the speedometer, tachometer, odometer,trip computer, outside temperature, and other gauges. It also displays importantmessages such as warnings and other helpful information.Displays your driving speed in mph or km/h.Shows the number of engine revolutions per minute.■Speedometer■Tachometer1SpeedometerYou can set the speedometer and the displayedmeasurements to read in either mph and km/h.2Units P.1381TachometerYou can turn on or off the tachometer display.2Show Tachometer P.142uu Gauges and Driver Information Interface u Driver Information InterfaceInstrument PanelShows the total number of miles or kilometers that your vehicle has accumulated.Shows the outside temperature in Fahrenheit (U.S.) or Celsius (Canada).Adjusting the outside temperature displayAdjust the temperature reading by up to ±5°F or ±3°C if the temperature reading seems incorrect.Use the audio/information screen to correct the temperature.2Customized Features P.463■OdometerOdometer■Outside Temperature *1Outside Temperature *The temperature sensor is in the front bumper.Road heat and exhaust from another vehicle can affect the temperature reading when your vehicle speed is less than 19 mph (30 km/h).It may take several minutes for the display to beupdated after the temperature reading has stabilized.Outside Temperatureuu Gauges and Driver Information Interface u Driver Information InterfaceInstrument Panel Shows the traffic sign recognition system.2Traffic Sign Recognition System P.630Press the (home) button, then press the / button to scroll to the contentyou want to see. Press ENTER to see detailed information.*1: Models with color audio system■Traffic Sign Recognition System■Accessing Content1Traffic Sign Recognition SystemYou can turn on or off the traffic sign recognitionsystem.2Vehicle Customization P.1432Customized Features P.463Models with color audio systemModels with Display Audio1Accessing ContentTo go back to the previous screen, press the*1/ *2 (back) button.You can edit, add, or delete the meter contents usingthe driver information interface.2Arrange Apps P.1412Show/Hide Apps P.14034uu Gauges and Driver Information Interface u Driver Information InterfaceInstrument Panel(Home) Button/ Button34Press or .34Models with color audio systemModels with Display Audio(Home) Button/ Button34uu Gauges and Driver Information Interface u Driver Information InterfaceInstrument Panel Press the ENTER button to switch between trip computer A and trip computer B.■Trip ComputerENTER ButtonENTER Models with color audio systemModels with Display AudioENTER Buttonuu Gauges and Driver Information Interface u Driver Information InterfaceInstrument Panel■DistanceShows the total number of miles or kilometers driven since the last reset. Meters A and B can be used to measure two separate trips.Resetting distanceTo reset the Distance , display it and then press and hold the ENTER button until the Distance is reset to 0.0.■Average fuel economy (Avg. Fuel)Shows the estimated average fuel economy of each Distance in mpg or l/100 km.The display is updated at set intervals. When a Distance is reset, the average fuel economy is also reset.■Instant fuel economyShows the instant fuel economy as a bar graph in mpg or l/100 km.■RangeShows the estimated distance you can travel on the remaining fuel. This estimated distance is based on the vehicle’s current fuel economy.1DistanceSwitch between Distance A and Distance B by pressing the ENTER button.1Average fuel economy (Avg. Fuel )You can change when the average fuel economy is reset.2Vehicle Customization P.1432Customized Features P.463Models with color audio systemModels with Display Audiouu Gauges and Driver Information Interface u Driver Information InterfaceInstrument Panel■CompassShows the compass screen.■Turn-by-Turn DirectionsWhen driving guidance is provided by thenavigation system* or Android Auto, turn-by-turn directions to your destination appear.2Refer to the Navigation System Manual2Android Auto P.376■Navigation*1Navigation*You can select whether to have the turn-by-turndisplay come on or not during route guidance.2Customized Features P.463When the compass or turn-by-turn directions aredisplayed, you can control some navigation systemfunctions on the driver information interface bypressing the ENTER button.2Refer to the Navigation System ManualModels with navigation system CompassTurn-By-Turn Driving Directionsuu Gauges and Driver Information Interface u Driver Information InterfaceInstrument PanelIndicates the state of RDM, CMBS TM and Blind spot information System *, such as On, Off, or Failure, by color and letters.The following colors indicate the state of any of the above mentioned systems:•Green: The system is on.•Gray: The system is off.•Amber: There is a problem with the system.■Safety Support1Safety SupportIf a system is indicated by the color amber, have your vehicle checked by a dealer immediately.To turn on or off each system, first press the / button to switch displays. From the next display you can select which system to turn on or off.2RDM On and Off P.6272CMBS TM On and Off P.5932Blind spot information system on and off P.583You can also confirm the state of the each function by the color of the safety support indicator.2Safety Support Indicator (Amber) P.1042Safety Support Indicator (Green/Gray) P.10734uu Gauges and Driver Information Interface u Driver Information InterfaceInstrument Panel2Driver Information Interface Warning andInformation Messages P.108■Warnings1WarningsThe Warnings app is dynamic and will only appearwhen there are active warnings. If there are noWarnings, this app will not be shown.(Example)Instrument PanelShows the current condition of the tire pressure and the remaining oil life.■Tire PressureShows the tire pressure of each tire.2Tire Pressure Monitoring System (TPMS) with Tire Fill Assist P.577■Oil LifeShows the remaining oil life and Maintenance Minder TM .2Maintenance Minder TM P.667■MaintenanceInstrument PanelShows the current phone information.2Bluetooth® HandsFreeLink® P.510Enables you to set the speedometer and thedisplayed measurements to read in either mphor km/h.Press and hold the ENTER button. Each timeyou do this, the unit will change from mph tokm/h or vice versa. After this, a confirmationscreen will appear for a few seconds.■Phone*■UnitsInstrument PanelShows blank screen.Shows the current audio information.2Audio System Basic Operation P.300■Blank■Now Playing*Instrument Panel You can show or hide the meter contents.Select the content you wish to show or hide,then press ENTER.u Repeat it if you want to show or hidemore than one app.■Show/Hide Apps1Show/Hide AppsYou cannot hide apps with the icon on the rightside.Selecting Default All inVehicle Customizationdoes not restore these settings to their original state.You can also add the Android Auto,AppleCarPlay,Sirius XM*, My Honda Music, USB, AM,FM, Bluetooth Audio, Social Playlist, AUX Input,CD* and Rear Entertainment* apps.Models with Display Audio ShownPress ENTERHiddenInstrument PanelChange the settings to your liking.■Arrange AppsYou can change the order of the apps on the home screen.1.Press the / button to select Arrange Apps , then press ENTER .2.Press the / button to select the icon you want to move, then press ENTER .3.Press the / button repeatedly to move the icon to your desired position, then press ENTER .■Settings1Arrange AppsSelecting Default All in Vehicle Customization does not restore these settings to their original state.343434■Show TachometerYou can show or hide the tachometer.Press the / button to select ShowTachometer, then press ENTER.u The tachometer appears when the checkbox is checked.1Show TachometerSelecting Default All in Vehicle Customizationdoes not restore these settings to their original state.34Instrument PanelInstrument Panel■Vehicle CustomizationUse the driver information interface to customize certain vehicle features.How to customizeFirst, make sure the vehicle is at a complete stop and that the power mode is set to ON. Next, press the (home) button, then press the / button to select Settings . Finally, press the ENTER button.1Vehicle CustomizationTo customize other features, press the / button.2List of customizable options P.1462Example of how to customize a setting P.150Change to P before you attempt to change a customized setting.3434/ ButtonScroll through the menu or items.34 ButtonGoes back to the previous screen.ENTER Enters the selected item.Goes to home screen.Instrument Panel Customization flowPress the (home) button.ENTERENTER343434ENTERP.141P.142ENTER3434ENTER34Instrument PanelENTERENTER 3434343434ENTER3434Instrument Panel■List of customizable options*1:Default SettingSetup GroupCustomizable Features DescriptionSelectable Settings Driver Assist System SetupForward Collision Warning DistanceChanges the distance at which CMBS TM alerts.Long /Normal *1/ShortACC Forward Vehicle Detect BeepCauses the system to beep when the system detects a vehicle, or when the vehicle goes out of ACC range.ON /OFF *1Road Departure Mitigation Setting Changes the setting for the road departure mitigation system.Narrow /Normal *1/Wide /Warning Only Lane Keeping Assist Suspend Beep Causes the system to beep when the LKAS is suspended.ON /OFF *1Traffic SignRecognition System Display SettingSelects whether the traffic sign icons come on.ON *1/OFFInstrument Panel*1:Default SettingSetup Group Customizable Features Description Selectable settings Meter Setup Language Selection Changes the displayed language.English *1/Français /Español“Trip A” Reset Timing Changes the setting of how the distance and average fuel economy of trip computer A is reset.When Fully Refueled /IGN OFF /Manually Reset *1“Trip B” Reset Timing Changes the setting of how the distance and average fuel economy of trip computer B is reset.When Fully Refueled /IGN OFF /Manually Reset *1Adjust Alarm Volume Changes the volume setting for buzzers, warnings,turn signals, and other alerting systems.High /Mid *1/LowReverse Alert Tone Causes the beeper to sound once when the gearposition is changed to R .ON *1/OFFFuel EfficiencyBacklight Turns the ambient meter feature on and off.ON *1/OFFRear Seat Reminder Turns the Rear Seat Reminder feature on and off.ON *1/OFFSetup Group Customizable Features Description Selectable settingsLighting Setup Interior LightDimming TimeChanges the length of time the interior lights stay onafter you close the doors.60sec/30sec*1/15secHeadlight Auto OFFTimerChanges the length of time the exterior lights stayon after you close the driver’s door.60sec/30sec/15sec*1/0sec Auto Light Sensitivity Changes the timing for the headlights to come on.Max/High/Mid*1/Low/Min Auto InteriorIlluminationSensitivityChanges the sensitivity of the brightness of theinstrument panel when the headlight switch is in theAUTO position.Max/High/Mid*1/Low/MinAuto Headlight ONWith Wiper ONChanges the settings for the wiper operation whenthe headlights automatically come on while theheadlight switch is in the AUTO position.ON*1/OFFInstrument Panel*1:Default SettingInstrument Panel*1:Default SettingSetup Group Customizable Features Description Selectable settings Door Setup Auto Door Lock Changes the setting for when the doors automatically lock.With Vehicle Speed *1/ShiftFrom P /OFFAuto Door Unlock Changes the setting for when the doors automatically unlock.All Doors When Driver’s DoorOpens *1/All Doors WhenShifted To Park /All Doors WhenIgnition Switched OFF /OFFKey And Remote Unlock Mode Sets up either the driver’s door or all doors to unlockon the first operation of the remote or built-in key.Driver Door *1/All DoorsKeyless Lock Answer Back LOCK/UNLOCK - The exterior lights flash.LOCK (2nd push)- The beeper sounds.ON *1/OFFSecurity Relock Timer Changes the time it takes for the doors to relock andthe security system to set after you unlock the vehicle without opening a door.90sec /60sec /30sec *1Default All —Cancels customized changes you have made orrestores them to their default setting.Cancel /SetInstrument Panel Example of how to customize a settingBelow are steps that explain how to change the reset timing for trip A from the default setting (manual) so that it resets automatically when the vehicle is fully refueled.1.Press the (home) button and then the/ button to select Settings, thenpress the ENTER button.2.Press the / button to select VehicleCustomization, then press the ENTERbutton.3434Instrument Panel3.Press the / button to select MeterSetup , then press the ENTERbutton.u Language Selection appears first in thedisplay.4.Press the / button to select “Trip A”Reset Timing , then press the ENTERbutton.u The display switches to thecustomization setup screen, where youcan select When Fully Refueled , IGNOFF , Manually Reset , or Exit .5.Press the / button to select When Fully Refueled , then press the ENTERbutton.u The SETUP “When Fully Refueled”screen appears, then the display returnsto the customization menu screen.343434Instrument Panel 6.Press the / button until Exit appearson the display, then press the ENTERbutton.7.Repeat Step 6 until you return to the Vehicle Customization screen, then pressthe (home) or (back) button to return to the home screen.34。
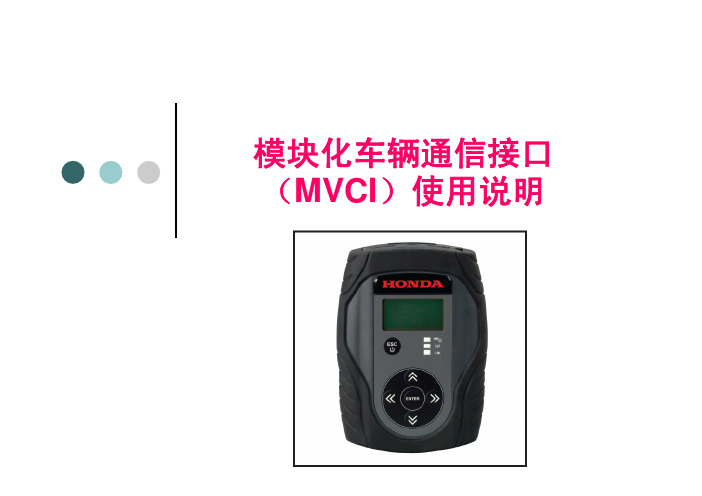
广汽本田MVCI检测设备文档说明
软件版本
硬件测试
① 蜂鸣器测试 ② LED测试 ③ LCD测试 ④ 小键盘测试 ⑤ 序列号 ⑥ 设备回环测试 ⑦ SDMEM卡测试
辅助计算机应用程序
MVCI Update
点击
MVCI与HIM的区别
z MVCI数据采集的频率更高,单位时间内可以采集更多的数据 z MVCI不具备行车记录器功能,如果需要查看行车记录器的数 据需要在F12内将Comms Interface 改为HIM
MVCI组件说明
MVCI
① 安装程序 ② 说明手册
USB连 接线
DLC插 头
电池
电源适 配器
适配器 插头
SD卡
MVCI组件说明
点击相应图片查看大图
MVCI组件说明-屏幕图标说明
注意:MVCI 电池充电器采用温控充电算法。在 MVCI 由 外接电源供电时,通常会显示电池正在充电的动画,即使 电池已经完全充满。
z 更换电池 MVCI 含两个 (2) 可充电 NiMH AA 电池。这些电池在通过车辆 DLC 为 MVCI 供电时充电。内部电池也可在通过从电源适配器端口向 MVCI 供 电时充电。请仅使用随附的交流电源适配器 (SPX 备件 P/N H547571)。 如果电池需要更换,请使用 2000mAh NiMH AA 电池 (SPX 备件 P/NH550175) 替换。有关电池位置的信息,请参阅本用户指南的“MVCI 组件说明”部分。应注意不要放错电池的方向。
The end
无线网络设置
设置无线网络要求以下步骤: 1. 打开无线网络设置。 2. 选择无线网络模式。 3. 选择和设置无线安全机制。 4. 设置到 MVCI 的计算机通信。 5. 连接到 MVCI。 具体操作请参考使用说明书31-47页
HDS-DN密度计说明书(090923)
第一章 HDS-DN 概述HDS-DN 核子密度(浓度)计是我公司技术人员在多年核仪表生产与应用的经验基础上,为满足用户需要而研制的产品。
它是由放射源、密度传感器构成一次仪表,完成密度信号的采集、输出,二次仪表完成运算、显示、输出。
它可由上、下位机构成的分布式测控网络系统。
该系统采用可靠性高的485接口、双绞线串行通讯,具有布线方便、传输距离远、速度快(9600波特率,通讯距离达2公里)等特点,与现在OMMNETPC-NET 网等相比更为经济、灵活、可靠。
一、密度(浓度)计一次仪表:二、密度(浓度)计二次仪表:一台主机最多可带16个二次仪表,二次仪表采用于美国INTEL 公司生产的十六位单片机产品80C196,具有独特的看门狗功能,永不死机;二次仪表带硬时钟和掉电保护RAM ,停电后时钟不停,参数不会丢失,二次仪表信号输入采用专门技术,根据远近既可用频率信号,又可用模拟电压信号。
二次仪表数码管显示,小键盘操作并具有定时或随时打印功能。
各二次仪表可独立完成常数设置、自动校准、动态密度显示与计量等功能。
在工作过程中,各二次仪表均可显示、被测介质密度、流量、累计量等信息;二次仪表分台式和嵌入表盘式二种。
二次仪表既可安装在工作现场,也可安装在车间的仪表盘上,供工作人员随时了解现场情况。
● 二次仪表功能强大,根据用户需要,不仅可提供4-20mA 瞬时输出信号,还可提供0-5V(或4-20mA 或0-20mA )的密度、流量输出控制信号,使每台二次仪表成为一个单回路调节控制器、485通讯、密(浓)度上下限输出。
应一些特殊用户要求,本二次仪表还增加了带光隔离保护的吨脉冲输出功能(脉宽100毫秒)。
● 二次仪表存储量大,并具有掉电保护,数据永久保存。
● 二次仪表设计工艺合理,结构简单,元器件数量少,可靠性高。
● 二次仪表采用工业级电源,稳压、屏蔽、浮空等多种措施,增强了对环境的适应性。
● 系统采用高稳定度的前置放大器,频率式前放传输距离可达三公里,电压式前放可传输800米,用户可根据需要灵活选用。
本田操作手册

FLY100(富莱100)汽车综合诊断平台操作手册目录前言 (1)欢迎使用FLY100(富莱100)汽车综合诊断平台操作手册 (1)手册使用对象 (2)开始使用FLY100(富莱100)汽车综合诊断平台 (2)登录系统 (3)在线帮助 (5)退出系统 (5)汽车诊断 (5)初始化 (6)车辆详细资料 (6)选择模式 (9)系统选择 (10)一、PGM-F1工具选择 (11)DTC显示 (12)数据表 (15)快摄 (16)ECU重新设置 (19)清除曲轴传感器匹配值 (20)检查 (21)调整 (22)行车记录器 (23)车上快摄 (27)二、AT工具选择 (30)DTC定格数据 (31)数据表 (34)快摄 (36)ECU重新设置 (38)检查 (39)行车记录器 (40)车上快摄 (44)FLY100(富莱100)汽车综合诊断平台其它功能 (45)前言本主题提供以下参考信息:⏹欢迎使用FLY100(富莱100)汽车综合诊断平台操作手册⏹产品背景及功能介绍⏹手册使用对象⏹使用约定欢迎使用FLY100(富莱100)汽车综合诊断平台操作手册欢迎使用FLY100(富莱100)汽车综合诊断平台操作手册,为便于快速了解和使用本系统,本手册提供了详细的操作说明,具有较强的实用性和可操作性。
通过本手册,可以了解到本系统的主要功能和相关的操作界面。
功能介绍FLY100(富莱100)汽车综合诊断平台作为富莱实业公司产品的组成部分,用于实现对汽车的所有电控系统进行检测,其主要功能如下:1.读取故障码和清除故障码支持永久故障码和临时故障码。
一旦故障码被触发,FL Y100(富莱100)即可检测出所有故障码,并且可以清除这些故障码。
目前总共可以检测出10000多条故障代码。
注:相对其他同类产品的优势:针对每一条故障码,都有对应的维修帮助,并且配有维修电路图。
2.数据流该功能可以查看所检测车辆所有系统支持的数据参数。
目前总共可以读出5000多条数据流信息。
车测试仪使用说明书范文

汽车检测仪如何使用汽车故障电脑检测仪使用方法如下:1 、选好合适的故障检测接头,把接头先接上解码器连接线。
2、然后将接头接到汽车的故障诊断座上,再用解码器的工作电源线接到点烟器上(诊断座自带电源的可免此项)。
3、车辆点火开关转至ON,这时屏幕显示出菜单,我们这时可根据需要检查的项目来选择具体的子菜单。
4、选择后可能过解码器上的屏幕读到故障部位的名称,有多个故障的则同时在屏幕上显示出来。
5、注意故障的名称只是代表它所在的这一部分的电路,并不一定就是这个零部件。
6、清除故障码:前面的程序和提取故障码一样,只是在选择子菜单时选择清除故障码,通过对话框的问答选择清除。
汽车灯光测试仪使用方法前照灯是汽车在夜间或在能见度较低的条件下,为驾驶员提供行车道路照明的重要设备,也是驾驶员发出警示、进行联络的灯光信号装置。
所以,前照灯必须有足够的发光强度和正确的照射方向。
由于在行车过程中,汽车受到振动后可能引起前照灯部件的安装位置发生变化,从而改变光束的正确照射方向;同时,灯泡在使用过程中会逐步老化,反射镜也会受到污染而使其聚光性能变差,导致前照灯的亮度不足,这些变化都会使驾驶员对前方道路情况辨认不清,或在与对面来车交会时造成对方驾驶员眩目等。
从而导致事故的发生。
因此,前照灯的发光强度和光束的照射方向被列为机动车运行安全检测的必检项目。
前照灯检测仪有聚光式、屏幕式、自动追踪光轴式、投影式4种。
一、检测前的准备1.检测仪的准备1)在前照灯检验仪不受光状态下,检查光度计和光轴偏斜指示计的指针是否能对准机械零点。
若指针失准,可用零点调整螺钉将其调整到零点上。
2)检查聚光透镜和反射镜的镜面有无污物或模糊不清的地方。
若有,可用柔软的布或镜头纸擦拭干净。
3)检查水准器的技术状况。
若水准器无气泡要进行修理,若气泡不在红钱框内,可用水准器调节器或垫片进行调整。
4)检查导轨是否沾有泥土或小石子等杂物,有杂物时要清理干净。
2.车辆的准备1)清除前照灯上的油污。
HDS中端设备巡检方法及注意事项
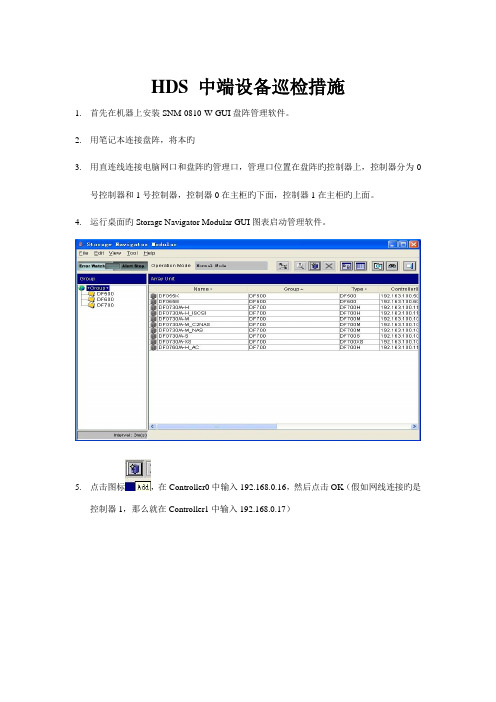
HDS 中端设备巡检措施1.首先在机器上安装SNM-0810-W-GUI盘阵管理软件。
2.用笔记本连接盘阵,将本旳3.用直连线连接电脑网口和盘阵旳管理口,管理口位置在盘阵旳控制器上,控制器分为0号控制器和1号控制器,控制器0在主柜旳下面,控制器1在主柜旳上面。
4.运行桌面旳Storage Navigator Modular GUI图表启动管理软件。
5.点击图标,在Controller0中输入192.168.0.16,然后点击OK(假如网线连接旳是控制器1,那么就在Controller1中输入192.168.0.17)6.注册成功后在管理工具主界面旳右侧就会出现刚刚所注册旳盘阵了,下图以AMS1000为例7.双击Array Unit列表中盘阵旳名字,例如上图中旳DF700H_77011821。
查看ComponentStatus中旳Subsystem列表,看与否有红色旳图标,和各个部件旳状态。
都正常旳状况下所有图标均没有惊叹号,状态栏显示都为Normal。
8.双击界面上方阵列名字旁边旳蓝色圆圈,在弹出窗口中查看阵列旳message信息,看有无报错。
9.选择Tools下拉菜单中旳Configuration Settings。
10.在Operation中选择Output,(目旳是把raid信息导出来做编辑)然后点击Browse按钮11.选择输出文献要保留旳目录E:\hds\rg.txt(注意这里旳保留途径一定要是英文途径,途径中不能包括中文)12.点击Apply,确认输出配置文献13.按照11-13步将RAID Group/Logical Unit、System Parameters、Port Information、Bootoptions、Parts Information、LAN Information六个配置信息所有导出保留。
14.假如是第一次进行盘阵旳巡检,还要打开盘阵主控柜旳前面板,记录电池上面旳电池过期日期。
HDS-USPV用户维护与应急操作手册

HDS USPV用户维护与应急操作手册Version 1.0HDS Guangzhou OfficeHDS客户服务热线: 400 678 6783目录第一章HDS USP V日常操作11.操作面板12.控制柜(DKC)的AC-BOX 13.磁盘柜(DKU)的AC-BOX 24.正常下电步骤25.正常上电步骤26.切断电源的步骤27.切断电源后的上电步骤38.出现灾难后的紧急关机处理39.异常处理410.通过StorageNavigator查看SIM信息411.通过SVP查看SIM信息7第二章HDS动态路径管理软件—HDLM基本操作91.HDLM命令路径92.dlnkmgr帮助命令93.dlnkmgr view命令94.Offline命令95.Online命令10第一章HDS USP V日常操作1. 操作面板2. 控制柜(DKC)的AC-BOX3. 磁盘柜(DKU)的AC-BOX4. 正常下电步骤z确认主机已停止对磁盘系统的访问。
Shutdown数据库;Umount文件系统;Varyoff VG。
z停止使用SVP。
z将操作面板的PS左边开关往上拨,同时将右边的开关往下拨(Enable +OFF),磁盘系统将顺序自动下电。
约5分钟后,除了BS-ON灯(黄色)亮以外,其它指示灯都熄灭,磁盘下电完成。
5. 正常上电步骤z将操作面板的PS左边开关和右边开关往上拨(Enable+ON),此时PS-ON指示灯亮(绿色),磁盘系统将顺序自动上电。
约5分钟后READY灯(绿色)亮,磁盘阵列上电完成。
6. 切断电源的步骤除非需要对电源供电进行更改/改造,否则请使用上述正常上下电步骤。
实施本步骤之前,请预先知会HDS公司。
z执行正常下电步骤。
z阵列下电完成后,关USP相应的断路器(在机柜的后面,每个机柜有两个断路器)。
此时BS-ON灯(黄色)熄灭。
***若切断电源供电超过48小时,需要在正常关机后将备份电池开关拨到Disable状态(往下拨)。
利用本田HDS故障诊断仪诊断发动机机械故障

利用本田HDS故障诊断仪诊断发动机机械故障
邱建明
【期刊名称】《《汽车与驾驶维修:维修版》》
【年(卷),期】2010(000)010
【摘要】故障现象:一辆2008年产广汽本田飞度轿车,装配L15A1发动机,行驶里程超过3万km。
车辆因发动机熄火无法行驶被拖进车间维修。
【总页数】2页(P66-67)
【作者】邱建明
【作者单位】
【正文语种】中文
【中图分类】U472.41
【相关文献】
1.利用真空度诊断发动机机械故障的技巧 [J], 杨臻
2.利用故障诊断仪对发动机电子控制系统进行故障诊断 [J], 王金金
3.基于ARM9和Linux的机械故障诊断仪的设计 [J], 张伟;周凤星;严保康
4.故障诊断仪无法诊断的故障模式——欧铃牌轻卡匹配大柴CA4DC2-10E4电控发动机车型雨天突发降速故障的分析 [J], 刘力君
5.旋转机械故障诊断仪的设计与实现 [J], 张昊
因版权原因,仅展示原文概要,查看原文内容请购买。
