手机中英文说明书
苹果ipad2中英文对照使用说明书
重要产品信息指南iPad本《重要产品信息指南》包含安全、操作、处理及回收、监管和软件许可证信息,以及iPad的一年有限保修。
请在《iPad使用手册》中查找其他环境信息,该手册的网址为:/zh_CN/manuals/iPad±请在使用iPad之前先阅读下列所有安全信息和操作说明,以避免受伤。
有关详细的操作说明,请访问/iPad或者使用Safari中的“iPad使用手册”书签,在iPad上阅读《iPad使用手册》。
若要获得《iPad使用手册》的可下载版本以及本《重要产品信息指南》的最新版本,请访问:/zh_CN/manuals/iPad重要的安全和操作信息警告:不遵循这些安全性说明,可能会导致火灾、触电或其他伤害,还可能损坏iPad或其他财物。
携带和操作iPad iPad包含敏感部件。
切勿使iPad跌落、弯曲、变形;切勿将其拆卸、打开、挤压、刺破、毁掉、使用微波炉烘烤、焚烧;切勿给其涂抹油漆或将异物插入其内。
避免放在有水或潮湿的地方请勿在雨中、洗脸池附近或其他潮湿的地方使用iPad。
小心不要将食物或液体泼洒在iPad上。
万一iPad进水,请在清洁前先拔掉所有电缆,并关闭iPad(按住睡眠/唤醒按钮,然后移动屏幕上的滑块),待iPad彻底晾干后再重新开机。
切勿尝试使用外部热源(如微波炉或吹风机)烘干iPad。
因液体渗入而损坏的iPad将无法维修。
维修或改造iPad请勿尝试自行维修或改造iPad。
拆卸iPad可能会导致不在保修范围内的机身损坏。
iPad不包含任何可由用户自行维修的部件,iPad Wi-Fi + 3G中的SIM卡和SIM卡托架除外。
维修服务只能由Apple授权服务商来提供。
如果iPad被液体沾湿、被刺破或遭到剧烈摔落,请在将其送到Apple授权服务商之前不要使用它。
有关服务信息,请从iTunes的“帮助”菜单中选取“iPad帮助”,或者访问:/support/ipad/service电池更换iPad中的可充电电池只能由Apple更换。
商品说明书中英文对照
商品说明书中英文翻译对照【药物名】对乙酰氨基酚【其他名称】乙酰氨基酚;扑热息痛;退热净;醋氨酚;Acetaminophen;N-acetyl-P-aminophenol【英文名称】Paracetamol【适应症】用于感冒及流感,发热,减轻中度疼痛如关节痛、神经痛、肌肉痛、头痛、偏头痛、痛经、牙痛等症状。
对阿司匹林过敏或不适应的患者应用本品尤为适宜。
【用法与用量】口服:成人每次300-500毫克,日2-3次。
儿童每日2-3次,每次2-3岁50-100毫克;4-6岁100-150毫克;7-9岁150-200毫克;10-12岁200-250毫克;12岁以上250-500毫克;1岁以下儿童避免使用。
【注意事项】(1)对阿司匹林过敏者一般对本品不发生过敏,但也有因对阿司匹林过敏而发生哮喘的病人中,少部分人在服用本品后发生轻度支气管痉挛性反应,因此,对阿司匹林过敏者慎用。
(2)孕妇和哺乳期妇女慎用。
(3)服用本品后如出现红斑或水肿症状,应立即停药。
【不良反应】一般剂量较少引起不良反应,对胃肠道刺激小,不会引起胃肠道出血。
但也偶可引起恶心、呕吐、出汗、腹泻及面色苍白等不良反应。
长期大量用药,对肝、肾均有损害,尤其是肾功能低下者,可能出现肾绞痛或急性肾功能衰竭。
另外还可发生高铁血红蛋白血症。
【禁忌症】(1)对本品过敏者禁用。
(2)1岁以下儿童及新生儿因肝、肾功能发育不全,应避免使用。
(3)酒精中毒、患肝病或病毒性肝炎时,本品有增加肝脏毒性作用的危险,应禁用。
(4)肾功能不全者禁用。
【限定剂型】片剂,咀嚼片,缓释片,泡腾片,分散片,胶囊剂,口服溶液剂,滴剂,糖浆剂,颗粒剂,泡腾颗粒剂,栓剂。
【药物贮藏】应在阴凉干燥处密闭保存。
【药物配伍】1、长期饮酒或正在应用其他肝酶诱导剂时,尤其是巴比妥类或其他抗痉挛药的患者,连续使用本品,有发生肝脏毒性反应的危险。
2、长期大量与阿司匹林、其他水酸盐制剂或其他非甾体抗炎药合用时(如每年累积用量达1000克,应用3年以上),可明显增加肾毒性的危险。
Q9C中英文使用说明书说明书
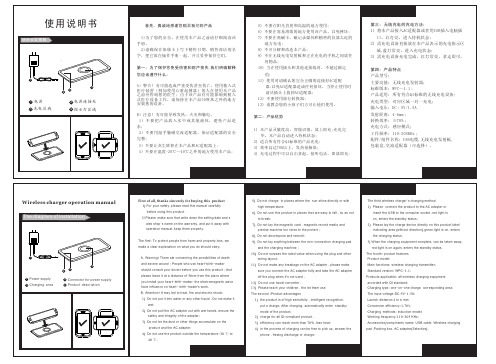
第三:无线充电的充电方法: 1)将本产品接入AC适配器或者用USB插入电脑插 口,红灯亮,进入待机状态; 2)需充电设备直接放在本产品表示的充电指示区 域,蓝灯常亮,进入充电状态; 3)需充电设备充电完成,红灯常亮,拿走即可。 第四:产品特点 产品型号: 主要功能:无线充电发射器; 标准版本:WPC—1.1; 产品适用:所有符合Q1标准的无线充电设备; 充电类型:对应区域一对一充电; 输入电压:DC:5V/1.5A 发射距离:4-6mm; 转换效率:≥70%; 充电方式:感应模式; 工作频率:110-205KHz; 配件/组件名称:USB电缆,无线充电发射板, 包装盒,交流适配器(可选择)。
1) Please connect the product to the AC adapter or on, enters the standby status;
The third wireless charger’s charging method
insert the USB to the computer socket ,red light is
3) efficiency can reach more than 70% ,less heat;
2) charge for all QI compliant product .
pad ,Packing box, AC adapter(Selective).
Accessories/compinents name: USB cable, Wireless charging
1 3 22 1 3 4 3
The first: To protect people from harm and property loss, we
9) Do not lay anything between the non-connection charging pad 10) Do not surpass the rated value when using the plug and other 11) Do not make any breakage on the AC adapter , please make off the plug when it's not used . wiring layout;
中英文对照

HDD VCR
蓝光播放器 Blu-ray Player Firmwares
黑白 black and white
激光打印机 Laser Printer Drivers
投影机固件 Projector Firmwares
投影机说明书 Projector Manuals
网卡 Network Card
网卡驱动 Network Card Drivers
扫描仪 Scanner
扫描仪驱动 Scanner Drivers
扫描仪说明书 Scanner Manuals
ink-jet All-in-One Printer Drivers
数码摄像机固件 Digital Video Camera Firmwares
数码摄像机说明书 Digital Video Camera Manuals
数码录音笔 Digital Voice Recorder
数码录音笔驱动 Digital Voice Recorder Drivers
显卡工具 Graphics Tools
显卡说明书 Graphics Manuals
CRT显示器 CRT Monitor
显示器驱动 CRT Monitor Drivers
显示器工具 CRT Monitor Tools
CRT显示器说明书 CRT Monitor Manuals
笔记本电脑驱动 Notebook Drivers
笔记本电脑工具 Notebook Tools
笔记本说明书 Notebook Manuals
上网本 Netbook
上网本BIOS Netbook BIOS
中英文对照说明书
中英文对照说明书【篇一:中英文对照说明书】前言preface感谢您使用徐州燃烧控制研究院有限公司生产的就地点火控制柜装置。
本公司的就地点火控制柜装置是徐州燃烧控制研究院有限公司自主开发生产的高品质就地控制装置,在使用系列本程控装置之前请您仔细阅读该手册以保证正确使用并充分发挥其优越性。
本说明书对就地控制柜(以下简称控制柜)的操作和安装方法等做了详细的介绍。
使用控制柜以前,在阅读本说明书的基础上,进行安全正确使用。
thank you for choosing the local ignition control cabinet designed by our company.the local ignition control device is explored by our company for the ignition control of boiler.this manual describes installation and operation of the cabinet clearly, please read this manual before using.内容介绍brief introduction本手册介绍了点火控制柜的组成、安装、配线、功能参数、日常使用维护及对故障的处理the manual includes the cabinet’s components, installation, wiring, data, maintenance, and troubleshooting.读者对象applicable readers本书适合下列人员阅读this manual is applicable for设备安装人员、维护人员、设计人员installer, maintenance man, and designer本书约定stipulation符号约定symbol stipulations说明提醒操作者需重点关注的地方points operator should pay attention to由于没有按要求操作可能造成死亡或重伤的场合危险!this symbol indicates death or gbh that may occur as a result of improper operation由于没有按要求操作可能造成中等程度伤害或轻伤或造成物质损害的场合注意!this symbol indicates secondary injury, flesh wound or object damage that may occur as a result of improper operation一、序言prologue1.1 开箱检查checking在开箱时请认真确认在运输中是否有破损现象控制柜内元器件与附图中的型号数量是否相符如发现有某种遗漏请速与供货商或我司联系解决!check if there is any damage.ensure the model and quantity in chart are accordance with components in cabinet.if there is any mistake, please contact with supplier or ourcompany.1.2 安全注意事项security不要安装在含有爆炸气体的环境里否则有引发爆炸的危险!必须由具有专业资格的人员进行配线作业否则有触电的危险!确认电源处于完全断开的情况下才能进行配线作业否则有触电危险!必须将控制柜的接地端子可靠接地否则有触电的危险!通电情况下不要用手触摸控制端子否则有触电的危险!do not install in explosive environment, or it may causeexplosion.do invite professionals for accompany when wiring, or it may cause electric shockdo shut off power before wiring.do earth the cabinet ground terminal.do not touch the control terminal when power is on.1.3 安装条件installation requirement1.4 日常维护maintenance定期检查柜内各种元器件,确认任一单元都没有松动的螺钉,所有电源和电线的连接都安全可靠;并保持外观完好。
产品使用说明书英语
便携式多媒体音响 portable multimedia acoustics使用说明书 user’s manual专注于完美音质的追求?? concentrate on perfect sound pursuit?感谢您使用本公司出品的数码产品,为了让您轻松体验产品,我们随机配备了内容详尽的使用说明,您从中可以获取有关产品的介绍,使用方法等方面的知识。
在您开始使用本机之前请先仔细阅读说明书,以便您能正确的使用本机,如有任何印刷错误或翻译失误望广大用户谅解,当涉及内容有所更改时,恕不另行通知。
一、产品概述 general information本机是一款外观小巧,设计精美、携带方便多媒体小音响,适用于家居、户外旅游、办公室等场所,随时随地享受音乐带来的轻松,为您的电脑、数码音乐播放器、手机等视听产品提供超值完美的音质。
二、功能特点 function overview【mp3播放】直接播放tf卡及u盘mp3文件。
[mp3 player] enable directly playing mp3 files in tf memory card and u disk.【fm收音机】fm数字立体声收音机,电台记忆播放。
(可选机型,功能以实物为准) [fm radio] a fm digital stereo radio; enable mnemonic radio channel playing.【外挂耳机】本机配置标准耳机插孔,可选配耳机聆听音乐。
[ext earphone] a standard earphone jack included; enable listening with earphone.【断点记忆】自动记忆上次退出时的曲目播放。
[memory function] memorize the item played last time automatically.【可充锂电】内置可充电锂电池,环保、节约、实用。
fenix3 中英文对照说明书

Owner’s Manual
翻译仅供参考,如有错误之处,请不吝指出,联系QQ:12594065 (SUNG),随时交流修正
February 2015
Printed in Taiwan
190-01840-00_0B
Table of Contents
Setting a Training Target .设...定....训...练...目...标........................................... 7 Cancelling a Training Target .取...消...训...练...目....标................................. 7
Setting up Garmin express 设...置.... G...a..r.m..i.n.. .e..x.p..r.e..s.s....................... 1
Activities .运...动..................................................................... 1 Starting an Activity .开...始...活...动............................................................ 2 Stopping an Activity .停...止...活...动.......................................................... 2 Skiing .滑...雪...................................................................................... 2
ZTE G650 G651 G420 G120 GoTa 数字集群手机 说明书

ZTE G650/G651/G420/G120 GoTa数字集群手机用户手册本资料著作权属中兴通讯股份有限公司所有,未经著作权人许可,任何单位或个人不得以任何方式摘录、复制或翻译。
对于有损版权人利益的行为,中兴通讯股份有限公司将依法追究侵权人的责任。
中兴通讯股份有限公司保留对本产品进行改进的权利,如有更改,恕不另行通知。
本手册中如有文字不明之处,请您及时向本公司或者代理商、销售商咨询。
中兴通讯拥有本手册的最终解释权。
Copyright © 2007 by ZTE Corporation版本:V5.2120070824使用之前 (10)1.1简介 (10)1.2安全须知 (11)1.3安全警告和注意事项 (11)1.4各部份说明 (14)1.5电池 (16)1.5.1 安装电池 (16)1.5.2 拆卸电池 (17)1.5.3 电池充电 (18)1.6R-UIM卡的插入与取出 (19)1.7开机/关机 (21)1.7.1 开机 (21)1.7.2 关机 (21)1.8文字输入 (21)1.9界面说明 (24)PTT电话的拨打与接听 (26)2.1拨打私密电话 (26)2.1.1 直接拨打 (26)2.1.2 从电话本中拨打 (27)2.1.3 从PTT通话记录中拨打 (27)32.2拨打组呼电话 (28)2.2.1 直接拨打 (28)2.2.2 从电话本中拨打 (28)2.2.3 从PTT通话记录中拨打 (28)2.3接听PTT电话 (29)2.4结束PTT电话 (29)2.4.1 退出组呼电话 (29)2.4.2 结束组呼电话 (29)2.4.3 结束私密呼电话 (30)2.5PTT广播呼叫 (30)2.6PTT紧急呼叫 (30)2.7PTT呼叫中的功能 (30)2.7.1 通话过程中的组成员状态查询 (30)2.7.2 群组成员管理 (32)2.7.3 将普通呼叫提升为紧急呼叫 (32)2.7.4 将紧急呼叫降低为普通呼叫 (32)2.7.5 通话音的切换 (32)普通电话的拨打与接听 (33)3.1拨打电话 (33)3.1.1 直接拨打 (33)3.1.2 从电话本中拨打 (33)43.1.3 从普通通话记录拨打 (33)3.2接听电话 (34)3.3挂断电话 (34)3.4普通呼叫中的功能 (34)3.4.1 通话过程中调节音量 (34)3.4.2 通话中查看电话本 (34)3.4.3 通话中静音 (34)3.4.4 通话中听筒及扬声器的切换 (34)3.4.5 三方通话 (35)电话本 (36)4.1私人号码本 (36)4.1.1 添加联系人 (36)4.1.2 查找联系人 (38)4.1.3 查看联系人 (39)4.1.4 修改联系人内容 (39)4.1.5 删除联系人 (39)4.1.6 设置分组铃音 (39)4.1.7 修改分组名称 (40)4.1.8 手机中记录与R-UIM卡中记录互传 (40)4.1.9 查看当前内存使用 (41)4.1.10 删除手机中所有联系人 (41)54.2PTT组号码本 (42)4.2.1 进入PTT组号码本 (42)4.2.2 新增PTT用户组 (42)4.2.3 修改PTT用户组 (42)4.2.4 删除PTT用户组 (43)4.2.5 删除全部用户组号码 (43)4.2.6 查看当前内存使用 (43)4.2.7 查看系统组号码本 (43)集群调度 (44)5.1守候功能 (44)5.2呼叫属性 (45)5.3PTT免打扰 (45)5.4PTT呼叫转移 (46)5.5群组状态查询 (46)5.6PTT漏接查询 (47)5.7岗位号码 (47)5.8主叫识别限制 (47)5.9遇忙来电提示 (48)5.10群组成员动态管理 (48)65.10.2 设组成员优先级 (49)5.10.3 设组成员通话时长 (49)5.11紧急呼叫 (49)短消息 (50)6.1写短信 (50)6.1.1 立即发送 (50)6.1.2 常用短语 (50)6.1.3 保存草稿 (51)6.1.4 返回 (51)6.2收件箱 (51)6.2.1 查看短信 (51)6.2.2 从短信中提取号码 (52)6.2.3 收到新短信 (52)6.3发件箱 (52)6.4草稿箱 (52)6.5短信设置 (53)6.6删除全部 (53)6.7常用短语 (54)7通话记录 (55)7.1通话记录图标说明 (55)7.2查看通话记录 (55)7.3删除通话记录 (56)7.4删除所有通话记录 (56)7.5存储记录中的号码 (56)7.6从通话记录中拨打普通电话 (56)7.7从通话记录中发起PTT呼叫 (56)7.8从通话记录中发送短信 (57)7.9查看记录号码的电话本信息 (57)情景模式 (58)8.1启动一种情景模式 (58)8.2修改情景模式 (58)8.3特殊来电铃音设定 (59)个人助理 (60)9.1计算器 (60)9.2闹钟 (60)9.2.1 新增闹钟 (60)9.2.2 查看与修改闹钟内容 (61)89.2.4 响闹过程中关闭铃声 (61)9.2.5 设闹钟铃声 (61)9.3日历 (61)9.3.1 查看当日事件 (61)9.3.2 新增事件 (62)9.3.3 查找日期及事件 (62)9.3.4 删除事件 (62)9.4世界时间 (62)9.5秒表 (63)9.5.1 一般计时 (63)9.5.2 计时中记录多个时间记录 (63)设置 (64)10.1进入设置 (64)10.2手机设置 (64)10.3通话设置 (66)10.4安全设置 (67)10.5恢复出厂设置 (68)附录 (69)11.1快捷方式 (69)911.1.2 快速进入应用 (69)11.1.3 快速回到待机状态 (69)11.1.4 删除当前屏幕输入 (69)11.1.5 快速设置情景模式 (70)11.1.6 快速进入菜单项 (70)11.1.7 在通话中快速进入或取消省电模式 (70)11.1.8 在待机屏快速更改呼叫属性 (70)11.1.9 在电话本中快速查找字母形式的姓名 (70)11.1.10 快速守候组切换 (70)11.2锁键盘 (71)11.3耳机使用 (71)11.3.1 使用耳机进行PTT操作 (71)11.3.2 使用耳机接听或挂断普通电话 (71)11.4故障弱化 (72)11.5故障分析 (72)101.1 简介恭喜您选择了中兴通讯的G650/G651/G420/G120CDMA PTT手机。
XT702简体中文说明书(milestone大陆版)
XT702设备型号: XT702恭喜您成为摩托罗拉移动电话的用户!我们非常高兴您选择了本款XT702触摸屏移动电话,该手机是Android平台产品,支持3GWCDMA 网络,使您瞬间拥有快速便捷的上网体验;独特的外形设计,简洁流畅的外形,500万像素的照相机功能,超大屏幕的广阔视野,酷炫的操作界面,会让您享受全新的用户体验!本手册系统地介绍了该款手机的多种功能,使用技巧和注意事项,请在使用手机前仔细阅读本手册。
引言1摩托罗拉全质量服务网页:/service 服务电话:400-810-5050,(021)38784655服务时间:周一至周日,早9:00-晚17:30热线传真:(010)65668800若您有意订购摩托罗拉原装配件或手机,请访问 ,或致电销售热线4006-123456。
MOTOROLA 及M 标识,还有这里所用的其他商标均为摩托罗拉公司所有。
蓝牙商标为其专利所有权者所有,摩托罗拉获得使用许可。
Java 和其他基于Java 的标志均为美国或其他国家SUN 公司的商标或注册商标。
所有其他产品和服务名称均为各自所属公司所有。
ⓒ2010摩托罗拉公司版权所有。
本款手机某些功能的使用取决于您的网络服务供应商的网络设置及性能。
另外,由于网络服务供应商的不同,手机的某些功能可能无法使用,并且/或者是网络服务供应商限制此项功能的使用。
关于手机的功能及功能的可用性,请向您的网络服务供应商咨询。
摩托罗拉将保留对本手册更正或更改其中信息及说明的权力,恕不另行通知且不承担任何责任。
引言2引言1目录3快速入门6关于手册6原装配件6重力感应8安装与准备9开机与关机11设备锁定和解锁12触摸屏的使用12主要按键14主屏幕15状态栏和指示符16使用提示17设置时间和日期18拨打电话18接听电话19信息19输入文本20手机基本设置25铃声设置25显示设置26目录3安全设置27自定义主屏幕29快捷方式29窗口小部件29通话指南30拨打电话30接听电话30免提功能30通话中使用静音31电话会议31通话记录32拨打紧急号码32联系人34搜索联系人34新建联系人34编辑联系人35删除联系人35导入联系人35信息功能36编写新信息36回复信息36创建彩信37电子邮件38设置电子邮件38目录4发送邮件39接收邮件40浏览器41多媒体43关于音乐43使用照相机45使用摄像机49连接设备51蓝牙无线连接51 WLAN53 USB连接54同步55更多应用程序56闹钟56日历56搜索功能57计算器58我的手势59故障处理60电磁波能量吸收比值63安全和法律信息65开放源代码软件信息87目录5警告:在使用手机前,请阅读手册的安全和法律信息。
TCL Z100手机 说明书
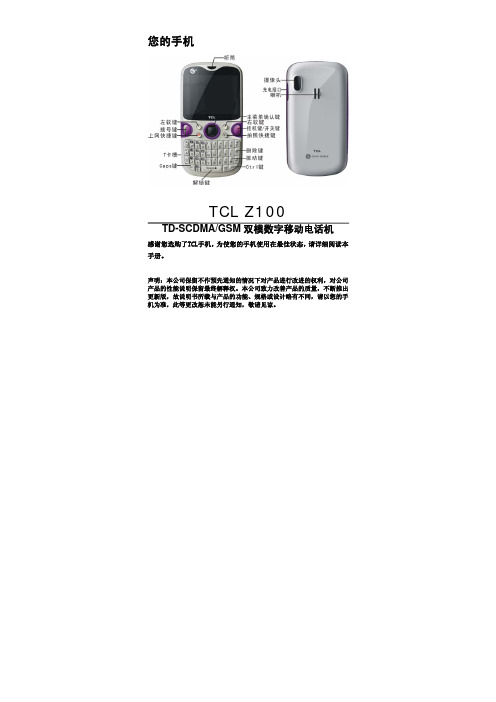
您的手机TCL Z100TD-SCDMA/GSM双模数字移动电话机感谢您选购了TCL手机,为使您的手机使用在最佳状态,请详细阅读本手册。
声明:本公司保留不作预先通知的情况下对产品进行改进的权利,对公司产品的性能说明保留最终解释权。
本公司致力改善产品的质量,不断推出更新版,故说明书所载与产品的功能、规格或设计略有不同,请以您的手机为准,此等更改恕未能另行通知,敬请见谅。
手机按键¾主菜单确认键:触摸感应上下左右可随时移动选择,按中间键确认选项;¾拨号键:向联系人发出呼叫;¾挂机键/开关键:挂断电话/开启或关闭手机;¾上网快捷键:短按此键,可进入上网界面;¾拍照快捷键:短按此键,可进入照像机界面;¾删除键:删除联系人、信息和文件等;¾振动键:短按此键,可激活振动模式。
手机主界面使用手机入门安装与取出电池TCL Z100手机使用锂电池。
在您购买手机时,手机电池没有充电,但有足够的电量供您开机。
请使用厂家提供的原装电池,使用手机前请先正确安装电池。
安装电池打开和合上电池盖:安装和取出电池电量显示电池电量图标显示在手机屏幕的左上角。
当电池电量微弱时,会发出低电告警声,并有提示框。
当电量继续减少到不能支持手机操作时,手机将自动关机。
电池种类 待机时间 通话时间锂离子电池 GSM:150小时TD:170小时GSM:180分钟TD:280分钟注意:电池实际使用时间会因操作方式、网络设置、通话设置的不同而有所不同。
电池充电前,请先仔细阅读下列注意事项。
注意:z当第一次使用电池,请给手机充电至少3小时以上。
z电池长时间没使用,它会自动放电,请在使用前充电。
z电池可以反复充电,但由于电池属于易损耗品,如果正常充电后,手机的待机时间大幅度地降低,请更换新电池。
z请勿强烈碰撞、振动、抛掷电池,否则会引起电池液体渗漏、破损、发热、爆炸或着火。
电池充电TCL Z100手机随机配备一个旅行充电器。
飞利浦aj3400中英文说明书
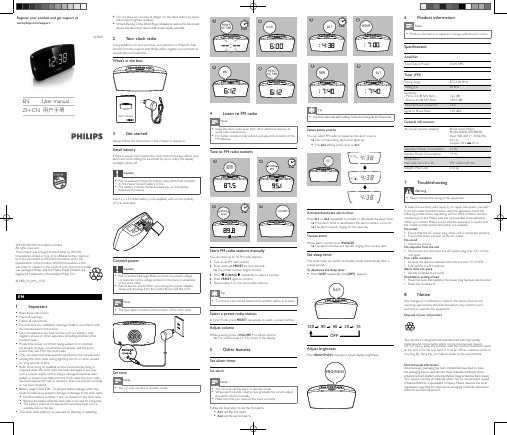
• This clock radio shall not be exposed to dripping or splashing.
Connect power
Caution
•• Risk of product damage! Make sure that the power voltage
2 sec
3
TUNING HOUR
4
2 sec
- VOLUME +
2014 © WOOX Innovations Limited. All rights reserved. This product was brought to the market by WOOX Innovations Limited or one of its affiliates, further referred to in this document as WOOX Innovations, and is the manufacturer of the product. WOOX Innovations is the warrantor in relation to the product with which this booklet was packaged. Philips and the Philips Shield Emblem are registered trademarks of Koninklijke Philips N.V.
Select alarm source
You can select FM radio or buzzer as the alarm source. »»The corresponding alarm icon lights up.
tcl-t188手机说明书
心机TCL T188感谢您选购了TCL手机,为使您的手机使用在最佳状态,请详细阅读本手册。
1.安全及注意事项 (2)2.手机外观 (7)3.手机规格一览表 (8)4.使用前的准备工作 (8)5.手机简要说明 (11)6.手机基本操作 (13)7.使用菜单功能 (14)信息中心 (14)通信录 (16)通话记录 (17)移动梦网 (18)中国移动服务 (19)客户服务 (19)我的收藏 (20)娱乐应用 (20)设置 (22)8.输入法操作说明 (24)9.附录一 常见故障诊断 (26)10.附录二 缩略语及其解释 (27)声明:本公司保留不作预先通知的情况下对产品进行改进的权利,对公司产品的性能说明保留最终解释权。
本公司致力改善产品的质量,不断推出更新版,故说明书所载与产品的功能、规格或设计略有不同,请以您的手机为准,此等更改恕未能另行通知,敬请见谅。
第 1 页1.安全及注意事项为了减少对人身伤害、电击、火的危险性,以及设备的损坏,请仔细阅读以下规则,并遵守这些规则,以防危险和违法。
重大安全事项提示易燃易爆区域◆在易燃易爆区域,请您关机。
请勿安装/取出电池、或给电池充电、使用手机,以免引起爆炸或火灾,易燃易爆区域有:化工厂、空气中含化学物质或微粒(如:颗粒、灰尘、金属粉末)的区域。
加油站、油库。
燃料区(如:船甲板下的舱体)。
有爆炸危险标志的区域。
有“关掉双向无线电设备”标志的区域。
通常建议您关闭汽车引擎区域等。
手机使用安全◆在雷雨天气时,请勿在充电时使用手机,或者在室外使用手机,以免受到雷击或其它伤害。
◆请不要将电池放在高温环境下(高温会导致电池热量提升),否则可能会导致着火或爆炸。
◆请勿将手机整夜(或长时间)地进行充电,并请将充电中的手机、充电器远离人身或其它易燃易爆物品的旁边,以免发生着火、爆炸或其它危险!◆在禁止使用手机场合,请严格遵守,务必将手机关机!◆请勿将手机、电池及充电器放置于具有强大电磁场的器具中,如电磁锅和微波炉,否则可能会导致电路故障、着火或爆炸。
中英文说明书
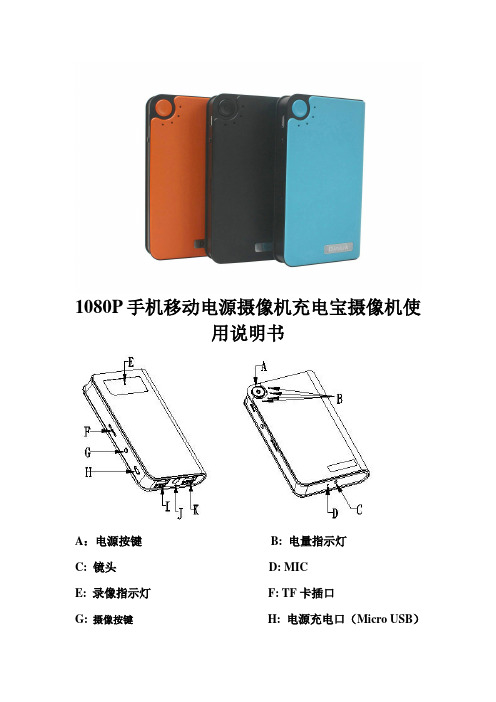
用说明书A:电源按键B: 电量指示灯C: 镜头D: MICE: 录像指示灯F: TF卡插口G:摄像按键H: 电源充电口(Micro USB)I: 摄像机数据口/充电口(DC 5V 2A)J: 照明灯K:电源输出口(DC 5V 1A)感谢您使用我公司的便携微型录像产品,在使用本产品之前,请认真阅读本使用说明书。
注意事项:1. 请不要在高,多尘和潮湿的环境中使用本机;2. 尽量避免在特别干燥的环境下使用本机,以防静电;3. 不要让本机与硬物摩擦撞击,否则会导致外观磨花或其他硬件损坏;4. 本机在格式化或正在进行文件的上传下载时请不要突然断开连接,否则可能会导致程序错误;5. 本机被作为移动磁盘时,请按正确的文件管理操作方法存储导出文件,重要数据请做好备份,任何错误操作方法导致文件丢失,本公司概不负责;6. 请不要拆解本机,本机可以通过USB口充电;一、本机特色:1. 移动电源与摄像机结合的独特设计,TF卡槽外置2. 高清晰1000万摄像头3. 高清AVI格式,音视频同步录制;4. 录像分辨率: 1920*1080 10帧 1280*720 30帧 640*480 30帧 320*240 30帧可选5. 单独拍照功能照片质量达到4032*3024,像素为1200万.6. 内置高容量可反复充电聚合物锂电池.二、操作说明:摄像部分操作说明:1、开机:短按摄像开机键一次,蓝灯长亮,机器进入待机状态。
2、录像:在待机状态下(蓝灯长亮)按下功能键一次,录像指示灯绿灯慢闪3下后熄灭进入录像状态。
录像过程中按摄像按键一次,机器保存录像文件并停止录像,录像文件每20分钟自动保存一个文件。
3、拍照:在待机状态下连按两次摄像按键,此时蓝色指示灯慢闪两次则就拍照一张。
4、录音:在待机状态下连按三次摄像按键,此时蓝色指示灯快闪三次熄灭则进入录音中,若要停止再按一次摄像按键即可。
5、移动侦测:在待机状态下连按四次摄像按键,此时蓝色指示灯均匀闪烁,检测到移动目标后蓝灯快闪三次后熄灭进入录像中,若要停止再按一次摄像按键即可。
万利达MT708说明书

开机充电时话机屏幕电池容量图标自右向左动画显示,电池充满以后电池容量以满格静止显示。 注意:电池在充电期间有轻微发热为正常现象。
电池的使用
电池的性能受多种因素的影响,包括您的无线承载网络配置、信号强度、使用手机时的温度;您 所选择和使用的功能或设置,和手机选择的配件以及您所使用的语音、数据或其它的应用程序模式。
注意:“1”键在待机状态下长按,代表呼叫语音信箱服务中心,此号码需要预先设定语音信箱号 码。
*、#键在不同的状态或功能菜单中有不同功能: 在待机界面,长按“#”键开启或退出静音模式。 在数字拨号界面,连续短按或长按“*”键可输入“+”、“P”或“W”字符;其中“P、W”
以方便呼叫分机;“+”用于拨打国际长途。 提示:“W、P会跳出一个视窗询问使 用者是否传送 DTMF。
1
一.安全及注意事项
为了安全、有效地使用您的手机,请您在使用前阅读以下信息: ¾ 在化工厂、加油站、油库以及其它爆炸物附近时,请您关机。 ¾ 使手机远离儿童。 ¾ 在驾车过程时,请使用耳机通话装置以保安全;除非在紧急情况下,否则请您在路旁停车, 再进行通话;特别是不要在高速驾车中使用手机。 ¾ 请勿在飞机上使用移动电话,在登机前请检查手机是否设置了自动开机功能。 ¾ 在医院不要使用移动电话,以免干扰医疗设备的正常运转,导致医疗事故的发生,如果在心 脏起搏器、助听器以及其它一些医疗电子设备附近使用手机时应特别注意,手机可能会干 扰这些设备。 ¾ 非原厂附件和配件,不具有保修资格。 ¾ 请勿自行拆卸手机,若您的手机发生故障,请与我们指定的维修处取得联系。 ¾ 严禁手机在没有装上电池时插上充电器充电;取电池时应关掉手机电源,否则会损坏电话记 忆。 ¾ 充电必须在通风和散热良好的环境下进行,远离易燃、易爆品。 ¾ 为避免消磁,请保持手机远离磁性物质,如磁碟片、信用卡等。 ¾ 确保手机不与任何液体接触,一旦发生此种情况,请拆下电池并与我们指定的维修处取得联 系。 ¾ 避免在温度过高或过低的环境下使用手机,避免将手机暴露在强烈日光下或湿度较高的环境 中。 ¾ 不能用液体或含有强洗涤剂的湿布来清洁您的移动电话。 ¾ 您的手机具有拍照和录音功能,请遵照相关法律法规使用这些功能,擅自拍照和录音可能会 触犯法律和法规。 ¾ 使用手机时请不要扔、放、敲打手机,以免损坏外壳及手机内部元件。 ¾ 不要将旧电池扔进一般生活垃圾中。在有明确规定废旧电池处理的地方,请按照规定的指示
英语作文智能手机说明书

英语作文智能手机说明书(中英文版){z}Smartphone User ManualIntroductionThank you for purchasing our智能手机.This user manual will guide you through the basic features and functionalities of your new smartphone.Please read this manual carefully to get the most out of your device.Setting Up Your Smartphone1.Switch on your smartphone by pressing the power button.2.Follow the on-screen instructions to complete the initial setup, including language selection, network setup, and privacy settings.3.Once the setup is complete, you can start using your smartphone.Basic Operations1.Touchscreen: Use your fingers to navigate through the interface and interact with apps.2.Home Screen: Swipe left or right to view different home screens and access your apps, shortcuts, and widgets.3.Back: Press the back button to return to the previous screen or app.4.Recent Apps: Press the recent apps button to switch between recently used apps.5.Notifications: Swipe down from the top of the screen to view andmanage notifications.Using the Camera1.Open the camera app from the home screen or by swiping up from the bottom of the screen.2.Tap the shutter button to take a photo or record a video.e the toggle buttons to adjust the camera settings, such as switching between the front and back cameras, adjusting the flash, and applying filters.4.After capturing a photo or video, tap the save button to save it to your device.Using Mobile Data1.To enable mobile data, go to Settings > Network & Internet > Mobile Data.2.Tap the slider to turn on mobile data.3.You can also configure your data usage settings, such as setting data limits and enabling data usage monitoring.Battery LifeTo optimize battery life, follow these tips:1.Close apps that you are not using.2.Turn off unnecessary features, such as Bluetooth and GPS, when not in use.e the power saving mode available in the settings to extendbattery life.TroubleshootingIf you encounter any issues, try the following steps:1.Restart your smartphone by turning it off and on again.2.Check for software updates by going to Settings > System > About phone > System updates.3.If the problem persists, contact our customer support for further assistance.ConclusionWe hope this user manual has helped you understand how to use your new智能手机.If you have any further questions or need assistance, please refer to the troubleshooting section or contact our customer support.Enjoy using your smartphone!。
手机中英文说明书
7、背景通话 通话过程中,使用 会退回到主界面进行其他操作,返回通话界面请轻点绿色背景状态栏
4.4呼叫等待
当切换按钮上拨时,+ 按钮为菜单按钮,- 按钮为返回按钮;当切换按钮下拨时,+按钮为音量调高按钮,-按钮为音量调低按钮。
1.3状态图标
屏幕顶部状态栏中的图标提供有关手机的信息:
状态图标含义
信号显示 显示您是否处于网络覆盖范围以及是否可以拨打或接听电话。信号格数越多,信号越强。如果没有信号,则信号格会被替换为“无服务”。
数字输入法
在此输入法状态下按数字键输入对应的数字。
符号输入法
点选图中所示符号位置,可切换至符号输入法,点选需要的符号即可选择需要的符号。
3.4搜索
您可以在手机上搜索应用程序,如iPod、iReader 等。
前往“搜索”:在首要主屏幕上,从左到右快速滑动手指。从“搜索”屏幕,按下主屏幕按钮 ,以返回到首要主屏幕页面。
SIM卡推出工具:推出 SIM 卡托架。
1.2按键
有几个简单按钮,
Power键:使您可以轻松地开启或关掉手机。
主屏幕按钮:可以让您随时退回到主屏幕界面。
侧键:切换键,可以在菜单(返回)按钮 和 音量调节按钮之间切换
如果您当前没有使用手机,则可以锁定它以关闭显示屏,从而节省电池电量。
1.1附件
配件用途
耳机:听音乐、视频及接听电话。使用内建麦克风交谈。短按中央按钮可以接听,长按中央按钮,结束通话。听音乐时,按下此按钮一次来播放或暂停播放歌曲
Dock接口至USB电缆:使用电缆将手机连接至电脑以进行同步和充电。电缆可以与选购的基座配合使用,或者直接插入手机。
X7说明书

目录第1章基本知识 (1)1.1简介 (1)1.2安全须知 (1)1.3通用注意事项 (1)1.4使用手机的注意事项 (2)1.5使用电池的注意事项 (2)1.6使用充电器的注意事项 (2)1.7清洁和维护 (2)1.8一般注意事项 (2)第2章使用前 (3)2.1技术参数 (3)2.2SIM卡 (3)2.2.1 SIM/UIM卡的插入和取出 (3)2.2.2 记忆卡的插入和取出 (3)2.3电池 (3)2.3.1电池的拆卸和安装 (3)2.3.2电池的充电 (3)2.4开机 (3)第3章基本说明 (3)3.1键盘介绍 (3)3.1.1 基本按键 (3)3.2电话功能 (3)3.2.1 拨打电话 (3)3.2.2 接听电话 (4)3.2.3 拒绝电话 (4)3.3使用数据线 (4)第4章菜单介绍 (5)4.1手机模式切换 (5)4.1.1 模式设臵 (5)4.1.2 双模设臵 (5)4.2特效介绍 (5)4.3基本功能 (5)4.3.1 短信 (5)4.3.2 彩信 (5)4.3.3 通讯录 (6)4.3.4 通话中心 (6)4.3.5 情景模式 (7)4.3.6 手机设臵 (7)4.3.7 安全设臵 (7)4.3.8 恢复出厂设臵 (7)4.3.9 电子邮件 (7)4.3.10 小区广播 (8)4.4多媒体工具 (8)4.4.1 相机 (8)4.4.2 视频录像器 (8)4.4.3 视频播放器 (8)4.4.4 音乐播放器 (8)4.4.5 蓝牙 (8)4.4.6 电子书 (8)4.4.7 照片编辑器 (9)4.4.8 调频广播 (9)4.4.9 录音 (9)4.4.10 幻灯片 (9)4.5事务管理 (9)4.5.1 闹钟 (9)4.5.2 任务 (9)4.5.3 文件管理 (9)4.5.4 健康管理 (10)4.5.5 单位换算 (10)4.5.6 汇率换算 (10)4.5.7 健康管理 (10)4.5.8 码表 (10)4.6娱乐游戏 (10)4.6.1 Java (10)4.6.2 游戏: (10)4.7上网功能 (10)4.7.1 网络服务 (10)4.7.2 无线网络 (10)4.7.3 几种上网方式介绍 (10)4.8通话中菜单 (12)第5章常见问题 (13)5.1什么手机出现“请插入SIM卡”字样? (13)5.2PIN、PIN2、PUK、PUK2码和限制密码的查询及注意事项:. 135.3时常掉网情况发生 (13)5.4对方听不到声音 (13)5.5不充电或充电不显示 (13)5.6信号时有时无 (13)5.7电话无法拨出 (13)5.8手机待机时间短 (13)第1章基本知识1.1 简介感谢您选择X7系列彩屏移动电话。
HUAWEI华为 nova 6 SE 用户指南 说明书
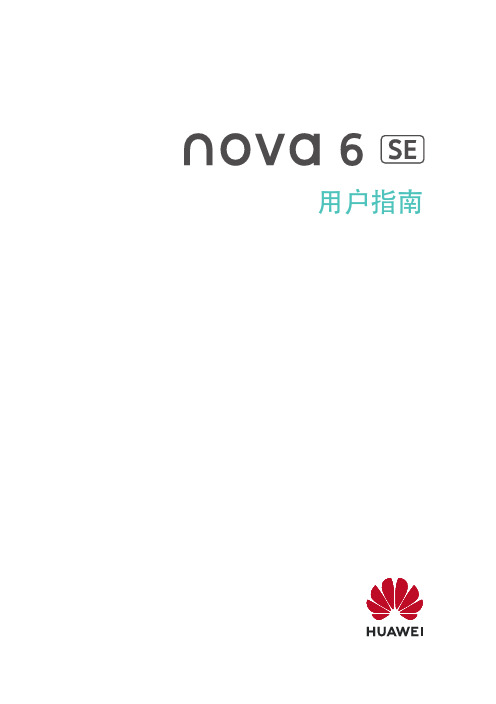
正在使用超级快充
省电模式已开启
蓝牙已开启
蓝牙设备电量
已连接蓝牙设备
已连接至 VPN 网络
已进入驾驶模式
已连接至投屏设备
位置服务已开启
护眼模式已开启
已连接耳机
已连接带麦克风的耳机
有未接来电
有新消息
麦克风已被禁止
静音模式
10
更多未显示的信息 NFC 已开启 数据同步中 性能模式已开启 收到日程提醒
振动模式 免打扰模式已开启 数据同步失败 收到新邮件 健康使用手机已开启
快捷开关
快捷开关
打开快捷开关 从屏幕顶部状态栏下滑出通知面板,继续向下滑出整个菜单。
基础使用
11
基础使用
• 点击快捷开关,开启或关闭相应功能。 • 长按快捷开关,进入对应功能的设置页面。 • 点击 进入设置界面。 自定义快捷开关 点击 ,然后长按拖动快捷开关调整位置。
桌面窗口小工具
桌面窗口小工具
您可以根据需要添加、移动或删除桌面窗口小工具,包括一键锁屏、天气、备忘录预览、联系人、 日历等。
加到主屏幕。然后点击一键锁屏图标锁屏。 设置自动锁屏时间
进入 设置 > 显示和亮度 > 休眠,选择对应的屏幕自动休眠时长。 点亮屏幕 您可以通过以下方式点亮屏幕: • 按电源键点亮屏幕。
• 进入 设置 > 辅助功能 > 快捷启动及手势 > 亮屏,开启并使用拿起手机亮屏。
输入密码解锁 点亮屏幕后,从屏幕任意位置滑动,会出现密码输入面板。输入锁屏密码即可。 使用人脸解锁 点亮屏幕后,将手机对准人脸。手机会自动进行人脸识别校验,校验成功后即可解锁。 指纹解锁屏幕 用事先录入指纹的手指按压指纹感应区域,即可解锁。
- 1、下载文档前请自行甄别文档内容的完整性,平台不提供额外的编辑、内容补充、找答案等附加服务。
- 2、"仅部分预览"的文档,不可在线预览部分如存在完整性等问题,可反馈申请退款(可完整预览的文档不适用该条件!)。
- 3、如文档侵犯您的权益,请联系客服反馈,我们会尽快为您处理(人工客服工作时间:9:00-18:30)。
输入法
可选输入法有拼音、手写、英文大写、英文小写以及数字。
并非在任何情况下都可以使用全部输入法。请时常检查屏幕上的指示符号,以确定当前使用的输入法。
输入文字时,要在可用的输入法之间切换,请反复按指示符号,直到屏幕上显示所需输入法的指示符号。
数字输入法
在此输入法状态下按数字键输入对应的数字。
符号输入法
点选图中所示符号位置,可切换至符号输入法,点选需要的符号即可选择需要的符号。
3.4搜索
您可以在手机上搜索应用程序,如iPod、iReader 等。
前往“搜索”:在首要主屏幕上,从左到右快速滑动手指。从“搜索”屏幕,按下主屏幕按钮 ,以返回到首要主屏幕页面。
放大或缩小
查看照片、地图时,您可以进行放大或缩小。将您的手指合拢或张开来进行放大和缩小。查看照片时,连按两次(快速轻按两次)以放大,再次连
按两次以缩小。查看地图时,连按两次以放大,用两个手指轻按一次以缩小。
编辑—剪切、拷贝和粘贴
触摸屏可让您轻松地更改您所输入的文本。屏幕放大镜可帮助您将插入点精确地放置到期望位置。所选文本上的抓取点可让您快速地选择更多或更少的文本。您也可以在应用程序内或在多个应用程序之间剪切、拷贝和粘贴文本。
3.1使用应用程序
高分辨率屏幕和简单的手指手势使得使用手机应用程序很容易。
打开和切换应用程序
若要在手机上打开应用程序,请在主屏幕上轻按其图标。
பைடு நூலகம்返回到主屏幕:将切换按钮向上扳动,按侧键的“-”按钮 。
切换到其他主屏幕:快速向左或向右滑动手指,或者在一行圆点的左右轻按。
前往第一个主屏幕:按下主屏幕按钮 。
Dock接口至USB电缆:使用电缆将手机连接至电脑以进行同步和充电。电缆可以与选购的基座配合使用,或者直接插入手机。
USB电源适配器:使用附带的电缆将电源适配器连接到手机,然后将其插入标准电源插座以给手机充电。
SIM卡推出工具:推出 SIM 卡托架。
手机保护套:为了保护手机防止磨损。
1.2按键
拼音输入法
拼音字母已经全部显示出来。您只需按一下所需要的拼音字母。手机就会提供合理的拼音字母组合。
使用拼音输入法输入汉字:
1、您只需按一下所需要的拼音字母即可输入该拼音字母(字母“ü”在屏幕上对应于“v”)。
2、滚动至所需汉字,然后点选即可。
手写输入法
该手机支持手写输入法, 手写输入是一种非常人性化的输入方式,手写功能给人们带来的方便已经得到了大家的认可。本手机支持手写文字的输入法,您只需长按输入框,选择输入法,切换到QQ 输入法,再次点击输入框,调出输入法,按输入法左下方的切换钮,切换到手写输入法
设定墙纸:
1.在第一屏,或屏幕空白处,长按会出现 选择壁纸来源菜单 ,选择其中一种。
2.轻按“确定”,屏幕显示所选中的壁纸。
3键入
任何时候,只要您需要键入,屏幕键盘就会出现。
输入文本
1、 轻按文本栏(如备忘录或写信息)以调出键盘。
2、 轻按键盘上的键。刚开始时,可以仅用食指键入。使用熟练后,可用两个拇指以更快地键入。
WI-FI 显示手机已通过 Wi-Fi 网络接入互联网。信号格数越多,则信号越强。
锁屏 显示手机已锁定。请参阅开机按键的说明。
闹钟 显示设置了闹钟。请参阅 “闹钟”设置。
蓝牙 白色图标:蓝牙已打开,并且耳机或车载套件这类设备
已连接。无图标:蓝牙已关闭。请参考设置中WIFI设置项
2.1.3使 SIM 卡与托架平行,将 SIM 卡置于顶部(如图所示),小心地装回托架。
2.2 USB使用
在开机状态下连接USB,拉下通知栏,选择USB 连接,之后选择打开USB 存储设备,此时您就可以操作电脑进行手机与电脑之间的数据传输了;同时与电脑USB连接后还可以为手机充电。
3、 基本功能
主屏幕按钮
随时按下主屏幕按钮以返回到主屏幕,该屏幕包含您的手机应用程序。轻按任一应用程序图标,即可开始使用。若要查看您最近使用的应用程序,请长按主屏幕按钮。请参阅 “打开和切换应
用程序”。
当切换按钮上拨时,+ 按钮为菜单按钮,- 按钮为返回按钮;当切换按钮下拨时,+按钮为音量调高按钮,-按钮为音量调低按钮。
1、 概览
您的主屏幕可能看起来不同,取决于您拥有的机型以及您是否已重新排列了图标。
1.1附件
配件用途
耳机:听音乐、视频及接听电话。使用内建麦克风交谈。短按中央按钮可以接听,长按中央按钮,结束通话。听音乐时,按下此按钮一次来播放或暂停播放歌曲
有几个简单按钮,使您可以轻松地开启或关掉手机,菜单(返回)按钮 和 音量调节按钮之间的切换
1、 概览
您的主屏幕可能看起来不同,取决于您拥有的机型以及您是否已重新排列了图标。
1.1附件
配件用途
耳机:听音乐、视频及接听电话。使用内建麦克风交谈。短按中央按钮可以接听,长按中央按钮,结束通话。听音乐时,按下此按钮一次来播放或暂停播放歌曲
4.2接听或拒绝接听来电
要接听来电,请点击屏幕中的接听。要结束通话,请点击屏幕中的结束通话。
要拒绝接听来电,请点击屏幕中的挂断或按开关机键拒接来电 。
在接通电话后,选择静音,对方将不能听到您的声音。
4.3拨打过程
要在通话过程中增大或减小音量,请按向上或向下侧键,在通话过程中选择静音、显示键盘、小键盘、免提听筒、添加、通话保持、联系人需拖动屏幕下方的滚球到需要操作的区域,便可进入。
通话键。
2、按通话记录可拨打最近拨打过的电话号码列表中的电话。
3、使用联系人姓名或电话号码拨打电话。请参见“联系人”。
要拨打国际长途电话,请长按“0”输入国际长途码(“+”字符代表国际拨出代码),然后输入国家或地区代码、区号(请根据需要输入,且区号前无需加“0”) 和电话号码。
Dock接口至USB电缆:使用电缆将手机连接至电脑以进行同步和充电。电缆可以与选购的基座配合使用,或者直接插入手机。
USB电源适配器:使用附带的电缆将电源适配器连接到手机,然后将其插入标准电源插座以给手机充电。
SIM卡推出工具:推出 SIM 卡托架。
1.2按键
有几个简单按钮,
Power键:使您可以轻松地开启或关掉手机。
如果您不能关闭手机,或者问题仍然存在,您可能需要复位手机。
强制退出应用程序:按住手机顶部的“开/关”按钮几秒钟,直至应用程序退出。
复位手机:手机耳机孔内有复位按键,在出现死机手机功能无法使用时,使用此按键,具体位置请查看第一节“概览”。
4、 电话
4.1拨打电话
1、输入电话号码(固定电话号码前可能需加区号),然后按
查看最近使用的应用程序:长按主屏幕按钮。屏幕底部会显示四个最近使用的应用程序。快速向左滑动手指以查看更多应用程序。
拖移手指来滚动不会选取或激活屏幕上的任何内容。
快速滑动手指来迅速滚动屏幕。
在具备索引的列表中查找电话本:轻按字母,跳转到以该字母开头的内容。沿索引拖移手指来快速滚动列表。
选取联系人:轻按列表中的联系人。显示某人的联络信息供您呼叫该联系人。
1、静音 通话中请按“静音”您仍然可以听到对方说话,而对方听不到您说话。
2、拨号键盘 您可以 使用小键盘输入信息,不使用键盘仍要继续通话点击隐藏键盘,可以回到拨打界面;如果您使用完小键盘需要挂断电话,直接点击“结束通话”就可以了
重新排列图标
您可以按所需的任何顺序排列主屏幕上的图标。
重新排列图标:
3.2.1 触摸主屏幕图标上的任一图标并按住不放,直至它开始晃动。
3.2.2通过拖移图标来进行排列。
3.2.3 按下主屏幕按钮 以存储排列。
将图标移到另一个屏幕:在排列图标时,将图标拖到屏幕的那一侧。
用文件夹进行整理
键入时,字母会出现在您的拇指或其他手指的上方。如果您触摸到错误的键,您可以将手指滑动到正确的键。只有在手指离开键后,字母才会被输入。
删除上一个字符,轻按删除按钮 。
切换输入法 轻按切换按钮 ,切换其他输入法
显示数字、标点及符号 请按数字键 ,轻按符号键 以查看更多标点符号。
键入不在键盘上的字母或符号触摸相关字母或符号并按住不放,然后滑动以选取变体。
默认情况下,如果您不触摸屏幕的时间达到一分钟,则手机会锁定。
锁定 按下“Power键”按钮。
解锁 按下主屏幕按钮键或Power键点亮屏幕后拖移滑块实现解锁。
关机 按住Power键按钮几秒钟,直至出现手机选项-关机,选择关机,手机会关闭应用程序进入到关机状态。开机长按住“Power”按钮几秒,直至出现开机标志。
创建文件夹:触摸一个图标并按住不放,直至主屏幕图标开始晃动,然后将该图标拖到另一个图标。
手机会创建新的文件夹,包括两个图标,并显示该文件夹的名称。您可以轻按名称栏,并使用键盘输入不同的名称。
添加墙纸
您可以将某个图像或照片设定为屏幕的墙纸。您可以选取手机附带的图像、来自“相机胶卷”的照片或从电脑同步到手机的照片。
以纵向或横向模式查看
许多应用程序都可让您以纵向或横向模式观看屏幕。转动手机,显示屏也会转动显示内容,并自动调整以适合新屏幕方向。
以下应用程序都支持纵向和横向模式:
UCWEB
音乐播放器
照片
3.2自定主屏幕
您可以自定主屏幕上的图标的布局,包括屏幕底部的 Dock 图标。如果您愿意的话,可以将它们排列在多个主屏幕上。您也可以整理应用程序,方式是将它们收集在文件夹中。
1.3状态图标
屏幕顶部状态栏中的图标提供有关手机的信息:
