weblogic安装部署
weblogic安装部署总结
weblogic安装部署总结一,安装安装Weblogic9.2安装 SERVER920_WIN32.EXE 一路next就行安装后,weblogic是没有使用域的可以开始-程序-bea products-quickStart 在弹出界面中点击Start Weblogic Server 9.2启动整个weblogc服务然后登陆http://localhost:7001/console(用户名密码默认是weblogic/weblogic)中 Deployments可以看到整个weblogic本身已经有的服务,这样就表示安装成功。
二,建立域开始-程序-bea products-tools-configuration Wizard,如果是win8,直接运行程序中的configuration Wizard建立一名为yangha2_domain的域,自己设置用户名和密码(这里一样是设置为weblogic/weblogic)系统默认在D:\bea下生产目录user_projects,最后形成:D:\bea\user_projects\domains\yangha2_domain的目录结构,可以不断这么新建域,注意这个文件D:\bea\user_projects\domains\yangha2_domain\config\config.x ml三,项目部署前可以部署war包,也可以直接讲tomcate下的应用作为部署文件,这里分别以JSTLSample.war,和tomcate下的tomcate的TestSSH为例要将项目部署在yangha2_domain下,首先启动yangha2_domain:开始-程序-bea products-user projects-yangha2_domain-Start admin service for Weblogic...如果是win8 就只就双击:E:\bea\user_projects\domains\yangha_domain\startWebLogic.c md四,项目部署访问http://localhost:7001/console,由于启动的是域yangha2_domain所以登陆要用yangha2_domain的用户名和密码weblogic/weblogic,登陆进入后Deployments发现没有应用,因为yangha2_domain还没有部署任何东西,点击左上角的Lock&Edit 再点击Deployments 再点击Install,选择相应war包或者tomcate下的应用的部署文件的地址,一次只能部署一个,一路next完毕。
weblogic的安装和部署

安装步骤:1 ,从公司ftp网站下载weblogic10 安装程序:2 ,安装weblogic10 :按默认安装(可选择customer 安装,只安装webloglic10 server )部署在Weblogic上部署FineReport应用的步骤如下:1. 复制目录:拷贝FineReport安装目录下的WebReport文件夹至服务器(Weblogic 所在的服务器)任意目录,这里将这些文件复制到服务器的C:\ WebReport。
2. Weblogic部署:Weblogic部署FineReport应用,我们以Weblogic10为例:►启动服务器,打开Weblogic管理控制台,默认地址为http://localhost:7001/console,选择左边的部署菜单,点击右侧的安装按钮进行部署。
►调整至FineReport部署位置,即C:\WebReport,选定WebReport,点击“下一步”:►选择默认的定位方式不变,“下一步”:►使用默认设置直接点击“完成”(也可根据需求点击“下一步”逐步进行设置):►点击左侧的“激活更改”按钮进行提交:►看到“激活所有更改。
不需要重新启动”信息时,表示我们已经部署完毕了。
选择刚部署的应用---->启动:►打开浏览器,在地址栏输入http://localhost:7001/WebReport/ReportServer?reportlet=/demo/basi c/post.cpt,如果页面能够正常显示,则表明FineReport应用部署成功。
注意事项:如果登录需要用户名密码,则weblogic/weblogic如果出现ng.NoClassDefFoundError: com/sun/xml/stream/XMLReaderImpl的错误,将bea/modules目录中的glassfish.jaxws.sjsxp_2.0.1.jar删除即可,原因是类冲突具体可以参考学习教程里weblogic服务器的部署。
weblogic安装与部署

Weblogic安装与部署目录1. 环境准备工作 (2)2. 安装部署 (2)2.1 weblogic安装 (2)2.2链接缓冲池配置 (2)2.3数据源配置 (2)2.4创建表空间 (2)2.5创建数据库使用用户 (3)2.6导入备份库 (4)2.7部署应用程序 (4)3. 部署出现问题 (4)3.1 备份库与rar包 (4)3.2应用部署rar包位置 (4)3.3xfire在weblogic8.1版本中,qname.jar包问题 (4)3.3安装启动出现闪退现象 (4)3.4 weblogic正常启动闪退 (5)3.5数据库导入报错-0010 (5)3.6 weblogic初次启动内存溢出报错 (5)1.环境准备工作A.weblogic8.14安装包B.ORCL10 安装包C.PL/SQL安装包D.备份库和RAR包2.安装部署2.1 weblogic安装安装好weblogic后,创建一个新的域,在浏览器中访问127.0.01:7001/console页面中登录weblogic安装时,配置端口号、账户、以及密码登录weblogic。
Weblogic安装时,会有两种模式,一种开发环境模式,一种生产数据环境模式。
创建域后,在weblogci安装目录文件夹以下,会产生一个user_projects文件夹。
2.2链接缓冲池配置在weblogic控制台页面中,对链接缓冲池进行配置。
在配置时,选择页面选项链接缓冲池。
第一步:选择使用的数据库以及相应的数据库驱动程序。
第二步:对数据库名:orcl、数据库使用名、密码、以及主机进行设置。
【注意1:主机名,如数据库安装在本机上,可以使用localhost或者127.0.0.1进行访问。
如数据库非本机上,则输入数据库服务器IP地址】【注意2:数据库使用名和密码,就是要链接的数据库】2.3数据源配置数据源配置,主要是配置JDNI名称。
JDNI名称赋值,则需要使用发包,在发包下寻找datesource.xml文件。
WebLogic安装和项目部署
WebLogic安装和项目部署一 WebLogic安装1、打开WebLogic安装程序:wls1035_win32.exe(我们选用的是WebLogic 11g)。
如图1-1所示:图1-1 WebLogic安装2、进入WebLogic安装的欢迎界面,单击“下一步”按钮。
如图1-2所示:图1-2 WebLogic安装欢迎界面3、选择中间件主目录创建新的中间件主目录,其安装位置为默认的位置(安装位置默认为C:\Oracle\ Middleware,保持默认目录),如图1-3所示。
单击“下一步”按钮:图1-3 选择中间件主目录4、注册安全更新把“我希望通过My Oracle Support接收安全更新”前勾选框的“√”去掉,如图1-4所示。
单击“下一步”按钮:图1-4 注册安全更新5、选择安装类型默认选择“典型”安装类型,如图1-5所示。
单击“下一步”按钮。
图1-5 选择安装类型6、选择产品安装目录WebLogic Server和Oracle Coherence保持默认路径,如图1-6所示。
单击“下一步”按钮。
图1-6 选择产品安装目录7、选择快捷方式位置默认选择“‘所有用户’开始菜单文件夹(推荐)”,如图1-7所示。
单击“下一步”按钮。
图1-7 选择快捷方式位置8、安装概要检查前面所要创建的安装产品和JDK,如图1-8所示。
单击“下一步”按钮。
图1-8 安装概要9、 WebLogic安装过程,如图1-9所示:图1-9 WebLogic安装10、安装完成如果出现图1-10所示的界面,则表示WebLogic安装完成。
单击“完成”按钮。
图1-10 WebLogic安装完成二 WebLogic配置1、在安装完成的界面(图1-10)中,如果选中“运行Quickstart”(默认是选中),则过几秒会自动弹出如图2-1所示的界面,选择“Getting started with WebLogic Server 10.3.5”选项就可进入配置向导,如图2-2所示。
weblogic安装及部署
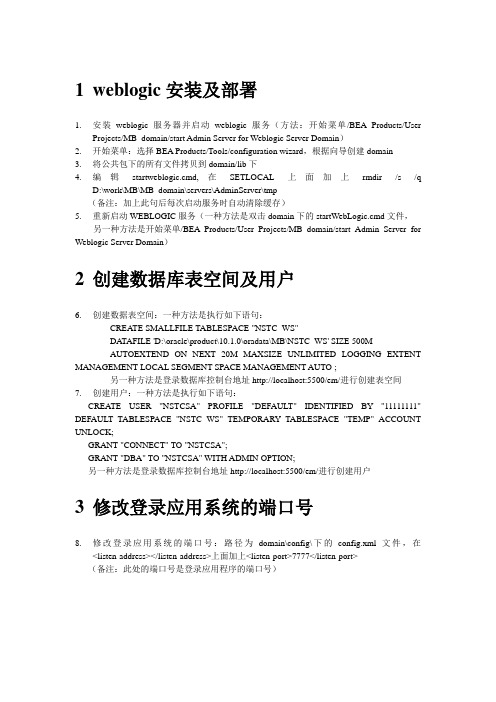
1weblogic安装及部署1.安装weblogic服务器并启动weblogic服务(方法:开始菜单/BEA Products/UserProjects/MB_domain/start Admin Server for Weblogic Server Domain)2.开始菜单:选择BEA Products/Tools/configuration wizard,根据向导创建domain3.将公共包下的所有文件拷贝到domain/lib下4.编辑startweblogic.cmd,在SETLOCAL上面加上rmdir /s /qD:\work\MB\MB_domain\servers\AdminServer\tmp(备注:加上此句后每次启动服务时自动清除缓存)5.重新启动WEBLOGIC服务(一种方法是双击domain下的startWebLogic.cmd文件,另一种方法是开始菜单/BEA Products/User Projects/MB_domain/start Admin Server for Weblogic Server Domain)2创建数据库表空间及用户6.创建数据表空间:一种方法是执行如下语句:CREA TE SMALLFILE TABLESPACE "NSTC_WS"DA TAFILE 'D:\oracle\product\10.1.0\oradata\MB\NSTC_WS' SIZE 500MAUTOEXTEND ON NEXT 20M MAXSIZE UNLIMITED LOGGING EXTENT MANAGEMENT LOCAL SEGMENT SPACE MANAGEMENT AUTO ;另一种方法是登录数据库控制台地址http://localhost:5500/em/进行创建表空间7.创建用户:一种方法是执行如下语句:CREA TE USER "NSTCSA" PROFILE "DEFAULT" IDENTIFIED BY"11111111" DEFAULT TABLESPACE "NSTC_WS" TEMPORARY TABLESPACE "TEMP" ACCOUNT UNLOCK;GRANT "CONNECT" TO "NSTCSA";GRANT "DBA" TO "NSTCSA" WITH ADMIN OPTION;另一种方法是登录数据库控制台地址http://localhost:5500/em/进行创建用户3修改登录应用系统的端口号8.修改登录应用系统的端口号:路径为domain\config\下的config.xml文件,在<listen-address></listen-address>上面加上<listen-port>7777</listen-port>(备注:此处的端口号是登录应用程序的端口号)4创建数据源9.利用Weblogic控制台创建数据源,登录地址:http://localhost:7777/console/(依据向导创建数据源,数据源名在domain\config\下的config.xml文件中找)(用户名:weblogic 密码:11111111)10.Weblogic控制台,点击“Services/JDBC/Data Sources”进入如下页面:5修改配置文件11.修改配置应用文件,找到domain\webapps\webgate\WEB-INF下的web.xml文件里的<param-value>ENI,WST,WCL,BMS,CCFM</param-value>(根据实际情况,有几个应用加载几个,否则登录系统会提示找不到应用程序“·原因:加载具体的web应用时异常找不到web应用:'/BPC'如有疑问请联系系统管理员。
weblogic_11g的安装和集群部署

weblogic 11g安装部署及集群目录1. Weblogic的安装与单个项目部署 (4)1.1. Weblogic的安装 (4)1.2. 创建域 (11)1.3. 配置系统使用的数据源 (16)1.4. 发布应用程序 (20)2. 集群的简介、部署和运行 (24)2.1. 集群的简介 (24)2.1.1. 集群的定义 (24)2.1.2. 集群的优点 (24)2.1.3. 主要功能 (25)2.1.4. 配置集群应用的必要条件 (25)2.2. WebLogic单台主机集群的部署 (25)2.2.1. 运行weblogic的配置向导 (25)2.2.2. 创建新的Domain (26)2.2.3. 选择安装域源 (27)2.2.4. 指定域的名称和位置 (28)2.2.5. 配置管理员用户名和密码 (29)2.2.6. 配置域启动模式和JDK (30)2.2.7. 选择可选配置 (31)2.2.8. 配置管理服务器 (32)2.2.9. 配置受管理服务器 (33)2.2.10. 配置群集信息 (34)2.2.11. 将“受管理服务器”添加到“集群”中 (35)2.2.12. 创建HTTP 代理应用程序 (36)2.2.13. 配置计算机 (37)2.2.14. 配置向计算机分配服务器 (38)2.2.15. 检查WebLogic 域配置 (39)2.2.16. 正在创建域 (40)2.2.17. 编辑WebLogic 服务启动文件 (41)2.3. 增加新的受控节点 (41)2.3.1. 增加计算机 (42)2.3.2. 增加受控服务器 (43)2.3.3. 在新主机上配置weblogic服务 (45)2.3.4. 编辑weblogic服务启动文件 (51)2.4. 运行WebLogic 服务 (51)2.5. 将应用部署到集群上 (55)2.5.1. 配置数据源 (55)2.5.2. 点击“部署”菜单 (55)2.5.3. 锁定并编辑 (56)2.5.4. 开始安装 (57)2.5.5. 部署成功验证 (60)2.6. 部署集群过程中的问题 (62)1.Weblogic的安装与单个项目部署1.1.Weblogic的安装1)运行安装程序,初始界面如下:2)点击下一步按扭:3)选择安装的目录,这里我是在虚拟机中进行操作,所以目录为C:\Oracle\Middleware,点击下一步按钮继续:4)去掉勾选的选项,并点击“yes”,之后点击下一步按钮继续:5)选择安装的配置组件,这里我们选择“定制”手动配置安装的组件,点击下一步按钮继续:6)这里我们选择安装Weblogic Server,将Server 的默认组件勾选上,下方的oracle coherence不需要勾选,点击下一步按钮继续:7)选择安装JDK,按照默认的设置即可,点击下一步按钮继续:8)选择安装组件服务的目录,这里我选择的均为默认填写的位置,点击下一步按钮继续:9)系统询问是否安装远程管理的Server 服务器,这里我们选择不进行管理点击下一步继续:10)这里选择快捷方式位置,默认选择即可,点击下一步。
weblogic的安装与部署

weblogic的安装与部署2015年12月21日目录一前期准备 (2)◆ 1.1.系统与软件要求 (2)◆ 1.2.安装java环境 (2)◆ 1.3.创建用户组、用户 (2)◆ 1.4.配置网络环境 (2)1.4.1.修改主机名 (2)1.4.2.配置网卡 (3)1.4.3.关闭防火墙 (3)◆ 1.5.配置环境变量 (3)◆ 1.6.准备安装介质 (4)二安装weblogic软件 (4)三创建域名 (10)四部署 (17)◆ 4.1配置管理服务器 (19)◆ 4.2添加管理服务器 (24)◆ 4.3部署和删除应用 (25)◆ 4.4配置jdbc数据源 (30)◆ 4.5创建集群 (39)◆ 4.6使用weblogic脚本工具 (41)◆ 4.7创建和配置计算机 (42)◆ 4.8配置jms服务 (45)◆ 4.9创建和使用部署计划 (52)◆ 4.10配置节点管理器 (57)◆ 4.11安装和配置Cluster Proxy (60)◆ 4.12在集群中管理http会话 (77)一前期准备1.1.系统与软件要求操作系统:64位oraclelinux 6.4系统(linux64 oracle)Java环境:jdk-7u79-linux-x64软件版本:64位weblogic12c(wls_121200)1.2.安装java环境A.检查是否有jdk(版本要求1.7以上)----- rpm -qa |grepjdk然后卸载掉原来的jdk-------rpm –e jdk名称B.首先,创建一个目录/stage(mkdir /stage),然后使用工具将java 环境上传到该目录下(需要配置ip),这里使用flashfxp工具上传C.在root用户下,使用命令rpm –ivh jdk-7u79-linux-x64进行安装1.3.创建用户组、用户[root@localhost ~]# groupaddweblogic[root@localhost ~]# useradd -g weblogicweblogic[root@localhost ~]# passwdweblogic这里密码设置为oracle1.4.配置网络环境1.4.1.修改主机名vi /etc/hosts,添加如下:配置完成后重启,使配置生效(可选)1.4.2.配置网卡vi /etc/sysconfig/network-script/ifcfg-eth0,添加内容如下:注1:UUID不能改,HWADDR可以使用命令ifconfig –a 查询,然后修改修改完成后,重启网卡service network reload注2:本次文档为两次实验完成,ip后期与前期不同,实为一个ip 1.4.3.关闭防火墙vi /etc/selinux/config,修改如下:修改完成后,重启系统,使修改生效1.5.配置环境变量如下1.6.准备安装介质上传weblogic安装包,使用flashfxp工具,上传格式为二进制如下:二安装weblogic软件[root@udbs ~]# mv wls_121200.jar /home/weblogic[root@udbs ~]# chmod -R 775 /home/weblogic[root@udbs ~]# su - weblogic[weblogic@udbs ~]$ lltotal 901156-rwxrwxr-x. 1 root root 922778165 Apr 27 2014 wls_121200.jar [weblogic@udbs ~]$ java -jar wls_121200.jar启动安装界面如下:点next默认目录,点next默认,点next先决条件检查,点next点next点yes点install,开始安装安装完成,点next安装完成,不勾选Automatically Launch the Configuration Wizard ,至此,软件安装完成三创建域名进入/bin目录下,运行config.sh(./config.sh),如下:出现如下界面:默认,点next,指定域名模板点next,创建管理员和密码点next指定domain模式和JDK,选Production,点next勾选配置选项,三个全选,点next配置管理server,点next配置管理节点,点next点add,添加managed Server,点next暂不添加cluster,直接点next暂不添加Machine,直接点next进入配置概要界面,点create开始创建创建成功,点next点finish,完成域名创建四部署4.1.配置管理服务器4.1.1 打开一个shell脚本,进入base_domain目录,运行startWeblogic.sh(./startWeblogic.sh),如下:开启weblogic服务器:4.1.2在客户端,打开web,输入地址192.168.0.132:7001/console,进入登录界面输入用户名和密码,点login,进入weblogic控制台,如下:4.1.3 进入控制台以后,点环境+,再点击服务器,如下点new_ManagedServer_1,如下点锁定并编辑,启动ssh监听,端口为7004,如下点保存再点激活,配置成功注:本次文档由两次实验完成,服务器名前期与后期不同,实为一个服务器名4.2 添加管理服务器4.2.1首先,点服务器,再点锁定并编辑,点新建,配置如下点下一步,再点下一步,然后点完成、保存按照上面的步骤添加服务器new_ManagedServer_3,监听端口号为70074.2.2 配置new_ManagedServer_2和new_ManagedServer_3和配置new_ManagedServer_1一样,只需要将new_ManagedServer_2的ssh监听端口号改为7006,将new_ManagedServer_3的端口号改为7008,保存并激活。
Weblogic部署项目三种方式

Weblogic部署项⽬三种⽅式在weblogic中部署项⽬通常有三种⽅式:第⼀,在控制台中安装部署;第⼆,将部署包放在domain域中autodeploy⽬录下部署;第三,使⽤域中配置⽂件config.xml 进⾏项⽬的部署。
控制台部署1 启动weblogic服务,登录到weblogic控制台页⾯,输⼊⽤户名和密码,登录到控制台⾥⾯2 点击左侧的部署3 在右侧点击安装按钮,准备进⾏项⽬安装4 看到路径输⼊框,可以在下⾯选择要部署的项⽬的位置5 也可以直接输⼊要部署的包的位置,敲回车6 点击下⼀步即可7 继续下⼀步8 点击完成按钮9 保存前⾯各步的设置10 保存完成后,会看到激活更改的提⽰,且不需要重启。
11 这时便可以进⾏了,输⼊项⽬名称,看到了项⽬的欢迎页⾯,即项⽬部署成功。
如果前⾯的步骤操作完成了,但依然⽆法访问项⽬的话,可以参考下⾯的补充步骤补充步骤补1 点击部署,勾选上项⽬,点击启动补2 待启动后,项⽬状态为活动,健康状况为OK时,继续测试。
autodeploy⾃动部署⾃动部署时不需要登录控制台,在domain域的主⽬录下⾯有个autodeploy⽬录,直接将项⽬包拷贝到autodeploy⽬录下⾯就可以了。
autodeploy⽬录⾥⾯有个readme.txt ⽂档,打开看⼀下,这⾥摘第⼀段出来[html]1. This autodeploy directory provides a quick way to deploy applications2. to a development server. When the WebLogic Server instance is running3. in development mode, applications and modules in this directory are4. automatically deployed.主要说什么呢,就是开发模式下⾯,当weblogic启动时,会⾃动部署autodeploy⽬录下⾯的项⽬。
WebLogic的安装和应用部署
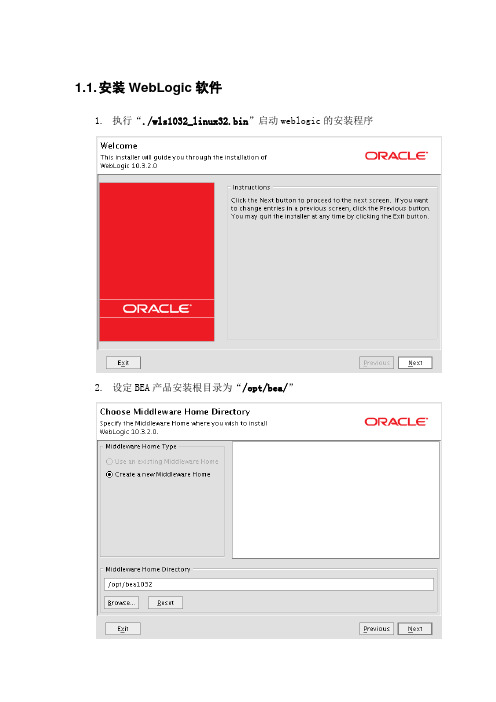
1.1. 安装WebLogic软件1.执行“./wls1032_linux32.bin”启动weblogic的安装程序2.设定BEA产品安装根目录为“/opt/bea/”3.选择不进行注册4.选择定制安装5.除了示例,安装所有组件6.选择SUN的JDK,因为JRockit的兼容性不好7.设定BEA产品安装根目录为“/opt/bea/wlserver_10.3”8.安装前确认9.安装结束1.2. 创建新的Domain1.执行“./opt/bea/wlserver_10.3/common/bin/config.sh”2.选择根据安装的产品自动创建3.设置Domain的名字为“fangtan”,Domain的路径为默认4.设置Domain的密码5.选择使用“产品模式”6.选择配置Administration Server7.配置监听地址为“0.0.0.0”,以监听服务器的所有IP地址8.配置生效前确认9.配置结束10.在新Domian目录“/opt/bea/user_projects/domains/fangtan”下创建子目录“servers/AdminServer/security”,在其下创建文本文件“boot.properties”,该文件的作用是启动WebLogic的服务时,不再需要输入密码,并编辑内容为(明文填写的密码在第一次启动时会加密后重新写回):username=创建Domain时设置的用户名password=创建Domain时设置的密码11.进入目录“/opt/bea/user_projects/domains/fangtan/bin/”,执行命令“./startWebLogic.sh”启动新建Domain的管理服务器。
1.3. 创建新的Server1.用浏览器访问“http://weblogic_server_ip:7001/console/”2.从导航树选择“服务器”,并执行“锁定并编辑”3.选择“新建”服务器4.设置新建服务器的名称为“JianyanServer”,设置新建服务器的端口为“8080”,设置监听地址为“0.0.0.0”,最后选择“完成”5.确认新服务器已经成功创建,并点击进入服务器的管理界面保留文件的个数为一周,最后执行“保存”制保留文件的个数为一周,如果不需要记录HTTP日志,也可以选择不启用HTTP访问日志,在执行“保存”后,最后执行“激活更改”8.确认新服务器创建成功9.在新Domian目录“/opt/bea/user_projects/domains/fangtan”下创建子目录“servers/JianyanServer/security”,在其下创建文本文件“boot.properties”,该文件的作用是启动WebLogic的时,不再需要输入密码,并编辑内容为:username=创建Domain时设置的用户名password=创建Domain时设置的密码10.进入目录“/opt/bea/user_projects/domains/fangtan/bin/”,执行命令“./startManagedWebLogic.sh JianyanServer”启动新建的服务器。
WEB服务部署_Weblogic中间件安装及部署

WebLogic中间件安装及程序部署1安装WebLogic1.安装文件server1002_win32.exe,双击开始运行如下图所示:图1-12.进入到WebLogic安装向导界面, 点击【Next】按钮,如下图所示:图1-23.进入创建主目录界面,点击【Next】按钮,如下图所示:图1-3注:上图红色框内可通过【Browse】按钮可以选择安装路径。
4.进入安装选择界面,选择“Custom”安装方式, 点击【Next】按钮,如下图所示:图1-45.进入选择安装的产品组件界面,按照如下已选项选择,点击【Next】按钮,如下图所示:图1-56.进入选择安装目录,点击【Next】按钮,如下图所示:图1-67.进入端口设置界面,默认为选择“NO”项,点击【Next】按钮,如下图所示:图1-78.进入下一界面,默认选择,点击【Next】按钮,如下图所示:图1-89.进入安装界面,如下图所示:图1-910.程序安装完成后,把“Run Quickstart”前的勾去掉,点击【Done】按钮退出,如下图所示:图1-102创建WebLogic域1.依次“开始》所有程序》BEA》Tools》Configuration Wizard”打开创建域程序,如下图所示:图2-12.进入创建域界面,默认选择创建项,点击【Next】按钮,如下图所示:图2-23.进入配置路径界面,默认选择创建项,点击【Next】按钮,如下图所示:图2-34.进入设置管理员帐号和密码界面,填写用户名和密码,点击【Next】按钮,如下图所示:图2-4注:在上面的窗口中填写启动WebLogic服务和进入WebLogic管理控制台的管理员信息。
●*User name:登录控制台用户名●*User password:登录控制台用户密码●*Confirm user password:重复确认密码5.进入到配置服务器启动模式和Java SD界面,点击【Next】按钮,如下图所示:图2-46.进入下一界面,默认选择,点击【Next】按钮,如下图所示:图2-57.进入设置域名路径界面,默认选项,点击【Create】按钮,如图所示:图2-68.进入创建域界面,Progress下的创建进度条完成任务100%后,点击【Done】按钮退出即可,如下图所示:图2-73部署3.1启动服务1.依次“开始》所有程序》BEA》User Projects》domain7001》Star Admin Serverfor Weblogic Server Domain”启动Weblogic服务,直到出现如下界面,表示启动完成,红圈中显示的是服务器端口号(默认情况下是7001),如下图所示:图3-13.2配置WAR包程序文件1.利用解压缩软件打开已有的主程序WAR文件包,进入如下图所示:图3-22.依次“WEB-INF》classes》ams_init.properties(可以用记事本打开该文件)”,将amsHome及path的文件路径指向盘符中已有的amsHome文件夹,如amsHome在D盘根目录下则路径设置,如下图所示:图3-3注:此处路径中的位置节点符号要设成“/”而不是“\”。
weblogic9.2安装部署步骤(截图)
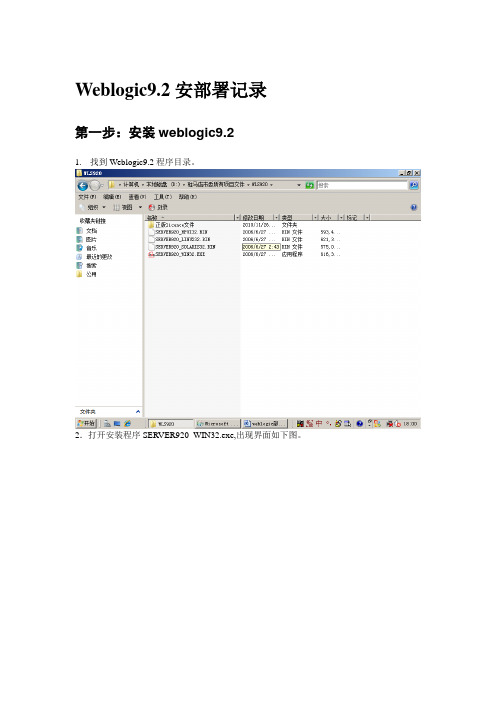
Weblogic9.2安部署记录第一步:安装weblogic9.21.找到Weblogic9.2程序目录。
2.打开安装程序SERVER920_WIN32.exe,出现界面如下图。
3.初始化完成后,点击next,所示。
图3 初始化完成后界面5 选择安装目录为d:\bea点击next.6点击next,在下图中选择complete.7.点击next.8.点击next,在下图中选择yes。
9.继续点击next后界面如下图。
10.在上图中使用默认设置,点击next。
11.点击next后开始安装。
12.点击Done。
13.点击Start WebLogic Server 9.2.14.15. 成功启动后自动弹出如下页面。
测试安装成功方法,访问http://127.0.0.1:7001/index.jsp。
http://127.0.0.1:7001/console/login/LoginForm.jsp 16.默认登录名和密码:weblogic/weblogic.1.创建域2.选择create a new weblogic domain34567910启动刚配置的域中的服务打开浏览器,输入地址http://127.0.0.1:7001/console后出现如下页面输入用户名密码:weblogic/11111111进入页面表明配置正确,启动正常。
第三步:修改端口7001为8012 依次点击base_domain->Enviroment->servers出现如下界面3 点击AdminServer(admin)4 将上图中的7001改为80,然后点击界面最下方的save按钮。
5 激活修改。
第四步:配置数据源1依次点击base_domain->Services->JDBC->Data Sources出现如下界面2 点击new按钮,出现如下界面3 选择正确的数据库类型和数据库驱动,然后点击next。
Weblogic安装与布署

Weblogic安装与布署一、webloigc的安装1,使用root登录安装好的linux服务器,利用ssh工具上传文件server100_1inux32.bin,由于此文件是bin文件,可放到任何目录。
例如放到/usr/webloigc下。
2,给文件server100_linux32.bin授予执行的权限。
Cd /usr/weblogicChmod u+x server100_linux32.bin3,执行此文件./server100_linux32.bin,由于此安装是图形界面,按照向导进行安装直至安装结束。
4,创建域进入weblogic的安装目录,/usr/bea/wlserver_10.0/common/bin,执行./config.sh –mode=console,即可打开创建向导,按照向导提示进行创建,直至创建成功。
Select Domain Source:---------------------Select the source from which the domain will be created. You can create the domain by selecting fromthe required components or by selecting from a list of existing domain templates.->1|Choose Weblogic Platform components| You can choose the Weblogic component(s) that you want supported in your domain.2|Choose custom template| Choose this option if you want to use an existing template. This could be a custom created|template using the Template Builder.Enter index number to select OR [Exit][Previous][Next]> 2<---------------------------------- BEA WebLogic Configuration Wizard --------------------------------->Enter the location of the domain template:------------------------------------------Please enter the absolute path to the location of domain template."Target Location" = [Enter new value or use default"/usr/bea/wlserver_10.0/common/templates/domains/wls.jar"]Enter new Target Location OR [Exit][Previous][Next]> n<---------------------------------- BEA WebLogic Configuration Wizard --------------------------------->Configure Administrator Username and Password:----------------------------------------------Create a user to be assigned to the Administrator role. This user is the default administrator used to start development mode servers.| Name | Value |_|_________________________|_________________________________________|1| *User name: | weblogic |2| *User password: | |3| *Confirm user password: | |4| Description: | This user is the default administrator. |Use above value or select another option:1 - Modify "User name"2 - Modify "User password"3 - Modify "Confirm user password"4 - Modify "Description"Enter option number to select OR [Exit][Previous][Next]> 2<---------------------------------- BEA WebLogic Configuration Wizard --------------------------------->Configure Administrator Username and Password:----------------------------------------------Create a user to be assigned to the Administrator role. This user is the default administrator used to start development mode servers."*User password:" = []Enter new *User password: OR [Exit][Reset][Accept]><---------------------------------- BEA WebLogic Configuration Wizard --------------------------------->Configure Administrator Username and Password:----------------------------------------------Create a user to be assigned to the Administrator role. This user is the default administrator used to start development mode servers.| Name | Value |_|_________________________|_________________________________________|1| *User name: | weblogic |2| *User password: | ******** |3| *Confirm user password: | |4| Description: | This user is the default administrator. |Use above value or select another option:1 - Modify "User name"2 - Modify "User password"3 - Modify "Confirm user password"4 - Modify "Description"5 - Discard ChangesEnter option number to select OR [Exit][Previous][Next]> 3<---------------------------------- BEA WebLogic Configuration Wizard --------------------------------->Configure Administrator Username and Password:----------------------------------------------Create a user to be assigned to the Administrator role. This user is the default administrator used to start development mode servers."*Confirm user password:" = []Enter new *Confirm user password: OR [Exit][Reset][Accept]><---------------------------------- BEA WebLogic Configuration Wizard --------------------------------->Configure Administrator Username and Password:----------------------------------------------Create a user to be assigned to the Administrator role. This user is the default administrator used to start development mode servers.| Name | Value |_|_________________________|_________________________________________|1| *User name: | weblogic |2| *User password: | ******** |3| *Confirm user password: | ******** |4| Description: | This user is the default administrator. |Use above value or select another option:1 - Modify "User name"2 - Modify "User password"3 - Modify "Confirm user password"4 - Modify "Description"5 - Discard ChangesEnter option number to select OR [Exit][Previous][Next]> n<---------------------------------- BEA WebLogic Configuration Wizard --------------------------------->Domain Mode Configuration:--------------------------Enable Development or Production Mode for this domain.->1|Development Mode2|Production ModeEnter index number to select OR [Exit][Previous][Next]> 2<---------------------------------- BEA WebLogic Configuration Wizard --------------------------------->Java SDK Selection:-------------------->1|JRockit SDK 1.5.0_06 @ /usr/bea/jrockit90_150_062|Sun SDK 1.5.0_06 @ /usr/bea/jdk150_063|Other Java SDKEnter index number to select OR [Exit][Previous][Next]> 1<---------------------------------- BEA WebLogic Configuration Wizard --------------------------------->Choose Configuration Option:----------------------------*Do you want to modify any of the preconfigured settings or defaults in your template?**To keep the default or template settings, and proceed directly to name and create your domain,*leave No selected.1|Yes->2|NoEnter index number to select OR [Exit][Previous][Next]> 2<---------------------------------- BEA WebLogic Configuration Wizard --------------------------------->Select the target domain directory for this domain:---------------------------------------------------"Target Location" = [Enter new value or use default "/usr/bea/user_projects/domains"]Enter new Target Location OR [Exit][Previous][Next]> n<---------------------------------- BEA WebLogic Configuration Wizard --------------------------------->Edit Domain Information:------------------------| Name | Value |_|________|_____________|1| *Name: | base_domain |Enter value for "Name" OR [Exit][Previous][Next]> 1<---------------------------------- BEA WebLogic Configuration Wizard --------------------------------->Edit Domain Information:------------------------| Name | Value |_|________|_______|1| *Name: | 1 |Use above value or select another option:1 - Modify "Name"2 - Discard ChangesEnter option number to select OR [Exit][Previous][Next]> 1<---------------------------------- BEA WebLogic Configuration Wizard --------------------------------->Edit Domain Information:------------------------| Name | Value |_|________|_______|1| *Name: | 1 |Enter value for "Name" OR [Exit][Previous][Next]> qa<---------------------------------- BEA WebLogic Configuration Wizard --------------------------------->Edit Domain Information:------------------------| Name | Value |_|________|_______|1| *Name: | qa |Use above value or select another option:1 - Modify "Name"2 - Discard ChangesEnter option number to select OR [Exit][Previous][Next]> n<---------------------------------- BEA WebLogic Configuration Wizard ---------------------------------> Creating Domain...0% 25% 50% 75% 100%[------------|------------|------------|------------][***************************************************]**** Domain Created Successfully! ****二、weblogic的布署配置数据源需要登录weblogic控制台,在/usr/bea/user_projects/domain/tradebeam/bin目录上执行./startWeblogic.sh启动服务。
Weblogic安装、使用及部署

GDFCS2-DSS1-PD-01广东省三防指挥系统二期工程决策支持业务应用系统现场部署说明书中国水利水电科学研究院北京星球数码科技有限公司2009年10月修改记录目录一、WebLogic安装、使用及部署 (4)1WebLogic安装 (4)1.1WebLogic安装 (4)1.2WebLogic建立Domain(Configuration Wizard) (7)1.3WebLogic建立Domain Template Builder (14)2MyEclipse应用WebLogic (23)2.1设置weblogic servers (23)2.2部署、启动 (24)3WebLogic管理 (26)3.1WEB部署.war包 (26)3.2建立JDBC数据源 (29)4WebLogic 目录介绍 (33)5WebLogic 错误描述 (33)5.1 (33)二、数据库对象部署1 数据库对象导出2 数据库对象导入三、ArcGIS部署四、其他程序的部署1一、WebLogic安装、使用及部署1WebLogic安装1.1WebLogic安装1)双击platform1020_win32.exe,弹出安装窗口,下一步2)选择weblogic安装主目录,下一步3)选择安装类型,一般默认选择,下一步4)设置weblogic各工程的目录,下一步5)选择用户的“开始菜单目录”权限6)安装成功,完后成首先要添加一个domain(域),如果进行项目配置的话还需要配置连接池1.2WebLogic建立Domain(Configuration Wizard)在bea安装目录wlserver_10.0\common\bin\下双击config.cmd命令,弹出创建domain 窗口。
1)提示是创建一个新的Domain或使用一个已存在的Domain2)选择Domain数据源,可在默认复选框中选择或选择已存在的domain模板3)设置domain的用户名及密码4)配置domain的启动模式及JDK5)自定义服务配置,选择”YES”进行下一步6)配置domain服务名、监听地址、端口号、SSL,本地开发Listen address最好选择localhost。
WebLogic10.3安装部署
WebLogic10.3安装部署WebLogic10.3安装配置(图文) ◆webLogic安装:1,安装weblogic10:(此处略)按默认安装。
◆配置weblogic10 domain:1,创建一个weblogic domain:如图所示:点击next进入下一步:此处默认选项,直接点击next进入下一步:输入域名和域名所处位置(配置domain name,不能在同一个目录下配置多个domain)点击下一步:配置进入控制台的用户名和密码:密码最少为八位:注意此处默认选择weblogic自带的jdk,不能选择已安装的高版本的其他jdk:运行管理服务的WebLogic服务器称为管理服务器, 每个WebLogic受管服务器都会在启动时从管理服务器得到各自的属性配置.点击next进入下一步:输入用户名、监听地址以及监听端口。
安装成功以后,可以看到如下所示:点击启动weblogic10服务器:如下所示,打开浏览器,输入:http://192.168.16.21:7001/console 如下所示,则服务器成功启动:在myeclipse下配置weblogic101,启动Eclipse,选择“Window -> Preferences”菜单,打开首选项对话框。
展开MyEclipse 下的Application Servers 节点,点击WebLogic 10,选中右边的Enable 单选按钮,启用WebLogic 服务器。
配置如下:2,接着展开WebLogic 10 节点,点击JDK,在右边的WLS JDK name 处选择WebLogic 10 的默认JDK单击Add 按钮,弹出WebLogic -> Add JVM 对话框,在JRE 主目录处选择WebLogic 安装文件夹中的JDK 文件夹,这时候就可以在WLS JDK name 组合框中选择jdk150_04 了。
配置完成后,在myeclipse的工具栏可以看到如下所示:配置weblogic10的JDBC Data Source1,进入webloglic10控制台:http://192.168.16.21:7001/console/在左边的Domain Structure选择数据源进入数据源配置页面点击“新建”按钮进入“新建JDBC Data Source”页面配置数据源的名字,JNDI的名字,选择数据库,在Database Driver选择时注意选择XA和non-XA驱动:选择XA(分布式事务支持)驱动,进入下一步:Next进入下一步,配置jdbc数据源选项点击Test Configuration测试Jdbc数据源:如下所示,则测试成功点击finish完成。
Weblogic9.2安装与部署
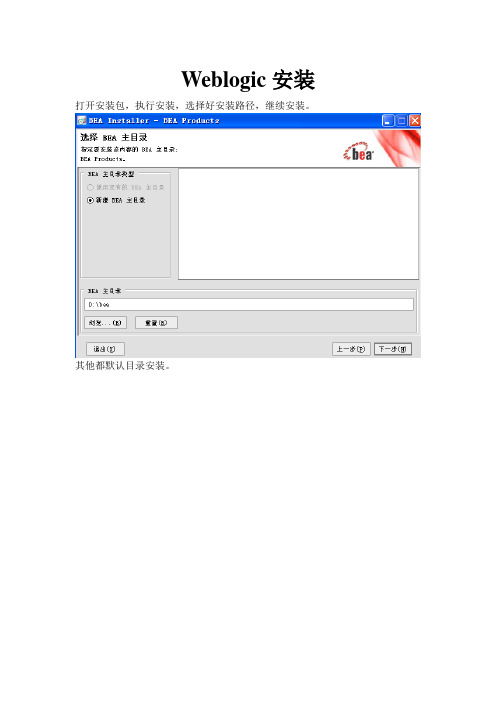
Weblogic安装打开安装包,执行安装,选择好安装路径,继续安装。
其他都默认目录安装。
创建域打开开始菜单,选择如图:
选择新建域,默认下一步
输入用户名密码:weblogic。
点下一步。
一直默认到下一步。
输入域名:mydomain,点创建。
钩选启动管理服务器,然后完成安装。
配置数据源
打开IE,进入weblogic配置页面:
http://localhost:7001/console
输入用户名和密码:weblogic。
确保数据库已经启动。
选择数据源,进行配置。
点击锁定并编辑后,点击新建。
如图填写和选择。
然后点击下一步。
如上图继续填写。
然后点击下一步。
上一步骤,测试成功后,在此图钩选服务器后,点完成。
完成新建。
点击创建好的sdzw进入详细配置。
点击进入连接缓冲池。
填写完成后,点击高级。
设置非活动连接超时时间,如上图。
同上设置完:CKQ、TKQ、SDZW后,点击激活更改。
完成设置。
部署
点击部署,进入设置。
点击锁定并编辑,然后点击安装。
选择工程所在目录,然后点击下一步。
默认下一步至上图页面,点击完成。
退回到部署概要里,选择部署的工程,启动服务。
WebLogic安装及部署
WebLogic安装及部署安装(输⼊命令打开安装窗⼝)打开命令终端,cd 到你wls1036_generic.jar存放的⽬录下在终端输⼊:java -Dspace.detection=false -jar wls1036_generic.jar点击回车启动进⼊安装后的bin⽬录mac⽬录:/Users/apple/Oracle/Middleware/Oracle_Home/user_projects/domains/base_domain/bin项⽬⽇志地址:/Users/apple/Oracle/Middleware/Oracle_Home/user_projects/domains/base_domain/logs执⾏启动脚本./startWebLogic.sh执⾏关闭脚本./stopWebLogic.sh登录浏览器访问部署项⽬点击侧边栏的'部署'链接,打开控制⾯板。
eclipse插件地址:SpringBoot项⽬weblogic部署前修改步骤1.创建weblogic.xml在WEB-INF下创建weblogic.xml,内容:<?xml version="1.0" encoding="UTF-8"?><wls:weblogic-web-appxmlns:wls="/weblogic/weblogic-web-app"xmlns:xsi="/2001/XMLSchema-instance"xsi:schemaLocation="/xml/ns/javaee/xml/ns/javaee/ejb-jar_3_0.xsd/weblogic/weblogic-web-app/weblogic/weblogic-web-app/1.4/weblogic-web-app.xsd"><wls:container-descriptor><wls:prefer-application-packages><wls:package-name>org.slf4j</wls:package-name></wls:prefer-application-packages></wls:container-descriptor><session-descriptor><cookie-name>JSESSIONID1</cookie-name></session-descriptor></wls:weblogic-web-app>2.修改启动类public class ManageApplication extends SpringBootServletInitializer implements WebApplicationInitializer { @Overrideprotected SpringApplicationBuilder configure(SpringApplicationBuilder application) {return application.sources(ManageApplication.class);}public static void main(String[] args) {SpringApplication.run(ManageApplication.class, args);}}3.打包使⽤mvn clean package打包为*.war后,⽤好压打开war包以下⽂件⼀般不存在,如果存在则删除WEB-INF/web.xmlWEB-INF/lib/tomcat-embed-websocket-***.jar,即可在weblogic下部署。
Weblogic应用程序部署步骤
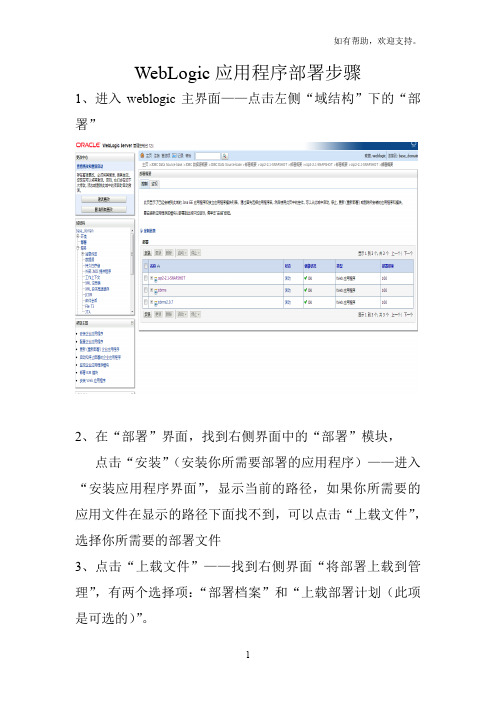
WebLogic应用程序部署步骤1、进入weblogic主界面——点击左侧“域结构”下的“部署”2、在“部署”界面,找到右侧界面中的“部署”模块,点击“安装”(安装你所需要部署的应用程序)——进入“安装应用程序界面”,显示当前的路径,如果你所需要的应用文件在显示的路径下面找不到,可以点击“上载文件”,选择你所需要的部署文件3、点击“上载文件”——找到右侧界面“将部署上载到管理”,有两个选择项:“部署档案”和“上载部署计划(此项是可选的)”。
说明:“部署档案”,是从你当前浏览的计算机上选择你所需要的应用程序或模块,找到文件后,将此部署上载到管理服务器。
“上载部署计划(可选)”,是一种配置,可对包含在部署档案中的描述符进行补充。
部署在没有部署计划的情况下可以运行, 但你也可以立即上载一个部署计划。
此部署计划档案是一个打包为 .jar 文件的配置信息目录。
4、点击“部署档案”旁的“选择文件”(选择相应的应用程序,为*.war文件),确定——点击“下一步”——进入“找到要安装的部署并准备部署”(提示:以成功将文件上载到服务器上)——点击“下一步”5、找到右侧“选择定位样式”窗格,有两个选项,“将此部署安装为应用程序”和“将此部署安装为库”。
根据实际情况进行选择。
说明:“将此部署安装为应用程序”,是此应用程序及其组件将被定位到同一位置。
这是最常见的方法。
“将此部署安装为库”,应用程序库是可供其他部署共享的部署,在运行其引用应用程序的所有目标上,库都应该是可用的。
6、点击“下一步”,进入“选择部署目标”,选择要对其部署此应用程序的服务器和/或集群。
选择“服务器”,如“AdminServer”等。
7、点击“下一步”,之后的设置都是可选的,也可以部署之后进行设置。
可供设置的选项有,“一般信息”,“安全”,“源可访问性”。
8、点击“下一步”9、点击“完成”10、部署完成之后,在右侧“部署”窗格中,有两个界面“控制”和“监视”。
- 1、下载文档前请自行甄别文档内容的完整性,平台不提供额外的编辑、内容补充、找答案等附加服务。
- 2、"仅部分预览"的文档,不可在线预览部分如存在完整性等问题,可反馈申请退款(可完整预览的文档不适用该条件!)。
- 3、如文档侵犯您的权益,请联系客服反馈,我们会尽快为您处理(人工客服工作时间:9:00-18:30)。
Weblogic安装部署一、首先上官网下载Weblogic的window x86版本和Linux x86(32bit)版本,地址:/technetwork/middleware/weblogic/downloads/index.html选择AcceptLicense Agreement,点击你要下载的版本就可以下载,下载需要用户登录:用户名:justinhits@密码:1nf0h)W1下载后:linux版本:oepe111130_wls1032_linux32.binWindow版本:wls1032_win32.exe二、安装只要运行安装程序,跟着向导一步一步进行就可以啦。
(windows双击安装程序、linux命令(cd安装程序所在目录然后./oepe111130_wls1032_linux32.bin))注意2点1.记录下自己填写的配置管理用户名和密码。
2.新建域的位置。
(我放在F:\bea\user_projects\domains\mydomain)三、部署应用项目(部分摘自/p-36051142.html):自动布署、命令行布署(可与Ant结合)、控制台(console)布署。
下面简要说明三种布署方式。
1.启动weblogic,浏览器地址http://127.0.0.1:7001/console,输入你安装的时候记录的配置管理用户名和密码,点击登录。
2进入控制台界面:3点击部署进入部署界面:3点击安装按钮进入安装界面,进行安装:选择你要安装项目的根目录,点击下一步。
输入你项目部署的名称,访问位置,点击完成。
4设置项目的上下文根:需要在在你的web应用的WEB-INF文件中创建一个文件(weblogic.xml),内容如下<?xml version="1.0"encoding="UTF-8"?><weblogic-web-app><context-root>/struts2</context-root></weblogic-web-app>5当项目使用到外部的jar包的设置1当直接用windows下的welbogic.cmd或者linux下的weblogic.sh 直接启动,就需要在\bea\user_projects\domains\mydomain\bin下找到这2个命令,用文本编辑器打开,修改set SAVE_CLASSPATH=加入你需要jar包的地址:如E:\workspace\car_java\WebRoot\WEB-INF\lib\antlr-2.7.6.jar ;E:\workspace\car_java\WebRoot\WEB-INF\lib\sapjco.jar;%CL ASSPATH%如果是用myeclipse启动weblogic,也需要加入:然后重新启动weblogic,通过http://127.0.0.1:7001/struts2访问项目起始页:通过点击后台action调用正常。
说明项目部署成功。
Linux 可视化界面部署和windows基本是一致的就是启动、关闭weblogic时候用的是mydomain/bin目录下的startWebLogic.sh 和stopWebLogic.sh命令Linux 命令行界面的安装及部署1切换到命令界面:打开一个终端,输入init 3,然后回车就切换到命令行界面。
运行安装程序:以下是来自网址/techdoc/install/2008/02/05/978116.shtml 概括了一下注意以下几点就OK啦:1 我是用root用户登录的,所以不用权限设置,用普通用户不能运行安装程序的需要授权文件夹权限,su切换下好了2 提前建好weblogic安装的目录,选择的时候方便。
3 安装好以后进入1.1 部署前准备把WebLogic的bin包放在/home目录上.1、创建weblogic用户组。
groupadd weblogicuseradd -g weblogic weblogicpasswd weblogic(修改weblogic密码)2、创建/var/web/jsp/bea目录,修改目录所有者权限mkdir /var/web/jsp/beachown –Rf weblogic:weblogic /var/web/jsp/bea3、用weblogic用户登陆系统,修改配置文件。
~/.bash_profile增加export LANG=en_US.iso8859151.2 安装WebLogic 8.1赋予.bin可执行权限:chmod a+x platform814_linux32.bin执行./platform814_linux32.bin -mode=console进入控制台安装的欢迎界面,键入[Next]继续此时出现授权许可协议,读完后键入[Yes]继续提示选择一个BEA主目录:输入:/var/web/jsp/bea确认BEA主目录,键入[1]继续选择安装类型, 键入[1]继续选择安装路径,默认,输入[next]继续。
确认安装路径。
键入[1]继续安装完毕。
注:(两个补丁文件见补丁包的说明)1.3 创建服务使用WebLogic用户登录系统:[weblogic@jcms bin]$ cd /var/web/jsp/bea/weblogic81/common/bin [weblogic@jcms bin]$ ./config.shUnable to instantiate GUI, defaulting to console mode.进入设置:Create or Extend a Configuration:---------------------------------Choose between creating and extending a configuration. Based on your selection, the Configuration Wizard guides you through the steps togenerate a new or extend an existing configuration.->1|Create a new WebLogic configuration| Start here to create a WebLogic configuration in your projects directory. 2|Extend an existing WebLogic configuration| Start here to extend an existing WebLogic configuration. Use this option to add applications and services, including Database| access (JDBC) and Messaging (JMS). This option also enables you to extend functionality by enabling WebLogic Workshop.Enter index number to select OR [Exit][Next]> 1Select a Domain Template:-------------------------Please select a template from the list or select another directory of templates. *[/home/weblogic/bea/weblogic81/common/templates/domains]1|Basic WebLogic Platform Domain 8.1.3.0| BEA Systems, Inc.| Create a basic WebLogic Platform domain, without installing sample applications. Domains created from this template will support the |WebLogic Server, WebLogic Workshop, WebLogic Integration and WebLogic Portal runtime functionality, including support for J2EE|applications, Web applications, Web Services, custom controls, business processes and portals. Use domains created from this template |for development of WebLogic Platform applications.2|Basic WebLogic Portal Domain 8.1.3.0| BEA Systems, Inc.| Create a basic WebLogic Portal domain, without installing sample applications. Domains created from this template will support the |WebLogic Server, WebLogic Workshop and WebLogic Portal runtime functionality, including support for J2EE applications, Web applications,|Web Services, custom controls and portals. Use domains created from this template for development of WebLogic Portal applications.3|Basic WebLogic Integration Domain 8.1.3.0| BEA Systems, Inc.| Create a basic WebLogic Integration domain, without installing sample applications. Domains created from this template will support |the WebLogic Server, WebLogic Workshop and WebLogic Integration runtime functionality, including support for J2EE applications, Web |applications, Web Services, custom controls and business processes. Use domains created from this template for development of WebLogic|Integration applications.4|Basic WebLogic Workshop Domain 8.1.3.0| BEA Systems, Inc.Enter index number to select OR [Down][Exit][Previous][Next]> downSelect a Domain Template:-------------------------Please select a template from the list or select another directory of templates.| Create a basic WebLogic Workshop domain, without installing sample applications. Domains created from this template will support the |WebLogic Server and WebLogic Workshop runtime functionality, including support for J2EE applications, Web applications, Web Services and |custom controls. Use domains created from this template for development of WebLogic Workshop applications.->5|Basic WebLogic Server Domain 8.1.3.0| BEA Systems, Inc.| Create a basic WebLogic Server domain without installing sample applications.6|WebLogic Server Examples Domain 8.1.3.0| BEA Systems, Inc.| Create the WebLogic Server Examples domain in a directory outside of the installed kit. The Examples domain contains a collection of|examples to show best practices for coding individual J2EE APIs.7|Avitek Medical Records Sample Domain 8.1.3.0| BEA Systems, Inc.| Create the Avitek Medical Records domain in a directory outside of the installed kit. The Avitek Medical Records is a WebLogic Server |sample application suite that concisely demonstrates all aspects of the J2EE platform. 8|Select another directory locationEnter index number to select OR [Up][Exit][Previous][Next]>5Select a Domain Template:-------------------------Please select a template from the list or select another directory of templates.*The selected template is the same as the one you are working on. Do you *want to reload the template ?->1|Yes2|NoEnter index number to select OR [Exit][Next]> 1Choose Configuration Option:-------------------------*Do you want to run the wizard in express mode?->1|Yes2|NoEnter index number to select OR [Exit][Previous][Next]> 1Configure Administrative Username and Password:--------------------Create a user automatically assigned to the Administrative Role. This user is the default administrator used to start development modeservers.| Name | Value |_|_________________________|________________________________ _|1| *User name: | weblogic |2| *User password: | |3| *Confirm user password: | |4| Description: | The default administration user |Select Option:1 - Modify "User name"2 - Modify "User password"3 - Modify "Confirm user password"4 - Modify "Description"Enter option number to select OR [Exit][Previous][Next]> 2Configure Administrative Username and Password:--------------------Create a user automatically assigned to the Administrative Role. This user is the default administrator used to start development modeservers."*User password:" = []Input new *User password: OR [Exit][Reset][Accept]> [输入八位密码] Configure Administrative Username and Password:--------------------Create a user automatically assigned to the Administrative Role. This user is the default administrator used to start development modeservers.| Name | Value |_|_________________________|________________________________ _|1| *User name: | weblogic |2| *User password: | ****** |3| *Confirm user password: | |4| Description: | The default administration user |Select Option:1 - Modify "User name"2 - Modify "User password"3 - Modify "Confirm user password"4 - Modify "Description"5 - Discard ChangesEnter option number to select OR [Exit][Previous][Next]> 3Configure Administrative Username and Password:--------------------Create a user automatically assigned to the Administrative Role. This user is the default administrator used to start development modeservers."*Confirm user password:" = []Input new *Confirm user password: OR [Exit][Reset][Accept]> [确认八位密码] ///口令必须与上面的一样Configure Administrative Username and Password:--------------------Create a user automatically assigned to the Administrative Role. This user is the default administrator used to start development modeservers.| Name | Value |_|_________________________|________________________________ _|1| *User name: | weblogic |2| *User password: | ******** |3| *Confirm user password: | ******** |4| Description: | The default administration user |Select Option:1 - Modify "User name"2 - Modify "User password"3 - Modify "Confirm user password"4 - Modify "Description"5 - Discard ChangesEnter option number to select OR [Exit][Previous][Next]> nextDomain Mode Configuration:--------------------------Enable Development or Production Mode for this domain.->1|Development Mode2|Production ModeEnter index number to select OR [Exit][Previous][Next]> 2Java SDK Selection:-------------------->1|JRockit SDK 1.4.2_04-8130 @ /home/weblogic/bea/jrockit81sp3_142_04 2|Sun SDK 1.4.2_04 @ /home/weblogic/bea/jdk142_043|Other Java SDKEnter index number to select OR [Exit][Previous][Next]> 1Select the target domain directory for this configuration:----"T arget Location" = [/home/weblogic/bea/user_projects/domains]Input new T arget Location OR [Exit][Previous][Next]> [直接回车]Edit Domain Information:------------------------| Name | Value |_|________|__________|1| *Name: | mydomain |Enter value for "Name" OR [Exit][Previous][Next]> [输入名称或者直接回车]Creating Domain...0% 25% 50% 75% 100%[------------|------------|------------|------------][***************************************************]**** Domain Created Successfully! ****完成服务的建立!1.4部署应用1.4.1启动和关闭1、如何启动WebLogic[weblogic@jcms bin]$ cd /var/web/jsp/bea/user_projects/domains/mydomain [weblogic@jcms bin]$ ./startWebLogic.sh (需要输入用户名密码)2、如何关闭WebLogic[weblogic@jcms bin]$ ./stopWebLogic.sh1.4.2 设置自动启动WebLogic1、无需输入用户名密码启动关闭weblogic。
