Lenovo_System_x3650M5_系统全新安装教程
联想服务器的raid配置及Server2012操作系统的安装
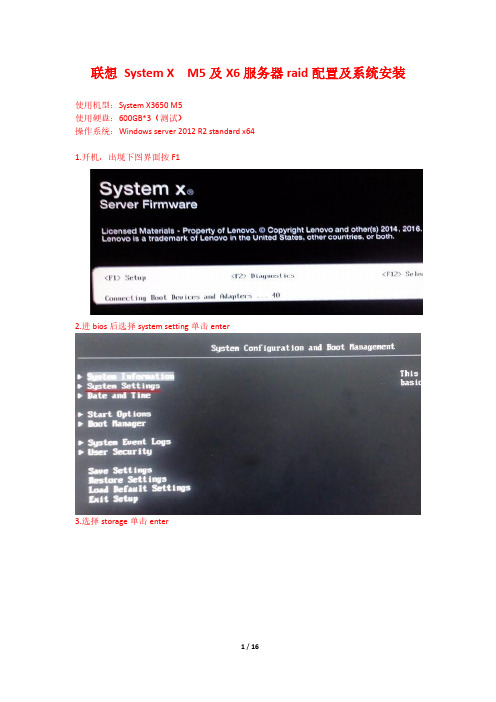
联想System X M5及X6服务器raid配置及系统安装使用机型:System X3650 M5使用硬盘:600GB*3(测试)操作系统:Windows server 2012 R2 standard x641.开机,出现下图界面按F12.进bios后选择system setting单击enter3.选择storage单击enter4.可以看到阵列卡为M5210单击enter5.选择main menu单击enter6.选择configuration management单击enter7.因为已有raid配置信息,首先选择clear configuration单击enter(新机器跳过这步)8.选择“【】”单击空格键(新机器跳过这步)9.选择yes单击enter(新机器跳过这步)10.选择ok单击enter(新机器跳过这步)11.此时多出create项,选择create virtual drive单击enter(若选择ok后仍然只能看到view 和clear两项,可以exit到上一级菜单然后重新进入configuration management)12.选择raid级别(RAID0,RAID1,RAID5)13.选择raid5后单击enter(如2块盘选择RAID1)14.选择select drivers单击enter15.选择check all单击enter16.选择apply changes单击enter17.选择save configuration单击enter保存配置后多次按esc退出18.添加USB启动项及从U盘启动或CD/DVD安装系统选择Boot Manager选择Add Boot Option选择第一个选项选择USB Storage 然后回车enter返回到bios初始界面选择SAVE 保存更改19.配置完raid和添加usb启动后接下来是系统安装选择Start Option选择USB Storage (u盘)或CD/DVD(光盘)20.选择系统版本windows server 2012 R2 standard(带GUI的服务器)x6421.选择自定义安装22.磁盘分区23.等待安装24.设置密码25.登陆系统26.由于未安装驱动,设备管理器出现问题设备,右击选择更新驱动程序(基本设备是主板芯片驱动,,其他的浏览选择U盘2012 X 64)27.选择浏览从U盘查找驱动程序28.点击下一步,安装成功。
联想System-ESXi安装手册

x3850X6服务器安装部署vMware vSphere 6.0U2V1.02016年12月变更控制版本编制(修改)/日期审核/日期说明V1.0duhao 2016/12/1目录变更控制 (1)1 登录IMM (2)1.1 配置地址 (2)1.2 添加例外 (3)1.3 登录管理平台 (3)2 配置RAID (4)2.1 配置目录 (4)2.2 添加阵列 (4)2.3 配置阵列 (5)3 挂载镜像 (7)3.1 远程登录 (7)3.2 登录控制台 (8)3.3 选择镜像 (9)4 安装ESXi (12)4.1 安装加载 (12)4.2 部署路径 (13)4.3 配置口令 (15)5 系统配置 (17)1 登录IMM1.1 配置地址对笔记本IP地址进行配置,令笔记本IP地址和192.168.70.125在同一网段并能PING通,打开浏览器访问192.168.70.125。
1.2 添加例外浏览器中点击添加例外,并确认获取证书。
1.3 登录管理平台输入x3850X6服务器默认用户名以及密码(User name:USERID Passord:PASSW0RD)。
2 配置RAID2.1 配置目录选择Server Management(服务管理器)中的Local Starage(本地存储)。
2.2 添加阵列点击Storage RAID Configuration(存储磁盘阵列的配置)选中磁盘阵列,点击Create V olume。
选中选项以后点击Next。
2.3 配置阵列首先选择RAID1方式部署磁盘阵列。
再将两个磁盘Drive0以及Drive1添加进去。
点击Next即可建立新的磁盘阵列,并修改为相应命名。
选中选项以后点击Next。
点击Finish以后完成配置。
3 挂载镜像3.1 远程登录选择Server Management(服务管理器)中的Remote Control(远程控制)进入服务器系统进行VMware安装。
服务器x3650硬件安装手册

目录第1章功能概述 (4)1.1产品特性 (4)1.2硬件概要 (4)第2章场地要求 (5)2.1环境要求 (5)2.2噪音排放 (5)2.3散热 (5)2.4电源 (5)2.5尺寸(2U) (6)第3章组件说明 (7)3.1服务器前部 (7)3.2服务器后部 (8)第4章组件安装 (10)4.1服务器主板 (10)4.2硬盘安装操作方法 (11)第5章设备启停 (12)5.1服务器电源功能 (12)5.2开启服务器 (12)5.3关闭服务器 (12)第6章状态说明 (13)6.1光通路诊断面板 (13)第7章其他 (16)7.1RAID配置 (16)7.2W INDOWS2003操作系统安装说明 (19)7.3R ED H AT E NTERPRISE L INUX4安装说明 (37)7.4微码的检查和升级 (43)1.1产品特性·稳定的平台设计有助于最大程度地降低部署和支持成本·高级的电源管理和矢量校准冷却技术有助于降低数据中心的电力和冷却成本·24x7 小时数据可用性能够保护关键业务的数据1.2硬件概要·2U服务器为要求苛刻的应用程序提供极佳的性能和可用性·最多可支持两颗双核英特尔至强处理器5160(最高 3.0 GHz,前端总线速度最高可达 1333 MHz)或最多两颗四核英特尔至强处理器 X5355(最高 2.66 GHz,前端总线速度最高可达1333 MHz)·通过12个 DIMM 插槽来增强内存可扩展性,支持多达 48GB 的新一代高性能 667 MHz 内存·四个PCI-Express插槽x8(1 个全长/1 个半长/2 个薄形)。
支持 2 个 PCI-X 133MHz 插槽的可选升级板·多达八个2.5英寸热插拔SAS硬盘驱动器和用于存储保护的内置磁带备份选件·集成的 RAID-0、RAID-1 和 RAID-10,可选择通过IBM ServeRAID™-8k 升级到 RAID-5(无需使用 PCI 插槽)·热插拔的冗余散热、电源和硬盘驱动器,可实现高可用性2.1环境要求温度·服务器运行时:10° 到35°C(50.0°到95.0°F);海拔高度:0 到914.4米(3000 英尺)。
IBM服务器X3650安装操作系统步骤
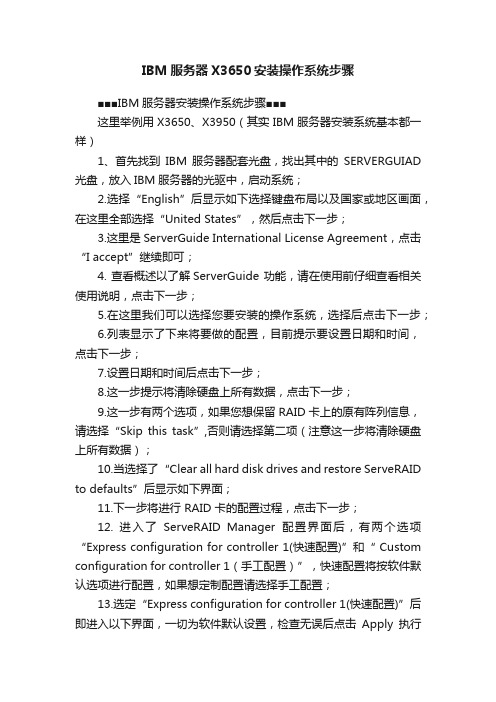
IBM服务器X3650安装操作系统步骤■■■IBM服务器安装操作系统步骤■■■这里举例用X3650、X3950(其实IBM服务器安装系统基本都一样)1、首先找到IBM服务器配套光盘,找出其中的SERVERGUIAD 光盘,放入IBM服务器的光驱中,启动系统;2.选择“English”后显示如下选择键盘布局以及国家或地区画面,在这里全部选择“United States”,然后点击下一步;3.这里是ServerGuide International License Agreement,点击“I accept”继续即可;4. 查看概述以了解ServerGuide 功能,请在使用前仔细查看相关使用说明,点击下一步;5.在这里我们可以选择您要安装的操作系统,选择后点击下一步;6.列表显示了下来将要做的配置,目前提示要设置日期和时间,点击下一步;7.设置日期和时间后点击下一步;8.这一步提示将清除硬盘上所有数据,点击下一步;9.这一步有两个选项,如果您想保留RAID卡上的原有阵列信息,请选择“Skip this task”,否则请选择第二项(注意这一步将清除硬盘上所有数据);10.当选择了“Clear all hard disk drives and restore ServeRAID to defaults”后显示如下界面;11.下一步将进行 RAID 卡的配置过程,点击下一步;12. 进入了ServeRAID Manager配置界面后,有两个选项“Express configuration for controller 1(快速配置)”和“ Cu stom configuration for controller 1(手工配置)”,快速配置将按软件默认选项进行配置,如果想定制配置请选择手工配置;13.选定“Express configuration for controller 1(快速配置)”后即进入以下界面,一切为软件默认设置,检查无误后点击Apply执行配置;14.选定“ Custom configuration for controller 1(手工配置)”后,进入如下界面,左边是控制器1上连接的硬盘,将左侧硬盘拖进右侧“New array A”中,然后点击下一步:;15.在如下红圈处输入逻辑驱动器的大小,推荐一个控制器上只有一个逻辑驱动器。
IBM X3650服务器重装系统
ServerGuide 引导安装指南适用于当前IBM System X部分机型设置和配置概述:使用ServerGuide 设置和安装CD 时,您不需要安装软盘。
可以使用CD 配置任何支持的IBM 服务器型号。
安装程序提供了安装服务器型号所需要的任务列表。
在装有ServeRAID 适配器或具有RAID 能力的集成SAS 控制器的服务器上,您可以在配置阵列的阶段来创建逻辑驱动器。
注意:1、使用ServerGuide光盘安装会清除硬盘上的分区和数据,如果还有要保留的数据请先备份或选择其他安装方式, 2、ServerGuide光盘并不包含操作系统程序,请客户自己准备一张正版Windows操作系统光盘。
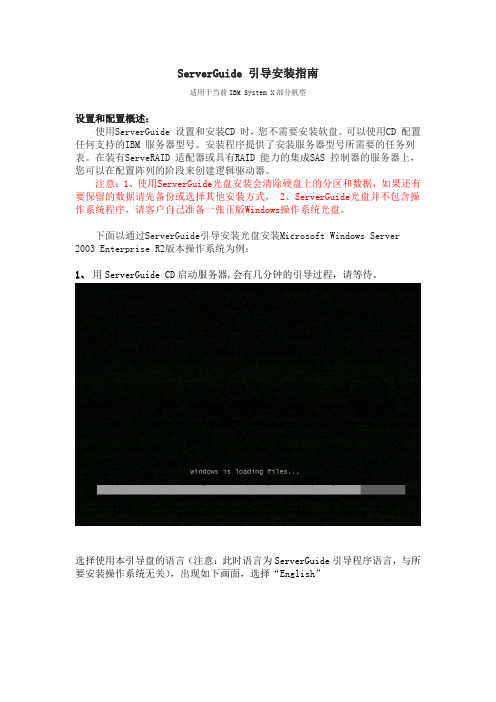
下面以通过ServerGuide引导安装光盘安装Microsoft Windows Server 2003 Enterprise R2版本操作系统为例:1、用ServerGuide CD启动服务器,会有几分钟的引导过程,请等待。
选择使用本引导盘的语言(注意:此时语言为ServerGuide引导程序语言,与所要安装操作系统无关),出现如下画面,选择“English”2、选择键盘布局的画面,在这里选择“United States”,然后点击”NEXT”:3、出现许可协议界面,阅读许可协议内容,点击“I accept”继续即可:中文用户可以在Language选项中选择Chinese 阅读中文协议.4、查看概述以了解ServerGuide 功能,请在使用前仔细查看相关使用说明,点击“NEXT”继续:5、在这里可以选择您要安装的操作系统,选择后点击“NEXT”:6、设置正确的日期和时间后点击“NEXT”:7、此时进入阵列配置阶段:(1)、如果是没有配置过阵列的服务器则如下图所示:在中线右边的上半部分会显示出阵列卡、硬盘数量和当前阵列的信息。
在阵列卡支持及硬盘数量足够的情况下,在Select RAID Level的选项下会有一些可以配置的阵列级别可选。
联想x3650M5 v4新品产品介绍 ver1.0
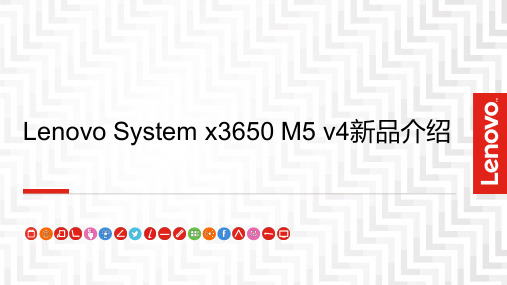
Lenovo System x3650 M5 v4新品介绍概述和简介x3650 M5 高性能2P2U 机架式服务器针对大数据和分析而设计满足多种需求的灵活配置具有强大优势•使用顶级E5-2600 v4 处理器和最高1.5 TB 的DDR4 2400MHz 内存,进而提高了性能•支持高性能NVMe 存储,最多支持8 个NVMe•高速和大容量产品可为关键业务解决方案提供支持,如业务分析、云和高性能计算•一台服务器满足各种功能需求,可选择3.5 英寸、2.5 英寸HDD 和高性能SSD•轻松升级路径,通过ML2 适配器和灵活的无插槽RAID (提供端到端12Gbps 性能)实现了较低TCO•面向关键业务应用程序的冗余特性,可提供数据保护并缩短停机时间•目标用户:各类客户:SMB 和大型企业(关键业务)。
例如,银行、电信、保险、政府、Web 服务提供商。
•目标工作负载:云应用程序、虚拟化服务器工作负载、业务分析、大数据、ERP 、CRM 、SAPx3650 M 5(MT :8871)处理器最多2 个Intel E 5-2600 v 4 系列处理器外形2U 机架内存插槽最大内存24 个DDR4(R/LR )2400MHz DIMM 最高2DPC@2133MHz延展性目标为3DPC@2133MHz (R/LR )、和2DPC@2400 MHz ,最高1.5TB 介质槽ODD (可选)(因机型而异)磁盘驱动器类型SAS/SATA/SSD/NVMeHDD 托架数2.5 英寸驱动器——HS 8 个-> 16 个-> 24 个(最多支持8 个NVMe )3.5 英寸驱动器——HS 12 个(还支持其它后置驱动器——24 个2.5 英寸+2 个2.5 英寸+2 个2.5 英寸或12 个3.5 英寸+2 个3.5 英寸+2 个2.5 英寸或8 个3.5 英寸+2 个3.5 英寸或8 个3.5 英寸+2 个2.5 英寸)RAID 12Gb ,第一个为专用无插槽RAID/支持多个RAID (最多4 个RAID 适配器)NIC/TPM 1 个IMM 和4 个1Gb 接口(标配),ML2 或PCIe (可选)/支持PCIe (x16/x8)最多8 个PCIe 插槽+ 1 个专用无插槽RAID电源AC 550W/750W/900W/1500W 铂金认证,750W/1300W 钛金认证和900W -48VDC 。
如何安装服务器系统
如何安装服务器系统
要安装服务器系统,您可以按照以下步骤进行操作:
1. 确定要安装的服务器系统。
根据您的需要选择适合的操作系统,
常见的选择有Windows Server、Linux(如Ubuntu、CentOS等)等。
2. 获取服务器系统的安装介质。
您可以从官方网站下载服务器系统
的ISO镜像文件,并将其写入到可引导的安装介质上,如USB闪存驱动器或光盘。
3. 将安装介质插入服务器的启动设备,启动服务器。
4. 进入BIOS设置。
在服务器启动时按下适当的键(通常是F2、Delete或F12)进入BIOS设置。
5. 配置引导顺序。
确保服务器的启动顺序配置为从安装介质启动,
以便让服务器在启动时加载安装介质。
6. 保存BIOS设置,并重启服务器。
7. 启动服务器并开始安装。
当服务器启动时,按照系统安装界面的指引进行操作,选择安装语言、键盘布局等参数,然后选择安装到哪个磁盘分区。
8. 等待安装完成。
安装过程可能需要一些时间,请耐心等待。
9. 配置服务器系统。
一旦安装完成,您需要配置服务器系统的一些基本设置,如网络连接、用户帐户、防火墙等。
10. 完成安装。
一旦完成系统的配置,您的服务器系统就已经安装好了。
您可以通过远程登录或物理登录到服务器上,开始进行您的操作和配置。
请注意,不同的服务器系统可能有所不同的安装步骤和界面。
上述步骤仅为一般指南,您可能需要根据具体的服务器系统和硬件配置进行相应的调整。
System x3650 M5 安装手册_上架组装_红皮书
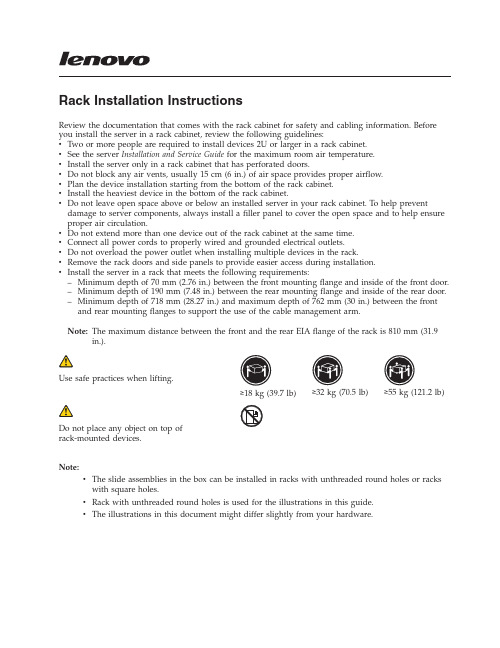
Rack Installation InstructionsReview the documentation that comes with the rack cabinet for safety and cabling information.Before you install the server in a rack cabinet,review the following guidelines:v Two or more people are required to install devices2U or larger in a rack cabinet.v See the server Installation and Service Guide for the maximum room air temperature.v Install the server only in a rack cabinet that has perforated doors.v Do not block any air vents,usually15cm(6in.)of air space provides proper airflow.v Plan the device installation starting from the bottom of the rack cabinet.v Install the heaviest device in the bottom of the rack cabinet.v Do not leave open space above or below an installed server in your rack cabinet.To help prevent damage to server components,always install a filler panel to cover the open space and to help ensure proper air circulation.v Do not extend more than one device out of the rack cabinet at the same time.v Connect all power cords to properly wired and grounded electrical outlets.v Do not overload the power outlet when installing multiple devices in the rack.v Remove the rack doors and side panels to provide easier access during installation.v Install the server in a rack that meets the following requirements:–Minimum depth of70mm(2.76in.)between the front mounting flange and inside of the front door.–Minimum depth of190mm(7.48in.)between the rear mounting flange and inside of the rear door.–Minimum depth of718mm(28.27in.)and maximum depth of762mm(30in.)between the front and rear mounting flanges to support the use of the cable management arm.Note:The maximum distance between the front and the rear EIA flange of the rack is810mm(31.9 in.).Use safe practices when lifting.≥18kg(39.7lb)≥32kg(70.5lb)≥55kg(121.2lb)Do not place any object on top ofrack-mounted devices.Note:v The slide assemblies in the box can be installed in racks with unthreaded round holes or rackswith square holes.v Rack with unthreaded round holes is used for the illustrations in this guide.v The illustrations in this document might differ slightly from your hardware.The following illustration shows the items that you need to install the server in a rack cabinet.If any items are missing or damaged,contact your place of purchase.Note:You will need both the slide box and the cable management arm box for this installation.If you choose the optional"System X Gen-II Universal Slides Kit",the items should be included in the slide box as the illustration shows below:Note:You will be able to refer the related installation information for the different holes of the rack in Appendix B,C and D .2Identify rack space for system.Select an available space (depending on the server you are installing)in your rack to install your server.Note:You need 2U of space and the sliderails are installed in the bottom U of the 2U.Fully extend the outer slide member to the rear Extend 1 the outer slide member all the way back until you hear an audible click.The rear rackmount bracket is now rotated into the unlocked position. 2 .Note:Each slide is marked with R (right)or L (left).3Attach the rear rackmount bracket to the rear of the rack.Align the rear end of the outer slide member against the holes on the rear of the rack.Line up the pins and push the slide in so that the pins go into the holes.The two slide pins will protrude through the top and bottom holes on the EIA flange.Push the slide towards the rear of the rack until the rear rackmount bracket locks into place.Attach the front rackmount bracket to the front of the rack.Rotate the front latch to the open position and align the front end of the outer slide member against the holes on the front of the rack.Line up the pins with holes in the EIA flanges and pull the slide forward so that the pins protrude through the holes.Lock the front of the slide by allowing the front latch to rotate to the closed position.Repeat step 2,3and 4for the other outer slidemember.4Secure the cable management arm and the server in the rack for shipping if needed.If you are shipping the rack with the system installed or if you are in a vibration-prone area,insert the M5screws into the rear of the e a cable tie to secure the free end of the cable management arm to the rack if needed.Tighten the front screws if needed.Press on the release latches 1 .When you move therack cabinet,or if you install the rack cabinet in a vibration-prone area,tighten the captive M5screws 2 in the front of the server.Note:5Slide the server into the rack.Lift the locking levers 1 on the slides and pushthe server 2 all the way into the rack until it clicksinto place.Install the server on the slides.Notes:e safe practices while lifting.2.If you are installing a2U server,make sure thatyou have two people when lifting the server.Their hands should be positioned as illustrated.Pull the slides forward 1 until they click,twotimes,into place.Carefully lift the server and tilt itinto position over the slides so that the rearnailheads 2 on the server line up with the slotsin the slides.Lower the server down until the rearnailheads slide into the two rear slots,and thenslowly lower the front of the server 3 until theother nailheads go into the other slots on the slides.Make sure the front latch covers the front nailheadso the system is secured to the slides.6Installing Cable ManagementArmInstall the cable management support arm.Notes:1.The cable management arm can be installed on either side of the server.It is best to install it so it hinges on the side opposite the power supplies to provide access to the power supplies.To install the cable management arm on the other side,follow the instructions in the Appendix section and install the hardware on the opposite side.2.Make sure the cable management support barmust be on top of the slide tab in order to work correctly.Place the pin down 1 into the horizontal slot on the rear of the slidrails.Then rotate the other end of the bar toward the rack 2 .Connect the stop bracket to the slide.The capital letters O is marked on cablemanagement arm pins to identify the outside pins.Install the cable management stop bracket (with capital letter O )on the unattached end of the support arm.Make sure the support arm is securely installed.7Install the cable management armPlace the cable management arm on the support arm.Slide the cable management arm tabs into both the inside and the outside slots of the slide.Push the tabs until they snap into place.Close the cable management support stop.In order to make it easier to rotate the cablemanagement arm on and off the cable management support bar,you can open the support stop by pushing the tabs above and below the cable management support.8Connect and route the cables.Notes:1.The location of the cable straps may be slightlydifferent in different systems.e the cable straps provided on the rear of thesystem to retain the cables and prevent themfrom sagging.Attach the power cords and other cables to the rear of the server.Route the cables and power cords on the cable management arm and secure them with cable ties or hook-and-loop fasteners.Secure the cables with the cable strap.Cables must be bundled with the cable strap for proper movement of the cable management arm.Notes:1.Make sure the cables do not sag below the Uspace so they will not get caught on the lowersystems.2.Allow a little slack in all cables to avoid tension in the cables as the cable management armmoves.9Removing the server from the rackLift the server off of the slides.After the front nailheads clear the latches,lift up onthe rear of the server to level the server.Lift theserver out of the rack and place it on a sturdysurface.Note:Use safe practices while lifting.Unlatch and rotate the front of the server.Note:If you are removing a2U server,make surethat you have two people when lifting the server.Their hands should be positioned as illustrated.To remove the server from the rack,disconnect thecables from the rear of the server.Remove the cablemanagement arm by pulling the pins out whilesliding the tabs out of the mounting location.Press the locking levers 1 ,while supporting therear of the server,and lift the front of the server upslightly 2 to clear the nailhead 3 from the slot.10Unlatch the front rackmount bracket from thefront of the rack.To disconnect the slides from the front of the rack,rotate the latch inward 1 and push the slide back 2 .Remove the slide from the rack.Remove the rear end of the slides.To disengage the slides from the rear of the rack,pull from the front of the slide forward to unlatch the rear hooks 1 and take the slides out of the rack 2 .11Appendix A:How to change the cable management arm support bar to install cable management armon the right side of the rack.To allow the cable management arm to be installed on the right side of the rack(as viewed from the rear),the stop bracket on the end of the support bar must be rotated to allow the part to be installed on the right slide.12Appendix B:To install Rack with Square Hole 9.5mm for System X Gen-II Universal SlidesKit Identify rack space for the nut barSelect an available space (depending on the serveryou are installing)in the rack to install your server.Place the nut bar on the selected space of the rack.Attach the front of the slide to the nut bar on the rackLine up the pin hole of the front slide to the nut baryou just placed on therack.Secure the front of the slide on the rackInsert the M6screws to the front of the rack tosecure the front of the slide you just attached.Secure the rear of the slide on the rack Insert the Universal M4screws to the rear of the rack to secure the rear of the slide.13Identify rack space for the clipsSelect an available space (depending on the serveryou are installing)in the rack to install your server.Place the clips on the selected space of the rack.Attach the front of the slide to the clips on the rackLine up the pin hole of the front slide to the clipsyou just placed on therack.Secure the front of the slide on the rackInsert the M6screws to the front of the rack tosecure the front of the slide you just attached.Secure the rear of the slide on the rack Insert the Universal M4screws to the rear of the rack to secure the rear of the slide.14Attach the front of the slide to the clips on therack Select an available space (depending on the server you are installing)in the rack to install your server.Line up the pin hole of the front slide to theselected space on the rack.Secure the front of the slide on the rack Insert the M6or #12-24screws to the front of the slide you just attached and secure it on the front of therack.Secure the rear of the slide on the rackInsert the Universal M4screws to the rear of therack to secure the rear of the slide15First Edition(January2015)Printed in the U.S.A.©Copyright Lenovo2015.LIMITED AND RESTRICTED RIGHTS NOTICE:If data or software is delivered pursuant a General Services Administration“GSA”contract,use,reproduction,or disclosure is subject to restrictions set forth in Contract No. GS-35F-05925.(1P)P/N:00MV623。
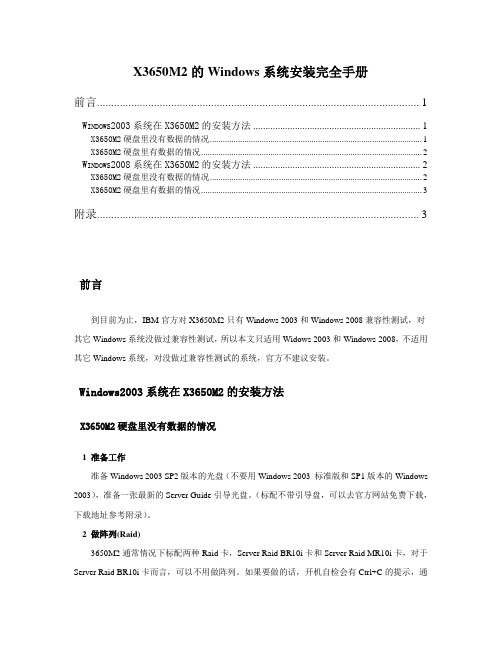
X3650M2的Windows系统安装完全手册
X3650M2的Windows系统安装完全手册前言 (1)W INDOWS2003系统在X3650M2的安装方法 (1)X3650M2硬盘里没有数据的情况 (1)X3650M2硬盘里有数据的情况 (2)W INDOWS2008系统在X3650M2的安装方法 (2)X3650M2硬盘里没有数据的情况 (2)X3650M2硬盘里有数据的情况 (3)附录 (3)前言到目前为止,IBM官方对X3650M2只有Windows 2003和Windows 2008兼容性测试,对其它Windows系统没做过兼容性测试,所以本文只适用Widows 2003和Windows 2008,不适用其它Windows系统,对没做过兼容性测试的系统,官方不建议安装。
Windows2003系统在X3650M2的安装方法X3650M2硬盘里没有数据的情况1 准备工作准备Windows 2003 SP2版本的光盘(不要用Windows 2003 标准版和SP1版本的Windows 2003),准备一张最新的Server Guide引导光盘。
(标配不带引导盘,可以去官方网站免费下载,下载地址参考附录)。
2 做阵列(Raid)3650M2通常情况下标配两种Raid卡,Server Raid BR10i卡和Server Raid MR10i卡,对于Server Raid BR10i卡而言,可以不用做阵列。
如果要做的话,开机自检会有Ctrl+C的提示,通过按Ctrl+C键来进入Raid卡BIOS界面来做Raid。
如果没有提示或者按Ctrl+C无效,可通过F1进入UEFI来选择相关的选项,进入Raid卡的BIOS界面来做Raid。
对于Server Raid MR10i卡而言,必须做Raid。
开机自检会有Ctrl+H的提示,通过按Ctrl+H 键来进入Raid卡BIOS界面来做Raid。
如果没有提示或者按Ctrl+H无效,可通过F1进入UEFI 来选择相关的选项,再进入Raid卡的BIOS界面来做Raid。
联想服务器IMM运维管理指南

联想服务器IMM运维管理指南Integrated Management Module II (IMM2) 基本操作(远程管理端口)目录一、登陆IMM远程管理界面 (3)1. 设置固定的IMM远程管理口IP地址登陆 (4)2. 临时登陆 (7)3. 在Windows操作系统中,通过带内接口登陆 (9)二、IMM管理界面简介 (11)三、IMM常用操作说明 (37)1. 查看、导出日志及熄灭日志检查指示灯 (37)2. 微码刷新 (43)3. 远程终端 (65)一、登陆IMM远程管理界面找到服务器背面的IMM远程管理口,一般会标记为”IMM”或者有一个扳手型的标志,参考《认识您的System X服务器》(知识库编号:154325)。
在System x3650 M5等主流型服务器上有单独的IMM远程管理口。
在System x3250 M5等低端型服务器上IMM远程管理口与普通网口复用。
IMM远程管理的默认登陆用户名及密码为:用户名:USERID密码:PASSW0RD(数字0)1. 设置固定的IMM远程管理口IP地址登陆开机看到Lenovo System x Logo时按F1键进入BIOS界面,进入System Settings。
再进入Integrated Management Module。
进入Network Configuration设置IMM远程管理口的IP地址。
注:如果IMM无法登陆或者发生问题需要恢复,可以选择”Reset IMM to Defaults”恢复IMM默认设置(包括IP地址及用户),或者选择”Reset IMM”重启IMM功能。
在BIOS中恢复或重启IMM可能会出现数分钟操作无响应的情况,风扇也会全速转动。
对于有独立IMM远程管理口的System x机型,X3650M5的第一项”Network Interface Port”为"Dedicated";对于共享网口的机型,该项为"Shared",一般不需要做改动。
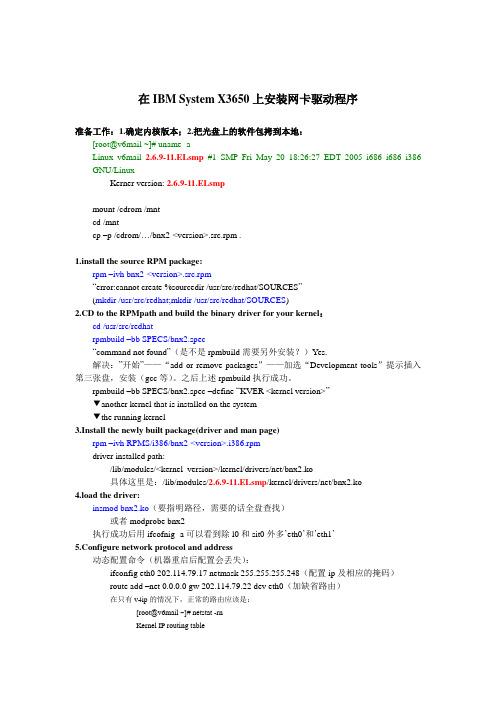
在IBM System X3650上安装网卡驱动程序
在IBM System X3650上安装网卡驱动程序准备工作:1.确定内核版本;2.把光盘上的软件包拷到本地:[root@v6mail ~]# uname -aLinux v6mail 2.6.9-11.ELsmp#1 SMP Fri May 20 18:26:27 EDT 2005 i686 i686 i386 GNU/LinuxKerner version: 2.6.9-11.ELsmpmount /cdrom /mntcd /mntcp –p /cdrom/…/bnx2-<version>.src.rpm .1.install the source RPM package:rpm –ivh bnx2-<version>.src.rpm“error:cannot create %sourcedir /usr/src/redhat/SOURCES”(mkdir /usr/src/redhat;mkdir /usr/src/redhat/SOURCES)2.CD to the RPMpath and build the binary driver for your kernel:cd /usr/src/redhatrpmbuild –bb SPECS/bnx2.spec“command not found”(是不是rpmbuild需要另外安装?)Yes.解决:”开始”——“add or remove packages”——加选“Development tools”提示插入第三张盘,安装(gcc等)。
之后上述rpmbuild执行成功。
rpmbuild –bb SPECS/bnx2.spec –define “KVER <kernel version>”▼another kernel that is installed on the system▼the running kernel3.Install the newly built package(driver and man page)rpm –ivh RPMS/i386/bnx2-<version>.i386.rpmdriver installed path:/lib/modules/<kernel_version>/kernel/drivers/net/bnx2.ko具体这里是:/lib/modules/2.6.9-11.ELsmp/kernel/drivers/net/bnx2.ko4.load the driver:insmod bnx2.ko(要指明路径,需要的话全盘查找)或者modprobe bnx2执行成功后用ifcofnig -a可以看到除l0和sit0外多’eth0’和’eth1’5.Configure network protocol and address动态配置命令(机器重启后配置会丢失):ifconfig eth0 202.114.79.17 netmask 255.255.255.248(配置ip及相应的掩码)route add –net 0.0.0.0 gw 202.114.79.22 dev eth0(加缺省路由)在只有v4ip的情况下,正常的路由应该是:[root@v6mail ~]# netstat -rnKernel IP routing tableDestination Gateway Genmask Flags MSS Window irtt Iface202.114.79.16 0.0.0.0 255.255.255.248 U 0 0 0 eth1169.254.0.0 0.0.0.0 255.255.0.0 U 0 0 0 eth10.0.0.0 202.114.79.22 0.0.0.0 UG 0 0 0 eth1静态配置ip及路由:cd /etc/sysconfig/network-scriptsvi ifcfg-eth0(配置文件样本)[root@v6mail network-scripts]# cat ifcfg-eth0DEVICE=eth0BOOTPROTO=noneHW ADDR=00:1A:64:D3:A8:78ONBOOT=yesTYPE=EthernetUSERCTL=noIPV6INIT=yesPEERDNS=yesIPADDR=2001:250:4001:1::3GATEWAY=2001:250:4001:1::ffff[root@v6mail network-scripts]# cat ifcfg-eth1DEVICE=eth1ONBOOT=yesBOOTPROTO=staticIPADDR=202.114.79.17NETMASK=255.255.255.248GATEWAY=202.114.79.22注:v6的ip可能使用配置文件不生效,解决方法是将配置命令写入/etc/rc.local里:[root@v6mail network-scripts]# more /etc/rc.local#!/bin/sh## This script will be executed *after* all the other init scripts.# You can put your own initialization stuff in here if you don't# want to do the full Sys V style init stuff.touch /var/lock/subsys/local####### haoyf add 20090918ifconfig eth0 add 2001:250:4001:1::3/64route -A inet6 add default gw 2001:250:4001:1::ffff。
System X3650 M5手动加载raid驱动安装 SuSe11 sp3 系统
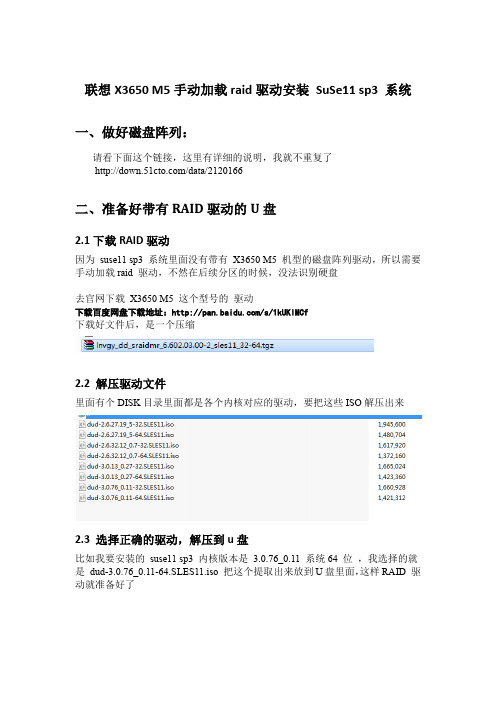
联想X3650 M5手动加载raid驱动安装SuSe11 sp3 系统一、做好磁盘阵列:请看下面这个链接,这里有详细的说明,我就不重复了/data/2120166二、准备好带有RAID驱动的U盘2.1下载RAID驱动因为suse11 sp3 系统里面没有带有X3650 M5 机型的磁盘阵列驱动,所以需要手动加载raid 驱动,不然在后续分区的时候,没法识别硬盘去官网下载X3650 M5 这个型号的驱动下载百度网盘下载地址:/s/1kUKIMCf下载好文件后,是一个压缩2.2 解压驱动文件里面有个DISK目录里面都是各个内核对应的驱动,要把这些ISO解压出来2.3 选择正确的驱动,解压到u盘比如我要安装的suse11 sp3 内核版本是 3.0.76_0.11 系统64 位,我选择的就是dud-3.0.76_0.11-64.SLES11.iso 把这个提取出来放到U盘里面,这样RAID 驱动就准备好了三、安装操作系统:3.1 将准备好的SuSe 11 sp3 系统光盘放入光驱,设置从光盘启动在这个界面按F6,选择YES,然后选择Installation:也有可能你系统启动的时候是下面这样纸滴:-------------------------------------------------------------------------------------------------------出现此界面在Installation 选择上按 E 进入一些编辑界面在linuxefi 这行末尾加入以下参数:broken_modules=ahci driverupdate=1如上图所示,输完参数后按F10 开始启动------------------------------------------------------------------------------------------------------ 以上两种界面启动成功后都会到下面这个界面:3.2 选择从U盘加载raid驱动然后在这里就会找到你U盘以及你U盘里面的驱动(我这里是贴的图,正常找到驱动会看到)加载好以后。
Lenovo_System_x3650M5_系统全新安装教程

目录第1章产品介绍 (1)1.1服务器 (1)1.2引导工具 (2)第2章光盘刻录 (7)2.1 引导盘刻录 (7)2.2 安装盘刻录 (8)第3章Raid卡配置 (9)第4章添加USB引导 (15)第5章系统安装 (19)第1章产品介绍1.1服务器IBM System x3650 M1、M2、M3、M4是IBM公司的产品,Lenovo收购后,推出了Lenovo System x3650 M5。
M5相关介绍:/abstracts/tips1193.html?Open#osM5支持的操作系统如下:M5相关图片如下:1.2引导工具引导工具在Lenovo收购前后有所区别。
收购前,比如ServerGuide9.41版本,命名ibm_utl_sguide_9.41-win2k03-08_anyos_x86-64.iso;从该地址的介绍中知,该工具支持的Lenovo 产品如下:该工具支持的IBM产品如下:第2章光盘刻录整个安装过程使用DVD+DVD,或者U盘+DVD的模式,分别用来刻录引导盘、操作系统。
引导盘可以使用DVD或者U盘刻录,安装盘经过测试不能使用U盘,必须使用DVD刻录。
本教程使用U盘+DVD的形式。
2.1 引导盘刻录先下载所需的工具,有两个版本,分别支持Windows Server2008和Windows Server 2012,根据需要进行下载,下载地址:https:///support/entry/portal/docdisplay?lndocid=LNVO-GUIDE下载后,安装引导盘制作工具UltraISO,打开工具,刻录过程可参考如下百度经验/article/11c17a2c717e6cf446e39df8.html。
根据光驱的速度,整个过程可能需要3-8分钟。
值得注意的是,如果使用U盘制作引导盘,制作时有一点区别,应选择写入硬盘映像,如下图。
2.2 安装盘刻录安装盘刻录同引导盘刻录基本相同,可参考百度经验:/article/4ae03de34c61bb3efe9e6b45.html 根据光驱的速度不同,整个过程可能需要5-15分钟。
ibm x3650安装Linux

在x3650 上安装RHAS4使用机型: x3650(797971C)磁盘接口: SAS使用硬盘:73.4GB × 3处理器:Intel 5160, 3GHz , L2 Cache4MB内存:1024 MB使用网卡: On-Board Broadcom NetXtreme Gigabit Ethernet一.安装前的准备:1.安装前需要准备什么:检查并升级主板BIOS到最新版本需要4张有许可证的RHAS4 光盘可支持的硬盘驱动器(请访问/us/compat,查看支持的选件及其部件号)装有ServeRaid 8k RHAS3 驱动程序的软盘。
2.从哪里获得设备驱动和文件:x系列服务器/NF服务器/PC Server驱动程序下载一览表:/cn/support/download/driver/matrix?categoryid=2131二.操作系统安装1 启动服务器,在系统提示时按ctrl+A 进入ServeRAID 8k/8k-l 设置程序,在里面按需要和提示设定好硬盘和RAID(如果需要的话),设定好后退出。
2 BIOS中设置机器先从CD ROM引导系统。
将第一张RHAS4 光盘装入光盘驱动器中,引导RHAS4到如下图所示情况后,将ServeRAID 8k/8k-l 驱动程序软盘插入外置软驱(驱动及软盘制作见驱动程序下载一栏表),在“Boot:”后键入linux dd 回车,加载驱动。
ServeRAID控制器驱动加载完成后进入安装界面。
安装进入基本设置,设置“语言”为中文,美式键盘。
如遇已经安装某一版本RedHat,要求选择升级或完全安装,选择安装Red Hat ENTERPRISE Linux AS硬盘分区。
要求创建根分区和交换分区,根分区不小于256M,建议创建交换分区,可为2G。
如此部分空间容量设置过小,将无法安装软件包。
此部分需要特别注意,否则可能造成硬盘数据丢失。
安装软件包安装软件包,途中要求插入光盘2,光盘3,以及光盘1进行安装后配置取出光盘,重新引导创建系统用户等。
IBM x3650 M2服务器系统安装攻略
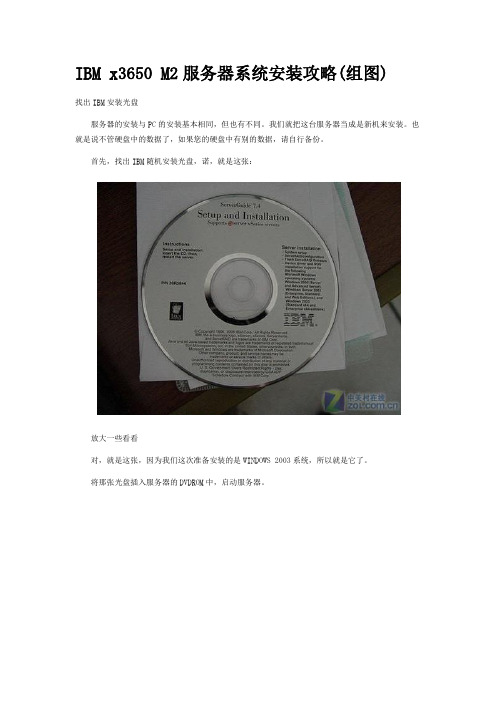
IBM x3650 M2服务器系统安装攻略(组图)找出IBM安装光盘服务器的安装与PC的安装基本相同,但也有不同。
我们就把这台服务器当成是新机来安装。
也就是说不管硬盘中的数据了,如果您的硬盘中有别的数据,请自行备份。
首先,找出IBM随机安装光盘,诺,就是这张:放大一些看看对,就是这张,因为我们这次准备安装的是WINDOWS 2003系统,所以就是它了。
将那张光盘插入服务器的DVDROM中,启动服务器。
这台服务器是使用SCSI硬盘的。
服务器自动转从光盘启动,进行预读数据处理。
光盘引导程序正好进入到图形界面。
我们可以看到IBM的安装封面了。
稍等片刻之后,封面界面切换,来到语种先择界面,要求我们选择相应的语言版本这里,是选择键盘和区域语言,直接下一步行啦,其实你真要选的话,要有心里准备,键盘当然可以选其它的,必竟它都是通用的,其实默认的也没什么,换了键盘一样使用。
至于区域选择嘛,你就慢慢向下拉,再拉,再拉,拉到最下面。
嗯,看到了没有?Chinese选项。
找到没有?没找到?再认真找一次嘛。
还是没找到?那么,,那么,,,,恭喜你,总算觉悟了,没错,它没有这个选项,呵呵,所以,就不用选什么区域了,用默认的吧。
这里,是最终用户授权书吧?不懂,反正我知道一定得选“I Accept”才行,如果不信,你也可以点“I do NOT Accept”试试啊!到了这一步,还是老样子,直接下一步算啦到了这里,要看清楚啦,一定要选对你所要安装的操作系统程序类型,如果安装2000系统,你就选2000的,如果装2003的系统,那你就选2003的,不要乱点啦。
我所准备安装的是WIN2003系统,当然我就选2003啦。
选好系统后,来到日期与时间的设置选项,如果正确的话,就可以下一步了,如果不正确,那么修改一下把它弄正确来就行。
日期与时间设置好后,就快到了硬盘选项了。
E文太差,谁帮我翻译一下,反正我是直接下一步了,也就是“Skip this task”,意思是大概是跳过吧,猜的,呵呵。
联想Systemx3650M5机器加raid6实施步骤
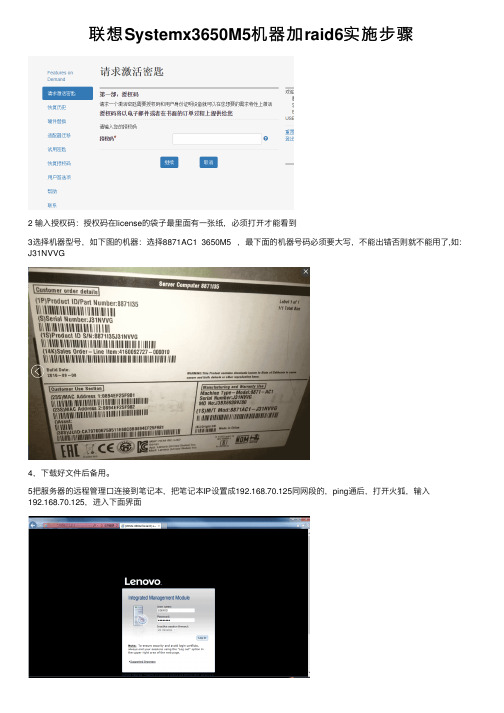
2 输入授权码:授权码在license的袋子最里面有一张纸,必须打开才能看到 3选择机器型号,如下图的机器:选择8871AC1 3650M5 ,最下面的机器号码必须要大写,不能出错否则就不能用了,如: J31NVVG
4,下载好文件后备用。 5把服务器的远程管理口连接到笔记本,把笔记本IP设置成192.168.70.125同网段的,ping通后,打开火狐,输入 192.168.70.125,进入下面界面
输入USERID,PASSW0RD,点击log in 6进入下面界面,选择Activation Key Management
7进入下图,点击add 8点击下图的select file 9导入第四步下载好的文件,点击OK
10可以看到界面里面有激活好的许可,说明激活完成
(这个图片不是raid 6的许可,能看到就可以)
- 1、下载文档前请自行甄别文档内容的完整性,平台不提供额外的编辑、内容补充、找答案等附加服务。
- 2、"仅部分预览"的文档,不可在线预览部分如存在完整性等问题,可反馈申请退款(可完整预览的文档不适用该条件!)。
- 3、如文档侵犯您的权益,请联系客服反馈,我们会尽快为您处理(人工客服工作时间:9:00-18:30)。
目录
第1章产品介绍 (1)
1.1服务器 (1)
1.2引导工具 (2)
第2章光盘刻录 (7)
2.1 引导盘刻录 (7)
2.2 安装盘刻录 (8)
第3章Raid卡配置 (9)
第4章添加USB引导 (15)
第5章系统安装 (19)
第1章产品介绍
1.1服务器
IBM System x3650 M1、M2、M3、M4是IBM公司的产品,Lenovo收购后,推出了Lenovo System x3650 M5。
M5相关介绍:/abstracts/tips1193.html?Open#os
M5支持的操作系统如下:
M5相关图片如下:
1.2引导工具
引导工具在Lenovo收购前后有所区别。
收购前,比如ServerGuide9.41版本,命名
ibm_utl_sguide_9.41-win2k03-08_anyos_x86-64.iso;
从该地址的介绍中知,该工具支持的Lenovo 产品如下:
该工具支持的IBM产品如下:
第2章光盘刻录
整个安装过程使用DVD+DVD,或者U盘+DVD的模式,分别用来刻录引导盘、操作系统。
引导盘可以使用DVD或者U盘刻录,安装盘经过测试不能使用U盘,必须使用DVD刻录。
本教程使用U盘+DVD的形式。
2.1 引导盘刻录
先下载所需的工具,有两个版本,分别支持Windows Server2008和Windows Server 2012,根据需要进行下载,下载地址:
https:///support/entry/portal/docdisplay?lndocid=LNVO-GUIDE
下载后,安装引导盘制作工具UltraISO,打开工具,刻录过程可参考如下百度经验/article/11c17a2c717e6cf446e39df8.html。
根据光驱的速度,整个过程可能需要3-8分钟。
值得注意的是,如果使用U盘制作引导盘,制作时有一点区别,应选择写入硬盘映像,如下图。
2.2 安装盘刻录
安装盘刻录同引导盘刻录基本相同,可参考百度经验:
/article/4ae03de34c61bb3efe9e6b45.html 根据光驱的速度不同,整个过程可能需要5-15分钟。
第3章Raid卡配置
开机进入如下页面,按F1→选择System Setting
选择Storage
选择阵列卡,按回车
选择Main Menu
进入HII配置程序,选择Configration Management
选择Create Profile Based Vitural Drive ,如果想自定义更多选项请选择Create Vitural Drive
选择Generic RAID 5
服务器挂载了4个300GB的硬盘,RAID5只能识别3个硬盘的容量,共835GB。
此界面中的其他选项都是根据阵列卡的预设固定的,无法自行选择,直接选择Save Configuration即可。
注:如果想自定义这些选项,请在上面的步骤中选择Create Vitural Drive。
用空格选中Confirm后,选Yes确定
选择OK完成创建RAID。
多次按ESC健回到System Configeration and Boot Management界面,点击Y健,保存设置
第4章添加USB引导
开机→F1→Boot Manager
选择Change Boot Order,可以看到系统默认只有3中启动方式。
返回到Boot Manage界面,选择Add Boot Option
选择Generic Boot Option
使用上下箭头,选择USB Storage,回车确认
回到Change Boot Order界面,可以看到现在有4中启动方式。
多次ESC后,点击Y健保存,USB启动添加完成。
第5章系统安装
本文使用刻录的U盘做引导盘,使用刻录的光盘做安装盘。
先按照上述步骤做好Raid。
开机→插上引导盘-U盘
开机后无需任何操作,系统直接从引导盘(U盘)启动
Starting Windows
加载引导盘Loading ServerGuide
引导盘加载成功,可以看出版本为10.1,选择English
选择United States→Next
I accept →Next
Welcome to ServerGuide→Next
ServerGuide中已经包含相关驱动,直接Next
选择操作系统,该引导盘只支持Windows Server2008、2011,此处选择Server08 R2 x64→Next
根据需要进行版本选择,此处选择企业版的→Next
确认一下日期和时间→Next
创建系统分区大小和文件类型,根据需要进行设置,此处设置100GB即102400MB,文件格式为NTFS,→Next
ToolsCenter Suite设置,可根据需要进行安装,此处不选择,直接Next
再次确认一下设置信息,Next
系统提示,为了系统的安装,引导盘正在向硬盘里面拷贝一些文件,可能花费5分钟的时间,待完成后,Next
提示将要安装系统,确认已经插好系统盘
此时将刻录好的DVD安装盘插入光驱(也可提前插入)
系统提示,ServerGuide 正在DVD中查找指定的系统,可能花费两分钟
指定系统已经在DVD中找到,Next
安装语言、时间和货币形式、键盘或者输入法设置,此处全部选择Chinese(PRC)—中国(中华人民共和国),Next
选I agree to the…→Next
启动Windows安装过程,稍等完成后,Next
安装程序正在启动
进入熟悉的安装过程
安装过程中的重启,系统自动重启
此时,安装盘自动弹出
重启后界面
重启后,系统继续安装过程
安装程序正在为首次使用计算机做准备
安装完成,进入系统。
