使用床垫说明
健晨保健床垫功能层说明

健晨保健床垫各功能层说明
1、专用织锦标识布层
(高档美观、织锦密度高、防尘防螨)
2、磁棒保护布层
3、医用永久软质磁棒层
4、托玛琳保护层
5、托玛琳功能纤维层
(产生空气负离子,活化细胞,增强免疫力,净化空气)
6、远红外加强层
7、全棉斜纹米黄标志布层
8、标志不织布层
9、远红外功能纤维层
(改善血液循环、人体微循环、产生温热效应等功能)
10、羊毛纤维层
11、活性炭纤维毡
(活性炭具有吸附空气中有毒有害物质,净化空气的效果)12、GT棉层
(GT棉具有非常好的保暖功效)
13、持久高弹PU按摩集成块
(PU按摩垫为航空材料,密度高,永不变形,给人体类指压按摩)
14、高回弹性垫体
15、耐磨织锦布。
ive的汗蒸床垫的说明书
ive的汗蒸床垫的说明书
1、汗蒸床垫是一款集睡与汗蒸为一体的多功能型保健床垫,利用先进的技术把十二种矿石粉和三种有机宝石压缩到硅胶中精制而成,不断的释放远红外线和负离子,让人在睡梦和汗蒸出汗的过程中达到预防保健和调理疾病的作用,是现代养生中不可缺少的一艘保驾护航船!
2、里面含有十二种矿石粉和三种有机宝石,这些矿石粉是相辅相成的,缺一不可才能发挥奇效。
远红外线可以深入皮下脂肪6厘米,普折叠起来就可以让身体得到全方位的照射,效果更佳。
3、可搬回家的汗蒸馆。
汗蒸最大的优势就是排湿、排毒、排寒,但是汗蒸后很重要的一点就是不能着凉,普通汗蒸房蒸完在回家的路上寒气可能又会侵入体内,而汗蒸床垫躺在家里就可以汗蒸,一是不会让寒气再次侵入体内,二是方便并加大了排毒效果。
二、床垫汗蒸的作用
1、汗蒸可以加速体内血液循环,打通身体内环境,彻底排出身体污物;
2、激活身体休眠细胞,增强人体免疫力,促进伤口愈合
3、加强气管,支气管及肺部功能,对脱敏,排痰有良好的作用
4、排湿、排寒以及积聚在体内的毒垢,能够减轻关节炎,肠胃病,慢性支气管炎等症状
5、增加身体基础代谢,降低血糖,胆固醇,甘油三脂,净化血液
6、抑菌,促进肌体修复与再生功能,尤其对妇科炎症有神奇效果
7、改善酸性体质及治疗都市人群亚健康状态,对睡眠及神经衰弱有很好功效。
ISOFLEX 压力管理床垫使用说明书

ISOFLEX®Pressure Management MattressInstructions for UseRead and understand the operating instructions and all safety precautions prior to use. SymbolsConsultInstructions forUseDo not tumble dryFoot end ofmattressDo not ironLatex freeDo not dry cleanDamp wipe onlyAllow to completely air dry10%ChlorinatedBleachSAFETY PRECAUTIONSWarning:•ISOFLEX mattress covers (top and bottom) should be inspected for tears, punctures, excessive wear, and misaligned zippers each time the covers are cleaned. If a mattress cover becomes compromised, themattress should be removed from service immediately to prevent cross contamination.Caution:•When utilizing an X-Ray plate while the patient is on ISOFLEX, take precautions to insure that no sharp edges from the X-Ray plate come in contact with the mattress cover. It is recommended that a pillow case, or some other protective device, is placed on the plate prior to placement under the patient. If a mattress cover becomes compromised, the mattress should be removed from service immediately to prevent cross contamination.•When cleaning the underside of the mattress, insure that no liquid is allowed to seep in to the zipper area and watershed cover barrier, fluids allowed to come in contact with the zipper may leak in to the mattress.•Check patient’s skin regularly. Consult physician if any redness or skin break occurs. Serious injury could result if the patient’s skin condition is left untreated.•The patient’s skin should be checked and assessed every 8 hours, or once per shift, to insure proper mattress performance.Intended UseISOFLEX mattresses provide pressure redistribution for patients with existing, or who are at risk of developing, pressure ulcers.Unpacking Instructions:1. Remove the mattress from the box.2. Lay the mattress on its side.3. Using scissors, carefully cut the sleeve that holds the folded mattress. Becareful not to inadvertently cut the mattress.4. Remove and discard the sleeve.5.Set up Instructions:1. Place the ISOFLEX mattress on the bed frame. Insure that the mattress properly fits the bed frame on whichit is being placed. Using an ISOFLEX mattress on a bed frame of a larger or smaller width than the stated ISOFLEX width may result in the mattress sliding and patient injury.2. Insure that the foot end symbol ( ) is located at the foot end of the bed frame. ISOFLEXmattresses are equipped with a dedicated sloped heel section and must be installed with this section at the foot end of the bed frame.3. Place the linens on the mattress leaving them as loose as possible to avoid creating a “hammocking” effectand increasing interface pressures.4. Place the patient on the mattress.Cleaning Instructions:1. Gaymar mattress surfaces are designed for long-lasting comfort and reliability. In order to maintain theseproducts, they should be cleaned regularly using soap and water and a hospital grade disinfectant. Gaymar recommends these disinfecting agents: Ecolab® Airkem® A-33 Quaternary Solution, 3M® Phenolic Disinfectant Cleaner Concentrate Solution Product #18, or a 10% Chlorinated Bleach Solution.2. Alcohol is not recommended because it can discolor and degrade the cover.3. Allow to completely dry. The solution contact time is what makes the disinfectant process effective.4. Wipe down the mattress with a clean dry cloth to remove any excess disinfectant.NOTE: The cover must be dry prior to storage or application of linens. Failure to remove excess disinfectant could eventually degrade the cover.5. An antimicrobial agent has been used to help prevent bacteria and fungus from destroying the coating of thecover. Should unsightly stains, discoloration, brittleness, stickiness, or unpleasant odors become noticeable, the antimicrobial agent may have become ineffective and the product should be replaced.Distributed by: Stryker Medical3800 East Centre Avenue Portage, MI 49002 USA Copyright:©2010. Stryker Medical, Inc. All rights reserved.Trademark Information:Stryker is a registered trademarks of Stryker Medical.ISOFLEX is a trademark of Gaymar Industries, Inc.Ecolab and Airkem are registered trademarks of Ecolab Inc.3M is a registered trademarks of 3M Corporation.This product is made with Intelli-Gel ®* polymeric columned material and Gelastic™* polymeric columned material.*EdiZONE, LLC of Alpine, UT.Patent Information:This product is covered by one or more of the following US patents: 7666341, 7076822, 7060213, 6843873, 6797765, 6767621, 6447865, 6413458, 6099951, 6026527, 5749111 and other US and/or foreign patents and pending patent applications.P/N 101392000 Rev A 6/10。
SMD 57床垫使用说明书

Kulllanma TalimatıORIGINAL OPERATING INSTRUCTIONSSMD 57magazineIt is essential that the operating instructions are read before the tool is operated for the first time.Always keep these operating instructions to-gether with the tool.Ensure that the operating instructions arewith the tool when it is given to other persons.1These numbers refer to the corresponding illustra-tions.The illustrations can be found on the fold-out cover pages.Keep these pages open while studying the oper-ating instructions.Operating controls and parts of the magazine 1@Depth gauge;Screw length adjustment button =Screw length marks%Screwdriving depth adjustment thumbwheel &Release buttons (Strip guide )Transport latch+Lockbutton for sustained operation §Strip releaseDraws attention to imminent danger that will lead to serious bodily injury or fatality.WARNINGDraws attention to a potentially dangerous situation that could lead to serious personal injury or fatality.CAUTIONDraws attention to a potentially dangerous situation that could lead to slight personal injury or damage to the equipment or other property.NOTEDraws attention to an instruction or other useful informa-tion.General warning Warning:electricityObligation signsWear eye protection Wear a hardhat Wear ear protectionWear protective glovesSymbolsReturn wastematerial forrecycling.Read theoperatinginstructionsbefore use.Location of identification data on the toolThe type designation and the serial number are stampedon the rear of the magazine.Make a note of this data inyour operating instructions and always refer to it whenmaking an enquiry to your Hilti representative or servicedepartment.Type:Serial no.:collated screws.The magazine is suitable for use withthe Hilti SF4000/SF4000‑A/SD2500/SD4500/SD5000/SD5000‑A22/SD4500‑A18and SD45screwdrivers.The magazine and Hilti screwdrivers areoptimally matched to each other.In the safety rules in these operating instructions,thedesignation“power tool”refers to the magazine.Modification of the power tool is not permissible.Observe the information printed in the operating instruc-tions concerning operation,care and maintenance.To avoid the risk of injury,use only genuine Hilti ac-cessories and insert tools.The power tool and its ancillary equipment may presenthazards when used incorrectly by untrained personnel orwhen used not as directed.The power tool is designed for professional use and maybe operated,serviced and maintained only by trained,authorized personnel.This personnel must be informed ofany special hazards that may be encountered.The powertool and its ancillary equipment may present hazardswhen used incorrectly by untrained personnel or whenused not as directed.The working environment may be as follows:constructionsite,workshop,renovation,conversion or new construc-tion.Working on materials hazardous to the health(e.g.as-bestos)is not permissible.1Magazine1S‑MBL116PH2bit1Operating instructions1Cardboard boxDesignationS‑MBL116PH2bitSME extensionSMD57magazine2;Magazine unit,complete382905=Depth gauge383002Right of technical changes reserved.Magazine SMD 57WeightWithout screwdriver,Without screw strip:0.35kg Length186mm Contact pressureto 40N (4.0kp)Screw capacity (screws per strip)50Suitable drywall screw types SMD 57Length9…57mm Thread inside diameter 3…4.5mm Head diameter 7.5…8.6mmDrive typePhilips no.2(S‑MBL 116PH2)Philips no.2can be driven with the following Hilti screwdriversSF 4000/SF 4000‑A /SD 5000/SD 2500/SD 4500/SD 5000‑A22/SD 4500‑A18/SD 45common sense when operating a power tool.Do not use a power tool while you are tired or under the influence of drugs,alcohol or medication.A moment of inattention while operating power tools may result in serious personal injury.b)Use the power tool,accessories and tool bits etc.in accordance with these instructions,taking into account the working conditions and the work to be e of the power tool for opera-tions different from those intended could result in a hazardous situation.c)Maintain power tools.Check for misalignment orbinding of moving parts,breakage of parts and any other condition that may affect the power tool’s operation.If damaged,have the power tool repaired before use.Many accidents are caused by poorly maintained power tools.d)Store idle power tools out of the reach of chil-dren and do not allow persons unfamiliar with the power tool or these instructions to operate the power tool.Power tools are dangerous in the hands of untrained users.e)Dress properly.Do not wear loose clothing orjewellery.Keep your hair,clothing and gloves away from moving parts.Loose clothes,jewellery or long hair can be caught in moving parts.f)Use personal protective equipment.Always weareye protection.Protective equipment such as dust mask,non-skid safety shoes,hard hat,or hearing protection used for appropriate conditions will reduce personal injuries.a)Observe the operating instructions and the safety rules contained for the magazine and the screw-driver used.b)Always work with the screwdriver running at max-imum speed.Accordingly,use the switch lockbut-ton on the screwdriver.c)Do not hold the SMD 57magazine in the area ofthe depth gauge.d)Each screwdriving stroke must be completed infull.Interruption of the magazine stroke or release of pressure half way through the screwdriving operation may lead to malfunctions.e)Change the screw strip only when the screwdriveris switched off.f)Wear eye protection,especially when workingoverhead.g)Use only genuine Hilti S‑MBL 116PH2bits.Checkthat the bits are in good condition.h)Use only genuine Hilti screw strips and screws.i)Always work at right angles to the surface of theworkpiece to be fastened.j)Store the screw strips in a straight position,asthey are in the original package.Disconnect the screwdriver’s supply cord from the elec-tric supply before fitting the magazine.1.Remove the depth gauge and bit holder from thescrewdriver.2.Fit the bit into the screwdriver.NOTE The bit clicks into position.3.Push the magazine onto the screwdriver in the de-sired working position until it is heard to engage.NOTE The magazine can be engaged on the tool invarious positions(every15°).NOTE Check to ensure that the screwdriver is setto“forward”rotation.screws to be driven.2.Press the button and slide the depth gauge back orforward.3.Set the depth gauge to one of the5length markscorresponding to the length of the screws.NOTE The correct screw length setting is very im-portant for trouble-free magazine operation.channel until the first screw is in position at the markor until the end of the strip is flush with the uppersurface of the magazine at the exit opening.2.Check that the screw strip has engaged by trying topull it back gently.thumbwheel.2.Turning the thumbwheel counterclockwise causesthe screw to be driven deeper.3.Drive a screw to test the screwdriving depth setting.Readjust the setting if necessary.NOTE Each audible click of the thumbwheel corres-ponds to an adjustment of0.2mm(0.008inch).Turning the thumbwheel clockwise causes the screwto be driven less deeply.Disconnect the screwdriver’s supply cord from the elec-tric supply.1.Release the strip retainer by pressing the transportlatch.2.Pull the screw strip back.NOTE Alternatively,the screw strip can be pulledupwards,out of the magazine,without pressing thetransport latch.Disconnect the screwdriver’s supply cord from the elec-tric supply before removing the magazine.The magazine can be removed by pressing the releasebuttons and,at the same time,pulling it away from thescrewdriver.Dirt and dust(especially from plaster)may have an ad-verse effect on operation of the magazine.CAUTIONDo not,under any circumstances,lubricate themagazine with mineral oil/grease or graphitesprays.This would increase the risk of malfunctions.Clean the magazine simply by blowing out the dirt anddust with compressed air.It is recommended that the magazine is cleaned by wash-ing it out with warm water after a long period of heavyuse.1.Remove the screw strip as described in the section“Moving the screw strip back”.2.Remove the magazine as described in the section“Removing the magazine from the screwdriver”.3.Press the release spring together with the aid ofpliers or a similar tool.The transport mechanism,including the depth gauge,can then be removedfrom the casing.You now have three assemblies inyour hand:the transport mechanism,the pressurespring and the casing.4.If necessary,the depth gauge can also be separatedfrom the other parts by pulling it out while pressingthe screw length adjustment button.NOTE Take care to avoid pinching your fingers.5.The parts can then be cleaned thoroughly with warmwater.NOTE We recommend use of a nylon brush(an oldtoothbrush)to remove stubborn deposits.Operate the transport movement once or twice to checkthat the magazine is functioning correctly after cleaningand reassembly.Most of the materials from which Hilti tools or appliances are manufactured can be recycled.The materials must be correctly separated before they can be recycled.In many countries,Hilti has already made arrangements for taking back old tools and appliances for recycling.Ask Hilti customer service or your Hilti representative for further information.Hilti warrants that the tool supplied is free of defects inmaterial and workmanship.This warranty is valid so longas the tool is operated and handled correctly,cleanedand serviced properly and in accordance with the HiltiOperating Instructions,and the technical system is main-tained.This means that only original Hilti consumables,components and spare parts may be used in the tool.This warranty provides the free-of-charge repair or re-placement of defective parts only over the entire lifespanof the tool.Parts requiring repair or replacement as aresult of normal wear and tear are not covered by thiswarranty.Additional claims are excluded,unless stringent na-tional rules prohibit such exclusion.In particular,Hiltiis not obligated for direct,indirect,incidental or con-sequential damages,losses or expenses in connec-tion with,or by reason of,the use of,or inability touse the tool for any purpose.Implied warranties ofmerchantability or fitness for a particular purpose arespecifically excluded.For repair or replacement,send the tool or related partsimmediately upon discovery of the defect to the addressof the local Hilti marketing organization provided.This constitutes Hilti’s entire obligation with regard towarranty and supersedes all prior or contemporaneouscomments and oral or written agreements concerningwarranties.73157*57Hilti CorporationLI-9494Schaan Tel.:+423/2342111Fax:+423/Hilti =registered trademark of Hilti Corp.,Schaan W 3197|1212|00-Pos.1|1。
SleepSafe 床垫说明书

good night.sleep safe.Your Checklist for Preparing to Order the Correct SleepSafe ® BedWhen ordering your SleepSafe® Bed, please select the following choices:1. Rail Height: O LOW O MEDIUM O TALL O BASIC (Product has limitations)2. Foundation: O FIXED with Box Spring O FIXED with Bunkie Board O ARTICULATED O HI-LOO MANUAL _Full HiLo _HiLo Only _Articulation Only _ Electric Articulation / Manual HiLo 3. Finish: O OAK O MAPLE O CHERRY O MAHOGANY O ALDERO SOLID COLOR __White __Blue __Green __Red __Yellow __Orange __Purple __Pink __BlackO MULTI COLOR (Please call for a form to select your color combination.) 4. Bed Size: O TWIN O FULL O QUEEN5. Padding: O PADDING AROUND WINDOWS O PADDING OVER WINDOWS O NO PADDINGPADDING COLOR __Cream __Gray __Light Blue __Taupe6. Windows: O CLEAR WINDOWS O MESH WINDOWS O CLEAR/MESH COMBINATION7. Extras: O HEADBOARD WINDOW O FOOTBOARD WINDOWO IV POLE KIT O TUBING CHANNEL ACCESS O DUAL VIEW (Tall Bed)O SleepSafer® EXTENSION O SleepSafer® EXTENSION with ENCLOSURE3629 Reed Creek Drive · Bassett, VA 24055 · Local: 276-627-0088 · Fax: 276-627-0234All SleepSafe® Beds include these items:• Bed Enclosure• Foundation• Premium Mattress • Casters• Assembly Instructions • Tools for Assembly• Standard Shipping Within the Continental US Made in USASafety FirstTHREE MODELS of SleepSafe ® Beds are available in TWIN, FULL and QUEEN sizes with safety rail height protection ranging from 8¾” to 36¼” above the mattress depending on the foundation. Appropriate SAFETY RAIL HEIGHT is based on the activity level of the user, with more active users requiring additional height.SleepSafe® Beds are a proven, ultra-safe solution to address problems with entrapment and falls. Unique in the industry, these beds meet or exceed FDA guidelines on the 7 Zones of Entrapment .SleepSafe® II Medium Bed with Alder finishPremium Memory Foam MattressSleepSafe® Beds use CertiPUR-US ® compliant foam products for our mattresses featuring gel technology. They provide optimized pressure redistribution, rapid heat dissipation, and increases in breathability compared to standard foam. Mattresses support up to 350 pounds. Full details are available on our website.Resists BurrowingThe SleepSafe ® precision-fi t custom mattress fi ts tightly within the bed frame. Even with aggressive compression, it is diffi cult to burrow deeply enough to create an entrapment issue or safety hazard.Clear, break-resistant windows, or our new Please consider the TRANSFER HEIGHT before ordering your bed. It is the distance from the topof the side panel (below the safety rail) to the fl oor. SleepSafe® - LOW - 18½” or 20” Transfer Height SleepSafe® II - MEDIUM - 29½” or 31” Transfer Height SleepSafer® - TALL - 23½” or 25” Transfer Height Easily MovedCasters provide mobilityand can be locked.Safest Yet!SleepSafer® Extension Kit increases bed safety height another 16¾”. The Kit, with or without top enclosure, may be included with a new bed order or can be sent as a retrofi t for most existing beds. Screen mesh windows off er additional ventilation.SleepSafer®SleepSafe® II SleepSafe®Safety Rail Heights – 3 ModelsLOW – This is our classic SleepSafe® bed with safety rails ranging up to 17¼” above the mattress depending on the foundation choice.MEDIUM – The SleepSafe® II provides protection ranging up to 27” above the mattress depending on the foundation choice.TALL – The SleepSafer® provides protection up to 36¼” above the mattress depending on the foundation choice. The SleepSafer® Extension Kit off ers an additional 16¾” of safety rail height when ordered or retrofi tted to your existing SleepSafer® Bed.50¾”57”MEDIUM TALL40¾”SleepSafe® BedSpecifi cationsLow BedSleepSafe®Medium Bed SleepSafe® IITall Bed / ExtensionSleepSafer®SAFETY RAIL HEIGHT Distance from the top of mattress to the top of the safety railFixed Foundation with Box Spring (Choice of settings)12” or 8¾” 17¾”, 14” or 10”31” or 24¾” / 47¾” or 41½” Fixed Foundation with Bunkie Board (Choice of settings)17¼” or 14” 27” or 21¾”36¼” or 30” / 53” or 46¾” Manual Articulating Foundation 15” or 11¾”21”, 17” or 13¼”34” or 27¾” / 50¾” or 44½” Manual HI-LO FoundationLO 11½” to EVEN with rail LO 21¼” to HI 9½” or LO 16” to HI 4¼”LO 30½” to HI 18¾” / LO 47½” to HI 35¾”Articulating Foundation (Choice of settings)15” or 11¾”21”, 17” or 13¼”34” or 27¾” / 50¾ or 44½”Electric HI-LO Foundation (LO to HI Settings)LO 11½” to HI 1¼” below rail LO 21¼” to HI 11” or LO 16” to HI 5¾” LO 30½” to HI 20¾” / LO 47½” to HI 37¼”MATTRESS HEIGHT Distance from the top of the mattress to the fl oor.Fixed Foundation with Box Spring (Choice of settings)23¾” or 27” 28”, 32” or 35½”23¾” or 30”Fixed Foundation with Bunkie Board (Choice of settings)18½” or 21¾”18¾” or 24”18½” or 24¾”Manual Articulating Foundation 20¾” or 24”25”, 28¾” or 32½”20¾” or 27”Manual HI-LO FoundationLO 24¼” to HI 36” LO 24½” to HI 36¼” or LO 29¾” to HI 41½”LO 24¼” to HI 36” Articulated Foundation (Choice of settings)20¾” or 24”25”, 28¾ or 32½”20¾” or 27”Electric HI-LO Foundation - (LO to HI Settings)LO 24¼” to HI 34½” LO 24½” to HI 34¾” or LO 29¾” to HI 40” LO 24¼” to HI 34½”FLOOR TO RAIL HEIGHTDistance from the top of the rail to the fl oor.35¾”45¾”54¾” / 72”OVERALL OUTSIDE DIMENSIONSTwin 42¼” W x 80½” L x 40¾”H 42¼” W x 80½” L x 50¾”H 42¼” W x 80¼” L x 56”H (72¾”H w/Ext.)Full 56” W x 80” L x 40¾”H 56” W x 80” L x 50¾”H 56” W x 80” L x 57”H (72¾”H w/Ext.)Queen65” W x 80” L x 40¾”H 65” W x 80” L x 50¾”H 65” W x 80” L x 57”H (72¾”H w/Ext.)MATTRESS SIZE Width without pads / Width with pads / LengthTwin 38” W / 36” W / 77” L 38” W / 36” W / 77” L 38” W / 36” W / 77” L Full 51” W / 50” W / 77” L 51” W / 50” W / 77” L 51” W / 50” W / 77” L Queen61” W / 60” W / 77” L 61” W / 60” W / 77” L 61” W / 60” W / 77” L UNDER BED FLOOR CLEARANCEStandard Models8”8”7¾”TRANSFER HEIGHT Distance from the topedge of the folded down safety rail to the fl oor.22¼” with Safety Rail On20¾” with Safety Rail Off32” with Safety Rail On30½” with Safety Rail Off26” with Safety Rail On24½” with Safety Rail Off72¾” w/Extension7/17HI -L O FO UN DA TI ONAll ow s c on tro l o f th e fra me he igh t a s w ell as th e h ea d a nd kn ee el ev ati on .Sle ep Sa fe® II sh ow n h ere wi th ou t th e m att res s.FoundationsFIXED – The mattress rests on a fi xed foundation, which can be a box spring or bunkie board, depending on the safety rail protection needed. A bunkie board allows 6” of addtional safety rail height.MANUAL – Off ers four NON-ELECTRIC options: Full HiLo Manual, Manual Hi-Lo only, Manual articulation only, and Electric articulation with Manual Hi-Lo. Cranks are located in front, below the safety rail.ARTICULATED – The mattress rests on an ELECTRIC frame that has both head and knee articulation, operated by a handheld remote. HI-LO – The mattress rests on an ELECTRIC frame that off ers mattress height adjustability as well as head and knee articulation. The surface of the mattress can be adjusted from 22¾” to 38¾” from the floor.AccessoriesDUAL VIEW SAFETY RAILS For more visibility or accessibility, our SleepSafer® TALL bed may be ordered with see-through rails on both sides.SLEEPSAFER® EXTENSION KIT increases bed safety height another 16¾”. The kit, with or without top enclosure, may be included with a new bed order or can be sent as a retrofi t for most existing beds.PADDINGCustom-fi t padding provides protection from contact with the bed frame. The 3/4” high-density foam is covered with easy to clean waterproof nylon. Pads can be ordered to surround the windows or cover the windows. They can be removed for cleaning. IMPORTANT: When required, padding needs to be indicated at the time of ordering your bed. IV ATTACHMENT KIT A stainless steel IV pole, along with an access area, may be orderedwith your bed.SleepSafe II Medium Bedwith Alder FinishBreak-resistant windows are availablefor the headboard and/or footboard.Finish ChoicesSleepSafe® Beds can be fi nished using one of these choices:SOLID COLORSBright, highly durable surfaces off er a suitable option for matching any decor. Colors: White, Blue, Green, Red, Yellow,Orange, Purple, Pink and Black.OAKMAPLECHERRYMULTICOLOR MIX & MATCHYou can mix and match the colors for a truly unique bed. Please call for details!SleepSafe II Medium Bed with Oak FinishMAHOGANYALDER12 34FDA RegisteredSleepSafe® II - Medium Bed Full Size - CherryThe New SleepSafe ® Manual Safety Bed.RETHINKING THE WAY SAFETY BEDS CAN WORK.Manual Foundation no w offers four choices with easy to operate hand cranks.UP FRONT CONTROL AND VERSATILITY.CONTROLS KNEE ELEVATION1) Manual Hi-Lo - Hi-Lo Foundation with Articulation.This will raise and lower the mattress height and raise and lower the head and knee section of the bed by using the three cranks.2) Manual Flat - Hi-Lo Foundation without Articulation.This will raise and lower the mattress height by using one crank located in the center of the front panel of the bed.3) Manual Electric - Articulating Foundation with Manual Hi-Lo. This will raise and lower the head and/or knee section of the bed electrically with remote. Will raise and lower mattress manually.4) Manual Plus - Articulating Foundation without Hi-Lo.This will raise and lower the head and/or knee section of the bed by using two cranks located in the front panel of the bed.SleepSafe® Beds is a domestic USA manufacturer of custom safety beds, featuring removable safety side rails, designed to address the issues of falls and entrapment for those with special needs. Models include SleepSafe®-Low Bed, SleepSafe® II- Medium Bed, and SleepSafer®- Tall Bed , offering progressively more safety rail to mattress height.SleepSafe® Beds are built to order, offering twin, full or queen size; fixed, articulating or HiLo foundations; padding; wood and color choices, and other helpful options. SleepSafe® Beds help those with special needs get a safe, restful sleep with peace of mind for their caregivers.CONTROLS HEAD ELEVATIONCONTROLS MATTRESS HEIGHTFDA RegisteredWe’re here to help.SleepSafe® Beds is a domestic USA manufacturer of custom safety beds, featuring removable safety side rails, designed to address the issues of falls and entrapment for those with special needs. Models include SleepSafe®-Low Bed, SleepSafe® II- Medium Bed, and SleepSafer®- Tall Bed, offering progressively more safety rail to mattress height.SleepSafe® Beds are built to order, offering twin, full or queen size; fixed, articulating or HiLo foundations; padding; various finishes, and other helpful options.SleepSafe® Beds help those with special needs get a safe, restful sleep with peace of mind for their caregivers.SleepSafe II® - Medium Bed - Alder - Both Safety Rails Up- Manual Crank for HiLo control of mattress height - 31.5” Transfer HeightSleepSafe II® - Medium Bed - Multi-Color (Customer’s Choice)- Both Safety Rails Up - 31.5” Transfer HeightSleepSafer®- Tall Bed - Cherry - Shows Extension and Top- Extension Adds 16.75” to Safety Rail Height - Shows optional screened mesh windows - Extension may be ordered with or without Top.- Safety Rail Flip Open Option is Available - 25.5” Transfer HeightSleepSafe® - BASIC Bed - Maple - One Safety Rail Up, One Down - Bunkie Board Fixed Foundation - 21.25” Transfer HeightSleepSafe® - Low Bed - Oak - One Safety Rail Up, One Down- Manual Crank for Head and Knee Articulation - Screened Mesh WindowsSleepSafe II® - Medium Bed - Oak - Padding surrounding clear windows - IV Pole with Medical Tubing Access - One Safety Rail Up, One Down - 31.5” Transfer Height。
婷唯远红外线保健床垫使用说明

婷唯远红外线保健床垫使用说明一、婷唯远红外线保健床垫简介婷唯远红外线保健床垫是一款结合了远红外线技术的床垫,能够为用户提供舒适的睡眠环境,并具备促进健康的功效。
远红外线是一种波长较长的电磁辐射,具有渗透力强、热效应好等特点,可以促进血液循环、增强免疫力、舒缓疲劳等。
二、婷唯远红外线保健床垫的使用方法1. 打开包装,取出床垫并展开。
在室内通风处放置一段时间,以去除新品的气味。
2. 将婷唯远红外线保健床垫铺在床上,确保床垫平整、牢固。
将床单铺在床垫上,以增加舒适度。
3. 调整床垫硬度。
婷唯远红外线保健床垫采用可调节硬度设计,用户可以根据自己的需求选择适合的硬度。
调节硬度的方法是,在床垫下方的调节开关上旋或下旋,以增加或减少床垫的硬度。
4. 预热床垫。
在使用床垫之前,建议预热床垫10-15分钟,以保证床垫表面温度均匀。
5. 躺下休息。
将身体舒展至床垫上,感受婷唯远红外线的功效。
建议使用者每天保持至少6-8小时的睡眠时间,以达到最佳的保健效果。
6. 定期清洗。
为了保持床垫的清洁和卫生,建议定期清洗床单,并定期将床垫擦拭干净。
三、婷唯远红外线保健床垫的注意事项1. 婷唯远红外线保健床垫仅适用于家庭日常使用,禁止商业用途。
2. 床垫表面为红外线发热面,禁止直接接触尖锐物品,以免损坏。
3. 使用过程中如有异味、发热不均匀等异常情况,请立即停止使用,并联系售后服务。
4. 婷唯远红外线保健床垫适用于室内使用,禁止在潮湿环境下使用。
5. 床垫不可折叠,避免受到强烈撞击或压力。
6. 婷唯远红外线保健床垫需要接通电源才能正常工作,请确保床垫的电源线安全可靠,并避免长时间使用过程中电源线受损。
7. 婷唯远红外线保健床垫不适用于心脏病、高血压、糖尿病等患者,以及孕妇和婴幼儿,使用前请咨询医生意见。
8. 婷唯远红外线保健床垫使用过程中如出现不适或过敏等症状,请停止使用并及时就医。
总结:婷唯远红外线保健床垫是一款具备远红外线技术的床垫,通过其独特的功能,可以为用户提供舒适的睡眠体验,并具备促进健康的功效。
床垫使用说明书
床垫使用说明书一、产品介绍本说明书旨在为床垫用户提供全面、实用的使用指导,以确保您能充分享受本产品带来的舒适体验。
本床垫采用优质材料制作,经过精心设计和制造,具有出色的支撑性能和舒适度。
二、包装与外观床垫的包装为一个坚固的纸箱,外观简洁大方。
在纸箱上印有床垫资料。
三、安装与调试1. 打开包装,将床垫取出,确保无损坏。
2. 将床垫放置在床架上,确保放置平稳。
3. 若需调整床垫位置,请根据个人需求进行微调。
四、使用与保养1. 请定期翻转和转动床垫,以确保床垫均匀磨损。
建议每隔两星期翻转一次,以延长床垫的使用寿命。
2. 为保持床垫的清洁和卫生,建议定期更换床单、被套等床上用品。
3. 避免在床垫上使用尖锐物品或重物,以免损坏床垫表面。
4. 若发现床垫有污渍或灰尘,请用软布擦拭干净。
5. 若发现床垫有异常声音或松动,请及时进行维修或更换。
五、注意事项1. 请勿在潮湿的环境中使用本产品,以免受潮损坏。
2. 请勿在高温环境中使用本产品,以免引起火灾或烫伤等危险。
3. 请勿将本产品暴露在阳光下,以免造成褪色或变形。
4. 请勿将本产品放在易燃易爆物品附近,以免发生火灾或爆炸等危险。
六、清洁与维护床垫的外罩可拆下清洗,具体步骤如下:1. 从床垫两侧将绑带松开,使外罩与床垫脱离。
2. 轻轻拉动外罩的上部或下部,使其完全脱离床垫。
3. 将外罩翻转,彻底清洗干净,注意不要损坏外罩的材质和细节设计。
4. 清洗完毕后,将外罩重新套在床垫上,并绑好绑带。
以上就是简要的床垫使用说明,希望对您有所帮助。
床档使用方法及注意事项
床档使用方法及注意事项使用床垫的方法和注意事项有很多,以下是其中的50条并展开详细描述:1. 选择适合身体需求的床垫。
不同身体状况需要不同的支撑,可以根据个人习惯和健康状况选择硬度和材质合适的床垫。
2. 经常翻转床垫。
为了延长床垫的使用寿命,建议每隔一段时间将床垫翻转一次,使压力得到均匀分散。
3. 使用床垫隔板。
在使用床垫的时候,可以考虑使用床垫隔板,以免床垫直接接触地板或者床架,保持通风和干爽。
4. 遇到潮湿的环境,及时晾晒床垫。
床垫长时间处于潮湿环境下容易滋生霉菌,所以要定期将床垫取出晾晒,以保持干爽。
5. 使用床垫垫套。
床垫上使用床垫垫套,可以有效保护床垫表面,减少污渍和异味,同时也更易清洗。
6. 避免跳跃在床垫上。
长时间跳跃在床垫上会缩短床垫的使用寿命,增加损坏的可能性,应该避免这样做。
7. 定期清洁床垫。
床垫表面容易积聚灰尘和细菌,应该定期使用吸尘器和清洁剂清洁床垫,保持卫生。
8. 避免将液体淋漓在床垫上。
如果床垫不慎被液体浸湿,应及时清洁并晾干,以免细菌滋生和发霉。
9. 根据季节调整床垫。
夏季可考虑使用透气性好的床垫,冬季可以在床垫上加厚床垫套,以保持温度的舒适。
10. 避免长时间在床上使用电子产品。
长时间使用电子产品会造成床垫变形和损坏,建议减少在床上使用电子产品的时间。
11. 避免将宠物放在床垫上。
宠物的体毛、皮屑和其他分泌物容易污染床垫,应该避免宠物进入床垫范围。
12. 考虑使用床垫加热器。
在寒冷的季节里,可以考虑使用床垫加热器,以保持床垫的干燥和温暖。
13. 避免将尖锐物品放在床垫上。
尖锐物品有可能刺破床垫表面,所以不要将这些物品放在床垫上。
14. 遵循床垫的使用说明。
不同品牌和型号的床垫有不同的使用说明,应该按照说明书上的建议使用。
15. 找到最佳的睡眠姿势。
根据个人习惯和身体状况,找到最适合自己的睡眠姿势,以减轻身体压力。
16. 睡前放松身心。
在上床睡觉前,可以通过冥想、音乐、阅读等方式放松身心,以提高睡眠质量。
华氏舒适性床床垫用户指南书说明书
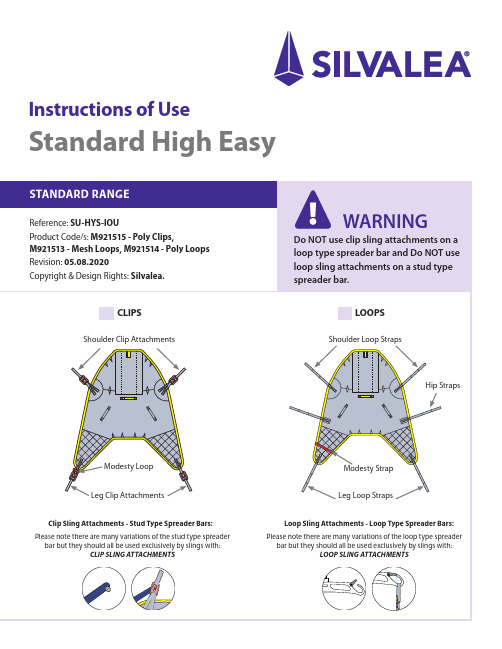
Instructions of Use Standard High EasySling Application in Chair:With sling label facing outwards glide sling down back of patient.Take the leg sections of the sling and place them down each side of the patient.Fold the sling in half with the label inside the sling. Turn patient on their side and place folded edge of the sling against spine areaOpen sling out and lay half over the patient then roll up the other half of the sling underneath against the spine area. Thread leg section under the leg.11223Sling Application on Bed:Glide each leg section under each thigh. Ensure that the leg sections are not twisted. Connect leg straps together by taking the right leg strap and thread through the modesty loop.3Roll patient onto the opposite side and pull through the underside of the sling. Lay patient flat on their back and position central to the sling.With the leg straps threaded through the modesty loop, attach the straps to the lower stud on the spreader bar. When securing the clips there should be a click sound to confirm the clip is located correctly.Fit the shoulder strap clips to the spreader bar. As before when securing the clips there should be a click sound to confirm the clip is located correctly. Once you are happy that the sling is fitted correctly you can now commence the transfer.NOTE: Once the sling takes the weight of the patient you may need to re-adjust the position of the sling for the patients comfort. Lower the patient back onto the chair/bed to make any adjustments before continuing the transfer.Ensure the leg sections are brought together bythreading the leg paddle through the modesty strap. This gives a closed leg position.Once the sling has been fitted correctly to your patient, attach the loop straps to the spreader bar of the lift. Color coding on the pick up loops are provided for ease of reference and position. You can now commence the transfer.NOTE: Once the sling takes the weight of the patient you may need to re-adjust the position of the sling for the patients comfort. Lower the patient back onto the chair/bed to make any adjustments before continuing the transfer.2211Attaching a Clip Sling: (stud spreader bar)Attaching a Loop Sling: (loop spreader bar)General Instructions: WarningDo not attempt to transfer the patient untilall appropriate sling attachments are secured to the lift spreader bar and you are satisfied that the sling is the correct style, size and fit for the patient. Correct sizing of a sling is important as a sling that is too large could cause the patient to slip through the aperture.While every attempt is made to instruct a safe move you must conform to the current moving and handling procedures/regulations. If in any doubt, consult your Moving and Handling Advisor.Service Label & Sling Checks:All products should be checked each time they are used for any signs of deterioration.The service label is a visual guide to the product’s check. Please conduct a thorough sling check in line with current safety requirements in your country.If in doubt consult your distributor for current sling checking protocols.A risk assessment must be carried out to ensure that the correct size and style of sling has been met before use.Pre-use sling check list:• braiding/straps for deterioration and fraying• material for holes/snagging• compatibility with the lift• safe working load of both the lift and sling/ product (if applicable)• label is legibleRemove from use immediately if there are any signs of deterioration to the sling or straps or the labelis illegible.Washing Guidelines:• Follow laundry temperatures for washing and drying detailed on the product label.• Always ensure that all Hook & Loop fastenings are fully closed before washing.• All products should be laundered using non- biological detergents.• DO NOT IRONProduct Care:• Ensure that any Hook & Loop fastenings are closed when not in use. This will prevent unnecessary snagging of the sling material and prevent clogging of the Hook & Loop.• Launder regularly.• Store products in a suitable dry clean place.• Silvalea will accept no liability for any additions/ adaptations made to our products that have NOT been carried out by ourselves. Doing so may cause serious injury or death to the patient.Drying Guidelines:• Follow the recommended drying temperaturesas stated on product label.• Overheating a textile product can cause deterioration in the material components.• Do not place the product on a convector heateror steam pipes.。
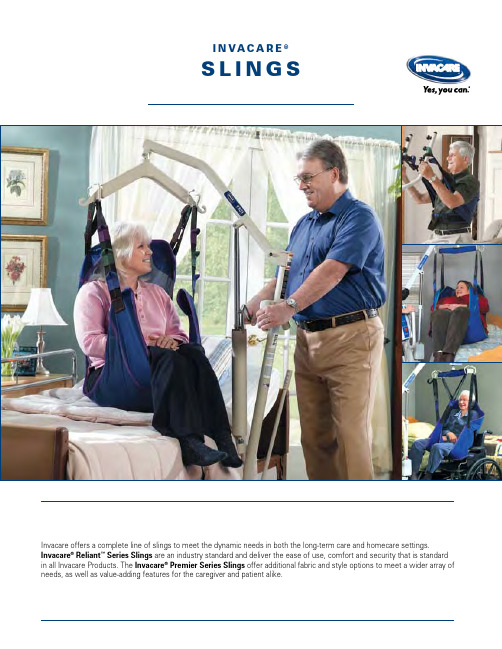
Invacare Reliant和Premier Series患者搬运床床垫说明书
I n va c a r e®S l I n g SInvacare offers a complete line of slings to meet the dynamic needs in both the long-term care and homecare settings. Invacare® Reliant™ Series Slings are an industry standard and deliver the ease of use, comfort and security that is standard in all Invacare Products. The Invacare® Premier Series Slings offer additional fabric and style options to meet a wider array of needs, as well as value-adding features for the caregiver and patient alike.Complete instructions for lift usage and sling procedures are found in the Invacare Operating Manual. Only Invacare slings and accessories should be used on Invacare lifts.Invacare ® Reliant ™ Slings come in an array of styles to meet a variety of client needs. Reliant slings feature a unique, fully padded fabric that forms a soft yet supportive surface. The soft, brushed lining helps prevent sliding for ultimate comfort and skin protection, and the stretch-resistant feature helps the slings hold their shape for superior support and ease of positioning. For clients and caregivers alike, Invacare Reliant slings are designed with comfort and safety in mind.FeaturesSling size and fit can vary significantly depending on patient weight and girth. These are general guidelines. Consult physician before sling selection.Washing instructions are on each sling label. Washing temperatures should not exceed 180˚ F. Air-dry or dry at low temperatures.All slings are constructed of polyester fabrics which can be used in wet or dry environments.All Invacare ® slings were designed specifically for use with Invacare ® brand lifts for proper usage andoptimal performance. To receive the maximum benefits from Invacare products, please see the size guide, product specs and operator manuals for solutions that best suit your needs.Invacare ® Reliant ™ Full-Body Slings Invacare ® Reliant ™ Full-Body Slings with Commode Opening Invacare ® Reliant ™ Full-Body Slings with Commode Opening Invacare ® Reliant ™ Toileting Sling with Belt1.3.4.2.3412Full Body Sling With/Without Commode Opening (CO)An easy sling to use while transferring the patient from the bed to a wheelchair, toilet or shower chair or from floor to bed. It offers total head and neck support and the padded lower section provides additional under-thigh comfort and support. Use the full body sling for patients who are totally dependent, partially-dependent, non-weight bearing, very heavy or have limited head control. Use this sling for amputee patients (in a reclined position).Compatible with the following lifts: Invacare ® I-Lift ® Series Lifts Invacare ® I-Transia ® Ceiling Hoist Invacare ® Reliant ™ 450, 600 Lifts Divided Leg SlingThe divided leg sling is a secure, easy-to fit general purpose sling, designed for the majorityof sling users. Use the divided leg sling for patients who are totally dependent, partiallydependent, non-weight bearing, very heavy or have limited head control. Use this sling when transferring the patient from the bed to a wheelchair, recliner or shower chair.The large opening also accommodates patible with the following lifts: Invacare ® I-Lift ® Series LiftsInvacare ® I-Transia ® Ceiling Hoist Invacare ® Reliant ™ 450, 600 Lifts SIZE A B C D E Weight Model #/MaterialCapacityM 41.5" 53.3" 23.9" N/A 43.7" 450 lb. R110/M esh L 45.5" 58.3" 26.3" N/A 47.7" 450 lb. R111/M esh XXL 45" 55" 45" N/A 45" 600 lb. R140/M esh M 41.5" 53.3" 23.9" 6" 43.7" 450 lb. R114/M esh w/CO L 45.5" 58.3" 26.3" 7" 47.7" 450 lb. R115/M esh w/CO XL 45.5" 63.2" 26.3" 7" 47.7" 450 lb. R116/M esh w/CO XXL 45" 55" 45" 7" 45" 600 lb. R141/ Mesh w/CO M 41.5" 54.7" 23.2" N/A 41.8" 450 lb. R112/Solid FabricL 45.5" 60.3" 26.3" N/A 45" 450 lb. R113/Solid Fabric XL45.5"65.3"26.1"N/A45"450 lb.R117/Solid FabricSIZE A B C Weight Model # CapacityS 33" 29.16" 12" 450 lb. R100P M 37.5" 35.66" 17" 450 lb. R100L 41"40.66" 20.5"450 lb.R101XL44.5" 43.16" 22.6" 450 lb. R102ACEBA CBDW e i g h t i n P o u n d sGeneral Sling Sizes*Color/Weight ChartS M L XL XXLNavy Purple Green Blue Black*Color/weight chart is intended as a guideSolid Fabric Toileting SlingThe Toileting Sling offers superb access for quick toileting and hygiene. It is easy to place and remove in a bed or chair situation. The fully padded design supports the back, offers under thigh comfort and allows for removal of clothing. Color coded positioning straps help align the sling properly on the hanger bar. Note: This sling requires the patient to have FULL head and neck control.Compatible with the following lifts: Invacare ® I-Lift ® Series Lifts Invacare ® I-Transia ® Ceiling Hoist Invacare ® Reliant ™ 450, 600 Lifts SIZE A B C Weight Model # Capacity L36"44.7"20.5"450 lb.R121A BCTransfer Sling (use with Stand-Up Lift)Transport slings are for transferring patients with minimal weight-bearing capacity, whohave head and neck control, are cooperative, can sit up on the edge of the bed (with or without assistance) and are able to bend at the hips, knees and ankles. Use the R134 and R136 transport sling for transferring patient from bed to chair, chair to car or general in-room transport. Do not raise patient to a full standing position while using the transport patible with the following lifts:Invacare ® Reliant ™ 350 Lift Invacare ® Get-U-Up ™ Lift A CBSIZE A B C Weight Model # Capacity One Size 34"13.5"9"440 lb.R134XL46" 13.5" 10" 440 lb. R136Standing Sling (use with Stand-Up Lift)Standing slings are for patients who are partially dependent, have at least 60% weight bearing capacity, have head and neck control, are cooperative, can sit up on the edge of the bed (with or without assistance) and are able to bend at the hip, knees and ankles. Use the R130 or R131 standing slings for standing assistance, quick toileting, weight bearing practice and for transferring patient from bed to chair, or chair to patible with the following lifts:Invacare ® Reliant ™ 350 Lift Invacare ® Get-U-Up ™ Lift A BSIZE A B Weight Model # Capacity One Size 60"16"440 lb.R130XL84" 16" 440 lb. R131Stand Assist SlingDesigned for use with the Invacarestand up lifts, the Stand Assist Sling offers a comfortable and safe transfer for those who have some weight bearing ability, but cannot standindependently. The sling is well-padded and features non-slip material on the side that touches the patient to assure a comfortable transfer patible with the following lifts:Invacare ® Roze ™ Lift Invacare ® Reliant ™ 350 Lift Invacare ® Get-U-Up ™ Lift Transfer Stand Assist SlingAlso designed for optimal use with the Invacare stand up lifts, this high-quality sling provides simple seated transfer for patients with minimal weight bearing ability.Compatible with the following lifts:Invacare ® Roze ™ Lift Invacare ® Reliant ™ 350 Lift Invacare ® Get-U-Up ™ LiftThe Invacare ® Premier Series Slings balance solutions for any transfer. Invacare says this with confidence because these slings were developed in collaboration with Occupational and Physical therapists. Invacare Premier slings are available in a wide variety of styles and can be adjusted to ensure a comfortable and secure fit for the patient. Clearly labeled slings and easy attachment points make it simple for the caregiver to quickly attach the sling and lift the patient.CBABCABMo d el #/Material SIZE A B C Waist Weight Polyester Fabric Capacity S 10.2" 33.1" 34.7" 46.4" 450 lb. 2484685M 13.0" 35.3" 46.1"55.1"450 lb. 2484686L 14.2" 37.4" 50.0" 59.1" 450 lb. 2484687XL14.2"40.2"71.3" 80.3"450 lb.2484688Model #/MaterialSIZE A B C Waist Weight Polyester Fabric Capacity S 33.9" 33.1" 9.5" 46.4" 450 lb. 2484689M 40.2" 35.3" 10.2" 55.1" 450 lb. 2484690L 46.5" 37.4" 13.0" 59.1" 450 lb. 2484691XL48.5" 40.2" 13.8" 80.3" 450 lb. 2485117D。
Accora 400 600床垫说明书
IntroductionDEALER: These instructions MUST be given to the user of the product.USER: BEFORE using this product, read this manual and save for the future reference. GeneralSignal words are used in this manual and apply to hazards or unsafe practices which could result in personal injury or property damage. See the information below for definitions of the signal words.WARNING: Warning indicates a potentially hazardous situation which, if not avoided, could result in death or serious injury.CAUTION: Caution indicates a potentially hazardous situation which, if not avoided, may result in property damage or minor injury or both. Product DescriptionThe Accora 400 and 600 mattresses are multi-tiered pressure redistribution mattresses with high density head / torso sections. The mattress incorporates an air channel heel section, firm mattress edges and a 4 way stretch top cover. Clinical ApplicationsAccora 400 is indicated for users up to 350 lbs. Accora 600 is indicated for users up to 450 lbs. Suitability for the mattress must be assessed by a competent practitioner.Instructions for use1. Remove all packaging.2. Lay the mattress onto the bed frame, ensuringthere are no sharp edges which may tear the cover.3. Do not use the mattress without a cover as itprovides a protective barrier which helpsextend the life of the product. 4. Ensure the mattress is orientated with the silkscreen text facing upwards and the feetgraphic at the foot end of the bed. DecontaminationTo clean the mattress1. Remove all bedding.2. Clean the top and bottom covers with anorganic cleaner or soapy water.3. Wipe down the mattress unit with a dampcloth, pre-soaked with warm water containinga mild detergent. Approved intermediate leveldisinfectants may be used according to thecover material.4. After cleaning, please avoid dust andproximity to dusty areas. All parts should beair dried thoroughly before use.IFU-FM1-001EN REV 03IFU-FM1-001EN REV 03 MaintenanceInspectionThe internal and external parts for the mattress must be inspected at least every 3 months for damage and wear. Remove the mattress from service and replace all damaged parts. Inspection RecordAn inspection record should be kept recording the Inspection date, Name of Inspector, Whetherdamage found, Date removed from service, repair date, returned to service date. Compression Test1. Remove the bedding from the mattress.2. Measure the thickness of the mattress(mattress depth) in an uncompressed area. 3. Lay a straight edge over the compressed areaof the mattress. Measure the depth of the compressed area (compression depth). 4. Use the following formula to determine theamount of compression (compress percentage):DisposalDisposal of the mattresses should be inaccordance with local regulations and facility standard operating procedures.Limited WarrantyThis warranty is extended only to the original purchaser/user of our products.This warranty gives you specific legal rights and you may also have other legal rights which vary from state to state. Accora warrants the mattress and cover when purchased new and unused to be free from defects in materials,workmanship, and assembly for the following time periods:If within such warranty period any such product shall be proven to be defective, such product shall be repaired orreplaced with new or refurbished product components, or are fund corresponding to the proper service time shall be offered, at Accora option. This warranty does not include any labor or shipping charges incurred in replacement part installation or repair of any such product. Moreover, the warranty period of their paired or replaced product shall terminate with the termination of the warranty period for the original product component.For warranty service, please contact the dealer from whom you purchased your Accora product. In the event you do not receive satisfactory warranty service, please write directly to Accora at the address on the back cover. Provide the dealer’s name, address, model number, and the date of purchase, indicate nature of the defect and, if the product is serialized, indicate the serial number.Accora will issue a return authorization. The defective unit or parts shall be cleaned using disinfectant prior to return and must be returned for warranty inspection using the serial number, when applicable, as identification within thirty days of return authorization date. DO NOT return products to our factory without our prior consent. C.O.D. shipments will be refused; please prepay shipping charges.LIMITATIONS AND EXCLUSIONS: THE FOREGOING WARRANTY SHALL NOT APPLY TO SERIAL NUMBERED PRODUCTS IF THE SERIAL NUMBER HAS BEEN REMOVED OR DEFACED; PRODUCTS SUBJECTED TO NEGLIGENCE, ACCIDENT, IMPROPER OPERATION, MAINTENANCE OR STORAGE; DAMAGE CAUSED BY ANY EVENTS OUTSIDE THE CONTROL OF ACCORA INCLUDING, BUT NOT LIMITED TO: DAMAGE FROM CARELESSNESS, ACCIDENTAL DAMAGE, DAMAGE FROM SHARP OBJECTS, TEARS, NEGLIGENCE (WHETHER WILLFUL OR NOT), TAMPERING, DAMAGE FROM FIRE, DAMAGE OCCURRING IN TRANSIT AFTER DELIVERY BY ACCORA OR EXCESSIVE WEAR AND TEAR, INCLUDING BUT NOT LIMITED TO THE FAILURE TO FOLLOW CLEANING INSTRUCTIONS, USE OF INAPPROPRIATE CLEANING COMPOUNDS AND FAILURE TO ENSURE THAT ANY PRODUCT IS THOROUGHLY DRIED BEFORE TURNING OR FLIPPING IT OVER; DAMAGE RESULTING FROM CONTAMINATION FOLLOWING DAMAGE TO THE COVER AND FAILURE TO REPLACE IT, CONTAMINATION DUE TO INCORRECT STORAGE OR FAILURE TO INSPECT THE INTERIOR OF THE PRODUCT AS STATED HEREIN, OR DAMAGE DUE TO UNUSUAL CONTAMINATION OR INFECTION, SPILLAGE OR STAINING, OR USE OF ABRASIVE, CORROSIVE OR ANY SUCH SIMILAR DAMAGING SUBSTANCE; DAMAGE DUE TO UNDERTAKING ANY ACTION OR PROCEDURE USING THE PRODUCT OUTSIDE ITS NORMAL AND INTENDED USE; DAMAGE RESULTING FROM FAILURE TO REPLACE DAMAGED PARTS PROMPTLY OR DAMAGE DUE TO INTERIOR PARTS BEING USED WITHOUT THE COVER, BEING USED WITH A DAMAGED COVER, OR WITH THE COVER BEING INCORRECTLY FITTED; DAMAGE WHEN ANY PARTS OF THE PRODUCT ARE USED AS PART OF, OR IN CONJUNCTION WITH, ANY OTHER PRODUCT OR PIECE OF EQUIPMENT EXCEPT AS SPECIFICALLY PROVIDED FOR BY ACCORA; DAMAGE NOT PROVEN TO THE SATISFACTION OF ACCORA TO BE DUE TO DEFECTIVE MATERIALS, WORKMANSHIP OR ASSEMBLY; OR PRODUCTS MODIFIED WITHOUT ACCORA EXPRESS WRITTEN CONSENT INCLUDING, BUT NOT LIMITED TO MODIFICATION THROUGH THE USE OF UNAUTHORIZED PARTS OR ATTACHMENTS OR PRODUCTS DAMAGED BY REASON OF REPAIRS MADE TO ANY COMPONENT WITHOUT THE SPECIFIC CONSENT OF ACCORA. IT IS A CONDITION OF THIS WARRANTY THAT THE FOLLOWING IS COMPLIED WITH:1) ALL INSTRUCTIONS FOR CLEANING AND MAINTENANCE OF THE PRODUCT ARE ADHERED TO. 2) THE INTERNAL AND EXTERNAL PARTS OF ANY PRODUCT ARE INSPECTED AT LEAST ONCE EVERY THREE (3) MONTHS FOR ANY DAMAGE AND WEAR. ALL DAMAGED PARTS ARE REPLACED IMMEDIATELY WITH THE APPROPRIATE REPLACEMENT PART, OR THE PRODUCT IS IMMEDIATELY TAKEN OUT OF SERVICE UNTIL THE REPLACEMENT PART HAS BEEN OBTAINED AND THE DAMAGED PART HAS BEEN REPLACED.THE FOREGOING EXPRESS WARRANTY IS EXCLUSIVE AND IN LIEU OF ANY OTHER EXPRESS WARRANTIES WHATSOEVER, WHETHER EXPRESS OR IMPLIED, INCLUDING THE IMPLIED WARRANTIES OF MERCHANTABILITY AND FITNESS FOR A PARTICULAR PURPOSE AND THE SOLE REMEDY FOR VIOLATIONS OF ANY WARRANTY WHATSOEVER, SHALL BE LIMITED TO REPAIR, REPLACEMENT, OR REFUND OF THE DEFECTIVE PRODUCT PURSUANT TO THE TERMS CONTAINED HEREIN. THE APPLICATION OF ANY IMPLIED WARRANTY WHATSOEVER SHALL NOT EXTEND BEYOND THE DURATION OF THE EXPRESS WARRANTY PROVIDED HEREIN. ACCORA SHALL NOT BE LIABLE FOR ANY CONSEQUENTIAL OR INCIDENTAL DAMAGES WHATSOEVER AND DISCLAIMS ANY LIABILITY BEYOND THE INITIAL PURCHASE PRICE OF THE PRODUCT. THIS WARRANTY SHALL BE EXTENDED TO COMPLY WITH STATE/ PROVINCIAL LAWS AND REQUIREMENTS.Technical DataMaterialsDimensionsIFU-FM1-001EN REV 03。
Protekt Aire Supreme Support 自调整空气 泡沫床垫说明书
Operation ManualFORProtekt® Aire Supreme Support Self-Adjusting Air/Foam Mattress with Optional Alternating Pressure PumpTable of ContentsIntroduction (4)Indications/Contraindications (4)Risks and Precautions (4)Preparation for Use (5)Mattress Installation (5)Patient Placement (5)To Use as a Static System (6)To Use as an Alternating Pressure System (6)Care and Cleaning (7)Preventative Maintenance Schedule (8)Troubleshooting (9)Specifications (10)Warranty (11)IntroductionThis manual is intended to be used for the initial set up and proper maintenance of the Protekt® Aire Supreme Support Self-Adjusting Air/Foam Mattress with Optional Alternating Pressure Pump. It is important that you read and review these instructions in their entirety and consult with your healthcare professional if there are any questions. Carefully review the Indications and Risk and Precautions sections prior to placing a patient on any Protekt® Aire Supreme Support Self-Adjusting Air/Foam Mattress.IndicationsThe Protekt® Aire Supreme Support Self-Adjusting Air/Foam Mattress System (94001) provides non-powered zoned pressure redistribution, and the Protekt® Aire Supreme Support Self-Adjusting Air/Foam Mattress with Optional Pump (94001-P) provides alternating pressure therapy. Both are indicated for the prevention and treatment of any and all stage pressure ulcers when used in conjunction with a comprehensive pressure ulcer management plan.The Protekt® Aire Supreme Support Self-Adjusting Air/Foam Mattress support surface consists of 10 air cylinders that run laterally underneath the body and are contained in a foam cavity. On top of the air cells is a high-density foam coupled with a 1" thick gel infused memory foam layer zoned for pressure redistribution. The heel section is sloped to further redistribute pressure for the sensitive heel areas. Both the self-adjusting air cylinders and the foam top surface aid in pressure redistribution and in maintaining low interface pressures throughoutthe surface.Risk and PrecautionsTransfer: Standard precautions should be taken during patient transfer.Side Rails and Restraints:WARNING: Use or non-use of restraints, including side rails, can be critical to patient safety. Serious injury or death can result from the use (potential entrapment) or non-use (potential patient falls) of side rails or other restraints. Monitor patients frequently to guard against patient entrapment and/or falls.Patient Migration: Specialty surfaces have different shear and support characteristics than conventional surfaces and may increase risk of patient movement, sinking and/or migration into hazardous positions of entrapment and/or inadvertent bed exit. Monitor patients frequently to guard against patient entrapment and/or falls.Shock Hazard –DANGER!: When used as powered system, do not remove control unit case cover. Risk for electrical shock may occur if control unit is disassembled. Refer to qualified service personnel.Fluids: When used as a powered system, avoid spilling fluids on control unit. Fluids remaining on controls can cause corrosion, which may cause components to fail or operate erratically, possibly producing potential hazards for patient and staff. If spills do occur, unplug the unit immediately and clean fluid from control unit wearing rubber gloves while it is unplugged to avoid any possibility of shock. Once fluid is removed, check operation of components in area of spill.No Smoking in Bed: Smoking in bed can be dangerous. To avoid the risk of fire, smoking in bed should never be allowed.Disposal: At the end of useful life, dispose of waste according to local requirements.Preparation For Use1. Open shipping container and check for damages which may have occurred en route. DONOT USE SHARP INSTRUMENTS TO OPEN BOXES. DAMAGE TO MATTRESS COULD RESULT.2. Remove Protekt® Aire Supreme Support Self-Adjusting Air/Foam Mattress from protectiveplastic cover.The mattress may appear wrinkled when unpacked. To remove wrinkles, allow mattress up to24 hours to accommodate; see Troubleshooting table for more information. Wrinkles will notaffect inflation or function. Mattress may be used immediately if needed3. Check mattresses surface for tears or cracking; do not use if tears or cracking are present. Ifany damages exist, please contact your local provider immediately.4. If re-installing the Protekt® Aire Supreme Support onto a new frame or for a new patient,check mattress surface for staining and soiling; clean and/or disinfect as required (see Care and Cleaning section).5. Level bed and lock brakes.6. Remove existing mattress from bed frame.Mattress Installation1. Position mattress on bed frame with logo facing up and heel slope section aligned at the footof the bed.2. Ensure mattress is properly positioned with no gaps between mattress and bed frame or siderails. Always use a standard healthcare bed frame with safeguards or protocols that may be appropriate. Frame and side rails must be properly sized relative to the mattress to help minimize any gaps that might entrap a patient’s head or body.Patient PlacementIt is recommended that all sections of this manual be read prior to patient placement. Carefully review the Contraindications, Risks and Precautions and Mattress Installation sections prior to placing a patient on any Protekt® Aire Supreme Support Self-Adjusting Air/Foam Mattress. The Protekt® Aire Supreme Support Self-Adjusting Air/Foam Mattress ships as an open system (the pump needs to be connected). The following are the instructions for using the system based on desired therapeutic function.To Use as a Non-Powered Self Adjusting Air System1. Transfer patient following all applicable safety rules and institution protocols.2. Center patient side-to-side and head-to-foot on Protekt® Aire Supreme Support Self-Adjusting Air/Foam Mattress.3. Air in alternating cylinders will level out providing a static air surface adjusting to the patient.4. NOTE - If the tubes are left unattached to a pump, the Protekt® Aire Supreme Support Self-Adjusting Air/Foam Mattress will operate as an open air system with air going in and out based on patient movement and will function as a Non-Powered Self Adjusting Air System To Use as an Alternating System – Protekt 3000 Pump Option1. At the foot end of the mattress, unzip the lower zipper and remove the tubing.2. Place pump on a horizontal surface or suspend on the end of bed frame with built-in hanger.3. Connect pump to hoses extending from the mattress. Ensure air hoses are not kinked andwill not be pinched by any articulated bed mechanisms.4. Ensure green Power switch is in the OFF position.5. Plug pump into a properly grounded wall outlet. (Verify power to this outlet is not controlled bya wall switch).6. Press green Power switch to the ON position. Air will begin to flow into mattress.7. Yellow LED indicates low air pressure; green LED indicates proper air pressure has beenreached and mattress is ready for patient placement.8. Rotate the comfort control knob on the control unit clockwise to increase the airflow forAlternating Therapy.9. Rotate the comfort control knob on the control unit counter-clockwise to reduce the airflow forAlternating Therapy.Ensure control unit hoses are properly connected to mattress for the desired function.To Use as an Alternating System - Protekt 4000 Pump Option1. At the foot end of the mattress, unzip the lower zipper and remove the tubing.2. Place pump on a horizontal surface or suspend on the end of bed frame with built-in hanger.3. Connect pump to hoses extending from the mattress. Ensure air hoses are not kinked andwill not be pinched by any articulated bed mechanisms.4. Ensure green Power switch is in the OFF position.5. Plug pump into a properly grounded wall outlet. (Verify power to this outlet is not controlled bya wall switch).6. Press Power switch button to the ON position. Air will begin to flow into mattress.7. Yellow LED indicates low air pressure; green LED indicates proper air pressure has beenreached and mattress is ready for patient placement.8. Adjust the digital weight setting on the pump to set the airflow for Alternating Therapy.Ensure control unit hoses are properly connected to mattress for the desired function.Washing and DisinfectionRoutine Care: Surface wipe with neutral detergent and lukewarm water. Rinse thoroughly with water and dry thoroughly.Disinfection: Surface wipe the cover with quaternary solution or 1:10 bleach/water mixture according to recommended protocols. Avoid over saturation and ensure the surface does not stay wet longer than the chemical manufacturer’s guidelines for proper disinfecting. Wipe up excess disinfectant after the recommended kill time has elapsed. Thoroughly rinse the surface of the mattress with clean water using a clean cloth. Allow the surface to completely air dry prior to use. Phenolics may be used for the vinyl bottom of the cover onlyStorageWhen not in use, mattress should be stored flat in a controlled climate room.Preventive Maintenance SchedulePreventive maintenance for the Protekt® Aire Supreme Support Self-Adjusting Air/Foam Mattress consists of regular cleaning and an overall system evaluation to be performed at the intervals described below.All components must be cleaned, disinfected and inspected after each patient’s use and before use by a new patient. Always use standard precautions, treating all used equipment as contaminated. Institutions should follow local protocols for cleaning and disinfection. Inspection/System EvaluationCheck each of the following before placing the Protekt® Aire Supreme Support Self-Adjusting Air/Foam Mattress with a new patient:1. Check mattress surface for tears or cracking; do not use if tears or cracks are present.2. Ensure mattress is free of stains and is not overly faded.3. Ensure air inlet hoses and connectors on mattress and control unit are clean andundamaged.4. Ensure control unit and power cord are clean and undamaged.5. Ensure control unit hanger brackets are secure and operate correctly.6. Ensure OFF/ON Power switch and comfort control knob both operate correctly.7. Attach control unit to the black Alternating Pressure hoses and power up to ensure there areno air leaks.It is recommended that all selections of this manual be reviewed before troubleshooting any Protekt® Aire Supreme Support Self-Adjusting Air/Foam MattressDo not to attempt troubleshooting beyond the scope of this manual or where the remedy recommends contacting a Proactive Medical service representative. Any unauthorized service, modification, alteration, or misuse may lead to serious injury and/or product damage and will void all applicable warranties.For questions regarding this product, a replacement User Manual, other replacement parts, maintenance or additional information about PROACTIVE MEDICAL products and services, contact your PROACTIVE MEDICAL representative.1011 Protekt® Aire Supreme Support Self-Adjusting Air/FoamMattress Five/Three Warranty:In connection with your purchase of a Protekt® Aire Supreme Support Self-Adjusting Air/Foam Mattress, PROACTIVE MEDICAL warrants , to the original purchaser, against manufacturer’s defects in material and/workmanship for a period of five (5) years from the date of purchase on the mattress and one (1) year from the date of purchase on the control unit under normal usage* and so long as all applicable procedures** are followed. Conditions and Limitations:Under this warranty, upon reasonable notice, PROACTIVE MEDICAL will replace or repair defective parts or whole units Covered under this warranty as its sole option. No returns or replacements will be allowed without authorization from PROACTIVE MEDICAL. This warranty applies to material/parts replacement costs and labor costs only and does not include shipping and handling costs or disposal fees.This warranty does not extend to, nor cover:• Patient wearables, such as, but not limited to, non-integrated Cover Sheet(s) and disposables used in conjunction with the mattress; or• Normal wear and tear; or• Damage, including rust, corrosion or product failure due to causes beyond PROACTIVE MEDICAL control, such as, but not limited to abuse, theft, fire, flood, wind, lightening, freezing, power failure, power reduction, clogging of mattress pores due to tobacco smoke, unusual atmospheric conditions, foam deterioration due to exposure to moisture or other acts of God; or• Damage to mattress or mattress handles through use of the mattress for patient transfer or transport.PROACTIVE MEDICAL reserves the right to make material changes to the product predicated upon availability of raw Materials of like quality.Service beyond that described in the User Manual must be carried out by PROACTIVE MEDICAL or such other entities as may be approved by PROACTIVE MEDICAL in writing.This warranty is VOID if:• Proof of purchase cannot be made by the original purchaser;• Adjustment, modification, maintenance, and/or repair beyond that described in the User Manual is carried out by entities not approved in writing by PROACTIVE MEDICAL• The electrical installation of the room does not comply with the appropriate national electrical wiring standards; • The equipment is not used in accordance with the instructions and warnings enumerated in the User Manual. This warranty is in no way to be construed as an extension of any periodic or preventive maintenance agreement, extended service agreement or in-service agreement entered into by the parties.THE FORGOING BASIC WARRANTY MADE BY PROACTIVE MEDICAL IS IN LIEU OF ALL OTHER WARRANTIES EXPRESSED OR IMPLIED, INCLUDING WITHOUT LIMITATION, ANY IMPLIED WARRANTIES OFMERCHANTABILITY OR FITNESS FOR A PARTICULAR PURPOSE. PROACTIVE MEDICAL IS NOT LIABLE FOR CONSEQUENTIAL OR INCIDENTAL DAMAGES AND EXPENSES, INCLUDING DAMAGES TO PERSON OR PROPERTY, DUE IN WHOLE OR IN PART OF THE USE OF THIS PRODUCT EXCEPT AS OTHERWISE REQUIRED BY LAW.* Normal usage does not include misuse, abuse, alteration, modification, burns, punctures, improper handling, harsh cleaning solutions or drying procedures not recommended by the manufacturer, solutions no properly diluted as per product instructions or caustic staining agents.** Applicable procedures include, without limitation, those set out in the accompanying User Manual and other guidelines and Procedures provided by PROACTIVE MEDICAL .NOTE: To the extent any portion of this warranty is held invalid under federal law, such invalidity shall not affect the validity of the remaining portions of this warranty agreement, and the parties acknowledge that it is their intention that such provision (or portion thereof) shall be construed in a manner designed to effectuate the purpose of such provision to the maximum extent enforceable under applicable law. This warranty gives you specific legal rights and you may also have other rights which may vary from region to region.。
美特丽丝床垫的说明书

美特丽丝床垫的说明书对身体有一定的好处,其实关于美特丽丝床垫的功效与危害这个问题,总的来说,美特丽丝床垫因其红外线而非常出名。
具体而言,美特丽丝床垫的功效如下:一是促进睡眠,二是促进血液循环。
众所周知,床垫比地板舒服,加上床垫以后,很明显能够改善和促进睡眠;二是促进血液循环,美特丽丝床垫的红外线功能,能够很好地促进人体的血液循环,进而起到调理身体的功效和作用。
那么美特丽丝床垫有没有什么危害呢,换言之就是这款床垫的危害是什么呢。
其实很多人担心,红外线会对人体产生危害,但是其实不会的,这款床垫的红外线,根本不会对人体造成危害,由此可知,这款床垫其实对人体没有什么危害。
1、去掉塑料包膜:新买的床垫,为保证运输过程中不被污染,通常都会套一个包装膜。
不少消费者认为撕掉包装膜容易弄脏床垫。
其实不然,床垫套着包装膜反而不透气,更容易发潮、长霉点,甚至还会发臭。
2、除尘清理:CBD床垫保养还需要定期对床垫进行除尘清理。
由于床垫的材质问题,对于床垫的除尘不可用液体等清洁剂或者化学清洁物品进行清理,而需要借助吸尘器来进行清理。
使用液体的清洁用品会破坏床垫,会使床垫内部的金属物质沾上液体生锈等,不但减少使用寿命,还会对人的身体健康产生不利影响3、定期翻转:新购买的CBD床垫在年,每两至三个月翻转一次,次序包括正反两面、左右上下四边,这样床垫的弹簧可以受力均匀,延长使用寿命。
第二年之后,频率可略微降低,半年翻转一次就可以了。
4、定期更换:很多人都认为,只要床垫没坏就不用更换,但通常来说,弹簧床垫的有效使用寿命一般为10年左右。
用过十年之后的床垫由于弹簧受到长期重压,使得其弹性发生了一定的变化,导致这时身体与床的贴合度已出现落差,这样人体脊椎就无法得到最有效的支撑而处在弯曲状态下。
所以即使没有出现局部损坏的情况,还是应该及时更换新的床垫。
5、针对美特丽丝床垫能治病吗和床垫如何保养的相关问题做了详细的了解,从上面来看,美特丽丝床垫确实有一定的理疗效果,还是很不错的,如果有相关的疾病什么的,选购这样的床垫多少有些帮助,另外我们在使用床垫的过程之中一定要注意保养,这样才能更好的维护床垫。
护理床上的气垫使用方法
护理床上的气垫使用方法气垫床是一种通过注入空气来调节硬度和支撑力的床垫。
它常用于医院、护理院和家庭护理中,为长期卧床不起的病人提供最佳的睡眠和休息环境。
下面将详细介绍护理床上气垫的使用方法。
1.准备气垫床:在使用气垫床之前,需要先确保将床垫安装在床身上,并且连接好电源。
然后将床单铺在气垫上,床单要平整并牢固地固定在床垫四周,以防止床单滑动和移位。
2.调整气垫硬度:气垫床可以根据使用者的需求来调整硬度。
通过控制气泵的气阀开关,可以增加或减少床垫内的空气量。
使用者可以根据自己的喜好来自由调节气垫的硬度。
通常来说,病人需要较坚硬的床垫以提供支撑力,而床垫较软的话则可以提供更舒适的睡眠环境。
3.检查气垫泄露:在使用气垫床之前,需要定期检查床垫是否有漏气现象。
可以使用湿布擦拭床垫表面,观察是否有气泡出现。
如果发现有气泡冒出,说明床垫存在漏气情况,需要及时修复或更换床垫,以免病人受到伤害。
4.保持床垫清洁:床垫需要定期清洗,以保持床垫的卫生和整洁。
首先需要将气垫放气,然后使用温和的清洁剂和湿布擦拭床垫表面。
注意不要使用过多的水分,以免进入床垫内部。
清洗完成后,需将床垫晾干后再使用。
5.定期翻动身体:长期卧床的病人需要定期翻动身体,以避免长时间的压迫导致不适甚至褥疮。
在翻身时,需要关闭气垫的气泵开关,并确保气垫放气,避免病人的一侧身体压迫时间过长。
6.避免刺激性物品接触:为了保护气垫床的表面和延长使用寿命,需要避免床垫接触刺激性物品或锐利物体。
不要使用针或其他锐利物品放置在气垫上,以防止刺破床垫导致漏气。
7.注意保持室温适宜:气垫床的温度也需要适宜,过高或过低的室温都会影响气垫的功能。
因此,需要确保床垫周围的室温合适,不要过于潮湿或过于干燥。
总结起来,护理床上的气垫使用方法包括准备气垫床、调整气垫硬度、检查气垫泄露、保持床垫清洁、定期翻动身体、避免刺激性物品接触以及注意保持室温适宜。
通过正确的使用方法,可以提供舒适的睡眠环境和有效的护理支持,为病人提供最佳的护理体验。
床垫家具说明文字
填充料Fillers天然乳胶Natural latex天然乳胶:乳胶的原材料主要来源于橡胶树上的汁液,每棵树每天每一次只能产生30毫升左右的汁液,并且这种汁液必须在每天天亮之前采回不受阳光平扰(这也是乳胶不能在太阳下暴晒的原因),所以乳胶不管是在国内国外,乃至全世界都是极其珍贵的材料。
乳胶最主要有大大的特性:1、防螨、防菌、防虫2、透气性特强促进人的身体血液循环,消除疲劳3、超高的弹力,回弹力能达到100%。
4、矫正功能,矫正人的不良睡姿,顺应人体脊椎曲线,从而保护好你的脊椎。
5、超静音,抗静电。
6、经久耐用。
Memory foam 记忆绵我公司使用的记忆绵美国进口原材料,美国发泡技术,美国美标要求,记忆绵又叫慢回弹,主要特点:无音、无异味、防螨、防菌、防虫,能快速缓解身体不同压力无论你是坐、躺、睡都有一种超强下吸的悉感,让人全心身地放松,产生绝佳的睡眠状态。
海棉(填充物,即舒适层,保暖层)Sponge(Filler,or comfortable layer and warm keeping layer)高密度海棉,它主要原料是一种有毒化学物“聚胺旨”经化学反应发泡而成,所谓有毒性虽是它的缺点,但毒性在化学的时间里已经全部挥发就像氢气+氧气的原理样,它的缺点反过来就是它的优点,具防菌、防虫、防螨、防霉,这些都是天然形成,我公司使用的海绵密度高,回弹力超强。
感触柔软舒适,数以万计的透气孔,促使人的身体血液循环,打通每一个毛孔,使人处于充分的放松状态,有助于提升健康的睡眠,消除疲劳。
Fabric 面料Kitted fabric 针织布针织布最大特点是触感温柔平滑,每平方厘米面料多达5000个透气孔,透气特强、舒适、比普通织绵棉布更贴身柔软,超强的天然收缩弹性,滋润人的每一寸肌肤,促进优质健康睡眠。
Brocade 针织布织绵的特点:柔软、舒适、贴身,比一般普通布更具防螨防菌的功效,织绵布给人的感触更显高贵而典雅。
iq智慧床垫使用说明书
iq智慧床垫使用说明书
IQ智慧床垫使用说明书如下:
1.使用前,请将床垫打开并展开。
2.将床垫放置在床架上,确保床垫平稳。
3.将床垫与电源连接。
请注意,电源必须符合国家安全标准。
4.按照说明连接WiFi并下载IQ智慧床垫的App。
5.打开App后,按照说明进行注册并绑定您的床垫。
6.按照说明设置您的偏好和个人信息。
7.开始享受智慧床垫带来的舒适体验。
8.如果需要清洁,请使用干布轻轻擦拭。
9.如果需要维修或更换部件,请联系官方售后服务。
注意事项:
1.请勿把床垫插到不正常的电源插头或不符合国家安全标准的电源。
2.请勿将床垫弄湿。
3.请勿在床垫上跳跃或剧烈运动。
4.请勿在床垫上放置油性或腐蚀性物品。
5.请勿在床垫上吸烟或使用火源。
希望这份说明书对您有所帮助。
如有任何疑问或问题,请随时联系官方售后服务。
睡个好觉床垫使用说明书解读

睡个好觉床垫使用说明书解读【前言】感谢您购买睡个好觉床垫。
为了您能够充分了解和正确使用我们的产品,本文将对床垫使用说明书进行详细的解读。
【一、产品概述】睡个好觉床垫由优质材料制成,采用先进的生产工艺制造而成。
该床垫系列分为多个型号,包括单人床垫、双人床垫等,以满足不同消费者的需求。
【二、床垫特点】1. 舒适性:睡个好觉床垫采用高密度记忆棉材料,能根据人体曲线自动调整,为用户提供舒适的睡眠体验。
2. 健康性:床垫表面覆盖一层天然抗菌织物,有效抑制细菌滋生,为用户提供健康的睡眠环境。
3. 透气性:床垫内部采用通风设计,能够促进床垫内部空气流通,使用户在睡眠过程中保持干爽舒适。
4. 耐久性:床垫使用高弹簧设计,能够有效减少床垫使用时的变形和塌陷,延长产品使用寿命。
【三、使用方法】1. 安装:取出床垫,将其放置在床框上,确保床垫与床框完全贴合。
2. 清洁:定期使用吸尘器清理床垫表面灰尘,如有污渍,可用干净湿布进行擦拭。
请勿使用化学洗涤剂。
3. 翻转:为了保持床垫的均匀受力,建议每个月将床垫翻转一次,使其两侧磨损程度相对均衡。
4. 注意事项:请勿在床垫上跳跃,避免使用尖锐物品直接接触床垫表面,以免划伤。
【四、保养方法】1. 通风:床垫定期进行通风,可将床垫放置在通风良好的地方,避免潮湿。
2. 防潮防虫:如遇潮湿环境,可使用防潮垫或安装床垫防潮罩,以保持床垫的干燥。
3. 防火:请勿在床垫上使用明火,禁止吸烟或离开火源较近的地方使用床垫。
4. 定期更换:为了保持床垫的舒适性和使用寿命,建议每7-10年更换一次床垫。
【五、注意事项】1. 使用过程中如发现任何异味、变形或损坏,请立即停止使用,并联系售后服务部门进行解决。
2. 请勿将床垫暴露在阳光下,以免材料老化和褪色。
3. 建议在使用床垫前进行适当的放置,以使床垫恢复弹性。
4. 床垫仅供卧寝使用,请勿将其用作其他用途。
【六、售后服务】睡个好觉床垫提供一年质保服务,如产品存在质量问题,请及时联系售后服务部门,我们将尽快为您处理。
- 1、下载文档前请自行甄别文档内容的完整性,平台不提供额外的编辑、内容补充、找答案等附加服务。
- 2、"仅部分预览"的文档,不可在线预览部分如存在完整性等问题,可反馈申请退款(可完整预览的文档不适用该条件!)。
- 3、如文档侵犯您的权益,请联系客服反馈,我们会尽快为您处理(人工客服工作时间:9:00-18:30)。
装 普通国内包装 4 个包角+尼龙+编织袋
工
序
备 酒店专用标,四季商标 注
PDF 文件使用 "pdfFactory Pro" 试用版本创建
正面:/ 12mm,25kg/m3 海棉 1 层
自重:/
面 反面:/ 12mm,25kg/m3 海棉 1 层
自然厚度:/ 自重:/
数量:包Biblioteka 缝正面:/ 15mm,25kg/m3 海 棉1层
反面:/ 12mm,25kg/m3 海棉 1 层
自然厚度:/ 自重:/
包 包装材料
自然厚度:/ 自重:/
包装工艺要求
簧 ● 弹 簧 圈 数 :6 ● 串簧钢丝线径:1.35mm
工 ● 围边钢丝线径:4.8mm
重量: 重量:
序 ● 护边弹簧配备:正全侧隔 重量:
成品尺寸(mm) 2000*2000 1800*2000 1500*2000 1500*1900 1350*2000 1200*1900
床芯尺寸(mm) 1980*1980 1780*1980 1480*1980 1480*1880 1330*1980 1180*1880
数量
1层 1层 1层 1层
缝 绗缝属性:□单针■多针□跳花□拉扣□其它 自然厚度: 绗缝属性:□单针■多针□跳花□拉扣□其它 自然厚度:
绗缝花型:(示意图:1200*2000mm) 工
绗缝花型:(示意图:1200*2000mm)
围边面料编号:0371#
围边绗缝:(从外至内)
材料 面料 海绵 无纺布
特性 棉涤(可加阻燃功能) 10mm,20kg/m3 30g/m2
数量
1层 1层 1层
绗缝属性:□单针■多针□跳花□拉扣□其它 绗缝花型:
自然厚度:
序
正面
侧面
□ 正标 管边带型号:
□ 斜标
□ 其它 颜色:
□ 正标
□ 斜标 用量:
正 面:(从外至内)
反 面:(从外至内)
材料
特性
包 海绵 20mm,25kg/m3(长宽各缩 140mm)
缝
工
序
数量 材料
特性
1层
海绵
20mm,25kg/m3(长宽各缩 140mm)
▲ 警告:本工艺图纸为公司机密文件,未经同意不得带出公司,违 者追究法律责任。
普通款式
单面假双层
外观款式示意图
双面假双层
单面方型
单面欧式假双层
其它款式
(275)
(230)
□
□
■
□
□
● 弹 簧 特 性 :精钢邦尼尔弹簧
● 弹簧钢丝线径:2.2mm
● 弹 簧 高 度 :160mm
弹 ● 弹 簧 口 径 :70mm
绗 7mm,20kg/m3 海棉 1 层
7mm,20kg/m3 海棉 1 层
缝 30g/m2 无纺布 1 层
30g/m2 无纺布 1 层
工
四个无字气孔
序 自然厚度:/
成品厚度:/
自然厚度:/ 成品厚度:/
自然厚度:/ 成品厚度:/
绗缝花型:/
绗缝花型:/
绗缝花型:/
圆圈跳花
圆圈跳花
25*25mm 小波浪
商标型号:
位置:
正 面:(从外至内)
毛 800g/m2 针刺棉 1 层 坯 80g 无纺布 1 层 工
序 自然厚度:/
自重:/
管边带型号:
粘胶
包 缝 正面:/
反面:/
工
序
商标型号:
位置:
反 面:(从外至内)
800g/m2 针刺棉 1 层 80g 无纺布 1 层
拉手:
气孔:
双层弹簧中层:
自然厚度:/ 颜色: 绷
PDF 文件使用 "pdfFactory Pro" 试用版本创建
产品型号:纽约 整床标准厚度:(mm)
设 计:
工艺制图:
新品部:
床垫车间:
签发日期:20010 年 3 月 8 日 面料类别:■特级□一级□二级□其它
面料特性:□提花□针织□全棉■其它
工艺审核: 直辖领导:
1层
工
序
自然厚度:
自重:
自然厚度:
自重:
面料编号:0371#
绗缝正面:(从外至内)
材料 面料 弹力棉 海绵 无纺布
特性 棉涤(可加阻燃功能) 175g/m2 20mm,20kg/m3 30g/m2
绗
数量
1层 1层 1层 1层
面料编号:0371#
绗缝反面:(从外至内)
材料 面料 弹力棉 海绵 无纺布
特性 棉涤(可加阻燃功能) 175g/m2 20mm,20kg/m3 30g/m2
面子编号:
自重:
绗缝反面:(从外至内)
589 713 868 651 527 589
围边编号:
自重:
围边绗缝:(从外至内)
面料 1 层
面料 1 层
面料 1 层
200 g/m2 弹力棉 1 层
200 g/m2 弹力棉 1 层
7mm,20kg/m3 海棉 1 层
38mm,25kg/m3 蛋 型 海 棉 1 层 38mm,25kg/m3 蛋 型 海 棉 1 层 30g/m2 无纺布 1 层
348
毛 材料
坯 工 针刺棉
正 面:(从床簧至外) 特性
800g/m2
数量 1层
材料 针刺棉
反 面:(从床簧至外) 特性
800g/m2
数量 1层
材料
双层弹簧夹层: 特性
数量
序 自然厚度:
自重:
自然厚度:
自重:
自然厚度:
自重:
粘 材料
胶
正 面:(从床簧至外) 特性
数量
材料
反 面:(从床簧至外) 特性
数量
整床标准厚度:320mm
整床自重:
面料型号:28#(阻)
是否双层:普通双面假双层
成品尺寸
弹簧排列
整床弹簧数量 整床弹簧钢丝总重量
弹 簧 属 性 :/袋装弹簧
弹簧钢丝线径:/ 2.2mm
弹 弹 簧 高 度 :/ 180mm
簧 弹 簧 口 径 :/ 65mm 工 弹 簧 圈 数 :/ 6 序 单 只 重 量 :/
串簧钢丝线径:/ 无 重量:/
围边钢丝线径:/ 4.8mm 重量:/
海棉边框:/
护边弹簧配备:/
面子编号: /
自重:/
绗缝正面:(从外至内)
1500*1900 1500*2000 1800*2000 1350*2000 1100*2000 1200*2000
19*31 23*31 28*31 21*31 17*31 19*31
□ 说明书 ■ 质保卡 ■ 规格标签 □ 其它
PDF 文件使用 "pdfFactory Pro" 试用版本创建
设计: 审核: 批准: 项目编号: 日期:2010.9.23.
警告:本工艺图纸为公司机密文件,未经同意不得带 出公司,违者追究法律责任。
型号:酒店床垫 6213 型号
西北石油局石油大厦使用床垫
使用品牌:“喜临门”酒店床垫,产 品 型 号 : 纽 约 使用区域:普通标房及套房
高度:床垫 280MM+床托 200MM+床脚 110MM=590MM 使用品牌:“喜临门”酒店床垫,产 品 型 号 : 6 2 1 3 使用区域:行政套房
高度:床垫 320MM+床托 200MM+床脚 80MM=600MM 使用品牌:美国“SIMMONS(席梦思)”床垫 使用区域:总统套房 高度:床垫 W2000*D2000
材料
胶边海绵: 特性
数量
工
序 自然厚度:
自重:
自然厚度:
自重:
自然厚度:
自重:
正 面:(从床簧至外)
反 面:(从床簧至外)
绷
材料
面
特性
数量
材料
特性
数量
PDF 文件使用 "pdfFactory Pro" 试用版本创建
面 海绵
10mm,20kg/m3
1 层 海绵
10mm,20kg/m3
弹簧排列(只) 23*30 21*30 18*30 18*29 16*30 14*29
床簧弹簧数量(只) 690 630 540 522 480 406
床簧排列示意图(成品尺寸:1800*2000mm)
1000*2000 980*1980
12*30
360
1000*1900 980*1880
12*29
□ 其它
数量 1层
自然厚度:
包
包装要求:
自重: 包装内附件:
自然厚度:
PDF 文件使用 "pdfFactory Pro" 试用版本创建
自重:
□ 绣花
■ 四季商标 ■ 主标 成品照片
■ 气孔
装 ■ 聚乙烯薄膜 工 □ 牛皮纸 序 ■ 无字护角
□ 编织袋 □ 其它 备 注:
