apache2.4.7虚拟主机配置
Apache 虚拟主机的配置方法总结
Apache 虚拟主机的配置方法总结:虚拟主机1. 在httpd.conf中找到Include conf/extra/httpd-vhosts.conf 把前面的#去除2. 添加监听如:Listen 8080Listen 192.168.0.100:803. 删除或注掉DocumentRoot "D:/Apache2.2/htdocs"# DocumentRoot: The directory out of which you will serve your# documents. By default, all requests are taken from this directory, but# symbolic links and aliases may be used to point to other locations.##DocumentRoot "D:/Apache2.2/htdocs"4. 在配置extra/httpd-vhosts.conf时,如果要保留原来httpd.conf中默认的访问目录和域名,必须为默认域名也创建一个virtualHost,样例如下(监听端口是8080):5. httpd-vhosts.conf配置如下:NameVirtualHost *:8080NameVirtualHost 192.168.0.100:80在文档底部接着添加:<VirtualHost 192.168.0.100:80>ServerName njumasoftDocumentRoot F:/php/UmasoftFrw<Directory />Options FollowSymLinksAllowOverride NoneOrder allow,denyAllow from allSatisfy all</Directory>DirectoryIndex index.html index.phpCustomLog "logs\njumasoft-access.log" commonErrorLog "logs\njumasoft-error.log"</VirtualHost><VirtualHost 192.168.0.100:8080>ServerName mysqldDocumentRoot D:/Apache2.2/htdocs<Directory />Options FollowSymLinksAllowOverride NoneOrder allow,denyAllow from allSatisfy all</Directory>DirectoryIndex index.html index.phpCustomLog "logs\mysqld-access.log" commonErrorLog "logs\mysqld-error.log"</VirtualHost>其它设置参见:/Apache/ApacheMenu/vhosts/index.html虚拟目录1.找到"conf/httpd.conf" 文件,按如下示例设置:<IfModule dir_module>DirectoryIndex index.html index.html.var index.phpAlias /mysql D:/Apache2.2/htdocs/phpMyAdmin<Directory D:/Apache2.2/htdocs/phpMyAdmin>Options MultiViewsAllowOverride NoneOrder allow,denyAllow from all</Directory></IfModule>注:以上配置均需重启Apache。
如何在Linux上安装和配置Apache服务器
如何在Linux上安装和配置Apache服务器Apache是一个流行的开源Web服务器软件,被广泛用于搭建和管理网站。
在Linux系统上安装和配置Apache服务器是一项基本的技能。
本文将介绍如何在Linux操作系统下安装和配置Apache服务器。
一、安装Apache服务器首先,打开终端窗口,并使用以下命令来更新软件包列表:sudo apt update接下来,使用以下命令来安装Apache服务器:sudo apt install apache2安装过程中,您需要输入管理员密码进行确认。
安装完成后,Apache服务器将自动启动。
二、配置Apache服务器1. 配置文件路径Apache的配置文件位于/etc/apache2目录下。
在终端中使用cd命令进入该目录:cd /etc/apache22. 主配置文件编辑主配置文件apache2.conf,使用以下命令打开该文件:sudo nano apache2.conf在打开的文件中,可以找到一些常用的配置选项,您可以根据需要进行修改。
例如,您可以更改服务器名称、监听端口等。
3. 虚拟主机配置虚拟主机配置允许您在同一台服务器上运行多个网站。
默认情况下,Apache服务器已经为您配置了一个默认的虚拟主机。
如果您想添加更多的虚拟主机,您可以在/etc/apache2/sites-available目录下创建配置文件。
使用以下命令进入该目录:cd /etc/apache2/sites-available使用以下命令创建一个新的虚拟主机配置文件,例如mywebsite.conf:sudo nano mywebsite.conf在此配置文件中,您可以设置您的网站的域名、目录路径和其他相关设置。
保存并关闭文件。
接下来,使用以下命令启用新的虚拟主机配置文件:sudo a2ensite mywebsite.conf最后,重新加载Apache服务器以应用配置更改:sudo service apache2 reload您的新虚拟主机现在应该已经生效了。
CentOS6.0+apache2.4+php5.4.7+mysql5.5.27

CentOS6.0+apache2.4+php5.4.7+mysql5.5.27一、安装前准备1、安装编译工具及所需要库文件yum install make apr* autoconf automake curl-devel gcc gcc-c++ gtk+-devel zlib-devel openssl openssl-devel pcre-devel gd gettext gettext-devel kernel keyutils patch perl kernel-headers compat* mpfr cpp glibc libgomp libstdc++-devel ppl cloog-ppl keyutils-libs-devel libcom_err-devel libsepol-devel libselinux-devel krb5-devel libXpm* freetype freetype-devel freetype* fontconfig fontconfig-devel libjpeg* libpng* php-common php-gd ncurses* libtool* libxml2 libxml2-devel2、下载软件包(统一下载到/usr/local/src )wget /Downloads/MySQL-5.5/mysql-5.5.27.tar.gzwget /files/v2.8/cmake-2.8.8.tar.gzwget /apache//httpd/httpd-2.4.3.tar.gzwget /apache//apr/apr-1.4.6.tar.gz # Apache库文件wget /apache//apr/apr-util-1.4.1.tar.gz # Apache库文件wget /distributions/php-5.4.7.tar.gzwget /project/mcrypt/Libmcrypt/2.5.8/libmcrypt-2.5.8.tar.gz #PHPlibmcrypt模块wget ftp:///pub/software/programming/pcre/pcre-8.31.tar.gz二、安装mysql 5.5.271、安装cmake# cd /usr/local/src# tar zxf cmake-2.8.8.tar.gz# cd cmake-2.8.8# ./configure# make# make install2、开始安装mysql# groupadd mysql# useradd -g mysql mysql -s /bin/false // 创建用户mysql并加入到mysql组,不允许mysql 用户直接登陆系统# mkdir -p /data/mysql // 创建mysql 数据库存放目录# chown -R mysql.mysql /data/mysql // 设置mysql 数据库权限# mkdir -p /usr/local/mysql // 创建mysql 安装目录# cd /usr/local/src# tar zxf mysql-5.5.27.tar.gz# cd mysql-5.5.27# cmake . -DCMAKE_INSTALL_PREFIX=/usr/local/mysql -DMYSQL_DATADIR=/data/mysql -DSYSCONFDIR=/etc# make# make install# cd /usr/local/mysql# cp ./support-files/f /etc/f# vi /etc/f //编辑配置文件,在[mysqld] 部分增加下面一行datadir = /data/mysql:wq! 保存# ./scripts/mysql_install_db --user=mysql# cp ./support-files/mysql.server /etc/rc.d/init.d/mysqld // 把mysql 加入系统启动# chmod 755 /etc/init.d/mysqld# chkconfig mysqld on# vi /etc/rc.d/init.d/mysqld 修改下面两项定义basedir =/usr/local/mysql // MySQL程序安装路径datadir =/data/mysql // MySQl数据库存放目录大约在46、47行,注意,等号后面不要有空格# service mysqld start# vi /etc/profile // 把mysql服务加入系统环境变量:在最后添加下面这一行export PATH=$PATH:/usr/local/mysql/bin:wq! // 保存下面这两行把myslq的库文件链接到系统默认的位置,这样你在编译类似PHP等软件时可以不用指定mysql的库文件地址ln -s /usr/local/mysql/lib/mysql /usr/lib/mysqlln -s /usr/local/mysql/include/mysql /usr/include/mysql# shutdown -r now // 需要重启系统,等待系统重新启动之后继续在终端命令行下面操作# mysql_secure_installation // 根据提示按Y 回车,然后输入2次同样的密码,继续按Y 回车,直到设置完成。
虚拟机中如何在Linux上安装和配置Apache服务器
每日一句:I am a slow walker, but I never walk backwards.(我走得很慢,但从来不后退。
)一、本次配置a)操作系统:Linuxb)服务器:httpd-2.4.3.tar.gzc)APR:apr-1.4.6.tar.gzd)APR-Util:apr-util-1.5.1.tar.gze)PCRE:pcre-8.31.tar.gz二、Linux安装程序的基本步骤1、./configure --prefix=安装目录2、make3、make install三、Linux安装apache服务器步骤:1、gzip -d httpd- NN.tar.gz (阿帕奇服务器安装包)2、tar xvf httpd- NN.tar(执行第一步后出现这个文件)3、cd httpd- NN(执行完第二步后会产生一个服务器的目录,使用cd命令进入)4、安装程序的基本步骤5、安装目录/bin/apachectl -k start (启动服务器)6、测试。
打开浏览器输入http://服务器IP,如果出现It Works,则服务器安装成功7、安装过程中遇到的问题a)安装服务器时提示缺少apr文件(到官网下载后进行安装(还是按照安装步骤))b)安装apr时提示确实apr-util(到官网下载后进行安装(还是按照安装步骤))c)安装服务器时提示确实pcre(到官网下载后进行安装(还是按照安装步骤))四、配置apache的虚拟主机a)将“安装目录\conf\httpd.conf ”中“#Include etc/extra/httpd-vhosts.conf ”的#去掉。
这样才能使httpd-vhosts.conf文件起作用,或者直接在httpd.conf中写配置也可以(不建议这么做)b)在httpd-vhosts.conf中配置VirtualHost(注:Apache在接受到请求时,首先会默认第一个VirtualHost,然后再找匹配的,如果没有匹配的,默认就是第一个VirtualHost起作用)<VirtualHost *:80> #主机名ServerAdmin admin@ #如果服务器有任何问题将发信到这个地址DocumentRoot /www/ #虚拟主机的指向目录ServerName #访问主机的域名[:端口号]ServerAlias * #- -这个不知道是啥。
apache下配置详解
Apache下关于虚拟主机的配置关于虚拟主机的概述:配置虚拟主机主要应用场景:多站点访问,一个服务器放置了多个站点服务。
主要的三种配置方法:1、基于IP 2、基于端口3、基于主机名步骤详解:1.虚拟主机使用的话,必须将中心服务关闭,在/etc/httpd/conf/httpd.conf文件里,将DocumentRoot一行注释掉来关闭中心服务。
2.可以在httpd.conf文件最后面直接添加虚拟主机的配置内容,也可以在/etc/httpd/conf.d/下面创建一个自己的配置文件,如:my.conf文件。
3.my.conf文件配置详解1)基于IP配置<VirtualHost 192.168.0.112:80>ServerName DocumentRoot "/www/"</VirtualHost><VirtualHost 192.168.0.113:80>ServerName DocumentRoot "/www/"</VirtualHost>以上2个虚拟主机配置的IP分别为192.168.0.113和192.168.0.112,端口同为80端口。
这样在浏览器分别输入不同的ip或域名时就会访问到不同的站点。
Tips:如果只有一块网卡可以同过ipaddr add 192.168.0.112 dev eth0来添加辅助ip。
如果是域名方式访问,还需要在windows和linux下的hosts文件里面自行添加域名解析。
关于辅助ip的设置:ipaddr add 192.168.0.112/24 dev eth0这是为网卡设置一个辅助ip。
假如一个网卡的ip地址为192.168.0.22,执行上面的命令,在用ifconfig 查看,会发现有两个ip地址,而192.168.0.22称为主地址(Primary IP address),而192.168.0.112称为辅助地址(secondary IP address),一块网卡是允许有多个IP地址的,所以就算再多添加几个secondary IP 也是合法行的。
APACHE安装配置说明
APACHE安装配置说明⼀、软件下载⼆、环境检查# rpm -qa|grep zlibzlib-devel-1.2.3-3zlib-1.2.3-3# rpm -qa|grep sslopenssl-devel-0.9.8b-10.el5openssl-0.9.8b-10.el5如果需要依赖包,安装其对应的devel包即可,此处仅⽤到zlib和ssl。
另,如果有httpd包,要先卸载掉或停⽌其服务。
三、编译安装1、针对安装⽬的的说明(来⾃INSTALL⽂件)如果是开发者则使⽤此选项,--with-included-apr利于连接apache的代码或者是调试apache,其消除了由于版本或者编译中跟APR或者APR-util代码产⽣的不匹配;如果从⼦版本编译apache,要先运⾏buildconf(需要Python,GNU autoconf和libtool),然后运⾏configure。
发⾏包不⽤。
如果要在FreeBSD5.4之前编译时包含apache的threaded MPM,需要使⽤--enable-threads和--with-mpm 参数在Mac上编译⼦版本,要使⽤GNU Libtool 1.4.2及以上版本2、关于SSL加密和正则表达式(来⾃⽂件README)Apache2.0及以上版本在⽬录modules/ssl/下包含了mod_ssl模块⽤于配置和监听ssl⽹络接⼝的连接。
(另外,⼀些apr-util版本在⽬录srclib/apr-util/ssl/下提供了ssl⽹络接⼝)带有单词crypto的包的名字,可能包含openssl加密库的⽬标代码。
如果apache的加密功能不理想或者要排除再重分配,则可以使⽤包的名字包含nossl的发布包。
Apache使⽤PCRE包包含的正则表达式。
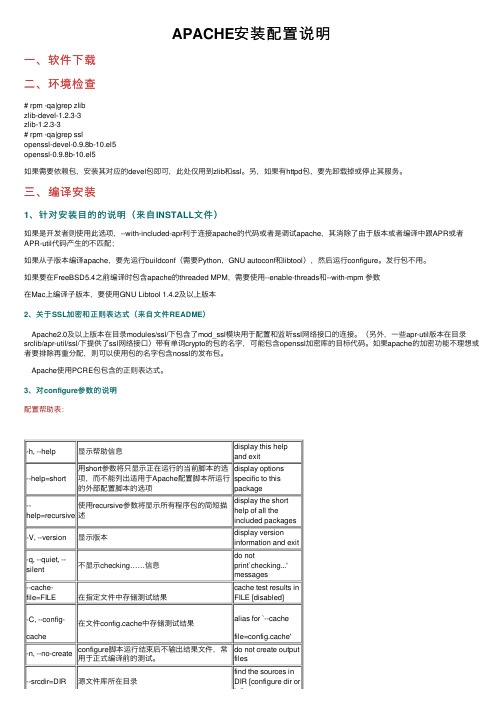
3、对configure参数的说明配置帮助表:-h, --help显⽰帮助信息display this help and exit--help=short ⽤short参数将只显⽰正在运⾏的当前脚本的选项,⽽不能列出适⽤于Apache配置脚本所运⾏的外部配置脚本的选项display optionsspecific to thispackage--help=recursive 使⽤recursive参数将显⽰所有程序包的简短描述display the shorthelp of all theincluded packages-V, --version显⽰版本display version information and exit-q, --quiet, --silent不显⽰checking……信息do notprint`checking...' messages--cache-file=FILE在指定⽂件中存储测试结果cache test results in FILE [disabled]-C, --config-cache 在⽂件config.cache中存储测试结果alias for `--cachefile=config.cache'-n, --no-create configure脚本运⾏结束后不输出结果⽂件,常⽤于正式编译前的测试。
Ubuntu Linux Apache虚拟主机的安装配置档
Ubuntu Linux Apach虚拟主机的安装配置目标1.创建基于IP 的虚拟主机用于一个项目的整体测试2.创建基于用户的虚拟主机用于用户测试自己的代码开始创建虚拟主机的目录结构sudo /home/wwwcd /home/wwwsudo mkdir 192.168.0.251 192.168.0.252cd 192.168.0.251sudo mkdir cgi-bin htdocs logs dbcd ../192.168.0.252sudo mkdir cgi-bin htdocs logs dbtree /home/www/home/www|-- 192.168.0.251| |-- cgi-bin| |-- db| |-- htdocs| `-- logs`-- 192.168.0.252|-- cgi-bin|-- db|-- htdocs`-- logs1.要在192.168.0.251 和192.168.0.252 上创建两个基于IP 的虚拟主机,为了直观起见,在/home/www 下分别创建了目录192.168.0.251 和192.168.0.2522.cgi-bin 子目录用于存放CGI 脚本3.db 子目录用于存放SQLite 数据库4.htdocs 子目录用于存放站点文档5.logs 子目录用于存放站点日志创建虚拟主机的管理帐号并设置目录权限sudo useradd -g www-data -d /home/www/192.168.0.251 wuser1sudo useradd -g www-data -d /home/www/192.168.0.252 wuser2sudo passwd wuser1sudo passwd wuser2sudo chown -R wuser1.www-data /home/www/192.168.0.251sudo chown -R wuser2.www-data /home/www/192.168.0.2521.将192.168.0.251 虚拟主机的管理者赋予wuser1;将192.168.0.252 虚拟主机的管理者赋予wuser2;允许他们使用ssh 登录2.wuser1 和wuser2 的主组均设置为www-data,这样设置的方便之处在于:若站内有Apache 进程可写的内容,只需添加组可写权限即可配置虚拟网络接口和主机名解析使用如下命令:sudo vim /etc/network/interfaces添加如下的配置auto eth0:1iface eth0:1 inet staticaddress 192.168.0.251netmask 255.255.255.0network 192.168.0.0broadcast 192.168.0.255gateway 192.168.0.1auto eth0:2iface eth0:2 inet staticaddress 192.168.0.252netmask 255.255.255.0network 192.168.0.0broadcast 192.168.0.255gateway 192.168.0.1然后使用如下命令重新启动网络服务sudo /etc/init.d/networking restart然后在/etc/hosts 文件中添加如下的行192.168.0.251 web1192.168.0.252 web2配置ApacheS1. 在/etc/apache2/sites-available/ 目录下创建新的文件192.168.0.251,添加如下的配置/etc/apache2/sites-available/192.168.0.251DocumentRoot "/home/www/192.168.0.251/htdocs/"Options Indexes FollowSymLinks MultiViewsAllowOverride AllOrder allow,denyallow from allScriptAlias /cgi-bin/ /home/www/192.168.0.251/cgi-bin/AllowOverride NoneOptions +ExecCGI -MultiViews +SymLinksIfOwnerMatchOrder allow,denyAllow from allErrorLog /home/www/192.168.0.251/logs/error.logCustomLog /home/www/192.168.0.251/access.log combinedS2. 在/etc/apache2/sites-available/ 目录下创建新的文件192.168.0.252,添加如下的配置/etc/apache2/sites-available/192.168.0.252DocumentRoot "/home/www/192.168.0.252/htdocs/"Options Indexes FollowSymLinks MultiViewsAllowOverride AllOrder allow,denyallow from allScriptAlias /cgi-bin/ /home/www/192.168.0.252/cgi-bin/AllowOverride NoneOptions +ExecCGI -MultiViews +SymLinksIfOwnerMatchOrder allow,denyAllow from allErrorLog /home/www/192.168.0.252/logs/error.log CustomLog /home/www/192.168.0.252/access.log combinedS3. 重新启动Apachesudo a2enmod rewritesudo a2enmod php5sudo a2enmod perlsudo a2enmod mod_pythonsudo a2ensite 192.168.0.251sudo a2ensite 192.168.0.252sudo /etc/init.d/apache2 restart配置站点内容的上传FTP 服务器S1: 使用如下命令安装proftpdsudo apt-get install proftpd proftpd-docS2. 使用默认配置即可实现本地用户的上传和下载Samba 服务器S1. 使用如下命令sudo vi /etc/samba/smb.conf添加如下的配置行:/etc/samba/smb.conf[homes]comment = Home Directoriesbrowseable = nowritable = yescreate mask = 0644directory mask = 0755S2. 配置Samba 用户通过如下命令添加Samba 用户sudo smbpasswd -a wuser1sudo smbpasswd -a wuser2S3. 启动Samba 服务器sudo /etc/init.d/samba restart创建基于用户的虚拟主机*可能开发者在Windows 客户机没有创建开发环境*为了使每个开发者可以测试自己的代码,可以创建基于用户的虚拟主机创建用户帐号sudo useradd -g www-data -m user1sudo useradd -g www-data -m user2sudo passwd user1sudo passwd user21.用户需要在宿主目录下创建public_html 子目录,将Web 文档放入其中,可以通过URL http://IPorHostname/~username 访问自己的站点2.若进行CGI 开发,还需要在宿主目录下创建cgi-bin 子目录配置Apache使用如下命令启用userdir 模块即可sudo a2enmod userdir若进行CGI 开发,需要修改/etc/apache2/mods-available/userdir.confUserDir public_htmlUserDir disabled rootAllowOverride FileInfo AuthConfig LimitOptions MultiViews Indexes SymLinksIfOwnerMatch IncludesNoExec ScriptAliasMatch ~([a-z]+)/cgi-bin/(.*) /home/$1/cgi-bin/$2 # 添加此行,意思是匹配~user_name/cgi-bin/cgi_name自动映射到/home/user_name/cgi-bin/cgi-name脚本关于默认的虚拟主机Ubuntu 中文件/etc/apache2/sites-available/default 配置的是默认的虚拟主机。
Apache虚拟主机VirtualHost配置
Apache 虚拟主机 VirtualHost 配置虚拟主机 (Virtual Host)是在同一台机器搭建属于不同域名或者基于不同 IP 的多个网站服务的技术. 可以为运行在同一物理机器上的各个网站指配不同的IP 和端口, 也可让多个网站拥有不同的域名.Apache 是世界上使用最广的 Web 服务器, 从版开始支持虚拟主机. 本文将讲解在不同服务器 (Redhat Enterprise Linux, Ubuntu Linux, Windows) 上使用 Apache 搭建虚拟主机来搭建多个网站.主旨本文旨在让读者知道如何在同一台机器上搭建多个网站, 并附带一些使用技巧. 以操作为主, 不会过多谈及原理.目标本文是写给拥有一定的服务器配置和管理技能, 工作中需要同时维护多个网站的网站主, 网站开发者和网络管理员. 如果你是互联网公司的配管工程师, 对计算机服务器原理和操作十分熟悉, 请忽视本文, 你不会在上面找到太多有价值的东西.Redhat Enterprise LinuxRedhat Enterprise Linux (包括 CentOS Linux), 是使用最广的 Linux 服务器, 大量的网站应用都部署在其上.1. 打开文件 /etc/httpd/conf/, 搜索 VirtualHost example, 找到代码如下:## VirtualHost example:# Almost any Apache directive may go into a VirtualHost container.# The first VirtualHost section is used for requests without a known# server name.##<VirtualHost *:80># ServerAdmin# DocumentRoot /www/docs/ ServerName ErrorLog logs/ CustomLog logs/ common#</VirtualHost>2. 仿照例子, 添加一段代码来指定某一域名的网站.## DocumentRoot 是网站文件存放的根目录# ServerName 是网站域名, 需要跟 DNS 指向的域名一致#<VirtualHost *:80>ServerAdminDocumentRoot /var/www/httpdocs/demo_aliluna_comServerName ErrorLog logs/ CustomLog logs/ common</VirtualHost>3. 重启 httpd 服务, 执行以下语句.service httpd restartUbuntu LinuxUbuntu 在 Linux 各发行版中, 个人用户数量最多的. 很多人在本机和虚拟机中使用. 但 Ubuntu 和 Redhat 的 VirtualHost 设置方法不相同.1. 打开目录 /etc/apache2/sites-available/, 发现 default 和default-ssl 两个文件, 其中 default 是 http 虚拟主机服务的配置文件, default-ssl 是配置 https 服务使用的. 可以复制一份 default 文件. 并修改配置文件名, 文件名必须与域名一致 (如:2. 打开新建的配置文件, 修改 DocumentRoot, ServerName 和对应的配置目录. 例子如下:## DocumentRoot 是网站文件存放的根目录# ServerName 是网站域名, 需要跟 DNS 指向的域名一致#<VirtualHost *:80>ServerAdminDocumentRoot /var/www/httpdocs/demo_aliluna_comServerName ErrorLog ${APACHE_LOG_DIR}/ CustomLog ${APACHE_LOG_DIR}/ combined</VirtualHost>3. 通过 a2ensite 激活虚拟主机配置sudo a2ensite 打开目录 /etc/apache2/sites-enabled/, 你会发现所有激活的虚拟主机, 可以通过 a2dissite 进行注销sudo a2dissite 重启 Apache 服务, 激活虚拟主机sudo/etc/apache2 restartWindowsWindows 是市场占有率最高的 PC 操作系统, 也是很多人的开发环境. 其VirtualHost 配置方法与 Linux 上有些差异, 以下方式适合原生 Apache, XAMPP 和 WAMP 套件.1. 打开目录 {Apache2 安装目录}\conf\extra\, 找到文件.2. 仿照例子, 添加一段代码来指定某一域名的网站.## DocumentRoot 是网站文件存放的根目录# ServerName 是网站域名, 需要跟 DNS 指向的域名一致#<VirtualHost *:80>ServerAdminDocumentRoot "D:/workspace/php/demo_aliluna_com"ServerName ErrorLog "logs/"CustomLog "logs/" common</VirtualHost>3. 打开文件, 添加如下语句.# Virtual hostsInclude conf/extra/4. 重启 Apache 服务.总结最近我在不同的几台服务器上搭建了一些网站服务, 这篇文章也算是我的个人笔记, 望日后可自用, 也希望对读者有用. 文中介绍了几个主流开发和部署环境上配置虚拟主机的方法, 其他 OS 大同小异.。
Apache服务器配置

IN CNAME
IN CNAME
在上面的配置中,在提交的DNS正向配置文件以及反向配置文件中, 已经具有如下的A记录和PTR记录,分别为
www
利用httpd.conf我们可以对Apache服务器进行全局 配置、管理或预设服务器的参数定义、虚拟主机的设 置等。httpd.conf是一个文本文件,我们可以用vi编辑 工具进行修改。 httpd.conf文件主要分为三个部分: Section 1: Global Environment (全局变量) Section 2: 'Main' server configuration(主服务器配置) Section 3: Virtual Hosts(虚拟主机配置)
2.配置基于IP的虚拟主机 (1)基于IP虚拟主机的DNS配置 如果用户想要创建两个基于IP的虚拟主机和
这两个虚拟主机站点的共同域名是 。用户可以按照如下所示在DNS正向配置文 件中进行配置:
lth IN
A 192.168.15.212
3.Port 该参数用来指定Apache服务器的监听端口。一般来说,标准的HTTP
服务默认端口号是80,一ቤተ መጻሕፍቲ ባይዱ不要更改这个数值。本例为80端口:
Port 80 4.ServerAdmin
设置Apache服务器管理员的邮件地址。
5.ServerName 该参数使得用户可以自行设置主机名,以取代安装Apache服务器主机
7.MaxKeepAliveRequests 当使用保持连接(persistent connection)功能时,可以使用本参数决定
每次连接所能发出的要求数目的上限。如果此数值为0,则表示没有限制。 建议尽可能使用较高的数值,以充分发挥Apache的高性能,本例设置每次 连接所能发出的要求数目上限为100:
linux-Apache 配置
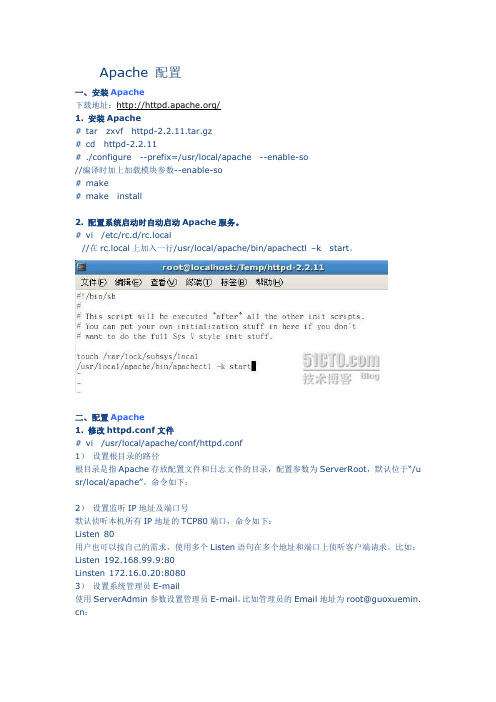
Apache 配置一、安装Apache下载地址:/1. 安装Apache# tar zxvf httpd-2.2.11.tar.gz# cd httpd-2.2.11# ./configure --prefix=/usr/local/apache --enable-so//编译时加上加载模块参数--enable-so# make# make install2. 配置系统启动时自动启动Apache服务。
# vi /etc/rc.d/rc.local//在rc.local上加入一行/usr/local/apache/bin/apachectl –k start。
二、配置Apache1. 修改httpd.conf文件# vi /usr/local/apache/conf/httpd.conf1)设置根目录的路径根目录是指Apache存放配置文件和日志文件的目录,配置参数为ServerRoot,默认位于“/u sr/local/apache”。
命令如下:2)设置监听IP地址及端口号默认侦听本机所有IP地址的TCP80端口,命令如下:Listen 80用户也可以按自己的需求,使用多个Listen语句在多个地址和端口上侦听客户端请求。
比如:Listen 192.168.99.9:80Linsten 172.16.0.20:80803)设置系统管理员E-m ail使用ServerAdmin参数设置管理员E-m ail,比如管理员的Email地址为root@guoxuemin. cn:4)设置服务器主机的名称参数ServerName用来设置服务器的主机名称,如果没有域名则填入服务器的IP地址,比如服务器的IP地址为192.168.99.9:5)设置主目录的路径用户可以使用参数Document Root配置服务器主目录默认路径,比如,主目录路径为:6)设置默认文件Apache的默认文件名为index.ht ml,可以使用Directory Index参数来配置,比如,将ind ex.php设置为默认文件名:7)测试:打开浏览器,输入地址:http://192.168.99.9,可以打开站点了:2. 配置目录权限使用<Directory 目录路径>和</Directory>设置目录的权限。
apache 2.4 配置webdav的用户权限
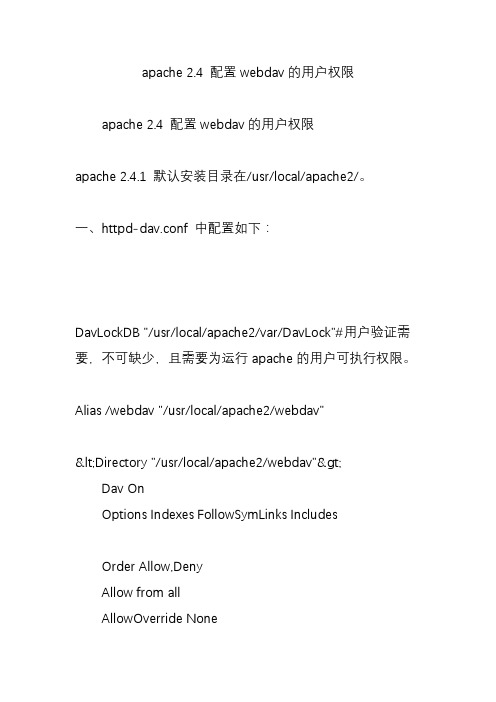
apache 2.4 配置webdav的用户权限apache 2.4 配置webdav的用户权限apache 2.4.1 默认安装目录在/usr/local/apache2/。
一、httpd-dav.conf 中配置如下:DavLockDB "/usr/local/apache2/var/DavLock"#用户验证需要,不可缺少,且需要为运行apache的用户可执行权限。
Alias /webdav "/usr/local/apache2/webdav"<Directory "/usr/local/apache2/webdav">Dav OnOptions Indexes FollowSymLinks IncludesOrder Allow,DenyAllow from allAllowOverride None#AuthType DigestAuthType BasicAuthName DAV-upload#You can use the htdigest program to create the password database:#htdigest -c "/tmp/mips/user.passwd" DAV-upload admin#htpasswd -c "/tmp/mips/user.passwd" adminAuthUserFile "/usr/local/apache2/user.passwd"#AuthDigestProvider fileAuthBasicProvider file# Allow universal read-access, but writes are restricted# to the admin user.# <LimitExcept GET POST PUT OPTIONS> # require user admin# Require valid-user# </LimitExcept>#admin admin# <LimitExcept GET PUT POST DELETE MOVE COPY OPTIONS>Require user admin# </LimitExcept>#guest guest<LimitExcept PUT POST DELETE MOVE OPTIONS>Require user guest</LimitExcept></Directory>二、说明:以上的配置实现的效果:admin 用户拥有默认权限,可修改webdav下的文件,可上传,删除,下载,重命名,修改等;guest用户权限做了限制,只可以查看,下载,不可上传、删除、编辑等。
Apache2配置参数详细说明

StartThreads 250
MinSpareThreads 25
MaxSpareThreads 250
MaxThreads 1000
MaxRequestPerChild 0
</IfModule>
# OS/2 MPM
# StartServers:启动的服务进程数量
# ThreadsPerChild:每个服务进程中的工作线程常数
# MaxRequestsPerChild:服务进程中允许的最大请求数目
<IfModule worker.c>
StartServers 2
MaxClients 150
MinSpareThreads 25
MaxSpareThreads 75
<IfModule>
<IfModule>
#
#PidFile:记录服务器启动进程号的文件。
#
<IfModule !mpm_neware.c>
PidFile logs/httpd.pid
</IfModule>
#
#Timeout:接收和发送前超时秒数
#
Timeout 300
#
#KeepAlive:是否允许稳固的连接(每个连接有多个请求),
#
KeepAliveTimeout 15
##
##Server-Pool大小设定(针对MPM的)
##
# prefork MPM
# StartServers:启动时服务器启动的进程数
# MinSpareServers:保有的备用进程的最小数目
Apache配置详解
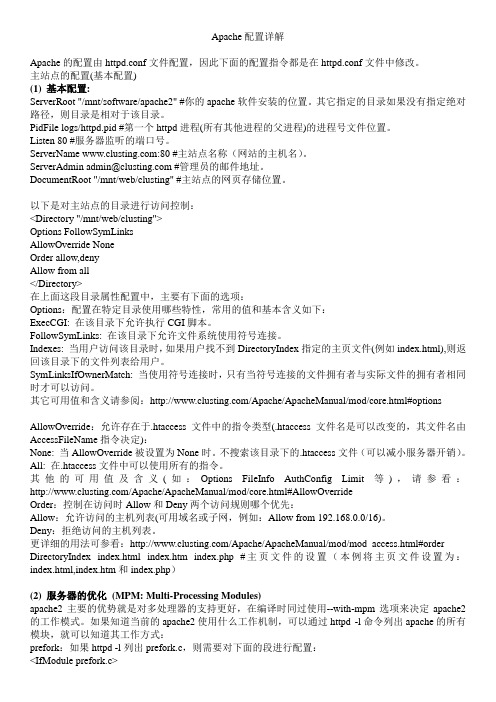
Apache配置详解Apache的配置由httpd.conf文件配置,因此下面的配置指令都是在httpd.conf文件中修改。
主站点的配置(基本配置)(1) 基本配置:ServerRoot "/mnt/software/apache2" #你的apache软件安装的位置。
其它指定的目录如果没有指定绝对路径,则目录是相对于该目录。
PidFile logs/httpd.pid #第一个httpd进程(所有其他进程的父进程)的进程号文件位置。
Listen 80 #服务器监听的端口号。
ServerName :80 #主站点名称(网站的主机名)。
ServerAdmin admin@ #管理员的邮件地址。
DocumentRoot "/mnt/web/clusting" #主站点的网页存储位置。
以下是对主站点的目录进行访问控制:<Directory "/mnt/web/clusting">Options FollowSymLinksAllowOverride NoneOrder allow,denyAllow from all</Directory>在上面这段目录属性配置中,主要有下面的选项:Options:配置在特定目录使用哪些特性,常用的值和基本含义如下:ExecCGI: 在该目录下允许执行CGI脚本。
FollowSymLinks: 在该目录下允许文件系统使用符号连接。
Indexes: 当用户访问该目录时,如果用户找不到DirectoryIndex指定的主页文件(例如index.html),则返回该目录下的文件列表给用户。
SymLinksIfOwnerMatch: 当使用符号连接时,只有当符号连接的文件拥有者与实际文件的拥有者相同时才可以访问。
其它可用值和含义请参阅:/Apache/ApacheManual/mod/core.html#options AllowOverride:允许存在于.htaccess文件中的指令类型(.htaccess文件名是可以改变的,其文件名由AccessFileName指令决定):None: 当AllowOverride被设置为None时。
配置虚拟主机的步骤
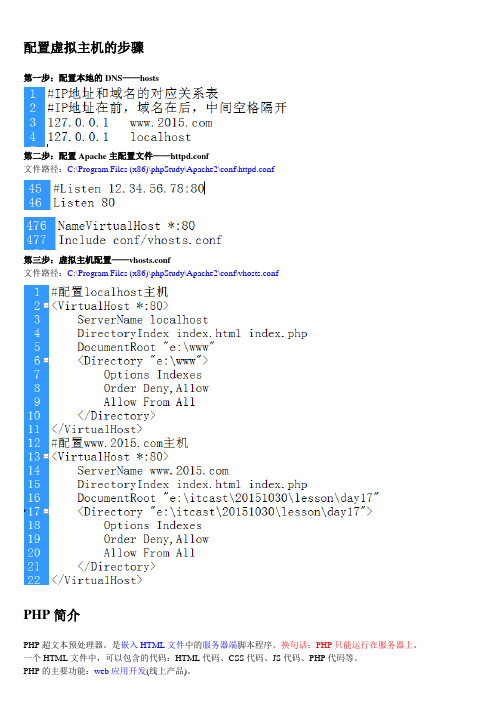
配置虚拟主机的步骤第一步:配置本地的DNS——hosts第二步:配置Apache主配置文件——httpd.conf文件路径:C:\Program Files (x86)\phpStudy\Apache2\conf\httpd.conf第三步:虚拟主机配置——vhosts.conf文件路径:C:\Program Files (x86)\phpStudy\Apache2\conf\vhosts.confPHP简介PHP超文本预处理器。
是嵌入HTML文件中的服务器端脚本程序。
换句话:PHP只能运行在服务器上。
一个HTML文件中,可以包含的代码:HTML代码、CSS代码、JS代码、PHP代码等。
PHP的主要功能:web应用开发(线上产品)。
PHP入门比较简单,语法与C、Java、C#、JS等相似。
PHP主要用函数做各种操作,而JS主要用内置对象作操作。
PHP语言基础●PHP代码,跟ASP一样,都是嵌入到HTML文件中去的。
●PHP代码标记:<?php ……?>●PHP文件的扩展名:.php●PHP文件的执行,必须从域名开始访问(必须要经过虚拟主机)。
●访问PHP文件的路径上,不能包含空格和中文。
●PHP也是区分大小写,但关键字和函数名不区分大小写。
●PHP中每条语句,必须以英文下的分号结束(;)。
PHP注释●HTML注释:<!—注释内容-->●CSS注释:/* */●JS注释://或/* */注意的功能:是为以后修改项目时,找问题非常方便。
●PHP的单行注释://或#●PHP的多行注释:/* */●提示:多行注释不能相互嵌套。
●注意:PHP的注释,与代码一样,最终在客户端都是不可见。
PHP变量1、变量的概念变量是临时存储数据的容器。
变量可以看成是宾馆的房间号。
变量可以看成是一个瓶子,瓶子中可以装水、汽水、沙子、酱油等。
我们可以把内存条看成是,由若干个“小格子”构成。
每一个“小格子”可以存储一个变量。
ApachehttpServer2.4安装与配置
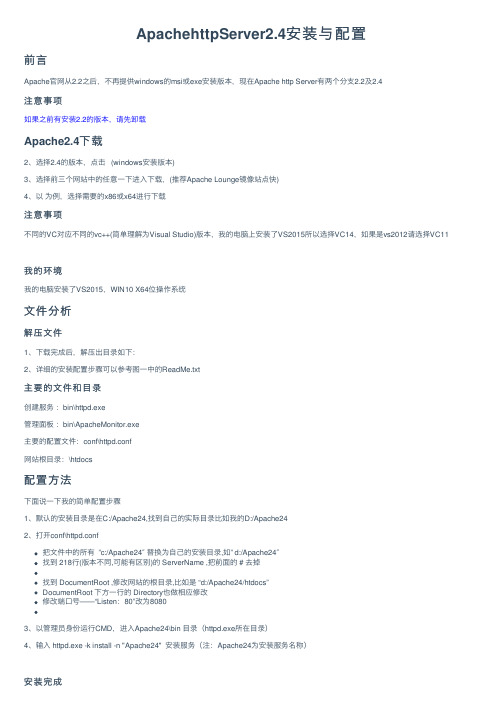
ApachehttpServer2.4安装与配置前⾔Apache官⽹从2.2之后,不再提供windows的msi或exe安装版本,现在Apache http Server有两个分⽀2.2及2.4注意事项如果之前有安装2.2的版本,请先卸载Apache2.4下载2、选择2.4的版本,点击 (windows安装版本)3、选择前三个⽹站中的任意⼀下进⼊下载,(推荐Apache Lounge镜像站点快)4、以为例,选择需要的x86或x64进⾏下载注意事项不同的VC对应不同的vc++(简单理解为Visual Studio)版本,我的电脑上安装了VS2015所以选择VC14,如果是vs2012请选择VC11我的环境我的电脑安装了VS2015,WIN10 X64位操作系统⽂件分析解压⽂件1、下载完成后,解压出⽬录如下:2、详细的安装配置步骤可以参考图⼀中的ReadMe.txt主要的⽂件和⽬录创建服务:bin\httpd.exe管理⾯板:bin\ApacheMonitor.exe主要的配置⽂件:conf\httpd.conf⽹站根⽬录:\htdocs配置⽅法下⾯说⼀下我的简单配置步骤1、默认的安装⽬录是在C:/Apache24,找到⾃⼰的实际⽬录⽐如我的D:/Apache242、打开conf\httpd.conf把⽂件中的所有 ”c:/Apache24″替换为⾃⼰的安装⽬录,如” d:/Apache24″找到 218⾏(版本不同,可能有区别)的 ServerName ,把前⾯的 # 去掉找到 DocumentRoot ,修改⽹站的根⽬录,⽐如是 “d:/Apache24/htdocs”DocumentRoot 下⽅⼀⾏的 Directory也做相应修改修改端⼝号——“Listen:80”改为80803、以管理员⾝份运⾏CMD,进⼊Apache24\bin ⽬录(httpd.exe所在⽬录)4、输⼊ httpd.exe -k install -n "Apache24" 安装服务(注:Apache24为安装服务名称)安装完成5、⾄此,安装基本完成。
Apache2.4+php7.1环境搭建 史上最全
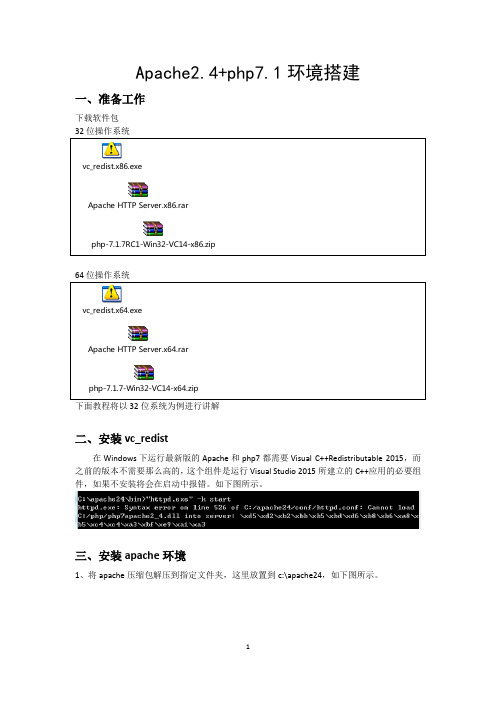
Apache2.4+php7.1环境搭建一、准备工作下载软件包下面教程将以32位系统为例进行讲解二、安装vc_redist在Windows下运行最新版的Apache和php7都需要Visual C++Redistributable 2015,而之前的版本不需要那么高的,这个组件是运行Visual Studio 2015所建立的C++应用的必要组件,如果不安装将会在启动中报错。
如下图所示。
三、安装apache环境1、将apache压缩包解压到指定文件夹,这里放置到c:\apache24,如下图所示。
2、修改apache配置文件,配置文件路径为C:\apache24\conf\httpd.conf,设置apache安装路径,如下图所示。
3、安装apache服务,在cmd进入C:\apache24\bin路径,输入命令:”httpd.exe”–k install –n Apache2.4,双引号不能少,Apache2.4为服务名。
如图所示。
4、开启服务,进入C:\apache24\bin,找到ApacheMonitor.exe,启动apache。
如图所示。
5、测试apache安装效果。
在浏览器地址栏输入http://127.0.0.1,出现如图所示网页即为成功安装。
三、安装php环境1、将php压缩包解压到指定文件夹,这里放置到c:\php,如下图所示。
2、复制一份php.ini-development文件,命名为php.ini。
打开php.ini,搜索关键字“extension_dir”,将其修改为php的dll库路径,如下图所示。
找到如下注释,删除,如下图所示。
3、在apache配置文件httpd.conf最下面中添加php支持语句。
如下图所示4、在C:\apache24\htdocs创建php测试文件。
如下图所示。
5、重启apache服务,并在浏览器中查看php测试网页。
写在最后:网上有很多关于Apache2.4和php7的教程,但是很多跟着做都是做不出来的,不知这些人放这些教程出来做什么,作为一名教育工作者,我认为搭环境只是学习php的入门,一个入门者如果受这么多的困难才能搭出个环境来,还会对后面的学习有信心吗?因此我写下这个教程,以便更多人的学习!。
服务器设置与调试报告
服务器设置与调试报告1. 引言本文档旨在详细记录服务器设置与调试过程,以便于后续的维护与管理。
本文档适用于具有中级网络知识水平的技术人员。
2. 服务器硬件与软件环境2.1 硬件环境- CPU:Intel Xeon E5-2620- 内存:32GB DDR3- 硬盘:2TB SATA- 网络:2x 1Gbps 网络接口2.2 软件环境- 操作系统:CentOS 7.5- 服务器软件:Apache 2.4.6、MySQL 5.7.25、PHP 7.2.143. 服务器设置3.1 基本设置1. 配置网络接口:设置网络模式为桥接模式,连接内外网络。
2. 配置主机名:设置主机名为"server",便于识别。
3. 配置IP地址:分配一个内网IP地址,如192.168.1.1。
3.2 软件安装与配置1. 安装操作系统:使用CentOS 7.5镜像文件进行安装。
2. 安装服务器软件:- 安装Apache:使用yum命令安装Apache服务器软件。
- 安装MySQL:使用yum命令安装MySQL数据库软件。
- 安装PHP:使用yum命令安装PHP解释器。
3. 配置Apache:- 配置虚拟主机:在配置文件中添加虚拟主机配置,设置不同的域名指向不同的网站目录。
4. 配置MySQL:- 修改配置文件:编辑MySQL的配置文件"f",设置字符集为UTF-8、开启远程访问等。
- 创建数据库与用户:创建数据库和用户,分配权限。
5. 配置PHP:- 修改配置文件:编辑PHP的配置文件"php.ini",设置时区、上传大小限制等。
- 安装扩展:根据需求安装PHP扩展,如mysqli、pdo等。
4. 服务器调试4.1 常见问题排查1. 无法访问网站:检查Apache配置文件是否正确,查看防火墙是否开放80端口。
2. 数据库连接失败:检查MySQL服务是否运行正常,查看PHP扩展是否已安装。
CentOS 7.3下配置 Apache2.4 + MySQL5.7 + PHP7.1.8

一.Apache1.查看httpd包是否可用yum list | grep httpd2.安装Apacheyum install httpd3.配置servernamevi /etc/httpd/conf/httpd.conf修改这行: ServerName localhost:804.启动systemctl start httpd5.设置开机启动chkconfighttpd on二MySQL1.安装MySQL源yum localinstall /get/mysql57-community-release-el7-7.noarch.rpm2.安装MySQLyum install mysql-community-server3.启动MySQLsystemctl start mysqld4.获取密码grep 'temporary password' /var/log/mysqld.log得到这行A temporary password is generated for root@localhost: Jqqskhz1Wr(? 冒号后面的就是密码5.修改密码[root@localhost ~]# mysql_secure_installation当出现如下提示时候直接按回车:Enter current password for root出现如下再次回车:Set root password? [Y/n]出现如下提示输入你需要设置的密码,回车后在输入一次确认:New password:接下来还会有四个确认,分别是:Remove anonymous users? [Y/n] Disallow root login remotely? [Y/n]Remove test database and access to it? [Y/n] Reload privilege tables now? [Y/n]6.进入MySQLmysql -uroot -p7.开放远程访问权限use mysql;update user set host = '%' where user = 'root';百分号相当于*号,意为全部放行,也可改为IP地址则只允许此IP连接,也可以设置为192.168.%.%或者192.168.0.1/9代表允许一个ip段进行连接,也可以多加几条数据设置不同ip允许连接三、PHP安装1.首先输入"yum upgrade"进行更新。
Apache2.4+Tomcat7.0整合配置详解
Apache2.4+Tomcat7.0整合配置详解⼀、简单介绍 Apache、TomcatApache HTTP Server(简称 Apache),是 Apache 软件基⾦协会的⼀个开放源码的⽹页服务器,可以在 Windows、Unix、Linux 等操作系统中运⾏是最流⾏的Web服务器软件之⼀。
Apache 反应速度快,运⾏效率⾼,但只⽀持HTML等静态页⾯(加载插件后也可⽀持 PHP 页⾯)。
Apache Tomcat 是由 Apache 软件基⾦协会与 Sun 公司联合开发的⼀款Web服务器,它除了⽀持HTML等静态页⾯外,还⽀持JSP、Servlet 。
在相同的运⾏环境下,Tomcat 对静态页⾯的反应速度没有 Apache 灵敏,整合 Apache 与 Tomcat 能使系统运⾏于⼀个良好环境下,提⾼系统效率。
⼆、软件包下载运⾏环境:Windows 7Apache 2.4 下载:Tomcat 7.0 下载:JDK 6 下载:mod_jk.mo 连接包下载:下载mod_jk时⼀定要看清版本,下载对应的版本如果已有tomcat和jdk,则不⽤另外下载三、Apache 2.4 安装下载的apache2.4如下图所⽰,直接解压到D:\apache-httpd修改⽂件D:\apache-httpd\conf\httpd.conf,端⼝改为8000,程序⽬录指定为E:\apache-tomcat-7.0.50\webapps\ROOT(即tomcat程序所在⽬录,此⽬录可以修改)ServerRoot "D:/apache-httpd"## Mutex: Allows you to set the mutex mechanism and mutex file directory# for individual mutexes, or change the global defaults## Uncomment and change the directory if mutexes are file-based and the default # mutex file directory is not on a local disk or is not appropriate for some# other reason.## Mutex default:logs## Listen: Allows you to bind Apache to specific IP addresses and/or# ports, instead of the default. See also the <VirtualHost># directive.## Change this to Listen on specific IP addresses as shown below to# prevent Apache from glomming onto all bound IP addresses.##Listen 12.34.56.78:80Listen 8000## Dynamic Shared Object (DSO) Support## To be able to use the functionality of a module which was built as a DSO you # have to place corresponding `LoadModule' lines at this location so the# directives contained in it are actually available _before_ they are used.# Statically compiled modules (those listed by `httpd -l') do not need# to be loaded here.## Example:# LoadModule foo_module modules/mod_foo.so#LoadModule access_compat_module modules/mod_access_compat.so LoadModule actions_module modules/mod_actions.soLoadModule alias_module modules/mod_alias.soLoadModule allowmethods_module modules/mod_allowmethods.so LoadModule asis_module modules/mod_asis.soLoadModule auth_basic_module modules/mod_auth_basic.so#LoadModule auth_digest_module modules/mod_auth_digest.so#LoadModule auth_form_module modules/mod_auth_form.so#LoadModule authn_anon_module modules/mod_authn_anon.so LoadModule authn_core_module modules/mod_authn_core.so#LoadModule authn_dbd_module modules/mod_authn_dbd.so#LoadModule authn_dbm_module modules/mod_authn_dbm.so LoadModule authn_file_module modules/mod_authn_file.so#LoadModule authn_socache_module modules/mod_authn_socache.so#LoadModule authnz_fcgi_module modules/mod_authnz_fcgi.so#LoadModule authnz_ldap_module modules/mod_authnz_ldap.so LoadModule authz_core_module modules/mod_authz_core.so#LoadModule authz_dbd_module modules/mod_authz_dbd.so#LoadModule authz_dbm_module modules/mod_authz_dbm.so LoadModule authz_groupfile_module modules/mod_authz_groupfile.so LoadModule authz_host_module modules/mod_authz_host.so#LoadModule authz_owner_module modules/mod_authz_owner.so LoadModule authz_user_module modules/mod_authz_user.so LoadModule autoindex_module modules/mod_autoindex.so#LoadModule buffer_module modules/mod_buffer.so#LoadModule cache_module modules/mod_cache.so#LoadModule cache_disk_module modules/mod_cache_disk.so#LoadModule cache_socache_module modules/mod_cache_socache.so#LoadModule cern_meta_module modules/mod_cern_meta.so LoadModule cgi_module modules/mod_cgi.so#LoadModule charset_lite_module modules/mod_charset_lite.so#LoadModule data_module modules/mod_data.so#LoadModule dav_module modules/mod_dav.so#LoadModule dav_fs_module modules/mod_dav_fs.so#LoadModule dav_lock_module modules/mod_dav_lock.so#LoadModule dbd_module modules/mod_dbd.so#LoadModule deflate_module modules/mod_deflate.soLoadModule dir_module modules/mod_dir.so#LoadModule dumpio_module modules/mod_dumpio.soLoadModule env_module modules/mod_env.so#LoadModule expires_module modules/mod_expires.so#LoadModule ext_filter_module modules/mod_ext_filter.so#LoadModule file_cache_module modules/mod_file_cache.so#LoadModule filter_module modules/mod_filter.so#LoadModule http2_module modules/mod_http2.so#LoadModule headers_module modules/mod_headers.so#LoadModule heartbeat_module modules/mod_heartbeat.so#LoadModule heartmonitor_module modules/mod_heartmonitor.so#LoadModule ident_module modules/mod_ident.so#LoadModule imagemap_module modules/mod_imagemap.soLoadModule include_module modules/mod_include.so#LoadModule info_module modules/mod_info.soLoadModule isapi_module modules/mod_isapi.so#LoadModule lbmethod_bybusyness_module modules/mod_lbmethod_bybusyness.so #LoadModule lbmethod_byrequests_module modules/mod_lbmethod_byrequests.so #LoadModule lbmethod_bytraffic_module modules/mod_lbmethod_bytraffic.so#LoadModule lbmethod_heartbeat_module modules/mod_lbmethod_heartbeat.so#LoadModule ldap_module modules/mod_ldap.so#LoadModule logio_module modules/mod_logio.soLoadModule log_config_module modules/mod_log_config.so#LoadModule log_debug_module modules/mod_log_debug.so#LoadModule log_forensic_module modules/mod_log_forensic.so#LoadModule lua_module modules/mod_lua.so#LoadModule macro_module modules/mod_macro.soLoadModule mime_module modules/mod_mime.so#LoadModule mime_magic_module modules/mod_mime_magic.soLoadModule negotiation_module modules/mod_negotiation.soLoadModule proxy_module modules/mod_proxy.soLoadModule proxy_ajp_module modules/mod_proxy_ajp.soLoadModule proxy_balancer_module modules/mod_proxy_balancer.so LoadModule proxy_connect_module modules/mod_proxy_connect.so#LoadModule proxy_express_module modules/mod_proxy_express.so#LoadModule proxy_fcgi_module modules/mod_proxy_fcgi.soLoadModule proxy_ftp_module modules/mod_proxy_ftp.so#LoadModule proxy_html_module modules/mod_proxy_html.soLoadModule proxy_http_module modules/mod_proxy_http.so#LoadModule proxy_http2_module modules/mod_proxy_http2.so#LoadModule proxy_scgi_module modules/mod_proxy_scgi.so#LoadModule proxy_wstunnel_module modules/mod_proxy_wstunnel.so#LoadModule ratelimit_module modules/mod_ratelimit.so#LoadModule reflector_module modules/mod_reflector.so#LoadModule remoteip_module modules/mod_remoteip.so#LoadModule request_module modules/mod_request.so#LoadModule reqtimeout_module modules/mod_reqtimeout.soLoadModule rewrite_module modules/mod_rewrite.so#LoadModule sed_module modules/mod_sed.so#LoadModule session_module modules/mod_session.so#LoadModule session_cookie_module modules/mod_session_cookie.so#LoadModule session_crypto_module modules/mod_session_crypto.so#LoadModule session_dbd_module modules/mod_session_dbd.soLoadModule setenvif_module modules/mod_setenvif.so#LoadModule slotmem_plain_module modules/mod_slotmem_plain.so LoadModule slotmem_shm_module modules/mod_slotmem_shm.so#LoadModule socache_dbm_module modules/mod_socache_dbm.so#LoadModule socache_memcache_module modules/mod_socache_memcache.so#LoadModule socache_shmcb_module modules/mod_socache_shmcb.so LoadModule speling_module modules/mod_speling.soLoadModule ssl_module modules/mod_ssl.so#LoadModule status_module modules/mod_status.so#LoadModule substitute_module modules/mod_substitute.so#LoadModule unique_id_module modules/mod_unique_id.so#LoadModule userdir_module modules/mod_userdir.so#LoadModule usertrack_module modules/mod_usertrack.so#LoadModule version_module modules/mod_version.so#LoadModule vhost_alias_module modules/mod_vhost_alias.so#LoadModule watchdog_module modules/mod_watchdog.so#LoadModule xml2enc_module modules/mod_xml2enc.so<IfModule unixd_module>## If you wish httpd to run as a different user or group, you must run# httpd as root initially and it will switch.## User/Group: The name (or #number) of the user/group to run httpd as.# It is usually good practice to create a dedicated user and group for# running httpd, as with most system services.#User daemonGroup daemon</IfModule># 'Main' server configuration## The directives in this section set up the values used by the 'main'# server, which responds to any requests that aren't handled by a# <VirtualHost> definition. These values also provide defaults for# any <VirtualHost> containers you may define later in the file.## All of these directives may appear inside <VirtualHost> containers,# in which case these default settings will be overridden for the# virtual host being defined.### ServerAdmin: Your address, where problems with the server should be# e-mailed. This address appears on some server-generated pages, such# as error documents. e.g. admin@#ServerAdmin aaa123@## ServerName gives the name and port that the server uses to identify itself. # This can often be determined automatically, but we recommend you specify # it explicitly to prevent problems during startup.## If your host doesn't have a registered DNS name, enter its IP address here. #ServerName localhost## Deny access to the entirety of your server's filesystem. You must# explicitly permit access to web content directories in other# <Directory> blocks below.#<Directory />AllowOverride noneRequire all denied</Directory>## Note that from this point forward you must specifically allow# particular features to be enabled - so if something's not working as# you might expect, make sure that you have specifically enabled it# below.### DocumentRoot: The directory out of which you will serve your# documents. By default, all requests are taken from this directory, but# symbolic links and aliases may be used to point to other locations.#DocumentRoot "E:\apache-tomcat-7.0.50\webapps\ROOT"<Directory "E:\apache-tomcat-7.0.50\webapps\ROOT">## Possible values for the Options directive are "None", "All",# or any combination of:# Indexes Includes FollowSymLinks SymLinksifOwnerMatch ExecCGI MultiViews## Note that "MultiViews" must be named *explicitly* --- "Options All"# doesn't give it to you.## The Options directive is both complicated and important. Please see# /docs/2.4/mod/core.html#options# for more information.#Options Indexes FollowSymLinks## AllowOverride controls what directives may be placed in .htaccess files.# It can be "All", "None", or any combination of the keywords:# AllowOverride FileInfo AuthConfig Limit#AllowOverride None## Controls who can get stuff from this server.#Require all granted</Directory>## DirectoryIndex: sets the file that Apache will serve if a directory# is requested.#<IfModule dir_module>DirectoryIndex index.html index.php index.htm index.jsp</IfModule>## The following lines prevent .htaccess and .htpasswd files from being# viewed by Web clients.#<Files ".ht*">Require all denied</Files>## ErrorLog: The location of the error log file.# If you do not specify an ErrorLog directive within a <VirtualHost># container, error messages relating to that virtual host will be# logged here. If you *do* define an error logfile for a <VirtualHost># container, that host's errors will be logged there and not here.#ErrorLog "logs/error.log"## LogLevel: Control the number of messages logged to the error_log.# Possible values include: debug, info, notice, warn, error, crit,# alert, emerg.#LogLevel warn<IfModule log_config_module>## The following directives define some format nicknames for use with# a CustomLog directive (see below).#LogFormat "%h %l %u %t \"%r\" %>s %b \"%{Referer}i\" \"%{User-Agent}i\"" combinedLogFormat "%h %l %u %t \"%r\" %>s %b" common<IfModule logio_module># You need to enable mod_logio.c to use %I and %OLogFormat "%h %l %u %t \"%r\" %>s %b \"%{Referer}i\" \"%{User-Agent}i\" %I %O" combinedio </IfModule>## The location and format of the access logfile (Common Logfile Format).# If you do not define any access logfiles within a <VirtualHost># container, they will be logged here. Contrariwise, if you *do*# define per-<VirtualHost> access logfiles, transactions will be# logged therein and *not* in this file.#CustomLog "logs/access.log" common## If you prefer a logfile with access, agent, and referer information# (Combined Logfile Format) you can use the following directive.##CustomLog "logs/access.log" combined</IfModule><IfModule alias_module>## Redirect: Allows you to tell clients about documents that used to# exist in your server's namespace, but do not anymore. The client# will make a new request for the document at its new location.# Example:# Redirect permanent /foo /bar## Alias: Maps web paths into filesystem paths and is used to# access content that does not live under the DocumentRoot.# Example:# Alias /webpath /full/filesystem/path## If you include a trailing / on /webpath then the server will# require it to be present in the URL. You will also likely# need to provide a <Directory> section to allow access to# the filesystem path.## ScriptAlias: This controls which directories contain server scripts.# ScriptAliases are essentially the same as Aliases, except that# documents in the target directory are treated as applications and# run by the server when requested rather than as documents sent to the# client. The same rules about trailing "/" apply to ScriptAlias# directives as to Alias.#ScriptAlias /cgi-bin/ "D:/apache-httpd/cgi-bin/"</IfModule><IfModule cgid_module>## ScriptSock: On threaded servers, designate the path to the UNIX# socket used to communicate with the CGI daemon of mod_cgid.##Scriptsock cgisock</IfModule>## "D:/apache-httpd/cgi-bin" should be changed to whatever your ScriptAliased# CGI directory exists, if you have that configured.#<Directory "D:/apache-httpd/cgi-bin">AllowOverride NoneOptions NoneRequire all granted</Directory><IfModule mime_module>## TypesConfig points to the file containing the list of mappings from# filename extension to MIME-type.#TypesConfig conf/mime.types## AddType allows you to add to or override the MIME configuration# file specified in TypesConfig for specific file types.##AddType application/x-gzip .tgz## AddEncoding allows you to have certain browsers uncompress# information on the fly. Note: Not all browsers support this.##AddEncoding x-compress .Z#AddEncoding x-gzip .gz .tgz## If the AddEncoding directives above are commented-out, then you# probably should define those extensions to indicate media types:#AddType application/x-compress .ZAddType application/x-gzip .gz .tgz## AddHandler allows you to map certain file extensions to "handlers":# actions unrelated to filetype. These can be either built into the server# or added with the Action directive (see below)## To use CGI scripts outside of ScriptAliased directories:# (You will also need to add "ExecCGI" to the "Options" directive.)##AddHandler cgi-script .cgi# For type maps (negotiated resources):#AddHandler type-map var## Filters allow you to process content before it is sent to the client.## To parse .shtml files for server-side includes (SSI):# (You will also need to add "Includes" to the "Options" directive.)##AddType text/html .shtml#AddOutputFilter INCLUDES .shtml</IfModule>## The mod_mime_magic module allows the server to use various hints from the # contents of the file itself to determine its type. The MIMEMagicFile# directive tells the module where the hint definitions are located.##MIMEMagicFile conf/magic## Customizable error responses come in three flavors:# 1) plain text 2) local redirects 3) external redirects## Some examples:#ErrorDocument 500 "The server made a boo boo."#ErrorDocument 404 /missing.html#ErrorDocument 404 "/cgi-bin/missing_handler.pl"#ErrorDocument 402 /subscription_info.html### MaxRanges: Maximum number of Ranges in a request before# returning the entire resource, or one of the special# values 'default', 'none' or 'unlimited'.# Default setting is to accept 200 Ranges.#MaxRanges unlimited## EnableMMAP and EnableSendfile: On systems that support it,# memory-mapping or the sendfile syscall may be used to deliver# files. This usually improves server performance, but must# be turned off when serving from networked-mounted# filesystems or if support for these functions is otherwise# broken on your system.# Defaults: EnableMMAP On, EnableSendfile Off##EnableMMAP off#EnableSendfile on# Supplemental configuration## The configuration files in the conf/extra/ directory can be# included to add extra features or to modify the default configuration of # the server, or you may simply copy their contents here and change as # necessary.# Server-pool management (MPM specific)#Include conf/extra/httpd-mpm.conf# Multi-language error messages#Include conf/extra/httpd-multilang-errordoc.conf# Fancy directory listings#Include conf/extra/httpd-autoindex.conf# Language settings#Include conf/extra/httpd-languages.conf# User home directories#Include conf/extra/httpd-userdir.conf# Real-time info on requests and configuration#Include conf/extra/httpd-info.conf# Virtual hosts#Include conf/extra/httpd-vhosts.conf# Local access to the Apache HTTP Server Manual#Include conf/extra/httpd-manual.conf# Distributed authoring and versioning (WebDAV)#Include conf/extra/httpd-dav.conf# Various default settings#Include conf/extra/httpd-default.conf# Configure mod_proxy_html to understand HTML4/XHTML1<IfModule proxy_html_module>Include conf/extra/proxy-html.conf</IfModule># Secure (SSL/TLS) connections#Include conf/extra/httpd-ssl.conf## Note: The following must must be present to support# starting without SSL on platforms with no /dev/random equivalent# but a statically compiled-in mod_ssl.#<IfModule ssl_module>SSLRandomSeed startup builtinSSLRandomSeed connect builtin</IfModule>完成配置后,启动Apache 2.4,在 "E:\apache-tomcat-7.0.50\webapps\ROOT" 添加静态页⾯ index.html。
apache2服务器的搭建和配置步骤详解
apache2服务器的搭建和配置步骤详解前⾔这篇⽂章主要给⼤家介绍了在linux下apache2服务器的搭建和配置的相关资料,具有⼀定的参考价值,下⾯来⼀起学习学习吧。
步骤如下⾸先当然是下载包包:myths@myths-X450LD:~$ sudo apt-get install apache2装完后就可以⽤了,在地址栏输⼊本地回送地址127.0.0.1或者localhost就可以进⼊到默认的界⾯了。
默认的界⾯当然就是apache2的说明界⾯了。
其实很多情况下并不需要在⽹上寻找帮助⽂档,⼏乎所有的软件都会⾃带使⽤说明,只是略长,我们⼀般都懒得看。
但是其实很多重要的东西就在这当中,⽐如apache2的默认界⾯⾥:Ubuntu Logo Apache2 Ubuntu Default PageIt works!This is the default welcome page used to test the correct operation of the Apache2 server after installation on Ubuntu systems. It is based on the equivalent page on Debian, from which the Ubuntu Apache packaging is derived. If you can read this page, it mea If you are a normal user of this web site and don't know what this page is about, this probably means that the site is currently unavailable due to maintenance. If the problem persists, please contact the site's administrator.Configuration OverviewUbuntu's Apache2 default configuration is different from the upstream default configuration, and split into several files optimized for interaction with Ubuntu tools. The configuration system is fully documented in /usr/share/doc/apache2/README.Debian.gz. Refe The configuration layout for an Apache2 web server installation on Ubuntu systems is as follows:/etc/apache2/|-- apache2.conf| `-- ports.conf|-- mods-enabled| |-- *.load| `-- *.conf|-- conf-enabled| `-- *.conf|-- sites-enabled| `-- *.confapache2.conf is the main configuration file. It puts the pieces together by including all remaining configuration files when starting up the web server.ports.conf is always included from the main configuration file. It is used to determine the listening ports for incoming connections, and this file can be customized anytime.Configuration files in the mods-enabled/, conf-enabled/ and sites-enabled/ directories contain particular configuration snippets which manage modules, global configuration fragments, or virtual host configurations, respectively.They are activated by symlinking available configuration files from their respective *-available/ counterparts. These should be managed by using our helpers a2enmod, a2dismod, a2ensite, a2dissite, and a2enconf, a2disconf . See their respective man pages for The binary is called apache2\. Due to the use of environment variables, in the default configuration, apache2 needs to be started/stopped with /etc/init.d/apache2 or apache2ctl. Calling /usr/bin/apache2 directly will not work with the default configuration. Document RootsBy default, Ubuntu does not allow access through the web browser to any file apart of those located in /var/www, public_html directories (when enabled) and /usr/share (for web applications). If your site is using a web document root located elsewhere (such as i The default Ubuntu document root is /var/www/html. You can make your own virtual hosts under /var/www. This is different to previous releases which provides better security out of the box.Reporting ProblemsPlease use the ubuntu-bug tool to report bugs in the Apache2 package with Ubuntu. However, check existing bug reports before reporting a new bug.Please report bugs specific to modules (such as PHP and others) to respective packages, not to the web server itself.Valid XHTML 1.0 Transitional仅仅从这个⽂件中,我们就可以⾄少得到以下的重要信息:当访问本机的时候,默认进⼊的页⾯是/var/www/html/index.html。
- 1、下载文档前请自行甄别文档内容的完整性,平台不提供额外的编辑、内容补充、找答案等附加服务。
- 2、"仅部分预览"的文档,不可在线预览部分如存在完整性等问题,可反馈申请退款(可完整预览的文档不适用该条件!)。
- 3、如文档侵犯您的权益,请联系客服反馈,我们会尽快为您处理(人工客服工作时间:9:00-18:30)。
在网上找了好多关于apache2.4.7虚拟主机配置的问题,都没找到确切的答案,经过我自己的摸索终于找到了解决方案。
1.打开apache->conf->extra->httpd-vhost.conf文件。
2.按照模板复制一个虚拟主机配置
例如:
这里要配置好你存放的文件目录。
和你设置的访问域名。
3.配置apache->conf->httpd.conf配置文件
如果你用的不是默认的80端口需要增加listen
例如:
增加的listen地址要与虚拟主机配置保存一致
3.更改httpd.conf中的虚拟主机配置
要将虚拟主机访问的地址与之前的保持一直,红色框框内就是需要更改的地方。
最后一个代表让所有人访问,当然本机的话只能是局域网。
把只能让本机访问那个注释掉。
4.引入虚拟主机,同样是在httpd.conf配置文件中
apache2.4.7配置文件下没有,要自己输入
保存好后重启服务器就可以访问你配置的域名了
我用的是easyPHP集成环境14.1VC11。
