SOLARIS 10下安装ORACLE 11G
SuSe10下Oracle11g文件系统模式安装及配置、网络配置与连接
SuSe10下Oracle11g文件系统模式安装及配置、网络配置与连接概述本课程主要讲解oracle数据库软件的安装及配置,以及数据库的创建过程和网络配置与连接等;同时讲解一些数据库安装过程中的常见问题解决办法。
注意:本文当中引用的package_name均为变量,请根据实际包名替换。
如果使用远程安装,请在客户端机器上安装Xmanager Enterprise 3软件。
1. Oracle数据库安装前的准备工作1.1.对操作系统的要求1、操作系统版本要求Linux版本与oracle版本配套关系表表格1Linux版本与Oracle版本配套关系表2、各操作系统所需补丁包Linux(使用rpm -q “package_name”可以查看是否安装了相应补丁包,相关包的版本名称可能有些不同,只要不低于以下列出的版本即可)查询命令示例如下:EIA196:~ # rpm -q "binutils-2.16.91.0.5"binutils-2.16.91.0.5-23.20查询技巧提示:如果有些包查询不到,可以通过只查询部分关键字的方法来确定是否安装,示例如下:EIA196:~ # rpm -q "gcc-c++"gcc-c++-4.1.2_20070115-0.11SUSELinux 10(Linux x86-64)要求安装如下rpm包:binutils-2.16.91.0.5compat-libstdc++-5.0.7-22.2gcc-4.1.0gcc-c++-4.1.0glibc-2.4-31.2glibc-32bit-2.4-31.2 (32 bit)glibc-devel-2.4glibc-devel-32bit-2.4 (32 bit)libaio-0.3.104libaio-32bit-0.3.104 (32 bit)libaio-devel-0.3.104libelf-0.8.5libgcc-4.1.0libstdc++-4.1.0libstdc++-devel-4.1.0make-3.80sysstat-6.0.2unixODBC-2.2.11unixODBC-devel-2.2.11SUSELinux 10(Linux x86)要求安装如下rpm包:binutils-2.16.91.0.5compat-libstdc++-5.0.7glibc-2.4-31.2glibc-devel-2.4-31.2gcc-4.1.0ksh-93r-12.9libaio-0.3.104libaio-devel-0.3.104libelf-0.8.5libgcc-4.1.0libstdc++-4.1.0libstdc++-devel-4.1.0make-3.80sysstat-6.0.2unixODBC-2.2.11unixODBC-devel-2.2.113、操作系统资源要求:(1)安装Oracle数据库软件要求至少5GB磁盘空间,Enterprise Edition版本安装要求4.6GB空间,建议分配给安装目录10GB以上空间。
solaris10安装oracle
solaris10安装oracle作为象我一样的菜鸟,面对oracle首要的问题就是oracle的安装,solaris在图形界面下安装oracle和windows下没什么太大区别,关键是solaris下的参数设置。
下面以oracle 9i为例:1。
以root用户身份进入系统建立oracle用户和管理组dba# groupadd dba# useradd -d /export/home/oracle -g dba -m oracle2.修改/etc/system文件:此文件是oracle安装的重中之重,里面设置了一些需要修改的系统参数。
# vi /etc/system 在末尾加如如下内容:set semsys:seminfo_semmni=315set semsys:seminfo_semmsl=300set semsys:seminfo_semmns=630set semsys:seminfo_semmap=1024set semsys:seminfo_semume=200set semsys:seminfo_semopm=256set semsys:seminfo_semvmx=32767set shmsys:shminfo_shmmax=4294967295set shmsys:shminfo_shmmni=315set shmsys:shminfo_shmseg=10set shmsys:shminfo_shmmin=1下面介绍每个参数的作用:一个内存区域,可以被不同的进程读取。
Oracle使用它来构成SGA。
Oracle使用以下三种方法来创建一个SGA区:1.使用单个共享内存段。
2.使用连续多个共享内存段。
3.使用多个不连续共享内存段。
Oracle优先使用的第一种方法,如果成功,则继续初始化,不成功则使用第二种方法,再不成功则使用第三种方法。
如果再不成功,则初始化失败,Oracle报告错误代码。
oracle+11g安装图解
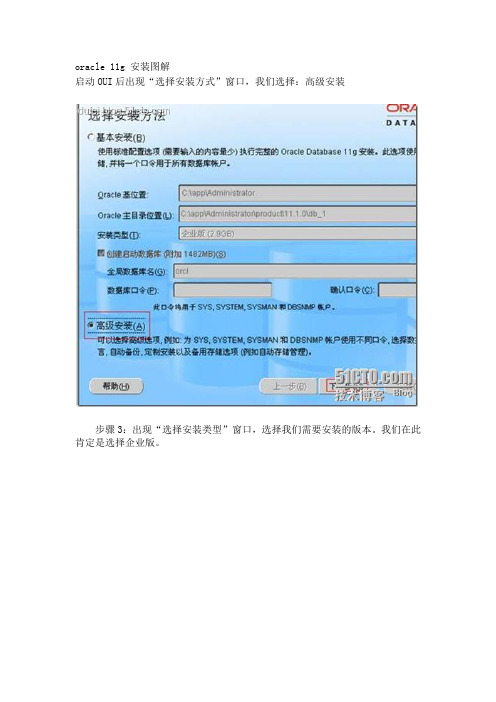
oracle 11g 安装图解启动OUI后出现“选择安装方式”窗口,我们选择:高级安装步骤3:出现“选择安装类型”窗口,选择我们需要安装的版本。
我们在此肯定是选择企业版。
至于产品语言不用选择,它会根据当前系统的语言自动调整!步骤4:出现“安装位置”窗口Oracle 基目录:用于安装各种与ORACLE软件和配置有关的文件的顶级目录。
软件位置:用于存放安装具体ORACLE产品的主目录和路径。
在此我们使用默认的配置。
在此ORACLE会选择剩余空间最多的盘作为基目录和安装目录的所在盘。
可以输入一个电子邮件或是metalink接收安全问题通知,在此我直接输入一个电子邮件,当然也可以是metalink用户信息!步骤5:再向下就是对安装环境进行检测,如果不满足条件则会给出相应的提示,如图所示:在此是因为我的内存不足,所以会报此提示,那么我们在此调整内存,以满足条件后再继续安装。
步骤6:出现“选择配置选项”如图:在此选择安装数据库。
如果是“配置自动存储管理”,则自动存储管理(ASM)可用来自动化和简化对数据文件、控制文件和日志文件的优化布局。
自动存储管理(ASM)将每个文件切割成许多小扩展文件,并将它们平均分散在一个磁盘组的所有磁盘上。
一旦自动存储管理(ASM)磁盘组建立,创建和删除文件的时候,Oracle数据库都会从磁盘组自动分配存储空间。
如果是“仅安装软件”,则只安装ORACLE软件,在安装之后还需要再运行数据库配置助手创建数据库。
步骤7:出现“选择数据库配置”窗口,在此需要选择在安装过程中创建的数据库类型。
一般用途/事务处理:适合各种用途的预配置数据库。
数据仓库:创建适用于特定需求并运行复杂查询环境。
常用于存储并快速访问大量记录数据。
高级:安装结束后运行ORACLE DBCA后,用户才可以配置数据库。
在此我们选择“一般用途/事务处理”步骤8:单独下一步后,出现“指定数据库配置选项”全局数据库名:主要用于在分布式数据库系统中,区分不同的数据库使用,如北京有一个数据库db1,上海也有一个同名数据库,怎么区分它们呢,在此可以使用数据库名.域名的形式,这样即使数据库名相同,也可以区分开。
oracle11g安装教程Oracle11g安装教程的步骤1.下载Oracle11g

oracle11g安装教程Oracle11g安装教程的步骤1.下载
Oracle11g
以下是Oracle11g安装教程的步骤:
1. 下载Oracle11g安装程序:从Oracle公司官网下载最新版Oracle11g安装程序,并解压缩到本地磁盘。
2. 运行Oracle11g安装程序:使用管理员权限运行Oracle11g安装程序,按照向导提示进行安装。
3. 设置Oracle用户名和密码:设置Oracle系统管理员账户及其密码,并设置Oracle如何处理管理员密码规则检查。
4. 创建Oracle配置文件目录:在进行Oracle安装之前,需要创建Oracle配置文件目录,指定ORACLE_HOME、ORACLE_SID、ORACLE_BASE等环境变量。
5. 配置Oracle数据库:选择自定义安装类型,并指定Oracle安装的路径、数据库类型、字符集和语言等选项。
6. 安装Oracle软件:根据向导提示,点击“安装”按钮开始安装Oracle11g软件。
7. 为Oracle创建一个数据库:根据向导提示,输入需要创建的Oracle数据库名称及其密码,并选择需要创建的数据文件和表空间等选项。
8. 完成Oracle安装:安装Oracle完成后,运行netca等Oracle 配置工具以创建网络服务等配置。
以上是Oracle11g安装教程的基本步骤,需要注意的是,在安装过程中需要仔细阅读向导提示,并根据需要进行自定义配置,以达到最优的Oracle系统环境配置。
Suse10安装Oracle11g操作步骤

这些软件包还是要检查下,不要少了。
rpm –q ,此文档以SUSE 10 SP1 64bit安装Oracle 11g R1 64bit为基础环境编写。
其它版本安装也可参考,但例如设置环境变量等地方可能会有所不同。
第1章创建用户和组1.1 创建名为dba的操作系统组【检查命令】# grep dba /etc/group无输出则表示dba组不存在。
如果dba组已存在,则使用以下命令删除dba组。
【删除命令】# /usr/sbin/groupdel dba【创建命令】# /usr/sbin/groupadd -g 200 dba1.2 创建名为oracle的操作系统用户【检查命令】# grep oracle /etc/passwd无输出则表示Oracle用户不存在。
如果Oracle用户已存在,则使用以下命令删除Oracle用户。
【删除命令】# /usr/sbin/userdel -f oracle【创建命令】# /usr/sbin/useradd -u 300 -g dba -d /home/oracle -s /bin/bash -m oracle【命令说明】用户名为oracle,隶属于dba组。
1.3 为oracle用户建立密码【创建命令】# passwd oracle第2章设置环境变量和赋权2.1 赋予目录正确的权限2.1.1 对文件系统/opt/oracle并赋权【命令】# chown oracle:dba /opt/oracle# chmod 770 /opt/oracle2.1.2 对文件系统/opt/orabak并赋权【命令】# chown oracle:dba /opt/orabak# chmod 770 /opt/orabak2.1.3 创建目录/usr/local/bin并赋权检查/usr/local/bin目录是否存在,如不存在则需创建该目录,并赋予777权限。
【命令】# mkdir /usr/local/bin# chmod 777 /usr/local/bin# ll /usr/local | grep bindrwxrwxrwx 2 root root 4096 2007-05-03 21:24 bin2.1.4 赋权/tmp目录权限检查/tmp是否具有777权限,如不具备则赋予/tmp目录777权限。
201211 Solaris10 + Oracle 10gR2 Client安装教程
技术文档模板(v 121110)作者王卫锋审核分类Oracle 子类DateBase 10gR2 Client 更新时间2012-11-10关键字Solaris 10,Oracle DataBase 10gR2 Client摘要Solaris 10平台安装Oracle DataBase 10gR2 Client详细教程主要适Solaris 10,Oracle DataBase 10gR2 Client用环境版本说明拟制/修改责任人拟制/修改日期修改内容/理由版本号V121110 王卫锋2012-11-10 新建目录版本说明 (2)1 系统和软硬件环境说明 (4)2准备工作 (4)2.1确定安装哪个版本的Solaris (4)2.2 必须安装以下软件包(或更高版本) (4)2.3确定是否安装所需的软件包 (5)2.4创建所需的操作系统组和用户 (5)3安装步骤 (6)4环境变量配置 (13)5验证效果 (14)1 系统和软硬件环境说明硬件环境:Sun SPARC或x86服务器软件环境:Solaris 10,Oracle DataBase 10gR2 Client2准备工作对于要安装的Oracle产品,系统必须满足以下产品的具体要求:•PL / SQL本地编译,PRO * C / C + + Oracle调用接口,甲骨文公司的C + +调用接口,以及Oracle XML 开发工具包(XDK)•Sun ONE Studio 10(C和C + + 5.5)•GCC 3.4.2•Pro* FORTRAN Sun ONE Studio 8(FORTRAN 95)•Oracle的JDBC / OCI驱动程序与Oracle JDBC / OCI驱动程序,您可以使用以下版本的JDK:•Sun Java 2 SDK标准版1.3.1_11和JNDI扩展•Sun Java 2 SDK标准版1.2.2_17和JNDI扩展注意:安装此版本的JDK 1.4.2_08为了确保该系统满足这些要求:2.1确定安装哪个版本的Solaris# uname -r5.10在这个例子中,所示版本的Solaris 10(5.10)。
Oracle11gR2 for solaris 10_U10a安装手册

Solaris 10安装oracle 11g R2_x64安装环境:vmware workstation 9系统版本:solaris 10 _U10 64-bit主机名:shawnIP地址:192.168.0.2081、用root身份创建用户和组:bash-3.2 #groupadd oinstallbash-3.2# groupadd dbabash-3.2#useradd –g oinstall –G dba –d /export/home/oracle –s /bin/csh –m oracle(g 表示用户所属组、-G 表示用户所属附加组、-d 表示用户主目录、-s 表示用户默认shell 类型、oracle 表示用户名,-m 参数表示自动创建此用户的主目录)bash-3.2#passwd oracle(为oracle用户设置密码,密码设置为:oracle123)2、修改修改oracle 用户的环境变量用户的环境变量(一定要注意环境变量的一定要注意环境变量的shell)以oracle用户登陆,在oracle用户的主目录下找到并修改它的环境变量.profile(这是一个隐藏文件,ls时须加-a参数)。
ORACLE_BASE=/export/home/oracle/app/oracleexport ORACLE_BASEORACLE_HOME=$ORACLE_BASE/product/11.2.0/dbhome_1export ORACLE_HOMEORACLE_SID=shawnexport ORACLE_SIDPATH=$ORACLE_HOME/bin:/bin:/sbin:/usr/ccs/bin:/usr/local/binexport PATH使文件生效:-bash-3.2$ source .profile3、修改Solaris系统参数:(1)使用root 账户登录,创建/etc/system 文件的一个备份(也可以不用创建此文件,而直接在system 文件上面进行编辑),例如:bash-3.2# cp /etc/system /etc/system.orig(2)编辑/etc/system,在最后添加如下:set semsys:seminfo_semmni=100set semsys:seminfo_semmns=1024set semsys:seminfo_semmsl=256set semsys:seminfo_semvmx=32767set shmsys:shminfo_shmmax=4294967295set shmsys:shminfo_shmmni=100(3) 重启系统使参数生效:bash-3.2#reboot4、将Oracle11gR2的ZIP文件拷贝到本地文件夹(必须使用二进制传输文件,否则容易报错invalid entry size),并解压出来运行其安装程序runInstaller,(Oracle的安装包有两个,这两个包必须解压在同一个文件夹下面,否则安装将报错)在oracle用户下面运行runIstaller文件进入ORACLE的安装界面(如果是在root用户下面运行./runInstaller进行安装,那么安装程序将自动结束安装),运行完./runinstaller之后会弹出如下画面:(1)不勾选安全更新,(点下一步会弹出一个对话框,直接选“是”)(2)选创建和配置数据库(3)选择服务器类(4)如果没有集群环境,选择单实例安装(5)安装类型选择高级安装(6)产品语言选择简体中文和英语(7)数据库版本选择企业版(8)指定基目录(9)指定产品清单目录和组名(10)选择一般用途(11)填写全局数据库名和SID(12)内存大小以实际情况为准(13)字符集使用ZHS16GBK(14)选择使用Database Control管理数据库(15)数据库文件位置选择默认值(16)选择不启用备份(17)这里选择对所有账号使用相同口令,根据建议标准使用强密码如:oracle1.A。
Solaris10 安装oracle

1安装oracle数据库(version 10.2.0.1)1.1选择高级安装数据库字符集为:AMERICAN.WE8ISO8859P11.2设置sga的大小在oracle控制台(http://ip:1158/em)*.sga_target=25438453761.3启动oracle数据库监听器进入oracle安装目录的bin目录,通过./lsnrctl service 检查oracle服务器是否启动如果没有,通过./lsnrctl start 启动。
1.4启动oracle服务1.5如果在启动过程中start命令无法启动,可以通过SQL>startup pfile=’/export/home/oracle/oracle/admin/t2/pfile/init.ora…’1.6如果启动出现share-pool-memory不足,可以修改进入oracle安装目录的dbs目录,在init<sid>.ora中修改1.7如果出现swap不足,通过这个命令分配swap空间$mkfile 800m /export/swapfile$swap –a /export/swapfile分配空间可以通过计算差多少,分配多少,也不要太多。
1.8在安装oracle时,出现out of memory异常,解决办法是:从solaris 10开始,对sem,shm的配置无法通过/etc/system文件来进行修改,更改方式如下:ITPUB个人空间&k3m.XFrc1) 设置max-shm-memory的值为4GB:#projadd -U oracle –K "project.max-shm-memory=(priv,4096MB,deny)"user.oracle查看设置是否生效:# cat /etc/project在project文件的末尾能够看到新增加的一行user.oracle:100::oracle::project.max-shm-memory=(priv, 4294967296,deny)2) 修改参数max-sem-ids# projmod -s -K "project.max-sem-ids=(priv,256,deny)" user.oracle 检查修改是是否生效查看是否生效# su - oracle$ prctl –i project user.oracleproject: 100: user.oracleNAME PRIVILEGE VALUE FLAG ACTION RECIPIENT 。
Solaris 10下安装Oracle 11g
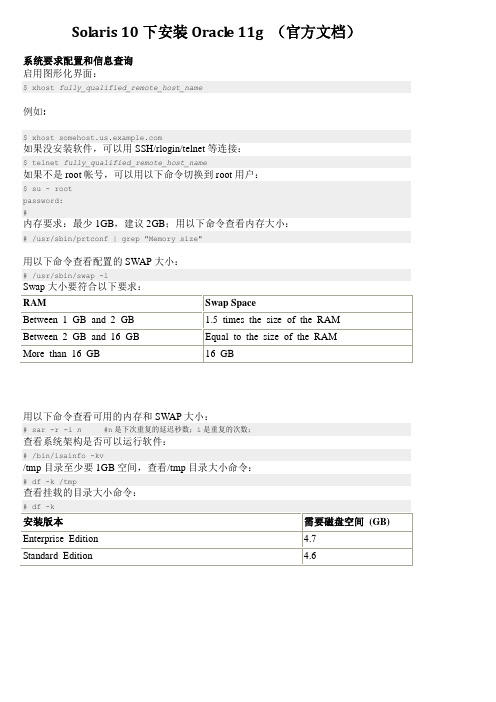
用以下命令查看配置的 SWAP 大小:
# /usr/sbin/swap -l
Swap 大小要符合以下要求: RAM Between 1 GB and 2 GB Between 2 GB and 16 GB More than 16 GB Swap Space 1.5 times the size of the RAM Equal to the size of the RAM 16 GB
用以下命令查看可用的内存和 SWAP 大小:
# sar -r -i n #n 是下次重复的延迟秒数;i 是重复的次数;
查看系统架构是否可以运行软件:
# /bin/isainfo -kv
/tmp 目录至少要 1GB 空间,查看/tmp 目录大小命令:
# df -k /tmp
查看挂载的目录大小命令:
# df -k
Solaris 10 下安装 Oracle 11g (官方文档)
系统要求配置和信息查询 启用图形化界面:
$ xhost fully_qualified_remote_host_name
例如:
$ xhost
如果没安装软件,可以用 SSH/rlogin/telnet 等连接:
安装版本 Enterprise Edition Standard Edition
需要磁盘空间 (GB) 4.7 4.6
PS:双击获取文档,ctrl+A,ctrl+C,然后粘贴到word即可。 未能直接提供word版本,抱歉。
$ telnet fully_qua如果不是 root 帐号,可以用以下命令切换到 root 用户:
$ su - root password: #
内存要求:最少 1GB,建议 2GB;用以下命令查看内存大小:
solaris 10 安装 oracle

14.开始安装,时间比较长,其中会提示换盘,在提示中要修改PATH为:/cdrom/disk2 & /cdrom/disk3.
15."Install Successful"后,会有对话框提示:以root身份运行/home/oracle/product/9.2/root.sh脚本,Enter the full pathname of the local bin directory : y . //在/usr/local/bin中生成一些命令,在/var/opt/oracle中生成oratab文件.
六. Oracle常用命令
dbca - 用于创建,删除,管理oracle实例
oemapp dbassist - Database Configuration Assistant 用于数据库的管理(创建,修改,删除)
netca - Net8 Configuration Assistant 用于数据库服务器网络服务的配置
16.开始创建数据库. //这一步在我的256M的机器上特别的慢,实在是让人忍不可忍啊.哈哈!
17.弹出"Net Configuration Assistant"界面,选中"erform typical configuration"项,进行网络的典型配置.
18.安装完毕.
四. oracle的启动与关闭
# useradd -c oracle -g dba -d /home/oracle -m -s /bin/bash oracle //添加一个oracle用户
# passwd oracle //修改用户的密码
Oracle 11g安装图文攻略(转载网络文章)
Oracle 11g安装图文攻略呵呵,花了一个多小时,左右把11g安装折腾好了。
其中折腾SQL Developer 花了好长时间,总算搞定了。
好了,先总结下安装步骤,希望给后面的童鞋提高安装效率。
呵呵。
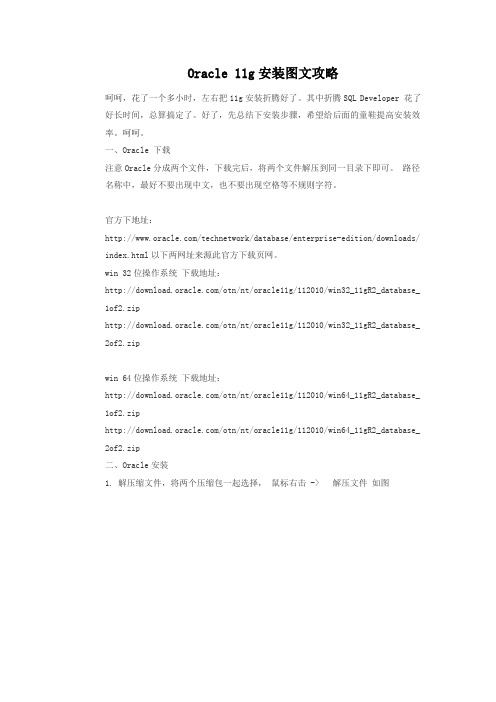
一、Oracle 下载注意Oracle分成两个文件,下载完后,将两个文件解压到同一目录下即可。
路径名称中,最好不要出现中文,也不要出现空格等不规则字符。
官方下地址:/technetwork/database/enterprise-edition/downloads/ index.html以下两网址来源此官方下载页网。
win 32位操作系统下载地址:/otn/nt/oracle11g/112010/win32_11gR2_database_ 1of2.zip/otn/nt/oracle11g/112010/win32_11gR2_database_ 2of2.zipwin 64位操作系统下载地址:/otn/nt/oracle11g/112010/win64_11gR2_database_ 1of2.zip/otn/nt/oracle11g/112010/win64_11gR2_database_ 2of2.zip二、Oracle安装1. 解压缩文件,将两个压缩包一起选择,鼠标右击 -> 解压文件如图2.两者解压到相同的路径中,如图:3. 到相应的解压路径上面,找到可执行安装文件【 setup.exe 】双击安装。
如图:4. 安装第一步:配置安全更新,这步可将自己的电子邮件地址填写进去(也可以不填写,只是收到一些没什么用的邮件而已)。
取消下面的“我希望通过My Oracle Support接受安全更新(W)”。
如图:5. 安全选项,直接选择默认创建和配置一个数据库(安装完数据库管理软件后,系统会自动创建一个数据库实例)。
如图:6. 系统类,直接选择默认的桌面类就可以了。
(若安装到的电脑是,个人笔记本或个人使用的电脑使用此选项) 如图:7. 典型安装。
SUSE10下安装Oracle11g
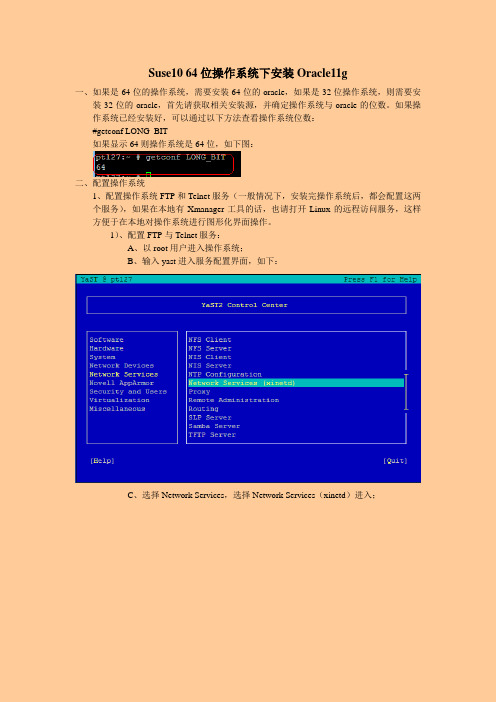
Suse10 64位操作系统下安装Oracle11g一、如果是64位的操作系统,需要安装64位的oracle,如果是32位操作系统,则需要安装32位的oracle,首先请获取相关安装源,并确定操作系统与oracle的位数。
如果操作系统已经安装好,可以通过以下方法查看操作系统位数:#getconf LONG_BIT如果显示64则操作系统是64位,如下图:二、配置操作系统1、配置操作系统FTP和Telnet服务(一般情况下,安装完操作系统后,都会配置这两个服务),如果在本地有Xmanager工具的话,也请打开Linux的远程访问服务,这样方便于在本地对操作系统进行图形化界面操作。
1)、配置FTP与Telnet服务:A、以root用户进入操作系统;B、输入yast进入服务配置界面,如下:C、选择Network Services,选择Network Services(xinetd)进入;D、选择Enable,然后分别选择pure-ftpd服务和in.telnetd服务,将开关打开;E、最后选择Finish完成;注:如果在打开服务的时候系统提示需要插入安装光盘,请插入光盘,然后点击OK继续。
F、修改/etc/ftpusers文件,将文件中root前加注释;G、修改/etc/pam.d/login文件,将auth required pam_securetty.so前加注释;H、重启xinetd服务;#/etc/init.d/xinetd restart注:如果远程telnet和ftp登陆服务器,可能需要关闭服务器防火墙,请确认。
2)、开启远程连接服务:A、以root用户登陆;B、输入yast进入服务配置界面;C、选择Network Services,选择Remote Administration进入;D、选择Allow Remote Administration ,点击Finish,点击OK;E、重启rcxdm服务;#rcxdm restart注:此时便可以用Xmanager远程桌面Linux了,如果远程的时候没有出现Linux操作系统桌面,请重启一下Linux系统。
oracle 11g在Solaris下的官方安装文档
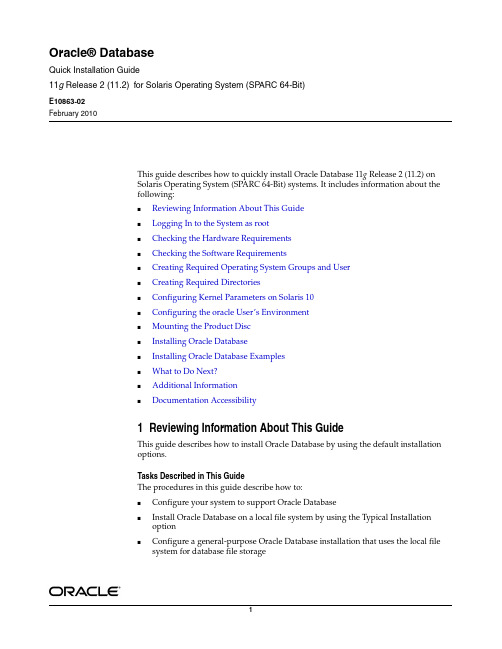
Oracle® DatabaseQuick Installation Guide11g Release 2 (11.2)for Solaris Operating System (SPARC 64-Bit)E10863-02February 2010This guide describes how to quickly install Oracle Database 11g Release 2 (11.2) onSolaris Operating System (SPARC 64-Bit) systems. It includes information about thefollowing:■Reviewing Information About This Guide■Logging In to the System as root■Checking the Hardware Requirements■Checking the Software Requirements■Creating Required Operating System Groups and User■Creating Required Directories■Configuring Kernel Parameters on Solaris 10■Configuring the oracle User’s Environment■Mounting the Product Disc■Installing Oracle Database■Installing Oracle Database Examples■What to Do Next?■Additional Information■Documentation Accessibility1Reviewing Information About This GuideThis guide describes how to install Oracle Database by using the default installationoptions.Tasks Described in This GuideThe procedures in this guide describe how to:■Configure your system to support Oracle Database■Install Oracle Database on a local file system by using the Typical Installationoption■Configure a general-purpose Oracle Database installation that uses the local filesystem for database file storageResults of a Successful InstallationAfter you successfully install Oracle Database:■The database that you created and the default Oracle Net listener process run on the system.■Oracle Enterprise Manager Database Control run and can be accessed by using a Web browser.Tasks Not Described in This GuideThis guide covers the Typical Installation scenario and does not describe how to complete the following tasks:■Using the Advanced Installation option to install the software■Installing the software on a system that has an existing Oracle software installation ■Installing Oracle Clusterware and Oracle Real Application Clusters (RAC) on a cluster■Enabling Enterprise Manager e-mail notifications or automated backups ■Using alternative storage options such as Automatic Storage Management ■Installing and configuring Oracle grid infrastructureWhere to Get Additional Installation InformationFor more information about installing Oracle Database, including information about the tasks not described in this guide, refer to one of the following guides:■If you want to install the software on a single system, then refer to Oracle Database Installation Guide .■If you want to install Oracle grid infrastructure for a standalone server, then refer to the "Oracle Grid Infrastructure" chapter in Oracle Database Installation Guide .■If you want to perform a Oracle Real Application Clusters installation, then refer to Oracle Grid Infrastructure Installation Guide and Oracle Real Application Clusters Installation Guide . These guides describe how to install Oracle Clusterware and Oracle Real Application Clusters. Oracle clusterware is a prerequisite for Oracle Real Application Clusters installations.All these guides are available on the product disc. To access them, use a Web browser to open the welcome.htm file located in the top-level directory of the installation media, and then select the Documentation tab.2Logging In to the System as rootBefore you install Oracle Database, you must complete several tasks as the root user. To log in as the root user, complete one of the following procedures:■If you are installing the software from an X Window System workstation or X terminal, then perform the following:Note:You must install the software from an X Window Systemworkstation, an X terminal, or a PC or other system with X server software installed.1.Start a local terminal session, for example, an X terminal (xterm ).2.If you are not installing the software on the local system, then enter thefollowing command to enable the remote host to display X applications on the local X server:$ xhost fully_qualified_remote_host_nameFor example:$ xhost 3.If you are not installing the software on the local system, then use the ssh , rlogin , or telnet command to connect to the system where you want to install the software:$ telnet fully_qualified_remote_host_name4.If you are not logged in as the root user, then enter the following command to switch user to root :$ su -password:#■If you are installing the software from a PC or other system with X server software installed, then:1.Start the X server software.2.Configure the security settings of the X server software to permit remote hosts to display X applications on the local system.3.Connect to the remote system where you want to install the software, and start a terminal session on that system, for example, an X terminal (xterm ).4.If you are not logged in as the root user on the remote system, then enter the following command to switch user to root :$ su -password:#3Checking the Hardware RequirementsThe system must meet the following minimum hardware requirements:■Memory Requirements ■System Architecture ■Disk Space RequirementsNote:If necessary, refer to your X server documentation for moreinformation about completing this procedure. Depending on the X server software that you are using, you may need to complete the tasks in a different order.3.1Memory RequirementsThe following are the memory requirements for installing Oracle Database 11g Release 2 (11.2):■At least 1 GB of RAMTo determine the physical RAM size, enter the following command:# /usr/sbin/prtconf | grep "Memory size"If the size of the physical RAM is less than the required size, then you must install more memory before continuing.■The following table describes the relationship between installed RAM and the configured swap space requirement:To determine the size of the configured swap space, enter the following command:# /usr/sbin/swap -lIf necessary, refer to the operating system documentation for information about how to configure additional swap space.■To determine the available RAM and swap space, enter the following command:# sar -r -i nwhere, n is the number of seconds to delay for the next iterations and i is the number of iterations you want to test.3.2System ArchitectureTo determine whether the system architecture can run the software, enter the following command:Note:On Solaris, if you use non-swappable memory, like ISM, thenyou should deduct the memory allocated to this space from the available RAM before calculating swap space.RAMSwap SpaceBetween 1 GB and 2 GB 1.5 times the size of RAM Between 2 GB and 16 GB Equal to the size of RAM More than 16 GB16 GBNote:The output of this command shows the total/available swapblocks, where each block is equal to 512 bytes and not 1 KB.Note:Oracle recommends that you take multiple values for theavailable RAM and swap space before freezing on a value. This isbecause the available RAM and swap space keep changing depending on the user interactions with the computer.# /bin/isainfo -kvThis command displays the processor type. Verify that the processor architecture matches the Oracle software release that you want to install. If you do not see the expected output, then you cannot install the software on this system.3.3Disk Space RequirementsThe following are the disk space requirements for installing Oracle Database 11g Release 2 (11.2):■At least 1 GB of disk space in the /tmp directoryTo determine the amount of disk space available in the /tmp directory, enter the following command:# df -k /tmpThis command displays disk space in 1 kilobyte blocks. On most systems, you can use the df command with the -h flag (df -h ) to display output in "human-readable" formatIf there is less than 1 GB of free disk space available in the /tmp directory, then complete one of the following steps:■Delete unnecessary files from the /tmp directory to meet the disk space requirement.■Set the TMP and TMPDIR environment variables when setting the oracle user’s environment.■Extend the file system that contains the /tmp directory. If necessary, contact the system administrator for information about extending file systems.■To determine the amount of free disk space on the system, enter the following command:# df -k■The following table shows the approximate disk space requirements for software files for each installation type:Additional disk space, either on a file system or on an Automatic StorageManagement disk group is required for the fast recovery area if you choose to configure automated backups.See Also:"Configuring the oracle User’s Environment" for moreinformation on setting TMP and TMPDIR Installation Type Requirement for Software Files (GB)Enterprise Edition 4.68Standard Edition 4.62Standard Edition One4.62Custom (Enterprise Edition + custom install options)4.714Checking the Software RequirementsDepending on the products that you intend to install, verify that the following software are installed on the system.Note:Oracle Universal Installer performs checks on the system toverify that it meets the listed requirements. To ensure that these checkspass, verify the requirements before you start Oracle UniversalInstaller.■Operating System Requirements■Package Requirements■Compiler Requirements■Additional Software Requirements■Patch Requirements4.1Operating System RequirementsThe following are the operating system requirements for Oracle Database 11g Release 2 (11.2):■Solaris 10 U6 (5.10-2008.10)To determine the distribution and version of Solaris installed, enter the following command:# uname -r5.10In this example, the version shown is Solaris 10 (5.10). If necessary, refer to your operating system documentation for information about upgrading the operating system.To determine the update level of Solaris installed, enter the following command:$ cat /etc/release4.2Package RequirementsThe following packages (or later versions) are required for Oracle Database 11g Release 2 (11.2):■SUNWarc■SUNWbtool■SUNWhea■SUNWlibC■SUNWlibm■SUNWlibms■SUNWsprot■SUNWtoo■SUNWi1of■SUNWi1cs (ISO8859-1)■SUNWi15cs (ISO8859-15)■SUNWxwfnt■SUNWcslYou may also require additional font packages for Java, depending on your locale. Refer to the following Web site for more information:/j2se/1.4.2/font-requirements.htmlTo determine whether the required packages are installed, enter commands similar to the following:# pkginfo -i SUNWarc SUNWbtool SUNWhea SUNWlibC SUNWlibms SUNWsprot \SUNWtoo SUNWi1of SUNWi1cs SUNWi15cs SUNWxwfntIf a package is not installed, then install it. Refer to your operating system or software documentation for information about installing packages.4.3Compiler RequirementsSun Studio 12 (C and C++ 5.9) is supported with Pro*C/C++, Oracle Call Interface, Oracle C++ Call Interface, and Oracle XML Developer’s Kit (XDK) for Oracle Database 11g Release 2.4.4Additional Software RequirementsDepending on the components you want to use, you must ensure that the following software are installed:■Oracle Messaging Gateway■Oracle JDBC/OCI Drivers■Browser Requirements4.4.1Oracle Messaging GatewayOracle Messaging Gateway supports the integration of Oracle Streams Advanced Queuing (AQ) with the following software:■IBM MQ Series V6.0, client and server■TIBCO Rendezvous 7.2If you require a CSD for WebSphere MQ, then refer to the following Web site for download and installation information:/software/integration/wmq/support4.4.2Oracle JDBC/OCI DriversYou can use JDK 6 Update 10 (Java SE Development Kit 1.6 u10) or JDK 5 (1.5.0_ 16) with the JNDI extension with the Oracle Java Database Connectivity and Oracle Call Interface drivers. However, these are not mandatory for the database installation. Please note that JDK 1.5.0 is installed with this release.4.4.3Browser RequirementsWeb browsers must support JavaScript and the HTML 4.0 and CSS 1.0 standards. The following browsers meet these requirements. On Oracle Enterprise Manager Database Control:■Netscape Navigator 8.1■Netscape Navigator 9.0■Microsoft Internet Explorer 6.0 SP2■Microsoft Internet Explorer 7.0■Microsoft Internet Explorer 7.0 SP1■Microsoft Internet Explorer 8.0■Firefox 2.0■Firefox 3.0.7■Safari 3.0.4■Safari 3.1■Safari 3.24.5Patch RequirementsThe following or later patches are required for Oracle Database 11g Release 2 (11.2) for Solaris:4.5.1Operating system-specific patchesInstallation Type or Product RequirementAll installations Patches for Solaris 10:■120753-06: SunOS 5.10: Microtaskinglibraries (libmtsk) patch■139574-03: SunOS 5.10Pro*C/C++,Pro*FORTRAN,Oracle Call Interface,Oracle C++ Call Interface,Oracle XML Developer’s Kit (XDK) Patches For Solaris 10:■119963-14: SunOS 5.10: Shared library patch for C++■124861-15: SunOS 5.10 Compiler Common patch for Sun C C++(optional)Database Smart Flash Cache (An Enterprise Edition only feature.)The following patches are required for Solaris Operating System (SPARC 64-Bit) if you are using the flash cache feature: 125555-03140796-01140899-01141016-01139555-08141414-10141736-05To determine whether an operating system patch is installed, enter a command similar to the following:# /usr/sbin/patchadd -p | grep patch_number(without version number)For example, to determine if any version of the 119963 patch is installed, use the following command:# /usr/sbin/patchadd -p | grep 119963If an operating system patch is not installed, then download it from the following Web site and install it:5Creating Required Operating System Groups and UserThe following local operating system groups and users are required if you are installing Oracle Database:■The Oracle Inventory group (typically, oinstall)■The OSDBA group (typically, dba)■The Oracle software owner (typically, oracle)■The OSOPER group (Optional. Typically, oper)To determine whether these groups and users already exist, and if necessary, to create them, follow these steps:1.To determine whether the oinstall group exists, enter the following command:# more /var/opt/oracle/oraInst.locIf the output of this command shows the oinstall group name, then the group already exists.If the oraInst.loc file exists, then the output from this command is similar to the following:inventory_loc=/u01/app/oracle/oraInventoryinst_group=oinstallThe inst_group parameter shows the name of the Oracle Inventory group,oinstall.2.To determine whether the dba group exists, enter the following command:# grep dba /etc/groupIf the output from this commands shows the dba group name, then the group already exists.3.If necessary, enter the following commands to create the oinstall and dbagroups:# /usr/sbin/groupadd oinstall# /usr/sbin/groupadd dba4.To determine whether the oracle user exists and belongs to the correct groups,enter the following command:# id -a oracleIf the oracle user exists, this command displays information about the groups to which the user belongs. The output should be similar to the following, indicating that oinstall is the primary group and dba is a secondary group:uid=440(oracle) gid=200(oinstall) groups=201(dba),202(oper)5.If necessary, complete one of the following actions:■If the oracle user exists, but its primary group is not oinstall or it is not a member of the dba group, then enter the following command:# /usr/sbin/usermod -g oinstall -G dba oracle■If the oracle user does not exist, enter the following command to create it: # /usr/sbin/useradd -g oinstall -G dba oracleThis command creates the oracle user and specifies oinstall as theprimary group and dba as the secondary group.6.Enter the following command to set the password of the oracle user:# passwd -r files oracle6Configuring Kernel Parameters on Solaris 10On Solaris 10, verify that the kernel parameters shown in the following table are set to values greater than or equal to the recommended value shown. The table also contains the resource controls that replace the /etc/system file for a specific kernel parameter. As Oracle Database does not set project information when starting processes, some /etc/system processes that are deprecated but not removed must still be set for Oracle Database.Note:■The kernel parameter and shell limit values shown in this section are recommended values only. For production database systems,Oracle recommends that you tune these values to optimize theperformance of the system. Refer to your operating systemdocumentation for more information about tuning kernelparameters.■On Solaris 10, you are not required to make changes to the/etc/system file to implement the System V IPC. Solaris 10 usesthe resource control facility for its implementation. However,Oracle recommends that you set both resource control and/etc/system/ parameters. Operating system parameters notreplaced by resource controls continue to affect performance andsecurity on Solaris 10 systems. For further information, contactyour Sun vendor.Parameter Replaced by ResourceControl Recommended Valuenoexec_user_stack NA1Use the following procedure to view the current value specified for resource controls, and to change them if necessary:1.To display the current values of the resource control, enter the followingcommands:$ id -p // to verify the project iduid=100(oracle) gid=100(dba) projid=1 (group.dba)$ prctl -n project.max-shm-memory -i project group.dba$ prctl -n project.max-sem-ids -i project group.dba2.If you must change any of the current values, then:a.To modify the value of max-shm-memory to 6 GB:# prctl -n project.max-shm-memory -v 6gb -r -i project group.dbab.To modify the value of max-sem-ids to 256:# prctl -n project.max-sem-ids -v 256 -r -i project group.dbaUse the following procedure to modify the resource control project settings, so that they persist after a system restart:1.By default, Oracle instances are run as the oracle user of the dba group. Aproject with the name group.dba is created to serve as the default project for the oracle user. Run the command id to verify the default project for the oracle user:# su - oracle$ id -puid=100(oracle) gid=100(dba) projid=100(group.dba)$ exit2.To set the maximum shared memory size to 2 GB, run the projmod command:# projmod -sK "project.max-shm-memory=(privileged,2G,deny)" group.dbaAlternatively, add the resource control valueproject.max-shm-memory=(privileged,2147483648,deny) to the last field of the project entries for the Oracle project.semsys:seminfo_semmniproject.max-sem-ids 100semsys:seminfo_semmnsNA 1024semsys:seminfo_semmslprocess.max-sem-nsems 256semsys:seminfo_semvmxNA 32767shmsys:shminfo_shmmaxproject.max-shm-memory 4294967295shmsys:shminfo_shmmni project.max-shm-ids 100Note:When you use the prctl command (Resource Control) tochange system parameters, you do not need to restart the system forthese parameter changes to take effect. However, the changedparameters do not persist after a system restart.ParameterReplaced by Resource Control Recommended Value3.After these steps are complete, check the values for the /etc/project file usingthe following command:# cat /etc/projectThe output should be similar to the following:system:0::::user.root:1::::noproject:2::::default:3::::group.staff:10::::group.dba:100:Oracle defaultproject:::project.max-shmmemory=(privileged,2147483648,deny)4.To verify that the resource control is active, check process ownership, and run thecommands id and prctl, as in the following example:# su - oracle$ id -puid=100(oracle) gid=100(dba) projid=100(group.dba)$ prctl -n project.max-shm-memory -i process $$process: 5754: -bashNAME PRIVILEGE VALUE FLAG ACTION RECIPIENT project.max-shm-memory privileged 2.00GB - denyNote:The value for the maximum shared memory depends on theSGA requirements and should be set to a value greater than the SGAsize.For additional information, refer to the Solaris Tunable ParametersReference Manual.7Creating Required DirectoriesCreate directories with names similar to the following, and specify the correct owner, group, and permissions for them:■The Oracle base directory■An optional Oracle data file directoryBefore you create an Oracle base directory, you must identify an appropriate file system with sufficient free disk space.Note:If you do not want to create a separate Oracle data filedirectory, you can install the data files in a subdirectory of the Oraclebase directory. However, this is not recommended for productiondatabases.To determine where to create these directories:1.Enter the following command to display information about all mounted filesystems:# df -kThis command displays information about all the file systems mounted on the system, including:■The physical device name ■The total amount, used amount, and available amount of disk space, in kilobytes■The mount point directory for that file system 2.From the display, identify either one or two file systems that meet the disk space requirements mentioned earlier in this section.3.Note the name of the mount point directory for each file system that youidentified.In the following examples, /u01 is the mount point directory used for the software, and /u02 is the mount point directory used for the Oracle data file directory. You must specify the appropriate mount point directories for the file systems on your system.To create the required directories and specify the correct owner, group, andpermissions for them:1.Enter the following command to create subdirectories in the mount point directorythat you identified for the Oracle base directory:# mkdir -p /u01/app/oracle2.If you intend to use a second file system for the Oracle Database files, then createan oradata subdirectory in the mount point directory that you identified for the Oracle data file directory (shown as /u02 in the examples):# mkdir /u02/oradata3.Change the owner and group of the directories that you created to the oracleuser and the oinstall group:# chown -R oracle:oinstall /u01/app/oracle# chown -R oracle:oinstall /u02/oradata4.Change the permissions on the directories that you created to 775:# chmod -R 775 /u01/app/oracle# chmod -R 775 /u02/oradata8Configuring the oracle User’s EnvironmentYou run Oracle Universal Installer from the oracle account. However, before you start Oracle Universal Installer, you must configure the environment of the oracle user. To configure the environment, you must:■Set the default file mode creation mask (umask ) to 022 in the shell startup file.■Set the DISPLAY environment variable.To set the oracle user’s environment:Note:In the following procedure, replace /u01 and /u02 with theappropriate mount point directories that you identified in Step 3previously.1.Start a new terminal session.2.Enter the following command to ensure that X Window applications can displayon this system:$ xhost fully_qualified_remote_host_nameplete one of the following steps:■If the terminal session is not connected to the system where you want to install the software, then log in to that system as the oracle user.■If the terminal session is connected to the system where you want to install the software, then switch user to oracle:$ su - oracle4.To determine the default shell for the oracle user, enter the following command:$ echo $SHELL5.Open the oracle user’s shell startup file in any text editor:■ C shell (csh or tcsh):% vi .login6.Enter or edit the following line in the shell startup file, specifying a value of 022for the default file mode creation mask:umask 0227.If the ORACLE_SID, ORACLE_HOME, or ORACLE_BASE environment variable is setin the file, then remove the appropriate lines from the file.8.Save the file, and exit from the editor.9.To run the shell startup script, enter the following command:■Bourne shell, Bash shell on SUSE, or Korn shell:$ . ./.profile■ C shell:% source ./.login10.If you are not installing the software on the local computer, then run the followingcommand on the remote computer to set the DISPLAY variable:■Bourne, Bash or Korn shell:$ export DISPLAY=local_host:0.0■ C shell:% setenv DISPLAY local_host:0.0In this example, local_host is the host name or IP address of the localcomputer that you want to use to display Oracle Universal Installer.Run the following command on the remote computer to check if the shell and the DISPLAY environmental variable are set correctly:echo $SHELLecho $DISPLAYNow to enable X applications, run the following commands on the local computer: $ xhost + fully_qualified_remote_host_nameTo verify that X applications display is set properly, run a X11 based program that comes with the operating system such as xclock:$ xclock_pathIn this example, xclock_path is the directory path. For example, you can find xclock at /usr/X11R6/bin/xclocks. If the DISPLAY variable is set properly, then you can see xclock on your computer screen.See Also:PC-X Server or Operating System vendor documents forfurther assistance11.If you determined that the /tmp directory had insufficient free disk space whenchecking the hardware requirements, then enter the following commands to set the TMP and TMPDIR environment variables. Specify a directory on a file system with sufficient free disk space.■Bourne, Bash, or Korn shell:$ TMP=/directory$ TMPDIR=/directory$ export TMP TMPDIR■ C shell:% setenv TEMP /directory% setenv TMPDIR /directory12.Enter commands similar to the following to set the ORACLE_BASE and ORACLE_SID environment variables:■Bourne, Bash, or Korn shell:$ ORACLE_BASE=/u01/app/oracle$ ORACLE_SID=sales$ export ORACLE_BASE ORACLE_SID■ C shell:% setenv ORACLE_BASE /u01/app/oracle% setenv ORACLE_SID salesIn these examples, /u01/app/oracle is the Oracle base directory that youcreated earlier, and sales is the name that you want to call the database (typically no more than five characters).13.Enter the following commands to ensure that the ORACLE_HOME and TNS_ADMINenvironment variables are not set:■Bourne, Bash, or Korn shell:$ unset ORACLE_HOME$ unset TNS_ADMIN■ C shell:% unsetenv ORACLE_HOME% unsetenv TNS_ADMIN14.To verify that the environment has been set correctly, enter the followingcommands:$ umask$ env | moreVerify that the umask command displays a value of 22, 022, or 0022 and theenvironment variables that you set in this section have the correct values.9Mounting the Product DiscOn most Solaris systems, the product disc mounts automatically when you insert it into the drive. If the disc does not mount automatically, then follow these steps to mount it:1.Switch user to root:$ su - root2.If necessary, enter a command similar to the following to eject the currentlymounted disc, then remove it from the drive:# eject3.Insert the disc into the disc drive.4.To verify that the disc mounted automatically, enter a command similar to thefollowing:# ls /dvd/dvd05.If this command fails to display the contents of the disc, then enter a commandsimilar to the following:# /usr/sbin/mount -r -F hsfs /dev/dsk/c x t y d z s2 /dvdIn this example, /dvd is the disc mount point directory and/dev/dsk/cxtydzs2 is the device name for the disc device, for example/dev/dsk/c0t2d0s2.6.If Oracle Universal Installer displays the Disk Location dialog box, then enter thedisc mount point directory path. For example:■Disc mounted automatically:/dvd/dvd0■Disc mounted manually:/dvd10Installing Oracle DatabaseAfter configuring the oracle user’s environment, start Oracle Universal Installer and install Oracle Database as follows:1.To start Oracle Universal Installer, enter the following command:。
sol-install-oracle11gr2
ORACLE 11GR2 在solaris.x64上的安装手册本文目的:普通用户可以参照文档安装solaris.x64+11gr2参考11gr2-ORACLE手册,找到想要安装操作系统的说明文档edit by :pengguangzhi2006@目录ORACLE 11GR2 在solaris.x64上的安装手册 (1)第一部:安装前的准备工作(参考手册预安装部分) (2)检查硬件需求: (2)第二部分安装操作系统: (2)检查主机名Osolaris10及网络: (25)查看修改UDP/TCP内核参数: (25)Osolaris10软件需求检查: (26)建立用户与组: (27)配置shell限制: (27)修改系统内核参数: (28)配置用户ORACLE、GRID环境,创建目录: (30)软件安装 (31)安装GRID (31)添加四块硬盘; (31)改变设备权限: (33)开始安装GRID (34)配置磁盘组FRA: (40)开始安装ORACLE (42)用DBCA安装数据库 (48)第一部:安装前的准备工作(参考手册预安装部分)如果要安装ASM或者ORACLE RESTART,你必须先安装ORACLE GRID INFRASTRUCTURE,否则,你要用ORACLE RESTART手动注册到ORACLE DB;确定安装平台是否合适安装ORACLE:检查硬件需求:系统架构:用VMWARE模拟X86架构,/bin/isainfo –kv查看CPU架构信息;64-bit amd64 kernel modules FRO X86架构;内存: 要求最小1g,推荐设置2G以上;/usr/sbin/prtconf | grep “Memory size”SWAP:如2G内存,设置4G swap -l;查看如何增加SWAP:sar –r –I n ;磁盘要求:/tmp要求1G以上;df –k /tmp查看临时空间大小;Oracl 企业版要求5.5G的安装空间;显示器需求:1024*768以上;运行等级:3第二部分安装操作系统:针对以上需求,设计如下:主机名:Osolaris10IP地直:192.168.3.3内存分配:2GSwap分配:4G磁盘分配:50G(实验环境)分区:/tmp 3G / 余下的安装过程图解:启动VMWARE,然后依图操作:完成VMWARE配置,接下来安装操作系统:接着按F2,进入图形窗口按回车后:选0英语继续:ROOT的密码设置为:solaris;然后,自动重启进入系统!把root的shell改成/usr/bin/bash:检查主机名Osolaris10及网络:ping –s Osolaris;ping –s localhost;-bash-3.2# ping -s Osolaris10PING Osolaris10: 56 data bytes64 bytes from Osolaris10 (192.168.3.3): icmp_seq=0. time=0.108 ms-bash-3.2# cat /etc/hostname.e1000g0Osolaris10或者-bash-3.2# cat /etc/nodename查看修改UDP/TCP内核参数:-bash-3.2# ndd /dev/tcp tcp_smallest_anon_port tcp_largest_anon_port 3276865535修改内核参数:vim /etc/systemSet tcp_smallest_anon_port=9000Set tcp_largest_anon_port=65500Set udp_smallest_anon_port=9000Set udp_largest_anon_port=65500-bash-3.2# ndd -set /dev/tcp tcp_smallest_anon_port 9000-bash-3.2# ndd -set /dev/tcp tcp_largest_anon_port 65500-bash-3.2# ndd -set /dev/udp udp_largest_anon_port 65500-bash-3.2# ndd -set /dev/udp udp_smallest_anon_port 9000结果如下:-bash-3.2# ndd /dev/tcp tcp_smallest_anon_port tcp_largest_anon_port 900065500-bash-3.2# ndd /dev/udp udp_smallest_anon_port udp_largest_anon_port 900065500Osolaris10软件需求检查:操作系统需求:Oracle Solaris 10 U6(5.10-2008.10)以后(在2.4.1中可以查到)内核需求:针对本操作系统,要求如:#uanme –r 5.10软件包需求:■SUNWarcSUNWbtool■SUNWhea■SUNWlibC■SUNWlibm■SUNWlibms■SUNWsprot■SUNWtoo■SUNWi1of■SUNWi1cs (ISO8859-1)■SUNWi15cs (ISO8859-15)■SUNWxwfnt■SUNWcsl使用如下命令检查软件包是否安装:-bash-3.2# pkginfo -i SUNWarc SUNWbtool SUNWhea SUNWlibC SUNWlibm SUNWlibms SUNWsprot SUNWtoo SUNWi1of SUNWi1cs SUNWi15cs SUNWxwfnt SUNWcsl用此方法打补丁:(-d 指定目录)-bash-3.2# pkgadd -d /cdrom/sol_10_113_x86/Solaris_10/Product SUNWi1cs SUNWi15cs 补丁需求:安装类型或产品需求都应安装Oracle Solaris 10补丁:■119961-05: SunOS 5.10_x86: Assembler■119964-14: SunOS 5.10_x86 Shared library patch forC++_x86■120754-06: SunOS 5.10_x86 libmtsk■137104-02■139575-03■141415-04Database Smart Flash Cache (企业版特性) 如果使用 the flash cache特性需要以下补丁:■139556-08■140797-01■140900-01■141017-01■141415-10■141737-05使用如下方法检查以上补丁:(都有)-bash-3.2# patchadd -p |grep 141737建立用户与组:Oinstall作为安装主组,拥有管理ASM和数据库权限;Oracle作为安装软件拥有人,oinstall作为主组,oracle必须加入以下二组及asmdba组;Dba作为OSDBA组Oper作为OSOPER组Grid作为GRID软件拥有人,oinstall作为主组,grid必毋须加入以下三组及dba组:Asmdba作为ASM的OSDBA组,访问ASM实例的权限,组员可以访问ASM管理的文件;Asmadmin作为ASM的OSASM组,管理ASM存储文件权限,挂载磁盘组,不能访问数据库实例;如果不定义这个组,则ASMDBA组拥有这个组的权限;Asmoper作为ASM的OSOPER组,拥用起动和停ASM实例的权限;创建用户及组:Grouadd -g 501 oinstallgroupadd -g 502 dbagroupadd -g 503 opergroupadd -g 504 asmdbagroupadd -g 505 asmadmingroupadd -g 506 asmoperuseradd -u 502 -g oinstall -G dba,oper,asmdba -m -d /export/home/oracle -s /usr/bin/bash oracleuseradd -u 503 -g oinstall -G asmdba,asmadmin,asmoper,dba -m -d /export/home/grid-s /usr/bin/bash gridpasswd oracle oracle11gpasswd grid grid11g配置shell限制:查看当前所有限制:-bash-3.2# ulimit -acore file size (blocks, -c) unlimiteddata seg size (kbytes, -d) unlimitedfile size (blocks, -f) unlimitedopen files (-n) 256pipe size (512 bytes, -p) 10stack size (kbytes, -s) 10240cpu time (seconds, -t) unlimitedmax user processes (-u) 28565virtual memory (kbytes, -v) unlimited-bash-3.2# ulimit -S -s 10240-bash-3.2# ulimit -H -s 32768-bash-3.2# ulimit -S -n 1024-bash-3.2# ulimit -H -n 65536-bash-3.2# ulimit –a //查看软限制ope n files (-n) 1024stack size (kbytes, -s) 10240max user processes (-u) 28565 大于16384的要求,不能修改成功-bash-3.2# ulimit -a -H //查看硬限制ope n files (-n) 65536stack size (kbytes, -s) 32768max user processes (-u) 28565为保证开机生效:修改系统内核参数:1,做资源控制:创建project:-bash-3.2# projadd group.dba-bash-3.2# cat /etc/projectsystem:0::::user.root:1::::noproject:2::::default:3::::group.staff:10::::group.dba:100::::-bash-3.2# usermod -K project=group.dba oracle-bash-3.2# usermod -K project=group.dba grid-bash-3.2# cat /etc/user_attroracle::::type=normal;project=group.dbagrid::::type=normal;project=group.dba修改的工程参数要求:Project.max-sem-ids >=100Process.max-sem-nsems >=256 //set semsys:seminfo_semmsl=256来修改Project.max-shm-memory >=4294967295Project.max-shm-ids >= 100查看当前值的方法:(oracle)-bash-3.2$ prctl -n project.max-sem-ids -i project group.dba修改:-bash-3.2# iduid=0(root) gid=0(root)# prctl -n project.max-shm-memory -v 4gb -r -i project group.dba //成功更改内存中参数若要永久生效:# projmod -sK "project.max-shm-memory=(privileged,4.00GB,deny)" group.dba-bash-3.2# cat /etc/projectsystem:0::::default:3::::group.staff:10::::group.dba:100::::project.max-shm-memory=(privileged,4294967296,deny)---4g内存为了永久保存这些配置,最好在/etc/system文件中编辑:set noexec_user_stack=1set semsys:seminfo_semmni=100set semsys:seminfo_semmns=1024set semsys:seminfo_semmsl=256set semsys:seminfo_semvmx=23767set shmsys:shminfo_shmmax=4294967296set shmsys:shminfo_shmmni=100重启生效!配置用户ORACLE、GRID环境,创建目录:需要确定的软件安装目录:■Oracle Base 目录:Oracle的ORACLE_BASE= /u01/app/oracleGrid的ORACLE_BASE= /u01/app/grid■Oracle Inventory目录:/u01/app/oraInventory(OUI自动创建)■Oracle Home目录:Oracle的ORACLE_HOME= /u01/app/oracle/product/11.2.0/dbhome_1 Grid的ORACLE_HOME= /u01/app/grid/product/11.2.0/grid创建这些目录:# mkdir -p /u01/app/oracle# mkdir -p /u01/app/grid# chown -R grid:oinstall /u01#chown -R oracle:oinstall /u01/app/oracle# chmod -R 775 /u01配置系统远程登录及环境变量:让root可以远程登陆solaris图形界面vi /etc/default/login# If CONSOLE is set, root can only login on that device. # Comment this line out to allow remote login by root. CONSOLE=/dev/console #注释掉这句即可配置用户环境(确定UMAK为022)$ su - oracle$ echo $SHELL确定当前shell,使用适当的文件修改:Bash shell (bash):$ vi .bash_profileORACLE_BASE=/u01/app/oracleORACLE_SID=orclORACLE_HOME=$ORACLE_BASE/product/11.2.0/dbhome_1export ORACLE_BASE ORACLE_SID ORACLE_HOMEsu – grid$ echo $SHELL确定当前shell,使用适当的文件修改:vim .bash_profileORACLE_BASE=/u01/app/gridORACLE_SID=+ASMORACLE_HOME=$ORACLE_BASE/product/11.2.0/gridexport ORACLE_BASE ORACLE_SID ORACLE_HOME完成环境设置,关机,下面为ASM添加硬盘!软件安装安装GRID添加四块硬盘;以ROOT身份执行:-bash-3.2# formatSearching for disks...doneAVAILABLE DISK SELECTIONS:0. c1t0d0 <VMware,-VMware Virtual -1.0 cyl 6524 alt 2 hd 255 sec 63>/pci@0,0/pci15ad,1976@10/sd@0,01. c1t1d0 <VMware,-VMware Virtual -1.0 cyl 2608 alt 2 hd 255 sec 63>/pci@0,0/pci15ad,1976@10/sd@1,02. c1t2d0 <VMware,-VMware Virtual -1.0 cyl 2608 alt 2 hd 255 sec 63>/pci@0,0/pci15ad,1976@10/sd@2,03. c1t3d0 <VMware,-VMware Virtual -1.0 cyl 2608 alt 2 hd 255 sec 63>/pci@0,0/pci15ad,1976@10/sd@3,04. c1t4d0 <VMware,-VMware Virtual -1.0 cyl 2608 alt 2 hd 255 sec 63>/pci@0,0/pci15ad,1976@10/sd@4,0Specify disk (enter its number): 1FORMAT MENU:disk - select a disktype - select (define) a disk typepartition - select (define) a partition tablecurrent - describe the current diskformat - format and analyze the diskfdisk - run the fdisk programrepair - repair a defective sectorlabel - write label to the diskanalyze - surface analysisdefect - defect list managementbackup - search for backup labelsverify - read and display labelssave - save new disk/partition definitionsinquiry - show vendor, product and revisionvolname - set 8-character volume name!<cmd> - execute <cmd>, then returnquitformat> partitionWARNING - This disk may be in use by an application that hasmodified the fdisk table. Ensure that this disk isnot currently in use before proceeding to use fdisk. format> fdiskNo fdisk table exists. The default partition for the disk is:a 100% "SOLARIS System" partitionType "y" to accept the default partition, otherwise type "n" to edit the partition table.Yformat> pPARTITION MENU:0 - change `0' partition1 - change `1' partition2 - change `2' partition3 - change `3' partition4 - change `4' partition5 - change `5' partition6 - change `6' partition7 - change `7' partitionselect - select a predefined tablemodify - modify a predefined partition tablename - name the current tableprint - display the current tablelabel - write partition map and label to the disk!<cmd> - execute <cmd>, then returnquitpartition> 5Part Tag Flag Cylinders Size Blocks5 unassigned wm 0 0 (0/0/0) 0Enter partition id tag[unassigned]: fra`fra' not expected.Enter partition id tag[unassigned]: usrEnter partition permission flags[wm]:Enter new starting cyl[1]: 3Enter partition size[0b, 0c, 3e, 0.00mb, 0.00gb]: 19.5gpartition> pCurrent partition table (unnamed):Total disk cylinders available: 2607 + 2 (reserved cylinders)Part Tag Flag Cylinders Size Blocks0 unassigned wm 0 0 (0/0/0) 01 unassigned wm 0 0 (0/0/0) 02 backup wu 0 - 2606 19.97GB (2607/0/0) 418814553 unassigned wm 0 0 (0/0/0) 04 unassigned wm 0 0 (0/0/0) 05 usr wm 3 - 2548 19.50GB (2546/0/0) 409014906 unassigned wm 0 0 (0/0/0) 07 unassigned wm 0 0 (0/0/0) 08 boot wu 0 - 0 7.84MB (1/0/0) 160659 unassigned wm 0 0 (0/0/0) 0 partition> quitformat> quit照此完成其余硬盘并查看结果:# ls -l /dev/rdsk/c1t1d0s5lrwxrwxrwx 1 root root 50 Apr 2 18:41 /dev/rdsk/c1t1d0s5 -> ../../devices/pci@0,0/pci15ad,1976@10/sd@1,0:f,raw# ls -l /dev/rdsk/c1t2d0s5lrwxrwxrwx 1 root root 50 Apr 2 18:42 /dev/rdsk/c1t2d0s5 -> ../../devices/pci@0,0/pci15ad,1976@10/sd@2,0:f,raw# ls -l /dev/rdsk/c1t3d0s5lrwxrwxrwx 1 root root 50 Apr 2 18:42 /dev/rdsk/c1t3d0s5 -> ../../devices/pci@0,0/pci15ad,1976@10/sd@3,0:f,raw# ls -l /dev/rdsk/c1t4d0s5lrwxrwxrwx 1 root root 50 Apr 2 18:42 /dev/rdsk/c1t4d0s5 -> ../../devices/pci@0,0/pci15ad,1976@10/sd@4,0:f,raw改变设备权限:chown grid:asmadmin ../../devices/pci@0,0/pci15ad,1976@10/sd@1,0:f,rawchown grid:asmadmin ../../devices/pci@0,0/pci15ad,1976@10/sd@2,0:f,rawchown grid:asmadmin ../../devices/pci@0,0/pci15ad,1976@10/sd@3,0:f,rawchown grid:asmadmin ../../devices/pci@0,0/pci15ad,1976@10/sd@4,0:f,rawchmod 660 ../../devices/pci@0,0/pci15ad,1976@10/sd@1,0:f,rawchmod 660 ../../devices/pci@0,0/pci15ad,1976@10/sd@2,0:f,rawchmod 660 ../../devices/pci@0,0/pci15ad,1976@10/sd@3,0:f,rawchmod 660 ../../devices/pci@0,0/pci15ad,1976@10/sd@4,0:f,rawchown -h grid:asmadmin /dev/rdsk/c1t1d0s5chown -h grid:asmadmin /dev/rdsk/c1t2d0s5chown -h grid:asmadmin /dev/rdsk/c1t3d0s5chown -h grid:asmadmin /dev/rdsk/c1t4d0s5-bash-3.2# ls -l ../../devices/pci@0,0/pci15ad,1976@10/sd@1,0:f,rawcrw-rw---- 1 grid asmadmin 33, 133 Apr 2-bash-3.2# ls -l /dev/rdsk/c1t1d0s5lrwxrwxrwx 1 grid asmadmin 50 Apr 2 18:41 /dev/rdsk/c1t1d0s5 -> ../../devices/pci@0,0/pci15ad,1976@10/sd@1,0:f,raw开始安装GRIDSu – gridbash-3.2$ ssh-agent $SHELLbash-3.2$ ssh-addbash-3.2$ export DISPLAY=192.168.3.254:0.0bash-3.2$ /usr/openwin/bin/xhost +access control disabled, clients can connect from any hostbash-3.2$ cd /installsoft/grid/bash-3.2$ ./runInstaller-bash-3.2# /u01/app/oraInventory/orainstRoot.sh更改/u01/app/oraInventory.的权限添加组读写权限去掉所有读写执行权限.更改/u01/app/oraInventory 的组为oinstall.执行完成;-bash-3.2# /u01/app/grid/product/11.2.0/grid/root.sh运行Oracle 11g root.sh脚本...以下环境变量被设置为:ORACLE_OWNER= gridORACLE_HOME= /u01/app/grid/product/11.2.0/grid输入本地bin directory的位置: [/usr/local/bin]:创建/usr/local/bin 目录...复制dbhome 到/usr/local/bin ...复制oraenv 到/usr/local/bin ...复制coraenv 到/usr/local/bin ...创建/var/opt/oracle/oratab 文件...当用DBCA创建一个数据库时,Entries 会被写入/var/opt/oracle/oratab文件中完成root.sh 脚本通用部分;现在产品特定的root actions将被执行.2014-04-02 21:12:08: 检查超级用户权限2014-04-02 21:12:08:用户有super user 权限2014-04-02 21:12:08: 解析主机名使用配置参数文件:/u01/app/grid/product/11.2.0/grid/crs/install/crsconfig_params创建跟踪目录LOCAL ADD MODE为用户grid、权限级oinstall创建OCR keys..操作成功.CRS-4664: 节点osolaris10 成功被pinned.添加服务到inittabCRS-4123: Oracle高可用服务被启动.ohasd 正在启动osolaris10 2014/04/02 21:12:35/u01/app/grid/product/11.2.0/grid/cdata/osolaris10/backup_20140402_211235.olr 成功配置Oracle Grid Infrastructure为一个Standalone Server为集群软件修改inventory properties启动Oracle Universal Installer...检查swap space:必须大于500 MB. 实际5565 MB 通过inventory指针位置:/var/opt/oracle/oraInst.locnventory 位置:/u01/app/oraInventory'UpdateNodeList' 成功.软件安装完成!配置磁盘组FRA:$cd $ORACLE_HOME/bin$asmca然后退出!开始安装ORACLE#su – oracle$cd /installsoft/$ unzip solaris.x64_11gR2_database_1of2.zip$ unzip solaris.x64_11gR2_database_2of2.zip$ cd database/$ ssh-agent $SHELL$ ssh-add$ export DISPLAY=192.168.3.254:0.0$ /usr/openwin/bin/xhost +access control disabled, clients can connect from any host $ ./runInstaller-bash-3.2# /u01/app/oracle/product/11.2.0/dbhome_1/root.sh运行Oracle 11g root.sh script...检查天南地北变量设置:ORACLE_OWNER= oracleORACLE_HOME=/u01/app/oracle/product/11.2.0/dbhome_1输入the local bin 目录路径: [/usr/local/bin]:The file "dbhome" already exists in /usr/local/bin. Overwrite it? (y/n) [n]: y Copying dbhome to /usr/local/bin ...The file "oraenv" already exists in /usr/local/bin. Overwrite it? (y/n) [n]: y Copying oraenv to /usr/local/bin ...The file "coraenv" already exists in /usr/local/bin. Overwrite it? (y/n) [n]: y Copying coraenv to /usr/local/bin ...当用DBCA创建一个数据库时,Entries 会被写入/var/opt/oracle/oratab文件中完成运行root.sh脚本的通用部分。
Oracle11G安装过程
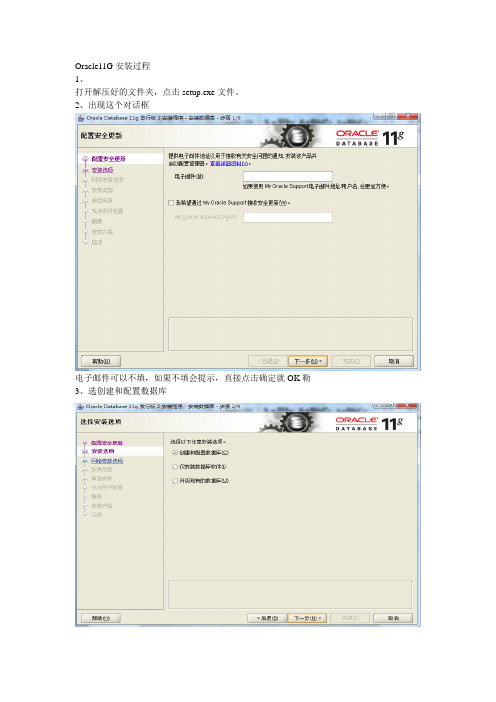
Oracle11G安装过程
1、
打开解压好的文件夹,点击setup.exe文件。
2、出现这个对话框
电子邮件可以不填,如果不填会提示,直接点击确定就OK勒3、选创建和配置数据库
4、根据自己需要选择,可以选桌面类和服务器类
5、这里可以选择安装的路径,和配置orcl数据库的秘密(密码必须是字母与数字组合,如果不是会提示,但直接点确定就OK)
6、检查系统配置
7、点完成
8、正在安装(可能有几分钟)
9、接下来会出现这样一个对话框(这个过程也需要几分钟)
10、数据库创建完后,出现这个对话框(这一步比较重要)
点击口令管理把SCOTT的是否锁定账号的勾去掉然后输入口令最后点确定这个秘密要符合Oracle的秘密规则,如果不符合,会有一个提示对话框,直接点确定就OK。
11、最后出现这个界面,就代表成功安装完成了,直接点击关闭即可。
- 1、下载文档前请自行甄别文档内容的完整性,平台不提供额外的编辑、内容补充、找答案等附加服务。
- 2、"仅部分预览"的文档,不可在线预览部分如存在完整性等问题,可反馈申请退款(可完整预览的文档不适用该条件!)。
- 3、如文档侵犯您的权益,请联系客服反馈,我们会尽快为您处理(人工客服工作时间:9:00-18:30)。
Solaris10下安装Oracle11g(官方文档)系统要求配置和信息查询启用图形化界面:$xhost fully_qualified_remote_host_name例如:$xhost 如果没安装软件,可以用SSH/rlogin/telnet等连接:$telnet fully_qualified_remote_host_name如果不是root帐号,可以用以下命令切换到root用户:$su-rootpassword:#内存要求:最少1GB,建议2GB;用以下命令查看内存大小:#/usr/sbin/prtconf|grep"Memory size"用以下命令查看配置的SWAP大小:#/usr/sbin/swap-lSwap大小要符合以下要求:RAM Swap SpaceBetween1GB and2GB 1.5times the size of the RAM Between2GB and16GB Equal to the size of the RAMMore than16GB16GB用以下命令查看可用的内存和SWAP大小:#sar-r-i n#n是下次重复的延迟秒数;i是重复的次数;查看系统架构是否可以运行软件:#/bin/isainfo-kv/tmp目录至少要1GB空间,查看/tmp目录大小命令:#df-k/tmp安装版本需要磁盘空间(GB) Standard Edition One 4.6Custom(Enterprise Edition+custom install options) 4.7查看系统版本:#uname-r查看升级信息:$cat/etc/release要求以下系统软件包:∙SUNWarc∙SUNWbtool∙SUNWhea∙SUNWlibC∙SUNWlibm∙SUNWlibms∙SUNWsprot∙SUNWtoo∙SUNWi1of∙SUNWi1cs(ISO8859-1)∙SUNWi15cs(ISO8859-15)∙SUNWxwfnt∙SUNWcsl查看方法:#pkginfo-i SUNWarc SUNWbtool SUNWhea SUNWlibC SUNWlibms SUNWsprot\ SUNWtoo SUNWi1of SUNWi1cs SUNWi15cs SUNWxwfnt安装软件包方法:#pkgadd-R SUNWxwfnt all编译器要求:Oracle Solaris Studio12(C and C++5.9)is supported with Pro*C/C++,Oracle Call Interface,Oracle C++Call Interface,and Oracle XML Developer's Kit(XDK) for Oracle Database11g Release2.系统补丁要求:Installation Type or Product RequirementAll installations Patches for Oracle Solaris10:∙120754-06:SunOS5.10_x86libmtsk∙119961-05:SunOS5.10_x86:Assembler∙119964-14:SunOS5.10_x86Shared library patch for C++_x86∙137104-02∙139575-03∙139556-08∙141445-09(11.2.0.2)Installation Type or Product Requirement∙141415-04Database Smart Flash Cache(An Enterprise Edition only feature.)The following patches are required for Oracle Solaris on x86-64(64-bit)if you are using the flash cache fea ture:140797-01140900-01141017-01141415-10141737-05#/usr/sbin/patchadd-p|grep119963创建用户和用户组以下用户组是要求创建的:∙The Oracle Inventory group(typically,oinstall)∙The OSDBA group(typically,dba)∙The Oracle software owner(typically,oracle)∙The OSOPER group(Optional.Typically,oper)查看oinstall用户组是否存在的命令:#more/var/opt/oracle/oraInst.loc如果存在,会输出类似以下内容:inventory_loc=/u01/app/oracle/oraInventoryinst_group=oinstall查看dba组是否存在:#grep dba/etc/group用以下命令创建用户组oinstall和dba:#/usr/sbin/groupadd oinstall#/usr/sbin/groupadd dba查看oracle用户是否存在:#id-a oracle如果存在Oracle帐号但它不属于oinstall和dba组,则用以下命令修改它:#/usr/sbin/usermod-g oinstall-G dba oracle如果不存在oracle帐号,用以下命令创建:#/usr/sbin/useradd-d/export/home/oracle-m-s/bin/bash-g oinstall-G dba oracle用以下命令修改oracle用户密码:#passwd-r files oracle在Solaris10上设置内核参数Resource Control Recommended Valueproject.max-sem-ids100Resource Control Recommended Value process.max-sem-nsems256project.max-shm-memory4294967295project.max-shm-ids100查看resource control值:$id-puid=100(oracle)gid=100(dba)projid=1(group.dba)$prctl-n project.max-shm-memory-i project group.dba$prctl-n project.max-sem-ids-i project group.dbaFor Solaris10and later,you need to create the resource called“project”and associate it with the user account“oracle:oinstall”.Below please find the example for your information.%projadd-p100-c'Oracle11gR2'-U oracle-G oinstall-K'project.max-shm-memory=(privileged,16G,deny)'user.oracle%usermod-K project=user.oracle oracleI’ve modified the project name called“user.oracle”and assigned16.0GB into it.You should be able to create database via DBCA without getting“out of memory”now.Please check.如果要修改resource control值,用以下命令:a.To modify the value of max-shm-memory to6GB:b.#prctl-n project.max-shm-memory-v6gb-r-i project group.dbac.To modify the value of max-sem-ids to256:#prctl-n project.max-sem-ids-v256-r-i project group.dba用以下命令查看为oracle用户创建的项目是否正常:#su-oracle$id-puid=100(oracle)gid=100(dba)projid=100(group.dba)$exit设置最大shared memory到2GB:#projmod-sK"project.max-shm-memory=(privileged,2G,deny)"group.dba查看/etc/project内容:#cat/etc/project一般输出以下类似内容:system:0::::user.root:1::::noproject:2::::default:3::::group.staff:10::::group.dba:100:Oracle defaultproject:::project.max-shmmemory=(privileged,2147483648,deny)用以下命令检查resource control是否激活和进程所有权:#su-oracle$id-puid=100(oracle)gid=100(dba)projid=100(group.dba)$prctl-n project.max-shm-memory-i process$$process:5754:-bashNAME PRIVILEGE VALUE FLAG ACTION RECIPIENT project.max-shm-memory privileged 2.00GB-deny设置shell limits建议设置成以下表格里对应的值:Shell Limit Recommended ValueTIME-1(Unlimited)FILE-1(Unlimited)DATA Minium value:1048576STACK Minium value:32768NOFILES Minium value:4096VMEMORY Minium value:4194304用以下命令可以查看shell limit值:ulimit-tulimit-fulimit-dulimit-sulimit-nulimit-v创建目录查看目录大小#df-k创建安装目录#mkdir-p/u01/app/oracle创建数据文件目录#mkdir/u02/oradata更改目录所有者#chown-R oracle:oinstall/u01/app/oracle#chown-R oracle:oinstall/u02/oradata更改目录权限#chmod-R775/u01/app/oracle#chmod-R775/u02/oradata修改Oracle用户环境变量用以下命令使图形界面可用:$xhost fully_qualified_remote_host_name例如$xhost 用以下命令切换到oracle帐号:$su-oracle用以下命令查看shell类型:$echo$SHELL运行shell启动脚本,用以下命令:1.Bash Shell下:$../.bash_profile2.Bourne或Korn Shell下:$../.profile3.C Shell下:%source./.login如果本地没安装软件,则用以下设置远程系统DISPLAY:∙Bourne,Bash or Korn shell:∙$export DISPLAY=local_host:0.0∙C shell:%setenv DISPLAY local_host:0.0以下检查DISPLAY是否设置正常:Run the following command on the remote system to check if the shell and the DISPLAY environmental variable are set correctly:echo$SHELLecho$DISPLAYNow to enable X applications,run the following commands on the local computer:$xhost+fully_qualified_remote_host_nameTo verify that X applications display is set properly,run a X11based program that comes with the operating system such as xclock:$xclockIn this example,you can find xclock at/usr/X11R6/bin/xclocks.Ifthe DISPLAY variable is set properly,then you can see xclock on your computer screen.设置/tmp目录a.To determine the free disk space on each mounted file system use thefollowing command:b.#df-h/tmpc.If necessary,enter commands similar to the following to create atemporary directory on the file system that you identified,and set theappropriate permissions on the directory:d.$sudo mkdir/mount_point/tmpe.$sudo chmod a+wr/mount_point/tmpf.#exitg.Enter commands similar to the following to setthe TMP and TMPDIR environment variables:o Bourne,Bash,or Korn shell:o$TMP=/mount_point/tmpo$TMPDIR=/mount_point/tmpo$export TMP TMPDIRo C shell:o%setenv TMP/mount_point/tmp%setenv TMPDIR/mount_point/tmp设置ORACLE_BASE/ORACLE_SID∙Bourne,Bash,or Korn shell:∙$ORACLE_BASE=/u01/app/oracle∙$ORACLE_SID=sales∙$export ORACLE_BASE ORACLE_SID∙C shell:∙%setenv ORACLE_BASE/u01/app/oracle%setenv ORACLE_SID sales挂载安装光盘1.Switch user to root:2.$su-root3.If necessary,enter a command similar to the following to eject thecurrently mounted disc,then remove it from the drive:4.#eject5.Insert the disc into the disc drive.6.To verify that the disc mounted automatically,enter a command similar tothe following:7.#ls/dvd/dvd08.If this command fails to display the contents of the disc,then enter acommand similar to the following:9.#/usr/sbin/mount-r-F hsfs/dev/dsk/c x t y d z s2/dvdIn this example,/dvd is the disc mount point directoryand/dev/dsk/cxtydzs2is the device name for the disc device,forexample/dev/dsk/c0t2d0s2.10.If Oracle Universal Installer displays the Disk Location dialog box,thenenter the disc mount point directory path.For example:o Disc mounted automatically:o/dvd/dvd0o Disc mounted manually:/dvd开始安装(图形化界面)1.To start Oracle Universal Installer,enter the following command:2.$/mount_point/db/runInstallerIf Oracle Universal Installer does not start,then refer to Oracle DatabaseInstallation Guide for information about how to troubleshoot X Windowdisplay problems.3.The following table describes the recommended action for each OracleUniversal Installer e the following guidelines to complete theinstallation:o If you need more assistance,or to choose an option that is not a default,click Help for additional information.o If you encounter errors while installing or linking the software,then refer to Oracle Database Installation Guide for information abouttroubleshooting.Note:If you have completed the tasks listed previously,then you can completethe installation by choosing the default values on most screens. Screen Recommended ActionConfigure Security U pdates Enter your e-mail address,preferably your My Oracle Support e-mail addres s or user name in the Email field.You can select the I wish to receive security updates via My Oracle Supp ort check box to receive security updates.Enter your My Oracle Support password in the My Oracle Support Passwo rd field.Click Next.Download Software U pdates Starting with Oracle Database11g Release2(11.2.0.2),you can use the Soft ware Updates feature to dynamically download and apply latest updates.Sel ect one of the following options and click Next:∙Use My Oracle Support credentials for download:Select this option t o download and apply the latest software updates.Click Proxy Settings to configure a proxy for Oracle Universal Insta ller to use to connect to the Internet.Provide the proxy server inform ation for your site,along with a user account that has access to the lo cal area network through which the server is connecting.Starting with Oracle Database11g Release2(11.2.0.3),you can enter the ProxyRealm information if required.The proxy realm information is case-s ensitive.Click Test Connection to ensure that your proxy settings are correctl y entered,and the installer can download the updates.∙Use pre-downloaded software updates:Select this option to apply pre viously downloaded software updates.∙Skip Software Updates:Select this option if you do not want to apply any updates.Apply Soft ware Upda tes This screen is displayed if you select to download the software updates or pr ovide the pre-downloaded software downloads location.If you selected Use My Oracle Support credentials for download in the previ ous screen,select Download and apply all updates,and then click Next.If you selected Use pre-downloaded software updates in the previous screen, select Apply all updates,and then click Next.Select Inst allation Op tion Select Create and configure a database from the following list of available options,then click Next:∙Create and configure a database∙Install database software only∙Upgrade an existing databaseSystem Cla ss Select Server Class from the following options to install the database,and cl ick Next.∙Desktop Class:Choose this option if you are installing on a laptop or desktop class system.∙Server Class:Choose this option if you are installing on a server clas s system,such as what you would use when deploying Oracle in a production data center.Grid Install ation Optio ns Select Single instance database installation for the type of database installa tion you want to perform,and click Next.∙Single instance database installation:This option installs the database and the listener.∙Real Application Clusters database installation:This option installs O racle Real Application Clusters.∙Oracle RAC One Node database installation:This option installs the Oracle RAC One Node database.Note:Oracle RAC One Node is supported only with Oracle Clusterw are.Select Inst all Type Select Typical Install as the installation type from the following options,an d click Next:∙Typical Install:This installation method is selected by default.It lets you quickly install Oracle Database using minimal input.∙Advanced Install:This installation method enables to perform more c omplex installations.Typical Ins tall Config uration Enter the following information according to requirements:Oracle base:The Oracle base path appears by default.You can change the pa th based on your requirement.Software location:In the Software Location section,accept the default valu e or enter the Oracle home directory path in which you want to install Oracle components.The directory path should not contain spaces.Storage Type:Select File System,or Oracle Automatic Storage Managem ent as the database storage option.Database file location:If you select File System as your storage type,then cl ick Browse and specify a database file location.ASMSNMP Password:If you select Oracle Automatic Storage Management as your Storage Type,then specify the password for the ASMSNMP user.Database edition:Select the database edition to install.OSDBA Group:The OSDBA group is selected by default.You can also sele ct the OSDBA group from the list.Global database name:Specify the Global Database Name using the followi ng syntax:database_name.domainFor example,Administrative password:Enter the password for the privileged database acc ount.Confirm Password:Reenter,and confirm the password for the privileged datScreen Recommended Actionabase account.Click Next to continue.Create Inv entory This screen is displayed only during the first installation of Oracle products on a system.Specify the full path of the Oracle Inventory directory.Ensure that the operat ing system group selected is oinstall.Click Next to continue.Perform Pr erequisite Checks Verify that all the prerequisite checks succeed,and then click Next.Oracle Universal Installer checks the system to verify that it is configured co rrectly to run Oracle software.If you have completed all the preinstallation s teps in this guide,all the checks should pass.If a check fails,then review the cause of the failure listed for that check on t he screen.If possible,rectify the problem and rerun the check.Alternatively, if you are satisfied that your system meets the requirements,then you can se lect the check box for the failed check to manually verify the requirement.Note:Oracle recommends that you use caution in checking the Ignore All op tion.If you check this option,then Oracle Universal Installer may not confir m that your system can install Oracle Database successfully.Summary Review the information displayed on this screen,and then click Install.Note:Starting with Oracle Database11g Release2(11.2),you can save all the installation steps into a response file by clicking Save Response ter,this file can be used for a silent installation.Install Pro duct This screen states the progress of a database installation.After the database i s installed,you are prompted to execute some root configuration script for ne w inventory as the root user.Click Next.This screen then displays the status information for the configuration assista nts that configure the software and create a database.Finally,a message is displayed at the end of Database Configuration Assista nt process,and click OK.Execute the root.sh script as the root user to complete the installation and cl ick OK.Finish This screen is shown automatically when all the configuration tools are succ essful.Click Close.。