氙气老化箱说明书
风冷氙灯老化试验箱操作规程 氙灯老化试验箱操作规程
风冷氙灯老化试验箱操作规程氙灯老化试验箱操作规程1、合上断路器,启动电源,此时箱内温度和湿度仪表显示读数,将温度仪表设定为40℃,查找温湿度对比表得出温度40℃时65%的湿度对应的温度读数为34℃,将1、合上断路器,启动电源,此时箱内温度和湿度仪表显示读数,将温度仪表设定为40℃,查找温湿度对比表得出温度40℃时65%的湿度对应的温度读数为34℃,将湿度仪表设定为34℃,按“SET/ENT”键确认,数据便存入仪表。
2、启动光照开关,设定光照时间400小时,试验总时间500小时。
3、设定温度63℃;4、将光照强度调整的调整指针指向250V的地方,按从左到右的次序先后按“灯Ⅰ”“灯Ⅱ”“灯Ⅲ”启动三支灯管,约一秒左右,氙灯启程后点亮,即可松开启动开关。
5、假如需要显示或减小辐照强度,则在操作面板的下方按下红色“电源”键,两个窗口均有显示,按下“复位”键,仪器进入初始状态,此时两窗口分别显示“A00”和“00000”值。
7、确认预置数值,开始检测过程。
检测过程结束,仪器报警,“复位”回到初始状态。
8、当付照度的瞬时值大于测试标按时,调整,使指针渐渐向220调整,直到辐照度的瞬时值和测试值标准一致。
9、辐照强度调整完毕后,打开制冷开关,此时制冷用于除湿功能。
10、按检测要求打开“降雨”开关,(设定降雨时间12分钟,停止降雨时间48分钟)—专业分析仪器服务平台,试验室仪器设备交易网,仪器行业专业网络宣扬媒体。
相关热词:等离子清洗机,反应釜,旋转蒸发仪,高精度温湿度计,露点仪,高效液相色谱仪价格,霉菌试验箱,跌落试验台,离子色谱仪价格,噪声计,高压灭菌器,集菌仪,接地电阻测试仪型号,柱温箱,旋涡混合仪,电热套,场强仪万能材料试验机价格,洗瓶机,匀浆机,耐候试验箱,熔融指数仪,透射电子显微镜。
在酷热的夏天氙灯老化试验箱常见的就是超温、超压、过载报警,为有效的维护方法就是在试验室内安装空调;那么随着季节的变化在寒冷的冬季,我们又应当怎样去维护它呢?1.氙灯老化试验箱安装的场地:干燥、无雨雪滴漏的地方也可以像夏天那样安装空调,还可选用蒸汽伴热措施即使用管蒸汽暖气保温;冬季保温送汽之前要检查一下蒸汽保温管路是否畅通或堵塞;2.建议使用高纯度制冷剂,若制冷剂水分过多充注就会产生冰堵现象;3.检查与保养加湿器内储水应当每个月更换一次,确保水质的清洁,加湿水盘应当每个月至少清洗一次,以确保水流的畅通;4.检查干燥过滤器是否老化,若是显现老化现象需要适时的更换,否则使其应由的干燥吸水功能就会致使结冰;在这里我还可以教大家一个本身制作干燥过滤器的方法;找一个带有密封盖的铁罐,在盒底分别钻一个6厘米的圆孔,在圆孔处焊一段¢的铜管,将约200克制作(也可视铁罐的有效容积)的干燥氯化钙(选大块的)装入厚尼龙布袋中,将其放入铁罐中并盖紧,短时间不用时在将两个管口塞牢,以防潮湿空气进入。
氙弧灯老化试验箱安全操作及保养规程
氙弧灯老化试验箱安全操作及保养规程1. 前言氙弧灯老化试验箱(以下简称老化箱)是一种广泛应用于各种材料老化、耐候性、耐久性、抗氧化性等性能测试的设备。
在使用老化箱的过程中,要注意安全操作,以及进行正确的保养维护。
本文将详细介绍氙弧灯老化试验箱的安全操作规程和保养规程。
2. 氙弧灯老化试验箱安全操作规程2.1. 箱体操作1.在使用前,确保老化箱内没有易燃易爆物品。
2.打开老化箱前,必须启动排气设备,排除内部的有毒有害气体和水分。
3.操作人员必须穿戴防护用品(安全鞋、安全帽、耳塞等),并确保手和身体皮肤干燥。
4.操作人员必须熟悉老化箱的各个部件的名称和功能,以便在操作过程中使用。
5.老化箱在运转过程中,不得移动、摇晃或者颠簸,以免对老化箱造成损坏,影响使用效果。
6.老化箱在运转过程中,操作人员不得将手臂或身体伸入老化箱内部,以免发生危险。
2.2. 电气操作1.操作人员必须具备一定的电气知识,掌握老化箱的用电原理和保养技术。
2.操作人员不能在潮湿环境下操作老化箱,以免触电或因操作不当引发火灾等意外事故。
3.老化箱电源应使用有防爆功能的插头和插座,并设置开关箱,以保证操作人员安全。
4.打开或关闭电源前,必须将手取下开关,确认开关处于关闭状态。
5.操作人员在更换零部件或维护设备时,必须先关闭老化箱电源,以免触电危险。
6.老化箱电源的线路、插头、插座和开关等重要部件不得擅自更换或修理。
如有损坏,应及时寻求专业人员维修。
2.3. 温度操作1.操作人员必须熟悉老化箱的设定温度和温度控制仪表的使用方法。
2.在老化箱运转过程中,不得将温度调至过高或过低,以免损坏老化箱的零部件或引发设备故障。
3.在设定温度时,操作人员应注意防止控制仪表温度传感器的过热和烧毁。
4.老化箱应安装保险丝、热释放器、漏电保护器等安全保护装置,以防止过电流或漏电。
2.4. 维护操作1.操作人员必须按照设备保养提示以及保养规程进行维护,保证设备不受损坏,延长老化箱的使用寿命。
氙弧灯老化试验箱操作规程

氙弧灯老化试验箱操作规程
1.检查水位线是否在正常水位线之间。
2.插上电源,打开总电源开关。
3.按下电源开关,指示灯亮,进入主画面,点击左侧上端的橙色键,进行温度设定。
点击左侧下端的绿色键,进行黑板温度的设定。
点击右侧上端的蓝色键,进行湿度的设定。
点击右侧下端的粉色键,进行辐照强度的设定。
4.参数设定好后将试样放入氙弧灯老化试验箱内,点击运行按钮。
5.标准规定时间后停机,关闭电源,使试验箱各个系统均为静止状态。
取出试样,在标准的温度、相对湿度下放置后完成其余的检测任务。
第1 页共1 页。
氙灯老化试验箱方案
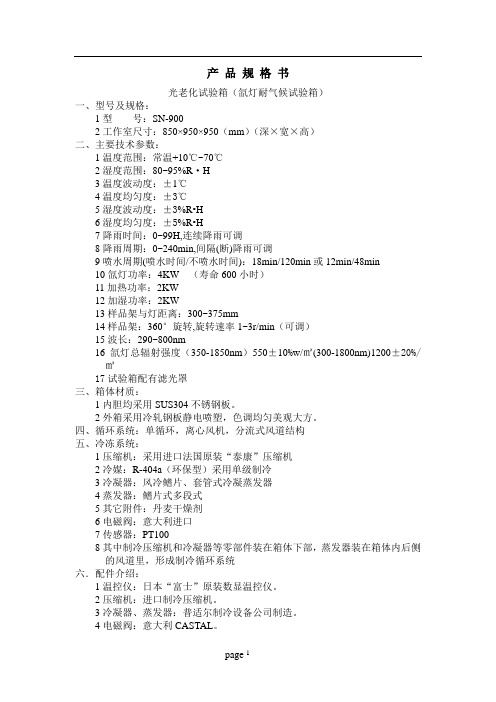
产品规格书光老化试验箱(氙灯耐气候试验箱)一、型号及规格:1型号:SN-9002工作室尺寸:850×950×950(mm)(深³宽³高)二、主要技术参数:1温度范围:常温+10℃~70℃2湿度范围:80~95%R²H3温度波动度:±1℃4温度均匀度:±3℃5湿度波动度:±3%R•H6湿度均匀度:±5%R•H7降雨时间:0~99H,连续降雨可调8降雨周期:0~240min,间隔(断)降雨可调9喷水周期(喷水时间/不喷水时间):18min/120min或12min/48min10氙灯功率:4KW (寿命600小时)11加热功率:2KW12加湿功率:2KW13样品架与灯距离:300~375mm14样品架:360°旋转,旋转速率1~3r/min(可调)15波长:290~800nm16氙灯总辐射强度(350-1850nm)550±10%w/㎡(300-1800nm)1200±20%/㎡17试验箱配有滤光罩三、箱体材质:1内胆均采用SUS304不锈钢板。
2外箱采用冷轧钢板静电喷塑,色调均匀美观大方。
四、循环系统:单循环,离心风机,分流式风道结构五、冷冻系统:1压缩机:采用进口法国原装“泰康”压缩机2冷媒:R-404a(环保型)采用单级制冷3冷凝器:风冷鳍片、套管式冷凝蒸发器4蒸发器:鳍片式多段式5其它附件:丹麦干燥剂6电磁阀:意大利进口7传感器:PT1008其中制冷压缩机和冷凝器等零部件装在箱体下部,蒸发器装在箱体内后侧的风道里,形成制冷循环系统六.配件介绍:1温控仪:日本“富士”原装数显温控仪。
2压缩机:进口制冷压缩机。
3冷凝器、蒸发器:普适尔制冷设备公司制造。
4电磁阀:意大利CASTAL。
5离心风机:中外合资祥明电机有限公司提供。
6加热装置:上海联合散热元件有限公司定制,为不锈钢鳍片式加热管,由长寿触点固态继电器控制七、电源:AC380V 50HZ八、保护系统:整机保护系统由超温保护、缺相、缺水断电保护及报警装置构成。
氙灯耐气候试验箱 使用说明书
氙灯耐气候试验箱使用说明书上海一恒科学仪器有限公司上海一恒科技有限公司公司地址:上海共和新路966号共和大厦7楼邮编:200070、56636560网址:E -m a i l :****************.**********************B-SUN-I 型一恒仪器理想的实验室伙伴前言尊敬的用户:感谢您一直以来对一恒仪器的支持,是一恒仪器高端品牌,专业提供实验培养箱、低温培室仪器设备,为广大用户提供高性能干燥箱、真空干燥箱、CO2养箱、恒温培养箱、恒温恒湿箱、药品稳定性试验箱、摇床、振荡器、氙灯老化试验箱、紫外老化试验箱等专用设备。
本公司致力于为用户提供智能化、专业化、人性化的实验室仪器设备,满足现代实验室高端应用需求。
本产品按公司ISO9001质量管理体系认证标准、ISO13485质量管理体系认证标准进行研发、生产、检验管理,产品自您购买之日起,公司售后服务将陪伴着您。
在您使用前请详细查阅本使用说明书(操作手册)。
如有任何疑问,敬请及时与我们取得联系,我们将竭尽全力为您服务。
上海一恒科学仪器有限公司上海一恒科技有限公司目录1.0简介 (1)2.0仪器主要性能及技术参数 (2)4.0安装前准备 (4)5.0试验 (5)6.0B-SUN-I常用配件安装及更换 (11)7.0B-SUN-I校准 (16)8.0保养及维护 (20)9.0常见故障及原因 (21)10.0售后服务 (21)11.0常用附件定购信息 (22)12.0其它 (22)13.0装箱单 (22)14.0附件 (22)1.0简介许多高分子材料在户外使用时经常会受到来自地球表面及大气层空间中的一些自然环境因素的破坏从而影响其使用寿命。
为了正确地评估其在户外的使用寿命,利用环境试验设备模拟各种外界各种自然气候条件,在实验室对各种产品的耐候性进行研究已成为一种广泛使用且行之有效的手段。
氙灯耐气候试验箱(以下简称B-SUN)能再现全光谱太阳光和雨水造成的损害。
氙灯老化试验箱中英文产品技术规格书
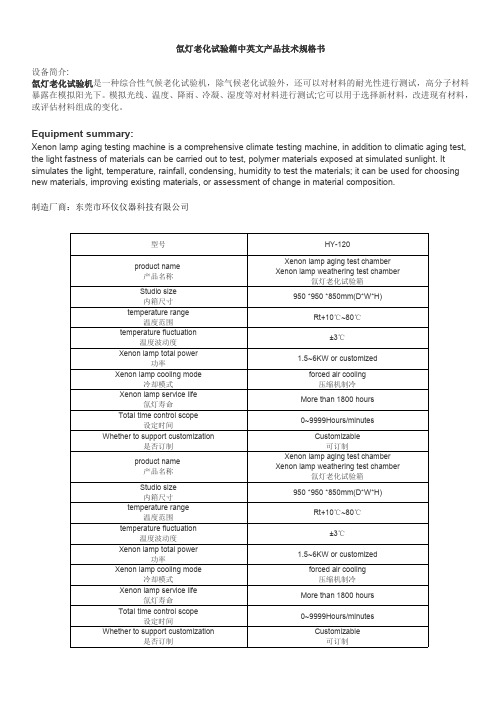
Rt+10℃~80℃
±3℃
1.5~6KW or customized forced air cooling 压缩机制冷
More than 1800 hours
0~9999Hours/minutes Customizable 可订制
功率 Xenon lamp cooling mode
冷却模式 Xenon lamp service life
氙灯寿命 Total time control scope
设定时间 Whether to support customization
是否订制
HY-120 Xenon lamp aging test chamber Xenon lamp weathering test chamber
氙灯老化试验箱 950 *950 *850mm(D*W*H)
Rt+10℃~80℃
±3℃
1.5~6KW or customized forced air cooling 压缩机制冷
More than 1800 hours
0~9999Hours/minutes Customizable 可订制
Xenon lamp aging test chamber Xenon lamp weathering test chamber
氙灯老化试验箱中英文产品技术规格书
设备简介: 氙灯老化试验机是一种综合性气候老化试验机,除气候老化试验外,还可以对材料的耐光性进行测试,高分子材料 暴露在模拟阳光下。模拟光线、温度、降雨、冷凝、湿度等对材料进行测试;它可以用于选择新材料,改进现有材料, 或评估材料组成的变化。
Equipment summary:
氙灯老化操作步骤

一、氙灯耐气候试验箱使用步骤:
1、氙灯耐气候试验箱把样品放在箱内的试验架上
2、先打开设备后面的“总电源”,再打开面板上的“电源开”。
3、调好试验的温度和湿度、试验时间和光照时间。
(1)调温度和湿度:轻按一下“SET”键,通过“︿”“﹀”来改变试验参数。
(2)调试验和光照时间:拿下时间显示器上的有机玻璃盖,通过“上面”“下面“键来改变大小,中间键为时间键。
4、开灯前,打开“氙灯准备”,然后再“点灯”,如需要光照周期再打开“光照”(注:如需要做什么试验就点什么)。
5、试验完毕后,要把所有的按钮都关掉。
6、打开箱门取出试验样品,检测试验样品的好坏。
二、氙灯耐气候试验箱使用注意事项:
1、不可改变仪表的内部参数。
2、不可以在开灯的情况下,眼睛离灯光很近。
3、不可以在设备有报警声的情况下使用。
4、不可以让非实验人员操作试验设备。
氙灯老化试验箱(光耐候试验箱)说明书
氙灯老化试验箱(光耐候试验箱)说明书满足的试验标准本产品严格按GB/T16422.2-99的技术参数设计制造。
同时符合、GB/T2423.24-1995 GB/T9344 GB/T1865-97等相应的标准模拟全阳光光谱氙灯耐气候试验箱通过将材料曝露在紫外线(UV),可见光和红外光下,对材料的耐光性进行测定。
它采用经过过滤处理的氙弧灯来产生与阳光具有最大吻合性的全阳光光谱。
采用合理过滤处理的氙弧灯是测试产品对直接光照中或透过玻璃的阳光中的较长波长段紫外线和可见光的敏感度的最佳方式。
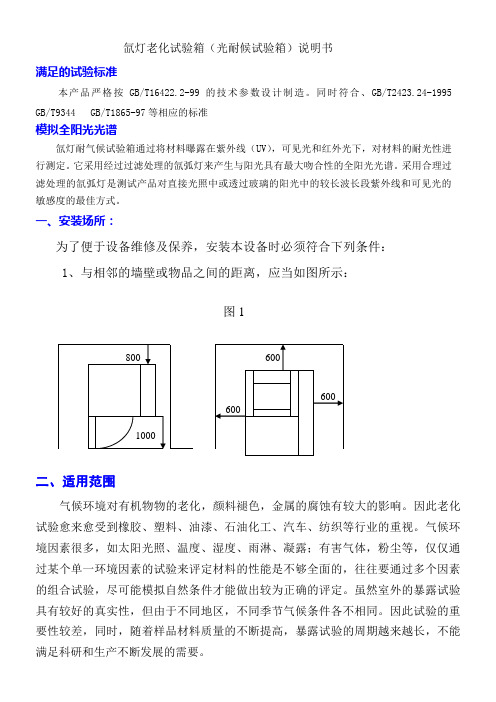
一、安装场所:为了便于设备维修及保养,安装本设备时必须符合下列条件:1、与相邻的墙壁或物品之间的距离,应当如图所示:图1二、适用范围气候环境对有机物物的老化,颜料褪色,金属的腐蚀有较大的影响。
因此老化试验愈来愈受到橡胶、塑料、油漆、石油化工、汽车、纺织等行业的重视。
气候环境因素很多,如太阳光照、温度、湿度、雨淋、凝露;有害气体,粉尘等,仅仅通过某个单一环境因素的试验来评定材料的性能是不够全面的,往往要通过多个因素的组合试验,尽可能模拟自然条件才能做出较为正确的评定。
虽然室外的暴露试验具有较好的真实性,但由于不同地区,不同季节气候条件各不相同。
因此试验的重要性较差,同时,随着样品材料质量的不断提高,暴露试验的周期越来越长,不能满足科研和生产不断发展的需要。
氙灯耐气候试验箱具有光照、淋雨、湿度、凝露等六个环境因素,而且可以独立调整,采用氙灯作光源,具有与太阳光近似的光谱分布,因此以氙灯光模拟太阳光。
同时温度和湿度较宽的调节范围供调节,淋雨采取独立循环系统,因此在必要时,可以在淋雨的供水源处加入有害气体物质。
改变样架冷却水温,可以调整样品表面的凝露量及试样表面温度,因此,本试验箱可作多因素耐气候的组合试验。
三、技术条件温度范围:RT~80℃湿度范围:45~90%R·H降雨周期:0~240min样架与氙灯距离:230~280mm加热功率:3KW加湿功率:1.5KW温度波动度:±0.5℃结构及材质:内箱尺寸 500 × 760 ×500三、面板说明1.温度2. 黑板温度3.湿度4.试验定时5.降雨周期6.光照定时7. 超温8.超压9.过载10.缺相11.缺水12.调光113. 调光2 14. 调光3 15.灯一16.灯二17.灯三18.电源19.制冷20.喷淋21.光照22.辐射仪四.使用注意事项1.于操作当中,除非有必要,请不要打开箱门,否则可能会导致不良后果。
SN-B1氙灯老化试验箱简介(触摸屏)
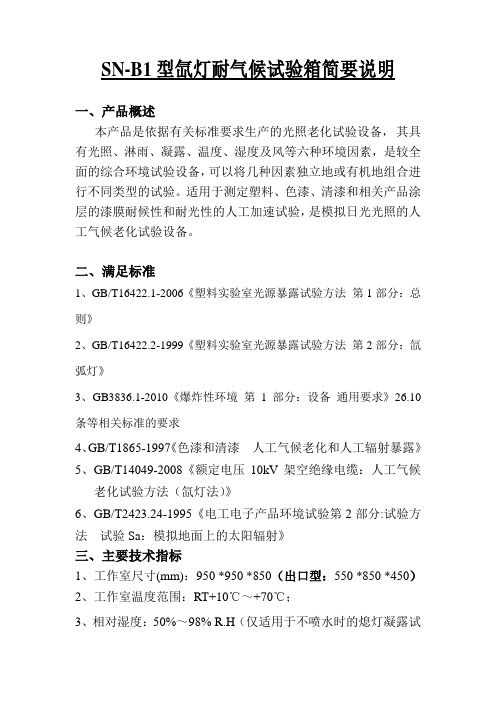
一、产品概述本产品是依据有关标准要求生产的光照老化试验设备,其具有光照、淋雨、凝露、温度、湿度及风等六种环境因素,是较全面的综合环境试验设备,可以将几种因素独立地或有机地组合进行不同类型的试验。
适用于测定塑料、色漆、清漆和相关产品涂层的漆膜耐候性和耐光性的人工加速试验,是模拟日光光照的人工气候老化试验设备。
二、满足标准1、GB/T16422.1-2006《塑料实验室光源暴露试验方法第1部分:总则》2、GB/T16422.2-1999《塑料实验室光源暴露试验方法第2部分:氙弧灯》3、GB3836.1-2010《爆炸性环境第1部分:设备通用要求》26.10条等相关标准的要求4、GB/T1865-1997《色漆和清漆人工气候老化和人工辐射暴露》5、GB/T14049-2008《额定电压10kV架空绝缘电缆:人工气候老化试验方法(氙灯法)》6、GB/T2423.24-1995《电工电子产品环境试验第2部分:试验方法试验Sa:模拟地面上的太阳辐射》三、主要技术指标1、工作室尺寸(mm):950 *950 *850(出口型:550 *850 *450)2、工作室温度范围:RT+10℃~+70℃;3、相对湿度:50%~98% R.H(仅适用于不喷水时的熄灯凝露试验工况);4、黑板温度测量范围:+50~+100℃(满足黑板温度在63℃±3℃、100℃±3℃时正常恒定工作);5、温度波动度:±3℃(空载时);6、温度均匀度:≤±2℃;7、湿度波动度:+2、-3% R.H;8、辐射强度:200w/m2~1500 w/m2范围内可任意调节;能同时满足波长范围在290 nm ~800nm 之间通带的平均辐照度为550w/m2±10%和波长范围在300 nm ~890nm之间的平均辐射强度为1000±200w/m2的要求,波长范围在300 nm ~1050nm之间的平均辐射强度为800±±10%的要求;9、氙灯总功率:1.8~7.5KW左右(以满足辐射强度指标要求为准);10、灯管数量:1支(以满足辐射强度指标要求为准) ;11、氙灯光谱范围:280 nm ~3000nm(接近太阳光谱);12、氙灯冷却方式:风冷;13、氙灯点灯方式:自动触发点灯;14、氙灯使用寿命:大于1500小时;15、总时间控制范围:0~9999小时/分钟;16、光照方式:具有连续光照和周期光照2种工作状态可调;17、连续光照时间范围:0~9999小时/分钟;18、周期光照时间范围:0~9999小时/分钟可调,连续/间隔(断)点灯的明、暗周期时间可随意设定(此功能只有象本公司生产的具备自动触发点灯功能的设备才能实现;有好多厂家是手动触发点灯,此时就不能实现模拟白天和黑夜的明暗周期点灯试验);;19、降雨方式:具有连续降雨和周期降雨2种工作状态可调;20、连续降雨时间范围:0~9999小时/分钟(可调);21、周期降雨时间范围:0~9999分钟可设,连续/间隔(断)降雨的淋雨、凝露周期时间可随意设定,如18min/102min或12min/48min(喷水时间/不喷水时间);22、淋雨水压:0.12~0.15Mpa23、喷水嘴孔径:Ф0.8mm;24、加热功率:2KW;25、加湿功率:1.5KW;26、样品架转速:1转/min360°旋转(出口型:为不带转鼓的平面辐射样架,故无此参数;其优点是既可放置平面样品,也可放置不规则的立体产品样品做试验,从而克服了旋转样架只能做标准平面样品试验的缺点);27、样品架与灯距离:300mm~375mm(出口型:80 mm ~300 mm 为间距可调式);28、试板容量:可放置不少于20块的标准试板;29、黑标准温度计:2块;尺寸为70*40*1和70*40*0.5各1块。
氙灯老化试验箱作业指导书
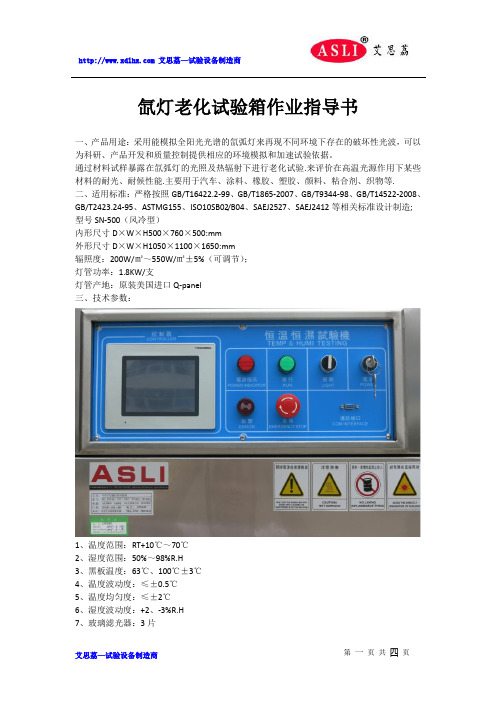
氙灯老化试验箱作业指导书一、产品用途:采用能模拟全阳光光谱的氙弧灯来再现不同环境下存在的破坏性光波,可以为科研、产品开发和质量控制提供相应的环境模拟和加速试验依据。
通过材料试样暴露在氙弧灯的光照及热辐射下进行老化试验.来评价在高温光源作用下某些材料的耐光、耐候性能.主要用于汽车、涂料、橡胶、塑胶、颜料、粘合剂、织物等.二、适用标准:严格按照GB/T16422.2-99、GB/T1865-2007、GB/T9344-98、GB/T14522-2008、GB/T2423.24-95、ASTMG155、ISO10SB02/B04、SAEJ2527、SAEJ2412等相关标准设计制造;型号SN-500(风冷型)内形尺寸D×W×H500×760×500:mm外形尺寸D×W×H1050×1100×1650:mm辐照度:200W/㎡~550W/㎡±5%(可调节);灯管功率:1.8KW/支灯管产地:原装美国进口Q-panel三、技术参数:1、温度范围:RT+10℃~70℃2、湿度范围:50%~98%R.H3、黑板温度:63℃、100℃±3℃4、温度波动度:≤±0.5℃5、温度均匀度:≤±2℃6、湿度波动度:+2、-3%R.H7、玻璃滤光器:3片8、氙灯灯源:风冷式灯管9、灯管总数量:4支10、降雨时间:0~9999min连续降雨可调11、降雨周期:0~240min间隔(断)降雨可调12、喷水周期:18min/102min或12min/48min(喷水时间/不喷水时间)13、淋雨水压:0.12~0.15Mpa14、喷水嘴孔径:Ф0.8mm15、氙灯功率:1.8KW×3支16、加热功率:2KW17、加湿功率:1.5KW18、样品托盘尺寸:450×720mm19、样品架与灯距离:230~280mm20、光谱波长:290nm~800nm21、光照周期连续可调时间:0~999H、M、S;22、辐照度:光谱波长在290nm~800nm之间时辐照强度为200W/㎡~550W/㎡±5%(可调节);23、电源要求:AC380(±10%)V/50HZ三相五线制箱体材料:1、外胆均采用优质(t=1.2mm)A3钢板数控机床加工成型,外壳表面进行喷塑处理,更显光洁、美观;2、内胆为进口(SUS)304优质不锈钢板;3、保温材质采用高密度玻璃纤维棉和高压聚胺脂发泡隔热保温;4、搅拌系统采用长轴风扇电机,耐高低温之不锈钢多翼式叶轮,以达强度对流垂直扩散循环;5、门与箱体之间采用双层耐高温之高张性密封条以确保测试区的密闭;6、采用无反作用门把手,操作更容易;7、机器底部采用高品质可固定式PU活动轮;四、系统介绍:加热系统:1、采用远红外不锈钢高速加温电加热器;2、高温、湿度、光照完全独立系统(互不干扰);3、温湿度控制输出功率均由微电脑演算,以达高精度及高效率之用电效益;加湿系统:1、外置式锅炉蒸汽式加湿器具有节能降耗功能,可节约70%能耗;2、具有水位自动补偿、缺水报警系统;3、湿度控制均采用P.I.D+S.S.R,系统同频道协调控制;控制系统:1、温湿度控制仪表采用(韩国)全进口高精度数显微电脑集成控制器;2、精度:0.1℃(显示范围);3、解析度:±0.1℃;4、感温传感器:PT100铂金电阻测温体;5、控制方式:热平衡调温调湿方式,所有电器均采用(施耐德)系列产品;6、温湿度控制采用P.I.D+S.S.R系统同频道协调控制;7、具有自动演算的功能,可将温湿度变化条件立即修正,使温湿度控制更为精确稳定;制冷、除湿系统控制:1、压缩机:全封闭法国泰康;2、制冷方式:复叠式单机制冷;3、冷凝方式:风冷式;4、制冷剂:R404A(环保型)5、全系统管路均作通气加压48H捡漏测试;6、加温、降温系统完全独立;7、内螺旋式冷媒铜管;8、翅片斜率式蒸发器(带自动除霜系统)9、干燥过滤器、冷媒流量视窗、修理阀、油分离器、电磁阀、贮液筒均采用进口原装件;10、除湿系统:采用蒸发器盘管露点温度层流接触除湿方式;光照系统:1、黑板温度计:金属黑板温度计;2、氙灯灯管:检测合格的原装美国进口Q-panel风冷式灯管,灯管寿命为1800-2000小时;3、辐照度的控制:可通过辐射仪及手动调节功率得到所须辐照度,面板直接显示当前灯管辐射强度;喷水循环系统:1、水质:去离子水(固体含量小于20ppm)2、具有储水箱水位显示;3、喷出的水具有可回收性;4、喷水压力在0.12~0.15Mpa之间可调;5、在工作室顶部安装了两个喷头;保护系统:1、风机过热保护2、整体设备欠相/逆相保护3、制冷系统过载保护4、制冷系统超压保护5、超温保护6、水泵过热,过流保护7、其它还有漏电8、缺水指示9、故障报警后自动停机五、设备使用条件:1、环境温度:5℃~+28℃(24小时内平均温度≤28℃)2、环境湿度:≤85%R.H。
氙灯老化试验箱安全操作及保养规程
氙灯老化试验箱安全操作及保养规程概述氙灯老化试验箱是一种用于加速光稳定材料衰减的专业设备,通常用于评估材料在不同条件下的耐久性能。
本文旨在介绍氙灯老化试验箱的安全操作规程以及保养要点,以确保设备正常运行并延长其使用寿命。
安全操作规程1. 电源接线在接入电源前,需检查电源接线是否接好,电压是否符合氙灯老化试验箱的要求。
若电源线异常,应及时更换或修理,防止电源短路或引发电火灾。
2. 试验室内安全进入试验室前,必须先按下紧急停止按钮,并确认试验箱的开关已关闭。
在试验箱内进行调试和维护时,需使用绝缘手套、绝缘工具等保护措施,防止因误操作导致人员触电。
3. 操作人员安全操作氙灯老化试验箱时,必须戴上防护眼镜和手套。
在调试和维护设备时,需保持机器处于停机状态,并通过安全措施,如锁定、断电等方式,防止机器突然启动而导致伤害。
4. 环境安全氙灯老化试验箱在工作过程中会产生较高的温度和辐射,需要放置在通风、干燥、敞亮的环境下,离易燃易爆物品远离。
5. 紧急情况处理若因故障引发火灾、爆炸等紧急情况,应按下紧急停止按钮,立即断开电源,并迅速撤离现场,避免受到伤害或造成财产损失。
紧急情况后,应及时联系设备维修人员和消防机构,进行处理。
保养要点1. 检查设备状况定期检查氙灯老化试验箱的电源线、导线、插座等是否正常,检查试验箱内温度是否正常,设备是否损坏,是否需要更换配件。
2. 定期清理经常清理氙灯老化试验箱的灯管、滤网和灰尘,以免灰尘积累影响设备使用寿命。
3. 养护氙灯使用过程中应避免震动,避免灯管磕碰或摔落。
如果发现灯管暗淡、闪烁或剧烈摇晃,应及时更换。
4. 特殊情况处理如果设备长时间未使用或在使用过程中出现异常情况时,应及时检查电源、温度、电机等设备部位,确保设备处于正常状态。
总结本文介绍了氙灯老化试验箱的安全操作规程及保养要点。
在实际使用中,务必按照上述规程进行操作,确保设备稳定运行,延长其使用寿命,并保障操作人员安全。
氙灯老化试验箱操作保养作业指导书[模板]
![氙灯老化试验箱操作保养作业指导书[模板]](https://img.taocdn.com/s3/m/d291cbc10066f5335b812132.png)
对应的流程/规范1. 目的为准确操作、保养测量仪器/量具,确保仪器/量具精确度、精密度在受控状态;以及延长仪器/量具使用周期,特制定本作业指导书。
2. 概述适用于我司Q-Sun氙灯老化试验箱,对油漆涂层对紫外线影响的抵御能力。
3. 术语4. 操作说明4.1使用前:首先检查Q-Sun氙灯老化试验箱是否贴有校验标签,校验有效期是否在校准周期内(如超出校准有效期,必须通知计量管理员安排校验)。
4.2Q-Sun氙灯老化试验箱名称介绍如下图:4.3按键及其功能介绍:4.3.1R UN(运行):用于开始运行一个测试。
除非用户选择一个不同的循环/步,否则当按下此键时,设备会继续运行原来的测试,且从之前停下来的时刻开始。
这样,这个循环就在连续的运行了。
运行时RUN 键上的绿色LED 灯会发亮;4.3.2S TOP(停止):用于停止一个测试。
按下该健时,QUV 的鼓风机继续运转 1 小时,冷却和干燥样品以防止其暴露在高温和湿气中继续腐蚀。
当处于STOP 状态时键上的蓝色LED 灯会发亮;4.3.3S ILENCE(消音):停止当前的报警声但并不删除错误信息,如果有多种错误,会再次出现报警声;4.3.4C LEAR (清除):用于取消错误信息。
在按“CLEAR”键后,你必须再接着按“ENTER”键。
如果有多项信息,重复上面步骤取消显示的每一项信息;4.3.5P ROGRAM(程序):用于进入编程模式。
当按“PROGRAM”键时,控制器处于编程模式下,编程模式允许用户设置测试时间,选择测试循环,修改或创建循环,校准温度计,设置报警音量或连接网络地址等;4.3.6U P/DOWN ARROWS(上/下箭头):使用这些箭头可以更改参数和在同一参数的不同选择间滚动;4.3.7L EFT/RIGHTARROWS(左/右箭头):在状态显示中移动光标,光标所处的参数不断闪烁;4.3.8“?”控制器进入诊断模式。
提供用户各种信息,如空气加热器以多大的百分比的功率工作,软件版本,UV 传感器最后一次校准至今的时间等,在诊断章节中有完整的诊断信息列表;4.3.9E NTER(确认):用于编程时接受当前选择,并进入下一级子菜单;4.3.10ESCAPE(取消):用于编程时取消当前选择,或返回上一级菜单;4.3.11警报灯:警报LED 是一盏红色指示灯,在测试结束、出错或有警告信息时闪烁。
SN-900 氙灯老化试验箱[水冷式] 说明书
![SN-900 氙灯老化试验箱[水冷式] 说明书](https://img.taocdn.com/s3/m/c22bf582b9d528ea81c77963.png)
氙灯老化试验箱[水冷式]-SN-900(图示)产品名称氙灯耐气候试验箱/氙灯试验箱/氙灯老化试验箱[水冷式]产品用途SN 型氙灯耐气候试验箱采用能摸拟全阳光光谱的氙弧灯来再现不同环境下存在的破坏性光波,可以为科研、产品开发和质量控制提供相应的环境模拟和加速试验。
SN 型氙灯试验箱可用于新材料的选择、改进现有材料或评估材料组成变化后耐用性的变化试验,可以很好的模拟在不同环境条件下,材料暴露在阳光下所产生的变化。
箱体结构 外胆均采用优质(t=1mm )A3钢板数控机床加工成型,外壳表面进行喷塑处理,更显光洁、美观。
(现已升级为圆弧边角)内胆为进口(t=1mm )SUS304优质不锈钢板。
高密度玻璃纤维棉.保温厚度为80mm 氙灯耐气候试验箱采用长轴风扇电机,耐高低温之不锈钢多翼式叶轮,以达强度对流垂直扩散循环.门与箱体之间采用双层耐高温之高张性密封条以确保测试区的密闭采用无反作用门把手,操作更容易机器底部采用高品质可固定式PU活动轮.观察窗采用多层中空钢化玻璃,(可清楚观察试验过程)产品功能全光谱氙灯。
多种供选择的过滤系统。
水喷淋功能。
相对湿度控制。
试验箱空气温度控制系统。
不规则形状的样品固定架。
价廉物美的氙弧灯管。
氙灯耐气候试验箱安装容易使用方便并且基本上不需要日常维护的特点。
氙弧灯管的使用寿命取决于所使用的辐射照度水平,一般灯管的寿命为1600小时。
灯管更换方便快捷,长效的过滤器为保持所需的光谱提供保障。
制冷系统冷机采用法国原装“泰康”全封闭压缩机。
冷冻系统采用单元或二元式低温回路系统设计。
美国“艾高”干燥过滤器,台湾“冠亚”油分离器,意大利“卡士妥”电磁阀采用多翼式送风机强力送风循环,避免任何死角,可使测试区域内温湿度分布均匀。
风路循环出风回风设计,风压风速均符合测试标准,并可使开门瞬间温湿度回稳时间快。
升温、降温、加湿系统完全独立可提高效率,降低测试成本,增长寿命,减低故障率符合标准本产品严格按GB14049-1993的技术参数设计制造.同时符合GB/T9344-88、GB2423.24-95、GB/T2424.14-95等相关标准型号SN-900工作尺寸D×W×H 950×950×850外形尺寸D×W×H 1500×1370×2100 功率(kw) 12.5KW性能指标温度范围RT+10℃~70℃湿度范围65~98%R.H降雨时间1~9999小时59分钟可调降雨周期1~240分钟,间隔(断)可调光谱波长290nm~800nm氙灯功率1KW、6KW(寿命:1600小时)温湿度运行控制系统精度范围设定/指示精度:温度±0.1℃、湿度±1%R.H温湿度传感器铂金电阻.PT100Ω/MV加热系统全独立系统,镍铬合金电加热式加热器加湿系统外置隔离式,全不锈钢浅表面蒸发式加湿器黑板温度双金属黑板温度计供水系统加湿供水采用自动控制.氙灯冷却循环用水温度控制器采用进口威伦彩色触摸屏及德国西门子PLC模块控制循环系统耐温低噪音空调型电机.多叶式离心风轮使用材料外箱材质优质碳素钢板,磷化静电喷塑处理/SUS304不锈钢雾面线条发纹处理内箱材质SUS304优质不锈钢光板样品架材质SUS304优质不锈钢条门框隔热耐高低温老化硅橡胶门密封条标准配置防辐射玻璃视窗1套、动态试品架1个、氙灯灯管2只安全保护漏电、短路、超温、缺水、电机过热、过电流保护电源电压AC380V±10%50±0.5Hz 三相五线制使用环境温度5℃~+30℃≤85%R.H以上PDF产品资料由维库仪器仪表网()整合提供。
氙灯老化试验箱操作步骤

氙灯老化试验箱操作步骤
一、首先将氙灯老化试验箱里水箱加满水,需采用去离子水或纯净水。
二、检查机台是风冷型还是水冷型,如是水冷型,先检查一下冷水机过水有没有问题,水源是否有水。
防止开启灯管后没水源造成灯管瞬间温度过高烧掉;
三、再将样品放置于氙灯老化试验箱内,如机台采用转骨式,必须将样品取样后夹于转骨架内,如果是平板式将样品放置于置物架内调整样品架的高度使之与灯管保持标准距离。
四、接通电源,点击触摸屏,设备您所需要温度湿度、淋雨、光照以及循环次数等。
五、关好氙灯老化试验箱箱门,如需观查箱内情况可以点击视窗灯,从视窗上查看,视窗上有覆过滤膜,可滤强光,正常情况下,不要用眼直视光源。
六、试验结束后将试验箱清洗后擦干,若一周内不进行试验的话,最好将水箱内的水放干,并打开箱门进行通风,等箱内干燥后再关闭箱门。
环仪仪器提供整理资料。
氙灯耐老化试验机腐蚀试验箱安全操作及保养规程
氙灯耐老化试验机腐蚀试验箱安全操作及保养规程氙灯耐老化试验机腐蚀试验箱是一种用来测试材料在不同环境条件下的耐久性和腐蚀性的设备。
本文档旨在提供氙灯耐老化试验机腐蚀试验箱的安全操作和保养规程,以确保设备能够安全高效地运行。
安全操作规程1. 设备安装•请确保设备安装时,符合产品包装盒中的安装说明,如有任何疑问,请咨询相关技术人员•请确认设备站立稳定,调整好水平,才能接通电源2. 电源连接•请根据电源输入要求(电压、频率等)插入相应电源线•插拔电源线时,应将电源开关关闭,以及时切断电源3. 试验操作•试验前请确认氙灯是否工作正常•在试验操作前,请先确认试验程序是否正确、是否已经设置好测试参数•在开启腐蚀试验时,请注意个人安全,避免化学物品或腐蚀液误触或溅到身上•在试验期间请勿私自开启试验箱门,以免破坏试验情况4. 事故处理•如出现设备异常,应及时对设备进行检查,避免出现进一步事故保养规程保养设备可以确保其良好性能,并延长使用寿命。
1. 日常保养•每次试验后请清理试验箱,避免化学物质沾染试验箱,同时保持设备内部干燥清洁•设备停止使用时,应将设备内部清洁干净,确保设备整体无水迹2. 定期保养•定期对试验箱进行检修,检测试验箱内外部是否有损伤,如有损伤,应及时修复•定期检查整个设备是否有松动或腐蚀,如有,则应及时修理或更换•定期对设备进行清洁和消毒,以确保设备内部永保清洁、卫生总结本文提供了氙灯耐老化试验机腐蚀试验箱的安全操作规程和保养规程,这些规程可以确保设备的安全稳定运行,同时延长其使用寿命。
尽管对于一些试验操作人员来说,遵守这些规程可能会花费一些时间和精力,但是经过遵守这些规程的努力,将会确保试验结果准确可靠。
氙灯老化试验箱的安装说明
氙灯老化试验箱的安装说明
-------东莞市环仪仪器科技有限公司
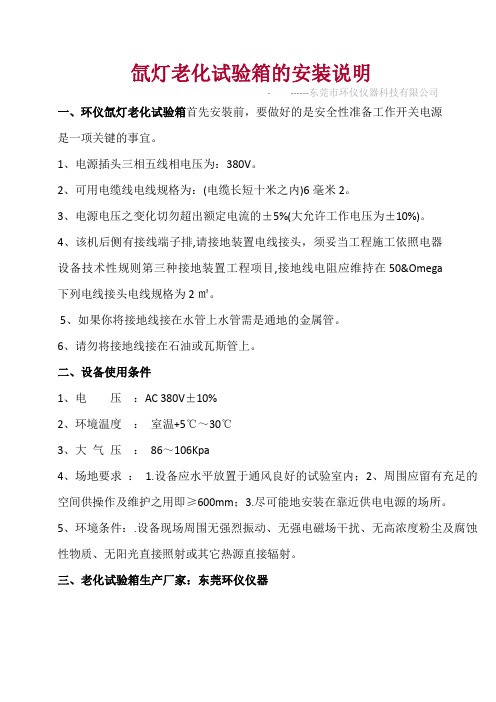
一、环仪氙灯老化试验箱首先安裝前,要做好的是安全性准备工作开关电源
是一项关键的事宜。
1、电源插头三相五线相电压为:380V。
2、可用电缆线电线规格为:(电缆长短十米之内)6毫米2。
3、电源电压之变化切勿超出额定电流的±5%(大允许工作电压为±10%)。
4、该机后侧有接线端子排,请接地装置电线接头,须妥当工程施工依照电器
设备技术性规则第三种接地装置工程项目,接地线电阻应维持在50&Omega
下列电线接头电线规格为2㎡。
5、如果你将接地线接在水管上水管需是通地的金属管。
6、请勿将接地线接在石油或瓦斯管上。
二、设备使用条件
1、电压:AC380V±10%
2、环境温度:室温+5℃~30℃
3、大气压:86~106Kpa
4、场地要求:1.设备应水平放置于通风良好的试验室内;2、周围应留有充足的空间供操作及维护之用即≥600mm;3.尽可能地安装在靠近供电电源的场所。
5、环境条件:.设备现场周围无强烈振动、无强电磁场干扰、无高浓度粉尘及腐蚀性物质、无阳光直接照射或其它热源直接辐射。
三、老化试验箱生产厂家:东莞环仪仪器。
恒温恒湿恒光氙气箱使用方法说明书
恒温恒湿恒光氙气箱使用方法说明书使用方法说明书使用前须知恒温恒湿恒光氙气箱是一种高级实验设备,为了确保您能正确使用该设备并达到最佳的实验效果,请仔细阅读以下使用方法。
1. 设备介绍恒温恒湿恒光氙气箱是一种用于模拟各种气候环境下的温度、湿度和光照条件的实验设备。
箱体内置氙气灯光源,可产生稳定的光照强度。
同时,箱体内部设有恒温及恒湿系统,可实现精确的温度和湿度控制。
2. 使用准备(1)将恒温恒湿恒光氙气箱放置在稳定的水平台上,并确保周围环境通风良好。
(2)连接相应的电源,并确保电源线接地良好。
(3)打开设备前方的面板,检查水箱内水位,确保充足。
如水位不足,请添加纯净水。
3. 设备操作(1)开机前,请确保温度和湿度控制参数已经设置好。
通常情况下,设备将会显示默认的参数设置值。
(2)按下电源按钮,设备将开始运行,各个指示灯将亮起。
(3)按照实验需求,设定所需的温度和湿度数值。
您可以使用设备配备的控制面板进行操作,也可以通过外接电脑远程控制设备。
(4)确认设置完成后,按下启动按钮,设备将根据您的设定开始工作,并实时显示工作状态。
(5)实验结束后,您可以选择将设备设回默认状态,或者根据下一次实验的要求进行新的设置。
4. 温度和湿度控制(1)温度控制:使用设备配备的温度控制器,您可以在设定的温度范围内进行微调,以满足您的具体需求。
(2)湿度控制:使用设备配备的湿度调节器,您可以根据实验要求,对湿度进行精确控制。
请确保水箱中始终保持适量的水分。
5. 光照控制恒温恒湿恒光氙气箱内置的氙气灯光源可以产生稳定的光照强度,您可以通过控制面板或外接电脑进行光照强度的调节。
根据实验需求,您可以设置不同的光照时间和强度。
6. 注意事项(1)请勿在高温、高湿或阳光直射的环境中使用设备。
(2)使用设备时请保持稳定的供电环境,避免电源波动引起设备故障。
(3)设备内部高温,请避免直接接触设备表面,以免烫伤。
(4)每次使用后,请及时清理设备,确保设备保持干净和卫生。
- 1、下载文档前请自行甄别文档内容的完整性,平台不提供额外的编辑、内容补充、找答案等附加服务。
- 2、"仅部分预览"的文档,不可在线预览部分如存在完整性等问题,可反馈申请退款(可完整预览的文档不适用该条件!)。
- 3、如文档侵犯您的权益,请联系客服反馈,我们会尽快为您处理(人工客服工作时间:9:00-18:30)。
4.0. operation操作The section explains how to start the Weather – Ometer R, run a standard test, create a stop schedule for a test, and program a custom test. Once these steps have been mastered, the operator can rely on the prompts in the touch screen to manipulate test programs. Refer to section 3.6 to review the description of the parameter input techniques.本节说明如何使用氙气仪来进行一个标准试验,随机停止试验并安排自定义测试。
一旦掌握了这些步骤,操作者可以依靠触摸屏上的提示来操作测试程序。
参考3.6节,可以回顾参数设置的叙述。
4.1. instrument start up启动仪器Before applying power to the instrument(工具), complete the setup, connection, and lamp installation procedures. When the setup procedures are complete, confirm the following:●Power at the wall disconnect switch is off.●The red power switch is off (O).●The working xenon lamp is installed.●Air, Dl and tap water supplies are on.●Instrument air pressure regulator is set to 552 KPA (80 psi).●Removable storage media card is inserted or DAQ system connected for datalogging.在拥有操作权限的前提下,完成机器的安装,连接,以及灯的安装(程序)。
当安装程序完成后,确认以下情况:●墙壁上的开关处于关闭的状态。
●红色电源开关关闭(O)。
●工作氙气灯已安装OK。
●空气,消旋和自来水正常开始。
●空气压力仪表调节设置为552帕(80磅)。
●移动存储介质卡插入或数据采集系统被连接,来采集数据。
1) Turn on power at the wall switch.2) Turn the instrument power switch on (I).3) Confirm that the Touch screen is operating. And I.D. screen will automatically change to the directory page.4) Confirm that the chart recorder (if included) is on. If not, press the ON button inside the lower right-hand corner of the chart recorder.5) Wait a few minutes to allow the instrument to fill the lamp cooling water reservoir. During first use, or use after the instrument has not been in operation, open the lower instrument doors and panels and check the water lines for leaks. Water will flow through the xenon lamp replacing the air with water.1)打开电源开关(在墙上)。
2)打开仪器电源开关(I)。
3)操作触摸屏,身份验证后屏幕会自动更改实验目录页面。
4)证实图表记录器(如果有)正常。
如果不正常,按下右下角的图表记录仪按钮。
5)等几分钟使仪器填补氙气灯冷却水。
第一次使用或很长时间未使用时,开下门和面板和检查水管是否泄漏,水流过氙灯时更换空气和水。
4.2. Preliminary settings 初步设置。
Before running a test, ensure that the settings in the following touch screen pages are as specified, or in conformance with requirements of the test method to be conducted.测试之前,确保按照显示屏指定的参数进行设定,或者在符合要求的测试方法下进行。
4.2.1. Unit settings page configuration1)On the Directory page, touch the Unit Settings button. The page below appears.2)Set the parameters according to the instructions below.Enabling a safety cut out: Enable a safety Cut Out by selecting Warning or Shutdown in the dropdown menu box. When set to Warning, the triggered cut out provides only a warning message in the main p age “Message:” box. When set to shutdown, the triggered cut out will cause the test program to be stopped and the instrument to enter cooling mode. Set a cut out to disabled to disable it.Irradiance cut out: This is the maximum irradiance set point tolerance allowed during operation. If the irradiance level exceeds this tolerance due to a malfunction, a warning or shutdown response will be initiated. It is set as an additive amount below and above the test set point.For exampleIf the test irradiance set point is 0.55 W/m2 and you wish to have a warning or a shutdown if the irradiance level goes more than 0.1 W/m2 out of tolerance (i.e., less than 0.45 or greater than 0.65 W/m2), set the cut out to 0.10.To adjust the irradiance cut out setting, touch its value box and a keypad appears. Touch in the desired value, then touch the enter button.Chamber temp cut out: this is the maximum chamber temperature set point tolerance allowed during operation. If the chamber temperature exceeds this tolerance due to a malfunction, a warning or shutdown response will be initiated. It is set as an additive amount below and above the test set point.For example, if the chamber temperature set point is 65℃and you wish to have a warning or a shutdown if the temperature goes more than 5℃out of tolerance (i.e., less than 60.0 or greater than 70℃), set the cut out to 5.0.To adjust the chamber temp .cut out setting, touch its value box and a keypad appears. Touch in the desired value, then touch the enter button.Relative humidity cut out:This is the maximum relative humidity set point tolerance allowed during operation. If the humidity level exceeds this tolerance due to a malfunction, a warning or shutdown response will be initiated. It is set as an additive amount below and above the test set point.For example, if the relative humidity for test is 65% and you wish to have the test stopped if relative humidity level rises to more than 60% or falls below 40%, set the cutout to 10.0.To adjust the chamber temp .cut out setting, touch its value box and a keypad appears. Touch in the desired value, then touch the enter button.Cut Out Time Delay: This delay defines how long the operating parameter must be continuously out of tolerance before the cut outs active. This setting applies to all the cut outs. This delay must be determined by the user with respect to specimen sensitivities and any set-point variation guidelines indicated in the applicable test method.To adjust the cut out time delay setting, touch its value box and a keypad appears. Touch in the desired value. Touch the enter button.Max. BPT: this is the maximum allowed black panel thermometer (sensor) temperature. When activated, it initiates cooling mode and sets the running test to "stopped." set it to 20℃above your test maximum BPT, or leave it at the default of 120℃.Recommended Max BPT (Bronchial provocation test) Cutout SettingThe Max BPT cut out should be set 20℃above your maximum test BPT temperature (or left at the default of 120℃). This cut out has a 60 second delay to prevent false tripping.最大BPT设置在最高试验温度的20℃以上(默认120℃)。