飞利浦剃须刀安装教程 三头s5080
Philips Norelco 8260XL 三头线头电动刮胡子说明书

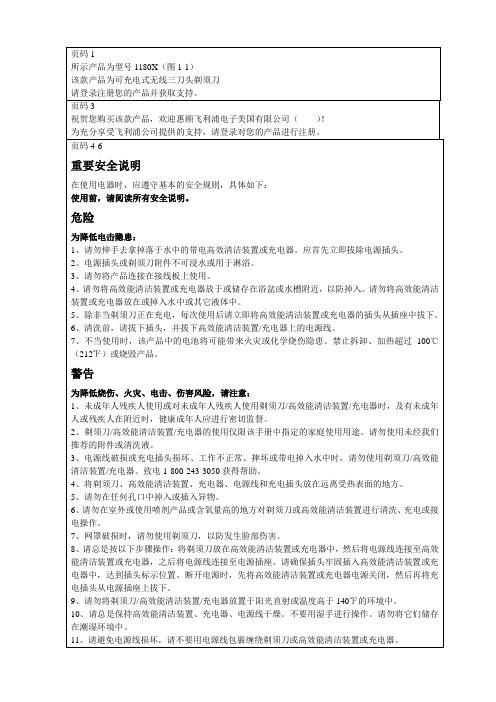
Register your product and get support at/norelcoRechargeable Tripleheader Cordless/Cord Razor2ENGLISH 48260XLCongratulations on your purchase and welcome to Philips Norelco!T o fully benefit from the support that Philips Norelco offers, register your product at /norelco4. Keep the razor, charging stand, cord and charging plug away from heated surfaces.5. Never drop or insert any object into any opening.6. Do not charge or plug in razor/charging stand outdoors or operate where aerosol (spray) products are being used or where oxygen is being administered.7. Do not use this razor with a damaged or broken comb, as facial injury may occur.8. For corded use, always attach plug to razor first, then to outlet. Be certain that plug is inserted firmly into razor, up to mark indicated on plug. For stand use, always put razor in stand first, attach cord to stand, then plug into outlet. T o disconnect, turn razor off then remove charging plug from outlet.9. Never put the razor in direct sunlight or store in a pouch at a temperature above 140°F .10. Razor can be rinsed under running tap water. Do not operate razor corded until fully dried.11. T o prevent possible damage to the cord, do not wrap cord around the razor or charging stand.SAVE THESE INSTRUCTIONSIMPORT ANT: The power plug contains a transformer. Do not cut off the power plug to replace it with another plug, as this will cause a hazardous condition.IMPORTANT SAfETy INSTRUCTIONSWhen using an electric razor, basic safety precautions shouldalways be followed, including the following:Read all instructions before using this appliance.DANGERT o reduce the risk of electric shock:1. Do not reach for a corded razor/charging stand that has fallen into water. Unplug immediately.2. Use razor only in dry condition. Do not use a razor/charging stand while bathing or in a shower.3. Do not submerge razor in water.4. Do not place or store a razor or charging stand where it can fall or be pulled into a tub or sink. Do not place or drop a razor or charging stand into water or other liquid.5. Always unplug this razor/charging stand from the electrical outlet immediately after use, except when razor is (re)charging.6. Remove power supply cord from razor before cleaning.WARNINGT o reduce the risk of burns, fire, electric shock, or injury topersons:1. Close supervision is necessary when this razor is used by, on, or near children or invalids.2. Use this razor for its intended household use as described in this manual. Do not use attachments not recommended by Philips Electronics North America Corporation.3. Never operate this razor/charging stand if it has a damaged cord or charging plug, if it is not working properly, if it has been dropped or damaged, or dropped into water while plugged in. For assistance call 1-800-243-3050.rimmerAutomaticWorldwide Voltage 100V to 240V ACCleaning Brush Storage/T ravelPouch 4-hour full charge cordless shave time Corded or cordfree use ear Warranty GuaranteeHoles to cut short hairs even closerfULL TWO yEAR WARRANTyPhilips Electronics North America Corporation warrants each new Philips Norelco Product, Model 8260XL (except cutters and combs) against defects in materials or workmanship for a period of two years from the date of purchase, and agrees to repair or replace any defective product without charge.IMPORT ANT: This warranty does not cover damage resulting from accident, misuse or abuse, lack of reasonable care, the affixing of any attachment not provided with the product or loss of parts or subjecting the product to any but the specified voltage.* Use of unauthorized replacement parts will void this warranty.PHILIPS ELECTRONICS NORTH AMERICA CORPORA TION WILL NOTPAy fOR WARRANTy SERVICE PERfORMED By A NON-AUTHORIZED REPAIR SERVICE AND WILL NOT REIMBURSE THE CONSUMER fOR DAMAGE RESUL TING fROM WARRANTy SERVICE PERfORMED By A NON-AUTHORIZED REPAIR SERVICE. NO RESPONSIBILITy IS ASSUMED fOR ANy SPECIAL, INCIDENT AL OR CONSEQUENTIAL DAMAGES.In order to obtain warranty service, simply go to /norelco or call 1-800-243-3050 for assistance. It is suggested that for your protection you return shipments of product by insured mail, insurance prepaid. Damage occurring during shipment is not covered by this warranty.NOTE: No other warranty, written or oral, is authorized by Philips Electronics North America Corporation.This warranty gives you specific legal rights, and you may also have other rights which vary from state to state. Some states do not allow the exclusion or limitation of incidental or consequential damages, so the above exclusion and limitations may not apply to you.* Read enclosed instructions carefully.Manufactured for:Philips Consumer LifestyleA Division of Philips Electronics North America Corporation1600 Summer Street – 5th Floor, Stamford, CT 06905-5125Norelco, TTPHILIPS is a Registered T rademark of Koninklijke Philips Electronics N.V.© 2008 Philips Electronics North America Corporation. All Rights Reserved.LISTEDLISTEDLISTED。
飞利浦S7000多功能电鬍刀用户手册说明书
S7000 series6繁體中文內容簡介______________________________________________________6一般描述__________________________________________________6產品握柄上的圖示是什麼意思?______________________________7快速清潔匣上的圖示是什麼意思?____________________________8如何為產品充電?__________________________________________9如何使用產品和配件?______________________________________10如何清潔產品和配件?______________________________________17如何使用快速清潔匣?______________________________________21如何將電鬍刀連線到智慧型手機?____________________________24如何更換電鬍刀刀頭?______________________________________26訂購配件__________________________________________________27疑難排解__________________________________________________28簡介感謝您購買本產品。
歡迎來到飛利浦的世界! 為充分享受飛利浦為您提供的好處,請至/welcome 或透過應用程式註冊產品。
一般描述1彈出式修整刀2修整刀釋放滑鈕3除毛刀頭組4電鬍刀組釋放按鈕5開關按鈕6握柄7小插頭插座8充電座9電源供應裝置10小插頭11保護蓋12收納袋13飛利浦快速清潔匣濾心14快速清潔匣15清潔刷16長度設定17崁入式鬢角造型修容器配件18鬢角造型修容器配件梳具19配件固定座20崁入式潔面刷配件21崁入式鼻毛修容刀配件注意: 提供的配件可能隨產品而異。
飞利浦电动剃须刀说明书
SW7700™ Lucas lm Ltd.English 6简体中文 25IntroductionCongratulations on your purchase and welcome to Philips! To fully benefit from the support that Philips offers, register your product at/welcome .Please read this user manual, as it contains information about the features of this shaver as well as some tips to make shaving easier and more enjoyable.General description (Fig. 1)1Shaving unit with hair chamber2On/off button3Replacement reminder4Cleaning reminder5Travel lock symbol6Unplug for use symbol7Battery status indicator8Socket for small plug9Click-on precision trimmer attachment 10Supply unit11Small plug12PouchImportant safety informationRead this important information carefully before you use the appliance and its accessories and save it for future reference. The accessories supplied may vary for different products.6EnglishDanger-Keep the supply unit dry.Warning -To charge the battery, only use the detachable supply unit (HQ8505) provided with theappliance.-The supply unit contains a transformer. Do not cut off the supply unit to replace it with another plug, as this causes a hazardous situation.-This appliance can be used by children aged from 8 years and above and persons withreduced physical, sensory or mental capabilities or lack of experience and knowledge if they have been given supervision or instruction concerning use of the appliance in a safe way and understand the hazards involved. Children shall not play with the appliance. Cleaning and user maintenance shall not be made bychildren without supervision.-Always unplug the shaver before you clean it under the tap.-Always check the appliance before you use it.Do not use the appliance if it is damaged, as this may cause injury. Always replace adamaged part with one of the original type.-Do not open the appliance to replace the rechargeable battery.7EnglishCaution-Never immerse the cleaning system or the charging stand in water and do not rinse it under the tap.-Never use water hotter than 60°C to rinse the shaver.-Only use this appliance for its intended purpose as shown in the user manual.-For hygienic reasons, the appliance should only be used by one person.-Never use compressed air, scouring pads,abrasive cleaning agents or aggressive liquids such as petrol or acetone to clean theappliance.-If your shaver comes with a cleaning system,always use the original Philips cleaning fluid (cartridge or bottle, depending on the type of cleaning system).-Always place the cleaning system on a stable,level and horizontal surface to prevent leakage.-If your cleaning system uses a cleaning cartridge, always make sure the cartridge compartment is closed before you use the cleaning system to clean or charge the shaver.-When the cleaning system is ready for use, do not move it to prevent leakage of cleaning fluid.-Water may drip from the socket at the bottom of the shaver when you rinse it. This is normal and not dangerous because all electronics are enclosed in a sealed power unit inside the shaver.-Do not use the supply unit in or near wallsockets that contain an electric air freshener to prevent irreparable damage to the supply unit.8EnglishElectromagnetic fields (EMF)-This Philips appliance complies with allapplicable standards and regulations regarding exposure to electromagnetic fields.General-This shaver is waterproof. It is suitable for use in the bath or shower and for cleaning under the tap. For safety reasons, the shaver cantherefore only be used without cord.-The supply unit is suitable for mains voltages ranging from 100 to 240 volts.-The supply unit transforms 100-240 volts to a safe low voltage of less than 24 volts.When you press the on/off button for the very first time, all display indications light up in sequence.Charge the shaver before use.Quick charge: When the battery is empty and you connect the shaver to a wall socket, the lights of the battery status indicator light up white one after the other repeatedly. When the battery contains enough energy for one shave, the bottom light of the battery status indicator starts flashing white slowly.9EnglishWhile the shaver continues to charge, first thebottom light of the battery status indicator flasheswhite and then lights up white continuously. Thenthe second light flashes and lights upcontinuously, and so on until the shaver is fullycharged.Battery fully chargedNote: This shaver can only be used without a cord.When the battery is fully charged, all lights of thethe battery status indicator light up whitecontinuously.Note: When you press the on/off button during orafter charging, the 'unplug for use' symbol lights upto indicate that the shaver is still connected to thewall socket.Note: When the battery is full, the display switchesoff automatically after 30 minutes.Battery lowWhen the battery is almost empty, the bottom lightof the battery status indicator flashes orange.Remaining battery chargeThe remaining battery charge is shown by thelights of the battery charge indicator that light upcontinuously.10EnglishClean the shaver after every shave for optimal performance (see 'Cleaning and maintenance'). When you switch off the shaver, the cleaning reminder flashes to remind you to clean the shaver.You can lock the shaver when you are going to travel. The travel lock prevents the shaver from being switched on by accident (see 'Activating the travel lock').For maximum shaving performance, replace the shaving heads every two years. The shaver is equipped with a replacement reminder which reminds you to replace the shaving heads. The replacement reminder flashes to indicate that you have to replace the shaving heads (see 'Replacing the shaving heads').Note: After replacing the shaving heads, you need to reset the replacement reminder by pressing theon/off button for 7 seconds.ChargingCharge the shaver before you use it for the firsttime and when the display indicates that thebattery is almost empty.Charging takes approx. 1 hour. A fully chargedshaver has a shaving time of up to 60 minutes.Note: You cannot use the shaver while it ischarging.Charging with the supply unit1Make sure the shaver is switched off.2Put the small plug in the shaver and put thesupply unit in the wall socket.The display of the shaver indicates that theshaver is charging.3After charging, remove the supply unit from thewall socket and pull the small plug out of theshaver.in the bath or shower.-Use this shaver for its intended household useas described in this manual.-For hygienic reasons, the shaver should only beused by one person.-Trimming is easier when the skin and hair aredry.Note: This shaver can only be used without a cord.1To switch the shaver on or off, press the on/off button once.The replacement symbol lights up continuously when the shaver is switched on.Skin adaptation periodYour first shaves may not bring you the result you expect and your skin may even become slightly irritated. This is normal. Your skin and beard need time to adapt to any new shaving system. To allow your skin to adapt to this new appliance, we advise you to shave regularly (at least 3 times a week) and exclusively with this appliance for a period of 3 weeks.For the best results on skin comfort, pre-trim your beard if you have not shaved for 3 days or longer. Dry shaving1Switch the shaver on.2Move the shaving heads over your skin in circular movements to catch all hairs growing in different directions. Exert gentle pressure for a close, comfortable shave.Note: Do not press too hard, this can cause skin irritation.3Switch off and clean the shaver after each use.The display lights up for a few seconds to show the battery status.Wet shavingFor a more comfortable shave, you can also use this shaver on a wet face with shaving foam or shaving gel.1Apply some water to your skin.2Apply shaving foam or shaving gel to your skin. 3Rinse the shaving unit under the tap to ensure that the shaving unit glides smoothly over your skin.4Switch the shaver on.5Move the shaving heads over your skin in circular movements to catch all hairs growing in different directions. Exert gentle pressure for a close, comfortable shave.Note: Do not press too hard, this can cause skin irritation.Note: Rinse the shaving unit regularly to ensure that it continues to glide smoothly over yourskin.6Dry your face.7Switch off the shaver and clean it after eachuse.Note: Make sure that you rinse all foam or shavinggel off the shaver.Using the click-on attachmentRemoving or attaching the click-on attachment1Make sure the shaver is switched off.3Hold the trimmer perpendicular to the skin and move it downwards while exerting gentlepressure.4Switch off and clean the trimmer after use.You can lock the shaver when you are going to travel. The travel lock prevents the shaver from being switched on by accident.1Press the on/off button for 3 seconds to enter the travel lock mode.While you activate the travel lock, theindications on the display light up briefly. When the travel lock is activated, the travel locksymbol flashes.1Press the on/off button for 3 seconds.While you deactivate the travel lock, the indications on the display light up briefly. When the travel lock is deactivated, the travel lock symbol flashes and goes out. The shaver switches on and is now ready for use again.Note: The shaver unlocks automatically when it is connected to wall socket.Cleaning and maintenance-Regular cleaning guarantees better shavingresults.-Never clean, remove or replace the shaving unitwhile the shaver is switched on.-Do not apply pressure to shaving head combs.-Do not touch shaving heads with hard objectsas this may dent or damage the precision-madeslotted combs.-Do not use abrasives, scourers or aggressiveliquids such as gasoline or acetone to clean theshaver.Cleaning the shaver under the tapClean the shaver after every shave for optimal5Rinse the shaving head holder under a warm tap.6Carefully shake off excess water and let the shaving head holder air dry completely.7Attach the shaving head holder to the bottompart of the shaving unit (‘click’).Clean the trimmer after each use.1Switch the shaver on.2Rinse the trimmer under a warm tap.3After cleaning, switch off the shaver.4Carefully shake off excess water and let the attachment air dry completely.Tip: For optimal performance, lubricate theteeth of the attachment with a drop of sewingmachine oil regularly.ReplacementReplacing the shaving headsSwitch the shaver off.Pull the shaving head holder off the bottompart of the shaving unit.Turn the retaining ring anticlockwise and lift itoff the shaving head.Repeat this process for the other retaining rings.Place them aside in a safe place.Remove the shaving heads from the shavinghead holder.Discard the used shaving heads immediately toavoid mixing them with the new shaving heads.8To reset the replacement reminder, press and hold the on/off button for approx. 7 seconds.Store the shaver in the pouch.Note: Always let the shaver dry before you store itin the pouch.Ordering accessoriesTo buy accessories or spare parts, visit/service or go to yourPhilips dealer. You can also contact the PhilipsConsumer Care Center in your country (see theinternational warranty leaflet for contact details).The following accessories are available:-SH70 Philips shaving heads-RQ111 Philips beard styler-RQ585 Philips cleansing brush-RQ560, RQ563 Philips cleansing brush heads-HQ8505 supply unitNote: The availability of the accessories may differby country.Recycling-Do not throw away the product with the normalhousehold waste at the end of its life, but handit in at an official collection point for recycling.By doing this, you help to preserve theenvironment.21English-This product contains a built-in rechargeablebattery which shall not be disposed of withnormal household waste. We strongly adviseyou to take your product to an official collectionpoint or a Philips service centre to have aprofessional remove the rechargeable battery.-Follow your country’s rules for the separatecollection of electrical and electronic productsand rechargeable batteries. Correct disposalhelps prevent negative consequences for theenvironment and human health.Removing the rechargeable shaver batteryfront and back panel in the bottom of theappliance. Remove the back panel.2Remove the front panel.3Unscrew the two screws at the top of the inner panel and remove the inner panel.4Remove the rechargeable battery with ascrewdriver.22EnglishWarranty and supportIf you need information or support, please visit/support or read theinternational warranty leaflet.Warranty restrictionsThe shaving heads (cutters and guards) are notcovered by the terms of the international warrantybecause they are subject to wear. TroubleshootingShaverProblem Possible cause SolutionThe appliance does not work when I press the on/off button.The appliance is stillattached to the wallsocket. For safetyreasons, theappliance can onlybe used withoutcord.Unplug the appliance andpress the on/off button toswitch on the appliance.The rechargeablebattery is empty.Recharge the battery.The travel lock isactivated.Press the on/off button for3 seconds to deactivate thetravel lock.The shaving unit issoiled or damagedto such an extentthat the motorcannot run.Clean the shaving headsthoroughly or replacethem. Also see 'Hairs or dirtobstruct the shaving heads'for a detailed description ofhow to clean the shavingheads thoroughly.The appliance does not shave as well as it used to.The shaving headsare damaged orworn.Replace the shaving heads.23EnglishProblem Possible cause SolutionHairs or dirt obstruct the shaving heads.Clean the shaving heads in the regular way or clean them thoroughly.To clean the shaving heads thoroughly, remove the shaving heads from the shaving head holder one by one (see 'Replacement'). Then separate the cutter from its guard and rinse each matching set under the tap.After rinsing, place the cutter back into its corresponding guard.Finally, put the shaving heads back into the shaving head holder (see 'Replacement').I replaced the shaving heads,but the replacement reminder is still showing.You have not resetthe replacement reminder.To reset the replacement reminder, press and hold the on/off button for approx. 7 seconds.Water is leaking from the bottom of the appliance.During cleaning,water may collect between the inner body and the outer shell of the appliance.This is normal and not dangerous because allelectronics are enclosed in a sealed power unit inside the appliance.24English介绍感谢您的惠顾,欢迎光临飞利浦! 为了让您能充分享受飞利浦提供的支持,请在 /welcome 上注册您的产品。
剃须刀设备说明书

显示屏上的图标是什么意思? (图 B) - 主菜单
您可以按菜单按钮来切换菜单项。 长按即可启用或禁用某些功能。 图标 含义 此菜单以百分数的形式显示电池状态。
可以通过此菜单启用或禁用旅行锁。
可以通过此菜单禁用或重新启用光环反馈。
- 打开剃须刀电源
20 简体中文
按下开/关按钮启动剃须刀。
从此菜单项中,您可以取消配对剃须刀和 智能手机。 注意: 请确保您的智能手机配备了 Bluetooth® 4.2 或更高版本。
本剃须刀配备了 Bluetooth® 4.2 及更高版 本,可与该应用程序连接。 将剃须刀和智 能手机配对后,即使剃须刀已关闭,剃须 刀上的蓝牙也会自动打开。 这样方便在随 后同步剃须数据,因此您在剃须时无需随 身携带智能手机。 有关将剃须刀和智能手
主菜单(图 A) 关闭剃须刀时,您可通过按菜单按钮在四 个菜单功能之间进行切换。
电池剩余电量 该菜单项显示电池剩余电量。
22 简体中文压力网罩传感源自 该菜单项显示上次剃须的压力反馈。
动作控制传感器 该菜单项显示上次剃须的动作反馈。
旅行锁 蓝牙
从此菜单项中,您可以通过按住菜单按钮 3 秒钟来锁定和解锁剃须刀。 您在旅行 时,可以锁住剃须刀,以防止电源意外开 启。
简体中文 23
机配对的好处的信息,请参阅“将剃须刀 连接到应用程序的好处”。 注意: 您可以通过激活旅行锁来关闭剃须 刀上的蓝牙。
主菜单(图 B) 您可以按菜单按钮来切换菜单功能。
电池剩余电量 该菜单项显示电池剩余电量。
剃须后反馈 旅行锁
注意: 只有通过应用程序设置启用此功能 后,才会显示此菜单。
- 蓝牙 图标 含义
此图标显示剃须刀已与您的智能手机配对。
电动剃须刀刀头更换指南

电动剃须刀刀头更换指南电动剃须刀作为现代男性日常护理工具的重要组成部分,刀头的质量和使用方法对于剃须体验至关重要。
本文将为您提供电动剃须刀刀头更换的指南,帮助您轻松更换剃须刀刀头,并提供一些使用注意事项。
一、选择适合的剃须刀刀头在更换剃须刀刀头前,首先需要根据您的电动剃须刀品牌和型号选择合适的刀头。
不同品牌和型号的剃须刀刀头形状、大小和安装方式可能不同,因此确保选择正确的刀头非常重要。
您可以查找电动剃须刀的说明书或者在制造商的官方网站上找到相应的型号和刀头规格。
二、准备工作在更换剃须刀刀头前,您需要进行一些简单的准备工作,以确保更换的顺利进行。
首先,确认电动剃须刀已经关闭并断开电源,并将其放置在平稳的表面上。
其次,准备一块干净的布或纸巾,以备清洁使用。
三、拆卸旧刀头1. 根据电动剃须刀的设计,找到刀头的固定方式,可能有旋转锁扣或按压式的固定装置。
2. 如果有旋转锁扣,您需要顺时针旋转锁扣,直到刀头可以轻松拆卸。
如果有按压式固定装置,您需要按压并保持按压装置,同时轻轻拔出刀头。
3. 当旧刀头成功拆卸后,将其放置在一旁。
四、清洁与安装新刀头1. 使用准备好的布或纸巾清洁剃须刀头固定孔和连接接口,确保无杂质和残留物。
2. 取出新刀头,并使用同样的方式将其插入固定孔或连接接口。
根据刀头的设计,可能需要旋转锁扣或按压式固定装置,确保刀头稳固地安装在剃须刀上。
3. 轻轻拉动新刀头,确认其已经牢固安装。
五、测试与调整1. 重新连接电动剃须刀的电源,打开电动剃须刀。
2. 轻轻将剃须刀放在皮肤上,测试新刀头的剃须效果。
确保新刀头的剃须效果和舒适度与旧刀头相当或更好。
3. 如有需要,您可以根据个人喜好和剃须效果调整刀头的角度或位置。
不同品牌的剃须刀可能提供不同的调整方式,请仔细阅读产品说明书。
六、保养与清洁为了延长电动剃须刀刀头的寿命,并获得更好的剃须效果,定期清洁和保养是必不可少的。
1. 根据产品说明书和制造商建议,定期使用专业的清洁液或清洁系统清洁剃须刀刀头和刀网。
电动剃须刀刀头更换说明书

电动剃须刀刀头更换说明书尊敬的用户:感谢您购买我们的电动剃须刀。
为了保证您的剃须体验始终如一地优质,我们特别为您提供了刀头更换说明。
请您仔细阅读以下内容并按照步骤操作。
一、更换刀头前准备1. 确保电动剃须刀已经关闭,并拔下电源适配器。
2. 准备好新的刀头,确保是与您购买的电动剃须刀相匹配的型号。
二、更换刀头步骤请按照以下步骤更换剃须刀的刀头:1. 握住电动剃须刀的握把,找到刀头上方的释放按钮。
2. 使用拇指和食指按住释放按钮,轻轻向上推动刀头直至完全拆卸。
3. 取下拆卸的刀头,放置在清洁的表面上。
4. 拿出新的刀头,确保刀头连接部位干净无异物。
5. 将新刀头对准剃须刀底部的插槽。
6. 轻轻按下新刀头,直至完全插入,并确保刀头与剃须刀完全吻合。
7. 拔下新刀头连接钮的保护套,确认刀头连接牢固。
8. 整理好剃须刀以及配件,并将插头重新连接至电源适配器。
三、注意事项为了保持最佳的剃须效果和使用寿命,请您注意以下事项:1. 根据个人剃须频率,建议每6个月更换一次刀头,以确保剃须的舒适度和卫生性。
2. 在刀头更换过程中,切勿用力过度或施加扭转力,以免损坏剃须刀。
3. 在更换刀头之前,请务必确保电动剃须刀已经关闭,并拔下电源适配器。
4. 如果您需要购买新的刀头,请联系我们的客服中心或授权经销商。
衷心感谢您再次选择我们的电动剃须刀。
我们坚信,通过正确更换刀头,您将能够获得持久舒适的剃须体验。
如有任何问题或需要进一步咨询,请随时与我们联系。
祝您剃须愉快!此致电动剃须刀制造商。
电动剃须刀刀片更换操作规程

电动剃须刀刀片更换操作规程电动剃须刀是现代男性必备的日常用品之一,可以快速、方便地修剪胡须,使得面部更加清爽整洁。
然而,在使用电动剃须刀一段时间后,刀片会逐渐磨损,需要进行更换,以确保剃须刀的剃须效果和安全性。
本文旨在介绍电动剃须刀刀片更换的操作规程,以帮助用户正确、安全地进行刀片更换。
1. 准备工作首先,确保剃须刀是关闭状态,拔掉充电器连接线,以免发生意外伤害。
然后,准备好新的剃须刀刀片和所需的工具,如专用螺丝刀或剪刀等。
对于不同品牌的电动剃须刀,刀片的形式和替换方式可能有所不同,请根据产品说明书对应查找替换零件和工具。
2. 刀片拆卸在进行刀片更换之前,首先需要找到电动剃须刀上的刀片固定螺丝。
使用专用螺丝刀,逆时针旋转拧松螺丝,使得刀片可以自由拆卸。
如果无法直接使用螺丝刀,可以使用剪刀或其他工具,根据产品特点巧妙地进行刀片拆卸。
3. 刀片更换当刀片成功拆卸后,用手轻轻将旧刀片从电动剃须刀头上取下。
注意避免直接用手触摸刀片,以免造成刀片损坏或者对皮肤造成伤害。
接下来,拿起新刀片,确保刀片的方向与电动剃须刀头上的刀片槽一致,然后将新刀片插入刀片槽内。
确保刀片安装牢固,没有松动现象。
4. 刀片固定在刀片更换完成后,需要使用螺丝刀或其他专用工具,顺时针旋转固定螺丝,将刀片固定在电动剃须刀头上。
旋紧螺丝时要适度,不宜过紧,以免损坏刀片或者剃须刀头。
5. 清洁保养刀片更换完成后,可以用清水或者专用清洁液清洗电动剃须刀头部,将刀片周围的污垢和残留物去除干净。
请务必保证剃须刀头完全干燥后再组装。
6. 使用检查当全部操作完成后,可以重新连接充电器,开启电动剃须刀进行检查。
确保刀片安装牢固,没有松动现象。
如果发现刀片不正常,或者剃须刀在运行时存在异常噪音或振动,应立即停止使用,并联系售后服务,以避免日后使用中产生问题。
总结起来,电动剃须刀刀片的更换操作规程包括准备工作、刀片拆卸、刀片更换、刀片固定、清洁保养和使用检查。
电动剃须刀的刀头更换方法

电动剃须刀的刀头更换方法电动剃须刀作为现代男性日常护理工具的重要组成部分,刀头的保养和更换显得尤为关键。
本文将详细介绍电动剃须刀的刀头更换方法,以确保剃须效果的持续优质和使用寿命的延长。
一、了解电动剃须刀刀头结构在更换电动剃须刀刀头之前,我们首先需要了解其基本结构。
一般来说,刀头由外部环托盘、内部剃须刀网和切割刀片等组成。
剃须刀网通过振动切割刀片,从而实现剃须的效果。
二、刀头更换前的准备工作在进行刀头更换之前,我们需要先关闭电源,并将剃须刀彻底清洁干净。
建议使用刷子或清水清除刀头上的须发残渣,并彻底风干,以确保更换刀头的操作顺利进行。
三、选择适合的刀头替换在市场上,有许多品牌和型号的电动剃须刀刀头供选择。
我们需要根据自己所使用的剃须刀型号和个人喜好来选择合适的刀头替换。
并确保所购买的刀头与剃须刀的型号相匹配。
四、刀头更换步骤1. 找到电动剃须刀顶部的刀头锁定钮或按键,按下并向旋转方向解锁或松开。
2. 将旧刀头从电动剃须刀上取下。
请注意,有些刀头需要稍微旋转才能取下,而其他型号的则可以直接拉出。
3. 接下来,将新刀头对准剃须刀底座,并确保其与剃须刀底部的齿槽完全吻合。
4. 轻轻按下或旋转刀头,直到它完全锁定在剃须刀上。
5. 最后,用手轻轻拉动新刀头,确保其已经牢固固定在剃须刀上。
五、刀头使用与保养注意事项1. 定期清洁刀头:为保证剃须效果和使用寿命,建议定期清洗刀头。
可以使用清水或专用清洁液对刀头进行清洁,并在使用后将其彻底晾干。
2. 防止严重压力:在使用过程中,避免过度使用力量,以免损坏刀头。
3. 定期更换刀片:刀片是刀头的核心部件,使用一段时间后会出现磨损现象。
建议根据个人使用频率,定期更换刀片,以保证剃须效果的最佳状态。
4. 学习正确使用技巧:电动剃须刀的使用技巧对刀头的保养和延长寿命至关重要。
请参考剃须刀说明书,并学习正确的使用技巧,以获得更好的剃须体验。
六、总结电动剃须刀的刀头更换是保持剃须效果和延长使用寿命的重要步骤。
电动刮胡刀刀片更换示范

电动刮胡刀刀片更换示范在追求外表整洁的男士们的日常生活中,电动刮胡刀无疑是一款非常实用的工具。
而刀片的质量和更换方法对于刮胡刀的使用效果和寿命有着至关重要的影响。
本文将为大家详细介绍电动刮胡刀刀片的更换示范,以帮助大家正确且有效地更换刀片。
一、准备工作在更换电动刮胡刀刀片之前,我们需要做一些准备工作。
首先,确保已购买了适合自己电动刮胡刀型号的刀片。
其次,准备一块干净的布或纸巾,以及一些清洁液体。
最后,找一个明亮且空旷的地方,以便更换刀片时能够清楚地看到每一个步骤。
二、拆下旧刀片在更换刀片之前,我们需要将旧刀片从电动刮胡刀上拆下来。
首先,打开刮胡刀的刀头保护盖,有些刮胡刀可能需要使用一支小指甲刀或者相应的工具轻轻弹开。
然后,将刀头保护盖完全打开。
接下来,我们需要找到刀头背面的推开按钮或手柄。
按住按钮或手柄,并同时向上推,直到旧刀片从刀头上弹出。
注意在拆下旧刀片时要小心,避免意外划伤手部。
三、清洁刀头拆下旧刀片后,我们需要对刀头进行清洁。
首先,用干净的布或纸巾轻轻擦拭刀头,去除刀片残留的胡须或油垢。
然后,用清洁液体沾湿一块布或纸巾,在刀头上反复擦拭,以确保刀头彻底清洁。
最后,用干净的布或纸巾将刀头擦干。
四、安装新刀片清洁完刀头后,我们可以开始安装新的刀片了。
首先,将新刀片插入刀头的刀片槽中,确保刀片与槽口完全贴合。
然后,按住刀片,用力向下按压,直到刀片牢固地固定在刀头上。
确保刀片安装牢固后,我们可以将刀头的保护盖合上,并锁紧,以保护刀片的安全以及延长使用寿命。
五、测试刀片在更换完刀片后,我们需要测试刀片是否安装正确以及是否正常工作。
将电动刮胡刀开启,将刀头轻轻贴近手臂等不易受伤的肌肤部位,开启刀头,切实检查刀片的切割效果。
如果刀片工作正常,无刮伤或拉扯感觉,说明刀片更换成功。
否则,需要重新检查刀片的安装及固定。
六、保养与存放为了延长刀片的使用寿命及确保刮胡刀的整洁卫生,我们需要定期保养和存放刮胡刀。
电动剃须刀刀头更换教程

电动剃须刀刀头更换教程电动剃须刀是现代男性日常个人护理的重要工具之一。
为了保持剃须刀的理想功效和卫生,定期更换刀头非常必要。
本文将为您提供一份电动剃须刀刀头更换的详细教程,帮助您正确而轻松地完成这一过程。
一、准备工作1. 确定适用刀头型号:不同品牌和型号的电动剃须刀使用的刀头可能有所不同,因此在更换刀头之前,先了解您所用电动剃须刀的具体刀头型号,并购买与之匹配的刀头。
2. 清洁工具准备:在更换刀头之前,需要准备一些清洁工具,如刷子、毛巾和温水。
这些工具将帮助您清洁剃须刀并保持卫生。
二、刀头更换步骤1. 关闭剃须刀电源:确保剃须刀处于关闭状态,避免在更换过程中发生意外。
2. 取下旧刀头:根据您所用剃须刀的设计,将旧刀头从剃须刀上拆卸下来。
方法可能各异,请仔细阅读剃须刀的使用说明书或参考相关视频教程。
3. 清洁剃须刀:在更换刀头之前,先用刷子将剃须刀上的剩余毛发和细菌清除干净。
然后,用温水轻轻清洗剃须刀,并用毛巾擦干。
4. 安装新刀头:打开刀头包装,将新刀头与剃须刀的连接接口正确对准,轻轻按下直到固定为止。
确保刀头牢固地连接在剃须刀上。
5. 测试运行:安装完刀头后,可以打开剃须刀电源,进行简短的测试运行,以确保刀头更换成功并且剃须刀正常工作。
三、刀头养护建议1. 定期清洁刀头:为了保证刀头的持久性能,定期清洁是必要的。
根据您的使用频率,建议每周或每两周清洁一次刀头。
将其拆下并用刷子清除残留毛发和细菌,然后用温水彻底清洗并擦干。
2. 润滑刀头:为了保持刀头的灵活性和平滑剃须效果,定期涂抹一些推荐使用的剃须膏或润滑油在刀头表面。
注意不要使用过多的润滑油,以免影响剃须效果。
3. 避免碰撞和摔落:刀头是剃须刀的核心部件,避免将剃须刀摔落或受到较大的碰撞,以免影响刀头的性能和寿命。
4. 存储在干燥通风的地方:剃须刀和刀头应存放在干燥通风的地方,避免潮湿和高温环境,以免对刀头造成损害。
通过正确更换和养护电动剃须刀的刀头,可以确保剃须质量和使用寿命的长久保持。
飞利浦剃须刀使用说明
旅行锁
该款剃须刀配备有旅行锁功能。当您打算长时间储存剃须刀或带剃须刀外出旅行时,可以使用旅行锁功能。关于如何使用旅行锁功能,请参见“旅行锁”。
页码16-18
充电
◆在低于40℉或高于95℉的温度下对剃须刀进行充电、再充电或储存,将降低电池使用寿命。
◆当最下面的充电指示灯变成橙黄色闪烁时(型号1180X, 1180)或者当插头符号闪烁时(型号1160X, 1160, 1150X),您可以进行再次充电。
◆请勿将剃须刀放在软袋中充电。
在充电器中充电
1.(图16-1)将小插头插入充电器。将电源插头插入100V到240V的交流电插座。仅限使用所配的电源线。
如何使用电动剃须刀进行剃须
◆剃须刀上的这一符号(图19-1)表示该剃须刀可以被用于盆浴或淋浴。
◆确保充电器或高效能清洁装置干燥、远离水源。
◆清洁脸部后在进行刮须,可以获得最好效果。
◆仅限将该剃须刀用作使用手册中提到的用途。
干剃
1.按一下开/关按钮以启动剃须刀。通过直线或螺旋移动、逆着胡须生长方向进行剃须(图20-1)。
页码7目录产品特点811页码810产品特点2d智能贴合面部轮廓跟踪系统可根据您的面部曲线轻松调节舒缓压力并消除刺激令剃须更贴面剃须刀头部件图81胡须盒收集胡茬顺滑剃须系统低摩擦的顺滑剃须系统可顺着您的肌肤滑动剃除表面胡茬带来贴近舒适的剃须感剃须刀刀头保护盖电子开关按钮图82旅行锁图83多项指标大小显示屏图84显示电池剩余电量仅限型号11801180显示电池电量型号1180x1180显示屏图85型号显示屏图86型号1150x显示屏图87卡合式精确修发器图91自动全球交流电电压100v至240v交流电清洁刷软袋仅限型号1180118011601160充电器可充电式剃须刀1小时充满电可供无线剃须50分钟限型号11160或40分钟限型号1150x快速充电无线剃须拔除电源后剃须两年担保期限45天退款保证飞利浦产品通过其独特的提拉毛须剪切毛须两步剃须系统使得剃须更加贴肤和舒适
剃须刀刀头更换与清洁技巧

剃须刀刀头更换与清洁技巧剃须刀是现代男性生活中必备的工具之一。
为了确保剃须刀的效果和寿命,定期更换刀头和进行适当的清洁是非常重要的。
本文将介绍剃须刀刀头更换和清洁的技巧,帮助您保持一个清爽的面部形象。
一、剃须刀刀头更换技巧剃须刀刀头的锐利度直接影响到剃须效果的质量。
一般来说,剃须刀刀头的使用寿命为3个月左右。
当刀头开始变钝或者出现刮伤时,就是更换刀头的时候了。
以下是剃须刀刀头更换的步骤:1. 准备工作:确保剃须刀已经关闭,拔掉电源插头。
将剃须刀放在干燥的平面上,准备更换刀头。
2. 取下旧刀头:根据剃须刀的设计,找到并解锁刀头固定装置。
轻轻拔起旧刀头,确保不会弄伤手指或损坏剃须刀。
3. 安装新刀头:将新刀头与剃须刀的连接部位对齐,并轻轻按下直到锁定。
确保新刀头牢固地固定在剃须刀上。
4. 测试刀头:打开剃须刀,接通电源,测试新刀头的运转情况。
确保刀头安装正确并且能够正常工作。
二、剃须刀清洁技巧剃须刀的清洁是保持剃须刀效果和卫生的关键。
定期清洁剃须刀可以防止刀头堵塞、细菌滋生以及延长剃须刀的使用寿命。
以下是剃须刀清洁的技巧:1. 清洁前准备:确保剃须刀已经关闭,并拔掉电源插头。
准备洗涤剃须刀所需的清洁剂和干净的毛巾。
2. 拆卸刀头:根据剃须刀的设计,找到并解锁刀头固定装置。
轻轻拆下刀头,注意不要弄伤手指。
3. 清洁刀头:将刀头放入清洗剂中,按照清洁剂的说明进行清洗。
可以使用刷子或软布轻轻擦拭刀头,去除须发和污垢。
4. 清洁刀身:用湿毛巾或刷子擦拭剃须刀的外部表面,去除污垢和残留的剃须膏。
确保刀身干净整洁。
5. 晾干和组装:将清洗干净的刀头和剃须刀身放在通风处晾干。
确保刀头和剃须刀身完全干燥后,按照更换刀头的步骤重新组装剃须刀。
三、剃须技巧除了更换刀头和清洁剃须刀,正确的剃须技巧也是保持面部清爽的重要因素。
以下是一些剃须技巧的建议:1. 洗脸:在剃须前用温水洗脸,可以软化胡须,减少刀头对皮肤的刺激。
2. 使用剃须膏:在剃须前涂抹适量的剃须膏,可以提供更顺滑的剃须体验,并保护皮肤免受刀头的伤害。
飞科剃须刀怎么安装,刀头坏了要怎么更换?

飞科剃须⼑怎么安装,⼑头坏了要怎么更换?
飞科剃须⼑怎么安装,⼑头坏了要怎么更换呢?妞趣⽹⼩编基于这两个问题,收集了下列相关
内容,⼀起来看看这篇飞科剃须⼑怎么安装的内容吧。
⼀:飞科剃须⼑怎么安装
1、仔细看剃须⼑的结构,会发现它的⼑头和⼿柄连接的位置是有⼀个很⼩的按钮的,轻轻按压
这个按钮后,盖⼦就会打开,不要⽤蛮⼒去掰开盖⼦。
2、准备好⼑⽚、⼑⽹,需先将⼑⽚放到⼑⽹当中,放的时候要注意它的正反朝向。
三个⼑⽹分
别放好之后,再将它们放到⼑架上。
3、在⼑架中间会有⼀个可以旋转的卡扣,⽤⼿指轻轻旋转它让⼑⽹固定在⼑架上,确保每个⼑
⽚不会轻易的掉出来。
4、然后合上⼑架,在合的时候会听到⼿柄连接位置的卡扣发出咔哒的声⾳,这就表⾯固定好,
打开飞科剃须⼑检查是否能正常使⽤,如果不能则可能是⼑⽚⽅向装反了,调整⼀下朝向即
可。
⼆:飞科剃须⼑怎么换⼑头
更换⼑头的步骤和上述基本相同,但更换之前需要先拆下⼑头,⽅法是按压卡扣并打开盖⼦,
然后旋转⼑架上的固定卡扣,将三个⼑⽹全部取出来,之后将新的⼑头装进去并按照上⾯的第
⼆、三、四步操作,新的⼑头就算装好了。
关于飞科剃须⼑怎么安装的内容,妞趣⽹⼩编便分享完了,希望对⼤家使⽤飞科剃须⼑时有所
帮助。
版权申明:本⽂仅是作者个⼈观点,与本站⽆关。
⽂中陈述⽂字和内容未经本站证实,对本⽂
以及其中全部或者部分内容、⽂字的真实性、完整性、及时性本站不作任何保证或承诺,请读
者仅作参考,并请⾃⾏核实相关内容。
电动剃须刀刀头更换操作规程

电动剃须刀刀头更换操作规程随着现代科技的进步,电动剃须刀成为了现代男性身上必备的护理工具之一。
为了保持剃须刀的工作效果和使用寿命,定期更换刀头是非常重要的。
本文将介绍电动剃须刀刀头更换的操作规程。
一、提前准备在开始更换刀头之前,我们应该做好以下准备工作,以确保操作的顺利进行:1. 确认原厂刀头:在购买新刀头之前,要确保选择与电动剃须刀型号相匹配的原厂刀头。
原厂刀头可以保证更好的兼容性和剃须效果。
2. 剃须刀清洁:在更换刀头之前,应将剃须刀清洁干净,以去除刀头附着物和细菌。
可以使用刷子或清洁刷清洁剃须刀。
3. 动力关闭:确保巧妙关闭剃须刀的电源开关,以避免在更换刀头时发生意外。
二、刀头更换步骤下面是电动剃须刀刀头更换的详细步骤。
1. 取下原刀头:在剃须刀的刀头底部通常有一个标志,表示刀头的拆卸按钮。
按下该按钮,将原刀头轻轻向上拉出。
2. 清洁剃须刀:在取下原刀头之后,可以进一步清洁剃须刀底部的头部插座,以确保无切刀残留物。
3. 安装新刀头:打开新刀头的包装,并在刀头底部找到标有“前”字样的部分。
将新刀头按照正确方向对准剃须刀底部的插座,轻轻推入并确保牢固固定。
4. 激活新刀头:在确保新刀头安装正确后,可以打开电源并启动剃须刀。
这个步骤有助于确保新刀头的运转正常。
5. 调试和调整:若新刀头存在异常震动、刀片运转不平稳等问题,可以尝试重新拆卸和安装刀头。
如果问题依旧,建议联系售后服务或专业人士进行检修和调试。
三、刀头更换注意事项在电动剃须刀刀头更换过程中,还需要注意以下事项:1. 规定时间更换:根据电动剃须刀的使用频率和刀头磨损程度,应定期更换刀头。
一般来说,每6个月至1年更换一次刀头是比较合适的。
2. 不要强力安装:在安装刀头时,不要用过大的力气进行安装,以免造成损坏。
3. 避免碰撞:在更换刀头后,应避免剃须刀碰撞或掉落,以免破坏刀头或其他部件。
4. 清洁保养:使用过程中要定期清洁剃须刀和刀头,以保持其卫生和使用寿命。
电动剃须刀刀头更换方法

电动剃须刀刀头更换方法近年来,电动剃须刀越来越受到男士们的青睐,其快速、便捷、舒适的剃须体验成为了许多人的首选。
然而,随着使用时间的增长,剃须刀刀头的磨损势必会影响剃须效果。
那么,我们应该如何正确更换电动剃须刀的刀头呢?本文将详细介绍电动剃须刀刀头更换的方法及注意事项。
一、刀头更换前的准备工作在开始更换电动剃须刀刀头之前,我们首先要确保刀头的品牌和型号与原机保持一致,以免出现不兼容的情况。
同时,准备一个清洁刷和一些清洁剂,以便在更换刀头的过程中对剃须刀进行彻底清洁。
另外,为了防止剃须刀滑落,可以在操作期间铺上干净的毛巾或湿巾,以起到稳固的作用。
二、刀头的拆卸与安装1. 清洁刀头在拆卸刀头之前,我们首先需要将其表面的杂质和须发残留物清洗干净。
可以直接使用清洁刷将刀头表面刷洗干净,再使用少量清洁剂将其浸泡一段时间,最后用清水冲洗干净,确保刀头完全干燥。
2. 拆卸刀头拆卸刀头时,一般来说,只需用力按下顶部的解锁按钮,然后轻轻将刀头拉出即可。
如果你不确定如何拆卸,可以参考说明书或在网上搜索相关视频教程,一定要遵循正确的步骤。
3. 安装新刀头安装刀头时,我们首先要确保新刀头的清洁程度,同时对比剃须刀的底座,找到正确的方向,确保刀头与底座的对准。
再将刀头轻轻插入,直到听到“咔嗒”声,表示刀头已经牢固安装。
三、刀头更换后的维护与保养刀头更换完成后,我们需要对剃须刀进行一些简单的维护与保养。
首先,使用清洁刷将刀头表面彻底清洁干净,清除残留的须发和杂质。
然后,可以利用清洁剂轻轻擦拭刀头,以增加其寿命和保持剃须效果。
最后,刀头更换后建议使用一段时间后再进行清洁,因为刀头在使用一段时间后会适应剃须习惯,使用效果会更好。
四、刀头更换的注意事项1. 刀头更换周期根据剃须的频率和个人使用习惯,一般建议每6个月至1年更换一次刀头。
如果剃须效果变差,刀头磨损明显,或者出现刀片松动的情况,就需要及时更换。
2. 使用正品刀头购买刀头时一定要选择正规渠道,确保购买到正品刀头。
电动剃须刀安装指南

电动剃须刀安装指南电动剃须刀是许多男性日常生活中必备的工具之一。
正确安装和使用电动剃须刀,不仅可以提高剃须效果,还能延长其使用寿命。
本文将为您提供一份电动剃须刀的安装指南,以帮助您正确地使用这一便捷而实用的剃须工具。
一、了解电动剃须刀的零部件在开始安装之前,我们首先来了解一下电动剃须刀的主要零部件。
通常,电动剃须刀的主要构成包括剃头、剃须刀片、刀架和插头等。
这些零部件紧密配合,确保了剃须刀的高效运转和舒适的使用体验。
二、准备工作在进行电动剃须刀的安装之前,我们需要准备以下工具和物品:1. 一把小螺丝刀:用于拆卸和安装剃须刀头部分的螺丝。
2. 剃须刀清洁液:用于清洁剃须刀刀头和剃须刀片,保持其卫生和锋利度。
3. 电源插座:插入电动剃须刀的插头,确保其正常供电。
三、剃须刀头的安装1. 关闭电动剃须刀电源开关,并拔下插头,确保安全。
2. 使用小螺丝刀,轻轻拆卸剃须刀头部分的螺丝。
注意,切勿用力过度,以免造成零部件损坏。
3. 取下旧的剃须刀头,清除可能残留在刀架上的毛发和污垢。
4. 将新的剃须刀头正确地安装在刀架上,确保与刀架紧密贴合,并再次使用螺丝刀将其固定。
四、剃须刀片的更换1. 关闭电动剃须刀电源开关,并拔下插头,确保安全。
2. 打开剃须刀头部分的剃须刀片盖,通常可以通过向上滑动或按下按钮实现。
3. 取下旧的剃须刀片,注意刀片的位置和方向。
有些剃须刀片可能需要顺时针旋转或按下按钮进行取下。
4. 将新的剃须刀片正确地安装到剃须刀片座上,确保与剃须刀片座紧密贴合。
5. 关闭剃须刀片盖,确保其安全固定。
五、电动剃须刀的清洁和维护良好的清洁和维护习惯可以使电动剃须刀更持久、更舒适地工作。
每次使用后,您可以按照以下步骤清洁和维护电动剃须刀:1. 断开电源,拔下插头。
2. 使用剃须刀清洁液喷洒在剃须刀刀头和剃须刀片上。
3. 使用清洁刷轻轻地刷洗刀头和刀片,将残留的毛发和污垢清除干净。
4. 将剃须刀刀头和剃须刀片晾干。
- 1、下载文档前请自行甄别文档内容的完整性,平台不提供额外的编辑、内容补充、找答案等附加服务。
- 2、"仅部分预览"的文档,不可在线预览部分如存在完整性等问题,可反馈申请退款(可完整预览的文档不适用该条件!)。
- 3、如文档侵犯您的权益,请联系客服反馈,我们会尽快为您处理(人工客服工作时间:9:00-18:30)。
飞利浦剃须刀安装教程三头s5080
1、先用手拿住剃须刀的保护盖,然后往上推就可以打开保护盖,同样拿住剃须刀头然后往上推,也把剃须刀头打开。
2、打开刀头之后,看到有一个S形的中央弹簧,用拇指和食指往内按,感觉松动的时候就可以把刀片也网罩一起拿出来了。
3、这时就可以换新的刀头了(刀片与网罩一起换),如果只想换刀片,把网罩往左右推(左边往左,右边往右推)然后拿出刀片,把新刀片装上去,重新安装好就可以使用了。
4、为了能让刀头使用更长的时间,不用频繁更换刀头,每次使用之后都可以按照以上方法拆开刀头里的刀片,清理干净刀片、网以及槽,然后再安装好。
5、新刀头安装好后,即可重新使用。
6、首先将剃须刀头部件竖直抽离剃须刀,注意抽离剃须刀时不要旋转剃须刀头部件。
刀架的最上方的两边,有两个对称的锁扣,用拇指和食指同时轻捏一下锁扣,刀头就会脱落。
将剃须刀头部件的凸缘插入剃须刀顶部的槽内,然后按下剃须刀头部件,将其安装在剃须刀上,听到“咔哒”一声后就说明安装好了。