Titan 系统内置制作
Avolites_TITAN_V7版本说明

Avolites Titan V7.0 版本说明版本升级1.目前控台是V5.0及之前的版本如果控台现在是V5.0及之前的版本,首先需要要先升级到V6.0版本,然后再升级的7.0版本。
您可以在爱富丽官方网站下载V6.0的版本然后根据提示安装。
下载时需要登陆会员账号。
如有需要可以登陆我们的公用账号gust2014,密码同样是gust20142.目前控台是V6.0或V6.1或V6.2版本在升级前请确保您的show文件和灯库都已经做好备份。
首先下载V7.0的升级程序和恢复盘程序。
以Tiger touch Pro为例,升级程序的名字叫做XXX Upgrade Installer恢复盘的名字叫做XXX Recovery Creator把升级程序直接放到U盘里,然后接到控台的USB接口上。
在控台触摸屏左上方,选择Tool工具栏,然后选择“Shutdown Software”。
依然在Tool工具栏的下拉菜单中,选择黄色的“Folder”文件夹选项,找到你的U盘,然后双击运行里面的升级程序。
根据提示进行升级,升级完成后把U盘拔出,然后把控台重启。
重启进入TITAN系统后,进入系统档:长按Avolite键+Disk键,即可看到当前系统的版本3.在电脑上安装TITAN模拟器4.请注意,V7.0版本不再支持window XP系统,因此请在Win7或者Win8或者Vista 系统的电脑上安装。
Titan模拟器内包含了Titan Mobile,Titan One和Personality Builder等软件,请在安装前把show文件和灯库先备份好。
安装模拟器后,首次运行需要激活。
如有需要可以登陆我们的公用账号gust2014,密码同样是gust2014进行激活。
新功能1.远程控制现在通过安卓系统和苹果ios系统可以对控台进行远程控制。
您的手机可以连接到同一个网络中的任意的Avolites控台。
通过镜像,就能实现手机和控台能同时控制同一个系统。
HTC G4 Tattoo制作金卡详细教程
HTC G4 Tattoo制作金卡详细教程编辑作者:HTC G4 Tattoo 刷机出现问题,导致刷机失败,这时我们可以使用用金卡刷回官方原版系统,那HTC G4 Tattoo金卡怎么制作的,下面是HTC G4 Tattoo制作金卡的详细教程。
1、首先我们需要找到一张micro SD卡,将这张卡在电脑上格式化,用FAT32格式。
2、安装sdk,嫌麻烦的就安装这个,从sdk中提取的可以使用Tools,然后解压到C盘。
3、电脑安装htc sync。
将内存卡放到手机。
手机连接电脑,选择第二种模式磁盘驱动器。
电脑可以打开硬盘。
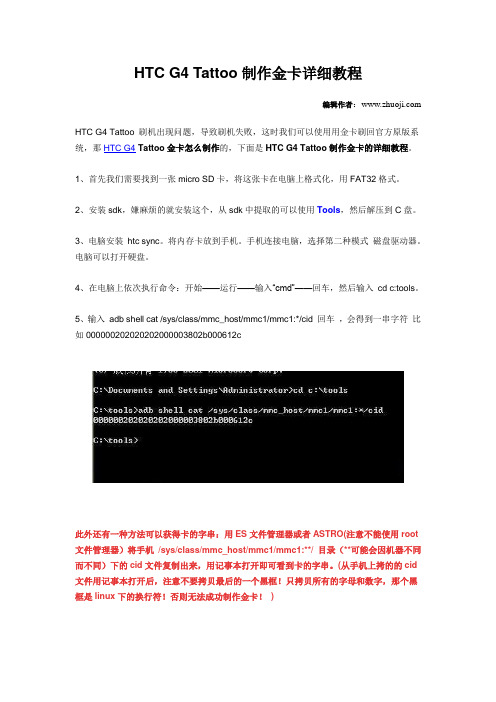
4、在电脑上依次执行命令:开始——运行——输入“cmd”——回车,然后输入cd c:tools。
5、输入adb shell cat /sys/class/mmc_host/mmc1/mmc1:*/cid 回车,会得到一串字符比如000000202020202000003802b000612c此外还有一种方法可以获得卡的字串:用ES文件管理器或者ASTRO(注意不能使用root 文件管理器)将手机/sys/class/mmc_host/mmc1/mmc1:**/ 目录(**可能会因机器不同而不同)下的cid文件复制出来,用记事本打开即可看到卡的字串。
(从手机上拷的的cid 文件用记事本打开后,注意不要拷贝最后的一个黑框!只拷贝所有的字母和数字,那个黑框是linux下的换行符!否则无法成功制作金卡!)6、进入http://hexrev.soaa.me/ 这个页面,输入刚才得到的长串字符000000202020202000003802b000612c 提交后得到你的卡的cid,如006100b00238000020202020200000007、进入http://psas.revskills.de/?q=goldcard 填上自己的邮箱,填上7步得到的cid 006100b0023800002020202020000000,提交后收到一封“goldcard.img”的邮件。
系统封装工具全使用图解
龙帝国系统封装工具全使用图解2009-09-21 14:19一、前期基础工作*一张光盘启动盘,要有GHOST8.0以上.*S&R&S_V9.5.智能系统封装工具*DEPLOY.CAB(在系统安装光盘:\SUPPORT\TOOLS目录下自带)注意:WIN2000/XP/2003,不通用。
还有最好和母盘对应。
*Windows2K/XP/2003系统安装光盘(推荐使用免激活的版本,要知序列号的;也可以用显示序列号软件或算号器算出VOL版)*DllCacheManager_V1.5(龙帝国专用版推荐)Dllcache备份还原工具* UltraISO(软碟通)注册版2、安装操作系统正常安装完整操作系统,系统文件格式建议采用FAT32,恢复后还可以转换为NTFS。
同时注意,安装时,建议选择完全格式化硬盘分区,不要选择快格!安装时要注意的事:如不是做纯净版的Ghost,最好要有一个备份用的分区是FAT32,正常安装操作系统并打好系统安全补丁(一定要安装到C盘,不能安装到其他分区,除非你是整个硬盘Ghost)。
操作系统可选择FAT32和NTFS两种文件格式进行安装,建议采用FAT32文件格式,因为Ghost对FTA32的压缩率更大一些,可以减小制作后的备份文件体积。
再一个是FTA32格式在恢复后还可以转换为NTFS,而NTFS转换成FTA32的话就比较麻烦,因此采用FAT32文件格式较为灵活一些。
当然认真读过MS的FAT与NTFS、NTFS与Convert NTFS区别的就应该知道,"原生"的NTFS比转换的NTFS在性能与文件碎片上更具有优势,因此也建议注重性能者采用NTFS文件格式进行安装操作系统(" 原生"是指直接用NTFS文件格式进行格式化的分区,而不是通过Convert转换的)。
3、安装应用软件(可选)安装注册并设置好你所需要的应用软件,如:Office、Winrar、输入法等。
IsoTek Super Titan 电源管理系统使用手册说明书

January 2011Multi award winning power management systemsSuper Titan Instruction ManualJanuary 2011ContentsThe company A.1The principles A.1The execution A.1Overview B.2Features B.2Safety B.3PlacementC.4Equipment coupling C.4System integration C.4Fault finding D.5Dimensions & sockets E.6G.9A. IntroductionB. The productC. InstallationD. TroubleshootingE. Specifications G. WarrantyGeneral sectionJanuary 2011A. IntroductionIsoTek was formed in July 2001 with the vision to create high quality mains power distribution units that moved beyond currentconventions. Through careful market analysis and extensive research we were able to launch products that moved power distribution forward to be recognised as an integral part of any audio or home theatre system. Our products continue to lead the way in power management systems, our latest EVO3 range galvanises our commitment to pursue excellence at every level.We believe all products benefit from their own clean power supply,therefore we advocated the concept of using (smaller) individual filters on each component, with these being specifically designed for their purpose, this dramatically reduces and stops component crosscontamination and dispels the belief that one size fits all. Every single component used in our designs is extensively tested for quality,reliability and purpose. Our circuit designs are extensively ‘field’ tested before coming to market so we can guarantee the widest compatibility with third party products.Within the market of premium audio it is vital to offer exceptional performance and value for money. Products must be made to the highest of standards, be reliable and attractive. A manufacturer must offer exceptional service, dealer training, support and undertake the very best in promotion design and literature. If all these elements are in place customers should experience excellence at every stage. Our continual quest is to meet these challenges.All of our products are professionally designed in England with deep consideration given to both style, functionality, performance and value for money. Our European manufacturing facility offers a multi-award winning hand built product line.The companyThe principlesThe executionThe companyJanuary 2011B. The productThank you for purchasing the IsoTek Super Titan.The Super Titan continues our multi award winning range and offers an unpresidented level of performance specifically for high current devices such as power amplifiers. It has been designed to offer an uncompromised level of power delivery close to 10,000 Watts with a transient ability over of 35,000 Watts. Super Titan is the ultimate high-end high power conditioner on the market.At the rear of the unit you will note four high quality silver plated locking Neutrik powercons rated at 32 Amps. These four outlets are individually isolated to stop cross contamination and any component cross talk. They are in no way connected to each other. Thus each connected component has a clean supply.Supplied with the Super Titan are two high current 32 Amp cables, one to power the unit the second to connect a component. Additional power cords can be purchased as needed.Super Titan features 135,000 Amps of instantanious protection, this is extremely important in today’s society where dangerous power surges can damage sensitive audio equipment.All fusing is external and in the form of a 32 Amp RCBO. Thiseliminates any need to enter the product. There is a second RCBO and power inlet and Neutrik Powercon output to power any addition conditioners.All components are of the highest grade and are under stressed, this gives greater longevity. Ninty percent of internal components used within Super Titan are specifically designed for purpose, thus guaranteeing the highest performance and specification.OverviewFeaturesFront elevation of the unitJanuary 2011B. The productSuper Titan has its own dedicated built in isolation system so it is not neccessary to place it into or onto an audio rack system. However you should insure that Super Titan is placed in a location which allows sufficient ventilation for the internal electronics. Ventilation should not be impeded by covering the ventilation openings with items such as newspapers, table-cloths, curtains etc. No naked flame sources, such as lighted candles should be placed on the unit.Other items may be placed on top of the Super Titan but only with an additional isolation platform, this is available to purchase separately.Do not place the unit near heat sources, such as radiators or air ducts.The unit should not be placed in areas which could exceed 25degrees, for example near vacumn tube amplifiers. Good air circulation is essential to prevent heat build up within the chassis. Do not place the Super Titan on an extremely soft surface, which could block the ventilation intakes on the underside of the unit.Do not let any liquids spill onto or objects fall into the chassis.The apparatus must not be exposed to dripping or splashing and no objects filled with liquids, such as vases should be placed on top .Should either of these events happen immediately switch off the unit at the wall socket, wait for at least one minute, unplug all other cables and return it to your authorised IsoTek dealer for a full service.SafetyWeight loadingJanuary 2011C. InstallationOnce the Super Titan is positioned, connect the unit to a mains wall socket. You will notice two very high quality 32Amp power cords are provided. The cable with the black locking Neutrik Powercon is the input cable. The cable with the light grey Neutrik Powercon is theoutput cable. It is important not to get these two connectors confused. DO NOT TRY TO CONNECT THE INPUT CABLE TO THE OUTPUT SOCKETSShould you wish to connect more than one piece of equipment to Super Titan additional 32 Amp cables can be supplied. Please also note that we do not recommend re-terminating existing cables you have with the Neutrik 32 Amp connectors unless these cables are rated at 32 Amps.The apparatus must be connected to an earthed mains socket-outlet.Turn off all equipment you wish to power from the Super Titan. Unplug the power cable(s) relating to these, connect the supplied 32A power cable into the Super Titan. Please remember grey is for the output.Plug the grey connector into the grey output socket at the back of the Super Titan, this will rotate and lock. Now connect the IEC connector into the back of your power amplifier or other high power device.Connect the 32A input power cord (black Neutrik connector), again this will rotate and lock. Now connect the Super Titan to the wall outlet.Turning the RCBO rated at 32A on the left hand side of the back pannel will power the unit.We recommend if you have the opportunity, to run a 32A feed for the Super Titan. However the unit will function perfectly well from a standard wall socket.Equipment couplingSystem integrationRear elevation of the unitJanuary 2011D. TroubleshootingThe front panel LEDs are not lit and the unit gives no power.Check that the 32Amp RCBO on the left hand side of the back panel is turned on. Check that the 32Amp power cable is correctly connected to the left hand power input socket.Check that the mains cable is securely plugged into the wall socket.On rare occasions the fuse at the main distribution fuse box may also need to be checked.We would strongly recommend a simple check of mains polarity. Your local IsoTek authorised dealer will be able to supply a product through us to help you establish this. Mains polarity is of particular importance in markets where European Shuko plugs are used.Always replace fuses with the same fuse type and rating .*********************************************************any doubt about the correct fusing.Fault finding Fuse location & Power switchFuse in UK three pin plugJanuary 2011E. SpecificationsThe following information relates only to the IsoTek Super Titan.Number of outlets:4Type of outlets:32A Silver plated Neutrik unswitchedMains inlet:32Amp NeutrikMains voltage:100 - 240V High current outlets (4):32AmpsMaximum current:32Amps continuousTotal available power (230V):7360W Transient Power:35,500WDimensions:500mm x 500mm x 300mm (WxDxH)Weight:27.0KgPlease note, the information given in this document is correct at the time of print. Small production changes in the course of improvement through our ongoing research and development policy may arise. If clarification of any point is required please refer to your localauthorised IsoTek dealer or visit where you can download the very latest information.Dimensions & socketsFront & rear elevationJanuary 2011G. WarrantyPlease complete & sendAs part of our on-going commitment to the highest standards of customer service, IsoTek offersyou the opportunity to extend the standard 2 year product warranty to 3 years, free of charge.Simply visit:/registerAnd follow the on screen instructions. This service will automatically update your details andgive confirmation of your registration via email within 24 hours.IsoTek will not share your personal details with any third parties without your permission.If you do not have internet access then please forward a copy of your invoice, together with theproduct serial number and your address to our UK office:IsoTek Systems,4 Mozzetta,Kings Head Yard,Winchester,SO23 9HNEngland.。
泰坦软件公司全方位优惠提供档案数字化扫描加工服务
泰坦软件公司全方位优惠提供档案数字化扫描加工服务为进一步贯彻广东省档案信息化建设五年规划要求,泰坦公司成立了“泰坦档案数字化加工中心”。
中心自2004年成立以来,先后为十几家单位实施了档案数字化工程。
公司拥有自主知识产权的档案文件扫描系统、图片数字化信息批量处理系统,公司注重用户在档案处理过程中的安全与保密,依托档案系统多年的管理经验和公信度,建立了一整套严密的文档数字化工程流程及操作规范,为客户不断提供优质、实惠、安全、及时的文档整理、文档影像及文档系统管理服务。
公司在承接的多个政府机关及企业的档案数字化项目服务过程中,以其安全性好、保密程度高、产品质量优秀、服务周到等获得好评。
“泰坦档案数字化加工中心”的建成,为全省各级档案馆(室)开展数字化工作提供了服务平台。
“中心”依托泰坦软件公司在档案资源数字化建设方面的成功经验,以及公司在文档数字化扫描方面的技术优势,遵照国家有关的档案数字化加工标准,按照用户的需求,提供对纸质文件资料、图片档案的数据录入、扫描、条目挂接、压缩、光盘刻录、生成查询与浏览系统及后续维护与加工服务,并确保文档资料的整理、扫描和检索利用等扫描加工各个环节的质量。
“中心”拥有先进的扫描加工设备和专业的扫描队伍,面向全省用户单位提供专业、快速、高效的档案数字化加工服务,目前,该“中心”日加工能力已达到2万页以上。
档案数字化工程的最终目标是使现有的文件和档案管理系统成为文件、档案集中管理和利用的统一平台。
就数据内容而言,它应包括目录数据(文件、档案、资料)、全文数据、多媒体数据(图片、图纸、图像)。
启动档案数字化工程主要目的就是借助现有信息平台的网络资源,实现对文件档案资料等信息的集中统一管理、安全保护和综合开发利用。
(1) 实现减少重复劳动及降低数据处理成本工程完成后,各部门相关人员都能通过现有的文档管理系统查到需要的档案。
并能通过电脑系统直接将原文打印出来,避免了数据的多次辗转造成的大量重复劳动,从而大大降低数据处理成本。
钛备份怎么用钛备份怎么还原
钛备份怎么用钛备份怎么还原钛备份软件是玩安卓游戏的玩家必备的一个软件,可以对一些安卓游戏的数据进行备份和还原。
对于很多新手来说,如何正确的使用钛备份是一个迫切的问题,今天西西小编给大家带来一篇钛备份使用详细图文教程!一、下载钛备份Titanium Backup for Android v7.0.0 直装专业版1、运行钛备份的前题:手机已作ROOT。
MIUI默认是已ROOT的。
2、下载并安装钛备份软件,名称:钛备份。
3、安装后在菜单会生成黄色的Ti图标。
二、用钛备份备份所有安装的文件和数据1、点击钛备份图标,便进入图1界面,请注意红圈内的备份目录。
自动在/sdcard下生成了你所备份的文件夹:TianiumBackup。
如果备份出现问题很可能是缺少BusyBox的文件,可在联网的状态下,点击右下“出现问题?”,程序便会自动下载安装BusyBox。
也可通过网上下载自行复制。
图1:如果装了外置SD卡的机友,可以自行设置备份目录,具体操作如下:点击进入钛备份--点菜单键(手机最左下角的键)--设置--备份文件夹名--后退一下(手机最右下角的键)--选择名字为“external_sd”的文件夹--创建新文件夹--输入“TitaniumBackup”并创建--选择“TitaniumBackup”文件夹--使用当前文件夹,然后返回钛备份的主页面,如果备份目录显示为:“/mnt/sdcard/external_sd/TitaniumBackup”,就证明设置成功了。
2、点击手机左下“菜单键”。
便进入图2。
然后再点红圈内“批处理操作”。
图2:3,点“批处理操作”后进入图3。
点击红圈内“运行”,备份所有程序+系统数据图3:4、运行后,进入图4。
此时可全选或勾选所需文件。
点击右上角红圈内的绿色√图4:5、随后便进入备份进行时,见图5。
图5:6、备份结束后,请务必点击校验您的备份按钮来验证一遍备份的文件,以防有备份不成功或不完整的现象出现。
TITAN自由ROM刷机教程
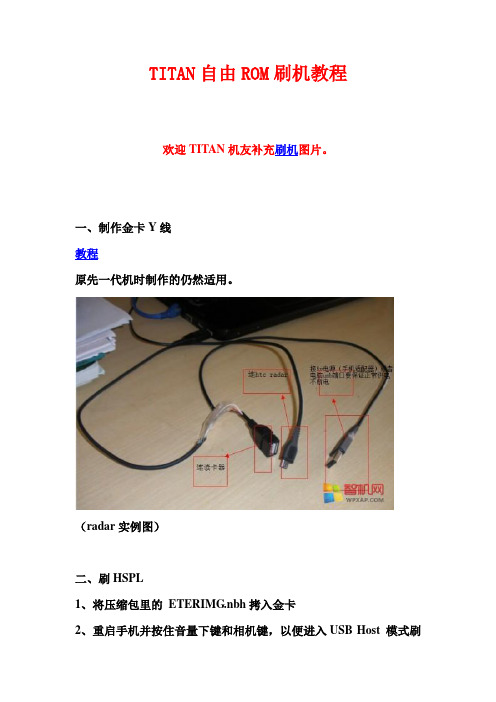
TITAN自由ROM刷机教程欢迎TITAN机友补充刷机图片。
一、制作金卡Y线教程原先一代机时制作的仍然适用。
(radar实例图)二、刷HSPL1、将压缩包里的ETERIMG.nbh拷入金卡2、重启手机并按住音量下键和相机键,以便进入USB Host 模式刷入ETERIMG.nbh3、重启手机按住音量下键和上键进入SPL界面。
这时会出现"2.05 MFG"。
4、连接手机到电脑。
运行压缩包里的HSPL文件。
5、选择2.05-HSPL进行安装6、按住音量上、下键阻止手机重启后进入USB Host 模式。
HSPL下载链接:/file/e7xxl5dt#DFT-HSPL-WP7SG1.rar三、刷radio1、手机关机,重启并按住音量上键、下键。
进入SPL界面。
2、用数据线将手机连接到电脑。
3、运行radio压缩包里的ROMUpdateUtility。
4、等待几分钟就完成了。
radio下载链接:/d/MCJMEXPNIEHX?p=129972/file/4ndmzcacdd09/n/RUU_ETERNITY_ Radio_Signed_17.5006.08.27_17.08.50.06.7z四、刷ROM1、手机关机,重启并按住音量上键、下键。
进入SPL界面。
2、用数据线将手机连接到电脑。
3、运行ROM压缩包里的ROMUpdateUtility。
4、等待刷机完成了。
5、重启手机。
ROM地址:/thread-410633-1-1.html 详情地址:/thread-943-1-1.html。
珠海泰坦软件密集架SDK使用手册(V1.1)
珠海泰坦软件系统有限公司密集架SDK V1.1密集架通信接口使用手册版本日期修正人修正内容V 1.0 2012-10-31 李振威最初定制V 1.1 2012-11-16 李振威接口修正非常感谢您使用我们公司的产品,我们将竭诚为您提供最好的服务。
本手册可能包含技术上不准确的地方或文字错误。
本手册的内容将做定期的更新,恕不另行通知。
更新的内容将会在本手册的新版本中加入。
我们随时会改进或更新本手册中描述的产品或程序。
1 内容简介 (4)1.1概述 (4)1.2功能 (4)1.3组件 (4)2返回码释义表 (5)3接口说明 (6)3.1初始化设备 (6)3.2打开设备连接 (6)3.3关闭设备连接 (6)3.4查询设备总数 (7)3.5移动密集架,定位至<列> (7)3.6移动密集架,定位至<单元格> (7)3.7恢复密集架 (8)3.8查询所有设备信息 (8)3.9查询单个设备信息 (9)3.10查询所有设备状态 (9)3.11查询单个设备状态 (9)3.12查询温湿度 (10)3.13设置恒定温湿度 (10)4调用流程 (11)1 内容简介1.1概述该密集架SDK仅用于由珠海泰坦软件系统有限公司研发生产的密集架设备。
1.2功能主要功能是:密集架列的移动/复位控制、状态查询、温湿度查询等等。
1.3组件TT_MJJ.dll 动态库文件TT_MJJ_CONFIG.xml 动态库配置文件2返回码释义表序号返回码类型释义1 R000 String 无效返回2 R900 String 成功返回3 R901 String 失败返回4 R902 String 网络故障3接口说明命名空间:namespace TiTanSoft。
密集架类:class MJJ。
以下接口示例均采用静态密集架类对象进行调用,若应用于 Web应用程序中,请在添加引用后,在class Global类中添加如下属性代码:public static MJJ Mjj = new MJJ( );3.1初始化设备String InitDevice( )①功能描述:初始化密集架设备环境。
思岚科技 雅典娜(Athena) 通用机器人平台专业版 用户手册说明书

w w w .slam t 上海思岚科技有限公司雅典娜(Athena)通用机器人平台专业版用户手册型号:N4M112020-08-18.rev.1.1目录 (2)产品介绍 (3)简介 (3)基本功能 (3)内部模块框图 (3)传感器配置 (4)接口配置 (4)指示灯状态说明 (5)充电座 (6)产品清单 (6)扩展说明 (7)简介 (7)接口定义 (7)A THENA参考设计 (9)部署及使用方法 (12)部署A THENA (12)连接至电脑 (17)调试工具 (17)充电与电池 (18)注意事项 (20)机械尺寸 (21)快速启动指南——开箱 (22)深度摄像头支架安装指导 (24)电池安装指导 (26)附录 (29)图表索引 (29)简介Athena 是一款由SLAMTEC 研发的小型可扩展、低成本机器人平台,可满足小型机器人应用开发的需求。
如智能巡检机器人,货柜运送机器人等。
其内置的高性能SLAMCUBE 自主导航定位系统套件使其具备路径规划与定位导航功能,从而能搭载不同应用在各种商用环境中工作。
Athena 采用多传感器融合技术,包含激光雷达、超声波传感器、跌落传感器、磁传感器、深度摄像头、碰撞传感器,能在复杂多变的商业环境中应变自如,成功完成自主建图,定位与导航。
基本功能自主建图定位与导航该平台具备自主建图定位与导航功能,工作过程中无需人为协助,能根据需要自动寻找路径并移动到指定的地点。
此外,它还支持多路线巡逻模式。
自动回充提供开放接口供上层应用调用,调用成功后可实现该平台在电量不足的情况下自动返回充电座充电。
第三方应用拓展该平台拥有完全开放的软硬件平台并提供外扩硬件支持,可通过SLAMWARE SDK 进行业务逻辑应用开发。
内部模块框图下图描述了Athena 和外部系统之间的通信、电源连接框图。
图表1-1 Athena 与外部系统连接示意图产品介绍User 外部系统Athena 主系统有线网络用户供电电源接口应急充电口急停开关刹车释放开关kaikaiguan 网络复位开关 Wi-Fi系统开关传感器配置图表 2-1 Athena传感器配置说明示意图接口配置图表 2-2 Athena接口配置说明示意图防跌落传感器深度摄像头传感器激光雷达传感器(层)超声波传感器碰撞传感器磁传感器应急充电Wi-Fi天线自动充电空气开关指示灯状态说明图表 2-3 Athena左右灯状态显示由于低电量的时候,同时存在health information、左转、右转等其他状态。
教你定制ROM(凯撒)
ROM定制1。
ROM基础知识......................................(1楼)2。
ROM制作工具介绍...............................(2楼)点此直达3。
ROM定制.............................................(3楼)点此直达4。
ROM定制FAQ......................................(4楼)点此直达5。
DIY及OEM包制作.................................(5楼)点此直达6。
模板的制作............................................(6楼)点此直达7。
移植......................................................(7楼)点此直达第一部分:ROM基础知识.........................................已熟悉的机油直接飘去2楼!A。
名词解释1. ROM,RAM,Flash MemoryROM(Read Only Memory)的全名为只读记忆体,是PPC上的硬盘部分用来存储和保存数据。
ROM数据不能随意更新,但是在任何时候都可以读取。
即使是断电,ROM也能够保留数据。
但是资料一但写入后只能用特殊方法或根本无法更改,因此ROM常在嵌入式系统中担任存放作业系统的用途RAM(Random Access Memory)的全名为随机存储记忆体,是PPC上的移动存储部分,用来存储和保存数据的。
它在任何时候都可以读写,RAM通常是作为操作系统或其他正在运行程序的临时存储介质(可称作系统内存)Flash Memory,由于ROM不易更改的特性让更新资料变得相当麻烦,因此就有了Flash Memory的发展,Flash Memory具有ROM不需电力维持资料的好处,又可以在需要的时候任意更改资料,我们常见的FLASH Memory有TF卡(全名:TransFLash卡),SD卡(全名:Secure Digital Memory Card),CF卡(全名:Compact Flash卡)等。
Titans系列混合矩阵切换器说明书
目录第一章泰坦混合矩阵切换器简介 (5)1.1 机箱外观 (5)1.2 设备简介 (7)1.3 功能特点 (8)1.4 泰坦混合矩阵切换器典型应用示意图 (11)第二章泰坦混合矩阵切换器技术参数 (11)2.1 输入接口-VGA (11)2.2 输入接口-YPbPr (12)2.3 输入接口-DVI(普通) (12)2.4 输入接口-模拟视频 (12)2.5 输入接口-SDI (12)2.6 输入接口-HDMI (13)2.7 输入接口-DVI(双链路) (13)2.8 输入接口-双绞线 (13)2.9 输出接口-DVI/VGA (14)2.10 双绞线输出接口 (14)2.11 设备控制 (14)2.12 功率和尺寸 (14)2.13 安装与其他 (15)第三章泰坦混合矩阵切换器软件使用方法 (15)3.1 Titans™1000混合矩阵切换器运行和配置 (15)3.2 Titans™1000混合矩阵切换器输入输出及功能 (18)3.3 Titans™1000混合矩阵切换器窗口控制 (31)3.4 Titans™1000混合矩阵切换器场景 (34)3.5 Titans™1000混合矩阵切换器特殊功能 (35)3.6 Titans™500混合矩阵切换器运行和配置 (40)3.7 Titans™500混合矩阵切换器输入输出及功能 (42)3.8 Titans™500混合矩阵切换器切换控制 (54)3.9 Titans™500混合矩阵切换器场景 (55)3.10 Titans™500混合矩阵切换器特殊功能 (57)第四章混合矩阵切换器控制指令集 (60)4.1 混合矩阵切换器设置组合方式(窗口模式)指令 (60)4.2 混合矩阵切换器1000设置输出屏显示分辨率指令 (61)4.3 混合矩阵切换器500设置输出屏显示分辨率指令 (62)4.4 混合矩阵切换器1000输出显示屏开窗口指令 (62)4.5 混合矩阵切换器1000移动窗口指令 (63)4.6 混合矩阵切换器1000更改窗口的输入源选择指令 (63)4.7 混合矩阵切换器保存场景指令 (64)4.8 混合矩阵切换器调用保存的场景指令 (64)4.9 混合矩阵切换器1000将窗口置顶或置底指令 (65)4.10 混合矩阵切换器1000关闭窗口指令 (65)4.11 混合矩阵切换器1000关闭一个拼接屏的所有窗口指令 (65)4.12 混合矩阵切换器读取输入通道的参数指令 (65)4.13 混合矩阵切换器更改VGA输入通道参数指令 (66)4.14 混合矩阵切换器恢复VGA卡为默认参数指令 (66)4.15 混合矩阵切换器输出测试指令 (67)4.16 混合矩阵切换器1000使能和关闭拼接屏指令 (67)4.17 混合矩阵切换器查询拼接屏信息指令 (67)4.18 混合矩阵切换器查询当前输入状态指令 (67)4.19 混合矩阵切换器查询窗口信息指令 (68)4.20 混合矩阵切换器设置同步模式指令 (68)4.21 混合矩阵切换器1000设置显示屏的输出映射指令 (68)4.22 混合矩阵切换器查询IP地址信息指令 (69)4.23 混合矩阵切换器修改IP信息指令 (69)4.24 混合矩阵切换器将字符缓冲区的内容写入到相应的输入通道指令 (70)4.25 混合矩阵切换器设置时间指令 (70)4.26 混合矩阵切换器读取时间指令 (71)4.27 混合矩阵切换器1000设置底图使能指令 (71)4.28 混合矩阵切换器500切换输出通道 (71)4.29 混合矩阵切换器设置输入源类型 (71)第五章安装说明 (72)5.1 打开包装 (72)5.2 安装机器 (72)5.3 机器调试 (72)第六章常见故障分析及解决 (72)6.1 安装完软件无法运行原因 (72)6.2 输出的画面无显示 (73)6.3 画面出现偏色现象 (73)6.4 画面出现抖动或者花点 (73)6.5 画面在显示设备中显示出现黑边 (73)安全使用说明线缆不容许在电源线、信号线、通讯线等线缆上压放物品,应避免对线缆踩踏和挤压,以防止出现漏电和短路等危险情况。
贤达崇明400人报告厅拼接屏系统设备清单及技术指标表
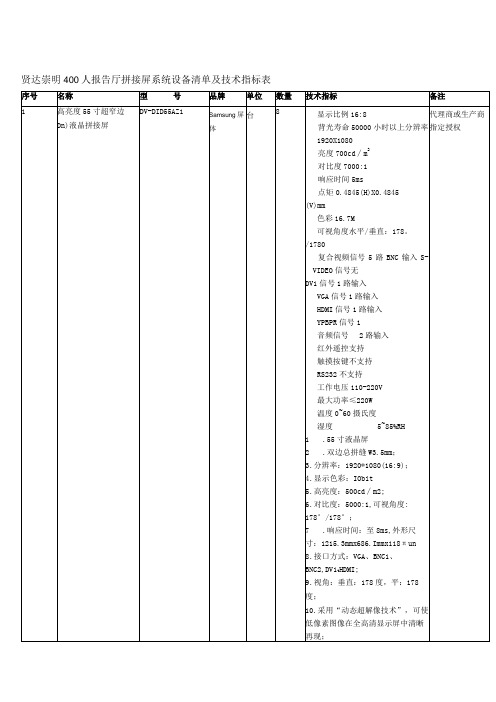
1个主控电动推杆(6Omm)
5个灵活方便操控的编码器(带PUSH功能)
1个高灵敏度轨迹球
1个千兆以太网口
4个3.0高速USB接口
1个标准机械键盘
独立背光且可调光按键
MIDI输入输出接口
2个1ED鹅颈灯
内置60G固态硬盘
内置UPS保护电源(可选)
无线DMX(可选)
19、(可选配)支持HDBaSeT1O协议,HDCP协议:最高支持108OP@60Hz、1920*1200@60H兼容HDTV;支持采用CΛT5e∕6线材输出最长距离达100米;***20、设备必须可通过电子白板、安卓平板、IoS平板电脑、Windows平板等各种系统平板进行触摸控制。(需出具第三方证明文件)***
2.双边总拼缝W3.5mm;
3.分辨率:1920*1080(16:9);
4.显示色彩:IObit
5.高亮度:500cd∕m2;
6.对比度:5000:1,可视角度:
178°/178°;
7.响应时间:至8ms,外形尺寸:1215.3mmx686.Immx118πun
8.接口方式:VGA、BNC1、BNC2,DV1tHDMI;
Hz
10
DVI连接电缆
RGB1EDVI-IO
北京
付
12
1TMDS比特率:1.65Gbps
2.输入/输出类型:DV1ma1e,18+1
3.即插即用,容易安装;适用于穿管施工。
11
工程视频电缆
SWYV75-5/3
江苏天诚
米
200
执行标准:Q/32100311D02-2006电缆芯数237;导体规格37/0.IOmm绝缘厚度0.50mm屏蔽结构纵包;平均外径6.OOmm铝箔铜丝编织96(112)/0.10
诺基亚手机diy固件教程
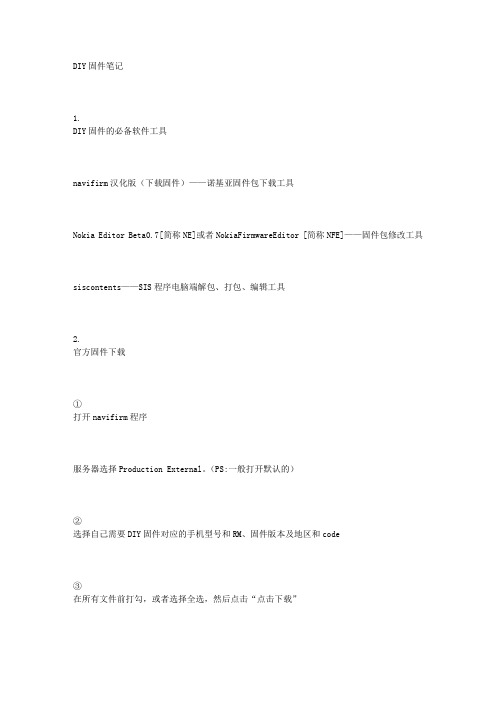
DIY固件笔记1.DIY固件的必备软件工具navifirm汉化版(下载固件)——诺基亚固件包下载工具Nokia Editor Beta0.7[简称NE]或者NokiaFirmwareEditor [简称NFE]——固件包修改工具siscontents——SIS程序电脑端解包、打包、编辑工具2.官方固件下载①打开navifirm程序服务器选择Production External。
(PS:一般打开默认的)②选择自己需要DIY固件对应的手机型号和RM、固件版本及地区和code③在所有文件前打勾,或者选择全选,然后点击“点击下载”注意,为了配合JAF刷机,固件包位置请放于C:\Program Files\Nokia\Phoenix\Products\rm-xxx文件夹中,xxx为您手机背面电池下方的RM数字,请自行建立文件夹3.DIY修改软件——详解NE的安装和使用①打开NokiaEditor Beta7程序,手机型号选择5320模式(PS:右下角的“Donate”按钮请无视~~)②点击“打开”按钮,选中所下载的固件中一个名为rm409_05.401_prd_v20_01_hongkong.fpsx (以我的亚太为例,不同版本不一样的,请大家注意自己的相同格式固件)③点击“解包”按钮,解包固件,稍等片刻。
④成功后会显示“rofs2.img 已解包完成,在rofs2文件夹下修改后点打包(修改固件时,本程序不要关)”⑤打开NokiaEditor Beta7文件夹下的rofs2文件夹,会发现有许多熟悉的文件,这就是手机里Z盘下的文件。
就是在这里DIY⑥在rofs2的文件夹下修改完毕后(什么开机画面、指定刷音乐、照相压缩率、XX程序、补丁、自己喜欢的软件修改和添加后记得备份,以防自己刷机测试后出问题)⑦再次打开NokiaEditor Beta7程序(刚才最小化的)⑧点击“打包”按钮,打包固件,稍等片刻。
成功后会显示“REB-rm409_05.401_prd_v20_01_hongkong.fpsx文件生成在本程序根目录,将文件名中"reb-"去掉,复制到"product"文件夹下,刷机即可!”⑨打开NokiaEditor Beta7文件夹会发现多了一个名为REB-rm409_05.401_prd_v20_01_hongkong.fpsx的文件,就是你修改后的固件,改名为原来的文件名称(即删掉“REB-”),放回下载的资料包里替换原文件再刷!(以上文件名均以我的固件名为例,各位自己注意下就行...)这里强烈建议:刷官方用凤凰,刷DIY固件用JAF!!!⑩至此,固件就DIY成功了!!!4.如何固化自己的功能表排序装上自己喜欢的软件,然后按照自己的习惯排序,然后从C:\private\101F4CD2\Content\appshelldata.xml提取这个appshelldata.xml,直接放到修改的固件中Z:\private\101F4CD2\Content\,覆盖原文件,OK,刷机格机之后,你再装相同的软件,那个软件的图标,就会自动乖乖的跑到你想让它去的那个地方了【与下一条配合使用更带劲】5.只需x管理器就可以隐藏功能表下的文件夹及其程序此方法仅限已XX的FP1和FP2机型!MR机型不支持!1.先进入功能表新建一个文件夹,名称自己决定,例如我设置为“回收站”,建立好后找到那些你想隐藏的程序(比如手机自带的那些没用的功能),把它们统统移动到刚才新建好的那个文件夹里.2.开XX,进入X-plore(x管理器的文本编码要是utf-8,其他的我没试过),然后进入以下路径C:\private\101F4CD2\Content\appshelldata.xml然后按8键进入编辑界面,查找“回收站”就会看到查找内容。
TITAN GER -400 4系统1设备用户手册说明书
3D Imaging SystemIonic Search SystemLong Range SystemMagnetoMeter System400-TITAN GER 4 System 1 DeviceCritical Warning•••Please be sure that all precautionstaken against risksDo not use your device while it is raining or on extremely wet floorTurn on your device after you make sure that all parts are in placeMake sure that the device battery is fully charged before searchingIf the battery start to give a peep sound, close the device and recharge the batteryDo not start the pulse induction system without connecting the coil cable to the device, other ways the device will stop in the middle of openingIt is recommended to read the user manual before start working on the device to understand everything and to avoid mistakes doing the searchAfter the device start make sound and turn off automatically put the battery on charge and do not try to start the device without charging the batteryOverview➢Dear customer, thank you for choosing the TITAN GER – 400 ➢This device enables you to detect underground gold &Treasures ➢TITAN GER – 400 designed to reach 35 meters under the ground ➢and 2500 meters front range➢In addition, it contain five systems to confirm your target➢and identify the target underground and its depthBe aware of high voltage resources, and do not use any charger other than the original charger that come with the deviceMain unit of the device is under warranty against all electronic breakdowns for two (2) yearsAny damages caused by user errors (laying open the main unit, hits, harms etc.) are not within this warrantyBattery , antenna and tablet are also not within this warrantyYou should follow the instructions inthis user manual strictly to minimize the faults and to use your device correctlyFigure (1) the long range system componentsThe Long Range System1Signal RecipientSignal TransmitterDispatcher AntennaRecipient AntennaThis system specializes to cover vast areas and locate the target with in 1 meter Square up to depths of 35 meters below the surface of the ground and Front Range up to 2,500 meters. Connect the DispatcherAntennaFigure (2) Dispatcher AntennaThe long-range system partsConnect the SignalTransmitterFigure (3) : Signal Transmitter Connect the SignalRecipientFigure (4) : Signal Recipient Connect the RecipientAntennaFigure (4) : Recipient Antenna- Open the DeviceScreen and Start TheSwitch the devicethrough ON / OFFFigure (5): Switch the device through ON / OFFCLICK ON THE SCREEN OF THE DEVICE TO DISPLAY THE LANGUAGES LIST THE DEVICE WORKS ON FOUR LANGUAGES:(GERMAN-ENGLISH-FRENCH-ARABIC)Figure (6) : languages listAfter selecting the language, you want to work in (English for example) The search systems menu will appear (Select long-range search system )Figure (7):search systems menuAfter selecting the long-range system, the metals that this system can detect will appear :Choose the metal to be search for from a list of metals through pressure on the metal name, (BURIED GOLD FOR EXAMPLE)Figure (8) :metals menuAfter selecting, the metal to be searched for, the Front Range Options will appearChoose the Front Range according to the area you want to reachYou can select between (0500 M - 1000 M - 1500 M - 2000 M - 2500 M) Choose 2500 M for example.Figure (9) :Front Range OptionsAfter selecting the Front Range, the search screen will appear which contain an indicator, which will guide you directly to the target. Make sure that the antenna is pointing aheadAdjust the antenna with the indicator on the screen to receive accurate signalFigure (10) : search screenIncrease the length of the antennas receiving a signalTo able the device to detects targets even to 2500 metersFigure (11) : Increasing the length of the antennasStar the search by holding the device as follow:If the target on the right side the indicatorWill Point to the right side and the seam to the left side as followFigure (11) : indicator in left side Figure (12) : indicator in right sideNorth to SouthSouth to NorthEast to WestWest to EastTo determine the depth of the discovered target Stand above target and After detecting the target, confirm the target from four direction turn 45 degreesWalk straight ahead until the antenna reverse to the backFigure (13) :determine the depthMeasure the distance between the antennas reversing back and the target center point.The distance between the antennas reversing back and the center point is equal the target depthFor example, if the distance is 10 m the depth of the target is 10.Figure (14) :determine the depth2The Ionic Search SystemIonic sensorIonic sensorThis system specializes to cover vast areas and locate the target with In 1 meter Square up to depth of 35 meters below the surface ofThe ground and Front Range up to 2500 meters verticalConnect componentConnect theDispatcher AntennaConnect the IonicSensorFigure (16) Switch on the device through ON / Off button- Open the Device Screen and Start the Device through ON / OFF switchFigure (17) languages listClick on the screen of the device to display the languages listthe device works on four languages:(GERMAN-ENGLISH-FRENCH-ARABIC)After selecting the language, you want to work in (English for example)The search systems menu will appear, Select IONIC search systemFigure (18) search systems menuAfter selecting the ionic system, the search screen will appear.Point the device to the ground if the device start to make a sound you must calibrateThe device with the ground by pressing on the calibration button as follow:Figure (18) calibration buttonAfter you finish the calibration, start the search by moving the device 180 degrees right and left.When the device detect a target, it will start to make a sound. In addition, the indicter will start to move to alert you about the target discovered.The sound will start Accelerating when you will be close to the target.Figure (19) indicter movementYOU CAN ALSO USE THE IONIC SEARCH SYSTEM DURING THE DRIVING IN A MOVING VEHICLE... AS FOLLOW:Figure (20) use ionic during drivingIn the event of lack of vision, you can operate the laser to locate the target place.Through the laser ON OFF, buttonFigure (21) operating laserAfter detecting the target, confirm the target from four directionNorth to SouthSouth to NorthEast to WestWest to EastNote:When you use the Ionic Search System the researcher should avoid directing device northward never, because the device will make a sound (This is because the device in this case will be Reverse of magnetic fields, which is directing from north to south)3D Imaging System3This system specializes to show you the area scanned on the tablet screen in three-dimensional photo and through which you can specify the target size, shape and depth of the target underground up to 45 meters.3D SensorDispatcher AntennaTablet HolderTabletFigure (21) 3D Imaging System componentsConnect componentFigure (22) Dispatcher AntennaConnect the Dispatcher AntennaConnect the 3DImaging SensorFigure (23)Imaging SensorInstall the TabletHolder To TheDeviceFigure (24)Tablet HolderFix the tablet that supplied with the device on the tablet holder which Contains analysis program to display the photoFigure (25) Fixing the tablet-Turning to the tablet to make a Bluetooth connection between the device and the analysis program.-Click on the Desktop optionFigure (26) Turning tablet onThe desktop screen will appear.1-Touch the arrow to revel the hidden icons.2-Click on the Bluetooth icon.3-Chose add a Bluetooth deviceFigure (27) tablet desktop screenThe tablet will start to search for any devices with Bluetooth in the area. When the device Bluetooth appear click on pair.Figure (28) search for devicesNOTE:The Bluetooth password is 1000Now select the 3D IMAGING system from the systems menu in the device.Figure (29) systems menuAfter selecting the 3D imaging system, the search screen will appear.Figure (30) search screenOpen the 3D GER Analyzer that installed on the tabletFigure (31) Opening the 3D GERStart a new project to scan the ground by clicking on new scanFigure (32) Start new scanThe connection settings window will appear on the screen.Figure (33) connection settingsEnter the settings as follow1-CHOSE DEVICE : TITAN GER2-INTER FACE : OPEN THE BLUETOOTH SETTINGS AND ENTER THE COM NUMBER ( OUT GOING ) FOR EXAMBLE COM 17Figure (34) connection settings3-TRANSMISSION METHOD : BLUETOOTH4-OPERATING MODE : GROUND SCAN5-IMPULSES PER LINE : 10 TO 50 ( EACH IMPULSE = 30 CM ) 6-NUMBER OF LINES : 1 TO 15 ( EACH IMPULSE = 30 CM ) 7-SCAN DIRECTION : OPTIONALAfter you enter the sittings, click on connect and shift to the device. Therefore, the device will start taking pictures as follow:Figure (35) starting taking picturesNO Explaining1 Start new scan and disconnect after scanning finish2 Open file from your tablet already existing in your tablet3 Cancel the scanning or delete the photo4 Save the photo as a .GER file to re-open it any time you want5 Save as a photo with no option to change anything in the photo shape6 Print report allowed you to see the where about of the metal and the other elements7 To return the photo as it is was before you start analyzing8 To hide and appear the grid which Represent the number of photo in the scan9 zoom to make the picture bigger10 Miniature to make the picture smaller11 A Tool you use it in case of not clear target to see the correct shape ( - )12 A Tool you use it in case of not clear target to see the correct shape ( + )13 to make the target in high size14 to make the target in low size15 move between the grid squares to pin point the area that you want to know its depth16 move between the grid squares to pin point the area that you want to know its depth17 The value which will deferent between the metals and the cavity and the ground18 when you pin point the target will allowed you to now in which line is your target exactly19 when you pin point the target will allowed you to now in which line is your target exactly20 Depth when you can see the target exact depth21 This options allowed you to see the target in 2D & 3D shape and you can hide the soil forexample or the metals and keep the cavity22 Another way to see the target from down23 Another way to see the target from the side24 Another way to see the target from the angleAfter you finish the scanning you can save the scan on the tablet as a project to be able to analyze again also you can save it as a photoFiger: press save after you choice typeIf you want to have printed report you can press on the print icon, the report will appear, and you can print it (the number in the report it is the value of the ground – metals – cavities4The Magnetometer SystemMagnetometerSensorFigure (36) magnetometer system componentsConnect componentConnect the Sensor to the DeviceFigure (37) Connecting SensorClick on the screen of the device to display the languages listThe device works on four languages:(GERMAN-ENGLISH-FRENCH-ARABIC)Figure (39) languages listFigure (39) search systems menuAfter selecting the language, you want to work in (English for example) The search systems menu will appearSelect MAGNETOMETER search systemFigure (40) calibration buttonAfter selecting the magnetometer system, the search screen will appear. Point the device to the ground if the device start to make a sound youmust calibrateThe device with the ground by pressing on the calibration button as follow:After you finish the calibration, start the search by moving the device forward and back agents the groundFigure (41) moving the deviceWhen the device detect a target, it will start to make a sound.In addition, the indicter will start to move to alert you about the target discovered.The sound will start Accelerating when you will be close to the target.Note:When you use the magnetic system the researcher should avoid directing device northward never, because the device will make a sound (This is because the device in this case will be Reverse of magnetic fields, which is directing from north to south)WarningIf you want the device work well without errors you have to follow next steps When using the device please do not wear the watchWhen using the device please do not wear the jewelryWhen using the device please get away from metal, lighter and mobile phone Please take off the beltThe shoes shoud not contain any metalStay away from the carStay away from electrical ground power lines or any surfacing electricOnly you can use the ionic system, while you are driving the car。
titan灯库操作方法
旗开得胜
读万卷书行万里路1
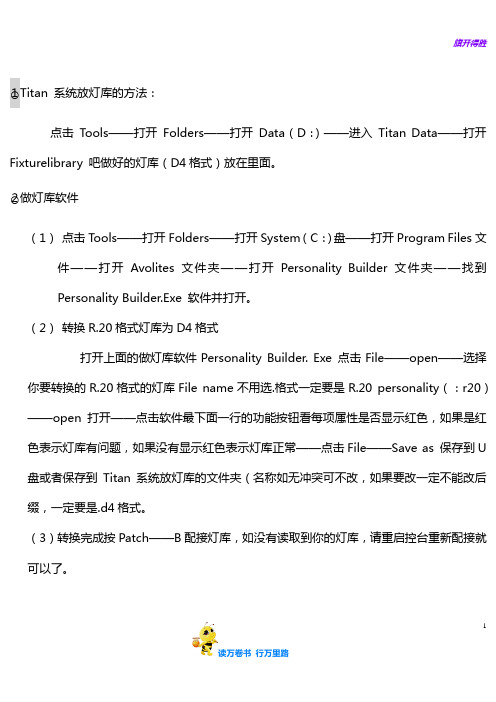
○1Titan 系统放灯库的方法:
点击Tools——打开Folders——打开Data(D:)——进入Titan Data——打开Fixturelibrary 吧做好的灯库(D4格式)放在里面。
○2做灯库软件
(1)点击Tools——打开Folders——打开System(C:)盘——打开Program Files文件——打开Avolites 文件夹——打开Personality Builder 文件夹——找到
Personality Builder.Exe 软件并打开。
(2)转换R.20格式灯库为D4格式
打开上面的做灯库软件Personality Builder. Exe 点击File——open——选择你要转换的R.20格式的灯库File name不用选.格式一定要是R.20 personality(:r20)——open打开——点击软件最下面一行的功能按钮看每项属性是否显示红色,如果是红色表示灯库有问题,如果没有显示红色表示灯库正常——点击File——Save as 保存到U 盘或者保存到Titan系统放灯库的文件夹(名称如无冲突可不改,如果要改一定不能改后缀,一定要是.d4格式。
(3)转换完成按Patch——B配接灯库,如没有读取到你的灯库,请重启控台重新配接就可以了。
EZ-ACCESS TITAN 模块化访问系统说明书

• ADA and IBC compliant • Three-year warranty • All aluminum • Easily configured • Safe, strong and durable
TITAN™ Code Compliant Modular Access System from EZ-ACCESS®
• Custom configurations available
• Site specific stamped drawings available
Features
• Made of corrosion-resistant aluminum for years of maintenance-free use • Durable and safe! • Long life cycle - will not rust, rot or corrode • Recyclable, non-corrosive, and naturally non-combustible • Virtually maintenance free • Lightweight
Specs
Ramps Platforms Curbs Picketed Guards Handrails (standard) Handrails (child) Legs Step Heights Risers Warranty
48” clear width (between curbs) 5’x5’, 5’x7’ and 6’x’6’ 2” 42” high 1 1/2” diameter, 36” high 1 1/2” diameter, 25” high Fully independent and adjustable 18”, 24”, 30”, 36”, 42”, 48”, 54” and 60” 6” high, 12” deep 3 years
- 1、下载文档前请自行甄别文档内容的完整性,平台不提供额外的编辑、内容补充、找答案等附加服务。
- 2、"仅部分预览"的文档,不可在线预览部分如存在完整性等问题,可反馈申请退款(可完整预览的文档不适用该条件!)。
- 3、如文档侵犯您的权益,请联系客服反馈,我们会尽快为您处理(人工客服工作时间:9:00-18:30)。
Shape ID 不能重复 , Name 名字不要太长和不支持中文的,至于Group 不太清楚的时候你选灯后选中你的属性看看控台的屏幕
(2)然后第二行
<Function ChannelID="Tilt" PatternID="Saw" Amplitude="200" Phase="0" Speed="20"/>
Speed默认的速度
6.制作时候我们只需复制这一个部分 蓝色框选的部分,到下面(第三行的</Shape>是每个效果的分界线和结束语,一起复制方便)
7.然后开始修改
(1)先改第一行
<Shape ID="4" Name="Tilt Saw" Group="P">
把ID号码 和 名字 改为我们需要的效果,例如我们要凌镜开和关的交换就改成(红色字体为改动)
Pulse 1:3 Tarops
SAW
改为
<FunctionChannelID="Prism" PatternID="Pulse 1:1" Amplitude="200" Phase="0" Speed="20"/>
这里有2点要注意的
1——Function Channel打开爱富利的灯库制作软件-Personality Builder,建立一个自己想知道的属性,然后再右边的Attribute ID里面显示的就是我们的Function ChannelID2 (因为之前有朋友在制作prism rot凌镜旋转就是写不出来,就是因为ID其实是Prism_Rot,一条下划线搞蒙了)
TITAN 系统内置效果制作
本文章使用的是8.1的TITAN模拟器
1.首先复制一份内置效果文件到桌面
电脑的路径为
C:\Program Files\Avolites\Titan\FixtureLibrary
控台的路径为
D:\TitanData\Avolites\FixtureLibrary
里面一份名字为Shape.xml的文件 就是内置效果未见
5.跳过设定的曲线部分,就是效果设置部分,也是本文章的重点 我这里复制其中一段 效果的公式来解释,例如 TILT SAW
第一行
<Shape ID="4" Name="Tilt Saw" Group="P">
Shape ID -效果IDName–在选择效果的时候显示的名字
Group效果的属性分类,例如TILI SAW 就是位置类型,所以分到P里面P就是Position
第二行
<Function ChannelID="Tilt" PatternID="Saw" Amplitude="200" Phase="0" Speed="20"/>
Function ChannelID选择属性
PatternID选择哪个曲线赋予这个属性
Amplitude默认的Size
Phase默认的Phase数值
2——PatternID也是一样要和内置文件里面的 曲线ID一样
8.最后完成如下图 然后确认保存,回到模拟器里面看看
9.选灯创建效果,选择效果
多了一个PRISM 1:1
总结:基本都是复制然后更改,要注意的是属性的ID 和曲线的ID 不能错最后附加比较常用的曲线表
FLICK DOWN
PULSE 1:1
2.用记事本格式打开 就是TXT 格式
3.打开后看到大量的数据,下面会具体说明 在最上面的是一些系统的描述,不需要管
4.然后看下面一段 这里就是系统里面设定的曲线,简单来说曲线可以理解为属性怎么表现效果都是根据这些曲线来决定,例如常用的DIMMER SIN 其中里面的SIN 就是一个数值从 50到100 然后100到 0 然后再 回到50的一个,淡入淡出的线条,所以当DIMMER 配合SIN这个线条的时候就能看到 淡入淡出的效果 SIN 的曲线
