佳博ZH-380使用说明书(快速安装指南)
炜煌 WH-E19 型纸卷式条形码打印机 快速安装手册说明书

QUICK INSTALL 快速安装 北京炜煌科技发展有限公司Beijing Bright Technology Development Co.,Ltd●打印机各部件一览 Printer Parts Names1.LF 键/电源指示灯 LF Button/ Power Light2.纸仓盖 Paper Case Cover3.固定架 Fastener4.纸卷 Paper Roll5.滚轴 Platen Roller6.纸仓开关 Lock .7.接地口 Grounding8.电源接口 Power Connector9.SET 键 SET Button 10.数据接口 Interface Connector按钮开关的操作及指示灯打印机上电后指示灯保持常亮状态,打印机缺纸时指示灯闪,不能接收数据。
正常上电后,LF 键为走纸键,SET 键无效。
自检测方式打印机断电,按LF 键不放手同时给打印机上电,松手,打印机就会打印出自检条。
Operation SpecificationAfter turning on the printer, the indicator light will keep on. When the light flash, it shows that the paper is lacking, and the printer can not receive data.After turning on the printer, press the LF button, the printer will feed paper, and the SET button is no used.The Self TestPress the LF button, do not release and repower the printer at thesame time,and then the printer will print out the self-check scrip.●尺寸 SizeWH-E19型尺寸 Product Size:外形尺寸:Outline Dimension: 106mm×81mm×40.5mm开口尺寸:Installation Dimension: 100+0.5mm(W)×75+0.5mm(H) 嵌入深度:Inlaid Deepness: 37.5mm●安装 Installation安装方法:把打印机嵌入部分插入仪器或设备面板的安装孔内,并把塑料卡子从设备面板后面夹紧打印机(如图),左右对称各一套,安装方法相同。
CP-380K用户手册
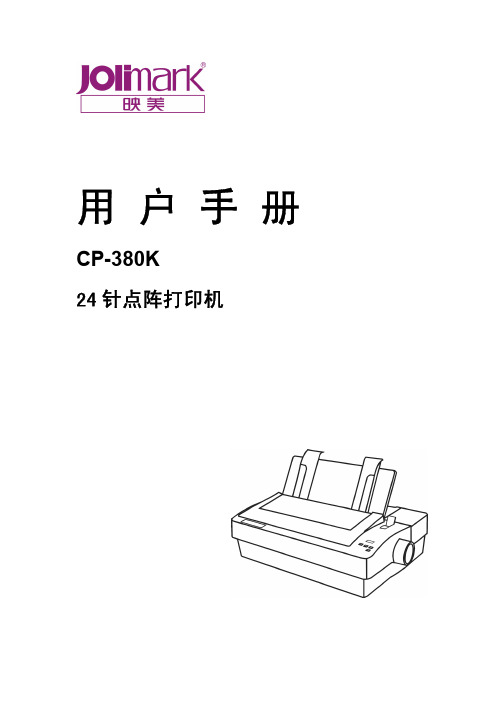
CP-380K 24 针点阵打印机
安全指引
安全指引
请在使用本产品前仔细阅读本手册,不要执行本手册中没有明确说明的操作。未经授权的操作会导致 错误或意外。制造商对因错误操作而导致打印机出现的任何问题均不负责。 请严格遵守标示在打印机上的所有警告和指导。 如果您刚使用过打印机,打印头可能很热,请不要马上去碰它。 安装连续纸的时候不要把手指放在拖纸器链齿盖的下面。 请勿带电或用酒精等化学用品清洁打印机。如需清洁,请先把电源插头拔下,用微湿的柔软布料擦 拭。 请勿在容易被液体溅到的地方使用打印机。 请勿堵塞机壳上的小槽或开孔。不要把打印机放在睡床、沙发、地毯或其它类似物品的表面,以防 堵塞通风孔。如果打印机被置于比较拥挤的环境中工作,应采取相应的通风措施。 打开包装之前,应考虑好放置打印机的位置。应选择一个平稳的台面或坚固的打印机台架,并要确 保打印机周围有足够的空间,以便纸张容易进出。 避免与其他大功率电器或容易引起电压波动的电器设备使用同一交流电源插座。 将整个计算机系统远离可能引起电磁干扰的器件,例如扬声器或无线电元件。 请勿把电源线放在容易被踩到的地方。如果电源线或电源插头已破损或断裂,请马上停止使用并更 换新部件。 避免把打印机放在温度和湿度变化较大的地方,如:阳光直射、靠近热源、多尘或多油烟的地方。 为防止触电或引起短路,请勿把任何物体从打印机通风孔推入机体内。 请勿自行检修打印机,或打开打印机的外壳,以免触电或产生其它危险。如需检修应找专业维修人 员。 在不用打印机时,应拔掉打印机电源线。外接插座应安装在接近打印机的地方。 出现以下情况时,请拔掉打印机电源线,并与专业维修人员联系: A:当电缆或插头损坏、磨损时。 B:当有液体溅入机内时。 C:当打印机被雨淋湿或进水时。 D:当遵从操作手册操作,机器却不能正常工作时。 E:当机器被摔落,造成机壳损坏时。 F: 当打印机特性明显变坏,需要维修时。
得力DL-886AW蓝牙标签打印机说明书

标签打印机用户手册目录手册信息 (1)安全须知 (2)第1章产品简介 (5)1.1 开箱清单 (5)1.2 外观及组件 (6)1.3 产品尺寸 (7)第2章产品规格 (9)第3章安装和使用 (11)3.1 安装介质 (11)3.2 电源连接 (14)3.3 接口连接 (15)3.4 操作面板 (16)3.5 基本功能使用 (18)3.5.1 开机/关机 (18)3.5.2 走纸 (18)3.5.3 打印测试 (19)3.5.4 标签学习 (20)第4章接口 (21)第5章清洁打印机 (22)5.1 清洁打印头 (22)5.2 清洁传感器、胶辊和纸张路径 (22)附录1:电子信息产品污染控制的说明 (23)手册信息本用户手册包含产品使用、安装等基本信息。
以下手册对各种技术问题和领域有更为详细的介绍。
安全须知在操作使用打印机之前,请仔细阅读下面的注意事项,以免发生人身伤害或设备损坏。
1.安全警告标志——警告:必须遵守,以免伤害人体,损坏设备。
——注意:给出了打印机操作的重要信息及提示。
2.安全注意事项警告:违反以下事项可能会导致严重的伤亡事故。
1)不要同时将几个插头插入一个多孔电源插座中。
•这会导致过热和火灾。
•如果插头潮湿或者肮脏,请在使用前烘干或者擦拭干净。
•如果插头与电源插座不配套,请不要插上电源。
•只能使用标准化的多孔电源插座。
2)您只能使用本包装中供应的适配器。
•使用其它适配器十分危险。
3)不要通过拉扯连接线的方式拔插头。
•这可能损坏连接线,造成火灾或者打印机故障。
4)不要在手潮湿的时候,插入或者拔出电源插头。
•这可能导致触电。
5)不要用力弯曲连接线,或者将其置于重物之下。
•连接线损坏后,可能造成火灾。
注意:违反以下事项可能造成轻伤或损坏设备。
1)如果发现打印机不明原因地冒烟、发出气味或者噪音,请拔下插头,再采取急救措施。
•关闭打印机,拔下设备的插头。
•在烟消失后,电话联系经销商进行维修。
得力DL-220B微型针式打印机用户手册 说明书

DL-220D/DL-220B用户手册V1.0安全指引请在使用本产品前仔细阅读本手册,不要执行本手册中没有明确说明的操作。
未经授权的操作会导致错误或意外。
制造商对因错误操作而导致打印机出现的任何问题均不负责。
为了避免受到电击和伤害及防止损坏打印机,在接上电源之前,务请注意以下重要事项:●仔细阅读操作手册等说明文件。
●打印机必须平放在固定的台面上。
●避免震动、碰撞、高温和阳光直射、灰尘等。
●请勿将打印机置于潮湿的环境中,请勿让雨水等任何液体沾湿打印机。
●打印机应安放在接近插座的地方,方便操作者进行电源插头的拔插操作。
●确保电源的电压值与打印机所规定的电压值一致,避免与电冰箱等大功率或有干扰的电器同一电源。
●为保证安全操作,三脚插头必须插进三孔交流电源插座中,其中地线必须有效接地。
●电源延长线必须为三芯并正确连接,以提供接地。
●若交流电源插座与打印机插头不匹配,请更换合适的交流电源插座,以保证人员、设备的安全使用。
●连接打印机通讯电缆时,请先关闭打印机和计算机的电源,选用适合的联机电缆将打印机和计算机连接起来,并锁定卡口和旋紧螺丝。
●请勿接触打印头外壳,以防止高温伤害。
●清洁打印机前,先关闭电源开关,从电源插座拔掉电源插头。
用软棉绒布沾少量中性清洁剂或酒精,轻抺打印机外部。
●如遇打印机发生故障,除认可的合格技术员外,不可擅自进行维修工作。
注:本手册内容如有更改,恕不另行通知。
目录第一章安装打印机 (4)1.1 开箱和检查 (4)1.2 放置打印机 (5)1.3 打印机部件 (6)1.4 打印机与主机连接 (7)1.5 连接电源 (8)1.6 安装纸卷 (9)1.7 安装色带 (10)1.8 安装驱动程序 (10)第二章控制面板操作 (14)2.1 指示灯 (14)2.2 走纸键 (14)第三章参数设置 (15)3.1如何进行参数设置 (15)3.2自检打印 (16)3.3系统设置 (17)3.4接口设置 (17)3.5纵向校正 (18)3.6十六进制 (18)3.7恢复出厂设置 (19)3.8安装智能助手工具 (20)第四章功能设置 (23)4.1 黑标设置 (23)4.1.1 黑标规格 (23)4.1.2 运行设置工具 (23)4.1.3 设置打印起始位置 (24)4.1.4 设置切纸位置 (25)4.1.4 设置黑标间距 (26)4.2 驱动属性设置 (26)4.2.2 钱箱设置 (26)4.2.3 黑标设置 (27)4.2.4 切刀设置 (27)第五章程序更新 (28)5.1 程序更新 (28)第六章故障处理 (30)6.1 指示灯与蜂鸣器 (30)6.2 打印错误 (30)6.3 卡纸处理 (31)6.4 清洁保养 (31)第七章规格参数与性能指标 (32)7.1 打印机规格 (32)7.2 通讯接口引脚 (33)7.2.1 USB接口 (33)7.2.2 钱箱接口 (33)7.2.3 串行接口 (34)7.2.4 并行接口 (34)7.3 电源适配器 (36)7.4 纸张规格 (37)第八章字符集 (38)8.1 通用代码页 (国际字符集: USA) (38)8.2 [PC437: USA, 欧洲标准] (39)8.3 [PC850: 多国文字] (40)8.4 [PC860: 葡萄牙文] (41)8.5 [PC863: 加拿大文-法文] (42)8.6 [PC865: 北欧文] (43)8.7 [PC858: 欧文] (44)8.8 [PC866: 古斯拉夫文 #2] (45)8.9 [KU42: 泰文] (46)8.10 [PC862: 希伯来文] (47)8.11 [PC737: 希腊文] (48)8.12 [PC864: 阿拉伯文] (49)8.13 [PC857: 土耳其文] (50)第九章指令集 (51)9.1 字符控制命令 (52)9.2 打印控制命令 (55)9.3 点图命令 (58)9.4 汉字命令 (59)9.5 黑标及切刀控制命令 (61)9.6 其他命令 (63)附录:电子信息产品污染控制的说明 (65)第一章 安装打印机1.1 开箱和检查打开纸箱,取出打印机并拆除保护材料。
休闲裤贴袋机 Chino Pocket Setter (MB1002D-1-S7300A-305P)
休闲裤贴袋机Chino Pocket Setter (MB1002D-1-S7300A-305P)使用说明书Instruction Manual常州智谷机电科技有限公司CHANGZHOU WISDOM &VALLEY ELECTRICAL TECHNOLOGY CO.,LTD在使用本设备之前请先阅读本使用说明书Please read the operation manual of the touch screen interface before using the device 请将本使用说明书放在便于查阅的地方保管Please keep this operation manual of touch screen interface in convenient placeforreference2020.03版本信息/Version感谢购买IMB工业用缝纫机。
在使用此机器之前,请仔细阅读以下的说明,这样可以更好地帮到您了解此机器的相关操作。
这些说明是根据现行的条例明确阐述了正确的工作方法。
Thank you for purchasing this industrial sewing machine from IMBBefore using this automatic unit,please read the following instructions,which will help you tounderstand how the machine operates.These instructions illustrate the correct working methods to comply with current regulations.在没有得到IMB授权许可的前提下,此说明书的任何部分是不可以被复制或者转录的。
说明书的内容可能被修改,而不需预先通知。
No part of this manual may be copied or transcribed without requesting prior authorization from IMBThe contents of this manual may be subject to change without advance notification.我们将欣然接受各位提出的改进此说明书的任何建议和指示We are happy to receive suggestions and/or indications on ways we could improve this manual.本机介绍说明分为三部分,具体请参照《MB1002D休闲裤贴袋机-使用说明书》、《MB1002D休闲裤贴袋机-零件手册》、《MB1002D休闲裤贴袋机-触摸屏界面操作说明》。
精益A380扫描仪使用说明书

第一章、安装扫描仪.............................................................................................7 软件安装需求 .............................................................................................................. 7 硬件需求 ..................................................................................................................... 7 安装与设定扫描仪 ....................................................................................................... 7 第一步、解除扫描仪安全保护锁 ........................................................................................... 8 第二步、连接您的扫描仪和计算机 ....................................................................................... 8 第三步、安装软件 ................................................................................................................. 9 第四步、测试扫描仪 ........................................................................................................... 11 安装其它软件 ............................................................................................................ 12
自动打标贴标设备操作手册说明书

自动打标贴标设备操作手册打标贴标设备操作手册深圳艾易欧自动化装备有限公司2021年11月29日更新艾易欧科技w ww .i ee oo .c om目录第一章安全 (3)1.1内容....................................................................................................................................31.2安全装置的位置................................................................................................................41.3安全装置的功能................................................................................................................41.4潜在危险............................................................................................................................51.5安全预防............................................................................................................................5第二章设备组成 (8)2.1内容....................................................................................................................................82.2整机外观与功能概况........................................................................................................9第三章设备各部件.......................................................................................................................11第四章电源开启/关闭流程 (12)4.1内容..................................................................................................................................124.2开启电源检查表..............................................................................................................124.3关闭电源检查表..............................................................................................................134.4开启设备流程..................................................................................................................134.5关停设备流程..................................................................................................................134.6注意事项..........................................................................................................................14第五章打印机设置.. (15)5.1打印机组成介绍..............................................................................................................155.2打印机驱动介绍..............................................................................................................165.3打印机模式设置..............................................................................................................175.4打印机标签位置设置........................................................................................................18第六章PLC 逻辑信号介绍 (19)6.1PLC 逻辑介绍.....................................................................................................................196.2PLC 信号介绍.....................................................................................................................19第七章打标贴标软件介绍.. (21)7.1软件主界面介绍..............................................................................................................217.2软件主功能介绍..............................................................................................................237.3软件配置事项..................................................................................................................327.4故障检查处理..................................................................................................................32第八章与上位机通信协议.. (33)8.1与拍照机的通信协议概述................................................................................................33第九章常见问题与解决方法.......................................................................................................35第十章支持与反馈.. (40)艾易欧科技w ww .i ee oo .c om1.1内容介绍安全装置的位置(EMO、设备电源开关、一体机电脑电源开关)。
佳博GP-76XX针式打印机安装使用手册

40CPL(7×9)/33CPL(9×9) ● 打印速度:4.5 字符行/秒 ● 走纸速度:120 毫米/秒
IMPACT DOT-MATRIX RECEIPT PRINTER
3
● 打印机接口:
串行接口: D-SUB 25 线插座(孔型),通讯波特率为 4800bps、9600bps、 19200bps 或 38400bps 可选(可通过 DIP 开关调整),数据结 构为无奇偶校验,8 位数据位,1 位停止位,支持 RTS/CTS 及 XON/XOFF 握手协议
4T200 4T300 系列 桌上型 热感式/热转式 条形码打印机 使用手册说明书
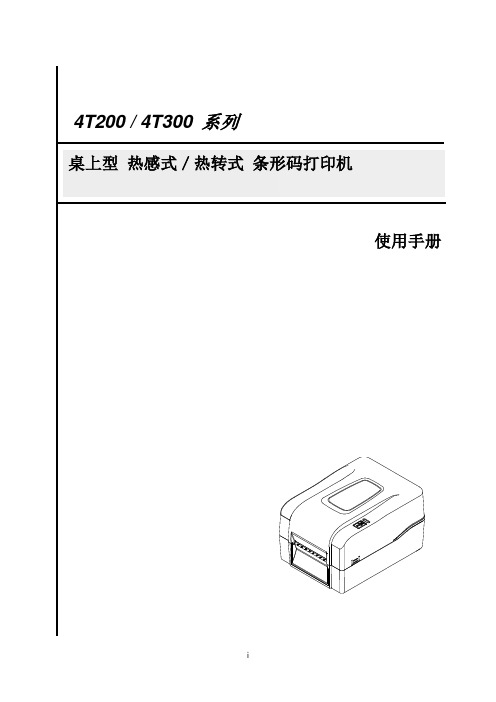
4T200 / 4T300 系列桌上型热感式/热转式条形码打印机使用手册©2016 鼎翰科技股份有限公司本手册和手册中所述的条形码打印机软件和韧体版权均归鼎翰科技股份有限公司所有。
本手册提供购买设备的操作者参考和使用,未经明确的书面许可,不得为了其他目的使用、复制。
所有其他品牌名称、产品名称或商标,利属于其他个别拥有者。
因持续产品的改进,故手册中所述的机种规格、配件、零件、设计及程序内容以实机为主,如有变更,恕不另行通知。
zenpert先擘尽力确保手册内容正确无误,但错误在所难免。
zenpert先擘保留更正任何这类错误的权利,并声明不对因此所造成的后果负责。
EN 55032, Class AEN 55024EN 60950-1This is a class A product. In a domestic environment this product may cause radio interference in which case the user may be required to take adequate measures.FCC part 15B, Class AICES-003, Class AThis equipment has been tested and found to comply with the limits for a Class A digital device, pursuant to Part 15 of the FCC Rules. These limits are designed to provide reasonable protection against harmful interference when the equipment is operated in a commercial environment.This equipment generates, uses, and can radiate radio frequency energy and, if not installed and used in accordance with the manufacturer’s instruction manual, may cause harmful interference with radio communications. Operation of this equipment in a residential area is likely to cause harmful interference, in which case you will be required to correct the interference at your own expense.This Class A digital apparatus complies with Canadian ICES-003.Cet appareil numérique de la classe A est conform à la norme NMB-003 du Canada.This device complies with Part 15 of the FCC Rules. Operation is subject to the following two conditions: (1) This device may cause harmful interference, and (2) this device must accept any interference received, including interference that may cause undesired operation.AS/NZS CISPR 32, Class AGB 4943.1GB 9254, Class AGB 17625.1此为在这种情况下,可能需要用户对干扰采取切实可行的措施。
380控制箱说明书

智能控制箱的安装及操作,一定要严格遵守国家电工操作规程,请勿带电作业。务必请具有资质的专业操作 人员进行,否则有可能出现触电事故! 图示说明:本说明书中出现的警示图示,表示下面的含义:
该标识表示与操作人员和设备安全有关的提示,操作前请认真阅读本说明书中的相关内容。
该标识表示与用电安全有关的提示。其操作必须由专业的操作人员进行操作,操作前必须详细阅读并理 解本说明书里的相关内容。
请妥善保存本说明书,以备必要时进行查阅。
1.3 型号说明
ECP 系列智能水泵控制箱型号说明 例:ECP3300211-BC,ECP 系列智能水泵控制箱,3 相 380V 供电,3KW, 一控二,带 BA 节点和 RS485 远程通讯功能。
注意:客户订货时和开始使用前,请确认您需要
的型号和此一致。
1.5 主要技术参数
序号
特征
1 适用功率
2 设备尺寸
3 控制方式
4 液位控制方式
内容 0.75~7.5KW(请参考控制器标签) 385x240x150mm 手动控制/自动控制 浮球开关/电极探头/远程压力表/压力开关/流量开关
5 工作电压
6 工作频率 7 空载(干转)保护动作时间 8 空载故障重启时间 9 过载保护动作时间 10 堵转动作时间 11 超压/欠压动作时间 12
超压/欠压动作电压
13 相序保护动作时间 14 缺相动作时间 15 电流不平衡保护动作时间 16 防锈巡检 17 功率损耗 18 报警输出负载 19 液位控制传输距离 20 远程通讯 21 安装组件 22 外壳材质 23 防护等级 24 安装环境
三相 AC380V 单相 AC220V 50HZ/60HZ ≤20 秒 0~999 分钟可调,默认 30 分钟 5 秒→6 分钟(反时限特性:电流越大时间越短) ≤1.5 秒 ≤5 秒,恢复时间:20 秒 三相 380V 超压/欠压动作电压:450V/350V 单相 220V 超压/欠压动作电压:250V/180V ≤3 秒 ≤3 秒 ≤ 3 秒 支持 静态功率:4W 动态功率:8W 声光报警,可选 BA 干接点:AC250V5A,DC30V5A ≤500 米 可选 RS485 EASYINSTALL 隐藏式安装组件,安装更方便,整体更美观 工程塑料外壳 IP54 室内或室外,避免太阳直接暴晒或者淋雨
鸿锋 340 380 四 八端口固定式读写器 用户手册说明书

HF340/380鸿锋340/380四/八端口固定式读写器用户手册欢迎您成为鸿陆技术的用户!感谢选择多端口读写器鸿锋340/380希望给您的工作带来便利目录目录 (3)一、技术规格 (5)1.1产品特点 (5)1.2主要功能及技术性能 (5)1.2.1主要功能 (5)1.2.2性能参数 (5)1.2.3工作环境 (6)二、示意图 (7)2.1结构外形尺寸 (7)2.2重量参数 (7)2.3接口示意图 (7)2.3.1电源、通信及I/O接口 (7)2.3.2I/O接口定义 (8)2.3.3外接射频线缆说明(选配) (11)2.3.4网络应用连接示意图 (11)三、安装说明 (12)3.1注意事项 (12)3.2安装条件 (13)3.3设备连接 (13)3.3.1连接电源适配器或PoE交换机 (13)a.连接电源适配器 (13)b.连接PoE交换机 (13)3.3.2连接外部天线和射频电缆 (14)3.3.3连接PC机 (14)3.4安装设备 (15)3.5验收 (15)3.5.1结构验收 (15)3.5.2性能验收 (15)四、网页操作说明 (16)4.1系统登录 (16)4.1.1登录 (16)4.1.2系统导航 (16)4.2参数配置 (17)4.2.1天线配置 (17)4.2.2RFID配置 (18)4.2.3网络配置 (19)4.2.4高级输出配置 (20)4.2.5GPI配置 (21)4.2.5Web参数配置示例 (22)4.3系统管理 (25)4.3.1系统管理 (25)4.3.1.1时钟同步 (26)4.3.1.2应用软件升级 (26)4.3.1.3基带软件升级 (28)4.3.2密码修改 (30)五、常见故障 (31)5.1日常维护 (31)5.2常见故障分析及解决 (31)六、包装附件及运输和存储 (33)6.1 (33)6.2附件 (33)6.3存储要求 (34)七、售后服务 (35)一、技术规格1.1产品特点HF340/380是一款高性能超高频多端口固定式RFID读写设备,支持ISO18000-6C/6B、GB/T29768、GJB7377.1协议,工作频段支持国标双频920MHz~925MHz、840MHz~845MHz和FCC,902MHz~928MHz以及ETSI,865MHz~868MHz,输出功率0dBm~35dBm可调,具有识别距离远、速度快、多标签识别能力超强、抗干扰能力强、防护性能高和安装使用方便等特点。
得力DL-950K针式打印机操作手册 说明书

绪 言承蒙惠顾,购得DL-950K打印机。
操作手册详细阐述了本机的性能及操作方法,能指导您正确使用。
当您遇到疑问或机器发生故障时,此手册会带给您很大的帮助。
DL-950K在硬件方面别具特色,其采用高速打印头设计,打印速度高达225汉字/秒,打印头寿命达4亿次/针。
同时具备光栅定位、纸边界自动定位、击打力自动调整等多种智能化功能,轻松实现各类票据打印。
软件方面,DL-950K兼容所有STAR、EPSON和OKI 打印机,拥有打印针调整和断针自动补偿功能等技术,方便的自动撕纸、参数设置是其特色功能。
DL-950K外观时尚、性能强大、可靠性高,是税务、企业财务、保险、电信等行业部门用户的理想选择。
本产品信息如有更改,恕不另行通知。
本资料仅供参考。
除中国现行法律法规规定,得力集团不承担任何由于使用本资料而造成的直接或间接损失的责任。
得力集团保留最终解释权。
目 录第1章安装打印机 ...................................... 1-11.1开箱和检查 ...................................... 1-11.2放置打印机 ...................................... 1-21.3打印机部件 ...................................... 1-31.4载纸板的安装及拆卸 .............................. 1-51.5安装和拆卸色带盒 ................................ 1-61.6打印机和主机连接 ................................ 1-91.7连接电源 ....................................... 1-111.8安装打印驱动程序 ............................... 1-12第2章纸的安装和使用 .................................. 2-12.1选纸 ............................................ 2-12.2调校打印头间隙 .................................. 2-12.3使用单页纸 ...................................... 2-22.4使用链式纸 ...................................... 2-4第3章控制面板 ....................................... 3-13.1按钮及其指示灯 .................................. 3-13.2开机功能 ........................................ 3-33.3组合功能 ........................................ 3-63.4设置模式下的按键功能 ............................ 3-9第4章参数设置 ....................................... 4-14.1如何进行参数设置 ................................ 4-24.2系统设置 ........................................ 4-34.3纸张设置 ........................................ 4-74.4接口设置 ....................................... 4-144.5仿真设置 ....................................... 4-144.6其他设置 ....................................... 4-164.7黑标调整模式 ................................... 4-184.8纵向校正 ....................................... 4-204.9恢复出厂设置 ................................... 4-21第5章票据通设置和使用 ................................ 5-15.1票据通设置 ...................................... 5-15.2票据通的使用 .................................... 5-3第6章自定义页面 ...................................... 6-16.1摩擦纸页长调整 .................................. 6-26.2摩擦纸页首调整 .................................. 6-36.3摩擦纸左边界调整 ................................ 6-46.4摩擦纸底空调整 .................................. 6-56.5链式纸页长调整 .................................. 6-66.6链式纸页首调整 .................................. 6-76.7链式纸左边界调整 ................................ 6-86.8链式纸底空调整 .................................. 6-96.9撕纸位置调整 ................................... 6-10第7章故障和保养 ...................................... 7-17.1故障处理 ........................................ 7-17.2保养与维护 ...................................... 7-6第8章规格 ........................................... 8-18.1打印机规格 ...................................... 8-18.2接口接头引脚 .................................... 8-48.3字符集 ......................................... 8-108.4控制码摘要表 ................................... 8-168.4.1 ESC/P和LQ仿真控制码摘要表 ..................... 8-168.4.2OKI仿真控制码摘要表............................ 8-20附录1:电子电气产品有害物质限制使用的说明 ............. 9-1安全规范企业公开信息:1.售后服务请致电得力全国服务热线:400-185-05552.产品能耗:a. 本产品符合GB21521-2014《打印机、传真机能效限定值及能效等级》一级能效等级最高要求。
快速安装手册-北京炜煌科技发展有限公司说明书
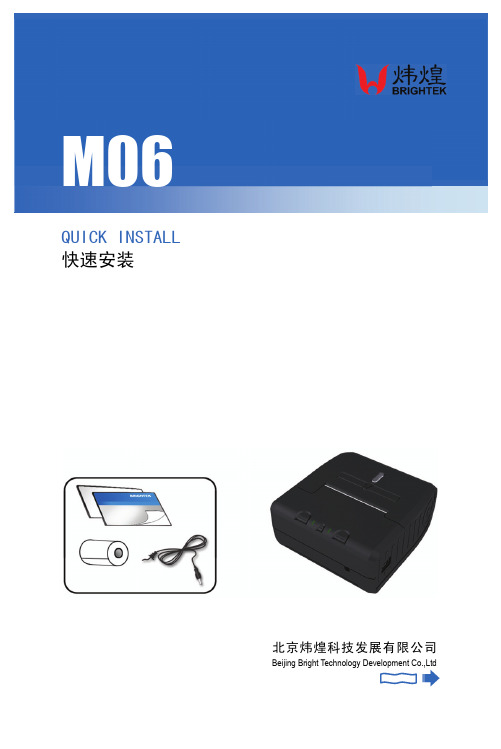
QUICK INSTALL 快速安装 北京炜煌科技发展有限公司Beijing Bright Technology Development Co.,Ltd快速安装手册●打印机各部件一览 Printer Parts Names1.纸仓盖 Paper Case Cover2.打印纸 Paper Roll3.色带 Ribbon4.电源指示灯 Power Indicator5.红外接口 IR Port6.电源开关 Power Button7.充电电源接口 Power Connector8.电池盖 Battery Cover9.电池 Battery 10.LF 键 LF Button 11.状态指示灯Status Indicator 12.SEL 键 SEL Button按钮开关的操作及指示灯开机:打印机按住电源开关3秒钟,电源打开。
工作状态指示灯闪亮。
少于3秒钟电源不动作。
关机:在开机状态,按压电源开关3秒钟,电源关闭,工作状态指示灯熄灭。
少于3秒钟电源不动作。
走纸:按压走纸键(LF 键),按下开始进纸,放开停止进纸。
自检测方式关机状态下按压走纸键(LF)键,然后开机,可以打印自检。
Operation SpecificationAfter press the power button and hold on for 3 seconds, then the power is on. The status indicator flashes.In the power-on state, press the power button and hold on for 3 seconds, then the power is off. The status indicator light turns off.Press the paper feed button (LF button), the printer starts feeding paper. If release the button, it will stop feeding paper. The Self TestIn the power-off state, press the paper feed button (LF button), notrelease and power on. Then the printer will print self-check scrip.快速安装手册●尺寸 SizeWH-M06型尺寸 Product Size:外形尺寸 Outline Dimension: 115.5mm×100mm×46mm●安装 Installation安装方法:如图推开电池盖,将电池下端两个卡位卡入打印机内,并用力将另一端扣入,电池盖推回即可。
24 针 80 列高速商用打印机 说明书
操作手册24针80列高速商用打印机目录第一章如何安装打印机⋅⋅⋅⋅⋅⋅⋅⋅⋅⋅⋅⋅⋅⋅⋅⋅⋅⋅⋅⋅⋅⋅⋅⋅⋅⋅⋅⋅⋅⋅⋅⋅⋅⋅⋅⋅⋅⋅⋅⋅⋅⋅⋅⋅⋅⋅⋅⋅⋅⋅⋅⋅⋅⋅⋅⋅⋅⋅⋅1-1 1-1打印机放置环境的选择⋅⋅⋅⋅⋅⋅⋅⋅⋅⋅⋅⋅⋅⋅⋅⋅⋅⋅⋅⋅⋅⋅⋅⋅⋅⋅⋅⋅⋅⋅⋅⋅⋅⋅⋅⋅⋅⋅⋅⋅⋅⋅⋅⋅⋅⋅⋅⋅1-1 1-2打印机的开箱检查⋅⋅⋅⋅⋅⋅⋅⋅⋅⋅⋅⋅⋅⋅⋅⋅⋅⋅⋅⋅⋅⋅⋅⋅⋅⋅⋅⋅⋅⋅⋅⋅⋅⋅⋅⋅⋅⋅⋅⋅⋅⋅⋅⋅⋅⋅⋅⋅⋅⋅⋅⋅⋅⋅⋅1-2 1-3打印机外形结构⋅⋅⋅⋅⋅⋅⋅⋅⋅⋅⋅⋅⋅⋅⋅⋅⋅⋅⋅⋅⋅⋅⋅⋅⋅⋅⋅⋅⋅⋅⋅⋅⋅⋅⋅⋅⋅⋅⋅⋅⋅⋅⋅⋅⋅⋅⋅⋅⋅⋅⋅⋅⋅⋅⋅⋅⋅⋅⋅1-3 1-4安装打印机⋅⋅⋅⋅⋅⋅⋅⋅⋅⋅⋅⋅⋅⋅⋅⋅⋅⋅⋅⋅⋅⋅⋅⋅⋅⋅⋅⋅⋅⋅⋅⋅⋅⋅⋅⋅⋅⋅⋅⋅⋅⋅⋅⋅⋅⋅⋅⋅⋅⋅⋅⋅⋅⋅⋅⋅⋅⋅⋅⋅⋅⋅⋅⋅⋅⋅1-5 1-5使用连续穿孔打印纸⋅⋅⋅⋅⋅⋅⋅⋅⋅⋅⋅⋅⋅⋅⋅⋅⋅⋅⋅⋅⋅⋅⋅⋅⋅⋅⋅⋅⋅⋅⋅⋅⋅⋅⋅⋅⋅⋅⋅⋅⋅⋅⋅⋅⋅⋅⋅⋅⋅⋅⋅⋅1-8 1-6以平推方式使用单张纸或多层纸⋅⋅⋅⋅⋅⋅⋅⋅⋅⋅⋅⋅⋅⋅⋅⋅⋅⋅⋅⋅⋅⋅⋅⋅⋅⋅⋅⋅⋅⋅⋅⋅1-12 1-7接口电缆连接⋅⋅⋅⋅⋅⋅⋅⋅⋅⋅⋅⋅⋅⋅⋅⋅⋅⋅⋅⋅⋅⋅⋅⋅⋅⋅⋅⋅⋅⋅⋅⋅⋅⋅⋅⋅⋅⋅⋅⋅⋅⋅⋅⋅⋅⋅⋅⋅⋅⋅⋅⋅⋅⋅⋅⋅⋅⋅⋅⋅⋅1-14 1-8打印机纸厚调杆的设置⋅⋅⋅⋅⋅⋅⋅⋅⋅⋅⋅⋅⋅⋅⋅⋅⋅⋅⋅⋅⋅⋅⋅⋅⋅⋅⋅⋅⋅⋅⋅⋅⋅⋅⋅⋅⋅⋅⋅⋅⋅⋅⋅⋅⋅⋅1-16 第二章打印机控制面板⋅⋅⋅⋅⋅⋅⋅⋅⋅⋅⋅⋅⋅⋅⋅⋅⋅⋅⋅⋅⋅⋅⋅⋅⋅⋅⋅⋅⋅⋅⋅⋅⋅⋅⋅⋅⋅⋅⋅⋅⋅⋅⋅⋅⋅⋅⋅⋅⋅⋅⋅⋅⋅⋅⋅⋅⋅⋅⋅2-1 2-1脱机状态下的面板功能操作⋅⋅⋅⋅⋅⋅⋅⋅⋅⋅⋅⋅⋅⋅⋅⋅⋅⋅⋅⋅⋅⋅⋅⋅⋅⋅⋅⋅⋅⋅⋅⋅⋅⋅⋅⋅⋅⋅⋅⋅⋅2-2 2-2面板操作开机功能⋅⋅⋅⋅⋅⋅⋅⋅⋅⋅⋅⋅⋅⋅⋅⋅⋅⋅⋅⋅⋅⋅⋅⋅⋅⋅⋅⋅⋅⋅⋅⋅⋅⋅⋅⋅⋅⋅⋅⋅⋅⋅⋅⋅⋅⋅⋅⋅⋅⋅⋅⋅⋅⋅⋅2-7 第三章 EDS设置⋅⋅⋅⋅⋅⋅⋅⋅⋅⋅⋅⋅⋅⋅⋅⋅⋅⋅⋅⋅⋅⋅⋅⋅⋅⋅⋅⋅⋅⋅⋅⋅⋅⋅⋅⋅⋅⋅⋅⋅⋅⋅⋅⋅⋅⋅⋅⋅⋅⋅⋅⋅⋅⋅⋅⋅⋅⋅⋅⋅⋅⋅⋅⋅⋅⋅⋅⋅⋅⋅⋅3-1 3-1如何操作EDS方式⋅⋅⋅⋅⋅⋅⋅⋅⋅⋅⋅⋅⋅⋅⋅⋅⋅⋅⋅⋅⋅⋅⋅⋅⋅⋅⋅⋅⋅⋅⋅⋅⋅⋅⋅⋅⋅⋅⋅⋅⋅⋅⋅⋅⋅⋅⋅⋅⋅⋅⋅⋅⋅⋅⋅⋅3-2 3-2 EDS设置功能⋅⋅⋅⋅⋅⋅⋅⋅⋅⋅⋅⋅⋅⋅⋅⋅⋅⋅⋅⋅⋅⋅⋅⋅⋅⋅⋅⋅⋅⋅⋅⋅⋅⋅⋅⋅⋅⋅⋅⋅⋅⋅⋅⋅⋅⋅⋅⋅⋅⋅⋅⋅⋅⋅⋅⋅⋅⋅⋅⋅⋅⋅⋅3-5 3-3横向点调整模式操作⋅⋅⋅⋅⋅⋅⋅⋅⋅⋅⋅⋅⋅⋅⋅⋅⋅⋅⋅⋅⋅⋅⋅⋅⋅⋅⋅⋅⋅⋅⋅⋅⋅⋅⋅⋅⋅⋅⋅⋅⋅⋅⋅⋅⋅⋅⋅⋅⋅⋅3-15 第四章打印机控⋅⋅⋅⋅⋅⋅⋅⋅⋅⋅⋅⋅⋅⋅⋅⋅⋅⋅⋅⋅⋅⋅⋅⋅⋅⋅⋅⋅⋅⋅⋅⋅⋅⋅⋅⋅⋅⋅⋅⋅⋅⋅⋅⋅⋅⋅⋅⋅⋅⋅⋅⋅⋅⋅⋅⋅⋅⋅⋅⋅⋅⋅⋅⋅⋅⋅⋅⋅⋅⋅4-1第五章维护与保养⋅⋅⋅⋅⋅⋅⋅⋅⋅⋅⋅⋅⋅⋅⋅⋅⋅⋅⋅⋅⋅⋅⋅⋅⋅⋅⋅⋅⋅⋅⋅⋅⋅⋅⋅⋅⋅⋅⋅⋅⋅⋅⋅⋅⋅⋅⋅⋅⋅⋅⋅⋅⋅⋅⋅⋅⋅⋅⋅⋅⋅⋅⋅⋅⋅⋅5-1 5-1一般保养与使用注意事项⋅⋅⋅⋅⋅⋅⋅⋅⋅⋅⋅⋅⋅⋅⋅⋅⋅⋅⋅⋅⋅⋅⋅⋅⋅⋅⋅⋅⋅⋅⋅⋅⋅⋅⋅⋅⋅⋅⋅⋅⋅⋅⋅⋅⋅5-1 5-2一般故障与简单处理⋅⋅⋅⋅⋅⋅⋅⋅⋅⋅⋅⋅⋅⋅⋅⋅⋅⋅⋅⋅⋅⋅⋅⋅⋅⋅⋅⋅⋅⋅⋅⋅⋅⋅⋅⋅⋅⋅⋅⋅⋅⋅⋅⋅⋅⋅⋅⋅⋅⋅⋅⋅5-3 第六章附录⋅⋅⋅⋅⋅⋅⋅⋅⋅⋅⋅⋅⋅⋅⋅⋅⋅⋅⋅⋅⋅⋅⋅⋅⋅⋅⋅⋅⋅⋅⋅⋅⋅⋅⋅⋅⋅⋅⋅⋅⋅⋅⋅⋅⋅⋅⋅⋅⋅⋅⋅⋅⋅⋅⋅⋅⋅⋅⋅⋅⋅⋅⋅⋅⋅⋅⋅⋅⋅⋅⋅⋅⋅⋅⋅⋅⋅6-1 6-1打印机规格⋅⋅⋅⋅⋅⋅⋅⋅⋅⋅⋅⋅⋅⋅⋅⋅⋅⋅⋅⋅⋅⋅⋅⋅⋅⋅⋅⋅⋅⋅⋅⋅⋅⋅⋅⋅⋅⋅⋅⋅⋅⋅⋅⋅⋅⋅⋅⋅⋅⋅⋅⋅⋅⋅⋅⋅⋅⋅⋅⋅⋅⋅⋅⋅⋅⋅6-1 6-2并行接口引脚功能⋅⋅⋅⋅⋅⋅⋅⋅⋅⋅⋅⋅⋅⋅⋅⋅⋅⋅⋅⋅⋅⋅⋅⋅⋅⋅⋅⋅⋅⋅⋅⋅⋅⋅⋅⋅⋅⋅⋅⋅⋅⋅⋅⋅⋅⋅⋅⋅⋅⋅⋅⋅⋅⋅⋅6-3 6-3 SPC-8K串行接口引脚功能⋅⋅⋅⋅⋅⋅⋅⋅⋅⋅⋅⋅⋅⋅⋅⋅⋅⋅⋅⋅⋅⋅⋅⋅⋅⋅⋅⋅⋅⋅⋅⋅⋅⋅⋅⋅⋅⋅⋅⋅⋅⋅⋅6-4 6-4 SPC-8K串行接口DIP开关设置⋅⋅⋅⋅⋅⋅⋅⋅⋅⋅⋅⋅⋅⋅⋅⋅⋅⋅⋅⋅⋅⋅⋅⋅⋅⋅⋅⋅⋅⋅⋅⋅⋅⋅⋅⋅⋅⋅6-4 6-5控制码摘要表⋅⋅⋅⋅⋅⋅⋅⋅⋅⋅⋅⋅⋅⋅⋅⋅⋅⋅⋅⋅⋅⋅⋅⋅⋅⋅⋅⋅⋅⋅⋅⋅⋅⋅⋅⋅⋅⋅⋅⋅⋅⋅⋅⋅⋅⋅⋅⋅⋅⋅⋅⋅⋅⋅⋅⋅⋅⋅⋅⋅⋅⋅6-6 6-6打印机字符集⋅⋅⋅⋅⋅⋅⋅⋅⋅⋅⋅⋅⋅⋅⋅⋅⋅⋅⋅⋅⋅⋅⋅⋅⋅⋅⋅⋅⋅⋅⋅⋅⋅⋅⋅⋅⋅⋅⋅⋅⋅⋅⋅⋅⋅⋅⋅⋅⋅⋅⋅⋅⋅⋅⋅⋅⋅⋅⋅⋅⋅⋅⋅⋅⋅⋅⋅⋅⋅⋅⋅⋅⋅⋅⋅⋅6-11第一章如何安装打印机第一章如何安装打印机本章描述如何安装一台新的打印机,步骤如下:·选择放置打印机环境·开箱·安装送纸旋钮·安装盒式色带·安装打印纸·将打印机联到计算机上如果需用打印机可选附件,安装打印机后,请参考附表选件。
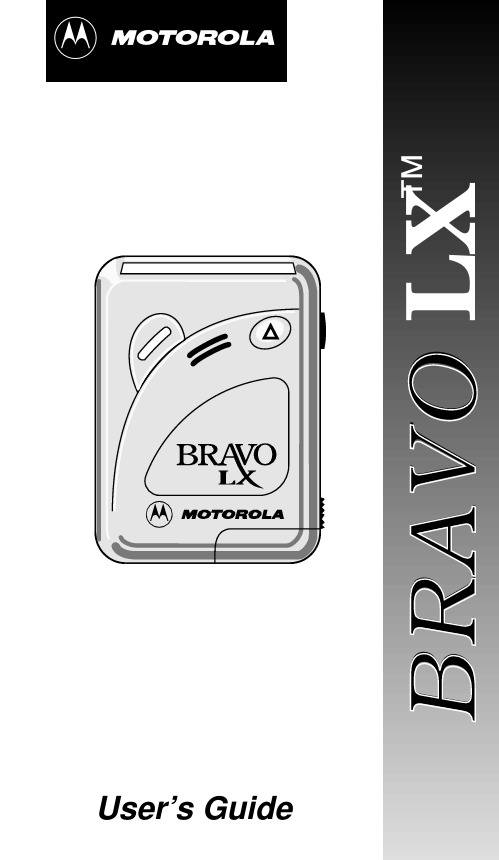
佳博BRAVO LX 便携式呼叫器使用手册说明书
CONTENTSPage Introduction (1)Controls (1)Turning Your Pager On (2)Turning Your Pager Off (2)Receiving and Reading Messages (3)Turning the Light On and Off (4)Changing Alert Modes (4)Selecting an Audible Alert (5)Setting the Time (5)Setting the Alarm (6)Setting the Date (6)Saving Messages (7)Erasing Messages (7)Selective Erasing of Messages (7)Effective Use of Your BRAVO LX Pager (8)Battery Information (8)Features (9)Cleaning Your BRAVO LX Pager (10)Repair and Maintenance (10)Patent Information (11)Congratulations on your purchase of a Motorola BRAVO LX pager. This compact pager uses many advances in electronic and wireless technology which allow you to receive numeric messages in-stantly and affordably.CONTROLSButtonsW On/Read/Select − turn pager on, read incoming messages, and select the function displayed. V Backlight/Reset − turn the display light on and reset the pager to the standby screen, whichshows time, date, alarm status, and alert status.Press V twice to reset to the standby screen. X Menu - scroll through the menu.After performing any pager function described in this user’s guide (setting the time, date, alarm, and so on), your BRAVO LX pager automatically returns to the standby screen and activates the selections you made.Function Indicators[Silent Alert − the pager alerts without audible alerts for incoming messages.D AudibleAlert− one of several pleasing audible alerts sound for an incoming message.\ Alarm− the alarm alerts you at the set time.= MessageLock− this message is locked against deletion.B ContinuousMessage− more message informa-Press W to turn your pager on.Y our pager gives an alert by either a sound or a vibra-tion, indicating it is on. After displaying the power-up screen, the time of day, the date, and an alert indica-tor are shown on the standby screen.TURNING YOUR PAGER OFFPress X until pager off? is displayed.Press W to turn your pager off.NOTE: The pager displays the time and date, but not an alert mode indicator. If the alarm is set, the alarmY our BRAVO LX pager can receive up to sixteen 20-character messages. When a message is received, the pager alerts for eight seconds.Press any button to stop the alert.Press W to display the message.Press V twice while reading your message to return to the standby screen.Messages longer than 12 characters display on a second screen, indicated by the B symbol. Press W to display the second screen. The second screen is displayed automatically after one minute, even if W is n o t p r e s s e d. The last screen of your message displays the mes-sage slot number and the time received.If a message is not read, the pager gives a reminder alert every two minutes and the screen displays the number of unread messages (i.e., 1 Page, 2 Pages) until all messages are read.If the pager receives more messages than its avail-able memory can hold, the new message replaces the oldest read, unlocked message.An overflow condition occurs when all message slots are filled with unread messages and a new message is received. Upon receipt of a message, while the pager is in the overflow condition, the oldest unread message is discarded. In this mode, the overflow in-d i c a t o r r e p l a c e s t h e d e fa u l t i d l e d i s p l ay with overflow. Messages must be read and erased to clear the overflow display.To turn the light off, press V again. The light turns off automatically two seconds after returning to the standby screen.CHANGING ALERT MODESPress X. Either silent ? or au d io ? is displayed, depending on the current mode.If au d io ? is displayed, the pager is in “Silent”mode. Press W to change to “Audible” mode. The pager chirps.If silent ? is displayed, the pager is in “Audible”mode. Press W to change to “Silent” mode. The pager vibrates.For your pager to vibrate when a message is re-ceived, it must be in “Silent” mode.SELECTING AN AUDIBLE ALERTPress X until set alert ? is displayed.Press W. The current alert number is displayed, for example: alert 3, and the pager gives a sample of the alert tone.Press X until the desired alert type is displayed.As each alert number is displayed, the pager gives a sample of the alert tone.Press W to select the alert number, set the alert tone to be used, and return to the standby screen.When messages are received, your pager gives the selected alert only when in the audible mode D. SETTING THE TIMEPress X until set time ? is displayed.Press W to set the time. The hour flashes.Press X to change the hour. Press W to switch to the minutes. The first digit of the minutes flashes. Press X to change the first minute digit. Press W to switch to the second digit. The second digit of the minutes flashes.Press X to change the second minute digit. Press W to switch to AM/PM. The a or p flashes.Press W to display the 12/24 hour screen.Press X to change the12/24 hour mode.Press V twice to return to the standby screen. SETTING THE ALARMPress X until set alarm ? is displayed.Press W to select the alarm on/off sequence. on or off flashes.Press X to turn the alarm on or off. Press W to switch to the hours. The hour flashes.Press X to change the hour. Press W to switch to the minutes. The first digit of the minutes flashes. Press X to change the first minute digit. Press W to switch to the second digit. The second digit of the minutes flashes.Press X to change the second minute digit. Press W to switch to AM/PM. The a or p flashes.Press X to change AM/PM.Press V twice to return to the standby screen. Note: Steps 6 and 7 apply when in the 12 hour mode. The symbol \ is displayed when the alarm is turned on. The pager vibrates or gives a 20-second alert and alarm is displayed at the selected time.If set, the alarm activates even when the pager is off. Press any button to stop the alarm alert.SETTING THE DATEPress X until set d ate ? is displayed.Press X until the desired month is displayed.Press W to switch to the day. The day flashes. Press X until the desired day is displayed. Press W to repeat setting the date, if needed.Press V twice to return to the standby screen. SAVING MESSAGESTo save a message, press X while reading your message. The prompt protect ? is displayed. Press W to protect the message. The symbol = indicates that your message is saved.Press X while reading the saved message to r e m o v e t h e p r o t e c t i o n.T h e p r o m p t unprotect ? is displayed.Press W to remove the protection. The symbol = is removed from the screen.Saved messages cannot be erased or overwritten by new messages when memory is full. You can save up to eight messages.ERASING MESSAGESPress X until erase all? is displayed.Press W. Your read, unprotected messages are erased. The pager returns to the standby screen. The erase all? prompt is displayed only if there are read messages in memory.SELECTIVE ERASING OF MESSAGESPress X twice while reading a message and thePress W to delete the message and return to the standby screen.Only unprotected messages can be deleted. EFFECTIVE USE OF YOUR BRAVO LX PAGER Y our BRAVO LX pager can help you keep in contact with everyone important to you. . . children or child care providers, business office, data services, and voice mail. Be sure that your children’s school, physi-cian, and friends have the number to contact you in emergencies.Give your pager number to family, friends, and asso-ciates to assure contact at any time, any place. When they call your pager number, they enter the number where they can be reached on a tone-type tele-p h o n e. T h i s nu m b e r i s t h e n d i s p l aye d o n your BRAVO LX pager.If you have a cellular phone, give your pager number instead of your cellular number. Then you can decide whom to call back, without paying for incoming cellu-lar calls. Y our BRAVO LX pager can help reduce your monthly cellular phone bill!BATTERY INFORMATIONY our BRAVO LX pager is designed to operate with an AAA-size alkaline battery. See diagram on page 2 for the battery door location. If detached from the pager, the hinged battery door can be easily snapped back into place.Backlight: In low-light conditions, the backlight makes the screen easy to read.Duplicate Messages: If the same message is re-ceived more than once, d uplicate is displayed at the beginning of the latest message. This message contains the latest timestamp and prevents a repeat-ed message from taking an extra memory slot.Low Battery Indicator: When battery power reach-es low levels, lo cell is displayed, prompting you to change the battery. All pager alerts change to two seconds in length.Message Erase: Messages can be erased all at once or selectively at your choice to free space in memory.Memory Retention: All messages remain in memo-ry, even when the pager is off and while the battery is being replaced.Memory Capacity: The BRAVO LX pager can store up to sixteen 20-character messages, for a total of 320 characters.Message Protect: Y ou can protect up to eight mes-sages stored in the pager memory.Overflow: overflow is displayed when more un-read messages are received than the available mes-sage memory can hold. After you read all of your un-read messages, the standby screen is displayed. Automatic Alert Reset: The pager alerts automati-cally stop, even if no buttons are pressed.Reminder Alert: The pager chirps or vibrates every two minutes until you read all unread messages. Standby Screen: The standby screen displays the time of day/date and the indicators.Time of Day and Day/Month: The time of day and the date display whether the pager is on or off. Timestamp: The time of day a message is received is displayed on the last screen of each message. User Selectable Audible Alerts: A selection of five alert tones gives you a choice of message alerts heard when you are paged in the audible alert mode D. CLEANING YOUR BRAVO LX PAGERT o clean the pager housing, use a soft, nonabrasive cloth moistened in a mild soap and water solution. Wipe the surface using a second cloth moistened in clean water. Do not place in water. Do not use al-cohol or other cleaning solutions.REPAIR AND MAINTENANCEY our BRAVO LX pager, properly handled, is capable of many years of trouble-free service. However, if ser-vice is required, Motorola’s Service Organization, staffed with specially trained technicians, offers con-veniently located repair and maintenance facilities throughout the country. Please contact your paging service representative or a Motorola sales office for more information.more Motorola U.S. patents. A partial listing of these patents is provided on the underside of the belt clip and on the inside surface of the back cover of the product. Other U.S. patents covering this product are pending.t, Motorola, BRAVO LX are trademarks or registeredtrademarks of Motorola, Inc.© 1995 by Motorola, Inc.All Rights Reserved.Paging Products Group1500 Gateway Blvd., Boynton Beach, FL 33426-8292Printed in U.S.A. 10/95。
MYZxA微型针式打印机使用说明书V1.02

MYZxA微型针式打印机使用说明书V1.02蚂蚁(东莞)科技发展有限公司MYZXA使用说明书目录目录 (i)一.特征与性能指标 (3)1.1主要特征 (3)1.2 性能指标 (3)1.3 型号说明 (5)二.安装说明 (5)2.1 打印机外形 (5)2.2 外观尺寸 (6)三.操作说明 (6)3.1 接口说明 (6)3.1.1 电源接口 (6)3.1.2 串行接口一 (7)3.1.3 串行接口二 (8)3.1.4 并行接口 (9)3.2 指示灯说明 (10)3.3按键操作说明 (10)3.3.1 走纸 (10)3.3.2 打印自检 (10)3.3.3 参数设置 (10)四.打印命令 (11)4.1 纸进给命令 (11)4.1.1 打印并换行 (11)4.1.2 打印并进纸 (11)4.1.3 设置行间距 (11)4.1.4 设置字间距 (11)4.1.5 换页 (12)4.2 选择字符集命令 (12)4.2.1 选择字符集1 (12)4.2.2 选择字符集2 (12)4.2.3 选择汉字打印 (12)4.3 格式设置命令 (12)4.3.1 设置页长 (12)4.3.2 设置装订长 (13)4.3.3 设置装订长 (13)4.3.4 设置垂直造表值 (13)4.3.5 执行垂直造表 (13)4.3.6 设置水平造表值 (13)4.3.7 执行水平造表 (14)4.3.8 打印空格或空行 (14)4.3.9 设置左限 (14)4.3.10 设置右限 (14)4.4 字符设置命令 (14)4.4.1 横向放大 (14)4.4.2 纵向放大 (15)MYZXA使用说明书4.4.3 横纵向放大 (15)4.4.4 字符放大一倍 (15)4.4.5 横纵向放大不同倍数 (15)4.4.6 允许/禁止上划线 (15)4.4.7 允许/禁止下划线 (15)4.4.8 选择上下标 (16)4.4.9 设置错位打印 (16)4.4.10 取消错位打印 (16)4.4.11 允许/禁止反白打印 (16)4.4.12 设置/取消反向打印 (16)4.4.13 设置纵向打印 (16)4.4.14 设置横向打印 (17)4.4.15 字符旋转打印 (17)4.4.16 设置打印方向 (17)4.5 图形打印命令 (17)4.5.1 打印点阵图形 (17)4.5.2 打印曲线 (18)4.5.3 打印条形码 (18)4.6 初始化命令 (18)4.6.1 打印机初始化 (18)4.7 数据控制命令 (18)4.7.1 回车 (18)4.7.2 允许/禁止打印 (19)五.使用与维护 (19)5.1 产品维护 (19)5.2.1 打印机使用注意事项 (19)5.2.2 打印机故障分析及排除 (19)附录西文字符集1 (20)附录西文字符集2 (21)版本说明 (21)MYZXA使用说明书一.特征与性能指标1.1主要特征◎采用针式打印方式◎采用高性能进口机芯◎集机芯与控制板于一体的独立打印模块◎体积小、外型美观、便于安装、功能完备、操作简单等特点◎自带单片机处理,具有标准的串行接口(RS232/485/TTL)接口、并口◎支持汉字、字符、图形等实时打印命令◎指令集与传统打印机兼容◎支持低功率模式打印◎广泛适用于医用器材、消防控制、工业控制、各种仪器仪表等需要打印的行业1.2 性能指标MYZXA使用说明书1.3 型号说明二.安装说明2.1 打印机外形说明:1、LF键/状态指示灯4、纸仓/纸卷2、纸仓开关5、固定架3、打印机头6、色带2.2 外观尺寸尺寸说明:外形尺寸:长X宽X高= 107.4 X 61.4 X 66.8 mm开孔尺寸:长X 宽= 102.4+0.5 mm X 56.4+0.5 mm嵌入深度:58.8 mm三.操作说明3.1 接口说明3.1.1 电源接口MYZXA打印机支持两种供电方式:1、5V /15W直流电源;2、9~24V/30W 直流电源。
佳博无热吸干机说明书(厚德控制器)1-wps)
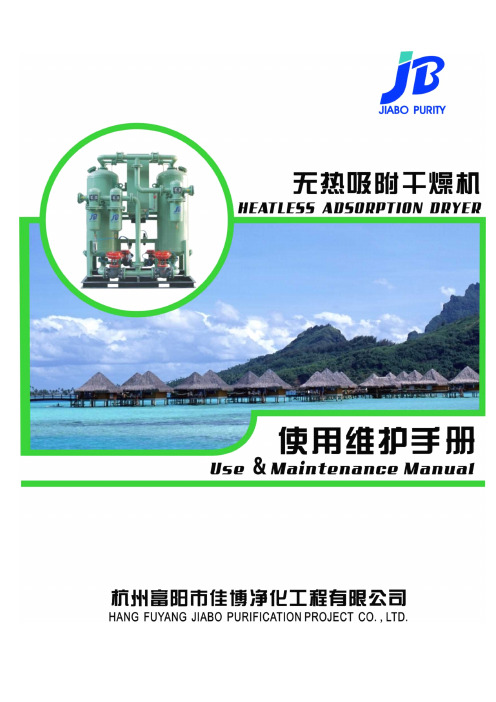
前言Preface感谢您使用富阳佳博JAL系列无热吸附式干燥机,无热吸附式干燥机是为了除去压缩空气中的水分而设计,如果安装合适,本设备基本不需要维修或调节。
本说明书包含重要的安装维护资料,为了确保机器正常、可靠运转,请务必在使用本机之前仔细阅读使用说明书,并按照说明书提供的方法进行安装维护。
Thank you for the use of Fuyang Jiabo JAL series Heatless Adsorption dryer, Heatless Adsorption dryer is designed to remove the water in the air,If you install the appropriate,This equipment does not need repair or adjust.This statement contains important information on the maintenance of the installation,In order to ensure the normal machinery,reliable operation,Please Read the Manuals carefully before use the air dryer,According to the manual provided by the method of installation and maintenance.安全规程Safety Code1、微热吸附式干燥机搬运、吊装时严禁重摔、碰撞及严重的震动。
2、需要维修时请书面通知本公司或请专业技术人员维修,请勿私自维修本设备。
3、只有在停机并切断电源的情况下才能进行维护及维修工作,并确保吸附干燥机不可能由于误操作而重新启动。
4、维修吸附干燥机前,应将吸附干燥机所有压力源切断,并将吸附干燥机内部压力释放。
得力 标签打印机用户手册 GE365W、GE386W 说明书

便携式标签打印机GE365WGE386W用户手册目录用户手册 (1)目录 (2)手册信息 (3)安全须知 (2)第1章产品简介 (5)1.1开箱清单 (5)1.2外观及组件 (6)1.3产品尺寸 (7)第2章产品规格 (8)第3章安装和使用 (9)3.1安装介质 (9)3.2电源连接 (10)3.3打印机充电 (10)3.4接口连接 (12)第4章基本功能使用 (13)4.1菜单模式进入与退出 (14)4.2打印自检页 (14)4.3打印质量(打印浓度) (14)4.4适应学习(标签学习) (14)4.5客户模式 (14)第5章常见问题处理 (16)5.1打印不清晰 (16)5.2打印跳标、定位不准 (17)5.3打印异响 (18)附录1:电子电气产品有害物质限制使用的说明 (19)GE365W/GE386W 用户手册1版本:1.0手册信息本用户手册包含产品使用、安装等基本信息。
以下手册对各种技术问题和领域有更为详细的介绍。
安全须知在操作使用打印机之前,请仔细阅读下面的注意事项,以免发生人身伤害或设备损坏。
1.安全警告标志——警告:必须遵守,以免伤害人体,损坏设备。
——注意:给出了打印机操作的重要信息及提示。
2.安全注意事项警告:违反以下事项可能会导致严重的伤亡事故。
1)不要同时将几个插头插入一个多孔电源插座中。
•这会导致过热和火灾。
•如果插头潮湿或者肮脏,请在使用前烘干或者擦拭干净。
•如果插头与电源插座不配套,请不要插上电源。
•只能使用标准化的多孔电源插座。
2)您只能使用本包装中供应的电池。
•使用其它电池十分危险。
3)不要通过拉扯连接线的方式拔插头。
•这可能损坏连接线,造成火灾或者打印机故障。
4)不要在手潮湿的时候,插或者拔电源插头。
•这可能导致触电。
5)不要用力弯曲连接线,或者将其置于重物之下。
•连接线损坏后,可能造成火灾。
注意:违反以下事项可能造成轻伤或损坏设备。
1)如果发现打印机不明原因地冒烟、发出气味或者噪音,请拔下插头,再采取急救措施。
- 1、下载文档前请自行甄别文档内容的完整性,平台不提供额外的编辑、内容补充、找答案等附加服务。
- 2、"仅部分预览"的文档,不可在线预览部分如存在完整性等问题,可反馈申请退款(可完整预览的文档不适用该条件!)。
- 3、如文档侵犯您的权益,请联系客服反馈,我们会尽快为您处理(人工客服工作时间:9:00-18:30)。
WPC1252/WPC1243/WPC1 Europe/Greek/Hebrew/Ea
254/WestEurope/Greek/He stEurope/Iran/WPC1252/
brew/EastEurope/Iran/IranII PC866/PC852/PC858/Iran
/Latvian/Arabic/Vietnam/Uy II/Latvian/Arabic/PT151,1
主要特点
*具有打印标签和票据双重功能 *USB+蓝牙接口(标配),USB+WIFI接口(选配) *蓝牙支持BT3.0和BLE4.0,可与安卓、苹果系统互联 *WIFI可工作在AP/STA/AP+STA模式,方便组建网络 *USB可设置为虚拟串口方式,便于开发与测试 *ESC/POS指令、下载位图、NV位图、多种一维条码、
80mm×200mm
无限制
存储器
DRAM:128KB FLASH:128KB NV FLASH:60KB
编程指令
TSC
ESC
开盖检测
微动开关
纸存在探测
光电传感器
能否退纸
否
扩展代码页 PC437/PC850/PC852/PC86 PC437/Katakana/PC850/P
0/PC863/PC865/WPC1250/ C860/PC863/PC865/West
ZH-380
便携式热敏条码打印机
珠海智汇网络设备有限公司
客服热线:400 811 0380
注意事项 安全注意事项
*本打印机只能使用本公司提供的专用电池和电源适配器,否则可 能引起产品损坏,电池漏液、起火,甚至爆炸。
*不要将电池投入火中,不要将电池短路、拆散或加热,否则可能 导致电池漏液、起火,甚至爆炸。
标签模式下,长按FUNC按键,则进行标签手动 校准
切换标签和 票据模式
手动校正 标签纸
便携式热敏条码打印机
a.打开翻盖
b.正确的放入纸卷
c.盖上翻盖,并留 出5mm纸
1.打开电池后盖
2.电池装入打印机 2.扣紧电池后盖
获取接口信息
打开打印机电源,按一下打印机功能按键,则打印机打印出接口 信息。
修改蓝牙名称、蓝牙配对码;WIFI模式、WIFI密码
在官方网站的下载中心/工具中下载相关设置工具,修改相应参 数。 PC端安装GprintSetTool,Android端安装Gptools.APK。
常见问题以及处理方法:
1.打印机不检纸? 答:机芯传感器太脏,请用软毛刷清洁传感器,若清洁后依旧不 能检纸,请与售后客服联系。 2.打印机开不了机? 答:可能是电池没电,请使用出厂标配的充电器充电,若还是开 不了机,请与售后客服联系。 3.打印机打印不清楚? 答:看整个打印幅面不清楚还是部份不清楚,如果是整个打印幅 面不清楚,可能是打印纸质量不符合标准;如果是部份不清楚, 则有可能是打印头太脏,请用棉布醮酒精清洁打印头的热敏片, 清洁后仍然打印不清楚,请与售后客服联系。
长按电源按键3s
打印机开机 且缺纸
开机状态下,按走纸按键
同时按住走纸按键电源按键,STAUS(蓝灯) 灭了,松开走纸按键
打印自检 测试页
同时按住走纸按键和电源按键,ERROR(红灯) 灭了,松开走纸按键。 开机状态下,按FYNC键
打印机关机,同时按住电源键、FEED和 FUNC键开机,待绿灯,红灯和蓝灯依次点亮 后,松开电源键,继续按住FEED和FUNC键: 直到打印出一行文字:当前模式为标签/票据模 式
打印机主体
1台
电源适配器
1个
USB数据线
1根
锂电池
1块
使用说明
1张
技术参数
打印模式
标签模式
票据模式
打印方式
直接热敏
分辨率
203DPI
打印速度
60mm/s(max)
60mm/s
通讯接口
USB/(USB+蓝牙4.0)/(USB+WIFI)/(USB+WIFI+蓝牙4.0)
打印最大宽度
80mm
72mm
打印最大幅面
*如果长时间不使用打印机,务必将电池从打印机中取出,否则可 能导致电池漏液。
*电池中的液体具有腐蚀性,如果操作不慎,导致电池漏液并将液 体粘到皮肤或衣物上,请立即用清水洗掉;如不慎进入眼睛内,请 立即用大量清水彻底冲洗眼睛,并就医治疗。
使用注意事项 *不要触摸打印机撕纸刀。 *热敏打印头为发热部件,打印过程中或打印刚结束时,勿触摸热 敏打印头以及周边部件。 *不要触摸热敏打印头以及连接插件,避免因静电损坏打印头。 *打印过程中不要打开纸仓盖,否则可能导致打印机工作不正常。 *为了保证打印质量和延长产品的使用寿命,建议使用推荐的或同 等质量的热敏打印纸。 *打印机不得在无纸的状态下打印,否则将严重损害打印胶辊和热 敏打印头。 *当拔插连接线时,请确认打印机电源处于关闭状态。 *避免水或导电的物质(例如:金属)进入打印机内部,一旦发 生,应立即关闭电源。 *若长时间存放打印机,请务必将电池充电至两格以上,并将电池 取出单独存放。 *请妥善保管本手册,以备使用参考。
注意 1:打印机只插充电器不能打印; 2:充电时,打印机需在开机状态下。
打印机驱动安装说明
用USB线把打印机和电脑连接,并开启打印机电源,此时电脑中 会出现U盘,U盘内附打印机驱动以及驱动安装说明,请参照驱动 安装说明安装驱动。
便携式热敏条码打印机
便携式热敏条码打印机
纸张类型
热敏卷筒纸/不干胶热敏纸 热敏卷筒纸
纸张宽度
45mm-80mm
(含衬纸)80mm
纸卷外径
50mm±0.5mm
出纸方式
上出纸0mAh
电源适配器
输入:AC 220V 输出:DC 9V/1A
充电时间
3-5小时
工作环境
温度:5~45℃ 湿度:≤93%RH(不凝露)
存储环境
gur/Thai/WPC1251/WPC12 251/PC747/WPC1257/Vie
57/Cyrillic/PC858/PC747/P tnan/PC864/PC1001/Uygu
C864/PC1001
r/Thai
条码
CODE128,EAN128,ITF,CO UPC-A、UPC-E、
DE39,CODE93,EAN13,EAN EAN(JAN)13、
温度:5~45℃ 湿度:≤93%RH(不凝露)
外形尺寸
131mm×107mm×58mm(长×宽×高)
重量
430g(带电池)
机芯寿命
50Km
便携式热敏条码打印机
①:走纸按键 ②:电源按键 ③:功能按键 ④:电源输入插座
⑤:状态提示灯(蓝色) ⑥:电量提示灯(绿色) ⑦:错误提示灯(红色) ⑧:USB插座
QRCODE二维码 *打印功耗低、印字清晰、机芯寿命长(50km)、打印精度高 *GB18030简体、BIG5繁体、韩文、国际字符集和扩展代码页 *LED可指示打印机异常、电量、充电与通讯连接等状态 *免费提供DLL、SDK、应用Demo,支持客户应用开发
便携式热敏条码打印机
打印机拆封清单
检查配件:
13+2,EAN13+5,EAN8,EAN 8+2,EAN8+5,CODABAR,U PC-A,UPC-A+2,UPCA+5,UPC-E,UPCE+2,UPC-E+5,QRCode
EAN(JAN)8、CODE39、 CODEBAR、ITF、 CODE93、CODE128、 QRCODE
字符集
(GB18030简体+Big5繁体+韩文)/日文,ANK字符