安桥DLNA操作指南
調諧至一個無線電台 - Onkyo说明书

調諧至一個無線電台自動調諧1.按主機上的 TUNER 幾次以選擇"AM"或"FM"。
2.按 TUNING MODE ,使顯示螢幕上的"AUTO"指示燈亮起。
3.按TUNING 開始自動調諧。
找到一個電台後搜尋即自動停止。
調諧至某個無線電台時,顯示幕上的"TUNED "指示燈亮起。
調到一個 FM 無線電台時,"FM STEREO"指示燈亮起。
"TUNED "指示燈熄滅時,無聲音輸出。
FM 無線電台的訊號微弱時:無線電波信號可能較弱,這取決於其構建結構與周圍環境情況。
在此種情況下,請按照下一節"手動調諧"說明的程序,手動選擇所需的電台。
手動調諧1.按主機上的TUNER 幾次以選擇"AM"或"FM"。
AM/FM 接收詳情2.按 TUNING MODE,使顯示螢幕上的"AUTO"指示燈熄滅。
3.按 TUNING 選擇所需的無線電台。
每按一下按鈕,頻率改變 1 個步長。
按住按鈕時頻率會持續改變,鬆開後停止。
調台時注意顯示幕。
若要返回自動調諧:按主機上的 TUNING MODE。
本機自動調諧至一個無線電台。
這時通常應顯示"AUTO"。
直接調諧頻率用於直接輸入您要收聽的無線電台的頻率。
1.按遙控器上的 TUNER 幾次以選擇"AM"或"FM"。
2.按 D.TUN。
3.使用數字按鈕,在 8 秒內輸入無線電台的頻率。
例如,要輸入 87.5 (FM),請按 8、7、5 或 8、7、5、0。
如果輸入的數字錯誤,請按 D.TUN 並輸入正確值。
預設一個 AM/FM 無線電台可以記錄最多 40 個您最喜歡的 AM/FM 無線電台。
提前記錄無線電台讓您能夠直接調到喜歡的電台。
DLAN使用教程

首先,让我们先了解下什么是DLAN,引用下百度百科DLNA的全称是DIGITAL LIVING NETWORK ALLIANCE,其宗旨是Enjoy your music, photos and videos, anywhere anytime, DLNA(Digital Living Network Alliance) 由索尼、英特尔、微软等发起成立、旨在解决个人PC,消费电器,移动设备在内的无线网络和有线网络的互联互通,使得数字媒体和内容服务的无限制的共享和增长成为可能,目前成员公司已达280多家。
DLNA能够简单快速的实现手机、PC、电视等多媒体终端的影音互联,将为人们的数字娱乐生活提供很大的便利。
但DLNA目前仍需要各大厂家间更进一步的实现技术标准和应用的统一,在更多的数字设备上普及和使用。
通俗点解释DLAN就是:其实DLAN说白了就是一种共享。
举个简单的例子,比如在家里。
你的手机,里有一部电影,想看但是手机没电了,那么此时,你家的电视,电脑等一切智能设备全部能即时分享你手机里的这部电影,这种方式就叫DLAN。
它的最大特点是不需要传输,也不需要云储存,可以由多个设备分享某个设备中的全部内容。
小弟做过尝试,可以把PC 上的视频共享到手机上来播放,不过想把手机上的视频/图片/音乐等媒体文件共享到PC上播放时未果,而且原因未知,后者有点类似于HDMI,但是DLAN共享是无线共享,而HDMI 是有线共享,这就是我上面帖子说的要做出致歉的原因,回过我那篇帖子的同学估计都猜得到好,废话不多说,开始讲DLAN的用法(PS:帖子教程采用的系统为WIN7,毕业以后把xp彻底弄成了win7,用xp的同学可以参照此教程操作,隔不了多少,原理基本相当,win8的操作方式跟win7几乎一样)1.首先需要改一下电脑的网络。
在右下角无线网络中点击右键选择“打开网络和共享中心”。
(家里必须有wifi环境)2.弹出“打开网络和共享中心”后,对我们的“活动网络”进行修改,改为“家庭网络”,然后单击“公用网络”,弹出“选择某某网络的位置”,再单击“家庭网络”,设置成功后点击关闭。
电视dlna投屏怎么设置?还不会的小伙伴看过来

电视dlna投屏怎么设置?还不会的小伙伴看过来
电视dlna投屏怎么设置?现在的电视机越来越智能化了,数字电视可以像手机那样安装一些视频播放软件,不再像以前那样只能接收一些卫视的节目了。
因此电视机也有了dlna投屏功能。
很多小伙伴可能不知道这个功能如何使用,下面我将分享dlna的使用过程,还不会的小伙伴可以看一下。
电视dlna投屏过程:
前提:手机端和电视端连接通一个无线局域网。
我们先打开电视机,在功能里面找到其中的应用功能,在里面找到投屏功能,打开后会有两个选项,分别是无线投屏和电脑浏览器投屏。
我们选择无线投屏,若是投屏音频则选择音频投屏,若是投屏视频则选择视频投屏。
然后打开手机端的音视频软件,找到相应的投屏UI图标,搜索到电视设备连接后就可以完成电视dlna的投屏了。
若是有的小伙伴嫌弃电视的dlna投屏使用麻烦,我们可以通过安装第三方投屏软件来进行投屏,这一类的应用投屏过程流畅,操作也非常得简单,只需在手机端和电视端分别安装一个【快投屏】工具就可以实现。
具体的操作过程如下:
1、打开手机端已经安装完毕的工具,主页面就是两种无线投屏方式,搜索投屏需要用到无线网,扫码投屏则不需要。
2、然后打开电视机端的软件,找到里面的投屏二维码用手机端软件进行扫码就完成投屏了。
若是各位家中有USB数据线,也可以使用USB数据线进行有线连接来投屏。
电脑的dlna投屏设置教学到这里就结束了,家中的电视机支持dlna投屏就用这种方式,不支持dlna投屏的安装第三方软件来投屏。
onkyo dv-sp1000 用户手册说明书

Some audio CDs feature copy protection that doesn’t conform to the official CD standard. Since these are nonstandard discs, they may not play properly in the DV-SP1000/DV-SP1000E.The DV-SP1000/DV-SP1000E supports CD-R and CD-RW discs recorded in Video CD format, audio CD format, or ISO9660 Level 2 format with MP3 or JPEG files. It also supports DVD-R and DVD-RW discs recorded in DVD-Video or DVD-Audio format, and DVD-RW discs recorded in DVD-VR format. How-Select 4:3 Letter box or 4:3 Normal if you have a 4:3 TV. Select 16:9 Wide-screen if you have a widescreen TV. Use the Up and Down []/[] buttons to select a language, and then press [ENTER].See page 81 for more information on Use the Up and Down []/[] buttons to select Off or On for the i.LINK Output Setting (i.LINK),If it’s set to On, the Initial Setup menu closes.On the Analog Audio Out menu,Current titleT otal number of titles To enter, for example, “12,” press the To clear a number, press the [CLEAR] button.Entered title number appears here Entered chapter number appears hereT otal number of tracks To enter, for example, “11,” press the [1] button twice.To clear a number, press the [CLEAR] button.Current track。
DLNA使用设置教程
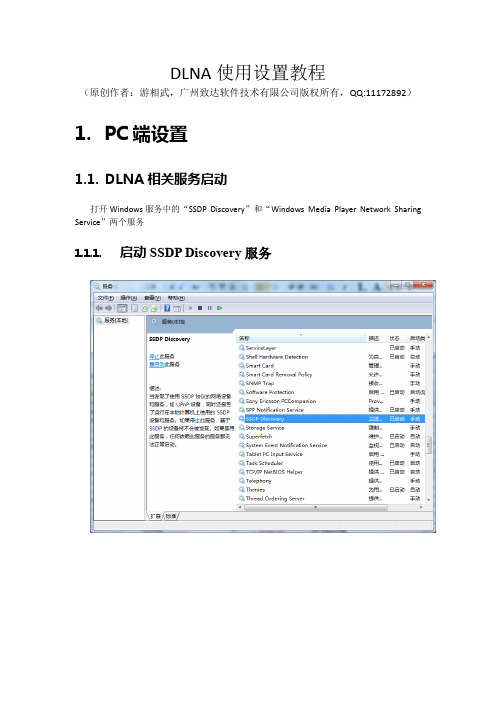
DLNA使用设置教程(原创作者:游相武,广州致达软件技术有限公司版权所有,QQ:11172892)1.PC端设置1.1.DLNA相关服务启动打开Windows服务中的“SSDP Discovery”和“Windows Media Player Network Sharing Service”两个服务1.1.1.启动SSDP Discovery服务1.1.2.启动WindowsMediaPlayerNetworkSharingService服务1.2.家庭网络设置家庭网络的设置是为了让设备可以安全的互相访问1.2.1.设置当前网络的连接为家庭网络设置路径:控制面板\网络和Internet\网络和共享中心Setp1:将上图设置网络位置设置为“家庭网络”Setp2:上一步选择了“家庭网络”后,系统将做一设置工作,在这里需要设置网络共享内容,以便家庭网络内的其它设备可以看到,可以设置为下图所示的默认值。
Setp3:设置完成后,系统将提示记录密码,这个密码在需要安全授权的时候会使用到,若家庭网络中的所有设备都是可信的则可以不使用。
Setp4:设置完成为了使得设备可以访问媒体文件,还需要点击“选择家庭组和共享选项”,选中“将我的图片、音乐和视频输出到我的家庭网络上的所有设备”。
然后点击“选择媒体流选项”,启用媒体流,出现“为计算机和设备选择媒体流选项”时,默认全部允许即可,这样将简化后面的设置。
1.3.媒体播放器设置在媒体播放器中完成以下设置:媒体库的菜单上有“媒体流”菜单,勾选“允许远程控制我的播放器”和“自动允许设备播放我的媒体”保持Windows Media Player不要关闭,等下播放图片、音乐、视频都是靠这个程序Step1:Step2:对远程设备的播放控制进行授权1.3.1.设置当前网络的连接为家庭网络设置路径:控制面板\网络和Internet\网络和共享中心2.手机端设置与播放在手机端可以使用手机内置的DLNA程序,也可以安装第三方程序进行控制。
安桥DLNA操作指南

在“媒体库”中可 以自由的设置共享 的音乐
依据步骤,我们可 以添加或者减少文 件夹
点击此项栏目,接 下来就可以在下拉 栏目里选取你储存 音乐的文件夹来进 行共享了。
只要在你存放音乐 的文件夹前勾选即 可。
它将把你所选取的 共享地址列出。 点击“是,使用这 些位置”和“完成 ”你的共享音乐就 全部搞定了,你在 功放的NET中,看 到你的电脑和共享 的文件夹及音乐了 。
设备准备nr系列功放电脑无线路由器网线nr系列win7确保你的无线路由器工作正常打开无线功能并将nr系列的功放连接至路由器stage连接stage功放设定nr系列对功放进行一个简单的设置进入setup选择硬件设置进入硬件设置选择网络进入网络启动dhcp自动获得ip地址或禁止dhcp手动设置ip地址最后保存功放设置完成stage对电脑进行一个设置确认电脑和功放连接在同一网络里无论您是无线连接或有线连接打开你的windowsmediaplayer点击媒体流的选项点开打开媒在弹出的页面里为电脑启动媒当这个页面出现的时候恭喜你
选取了要使用的功 放型号后会弹出界 面 你选取的歌曲就可 以在功放上面进行 播放了!
如何通过Windows Media Center设置共享文件夹
点击进入开始菜单
里的Windows Media Center
打开Windows Media Center
点击进入任务“设 置”
进入设置,打开“ 媒体库”
Ready . . .设备准备
NR系列功放
“NR”系列
无线路由器 网线
电脑
win7
Stage 1 - 连接
确保你的无线路由器工作 正常,打开无线功能,并 将”NR“系列的功放连 接至路由器
Stage 2 – 功放设定
安桥_CR-N755中文说明书

VLSC™ 是 Onkyo Corporation 的商标。 Music Optimizer™ 为 Onkyo Corporation 公司的商标。
Windows Media 和 Windows 标志是 Microsoft Corporation 在美国和 / 或其他国家的商标或注册商标。
iPhone、iPod、iPod classic、iPod nano、iPod shuffle 和 iPod touch 是 Apple Inc. 在美国及其他国家的注册商标。 “Made for iPod”和 “Made for iPhone”表示一个电子附 件是专为分别连接 iPod 或 iPhone 而设计并且经开发者 认证符合 Apple 性能标准。 Apple 不对此装置的操作或 其符合安全和法规标准负责。 请注意,使用此 iPod 或 iPhone 附件可能影响无线性能。 “DLNA®、DLNA 标志和 DLNA CERTIFIED™ 是数字生活 网络联盟的商标、服务标志或认证标志。”
右侧的标签贴在后面板上。
1. 此设备是 “一级镭射产品”,在机壳内部使用了 镭射激光。
2. 为避免镭射激光暴露,不要取下机壳。请向相 关技术人士咨询有关事宜。
Cs-3
功能
放大器
• WRAT (宽频带放大技术) • 对称设计功率放大器电路 • 2 个数字输入端 (1 个光纤 /1 个同轴) • 3 个音频输入端和 1 个输出端 • 最佳增益音量电路 • 3 阶段反向达林顿放大器设计 • 重低音扬声器前级输出
设备淋雨或受潮,无法正常工作,或设备坠落。
15. 需要维修服务的损坏 在以下的情况,请拔掉电源,由合格的维修服 务人员进行维修: A. 电源线或插头已损坏。 B. 物体已掉进或液体已被倒泻入设备。 C. 设备被淋雨。 D. 果设备按照如下指示不能正常操作,只能调 整操作说明中包括的控制功能,因为如果调 整不当可能导致设备损坏,就需要维修技工 花费大量的工作时间将设备恢复到正常的状 态。 E. 设备曾被跌过或是外壳已被损毁。 F. 设似乎不能正常操作,或者显示出在性能上 有明显的改变。
安桥功放中文说明书
安桥功放中文说明书安桥功放中文说明书---1. 引言安桥功放是一款高性能音频功放器,采用先进的技术和设计,为用户提供出色的音频体验。
本说明书旨在向用户介绍安桥功放的操作方法、功能特点以及注意事项,以帮助用户正确使用该产品。
---2. 产品概述安桥功放是一款多功能的家用音频功放器,适用于多种音频设备,如电视、音响系统、蓝牙音箱等。
该功放器具有以下主要特点:- 高保真音质:采用先进的音频处理技术,确保音质清晰、细腻,还原原音效果。
- 多种音频接口:支持多种音频输入接口,包括HDMI、AUX、蓝牙等,方便用户连接各种音频设备。
- 多种场景模式:内置多种音效模式和音场调节选项,提供不同音频场景的选择,满足用户对音效的不同需求。
- 简便的操作:设备配备直观的按键和显示屏,用户可以轻松地进行操作和调节音量。
---3. 使用方法3.1 连接音频设备将您需要连接的音频设备通过相应的音频接口连接到安桥功放,可以根据需要选择HDMI、AUX或蓝牙等接口。
3.2 开机与关闭按下电源按钮,可以将安桥功放器开启。
长按电源按钮可进行关闭操作。
在使用过程中,请注意正确使用电源线,以免发生电气故障。
3.3 调节音量通过旋转音量按钮或遥控器上的音量键可以调节音量大小,根据需要进行调节。
3.4 选择音效模式安桥功放器内置多种音效模式,用户可以根据不同的需求选择合适的模式。
通过按下模式按钮或遥控器上的模式键,可以切换不同的音效模式。
3.5 音场调节安桥功放器提供多种音场调节选项,用户可以根据自己的喜好进行调节。
通过按下音场按钮或遥控器上的音场键,可以选择不同的音场效果。
---4. 注意事项- 请将安桥功放器放置在通风良好的位置,避免过热。
- 请勿将任何容器中的液体倒入设备内部,以免发生电路短路或损坏。
- 请勿在潮湿或多尘的环境中使用安桥功放器,以免影响设备的正常运作。
- 请勿将安桥功放器放置在易受震动的环境中,以免影响音质和寿命。
- 请勿自行拆卸或修理设备,以免发生电击或其他安全事故。
[转]【全网首发】DLNA无线媒体服务器详细使用教程
![[转]【全网首发】DLNA无线媒体服务器详细使用教程](https://img.taocdn.com/s3/m/113ed23c657d27284b73f242336c1eb91a37339b.png)
[转]【全⽹⾸发】DLNA⽆线媒体服务器详细使⽤教程本帖最后由⼩葱头~ 于 2012-7-17 14:45 编辑以下内容转⾃隔壁机锋论坛 【写在前⾯】测试通过机型: EVO 3D、G11、Amaze、G12、G14、One X都是sense 系统最近发现论坛中有很多机友向我询问DLNA的事,我本⾝也是⼀知半解,于是痛下绝⼼,⼩⼩钻研了⼀下下!!发现功能还是很多了,可以⽤⼿机看电脑的东西,也可⽤电脑看⼿机的东西,很强⼤吧如果,我是说如果,你要是有3D电视也⽀持DLNA,那你就爽P了。
如果感觉我写的不错,请不要吝啬您的评分真的不会怀孕的!———————————————————————————————————————【何为DLNA】DLNA的全称是DIGITAL LIVING NETWORK ALLIANCE,其宗旨是Enjoy your music,photos and videos, anywhere anytime, DLNA(Digital Living Network Alliance)由索尼、英特尔、微软等发起成⽴、旨在解决个⼈PC,消费电器,移动设备在内的⽆线⽹络和有线⽹络的互联互通,使得数字媒体和内容服务的⽆限制的共享和增长成为可能,⽬前成员公司已达280多家。
DLNA并不是创造技术,⽽是形成⼀种解决的⽅案,⼀种⼤家可以遵守的规范。
所以,其选择的各种技术和协议都是⽬前所应⽤很⼴泛的技术和协议。
DLNA将其整个应⽤规定成5个功能组件。
从下到上依次为:⽹络互连,⽹络协议,媒体传输,设备的发现控制和管理,媒体格式。
———————————————————————————————————————【前期准备】⾸先说下我⾃⼰的平台:电脑:win7旗舰64位播放器:windows media player 12.0⽆线路由器:netgear jwnr2000⽹络结构:电脑有线连接路由,⼿机⽆线连接路由,⼿机与电脑处于同⼀⽹段。
安桥1075组合音响使用说明书
安桥1075组合音响使用说明书以安桥1075组合音响使用说明书为标题,写一篇文章。
一、产品概述安桥1075组合音响是一款高品质的音响设备,具有出色的音质和便捷的操作。
该音响采用先进的技术和设计,为用户提供优质的音乐体验。
本使用说明书将详细介绍该音响的使用方法和注意事项,以帮助用户更好地使用和保养此设备。
二、外观和配件安桥1075组合音响的外观简约流线,采用高质量的材料制造,外壳坚固耐用。
配件包括主音箱、副音箱、遥控器、电源线等。
用户在使用前请检查配件是否完整,并确保音响连接正确。
三、安装和连接1. 将主音箱和副音箱放置在合适的位置,保证音箱与墙壁或其他障碍物的距离,以获得最佳音效。
2. 将主音箱和副音箱通过音频线连接,确保连接牢固。
3. 将音响的电源线插入电源插座,并确保电源线连接正确。
四、功能操作1. 开机和关机:使用遥控器或手动按键,按下电源键即可实现开机和关机操作。
开机后,音响会自动进入待机模式。
2. 音量调节:使用遥控器或手动按键,按下音量加减键可以调节音量大小。
建议在使用过程中适度控制音量,以免影响听力。
3. 输入源选择:使用遥控器或手动按键,按下输入源选择键可以切换不同的音频输入源,如AUX、蓝牙、USB等。
4. EQ调节:使用遥控器或手动按键,按下EQ调节键可以选择不同的音效模式,如流行、摇滚、古典等。
用户可根据个人喜好选择合适的音效模式。
5. 静音功能:使用遥控器或手动按键,按下静音键可以暂时关闭音响的声音输出。
再次按下静音键可以取消静音状态。
五、注意事项1. 请勿将音响长时间暴露在高温、潮湿或封闭的环境中,以免损坏设备。
2. 使用时请避免将音响放置在易受振动的地方,以免影响音质。
3. 音箱表面请勿使用尖锐物品刮擦,以免划伤外壳。
4. 请勿将液体或金属物品倒入音箱内部,以免触电或引起故障。
5. 请定期清洁音响表面,使用柔软的干布擦拭,避免使用化学清洁剂或水直接清洗。
6. 如遇到故障或异常情况,请及时停止使用,并联系售后服务中心进行处理。
无线DLNA使用指南

第二步:电视机设置网络
IP (然■ 地也后在 址可用“ 。使遥协 )用控议 自器设 动输置 选入” 项界里 由面选 路下择 由方“ 器的手 自 动 动地” 设址选 置。项 。 IP
第二步:电视机设置网络
能■ ,最 前后 三进 项行 通网 过络 即测 可试 。, 使 用 无 线 DLNA 功
第三步:电脑安装设置DLNA软件
首先将三星USB无线网卡插入电视 侧面的USB端口中,任意一个USB端 口均可。这样电视就可以接受无线 网络信号了。右上图片说明了目前 各类电视机产品如何插入USB无线 网卡。右下图为55B8000产品USB网 卡连接实际效果图。
第二步:电视机设置网络
选■ 择在 ““ 无设 线置 ”” 。菜 单 里 “ 网 络 类 型 ” 中 ,
■首先安装随电视机附送的DLNA软件,安装步骤见下图
第三步:电脑安装设置DLNA软件
■运行共享软件, 后界面如右图。
■点击“共享”,“设置设备策 略” .将显示出的设备点击“接 受”.状态为“接受”的电即 可访问PC。
第三步:电脑安装设置DLNA软件
■在要允许电视访 问的文件夹上点 “右键”设成“共 享文件夹”。设好 的文件夹就出现在 右图内。
■最后再点一下“设置更改状态”,即这 个绿色的小图标,就等于是保存好现有设 置了。
第四步:使用DLNA
■好了,全都设置完毕,可以按一下遥控器上的“Media.P”按钮, 进入。
■安装DLNA软 件的“服务器” 名(就是供访 问的电脑), 可以在软件里 随意更改名字
第四步:使用DLNA
■进个“电影”菜单可以浏览PC共享文件夹中的视频文件,目前 支持的视频格式主要有AVI、H264、MPEG2、MKV、3GP、MP4、VOB 等等,支持的格式很多。
DLNA操作说明书 win7

win7设置多媒体服务器方法
步骤1. 将机器及笔记本或PC连接路由器(无线及有线均可)。
步骤2. 打开控制面板--查看方式--大图标--管理工具--服务;
启动Windows服务中的“SSDP Discovery”和“Windows Media Player Network Sharing Service”两个服务;
步骤 3.在“打开控制面板--查看方式--大图标--网络和共享中心”中将当前电脑的无线网络类型设置为“家庭网络”,手机也连接到这个无线网络;
步骤 4.在“打开控制面板--查看方式--大图标--网络和共享中心”中,点击“选择家庭组和共享选项”,如果你想在手机上播放电脑上的图片、视频、音乐等,需选中“将我的图片、音乐和视频输出到我的家庭网络上的所有设备”。
然后点击“选择媒体流选项”,启用媒体流,出现“为计算机和设备选择媒体流选项”时,默认全部允许即可。
点击确定。
媒体服务器设置完毕.
步骤5. 打开计算机-网络-媒体设备:
添加成功后,屏幕右上方图标颜色由灰变绿。
点击该图标,选择对应的机器的设备名称:
步骤7:进行步骤6后,会出现下图操作框,用户可拖动电脑上的视频、图片、音乐文件到该框内,即可在机器连接的电视中进行播放。
备注:DLNA不支持rmvb格式。
Onkyo TX-NR727 快速入门指南说明书

Make sure you have the following accessories:a Indoor FM antennab AM loop antennac Speaker cable labelsd Remote controller and two batteries(AA/R6)e Power cord(European and Taiwanese models)(Plug type varies from country to country.)f Speaker setup microphoneThe AV receiver can automatically perform speaker and surround settings, so that you can easily enjoy a surround sound tailored to your listening environment. Connect the supplied microphone to the AV receiver andfollow the on-screen instructions.When performing automatic speaker setup, connect your TV to the AV receiver and make the room as quiet as possible.Using the Remote ControllerBefore connecting the power cord, connect all of your speakers and AV components.Front speakersCenter speakerSurround speakersSubwoofer(s)Surround back speakersFront high speakersSpeaker Configuration5.1-channel:7.1-channel:+7.1-channel:+Y1302-1Connecting Components without HDMIConnecting to the Network (Optional)The following diagram shows how you can connect the AV receiver to your home network. In this example, it’s connected to a LAN port on a router, which has a 4-port 100Base-TX switch built-in.media serverThe AV receiver supports Wi-Fi, and you can connect the AV receiver to your home network by wireless LAN. For wireless LAN connection, see “4. Performing Wireless LAN Setup” (→Page 5).3. Turning On & Initial SetupInitial Setup is automatically started upon first-time use, and you can make an initial setup by watching guidance displayed on the TV screen. If you make this setup later, select No and press ENTER on the remote controller on the next screen after selecting the language.• Connect the AV receiver to your TV with HDMI to make an Initial Setup on the TV screen.• If you set your home network to “Wireless”, see “4. Performing Wireless LAN Setup”.Connecting Components with HDMIThe components connected to each terminal (BD/DVD , GAME , etc.) can be selected with the input selector buttons of the same name on the front panel. Note that these default assignments can be changed. For details, please refer to the instruction manual.Listening to TV audio (Optional)■Video upconversion to HDMI■AV receiverIf you’ve connected your TV to the AV receiver with an HDMI cable, composite video and component video sources can be upconverted and output by the HDMI OUT MAIN.(*) In order for the AV receiver to upconvert component input to HDMI output, the source output must be set to 480i/576i. When signal is input at resolution of 480p/576p and more, error message will be displayed.For further information, see “Playback ” in the Instruction Manual.Y ou can enjoy listening to Internet radio or files on a server (DLNA) through Wi-Fi (Wireless LAN) network. Y ou need to perform the wireless LAN setup to connect the AV receiver to a wireless device such as a wireless router.Previous check for wireless LAN routerThere are two types of setting, “Automatic” and “Manual”. If your wireless LAN router has a “WPS button” (*), automatic setup is available. If not, make the setting manually. If the router does not support WPS, take a note of a SSID and b Password (secret key) on the label of the router. Manual setting is available regardless of the “WPS button” on the router.(*) The “WPS button” is a standard of Wi-Fi Alliance. The name of the button may differ depending on the router maker.■Setup procedureConnect the AV receiver to your TV with HDMI and display the setup screen on the TV . Use a supplied remote controller for the setting. Press RECEIVER before using the remote controller. Use e /r or q /w in the center to select items on the screen, and press ENTER to confirm. Press RETURN to return to the previous screen. For further information, see “Remote Controller”. (→Page 8)1Display “Wireless setup” menu on your TV ● Setup using Initial SetupInitial Setup function is launched upon first-time use. To perform Initial Setup, move your cursor and click on “Wireless ” in “Network Connection ”, press ENTER , select “Yes ” on the next screen, and press ENTER . (*2)● Setup not using Initial SetupThis is a setting using Setup Menu (Home Menu). Display “Wireless setup ” menu by performing the following procedure which contains five steps.1. Press Receiver followed by Home on the remote controller.2. Select “Setup ” on the screen, and press ENTER .3. Select “Hardware Setup ”, and press ENTER .4. Select “Network (*1)”, and press ENTER .5. Select “Network Connection ”, move your cursor and click on “Wireless ”, and press ENTER . (*2)(*1) When “Network ” is grayed out, please wait until it becomes operable after the communication is completed.(*2) The reaction may be slow. Please wait for a short while.2Select the setting method, Automatic or Manual.● Automatic settingSelect “Push Button Configuration (Linksys E/EA Router)” (Connection to Linksys E/EA Router) or “Push Button Configuration (Other Routers)”, and press ENTER for North American models.Select “Push Button Configuration (Select from Router)” , and press ENTER for excluding North American models.● Manual settingSelect “Search Wireless Network ”, and press ENTER .3Automatic settingManual settingSelect “Push Button ” (*) and press ENTER . Press “WPS button” on thewireless LAN router, select “OK ” on the TV screen, and press ENTER .(*) If you select “PIN Code ”, PIN code setting isavailable. Use this setting in case WPS button is in the hard location to press, etc. In PIN code setting, register the displayed eight-digit PIN code with the wireless LAN router. For registration, see the instruction manual provided with the wireless LAN router.Select SSID of your wireless LAN router from the list of SSID displayed on the screen, and press ENTER . Either of the following options is automatically displayed in conjunction with the wireless router setting.WEP method1. Select “Default key ID ”, and press ENTER .2. Select “1” on the next screen. (If you change WEP key on the router side, select that number.)3. Select “Password ” on the next screen, and press ENTER .4. Enter the Password (*) by using a key board displayed on the screen, select “OK ”, and press ENTER .5. Select “OK ” on the next screen, and press ENTER .(*) Pressing Shift switches betweenuppercase and lowercase.WPA/WPA2 method1. Select “Password ”, and press ENTER .2. Enter the Password (*) by using a key board displayed on the screen, select “OK ”, and press ENTER .3. Select “OK ” on the next screen, and press ENTER .(*) Pressing Shift switches betweenuppercase and lowercase.No encryptionY ou do not need to set the default key ID nor Password. Select “OK ” on the screen, and press ENTER . Select “OK ” on the next screen again, and press ENTER .4ConnectionConnection is started, and Wi-Fi indicator flashes on the left of the AV receiver display. When connected successfully, Wi-Fi indicator lights. If the indicator does not light, the connection was not made successfully. Make settings above again. Try the manual setting if the automatic setting does not work.5Enjoying Internet radioPress HOME on the remote controller, select “Network Service ” on the next screen. Y ou can enjoy various types of Internet functions. For further information, see “Playback” in the Instruction Manual.If the settings or operations of Wi-Fi or Bluetooth do not work, see separate volume, “Wi-Fi & Bluetooth Troubleshooting”.■Remote Controller6. compressed music files.c Selects Zone 2/3.d Connection to your Access Point starts and Wi-Fi indicator flashes.e The remote control sensor receives signals from the remote controller.f Displays various information.g Selects listening modes.h (North American and Taiwanese models) DIMMER : Adjusts the display brightness.i Stores or deletes radio presets.j Selects the Auto or Manual tuning mode.k Accesses the HOME menu.l When the AM or FM input source is selected, w TUNING q are used to tune the tuner, and e PRESET r are used to select radio presets.When used with onscreen menus, they work as cursor buttons to select and set items. ENTER is also used with onscreen menus.pairing mode.p Connects a standard pair of stereo headphones.q Connects a camcorder or similar for audio/video playback.r Adjusts the tone.s Selects the input sources.t Displays various information about the currently selected input source.u Connects a USB storage or portable player for playback of music files.v Connects the speaker setup microphone.w Lights depending on the AV receiver’s setting status.x (European, Australian and Asian models)RT/PTY/TP : Used for RDS (Radio Data System).RDS works only in areas where RDS broadcasts are available.y (European, Australian and Asian models) Selects the Pure Audio listening mode.The indicator lights when this mode is selected.。
ONKYO TX-NR686 7.2 频道网络 AV 接收器说明书
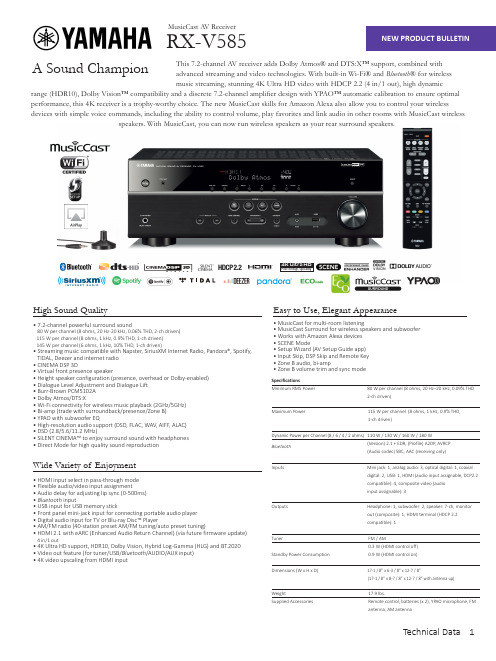
SpecificationsMinimum RMS Power 80 W per channel (8 ohms, 20 Hz–20 kHz, 0.09% THD2-ch driven)Maximum Power 115 W per channel (8 ohms, 1 kHz, 0.9% THD, 1-ch driven)Dynamic Power per Channel (8 / 6 / 4 / 2 ohms) 110 W / 130 W / 160 W / 180 W Bluetooth(Version) 2.1 + EDR, (Profile) A2DP , AVRCP (Audio codec) SBC, AAC (receiving only) Inputs Mini jack: 1, analog audio: 3, optical digital: 1, coaxial digital: 2, USB: 1, HDMI (audio input assignable, DCP2.2 compatible): 4, composite video (audio input assignable): 3Outputs Headphone: 1, subwoofer: 2, speaker: 7-ch, monitor out (composite): 1, HDMI terminal (HDCP 2.2 compatible): 1 Tuner FM / AM0.3 W (HDMI control off)Standby Power Consumption 0.9 W (HDMI control on)Dimensions (W x H x D) 17-1 / 8” x 6-3 / 8” x 12-7 / 8”(17-1 / 8” x 8-7 / 8” x 12-7 / 8” with antenna up)Weight17.9 lbs.Supplied Accessories Remote control, batteries (x 2), YPAO microphone, FMantenna, AM antennaHigh Sound Quality• 7.2-channel powerful surround sound80 W per channel (8 ohms, 20 Hz-20 kHz, 0.06% THD, 2-ch driven)115 W per channel (8 ohms, 1 kHz, 0.9% THD, 1-ch driven) 145 W per channel (6 ohms, 1 kHz, 10% THD, 1-ch driven)• Streaming music compatible with Napster, SiriusXM Internet Radio, Pandora®, Spotify,TIDAL, Deezer and internet radio • CINEMA DSP 3D• Virtual front presence speaker• Height speaker configuration (presence, overhead or Dolby-enabled)• Dialogue Level Adjustment and Dialogue Lift • Burr-Brown PCM5102A • Dolby Atmos/DTS:X• Wi-Fi connectivity for wireless music playback (2GHz/5GHz)• Bi-amp (trade with surroundback/presence/Zone B)• YPAO with subwoofer EQ• High-resolution audio support (DSD, FLAC, WAV, AIFF, ALAC)• DSD (2.8/5.6/11.2 MHz)• SILENT CINEMA™ to enjoy surround sound with headphones • Direct Mode for high quality sound reproductionWide Variety of Enjoyment• HDMI input select in pass-through mode • Flexible audio/video input assignment• Audio delay for adjusting lip sync (0-500ms)• Bluetooth input• USB input for USB memory stick• Front panel mini-jack input for connecting portable audio player • Digital audio input for TV or Blu-ray Disc™ Player• AM/FM radio (40-station preset AM/FM tuning/auto preset tuning)• HDMI 2.1 with eARC (Enhanced Audio Return Channel) (via future firmware update) 4 in/1 out• 4K Ultra HD support, HDR10, Dolby Vision, Hybrid Log-Gamma (HLG) and BT.2020• Video out feature (for tuner/USB/Bluetooth /AUDIO/AUX input)• 4K video upscaling from HDMI inputThis 7.2-channel AV receiver adds Dolby Atmos® and DTS:X™ support, combined with advanced streaming and video technologies. With built-in Wi-Fi® and Bluetooth ® for wireless music streaming, stunning 4K Ultra HD video with HDCP 2.2 (4 in/1 out), high dynamicrange (HDR10), Dolby Vision™ compatibility and a discrete 7.2-channel amplifier design with YPAO™ automatic calibration to ensure optimal performance, this 4K receiver is a trophy-worthy choice. The new MusicCast skills for Amazon Alexa also allow you to control your wirelessdevices with simple voice commands, including the ability to control volume, play favorites and link audio in other rooms with MusicCast wirelessspeakers. With MusicCast, you can now run wireless speakers as your rear surround speakers.Easy to Use, Elegant Appearance• MusicCast for multi-room listening• MusicCast Surround for wireless speakers and subwoofer • Works with Amazon Alexa devices • SCENE Mode• Setup Wizard (AV Setup Guide app)• Input Skip, DSP Skip and Remote Key • Zone B audio, bi-amp• Zone B volume trim and sync modeA Sound ChampionHDCP2.24K Ultra HDNEW PRODUCT BULLETIN1Technical Data MusicCast AV ReceiverRX-V585MusicCast — Your Music EverywhereMusicCast is a revolution in network audio. Use all your MusicCast products together or separately — it’s completely up to you. Control it all from one app, intuitively, quickly and easily. Use a sound bar, a wireless speaker, an AV receiver, or Hi-Fi audio; whichever suits you best. Mix and match, then expand your MusicCast system as you want. What’s more, Amazon Alexa with MusicCast gives you the ability to control all MusicCast devices with simple voice commands.High Sound QualityEasy to Use, Elegant Appearance AmAmazon Alexa with MusicCastAmazon Alexa-enabled devices can now control key functions of any MusicCast product using voice commands. Using two types of Alexa skills, the MusicCast Smart Home skill and MusicCast skill, you can play music, control volume, play playlists and even link rooms together to play music all throughout the house. Discover a new, exciting way to control music and entertainment experiences in your home.CINEMA DSP 3DSound Field Reproduction TechnologyWide, high and dense sound. CINEMA DSP 3D provides a wide, high and dense sound field. HD Audio format decoding lets you enjoy HD Audio sources. Virtual Presence Speaker delivers three-dimensional sound without the actual use of presencespeakers.Dolby Atmos® and DTS:X ™Experience dimension. These sound technologies transport you from an ordinary moment into an extraordinary experience with captivating, multidimensional sound that fills your room with amazing richness and depth. These sound technologies allow for music, people and objects to come alive in breathtaking detail and flow in precise choreography all around you, making you feel like you are right in the middle of thestory.• AirPlay works with iPhone, iPad, and iPod touch with iOS 4.3.3 or later, Mac with OS X Mountain Lion or later, and Mac and PC with iTunes 10.2.2 or later. Supports iOS 7 or later for setup using Wireless Accessory Configuration. “Made for iPod,” “Made for iPhone,” and “Made for iPad” mean that an electronic accessory has been designed to connect specifically to iPod, iPhone, or iPad, respectively, and has been certified by the developer to meet Apple performance standards. Apple is not responsible for the operation of this device or its compliance with safety and regulatory standards. Please note that the use of this accessory with iPod, iPhone, or iPad may affect wireless performance. AirPlay, iPad, iPhone, iPod, iPod nano, and iPod touch are trademarks of Apple Inc., registered in the U.S. and other countries. • The Bluetooth® word mark and logos are registered trademarks owned by Bluetooth SIG, Inc. and any use of such marks by Yamaha Corporation is under license. Other trademarks and trade names are those of their respective owners. • The Wi-Fi CERTIFIED Logo is a certification mark of the Wi-Fi Alliance. The Wi-Fi Protected Setup Identifier Mark is a mark of the Wi-Fi Alliance. “Wi-Fi” and “Wi-Fi Protected Setup” are marks or registered marks of the Wi-Fi Alliance. • Spotify and Spotify logo are registered trademarks of the Spotify Group. • Pandora and Pandora Internet Radio logo are registered trademarks or trademarks of Pandora Media, Inc. in the United States and/or other countries. • TIDAL and TIDAL logo are registered trademark of Aspiro AB in the European Union and other countries. • Deezer and Deezer logo are international trademarks of Deezer S.A., registered in France and other countries. • Dolby, Dolby Atmos, Dolby Audio, and the double-D symbol are trademarks of Dolby Laboratories. • For DTS patents, see . Manufactured under licence from DTS, Inc. DTS, the Symbol, DTS in combination with the Symbol, DTS:X, and the DTS:X logo are registered trademarks or trademarks of DTS, Inc. in the United States and/or other countries. © DTS, Inc. AllRights Reserved. • HDMI, the HDMI logo and High-Definition Multimedia Interface are trademarks or registered trademarks of HDMI Licensing LLC in the United States and other countries. • CINEMA DSP is a trademark of Yamaha Corporation. • SILENT CINEMA is a trademark of Yamaha Corporation. • Product designs and specifications are subject to change without notice.MusicCast SurroundWith wireless rear speakers, the fuss of hiding wires en route to the rear speakers is removed. You can also add a MusicCast wireless subwoofer, which can provide more options for subwoofer placement. All new from Yamaha, MusicCast Surround offers an easy way to enhance your home theater experience.plus MusicCast 20 x 2SUB 100Additional products required to utilize MusicCast Surround.SCENE for One-Touch StartOne-touch start. Pressing a SCENE button powers on the AV receiver and selects the input source and DSP mode. You can reset the buttons fordifferent sources by selecting a source and DSP mode, then pressing a SCENE button for more than three seconds.MusicCast AV ReceiverRX-V585RX-V585 NPB2Technical Data。
Onkyo TX-NR686 7.2 通道 A V 接收器说明书
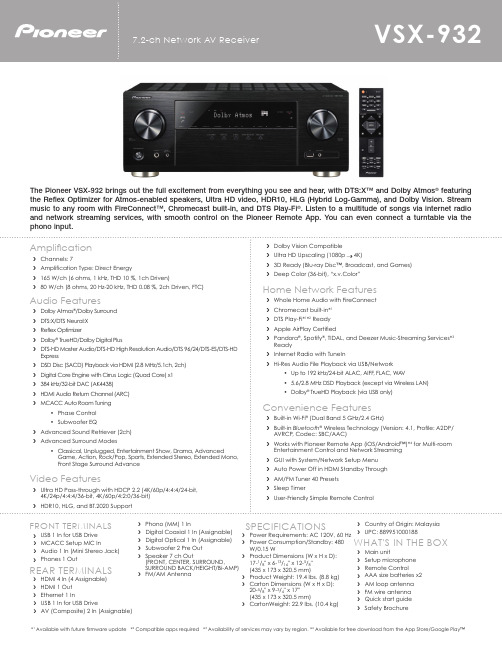
The Pioneer VSX-932 brings out the full excitement from everything you see and hear, with DTS:X™ and Dolby Atmos® featuring the Reflex Optimizer for Atmos-enabled speakers, Ultra HD video, HDR10, HLG (Hybrid Log-Gamma), and Dolby Vision. Stream music to any room with FireConnect™, Chromecast built-in, and DTS Play-Fi®. Listen to a multitude of songs via internet radio and network streaming services, with smooth control on the Pioneer Remote App. You can even connect a turntable via the phono input.FRONT TERMINALS›USB 1 In for USB Drive›MCACC Setup MIC In›Audio 1 In (Mini Stereo Jack)›Phones 1 OutREAR TERMINALS›HDMI 4 In (4 Assignable)›HDMI 1 Out›Ethernet 1 In›USB 1 In for USB Drive›AV (Composite) 2 In (Assignable) ›Digital Coaxial 1 In (Assignable)›Digital Optical 1 In (Assignable)›Subwoofer 2 Pre Out›Speaker 7 ch Out(FRONT, CENTER, SURROUND,SURROUND BACK/HEIGHT/Bi-AMP)›FM/AM AntennaSPECIFICATIONS›Power Requirements: AC 120V, 60 Hz›Power Consumption/Standby: 480W/0.15 W›Product Dimensions (W x H x D):17-1/8" x 6-13/16" x 12-5/8"(435 x 173 x 320.5 mm)›Product Weight: 19.4 lbs. (8.8 kg)›Carton Dimensions (W x H x D):20-5/8" x 9-3/4" x 17"(435 x 173 x 320.5 mm)›CartonWeight: 22.9 lbs. (10.4 kg)›UPC: 889951000188WHAT'S IN THE BOX›Main unit›Setup microphone›Remote Control›AAA size batteries x2›AM loop antenna›FM wire antenna›Quick start guide›Safety Brochure*1 Available with future firmware update *2 Compatible apps required *3 Availability of services may vary by region. *4 Available for free download from the App Store/Google Play™© 2017 Onkyo & Pioneer Corporation. All rights reserved.Note: Specifications and design subject to change without notice.Multi-Dimensional Excitement with Dolby Atmos ®The VSX-932 is compatible with5.2.2ch configuration of the latest theater sound platform, Dolby Atmos ®. You can reproduce object-oriented sound in smooth, curvingmovements, or the realistic three-dimensional movement overhead by the top speakers.DTS:X™DTS:X is the next-generation audio codec from DTS that leverages object-based audioto enable new immersive and interactive audio experiences. Since DTS:X can automatically adapt the audio to the existing channels and speaker system, no specific speaker layout is required. Experience an immersive soundscape with incredibly rich and life-like audio.Next Generation Video Standard ReadyThe VSX-932 supports pass-through for Dolby Vision, HLG (Hybrid Log-Gamma), andHDR10 signals. By connectinga compatible source device, you can enjoy these latest video standards on a compatible display. What’s more, all HDMI terminals support 4K (60p/4:4:4/24-bit), Wide Color Gamut (BT.2020), and HDCP 2.2, so you will have no problem when upgrading to new devices, and can also enjoy premium content such as 4K videos with digital copy protection.Chromecast built-inThe VSX-932 comes with Chromecast built-in, so you can use your mobile device tostream your favorite music, radio, or podcasts to your speaker. You can control the audiofrom anywhere in the house using Chromecast-enabled apps running on your personal device—iPhone, iPad, Android phone and tablet, Mac and Windows laptop, and Chromebook™. Discover Chromecast-enabled apps at /cast/apps.DTS Play-Fi ®DTS Play-Fi* wirelessly streams any audio content from any compatible mobile device to theVSX-932 and DTS Play-Ficompatible audio systems, creating a multi-room system in your home. You can stream different sources to different speakers at the same time from the DTS Play-Fi app.* DTS Play-Fi will be available with future firmware update.Dolby Atmos 5.2.2ch Speaker SystemHDR Dynamic Range Expansion ImageNo HDRWith HDR* For illustration purpose onlyMCACC Auto Room TuningCreate the optimum acousticenvironment with Pioneer’s MCACC (Multi-Channel Acoustic Calibration System), developed with theexpertise of professional recording studios. With the custom microphone, the system automatically compensates for differences in speaker size, level and distance, and equalzes response.Synchronized Sound with Phase ControlAs an innovative solution for the phase lag between the subwoofer and the mainchannel speakers caused by the bass management filter, Phase Control compensates for the delayed bass to improve sound synchronization.Reflex OptimizerWhen using Dolby Atmos-enabled speakers, high Before After directivity sound from the unit reflects off thesound directly reaches the ears. The different pathways cause a phase shift, making the soundfeel uncomfortable. The Reflex Optimizer which uses the Phase Control technology adjusts this shift, and improves the localization of the sound image by aligning the frequencies with those of the floor speakers, creating the ideal reproduction environment.Multi-room Audio Offers a Variety of Ways to Enjoy MusicFireConnect™ mirrors network audio andexternal analog sources connected to the master component—from streaming services to vinylrecords—on FireConnect™-compatible speakers in other rooms. Music selection, speaker grouping, and playback management across the home are built into Pioneer Remote App for iOS and Android.* Sharing of audio from external inputs depends on the model and is enabled with a future firmware update. Sampling rates of 44.1 kHz and 48 kHz are supported. FireConnect is atechnology based on Blackfire provided by Blackfire Research Corp., USA.•PIONEER, MCACC, Phase Control, Advanced Sound Retriever , and the logos are registered trademarks of Pioneer Corporation, and are used under license. •The terms HDMI and HDMI High-Definition Multimedia Interface, and the HDMI Logo are trademarks or registered trademarks of HDMI Licensing LLC in the United States and other countries. •Dolby, Dolby Atmos, Dolby Surround, Dolby Vision, and the double-D symbol are registered trademarks of Dolby Laboratories. •For DTS patents, see . Manufactured under license from DTS, Inc. DTS, the Symbol, DTS and the Symbol together , DTS:X, the DTS:X logo, Play-Fi, and the Play-Fi logo are registered trademarks or trademarks of DTS, Inc. in the United States and/or other countries. © DTS, Inc. All Rights Reserved. •AirPlay, iPad, and iPhone are trademarks of Apple Inc., registered in the U.S. and other countries. •AirPlay works with iPhone, iPad, and iPod touch with iOS 4.3.3 or later , Mac with OS X Mountain Lion, and Mac and PC with iTunes 10.2.2 or later. The AirPlay logo is a trade-mark of Apple Inc. App Store is a service mark of Apple Inc. •IOS is a trademark on which Cisco holds the trademark right in the US and certain other countries. •Wi-Fi is a registered trademark of the Wi-Fi Alliance. The Wi-Fi CERTIFIED Logo is a certification mark of the Wi-Fi Alliance. •The Bluetooth word mark and logos are registered trademarks owned by Bluetooth SIG, Inc. •”x.v.Color” is a trademark of Sony Corporation. •Pandora, the Pandora logo, and the Pandora trade dress are trademarks or registered trademarks of Pandora Media, Inc. used with permission. •Spotify and the Spotify logo are trademarks of the Spotify Group, registered in the U.S. and other countries. •The product with the Hi-Res Audio logo is conformed to Hi-Res Audio standard defined by Japan Audio Society. The logo is used under license from Japan Audio Society. •Android, Google Play, Chromebook, and the Chromecast built-in badge are trademarks of Google Inc. •Blu-ray Disc™, Blu-ray™, Ultra HD Blu-ray™ and the logos are trademarks of the Blu-ray Disc Association. •FireConnect is a technology of Blackfire Research Corp, USA.VSX-932All other trademarks and registered trademarks are the property of their respective holders.Integrated Technologies。
安桥说明书
安桥说明书安桥说明书1. 简介安桥是一种适用于计算机网络中的防火墙设备。
它能够对网络流量进行监控和过滤,以保护网络中的计算机系统免受未经授权的访问和恶意攻击。
本文档将介绍安桥的功能、配置和使用方法。
2. 功能安桥具备以下主要功能:- **包过滤**:安桥可以根据预设的规则对网络流量进行过滤,只允许特定的数据包通过,从而减少恶意流量对网络的影响。
- **访问控制**:通过配置安桥,管理员可以限制从内部网络到外部网络的访问,保护敏感数据不被未经授权的人员获得。
- **攻击防护**:安桥可以通过检测和阻断特定类型的攻击流量,如DDoS攻击、SQL 注入攻击等,保护网络免受恶意攻击。
- **日志记录**:安桥可以记录网络流量、连接和事件等信息,方便管理员进行审计和故障排查。
3. 配置3.1 硬件配置安桥的硬件配置取决于网络规模和性能需求。
通常包括以下组件:- **处理器**:用于处理和过滤网络流量的中央处理器。
- **内存**:存储安桥运行所需的配置和数据。
- **网络接口**:用于连接安桥与网络设备的接口。
3.2 软件配置安桥的软件配置包括以下方面:- **操作系统**:选择合适的操作系统,并进行安装和配置。
- **网络配置**:配置安桥的网络接口、IP地址、子网掩码等信息,以使其能够正常和其他设备进行通信。
- **规则配置**:根据需求,配置安桥的包过滤规则、访问控制规则和攻击防护规则等。
- **日志配置**:配置安桥的日志记录选项,包括日志的格式、存储位置等。
4. 使用方法4.1 登录与认证使用Web浏览器访问安桥的管理界面,并输入正确的用户名和密码进行登录认证。
4.2 配置管理在安桥的管理界面中,可以进行以下配置管理操作:- **规则配置**:设置包过滤规则、访问控制规则和攻击防护规则,以满足特定的安全需求。
- **网络配置**:配置网络接口、IP地址、子网掩码等信息,以使安桥能够与其他设备进行通信。
Onkyo SA-10 操作说明书

Model SA-10 操作说明书Super Audio CD Player附件 (2)关于遥控器 (2)安装电池 (2)遥控器的操作范围 (2)特点 (3)高音效 (3)高性能 (3)部件名称与功能 (4)前面板 (4)显示屏 (5)后面板 (6)遥控器 (7)连接立体声音频放大器 (8)连接带有数字音频输入端子的设备 (8)连接带有数字音频输出端子的设备 (9)将iPod或USB存储设备连接至USB端口 (9)连接PC或Mac (10)连接带有遥控端子的设备 (10)连接 (10)设置 (10)连接定时器设备 (10)连接电源线 (10)11基本操作 (11)开启电源 (11)选择播放媒体模式 (11)关闭显示屏和照明灯 (11)始终关闭照明灯 (11)停止数字输出 (12)设置超级音频CD的最优先播放层 (12)播放CD/超级音频CD (13)播放CD和超级音频CD (13)以特定顺序播放曲目(编程播放) (14)播放DATA CD和DATA DVD (15)播放文件 (15)播放iPod (16)聆听iPod上的音乐 (16)设置操作模式( “On-Display” 模式) (16)对iPod充电 (17)播放USB存储设备 (18)播放储存在USB存储设备上的文件 (18)用作数模转换器 (20)连接和从计算机播放(USB-DAC) (20)连接和播放数字设备(同轴/光纤) (24)指定所需的音质 (24)切换滤波器的特性。
(24)设置 25菜单图 (25)菜单操作 (25)Dither (26)NoiseShaper (26)Phones (26)HP AMP Gain (26)Resume Play (27)Phase (27)AutoStandby (27)Timer Play (27)提示 (28)提示 (29)故障诊断 (30)保修和修理 (34)附录 (35)可播放的媒体 (35)光碟 (35)USB存储设备 (37)音乐文件的播放顺序 (38)关于光碟和文件 (38)使用媒体的注意事项 (38)插入光碟 (38)关于媒体的使用 (39)清洁光碟 (39)数模转换器 (40)支持的音频格式规格 (40)术语解释 (40)商标信息 (41)规格 (42)索引 (44)1感谢您选购此Marantz产品。
安桥MINI组合的使用方法(1)(转载)

安桥FR-V7MINI组合的使用方法(1)安桥MINI组合机有CD,MD和收音三种功能的有多种型号,外型相似的不少,使用方法大同小异。
在此用一台安桥CR-V7作为实例,把这种机器的使用方法介绍给各位作为参考。
(一)收音机调台:开机后按图3-2,屏幕显示:FM...................,按图2-3或4开始自动搜台,搜到以后自动停下来,按图4-2,屏幕显示Preset Write?(调台录入?),按图4-3后可以看到屏幕右边有个数字闪动,这是所搜到电台的位置,可以转动图4-1选择位置,然后按图4-3确认;也可以直接按图4-3,屏幕显示:Over Write?(是否录入?),再按图4-3确认就可以录入这个台的位置了。
继续从按图2-3或4开始,反复操作就可以搜完当地能接收到的FM电台,这种机器有30个存台的位置,基本可以满足需求了。
在开始调台之前,可以把以前已经录入的电台删除,具体操作如下:找到想要删除电台的位置,连按图4-2,找到屏幕显示:Preset Erase(调台删除),按图4-3,屏幕显示:Erase OK(是否删除),再按图4-3就可以删除这个位置原来录入的电台,用这种方法反复操作就可以把不想要电台的全部删除。
这种机器收音机调台还有全自动搜台的功能:Auto Preset,由于灵敏度太高,自动搜台把一些有杂音的位置当作电台录入,30个位置很快就被占满,但大部分都不是真正的电台,结果还要逐个删除才能重新调台。
建议收音机调台的时候不要使用自动调台的功能。
(二)调时间:接通电源没有开机时屏幕上有0:00在不停地闪动,如需要调时间就按图1-1,屏幕显示:Clock(时钟),这时马上按图4-1,屏幕出现:SUN(星期天)在闪动,这时可转动图4-1顺时针:MON(星期一),TUE(星期二),WED(星期三),THU(星期四),FRI(星期五),SAT(星期六),找到合适的日子以后按图4-1,屏幕上0:00开始闪动,转动图4-1(时钟24小时)找到适当的时间按图4-1确认,这时屏幕上的星期几的显示消失,时间开始走动,调时间的操作完成了。
安桥686功放说明书

USB:当选择“NET”输入选择器,连接 USB 设备且选择 USB 输入时亮起。如果 USB 未正确连接,则会闪烁。 HDMI:已输入 HDMI 信号并且已选定 HDMI 输入选择。 DIGITAL:已输入数字信号且已选定数字输入。 3. 根据输入数字音频信号的类型和聆听模式亮起。 4. 在下列情况下亮起。 RDS(欧洲、澳大利亚及亚洲产品类型):接收 RDS 广播。 TUNED:接收 AM/FM 电台。 FM ST:接收 FM 立体声。 SLEEP:已设定睡眠定时器。( p101) AUTO STBY:已设置 Auto Standby。( p101) 5. 开启静音时闪烁。
连接电视 连接 ARC 电视 连接非 ARC 电视
连接播放设备 连接装有 HDMI 接口的 AV 设备 连接无 HDMI 接口的 AV 设备 连接音频组件 连接视频摄像机等
连接单独房间中的 AV 设备(多区域连接) 连接前置主放大器 (ZONE 2)
连接天线
目录 ≫ 连接 ≫ 播放 ≫ 设置 ≫
5 网络连接
MAIN/ZONE 2 按钮:控制多区域功能 ( p63)。(本机不使用 ZONE 3 按钮。)
9. 播放按钮:用于 Music Server ( p52) 或 USB 设备 ( p49) 的播放操
作。
10.
按钮:用于 Music Server ( p52) 或 USB 设备 ( p49) 的重复/随
12. MASTER VOLUME 13. 按 LISTENING MODE 按钮(上方)来选择“Movie/TV”、“Music”或 “Game”,然后
旋转 LISTENING MODE 旋钮(下方)更改聆听模式。( p66) 14. 您可以调整前置扬声器的音质。按 TONE 按钮(上方)从“Bass”和“Treble”中选择
- 1、下载文档前请自行甄别文档内容的完整性,平台不提供额外的编辑、内容补充、找答案等附加服务。
- 2、"仅部分预览"的文档,不可在线预览部分如存在完整性等问题,可反馈申请退款(可完整预览的文档不适用该条件!)。
- 3、如文档侵犯您的权益,请联系客服反馈,我们会尽快为您处理(人工客服工作时间:9:00-18:30)。
media player,点 1
击“媒体流”的选Leabharlann 2项,点开“打开媒
体流”
在弹出的页面里 为电脑“启动媒 体流”
当这个页面出现的 时候,恭喜你! 流媒体的共享设置 已经完成了并可以 使用dlna的局域网 络共享音乐了
如果你的电脑是 win7的旗舰版 系统你可能会出 现这样的情况,
那么你的电脑需 要多做一个步骤 点击“windows 服务管理工具”
选取了要使用的功 放型号后会弹出界 面 你选取的歌曲就可 以在功放上面进行 播放了!
如何通过Windows Media Center设置共享文件夹
点击进入开始菜单
里的Windows Media Center
打开Windows Media Center
点击进入任务“设 置”
进入设置,打开“ 媒体库”
方法一: 在功放里直接选择 播放
使用功放里的 “NET”通道 直接选择共享的电 脑
方法一: 在功放里直接选择 播放
选取歌曲曲目
方法一: 在功放里直接选择 播放
出现歌曲播放的界 面
方法二: 在电脑里选择曲目给 功放播放(功放开到 “NET”通道)
选到你要收听的曲目 然后右击曲目选择到 要播放的功放
进入 “硬件设置” 选择 “网络”
进入 “网络” 启动 “DHCP”
(自动获得IP地址)
或禁止 “DHCP”
(手动设置IP地址)
最后 “保存” 功放设置完成
Stage 3 – 电脑端设定 . . .
对电脑进行一个设置
确认电脑和功放连 接在同一网络里 (无论您是无线连 接或有线连接)
打开你的windows
Ready . . .设备准备
NR系列功放
“NR”系列
无线路由器 网线
电脑
win7
Stage 1 - 连接
确保你的无线路由器工作 正常,打开无线功能,并 将”NR“系列的功放连 接至路由器
Stage 2 – 功放设定
“NR”系列
对功放进行一个简单的设置
进入 “SET UP” 选择“硬件设置”
在“媒体库”中可 以自由的设置共享 的音乐
依据步骤,我们可 以添加或者减少文 件夹
点击此项栏目,接 下来就可以在下拉 栏目里选取你储存 音乐的文件夹来进 行共享了。
只要在你存放音乐 的文件夹前勾选即 可。
它将把你所选取的 共享地址列出。 点击“是,使用这 些位置”和“完成 ”你的共享音乐就 全部搞定了,你在 功放的NET中,看 到你的电脑和共享 的文件夹及音乐了 。
媒体流不能启动的原因就 是这条被禁用了 So,我们要启动它
3
4 2
5
右键进入属
1
性,弹出界
面
当这个页面出现的 时候,恭喜你! 流媒体的共享设置 已经完成了。
这个时候你已经可 以在功放的NET上 共享你的音乐了( 默认的音乐共享文 件夹在“我的音乐 ”)
如何使用局域网络共享音乐
两 —— 种玩法
