JAVA将任意图片文件压缩成想要的图片类型与大小
java 实现对图片进行指定的缩小或放大
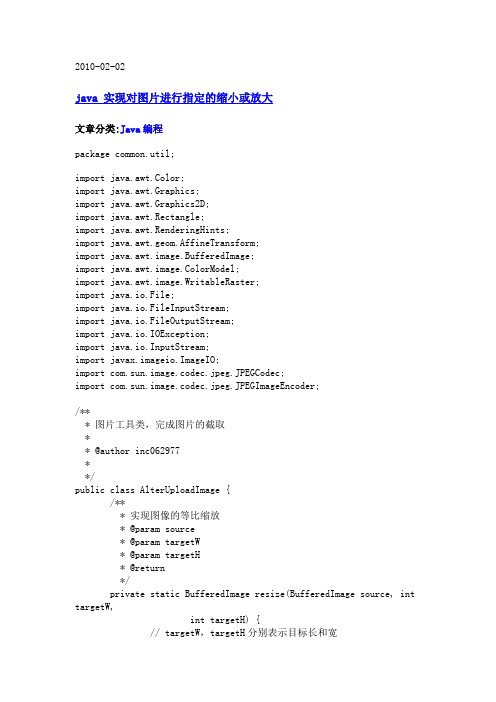
2010-02-02java 实现对图片进行指定的缩小或放大文章分类:Java编程package common.util;import java.awt.Color;import java.awt.Graphics;import java.awt.Graphics2D;import java.awt.Rectangle;import java.awt.RenderingHints;import java.awt.geom.AffineTransform;import java.awt.image.BufferedImage;import java.awt.image.ColorModel;import java.awt.image.WritableRaster;import java.io.File;import java.io.FileInputStream;import java.io.FileOutputStream;import java.io.IOException;import java.io.InputStream;import javax.imageio.ImageIO;import com.sun.image.codec.jpeg.JPEGCodec;import com.sun.image.codec.jpeg.JPEGImageEncoder;/*** 图片工具类,完成图片的截取** @author inc062977**/public class AlterUploadImage {/*** 实现图像的等比缩放* @param source* @param targetW* @param targetH* @return*/private static BufferedImage resize(BufferedImage source, int targetW,int targetH) {// targetW,targetH分别表示目标长和宽int type = source.getType();BufferedImage target = null;double sx = (double) targetW / source.getWidth();double sy = (double) targetH / source.getHeight();// 这里想实现在targetW,targetH范围内实现等比缩放。
java实现图片像素质量压缩与图片长宽缩放

java实现图⽚像素质量压缩与图⽚长宽缩放⽬录java 图⽚像素质量压缩与图⽚长宽缩放java 修改图⽚dpi(像素/⼤⼩)java 图⽚像素质量压缩与图⽚长宽缩放今天找到的这个⽅法⽐以前项⽬⽤到的⽅法更好,这⾥记录下,⽅便⽇后使⽤!/*** 缩放图⽚(压缩图⽚质量,改变图⽚尺⼨)* 若原图宽度⼩于新宽度,则宽度不变!* @param newWidth 新的宽度* @param quality 图⽚质量参数 0.7f 相当于70%质量* 2015年12⽉11⽇*/public static void resize(File originalFile, File resizedFile,int newWidth, float quality) throws IOException {if (quality > 1) {throw new IllegalArgumentException("Quality has to be between 0 and 1");}ImageIcon ii = new ImageIcon(originalFile.getCanonicalPath());Image i = ii.getImage();Image resizedImage = null;int iWidth = i.getWidth(null);int iHeight = i.getHeight(null);if(iWidth < newWidth){newWidth = iWidth;}if (iWidth > iHeight) {resizedImage = i.getScaledInstance(newWidth, (newWidth * iHeight)/ iWidth, Image.SCALE_SMOOTH);} else {resizedImage = i.getScaledInstance((newWidth * iWidth) / iHeight,newWidth, Image.SCALE_SMOOTH);}// This code ensures that all the pixels in the image are loaded.Image temp = new ImageIcon(resizedImage).getImage();// Create the buffered image.BufferedImage bufferedImage = new BufferedImage(temp.getWidth(null),temp.getHeight(null), BufferedImage.TYPE_INT_RGB);// Copy image to buffered image.Graphics g = bufferedImage.createGraphics();// Clear background and paint the image.g.setColor(Color.white);g.fillRect(0, 0, temp.getWidth(null), temp.getHeight(null));g.drawImage(temp, 0, 0, null);g.dispose();// Soften.float softenFactor = 0.05f;float[] softenArray = { 0, softenFactor, 0, softenFactor,1 - (softenFactor * 4), softenFactor, 0, softenFactor, 0 };Kernel kernel = new Kernel(3, 3, softenArray);ConvolveOp cOp = new ConvolveOp(kernel, ConvolveOp.EDGE_NO_OP, null);bufferedImage = cOp.filter(bufferedImage, null);// Write the jpeg to a file.FileOutputStream out = new FileOutputStream(resizedFile);// Encodes image as a JPEG data streamJPEGImageEncoder encoder = JPEGCodec.createJPEGEncoder(out);JPEGEncodeParam param = encoder.getDefaultJPEGEncodeParam(bufferedImage);param.setQuality(quality, true);encoder.setJPEGEncodeParam(param);encoder.encode(bufferedImage);} // Example usagepublic static void main(String[] args) throws IOException {// File originalImage = new File("C:\\11.jpg");// resize(originalImage, new File("c:\\11-0.jpg"),150, 0.7f);// resize(originalImage, new File("c:\\11-1.jpg"),150, 1f);File originalImage = new File("d:\\testImg\\1.jpg");System.out.println("源⽂件⼤⼩" + originalImage.length());// File resizedImg = new File("d:\\testImg\\11.jpg");// resize(originalImage, resizedImg, 850, 1f);// System.out.println("0.5转换后⽂件⼤⼩" + resizedImg.length());// File resizedImg1 = new File("d:\\testImg\\111.jpg");File resizedImg1 = new File("/alidata/zkyj/dashixiong/tempImgFile/11.jpg");resize(originalImage, resizedImg1, 1550, 0.7f);System.out.println("0.7转换后⽂件⼤⼩" + resizedImg1.length());}java 修改图⽚dpi(像素/⼤⼩)import com.sun.image.codec.jpeg.JPEGCodec;import com.sun.image.codec.jpeg.JPEGEncodeParam;import com.sun.image.codec.jpeg.JPEGImageEncoder;import javax.imageio.ImageIO;import java.awt.image.BufferedImage;import java.io.File;import java.io.FileOutputStream;import java.io.IOException;public class DPIHandleHelper {private static int DPI = 300;public static void main(String[] args) {String path = "C:\\test.jpg";File file = new File(path);handleDpi(file, 300, 300);}/*** 改变图⽚DPI** @param file* @param xDensity* @param yDensity*/public static void handleDpi(File file, int xDensity, int yDensity) {try {BufferedImage image = ImageIO.read(file);JPEGImageEncoder jpegEncoder = JPEGCodec.createJPEGEncoder(new FileOutputStream(file)); JPEGEncodeParam jpegEncodeParam = jpegEncoder.getDefaultJPEGEncodeParam(image);jpegEncodeParam.setDensityUnit(JPEGEncodeParam.DENSITY_UNIT_DOTS_INCH);jpegEncoder.setJPEGEncodeParam(jpegEncodeParam);jpegEncodeParam.setQuality(0.75f, false);jpegEncodeParam.setXDensity(xDensity);jpegEncodeParam.setYDensity(yDensity);jpegEncoder.encode(image, jpegEncodeParam);image.flush();} catch (IOException e) {e.printStackTrace();}}}以上为个⼈经验,希望能给⼤家⼀个参考,也希望⼤家多多⽀持。
java中实现压缩图片(指定图片宽度和高度或者压缩比例对图片进行压缩)
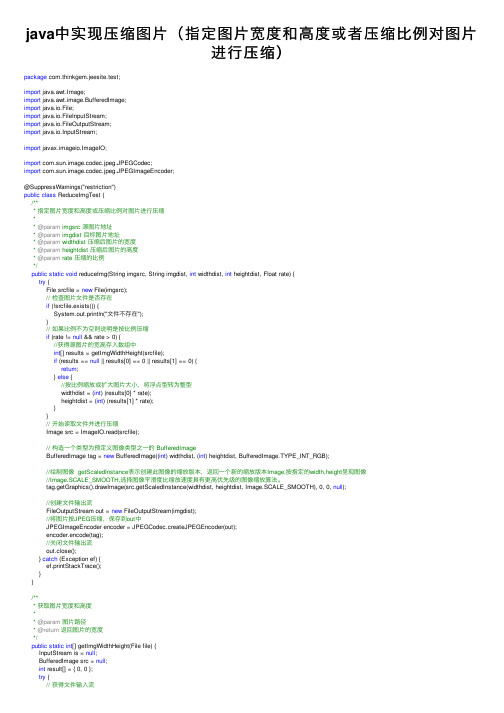
java中实现压缩图⽚(指定图⽚宽度和⾼度或者压缩⽐例对图⽚进⾏压缩)package com.thinkgem.jeesite.test;import java.awt.Image;import java.awt.image.BufferedImage;import java.io.File;import java.io.FileInputStream;import java.io.FileOutputStream;import java.io.InputStream;import javax.imageio.ImageIO;import com.sun.image.codec.jpeg.JPEGCodec;import com.sun.image.codec.jpeg.JPEGImageEncoder;@SuppressWarnings("restriction")public class ReduceImgTest {/*** 指定图⽚宽度和⾼度或压缩⽐例对图⽚进⾏压缩** @param imgsrc 源图⽚地址* @param imgdist ⽬标图⽚地址* @param widthdist 压缩后图⽚的宽度* @param heightdist 压缩后图⽚的⾼度* @param rate 压缩的⽐例*/public static void reduceImg(String imgsrc, String imgdist, int widthdist, int heightdist, Float rate) {try {File srcfile = new File(imgsrc);// 检查图⽚⽂件是否存在if (!srcfile.exists()) {System.out.println("⽂件不存在");}// 如果⽐例不为空则说明是按⽐例压缩if (rate != null && rate > 0) {//获得源图⽚的宽⾼存⼊数组中int[] results = getImgWidthHeight(srcfile);if (results == null || results[0] == 0 || results[1] == 0) {return;} else {//按⽐例缩放或扩⼤图⽚⼤⼩,将浮点型转为整型widthdist = (int) (results[0] * rate);heightdist = (int) (results[1] * rate);}}// 开始读取⽂件并进⾏压缩Image src = ImageIO.read(srcfile);// 构造⼀个类型为预定义图像类型之⼀的 BufferedImageBufferedImage tag = new BufferedImage((int) widthdist, (int) heightdist, BufferedImage.TYPE_INT_RGB);//绘制图像 getScaledInstance表⽰创建此图像的缩放版本,返回⼀个新的缩放版本Image,按指定的width,height呈现图像//Image.SCALE_SMOOTH,选择图像平滑度⽐缩放速度具有更⾼优先级的图像缩放算法。
java图片无损压缩
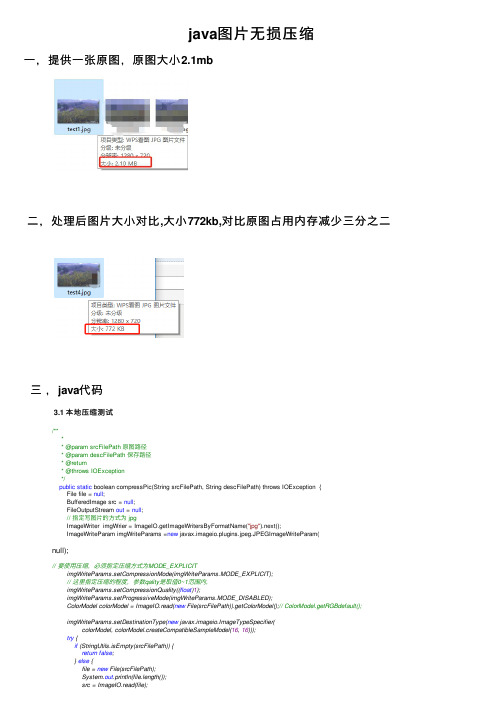
java图⽚⽆损压缩⼀,提供⼀张原图,原图⼤⼩2.1mb⼆,处理后图⽚⼤⼩对⽐,⼤⼩772kb,对⽐原图占⽤内存减少三分之⼆三,java代码3.1 本地压缩测试/**** @param srcFilePath 原图路径* @param descFilePath 保存路径* @return* @throws IOException*/public static boolean compressPic(String srcFilePath, String descFilePath) throws IOException {File file = null;BufferedImage src = null;FileOutputStream out = null;// 指定写图⽚的⽅式为 jpgImageWriter imgWrier = ImageIO.getImageWritersByFormatName("jpg").next();ImageWriteParam imgWriteParams =new javax.imageio.plugins.jpeg.JPEGImageWriteParam(null);// 要使⽤压缩,必须指定压缩⽅式为MODE_EXPLICITimgWriteParams.setCompressionMode(imgWriteParams.MODE_EXPLICIT);// 这⾥指定压缩的程度,参数qality是取值0~1范围内,imgWriteParams.setCompressionQuality((float)1);imgWriteParams.setProgressiveMode(imgWriteParams.MODE_DISABLED);ColorModel colorModel = ImageIO.read(new File(srcFilePath)).getColorModel();// ColorModel.getRGBdefault();imgWriteParams.setDestinationType(new javax.imageio.ImageTypeSpecifier(colorModel, colorModel.createCompatibleSampleModel(16, 16)));try {if (StringUtils.isEmpty(srcFilePath)) {return false;} else {file = new File(srcFilePath);System.out.println(file.length());src = ImageIO.read(file);out = new FileOutputStream(descFilePath);imgWrier.reset();// 必须先指定 out值,才能调⽤write⽅法, ImageOutputStream可以通过任何// OutputStream构造imgWrier.setOutput(ImageIO.createImageOutputStream(out));// 调⽤write⽅法,就可以向输⼊流写图⽚imgWrier.write(null, new IIOImage(src, null, null),imgWriteParams);out.flush();out.close();}} catch (Exception e) {e.printStackTrace();return false;}return true;}public static void main(String[] args) throws IOException {String stpa="D:\\⽂件表\\test1.jpg";String st1="D:\\⽂件表\\test2.jpg";compressPic(stpa, st1);}3.2 也可压缩后转成数据格式返回做其他操作1/**2 *3 * ⾃⼰设置压缩质量来把图⽚压缩成byte[]4 *5 * @param image6 * 压缩源图⽚7 * @param quality8 * 压缩质量,在0-1之间,9 * @return 返回的字节数组10*/11private byte[] bufferedImageTobytes(BufferedImage image, float quality) {12// 如果图⽚空,返回空13/*if (image == null) {14 return null;15 } */16// 得到指定Format图⽚的writer17 Iterator<ImageWriter> iter = ImageIO18 .getImageWritersByFormatName("jpg");// 得到迭代器19 ImageWriter writer = (ImageWriter) iter.next(); // 得到writer2021// 得到指定writer的输出参数设置(ImageWriteParam )22 ImageWriteParam iwp = writer.getDefaultWriteParam();23 iwp.setCompressionMode(ImageWriteParam.MODE_EXPLICIT); // 设置可否压缩24 iwp.setCompressionQuality(quality); // 设置压缩质量参数2526 iwp.setProgressiveMode(ImageWriteParam.MODE_DISABLED);2728 ColorModel colorModel = image.getColorModel();29// 指定压缩时使⽤的⾊彩模式30 iwp.setDestinationType(new javax.imageio.ImageTypeSpecifier(colorModel,31 colorModel.createCompatibleSampleModel(16, 16)));3233// 开始打包图⽚,写⼊byte[]34 ByteArrayOutputStream byteArrayOutputStream = new ByteArrayOutputStream(); // 取得内存输出流35 IIOImage iIamge = new IIOImage(image, null, null);36try {37// 此处因为ImageWriter中⽤来接收write信息的output要求必须是ImageOutput38// 通过ImageIo中的静态⽅法,得到byteArrayOutputStream的ImageOutput39 writer.setOutput(ImageIO40 .createImageOutputStream(byteArrayOutputStream));41 writer.write(null, iIamge, iwp);4243 } catch (IOException e) {44 System.out.println("write errro");45 e.printStackTrace();46 }47return byteArrayOutputStream.toByteArray();48 }。
JAVA图片压缩到指定大小
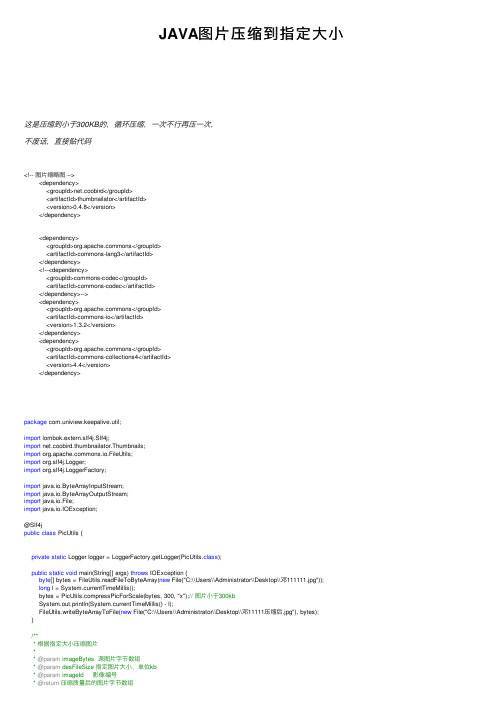
JAVA图⽚压缩到指定⼤⼩这是压缩到⼩于300KB的,循环压缩,⼀次不⾏再压⼀次,不废话,直接贴代码<!-- 图⽚缩略图 --><dependency><groupId>net.coobird</groupId><artifactId>thumbnailator</artifactId><version>0.4.8</version></dependency><dependency><groupId>mons</groupId><artifactId>commons-lang3</artifactId></dependency><!--<dependency><groupId>commons-codec</groupId><artifactId>commons-codec</artifactId></dependency>--><dependency><groupId>mons</groupId><artifactId>commons-io</artifactId><version>1.3.2</version></dependency><dependency><groupId>mons</groupId><artifactId>commons-collections4</artifactId><version>4.4</version></dependency>package com.uniview.keepalive.util;import lombok.extern.slf4j.Slf4j;import net.coobird.thumbnailator.Thumbnails;import mons.io.FileUtils;import org.slf4j.Logger;import org.slf4j.LoggerFactory;import java.io.ByteArrayInputStream;import java.io.ByteArrayOutputStream;import java.io.File;import java.io.IOException;@Slf4jpublic class PicUtils {private static Logger logger = LoggerFactory.getLogger(PicUtils.class);public static void main(String[] args) throws IOException {byte[] bytes = FileUtils.readFileToByteArray(new File("C:\\Users\\Administrator\\Desktop\\邓111111.jpg"));long l = System.currentTimeMillis();bytes = pressPicForScale(bytes, 300, "x");// 图⽚⼩于300kbSystem.out.println(System.currentTimeMillis() - l);FileUtils.writeByteArrayToFile(new File("C:\\Users\\Administrator\\Desktop\\邓11111压缩后.jpg"), bytes);}/*** 根据指定⼤⼩压缩图⽚** @param imageBytes 源图⽚字节数组* @param desFileSize 指定图⽚⼤⼩,单位kb* @param imageId 影像编号* @return压缩质量后的图⽚字节数组*/public static byte[] compressPicForScale(byte[] imageBytes, long desFileSize, String imageId) { if (imageBytes == null || imageBytes.length <= 0 || imageBytes.length < desFileSize * 1024) {return imageBytes;}long srcSize = imageBytes.length;double accuracy = getAccuracy(srcSize / 1024);try {while (imageBytes.length > desFileSize * 1024) {ByteArrayInputStream inputStream = new ByteArrayInputStream(imageBytes);ByteArrayOutputStream outputStream = new ByteArrayOutputStream(imageBytes.length); Thumbnails.of(inputStream).scale(accuracy).outputQuality(accuracy).toOutputStream(outputStream);imageBytes = outputStream.toByteArray();}("【图⽚压缩】imageId={} | 图⽚原⼤⼩={}kb | 压缩后⼤⼩={}kb",imageId, srcSize / 1024, imageBytes.length / 1024);} catch (Exception e) {logger.error("【图⽚压缩】msg=图⽚压缩失败!", e);}return imageBytes;}/*** ⾃动调节精度(经验数值)** @param size 源图⽚⼤⼩* @return图⽚压缩质量⽐*/private static double getAccuracy(long size) {double accuracy;if (size < 900) {accuracy = 0.85;} else if (size < 2047) {accuracy = 0.6;} else if (size < 3275) {accuracy = 0.44;} else {accuracy = 0.4;}return accuracy;}}。
Java实现的上传并压缩图片功能【可等比例压缩或原尺寸压缩】
Java实现的上传并压缩图⽚功能【可等⽐例压缩或原尺⼨压缩】本⽂实例讲述了Java实现的上传并压缩图⽚功能。
分享给⼤家供⼤家参考,具体如下:先看效果:原图:1.33M处理后:27.4kb关键代码:package codeGenerate.util;import java.awt.Color;import java.awt.Graphics2D;import java.awt.Image;import java.awt.image.BufferedImage;import java.io.File;import java.io.FileNotFoundException;import java.io.IOException;import javax.imageio.ImageIO;public class ImageZipUtil {public static void main(String[] args) {zipWidthHeightImageFile(new File("C:\\spider\\3.png"),new File("C:\\spider\\3-1.jpg"),425,638,0.7f);//zipImageFile(new File("C:\\spider\\2.JPG"),new File("C:\\spider\\2-2.JPG"),425,638,0.7f);//zipImageFile(new File("C:\\spider\\3.jpg"),new File("C:\\spider\\3-3.jpg"),425,638,0.7f);System.out.println("ok");}/*** 根据设置的宽⾼等⽐例压缩图⽚⽂件<br> 先保存原⽂件,再压缩、上传* @param oldFile 要进⾏压缩的⽂件* @param newFile 新⽂件* @param width 宽度 //设置宽度时(⾼度传⼊0,等⽐例缩放)* @param height ⾼度 //设置⾼度时(宽度传⼊0,等⽐例缩放)* @param quality 质量* @return 返回压缩后的⽂件的全路径*/public static String zipImageFile(File oldFile,File newFile, int width, int height,float quality) {if (oldFile == null) {return null;}try {/** 对服务器上的临时⽂件进⾏处理 */Image srcFile = ImageIO.read(oldFile);int w = srcFile.getWidth(null);int h = srcFile.getHeight(null);double bili;if(width>0){bili=width/(double)w;height = (int) (h*bili);}else{if(height>0){bili=height/(double)h;width = (int) (w*bili);}}String srcImgPath = newFile.getAbsoluteFile().toString();System.out.println(srcImgPath);String subfix = "jpg";subfix = srcImgPath.substring(stIndexOf(".")+1,srcImgPath.length());BufferedImage buffImg = null;if(subfix.equals("png")){buffImg = new BufferedImage(width, height, BufferedImage.TYPE_INT_ARGB);}else{buffImg = new BufferedImage(width, height, BufferedImage.TYPE_INT_RGB);}Graphics2D graphics = buffImg.createGraphics();graphics.setBackground(new Color(255,255,255));graphics.setColor(new Color(255,255,255));graphics.fillRect(0, 0, width, height);graphics.drawImage(srcFile.getScaledInstance(width, height, Image.SCALE_SMOOTH), 0, 0, null);ImageIO.write(buffImg, subfix, new File(srcImgPath));} catch (FileNotFoundException e) {e.printStackTrace();} catch (IOException e) {e.printStackTrace();}return newFile.getAbsolutePath();}/*** 按设置的宽度⾼度压缩图⽚⽂件<br> 先保存原⽂件,再压缩、上传* @param oldFile 要进⾏压缩的⽂件全路径* @param newFile 新⽂件* @param width 宽度* @param height ⾼度* @param quality 质量* @return 返回压缩后的⽂件的全路径*/public static String zipWidthHeightImageFile(File oldFile,File newFile, int width, int height,float quality) {if (oldFile == null) {return null;}String newImage = null;try {/** 对服务器上的临时⽂件进⾏处理 */Image srcFile = ImageIO.read(oldFile);String srcImgPath = newFile.getAbsoluteFile().toString();System.out.println(srcImgPath);String subfix = "jpg";subfix = srcImgPath.substring(stIndexOf(".")+1,srcImgPath.length());BufferedImage buffImg = null;if(subfix.equals("png")){buffImg = new BufferedImage(width, height, BufferedImage.TYPE_INT_ARGB);}else{buffImg = new BufferedImage(width, height, BufferedImage.TYPE_INT_RGB);}Graphics2D graphics = buffImg.createGraphics();graphics.setBackground(new Color(255,255,255));graphics.setColor(new Color(255,255,255));graphics.fillRect(0, 0, width, height);graphics.drawImage(srcFile.getScaledInstance(width, height, Image.SCALE_SMOOTH), 0, 0, null);ImageIO.write(buffImg, subfix, new File(srcImgPath));} catch (FileNotFoundException e) {e.printStackTrace();} catch (IOException e) {e.printStackTrace();}return newImage;}}说明:1、根据需求⼤家可以⾃⾏设置质量参数quality,到底设置成多少,可以先看下效果在取值;2、⽹上通⽤的⽅法⽤的是jdk⾃带jar包中⽅法,我这⾥衍⽣了⼀下:⽤Graphics2D,能够同时处理jpg和png格式;3、new Color(255,255,255)是⽩⾊,等同于WHITE,但是⽤WHITE 的话,Linux下某些图⽚会有其它⾊值;4、main中的宽425和⾼638可以根据⾃⼰的需求⾃⾏设置,但是对于长和宽⼀样的,按照400(⼩值的值425)*400来处理;更多java相关内容感兴趣的读者可查看本站专题:《》、《》、《》、《》及《》。
Java中图片压缩处理
Java中图⽚压缩处理整理⽂档,搜刮出⼀个Java做图⽚压缩的代码,稍微整理精简⼀下做下分享。
⾸先,要压缩的图⽚格式不能说动态图⽚,你可以使⽤bmp、png、gif等,⾄于压缩质量,可以通过BufferedImage来指定。
在C盘的temp下放置⼀张图⽚pic123.jpg,尽量找⼀个像素⾼⼀点的图⽚,这⾥我找了⼀张5616*3744的。
package test;import java.io.*;import java.util.Date;import java.awt.*;import java.awt.image.*;import javax.imageio.ImageIO;import com.sun.image.codec.jpeg.*;/*** 图⽚压缩处理* @author 崔素强*/public class ImgCompress {private Image img;private int width;private int height;@SuppressWarnings("deprecation")public static void main(String[] args) throws Exception {System.out.println("开始:" + new Date().toLocaleString());ImgCompress imgCom = new ImgCompress("C:\\temp\\pic123.jpg");imgCom.resizeFix(400, 400);System.out.println("结束:" + new Date().toLocaleString());}/*** 构造函数*/public ImgCompress(String fileName) throws IOException {File file = new File(fileName);// 读⼊⽂件img = ImageIO.read(file); // 构造Image对象width = img.getWidth(null); // 得到源图宽height = img.getHeight(null); // 得到源图长}/*** 按照宽度还是⾼度进⾏压缩* @param w int 最⼤宽度* @param h int 最⼤⾼度*/public void resizeFix(int w, int h) throws IOException {if (width / height > w / h) {resizeByWidth(w);} else {resizeByHeight(h);}}/*** 以宽度为基准,等⽐例放缩图⽚* @param w int 新宽度*/public void resizeByWidth(int w) throws IOException {int h = (int) (height * w / width);resize(w, h);}/*** 以⾼度为基准,等⽐例缩放图⽚* @param h int 新⾼度*/public void resizeByHeight(int h) throws IOException {int w = (int) (width * h / height);resize(w, h);}/*** 强制压缩/放⼤图⽚到固定的⼤⼩* @param w int 新宽度* @param h int 新⾼度*/public void resize(int w, int h) throws IOException {// SCALE_SMOOTH 的缩略算法⽣成缩略图⽚的平滑度的优先级⽐速度⾼⽣成的图⽚质量⽐较好但速度慢BufferedImage image = new BufferedImage(w, h,BufferedImage.TYPE_INT_RGB );image.getGraphics().drawImage(img, 0, 0, w, h, null); // 绘制缩⼩后的图File destFile = new File("C:\\temp\\456.jpg");FileOutputStream out = new FileOutputStream(destFile); // 输出到⽂件流// 可以正常实现bmp、png、gif转jpgJPEGImageEncoder encoder = JPEGCodec.createJPEGEncoder(out);encoder.encode(image); // JPEG编码}}运⾏后在C盘temp下⽣成⼀个465.jpg,像素⼤⼩为600*400,像素⼤⼩是我指定的。
java等比缩小、放大图片尺寸

1<dependency> 2<groupId>net.coobird</groupId> 3<artifactId>thumbnailator</artifactId> 4<version>0.4.8</version> 5</dependency>
3.解 决 方 案
代码实现:
1 /* 2 * 对图片进行等比缩小或放大 3 * @attention: 4 * Thumbnails可以将修改后的图片转换成OutputStream、BufferedImage或者File 5 * @date: 2022/2/16 18:37 6 * @param: imgInputPath 原图片路径 7 * @param: imgOutputPath 图片输出路径 8 * 可以更改原图片的格式(比如:原图片是png格式,我们可以在让其生成的时候变成非png格式) 9 * @param: scale 图片比例 10* @return: boolean 成功、失败 11*/ 12public static boolean compressPicBySize(String imgInputPath, String imgOutputPath, float scale) { 13boolean flag = false; 14String imgStatus = (scale > 1) ? "放大" : "缩小"; 15try { 16Thumbnails.of(imgInputPath).scale(scale).toFile(imgOutputPath); 17// 成功 18flag = true; ("图片{}成功", imgStatus); 20} catch (IOException e) { 21e.printStackTrace(); 22log.error("图片{}失败:{}", imgStatus, e.getMessage()); 23} 24return flag; 25}
java图片的压缩
106. encoder.encode(tag);
107. out.close();
113. }
114. public String compressPic (String inputDir, String outputDir, String inputFileName, String outputFileName) {
13.import com.sun.image.codec.jpeg.JPEGImageEncoder;
14.
15./*******************************************************************************
16. * 缩略图类(通用) 本java类能将jpg、bmp、png、gif图片文件,进行等比或非等比的大小转换。 具体使用方法
68. // 图片处理
69. public String compressPic() {
70. try {
71. //获得源文件
72. file = new File(inputDir + inputFileName);
17. * compressPic(大图片路径,生成小图片路径,大图片文件名,生成小图片文名,生成小图片宽度,生成小图片高度,是否等比缩放(默认为true))
18. */
19. public class CompressPicDemo {
20. private File file = null; // 文件对象
Java实现图片压缩的两种方法
Java实现图⽚压缩的两种⽅法问题背景。
典型的情景:Nemo社区中,⽤户上传的图⽚免不了要在某处给⽤户做展⽰。
如⽤户上传的头像,那么其他⽤户在浏览该⽤户信息的时候,就会需要回显头像信息了。
⽤户上传的原图可能由于清晰度较⾼⽽体积也相对较⼤,考虑⽤户流量带宽,⼀般⽽⾔我们都不会直接体积巨⼤的原图直接丢给⽤户让⽤户慢慢下载。
这时候通常我们会在服务器对图⽚进⾏压缩,然后把压缩后的图⽚内容回显给⽤户。
压缩⽅案:这⾥主要找了两个java中常⽤的图⽚压缩⼯具库:Graphics和Thumbnailator。
1、Graphics:/*** compressImage** @param imageByte* Image source array* @param ppi* @return*/public static byte[] compressImage(byte[] imageByte, int ppi) {byte[] smallImage = null;int width = 0, height = 0;if (imageByte == null)return null;ByteArrayInputStream byteInput = new ByteArrayInputStream(imageByte);try {Image image = ImageIO.read(byteInput);int w = image.getWidth(null);int h = image.getHeight(null);// adjust weight and height to avoid image distortiondouble scale = 0;scale = Math.min((float) ppi / w, (float) ppi / h);width = (int) (w * scale);width -= width % 4;height = (int) (h * scale);if (scale >= (double) 1)return imageByte;BufferedImage buffImg = new BufferedImage(width, height, BufferedImage.TYPE_INT_RGB);buffImg.getGraphics().drawImage(image.getScaledInstance(width, height, Image.SCALE_SMOOTH), 0, 0, null);ByteArrayOutputStream out = new ByteArrayOutputStream();ImageIO.write(buffImg, "png", out);smallImage = out.toByteArray();return smallImage;} catch (IOException e) {log.error(e.getMessage());throw new RSServerInternalException("");}}重点在于:BufferedImage buffImg = new BufferedImage(width, height, BufferedImage.TYPE_INT_RGB);buffImg.getGraphics().drawImage(image.getScaledInstance(width, height, Image.SCALE_SMOOTH), 0, 0, null);2、Thumbnailator:/*** compressImage** @param path* @param ppi* @return*/public static byte[] compressImage(String path, int ppi) {byte[] smallImage = null;try {ByteArrayOutputStream out = new ByteArrayOutputStream();Thumbnails.of(path).size(ppi, ppi).outputFormat("png").toOutputStream(out);smallImage = out.toByteArray();return smallImage;} catch (IOException e) {log.error(e.getMessage());throw new RSServerInternalException("");}}实际测试中,批量的情境下,后者较前者更快⼀些。
java上传图片并压缩图片大小
java上传图⽚并压缩图⽚⼤⼩Thumbnailator 是⼀个优秀的图⽚处理的Google开源Java类库。
处理效果远⽐Java API的好。
从API提供现有的图像⽂件和图像对象的类中简化了处理过程,两三⾏代码就能够从现有图⽚⽣成处理后的图⽚,且允许微调图⽚的⽣成⽅式,同时保持了需要写⼊的最低限度的代码量。
还⽀持对⼀个⽬录的所有图⽚进⾏批量处理操作。
⽀持的处理操作:图⽚缩放,区域裁剪,⽔印,旋转,保持⽐例。
另外值得⼀提的是,Thumbnailator⾄今仍不断更新,怎么样,感觉很有保障吧!Thumbnailator官⽹:下⾯我们介绍下如何使⽤Thumbnailator使⽤介绍地址:<!-- 图⽚缩略图 --><dependency><groupId>net.coobird</groupId><artifactId>thumbnailator</artifactId><version>0.4.8</version></dependency>按指定⼤⼩把图⽚进⾏缩放(会遵循原图⾼宽⽐例)//按指定⼤⼩把图⽚进⾏缩和放(会遵循原图⾼宽⽐例)//此处把图⽚压成400×500的缩略图Thumbnails.of(fromPic).size(400,500).toFile(toPic);//变为400*300,遵循原图⽐例缩或放到400*某个⾼度按照指定⽐例进⾏缩⼩和放⼤//按照⽐例进⾏缩⼩和放⼤Thumbnails.of(fromPic).scale(0.2f).toFile(toPic);//按⽐例缩⼩Thumbnails.of(fromPic).scale(2f);//按⽐例放⼤图⽚尺⼨不变,压缩图⽚⽂件⼤⼩//图⽚尺⼨不变,压缩图⽚⽂件⼤⼩outputQuality实现,参数1为最⾼质量Thumbnails.of(fromPic).scale(1f).outputQuality(0.25f).toFile(toPic);我这⾥只使⽤了图⽚尺⼨不变,压缩⽂件⼤⼩源码/**** @Description:保存图⽚并且⽣成缩略图* @param imageFile 图⽚⽂件* @param request 请求对象* @param uploadPath 上传⽬录* @return*/public static BaseResult uploadFileAndCreateThumbnail(MultipartFile imageFile,HttpServletRequest request,String uploadPath) {if(imageFile == null ){return new BaseResult(false, "imageFile不能为空");}if (imageFile.getSize() >= 10*1024*1024){return new BaseResult(false, "⽂件不能⼤于10M");}String uuid = UUID.randomUUID().toString();String fileDirectory = CommonDateUtils.date2string(new Date(), CommonDateUtils.YYYY_MM_DD);//拼接后台⽂件名称String pathName = fileDirectory + File.separator + uuid + "."+ FilenameUtils.getExtension(imageFile.getOriginalFilename());//构建保存⽂件路劲//2016-5-6 yangkang 修改上传路径为服务器上String realPath = request.getServletContext().getRealPath("uploadPath");//获取服务器绝对路径 linux 服务器地址获取当前使⽤的配置⽂件配置//获取服务器绝对路径 linux 服务器地址获取当前使⽤的配置⽂件配置//String urlString=PropertiesUtil.getInstance().getSysPro("uploadPath");//拼接⽂件路劲String filePathName = realPath + File.separator + pathName;("图⽚上传路径:"+filePathName);//判断⽂件保存是否存在File file = new File(filePathName);if (file.getParentFile() != null || !file.getParentFile().isDirectory()) {//创建⽂件file.getParentFile().mkdirs();}InputStream inputStream = null;FileOutputStream fileOutputStream = null;try {inputStream = imageFile.getInputStream();fileOutputStream = new FileOutputStream(file);//写出⽂件//2016-05-12 yangkang 改为增加缓存// IOUtils.copy(inputStream, fileOutputStream);byte[] buffer = new byte[2048];IOUtils.copyLarge(inputStream, fileOutputStream, buffer);buffer = null;} catch (IOException e) {filePathName = null;return new BaseResult(false, "操作失败", e.getMessage());} finally {try {if (inputStream != null) {inputStream.close();}if (fileOutputStream != null) {fileOutputStream.flush();fileOutputStream.close();}} catch (IOException e) {filePathName = null;return new BaseResult(false, "操作失败", e.getMessage());}}// String fileId = FastDFSClient.uploadFile(file, filePathName);/*** 缩略图begin*///拼接后台⽂件名称String thumbnailPathName = fileDirectory + File.separator + uuid + "small."+ FilenameUtils.getExtension(imageFile.getOriginalFilename());//added by yangkang 2016-3-30 去掉后缀中包含的.png字符串if(thumbnailPathName.contains(".png")){thumbnailPathName = thumbnailPathName.replace(".png", ".jpg");}long size = imageFile.getSize();double scale = 1.0d ;if(size >= 200*1024){if(size > 0){scale = (200*1024f) / size ;}}//拼接⽂件路劲String thumbnailFilePathName = realPath + File.separator + thumbnailPathName;try {//added by chenshun 2016-3-22 注释掉之前长宽的⽅式,改⽤⼤⼩// Thumbnails.of(filePathName).size(width, height).toFile(thumbnailFilePathName);if(size < 200*1024){Thumbnails.of(filePathName).scale(1f).outputFormat("jpg").toFile(thumbnailFilePathName);Thumbnails.of(filePathName).scale(1f).outputFormat("jpg").toFile(thumbnailFilePathName);}else{Thumbnails.of(filePathName).scale(1f).outputQuality(scale).outputFormat("jpg").toFile(thumbnailFilePathName); }} catch (Exception e1) {return new BaseResult(false, "操作失败", e1.getMessage());}/*** 缩略图end*/Map<String, Object> map = new HashMap<String, Object>();//原图地址map.put("originalUrl", pathName);//缩略图地址map.put("thumbnailUrl", thumbnailPathName);return new BaseResult(true, "操作成功", map);}获取当前使⽤的配置⽂件信息/*** 根据key从gzt.properties配置⽂件获取配置信息* @param key 键值* @return*/public String getSysPro(String key){return getSysPro(key, null);}/*** 根据key从gzt.properties配置⽂件获取配置信息* @param key 键值* @param defaultValue 默认值* @return*/public String getSysPro(String key,String defaultValue){return getValue("spring/imageserver-"+System.getProperty("spring.profiles.active")+".properties", key, defaultValue); }例://获取服务器绝对路径 linux 服务器地址String urlString=PropertiesUtil.getInstance().getSysPro("uploadPath");package mon.properties;import org.slf4j.Logger;import org.slf4j.LoggerFactory;import java.io.IOException;import java.io.InputStream;import java.io.InputStreamReader;import java.util.Properties;import java.util.concurrent.ConcurrentHashMap;/**** @ClassName PropertiesUtil.java* @Description 系统配置⼯具类* @author caijy* @date 2015年6⽉9⽇上午10:50:38* @version 1.0.0*/public class PropertiesUtil {private Logger logger = LoggerFactory.getLogger(PropertiesUtil.class);private ConcurrentHashMap<String, Properties> proMap;private PropertiesUtil() {private PropertiesUtil() {proMap = new ConcurrentHashMap<String, Properties>();}private static PropertiesUtil instance = new PropertiesUtil();/*** 获取单例对象* @return*/public static PropertiesUtil getInstance(){return instance;}/*** 根据key从gzt.properties配置⽂件获取配置信息* @param key 键值* @return*/public String getSysPro(String key){return getSysPro(key, null);}/*** 根据key从gzt.properties配置⽂件获取配置信息* @param key 键值* @param defaultValue 默认值* @return*/public String getSysPro(String key,String defaultValue){return getValue("spring/imageserver-"+System.getProperty("spring.profiles.active")+".properties", key, defaultValue); }/*** 从配置⽂件中获取对应key值* @param fileName 配置⽂件名* @param key key值* @param defaultValue 默认值* @return*/public String getValue(String fileName,String key,String defaultValue){String val = null;Properties properties = proMap.get(fileName);if(properties == null){InputStream inputStream = PropertiesUtil.class.getClassLoader().getResourceAsStream(fileName);try {properties = new Properties();properties.load(new InputStreamReader(inputStream,"UTF-8"));proMap.put(fileName, properties);val = properties.getProperty(key,defaultValue);} catch (IOException e) {logger.error("getValue",e);}finally{try {if (inputStream != null) {inputStream.close();}} catch (IOException e1) {logger.error(e1.toString());}}}else{val = properties.getProperty(key,defaultValue);}return val;}}。
Java将大图片转成小图片

我们经常会将一个小的图片变成小一些的图片,利用java可以方便的实现,而且实现了这个功能后就可以实现更强大的功能,将一个文件夹中的所有图片都变成一个尺寸。
这里提供一个将大图变成小图的方法。
并且提供一个根据这个方法的写好的一个:图片批量尺寸处理器。
可以将一个文件夹下的所有图片,批量的按照一定尺寸都保存到另一个文件夹中。
该工具在操作超大图片的时候会出现内存溢出的错误。
功能简单也没有做太多出错处理,一般情况下挺好用的,大家将就着用吧。
import java.awt.Graphics2D;import java.awt.Image;import java.awt.geom.AffineTransform;import java.awt.image.AffineTransformOp;import java.awt.image.BufferedImage;import java.io.File;import java.io.FileInputStream;import java.io.FileNotFoundException;import java.io.IOException;import java.io.InputStream;import javax.imageio.ImageIO;public class Temp01{private Temp01(){}private void imageOp(InputStream inFile, String outFilePath, int width, int height){Image image = null;try {image = ImageIO.read(inFile);} catch (IOException e) {System.out.println("file path error...");}int originalImageWidth = image.getWidth(null);int originalImageHeight = image.getHeight(null);BufferedImage originalImage = new BufferedImage( originalImageWidth,originalImageHeight,BufferedImage.TYPE_3BYTE_BGR);Graphics2D g2d = originalImage.createGraphics();g2d.drawImage(image, 0, 0, null);BufferedImage changedImage =new BufferedImage(width,height,BufferedImage.TYPE_3BYTE_BGR);double widthBo = (double)width/originalImageWidth;double heightBo = (double)width/originalImageHeight; AffineTransform transform = new AffineTransform();transform.setToScale(widthBo, heightBo);AffineTransformOp ato = new AffineTransformOp(transform, null);ato.filter(originalImage, changedImage);File fo = new File(outFilePath); //将要转换出的小图文件try {ImageIO.write(changedImage, "jpeg", fo);} catch (Exception e) {e.printStackTrace();}}private void imageOp(String inFilePath, String outFilePath, int width, int height){File tempFile = new File(inFilePath);Image image = null;try {image = ImageIO.read(tempFile);} catch (IOException e) {System.out.println("file path error...");}int originalImageWidth = image.getWidth(null);int originalImageHeight = image.getHeight(null);BufferedImage originalImage = new BufferedImage(originalImageWidth,originalImageHeight,BufferedImage.TYPE_3BYTE_BGR);Graphics2D g2d = originalImage.createGraphics();g2d.drawImage(image, 0, 0, null);BufferedImage changedImage =new BufferedImage(width,height,BufferedImage.TYPE_3BYTE_BGR);double widthBo = (double)width/originalImageWidth;double heightBo = (double)width/originalImageHeight;AffineTransform transform = new AffineTransform();transform.setToScale(widthBo, heightBo);AffineTransformOp ato = new AffineTransformOp(transform, null);ato.filter(originalImage, changedImage);File fo = new File(outFilePath); //将要转换出的小图文件try {ImageIO.write(changedImage, "jpeg", fo);} catch (Exception e) {e.printStackTrace();}}public static void main(String[] args) throws FileNotFoundException { Temp01 t1 = new Temp01();t1.imageOp("C:/p02.jpg", "C:/p03.jpg", 400, 300);InputStream in = new FileInputStream(new File("C:/p02.jpg")); t1.imageOp(in, "C:/p04.jpg", 400, 300);}}。
Java实现图片压缩代码,图片大小转换

Java实现图⽚压缩代码,图⽚⼤⼩转换在很多项⽬中我们会把上传的图⽚做处理,⽐较图⽚上传过多对服务器的容量和带宽有很多的浪费,如果不是必须的⾼清图⽚,我们可以通过代码来做压缩。
在我的项⽬中我们压缩图⽚的⽬的是让web页⾯打开的速度很快,并且节省空间。
下⾯先分享⼀下代码:package org.util;import javax.imageio.ImageIO;import java.awt.*;import java.awt.image.BufferedImage;import java.awt.image.CropImageFilter;import java.awt.image.FilteredImageSource;import java.awt.image.ImageFilter;import java.io.File;import java.io.FileOutputStream;import java.io.IOException;import java.io.OutputStream;public class ImgTools {/*** 按照宽⾼⽐例压缩** @param img* @param width* @param height* @param out* @throws IOException*/public static void thumbnail_w_h(File img, int width, int height,OutputStream out) throws IOException {BufferedImage bi = ImageIO.read(img);double srcWidth = bi.getWidth(); // 源图宽度double srcHeight = bi.getHeight(); // 源图⾼度double scale = 1;if (width > 0) {scale = width / srcWidth;}if (height > 0) {scale = height / srcHeight;}if (width > 0 && height > 0) {scale = height / srcHeight < width / srcWidth ? height / srcHeight: width / srcWidth;}thumbnail(img, (int) (srcWidth * scale), (int) (srcHeight * scale), out);}/*** 按照固定宽⾼原图压缩** @param img* @param width* @param height* @param out* @throws IOException*/public static void thumbnail(File img, int width, int height,OutputStream out) throws IOException {BufferedImage BI = ImageIO.read(img);Image image = BI.getScaledInstance(width, height, Image.SCALE_SMOOTH);BufferedImage tag = new BufferedImage(width, height,BufferedImage.TYPE_INT_RGB);Graphics g = tag.getGraphics();g.setColor(Color.RED);g.drawImage(image, 0, 0, null); // 绘制处理后的图g.dispose();ImageIO.write(tag, "JPEG", out);}/*** 按照宽⾼裁剪** @param srcImageFile* @param destWidth* @param destHeight* @param out*/public static void cut_w_h(File srcImageFile, int destWidth,int destHeight, OutputStream out) {cut_w_h(srcImageFile, 0, 0, destWidth, destHeight, out);}public static void cut_w_h(File srcImageFile, int x, int y, int destWidth,int destHeight, OutputStream out) {try {Image img;ImageFilter cropFilter;// 读取源图像BufferedImage bi = ImageIO.read(srcImageFile);int srcWidth = bi.getWidth(); // 源图宽度int srcHeight = bi.getHeight(); // 源图⾼度if (srcWidth >= destWidth && srcHeight >= destHeight) {Image image = bi.getScaledInstance(srcWidth, srcHeight,Image.SCALE_DEFAULT);cropFilter = new CropImageFilter(x, y, destWidth, destHeight);img = Toolkit.getDefaultToolkit().createImage(new FilteredImageSource(image.getSource(), cropFilter));BufferedImage tag = new BufferedImage(destWidth, destHeight,BufferedImage.TYPE_INT_RGB);Graphics g = tag.getGraphics();g.drawImage(img, 0, 0, null); // 绘制截取后的图g.dispose();// 输出为⽂件ImageIO.write(tag, "JPEG", out);}} catch (Exception e) {e.printStackTrace();}}// #cut_w_hpublic static void main(String[] args) throws IOException {File img = new File("e:\\a\\a.jpg");FileOutputStream fos = new FileOutputStream("e:\\a\\b.jpg");// ImgTools.thumbnail(img, 100, 100, fos);// ImgTools.cut_w_h(img, 230, 200, fos);ImgTools.thumbnail_w_h(img, 100, 0, fos);}}其实我们很多⼈喜欢在上传的时候就做了限制了,这样在上传时就节省了带宽,可是很多客户是不会做图⽚处理的,5M的⼤图直接就给你上传,限制了说我们做的不⼈性化。
java图片压缩介绍
java图片压缩介绍java 图片压缩博客分类:•Java基础传进文件传出文件方式的:Java代码19.ImageWriter imgWrier;20.ImageWriteParam imgWriteParams;21.22.// 指定写图片的方式为 jpg23.imgWrier = ImageIO.getImageWritersByFormatName ("jpg").next();24.imgWriteParams = new javax.imageio.plugins.jpeg.JPE GImageWriteParam(null);25.// 要使用压缩,必须指定压缩方式为MODE_EXPLICIT26.imgWriteParams.setCompressionMode(imgWritePara ms.MODE_EXPLICIT);27.// 这里指定压缩的程度,参数qality是取值0~1范围内,28.imgWriteParams.setCompressionQuality((float)0.1);29.imgWriteParams.setProgressiveMode(imgWriteParam s.MODE_DISABLED);30.ColorModel colorModel = ColorModel.getRGBdefault ();31.// 指定压缩时使用的色彩模式32.imgWriteParams.setDestinationType(new javax.imagei o.ImageTypeSpecifier(colorModel, colorModel33..createCompatibleSampleModel(16, 16)));34.35.try36.{37.if(StringUtils.isBlank(srcFilePath))38.{39.return false;40.}41.else42.{(data为传过来的byte[]数组)Java代码3.BufferedImage src = null;4.ByteArrayOutputStream out = null;5.ImageWriter imgWrier;6.ImageWriteParam imgWriteParams;7.8.// 指定写图片的方式为 jpg9.imgWrier = ImageIO.getImageWritersByFormatName ("jpg").next();10.imgWriteParams = new javax.imageio.plugins.jpeg.JPE GImageWriteParam(null);11.// 要使用压缩,必须指定压缩方式为MODE_EXPLICIT12.imgWriteParams.setCompressionMode(imgWritePara ms.MODE_EXPLICIT);13.// 这里指定压缩的程度,参数qality是取值0~1范围内,14.imgWriteParams.setCompressionQuality((float)0.1/data.length);15.16.imgWriteParams.setProgressiveMode(imgWriteParam s.MODE_DISABLED);17.ColorModel colorModel = ColorModel.getRGBdefault ();18.// 指定压缩时使用的色彩模式19.imgWriteParams.setDestinationType(new javax.imagei o.ImageTypeSpecifier(colorModel, colorModel20..createCompatibleSampleModel(16, 16)));21.22.try23.{24.src = ImageIO.read(is);25.out = new ByteArrayOutputStream(data.length);。
java实现图像压缩
g.drawRect(this.getWideth() - 120, h - 18,119,17);
g.setColor(new Color(255,102,0));
g.drawString(t, this.getWideth() - 100, h - 5);
tag.getGraphics().drawImage(srcFile, 0, 0, width, height, null);
String filePrex = oldFile.substring(0, oldFile.indexOf('.'));
g.drawImage(src, 0, 0, this.getWideth(), h, null);
if(t!=null)
{
g.setColor(new Color(242,242,242));
g.fillRect(this.getWideth() - 120, h - 18,120,18);
return (int) hh;
}
else
{
this.setWideth(w);
return h;
}
}
public void proce(String fpath) throws Exception
{
int h=this.getHeight(wideth,height);
BufferedImage tag = new BufferedImage(this.getWideth(),h,BufferedImage.TYPE_INT_RGB);
Graphics g=tag.getGraphics();
java处理图片压缩、裁剪
java处理图⽚压缩、裁剪package img;import java.awt.Color;import java.awt.geom.AffineTransform;import java.awt.image.AffineTransformOp;import java.awt.image.BufferedImage;import java.io.ByteArrayInputStream;import java.io.ByteArrayOutputStream;import java.io.File;import java.io.FileInputStream;import java.io.FileNotFoundException;import java.io.FileOutputStream;import java.io.IOException;import java.io.InputStream;import java.io.OutputStream;import javax.imageio.ImageIO;import javax.media.jai.PlanarImage;import mons.io.IOUtils;import com.alibaba.simpleimage.ImageFormat;import com.alibaba.simpleimage.ImageWrapper;import com.alibaba.simpleimage.SimpleImageException;import com.alibaba.simpleimage.render.CropParameter;import com.alibaba.simpleimage.render.ScaleParameter;import com.alibaba.simpleimage.render.WriteParameter;import com.alibaba.simpleimage.render.ScaleParameter.Algorithm;import com.alibaba.simpleimage.util.ImageCropHelper;import com.alibaba.simpleimage.util.ImageReadHelper;import com.alibaba.simpleimage.util.ImageScaleHelper;import com.alibaba.simpleimage.util.ImageWriteHelper;/*** 图⽚的压缩、裁剪*/public class Test {public static void main(String[] args) throws Exception {// 输⼊输出⽂件路径/⽂件String src = "D:\\test\\map.jpg";String dest = "D:\\test\\map1.jpg";File srcFile = new File(src);File destFile = new File(dest);// 将输⼊⽂件转换为字节数组byte[] bytes = getByte(srcFile);// 构造输⼊输出字节流ByteArrayInputStream is = new ByteArrayInputStream(bytes);ByteArrayOutputStream os = new ByteArrayOutputStream();// 处理图⽚zoomAndCut2(is, os, 400, 400);// 将字节输出流写到输出⽂件路径下writeFile(os, destFile);}/*** 按固定长宽进⾏缩放* @param is 输⼊流* @param os 输出流* @param width 指定长度* @param height 指定宽度* @throws Exception*/public static void zoomImage(InputStream is, OutputStream os, int width, int height) throws Exception {//读取图⽚BufferedImage bufImg = ImageIO.read(is);is.close();//获取缩放⽐例double wRatio = width * 1.0/ bufImg.getWidth();double hRatio = height * 1.0 / bufImg.getHeight();AffineTransformOp ato = new AffineTransformOp(AffineTransform.getScaleInstance(wRatio, hRatio), null);BufferedImage bufferedImage = ato.filter(bufImg, null);//写⼊缩减后的图⽚ImageIO.write(bufferedImage, "jpg", os);}/*** 按固定⽂件⼤⼩进⾏缩放* @param is 输⼊流* @param os 输出流* @param size ⽂件⼤⼩指定* @throws Exception*/public static void zoomImage(InputStream is, OutputStream os, Integer size) throws Exception {/*FileInputStream的available()⽅法返回的是int类型,当数据⼤于1.99G(2147483647字节)后将⽆法计量,故求取流⽂件⼤⼩最好的⽅式是使⽤FileChannel的size()⽅法,其求取结果与File的length()⽅法的结果⼀致参考:/chaijunkun/article/details/22387305*/int fileSize = is.available();//⽂件⼤于size时,才进⾏缩放。
Java使用Thumbnails对大图片压缩

Java使⽤Thumbnails对⼤图⽚压缩引⾔在最近的项⽬开发中,经常会使⽤到图⽚上传,但是过⼤的图⽚在查看的时候会影响打开速度,浪费流量以及服务器存储空间,所以需要在后端处理完图⽚再上传,这⾥我们⽤到了Thumbnails图⽚处理⼯具类。
Thumbnails主要⽀持以下⼀些功能1、指定⼤⼩进⾏缩放2、按照⽐例进⾏缩放3、不按照⽐例,指定⼤⼩进⾏缩放4、旋转5、⽔印6、裁剪7、转化图⽚格式8、输出到OutputStream9、输出到BufferedImage使⽤步骤:⼀、添加Maven<dependency><groupId>net.coobird</groupId><artifactId>thumbnailator</artifactId><version>0.4.8</version></dependency>⼆、具体操作1:指定⼤⼩进⾏缩放/*** 指定⼤⼩进⾏缩放** @throws IOException*/private void test1() throws IOException {/** size(width,height) 若图⽚横⽐200⼩,⾼⽐300⼩,不变* 若图⽚横⽐200⼩,⾼⽐300⼤,⾼缩⼩到300,图⽚⽐例不变若图⽚横⽐200⼤,⾼⽐300⼩,横缩⼩到200,图⽚⽐例不变* 若图⽚横⽐200⼤,⾼⽐300⼤,图⽚按⽐例缩⼩,横为200或⾼为300*/Thumbnails.of("images/test.jpg").size(200, 300).toFile("C:/image_200x300.jpg");Thumbnails.of("images/test.jpg").size(2560, 2048).toFile("C:/image_2560x2048.jpg");}2:按照⽐例进⾏缩放/*** 按照⽐例进⾏缩放* scale 图⽚的压缩⽐例值在0-1之间,1f就是原图,0.5就是原图的⼀半⼤⼩ * outputQuality 图⽚压缩的质量值在0-1 之间,越接近1质量越好,越接近0 质量越差 * @throws IOException*/private void test2() throws IOException {/*** scale(⽐例)*/Thumbnails.of("images/test.jpg").scale(0.25f).outputQuality(0.8f).toFile("C:/image_25%.jpg");Thumbnails.of("images/test.jpg").scale(0.75f).outputQuality(0.8f).toFile("C:/image_110%.jpg"); }3:不按照⽐例,指定⼤⼩进⾏缩放/*** 不按照⽐例,指定⼤⼩进⾏缩放** @throws IOExceptionprivate void test3() throws IOException {/*** keepAspectRatio(false) 默认是按照⽐例缩放的*/Thumbnails.of("images/test.jpg").size(120, 120).keepAspectRatio(false).toFile("C:/image_120x120.jpg"); }4:旋转/*** 旋转** @throws IOException*/private void test4() throws IOException {/*** rotate(⾓度),正数:顺时针负数:逆时针*/Thumbnails.of("images/test.jpg").size(1280, 1024).rotate(90).toFile("C:/image+90.jpg");Thumbnails.of("images/test.jpg").size(1280, 1024).rotate(-90).toFile("C:/iamge-90.jpg");}5:⽔印/*** ⽔印** @throws IOException*/private void test5() throws IOException {/*** watermark(位置,⽔印图,透明度)*/Thumbnails.of("images/test.jpg").size(1280, 1024).watermark(Positions.BOTTOM_RIGHT, ImageIO.read(new File("images/watermark.png")), 0.5f) .outputQuality(0.8f).toFile("C:/image_watermark_bottom_right.jpg");Thumbnails.of("images/test.jpg").size(1280, 1024).watermark(Positions.CENTER, ImageIO.read(new File("images/watermark.png")), 0.5f).outputQuality(0.8f).toFile("C:/image_watermark_center.jpg");}6:裁剪/*** 裁剪** @throws IOException*/private void test6() throws IOException {/*** 图⽚中⼼400*400的区域*/Thumbnails.of("images/test.jpg").sourceRegion(Positions.CENTER, 400, 400).size(200, 200).keepAspectRatio(false).toFile("C:/image_region_center.jpg");/*** 图⽚右下400*400的区域*/Thumbnails.of("images/test.jpg").sourceRegion(Positions.BOTTOM_RIGHT, 400, 400).size(200, 200).keepAspectRatio(false).toFile("C:/image_region_bootom_right.jpg");/*** 指定坐标*/Thumbnails.of("images/test.jpg").sourceRegion(600, 500, 400, 400).size(200, 200).keepAspectRatio(false).toFile("C:/image_region_coord.jpg");}7:转化图⽚格式/*** 转化图⽚格式** @throws IOException*/private void test7() throws IOException {/*** outputFormat(图像格式)*/Thumbnails.of("images/test.jpg").size(1280, 1024).outputFormat("png").toFile("C:/image_1280x1024.png");Thumbnails.of("images/test.jpg").size(1280, 1024).outputFormat("gif").toFile("C:/image_1280x1024.gif");}8:输出到OutputStream* 输出到OutputStream** @throws IOException*/private void test8() throws IOException {/*** toOutputStream(流对象)*/OutputStream os = new FileOutputStream("C:/image_1280x1024_OutputStream.png");Thumbnails.of("images/test.jpg").size(1280, 1024).toOutputStream(os);}9:输出到BufferedImage/*** 输出到BufferedImage** @throws IOException*/private void test9() throws IOException {/*** asBufferedImage() 返回BufferedImage*/BufferedImage thumbnail = Thumbnails.of("images/test.jpg").size(1280, 1024).asBufferedImage();ImageIO.write(thumbnail, "jpg", new File("C:/image_1280x1024_BufferedImage.jpg"));}三、对图⽚⽂件进⾏Base64操作/*** 对内存中的图⽚⽂件进⾏Base64处理** @throws IOException*/public String Base64ImageByMemory(BufferedImage pic) {String imgString = "";ByteArrayOutputStream newBaos = new ByteArrayOutputStream();//io流try {ImageIO.write(pic, "jpg", newBaos);//写⼊流中byte[] bytes = newBaos.toByteArray();//转换成字节imgString = URLEncoder.encode(new BASE64Encoder().encode(bytes), "UTF-8");} catch (Exception e) {e.printStackTrace();}return imgString;}四、获取服务器图⽚⽂件⼤⼩/*** 输出到OutputStream** @throws IOException*/public void getImageFileSize(){int size;URLConnection conn;try {String path="";path="https:///pic/a8773912b31bb051c36044e93b7adab44bede0af";//世界地图 //path="http://10.30.23.217:9017/image/0c09ca36-abea-4efa-85b0-99b6d261f66c"; //服务器上图⽚URL url = new URL(path);conn = url.openConnection();size = conn.getContentLength();if (size < 0){System.out.println("Could not determine file size.");}else{System.out.println("The size of file is = " + size + " bytes");BigDecimal filesize = new BigDecimal(size);BigDecimal megabyte = new BigDecimal(1024 * 1024);float returnValue = filesize.divide(megabyte, 2, BigDecimal.ROUND_UP).floatValue();System.out.println("The size of file is = "+returnValue+"M");}conn.getInputStream().close();} catch (IOException e) {e.printStackTrace();}}⾄此,图⽚压缩的相关处理和Base64以及获取服务器⽂件⼤⼩的功能就总结完了!以上就是Java 使⽤Thumbnails对⼤图⽚压缩的详细内容,更多关于java ⼤图⽚压缩的资料请关注其它相关⽂章!。
java对图片进行压缩和resize缩放的方法
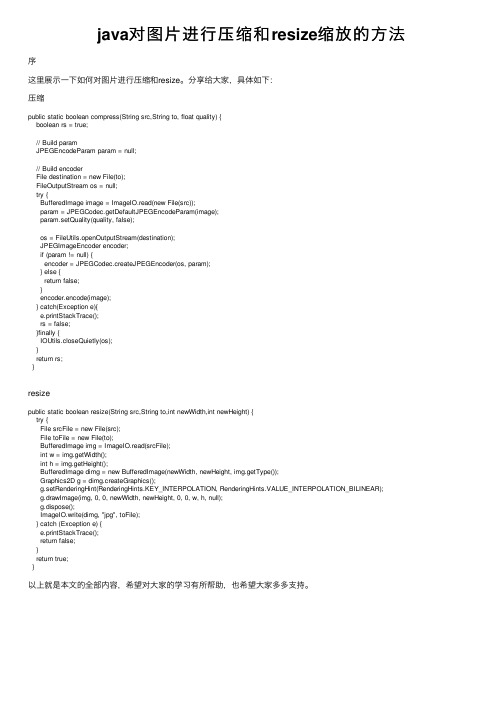
java对图⽚进⾏压缩和resize缩放的⽅法序这⾥展⽰⼀下如何对图⽚进⾏压缩和resize。
分享给⼤家,具体如下:压缩public static boolean compress(String src,String to, float quality) {boolean rs = true;// Build paramJPEGEncodeParam param = null;// Build encoderFile destination = new File(to);FileOutputStream os = null;try {BufferedImage image = ImageIO.read(new File(src));param = JPEGCodec.getDefaultJPEGEncodeParam(image);param.setQuality(quality, false);os = FileUtils.openOutputStream(destination);JPEGImageEncoder encoder;if (param != null) {encoder = JPEGCodec.createJPEGEncoder(os, param);} else {return false;}encoder.encode(image);} catch(Exception e){e.printStackTrace();rs = false;}finally {IOUtils.closeQuietly(os);}return rs;}resizepublic static boolean resize(String src,String to,int newWidth,int newHeight) {try {File srcFile = new File(src);File toFile = new File(to);BufferedImage img = ImageIO.read(srcFile);int w = img.getWidth();int h = img.getHeight();BufferedImage dimg = new BufferedImage(newWidth, newHeight, img.getType());Graphics2D g = dimg.createGraphics();g.setRenderingHint(RenderingHints.KEY_INTERPOLATION, RenderingHints.VALUE_INTERPOLATION_BILINEAR);g.drawImage(img, 0, 0, newWidth, newHeight, 0, 0, w, h, null);g.dispose();ImageIO.write(dimg, "jpg", toFile);} catch (Exception e) {e.printStackTrace();return false;}return true;}以上就是本⽂的全部内容,希望对⼤家的学习有所帮助,也希望⼤家多多⽀持。
- 1、下载文档前请自行甄别文档内容的完整性,平台不提供额外的编辑、内容补充、找答案等附加服务。
- 2、"仅部分预览"的文档,不可在线预览部分如存在完整性等问题,可反馈申请退款(可完整预览的文档不适用该条件!)。
- 3、如文档侵犯您的权益,请联系客服反馈,我们会尽快为您处理(人工客服工作时间:9:00-18:30)。
本文由我司收集整编,推荐下载,如有疑问,请与我司联系
JAVA 将任意图片文件压缩成想要的图片类型与大小2012/11/06 0 二话不说,直接贴出代码:
import java.awt.Image;import java.awt.image.BufferedImage;import java.io.File;import java.io.IOException;import javax.imageio.ImageIO;public class imageTest {//测试方法public static void main(String[] args){//定义源文件File sourcefile = new File( D:\\qwe.png //定义压缩后的文件名File newFile = new File( D:\\xx.png try { imageCompress(sourcefile,newFile, 1028, 800, png } catch (IOException e) {e.printStackTrace();}}/** * 生成缩略图* @param sourceFile 源始文件路径*
@param destFile 目标文件路径* @param destWidth 目标文件宽度* @param destHeight 目标文件高度* @return flag 是否写入成功* @throws IOException
*/public static boolean imageCompress(File sourceFile, File destFile,int destWidth,int destHeight,String imageTpye) throws IOException{//保存源文件图像Image srcImage = null;//保存目标文件图像BufferedImage tagImage = null;//判断目标文件图像是否绘制
成功boolean flag = false;//判断图片文件是否存在以及是否为文件类型
if(sourceFile.exists() sourceFile.isFile()){//读取图片文件属性srcImage = ImageIO.read(sourceFile);//生成目标缩略图tagImage = new BufferedImage(destWidth,destHeight,BufferedImage.TYPE_INT_RGB);//根据目标图片
的大小绘制目标图片
tagImage.getGraphics().drawImage(srcImage,0,0,destWidth,destHeight,null);flag = ImageIO.write(tagImage, imageTpye, destFile);}else{flag = false;} return flag; }}
tips:感谢大家的阅读,本文由我司收集整编。
仅供参阅!。
