edem2.6安装
考虑颗粒间黏结力的黏性土壤离散元模型参数标定
考虑颗粒间黏结力的黏性土壤离散元模型参数标定武涛;黄伟凤;陈学深;马旭;韩子奇;潘潼【摘要】[Objective] To calibrate contact parameters and contact model parameters for the cohesive soil discrete element model.[Method]The Hertz-Mindlin with JKR contact model which consider the cohesion between particles was employed for the repose angle simulation test.The simulation test was based on the results of physical test for angle of repose.The key parameters including JKR surface energy, coefficient of restitution, coefficient of static friction and coefficient of rolling friction were obtained from the GEMM (Generic EDEM material model) database.A Box-Behnken design was then used to perform the simulation test for repose angle in above value ranges.[Result]The regression model for repose angle was acquired from the test results by multiple regression analysis.Analysis of variance showed that the model was extremely significant, and the relationship between experimental factors and repose angle was fitted to a quadratic polynomial with complex liner and quadratic interactions.The optimized solution was acquired by using 40.45° as the target of repose angle.The optimized solution was as follow, JKR surface energy was 7.91 J·m-2, coefficient of restitution was 0.66, coefficient of static friction was 0.83, and coefficient of rolling friction was 0.25.The optimized solution was then used for simulation test and the obtained repose angle was 39.73°.The simulation test was highly matched with physical test on both angle and shape of repose.[Conclusion] For thesoil sample used in this research, the optimized parameters can be used for further simulation of kinematics and dynamics between cohesive soil and soil contact components, and for providing the motion characteristics of cohesive soil under the actions of soil contact components.%[目的]实现黏性土壤离散元模型的接触参数与接触模型参数标定.[方法]基于土壤堆积角物理试验结果,采用考虑颗粒间黏结力的"Hertz-Mindlin with JKR"接触模型进行土壤堆积角仿真试验,借助GEMM(Generic EDEM material model database)数据库获得离散元模型关键参数(包括JKR表面能、恢复系数、静摩擦系数与动摩擦系数),进一步运用Box-Behnken试验方法进行堆积角仿真试验.[结果]通过对试验结果进行多元回归拟合分析获得了堆积角回归模型,回归模型的方差分析表明该模型极显著,试验因素对堆积角的影响为二次多项式,且存在复杂的一次与二次交互作用.以堆积角40.45°为目标对回归模型进行寻优,得到了优化解:JKR表面能7.91 J·m-2;恢复系数0.66;静摩擦系数0.83;动摩擦系数0.25.以此优化解进行仿真试验获得的堆积角为39.73°.堆积角仿真试验与物理试验在堆积角度和形状上具有较高的相似性.[结论]可利用该优化参数对样品土壤进行进一步的黏性土壤与触土部件间的离散元仿真,从而揭示黏性土壤在触土部件作用下的运动规律.【期刊名称】《华南农业大学学报》【年(卷),期】2017(038)003【总页数】6页(P93-98)【关键词】黏性土壤;离散元模型;接触参数;JKR接触模型;黏结力;堆积角【作者】武涛;黄伟凤;陈学深;马旭;韩子奇;潘潼【作者单位】华南农业大学工程学院,广东广州 510642;华南农业大学工程学院,广东广州 510642;华南农业大学工程学院,广东广州 510642;华南农业大学工程学院,广东广州 510642;华南农业大学工程学院,广东广州 510642;华南农业大学工程学院,广东广州 510642【正文语种】中文【中图分类】S220.1土壤介质的空间变异性及非线性特征,给土壤-机械相互作用模型的建立带来了很大的困难[1]。
EDEM2.6_安装向导
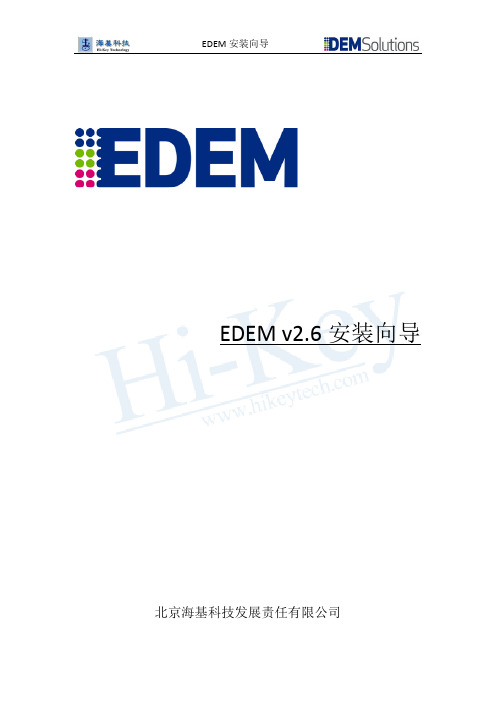
EDEM 安装向导
图 2 安装向导界面
4. 如果您在笔记本电脑上安装好 License Manager,这时可以重新启用无线网 卡。 5. 出现图 3 所示时,表明程序试图将机器码(locking code)保存至某一路径。 此时,直接关闭窗口即可。然后安装随后弹出的插件。
图 3 机器码保存提示
EDEM 安装向导
安装软件:
1. 以管理员身份或拥有管理员权限的用户身份登陆计算机; 2. 双击安装文件.exe(如:EDEM-2.6.0_win64.exe),在弹出窗口中选择安装 商业版本(Install EDEM)或教育版本(Install EDEM Academic)。 *商业版与教育版对应各自的 license ,商业用户请选择“Install EDEM”; 高校用户请选择“Install EDEM Academic”。
EDEM 安装向导 3. 将获取的 license 文件(文本格式)拷贝至您安装 EDEM license manager 机器 上任何位置,点击“开始->所有程序->DEM Solutions-> EDEM 2.6-> LM Admin”。 4. 弹出 WlmAdmin 对话框,在左侧树状结构中,点击开 Subnet Server 子结构, 并右键需要加载 License 的 server (如图 6 中的 localhost) , 选择“Add Feature > From a File > To Server and its File”。在弹出的窗口中指定 license 文件(如:lservrc)。
图 1 选择安装版本
EDEM 安装向导 3. 进入安装向导界面(如图 2),点选“Next”按钮,并按以下说明安装软件: a) Typical(典型安装):安装 EDEM 及其它组件。必要时,安装较新的 License Manager(license 管理器); b) Complete(完整安装)推荐:安装全部组件,包括 License Manager 和它 的工具包; c) Custom(自定义安装):必要时,用户可以通过自定义安装来选择安装 特定的模块(如:License Manager 等)或改变 EDEM 安装路径。
EDEM软件Bond过程
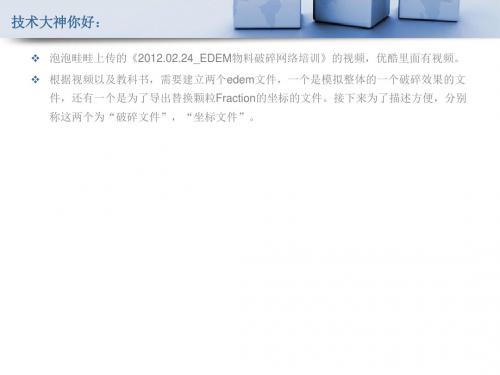
破碎文件设置过程
3.1颗粒设置结束后对颗粒粘结进行设置。
破碎文件设置过程
4.Geometry设置
这里我设置了两个正方体,一个是颗粒工厂,一个是steel盒子。
破碎文件设置过程
5.Factory设置
先新建一个颗粒工厂,类型是Whole。
破碎文件设置过程
5.2导入外部颗粒工厂文件。
3.导入已经在solidworks里面画好的一个立体几何体。并且建立一个颗粒工厂。
坐标文件设置过程
4.颗粒工厂参数设置如下。
坐标文件仿真
颗粒被压缩的过程如下图。
坐标文件仿真
仿真完成后分别导出x、y、z的坐标。单位m。
j剪切应力
物体由于外因(载荷、温度变化等)而变形时,在它内部任一截面的两方出现的相互 作用力,称为“内力”。内力的集度,即单位面积上的内力称为“应力”。应力可分 解为垂直于截面的分量,称为“正应力”或“法向应力”;相切于截面的分量称为“ 剪切应力”。 作用在构件两侧面上的外力的合力是一对大小相等,方向相反,作用线相距很近的横 向集中力。在这样的外力作用下,构件的变形特点是:以两力之间的横截面为分界线 ,构件的两部分沿该面发生相对错动。构件的这种变形形式称为剪切,其截面为剪切 面。截面的单位面积上剪力的大小,称为剪应力。 剪切应力的计算:在实用计算中,假设在剪切面上剪切应力是均匀分布的。若以A表示 剪切面面积,则应力是
剪切刚度
剪切刚度是反映结构面剪切变形性质的重要参数,其数值等于峰值前剪切刚度曲线上任一点的切线 斜率。 2剪切刚度的理解与应用⑴规范要求:
①《高规》第E.0.1条规定:底部大空间为一层时,可近似采用转换层上、下层结构等效剪切刚度
<EDEMCFD案例01>EDEM2018FLUENT19.2CouplingInter...
<EDEMCFD案例01>EDEM2018FLUENT19.2CouplingInter...EDEM的版本2018,Fluent(已经嵌入在ANSYS中,下载ansys 软件只需安装Fluent)版本19.2,在使用EDEM-CFD仿真之前,它们之间的耦合代码需要进行编译。
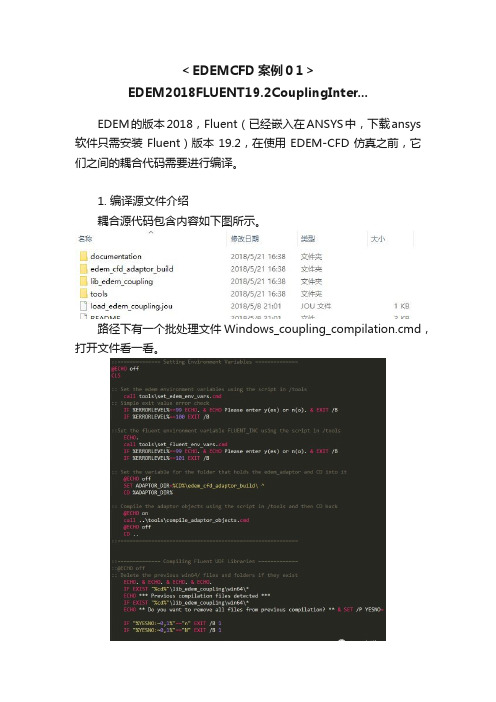
1. 编译源文件介绍耦合源代码包含内容如下图所示。
路径下有一个批处理文件Windows_coupling_compilation.cmd,打开文件看一看。
该批处理文件结构很简单,包含两部分内容:•设置环境变量。
主要通过tools文件夹下两个批处理文件set_edem_env_vars.cmd及tools\set_fluent_env_vars.cmd,其中前者设置EDEM环境变量,后者设置Fluent相关环境变量。
•调用tools文件夹下compile_lib_edem_coupling.py进行编译。
2. 环境变量设置2.1 EDEM环境变量用文本编辑器打开set_edem_env_vars.cmd,其中内容如下图所示。
其中第6行如下图所示,可以看到官方提供源代码中包含的EDEM版本包含2.6, 2.7, 2017.0, 2017.1, 2017.2,并不包含2018。
这里直接添加2018.2.2 Fluent环境变量用文本文件打开set_fluent_env_vars.cmd,该批处理文件用于设置Fluent相关的环境变量。
文件第6行输入Fluent版本,如下图所示,并无19.2版本。
直接添加Fluent19.2版本。
实际上可以直接通过环境变量来解决问题。
3. 编译代码•启动VS2015 x64本机工具命令提示符(安装了VS2015之后就有),x64 Native Tools Command Prompt。
•编译需要用到python指令,需要将python指令添加到path 下,可以自行下载python安装;ANSYS也提供了python的一个版本,我安装在D:\Program Files\ANSYS Inc\v192\commonfiles\CPython\2_7_13\winx64\Release\python 该路径下,根据安装的路径和版本不同,D:\Program Files、v192、2_7_13可能是不同的。
EDEM与ANSYS Workbench耦合介绍及案例展示专题资料集锦
相关专题: 颗粒仿真 无微不至_EDEM软件
更多资料:/Home.html
出在其他条件一定的情况下,随着振幅和频率的增加,物料沿筛面后移的速度
增加,同时透筛效率增高,在振幅40mm时和频率6Hz时出现筛分损失;随着振动 方向角的增大,在25°到45°范围内,物料沿筛面后移的速度增加,在45°时达
到最大,超过45°之后,物料沿筛面后移的速度逐渐降低,而透筛效率在35°时
最高,超过35°,透筛效率逐渐降低。模拟结果与试验测量结果总体趋势基本 吻合,这表明了利用EDEM进行数值模拟的正确性和可行性。
EDEM与ANSYS Workbench耦合介绍及案例 展示专题资料集锦
更新时间:2014-12-22
以下是小编整理的一些有关EDEM与ANSYS Workbench耦合介绍及案例展示专
题资料,其中包括了有关EDEM的相关资讯以及相关的案例文档和视频资料。 有关文档的下载,可以到研发埠网站的专题模块,输入相应的专题名,搜索
EDEM V2.6.1新版本功能及案例展示.pdf
EDEM与ANSYS Workbench(视频)
聚焦EDEM: EDEM两相流高级网络培训【视频】
EDEM联合XFlow CFD仿真流体系统中的颗粒运动
颗粒筛分问题EDEM模拟算例
EDEM?模拟高压辊磨机(HPGR)粉碎过程
相关文献: 基于EDEM的振动筛分数值模拟与分析.pdf 为了寻找振动筛的最佳运动学参数(振幅、频率、振动方向角),达到提高透筛 效率并减少清选损失的目的,利用EDEM软件,对振动筛分过程进行数值模拟,得
离散元仿真软件EDEM联合仿真结构分析方法.pdf EDEM联合仿真概述,EDEM动力学模块应用方法与案例演示,EDEM-FEM应用方 法与案例演。<br> EDEM是一款基于离散元(DiscreteElement Method,简称DEM)的颗粒力学仿真软件,可以模拟散体物料加工处理过程中 颗粒体系的行为特征,协助设计人员对相关工艺及设备进行分析和优化。另 外,EDEM还可以与CFD、FEA、MBD软件联合仿真,进行颗粒-流体问题分析、 设备应力分析、多体动力学分析等。
edem破解版安装方法
破解版仅用作内部交流、学习。
禁止用作商业用途。
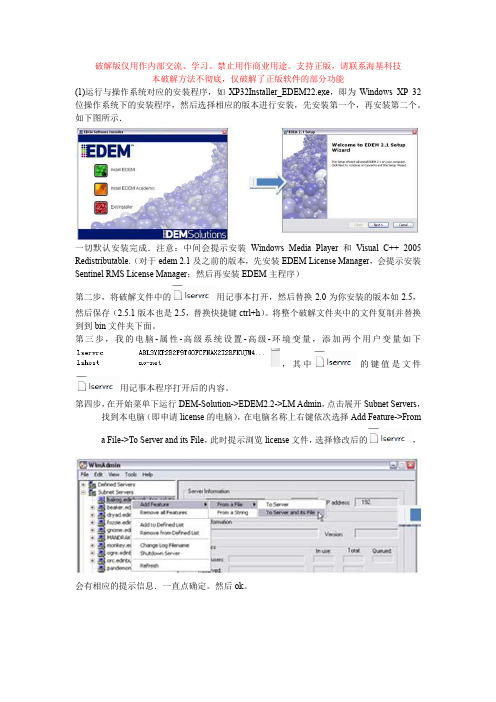
支持正版,请联系海基科技本破解方法不彻底,仅破解了正版软件的部分功能(1)运行与操作系统对应的安装程序,如XP32Installer_EDEM22.exe,即为Windows XP 32位操作系统下的安装程序,然后选择相应的版本进行安装,先安装第一个,再安装第二个。
如下图所示.一切默认安装完成.注意:中间会提示安装Windows Media Player和Visual C++ 2005 Redistributable.(对于edem 2.1及之前的版本,先安装EDEM License Manager,会提示安装Sentinel RMS License Manager;然后再安装EDEM主程序)第二步,将破解文件中的用记事本打开,然后替换2.0为你安装的版本如2.5,然后保存(2.5.1版本也是2.5,替换快捷键ctrl+h)。
将整个破解文件夹中的文件复制并替换到到bin文件夹下面。
第三步,我的电脑-属性-高级系统设置-高级-环境变量,添加两个用户变量如下,其中的键值是文件用记事本程序打开后的内容。
第四步,在开始菜单下运行DEM-Solution->EDEM2.2->LM Admin,点击展开Subnet Servers,找到本电脑(即申请license的电脑),在电脑名称上右键依次选择Add Feature->Froma File->To Server and its File,此时提示浏览license文件,选择修改后的,会有相应的提示信息.一直点确定。
然后ok。
第五步,打开开始菜单中。
选择no-net以后点击refresh,然后点击ok。
第六步,启动edem软件.(1)如需安装CFD coupling,运行相应的程序,默认安装即可.1.卸载说明(1)首先在控制面板中卸载edem软件及相关的组件(对于edem 2.1及之前的版本,需对edem,edem-CFD coupling,Sentinel RMS License Manager进行卸载);(2)清除目录C:\Program Files\DEM Solutions下的文件;(3)清除目录C:\Window\system32下的lservsta文件;(4)打开注册表,对整个注册表进行搜索(可按F3连续搜索),如输入dem,将搜到的与安装目录C:\下的edem相关项全部清除(注意,不要将包含dem的其它项删除,如modem)(5)重启电脑.。
E-Prime2.0实验软件一些实用的技巧

E-Prime2.0实验软件⼀些实⽤的技巧以下为⼀些使⽤E-Prime过程中学习到、总结到的实⽤做法。
有没有⽤,见仁见智。
E-Prime实验软件,知道的知道,不知道就跳过吧。
适合在E-Prime上有⼀定经验的⼈。
事先声明:这篇东西并不能让你学会E-Prime,所以为了学会E-Prime⽽搜到本篇东西的初学者可以绕过。
⾄于这篇东西有没有⽤,这么说吧,当你需要⽤到其中介绍的某些功能时,能给你⼀些参考,仅此⽽已。
⽽要是觉得说这⾥的东西⾃⼰看教程都能学会,这篇东西⼀点价值都没有的同学,试问:学问、知识本来就存在这世界上,⾃⼰探索都能学会,那为什么还要书籍和教师呢?想学习E-Prime,或求E-Prime程序等等的,推荐⼀个论坛:“我爱脑科学⽹”的“⼼⼼⽔滴论坛”,⾥⾯的“⾏为实验技术”栏⽬包含着E-Prime的很多内容:注:该论坛活跃着不少E-Prime、科研⾼⼿。
这是第⼀次写了篇被分享的东西,还真不知道原来作者本⼈是可以看到有些⽹友对分享后的回复的。
请⼤家发表评论时注意⽤词,以免他⼈对你的情商作出错误的估计,并卷⼊⽆谓的⼝⾆之争。
有新东西,继续添加。
1.当存储达到⼀定次数后,即使重装E-Prime2.0,也不能继续使⽤。
(这不是新东西,但可能会碰到。
只在XP系统中试过,其他系统不详)(1)此时需要卸载掉E-Prime2.0。
(2)“开始”->“运⾏”:输⼊“regedit”。
打开注册表。
然后找到并删除注册表中“HKEY_CURRENT_USER\Software\psychology software\E-Prime”“HKEY_LOCAL_MACHINE\Software\psychology software\E-Prime”两个条⽬。
(E-Prime在注册表中残留的信息)(3)重新安装E-Prime2.0,就可以继续使⽤了。
2.弹出窗⼝让被试输⼊答案在需要被试输⼊答案的地⽅,加⼊Inline,填⼊以下三⾏代码。
绿体2.6版本使用教程

绿体2.6版本使用教程如下:
1.安装软件:首先需要下载并安装绿体
2.6版本的软件。
安装过
程中需要注意选择合适的安装路径,并根据实际需要安装相应的组件和插件。
2.数据准备:在使用绿体2.6版本进行数据分析前,需要准备好
相应的基因组数据和参考序列文件。
可以从公共数据库或自己的实验数据中获取相关的数据,并将其转换为绿体2.6版本所支持的格式。
3.数据导入:将准备好的数据导入绿体2.6版本的软件中。
可以
使用软件自带的数据导入工具,也可以手动将数据文件复制到相应的文件夹中。
4.数据预处理:对导入的数据进行预处理,包括质量控制、序列
过滤、去除低质量序列等操作。
可以使用绿体2.6版本自带的预处理工具或其他相应的软件进行操作。
5.数据分析:对预处理后的数据进行分析,包括基因组组装、基
因注释、SNP检测等操作。
可以根据实际需要选择相应的分析工具和参数进行操作。
6.结果解读:对分析所得的结果进行解读和统计分析,并将结果
呈现出来。
可以使用绿体2.6版本自带的结果呈现工具或其他相应的软件进行操作。
专业颗粒力学软件EDEM中文手册
专业工程软件和服务提供商 An Engineering software&service provider
公 DEM-Solutions
Experts in Descrete Element Modeling
Dr Carlos Calle, Director of NASA
8
海基科技概况
北京海基科技发展有限责任公司
成立于1996年,并于2001年在上海成
立了分公司,2006年成立了成都办事
处。目前海基科技的业务涉及到产品
全生命周期(PLM)的各个阶段,并
为广大用户提供工程仿真分析、试验
用EDEM的工业标准用户图形界面,我们可以简便的建立和初始化模型。我 们的用户友好功能包括:
☆导入机械几何CAD模型或表面网格 ☆基于CAD模型和激光扫描结果对真实颗粒形状的精确描述 ☆对分批或连续流动的强有力、快速的颗粒初始化 ☆力学性质、相互作用项和其它模型参数的设置简便 ☆模型参数值的数据库
2
功 EDEM功能简介
能 EDEM求解路线:creator、Simulator、Analyst
Model particle builder
介
Pre-processing
EDEM Creator
Various particle generation methods
CAD model geometry import
件
科技设计的用来模拟和分析颗粒系统处理和生
产操作的通用CAE软件。
介
使用EDEM,可以快速、简便的为我们的
固体颗粒系统建立一个参数化的模型,可以通
Edem安装及彻底卸载说明
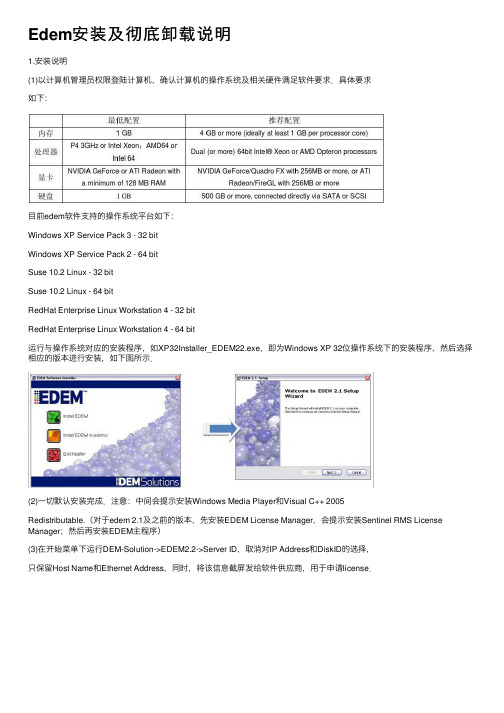
Edem安装及彻底卸载说明1.安装说明(1)以计算机管理员权限登陆计算机,确认计算机的操作系统及相关硬件满⾜软件要求.具体要求如下:⽬前edem软件⽀持的操作系统平台如下:Windows XP Service Pack 3 - 32 bitWindows XP Service Pack 2 - 64 bitSuse 10.2 Linux - 32 bitSuse 10.2 Linux - 64 bitRedHat Enterprise Linux Workstation 4 - 32 bitRedHat Enterprise Linux Workstation 4 - 64 bit运⾏与操作系统对应的安装程序,如XP32Installer_EDEM22.exe,即为Windows XP 32位操作系统下的安装程序,然后选择相应的版本进⾏安装,如下图所⽰.(2)⼀切默认安装完成.注意:中间会提⽰安装Windows Media Player和Visual C++ 2005Redistributable.(对于edem 2.1及之前的版本,先安装EDEM License Manager,会提⽰安装Sentinel RMS License Manager;然后再安装EDEM主程序)(3)在开始菜单下运⾏DEM-Solution->EDEM2.2->Server ID,取消对IP Address和DiskID的选择,只保留Host Name和Ethernet Address,同时,将该信息截屏发给软件供应商,⽤于申请license.(4)在开始菜单下运⾏DEM-Solution->EDEM2.2->LM Admin,点击展开Subnet Servers,找到本电脑(即申请license的电脑),在电脑名称上右键依次选择Add Feature->From a File->To Server and its File,此时提⽰浏览license⽂件,选择license后,会有相应的提⽰信息.如下图所⽰.Edem 2.1 license添加提⽰信息Edem 2.2 license添加提⽰信息(5)启动edem软件.(6)如需安装CFD coupling,运⾏相应的程序,默认安装即可.2.卸载说明(1)⾸先在控制⾯板中卸载edem软件及相关的组件(对于edem 2.1及之前的版本,需对edem,edem-CFD coupling,Sentinel RMS License Manager进⾏卸载);(2)清除⽬录C:\Program Files\DEM Solutions下的⽂件;(3)清除⽬录C:\Window\system32下的lservsta⽂件;(4)打开注册表,对整个注册表进⾏搜索(可按F3连续搜索),如输⼊dem,将搜到的与安装⽬录C:\下的edem相关项全部清除(注意,不要将包含dem的其它项删除,如modem)(5)重启电脑.。
EDEM-ADAMS耦合工具EALink-海基

双向耦合
单向耦合
设备运动
设备驱动
EALink必要性
灵活复杂的设备运动
计算 友好 高效
散料对设备的作用力响应
Hi-Key 界面 适用 性强
可借用ADAMS功能模块
频域振动分析
优化/试验分析 耐久性分析
EALink操作案例
Step 2 :启动EDEM耦合服务
Hi-Key
EALink操作案例
Step 3 :ADAMS模型创建
• 车身固定约束 • 车身与液压支架、液压支架与车斗、车斗与车身连接处分别建立旋转副
Hi-Key • 液压支架处建立滑移副
颗粒阻尼容器布局
设 计 试 验
颗粒阻尼
齿轮传动颗粒阻尼减振
ADAMS
Hi-Key
EDEM
颗粒阻尼
无颗粒
ADAMS
试验结果
Hi-Key
加速度 振幅约 0.04mm/s2
EALink概况
EALink
• 海基自主研发插件
Hi-Key • EDEM与ADAMS耦合工具
• 始于2013
EALink 1.1
EALink 1.0
EALink原理
设备运动
交换数据
颗粒对设备作用力
颗粒阻尼
有颗粒
ADAMS EALink
EDEM
Hi-Key
颗粒阻尼
有颗粒 ADAMS+EDEM
试验结果
Hi-Key
加速度振幅约 0.02—0.03mm/s2
展望
刚柔耦合 (nastran/marc)
耐久性分析 控制分析
EDES安装及更新方法(YFB-GY-04)
EDES安装及更新方法
前提条件:
1.用户端必需有M盘和E盘,如没有请联系电脑中心。
2.用户端必需已安装了Pro/E野火版
安装步骤:
1.搜索C:\WINDOWS\system32路径下的ElInfo.dll文件并删除。
2.起动C:\Program Files\proeWildfire 2.0\bin\ptcsetup.bat文件加载中文模块,如下图所示:
3.在:我的电脑->属性->高级->环境变量中增加一用户环境变量path d:\edm如下图所示:
注意:在输入变量名及变量值时请确定您的输入法为英文。
4.在:我的电脑->属性->高级->环境变量中更改环境变量lang chs如下图所示:
5.将“M:\“路径下的Update.exe和PrintFileSetup.ex e文件拷贝到用户端桌面上
1)双击Update.exe文件弹出如下对话框:
2)在桌面建立一Pro/E野火版的快捷图标并将起始路径设置为如下图所示:
3)起动Pro/E,如下图所示在下拉菜单中增加了2个菜单条:
4)双击PrintFileSetup.exe按以下步骤完成批处理打印程序的安装:
Next->”Company”中输入Apt->Next->Next->Next->Next->Finish 5)安装成功后在桌面出现一批处理打印图标,双击运行弹出如下对话框:
更新步骤:
1.先退出pro/e.
2.将“M:\“路径下的Update.exe文件拷贝到用户端桌面上并双击弹出如下对话框:。
edem 2020 帮助手册
主题:edem 2020 帮助手册内容:1. 欢迎使用edem 20202. edem 2020的功能概述3. 如何开始使用edem 20204. 在edem 2020中进行模拟5. 模拟结果分析与导出6. edem 2020的技术支持和帮助资源欢迎使用edem 2020edem 2020是一款专业的离散元分析软件,可以用于模拟和分析颗粒材料的力学行为。
本帮助手册将为您提供edem 2020的全面介绍和操作指南,帮助您快速上手使用这款强大的软件。
edem 2020的功能概述edem 2020具有以下主要功能:- 离散元模拟:可以模拟颗粒材料在各种工程应用中的行为,如岩土工程、振动筛选、物料处理等。
- 高度可视化:支持3D可视化显示,能够直观展示颗粒材料的运动和相互作用。
- 结果分析:提供丰富的模拟结果分析功能,可以对颗粒材料的力学行为进行深入分析。
- 多领域应用:适用于矿业、土木工程、冶金、化工等多个领域。
如何开始使用edem 2020要开始使用edem 2020,您需要首先进行以下步骤:1. 下载并安装edem 2020软件。
2. 注册并激活edem 2020,获取使用权限。
3. 阅读本帮助手册,了解软件的功能和操作方法。
在edem 2020中进行模拟在edem 2020中进行模拟操作非常简单,按照以下步骤进行:1. 创建新的模拟项目,设置模拟参数和颗粒材料性质。
2. 导入几何模型,初始化颗粒材料的位置和属性。
3. 设置模拟边界条件和加载条件。
4. 运行模拟并观察颗粒材料的行为。
模拟结果分析与导出edem 2020提供了丰富的结果分析功能,您可以进行以下操作:1. 查看颗粒材料的运动轨迹和相互作用力的分布。
2. 分析颗粒材料的压实度、应力和变形情况。
3. 导出模拟结果数据,生成报告或进行进一步的处理和分析。
edem 2020的技术支持和帮助资源如果您在使用edem 2020的过程中遇到任何问题,可以通过以下方式获取帮助:1. 访问冠方全球信息站,查看常见问题解答和用户手册。
FME 扩展产品滑动器 2 安装说明书

FME E XTENSIONSE XTENSION FOR M AGENTO 2 I NSTALLATION I NSTRUCTIONSI NTENDED A UDIENCEThe content of this document is designed to facilitate the users -managers, supervisors, and others of Product Slider Extension forMagento 2. A step by step instruction has been added to this documentto help users to install the extension on Magento 2.This extension will only work on Magento 2. As a safe practice alwaysbackup your files and database before installing any extension onMagento. If you are looking for someone to install the extension, we cando it for you as well. Just go to the following link and let support knowthe order id to expedite the installation process.Once you have installed please see the User Guide to help youunderstand how to use the extension to its full capacity. If you still havequestions, feel free to contact us on our website.T ABLE O F C ONTENTSI NTENDED A UDIENCE (2)I NSTALLATION I NSTRUCTIONS (4)M ETHOD I (4)M ETHOD II (5)D ISCLAIMER (6)I NSTALLATION I NSTRUCTIONSM ETHOD I1.Unzip fme_product-sliders-x.x.x.zip to a local folder.2.Make folder FME into your_magento_directory/app/code/ (if you don't find code folderwithin app folder, please create it first).3.Create following folders (as mentioned in step 2):a.app/code/FMEb.app/code/FME/ProductSliders4.Copy all the contents from fme_product-sliders-x.x.x to newly created ProductSlidersfolder.5.Now open console or shell.6.Go to your Magento directory and run the below commands:a.php bin/magento module:enable FME_ProductSlidersb.php bin/magento setup:upgradec.php bin/magento setup:static-content:deploy -f (-f may not work in Magentoversions less than 2.2.x.)d.chmod command for var/ pub/static and generated/ folders7.Reload the Magento admin and you will see FME Extensions in Left side Menu of youradmin panel.M ETHOD II1.Unzip fme_product-sliders-x.x.x.zip to a local folder.2.Make folder FME into your_magento_directory/app/code/ (if you don't find code folderwithin app folder, please create it first).3.Create following folders (as mentioned in step 2):•app/code/FME•app/code/FME/ProductSliders4.Copy all the contents from fme_product-sliders-x.x.x to newly created ProductSlidersfolder.5.Go to your_magento_directory/app/etc/6.Open config.php file in etc folder7.Add below line in $modules array at the end‘FME_ProductSliders’=>1,8.Now open console or shell.9.Go to your Magento directory and run the below commandsa.php bin/magento setup:upgradeb.php bin/magento setup:static-content:deploy -f (-f may not work in Magentoversions less than 2.2.x.)c.chmod command for var/ pub/static and generated/ folders10.Reload the Magento admin and you will see FME Extensions in Left side Menu of youradmin panel.D ISCLAIMERIt is highly recommended to back up your server files and databasebefore installing this module.No responsibility will be taken for any adverse effects occurring duringinstallation.It is recommended you install on a test server initially to carry out yourown testing.。
基于DEM的球磨机优化设计文档资料

采用软测量方法间接获取负荷值,主要实现方式是将这些方法封装进嵌入
式仪表或者开发软件工具包。这些做法存在结构性过强,方法固定、复用 率低的问题。为了使研究者可以将重心放在软测量算法的研究上,在通用 平台的基础上实验研究各种软测量算法,需要具有模块化结构和软测量算 法实验功能的球磨机负荷监测软件平台。依托863项目课题“自磨/半自
磨球磨机负荷监测技术研究”,进行了基于虚拟仪器技术的球磨机负荷监
测系统的设计。主要任务是球磨机负荷监测软件平台的设计与开发。
6.球磨实验机磨矿的离散元数值仿真分析 球磨机是矿物加工的关键设备,具有结构简单、紧凑、可靠性高等优点,广泛 应用于冶金、化工、陶瓷、水泥、建筑、电力以及国防工业等部门。然而球 磨机也存在很大的不足——高能耗和高铁损。针对球磨机的这些不足,国内外 学者已经做了大量深入的研究,但由于球磨机工作状态受到转速率、填充率、
应用案例:
1.离散元仿真软件EDEM在碎磨工艺模拟中的应用.pdf
应用背景,离散元方法简介,EDEM软件介绍,颗粒工厂技术,EDEM 的材 料数据库等介绍。EDEM是一款基于离散元(DiscreteElement Method, 简称DEM)的颗粒力学仿真软件,可以模拟散体物料加工处理过程中颗粒 体系的行为特征,协助设计人员对相关工艺及设备进行分析和优化。另 外,EDEM还可以与CFD、FEA、MBD软件联合仿真,进行颗粒-流体问题分 析、设备应力分析、多体动力学分析等。
运动的重要的要素之一本文引入了离散元分析法对球磨机的磨球尺寸进
行的研究,主要采用PFC 3D软件对球磨机进行分析,首先用该软件对实验 室球磨机样机进行了建模,并对PFC3D软件模拟结果的有效性进行了验证,
EDEM软件介绍

基于离散元方法的EDEM软件介绍2012年09月离散元方法简介传统的力学研究都是建立在连续性介质假设的基础上的,即认为研究对象是由相互连接没有间隙的大量微团构成。
然而,这种假设在有些领域并不适用,如:岩土力学。
1971年,CUNDALL提出的一种处理非连续介质问题的数值模拟方法,离散元方法(Discrete Element Method,简称DEM),理论基础是结合不同本构关系(应力-应变关系)的牛顿第二定律。
随后,这种方法被越来越广泛的应用于涉及颗粒系统地各个领域。
通过求解系统中每个颗粒的运动学和动力学方程(碰撞力及场力),不断地更新位置和速度信息,从而描述颗粒系统行为。
EDEM软件介绍EDEM主要由三部分组成:Creator、Simulator和Analyst。
Creator是前处理工具,完成几何结构导入和颗粒模型建立等工作;Simulator是求解器,用于模拟颗粒体系的运动过程;Analyst是后处理工具,对计算结果进行各种处理。
图1.1 EDEM结构框架及功能Creator——EDEM的前处理工具EDEM的前处理工具Creator主要完成建模工作,包括:材料参数设置,确定颗粒形状、颗粒产生方法、几何设备导入及运动特性描述等。
Creator的颗粒几何形状建模现实世界中,颗粒状物质形状各异、千差万别,而形状对颗粒体系的运动情况又有着重要的影响。
EDEM的前处理工具可以精确描述颗粒的几何外形,Creator 通过球面填充技术,将颗粒的表面用若干球面的组合表征,不仅能体现颗粒的非球形特征,又可以使颗粒的接触满足球面接触的物理模型。
图1.2 颗粒建模界面图1.3 采用球面填充方法表征颗粒形状图1.4 各种形状的颗粒颗粒工厂技术EDEM特有的颗粒工厂技术(Particle Factory TM),可以根据用户需要,设置颗粒的初始位置、生成速率、颗粒种类、粒径分布等。
图1.5 按正态分布生成的颗粒图1.6 指定颗粒生成的位置(红色区域)EDEM的材料数据库EDEM的材料数据库允许客户将所关注领域内的各种材料整理成库,在每次建模仿真时,直接从库里导出,不仅减少了用户建模时查找数据的繁琐工作,实现了相关数据的管理和积累。
2-inch Network Speed Dome 安装说明书

2-inch Network Speed Dome Installation ManualVersion 1.0.1Table of Contents1INTELLIGENT SPEED DOME INSTALLATION (1)1.1Installation Environments (1)1.2Check installation space and installation location intension (1)1.3Please keep all package material well for future use (1)2SETUP BEFORE INSTALLATION (2)2.1Check Accessories (2)2.2Open Device (2)2.3Installation Position Map (2)2.4SD Card Slot and Button (3)3CAMERA INSTALLATION (4)3.1Component Installation (4)3.2Installation Steps (5)3.2.1Installation Environments (5)3.2.2Installation Steps (5)4APPENDIX Ⅰ LIGHTENING PROTECTION AND SURGE PROTECTION (6)5APPENDIX Ⅱ12V DC WIRE GAUGE AND TRANSMISSION DISTANCE RELATIONSHIP SHEET (7)6APPENDIX Ⅲ WIRE GAUGE REFERENCE SHEET (8)WelcomeThank you for purchasing our speed dome!Please read the following safeguards and warnings carefully before you install or use the product!Important Safeguards and WarningsSafety Measures1. Qualified Engineer Needed●The installation engineer or maintenance engineer shall have corresponding CCTV systeminstallation certificate or maintenance qualification certificate.●The installation engineer or maintenance engineer shall have qualification certificate for workat height.●The installation engineer or maintenance engineer shall have the basic knowledge andoperation technique for low-voltage cable layout and low-voltage electronic cable connection.●Please read the installation manual carefully and keep it well for future reference,●We are not liable for any problems caused by unauthorized modifications or attempted repair.2. Lifting Appliance Requirement●Please select the proper speed dome installation mode and use the lifting appliances at thesafety environment.●The lifting appliances shall have the enough capacity to reach the installation height.●The lifting appliances shall have safe performance.The precaution measures include two types: Warning and Note.●Warning: It is to alert you there is an optional risk of death or series injury!●Note: It is to alert you there is an optional risk of damage or property loss!Warning1. All installation and operation here should conform to your local electrical safety codes. Weassume no liability or responsibility for all the fires or electrical shock caused by improper handling or installation.2. Be sure to use all the accessories (such as power adapter) recommended by manufacturer.3. Do not connect several speed domes to one power adapter. It may result in overheat or fireif it exceeds the rated load.4. Avoid aiming the lens at the strong radiation source directly (such as sun, laser, molten steeletc); in case it may cause unrecoverable damage to the thermal imaging detector. What’s worse, it may cause severe damage to the detector.5. Avoid oil stain and kinds of chemicals tarnishing and damaging the lens surface.6. Store the device in a cool and dry place where there is ventilation but no intenseelectromagnetic field.7. Violent vibration or crash is not allowed during transportation and application.8. Before you connect the cable, install or uninstall, or begin the daily maintenance work,please turn off the power and unplug the power cable.9. Please make sure the produce is secure firmly on the wall or the ceiling.10. Please turn off the power and unplug the power cable, If there is any smoke, disgustingsmell, or noise. Please contact your local retailer or customer service centre for help.11. All the examination and repair work should be done by the qualified service engineers. Weare not liable for any problems caused by unauthorized modifications or attempted repair.Note1. Safety Transportation●Heavy stress, violent vibration or water splash are not allowed during transportation, storageand installation.●This series product must use split type package during the transportation.●We are not liable for any damage or problem resulting from the integrated package duringthe transportation.2. When device is malfunctionShut down the device and disconnect the power cable immediately if there is smoke, abnormal smell or abnormal function. Please contact your local retailer ASAP.3. Do not try to dismantle or modify the device●There is risk of personal injury or device damage resulting from opening the shell.●Please contact your local retailer if there is internal setup or maintenance requirement.●We are not liable for any problems caused by unauthorized modifications or attempted repair.4. Do not allow other object falling into the device●Please make sure there is no metal or inflammable, explosive substance in the speed dome.●The above mentioned objects in the device may result in fire, short-circuit or damage.●Please shut down the device and disconnect the power cable if there is water or liquid fallinginto the camera. Please contact your local retailer ASAP.●Please pay attention to the camera. Avoid the sea water or rain to erode the camera.5. Handle carefullyDo not allow this series product fall down to the ground.Avoid heavy vibration.6. Installation Environment Requirement●This series speed dome should be installed in a cool, dry place away from direct sunlight,inflammable, explosive substances and etc.●This series product shall be away from the strong electromagnetism radiant, please keep itaway from wireless power, TV transmitter, transformer and etc.7. Daily Maintenance●Please use the soft cloth to clean dust on the shell, or you can use soft cloth with cleaningliquid to clean the shell and then use soft cloth to make it dry.●Do not use gasoline, dope thinner or other chemical material to clean the shell. It may resultin shell transfiguration or paint flake.●Do not allow the plastic or rubber material to touch the shell for a long time. It may result inpaint flake.1INTELLIGENT SPEED DOME INSTALLATION1.1Installation EnvironmentsBasic Requirement●All installation and operation here should conform to your local electrical safety codes.●Before installation, please open the package and check all the components are included.Please make sure the speed dome installation environment and installation mode can meet your requirement. If there is special requirement, please contact your local retailer for more information.●We assume no liability or responsibility for all the fires or electrical shock caused byimproper handling or installation.1.2Check installation space and installation location intensionPlease make sure the installation environment has enough space to install the speed dome and its corresponding bracket.Please make sure the ceiling, wall and the bracket can support the speed dome and its corresponding installation component. It shall sustain the 8X weight of the speed dome.1.3Please keep all package material well for future usePlease keep speed dome package material well in case you need to send it back to your local retailer or manufacturer for maintenance work.Non-original package material may result in device damage during the transportation.2SETUP BEFORE INSTALLATION2.1Check AccessoriesBefore the installation, please check the accessories one by one according to the packing list. Please make sure all the components listed are included. (Please check the container list for details.)2.2Open DeviceRemove the package and then take out the device. See Figure 2-1.Figure 2-12.3Installation Position MapThe installation position map is used for drilling positioning on the ceiling and outlet position. See Figure 2-2.Figure 2-22.4SD Card Slot and Rest ButtonSD card slot and button is shown in Figure 2-3.Please make sure the SD card is in the non read-write state when removing it. Otherwise, it may result in data loss and SD card damage. The button is used for default setting. Long press Reset button for more than 5 seconds, the system configuration information will be recovered to default setting.Figure 2-33CAMERA INSTALLATION2-inch network speed dome mainly adopts ceiling mount mode, which can be installed on the ceiling or wall.3.1Component InstallationThe installation of pedestal seal ring is shown in Figure 3-1.Figure 3-1The ceiling mount speed dome is shown in Figure 3-2.Figure 3-23.2Installation Steps3.2.1 Installation EnvironmentsThe ceiling mount speed dome can be installed in the hard construction ceiling in the indoor environment. Before the installation, please make sure:●The ceiling is thick enough to install the expansion bolt.●The ceiling can at least sustain the 8x weight of the speed dome.3.2.2 Installation StepsNote: There are two outlet modes for ceiling mount installation.Don’t drill hole on the ceiling, and open wire outlet from the side of the speed dome.Drill hole on the ceiling, and concealed wire outlet from the ceiling.Step 1Install the default pedestal seal ring on the pedestal according to the way shown in Figure 3-1. Step 2Confirm installation position and outlet mode first, dig holes on the ceiling according to the installation position map, and then put the three plastic expansion bolts into the holes you just dug.Step 3Unscrew three locking screws on the enclosure by using inner hex wrench, and remove the enclosure.Step 4Lay the outgoing line according to the outlet mode, and use three self-tapping screws to fix the pedestal on the installation surface, and insert the screws into the expansion bolts.Step 5Use three locking screws to fix the dome enclosure on the pedestal.So far, the camera installation is completed, and you can adjust the lens angle, zoom, focus and etc on the WEB interface.4APPENDIX Ⅰ LIGHTENING PROTECTION AND SURGE PROTECTIONThis series speed dome adopts TVS lighting protection technology. It can effectively prevent damages from various pulse signals below 2000W, such as sudden lighting and surge. While maintaining your local electrical safety code, you still need to take necessary precaution measures when installing the speed dome in the outdoor environment.●The distance between the signal transmission cable and high-voltage device (or high-voltagecable) shall be at least 50 meters.●Outdoor cable layout shall go under the penthouse if possible.●For vast land, please use sealing steel tube under the land to implement cable layout andconnects one point to the earth. Open floor cable layout is forbidden.●In area of strong thunderstorm hit or near high sensitive voltage (such as near high-voltagetransformer substation), you need to install additional high-power thunder protection device or lightning rod.●The thunder protection and earth of the outdoor device and cable shall be considered in thebuilding whole thunder protection and conform to your local national or industry standard.●System shall adopt equal-potential wiring. The earth device shall meet anti-jamming and atthe same time conforms to your local electrical safety code. The earth device shall not short circuit to N (neutral) line of high voltage power grid or mixed with other wires. When connect the system to the earth alone, the earth resistance shall not be more than 4Ωand earth cable cross-sectional area shall below 25 mm2.5 APPENDIX Ⅱ12V DC WIRE GAUGE AND TRANSMISSIONDISTANCE RELATIONSHIP SHEETThe recommended max transmission distance is under the following environments: The wire diameter is fixed and the DC 12V power voltage loss rate is below 10%. For the device of DC power supplying, the max allowed voltage loss rate is 10%. All the wires listed in the followingsheet are copper wire. (Copper wire resistance)6APPENDIX Ⅲ WIRE GAUGE REFERENCE SHEETMetric bare wire diameter(mm)AWG SWG Bare wire crosssection(mm2)0.050 43 47 0.00196 0.060 42 46 0.00283 0.070 41 45 0.00385 0.080 40 44 0.00503 0.090 39 43 0.00636 0.100 38 42 0.00785 0.110 37 41 0.00950 0.130 36 39 0.01327 0.140 35 / 0.01539 0.160 34 37 0.02011 0.180 33 / 0.02545 0.200 32 35 0.03142 0.230 31 / 0.04115 0.250 30 33 0.04909 0.290 29 31 0.06605 0.330 28 30 0.08553 0.350 27 29 0.09621 0.400 26 28 0.1257 0.450 25 / 0.1602 0.560 24 24 0.2463 0.600 23 23 0.2827 0.710 22 22 0.3958 0.750 21 / 0.4417 0.800 20 21 0.50270.900 19 20 0.63621.000 18 19 0.7854 1.250 16 18 1.22661.500 15 / 1.76632.000 12 143.14202.500 / / 4.90803.000 / / 7.0683Note•This manual is for reference only. Slight difference may be found in the user interface.•All the designs and software here are subject to change without prior written notice.•All trademarks and registered trademarks are the properties of their respective owners.•If there is any uncertainty or controversy, please refer to the final explanation of us.•Please visit our website or contact your local service engineer for more information.。
- 1、下载文档前请自行甄别文档内容的完整性,平台不提供额外的编辑、内容补充、找答案等附加服务。
- 2、"仅部分预览"的文档,不可在线预览部分如存在完整性等问题,可反馈申请退款(可完整预览的文档不适用该条件!)。
- 3、如文档侵犯您的权益,请联系客服反馈,我们会尽快为您处理(人工客服工作时间:9:00-18:30)。
1、安装时,只需安装edem.exe的第一项。
2、在前两项前面打对勾,进入下一步。
(注意,如果没弹出这一步,在后面的安装过程中可能出现错误提示,请重新装一下系统,目前还没找到其他更好的办法。
)
3、选择第一项,Typical安装
4、安装完成后,将EDEM许可文件中的lservrc拷贝到上面的文件夹下
5、新建环境变量
1)变量名:LSHOST;值:no-net
2)变量名:LSERVRC;值:C:\Program Files\DEM Solutions\EDEM 2.5\lservrc(把文件放的路径和文件名写在一起作为值)
3)安装到此完成第一次打开主程序的时候可能会出现下面的对话框,这时候点击no-net,选择OK即可。
