Veritas安装配置手册-CFS
Veritas_cluster_安装说明
Veritas HA/cluster软件安装说明目录一.简介1.V eritas Cluster Server(或quickstart)二.使用说明1.软件安装前的准备和说明2.软件的安装3.初步配置VCS一.简介1.Veritas Cluster ServerV eritas Cluster Server是一个高可用管理软件,它应用于一组服务器中为用户应用提供安全保障。
具体的讲,VCS保证应用在一台服务器上故障时,可以快速地切换到另一台服务器上,从而,提供应用和数据的高可用性。
V eritas Cluster Server具有如下特点:●可实现32节点系统的应用切换。
●切换速度快( <10秒)●完全GUI图形界面,简单易用●完全实现多应用多级切换(应用级切换 ),适用多种应用并存的系统。
某一应用的切换可以不对其它应用产生影响●远程PC监控界面和管理界面,便于无人值守的应用需求●与 Veritas file system 结合,提供高速的切换●与 Veritas Netbackup结合,提供备份系统的热备份●拥有多种应用的agent(web server、IP、数据库、多网卡、NFS、文件系统、disk、进程、SNMP、Netbackup、HSM、文件),适用领域相当广泛。
●用户可以自由定制agent,适应特殊应用。
●故障报警机制,全局网络管理。
●应用故障后,可以在本地重试,确保排除偶然因素。
二. 使用说明1.软件安装前的准备和说明●安装cluster server的操作系统平台是solaris8,RAM至少是128M。
在根目录下必须有/opt文件夹。
●必须在两主机的根目录下有.rhosts文件,此文件的内容是+即可。
●两主机的心跳线必须安装接通。
两主机的外网口保持互连相同。
●在两主机的/etc/hosts文件上必须有对方主机名的解析。
●在两主机上的/etc/hosts文件中配置四块网卡的IP地址,类似如下:#s1127.0.0.1 localhost192.168.2.31 s1 loghost192.168.3.31 s11172.16.2.31 heartbeats1-0172.16.3.31 heartbeats1-1#r1192.168.2.32 r1192.168.3.32 r11172.16.2.32 heartbeatr1-0172.16.3.32 heartbeatr1-1●在/etc/netmasks中加入四个网段的掩码, 类似如下:192.168.2.0 255.255.255.0192.168.3.0 255.255.255.0172.16.2.0 255.255.255.0172.16.3.0 255.255.255.0●在/etc下创建下列四个文件:hostname.eri0 (其内容是:s1)hostname.hme2hostname.hme0hostname.hme1●一般安装的顺序是先安装操作系统,然后是volume manager,然后是cluster,然后是sybase和其他的应用程序。
双机中Veritas的详细配置
Veritas HA安装配置手册目录1 安装 Veritas Storage Foundation (2)1.1 下载软件 (2)1.2 准备工作 (2)1.3 安装 SF for RAC (4)1.4 重新配置 SF for Oracle RAC (7)2 用 VEA 配置 Disk Group (7)2.1 安装 VEA (7)2.2 新建 DG (8)2.3 创建 Volumes 和 File System (9)2.4 在另外一个节点上配置 DG (11)3 安装 oracle 软件,创建数据库 (11)3 .1 安装 oracle 软件 (11)3 .2 用 Veritas 的 ODM 代替 Oracle 的 libodm 库 (11)3.3 手工创建数据库 (12)4 用 VCM 配置 Veritas HA (12)4.1 安装 VCM 图形界面,管理 VCS (12)4. 2 增加服务组 (12)4. 3 增加资源组 (12)4.4 在 resource 中设置 link 关系 (15)4.5 ha 配置文件 (15)5 HA 监控配置 (15)5.1 监控 oracle instance (15)5.2 listener 监控 (17)6 HA 切换 (17)6.1 HA 切换日志 (17)6.2 HA 切换测试 (17)7 常用命令 (18)7.1 Veritas DMP (18)7.2 Veritas VxVM (19)7.3 Veritas VCS (19)8 SMTP 报警邮件配置 (20)9 参考文档211 安装 Veritas Storage Foundation1.1 下载软件/vcsmcSF for RAC Release 5.1 on LINUX对应软件包 VRTS_SF_HA_Solutions_5.1_PR1_RHEL5_SLES10_x64.tar.gzVeritas Enterprise Administrator 3.4.15.0 (Linux)对应软件包 VRTSobgui-3.4.15.0-0.i686.rpmVCS Cluster Manager Java_Console 5.1 (Linux)对应软件包 VCS_Cluster_Manager_Java_Console_5.1_for_Linux.rpm1.2 准备工作# 软件要求Software VersionDatabase Oracle RAC 11g Release 2OperatingsystemRed Hat Enterprise Linux 5 (RHEL 5) Update 3 or laterOracle Enterprise Linux 5.3 (OEL 5.3) or laterSUSE Linux Enterprise Server 10 with SP2 (SLES 10 SP2)SUSE Linux Enterprise Server 10 with SP3 ( SLES 10 SP3)# 配置/etc/hosts在2 台主机/etc/hosts 上增加各自的IP192.168.0.49 host1192.168.0.50 host2# 配置2 个节点root 用户的ssh 信任# 配NTP# 准备共享磁盘存储上的 lun 必须对所有节点可见。
Veritas安装配置手册-CFS

山西电信CFSHA安装配置报告Oct, 2008Symantec Consulting Services .文件信息版本Subject Symantec 大中国区顾问服务VersionAuthor 胡华波Comments关于作者该文件可以与下列作者取得联系胡华波ConsultantSymantec Consulting Service, Greater China Region *********************修改历史日期作者版本修改内容目录1安装CFSHA4.1 for Linux (4)1.1环境准备 (4)1.2修改安装脚本 (4)1.3安装软件 (5)1.4安装MP4补丁 (17)1.5安装RP2补丁 (25)1.6配置软件 (26)2配置信息 (35)2.1/etc/llttab (35)2.2/etc/VRTSvcs/conf/config/main.cf (35)2.3图形方式配置DG,Volume,FileSystem (38)2.4命令方式配置DG,Volume,FileSystem (45)1 安装CFSHA4.1 for Linux安装软件版本为VCS for RedHat Linux1.1 环境准备配置ssh于每台主机上建立ssh public key[root@SX-MMS-SA-1 rhel4_i686]# ssh-keygen -t rsaGenerating public/private rsa key pair.Enter file in which to save the key (/root/.ssh/id_rsa):Enter passphrase (empty for no passphrase):Enter same passphrase again:Your identification has been saved in /root/.ssh/id_rsa.Your public key has been saved in /root/.ssh/id_rsa.pub.The key fingerprint is:1e:ce:2e:19:73:10:f6:2c:d7:09:4a:b8:02:3f:45:b0 root@SX-MMS-SA-为了scp所有主机同时安装软件,需要主机间scp不用输密码,copy SX-MMS-SA-1上ssh public key至另一主机上[********************]#scpid_rsa.pubSX-MMS-SA-2:/root/.ssh/authorized_keysroot@sx-mms-sa-2's password:id_rsa.pub 100% 226 0.2KB/s 00:001.2 修改安装脚本进入安装路径[root@SX-MMS-SA-1 install]# pwd/sf/rhel4_i686/storage_foundation_cluster_file_system/scripts/install[root@SX-MMS-SA-1 install]# lsCPI41LINUX.pm messages rex vxgettext[root@SX-MMS-SA-1 install]# vi CPI41LINUX.pm将脚本内“4AS”修改为“4ES”$CMD{STOP}{vxsvc}="/opt/VRTS/bin/vxsvcctrl stop";$COMM{LINUX}{SUPPARCHES} = [ qw( i586 i686 ia64 x86_64 ) ];$COMM{LINUX}{SUPPRHRELS} = [ qw( 4AS ) ];$COMM{LINUX}{SUPPSUSERELS} = [ qw( 9 ) ];修改后为$CMD{STOP}{vxsvc}="/opt/VRTS/bin/vxsvcctrl stop";$COMM{LINUX}{SUPPARCHES} = [ qw( i586 i686 ia64 x86_64 ) ];$COMM{LINUX}{SUPPRHRELS} = [ qw( 4ES ) ];$COMM{LINUX}{SUPPSUSERELS} = [ qw( 9 ) ];1.3 安装软件[root@SX-MMS-SA-1 storage_foundation_cluster_file_system]# ./installsfcfs -installonlyVERITAS STORAGE FOUNDATION CLUSTER FILE SYSTEM 4.1 INSTALLATIONPROGRAMCopyright (c) 2005 VERITAS Software Corporation. All rights reserved.VERITAS, the VERITAS Logo and all other VERITAS product names and slogans are trademarks orregistered trademarks of VERITAS Software Corporation. VERITAS and the VERITAS Logo Reg.U.S. Pat. & Tm. Off. Other product names and/or slogans mentioned herein may be trademarks or registered trademarks of their respective companies.Enter the system names separated by spaces on which to install SFCFS: SX-MMS-SA-2 SX-MMS-SA-1Checking system communication:installsfcfs requires that ssh commands used between systems execute without prompting forpasswords or confirmations. If installsfcfs asks for a login password, stop installsfcfsand run it again with the ssh configured for passwordless logins, or configure rsh and usethe -usersh option.Verifying communication with SX-MMS-SA-2 .............................. ping successfulAttempting ssh -x with SX-MMS-SA-2 .................................. ssh -x successfulAttempting scp with SX-MMS-SA-2 ........................................ scp successfulChecking OS version on SX-MMS-SA-2 ............................... Linux 2.6.9-78.ELsmpChecking VRTScavf rpm ................................................... not installedChecking Machine Type on SX-MMS-SA-2 (i686)Checking Linux Distribution on SX-MMS-SA-2 ................................. Redhat 4ESCreating log directory on SX-MMS-SA-2 ............................................ DoneChecking OS version on SX-MMS-SA-1 ............................... Linux 2.6.9-78.ELsmpChecking VRTScavf rpm ................................................... not installedChecking Machine Type on SX-MMS-SA-1 (i686)Checking Linux Distribution on SX-MMS-SA-1 ................................. Redhat 4ESLogs for installsfcfs are being created in /var/tmp/installsfcfs1022150043.Using /usr/bin/ssh -x and /usr/bin/scp to communicate with remote systems.Initial system check completed successfully.Press [Enter] to continue:VERITAS STORAGE FOUNDATION CLUSTER FILE SYSTEM 4.1 INSTALLATION PROGRAMVERITAS Infrastructure rpm installation:Installing VERITAS Infrastructure rpms on SX-MMS-SA-2:Checking VRTSvlic rpm ................................................... not installedChecking VRTScpi rpm .................................................... not installedChecking file system space ................................ required space is availableCopying VRTSvlic rpm to SX-MMS-SA-2 .............................................. DoneInstalling VRTSvlic 3.02 on SX-MMS-SA-2 .......................................... DoneCopying VRTScpi rpm to SX-MMS-SA-2 ............................................... DoneInstalling VRTScpi 4.1.0.151 on SX-MMS-SA-2 ...................................... DoneInstalling VERITAS Infrastructure rpms on SX-MMS-SA-1:Checking VRTSvlic rpm ................................................... not installedChecking VRTScpi rpm .................................................... not installedChecking file system space ................................ required space is availableInstalling VRTSvlic 3.02 on SX-MMS-SA-1 .......................................... DoneInstalling VRTScpi 4.1.0.151 on SX-MMS-SA-1 ...................................... Done VERITAS Infrastructure rpms installed successfully.Press [Enter] to continue:VERITAS STORAGE FOUNDATION CLUSTER FILE SYSTEM 4.1 INSTALLATION PROGRAMEach system requires a SFCFS product license before installation. License keys foradditional product features should also be added at this time.Some license keys are node locked and are unique per system. Other license keys, such as demo keys and site license keys, are registered on all systems and must be entered on thefirst system.SFCFS Licensing Verification:Checking SFCFS license key on SX-MMS-SA-2 ................................ not licensedEnter a SFCFS license key for SX-MMS-SA-2: [?] IZPG-I3R3-I6ON-37MG-KX7L-G943-P Registering VERITAS Storage Foundation for Cluster File System DEMO key on SX-MMS-SA-2Do you want to enter another license key for SX-MMS-SA-2? [y,n,q,?] (n)Registering IZPG-I3R3-I6ON-37MG-KX7L-G943-P on SX-MMS-SA-1Checking SFCFS license key on SX-MMS-SA-1 ... Storage Foundation Cluster File System HA DemoDo you want to enter another license key for SX-MMS-SA-1? [y,n,q,?] (n)SFCFS licensing completed successfully.Press [Enter] to continue:VERITAS STORAGE FOUNDATION CLUSTER FILE SYSTEM 4.1 INSTALLATION PROGRAMinstallsfcfs can install the following optional SFCFS rpms:VRTSobgui VERITAS Enterprise AdministratorVRTSvcsmn VERITAS Cluster Server Man PagesVRTSvcsApache VERITAS Cluster Server Apache AgentVRTSvcsdc VERITAS Cluster Server DocumentationVRTScscm VERITAS Cluster Server Cluster ManagerVRTScssim VERITAS Cluster Server SimulatorVRTSvmdoc VERITAS Volume Manager DocumentationVRTSvmman VERITAS Volume Manager Manual PagesVRTSlvmconv VERITAS Linux LVM to VxVM ConverterVRTSap VERITAS Action ProviderVRTStep VERITAS Task ProviderVRTSfsdoc VERITAS File System DocumentationVRTSfsmnd VERITAS File System Software Developer Kit Manual Pages1) Install all of the optional rpms2) Install none of the optional rpms3) View rpm descriptions and select optional rpmsSelect the optional rpms to be installed on all systems? [1-3,q,?] (1)VERITAS STORAGE FOUNDATION CLUSTER FILE SYSTEM 4.1 INSTALLATION PROGRAMinstallsfcfs will install the following SFCFS rpms:VRTSperl VERITAS Perl 5.8.0 RedistributionVRTSob VERITAS Enterprise Administrator ServiceVRTSobgui VERITAS Enterprise AdministratorVRTSllt VERITAS Low Latency TransportVRTSgab VERITAS Group Membership and Atomic BroadcastVRTSvxfen VERITAS I/O FencingVRTSvcs VERITAS Cluster ServerVRTSvcsmg VERITAS Cluster Server Message CatalogsVRTSvcsag VERITAS Cluster Server Bundled AgentsVRTSvcsdr VERITAS Cluster Server Disk Reservation Modules and Utilities VRTSvcsmn VERITAS Cluster Server Man PagesVRTSvcsApache VERITAS Cluster Server Apache AgentVRTSvcsdc VERITAS Cluster Server DocumentationVRTSjre VERITAS Java Runtime Environment RedistributionVRTScscm VERITAS Cluster Server Cluster ManagerVRTScssim VERITAS Cluster Server SimulatorVRTScscw VERITAS Cluster Server Configuration WizardsVRTSweb VERITAS Java Web ServerVRTSvcsw VERITAS Cluster Manager (Web Console)Press [Enter] to continue:...continued:VRTScutil VERITAS Cluster UtilitiesVRTSvxvmcommon VERITAS Volume Manager Common Package.VRTSvxvmplatform VERITAS Volume Manager Platform Specific Package.VRTSvmdoc VERITAS Volume Manager DocumentationVRTSvmman VERITAS Volume Manager Manual PagesVRTSvmpro VERITAS Volume Manager Management Services ProviderVRTSfspro VERITAS File System Management Services ProviderVRTSalloc VERITAS Volume Manager Intelligent Storage ProvisioningVRTSddlpr VERITAS Device Discovery Layer Services ProviderVRTSlvmconv VERITAS Linux LVM to VxVM ConverterVRTSvxfscommon VERITAS File System Common Package.VRTSvxfsplatform VERITAS File System Platform Specific Package.VRTSap VERITAS Action ProviderVRTStep VERITAS Task ProviderVRTSfsman VERITAS File System Manual PagesVRTSfsdoc VERITAS File System DocumentationVRTSfssdk VERITAS File System Software Developer KitVRTSfsmnd VERITAS File System Software Developer Kit Manual PagesVRTScavf VERITAS Cluster Server Agents for Cluster File SystemVRTSglm VERITAS Group Lock ManagerPress [Enter] to continue:VERITAS STORAGE FOUNDATION CLUSTER FILE SYSTEM 4.1 INSTALLATION PROGRAMChecking system installation requirements:Checking SFCFS installation requirements on SX-MMS-SA-2:Checking VRTSperl rpm ................................................... not installedChecking VRTSob rpm ..................................................... not installedChecking VRTSobgui rpm .................................................. not installedChecking VRTSllt rpm .................................................... not installedChecking VRTSgab rpm .................................................... not installedChecking VRTSvxfen rpm .................................................. not installedChecking VRTSvcs rpm .................................................... not installedChecking VRTSvcsmg rpm .................................................. not installedChecking VRTSvcsag rpm .................................................. not installedChecking VRTSvcsdr rpm .................................................. not installedChecking VRTSvcsmn rpm .................................................. not installedChecking VRTSvcsApache rpm .............................................. not installedChecking VRTSvcsdc rpm .................................................. not installedChecking VRTSjre rpm .................................................... not installedChecking VRTScscm rpm ................................................... not installedChecking VRTScssim rpm .................................................. not installedChecking VRTScscw rpm ................................................... not installedChecking VRTSweb rpm .................................................... not installedChecking VRTSvcsw rpm ................................................... not installedChecking VRTScutil rpm .................................................. not installedChecking VRTSvxvmcommon rpm ............................................. not installed Checking VRTSvxvmplatform rpm ........................................... not installed Checking VRTSvmdoc rpm .................................................. not installedChecking VRTSvmman rpm .................................................. not installedChecking VRTSvmpro rpm .................................................. not installedChecking VRTSfspro rpm .................................................. not installedChecking VRTSalloc rpm .................................................. not installedChecking VRTSddlpr rpm .................................................. not installedChecking VRTSlvmconv rpm ................................................ not installedChecking VRTSvxfscommon rpm ............................................. not installed Checking VRTSvxfsplatform rpm ........................................... not installedChecking VRTSap rpm ..................................................... not installedChecking VRTStep rpm .................................................... not installedChecking VRTSfsman rpm .................................................. not installedChecking VRTSfsdoc rpm .................................................. not installedChecking VRTSfssdk rpm .................................................. not installedChecking VRTSfsmnd rpm .................................................. not installedChecking VRTScavf rpm ................................................... not installedChecking VRTSglm rpm .................................................... not installedChecking file system space ................................ required space is available Checking for patch(1) rpm ..................................... version 2.5.4 installedChecking vxsvc process .................................................... not runningChecking had process ...................................................... not runningChecking hashadow process ................................................. not runningChecking CmdServer process ................................................ not runningChecking notifier process ................................................. not runningChecking vxfen driver ..................................................... not runningChecking gab driver ....................................................... not runningChecking llt driver ....................................................... not running Checking SFCFS installation requirements on SX-MMS-SA-1:Checking VRTSperl rpm ................................................... not installedChecking VRTSob rpm ..................................................... not installedChecking VRTSobgui rpm .................................................. not installedChecking VRTSllt rpm .................................................... not installedChecking VRTSgab rpm .................................................... not installedChecking VRTSvxfen rpm .................................................. not installedChecking VRTSvcs rpm .................................................... not installedChecking VRTSvcsmg rpm .................................................. not installedChecking VRTSvcsag rpm .................................................. not installedChecking VRTSvcsdr rpm .................................................. not installedChecking VRTSvcsmn rpm .................................................. not installedChecking VRTSvcsApache rpm .............................................. not installed Checking VRTSvcsdc rpm .................................................. not installedChecking VRTSjre rpm .................................................... not installedChecking VRTScscm rpm ................................................... not installedChecking VRTScssim rpm .................................................. not installedChecking VRTScscw rpm ................................................... not installedChecking VRTSweb rpm .................................................... not installedChecking VRTSvcsw rpm ................................................... not installedChecking VRTScutil rpm .................................................. not installedChecking VRTSvxvmcommon rpm ............................................. not installed Checking VRTSvxvmplatform rpm ........................................... not installed Checking VRTSvmdoc rpm .................................................. not installedChecking VRTSvmman rpm .................................................. not installedChecking VRTSvmpro rpm .................................................. not installedChecking VRTSfspro rpm .................................................. not installedChecking VRTSalloc rpm .................................................. not installedChecking VRTSddlpr rpm .................................................. not installedChecking VRTSlvmconv rpm ................................................ not installedChecking VRTSvxfscommon rpm ............................................. not installed Checking VRTSvxfsplatform rpm ........................................... not installedChecking VRTSap rpm ..................................................... not installedChecking VRTStep rpm .................................................... not installedChecking VRTSfsman rpm .................................................. not installedChecking VRTSfsdoc rpm .................................................. not installedChecking VRTSfssdk rpm .................................................. not installedChecking VRTSfsmnd rpm .................................................. not installedChecking VRTScavf rpm ................................................... not installedChecking VRTSglm rpm .................................................... not installedChecking file system space ................................ required space is availableChecking for patch(1) rpm ..................................... version 2.5.4 installedChecking vxsvc process .................................................... not runningChecking had process ...................................................... not runningChecking hashadow process ................................................. not runningChecking CmdServer process ................................................ not runningChecking notifier process ................................................. not runningChecking vxfen driver ..................................................... not runningChecking gab driver ....................................................... not runningChecking llt driver ....................................................... not runningInstallation requirement checks completed successfully.Press [Enter] to continue:VERITAS STORAGE FOUNDATION CLUSTER FILE SYSTEM 4.1 INSTALLATION PROGRAMI/O FencingI/O Fencing requires manual configuration after SFCFS Installation.If not properly configured, I/O Fencing will become disabled.It needs to be determined at this time if you plan to configureI/O Fencing in order to properly set the expected Fencing mode.See the Storage Foundation Cluster File System Installationand Administration Guide for more information on I/O Fencing.Will you be configuring I/O Fencing? [y,n,q,?] (y) nVERITAS STORAGE FOUNDATION CLUSTER FILE SYSTEM 4.1 INSTALLATION PROGRAMSFCFS can be installed on systems consecutively or simultaneously. Installing on systems consecutively takes more time but allows for better error handling.Would you like to install Storage Foundation Cluster File System HA on all systems simultaneously? [y,n,q,?] (y)Installing Storage Foundation Cluster File System HA 4.1 on all systems simultaneously:Copying VRTSperl rpm to SX-MMS-SA-2 ............................... Done 1 of 117 stepsInstalling VRTSperl 4.1.0.0 on SX-MMS-SA-1 ........................ Done 2 of 117 stepsInstalling VRTSperl 4.1.0.0 on SX-MMS-SA-2 ........................ Done 3 of 117 stepsCopying VRTSob rpm to SX-MMS-SA-2 ................................. Done 4 of 117 stepsInstalling VRTSob 3.2.540 on SX-MMS-SA-1 .......................... Done 5 of 117 stepsInstalling VRTSob 3.2.540 on SX-MMS-SA-2 .......................... Done 6 of 117 stepsInstalling VRTSobgui 3.2.540 on SX-MMS-SA-1 ....................... Done 7 of 117 stepsInstalling VRTSllt 4.1.00.10 on SX-MMS-SA-1 ....................... Done 8 of 117 stepsCopying VRTSobgui rpm to SX-MMS-SA-2 .............................. Done 9 of 117 stepsInstalling VRTSgab 4.1.00.10 on SX-MMS-SA-1 ...................... Done 10 of 117 stepsInstalling VRTSvxfen 4.1.00.10 on SX-MMS-SA-1 .................... Done 11 of 117 stepsInstalling VRTSobgui 3.2.540 on SX-MMS-SA-2 ...................... Done 12 of 117 stepsCopying VRTSllt rpm to SX-MMS-SA-2 ............................... Done 13 of 117 stepsInstalling VRTSllt 4.1.00.10 on SX-MMS-SA-2 ...................... Done 14 of 117 stepsCopying VRTSgab rpm to SX-MMS-SA-2 ............................... Done 15 of 117 stepsInstalling VRTSvcs 4.1.00.10 on SX-MMS-SA-1 ...................... Done 16 of 117 stepsInstalling VRTSvcsmg 4.1.00.10 on SX-MMS-SA-1 .................... Done 17 of 117 steps Installing VRTSvcsag 4.1.00.10 on SX-MMS-SA-1 .................... Done 18 of 117 steps Installing VRTSgab 4.1.00.10 on SX-MMS-SA-2 ...................... Done 19 of 117 stepsCopying VRTSvxfen rpm to SX-MMS-SA-2 ............................. Done 20 of 117 stepsInstalling VRTSvcsdr 4.1.00.10 on SX-MMS-SA-1 .................... Done 21 of 117 stepsInstalling VRTSvcsmn 4.1.00.10 on SX-MMS-SA-1 .................... Done 22 of 117 steps Installing VRTSvxfen 4.1.00.10 on SX-MMS-SA-2 .................... Done 23 of 117 stepsInstalling VRTSvcsApache 4.1.00.10 on SX-MMS-SA-1 ................ Done 24 of 117 steps Installing VRTSvcsdc 4.1.00.10 on SX-MMS-SA-1 .................... Done 25 of 117 stepsCopying VRTSvcs rpm to SX-MMS-SA-2 ............................... Done 26 of 117 stepsInstalling VRTSjre 1.4 on SX-MMS-SA-1 ............................ Done 27 of 117 stepsInstalling VRTScscm 4.4.00.10 on SX-MMS-SA-1 ..................... Done 28 of 117 steps Installing VRTSvcs 4.1.00.10 on SX-MMS-SA-2 ...................... Done 29 of 117 stepsCopying VRTSvcsmg rpm to SX-MMS-SA-2 ............................. Done 30 of 117 stepsInstalling VRTScssim 4.1.00.10 on SX-MMS-SA-1 .................... Done 31 of 117 stepsInstalling VRTSvcsmg 4.1.00.10 on SX-MMS-SA-2 .................... Done 32 of 117 steps Installing VRTScscw 4.1.00.10 on SX-MMS-SA-1 ..................... Done 33 of 117 stepsCopying VRTSvcsag rpm to SX-MMS-SA-2 ............................. Done 34 of 117 stepsInstalling VRTSweb 4.2 on SX-MMS-SA-1 ............................ Done 35 of 117 stepsInstalling VRTSvcsag 4.1.00.10 on SX-MMS-SA-2 .................... Done 36 of 117 steps Copying VRTSvcsdr rpm to SX-MMS-SA-2 ............................. Done 37 of 117 stepsInstalling VRTSvcsw 4.4.00.10 on SX-MMS-SA-1 ..................... Done 38 of 117 stepsInstalling VRTSvcsdr 4.1.00.10 on SX-MMS-SA-2 .................... Done 39 of 117 stepsCopying VRTSvcsmn rpm to SX-MMS-SA-2 ............................. Done 40 of 117 stepsInstalling VRTScutil 4.1.00.10 on SX-MMS-SA-1 .................... Done 41 of 117 stepsInstalling VRTSvcsmn 4.1.00.10 on SX-MMS-SA-2 .................... Done 42 of 117 stepsCopying VRTSvcsApache rpm to SX-MMS-SA-2 ......................... Done 43 of 117 stepsInstalling VRTSvcsApache 4.1.00.10 on SX-MMS-SA-2 ................ Done 44 of 117 steps Installing VRTSvxvmcommon 4.1.00.10 on SX-MMS-SA-1 ............... Done 45 of 117 steps Copying VRTSvcsdc rpm to SX-MMS-SA-2 ............................. Done 46 of 117 stepsInstalling VRTSvcsdc 4.1.00.10 on SX-MMS-SA-2 .................... Done 47 of 117 stepsCopying VRTSjre rpm to SX-MMS-SA-2 ............................... Done 48 of 117 stepsInstalling VRTSjre 1.4 on SX-MMS-SA-2 ............................ Done 49 of 117 stepsInstalling VRTSvxvmplatform 4.1.00.10 on SX-MMS-SA-1 ............. Done 50 of 117 steps Copying VRTScscm rpm to SX-MMS-SA-2 .............................. Done 51 of 117 stepsInstalling VRTSvmdoc 4.1.00.10 on SX-MMS-SA-1 .................... Done 52 of 117 stepsInstalling VRTScscm 4.4.00.10 on SX-MMS-SA-2 ..................... Done 53 of 117 stepsInstalling VRTSvmman 4.1.00.10 on SX-MMS-SA-1 .................... Done 54 of 117 stepsCopying VRTScssim rpm to SX-MMS-SA-2 ............................. Done 55 of 117 stepsInstalling VRTSvmpro 4.1.00.10 on SX-MMS-SA-1 .................... Done 56 of 117 stepsInstalling VRTSfspro 4.1.00.10 on SX-MMS-SA-1 .................... Done 57 of 117 stepsInstalling VRTScssim 4.1.00.10 on SX-MMS-SA-2 .................... Done 58 of 117 stepsCopying VRTScscw rpm to SX-MMS-SA-2 .............................. Done 59 of 117 stepsInstalling VRTSalloc 4.1.00.10 on SX-MMS-SA-1 .................... Done 60 of 117 stepsInstalling VRTScscw 4.1.00.10 on SX-MMS-SA-2 ..................... Done 61 of 117 stepsInstalling VRTSddlpr 4.1.00.10 on SX-MMS-SA-1 .................... Done 62 of 117 stepsCopying VRTSweb rpm to SX-MMS-SA-2 ............................... Done 63 of 117 stepsInstalling VRTSlvmconv 4.1.00.10 on SX-MMS-SA-1 .................. Done 64 of 117 stepsInstalling VRTSvxfscommon 4.1.00.10 on SX-MMS-SA-1 ............... Done 65 of 117 steps Installing VRTSweb 4.2 on SX-MMS-SA-2 ............................ Done 66 of 117 stepsCopying VRTSvcsw rpm to SX-MMS-SA-2 .............................. Done 67 of 117 stepsInstalling VRTSvcsw 4.4.00.10 on SX-MMS-SA-2 ..................... Done 68 of 117 stepsCopying VRTScutil rpm to SX-MMS-SA-2 ............................. Done 69 of 117 stepsInstalling VRTScutil 4.1.00.10 on SX-MMS-SA-2 .................... Done 70 of 117 stepsInstalling VRTSvxfsplatform 4.1.00.10 on SX-MMS-SA-1 ............. Done 71 of 117 stepsCopying VRTSvxvmcommon rpm to SX-MMS-SA-2 ........................ Done 72 of 117 steps Installing VRTSap 2.00 on SX-MMS-SA-1 ............................ Done 73 of 117 stepsInstalling VRTStep 1.20 on SX-MMS-SA-1 ........................... Done 74 of 117 stepsInstalling VRTSfsman 4.1.00.10 on SX-MMS-SA-1 .................... Done 75 of 117 stepsInstalling VRTSfsdoc 4.1.00.10 on SX-MMS-SA-1 .................... Done 76 of 117 stepsInstalling VRTSvxvmcommon 4.1.00.10 on SX-MMS-SA-2 ............... Done 77 of 117 stepsInstalling VRTSfssdk 4.1.00.10 on SX-MMS-SA-1 .................... Done 78 of 117 stepsInstalling VRTSfsmnd 4.1.00.10 on SX-MMS-SA-1 .................... Done 79 of 117 stepsCopying VRTSvxvmplatform rpm to SX-MMS-SA-2 ...................... Done 80 of 117 steps Installing VRTScavf 4.1.00.10 on SX-MMS-SA-1 ..................... Done 81 of 117 stepsInstalling VRTSglm 4.1.00.10 on SX-MMS-SA-1 ...................... Done 82 of 117 stepsInstalling VRTSvxvmplatform 4.1.00.10 on SX-MMS-SA-2 ............. Done 83 of 117 steps Copying VRTSvmdoc rpm to SX-MMS-SA-2 ............................. Done 84 of 117 stepsInstalling VRTSvmdoc 4.1.00.10 on SX-MMS-SA-2 .................... Done 85 of 117 stepsCopying VRTSvmman rpm to SX-MMS-SA-2 ............................. Done 86 of 117 stepsInstalling VRTSvmman 4.1.00.10 on SX-MMS-SA-2 .................... Done 87 of 117 steps Copying VRTSvmpro rpm to SX-MMS-SA-2 ............................. Done 88 of 117 stepsInstalling VRTSvmpro 4.1.00.10 on SX-MMS-SA-2 .................... Done 89 of 117 stepsCopying VRTSfspro rpm to SX-MMS-SA-2 ............................. Done 90 of 117 stepsInstalling VRTSfspro 4.1.00.10 on SX-MMS-SA-2 .................... Done 91 of 117 stepsCopying VRTSalloc rpm to SX-MMS-SA-2 ............................. Done 92 of 117 stepsInstalling VRTSalloc 4.1.00.10 on SX-MMS-SA-2 .................... Done 93 of 117 stepsCopying VRTSddlpr rpm to SX-MMS-SA-2 ............................. Done 94 of 117 stepsInstalling VRTSddlpr 4.1.00.10 on SX-MMS-SA-2 .................... Done 95 of 117 stepsCopying VRTSlvmconv rpm to SX-MMS-SA-2 ........................... Done 96 of 117 stepsInstalling VRTSlvmconv 4.1.00.10 on SX-MMS-SA-2 .................. Done 97 of 117 steps Copying VRTSvxfscommon rpm to SX-MMS-SA-2 ........................ Done 98 of 117 steps Installing VRTSvxfscommon 4.1.00.10 on SX-MMS-SA-2 ............... Done 99 of 117 steps Copying VRTSvxfsplatform rpm to SX-MMS-SA-2 ..................... Done 100 of 117 steps Installing VRTSvxfsplatform 4.1.00.10 on SX-MMS-SA-2 ............ Done 101 of 117 steps Copying VRTSap rpm to SX-MMS-SA-2 ............................... Done 102 of 117 stepsInstalling VRTSap 2.00 on SX-MMS-SA-2 ........................... Done 103 of 117 stepsCopying VRTStep rpm to SX-MMS-SA-2 .............................. Done 104 of 117 stepsInstalling VRTStep 1.20 on SX-MMS-SA-2 .......................... Done 105 of 117 stepsCopying VRTSfsman rpm to SX-MMS-SA-2 ............................ Done 106 of 117 stepsInstalling VRTSfsman 4.1.00.10 on SX-MMS-SA-2 ................... Done 107 of 117 stepsCopying VRTSfsdoc rpm to SX-MMS-SA-2 ............................ Done 108 of 117 stepsInstalling VRTSfsdoc 4.1.00.10 on SX-MMS-SA-2 ................... Done 109 of 117 stepsCopying VRTSfssdk rpm to SX-MMS-SA-2 ............................ Done 110 of 117 stepsInstalling VRTSfssdk 4.1.00.10 on SX-MMS-SA-2 ................... Done 111 of 117 stepsCopying VRTSfsmnd rpm to SX-MMS-SA-2 ............................ Done 112 of 117 stepsInstalling VRTSfsmnd 4.1.00.10 on SX-MMS-SA-2 ................... Done 113 of 117 stepsCopying VRTScavf rpm to SX-MMS-SA-2 ............................. Done 114 of 117 stepsInstalling VRTScavf 4.1.00.10 on SX-MMS-SA-2 .................... Done 115 of 117 stepsCopying VRTSglm rpm to SX-MMS-SA-2 .............................. Done 116 of 117 steps。
Veritas NBU安装手册V1.0

Veritas NBU备份软件安装手册二零零三年六月版权声明©2003 深圳市华为技术服务有限公司版权所有,保留一切权利。
非经本公司书面许可,任何单位和个人不得擅自摘抄、复制本书的部分或全部,并不得以任何形式传播。
修订记录目录第一章NBU软件的安装 (4)1.1. 安装前准备 (4)1.2. NBU MASTER SERVER软件的安装 (4)1.3. NBU MEDIA SERVER软件的安装 (7)1.4. NBU C LIENT 软件的安装 (7)1.5. NBU DAT A BASE AGENT软件的安装 (8)第二章NBU软件的配置 (9)2.1. 搜索并驱动磁带库 (9)2.2. 配置M ASTER SERVER (10)2.3. 配置M EDIA S ERVER (21)2.4. 配置检查 (23)第三章日常维护工作 (27)3.1. NBU四种管理界面 (27)3.2. 如何管理STORAGE UNIT (29)3.3. 如何管理备份策略 (31)3.4. NBU进程管理 (33)3.5. CATALOG管理 (33)3.6. 查看报告 (35)3.7. 备份恢复 (35)3.8. 常用命令 (37)3.9. 故障检测 (38)第一章NBU软件的安装1.1. 安装前准备1.1.1.文件系统空间检查一般情况下,我们的安装目录为\usr,检查\usr目录所在文件系统空间是否大于250M;如空间不够,可以清理磁盘空间,调整分区大小;和使用其他文件系统作为软件的安装目录如\home。
1.1.2.安装步骤Veritas NBU(NetBackUp)软件的分三部分进行:第一步:在备份服务器上安装NBU master server软件;第二步:在业务系统主机上安装NBU media server软件或Client软件第三步:在业务系统主机上安装NBU DataBase agent软件1.2. NBU master server软件的安装a)将NBU软件安装盘放入备份服务器的CDROM中说明:1、以下安装过程以SUN Ultra 60作为备份服务器为例2、安装过程需要使用root用户sun60 # cd cdrom0sun60 # lsDoc NB-Java NBClients hp-ux install linux solarissun60 # ./installb)下面开始安装NBU软件系统提示VERITAS Installation ScriptCopyright 2000 VERITAS Software CorporationInstallation Options1 NetBackup2 NetBackup Client Softwareq To quit from this scriptChoose an option [default: q]: 1[选1 安装Nbu进程,回车继续]Do you want to install NetBackup and Media Manager files? (y/n) [y]yNetBackup is normally installed in /usr/openv/netbackup.#系统会问是否会安装在/usr/openv/netbackup,如果此目录空间足够大(200M)选y,否则选n。
veritas使用手册

ZHE JIANG UNIVERSITY QWARE TECHNOLOGY GROUP Veritas Netbackup 安装、配置及维护手册目录第 1 部分 VERITAS NBU简介 (2)第 2 部分 NBU基本概念 (5)第 3 部分 NBU 管理界面 (7)3.1 配置存储单元 (7)3.1.1 存储单元配置要求 (7)3.1.2 配置一个介质管理的存储单元 (8)3.1.3 配置一个磁盘类型的存储单元 (10)3.2 配置备份策略(Policy) (13)3.2.1 备份策略的组成 (13)3.2.2 如何规划一个Policy (16)3.2.3 如何创建一个Policy (21)3.2.4 其它安装配置 (34)3.3 任务监视器(Activity Monitor) (38)3.4 NetBackup报告 (40)3.5 设备管理(device manager) (47)3.5.1 增加一个机械手 (47)3.5.2 增加一个驱动器 (50)3.5.3 机械手与驱动器配置实例 (51)3.6 介质管理 (54)3.6.1 如何启动介质管理 (54)3.6.2 配置Volume Pool (55)3.6.3 增加一个Volume Pool (55)3.6.4 Scratch Volume Pool (56)3.6.5 增加卷 (56)3.6.6 使用Robot Inventory功能增加一个机械手控制的卷 (56)3.6.7 不使用Robot Inventory功能增加一个卷 (58)3.6.8 移动卷 (59)3.6.9 Deassign一个卷 (60)3.6.10 改变一个卷的属性 (60)3.6.11 更换一个卷 (62)第 1 部分 VERITAS NBU简介NBU是VERITAS 公司提供的企业级备份管理软件,它支持多种操作系统,包括UNIX、Microsoft Windows、OS/2以及Macintosh等。
VERITAS安装文档1

VERITAS安装文档目录第一章备份软件安装 (7)1.1M ASTER S ERVER安装 (7)1.2M EDIA S ERVER安装 (12)1.3C LIENT安装 (12)1.4O RACLE备份客户端安装 (14)第二章备份配置 (15)2.1配置存储设备 (15)2.2配置V OLUME (18)2.3配置C ATALOG备份策略 (19)2.4建立备份策略 (21)第一章备份软件安装1.1 Master Server安装●修改/etc/hosts文件●将/usr文件系统扩大到10G●安装Master Server☆将安装盘放至光驱,并mount CDROM☆进入到cdrom下,键入“./install.”出现如下屏幕:☆选择1 进行SERVER端安装,以后均按照缺省方式安装,如上图所示。
☆在下面出现的窗口输入license☆完成●修改启动脚本:修改/etc/inittab文件,在最后增加一行,使得机器启动时自动启动Netbackup 相关服务:手动启动备份服务如下:●建立机械臂设备文件:☆从ftp:///storage/devdrvr/AIX/下载最新的Atape软件包☆将软件包解压,然后ftp至Master Server的/tmp目录下☆安装机械臂驱动:☆识别机械臂:●确定机械臂的scsi id:●删除机械臂设备:●创建设备文件:●机械臂操作测试●修改bp.conf文件1.2 Media Server安装●修改hosts文件●安装media server☆当出现菜单选择时选择1 进行Media Server 安装☆根据安装脚本的进程进行选择安装,如图所示:●修改bp.conf文件1.3 Client安装●Windows Client端要首先确认windows2000 补丁版本是SP2或以上,否则打补丁;要先确保服务端与客户端能够通讯。
●修改hosts文件●安装Client软件:☆客户端的安装比较简单,只要插入安装光盘Verutas NetBackup 光盘,SETUP程序会自动执行,选择netbackyup client 进行安装。
Veritas 用户手册说明书

Veritas User Guide Quick Reference GuideTHANK YOU FOR VOTING TEXECOM THANK YOU FOR VOTING TEXECOMUSER GUIDESecurity Control PanelsIssue 21 INS167Overview Premier Series User Guide 2 INS221 IntroductionUsers of the alarm system will be assigned a unique 4, 5 or 6 digit User code. User codes are used to arm and disarm the system. Some User codes can also access additional options such as, system tests and omitting zones.Keypads will be installed throughout the premises, usually one at each entry/exit door. The keypads are used to perform all of the system operations i.e. Arming, Disarming etc. Most User codes can be used at any keypad on the system. However, Local Users will only be able to use certain keypads on the system.The Emergency KeysIn case of emergency, the alarm system can provide three immediate emergency alarms by pressing and holding two specific keys for two seconds. !"The emergency keys can be enabled/disabled for each keypad on the system.The Panic alarm can be programmed for either audible or silent operation.The Panic alarm can be programmed for either instant or delayed operation. Emergency AlarmPress KeysPanic Alarm (PA)! & " Fire# & $ Medical% & &The Quick Arm Keys The ‘Quick Arm’ keys allow the system to be armed without having to enter a User code first. !"The ‘Quick Arm’ keys will only work if the keypad has been programmed to allowarming in this way.To FULL arm the system, press '.To PART arm the system, press !, ( or " followed by ).Keypad LockThe keys on the keypad can be locked to prevent unwanted access to the system. !"The Emergency keys will NOT operate with the keys locked.To Lock the keys, press * and + together.To Unlock the keys, press * and + together again.Premier Serie s User Guide Overview INS221 3LED IndicatorsFive LED indicators have been provided to indicate the status of the system. LEDStatus Meaning PowerOn AC mains is present on the control panelFlashing AC Mains is not present, the control panel is running on the standby battery ServiceOn The system requires attention, contact your installerOff The system does NOT require attention ReadyOn All zones are secure and the system is ready to be armedOff One or more zones are activeFlashing The system has zones (with the ‘Force Omit’ attribute) that are active Info.On The system is armed (can also be programmed for other indications)Off The system is unarmed (can also be programmed for other indications) OmitOn One or more zones are omitted Off No zones are omittedZone Faults During ArmingBefore attempting to arm the system, ensure that the premises are secure (all doors and windows closed etc.) and the Ready light is on.If an attempt is made to arm the system with any zones active (e.g. door ajar, open window, etc.) the internal sounders will bleep repeatedly (fault tone) and the display will show the zones that are active.The fault tone will stop and the exit tone will resume when all zones are secure. If it is necessary to leave a zone open then it must be omitted (see page 8 for details). !"If an active zone cannot be secured then it may be ‘in fault’, in this case contact the alarm company immediately. Arm Fail - Failing to Arm If the exit procedure is started and zones are still ‘Active’ at the end of the exit procedure, an Internal alarm will occur (internal sounders only) and the strobe light on the external sounder will flash. !"If this occurs the arm fail must be cleared and the zone in fault identified before the system can be armed (see page 6 for details on clearing an Arm Fail). The Ready LED To help prevent faults during arming a Ready light has been provided, see table above for details on how the Ready LED operates.Operating the Alarm System Premier Series User Guide 4 INS221 To FULL Arm the SystemThe system is FULL Armed when ALL zones are ON (not omitted). !"Your Installer may have programmed the system so that it can be set by just pressing', if this is the case then there is no need to enter the User code below.1. Ensure that the premises are secure (all doors and windows closed etc.) and the Ready light is on2. Enter a valid User code ,,,,3. Press * to armThe exit tone will sound4. Leave the premisesWhen the system has armed the exit tone will stopTo PART Arm the SystemThe system is PART Armed , when ONE OR MORE zones have been left OFF (omitted) i.e. the landing or a bedroom. !"The system is only Part Armed when zones are omitted using the ‘Part Arm’ procedure(omitting zones manually (see page 8 for details) is not classed as Part Arming).The bottom line of the display is programmable for each Part Arm.Your Installer may have programmed the system so that it can be Part Armed by just pressing !, ( or " followed by ), if this is the case then there is no need to enter the User code below.1. Ensure that the premises are secure (all windows and doors not being omitted are closed) and the Ready light is on2. Enter a valid User code ,,,,3. Press )4. Use keys ! - " to select the required Part Arm5. Press * to arm normally or press - to arm silentlyThe exit tone will sound (if silent arm has not been selected)6. Leave the protected areaWhen the system has armed, the exit tone (if sounding) will stopPremier Serie s User Guide Operating the Alarm System INS221 5 To ARM Individual AreasIf the system has been split up into separate areas of protection i.e. Area 1 = House, Area 2 = Garage, Area 3 = Shed etc. These areas can be individually selected for FULL or PART arming as required. !"Areas are selected by using keys ! - . (the / key can also be used toselect an area followed by ' or +).Only areas that exist on the system can be selected. (A ‘Star’ means the area can be selected and a ‘Dot’ means the area cannot be selected).Pressing 0 will select/deselect all areas, pressing ' will toggle between the first 8 areas and the second 8 areas (where applicable).1. Ensure that the premises are secure (all windows and doors not being omitted are closed) and the Ready light is on2. Enter a valid User code ,,,,3. Press '4. Use keys ! - . to select the required areas5. Press * or - to FULL arm the areasOr5. Press )!, ( or " followed by * or - to PART arm the areas The exit tone will sound (if silent arm has not been selected)6. Leave the premisesWhen the system has armed, the exit tone (if sounding) will stop To DISARM the SystemThe entry time is divided into two sections, the Entry time and the 2nd Entry time. If the Entry time expires, an Internal alarm will occur and the 2nd Entry time will start. If the 2nd Entry time expires, an Intruder alarm will occur (all internal and external sounders). !"It is perfectly normal for the 2nd Entry time to be programmed as zero, in whichcase, an Intruder alarm will occur as soon as the Entry time expires.1. Enter the premises via the designated entry pointThe entry tone will start2. Enter a valid User code ,,,,The entry tone will stopOperating the Alarm System Premier Series User Guide 6 INS221 To DISARM the System When Not in Entry1. Enter a valid User code ,,,,2. Press * To CANCEL the Exit ModeOnce the exit mode has been started you should leave the premises immediately, however, if for some reason you decide not to leave, the exit mode must be cancelled.1. Enter a valid User code ,,,,2. Press *The exit tone will stop. To CLEAR an Arm FailWhen the system tries to arm with zones active (open), the internal sounders will sound and the external strobe will be flashing to indicate a problem. For details on preventing an Arm Fail condition, please refer to page 3. !"If you were not present when the Arm Fail occurred or you do not clear the ArmFail, the internal sounders will continue to sound and the external strobe will continue to flash.1. Enter a valid User code ,,,,The internal and external sounders will stop, the external strobe will continue to flash and the number of the zone that caused the Arm Fail will be displayed.2. Enter a valid User code ,,,, and press 12 To SILENCE an AlarmWhen an alarm occurs on the system, the internal and external sounders will normally sound for a pre-programmed time (normally 15 minutes). !"If you were not present when the alarm activated, the internal and externalsounders may have already stopped but the external strobe will still be flashing. When alarm information is being displayed, pressing the SCROLL key will slow down the display and also allow manual scrolling through the events.1. Enter a valid User code ,,,,The internal and external sounders will stop and the number of the zone that caused the alarm will be displayed.The alarm now needs to be reset.Premier Serie s User Guide Operating the Alarm System INS221 7 To RESET After an AlarmUSER ResetOnce the alarm has been silenced (see page 6 for details), the system will need to be reset. !"If the system has been programmed, to be reset by an Engineer, pressing 1 willnot return the display to normal, if this is the case see ENGINEER Reset for details. The system may have been programmed to be reset by Anti-code, if this is the case, see ANTI-CODE Reset for details.1. Enter a valid User code ,,,,2. Press 1The external strobe will stop, the system will chime and the display will return to normal. ENGINEER ResetIf the system has been programmed to be reset by an Engineer following an alarm activation, you will still be able to silence the alarm by entering a valid User code (see page 6 for details). !"The system cannot be armed again until the alarm has been reset.1. Contact the telephone number on the display (if programmed) or the telephone number on the last page of this User GuideANTI-CODE ResetIf the system has been programmed to be reset using an Anti-Code following an alarm activation, you will still be able to silence the alarm by entering a valid User code (see page 6 for details).!"The system cannot be armed again until the alarm has been reset.1. Enter a valid User code ,,,,2. Press 1The display will show a random code number i.e. 4281.3. Contact the telephone number on the display (if programmed) or the telephone number on the last page of this User Guide and quote the random code number You will be given a 4-digit Anti-Code i.e. 5624.4. Enter the Anti-code that has been given to you ,,,,5. Press *If the Anti-code is correct, the keypad will bleep to indicate that the system has been reset and the display will return to normal.Operating the Alarm System Premier Series User Guide 8 INS221 To OMIT ZonesIt is possible to exclude (omit) individual zones when arming i.e. if a zone is ‘in fault’. Users with access to this function can only omit zones that have been programmed as ‘Omittable’. !"If the zone can be omitted, there will be a ‘Star’ to the right of the zone number.Only zones that have the ‘Omit’ attribute assigned to them can be omitted.A ‘Star’ will appear to the left of the zone number to indicate that the zone has been selected for omitting.All omitted zones will be automatically reinstated the next time the system is disarmed, unless programmed otherwise.To re-instate zones manually, simply follow the instructions again. However, when the 3 key is pressed on this occasion, the zones will be re-instated.1. Enter a valid User code ,,,, and press 32. Enter the zone number ,,,3. Press 3 to omit the selected zoneRepeat for other zones if required.4. Press 4 when finishedContinue to arm the system as normal. The Turn CHIME On and OffThe system can be set up so that activating (opening) certain zones will cause the internal sounders to chime. This would normally be used on a front door, exit button etc. !"Zones will only cause the internal sounders to chime if they are selected for chime (see page Master User Guide for details on selecting which zones chime). Once a zone has been selected for chime, the Chime facility can be manually turned on and off as required.!"The system can also be programmed to automatically turn chime on and off under certain conditions i.e. certain times of the day, door left open etc.If no zones have been programmed for Chime, then turning Chime on and off will have no effect.To turn CHIME OnTo turn CHIME Off 1. Press -1. Press - The Chime tone will sound.The Error tone will sound.Premier Serie s User Guide Operating the Alarm System INS221 9 To CHANGE Your User CodeUsers with access to this option can change their own User codes. User codes are unique to each user and can be 4, 5 or 6 digits long.!"Only the User code that is entered to access the change code menu will be changed. Before changing your code, it is vital that you memorise or write down the new code you are about to program. Failure to remember your code will require an engineer visit to re-program a new code for you. This may incur a call-out charge.1. Enter the User code that requires changing ,,,,2. Press 43. Press *4. Press (5. Press *6. Enter a new 4, 5 or 6-digit User code ,,,,7. Press * to accept the new code8. Press 1 to exit the menuThe display will return to normal.Quick Reference Guide Premier Series User Guide10 INS221 OperationDescription Action To Full Arm the SystemEnter a valid User code ,,,, Press Yes (or press Chime to arm silently) * or - To Part Arm the System Enter a valid User code ,,,, Press Part ) Select Required Part Arm !, ( or " Press Yes (or press Chime to arm silently) * or - To Arm Individual Areas Enter a valid User code ,,,, Press Area ' Select Required Area using keys 1 - 8 ! - . Press Yes (or press Chime to arm silently) * or - To Disarm the System Enter a valid User code ,,,, Press Yes (if the entry mode was not started) *To Cancel the Exit Mode Enter a valid User code ,,,, Press Yes * To Clear an Arm Fail Enter a valid User code ,,,, Press Reset 1 To Silence an Alarm Enter a valid User code ,,,, To Reset After an Alarm Enter a valid User code ,,,, Press Reset 1 To Engineer Reset Contact Your Installation Company_____________ To Anti-code Reset Enter a valid User code ,,,, Press Reset 1 Contact Your Alarm Receiving Centre_____________ Quote 4-digit code shown on display !"#$%&'((((' Enter 4-digit code given by Receiving Centre ,,,, Press Yes *To Omit Zones Enter a valid User code ,,,, Press Omit 3 Enter Zone Number(s) ,,,… Press Menu when finished 3 Press Yes to Arm * Turn Chime On/Off Press Chime Once to Turn ON - Press Chime Again to Turn OFF - To Change User Code Enter a valid User code ,,,, Press Menu followed by Yes 4* Press 2 followed by Yes (* Enter a new 4, 5 or 6 digit User code ,,,, Press Yes to accept * Press Reset to return to the normal display 1Premier Series User Guide Installation DetailsINS221 11AreasNo. DescriptionExit TimeEntry Time 1Entry Time 2Bell DelayBell DurationAbort TimeSec. Sec. Sec. Min. Min. Sec. Sec. Sec. Sec. Min. Min. Sec. Sec. Sec. Sec. Min. Min. Sec.Sec.Sec.Sec.Min.Min.Sec.KeypadsEmergency Keys No. LocationArea Quick Arm PA Fire MedUser CodesUser Name Type Default New Code Area Time Lock 01 Master 5678N/AN/AN/AN/AN/AZonesPart ArmsNo. DescriptionType Area Omit 12 3Installation Company DetailsInstallation Engineer:Installation Company:Address:Telephone Number:Installation Date:Service RecordDate Serviced Comments EngineerEmergency Telephone NumbersFor 24 Hour Call Out For Anti-Code ResetControl PanelDetailsModel Premier 24 ❏Premier 48 ❏Premier 88 ❏Premier 168 ❏ Premier 640 ❏Location© TEXECOM LTD. 2000 - 2005INS221-2。
VERITAS产品手册

一、前言企业只有在运行正常时才能够创造经济效益,一旦关键任务系统出现故障,每一分每一秒都意味着重大损失。
尽管这个道理显而易见,但许多公司都做不到对故障服务器的迅速恢复,原因是没有人愿意做这项极其复杂的工作,除非迫在眉睫非做不可。
系统崩溃时,大部分的公司IT部门都把大量的时间花在了恢复系统上,想尽办法能让系统达到可以从磁带恢复备份数据的状态。
他们需要重新安装操作系统和配置硬件,寻找技术熟练人员来完成这些复杂工作,从而浪费了大量的宝贵时间。
由于服务器恢复工作的压力非常大,因而会不可避免地发生错误,进而危及恢复的完整性。
IT每天都面临着严峻挑战,既要提供高度的应用、数据可用性与更高的服务级别要求,同时又要限制成本费用。
随着数据中心日益扩展,其中包括异架构操作系统,多种硬件配置和许多的节/站点等,使得上述挑战变得更加错综复杂。
VERITAS高可用解决方案旨在以集中方式控制服务器和存储系统,以减少这种复杂性。
VERITAS 提供专业化的服务,帮助客户评估应用系统的风险和需求,并通过一系列解决方案和各种技术,保障数据安全、系统不中断运行、高性能,并最大化投资回报二、产品介绍VERITAS 致力于为客户提供效用计算的IT框架,为客户提供一系列配套的解决方案,它们由经过全面测试和集成的产品组成,能够提供每个级别的可用性,从本地磁带备份到高水准数据和应用可用性,乃至广域网环境下灾难恢复。
1、存储基础软件(Storage Foundation)–Storage Foundation–Storage Foundation for Oracle–Storage Foundation for DB2–Storage Foundation for Oracle RAC–Storage Foundation for Cluster File System(1)Storage Foundation 技术特点存储在线管理,减少因磁盘系统维护造成的停机时间--应用使用的逻辑卷的在线扩充或缩小--逻辑卷结构的在线调整--逻辑卷数据的在线转移高性能、在线管理的文件系统--在线碎片整理--在线扩充或缩小--在线数据转移提供真正的数据共享--同种平台(Sun或HP)可以同时存储一个文件系统--适用性强的在线管理功能,极大地减少因系统维护造成的停机,近一步提高了应用系统的高可用性。
veritas NBU备份系统AIX客户端安装手册

XXX NBU客户端安装配置手册AIX安装版XXX2017年11月文档属性文档变更目录一、安装环境 (4)二、客户端安装需求 (4)三、客户端安装 (4)四、设置SAN Client模式 (12)五、检查备份客户端是否安装成功 (13)一、安装环境二、客户端安装需求1.确认/usr/openv文件系统有大于10G空间,默认安装目录/usr/openv2.使用root用户登录系统3.上传客户端安装包AIX.tar到/software目录下4.AIX.tar AIX安装包文件大小约3G,解压后占用空间大于6G。
三、客户端安装1.Master Server (182.180.154.238和182.180.154.239) 端/etc/hosts加入客户端的解析。
2.在数据库备份客户端/etc/hosts加入Master Server的解析3.上传数据库客户端安装包AIX.tar到数据库服务器端的/software目录上传方法:1)ftp 182.180.16.1252)输入FTP服务器账号和密码账号:lixin密码:1234563)ls AIX.tar 确认安装文件是否存在4)bin //ftp通过二进制传输5)get AIX.tar6)quit退出ftp4.解压客户端安装文件在/software目录下解压安装包,并进入解压目录5.开始安装1)提示是否继续,直接回车或输入y2)提示是否安装netbackup 客户端,直接回车或输入y3)输入指定的master server 名称,及确认客户端名称4)开始安装5)设置bp.conf配置文件,添加SERVER = veritas-5240-jj四、设置SAN Client模式1.在客户端上运行命令bpclntcmd -sanclient 1设置SAN Client模式,查看bp.conf设置是否生效,会增加SANCLIENT = 12.重启备份客户端软件的进程五、检查备份客户端是否安装成功1.确认5个进程是否运行(nbftclnt;nbdisco;bpcd;vnetd;pbx_exchange)2.检查客户端1556和13724端口通讯3.确认客户端自启动项是否加入备份服务设置确认客户端/etc下是否存在backup.aix文件,确认/etc/inittab里面是否有备份服务启动项会增加netbackup:2:wait:/etc/backup.aix start客户端安装结束。
NFS与veritas CFS

NFS服务器中“输送”出来。
文件通常以“块”为单位进行传输.其尺寸是8K (虽然它可能会将操作分成更小尺寸的分片).NFS传输协议用于服务器和客户机之间文件访问和共享的通信,从而使客户机远程地访问保存在存储设备上的数据。
Veritas的CFS,IBM的GPFS,这些属于集群文件系统,就类似于windows下面常用的FAT或者NTFS一样,是一种文件系统格式,只不过,集群文件系统可以让多个计算节点同时读写同一个文件系统的分区
集群NAS,是采用了集群文件系统,多个NAS头可以做性能和端口横向扩展,共同对网络上的主机提供网络文件存储服务的设备
NFS至少包括两个主要部分:一台服务器,以及至少一台客户机。被共享的目录和文件存放在服务器上,客户机远程地访问保存在服务器上的数据
VERITAS Storage Foundation,用户可将磁盘分组成为逻辑卷,提高磁盘的利用率,并
杜绝由于存储问题导致的停机。
另外,VERITAS Storage Foundation可在不同的操作系统和存储阵列之间移动数据;将I/O分布在多个路径中,从而提高系统性能;还可以将不重要或过时的文件移动到成本较的存储设备,从而降低存储成本。
NFS存在Single Point of Failure。
Single Point of Failure(SPoF)是指一个系统的这样一个部件,如果它失效或停止运转,将会导致整个系统不能工作。我们当然不希望看到,在一个要求高度可用性的系统中存在这样的部分,但这种情况在网络,软件应用以及其它工业系统中都存在。
VERITAS Storage Foundation
veritas备份软件安装
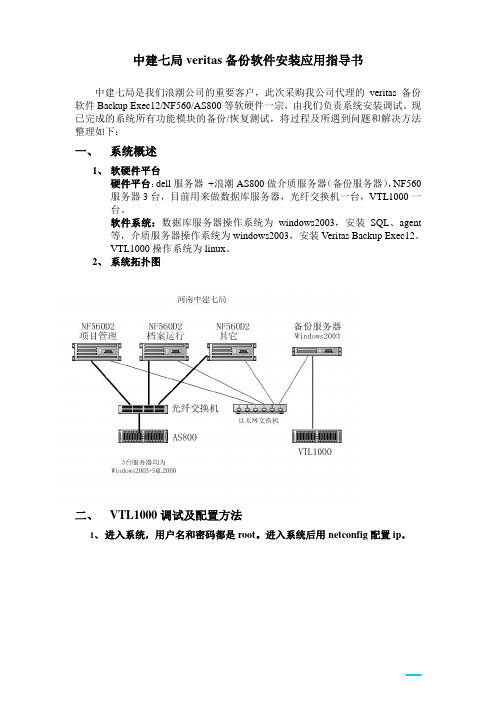
中建七局veritas备份软件安装应用指导书中建七局是我们浪潮公司的重要客户,此次采购我公司代理的veritas备份软件Backup Exec12/NF560/AS800等软硬件一宗,由我们负责系统安装调试。
现已完成的系统所有功能模块的备份/恢复测试,将过程及所遇到问题和解决方法整理如下:一、系统概述1、软硬件平台硬件平台:dell服务器+浪潮AS800做介质服务器(备份服务器),NF560服务器3台,目前用来做数据库服务器,光纤交换机一台,VTL1000一台。
软件系统:数据库服务器操作系统为windows2003,安装SQL、agent等,介质服务器操作系统为windows2003,安装Veritas Backup Exec12。
VTL1000操作系统为linux。
2、系统拓扑图二、VTL1000调试及配置方法1、进入系统,用户名和密码都是root。
进入系统后用netconfig配置ip。
2、ip配置正常后就可以在客户端安装console 连接调试3、安装完毕在桌面上点击VTL CONSOLE,打开4、添加一个VTL,用户密码都为root5、进入console 视图首先要输入license,客户购买时会附带license6、创建虚拟带库选择虚拟带库型号选择磁带驱动器型号及数量条形码及磁带插槽数选择带库创建完毕7、创建磁带两种模式,一般选择express就可以然后选择阵列创建完毕8、创建客户端,首先在客户端安装iscsi插件安装完毕后调试添加VTL1000,输入VTL1000的IP地址,建立连接9、在VTL1000端添加客户端选择添加客户端的型号给所添加的客户端起一个名字如果之前在服务器上ISCSI已经添加了VTL1000D的地址。
就可以被看到建立客户端验证11. 创建target连接12.客户端映射带库客户端添加完毕后就可以给客户端映射虚拟带库了选择已创建的带库13.检验VTL配置(VTL配置完成)在备份服务器的设备管理器中可以看到映射带库的磁盘驱动器三.AS800调试及配置方法AS800支持通过LCD、串口、AS Manager、IE浏览器四种方式调试通过串口telix或串口配置ip地址串口速率默认是384001.AS800 配置IP可以调整串口默认速率配置ip地址配置完ip需要重启控制器2.配置好ip后可以通过IE来管理配置AS800进入登陆界面用户名选择configuration 密码为空Configuration进来后的界面3.创建logic disk,选择硬盘选择RAID级别在阵列中的硬盘与其他硬盘用不同的颜色表示4.初始化,对所建RAID5进行再分区(PAITITION)选择容量大小创建多个paitition5.通过lun map把partition和主机通道绑定在一块让主机认到硬盘Channel选择0或者1Lun号可以随便设置默认从0开始6.AS800可以通过HBA卡的WWN号把LUN和某台主机绑定在一起建立WWNWWN和LUN绑定7.设置热备盘热备盘标记8 检查VTL配置在数据库服务器中查看是否有新的硬盘分区挂载(配置完成)四veritas备份软件安装应用软件安装1.Backup服务器端安装:在NF560上运行browser安装程序环境监察下一步本地检查,下一步检测通过,完成,如未通过,请看为通过原因并解决,直到通过为止。
VERITAS NetBackup备份系统安装配置手册

VERITAS NetBackup6.0 备份系统安装配置手册目录一、备份系统描述 (3)二、备份系统的安装要求 (4)2.1 Windows系统要求 (4)2.2磁盘空间要求 (4)三、NetBackup软件的安装与卸除 (5)3.1 NetBackup Master Server(Windows)的安装 (5)3.1.1安装NetBackup Master Server前准备 (5)3.1.2安装NetBackup Master Server (11)3.1.2 NetBackup Server补丁MP5的安装 (17)3.2 NetBackup Client(Windows平台)的安装与卸除 (20)3.2.1安装NetBackup Client (20)3.2.2载卸NetBackup Client (25)3.3安装和卸载SQL Agent(Windows平台) (25)四、NetBackup的磁带介质管理 (27)4.1使用NetBackup管理员控制台 (27)4.2配置存储设备 (28)4.2.1通过向导程序配置存储单元 (28)4.2.1通过Robot Inventory来进行磁带信息扫描和更新 (32)4.3配置介质池(V olume Pool) (36)4.4 NetBackup的磁带管理 (38)4.4.1如何将磁带划归至某个Volume Pool中 (38)4.4.2如何将磁带退出到Mail Slot中取带 (39)4.4.3如何将磁带从Mail Slot中放入Slot中 (42)4.5介质管理的常用命令 (44)4.5.1 bpexpdate (44)4.5.2 available_media (45)4.5.3 tpconfig (46)4.5.4 robtest (47)4.5.5 bplist (49)五、NetBackup的备份与恢复 (50)5.1 SQL数据库的备份与恢复 (50)5.1.1 SQL Server备份 (50)5.1.1.1创建SQL备份脚本 (50)5.1.1.2创建SQL备份策略 (52)5.1.2 SQL2000的恢复操作 (59)5.1.2.1恢复到本机原目录下 (59)5.1.2.2恢复到本机不同目录下 (62)5.2文件的备份与恢复 (66)5.2.1创建备份策略 (66)5.2.2 File的恢复操作 (72)六、NetBackup的灾难恢复 (79)6.1 NetBackup Catalog信息库的备份与恢复 (79)6.1.1配置NetBackup Catalog信息库的备份 (79)6.1.2恢复NetBackup Catalog信息库 (82)6.1.2.1从磁盘路径下恢复 (82)6.1.2.2从磁带中恢复 (82)七、NetBackup的性能优化及故障解决 (83)7.1性能优化 (83)7.1.1在控制台中修改参数 (83)7.1.2通过添加参数文件来增加性能 (86)7.2故障解决 (86)7.2.1使用作业监视器 (86)7.2.2常见错误 (87)7.2.3技术支持信息收集 (90)7.2.3.1系统信息收集 (90)7.2.3.2备份详细日志收集 (90)一、备份系统描述二、备份系统的安装要求2.1 Windows系统要求有固定的IP地址,且网络畅通。
Veritas Cluster Server入门手册
一、VCS 入门基本知识
VCS 全称 VERITAS Cluster Server,顾名思义,就是 起到集群管 理的功能。 Symantec 的 VCS 集成在 SFHA 产品中,当然也可以单独购买 VCS,主要是一个 HA 的角 色。
VCS 是一个商用的企业级软件解决方案,它可提供全面的可用性管理,把计划的 和非计划的停机时间降到最低。该产品能满足发展的但严格的世界电子商务模式所要 求的正常工作时间。电子商务需要增加不停机时间以保证为顾客进行各种服务;不管 哪种企业,多大规模,VERITAS Cluster Server (VCS)都能为他们的“无间断商务” 发挥重要作用。
3
2、VCS 基本概念
要搞懂 VCS,需要对下列这些基本概念搞清楚: (1)Cluser:就是集群,一个集群就是一群机器来共享同一组硬件存储设备,VCS 监 控这所有机器上运行的程序,出现任何问题,就将它在另一台机器上运行。一个集群 是通过同一个 cluster-ID 来识别的。这一组机器通过各种心跳线来保持通讯。 (2)Resources and resource types,资源包括硬件和软件资源,例如硬盘,网卡, 数据库,IP 地址,程序等等各种概念,这些都可以被 VCS 控制,状态基本就是两 种:ONLINE 和 OFFLINE。VCS 的作用就是监控这些资源。资源的概念是逻辑的,例如, 可以将 IP 地址和网卡设成一个资源。 (3)Agents 针对各种资源,可以开发各种 Agent,VCS 就是通过 Agent 来控制各种资 源,例如导入数据库,启动等等各种操作。有个朋友说过一句”Agent 的成熟度决定 了一个产品的成熟度”,呵呵,很有道理啊 (4)Resource Dependencies ,任何东西都有依赖性,何况资源阿,例如启动一个 web 服务资源,应该先把网卡和 IP 启动吧,如果网卡资源有问题,这台机器上所有的资 源产不多都应高 FAILOVER 了,这就是依赖性。 (5)Heartbeat 心跳,主流的保持集群同步的方式,就看大家谁做的好了。VERITAS 整 个通讯基本都是自己写的,主要包括 LLT(LOW Latency Thansport)和 GAB (Group Membership and Atomic Broadcast)。LLT 依赖于 MAC 地址实现稳定的底层协议,GAB 基于 LLT,实现 VCS 资源的同步。关于 LLT 和 GAB 有很多内容,这里就不叙述了。 (6)Splitbrian 恩,如果一个集群由于网络原因被分成了 2 个和多个部分,资源该在 哪些机器上启动呢,这个问题涉及内容很多,以后再讨论。
Veritas+Netbackup备份软件安装配置和维护手册
Veritas+Netbackup备份软件安装配置和维护⼿册Veritas Netbackup备份软件安装配置和维护⼿册⽬录第1章V ERITAS NETBACK6.0安装⼿册 (3)1.1 Veritas NetBackup6.0安装条件 (3)1.2 备份主服务器上安装Netbackup6.0 server软件和维护 (5)1.3 需要备份的主机上安装Netbackup Client客户端 (9)第2章N ETBACKUP维护和备份作业的制定 (12)[键⼊⽂字]第1章V ERITAS NETBACK6.0安装⼿册1.1V ERITAS N ET B ACKUP6.0安装条件安装之前,请确保windows服务器满⾜以下要求:◆安装 NetBackup 之前,删除系统中当前配置的其他任何供应商的备份软件。
其他供应商的备份软件会对 NetBackup 的安装和功能产⽣负⾯影响。
◆在基于 Windows 的服务器上安装 NetBackup 所需的系统配置:◆运⾏ Windows 2000 的 Intel Pentium 系统,内存不低于 516 MB,建议1GB以上,安装有 ServicePack 4 或者 Windows 2003 Server。
◆ Internet Explorer 5.0 或更⾼版本。
◆屏幕分辨率配置⾄少为 1024x768,颜⾊设置⾄少为 256 ⾊。
◆服务器的管理员帐户和密码。
◆⾜够的磁盘空间:VERITAS 建议您总共要有 5 GB 的存储空间,以容纳 NetBackup服务器软件和 NetBackup ⽬录。
◆ VERITAS 建议使⽤ NTFS 分区。
◆根据制造商的说明安装、且 Windows 软件能够识别的外围设备,如机械⼿设备和独⽴磁带机。
◆使所有服务器和客户机能够相互识别和相互通信的⽹络配置。
⼀般来说,如果可使⽤ping 命令从服务器访问客户机,则 NetBackup 的安装就可进⾏。
VERITAS_NetBackup安装文档

VERITAS_NetBackup安装文档VERITAS NetBackup安装文档安装VERITAS NetBackup一、安装阶段1. 准备好安装环境本例将media server和master server同装在一台机器上。
2.将安装盘放至光驱或考至本地磁盘。
3.双击SETUP。
4.进入Netbackup License Key And Server Type在lincense.txt中查找lincense,并在License Key中输入License 此时左边三个按钮同时变为可操作方式。
5.点击NetBackup master server。
6.选择typical方式安装 => NEXT/doc/b617040027.html,backup System Names => 输入Master Server Name(TEST) => NEXT8.输入Global Device Database Host Name =>TEST3--可以跟Master Server Name相同。
9.点击Install开始安装。
10.设置环境变量,并定位LOG文件(这一部可以不设置)控制面板 => 系统 => 高级 => 环境变量 => 新建环境变量。
11.点击Finish,进入getting started,完成配置阶段。
二、配置阶段1.有两种方式进入配置阶段a. 在安装VERITAS NetBackup结束时,点击Finish,进入getting started,实现配置向导。
b. 在Netbackup Administration Console=>Netbackup Management=>进入getting started。
2. Configure storage Devices配置storage Devices设备,特别是磁带设备时最容易出现备份异常的地方,所以要严格按照安装步骤来实现,如果存储设备仍然有问题,建议删除该设备,重新安装设备。
veritas软件安装部署及恢复操作手册
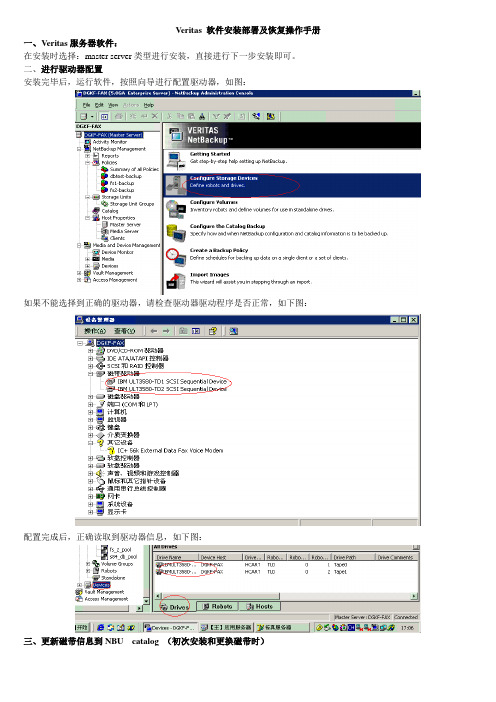
Veritas 软件安装部署及恢复操作手册一、Veritas服务器软件:在安装时选择:master server类型进行安装,直接进行下一步安装即可。
二、进行驱动器配置安装完毕后,运行软件,按照向导进行配置驱动器,如图:如果不能选择到正确的驱动器,请检查驱动器驱动程序是否正常,如下图:配置完成后,正确读取到驱动器信息,如下图:三、更新磁带信息到NBU catalog (初次安装和更换磁带时)1)show 显示磁带2)compare 比较磁带(如磁带更换或更新)3)update 更新catalog中磁带信息四、配置volue及策略配置过程:1,创建卷,如下图:2,将磁带划分到相应的卷,进行磁带分配东莞现网根据需求建立了以下5个poolNetbackup 记录catalog系统日志(6063L1,6065L1)Oldvolume 过期数据要恢复的磁带poolFs_1_pool 文件服务器1语音备份Fs_2_pool 文件服务器2语音备份S84_db_pool 东莞测试数据库数据备份以下为每个pool的磁带具体分配情况(可以根据实际情况修改,但是Netbac kup 磁带不能更换)1)Netbackup(固定不变的两个磁带)用于备份catalog系统日志2)Fs_1_pool (可以改变的,备份满了可以更换)用于备份文件服务器1上的录音文件3)Fs_2_pool(可以改变的,备份满了可以更换)用于备份文件服务器2上的录音文件4)S84_db_pool (固定不变的八个磁带)用于东莞测试数据库数据备份5)Oldvolume 测试及数据恢复使用3,创建磁带备份策略创建备份策略如下图:东莞实际现网做了3个策略Dbtest-backup 测试数据库策略:Fs1-backup 文件服务器1Fs2-backup 文件服务器24,备份Catalog日志备份catalog的几种方式1)选择都备份到磁带2)选择备份到磁带和disk东莞实际现网是将catalog备份到两个磁带(重要)磁带id为6063L1 和6065L1配置如下:选择备份到硬盘还是磁带:3)手工备份catalog信息4)如果是备份到disk,需要将catalog信息再备份到其他服务器时候,需要先停止NBU服务,再将文件拷贝到其他服务器。
Veritas Storage_Foundation_CFS操作手册
[V E R I T A S大中国区顾问服务]Veritas Storage Foundation CFS操作手册VERITAS Consulting ServicesGreater China1目录1目录 (2)2Storage Foundation CFS简单操作 (3)3.1命令行操作简介 (3)3.1.1检查cluster状态 (3)3.1.2 启动服务组 (4)3.1.3 停止服务组 (4)3.1.4 切换服务组 (4)3.1.5 停止某个资源 (4)3.1.6启动某个资源 (4)3.1.7发现某个资源出错后清除错误 (4)3.1.8如果资源无法启动或停止需要flush状态 (4)3.1.9查看心跳信息 (5)3.1.10查看节点的cluster状态 (5)3.1.11查看磁盘状态 (5)3.1.12查看 disk group 状态 (7)3.1.13查看disk group 剩余空间 (7)3.1.14查看 volume 的状态 (8)3.1.15 添加一个disk group (9)3.1.16在disk group中添加一块盘 (9)3.1.17创建volume (9)3.1.18创建文件系统 (9)3.1.19 mount文件系统 (9)3.1.20查看cluster的日志......................................................................................................... 错误!未定义书签。
3.1.21查看volume manager的日志 (10)3.1.22删除一个volume (10)3.1.23删除一个disk group (10)3.1.24如何扩大或缩小文件系统 (10)3.1.25如何禁止fencing (11)3.1.26 shutdown说明 (11)3.1.27检查磁盘的serial number (12)3.1.28如何查看license key (12)3.1.29如何添加license key (12)3.1.30如何查看多路径信息 (12)3.1.31如何让cluster两主机都停止后启动一台主机提供服务 (12)3.2 图形界面简介 (13)2Storage Foundation CFS简单操作Storage Foundation CFS的操作可以采用命令行、java图形界面和web界面进行。
Veritas Storage Foundation
Veritas Storage Foundation™for Oracle® RAC 安装和配置指南HP-UX6.0.1Veritas Storage Foundation™ for Oracle RAC 安装和配置指南本手册所述软件是根据许可协议而提供,仅可按该协议的条款使用。
产品版本:6.0.1文档版本:6.0.1 Rev 0法律声明Copyright © 2012 Symantec Corporation. © 2012 Symantec Corporation 版权所有。
Allrights reserved. 保留所有权利。
Symantec、Symantec 徽标、Veritas、Veritas Storage Foundation、CommandCentral、NetBackup、Enterprise Vault 和 LiveUpdate 是 Symantec Corporation 或其附属公司在美国和其他国家/地区的商标或注册商标。
“Symantec”和“赛门铁克”是 Symantec Corporation在中国的注册商标。
其他名称可能为其各自所有者的商标,特此声明。
本文档中介绍的产品根据限制其使用、复制、分发和反编译/逆向工程的授权许可协议分发。
未经 Symantec Corporation 及其特许人(如果存在)事先书面授权,不得以任何方式任何形式复制本文档的任何部分。
本文档按“现状”提供,对于所有明示或暗示的条款、陈述和保证,包括任何适销性、针对特定用途的适用性或无侵害知识产权的暗示保证,均不提供任何担保,除非此类免责声明的范围在法律上视为无效。
Symantec Corporation 不对任何与提供、执行或使用本文档相关的伴随或后果性损害负责。
本文档所含信息如有更改,恕不另行通知。
根据 FAR 12.212 中的定义,授权许可的软件和文档被视为“商业计算机软件”,受 FAR 第52.227-19 节“Commercial Computer Software-Restricted Rights”(商业计算机软件受限权利)和 DFARS 第 227.7202 节“Rights in Commercial Computer Software or CommercialComputer Software Documentation”(商业计算机软件或商业计算机软件文档权利)中的适用规定,以及所有后续法规中规定的权利的制约。
VERITAS实用操作手册(经验版)
VERITAS9.0实用操作手册(经验版)Kernel ()目录●安装指南一、服务器端的安装二、服务器端的配置二、客户端的安装三、安装过程中的常见问题●应用指南一、WIN2000系统的备份/恢复1、提交备份作业1、恢复到同一台计算机上2、异机的恢复(恢复到到不同的计算机上)●SQL数据库服务器的备份与恢复1、仅仅数据库损坏,手工恢复系统库以及用户数据库2、灾难恢复SQL数据库3、重定向恢复数据库安装指南说明:本操作指南中使用的VRITAS的版本号为9.1.4691,是目前最新版的VERITAS EXEC版本。
本操作手册仅仅是一个快速入门手册,更详细的操作请参考《Veritas Exec用户参考手册》对于VRITAS9.0的安装有两种方式:升级安装和全新安装。
升级安装是指企业中原先在使用VRITAS8.6产品,那么你得到新的9.0产品时一般是VERITAS 公司的升级光盘,这个升级光盘是不能够全新安装的,只能从V8.6版本上升级到9.0。
在光盘的协议中会提供一组升级用的序列号。
这样就麻烦一些,要先安装V8.6然后再升级到9.0。
关键就是序列号的问题,因为只有升级序列号,如果有全新的序列号,那么就可以全新安装的。
因为在从V8.6升级到V9.0的时候,VERITAS会生成一组新的安装序列号。
因此只要把安装后的SN记录下来,就可以把升级安装变成全新的完全安装了。
全新安装问题会少很多,但是客户机必须要把原来的V8.6组件全部卸载掉,然后再安装V9.0组件。
安装前客户端和服务器端有几个前提要注意一下:1.MDAC的版本也有要求,要2.7以上,WINDOWS 2000 SERVER中的是2.6 看MDAC的版本号在注册表的:\HKEY_LOCAL_MACHINE\SOFTWARE\ Microsoft\DataAccess中可以看到。
2.介质服务器端需要的安装SQL2000客户端(注意是客户端,不是服务器端),主要是为了备份SQL2000 SERVER需要。
- 1、下载文档前请自行甄别文档内容的完整性,平台不提供额外的编辑、内容补充、找答案等附加服务。
- 2、"仅部分预览"的文档,不可在线预览部分如存在完整性等问题,可反馈申请退款(可完整预览的文档不适用该条件!)。
- 3、如文档侵犯您的权益,请联系客服反馈,我们会尽快为您处理(人工客服工作时间:9:00-18:30)。
山西电信CFSHA安装配置报告Oct, 2008Symantec Consulting Services .文件信息版本Subject Symantec 大中国区顾问服务VersionAuthor 胡华波Comments关于作者该文件可以与下列作者取得联系胡华波ConsultantSymantec Consulting Service, Greater China Region *********************修改历史日期作者版本修改内容目录1安装CFSHA4.1 for Linux (4)1.1环境准备 (4)1.2修改安装脚本 (4)1.3安装软件 (5)1.4安装MP4补丁 (17)1.5安装RP2补丁 (25)1.6配置软件 (26)2配置信息 (35)2.1/etc/llttab (35)2.2/etc/VRTSvcs/conf/config/main.cf (35)2.3图形方式配置DG,Volume,FileSystem (38)2.4命令方式配置DG,Volume,FileSystem (45)1 安装CFSHA4.1 for Linux安装软件版本为VCS for RedHat Linux1.1 环境准备配置ssh于每台主机上建立ssh public key[root@SX-MMS-SA-1 rhel4_i686]# ssh-keygen -t rsaGenerating public/private rsa key pair.Enter file in which to save the key (/root/.ssh/id_rsa):Enter passphrase (empty for no passphrase):Enter same passphrase again:Your identification has been saved in /root/.ssh/id_rsa.Your public key has been saved in /root/.ssh/id_rsa.pub.The key fingerprint is:1e:ce:2e:19:73:10:f6:2c:d7:09:4a:b8:02:3f:45:b0 root@SX-MMS-SA-为了scp所有主机同时安装软件,需要主机间scp不用输密码,copy SX-MMS-SA-1上ssh public key至另一主机上[********************]#scpid_rsa.pubSX-MMS-SA-2:/root/.ssh/authorized_keysroot@sx-mms-sa-2's password:id_rsa.pub 100% 226 0.2KB/s 00:001.2 修改安装脚本进入安装路径[root@SX-MMS-SA-1 install]# pwd/sf/rhel4_i686/storage_foundation_cluster_file_system/scripts/install[root@SX-MMS-SA-1 install]# lsCPI41LINUX.pm messages rex vxgettext[root@SX-MMS-SA-1 install]# vi CPI41LINUX.pm将脚本内“4AS”修改为“4ES”$CMD{STOP}{vxsvc}="/opt/VRTS/bin/vxsvcctrl stop";$COMM{LINUX}{SUPPARCHES} = [ qw( i586 i686 ia64 x86_64 ) ];$COMM{LINUX}{SUPPRHRELS} = [ qw( 4AS ) ];$COMM{LINUX}{SUPPSUSERELS} = [ qw( 9 ) ];修改后为$CMD{STOP}{vxsvc}="/opt/VRTS/bin/vxsvcctrl stop";$COMM{LINUX}{SUPPARCHES} = [ qw( i586 i686 ia64 x86_64 ) ];$COMM{LINUX}{SUPPRHRELS} = [ qw( 4ES ) ];$COMM{LINUX}{SUPPSUSERELS} = [ qw( 9 ) ];1.3 安装软件[root@SX-MMS-SA-1 storage_foundation_cluster_file_system]# ./installsfcfs -installonlyVERITAS STORAGE FOUNDATION CLUSTER FILE SYSTEM 4.1 INSTALLATIONPROGRAMCopyright (c) 2005 VERITAS Software Corporation. All rights reserved.VERITAS, the VERITAS Logo and all other VERITAS product names and slogans are trademarks orregistered trademarks of VERITAS Software Corporation. VERITAS and the VERITAS Logo Reg.U.S. Pat. & Tm. Off. Other product names and/or slogans mentioned herein may be trademarks or registered trademarks of their respective companies.Enter the system names separated by spaces on which to install SFCFS: SX-MMS-SA-2 SX-MMS-SA-1Checking system communication:installsfcfs requires that ssh commands used between systems execute without prompting forpasswords or confirmations. If installsfcfs asks for a login password, stop installsfcfsand run it again with the ssh configured for passwordless logins, or configure rsh and usethe -usersh option.Verifying communication with SX-MMS-SA-2 .............................. ping successfulAttempting ssh -x with SX-MMS-SA-2 .................................. ssh -x successfulAttempting scp with SX-MMS-SA-2 ........................................ scp successfulChecking OS version on SX-MMS-SA-2 ............................... Linux 2.6.9-78.ELsmpChecking VRTScavf rpm ................................................... not installedChecking Machine Type on SX-MMS-SA-2 (i686)Checking Linux Distribution on SX-MMS-SA-2 ................................. Redhat 4ESCreating log directory on SX-MMS-SA-2 ............................................ DoneChecking OS version on SX-MMS-SA-1 ............................... Linux 2.6.9-78.ELsmpChecking VRTScavf rpm ................................................... not installedChecking Machine Type on SX-MMS-SA-1 (i686)Checking Linux Distribution on SX-MMS-SA-1 ................................. Redhat 4ESLogs for installsfcfs are being created in /var/tmp/installsfcfs1022150043.Using /usr/bin/ssh -x and /usr/bin/scp to communicate with remote systems.Initial system check completed successfully.Press [Enter] to continue:VERITAS STORAGE FOUNDATION CLUSTER FILE SYSTEM 4.1 INSTALLATION PROGRAMVERITAS Infrastructure rpm installation:Installing VERITAS Infrastructure rpms on SX-MMS-SA-2:Checking VRTSvlic rpm ................................................... not installedChecking VRTScpi rpm .................................................... not installedChecking file system space ................................ required space is availableCopying VRTSvlic rpm to SX-MMS-SA-2 .............................................. DoneInstalling VRTSvlic 3.02 on SX-MMS-SA-2 .......................................... DoneCopying VRTScpi rpm to SX-MMS-SA-2 ............................................... DoneInstalling VRTScpi 4.1.0.151 on SX-MMS-SA-2 ...................................... DoneInstalling VERITAS Infrastructure rpms on SX-MMS-SA-1:Checking VRTSvlic rpm ................................................... not installedChecking VRTScpi rpm .................................................... not installedChecking file system space ................................ required space is availableInstalling VRTSvlic 3.02 on SX-MMS-SA-1 .......................................... DoneInstalling VRTScpi 4.1.0.151 on SX-MMS-SA-1 ...................................... Done VERITAS Infrastructure rpms installed successfully.Press [Enter] to continue:VERITAS STORAGE FOUNDATION CLUSTER FILE SYSTEM 4.1 INSTALLATION PROGRAMEach system requires a SFCFS product license before installation. License keys foradditional product features should also be added at this time.Some license keys are node locked and are unique per system. Other license keys, such as demo keys and site license keys, are registered on all systems and must be entered on thefirst system.SFCFS Licensing Verification:Checking SFCFS license key on SX-MMS-SA-2 ................................ not licensedEnter a SFCFS license key for SX-MMS-SA-2: [?] IZPG-I3R3-I6ON-37MG-KX7L-G943-P Registering VERITAS Storage Foundation for Cluster File System DEMO key on SX-MMS-SA-2Do you want to enter another license key for SX-MMS-SA-2? [y,n,q,?] (n)Registering IZPG-I3R3-I6ON-37MG-KX7L-G943-P on SX-MMS-SA-1Checking SFCFS license key on SX-MMS-SA-1 ... Storage Foundation Cluster File System HA DemoDo you want to enter another license key for SX-MMS-SA-1? [y,n,q,?] (n)SFCFS licensing completed successfully.Press [Enter] to continue:VERITAS STORAGE FOUNDATION CLUSTER FILE SYSTEM 4.1 INSTALLATION PROGRAMinstallsfcfs can install the following optional SFCFS rpms:VRTSobgui VERITAS Enterprise AdministratorVRTSvcsmn VERITAS Cluster Server Man PagesVRTSvcsApache VERITAS Cluster Server Apache AgentVRTSvcsdc VERITAS Cluster Server DocumentationVRTScscm VERITAS Cluster Server Cluster ManagerVRTScssim VERITAS Cluster Server SimulatorVRTSvmdoc VERITAS Volume Manager DocumentationVRTSvmman VERITAS Volume Manager Manual PagesVRTSlvmconv VERITAS Linux LVM to VxVM ConverterVRTSap VERITAS Action ProviderVRTStep VERITAS Task ProviderVRTSfsdoc VERITAS File System DocumentationVRTSfsmnd VERITAS File System Software Developer Kit Manual Pages1) Install all of the optional rpms2) Install none of the optional rpms3) View rpm descriptions and select optional rpmsSelect the optional rpms to be installed on all systems? [1-3,q,?] (1)VERITAS STORAGE FOUNDATION CLUSTER FILE SYSTEM 4.1 INSTALLATION PROGRAMinstallsfcfs will install the following SFCFS rpms:VRTSperl VERITAS Perl 5.8.0 RedistributionVRTSob VERITAS Enterprise Administrator ServiceVRTSobgui VERITAS Enterprise AdministratorVRTSllt VERITAS Low Latency TransportVRTSgab VERITAS Group Membership and Atomic BroadcastVRTSvxfen VERITAS I/O FencingVRTSvcs VERITAS Cluster ServerVRTSvcsmg VERITAS Cluster Server Message CatalogsVRTSvcsag VERITAS Cluster Server Bundled AgentsVRTSvcsdr VERITAS Cluster Server Disk Reservation Modules and Utilities VRTSvcsmn VERITAS Cluster Server Man PagesVRTSvcsApache VERITAS Cluster Server Apache AgentVRTSvcsdc VERITAS Cluster Server DocumentationVRTSjre VERITAS Java Runtime Environment RedistributionVRTScscm VERITAS Cluster Server Cluster ManagerVRTScssim VERITAS Cluster Server SimulatorVRTScscw VERITAS Cluster Server Configuration WizardsVRTSweb VERITAS Java Web ServerVRTSvcsw VERITAS Cluster Manager (Web Console)Press [Enter] to continue:...continued:VRTScutil VERITAS Cluster UtilitiesVRTSvxvmcommon VERITAS Volume Manager Common Package.VRTSvxvmplatform VERITAS Volume Manager Platform Specific Package.VRTSvmdoc VERITAS Volume Manager DocumentationVRTSvmman VERITAS Volume Manager Manual PagesVRTSvmpro VERITAS Volume Manager Management Services ProviderVRTSfspro VERITAS File System Management Services ProviderVRTSalloc VERITAS Volume Manager Intelligent Storage ProvisioningVRTSddlpr VERITAS Device Discovery Layer Services ProviderVRTSlvmconv VERITAS Linux LVM to VxVM ConverterVRTSvxfscommon VERITAS File System Common Package.VRTSvxfsplatform VERITAS File System Platform Specific Package.VRTSap VERITAS Action ProviderVRTStep VERITAS Task ProviderVRTSfsman VERITAS File System Manual PagesVRTSfsdoc VERITAS File System DocumentationVRTSfssdk VERITAS File System Software Developer KitVRTSfsmnd VERITAS File System Software Developer Kit Manual PagesVRTScavf VERITAS Cluster Server Agents for Cluster File SystemVRTSglm VERITAS Group Lock ManagerPress [Enter] to continue:VERITAS STORAGE FOUNDATION CLUSTER FILE SYSTEM 4.1 INSTALLATION PROGRAMChecking system installation requirements:Checking SFCFS installation requirements on SX-MMS-SA-2:Checking VRTSperl rpm ................................................... not installedChecking VRTSob rpm ..................................................... not installedChecking VRTSobgui rpm .................................................. not installedChecking VRTSllt rpm .................................................... not installedChecking VRTSgab rpm .................................................... not installedChecking VRTSvxfen rpm .................................................. not installedChecking VRTSvcs rpm .................................................... not installedChecking VRTSvcsmg rpm .................................................. not installedChecking VRTSvcsag rpm .................................................. not installedChecking VRTSvcsdr rpm .................................................. not installedChecking VRTSvcsmn rpm .................................................. not installedChecking VRTSvcsApache rpm .............................................. not installedChecking VRTSvcsdc rpm .................................................. not installedChecking VRTSjre rpm .................................................... not installedChecking VRTScscm rpm ................................................... not installedChecking VRTScssim rpm .................................................. not installedChecking VRTScscw rpm ................................................... not installedChecking VRTSweb rpm .................................................... not installedChecking VRTSvcsw rpm ................................................... not installedChecking VRTScutil rpm .................................................. not installedChecking VRTSvxvmcommon rpm ............................................. not installed Checking VRTSvxvmplatform rpm ........................................... not installed Checking VRTSvmdoc rpm .................................................. not installedChecking VRTSvmman rpm .................................................. not installedChecking VRTSvmpro rpm .................................................. not installedChecking VRTSfspro rpm .................................................. not installedChecking VRTSalloc rpm .................................................. not installedChecking VRTSddlpr rpm .................................................. not installedChecking VRTSlvmconv rpm ................................................ not installedChecking VRTSvxfscommon rpm ............................................. not installed Checking VRTSvxfsplatform rpm ........................................... not installedChecking VRTSap rpm ..................................................... not installedChecking VRTStep rpm .................................................... not installedChecking VRTSfsman rpm .................................................. not installedChecking VRTSfsdoc rpm .................................................. not installedChecking VRTSfssdk rpm .................................................. not installedChecking VRTSfsmnd rpm .................................................. not installedChecking VRTScavf rpm ................................................... not installedChecking VRTSglm rpm .................................................... not installedChecking file system space ................................ required space is available Checking for patch(1) rpm ..................................... version 2.5.4 installedChecking vxsvc process .................................................... not runningChecking had process ...................................................... not runningChecking hashadow process ................................................. not runningChecking CmdServer process ................................................ not runningChecking notifier process ................................................. not runningChecking vxfen driver ..................................................... not runningChecking gab driver ....................................................... not runningChecking llt driver ....................................................... not running Checking SFCFS installation requirements on SX-MMS-SA-1:Checking VRTSperl rpm ................................................... not installedChecking VRTSob rpm ..................................................... not installedChecking VRTSobgui rpm .................................................. not installedChecking VRTSllt rpm .................................................... not installedChecking VRTSgab rpm .................................................... not installedChecking VRTSvxfen rpm .................................................. not installedChecking VRTSvcs rpm .................................................... not installedChecking VRTSvcsmg rpm .................................................. not installedChecking VRTSvcsag rpm .................................................. not installedChecking VRTSvcsdr rpm .................................................. not installedChecking VRTSvcsmn rpm .................................................. not installedChecking VRTSvcsApache rpm .............................................. not installed Checking VRTSvcsdc rpm .................................................. not installedChecking VRTSjre rpm .................................................... not installedChecking VRTScscm rpm ................................................... not installedChecking VRTScssim rpm .................................................. not installedChecking VRTScscw rpm ................................................... not installedChecking VRTSweb rpm .................................................... not installedChecking VRTSvcsw rpm ................................................... not installedChecking VRTScutil rpm .................................................. not installedChecking VRTSvxvmcommon rpm ............................................. not installed Checking VRTSvxvmplatform rpm ........................................... not installed Checking VRTSvmdoc rpm .................................................. not installedChecking VRTSvmman rpm .................................................. not installedChecking VRTSvmpro rpm .................................................. not installedChecking VRTSfspro rpm .................................................. not installedChecking VRTSalloc rpm .................................................. not installedChecking VRTSddlpr rpm .................................................. not installedChecking VRTSlvmconv rpm ................................................ not installedChecking VRTSvxfscommon rpm ............................................. not installed Checking VRTSvxfsplatform rpm ........................................... not installedChecking VRTSap rpm ..................................................... not installedChecking VRTStep rpm .................................................... not installedChecking VRTSfsman rpm .................................................. not installedChecking VRTSfsdoc rpm .................................................. not installedChecking VRTSfssdk rpm .................................................. not installedChecking VRTSfsmnd rpm .................................................. not installedChecking VRTScavf rpm ................................................... not installedChecking VRTSglm rpm .................................................... not installedChecking file system space ................................ required space is availableChecking for patch(1) rpm ..................................... version 2.5.4 installedChecking vxsvc process .................................................... not runningChecking had process ...................................................... not runningChecking hashadow process ................................................. not runningChecking CmdServer process ................................................ not runningChecking notifier process ................................................. not runningChecking vxfen driver ..................................................... not runningChecking gab driver ....................................................... not runningChecking llt driver ....................................................... not runningInstallation requirement checks completed successfully.Press [Enter] to continue:VERITAS STORAGE FOUNDATION CLUSTER FILE SYSTEM 4.1 INSTALLATION PROGRAMI/O FencingI/O Fencing requires manual configuration after SFCFS Installation.If not properly configured, I/O Fencing will become disabled.It needs to be determined at this time if you plan to configureI/O Fencing in order to properly set the expected Fencing mode.See the Storage Foundation Cluster File System Installationand Administration Guide for more information on I/O Fencing.Will you be configuring I/O Fencing? [y,n,q,?] (y) nVERITAS STORAGE FOUNDATION CLUSTER FILE SYSTEM 4.1 INSTALLATION PROGRAMSFCFS can be installed on systems consecutively or simultaneously. Installing on systems consecutively takes more time but allows for better error handling.Would you like to install Storage Foundation Cluster File System HA on all systems simultaneously? [y,n,q,?] (y)Installing Storage Foundation Cluster File System HA 4.1 on all systems simultaneously:Copying VRTSperl rpm to SX-MMS-SA-2 ............................... Done 1 of 117 stepsInstalling VRTSperl 4.1.0.0 on SX-MMS-SA-1 ........................ Done 2 of 117 stepsInstalling VRTSperl 4.1.0.0 on SX-MMS-SA-2 ........................ Done 3 of 117 stepsCopying VRTSob rpm to SX-MMS-SA-2 ................................. Done 4 of 117 stepsInstalling VRTSob 3.2.540 on SX-MMS-SA-1 .......................... Done 5 of 117 stepsInstalling VRTSob 3.2.540 on SX-MMS-SA-2 .......................... Done 6 of 117 stepsInstalling VRTSobgui 3.2.540 on SX-MMS-SA-1 ....................... Done 7 of 117 stepsInstalling VRTSllt 4.1.00.10 on SX-MMS-SA-1 ....................... Done 8 of 117 stepsCopying VRTSobgui rpm to SX-MMS-SA-2 .............................. Done 9 of 117 stepsInstalling VRTSgab 4.1.00.10 on SX-MMS-SA-1 ...................... Done 10 of 117 stepsInstalling VRTSvxfen 4.1.00.10 on SX-MMS-SA-1 .................... Done 11 of 117 stepsInstalling VRTSobgui 3.2.540 on SX-MMS-SA-2 ...................... Done 12 of 117 stepsCopying VRTSllt rpm to SX-MMS-SA-2 ............................... Done 13 of 117 stepsInstalling VRTSllt 4.1.00.10 on SX-MMS-SA-2 ...................... Done 14 of 117 stepsCopying VRTSgab rpm to SX-MMS-SA-2 ............................... Done 15 of 117 stepsInstalling VRTSvcs 4.1.00.10 on SX-MMS-SA-1 ...................... Done 16 of 117 stepsInstalling VRTSvcsmg 4.1.00.10 on SX-MMS-SA-1 .................... Done 17 of 117 steps Installing VRTSvcsag 4.1.00.10 on SX-MMS-SA-1 .................... Done 18 of 117 steps Installing VRTSgab 4.1.00.10 on SX-MMS-SA-2 ...................... Done 19 of 117 stepsCopying VRTSvxfen rpm to SX-MMS-SA-2 ............................. Done 20 of 117 stepsInstalling VRTSvcsdr 4.1.00.10 on SX-MMS-SA-1 .................... Done 21 of 117 stepsInstalling VRTSvcsmn 4.1.00.10 on SX-MMS-SA-1 .................... Done 22 of 117 steps Installing VRTSvxfen 4.1.00.10 on SX-MMS-SA-2 .................... Done 23 of 117 stepsInstalling VRTSvcsApache 4.1.00.10 on SX-MMS-SA-1 ................ Done 24 of 117 steps Installing VRTSvcsdc 4.1.00.10 on SX-MMS-SA-1 .................... Done 25 of 117 stepsCopying VRTSvcs rpm to SX-MMS-SA-2 ............................... Done 26 of 117 stepsInstalling VRTSjre 1.4 on SX-MMS-SA-1 ............................ Done 27 of 117 stepsInstalling VRTScscm 4.4.00.10 on SX-MMS-SA-1 ..................... Done 28 of 117 steps Installing VRTSvcs 4.1.00.10 on SX-MMS-SA-2 ...................... Done 29 of 117 stepsCopying VRTSvcsmg rpm to SX-MMS-SA-2 ............................. Done 30 of 117 stepsInstalling VRTScssim 4.1.00.10 on SX-MMS-SA-1 .................... Done 31 of 117 stepsInstalling VRTSvcsmg 4.1.00.10 on SX-MMS-SA-2 .................... Done 32 of 117 steps Installing VRTScscw 4.1.00.10 on SX-MMS-SA-1 ..................... Done 33 of 117 stepsCopying VRTSvcsag rpm to SX-MMS-SA-2 ............................. Done 34 of 117 stepsInstalling VRTSweb 4.2 on SX-MMS-SA-1 ............................ Done 35 of 117 stepsInstalling VRTSvcsag 4.1.00.10 on SX-MMS-SA-2 .................... Done 36 of 117 steps Copying VRTSvcsdr rpm to SX-MMS-SA-2 ............................. Done 37 of 117 stepsInstalling VRTSvcsw 4.4.00.10 on SX-MMS-SA-1 ..................... Done 38 of 117 stepsInstalling VRTSvcsdr 4.1.00.10 on SX-MMS-SA-2 .................... Done 39 of 117 stepsCopying VRTSvcsmn rpm to SX-MMS-SA-2 ............................. Done 40 of 117 stepsInstalling VRTScutil 4.1.00.10 on SX-MMS-SA-1 .................... Done 41 of 117 stepsInstalling VRTSvcsmn 4.1.00.10 on SX-MMS-SA-2 .................... Done 42 of 117 stepsCopying VRTSvcsApache rpm to SX-MMS-SA-2 ......................... Done 43 of 117 stepsInstalling VRTSvcsApache 4.1.00.10 on SX-MMS-SA-2 ................ Done 44 of 117 steps Installing VRTSvxvmcommon 4.1.00.10 on SX-MMS-SA-1 ............... Done 45 of 117 steps Copying VRTSvcsdc rpm to SX-MMS-SA-2 ............................. Done 46 of 117 stepsInstalling VRTSvcsdc 4.1.00.10 on SX-MMS-SA-2 .................... Done 47 of 117 stepsCopying VRTSjre rpm to SX-MMS-SA-2 ............................... Done 48 of 117 stepsInstalling VRTSjre 1.4 on SX-MMS-SA-2 ............................ Done 49 of 117 stepsInstalling VRTSvxvmplatform 4.1.00.10 on SX-MMS-SA-1 ............. Done 50 of 117 steps Copying VRTScscm rpm to SX-MMS-SA-2 .............................. Done 51 of 117 stepsInstalling VRTSvmdoc 4.1.00.10 on SX-MMS-SA-1 .................... Done 52 of 117 stepsInstalling VRTScscm 4.4.00.10 on SX-MMS-SA-2 ..................... Done 53 of 117 stepsInstalling VRTSvmman 4.1.00.10 on SX-MMS-SA-1 .................... Done 54 of 117 stepsCopying VRTScssim rpm to SX-MMS-SA-2 ............................. Done 55 of 117 stepsInstalling VRTSvmpro 4.1.00.10 on SX-MMS-SA-1 .................... Done 56 of 117 stepsInstalling VRTSfspro 4.1.00.10 on SX-MMS-SA-1 .................... Done 57 of 117 stepsInstalling VRTScssim 4.1.00.10 on SX-MMS-SA-2 .................... Done 58 of 117 stepsCopying VRTScscw rpm to SX-MMS-SA-2 .............................. Done 59 of 117 stepsInstalling VRTSalloc 4.1.00.10 on SX-MMS-SA-1 .................... Done 60 of 117 stepsInstalling VRTScscw 4.1.00.10 on SX-MMS-SA-2 ..................... Done 61 of 117 stepsInstalling VRTSddlpr 4.1.00.10 on SX-MMS-SA-1 .................... Done 62 of 117 stepsCopying VRTSweb rpm to SX-MMS-SA-2 ............................... Done 63 of 117 stepsInstalling VRTSlvmconv 4.1.00.10 on SX-MMS-SA-1 .................. Done 64 of 117 stepsInstalling VRTSvxfscommon 4.1.00.10 on SX-MMS-SA-1 ............... Done 65 of 117 steps Installing VRTSweb 4.2 on SX-MMS-SA-2 ............................ Done 66 of 117 stepsCopying VRTSvcsw rpm to SX-MMS-SA-2 .............................. Done 67 of 117 stepsInstalling VRTSvcsw 4.4.00.10 on SX-MMS-SA-2 ..................... Done 68 of 117 stepsCopying VRTScutil rpm to SX-MMS-SA-2 ............................. Done 69 of 117 stepsInstalling VRTScutil 4.1.00.10 on SX-MMS-SA-2 .................... Done 70 of 117 stepsInstalling VRTSvxfsplatform 4.1.00.10 on SX-MMS-SA-1 ............. Done 71 of 117 stepsCopying VRTSvxvmcommon rpm to SX-MMS-SA-2 ........................ Done 72 of 117 steps Installing VRTSap 2.00 on SX-MMS-SA-1 ............................ Done 73 of 117 stepsInstalling VRTStep 1.20 on SX-MMS-SA-1 ........................... Done 74 of 117 stepsInstalling VRTSfsman 4.1.00.10 on SX-MMS-SA-1 .................... Done 75 of 117 stepsInstalling VRTSfsdoc 4.1.00.10 on SX-MMS-SA-1 .................... Done 76 of 117 stepsInstalling VRTSvxvmcommon 4.1.00.10 on SX-MMS-SA-2 ............... Done 77 of 117 stepsInstalling VRTSfssdk 4.1.00.10 on SX-MMS-SA-1 .................... Done 78 of 117 stepsInstalling VRTSfsmnd 4.1.00.10 on SX-MMS-SA-1 .................... Done 79 of 117 stepsCopying VRTSvxvmplatform rpm to SX-MMS-SA-2 ...................... Done 80 of 117 steps Installing VRTScavf 4.1.00.10 on SX-MMS-SA-1 ..................... Done 81 of 117 stepsInstalling VRTSglm 4.1.00.10 on SX-MMS-SA-1 ...................... Done 82 of 117 stepsInstalling VRTSvxvmplatform 4.1.00.10 on SX-MMS-SA-2 ............. Done 83 of 117 steps Copying VRTSvmdoc rpm to SX-MMS-SA-2 ............................. Done 84 of 117 stepsInstalling VRTSvmdoc 4.1.00.10 on SX-MMS-SA-2 .................... Done 85 of 117 stepsCopying VRTSvmman rpm to SX-MMS-SA-2 ............................. Done 86 of 117 stepsInstalling VRTSvmman 4.1.00.10 on SX-MMS-SA-2 .................... Done 87 of 117 steps Copying VRTSvmpro rpm to SX-MMS-SA-2 ............................. Done 88 of 117 stepsInstalling VRTSvmpro 4.1.00.10 on SX-MMS-SA-2 .................... Done 89 of 117 stepsCopying VRTSfspro rpm to SX-MMS-SA-2 ............................. Done 90 of 117 stepsInstalling VRTSfspro 4.1.00.10 on SX-MMS-SA-2 .................... Done 91 of 117 stepsCopying VRTSalloc rpm to SX-MMS-SA-2 ............................. Done 92 of 117 stepsInstalling VRTSalloc 4.1.00.10 on SX-MMS-SA-2 .................... Done 93 of 117 stepsCopying VRTSddlpr rpm to SX-MMS-SA-2 ............................. Done 94 of 117 stepsInstalling VRTSddlpr 4.1.00.10 on SX-MMS-SA-2 .................... Done 95 of 117 stepsCopying VRTSlvmconv rpm to SX-MMS-SA-2 ........................... Done 96 of 117 stepsInstalling VRTSlvmconv 4.1.00.10 on SX-MMS-SA-2 .................. Done 97 of 117 steps Copying VRTSvxfscommon rpm to SX-MMS-SA-2 ........................ Done 98 of 117 steps Installing VRTSvxfscommon 4.1.00.10 on SX-MMS-SA-2 ............... Done 99 of 117 steps Copying VRTSvxfsplatform rpm to SX-MMS-SA-2 ..................... Done 100 of 117 steps Installing VRTSvxfsplatform 4.1.00.10 on SX-MMS-SA-2 ............ Done 101 of 117 steps Copying VRTSap rpm to SX-MMS-SA-2 ............................... Done 102 of 117 stepsInstalling VRTSap 2.00 on SX-MMS-SA-2 ........................... Done 103 of 117 stepsCopying VRTStep rpm to SX-MMS-SA-2 .............................. Done 104 of 117 stepsInstalling VRTStep 1.20 on SX-MMS-SA-2 .......................... Done 105 of 117 stepsCopying VRTSfsman rpm to SX-MMS-SA-2 ............................ Done 106 of 117 stepsInstalling VRTSfsman 4.1.00.10 on SX-MMS-SA-2 ................... Done 107 of 117 stepsCopying VRTSfsdoc rpm to SX-MMS-SA-2 ............................ Done 108 of 117 stepsInstalling VRTSfsdoc 4.1.00.10 on SX-MMS-SA-2 ................... Done 109 of 117 stepsCopying VRTSfssdk rpm to SX-MMS-SA-2 ............................ Done 110 of 117 stepsInstalling VRTSfssdk 4.1.00.10 on SX-MMS-SA-2 ................... Done 111 of 117 stepsCopying VRTSfsmnd rpm to SX-MMS-SA-2 ............................ Done 112 of 117 stepsInstalling VRTSfsmnd 4.1.00.10 on SX-MMS-SA-2 ................... Done 113 of 117 stepsCopying VRTScavf rpm to SX-MMS-SA-2 ............................. Done 114 of 117 stepsInstalling VRTScavf 4.1.00.10 on SX-MMS-SA-2 .................... Done 115 of 117 stepsCopying VRTSglm rpm to SX-MMS-SA-2 .............................. Done 116 of 117 steps。