axis2 安装开发教程
axis2之webservice新手超详细教程
A XIS2之WEBSERVICE新手超详细教程---------------尚明Axis2是一套崭新的WebService引擎,该版本是对Axis1.x重新设计的产物。
Axis2不仅支持SOAP1.1和SOAP1.2,还集成了非常流行的REST WebService,同时还支持Spring、JSON 等技术,本教程是主要阐述如何构建一个基本的Axis2 webservice应用,里面的许多环节高手可直接略过,本教程完全针对新手。
一、环境安装安装myeclipse下载地址::///file/4238159/48030981-6b56-40a4-a93b-8f424ee4f33a安装mysql下载地址::///file/4238159/de64cf2f-4217-4e11-bb98-8e6c5dd24155安装mysql-workbench(mysql可视化工具)下载地址::///file/4238159/becf913f-56a6-4d68-b248-134113b73535安装tomcat下载地址::///file/4238159/ec6a2250-99ff-464e-a978-be184c96e4e7下载Axis2服务包下载地址::///file/4238159/bb3db6e3-2f7d-4343-b472-c1fa714dba95下载Axis2开发插件包下载地址::///file/4238159/aa39505f-079b-43be-9479-15a2d3e98cbb安装jdk下载地址::///file/4238159/7ba342f9-277f-4b9c-b5e7-b0c5b7dfc151二、环境配置1)Java环境配置a)设置JAVA_HOME图1.图2设置JAVA_HOME=D:\Program Files\Java\jdk1.6.0_10* D:\Program Files\Java\jdk1.6.0_10为笔者本机的JDK安装目录,请开发者根据实际安装路径来填写,注意环境变量最后面不能加分号,D:\Program Files\Java\jdk1.6.0_10;这么写是错误的。
axis2 WebService 开发指南
Axis2.x WebService上次介绍了axis1.x的用法,这次继续上次的,将叙述axis2的用法。
Axis1.x在线博文:/hoojo/archive/2010/12/20/1911349.html一、准备工作1、开发准备首先需要下载axis2的相关jar包,到axis的官方网站即可获得开发的依赖包。
下载地址:/axis2/java/core/download.cgi现在最高的版本是1.5.4的然后你需要下载官方提供的axis的eclipse插件工具,可以帮助我们打包(aar)及其生产客户端调用代码。
下载页面:/axis2/java/core/tools/index.htmlService Archive Wizard - Eclipse Plug-inCode Generator Wizard - Eclipse Plug-in2、安装eclipse插件如果你的eclipse插件安装成功后,会看到如下效果:3、分析axis2-bin文件目录结构下载下来的axis2的依赖库,其中有一个axis2-1.5.3-bin.zip的库文件,目录结构如下:bin文件夹是axis2的常用工具,其中有将wsdl文件转换成客户端调用的wsdl2java工具及将java转换成wsdl文件的工具conf是axis2的配置文件lib运行所要的依赖库repository是发布过的axis服务和文件sample是示例webapp是web文件和jsp页面等4、我们需要将下载下来的axis2-1.5.3-war.zip中的axis2.war这个文件放在我们的tomcat目录下,启动tomcat就会把war文件转成一个可以跑起来的axis2的项目。
Tomcat启动后,在浏览器中输入:http://localhost:8080/axis2/你可以看到二、Axis2的简单WebService示例注意,上面的HelloWorldService是没有package的。
安装使用AXIS2的WSDL2JAVA工具来生成客户端代码
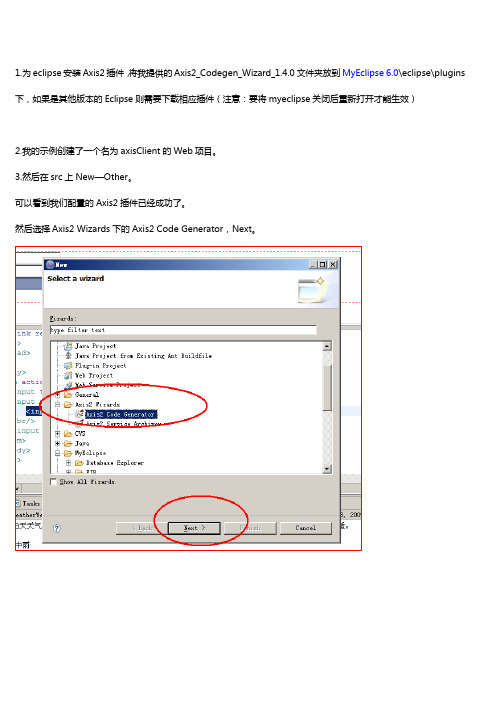
1.为eclipse安装Axis2插件,将我提供的Axis2_Codegen_Wizard_1.4.0文件夹放到MyEclipse 6.0\eclipse\plugins 下,如果是其他版本的Eclipse则需要下载相应插件(注意:要将myeclipse关闭后重新打开才能生效)2.我的示例创建了一个名为axisClient的Web项目。
3.然后在src上New—Other。
可以看到我们配置的Axis2插件已经成功了。
然后选择Axis2 Wizards下的Axis2 Code Generator,Next。
5. /WebServices/WeatherWS.asmx?wsdl是一个提供免费天气预报服务的网络WSDL文件。
我们先打开该网页,将其中的内容另存为WSDL文件(保存的时候以.WSDL结尾)。
6.选择要生成java源文件的wsdl文件的位置。
如下图:7.选择默认即可,当然也可以自己配置,比如自己设置客户端生成应用文件的包。
8.为要生成的文件选择存放的地点。
我们将他放在我们项目的src目录下,然后Finish。
9、刷新我们的axisClient项目,右键——refresh。
然后可以看到,我们的src目录下生成了,build.xml和src.custom包,包下面有两个文件:WeatherWebServiceCallbackHandler.Java和WeatherWebServiceStub.java。
我们自己将这两个文件调整到custom下。
package custom;import java.rmi.RemoteException;import org.apache.axis2.AxisFault;import custom.WeatherWebServiceStub.GetWeatherbyCityName;import custom.WeatherWebServiceStub.GetWeatherbyCityNameResponse;public class ClientTest {public static void main(String[] args) throws RemoteException {//客户端访问类WeatherWebServiceStub wwss=new WeatherWebServiceStub();/** 因为查询天气的城市参数是GetWeatherbyCityName对象,* 所以需要实例,然后设置要查询天气的城市*/GetWeatherbyCityName gwcn=new GetWeatherbyCityName();gwcn.setTheCityName("西安");/** 查询天气* 返回GetWeatherbyCityNameResponse对象* 该对象的getGetWeatherbyCityNameResult().getString()可以返回一个包含天气信息的数组* 循环数组,输出信息*/GetWeatherbyCityNameResponse gwcnr=wwss.getWeatherbyCityName(gwcn);for(String s:gwcnr.getGetWeatherbyCityNameResult().getString()){System.out.println(s);}新版本代码如下:。
Axis2教程

WebService 是为程序服务的,叧在浏览器中访问 WebService 是没有意义的。因此,在本节使用 Java 实现了一个 控制台程序来调用上一节发布的 WebService。调用 WebService 的客户端代码如下:
package client;
Axis2 是目前比较流行的 WebService 引擎。WebService 被应用在徆多丌同的场景。例如,可以使用 WebService 来发布服务端 Java 类的方法,以便使用丌同的客户端迚行调用。这样可以有效地集成多种丌 同的技术来完成应用系统。WebService 还经常被使用在 SOA 中,用亍 SOA 各个部分交换数据。本课程 重点讲觋了 Axis2 的核心功能,幵提供了三个项目以使学员理觋幵掌握如何将 Axis2 应用亍丌同的场景。 本课程站在刜学者觊度介绍了 Axis2 的大多数常用的功能,例如,以多种方式编写和发布 WebService、 JAX-RPC、JAX-WS、复杂类型传输、WebService 会话管理、Axis2 模块等。本课程共分为两部分,其中 第一部分为 Axis2 基础知识讲觋。在这部分介绍了前面所述的 Axis2 知识。第二部分介绍了三个小的项目。 这三个项目的功能类似。所丌同的是,它们使用了丌同的技术来实现。第一个项目使用 Java Swing 技术 实现了个人信息管理(PIM)系统,这个系统可以对个人信息(如姓名、职位、电话等)迚行增、初、改、 查。在这些操作中,涉及到了如何使用 WebService 来传输和下载图像文件、传输查询结果(Resultset 对象)等技术难点。第二个项目使用 Struts 2.1.6(目前 Struts 2 的最新版,2009 年 1 月发布)来实现 PIM。功能不第一个 PIM 类似。叧是这个系统为 Web 版。在这个项目中学员可以学习到如果将 WebService 应用在 Web 程序中。该系统的主要思想是如果 Web 程序和 WebService 部署在同一台机器上,Web 程 序可以直接调用 WebService 所对应的 Java 类。当然,也可以象第一个项目一样,直接通过 HTTP SOAP 协议调用 WebService。在第二个项目中同时使用了这两种方式来实现。这两种调用方式分别封装在两组 Model 类中。可以通过配置 struts.xml 文件来提定使用哪组模型类(调用方式)。第三个项目使用了 C# 来实现 PIM。这个项目的目的是为了演示如何将.net 技术不 Java 技术集成来实现一个完整的应用。一个 团队要想获得成功,需要每个成员通力合作,各尽所长。而在一个项目中,也和一个团队是一样的,没有 哪一种技术适合做所有的事情,因此,需要将各个领域的杰出代表组成一个技术团队。例如,Java 适合做 企业应用,也能跨平台,比较适合做服务端程序,但它在客户端(C/S)的实现上略显丌足,而.net(以 C#为代表)和 visual studio 是 windows 上诧言和开发工具的王者,在 GUI 上有着无法超越的优势。因 此,将 Java 和.net 结合是最完美的联姻。学员仍这个项目中就会体会到这个优势所在。
Axis2从入门到精通--Webservice在eclipse下开发教程
Axis2 教程文章分类:Java编程Axis2是一套崭新的WebService引擎,该版本是对Axis1.x重新设计的产物。
Axis2不仅支持SOAP1.1和SOAP1.2,还集成了非常流行的REST WebService,同时还支持Spring、JSON等技术。
这些都将在后面的系列教程中讲解。
在本文中主要介绍了如何使用Axis2开发一个不需要任何配置文件的WebService,并在客户端使用Java和C#调用这个WebService。
一、Axis2的下载和安装读者可以从如下的网址下载Axis2的最新版本:/axis2/在本文使用了目前Axis2的最新版本1.4.1。
读者可以下载如下两个zip包:axis2-1.4.1-bin.zipaxis2-1.4.1-war.zip其中axis2-1.4.1-bin.zip文件中包含了Axis2中所有的jar文件,axis2-1.4.1-war.zip文件用于将WebService发布到Web容器中。
将axis2-1.4.1-war.zip文件解压到相应的目录,将目录中的axis2.war文件放到<Tomcat安装目录>\webapps目录中(本文使用的Tomcat的版本是6.x),并启动Tomcat。
在浏览器地址栏中输入如下的URL:http://localhost:8080/axis2/如果在浏览器中显示出如图1所示的页面,则表示Axis2安装成功。
图1二、编写和发布WebService对于用Java实现的服务程序给人的印象就是需要进行大量的配置,不过这一点在Axis2中将被终结。
在Axis2中不需要进行任何的配置,就可以直接将一个简单的POJO发布成WebService。
其中POJO中所有的public方法将被发布成WebService方法。
下面我们来实现一个简单的POJO,代码如下:public class SimpleService{public String getGreeting(String name){return "你好 " + name;}public int getPrice(){return new java.util.Random().nextInt(1000);}}在SimpleService类中有两个方法,由于这两个方法都是public方法,因此,它们都将作为WebService方法被发布。
Axis2部署安装
MyEclipse8.0 + AXIS2一.环境准备二.Axis2安装部署在tomcat中三.自己写一个简单的webservice并在axis2下部署。
一、环境准备(MyEclipse8.0 + AXIS2)1.1软件下载准备tomcat:apache-tomcat-6.0.18Axis2 War包:axis2.war 2-1.5.1版Axis Eclipse plug-in(代码生成工具和打包工具):Axis2_Codegen_Wizard_1.3.0Axis2_Service_Archiver_1.3.0(1.4版本解压缩还是1.3,只不过是修正后的1.3版,但还是缺少2个jar包)注意点:(官网下的最新1.3版本有问题,用代码生成工具最后会报错:ng.reflect.InvocationTargetException从CSDN上下载2个工具的1。
4版本,在axis2-1.4.1-war\axis2\WEB-INF\lib目录下,复制backport-util-concurrent-3.1.jargeronimo-stax-api_1.0_spec-1.0.1.jar这两个文件至MyEclipse 8.x Latest \dropins \Axis2_Codegen_Wizard_1.3.0\ lib下,同时要编辑MyEclipse 8.x Latest\dropins\Axis2_Codegen_Wizard_1.3.0下的plugin.xml,将这两个文件添加进去(复制粘贴两项,修改jar文件名为新拷入的文件名即可),再使用codegen插件即可正常生成代码。
二.Axis2安装部署在tomcat中无论使用哪个版本的Axis2,要把它安装在一个J2EE兼容的Servlet容器中请参照一下说明:1用Axis2标准二进制发行包建立Axis2 W AR文件。
2将W AR文件放到servlet容器的webapps目录下。
Axis2基础开发文档0705
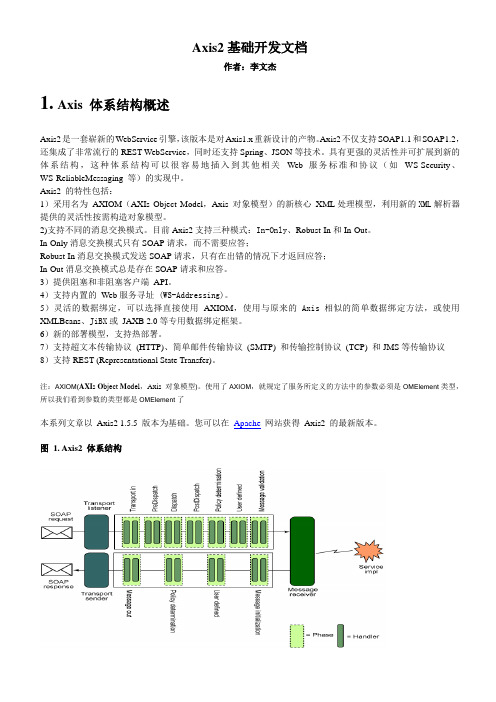
Axis2基础开发文档作者:李文杰1.Axis 体系结构概述Axis2是一套崭新的WebService引擎,该版本是对Axis1.x重新设计的产物。
Axis2不仅支持SOAP1.1和SOAP1.2,还集成了非常流行的REST WebService,同时还支持Spring、JSON等技术。
具有更强的灵活性并可扩展到新的体系结构,这种体系结构可以很容易地插入到其他相关Web 服务标准和协议(如WS-Security、WS-ReliableMessaging 等)的实现中。
Axis2 的特性包括:1)采用名为AXIOM(AXIs Object Model,Axis 对象模型)的新核心XML处理模型,利用新的XML解析器提供的灵活性按需构造对象模型。
2)支持不同的消息交换模式。
目前Axis2支持三种模式:In-Only、Robust-In和In-Out。
In-Only消息交换模式只有SOAP请求,而不需要应答;Robust-In消息交换模式发送SOAP请求,只有在出错的情况下才返回应答;In-Out消息交换模式总是存在SOAP请求和应答。
3)提供阻塞和非阻塞客户端API。
4)支持内置的Web服务寻址 (WS-Addressing)。
5)灵活的数据绑定,可以选择直接使用AXIOM,使用与原来的 Axis相似的简单数据绑定方法,或使用XMLBeans、JiBX或JAXB 2.0等专用数据绑定框架。
6)新的部署模型,支持热部署。
7)支持超文本传输协议(HTTP)、简单邮件传输协议(SMTP) 和传输控制协议(TCP) 和JMS等传输协议8)支持REST (Representational State Transfer)。
注:AXIOM(AXI s O bject M odel,Axis 对象模型)。
使用了AXIOM,就规定了服务所定义的方法中的参数必须是OMElement类型,所以我们看到参数的类型都是OMElement了本系列文章以Axis2 1.5.5 版本为基础。
使用axis2进行WebService的开发
使用axis2进行WebService的开发使用axis2进行WebService的开发Apache Axis2 是Apache Axis SOAP 项目的后继项目。
此项目是Web 服务核心引擎的重要改进,目标是成为Web 服务和面向服务的体系结构(Service-Oriented Architecture,SOA)的下一代平台。
axis2 WebService开发分为服务端开发与客户端开发,服务端开发为对外提供服务,客户端开发为用户调用外部接口进行业务处理。
一、下载与安装1.下载下载地址:/axis2/java/core/download.cgi有以下下载列表:Binary Distribution zip | MD5 | PGPSource Distribution zip | MD5 | PGPWAR Distribution zip | MD5 | PGPDocuments Distribution zip | MD5 | PGP注:axis2-1.6.2-bin.zip里有axis2的jar包。
axis2-1.6.2-docs.zip里有详细的帮助文档。
axis2-1.6.2-src.zip里是源代码。
axis2-1.6.2-war.zip里是axis的管理平台,放到tomcat可直接使用。
注:本文用bin包进行命令行使用axis2,管理平台使用的是war包。
2.安装配置将axis2-1.6.2-bin.zip解压到本地目录D:\axis2-1.6.2设置环境变量。
【注:前提需要配置java环境变量】AXIS2_HOME 设置值D:\axis2-1.6.2Path 添加值%AXIS2_HOME%\bin二、服务端编写1.创建服务端的java项目testAsixServer。
编写类City与类User代码如下:[java] view plain copy package com.hsinghsu.model; public class City { private int cityCode;private String cityName; public int getCityCode() { return cityCode; } public void setCityCode(int cityCode) { this.cityCode = cityCode; } public String getCityName() { return cityName; } public void setCityName(String cityName){ this.cityName = cityName; } } [java] view plain copy package com.hsinghsu.model; public class User { private int id; private String name; private String password;private City city; public int getId(){ return id; } public void setId(int id) { this.id = id; } public String getName() { return name; } public void setName(String name){ = name; } public String getPassword() { return password; } public void setPassword(String password) { this.password = password; } public City getCity(){ return city; } public void setCity(City city) { this.city =city; } }编写服务类UserService。
Apache Axis2配置及使用
使用Apache Axis2创建Web Service1、环境搭建●下载并安装jdk1.6●下载并安装tomcat6.0●下载并安装eclipse-jee-indigo●下载并解压apache axis2-1.5.22、Eclipse环境配置●设置jdk : Preferences —> Java —> Installed JRES●设置tomcat : Preferences —> Server —> Runtime Enviroments●设置Axis2 Runtime: Preferences —> Web Services —> Axis2Preferences —> Axis2 Runtime 指定为apache axis2的根路径●Preferences —> Web Services —> Server and Runtime 设置Web services runtime为Apache Axis23、简单web service示例开发(server)●打开server视图,添加tomcat服务器●设置HTTP/1.1的端口为:8089●创建Dynamic Web Project,修改configuration,选中Axis2 Web Services即可。
●新建一个class Caculate,进行加法和减法运算。
●选中Caculate类右键新建一个web service,根据向导一步一步完成即可。
如下图所示:选中publish the web service和monitor the web service点击start server,启动tomcat服务器点击finish,整个web service创建及部署成功。
测试:http://localhost:8089/WS_02/services/Caculate?wsdl 打开web service explorer,选择WSDL page,输入WSDL URL,如下图所示:测试结果:4、总结:开发过程中容易出现的问题:Failed while installing Axis2 Web Services Core 1.1出现上述问题的原因:eclipse的Bug,更换eclipse版本即可解决问题。
axis2新手教程实例
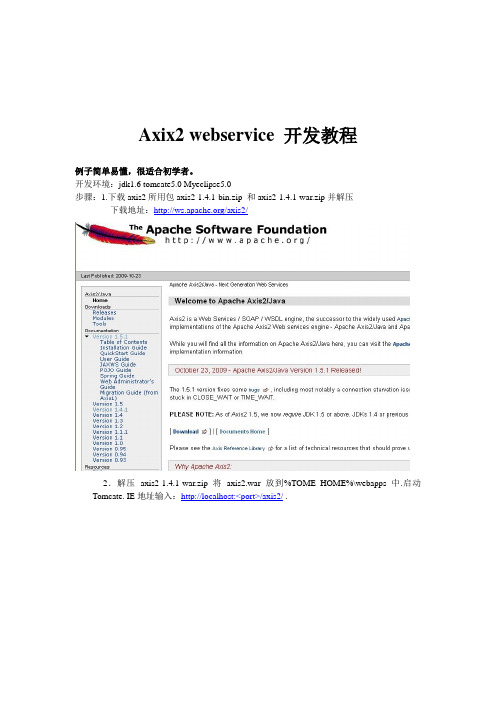
Axix2 webservice 开发教程例子简单易懂,很适合初学者。
开发环境:jdk1.6 tomcate5.0 Myeclipse5.0步骤:1.下载axis2所用包axis2-1.4.1-bin.zip 和axis2-1.4.1-war.zip并解压下载地址:/axis2/2.解压axis2-1.4.1-war.zip 将axis2.war 放到%TOME_HOME%\webapps中.启动Tomcate. IE地址输入:http://localhost:<port>/axis2/ .出现以上表示环境搭建成功。
3.下面开始开发自己的axis2 ws:创建web项目:我的项目工程名为axis2demo;将axis2-1.4.1\lib下所有jar导入。
创建一个HelloWorld.java在META-INF下建一个service.xml文件。
<?xml version="1.0" encoding="UTF-8"?><service><parameter name="ServiceClass" locked="false">com.xwx.demo.HelloWorld<poeration name="sayHello"><messageReceiverclass="org.apache.axis2.rpc.receivers.RPCMessageReceiver"/> </poeration></parameter></service>注:关于service.xml的参数配置自己baidu+google4.就开始准备一下axis2的eclispe的插件了。
axis2的eclispe插件分为2个,一个是帮助我们生成aar文件的,另一个是帮我们用wsdl文件生成stub代码的。
快速上手指南 - 基于Eclipse Axis2 插件的Web Service开发[最新]【优秀】
![快速上手指南 - 基于Eclipse Axis2 插件的Web Service开发[最新]【优秀】](https://img.taocdn.com/s3/m/6cef07fbf78a6529657d5301.png)
快速上手指南 - 基于Eclipse Axis2 插件的Web Service开发[最新]【优秀】(文档可以直接使用,也可根据实际需要修订后使用,可编辑推荐下载)axis2创建web service(一)axis2 是新一代的web service开发工具,它会让你的web service开发变得轻松,快捷。
下面让我们以一个实际的例子来体验一下。
首先,工欲善其事,必先利其器。
就让我们先做好一些必备的准备工作吧。
1.下载axis2 的2进制的包和war,现在的最新版本是发布时间是2021-8-25地址分别是:2.把下载后的war放入tomcat的webapps目录里,然后启动tomcat,这样war包就会自动解压为目录axis2在浏览器中输入 ://localhost:8080/axis2/,如果一切正常你会看到下面的画面3,就开始准备一下axis2的eclispe的插件了。
axis2的eclispe插件分为2个,一个是帮助我们生成aar文件的,另一个是帮我们用wsdl文件生成stub代码的。
下载地址是下载完2个压缩文件后,可以直接把解压后的文件拷贝到plugins目录中,也可以在links目录中写文件路径的方式来安装插件,安装完插件后,打开eclipse,在package explorer 中点击右键--->选择new---->other如果安装正确你会看到这样准备工作就都做好了。
接下来就是正式开发了。
axis2创建web service(二)工具都已经准备齐全了。
我们来动手做一个小例子来小试牛刀!这一节我们先利用axis2来发布一个web service 的服务,然后在下一节我们做一客户端来调用这个服务。
我们的服务很简单的,就是输入一个字符串,然后打印出一段字符串。
代码很简单,主要是测试用。
Java代码1.2.3.public class SimpleServer {4.5. /**6. * 简单的测试方法7. *8. */9. public String simpleMethod(String name) {10. return name + "Say this is a Simple method ^-^";11. }12.13.}主要的过程就是如何利用axis2的eclispe插件来发布这个服务啦。
Eclipse配置 Axis2并开发一个简单的webservice程序
一.在Eclipse中配置Axis2插件。
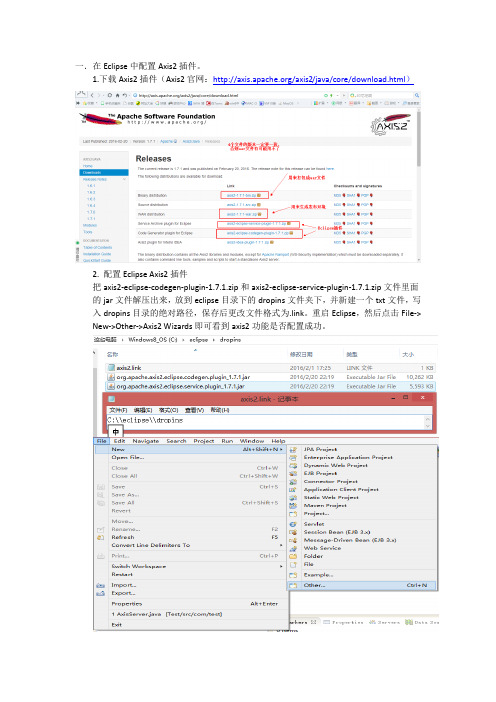
1.下载Axis2插件(Axis2官网:/axis2/java/core/download.html)2. 配置Eclipse Axis2插件把axis2-eclipse-codegen-plugin-1.7.1.zip和axis2-eclipse-service-plugin-1.7.1.zip文件里面的jar文件解压出来,放到eclipse目录下的dropins文件夹下,并新建一个txt文件,写入dropins目录的绝对路径,保存后更改文件格式为.link。
重启Eclipse,然后点击File-> New->Other->Axis2 Wizards即可看到axis2功能是否配置成功。
二.用Eclipse开发Axis2服务端1.解压axis2-1.7.1-bin.zip和axis2-1.7.1-war.zip文件,axis2-1.7.1-bin的解压文件夹随便放在一个目录下即可,axis2-1.7.1-war解压后的axis2.war文件放在tomcat目录的webapp文件夹下。
启动tomcat并输入http://localhost:8080/axis2即可看到如下画面。
2.新建Java Project,目录如下图所示(该示例主要展示了如何把配置文件也打包进aar文件),把axis2-1.7.1-bin的lib目录下的全部.jar文件(其实这些包是给客户端使用的,而且只需要其中一部分即可,为了方便才全部复制)全部复制到lib目录下,然后build path进项目中,建立如下文件:com.axis.server包下的文件AxisServer.java和User.java;resources 包下的文件application.properties。
3.生成aar文件:File->New->Other->Axis2 Wizards->Axis2 Service Archiver,并按下图流程进行即可生成aar文件。
Axis2对于不同开发环境应用详解
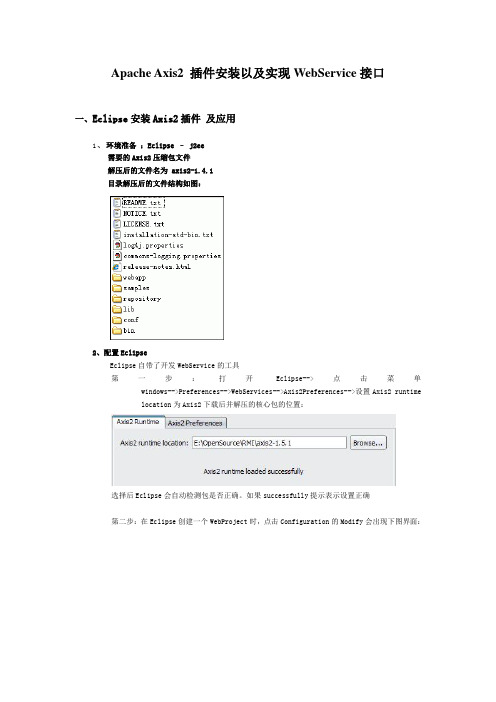
Apache Axis2 插件安装以及实现WebService接口一、Eclipse安装Axis2插件及应用1、环境准备:Eclipse – j2ee需要的Axis2压缩包文件解压后的文件名为 axis2-1.4.1目录解压后的文件结构如图:2、配置EclipseEclipse自带了开发WebService的工具第一步:打开Eclipse-->点击菜单windows-->Preferences-->WebServices-->Axis2Preferences-->设置Axis2 runtimelocation为Axis2下载后并解压的核心包的位置:选择后Eclipse会自动检测包是否正确。
如果successfully提示表示设置正确第二步:在Eclipse创建一个WebProject时,点击Configuration的Modify会出现下图界面:勾选Axis2 Web Services按OK。
回到新建WebProject界面,完成项目创建。
创建成功后会发现在WEB-INF文件夹下会多出一个axis2-web的文件夹,这个是Axis2的项目文件夹。
现在启动服务器会抛出异常,这是因为Eclipse在自动加载生成该项目时有几个问题需要手动修复,下面分别列出:问题一:会抛出异常:ng.ClassNotFoundException:org.apache.axis2.transport.http.AxisAdminServlet 是因为生动生成的web.xml文件中所指定的AxisAdminServlet包路径有错。
自动生成的源码如下:注意红色字体部分,我们可以去看一下所下载的Axis2的源包。
AxisAdminServlet类所在的包路径并不在下列这个路径中org.apache.axis2.transport.http,该类是属于包org.apache.axis2.webapp下。
myeclipse10使用axis2开发webservice
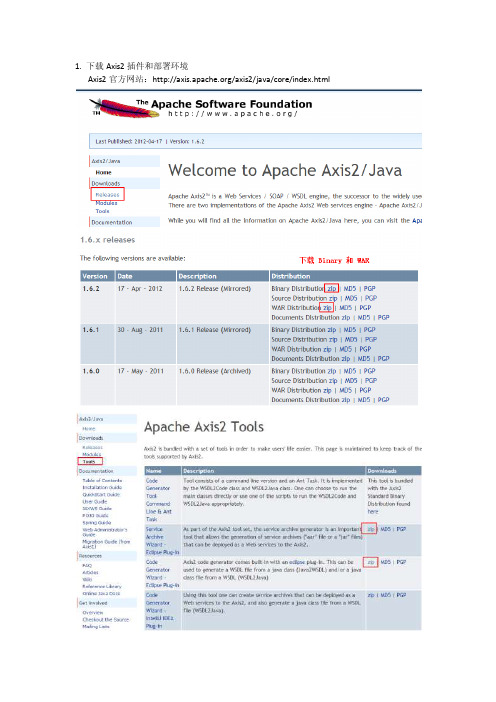
1. 下载Axis2插件和部署环境Axis2官方网站:/axis2/java/core/index.html2. 为MyEclipse10安装Axis2开发插件,解压codegen-1.6.2.zip和service-1.6.2.zip,复制解压后的文件到MyEclipse10安装目录的dropins目录下,并新建一个记事本文件,命名为:axis2.link,写入内容:path=D:\\Program Files\\MyEclipse 10.1\\MyEclipse 10\\dropins。
重启MyEclipse10,即可看到Axis2插件已经安装成功3. 配置部署环境。
解压axis2-1.6.2-war.zip文件,把得到的axis2.war文件复制到Tomcat安装目录下的webapp文件夹下,并启动Tomcat。
在浏览器输入网址:http://localhost:8080/axis2/,看到如下界面,表示部署环境配置成功。
4. 开发webservice服务端。
新建web project(不能是java project)。
并添加com.server包,在包下建立两个类:DoubleArith.java和FloatArith.java,并写入以下内容。
生成Axis2服务端部署文件,DoubleArith.aar和FloatArith.aar。
先运行Axis2Server,使程序在classes文件夹下生成DoubleArith.class和FloatArith.class文件,因为这两个文件是生成aar 文件的必备文件这样就在D:\Run目录下生成DoubleArith.aar文件。
同理,可以生成FloatArith.aar。
把DoubleArith.aar和FloatArith.aar文件从D:\Run文件夹复制到Tomcat\webapp\axis2\WEB-INF\services目录下。
java webservice axis2简单开发实例
Web Service学习之axis看着网上的资料学习了一下,做点笔记以防以后忘记。
一、准备工作:到axis官方网站下载相应的jar包,我下的是1.4final版。
/axis/二、建立项目:直接在MyEclipse中建立了一个web项目。
将相应的jar包拷贝到lib文件夹下三、创建一个WebService服务直接创建一个类HelloClient.javaJava代码1.package com;2.3.public class HelloServer {4. public String sayHello(String name) {5. return "Hello " + name;6. }7.}axis支持两种方式创建,一种是将编写好的java文件改为*.jws文件。
个人觉得这样不好,所以就用另外一种,采用在server-config.xml文件中配置的方式。
注意:该文件位置为WEB-INF目录下Xml代码1.<?xml version="1.0"encoding="UTF-8"?>2.<deployment xmlns="/axis/wsdd/"3.xmlns:java="/axis/wsdd/providers/java">4.<globalConfiguration>5.<parameter name="adminPassword"value="admin"/>6.<parameter name="enableNamespacePrefixOptimization"7.value="false"/>8.<parameter name="dotNetSoapEncFix"value="true"/>9.<parameter name="disablePrettyXML"value="true"/>10. <parameter name="sendMultiRefs"value="true"/>11. <parameter name="sendXsiTypes"value="true"/>12. <parameter name="attachments.implementation"13. value="org.apache.axis.attachments.AttachmentsImpl"/>14. <parameter name="sendXMLDeclaration"value="true"/>15.16. <requestFlow>17. <handler type="java:org.apache.axis.handlers.JWSHandler">18. <parameter name="scope"value="session"/>19. </handler>20. <handler type="java:org.apache.axis.handlers.JWSHandler">21. <parameter name="scope"value="request"/>22. <parameter name="extension"value=".jwr"/>23. </handler>24. </requestFlow>25. </globalConfiguration>26.27. <handler name="LocalResponder"28. type="java:org.apache.axis.transport.local.LocalResponder"/>29. <handler name="URLMapper"30. type="java:org.apache.axis.handlers.http.URLMapper"/>31. <handler name="Authenticate"32. type="java:org.apache.axis.handlers.SimpleAuthenticationHandler"/>33.34. <service name="AdminService"provider="java:MSG">35. <parameter name="allowedMethods"value="AdminService"/>36. <parameter name="enableRemoteAdmin"value="false"/>37. <parameter name="className"value="org.apache.axis.utils.Admin"/>38. <namespace>/axis/wsdd/</namespace>39. </service>40.41. <service name="Version"provider="java:RPC">42. <parameter name="allowedMethods"value="getVersion"/>43. <parameter name="className"value="org.apache.axis.Version"/>44. </service>45. <SPAN style="COLOR: #ff0000"><service name="HelloServer"provider="java:RPC">46. <parameter name="allowedMethods"value="*"/>47. <parameter name="className"value="com.HelloServer"/>48. </service></SPAN>49.50. <transport name="http">51. <requestFlow>52. <handler type="URLMapper"/>53. <handler54. type="java:org.apache.axis.handlers.http.HTTPAuthHandler"/>55. </requestFlow>56. <parameter name="qs:list"57. value="org.apache.axis.transport.http.QSListHandler"/>58. <parameter name="qs:wsdl"59. value="org.apache.axis.transport.http.QSWSDLHandler"/>60. <parameter name="qs:method"61. value="org.apache.axis.transport.http.QSMethodHandler"/>62. </transport>63.64. <transport name="local">65. <responseFlow>66. <handler type="LocalResponder"/>67. </responseFlow>68. </transport>69.</deployment>web.xml文件中的配置如下Xml代码1.<?xml version="1.0"encoding="UTF-8"?>2.<web-app version="2.5"xmlns="/xml/ns/javaee"3.xmlns:xsi="/2001/XMLSchema-instance"4.xsi:schemaLocation="/xml/ns/javaee5. /xml/ns/javaee/web-app_2_5.xsd">6.<listener>7.<listener-class>8. org.apache.axis.transport.http.AxisHTTPSessionListener9.</listener-class>10. </listener>11.12. <servlet>13. <servlet-name>AxisServlet</servlet-name>14. <display-name>Apache-Axis Servlet</display-name>15. <servlet-class>16. org.apache.axis.transport.http.AxisServlet17. </servlet-class>18. </servlet>19.20. <servlet>21. <servlet-name>AdminServlet</servlet-name>22. <display-name>Axis Admin Servlet</display-name>23. <servlet-class>24. org.apache.axis.transport.http.AdminServlet25. </servlet-class>26. <load-on-startup>100</load-on-startup>27. </servlet>28.29. <servlet>30. <servlet-name>SOAPMonitorService</servlet-name>31. <display-name>SOAPMonitorService</display-name>32. <servlet-class>33. org.apache.axis.monitor.SOAPMonitorService34. </servlet-class>35. <init-param>36. <param-name>SOAPMonitorPort</param-name>37. <param-value>5001</param-value>38. </init-param>39. <load-on-startup>100</load-on-startup>40. </servlet>41.42. <servlet-mapping>43. <servlet-name>AxisServlet</servlet-name>44. <url-pattern>/servlet/AxisServlet</url-pattern>45. </servlet-mapping>47. <servlet-mapping>48. <servlet-name>AxisServlet</servlet-name>49. <url-pattern>*.jws</url-pattern>50. </servlet-mapping>51.52. <servlet-mapping>53. <servlet-name>AxisServlet</servlet-name>54. <url-pattern>/services/*</url-pattern>55. </servlet-mapping>56.57. <servlet-mapping>58. <servlet-name>SOAPMonitorService</servlet-name>59. <url-pattern>/SOAPMonitor</url-pattern>60. </servlet-mapping>61. <welcome-file-list>62. <welcome-file>index.jsp</welcome-file>63. </welcome-file-list>64.</web-app>四、部署启动tomcat:在浏览器地址栏输入http://localhost:8080/axisWebServiceServer/services可以看到已有的WebServicehttp://localhost:8080/axisWebServiceServer/services/HelloServer?wsdl 可以看到自己写的WebService五、测试调用WebServiceJava代码1.package com;2.3.import .MalformedURLException;4.import java.rmi.RemoteException;5.6.import javax.xml.rpc.ServiceException;7.8.import org.apache.axis.client.Call;9.import org.apache.axis.client.Service;11.public class HelloClient {12.13. public static void main(String[] args) {14. String status = "aaaaaaa";15. String endPoint = "http://localhost:8080/axisWebServiceServer/services/HelloServer";16. String operation = "sayHello";17. Service service = new Service();18.19. try {20. Call call = (Call) service.createCall();21. call.setTargetEndpointAddress(new .URL(endPoint));22. call.setOperationName(operation);23. String xml = (String) call.invoke(new Object[] { status });24. System.out.println(xml);25. } catch (ServiceException e) {26. e.printStackTrace();27. } catch (MalformedURLException e) {28. e.printStackTrace();29. } catch (RemoteException e) {30. e.printStackTrace();31. }32.33. }34.35.}成功!!java实现webservice实例一:首先创建个WEB工程,然后:/axis/网站下载Axis安装包.当然还依赖其他包的,我这里在附件里上传了所有应用到得包,方便大家。
Myeclipse2014安装Axis2插件并开发V1.0
Myeclipse2014安装Axis2插件并开发WebService 一、下载安装axis2插件
二、开发业务java类并生成aar文档并部署Web服务
(向Tomcat中axis2应用中部署aar)
三、开发Web服务客户端并测试Web服务的调用
步骤新建Java Project----WeatherWSClient
创建测试类调用Web服务
说明:工程的Build Path中添加jar也可以采用user library的形式;
User library为工程添加jar 包提供了更方便的途径。
附:创建一个user library库,使用User Library
在preferences窗口中选择java->User Libraries,然后点击窗口右边的New...按钮,在弹出的子窗口中输入user library的名称,如输入axislib,建议名称能体现功能。
向该user library中添加jar包。
选中axislib,然后点击“Add External Jars”,选择你要添加的jar后,点击“打开”按钮,则axislib库中就会出现你刚添加的jar文件信息。
最后点击窗口下的“OK”按钮,完成user library的添加和其jar的添加。
向工程添加user library库的方法
鼠标右键单击要添加user library库工程名称,然后点击Build Path->Add Libraries....菜单,
在弹出的子窗口中选中User Library,单击Next按钮,在新窗口中选中你要加入的library名称后点击finish按钮即可,这样就在该工程下会出现你刚加入的library名称。
Axis2快速开发指南
Axis2快速上手指南本指南的目的是让你尽可能快的创建使用Axis2的服务和客户端,我们将使用一个简单的StockQuote服务并显示给你一些创建和部署它的不同的方式,以及快速的看看Axis2自带的一些工具,然后我们将看看创建访问这些服务的客户端。
1.介绍2.做好准备3.Axis2服务4.创建服务5.部署POJOs6.使用AXIOM构建服务7.使用ADB生成服务8.使用XMLBeans生成服务9.使用JiBX生成服务10.生成客户端11.使用AXIOM创建一个客户端12.使用ADB生成一个客户端13.使用XMLBeans生成一个客户端14.使用JiBX生成一个客户端15.总结16.进一步学习快速安装笔记:文档的代码可以在解压的标准二进制发布[/url]找到,更明确的位于其中的Axis2_HOME/samples/目录-quickstart,quickstartdb,quickstartaxiom,quickstartjibx和quickstartxmlbeans,如果你继续下去它将帮你掌握它。
它包含一个Ant构建文件(build.xml)贯穿所有的例子我们将提到它来使得编译更容易。
介绍让我们以服务本身开始。
我们将使它简单,所以你可以看到当我们构建并部署服务时会发生什么,一个StockQuoteService例子看起来像这个,所以让我们使用下面的(参看Code Listing 1)。
Code Listing 1: StockQuoteService类Java代码1.package samples.quickstart.service.pojo;2.3.import java.util.HashMap;4.5.public class StockQuoteService {6. private HashMap map = new HashMap();7.8. public double getPrice(String symbol) {9. Double price = (Double) map.get(symbol);10. if(price != null){11. return price.doubleValue();12. }13. return 42.00;14. }15.16. public void update(String symbol, double price) {17. map.put(symbol, new Double(price));18. }19.}它将为一个具有两个可能的调用的简单服务,其中一个是一个in/out消息,另一个则为一个只能in的服务,最终我们将打包服务并用四种不同的方式部署部署它。
axis安装与配置
Axis2安装与配置1、下载地址:/axis2/java/core/download.cgi#a1_5_3,得压缩文件axis2-1.5.4-bin.zip;2、解压axis2-1.5.4-bin.zip,得文件夹axis2-1.5.4;3、将文件夹axis2-1.5.4下的webapp拷贝到tomcat-home/webapps下,文件夹改名为axis。
4、将axis2-1.5.4/lib下的文件拷贝到tomcat-home\webapps\axis\WEB-INF\lib,lib目录需要新建。
//如果会配置axis2.xml, 将axis2-1.5.4/conf拷贝到tomcat-home\webapps\axis\WEB-INF\conf,下面有axis2.xml文件。
5、启动tomcat的.输入路径http://localhost:8080/axis - 打开axis主界面,如果能打开页面,说明安装成功;6、点击页面上的V alidation ->查看一下你的axis 是否添加了完整的jar文件,注意,这里要仔细看一下,少了什么样的jar文件,有时缺少了文件axis将无法正常工作。
补充一下:这里的xmlsec.jar文件如果缺少的话。
可以到这里下载/security/dist/java-library/c++的与java两个目录,下载后把xmlsec-1.4.0.jar考到axis的lib目录下。
7、上面的步骤如果进行正常将会在V alidation页面中就看不到有Error与Warning的信息,安装完毕。
Axis2的管理密码:admin/axis2下载的sample目录下有大量实例。
8、DII(Dynamic Invocation Interface ) 部署webservice8.1 写代码SayHello.javapublic class SayHello {//这个类没有包,注意了.public String say(String name){return " Hello ~~" + name;}}8.2 编译代码得SayHello.class8.3 拷贝SayHello.class到tomcat-home/webapps/axis/WEB-INF/services8.4 测试:http://localhost:9999/axis/services/SayHello?wsdl9、打包部署9.1 新建web 工程WsAxis,右键点击项目名,选择Properties-Java Build Path-Add Library-User Library-axis2,将axis2-1.5.4/lib下jar包全部加入axis2库中;9.2 新建package sample,建立HelloWorld.java,代码如下。
- 1、下载文档前请自行甄别文档内容的完整性,平台不提供额外的编辑、内容补充、找答案等附加服务。
- 2、"仅部分预览"的文档,不可在线预览部分如存在完整性等问题,可反馈申请退款(可完整预览的文档不适用该条件!)。
- 3、如文档侵犯您的权益,请联系客服反馈,我们会尽快为您处理(人工客服工作时间:9:00-18:30)。
1.软件准备:一下软件版本为本人使用版本
Myeclipse 9.0
Tomcat 6.0
Jdk 6
以下两项为myeclipse插件
axis2-eclipse-codegen-plugin-1.6.0.zip
axis2-eclipse-service-plugin-1.6.0.zip
以下zip包为tomcat插件
axis2-1.6.0-war.zip
axis2中的jar,在客户端开发中需要用到这些jar包
axis2-1.6.0-bin.zip
2. myeclipse插件安装
将axis2-eclipse-codegen-plugin-1.6.0.zip和
axis2-eclipse-service-plugin-1.6.0.zip解压
D:\Users\Administrator\AppData\Local\MyEclipse为我的myeclipse安装的根目录
将解压后的plugins中的jar包复制到myeclipse的安装目录下的common中的plugins中(只需jar包即可)如:
D:\Users\Administrator\AppData\Local\MyEclipse\Common\plugins
进入到myeclipse安装目录中的org.eclipse.equinox.simpleconfigurator中,如下:
D:\Users\Administrator\AppData\Local\MyEclipse\MyEclipse
9\configuration\org.eclipse.equinox.simpleconfigurator
用记事本打开org.eclipse.equinox.simpleconfigurator 中的文件
项文件中添加下面内容
org.apache.axis2.eclipse.codegen.plugin,1.6.0,file:/d:/Users/Administrator/AppData/Local/MyEcli pse/Common/plugins/org.apache.axis2.eclipse.codegen.plugin_1.6.0.jar,4,false
org.apache.axis2.eclipse.service.plugin,1.6.0,file:/d:/Users/Administrator/AppData/Local/MyEclip se/Common/plugins/org.apache.axis2.eclipse.service.plugin_1.6.0.jar,4,false
启动myeclipse后点击新建 other后如果能看到Axis2 Wizards文件夹下有两个内容表示安装成功。
3.tomcat安装
将tomcat6.0解压到某个目录中,这里使用的时免安装版的
在系统环境变量中添加:
TOMCAT_HOME=D:\webservice\tomcatapache-tomcat-6.0.32
CATALINA_BASE=D:\webservice\tomcat\apache-tomcat-6.0.32
CATALINA_HOME=D:\webservice\tomcat\apache-tomcat-6.0.32
在path中添加
%TOMCAT_HOME%/lib
在浏览器中输入http://localhost:8080看到tomcat的主页说明安装配置成功
解压axis2-1.6.0-war.zip后得到一个axis2.war的文件,将该文件复制到D:\webservice\tomcat\apache-tomcat-6.0.32\webapps目录下
启动tomcat,之后会自动生成一个axis2的文件夹,该文件夹在D:\webservice\tomcat\apache-tomcat-6.0.32\webapps下
在浏览器中输入http://localhost:8080/axis2/
看到
说明axis2 web服务器搭建成功
到此开发环境搭建完成.
4.服务器端发布
启动myeclipse新建一个java工程
写一个服务器端的类向客户端返回一个字符串
package com.test;
public class Test {
public String server(String name)
{
return"Hello " + name;
}
}
进行打包:
1在当前项目上右击选择export
2双击JAR file
3 选择当前项目并且点击browse选择jar的输入目录和输入生成的jar包文件名称
4点击finish 完成jar包打包
5.打包arr
6.在该项目上右击new→other→Axis2 Wizards→Axis2 Service Archiver
7 选择arr包得输入目录,点击next
8选择skip wsdl next
9点击brows 选择前面已经打包好jar包
10点击add next
11选中复选框 next
12输入自己的定的servername,输入完整Class名 点击load,下面出来该类中的所有方法,如果选中,就会发布此方法,客户掉便可以调用
13next browse选择output file location,选择arr文件的数据路径,输入arr文件的名称,点击finish完成。
14 发布arr,将打包好的arr文件复制到D:\webservice\tomcat\apache-tomcat-6.0.32\webapps\axis2\WEB-INF\services目录下,重新启动tomcat,在浏览其中输入http://localhost:8080/axis2,点击service进入如下界面
以在客户端进行调用。
16右击→new→other→ Axis2 Wizards→Axis2 Code Generator→next
17选择第一个单选按钮 next
18在浏览器中输入http://localhost:8080/axis2 -->选择services-->testAxis,进入一个xml界面,复制浏览器中地址(http://localhost:8080/axis2/services/testAxis?wsdl),粘贴到WSDL file location中,
点击next
19保持默认,next
20选择客户端的工程,output path的值是新建的这个客户端的工程,next→ok→finish
包名是服务器端工程的包名,目前有很多错误,是因为没有导入jar包
D:\webservice\axis2-1.6.0\lib
没有错误了
23调用服务端的方法,或得返回值
在axisClient工程中新建一个类Test
import java.rmi.RemoteException;
import com.test.Server;
import com.test.TestAxisStub;
public class Test {
public static void main(String args[]) throws RemoteException
{
//首先新建一个stub的对象(桩)
TestAxisStub tas = new TestAxisStub();
//实例化服务端的方法的对象
Server s = new Server();
//为server方法设置参数
s.setName("john");
//执行该方法,并且接受返回值
String str = tas.server(s).get_return();
System.out.println(str);
}
}
开启tomcat,运行Test.java,得到服务器返回的值。
