SLA桌面型3D打印机使用手册
Form 2 桌面SLA 3D 打印机简介说明书
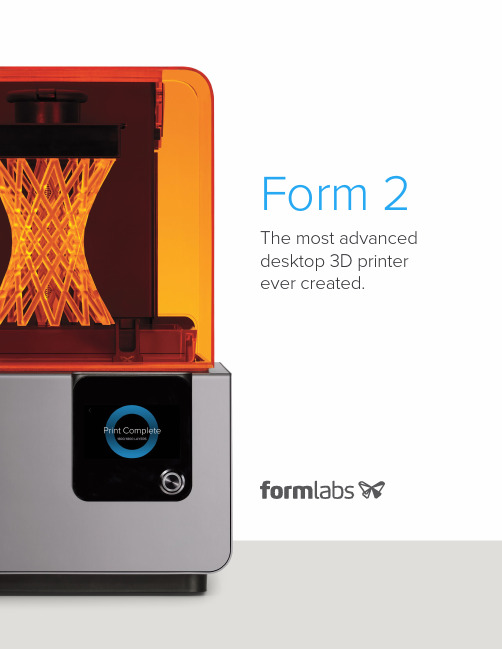
Form 2 The most advanced desktop 3D printer ever created.Powerful Printer. Amazing Ecosystem.The Form 2 comes standard with one liter of resin, Preform Software, finishing tools,and a one-year warranty. Set up is so simple, you’ll be printing in 15 minutes.Easy FinishingOur redesigned Finish Kit simplifies the post-print process, makingfinishing your parts quick and easy.Advanced MaterialsOur library of Standard and Functional Resins has been designed to work with the Form 2 to deliver beautiful results.Desktop StereolithographyThe Form 2 delivers professional quality parts right from your desktop.Intuitive SoftwarePreform makes printing simple. With one click, you can prepare your model and upload your project over Wi-Fi.What’s New?See what makes the Form 2 the most advanced desktop 3D printer ever created.Redesigned Print ProcessA new peel mechanism and heated resin tank create a reliable print process.Touch Screen + Wi-FiEasily send prints over Wi-Fi, reprint previous jobs, and manage your print queue.Materials LibraryOur resin cartridges are easy to store and swap out, giving you more flexibility and less mess.Bigger, Better PrintsWith a 40% bigger build volume, and a 50% more powerful laser, the Form 2 is capable of large prints with spectacular detail.Automated Resin SystemThe Form 2 automatically dispenses material from the resin cartridge based on the size of your prints. Print big parts without pausing for refills.Expect very high-quality 3D prints with excellent detail from the Form 2."— Richard Baguley, T om’s Guide"The Desktop AdvantageAchieve excellent results faster by harnessing the power of desktop printing.SERVICE BUREAU FORM 2INDUSTRIAL SLA TURNAROUND TIME 1 – 2 weeks Hours < 24hrs UPFRONT COST$0$3499$60K – $300K ROOK PRINT COST$75.00$1.67$6.00PRINT COST VS. FORM 245x1x 3.5xLONG TERM COSTS N/A free one-year warranty mandatory service contract (~$15K)ACCESSIBILITY external, third party internal, desktop,anyone can use internal, workshop, run by a technician,often projects will be billed for useROOKSAMPLEPART[The Form 2 is] the best prosumer 3D printer I’ve used."— John Biggs, Editor at TechCrunch "Exceptional Print QualityThe Form 2 delivers professional-quality printed parts at a fraction of the price.HOBBYIST FDM 1Part cost: $0.41Machine cost: $2,500DESKTOP SLA (FORM 2)1,2Part cost: $1.67Machine cost: $3,499INDUSTRIAL SLA 1Part cost: $6.00 Machine cost: $300,0001All parts printed at 100 micron layer height.2Printed in Formlabs ‘Grey Resin’ — one of our Standard prototyping resins.When viewed side-by-side, complex models printed by the Form 2 looked like finished products that you could buy in a store — the same models printed by a FDM printer feel like cheap toys in comparison."— Devindra Hardawar, Senior Editor at Engadget"HIGH-RESOLUTIONFor demanding applications, our carefully-engineered resins capture the finest features in your model.STRENGTH AND PRECISIONOur resins create accurate and robust parts, ideal for rapid prototyping and product development.SURFACE FINISHPerfectly smooth right out of the printer, parts created on the Form 2 have the polish and finish of a final product.Materials LibraryStandard ResinsCustom designed in-house to deliver the highest-quality output, our printmaterials capture astonishing detail without sacrificing durability or toughness.Materials LibraryFunctional ResinsOur growing library of high-performance resins adds new capabilitiesto the Form 2, offering a range of material properties to explore.TOUGH RESINTough is durable, adaptive, and impact-resistant.Developed to withstand high stress or strain, it isideal for snap-fit joints and rugged prototypes.CASTABLE RESINCastable burns out cleanly, without ash orresidue, perfect for capturing your high-resolutionprints through investment casting.FLEXIBLE RESINFlexible is versatile, tactile, and impact-resistant.It is excellent for making parts that arebendable and compressible.Material SpecificationsSTANDARD RESINSCLEARWHITEGREYBLACKPrice $149 /1L$149 /1L$149 /1L$149 /1L200 Microns ✓100 Microns ✓✓✓✓50 Microns ✓✓✓✓25 Microns ✓✓Application• Transparent polish • Internal Channels • Working with light• Neutral T one • Slightly Opaque • Base for Painting• Neutral T one • Slightly Opaque • Smooth surface • Great for photography• Highly pigmented • Most opaque • Small details •Delicate featuresPowerful SoftwarePreform is our powerful print preparation software. Its intuitive interface makes printing easy while also offering powerful features for advanced users.SIMPLE PROCESSAutomatic tools for orientation and support generation make print setup fast and effective.ADVANCED FEATURESOur advanced mode reveals complexity when you need it, allowing you to fine tune details like individual support placement, density, and geometry.PRINT MANAGEMENT TOOLSPrint time and volume estimateshelp you calculate costs."PREFORM SOFTWARE System Requirements Windows 7 and up Mac OS X 10.7 and up OpenGL 2.1 support 2GB RAM FeaturesSimple print setup One-Click-PrintAuto-orient for optimal print position Auto-mesh repairAuto-generation of supportsRotation, scaling, and duplication Layer slicer for path inspection .STL and .OBJ file input Download today at/products/preformT echnical SpecificationsPRINTERPrice$3499Dimensions35 × 33 × 52 cm13.5 × 13 × 20.5 in Weight13 kg / 28.5 lbs Operating Temperature Autoheats to 35° C or 95° FSelf-heating Resin Tank Power Requirements100–240 V1.5 A 50/60 Hz65 WLaser Specifications EN 60825-1:2007 certifiedClass 1 Laser Product405nm violet laser250mW laser Connectivity Wi-Fi, Ethernet and USB Printer Control Interactive T ouch-screenwith Push-button PREFORM SOFTWARESystem Requirements Windows 7 and upMac OS X 10.7 and upFile Type.STL or .OBJ PRINTING PROPERTIESTechnology Stereolithography (SLA)Peel Mechanism Sliding Peel Process with Wiper Resin Fill System Automated Cartridge System Build Volume145 × 145 × 175 mm5.7 × 5.7 ×6.9 inLayer Thickness(Axis Resolution)25, 50, 100, 200 microns0.001, 0.002, 0.004, 0.008 in. Laser Spot Size(FWHM)140 microns0.0055 inchesSupports Auto-GeneratedEasily Removable FINISHING KITIncludes• Finishing Tray • Scraper• Pre and Post-Rinse T ubs• Rinse Basket• Squeeze Bottle • Flush Cutters• Tweezers• Disposable Nitrile Gloves • Removal T ool• Removal JigExpert Customer SupportFormlabs is an established leader in desktop 3D printing, with service centers in North America and the EU.ONE YEAR WARRANTY The Form 2 ships with an industry-leading one-year standard warranty. No expensive contracts. Just service you can trust.CUSTOMER SUPPORTYour Form 2 comes withaccess to our experiencedCustomer Support engineers.Get the help and adviceyou need, fast.SERVICINGIf you run into problems,we’ll make sure your printeris fixed quickly. We coverreturn shipping within ourservice regions too.EDUCATIONAL RESOURCESOur extensive online supportsite is filled with articles,videos, webinars and forumsto provide help from ourgrowing community.Additional ResourcesHelpful linksOrder the Form 2 today Order a sample part Form 2 Quick Start GuideMaterial Data Sheets ContactContact the sales teamContact the support teamORDER TODAY/storeQUESTIONS?******************。
3D打印机产品说明书
3D打印机产品说明书产品名称:3D打印机产品型号:XXX发布日期:XXXX年XX月XX日一、产品概述3D打印机是一种创新的生产工具,通过使用数字化设计数据,能够将各种材料逐层堆积,以创建物体的三维实体。
本产品采用先进的3D打印技术,具有高精度、高效率和简便操作的特点,广泛应用于制模、教育、医疗、建筑等领域。
二、产品特点1. 高精度打印:本产品采用先进的激光光束熔化层叠(SLA)技术,可实现0.02mm的精度打印,确保打印结果的准确性和细腻度。
2. 多材料支持:本产品兼容多种3D打印材料,如ABS、PLA、尼龙等,用户可以根据需求选择适合的材料进行打印,满足不同应用场景的需求。
3. 快速打印速度:本产品采用升降平台设计,有效提高打印速度,节约用户时间成本。
4. 用户友好界面:产品配备了直观简洁的可视化操作界面,用户无需专业技能即可轻松操作,实现快速学习和上手使用。
三、产品规格1. 打印尺寸:200mm x 200mm x 200mm2. 打印精度:0.02mm3. 材料兼容性:ABS、PLA、尼龙等4. 打印速度:最高100mm/s5. 操作系统兼容性:Windows、Mac OS、Linux6. 连接方式:USB、无线WIFI四、产品安装与维护1. 安装:a)确保工作环境通风良好,并远离易燃物品;b)根据产品说明书,正确组装设备,连接电源;c)安装设备驱动程序并确保系统能够识别设备;d)执行校准程序以确保打印精度。
2. 日常维护:a)保持设备清洁,定期清理打印机表面和内部;b)定期检查和更换打印喷嘴,确保打印质量;c)定期检查传动系统和滑轨的润滑情况,确保设备正常运行;d)根据官方指导,定期进行设备固件升级。
五、注意事项1. 请勿在没有专业指导的情况下擅自拆卸或修理设备;2. 在使用过程中,注意设备周围环境的安全,避免发生意外;3. 请勿触摸正在运行的打印喷嘴,避免烫伤;4. 确保打印材料质量良好,以免影响打印效果;5. 使用过程中如遇到任何故障,请及时联系售后服务。
3D打印机操作指南

® ®
Personal 3D Printers 用户指南
209226-0001
法律声明
Stratasys 公司的产品和服务的唯一保证是此 类产品和服务附带的保修声明中提出。此处任 何信息均不构成额外的保修条款,应解释为。 Stratasys 公司不得的技术或编辑错误或遗漏 承担责任。 © 201 1 Stratasys Inc. All rights reserved. Stratasys, Dimension, uPrint, Catalyst, FDM, Dimension BST, Dimension SST, WaveWash, and Ecoworks are registered trademarks of Stratasys Inc. FDM Technology, Fused Deposition Modeling, ABSplus, Catalyst EX, and Smart Supports are trademarks of Stratasys, Inc. All other trademarks are the property of their respective owners, and Stratasys assumes no responsibility with regard to the selection, performance, or use of these non-Stratasys products. Product specifications are subject to change without notice. Printed in the.................................................
SLA 3D打印机使用手册说明书
西通桌面型3D打印机使用手册SLA系列公司名称:珠海西通电子有限公司公司网址:目录目录……………………………………………………………………..1. 说明事项…………………………………………………………….1.1 说明书介绍…………………………………………………….1.2 注意事项……………………………………………………….1.2.1 安全事项…………………………………………………1.2.2 联系我们…………………………………………………1.3 产品配件一览表……………………………………………….2. 产品概述………………………………………………………………2.1 产品类别2.2 产品外观……………………………………………………….2.3 产品规格……………………………………………………….2.3.1 技术参数…………………………………………………2.3.2 环境规格……………………………………………….…3. 操作说明……………………………………………………………..3.1开箱与打印前的准备…………………………………………..3.2 计算机准备工作…………………………………………………3.2.1 安装驱动软件………………………………..3.2.2 软件功能说明…………………………………………….4. 维护……………………………………………………………………4.1 ………………………………………………………5. 常见故障排除…………………………………………………………6. 保修申明和许可证协议………………………………………………1. 说明书事项1.1 说明书介绍本用户说明书主要包括产品概述、操作说明、打印测试模型、维护以及故障排除等几个部分组成。
请仔细阅读,并根据说明书的内容使用本SLA桌面级3D打印机。
1.1 注意事项1. 收到打印机首先检查打印机的配件是否齐全,然后在查看打印机外观有无破损或折断2. 装树脂盘的底部有层硅胶,切记这层硅胶绝对不可以拿掉,负责将无法打印,3. 树脂盘底部的硅胶不可用手直接触摸,表面若有杂物,需要立即使用乙醇(99.7%)或者异丙醇清洗。
西通电子有限公司桌面型3D打印机使用手册说明书
Manual of FDM 3D PrinterZHUHAI CTC ELECTRONIC CO, LTD Company Links:CONTENTS1. CONTENTS………………………………………………………..Description Matters…………………………………………………Manual Introduction………………………………………………Precautions ………………………………………………………Safety Precautions……………………………………………………Contact us……………………………………………………Accessories List………………………………………………….2. Product Description………………………………………………………………Product Categories………………………………………………………Appearance………………………………………………………….Product Specifications………………………………………………………….Technical parameters……………………………………………………Environmental Specifications……………………………………………………3.Instructions……………………………………………………………….Prepare for printing……………………………………………..Computer preparations………………………………………………….Replicatorg installment………………………………..Software Functions……………………………………………..Makerware installment (compatible with this software)……………Software Function………………………………………………LCD screen function keys and the Key Functions comment…………………………….4.Take the model…………………………………………………………………5.Maintenance……………………………………………………………………Clean the printhead………………………………………………………Tighten belts…………………………………………………………Screw axis and Maintenance…………………………………………………6.Troubleshooting………………………………………………………………7.Warranty statements and license agreement………………………………………………8.Operations Guide………………………………………………………………Let’s go1.Instructions mattersManual IntroductionThis User's Guide includes product description, operating instructions, print a test model, consisting of maintenance and troubleshooting, and several other parts. Please read it carefully, and use the3D printer based on the contents of the specification.PrecautionsThis product is due to the different regions from each customer, and the voltage of each region are different, so please make sure how much voltage before you use the printer in your area (generally 110v and 230v)This product required the customer's printer maintenance after using a period of time, it can extend the life of the printer with regular proper maintenance.Safety PrecautionsOur company do not recommend using other brands of supplies, in order to get the 3D best printing results, please use our special supplies. If use other supplies caused by maintenance and repair, its not included in our company's warranty.When the printer is printing or just finished printing , please do not touch the rest of the model, the head of printer and the platform or the internal body due to the high temperature .Contact UsIf you need to contact the after-sale 3D printers service, you can add my company’s group number "102304634" directly SD card user guide : about 3D printers use and troubleshooting information, available on the instruction included, you also can add my company's 3D printing community (group no. "102304634") for online technical support.You can add my company's sina weibo, it always update my company's new technology and software upgrades, add sina weibo have access to random rewards and prizes "a tablets "go into the sina weibo search CTC 3D printing in the future "concern" and “reprinted”can get more opportunity and higher rewarded .Accessories Listnumber the name of material quantity unit1 3D printer 1 table2 power line 1 root3 USB cable 1 root4 toolkit 1 cover5 SD卡 1 piece6 printing supplies 1 volume7 hanging material column 2 slipProduct CategoryProduct Categories3D printing is based on the west fuse deposition manufacturing process (FDM) rapid prototyping device that connected to the computer via an SD card online or print spooling, only an ordinary computer can be completed via USB cable to print, as long as you there have STL 3D file format you can complete a variety of print job complex three-dimensional solid model. This device is easy to use, even if you have never used 3D printer, but you can easily print all kinds of 3D models through 3D printer.Appearance(three Generation)(one Generation)(two Generation)Product SpecificationsThe total volume of printer:320*467*381mmPackage Size:565*430*535mmWeight (with packaging):15KGConstruction size:225*145*150mmInput voltage : 220VPower Requirement:210VConstruct platform temperature: about110(adequate heating in winter,appropriate cooling in summer)Nozzle extrusion flow rate is about 24cc / hrSupported operating systems:Windows XP Windows7/8(32位/64位)Software:ReplicatorG 或西通汉化版(Software is compatible with MakerWare)Print materials:ABS ,PLAMaterial properties: 3D printing special ABS and PLA(only produced in our company)Layer precision:0.1mm-0.5mm Positioning Precision:XY axis 0.011mm Filament Diameter:Z axis 0.0025mm Nozzle diameter:0.4mmMovement shaft speed:30mm/s_100mm/sRecommended nozzle movement speed: 35-40 mm/sInput file types:stl , gcodeRecommended environmentOperation environment :Installed in a well-ventilated, dust-free area. Temperature: 15 ° C to 35 ° C. Humidity: 20-80% (non-condensing)Storage environment : Temperature: 0 ° C to 40 ° C . Humidity: 10-80% (non-condensing). The existence of non-corrosive gases and cleaning applications.3.InstructionsPrepare for printing(1) Check whether the appearance of 3D printers outside the box bumps scratches and other defects.Check the box edges and corners are squeezed or without deformation or rupture of the place.(2)Open the box, after subtracting out the printer nozzle fixed tie, (tied in the front left side of the Z-axis X-axis Y-axis.Use Water-nose pliers to cut straps fixed printhead.(3)open the print head surface foam (Note: Try not to use face of the knife in order to avoid the above print head cable was hung before to hung up now)take the print head is mounted on the X-axis bracket, mounting orientation shown in rather the two screws.(图一)(图二)(4)Taking out the tube hanging material feeding tube installed in the hole at the back of the printer, and put the printing supplies into the feeding tube hanging, then pull out the printing supplies, printing supplies section of the circle into the print head party hole (Note use the left print head is inserted left and use the right print head is inserted on the right)(5) Check Limit switches cable of the printer loose or fall off the surface.(Z-axis ) (Y-axis ) (X-axis )(6)Check whether the voltage can reach the printer of voltage required (110 v or 220v, where the power supply is determined on the printer)(7)Taking out the SD card to read inside of the printer driver and installing the driver.(8)Turn on the printer and manipulate to control panel , make Z axis up to the top of the printer, check the printer nozzle parts and print platform’s distance can meets the criteria (best distance test method: Put a sheet of A4 paper in the printing surface of the platform and control panel make it go to the top of the Z-axis, and then pull the A4 paper, printing paper can be pulled out, but with a little bit of strength, but the paper will not be scratched,) Note: The blue paper of print platform surface can not be teared. Otherwise it will affect the print quality(9)You need to be ready for STL file format, after the software has been installed in the printer top can open the file, adjust the parameters, you can start printing3.1 Preparations for computer3.1.1 Installing Replicatorg drive software(1)Taking out SD card to read inside of the printer driver, looking for 3dsetup folder(2)Open 3dsetup file folders and looking for software(3)Right-click the file to open the software into the software installation manager(4)Click Replicatorg software installation (you can choose to install English, Chinese also can choose )(5)Click Replicatorg software automatically installs the icon will appear and then click the Next button.(6)Click Next will appear one icon, click on the Install button、(7)Click the Install button will pop up a window, need to wait for moments(8)After Click the Install button in the process the computer will pop up dialog box, please click Next(9)After clicking Next the computer will appear fifth consecutive prompt, click "Install this driver software."(10)Click Five times"Install this driver software" button to complete the installation , at the same time the computer will pop up dialog box to view the program was successful (query methods: View pop-up dialog box Driver Name, all check mark indicates that the software is installed successfully, if X number or ! number will be deemed not to have been successfully installed), after checking please click "Finish."(11) Click Finish emperor of the page "Next" button to begin the lights, the left the mouse click "Next" button, the computer Replicatorg print software installation completed.3.2.2 Software Functions(1) Charging the machine, link USB, open replicator, (first double nozzle to choose The Replicator Dual machine, choose the first single nozzle The Replicator Single)(2) Next is to select the correct serial port (Please note the serial number of the machine is often not com1)(3) Click online.(4)Then select the file you want to printThen there will be a pattern file:(5)Open the Control PanelSet the nozzle temperature: Target Tempriture box set a carriage.Different machines due to differences in temperature conductivity, temperature difference is relatively large, its better to start from 215 degrees , try to use the wire. The temperature rises rapidly to reach 190 degrees, indicating a larger margin heating. If relatively slow, indicating a small heating. If the Szymborska appear, there may bot be enough temperature. If there are bubbles silk sound, temperature high. From low to high, according to the actual situation to set a suitable temperature. If you click on the reverse, the extrusion head motor reversal,l running out of the material is sent back . Cut flat new material, take them into the hole , click stop, then click forward, the motor is transferred out of the head, insert a little tight, the material is bite into the nozzle, until spinning. Please note, it will arrive at a predetermined value will continue to wait for the temperature down when he reaches the bottom surface of the print.How to start printing:The map is moved to the appropriate location, click the following buttonChoose:Please note that the above options, click Generate Gcode to be Gcode. After generating gcode, this time move the print head to the center position,Can modify Feedrate (mm / s) to 20, Tralvel Feedrate 20 can make more accurate printing. How to calibrate (normal calibration is not necessary):Through the control panel take the head to the platform。
3D打印机设置用户手册
3D打印机设置用户手册欢迎使用我们的3D打印机!本用户手册将为您提供详尽的使用说明和设置指南,以帮助您快速了解和配置我们的打印机。
第一步:安装在开始使用之前,请确保您已经按照以下步骤正确安装3D打印机:1. 开箱检查:仔细检查包装盒,确保所有配件齐全。
如果有任何配件损坏或缺失,请立即联系我们的客服部门。
2. 组装打印机:根据附带的组装说明,将打印机的各个部件正确调整和安装好。
请务必仔细阅读说明书并按照指导操作。
3. 连接电源:将打印机正确地连接到电源插座,并确保电源开关处于关闭状态。
第二步:设备配置一旦你完成了打印机的安装,你就可以进行以下配置步骤来调整设备以适应你的需求:1. 导航菜单:打开打印机并导航至菜单界面。
通过使用打印机面板上的按键或旋钮,您可以浏览和选择不同的设置选项。
2. 语言设置:选择相应的语言选项,使打印机界面显示您熟悉和方便使用的语言。
3. 打印床平衡:根据提供的操作手册,使用打印机的平衡功能来确保打印床平衡且水平。
这一步骤对于获得高质量的打印结果至关重要。
4. 温度调节:根据您要使用的材料类型,调整打印机的温度设置。
不同的材料需要不同的温度来进行打印。
5. 打印速度和分辨率:根据您的需求和打印对象的复杂程度,调整打印机的打印速度和分辨率设置。
6. 连接设备:连接您的电脑或移动设备到打印机,以便您可以直接从电脑或设备上发送打印文件。
第三步:文件准备和打印在打印之前,请确保您已经成功完成前两个步骤。
以下是您需要准备和执行的步骤:1. 打印文件准备:使用3D设计软件创建或下载您想要打印的3D模型文件。
确保文件格式兼容并可以被打印机所认可。
2. 文件导入:将您的打印文件通过USB、SD卡或其他指定的介质导入到打印机中。
确保文件传输的可靠性和完整性。
3. 文件预览和调整:在打印之前,您可以在打印机的界面上对文件进行预览,并根据需要进行调整和修改。
4. 打印设置:根据您的需求和打印对象的要求,在打印机的设置界面上调整打印参数,如层厚度、填充密度等。
3D打印机操作指南

3D打印机操作指南3D打印技术作为一种快速、高效的生产方法,正逐渐应用于各个领域。
了解如何正确操作3D打印机是非常重要的,本文将为您提供一份详细的3D打印机操作指南。
一、机器准备1. 温度调整:首先,确保3D打印机的温度已经调整到适当的位置。
不同的打印材料需要不同的温度,所以务必仔细研究您要使用的材料的温度要求,并根据需要进行相应的调整。
2. 底板调整:确认打印机的底板调整合适,以确保打印物体能够牢固附着在底板上。
适当的调整可以避免材料在打印过程中脱落或变形的情况。
3. 打印材料加载:根据您打印的对象和所选择的材料,将正确的打印材料加载到打印机的材料槽中。
确保材料加载正确,以避免材料卡住或导致其他问题。
二、文件准备1. 设计和准备文件:在开始打印之前,确保您已经设计好所需的3D模型,并将其保存为适当的文件格式,例如STL或OBJ。
确保文件的准备工作已经完成,模型没有缺陷或错误。
2. 切片软件调整:使用切片软件将3D模型转换为适合打印的文件,在这个过程中,您需要调整一些参数,如打印层厚度、打印速度和填充密度等。
确保这些参数根据您的需求正确调整。
三、打印过程1. 启动打印机:打开3D打印机的电源开关,等到打印机完全启动后,您可以开始下一步操作。
2. 文件传输:将您准备好的打印文件通过USB、无线网等方式传输到打印机上。
确保传输的文件与您之前准备的文件相匹配。
3. 打印设置:通过打印机的界面,设置打印模式、温度、速度等参数。
确保这些参数与您之前在切片软件中设定的参数相匹配。
4. 打印开始:在一切准备就绪后,您可以点击打印按钮开始打印过程。
确保您的打印机在打印过程中不会受到外界干扰,以免影响打印质量。
5. 监控打印过程:在打印过程中,您可以通过打印机的屏幕或者相关软件来监控打印进度。
及时发现问题并采取相应的措施,以确保打印顺利进行。
6. 完成和取下物体:当打印完成后,等待打印物体冷却一段时间,然后轻轻取下。
2023年3D打印机操作与维护使用说明书
2023年3D打印机操作与维护使用说明书首部感谢您选择购买2023年款3D打印机。
为了帮助您正确操作和维护设备,提供了以下使用说明。
请在开始使用之前仔细阅读此手册,并按照指导进行操作。
第一章操作指南1. 准备工作在使用3D打印机之前,请确保您已准备好以下物品:- 3D打印机及其电源线- 适用的3D打印材料- 笔记本电脑或电脑与打印机连接的USB线- 相关的打印文件确保3D打印机周围空间足够,并避免接触可能引起电磁干扰的设备。
2. 连接与调试将3D打印机与电源线连接,并确保电源开关处于关闭状态。
使用USB线将3D打印机与笔记本电脑或电脑连接。
打开电源开关,并按照屏幕上的指示进行操作,完成设备的初始化和调试。
3. 打印文件准备将您要打印的文件保存为STL格式,并使用专业的3D建模软件进行操作。
确保文件没有错误并符合打印要求,如正确的尺寸、支撑结构等。
4. 打印操作在进行打印操作之前,请确保以下事项:- 检查打印机内部是否有残留物,如有,请清理干净。
- 检查3D打印材料是否充足。
- 确认打印床平整,并在需要的情况下进行调整。
开启打印机,选择合适的打印文件并加载到打印机软件中,按照软件提示完成参数设定。
如果需要,可以选择打印速度、温度等参数进行调整。
确认设置无误后,开始打印。
5. 打印结果处理在打印完成后,不要立即取出打印品。
让其自然冷却,以防烫伤。
然后使用合适的工具将打印品从打印床上取下,并进行后续的处理,如去除支撑结构、砂光、喷漆等。
第二章维护与保养1. 定期清洁定期清洁您的3D打印机可以确保其正常运行和打印质量。
关闭电源并拔掉电源线,使用干净的布或棉签轻轻擦拭打印机表面和打印床,移除灰尘和杂质。
2. 润滑与保养根据制造商的指导,定期对打印机的润滑部件进行保养。
使用适当的润滑剂,确保打印头、导轨等部件的正常运行。
3. 定期检查定期检查打印机内部和外部的连接部件,确保其紧固度和稳定性。
检查打印床的平整度,并进行调整。
3D打印机使用说明打印须知

By 武尚卿
3D打印机硬件介绍
打印机喷头
开关
托盘,3D模型 成型位置
Байду номын сангаас
打印材料盒
废料盒 网线接口, 连接电脑
3D打印机使用说明
支撑材料盒
计算机设置
3D打印机使用说明
计算机设置
网 络 连 接 IP
工 作 组 名 称
3D打印机使用说明
客户端软件设置
导 入 建 模 文 件
①
最 佳 打 印 位 置 检 查
3D打印机使用说明
3D打印机使用说明
②
封 闭 性 检 查
③
用 料 估 计
④
估 计 量 及 打 印 时 间
3D打印机使用说明
客户端软件设置
当Slices大于4/总Slices(切记,一定要大于4)以后,点击Serve端显示 器界面中下面的红色按钮
3D打印机使用说明
打印须知
打印前需用沾酒精的丝巾擦拭打印机喷头 用打印机中perform pattern test测试喷头状态 打印完毕后,清理机内残余物,按先关闭软件 后关闭电源的步骤关闭打印机
3d打印机使用说明解

SD卡插入打印
设置好参数的打印文件保存Gcode(注意文件 名不能保存中文)然后拷入SD卡中。
插入电源线和SD卡
显示屏显示正常,轻按显示屏旁的旋钮,旋转选择print from SD(旋钮轻按为确定,旋转为上下选择)
选择保存好的打印文件轻按旋钮确认打印。如需要停止打 印,轻按旋钮然后旋转选择stop print。
3D打印机
产品介绍 配件安装说明 智能用户界面 时尚小巧外观设计 高质量3d打印输出
成型原理:熔融堆积 打印尺寸:200X200X200mm 打印层厚:0.1-0.3mm 打印速度:10-300mm/s
配件安装说明
1 .安装送料轴,旋紧壳体内部的三个固定螺丝 2 .送料电机螺丝拧松,材料安装(注意材料卷方向)
软件选择专业设置- 运行平台向导- 连接打印机- RESUME 使打印机的打印头和平台归初始位置。
打印机归位后拔掉电源线,数据线可拔可不拔 用一张A4纸的厚度来测量平台四个角和打印头的间隙,刚刚好则符合打印条件
若哪个角不平,就拧哪个角的平台支撑螺丝
插上电源线和数据线 导入打印文件,开始打印
设置打印参数 (图为打印参考)
3 .材料捅入打印头蓝色小孔,(注意深度,捅到 底,深入大约7CM)送料棒按入蓝色小孔
4 .拧紧送料电机螺丝,夹紧材料,保证送料
产品使用方法
1.数据线连接打印 2.SD卡插入打印
数据线连接打印
插入数据线和电源线,显示屏显示正常即可运行软件
打开设备管理器查看端口名称,然后打开软件机型设置选择相同名 称串口
注意事项1
红色按钮为热床温度控制按 钮,左边为非智能加热,即 无限制加热至最顶峰;右边 为智能加热,即加热至打印 参数设定热床温度
工业级SLA光固化3D打印机技术参数.doc
工业级SLA光固化3D打印机技术参数一、采购数量:工业级SLA 3D打印机1台二、详细技术参数(1)工业级SLA光固化3D打印机1、★成型原理:SLA激光固化分层制作;2、材料类型:光敏树脂(可以通用类ABS,类亚克力,类橡胶,高温、常温材料等);3、★成型精度:±0.05mm~0.1mm(L≤100mm);±(0.05%~0.1%)*L mm(L>100mm);4、成型速度:80~250g/h;5、★成型空间:≥500mm(X)*400mm(Y)*300mm(Z);6、激光类型:半导体泵浦源激光器,波长355nm,功率≥500mw(变光斑3W),聚焦平面光斑尺寸≤0.15mm,加工速度≥5~10m/S;7、涂铺方式:智能定位真空吸附涂层,防误操作刮刀定位系统;8、正常层厚0.1mm,快速制作层厚0.1-0.15mm,精密制作层厚0.05-0.1mm;9、★光学扫描系统:高品质进口高速振镜扫描系统,扫描速度8m/S,跳跨速度10m/s;10、升降系统:垂直分辨率0.0002mm,重复定位精度±0.01mm;11、敞开式树脂槽:便于多种型号树脂的更换;人性化清洗排料孔,清洗换料更轻松;12、真空吸附式涂敷系统技术功能:提高刮平板运动速度,提高制作速度;消除制件气泡,提高制件质量;制件上表面平整,垂直方向精度高;13、成型树脂液面激光检测及液位自动补偿技术功能:精确控制层厚度,保证制件精度;制作过程中可自动补偿液面波动;缩短液面自动流平时间,提高制作速度;14、★自动工艺功能:制件过程中,实时地检测激光功率,根据材料的光学性能和光功率动态调整激光扫描速度,充分利用机器性能,加快制件速度;15、树脂加热方式:可控式远红外加热系统(或风热加热系统);16、设备支架钣金:3mm加厚钣金结构,一体式框架,5厘定制方管,更具稳固性能;17、★控制系统采用windows7及以上操作系统,以太网。
SLA光固化3D打印设备与操作

使用本机附带的电源线
常做产品维护,清洁机身
03 打印机操作
谢谢观看
02 打印机结构组成
2.2 基本参数
02 打印机结构组成
2.3 设备特点 02 打印机结构组成
叁
打印机操作
3. 1 注意事项
请将本机放置在通风、阴凉、少尘的环境内 带上手套后借助工具将模型取下,清理时请勿直接用手触摸
请勿直接用手触摸喷头,防止烫伤 请勿将打印机放置在振动较大或者不稳定的环境内
1992年,3D Systems创建了世界上第一台 SLA设备,可以在一小部分时间内逐层制造 复杂零件。SLA是20世纪80年代首次进入快 速原型制造领域,并继续发展成为一种广泛 使用的技术。
每个标准SLA 3D打印机通常由四个主要部分 组成: (1)装有液体光聚合物的罐:液态树脂通常是透 明的液体塑料。 (2)浸入水槽的穿孔平台:平台下降到水箱中, 可根据印刷过程上下移动。 (3)高功率紫外激光器。 (4)计算机界面,管理平台和激光运动。
SLA光固化3D打印设 备与操作
目录页
01 SLA工艺流程 02 打印机结构组成 03 打印机操作
学习目的
• 了解SLA光固化打印机的结构。 • 掌握打印参数设置。 • 掌握打印机的操作方法。 • 会进行后处理。
壹
SLA工艺流程
1. SLA工艺流程
01 SLA工艺流程
贰
打印机结构组成
2.1 打印机结构组成
课时12-13 操作桌面SLA打印机

课前导读
同学们大家好,上节课我们学习了立体光刻成型技术SLA的成 型原理,这节课我们来学习SLA打印机的操作方法。
教育
教学
学习
Байду номын сангаас作原理
一、SLA打印机工作原理
与其它3D 打印工艺一样,SLA 光固化设备在开始“打印”物体前,也需要对 物体的三维数字模型进行切片。然后打印时,打印机会在电脑的控制下,紫外激光 沿着零件各分层截面轮廓,对液态树脂进行逐点扫描。被扫描到的树脂薄层会产生 聚合反应,由点逐渐形成线,最终形成零件的一个薄层的固化截面,而未被扫描到 的树脂则保持原来的液态。
桌面级SLA打印机的优势: 体积小,重量轻,可以随意选择使用场地;
相比FDM打印机,其成型精度更高,打印模型的表面更光滑; 机器介绍
SLA打印机的调平步骤:拆料池 机器介绍
SLA打印机的调平:通过软件让他自动回原点。
机器介绍
通过调整平台上的螺丝来调整平台和面板的间距。
谢谢观赏
工作原理
二、SLA机器介绍
SLA打印机按照设备大小、成型尺寸等可以分为桌面级和工业级,下图中左边 的为桌面级SLA打印机,右边的为工业级。
机器介绍
现在我们就以桌面级SLA打印机设备来进行讲解,相比昂贵的工业级SLA打印 机(一般价格高达50万人民币),桌面级价格(一般为3—5万)要显得容易接受。
工作原理
当一层固化完毕,升降工作台移动一个层片厚度的距离,在上一层已经固化的 树脂表面再覆盖一层新的液态树脂,用以进行再一次的扫描固化。新固化的一层牢 固地粘合在前一层上,如此循环往复,直到整个零件原型制造完毕。
SLA 工艺的特点是,能够呈现较高的精度和较好的表面质量,并能制造形状特 别复杂(如空心零件)和特别精细(如工艺品、首饰等)的零件。
3D打印桌面SLA设备使用技巧2

Page 2
1.设备的简单操作
Page 3
1)打开亚克力保护罩,插入托盘
Page 4
2)倒入适量的树脂,树脂液面不 应超过树脂槽的刻度线。
Page 5
3)机座后部,插入数据线和电源线,数据 线USB头链接电脑
Page 6
4)打开软件→1倒入模型→2摆放模型方向→3添加支撑→4优化模型位置
措施:当发现底部硅胶雾化 时,需及时更换避免造成打 印失败,一般使用5kg树脂 后需更换树脂槽.
Page 14
3-2)更换树脂槽
更换树脂槽时,需 一定的顺序,应先去下 托理残渣
定期检查树脂槽, 发现槽中固化残渣时, 及时用镊子取出,避免 造成打印失败。
桌面型SLA不适合打印大实体模型,对于模型较大并且是实体的时候,可 借助辅助软件,掏空模型内部,这样不仅打印成功率,也节省了材料。
抽空处理
Page 22
措施:在Z轴导轨和丝杆上 添加润滑脂或润滑油, 周期为一个月.
Page 12
2)树脂储存
液体树脂长期敞开 放置,会逐渐变稠并固 化。
措施:模型打印完毕请盖 上亚克力罩,连续一个月 不打印需把树脂倒入黑色 瓶中,并放置阴凉处。
Page 13
3-1)更换树脂槽
树脂槽是属于易损 件,长期频繁使用的时 候,底部硅胶出现雾化。
Page 7
5)点击发送数据
Page 8
6)点击前面板开关按钮确认打印,并传输打印数据
Page 9
7)打印完成把模型托盘去下,用铲刀取下模型,放入清洗剂 中,浸泡3-5分钟,取出模型晾干,即完成打印。
Page 10
2.设备的简单维护
3D打印机使用操作手册
3D打印机使用操作手册随着科技的不断进步,3D打印技术的发展也越来越成熟。
3D打印机作为一种创新型的工具,既可以帮助我们实现创意设计,又可以应用于多个领域,这里将为大家介绍一下3D打印机的使用操作手册。
一、准备工作1.选择适合自己需求的3D打印机:市场上有多种型号和规格的3D打印机可供选择,根据个人需求选择合适的型号。
2.准备相关的软件:3D打印需要使用计算机辅助设计软件,如Tinkercad、SketchUp等,根据3D打印机的型号和厂商提供的软件进行安装。
3.准备模型文件:可以从网上下载或自己设计3D模型,支持的文件格式通常为STL,将模型文件保存到计算机。
二、安装和调试1.安装打印机和耗材:按照厂商提供的说明书安装打印机,将打印头和热床进行连接,确保打印机能够正常工作。
然后将耗材(通常为PLA或ABS材料)放入打印机的耗材槽中。
2.打印底板校准:通过调整底板的水平度和与打印头的距离,确保底板与打印头的间隙适当。
3.软件设置:根据打印机型号和软件的不同,进行相应的软件设置,例如选择打印类型(单色、多色、多材料等)、调整打印温度和打印速度等。
4.打印参数调试:调整打印参数,如打印速度、打印温度、填充密度等,以获得最佳打印效果。
三、开始打印1.导入模型文件:在软件中选择导入模型文件,将要打印的3D模型导入到软件中。
2.模型调整:根据需要对导入的模型进行放大、缩小、旋转等调整,使其符合自己的需求。
3.切片设置:将模型切片,即将模型分解为打印机可以理解的层次,选择合适的切片设置,如层高、填充密度、支撑结构等。
4.预览和修正:预览切片后的模型,检查是否有问题,如支撑结构、过于细小的部分等,根据需要进行调整或修正。
5.开始打印:将3D打印机连接到计算机,并启动打印,等待打印完成。
四、打印后的处理1.等待冷却:等待打印完成后,等待打印的模型冷却下来。
2.去除支撑:如果使用了支撑结构,将其去除,可以使用剪刀、镊子等工具轻松去除。
3D打印机新手操作手册
3D打印机新手操作手册编写日期:执行日期:目录开箱指南和硬件安装 (2)(一)警告 (3)(二)注意 (3)(三)装箱清单 (3)开箱指南 (3)初始硬件安装 (5)软件的安装 (6)O:空走速度一般为70-30选择 (6)F:喷头温度为220度 (6)连接机器以及如何给喷头及底板加温 (7)进丝与退丝 (9)如何载丝 (10)退丝 (11)开箱指南和硬件安装我们出厂时非常仔细的对Creator或者CreatorII进行打包装箱——我们希望您能在仔细阅读本指南后,再仔细开箱。
请您应该始终如一的小心爱护和使用Creator。
Creator对静电比较敏感,请确保你在操作Creator和尝试任何校正前,先通过接触接地物体把身体上的静电释放掉。
在您自行打开Creator进行维修时,请保证电源已经关闭,电线连接已经断开。
(一)警告1)高温危险。
里面有加热板,维修前先让它自然冷却。
2)可动部件可能会造成卷入挤压和切割伤害。
操作机器时请不要带手套或缠绕物。
(二)注意1)在工作温度下,设备可能会产生刺激性气味,请在使用Creator时保持环境的通风和开放。
2)在Creator运行过程中,请勿无人看管。
3)接触喷头出来的挤压材料可能会造成灼伤,请等到打印物件冷却后再把它移出打印工作平台。
(三)装箱清单——Creator系列机器在Creator机器顶部的纸盒是配件箱,里面有:——一个或两个喷头——1X或2x 丝盘支架——螺栓工具盒——六角扳手工具盒在Creator机架里的工作平台下面:——1kg 原色ABS丝盘——1kg 黑色ABS丝盘(仅配套双喷头机型)在Creator机器下面:——电源线——USB A to B 电缆——1x 或2x 丝线导套开箱指南Creator打印机出厂时经过非常紧凑而仔细的包装,请花点时间仔细拆箱。
在本部分内容中,机器的重要部件名称将会用粗体表示。
注意:不要强行撕开任何东西——你有可能会损坏Creator。
3D打印机简要使用说明

3D打印机用户使用简明手册武汉斯托得科技有限责任公司一、安全注意事项◆安装规范使用电源●请使用本机附带的电源适配器,使用220V电源。
●请勿在手湿时拔电源插头,或接触本机内导线。
●请勿拉拽、过度扭曲本机所配电线,以防造成断路或短路。
◆在打印过程中注意●请勿在没有人员监督的情况下使用本机。
●打印过程中和刚打印完成的时候,避免碰撞打印机内部的结构和打印件,以免烫伤。
●如果打印时发生打印机冒烟,产生异常噪音时,请立即关闭电源开关,停止打印机工作。
◆常做产品维护●定期在断电的情况下,用湿布拭去灰尘和粘接的打印材料。
●定期对打印机的传动件,如丝杆、轴承、丝杠添加润滑油,并清理积累的赃物。
二、产品介绍此产品是由武汉斯托得科技有限责任公司推出的第二代桌面式3D打印机。
它与普通二维打印机工作原理类似,区别在于二维打印机是使用油墨为打印材料,此3D打印机是使用融化状态的PLA或ABS为打印材料,通过电脑控制把打印材料一层层叠加起来就形成了实物,实现了将计算机中的灵感设计打印成现实世界中的实物。
它与传统制造方式不同的原理,及其理论上“无孔不入”的打印可能,留给人们巨大的想象空间。
它在短时间内为您实现任何您能想出的样品模型,及时保鲜您的创意火花。
在工程师们手里,它是制造大量的原型机母体,孕育着最终的投入大批量生产的成品;在家庭中,它简化了个性化的部件的制造方式,释放个体使用者的创新冲动;简易的使用方法更让孩子们爱上使用它,制造出自己的玩具,在娱乐中锻炼了智力和创新思维。
有了3D 打印机的帮助,您只需要能使用和学习一些软件操作即可将您的想法实现,改变了过去发明创造只是少数人的特权。
产品的原理主要基于堆积熔融FDM(Fused Deposition Modeling)工艺,即打印材料(PLA或ABS)经导管送向智能控制的喷头后,加热熔融并最终堆积成型。
成型的材料具高强度和高稳定性,能进行攻丝、钻孔、上色等操作,迅速参与使用。
3d打印机操作手册

3D打印机操作手册**一、设备简介**本手册旨在指导用户更好地操作3D打印机,确保顺利完成打印工作。
本打印机采用了最先进的打印技术,具有高效、精准和易于使用的特点。
**二、设备安装**1. **开箱检查**:打开包装箱,检查设备及其配件是否齐全,有无损坏。
2. **电源连接**:将打印机电源线插入电源插座,确保电源稳定。
3. **组装机器**:按照说明书指引,完成打印机各部件的组装。
4. **连接电脑**:将打印机与电脑连接,确保通讯正常。
**三、打印材料**本打印机支持多种打印材料,如ABS、PLA等。
根据实际需要选择合适的材料,遵循材料的加工温度等要求。
**四、软件操作**1. **软件安装**:安装打印机的切片软件,确保与打印机型号匹配。
2. **模型导入**:将待打印的3D模型导入软件。
3. **切片设置**:根据打印需求,设置打印层厚、填充密度等参数。
4. **模型调整**:根据实际需要,对模型进行旋转、缩放等调整。
**五、打印设置**1. **选择模式**:选择适合的打印模式,如快速模式或精细模式。
2. **打印平台调整**:确保打印平台水平,避免打印过程中出现问题。
3. **喷头温度与平台温度设置**:根据所选材料和模式,设置合适的温度。
4. **打印预览**:在软件中预览打印效果,确认无误后开始打印。
**六、打印过程**1. **开始打印**:点击软件中的“开始”按钮,启动打印过程。
2. **监控打印进度**:随时观察打印机的运行状态,确保无异常情况。
3. **异常处理**:如遇问题,如断料、喷头堵塞等,及时处理。
**七、后期处理**1. **取下模型**:待打印完成后,从打印平台上取下模型。
2. **清理残留物**:使用适当的工具清理模型上的残余材料。
- 1、下载文档前请自行甄别文档内容的完整性,平台不提供额外的编辑、内容补充、找答案等附加服务。
- 2、"仅部分预览"的文档,不可在线预览部分如存在完整性等问题,可反馈申请退款(可完整预览的文档不适用该条件!)。
- 3、如文档侵犯您的权益,请联系客服反馈,我们会尽快为您处理(人工客服工作时间:9:00-18:30)。
SLA桌面型3D打印机使用手册
POLYTECH-S1
声明
●本说明书包含关于产品安装、使用、维护和储存的重要信息,在使用前请仔细阅读并备
份。
●我公司有权在未通知的情况下对本型号的机器与本手册的相关内容进行修改。
●我公司对于因参照本手册而造成的任何损失(包括后续损失)均不承担责任,其中包括因
印刷或其它出版错误造成的损失。
●在未取得我公司的同意情况下,任何单位或个人不得对此说明书进行修改、复印、复制
或翻译。
●本手册受版权保护,且本公司保留对本手册的最终解释权。
目录
使用须知与重要安全事项 (1)
一、说明书事项 (2)
1.1 说明书介绍 (2)
1.2 产品清单一览表 (2)
1.3 产品外观介绍 (2)
1.4 产品技术参数 (3)
二、操作说明 (3)
2.1 开箱与打印前的准备 (3)
2.2 安装PreForm_setup_1.3打印软件 (3)
2.3 软件功能介绍 (5)
三、日常维护 (8)
四、常见故障排除 (8)
五、品质保证及售后服务 (9)
使用须知与重要安全事项
∙收到打印机首先检查打印机的配件是否齐全,然后在查看打印机外观有无破损或折断。
∙部分光敏树脂材料在使用过程中会产生轻微的气味,但不会使人感到不适,因此建议您在通风良好的环境下使用。
∙存放环境,在常温下存放,尽量避免较大温差产生雾气。
∙装树脂盘的底部有层硅胶,切记这层硅胶绝对不可以拿掉,否则将无法打印。
∙请勿将打印机放置于多尘、高湿度或日光强烈的环境下使用,变更使用环境的时候尽量避免较大温差避免镜片产生雾气。
∙请勿将打印机放置于倾斜台面上使用,可能会影响打印效果,机台有可能因掉落而产生损毁或触伤其它物品。
∙树脂盘底部的硅胶不可用手直接触摸,表面若有杂物,需要立即使用乙醇(99.7%)或者异丙醇清洗。
∙在使用过程中需要注意不要让吸盘上面的树脂滴在树脂盘下放的反光玻璃上。
∙打印机内部有四道反光镜片,在使用过程中发现有散光或余光等现象时需要清理镜片,镜片经理需要使用乙醇(99.7%)或者异丙醇清洗。
∙使用过程中,树脂不可长时间放置在自然光下,必须使用防辐射罩子罩起来存放。
∙打印过程中尽量不要让打印机靠近过强磁场,会干扰起打印。
∙当打印机正在打印过程中,请不要移动打印机或者断开打印机电源。
一、说明书事项
1.1 说明书介绍
本用户说明书主要包括产品概述、操作说明、打印测试模型、维护以及故障排除等几个部分组成。
请仔细阅读,并根据说明书的内容使用本SLA桌面级3D打印机。
1.2 产品清单一览表
序号名称数量备注
1 SLA 3D打印机1台标配
2 电源适配器1个标配
3 打印平台1个标配
4 铲刀1把赠送
5 树脂材料 500ml 1瓶赠送
6 清洗器皿1个赠送
7 镊子1把赠送
8 吸盘1套赠送
9 USB数据线1条赠送
10 斜口钳1把赠送
11 清洗剂 IPA 500ml 1瓶赠送
1.3 产品外观介绍。
