Pinnacle(中文)用户手册
PIN Genie智能锁 用户手册 Model No. PGD718 PGD728说明书

Model No. PGD718 / PGD728Section 1 Installation Instruction1.1 Installation overview1.2 Assembly parts1.3 Prepare door and check dimensions 1.4 Adjust the backset of latch1.5 Extend the bolt1.6 Install latch1.7 Prepare exterior assembly1.8 Install exterior assembly1.9 Install interior assembly1.10 Install batteries1.11 Install strike1.12 Install battery cover 1 1 2 2 3 3 3 4 5 6 6 6 11 12 12 13 14 1517 17 19 19 7 8 9 9 10 10 102.1 Components2.2 Setting switch2.3 Reset2.4 Display keypad switch2.5 Restart2.6 PIN GENIE button2.7 Changing the battery3.1 Passcode information3.2 How to enter settings3.3 Add Passcode3.4 Delete Passcode3.5 Check Passcode / BTSwitcher (PGD728)3.6 Alarm Sensitivity4.1 Unlock from outdoor4.1.1 Safe mode4.2 Unlock & Lock from indoor4.3 Lock from outdoorR1.1Installation overview1.2Assembly parts11.4Adjust the backset of latchAdjust as shown below (only if needed)23451.10Install batteries1.12Install battery cover 1.11Install strike2.1ComponentsBattery compartmentSocketFront (Front Body )Back (Main Body )Battery Compartment Cover72.2Setting switch报警功能开启状态OKAlarm mode ON Input passcode to disarm报警功能开启状态Successfully disarm.Alarm mode OFFPress and hold any two circles on the screen for 1.5 seconds. The circles you pressed will flash and you will hear a long BEEP.82.3 Reset2.4Display keypad switchReset: Restore the smart lock to factory default setting. Use a stick-like object such as a clip, toothpick etc. to push the reset button at the back panel of the smart lock for about 2 seconds. After that, you will hear a beep. The display keypad will play the boot animation and the smart lock is now restored to factory default setting and all the pro-grammed data has been deleted.The exterior display keypad can be locked and turned off using the display keypad switch at the back panel of the smart lock. With the display keypad switch off, people outside cannot input passcode to unlock the door.报警功能开启状态Alarm mode ON报警功能开启状态Successfully disarm.Alarm mode OFF Press and hold any two circles on the screen for 1.5 seconds.The circles you pressed will flash and you will hear a long BEEP.92.7Changing the batteryOpen the battery compartment cover and insert 4* AA batteries as shown below.• Make sure the batteries are correctly oriented.• Replacement of batteries does not affect programmed data.• To avoid setting loss, please insert new batteries within 15mins.2.5 RebootReboot: Press and release the restart button. The 10Section 3 --Programming Passcode3.1Passcode information• The default passcode is 123456. Once you add a new passcode, the default one would become invalid.• A maximum 8 sets of passcodes can be set for family use.The Passcode can be any combination of 6~8 digits.11Input Y to confirm If the passcode you entered twice match, it will be displayed on the screen for your final confirmation. Press . Your passcode is now set. To quit, press "OK" or .5 Continue pressing any digit on the screen until the passcode you want to delete is displayed. Hold the “OK” button for 1 second to enter the delete confirmation page.For example, to delete the second set passcode (1-2-3-4-5-6)313• If there is no passcode preset, the delete passcode mode will be invalid. The default passcode will not be shown on the display key pad. You can add a new passcode to override the default one.• If there is only one set of passcode preset, the delete passcode mode will also be invalid. For example, there is only one set of passcode (1-3-5-7-9-0). When you hold down the OK button, there will be an error message. The smart lock will beep twice.Press to switchConfirm deletionNo passcode presetError messagePress to delete.Press to end.Hold down the OK button3.5Check Passcode / BTSwitcher (PGD728)Press the “Program” button and the screen will be activated.1 Press “3" to enter check passcode mode.214Press to finishContinue pressing any digit on the screen to check other pass-codes. After all sets of passcode are displayed, the screen will auto-matically return to the setting page.For example: to check the second set passcode (1-2-3-4-5-6)3Press to switchQuery ResultNo passcode presetPress4.1Unlock from outdoor4.1.1Safe mode3. The PG and fix digit input mode can be toggled through pressing OK for 2 or more seconds.Enter Safe mode: The lock status icon will start flashing. Under safe mode, you will have to enter the passcode twice (in crazy mode keypad) to unlock the door.Each time followed by “OK” or simply use the mechanical key to exist the Safe mode.Input 6Safe mode flashesOK OKEnter passcodePress and hold O K f o r 3s t o a c t i v a t e t h e screenRe-enter passcodeSteps to unlock under safe mode:• If the code entered twice is correct, the door will be unlocked. If not, it will lead to a 10-minute disabling period.• After 10 minutes, it will go back to safe mode again. Repeat steps to unlock under safe mode. This time, wrong attempts will lead to a 20-minute disabling period.• After 20 minutes, it will go back to safe mode again. Repeat steps to unlock under safe mode. This time, wrong attempts will lead to a 30-minute disabling period.• After 30 minutes, safe mode will automatically end. Normal Mode will resume. Users can input a passcode to unlock the door.18Use warm water and mild dish soap to properly clean the display keypad of built-up dirt, oils, and other contaminates.Follow the general rules below:• Do rinse the touchscreen with warm water prior to the cleaning process.• Do use the application of soap with a damp, lukewarm cloth • Don't use abrasives, high alkaline cleaners, or gasoline • Don't leave cleaning detergent on the display keypad for long periods; wash immedi-ately.• Don't apply cleaners in direct sunlight or at elevated temperatures.• Don't use scrapers, squeegees or razors.To clean the bolt, you could use a mild dish soap and warm water. It may help improv-ing the performance of the lock.19。
Pinnacle.wedding.pro使用说明
Pinnacle wedding pro——产品使用说明书一、系统要求最小系统需求∙ 2.0 GHz Intel P4或同等速度处理器∙512MB 内存∙Windows2000或XP操作系统∙支持1024x768 32-bit分辨率的SVGA显示器∙硬盘(最小数据传输率10MB/s)∙AGP 2x 或更高速AGP插槽∙声卡推荐系统需求∙双P4 2.4GHz或更高速度处理器∙1G内存∙Windows XP操作系统∙支持1280x1024 32-bit分辨率的SVGA显示器。
∙单独的视频硬盘(最小数据传输率16MB/s)∙AGP 2x 或更高速AGP插槽∙声卡二、包装内容·“一世情缘之一生最爱”婚庆模版及特技安装光盘CD·“一世情缘之花好月圆”古典风格婚庆模版·“一世情缘之佳偶天成”古典风格婚庆模版·“一世情缘之百年好合”近代风格婚庆模版·“一世情缘之水晶之恋”卡拉OK现代风格婚庆模版·“一世情缘之比翼双飞”卡拉OK近代风格婚庆模版·“一世情缘之星梦奇缘”卡通风格婚庆模版·“一世情缘之美丽新娘”花絮风格婚庆模版·80种自定义婚庆专用“好莱坞”实时特技·40个自定义婚庆专用DVD/VCD菜单·“一世情缘”婚庆模版及特技演示光盘VCD·“一世情缘”婚庆模版及特技使用指南Pinnacle Liquid Edition v5.6广播级视频编辑软件·Pinnacle“好莱坞”特技实时版,超过300种预制效果直接使用·超过1000种实时特技预制,包括二三维划像和画中画效果·Pinnacle TitleDeko RT实时专业字幕制作软件∙Pinnacle Liquid Edition Driver 驱动光盘∙《Liquid Edition专业视频编辑实战》教科书,附带Liquid Edition演示光盘DVD ∙Liquid Edition 使用指南∙Liquid Edition 用户手册∙Pinnacle Liquid Edition 专业AGP接口视频加速卡∙Pinnacle Liquid Edition PRO专业接口箱,·包括复合端子、S端子及IEEE 1394 输入输出三、软件安装·Pinnacle Liquid Edition pro驱动程序的安装将Pinnacle Liquid Edition pro Driver 光盘放入光驱中,程序将自动运行,出现(图一)对话框,选择下一步继续安装,当出现界面(图二)如图选择快速安装,然后重新启动计算机,设备安装的正确显示:(图三)·Pinnacle Liquid Edition v5.6视频编辑软件安装方法因Liquid Edition 软件的采集目录(MediaAV)和渲染目录(Render)产生的文件容量比较大,所以,我们建议将软件、文件采集目录和渲染目录直接安装在比较大的AV硬盘中。
Pinnacle(中文)用户手册

Pinnacle 软件用户手册(第一版)北京合众拓普科技发展有限公司第一章:Pinnacle中文软件的安装建议Pinnacle软件的安装步骤如下:1、安装Pinnacle软件的英文版2、调入大地水准模型文件(注:当地坐标系统可以不需要安装)3、安装Pinnacle软件中文版(注:安装的路径一定与英文版相同)4、安装软件的帮助文件(注:帮助软件仍是英文版,可以根据自己的情况选择是否安装,建议安装目录与英文版相同)第二章:Pinnacle软件的简易流程一、运行Pinnacle软件Pinnacle 软件安装完后,点击开始\程序\Topcon Positioning System\Pinnacle汉化版,运行Pinnacle 程序,也可双击桌面上的Pinnacle图标。
二、 P innacle内业处理1、工程项目管理1)运行Pinnacle软件后,在出现的对话框,点击新建按钮。
2)在出现的对话框中,选择存储的路径,如要建立新的文件夹,再点击新建,在出现的对话框中输入新的文件夹名称,点击确定,返回到上个界面,点击确定。
3)输入项目名称,如:示例,建议使用项目名称进行管理,点击确定4)点击结束,关闭向导5)点击工具条上的新建控制网按键。
2、原始数据的输入1)在新建控制网上右键选择导入数据命令2)在出现的界面中,选择工具条上的本地计算机按键3)在出现的界面中,选择数据下载的路径,如:示例\NO1,按ctrl+A可以全部选择。
点击打开。
同样的方法将数据全部导入。
4)在出现的界面中,选择工具条上的开始按键,将数据导入数据库中。
5)导入数据后,将提示观测时段成功过滤、导入完成。
点击右上角关闭命令快捷键,关闭该对话框。
同样的方法将其他时段数据导入进来,本次将示例中的NO2的数据导入导数据库中。
3、原始数据属性修改1)在原始数据栏中点击每个新任务前的“+”号,可以看到输入的原始数据,该原始数据是按照时间的顺序进行排列的,右击第一个点名,选属性。
玻妞说明书

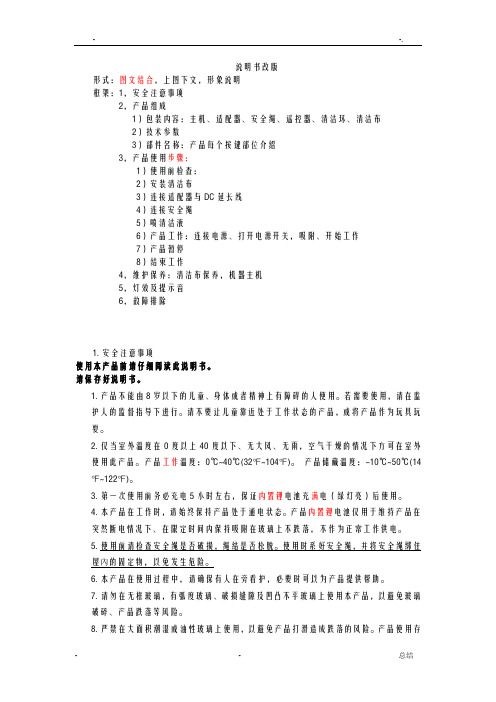
说明书改版形式:图文结合,上图下文,形象说明框架:1,安全注意事项2,产品组成1)包装内容:主机、适配器、安全绳、遥控器、清洁环、清洁布2)技术参数3)部件名称:产品每个按键部位介绍3,产品使用步骤:1)使用前检查:2)安装清洁布3)连接适配器与DC延长线4)连接安全绳5)喷清洁液6)产品工作:连接电源、打开电源开关,吸附、开始工作7)产品暂停8)结束工作4,维护保养:清洁布保养,机器主机5,灯效及提示音6,故障排除1.安全注意事项使用本产品前请仔细阅读此说明书。
请保存好说明书。
1.产品不能由8岁以下的儿童、身体或者精神上有障碍的人使用。
若需要使用,请在监护人的监督指导下进行。
请不要让儿童靠近处于工作状态的产品,或将产品作为玩具玩耍。
2.仅当室外温度在0度以上40度以下、无大风、无雨,空气干燥的情况下方可在室外使用此产品。
产品工作温度:0℃~40℃(32℉~104℉)。
产品储藏温度:-10℃~50℃(14℉~122℉)。
3.第一次使用前务必充电5小时左右,保证内置锂电池充满电(绿灯亮)后使用。
4.本产品在工作时,请始终保持产品处于通电状态。
产品内置锂电池仅用于维持产品在突然断电情况下、在限定时间内保持吸附在玻璃上不跌落,不作为正常工作供电。
5.使用前请检查安全绳是否破损,绳结是否松脱。
使用时系好安全绳,并将安全绳绑住屋内的固定物,以免发生危险。
6.本产品在使用过程中,请确保有人在旁看护,必要时可以为产品提供帮助。
7.请勿在无框玻璃,有弧度玻璃、破损缝隙及凹凸不平玻璃上使用本产品,以避免玻璃破碎、产品跌落等风险。
8.严禁在大面积潮湿或油性玻璃上使用,以避免产品打滑造成跌落的风险。
产品使用存放需远离热源或易燃物。
9.请勿将本产品放在水中或其他液体中,请勿直接对机器喷水,造成电击危险;禁止用潮湿的手触碰插头或产品。
10.高层户外使用本产品时,建议在楼下地面设置危险警示区,禁止人员靠近。
11.产品使用时需确保产品完全吸附在玻璃上方可放手,清洁完毕时先拿下机器再关闭电源。
RTK 测量 地方坐标转换参数计算
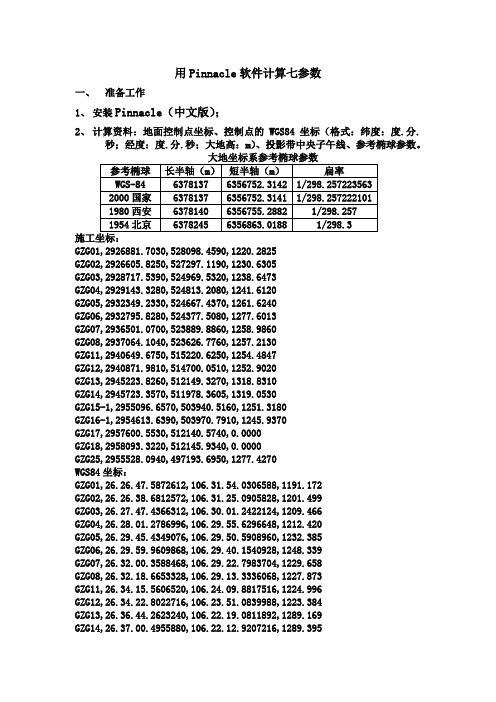
用Pinnacle软件计算七参数一、准备工作1、安装Pinnacle(中文版);2、计算资料:地面控制点坐标、控制点的WGS84坐标(格式:纬度:度.分.秒;经度:度.分.秒;大地高:m)、投影带中央子午线、参考椭球参数。
GZG01,2926881.7030,528098.4590,1220.2825GZG02,2926605.8250,527297.1190,1230.6305GZG03,2928717.5390,524969.5320,1238.6473GZG04,2929143.3280,524813.2080,1241.6120GZG05,2932349.2330,524667.4370,1261.6240GZG06,2932795.8280,524377.5080,1277.6013GZG07,2936501.0700,523889.8860,1258.9860GZG08,2937064.1040,523626.7760,1257.2130GZG11,2940649.6750,515220.6250,1254.4847GZG12,2940871.9810,514700.0510,1252.9020GZG13,2945223.8260,512149.3270,1318.8310GZG14,2945723.3570,511978.3605,1319.0530GZG15-1,2955096.6570,503940.5160,1251.3180GZG16-1,2954613.6390,503970.7910,1245.9370GZG17,2957600.5530,512140.5740,0.0000GZG18,2958093.3220,512145.9340,0.0000GZG25,2955528.0940,497193.6950,1277.4270WGS84坐标:GZG01,26.26.47.5872612,106.31.54.0306588,1191.172GZG02,26.26.38.6812572,106.31.25.0905828,1201.499GZG03,26.27.47.4366312,106.30.01.2422124,1209.466GZG04,26.28.01.2786996,106.29.55.6296648,1212.420GZG05,26.29.45.4349076,106.29.50.5908960,1232.385GZG06,26.29.59.9609868,106.29.40.1540928,1248.339GZG07,26.32.00.3588468,106.29.22.7983704,1229.658GZG08,26.32.18.6653328,106.29.13.3336068,1227.873GZG11,26.34.15.5606520,106.24.09.8817516,1224.996GZG12,26.34.22.8022716,106.23.51.0839988,1223.384GZG13,26.36.44.2623240,106.22.19.0811892,1289.169GZG14,26.37.00.4955880,106.22.12.9207216,1289.395GZG15-1,26.42.05.1545844,106.17.22.5217104,1221.346GZG16-1,26.41.49.4632968,106.17.23.6112432,1215.967GZG17,26.43.26.3253432,106.22.19.1922636,1185.226GZG18,26.43.42.3328224,106.22.19.4031804,1179.367GZG25,26.42.19.1797488,106.13.18.4954800,1247.258二、计算步骤打开Pinnacle(中文版),先建立项目施工椭球参数,具体步骤如下:1、建立转换参考椭球参数选择:坐标系统编辑器——新建椭球:基于WGS84椭球输入:名称、注释(便于区分)、椭球长半轴a=6378137、扁率1/f=298.257223563。
玻妞新版说明书
说明书改版形式:图文结合,上图下文,形象说明框架:1,安全注意事项2,产品组成1)包装内容:主机、适配器、安全绳、遥控器、清洁环、清洁布2)技术参数3)部件名称:产品每个按键部位介绍3,产品使用步骤:1)使用前检查:2)安装清洁布3)连接适配器与DC延长线4)连接安全绳5)喷清洁液6)产品工作:连接电源、打开电源开关,吸附、开始工作7)产品暂停8)结束工作4,维护保养:清洁布保养,机器主机5,灯效及提示音6,故障排除1.安全注意事项使用本产品前请仔细阅读此说明书。
请保存好说明书。
1.产品不能由8岁以下的儿童、身体或者精神上有障碍的人使用。
若需要使用,请在监护人的监督指导下进行。
请不要让儿童靠近处于工作状态的产品,或将产品作为玩具玩耍。
2.仅当室外温度在0度以上40度以下、无大风、无雨,空气干燥的情况下方可在室外使用此产品。
产品工作温度:0℃~40℃(32℉~104℉)。
产品储藏温度:-10℃~50℃(14℉~122℉)。
3.第一次使用前务必充电5小时左右,保证内置锂电池充满电(绿灯亮)后使用。
4.本产品在工作时,请始终保持产品处于通电状态。
产品内置锂电池仅用于维持产品在突然断电情况下、在限定时间内保持吸附在玻璃上不跌落,不作为正常工作供电。
5.使用前请检查安全绳是否破损,绳結是否松脱。
使用时系好安全绳,并将安全绳绑住屋內的固定物,以免发生危险。
6.本产品在使用过程中,请确保有人在旁看护,必要时可以为产品提供帮助。
7.请勿在无框玻璃,有弧度玻璃、破损缝隙及凹凸不平玻璃上使用本产品,以避免玻璃破碎、产品跌落等风险。
8.严禁在大面积潮湿或油性玻璃上使用,以避免产品打滑造成跌落的风险。
产品使用存放需远离热源或易燃物。
9.请勿将本产品放在水中或其他液体中,请勿直接对机器喷水,造成电击危险;禁止用潮湿的手触碰插头或产品。
10.高层户外使用本产品时,建议在楼下地面设置危险警示区,禁止人员靠近。
11.产品使用时需确保产品完全吸附在玻璃上方可放手,清洁完毕时先拿下机器再关闭电源。
PINNACLE操作手册

Pinnacle 用户参考手册北京合众思壮科技有限责任公司目录1.主菜单 (5)1.1 新建工程项目 (5)1.2 打开已建工程项目 (6)1.3 打印形式设置 (7)1.4 解算类型设置 (7)1.5 调用设备编辑对话框 (12)1.6 系统记录 (15)1.7 得解算报告 (15)1.8 坐标系统设置 (16)1.9 坐标转换 (21)1.10 坐标转换用于计算七参数 (22)1.11 大气(对流层、电离层)数据浏览、编辑 (24)1.12 浏览星历数据 (25)1.13 浏览星历图 (27)1.14 新特征 (28)1.15 注册 (28)1.16 帮助 (28)2.整个计算过程 (30)2.1关于New Network (30)2.1.1Track List(跟踪列表) (30)2.1.2 Points List(点列表) (31)2.1.3 Control Data(控制点数据) (32)2.1.3.1 New Control Data List(新建控制点数据列表) (32)2.1.3.2 新建控制点 (33)2.1.4 Import...(从文件导入数据) (35)2.2关于Raw Data Sessions (37)2.2.2 关于Unexpected (37)2.2.2.1Occupation View(查看观测时段) (37)2.2.2.2Properites(属性) (38)2.2.3右击一点号,出现的菜单 (38)2.2.3.1 Epoch View(查看历元数据) (39)2.2.3.2 Raw Data Graph(绘制原始数据图) (40)2.2.3.3 Split..(分割时段) (45)2.2.3.4 Occupation Planning(观测时段计划编制,即星历预报) (46)2.2.3.5Export to RINEX(以RINEX格式输出) (52)2.2.3.6 Properties(属性) (53)2.2.3.7Point properties(点属性) (57)2.2.3.8 Receiver properties(接受机属性) (57)2.2.3.9 Track properties(原始观测数据文件属性) (57)2.3关于Solutions (58)2.3.1Solution Type(解算类型) (58)2.3.2右击New Solutions, Vectors,出现的列表 (59)2.3.2.1Network view(网图) (60)2.3.2.2 Baseline View(查看基线) (60)2.3.2.3 Report(基线解算报告) (66)2.3.2.4 Properties(基线解算属性) (66)2.3.3右击一基线和一点的列表 (68)2.3.3.1 Vector result(基线结果) (68)2.3.3.2 Properties(基线属性) (70)2.3.3.3 Engine properties(设备属性) (70)2.4关于 Subnets (73)2.4.1 Attach Control Point(匹配控制点) (73)2.4.2 Run Adjustment(运行平差) (75)2.4.3 Browse(浏览) (76)2.4.4 Planning(计划) (77)2.4.5 Options(选项) (82)2.4.6 Report(报告) (83)2.4.7 Diagrams(图表) (83)2.4.8 SubNet to Control Points( 把子网中的点加入到控制点中) (85)2.4.9 Properties (属性) (85)1.主菜单1.1新建工程项目点击此图标,出现右面界面,在选定项目保存目录后,按OK结束。
Topcon GPS数据处理软件Pinnacle处理概要

Topcon GPS数据处理软件Pinnacle处理概要Topcon GPS接收机的数据处理软件Pinnacle是一个完全在Windows操作系统下运行的GPS观测数据处理软件,它界面友好,处理过程简单清晰,数据处理中间过程的信息和数据处理结果都有丰富美观的报表输出。
作为一种具有新颖思路的GPS数据后处理软件这里将它的数据处理过程做一简单描述:1.数据下载在数据处理前首先要获得所要处理的接收机数据文件,对于采用Topcon接收机的用户来讲,可以使用随机提供的PC-CDU软件将接收机记录下来的文件传输到计算机的硬盘上。
对于新版的Pinnacle软件在Import (导入观测数据文件)的窗口中增加了数据下载的功能,即可将接收机记录的数据直接读入Pinnacle的数据库中;2.建立工程项目打开Pinnacle,建立新的工程项目,只需将工程项目名称输入,其它的可以不必填写。
确定建立新的工程项目后,软件开始自动运行向导(Wizad),建议将其关闭,采用人工方式。
然后建立新的控制网NewNetwork(新建控制网集),出现从左至右排列的SubNets(网平差栏)、Solutions(基线解算栏)、Raw Data Sessions(原始数据栏)三个方框,实际上我们处理数据的顺序则就是从右向左依次进行的;3.观测文件的导入在新建的控制网上选择Immport(导入数据),在导入数据窗口中选择(本地计算机),找到用PC-CDU下载下来的数据文件,全部选中后点击确定。
然后选择(开始)将所选择的文件导入,关闭导入数据窗口;4.原始观测数据属性的编辑由于大多数用户在使用Topcon接收机做静态测量的时候,采用Minnter控制接收机记录数据,因此点名和天线高等必要的数据不能在测站输入接收机记录的数据中,而将它们记录在野外观测手簿上。
所以,在我们将接收机记录的文件导入Pinnacle后所做的第一件工作就是对照野外记录手簿将Point Name(点名)、天线高和天线高量测方式(垂高、斜高)针对每一次的设站观测Occupation(观测时段)做修改。
Pinnacle软件使用指南共45页

点击从本地计算机导入数据按钮,即 弹出选择原始数据文件的对话框,
导入完成后,主工作区的原始数据栏会出现 一个“新任务”,按F2键可将其改名,比如 每个原始观测时段可起一个名字.
依次将其它时段数据导入
如果是GB-1000接收机,或用手薄控制器在 野外已经输入了点名和仪器高的原始数据文 件,数据导入工作到这一步就全部结束。
后处理软件Pinnacle使用指南
简介
Pinnacle 是一款基于Windows平台的GNSS数据
后处理软件。该软件操作简单,功能强大,适用 于Topcon任何一款GNSS接收机,其使用过程大致可 分为以下五个步骤:
1.数据导入 2.基线解算 3.自由网平差 4.固定控制点平差 5.成果报表输出
4. 约束平差
设置约束平差时的属性
五. 成果报表输出
1. 成果报表
2. WGS84自由网成果报表
topconGPS
谢谢你的阅读
知识就是财富 丰富你的人生
可点击+号展开来查看基线解算的结果及解算信息.
三. 自由网平差
1. 组网.按《规范》要求挑选独 立基线构成GPS控制网,有两种 方法:
A. 将所有独立基线打勾;
B. 将冗余基线打勾,然后选禁用, 再将整体打勾;
将选好的基线整体托拽到网平差栏 即可自动完成组网工作,网平差栏 将出现一个新任务,按F2键可改名
随后,点击天线页,输入天线高,选择天线类型; 依次改完所有文件对应的点名和天线高.
二. 基线解算
在原始数据标题上,按住鼠标左键,将原始数据托拽到基线解算栏, 选择“静态解算模型”,按确定按钮,基线解算栏将出现数据,系 统将自动组成基线.
在基线文件夹上单击鼠标右键,选基线解算, 即可自动完成基线的解算工作。(不管是单 频、双频还是双频双星数据,基线解算均是 全自动进行的,用户无需任何干预,可贵的 是Pinnacle提供了强大的基线干预处理功能)
PINNACLE Studio 12 用户指南说明书

1. Click Pinnacle studio 12 icon to launch the application
2. After the application launched, you should see the screen below, the layout maybe different from what you see here as the application will save the last usage layout, but do not worry the usage still the same.
Front side of PINNACLE USB for Input
Rear side of PINNACLE USB for output
Breakout Box for PINNACLE PCI internal, the breakout box are for the input
Firewire cable for camcorder to PINNACLE Inputs RCA cable for VHS or camcorder that have RCA outputs to PINNACLE Inputs
23. Chose the location that you want the file to be saved in. 24. To do that you click the folder icon as highlighted in orange as shown in the picture below.
3. To start video capturing click on the tab “Capture” 4. As shown in the screen sho Nhomakorabea below
Hollywood 好莱坞 V4.5.8 安装说明
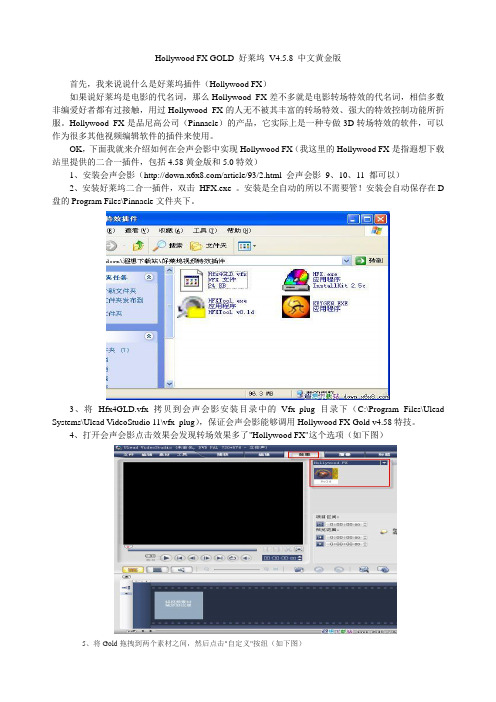
Hollywood FX GOLD 好莱坞V4.5.8 中文黄金版首先,我来说说什么是好莱坞插件(Hollywood FX)如果说好莱坞是电影的代名词,那么Hollywood FX差不多就是电影转场特效的代名词,相信多数非编爱好者都有过接触,用过Hollywood FX的人无不被其丰富的转场特效、强大的特效控制功能所折服。
Hollywood FX是品尼高公司(Pinnacle)的产品,它实际上是一种专做3D转场特效的软件,可以作为很多其他视频编辑软件的插件来使用。
OK,下面我就来介绍如何在会声会影中实现Hollywood FX(我这里的Hollywood FX是指遐想下载站里提供的二合一插件,包括4.58黄金版和5.0特效)1、安装会声会影(/article/93/2.html 会声会影9、10、11 都可以)2、安装好莱坞二合一插件,双击HFX.exe 。
安装是全自动的所以不需要管!安装会自动保存在D 盘的Program Files\Pinnacle文件夹下。
3、将Hfx4GLD.vfx 拷贝到会声会影安装目录中的Vfx_plug目录下(C:\Program Files\Ulead Systems\Ulead V ideoStudio 11\vfx_plug),保证会声会影能够调用Hollywood FX Gold v4.58特技。
4、打开会声会影点击效果会发现转场效果多了"Hollywood FX"这个选项(如下图)5、将Gold拖拽到两个素材之间,然后点击"自定义"按纽(如下图)6、我们会看到它的中文版界面,下来我们该注册了,单击现在注册按纽(如下图)7、打开注册页面我们会看到一组序列号和一组ID号(如下图)8、运行注册机KEYGEN.EXE,按顺序输入此序列号和ID号,算出注册码!单击Enter Y our Keycode填入注册码OK。
9、注册完以后我们还有一个最重要的任务,就是确保Hollywood FX 5中新增的效果可以正常使用,少了这步会漏掉一些效果的下面看方法:(1)打开Hollywood FX 5文件夹(在D:\Program Files\Pinnacle\Hollywood FX 5 里)(2)到该目录下把Effects、Objects、Images三个目录的文件复制到D:\Program Files\Pinnacle\Hollywood FX GOLD 目录相应的文件夹下。
品尼高12新功能说明
Pinnacle Studio Ultimate12主要的新特性和改进有:支持移动视频设备,包括Apple、video iPod和Sony PSP。
现在您可以把自己制作的视频输入到您的iPod、PSP或其他移动设备随身携带 Studio 新的输出功能。
更快的启动速度,大约比老版本快了4倍用不了30秒,您就能打开并进入Studio 12在各个模式间高速切换在编辑过程中点击各个按钮和功能模块,软件将快速的响应,较少等待和反应时间,这将大大提高您的工作效率,节约时间。
减小了35% 的内存占用量。
Studio 12 现在可以工作的更流畅、更稳定。
Pinnacle Studio 12 家族包括三款产品Studio、Studio Plus 和Studio Ultimate,专为视频爱好者和发烧友设计,可满足不同级别用户的需求。
新的Studio 12 家族融入了诸多最新的技术,包括支持新的高清格式AVCHD、微软最新的操作系统Windows Vista 以及新的网络发布功能。
此外还有更全面强大的创作工具,让您方便的共享作品。
Pinnacle Studio Ultimate version 12Pinnacle Studio Ultimate 是Studio 家族的新成员,它集合了Studio Plus 所有功能和精选的专业制作工具,完全整合了专业音频和视频工具。
专为视频发烧友和高级用户而设计,可以满足各种制作需求,让您更加全方位的控制创作质量和视觉效果。
Pinnacle Studio Ultimate 包含了BIAS 公司的SoundSoap? 音频清除工具,来自ProDAD VitaScene 的舞台灯光和电影风格特效,以及用StageTool 进行精细的平移和缩放编辑。
轻松实现专业质量的动画和色键抠像效果。
完整的Pinnacle Studio version 12 产品线增强了诸多性能得以改进用户的视频编辑体验。
品尼高 Liquid Edition 6 [软件介绍](官网转发)
](https://img.taocdn.com/s3/m/d4ad83c9da38376baf1faed6.png)
品尼高Liquid Edition 6 [软件介绍](官网转发)全新广播级视音频编辑和DVD制作解决方案全新广播级视音频编辑和DVD制作解决方案.广播级分量和HDV高清数字输入输出.广播级实时高清和标清编辑.实时DVD格式压缩及编辑,性能高于DC2000,完全替代MPEG压缩卡.USB 2.0即插即用.中文唱词字幕选件为电视剧大量对白字幕制作提供极大便利明智的选择视频编辑系统使你变得更明智。
下面介绍品尼高的Liquid Edition Pro V6,目前功能最强并且最全面的编辑方案。
品尼高Liquid Edition将即插即用与广播领域倍受推崇的品尼高Liquid系列的简单易用相结合。
有了最新的界面选择以及与品尼高的StudioTM相互兼容使Liquid Edition Pro V6功能更强,更易接受。
除了提供专业编辑所需各种编辑性能外,Liquid Edition Pro V6还有稳定的纯HDV实时编辑,SmartRT实时,SmartEDIT多格式编辑,高级音频工具及DVD制作,所有工作都在一个界面下完成。
关键特性1. SmartRT智能实时累计有千种实时SD与HD特技品尼高Liquid 提供了令人难以置信的大量智能实时SD和HD混合编辑特技支持,帮助你完成具有创造性的工作流程。
可多达10层实时特技包括二维、真三维、先进的颜色校正和色度/亮度键特技等等。
使用Liquid 智能实时,你可以充满信心去获取你能获得的所有存储硬件的可用资源,用以强化非常复杂分辨率独立实时的项目。
2.使用SmartEdit智能编辑可实现从SD到HD所有格式的编辑现在,Liquid包括了带可扩充本机支持的智能编辑,适用于同一时间线中的任何SD和HD 格式( DV,MPEG-2 IBP,MPEG-2 I帧,HDV甚至未压缩格式)。
这消除了在用于HDV输出和DVD编著转码时的时间不适及信号损失。
3.集成DVD编著创建向导基于DVD/VCD/SVCD和动作菜单、动作按钮和自动链接,从Liquid 时间线直接使用同样直观易用的界面。
HCP-850 Platinum 电源用户手册说明书

HCP-850 Platinum POWER SUPPLY USER’S MANUALHCP-850 PlatinumAntec’s High Current Pro Platinum series is the pinnacle of power supplies. High Current Pro Platinum is fully modular with a revolutionary 20+8-pin MBU socket for the needs of tomorrow. By using a PSU that is 80 PLUS® PLATINUM certified & ErP Lot 6: 2013, operating up to 94% efficient, you can reduce your electricity bill by up to 25% when compared to many other power supplies. HCP Platinum’s innovative 16-pin sockets create a new level of flexibility by doubling the modular connectivity, supporting two different 8-pins connectors and even future connectors of 10, 12, 14 or 16-pins. Backed by a 7-year warranty and lifetime global 24/7 support, the HCP-850 Platinum embodies everything a power supply can accomplish today.STANDARDS AND FEATURESThe connectors and power specifications of the HCP-850 Platinum PSU are all compatible with ATX12V v2.32 and EPS12V v2.92 specifications. The HCP-850 Platinum features Universal Input, which automatically senses when you connect the power supply to any AC power source between 100 - 240V without setting a voltage switch. This power supply also features Active Power Factor Correction (PFC), which improves the power factor value of the power supply by altering the input current wave shape, helping to power transmission across the grid.SYSTEM PROTECTIONA variety of industrial-grade safety circuitry will help protect your computer: Over Current Protection (OCP), Over Voltage Protection (OVP), Under Voltage Protection (UVP), Short Circuit Protection (SCP), Over Power Protection (OPP), Over Temparature Protection (OTP), Surge & Inrush Protection (SIP), No Load Operation (NLO) & Brown-Out Protection (BOP). Sometimes the PSU will “latch” i nto a protected state. You will need to power off the PSU and clear the fault before it will function again. There are no user-replaceable fuses in your HCP-850 Platinum.MODULAR CABLE JACKSThere are six 5-pin black jacks and five 16-pin black jacks on the back of your HCP-850 Platinum PSU. These jacks are for the optional cables that come with your power supply.Caution: Please connect only cables provided with this HCP-850 Platinum. Other cables may not be compatible!20+8-pin MBU connection You can connect 1 or 2 modular 8-pin cables into any of the 16-pin socketsOC Link™ System InstallationConnect the included O C Link™ cable to two Antec HCP Platinum power supplies. You can use any combination of models such as 850 + 1000 or 1300 + 1300. You can connect any system component to either PSU without restrictions. Please read the chapter “INSTALLATION” for general ins tallation help. Please turn the “I/O” switch on both power supplies to “I” (On). After completion of set-up, simply turn on the system.HCP-850 P. / HCP-1000 P. HCP-1300 P.80 PLUS® CERTIFICATION80 PLUS® certification is the most widely recognizedindependent standard in power supply efficiency. An 80PLUS® certified power supply uses less energy andgenerates less heat to stay cooler, run quieter and lastlonger. The HCP-850 Platinum has been 80 PLUS®PLATINUM certified to be at least 89% efficient at a widerange of operating loads; this will lower your operatingcosts and help protect the environment.POWER OUTPUTTo see the output capacity and regulation for each different voltage, see table 1. TABLE 1ConnectorsINSTALLATIONInstall the PSU into either the top or bottom of your case with the four screws provided. Refer to your case manual if you are unsure where the power supply should be installed.Connect the 24-pin main power connector to your motherboard.Connect the 8-pin or 4+4-pin connector for the CPU. If your motherboard has an 8-pin socket with a cover on some of the openings, we recommend that you remove the cover and use the 8-pinconnector.Note: Please also refer to your motherboards manual for any special instructions.Connect the AC power cord to the power supply AC inlet. Be sure to use the heavy-duty cord suppliedwith your PSU.PCI-E graphics cards use different amounts of power. For some, a single 6-pin connector is sufficient, making the hardwired connector the preferred choice. More powerful cards use multiple connectors, including the advanced 8-pin PCI-E connector. The 8-pin PCI-E connector on the PSU can be used aseither a 6- or 8-pin connector.Hard drives, optical drives (CD/DVD/BluRay™) and other accessories will use either the older 4-pin Molex connector or the newer 15-pin SATA connector. 4-pin Molex connectors have two black, one yellow and one red wire. The SATA connector has an additional orange power wire.When you have all the connections secured, turn the switch on the PSU to the “|” position.Technical Support:/supportUSA & Kanada1-800-22ANTEC*******************Europe+49-(0)40-226-139-22*******************Asia+886 (0)800-060-696 *******************Visit us on Facebook for contests, information & supportUSA & Canada /AntecIncEurope /AntecEuropeUK /AntecUKAustralia & New Zealand /AntecAUIndia /AntecIndiaIsrael /AntecIsraelPhilippines /AntecPHAntec, Inc.47900 Fremont Blvd., Fremont, CA 94538 / USATel: 510-770-1200 - Fax: 510-770-1288©2012 Antec, Inc. All rights reserved.Specifications are subject to change without prior notice. Actual product(s) and accessories may differ from illustrations. Omissions and printing errors excepted. Content of delivery might differ in different countries or areas. Some trademarks may be claimed as the property of others.Reproduction in whole or in part without written permission is prohibited.。
玻妞新说明书

玻妞新说明书 Last updated on the afternoon of January 3, 2021说明书改版形式:图文结合,上图下文,形象说明框架:1,安全注意事项2,产品组成1)包装内容:主机、适配器、安全绳、遥控器、清洁环、清洁布2)技术参数3)部件名称:产品每个按键部位介绍3,产品使用步骤:1)使用前检查:2)安装清洁布3)连接适配器与DC延长线4)连接安全绳5)喷清洁液6)产品工作:连接电源、打开电源开关,吸附、开始工作7)产品暂停8)结束工作4,维护保养:清洁布保养,机器主机5,灯效及提示音6,故障排除1.安全注意事项使用本产品前请仔细阅读此说明书。
请保存好说明书。
1.产品不能由8岁以下的儿童、身体或者精神上有障碍的人使用。
若需要使用,请在监护人的监督指导下进行。
请不要让儿童靠近处于工作状态的产品,或将产品作为玩具玩耍。
2.仅当室外温度在0度以上40度以下、无大风、无雨,空气干燥的情况下方可在室外使用此产品。
产品工作温度:0℃~40℃(32℉~104℉)。
产品储藏温度:-10℃~50℃(14℉~122℉)。
3.第一次使用前务必充电5小时左右,保证内置锂电池充满电(绿灯亮)后使用。
4.本产品在工作时,请始终保持产品处于通电状态。
产品内置锂电池仅用于维持产品在突然断电情况下、在限定时间内保持吸附在玻璃上不跌落,不作为正常工作供电。
5.使用前请检查安全绳是否破损,绳结是否松脱。
使用时系好安全绳,并将安全绳绑住屋内的固定物,以免发生危险。
6.本产品在使用过程中,请确保有人在旁看护,必要时可以为产品提供帮助。
7.请勿在无框玻璃,有弧度玻璃、破损缝隙及凹凸不平玻璃上使用本产品,以避免玻璃破碎、产品跌落等风险。
8.严禁在大面积潮湿或油性玻璃上使用,以避免产品打滑造成跌落的风险。
产品使用存放需远离热源或易燃物。
9.请勿将本产品放在水中或其他液体中,请勿直接对机器喷水,造成电击危险;禁止用潮湿的手触碰插头或产品。
哈马尔Pinnacle直升机用户手册说明书

Peace of mind comes in many forms. It’s knowing you can get up and down stairs on your own. It’s regaining your independence. It’s feeling secure each and every time you ride your stair lift—knowing you don’t have to worry about power outages, or about parking it at a specific spot on the track. It’s knowing you’ve made the best decision and acquired the right stair lift for you. That’s the feeling you get when you own a Pinnacle™ stair lift from Harmar.This energy efficient stair lift is constructed with the “Harmar Difference”— it is simple to operate, durable and lightweight. Surprisingly compact when folded, the Pinnacle™ boasts a unique patented drive system, wireless remotes and intuitive operating controls with indicator lights.This Owner’s Manual should be read and understood in its entirety prior to attempting to operate the equipment. All operating procedures must be followed in order to avoid possible injury and/or property damage.CONTENTSDealer information (3)Technical specifications (3)Stair Lift features (4)Safety features (4)Controls (5)Stair lift operation (5)Battery charger (7)Care and cleaning (7)Hand crank operation (7)Owner information (8)Troubleshooting (8)Warranty (9)DEALER INFORMATIONName: _______________________________________________________________Address: ___________________________________________________________________________________________________________________________________Telephone Number: ____________________________________________________Email: ________________________________________________________________If you have questions concerning the operation or maintenance of your stair lift, please contact your dealer.TECHNICAL SPECIFICATIONSWeight capacity: 350 lbs.Stair angles: 32 - 52 degreesReturn trips/charge: 20 - 60Speed: 19 ft/min.Shipping weight: Approx. 184 lb.Interchangeable arms:YesInterchangeable side to side:YesPower supply: 24 VDC batteryCharger input: 110 VAC; 50 - 60 HzCharger output: 24 VDC; 2 AmpsDrive system: Plastic worm/rackRail:Extruded aluminumPlastic covers:ABS - flame retardantStair Lift and Safety featuresSAFETY FEATURES• There are sensitive edges on the top and bottom of the carriage, and the front, back and underside of the footrest. If any of these edges touches an obstruction the lift will halt immediately and the armrest LED indicator light will turn orange. The lift may only be driven away from the obstruction.An interlock on the swivel seat prevents the lift from being operated unless the seat is in its normal, The safety brake is always engaged.LED indicator light Key lock (optional)ON/OFF switch Call/send unitManual hand crank Charger (located atone end of the rail)CONTROLS• The red “ON/OFF” switch is located on top of the carriage. This switch is normally left in the “ON” position (I). This switch can be turned “OFF” if you do not expect to use the lift for an extended period of time. Ensure that the lift is in the charging position.• The main “UP/DOWN” control switch is located at the front of one armrest. Use this switch for normal operation of the lift while in a seated in a secure position.• There are “UP” and “DOWN” buttons on the remote call/send hand control units.• Three is a three-color LED indicator light on one armrest.• Some units are equipped with an optional key switch located at the back of one armrest. Turn thisoff and remove the key when you want to ensure the lift cannot be used in your absence.STAIR LIFT OPERATIONCAUTION! Do not carry pets or children on your lap while riding the stair lift. The lift is designed for use by only one person at a time.Step 1: To aid entry to the chair, the armrest on the entry side may be raised. When positioning yourself on the seat at the upper landing, ensure the seat is fully swiveled and locked in position for safety. The seat may be swiveled by depressing the swivel release handle on either side of the seat. To turn the stair lift on, press the red “ON/OFF” switch located on the top of the carriage to the “ON” position (I) and ensure that the key switch (if equipped) is “ON.” When the lift is turned “ON” a green light on the armrest will indicate that the lift is ready for use.Step 2: To turn the stair lift on, press the red “ON/OFF” switch located on the top of the carriage to the “ON”CAUTION!Step 3: Ensure that you are securely seated before operating the lift. To operate the lift, continuously press the hand control switch on the side in which you wish to travel.CAUTION! Keep your feet centered on the footrest while traveling up and down the stairs. Never dangle your feet off the footrest while riding the lift.Step 4: If you release the control switch the lift will stop. Continue to press the switch or button all the way to the landing. The lift will gently stop at the appropriate, preset point.Step 5: To safely exit the lift, support yourself by the armrests, rise and step off the footrest. At the upper landing, ensure that the seat is fully swiveled and locked before rising. If you do not intend to use the lift again immediately the seat and armrests may be folded up to minimize obstruction to people walking on the stairs.CAUTION! Use the armrests to assist you when getting on and off the lift.Step 5: To operate the lift remotely, continuously press the appropriate up or down button on the call/send hand control unit. These hand control units are usually attached to a wall at the upper and lower landings of the staircase. Like all infrared devices, the signal may be interrupted if the hand control unit is not in the line of site of the stair lift. If this happens the lift may temporarily stop but restart immediately, as long as the hand remote is pressed continuously.If you are operating the lift remotely on behalf of another person, please ensure that they are securely seated with the seat belt engaged. Always keep the person in line of sight before commencing movement.NOTE:An orange light and single beep indicate that the lift has touched an obstruction and may only be operated in the opposite direction of the obstruction. Clear the obstruction before proceeding.If the light flashes orange and the lift beeps intermittently, the lift has been stopped away from the topfully charged.BATTERY CHARGERThe stair lift should be kept fully charged at all times. When the lift stops at an upper or lower landing it will charge automatically. The charger should be left plugged in at all times and the lift may be left on charge indefinitely, as the charger is intuitive and will not overcharge.CARE AND CLEANINGThe lift should require no technical maintenance to continue to operate at full capability. There is no grease or other lubricants used in the drive system, and no adjustments should be required. However, the lift should be inspected annually. The lift and rail should be kept clean. Dust can build up on surfaces, and soiling may occur. The upholstery and carriage can be cleaned with a damp, soapy cloth followed by a clean, damp cloth. Do not use abrasive cleansers as these can damage the finish. If heavy soiling occurs, clean by scrubbing lightly with a soft brush.HAND CRANK OPERATIONIf your lift fails to operate and the operator does not wish to dismount on the stairway, another person may use the manual hand crank to lower (or raise) the lift to a landing. However please follow the instructions on the bottom safety flap of the lift and turn the lift off. Insert the hand crank into the hole in the lower safety flap until it engages the motor shaft, and turn in the direction indicated.CAUTION! Do not operate the lift with the hand crank engaged.Owner Information and troubleshootingTROUBLESHOOTINGIf your lift does not operate, diagnose the problem by observing the LED indicator light on the armrest and listening to the beeps emitted:• A green light indicates the lift is in operating mode and may be moved in either direction.• An orange light indicates the lift is touching an obstruction and may be operated only in the direction away from the obstruction.• A flashing orange light, accompanied by an intermittent beep for 30 seconds (after a 5 second delay) indicates the lift has been stopped off the charge station. It is recommended that the lift be immediately moved to a charge station (located either end of the rail).• A redrepaired over the phone.。
Pinnacle计划系统操作规程
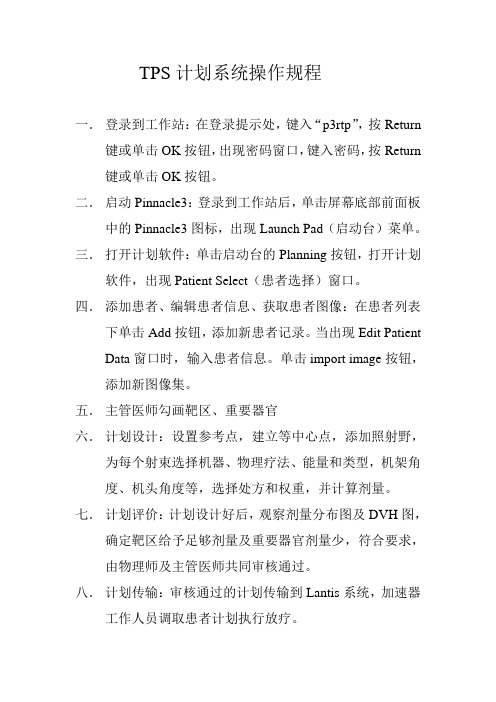
TPS计划系统操作规程
一.登录到工作站:在登录提示处,键入“p3rtp”,按Return 键或单击OK按钮,出现密码窗口,键入密码,按Return
键或单击OK按钮。
二.启动Pinnacle3:登录到工作站后,单击屏幕底部前面板中的Pinnacle3图标,出现Launch Pad(启动台)菜单。
三.打开计划软件:单击启动台的Planning按钮,打开计划软件,出现Patient Select(患者选择)窗口。
四.添加患者、编辑患者信息、获取患者图像:在患者列表下单击Add按钮,添加新患者记录。
当出现Edit Patient Data窗口时,输入患者信息。
单击import image按钮,添加新图像集。
五.主管医师勾画靶区、重要器官
六.计划设计:设置参考点,建立等中心点,添加照射野,为每个射束选择机器、物理疗法、能量和类型,机架角
度、机头角度等,选择处方和权重,并计算剂量。
七.计划评价:计划设计好后,观察剂量分布图及DVH图,确定靶区给予足够剂量及重要器官剂量少,符合要求,由物理师及主管医师共同审核通过。
八.计划传输:审核通过的计划传输到Lantis系统,加速器工作人员调取患者计划执行放疗。
Hollywood FX GOLD 好莱坞 V4.5.8 中文黄金版 [转场特效,配合会声会影使用]
![Hollywood FX GOLD 好莱坞 V4.5.8 中文黄金版 [转场特效,配合会声会影使用]](https://img.taocdn.com/s3/m/f49e3b2ab4daa58da0114ac7.png)
首先,我来说说什么是好莱坞插件(Hollywood FX)如果说好莱坞是电影的代名词,那么Hollywood FX差不多就是电影转场特效的代名词,相信多数非编爱好者都有过接触,用过Hollywood FX的人无不被其丰富的转场特效、强大的特效控制功能所折服。
Hollywood FX是品尼高公司(Pinnacle)的产品,它实际上是一种专做3D转场特效的软件,可以作为很多其他视频编辑软件的插件来使用。
OK,下面我就来介绍如何在会声会影中实现Hollywood FX(我这里的Hollywood FX是指遐想下载站里提供的二合一插件,包括4.58黄金版和5.0特效)1、安装会声会影(/article/93/2.html会声会影9、10、11 都可以)2、安装好莱坞二合一插件,双击HFX.exe 。
安装是全自动的所以不需要管!安装会自动保存在D盘的Program Files\Pinnacle文件夹下3、将Hfx4GLD.vfx 拷贝到会声会影安装目录中的Vfx_plug目录下(C:\Program Files\Ulead Systems\Ulead VideoStudio 11\vfx_plug),保证会声会影能够调用Hollywood FX Gold v4.58特技。
4、打开会声会影点击效果会发现转场效果多了“Hollywood FX”这个选项(如下图)5、将Gold拖拽到两个素材之间,然后点击“自定义”按纽(如下图)6、我们会看到它的中文版界面,下来我们该注册了,单击现在注册按纽(如下图)7、打开注册页面我们会看到一组序列号和一组ID号(如下图)8、运行注册机KEYGEN.EXE,按顺序输入此序列号和ID号,算出注册码!单击Enter Your Keycode填入注册码OK9、注册完以后我们还有一个最重要的任务,就是确保Hollywood FX 5中新增的效果可以正常使用,少了这步会漏掉一些效果的下面看方法:(1)打开Hollywood FX 5文件夹(在D:\Program Files\Pinnacle\Hollywood FX 5 里)(2)到该目录下把Effects、Objects、Images三个目录的文件复制到 D:\Program Files\Pinnacle\Hollywood FX GOLD 目录相应的文件夹下。
NEO9S AG Battery Pack 用户手册说明书

NEO9S/AG Battery PackInstructional ManualTHIS BATTERY SHIPS IN STORAGE MODE.Press the LED button to awaken the battery pack. You may also charge the battery pack full to awaken. Keep in mind some 3rd party chargers will not charge the pack when in storage mode. If the battery is in storage mode(LCD blank), the battery pack is functional, but no smart data transmission will occur.Introduction:Thank you for your choice in purchasing a Core SWX battery pack. The battery is designed to improve and assist you in your mobile powering requirements. This product is at the pinnacle of technological advancements, offering the features and performance of several different products, making it the most advanced battery product in the industry.Please read this manual to help you understand and capitalize on the features of this battery. Features:Features:•RunTime LCD•On-Board Microprocessor stores: Name, Serial Number, Voltage, Temperature, Current, Chemistry Type, Charge Cycles, and Date of Manufacturing.•The Viewfinder Capacity Display communicates with the camera to display your remaining battery capacity in your camera’s viewfinder. This includes Sony, BMD and RED DSMC2 models.•Four Stage, accurate, LED power gauge.•No memory effect.•Temperature, current, and voltage protection.•Rubberized casing provides a shock absorbing, non-slip shell to protect the battery pack.•Incorporated ptap/dtap provides unregulated power(11v-16.8v), as well as a 5v USB.The USB can also be used as a firmware update port.*contact Core SWX for confirmation of battery charger compatibility if using other chargers. Operation:1. Charging the Battery:•CoreSWX HC batteries were designed to be used with CoreSWX chargers. Any other charger may damage the battery and/or the charger. Please contact us before usingother chargers.•CoreSWX batteries can be recharged in any charge condition.•Charge the battery in ambient temperature range of 0o C and 45o C. For best results charge in an environment between 10o C and 35o C. Charging in conditions outside theaforementioned ranges may inhibit the pack from reaching maximum charge capacity.2. Discharging the battery:• Maximum continuous discharge for the is 12A(144W) with a 10second peak discharge rate of16A(192W)• The LCD automatically switches between 3 different phases; Normal RT(based on default 30wh draw), Remaining RT(based on actual draw, when in use), and Remaining Charge Time(whenconnected to a charger).• Press the side LED button for 1 second to activate the backlight feature.• During operation, the battery samples the current entering or exiting the battery in 7 secondintervals. During the charging process, the charge current fluctuates, causing the Charge Timereadings to vary.LED Indication Guide:Overtime the RunTime LCD and power gauge’s accuracy is dependent upon a full charge and discharge. At least once every 2 months the battery should be fully cycled(discharged and echarged) so the battery can relearn the capacity of the battery.Battery Storage:In the event the battery pack won’t be used for an extended period of time, store the battery pack at 40% charged in an environment between 10o C and 35o C. Every two months the battery pack should be fully cycled to reduce the change of self discharge and capacity loss.Reset/restore Function:In the event the battery shuts down, it is possible the battery pack’s protection internal circuitry was activated. To restore the pack, following the steps below:Firmware Update Function:The packs are equipped with a USB port which serves as an 5v output (for charging/powering devices) as well as a firmware update port. In the event of a firmware update, connect a USBA-USBA cable to the battery pack, and a PC or MAC. Once connected, you will see the LED on the bottom of the pack flash RED and GREEN. A folder will present on your Desktop and drag/drop the updated firmware packet into the folder. Firmware updates will take up to 30 seconds, but best to wait 1 minute prior to disconnecting the pack from the computing device. To disconnect, drag the firmware update folder into the Recycle bin, similar to disconnecting a Flash Drive. It is then safe to disconnect the pack from the computing device. Notes on Use:•An increase in temperature is normal during charging and discharging.•Make sure to keep battery contacts clean. •Do not attempt to disassemble the battery. Please contact Core SWX for any service issues.•Keep batteries separated when transporting.•Keep battery pack dry and avoid use in humid environments.NEO9S and NEO9AG Air Transport ComplianceThe battery pack models listed above is suitable for air transport as a non-hazardous article under the regulations of the IATA, the ICAO, and the UN. The packs contain less than 8 grams of equivalent lithium content. This quantity is in compliance with section A45-2* of the Hazardous Substance Standards of the ICAO. TheThe packs are suitable for air transport as a non-hazardous article. * Section A45-2: Lithium cells and lithium batteries are not subject to these instructions if they meet the following requirements: For a lithium ion battery the aggregate equivalent content is not more than 8g.Specification Data:NEO9S: V-mount ConnectionNEO9AG: 3-Stud Mount ConnectionCapacity: 98Wh(14.8v, 6.6Ah)Size: 3.54” x 4.65” x 1.90”Weight: 1.4lbs.Normal Runtime: (25w) 3.6hrs.Load: 16A peak/12A continuousWarranty:This product is warranted to the Original Purchaser against all defects in material and or workmanshipfor the period herein.The warranty period shall be, 2 years for parts and labor, unless otherwise noted. Core SWX agrees to pay equal return freight costs to return the product the same method it was received. In the event of an issue, purchaser agrees to the below RMA procedure.Procedure:1. Go to /repairsreturns and fill out the online form2. Print the RMA number confirmation, and ship the product needing service to Core SWX, LLC.along with RMA number confirmation, and copy of bill of sale.3. All shipments must be done either through UPS or FEDEX, and insured if necessary4. Core SWX, LLC. is not responsible for any lost shipments.Core SWX reserves the right to repair or replace any defective product under warranty after Core SWX determines which is more practical.If Core SWX receives defective product for warranty repair and they are found to be defective as a result of misuse or other damage, not caused by normal wear and tear, Core SWX will notify the customer of an estimate of repair. Customer will incur costs. There are no further warranties, either expressed or implied, including warranties of merchantability or fitness for a particular purpose that has any bearing upon this transaction.91B Commercial St. Plainview NY 11803 USAWeb:Email:*****************Tel: +1 516-595-7488 Fax: +1 516-595-7492Copyright © 2019All rights reservedDisclaimerThe information contained in this manual is believed to be correct at the time of issuance. Core SWX, LLC. reserves the right to make the changes to the information or specifications without obligation to notify any person of such revisions or changes. Changes will be incorporated in new versions of the manual.Core SWX, LLC. reserves the right to make changes to product design and functionality without notification.TrademarksAll product trademarks and registered trademarks are the property of Core SWX, LLC. All other trademarks and registered trademarks are the property of the respective companies.。
- 1、下载文档前请自行甄别文档内容的完整性,平台不提供额外的编辑、内容补充、找答案等附加服务。
- 2、"仅部分预览"的文档,不可在线预览部分如存在完整性等问题,可反馈申请退款(可完整预览的文档不适用该条件!)。
- 3、如文档侵犯您的权益,请联系客服反馈,我们会尽快为您处理(人工客服工作时间:9:00-18:30)。
Pinnacle 软件用户手册(第一版)北京合众拓普科技发展有限公司第一章:Pinnacle中文软件的安装建议Pinnacle软件的安装步骤如下:1、安装Pinnacle软件的英文版2、调入大地水准模型文件(注:当地坐标系统可以不需要安装)3、安装Pinnacle软件中文版(注:安装的路径一定与英文版相同)4、安装软件的帮助文件(注:帮助软件仍是英文版,可以根据自己的情况选择是否安装,建议安装目录与英文版相同)第二章:Pinnacle软件的简易流程一、运行Pinnacle软件Pinnacle 软件安装完后,点击开始\程序\Topcon Positioning System\Pinnacle汉化版,运行Pinnacle 程序,也可双击桌面上的Pinnacle图标。
二、 P innacle内业处理1、工程项目管理1)运行Pinnacle软件后,在出现的对话框,点击新建按钮。
2)在出现的对话框中,选择存储的路径,如要建立新的文件夹,再点击新建,在出现的对话框中输入新的文件夹名称,点击确定,返回到上个界面,点击确定。
3)输入项目名称,如:示例,建议使用项目名称进行管理,点击确定4)点击结束,关闭向导5)点击工具条上的新建控制网按键。
2、原始数据的输入1)在新建控制网上右键选择导入数据命令2)在出现的界面中,选择工具条上的本地计算机按键3)在出现的界面中,选择数据下载的路径,如:示例\NO1,按ctrl+A可以全部选择。
点击打开。
同样的方法将数据全部导入。
4)在出现的界面中,选择工具条上的开始按键,将数据导入数据库中。
5)导入数据后,将提示观测时段成功过滤、导入完成。
点击右上角关闭命令快捷键,关闭该对话框。
同样的方法将其他时段数据导入进来,本次将示例中的NO2的数据导入导数据库中。
3、原始数据属性修改1)在原始数据栏中点击每个新任务前的“+”号,可以看到输入的原始数据,该原始数据是按照时间的顺序进行排列的,右击第一个点名,选属性。
2)在出现的界面中,参考外业手簿上的记录,进行观测数据属性设置,在名称一栏中:输入与真实点名相同的文件名称,如G4,点击新建命令。
3)在出现的界面中,名称栏输入实际点名如:G4,点击确定命令,返回上个界面。
4)在返回的界面中,点击天线面板,在观测高栏前的方框中打上对钩,并根据外业测量的情况选择斜高或垂高,在空白出输入外业量测的仪器高,如:1.532,在类型栏选择外业使用的GPS天线类型JPSLEGANT_E,Hiper接收机选择Top_Hiper_GD,点击确定命令返回。
同样的方法对其他点进行点的属性更改,此过程一定要细心、避免出错。
全部的数据属性更改后,建议使用观测时段列表命令进行复查。
注意:对于在同一个点上观测多次的数据,其点必须从下来列表中进行选择,如图:此时点名列命中确定命令将不可用。
4、基线处理1)点住原始数据栏中的新任务,将它拖到基线解算栏中释放,出现的界面中点中静态解算模型,点击确定。
2)在基线解算栏栏中,右击基线网名,如:新任务,选基线解算。
进行基线处理。
3)在出现基线解算界面,软件自动进行基线处理,当基线处理完毕之后,会出现基线解算信息,点开各项前的+号可查看基线处理信息,这里我们关心的是基线的精度RMS及最好的Ratio值,一般要求在95以上。
对于快速静态测量可以适当放宽,可以根据实际的工程要求进行判别,点击关闭按钮关闭窗口。
如果基线结果不是满意的话,可以参考手册附录一:中的方法进行处理(开窗、删星、高度角设置等),具体的步骤见附录一,最后保证基线精度满足要求。
同样的方法处理其他时段的数据。
5、WGS84无约束平差1)当基线全部处理完后,将所有的基线文件选中(即将每一个基线前的方框中打上对钩)一起拖到网平差栏中释放,右点击新任务,选属性。
2)在平差模型选择自动给出粗差将权,点击确定命令返回钩)一起拖到网平差栏中释放,右点击新任务,选平差计算。
2)平差后,屏幕显示控制网图界面,查看有关的平差信息,我们关心的是测量中的最小二乘的结果必须在限差范围内,对于不能够形成闭合的图形,此项检查可以忽略。
对于超限的结果,可以根据提示的权值,重新进行匹配,集体的步骤参考附录二,平差合格后关闭该界面,返回。
5)平差合格后,返回到主界面,在网平差栏中,右点击新任务,选报表命令。
6)在出现的对话框,点开控制网平差成果表,只选平差的坐标系统一项,点击缺省运行,程序会自动生成WGS84无约束平差的平差结果报表。
第一种方式:进行大范围、长距离、高精度的控制测量,采用的是国家坐标系统。
6、定义地方坐标系统(此过程仅需做一次)1)在工具条上选(坐标系统编辑器)图标。
2)选择椭球面版,点击新建命令建立新的椭球参数,输入新建椭球名称:北京54,北京54椭球相关的参数,a=6378245 ,1/f=298.3,点击确定命令返回。
3)选择基准面版,点击新建命令,在出现的界面中输入基准名称:北京54,并选择椭球名称为北京54,点击确定命令返回。
4)选择平面坐标系统面版,点击新建命令,输入新建的平面坐标系统名称:示例,在点击新建命令,输入中央子午线的名称:111,基准名称选择建立好的北京54基准,点击界面中部的编辑投影命令,进入投影编辑界面,输入起始中央子午线:111,尺度比:1,E偏移值:500000。
点击确定命令只到返回主界面,点击关闭命令关闭该界面,具体步骤参考下列图。
7、在地方坐标系统下做约束平差1)右点击网名选择控制点列表命令。
2)在出现的界面中选择退出命令。
3)在控制点列表界面中,右击左边的空白区,选择新建控制点列表。
4)输入已知控制点表的名称0515,注释栏为空,点击确定。
5)右击新建控制点表,选新建项目-平面坐标,6)在对话框的常规栏目下,输入已知点的点名及坐标:Northing,Easting,Height,高程类型:椭球高或者高;一般选择海拔高,对系统/基准栏,选择新建立好的地方坐标系统的名称,如示例,其它参数均不改,点击确定,同理输入其它已知点的坐标。
输入完后关闭该界面。
7)在网平差栏中,进行地方坐标系统的已知点和WGS84点匹配,右击控制网名,如新任务,选择匹配控制点。
8)一般如果只有一个控制点列表,下面的界面不会出现,直接运行第九步,如果出现选择需要的列表名称,点击确定。
9)在出现的界面中,在左面要匹配的点栏内选择控制点的点名,在右面控制点同样选择控制点名称,点击匹配命令,则控制点被加入到下面的数据库中。
注意:软件自动计算已知点之间的距离误差,该距离不会大于100,如果超限,请检查坐标系统的建立或坐标的输入。
同样的方法加入其他控制点,全部加入后,点击关闭命令,返回。
注意:如果有两个控制点,最好只固定一个点的高程,两个点的平面。
三个以上的控制点,全部固定即可。
8、约束平差1)在网平差栏中右击新任务,并选择属性命令。
2)在出现的界面中选择参数面板,进行如下的配置,该配置为固定模式,点击确定命令返回转换模型:选择地心模型,如果只有两个控制点,请将旋转中E、N前的复选框取消。
约束:选择固定控制点平差系统/基准:选择建立的基准,如:北京54大地水准面:EGM963)在网平差栏中,右点击新任务,选平差计算。
程序自动进行约束平差。
4)在出现的控制网界面,同样要检查最小二乘的情况。
一般可以忽略,关闭返回。
5)右击新任务,选择报表。
6)在该界面,点开控制网平差成果表,选择所选的坐标系统,点击缺省运行。
7)在出现的界面中选择平面坐标和系统/基准中的自己定义坐标系统:示例,点击确定命令。
程序自动生成约束平差的最终结果报表。
至此,用Pinnacle进行Topcon GPS数据处理的全部操作结束。
第二种方式:进行局部范围、短距离、高精度的施工控制测量,采用的是国家坐标系统或地方坐标系统。
6、定义地方坐标系统(此过程仅需做一次)1)在工具条上选(坐标系统编辑器)图标。
,2) 在弹出的对话框中,选择地方坐标系统面板,点击新建命令,在出现的界面中,输入名称:如:示例(地),点击确定命令后,返回上个界面,点击关闭命令,返回主菜单界面。
7、在地方坐标系统下做约束平差1)右点击网名选择控制点列表命令。
2)在出现的界面中选择退出命令。
3)在控制点列表界面中,右击左边的空白区,选择新建控制点列表。
4)输入已知控制点表的名称0515,注释栏为空,点击确定。
5)右击新建控制点表,选新建项目-地方坐标,6)在对话框的常规栏目下,输入已知点的点名及坐标:Northing,Easting,Height,高程类型:椭球高或者海拔高;一般选择椭球高,对系统/基准栏,选择新建立好的地方坐标系统的名称,如示例(地),其它参数均不改,点击确定,同理输入其它已知点的坐标。
输入完后关闭该界面。
7)在网平差栏中,进行地方坐标系统的已知点和WGS84点匹配,右击控制网名,如新任务,选择匹配控制点。
8)一般如果只有一个控制点列表,下面的界面不会出现,直接运行第九步,如果出现选择需要的列表名称,点击确定。
9)在出现的界面中,在左面要匹配的点栏内选择控制点的点名,在右面控制点同样选择控制点名称。
点击匹配命令,则控制点被加入到下面的数据库中。
同样的方法加入其他控制点,全部加入后,点击关闭命令,返回。
注意:如果有两个控制点,最好只固定一个点的高程,两个点的平面。
三个以上的控制点,全部固定即可。
8、约束平差1)在网平差栏中右击新任务,并选择属性命令。
2)在出现的界面中选择参数面板,进行如下的配置,该配置为固定模式,点击确定命令返回转换模型:选择地心模型,如果只有两个控制点,请将旋转中E、N前的复选框取消。
约束:选择固定控制点平差系统类型:地方坐标系统/基准:选择建立的基准,如:示例(地)大地水准面:无3)在网平差栏中,右点击新任务,选平差计算。
程序自动进行约束平差。
4)在出现的控制网界面,同样要检查最小二乘的情况。
一般可以忽略,关闭返回。
5)右击新任务,选择报表。
6)在该界面,点开控制网平差成果表,选择所选的坐标系统,点击缺省运行。
程序自动生成约束平差的最终结果报表。
至此,用Pinnacle进行Topcon GPS数据处理的全部操作结束。
当然,Pinnacle解算的过程不仅仅如此,这仅是数据处理的简单流程。
更进一步的了解软件的功能,需要更进一步的学习掌握。