Weblogic8.1安装部署说明
LINUX_weblogic8.1安装手册
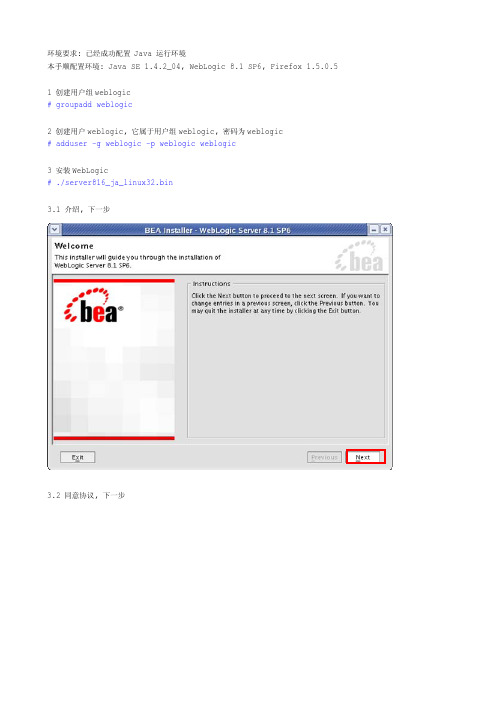
环境要求: 已经成功配置 Java 运行环境本手顺配置环境: Java SE 1.4.2_04, WebLogic 8.1 SP6, Firefox 1.5.0.51 创建用户组weblogic# groupadd weblogic2 创建用户weblogic, 它属于用户组weblogic, 密码为weblogic# adduser -g weblogic -p weblogic weblogic3 安装WebLogic# ./server816_ja_linux32.bin3.1 介绍, 下一步3.2 同意协议, 下一步3.3 选择BEA Home安装路径, 下一步3.4 选择完全安装, 下一步3.5 安装中3.6 选择WebLogic安装路径, 下一步3.7 安装完成, Done4 配置WebLogic# cd /opt/weblogic/bea/weblogic81/common/bin # sh config.sh4.1 创建一个WebLogic配置文件, 下一步4.2 选择配置文件的模板Base WebLogic Server Domain, 下一步4.3 选用默认配置, 下一步4.4 创将管理用户, 用户名:weblogic, 密码:weblogic, 下一步4.5 选择JDK, 选中Sun SDK, 下一步4.6 创建WebLogic 配置文件, 创建4.7 创建成功, Done5 启动WebLogic服务# cd /opt/weblogic/bea/user_projects/domains/mydomain/ # sh startWebLogic.sh6 部署WebLogic打开浏览器, 访问路径http://localhost:7001/console6.1 输入用户名和密码跳至步骤6.46.3 为Firefox安装Java Applet插件. 打开一个新的终端, 执行如下命令# ln -s /usr/java/j2sdk1.4.2_04/jre/plugin/i386/ns610-gcc32/libjavaplugin_oji.so/usr/lib/firefox-1.5.0.5/plugins然后刷新页面…6.4 部署一个Web应用程序6.5 上传war包(以struts-examples-1.3.5为例)6.6 选择项目6.7 部署6.8打开浏览器, 访问路径http://localhost:7001/struts-examples-1.3.5, 如出现下图网页, 部署成功7 反部署打开浏览器, 访问路径http://localhost:7001/console7.1 选择需要反部署的项目, 点击Stop按钮7.2 移除这个项目。
WEBLOGIC的安装、配置和启动
WEBLOGIC的安装、配置和启动WEBLOGIC的安装、配置和启动⼀、软件安装1. 安装前的准备⼯作1.1 ⾸先请确认您要安装的WebLogic版本所在的平台已通过了BEA的认证,完整的认证平台列表请参考1.2 确定⼀个安装⽬录,建议该⽬录下⾄少有1个G的空间,可单独创建个逻辑卷和⽂件系统1.3 创建⼀个BEA⽤户组帐号1.4 创建⼀个weblogic⽤户帐号2. 安装步骤WebLogic在AIX平台下的安装⽅法⼀般有三种:图形窗⼝模式,控制台模式,⽆⼈守护安装模式。
由于控制台模式的使⽤最为⼴泛且不受任何其它硬件条件的限制(所以我们这⾥只介绍控制台安装模式。
2.1 安装JRE环境WebLogic安装程序需要JRE的⽀持,根据安装平台的不同,WebLogic的安装介质也分为两类,⼀种⾃带了JRE(后缀名为.bin),⼀种需要下载平台⼚商所提供的JRE环境(后缀名为.jar),以WebLogic Server 8.1 with SP2为例,⽬前所⽀持的UNIX/LINUX平台如下所⽰(截⽌2004.2.23) WebLogic Server 8.1 with SP2⽀持平台是否⾃带JDKHP-UX (11.0,11.i, PA-RISC) YESSun Solaris (8, 9, SPARC) YESRed Hat Enterprise Linux (2.1, Pentium) YESRed Hat Enterprise Linux (2.1, Itanium) YESSuSE SLES (8, Pentium) YESUnited Linux (1.0, Pentium) YESIBM AIX (5.1, 5.2) NO⾸先要下载和操作系统以及WEBLOGIC相匹配JDK版本,最好是经过BEA认证的版本。
可查询以下链接;在AIX上安装JDK要注意以下步骤:安装后要修改环境变量/etc/environment⽂件,将PATH中Java部分更改为新安装的Java版本(Java131或Java14),并重新Login后⽣效!否则系统会使⽤原有的Java130环境,在安装weblogic7.0以上版本时会⾃动退回到提⽰符下。
linux下weblogic集群部署
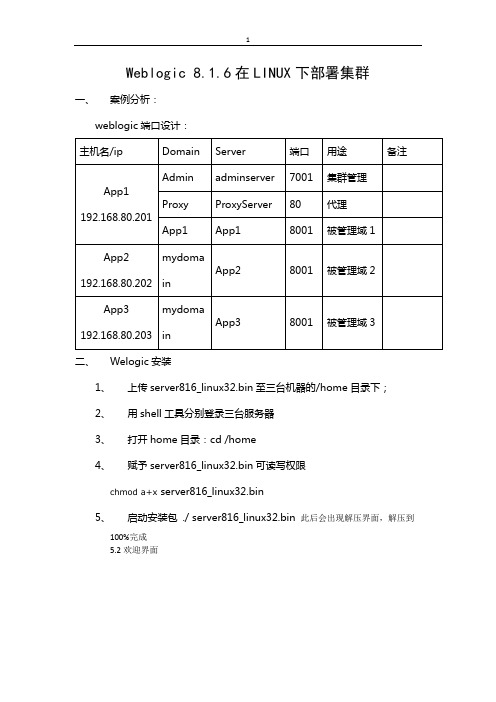
Weblogic 8.1.6在LINUX下部署集群一、案例分析:1、上传server816_linux32.bin至三台机器的/home目录下;2、用shell工具分别登录三台服务器3、打开home目录:cd /home4、赋予server816_linux32.bin可读写权限chmod a+x server816_linux32.bin5、启动安装包 ./ server816_linux32.bin 此后会出现解压界面,解压到100%完成5.2欢迎界面直接回车即可出现lience界面,输入“1”,回车;5.3选择BEA 主目录输入“/weblogic/bea”,回车即可。
2.4 选择安装类型选择12.5选择产品的安装目录默认即可,直接回车2.6等待安装2.7等待安装JDK2.8完成安装回车后,安装过程会清除安装过程中的临时文件。
三、Linux系统及weblogic部分系统参数修改1、用FTP工具分别登录三台服务器2、打开下载etc目录下的hosts、exports及/etc/security下的limits.conf3、在hosts文件中加入192.168.80.202 app2192.168.80.201 app1192.168.80.203 app34、在exports文件中加入* 192.168.80.201(rw,sync)* 192.168.80.202(rw,sync)* 192.168.80.203(rw,sync)5、在limits.conf文件末尾中加入* soft nproc 8192* hard nproc 16384* soft nofile 8192* hard nofile 65536* soft nproc 16384 * hard nproc 32768 * soft nofile 16384 * hard nofile 655366、重启服务器 reboot四、创建域:1、/home/weblogic/bea/weblogic81/common/bin目录中的 config.sh 文件,会出现是创建还是扩展域的提示页面,选择第一个,创建一个新的域2、系统会提示选择模板注意选择Basic Weblogic Server Domain,每次的顺序可能不一样,选择数字的时候要注意3、系统会出现是否使用快速模式选项,建议选择非快速模式“2”。
weblogic8.1部署

Weblogic8.1部署步骤1、登录Weblogic服务器初次部署的时候,登陆到Weblogic控制台地址●登录地址:例如weblogic服务器本机http://192.168.0.11:7002/console●初使用户名:weblogic●初使密码为:weblogic2、建立连接缓冲池(connecting pools)2.1、选择配置新的连接缓冲池( JDBC Connection Pool...)打开Weblogic控制台>>mydomain>>服务>>JDBC>>连接缓冲池>>配置新的连接缓冲池,详见下图。
2.2、选择数据库类型及数据库驱动:(oracle)●数据库类型:选择Oracle●数据库驱动程序:选择other如图:2.3、选择完成后点击“continue”系统会连接到建立连接池的页面建立连接池方法如下:●Driver Classname:oracle.jdbc.OracleDriver●URL:jdbc:oracle:thin:@192.168.0.17:1522:orcl2●Database User Name:gjjmx12_dy●Password:adminconnect●注意:如果是sysbase数据库创建缓冲池时,在properties出填写“charset=cp936”●点“test driver configuration”进入下个页面。
●然后点“creat and deploy”按钮,完成布置。
3、建立数据源(data sources)打开Weblogic控制台>>mydomain>>服务>>JDBC>>数据源>>配置新的JDBC Data Source3.1、选择配置新的JDBC Data Source●NaME:可自行编写(一般更程序名一致)。
WebLogic配置及简介
WebLogic 8.1 配置及使用简介一、WebLogic 8.1 配置a)开始->程序->Bea WebLogic Platform 8.1-> Configuration Wizard”,启动Configuration Wizard工具。
b)选择“新建WebLogic配置”,单击“下一步”。
c)选择“Basic WebLogic Server Domain”,单击“下一步”。
d)选择“快速”,单击“下一步”。
e)输入“User name”和“password”,单击“下一步”,密码需要8位以上f)选择作为Window服务,单击“下一步”。
g)默认设置,单击“下一步”。
h)选择开发模式,JDK选择Bea WebLogic默认安装JDK 1.4.2。
单击“下一步”。
i)默认值设置,可以修改配置名,单击“创建”。
j)选择“启动管理服务器”,单击“完成”。
k)开始->程序->Bea WebLogic Platform 8.1->User Projects->mydomain或其它域名->start serverl)打开http://127.0.0.1:7001/console,使用用户名和密码登录管理页面了。
二、应用程序的部署注意部署的应用程序只能使用JDK1.4.2版本编译,使用JDK1.5编译的Servlet会有问题。
a)部署方式1⏹部署→Web应用程序模块→部署新的Web应用程序模块⏹选择“上传文件”链接,选择打包好的web应用文件W AR文件,点击“上传”⏹选中upload下的刚才上传的war文件⏹点击“目标模块”按钮发布→部署⏹可以打开刚才部署的模块进行测试b)部署方式2直接把符合规范的应用拷贝到mydomain\applications目录下,适合开发c)部署方式3直接在部署时选择某个应用即可发布,适合开发三、数据库连接池的配置a)配置数据库链接池⏹服务→JDBC→连接缓冲池,点击配置新的JDBC Connection Pool... 选择合适的驱动程序:⏹数据类型:MS SQL Server⏹驱动程序:Microsoft’s MS SQL Server (Type 4 ) version 2000⏹微软的三个Jar拷贝到JDK1.4.2->jre->lib->ext下或者添加到类变量中也可b)配置数据源⏹服务→JDBC→数据源→⏹输入合适的jndi名称⏹选择数据库连接池四、WebLogic的目录结构BEA主目录JDKJRocket:BEA自己的虚拟机,只在某些系统上有该产品安装日志附加的工具jar文件:WebLogic Server根目录license.bea许可证文件,license信息,xml文件格式,包括产品组件,cpu数,并发数,过期时间,license类型,组件的校验码等等,学习版本会有限制,正式版本中需要购买许可证文件替换这个文件,如果购买了新的组件也需要更新这个文件。
linux 下安装weblogic8

linux 下安装weblogic8.1一:首先下载() platform812_linux32.bin二:安装weblogic1: [root@linuxweb home]# mkdir bea2: [root@linuxweb /]# chmod a+x platform812_linux32.bin3: [root@linuxweb /]# ./platform812_linux32.bin - i console (以终端模式安装,如果图型安装就不需要– I console ) 4: 休息一会儿,喝杯茶………………..100%5:Extracting 0%....................................................................................................100%Illegal argument: -Illegal argument: iIllegal argument: consoleUnable to instantiate GUI, defaulting to console mode.<--------------------------------- BEA Installer - WebLogic Platform 8.1 SP2 -------------------------------->Welcome:--------This installer will guide you through the installation of WebLogic Platform 8.1 SP2. Type "Next" or enter toproceed to the next prompt. If you want to change data entered previously, type "Previous". Y ou may quit the installer at any time by typing "Exit".Enter [Exit][Next]> N6: Select Option:1 - Y es, I agree with the terms of the license2 - No, I do not agree with the terms of the licenseEnter option number to select OR [Down][Exit][Previous]>17:Choose BEA Home Directory:--------------------------"BEA Home" = [/root/bea]Input new BEA Home OR [Exit][Previous][Next]>/home/bea (安装目录)8: Choose BEA Home Directory:--------------------------*BEA home choice->1|Y es, Use this BEA home directory [/home/bea]2|No, return to BEA home directory selectionEnter index number to select OR [Exit][Previous][Next]>19: Choose Install Type:--------------------->1|Complete|Install the complete BEA WebLogic Platform.2|Custom Installation|Choose software components to install and perform optional configuration.Enter index number to select OR [Exit][Previous][Next]>110: Choose Product Directory:-------------------------"Product Installation Directory" = [/home/bea/weblogic81]Input new Product Installation Directory OR [Exit][Previous][Next]>next11: Choose Product Directory:-------------------------->1|Y es, use this product directory [/home/bea/weblogic81]2|No, select another product directoryEnter index number to select OR [Exit][Previous][Next]>next12:去上个卫生间,继续休息一会,等待安装完成………..13:<--------------------------------- BEA Installer - WebLogic Platform 8.1 SP2 -------------------------------->Installing JDK....0% 25% 50% 75% 100%[------------|------------|------------|------------][***************************************************]14:[root@www /home]# cd bea/weblogic81/server/bin/15: [root@www bin]# ./startWLS.sh16: ie中测试:http://www.192.168.60.111:70001:console。
Bea Weblogic Server V8.1Sp2在Windows Ser ver 2003中安装的步骤
Bea Weblogic Server的安装步骤目录1.weblogic主程序的安装2.说明环境:操作系统:Windows Server 2003 Enterprise Edition Sp1Weblogic server:weblogic Server 8.1 Sp2正文1.双击Weblogic Server的安装程序:2.准备工作结束后,出现具体版本号,然后跳过具体版本号,进入Weblogic Server V8.1 Sp2的安装引导界面,点击下一步:3.是否同意许可,选择是。
4.选择Bea主目录的安装路径5.点击下一步,选择安装的类型,这里选择完全:6.点击下一步,并选择成品安装目录7.点击下一步,开始安装。
8.安装完成后的成功页面,如下:如何需要安装XML Spy的可以把前面的方框勾上,点击完成就会开始安装XML Spy。
这里选择不安装。
说明:1、安装过程中,没有出现任何的错误信息,说明weblogic server成功安装。
2、在bea主目录下的文件夹代表的意思分别是:Ext_componets------------------配合weblogic server使用的组成部分,组件。
Jdk141_05-----------------------Sun Java 2 SDK的1.4.1版本,1.4.1指明安装在机器上的Sun SDK版本。
Jrockit81sp2_141_05------------Weglogic JRockit SDK.1.4.1指明了安装在机器上的版本。
Logs--------------------------------存放weblogic server使用过程中所产生的日志。
User_projects---------------------存放用户定义的用户工程。
Utils--------------------------------包含支持安装所有BEA Weblogic 品台产品的有用工具。
Weblogic 8.1的安装与配置.doc,我自己整理的,可用
Weblogic 8.1的安装与配置2009年04月08日星期三22:33下面通过设置几个标题来说明Weblogic 8.1的安装与配置,并给出简单的对配置的测试。
下载可以从地址/pub/platform/81/platform814_zh_CN_win32.exe下载Weblogic 8.1 SP4,得到软件。
安装首先启动安装文件platform814_zh_CN_win32.exe,如图所示:在安装的过程中,主要有如下选择步骤:1、选择是否同意BEA许可条款;2、选择BEA主目录,我选择了D:\bea作为主目录;3、选择安装组件:全部安装主要安装了Webogic Server、Webogic Workshop、Webogic Portal、Webogic Integration这四个组件,可以自定义;安装完成,如图所示:配置选择“开始”->“程序”->“BEA WebLogic Platform 8.1”->“Configuration Wizard”,如图所示:选择“新建Weblogic配置”,单击“下一步”,如图所示:默认选中“Basic Weblogic Server Domain”,单击“下一步”,如图所示:选择自定义配置,单击“下一步”,如图所示:配置服务器,这里修改Name为snserver,其他根据自己的需要设置,单击“下一步”,如图所示:选择“否,单击“下一步”,如图所示:选择“否,单击“下一步”,如图所示:选择“否,单击“下一步”,如图所示:配置管理用户名和密码,下面选择“否,单击“下一步”,如图所示:保持默认选项,单击“下一步”,如图所示:保持默认选项,单击“下一步”,如图所示:选择Java的JDK,选择BEA自带的,单击“下一步”,如图所示:设置域名为sndomain,单击“创建”,创建并完成配置,如图所示:上面是详细的简单的配置。
测试启动上面我们配置的Weblogic Server,按照下图所示的启动路径,启动snserver,如图所示:可以看到启动成功的CMD窗口,如图所示:这时,可以通过登录Web console,方便地管理Weblogic Server。
WebLogic 8[1].1安装手册
![WebLogic 8[1].1安装手册](https://img.taocdn.com/s3/m/4c80d3d380eb6294dd886c97.png)
WebLogic Server 8.1安装文档1. 安装前的准备工作(SUN操作系统不需要重新下载jdk)操作系统平台:IBM AIX 5.2WebLogic版本:WebLogic Server 8.1sp31.1 首先请确认您要安装的WebLogic版本所在的平台已通过了BEA的认证,完整的认证平台列表请参考/platform/suppconfigs/configs81/81_over/overview.html1.2 确定一个安装目录,建议该目录下至少有1个G的空间,可以使用du来察看磁盘空间的使用情况在本项目中使用/home/bea目录进行安装。
1.3 从ibm网站上获取适合版本的jdk:/developerworks/java/jdk/aix/service.html然后安装此jdk2. 安装步骤WebLogic在UNIX平台下的安装方法一般有三种:图形窗口模式,控制台模式,无人守护安装模式。
在本例中采用图形窗口模式进行安装2.1 获取并上传weblogic安装介质到一个临时目录如果手头没有安装介质,我们可以到/上下载一个WebLogic试用版,然后通过FTP上传到主机上的一个tmp目录,该临时目录建议至少有1个G的剩余空间2.3 开始安装2.3.1 .jar的安装方法(sun系统请使用.bin的安装方法)用root用户登录系统,并赋予.jar可执行权限chmod a+x pj_server813_generic_ibm.jar使用命令Java –jar pj_server813_generic_ibm.jar2.3.2 .bin的安装方法用root用户登录系统,并赋予.bin可执行权限chmod a+x solaris64.bin使用命令./solaris64.bin开始安装WebLogic Server,此时会出现图形界面点击NextY es选择安装目录为F盘完全安装,Next:Next即开始安装:Installing……Done到此,WebLogic Server就安装完成,其他机器的安装相同。
weblogic 8.1.6 for linux安装

Linux AS 4 下WebLogic 安装注意: 配置文字可能有所不同,请按照文字说明信息操作.1.1 部署前准备把WebLogic的bin包放在/home目录上.1、创建weblogic用户组。
groupadd weblogicuseradd -g weblogic weblogicpasswd weblogic(修改weblogic密码)2、创建/var/web/jsp/bea目录,修改目录所有者权限mkdir /var/web/jsp/beachown –Rf weblogic:weblogic /var/web/jsp/bea3、用weblogic用户登陆系统,修改配置文件。
vi ~/.bash_profile增加export LANG=en_US.iso8859151.2 安装WebLogic 8.1页脚内容1赋予.bin可执行权限:chmod a+x weblogic_server816_linux32.bin 执行./weblogic_server816_linux32.bin -mode=console进入控制台安装的欢迎界面,键入[Next]继续此时出现授权许可协议,读完后键入[Yes]继续提示选择一个BEA主目录:输入:/var/web/jsp/bea确认BEA主目录,键入[1]继续选择安装类型, 键入[1]继续选择安装路径,默认,输入[next]继续。
确认安装路径。
键入[1]继续安装完毕。
注:(两个补丁文件见补丁包的说明)1.3 创建服务使用WebLogic用户登录系统:[weblogic@jcms bin]$ cd /var/web/jsp/bea/weblogic81/common/bin页脚内容2[weblogic@jcms bin]$ ./config.shUnable to instantiate GUI, defaulting to console mode.进入设置:<-------- BEA WebLogic Configuration Wizard -------------->Create or Extend a Configuration:---------------------------------Choose between creating and extending a configuration. Based on your selection, the Configuration Wizard guides you through the steps togenerate a new or extend an existing configuration.->1|Create a new WebLogic configuration| Start here to create a WebLogic configuration in your projects directory.2|Extend an existing WebLogic configuration| Start here to extend an existing WebLogic configuration. Use this option to add applications and services, including Database页脚内容3| access (JDBC) and Messaging (JMS). This option also enables you to extend functionality by enabling WebLogic Workshop.Enter index number to select OR [Exit][Next]> 1<-------------------------------- BEA WebLogic Configuration Wizard ----------------------->Select a Domain Template:-------------------------Please select a template from the list or select another directory of templates.*[/home/weblogic/bea/weblogic81/common/templates/domains]1|Basic WebLogic Platform Domain 8.1.3.0| BEA Systems, Inc.| Create a basic WebLogic Platform domain, without installing sample applications. Domains created from this template will support the页脚内容4|WebLogic Server, WebLogic Workshop, WebLogic Integration and WebLogic Portal runtime functionality, including support for J2EE|applications, Web applications, Web Services, custom controls, business processes and portals. Use domains created from this template|for development of WebLogic Platform applications.2|Basic WebLogic Portal Domain 8.1.3.0| BEA Systems, Inc.| Create a basic WebLogic Portal domain, without installing sample applications. Domains created from this template will support the|WebLogic Server, WebLogic Workshop and WebLogic Portal runtime functionality, including support for J2EE applications, Web applications,|Web Services, custom controls and portals. Use domains created from this template for development of WebLogic Portal applications.3|Basic WebLogic Integration Domain 8.1.3.0| BEA Systems, Inc.| Create a basic WebLogic Integration domain, without installing sample applications. Domains created from this template will support页脚内容5|the WebLogic Server, WebLogic Workshop and WebLogic Integration runtime functionality, including support for J2EE applications, Web|applications, Web Services, custom controls and business processes. Use domains created from this template for development of WebLogic|Integration applications.4|Basic WebLogic Workshop Domain 8.1.3.0| BEA Systems, Inc.Enter index number to select OR [Down][Exit][Previous][Next]> down<---------------------- BEA WebLogic Configuration Wizard ---------------------------->Select a Domain Template:-------------------------Please select a template from the list or select another directory of templates.页脚内容6| Create a basic WebLogic Workshop domain, without installing sample applications. Domains created from this template will support the |WebLogic Server and WebLogic Workshop runtime functionality, including support for J2EE applications, Web applications, Web Services and |custom controls. Use domains created from this template for development of WebLogic Workshop applications.->5|Basic WebLogic Server Domain 8.1.3.0| BEA Systems, Inc.| Create a basic WebLogic Server domain without installing sample applications.6|WebLogic Server Examples Domain 8.1.3.0| BEA Systems, Inc.| Create the WebLogic Server Examples domain in a directory outside of the installed kit. The Examples domain contains a collection of|examples to show best practices for coding individual J2EE APIs.7|Avitek Medical Records Sample Domain 8.1.3.0| BEA Systems, Inc.| Create the Avitek Medical Records domain in a directory outside of the installed kit. The Avitek Medical Records is a WebLogic Server |sample application suite that concisely demonstrates all aspects of the J2EE platform.页脚内容78|Select another directory locationEnter index number to select OR [Up][Exit][Previous][Next]>5<--------------------- BEA WebLogic Configuration Wizard --------------------->Select a Domain Template:-------------------------Please select a template from the list or select another directory of templates.*The selected template is the same as the one you are working on. Do you *want to reload the template ?->1|Yes2|No页脚内容8Enter index number to select OR [Exit][Next]> 1<------------------------- BEA WebLogic Configuration Wizard ------------------------->Choose Configuration Option:-------------------------*Do you want to run the wizard in express mode?->1|Yes2|NoEnter index number to select OR [Exit][Previous][Next]> 1<------------------------- BEA WebLogic Configuration Wizard ------------------------->Configure Administrative Username and Password:--------------------页脚内容9Create a user automatically assigned to the Administrative Role. This user is the default administrator used to start development modeservers.| Name | Value |_|_________________________|_________________________________|1| *User name: | weblogic |2| *User password: | |3| *Confirm user password: | |4| Description: | The default administration user |Select Option:1 - Modify "User name"2 - Modify "User password"3 - Modify "Confirm user password"4 - Modify "Description"Enter option number to select OR [Exit][Previous][Next]> 2页脚内容10<------------------------- BEA WebLogic Configuration Wizard ------------------------->Configure Administrative Username and Password:--------------------Create a user automatically assigned to the Administrative Role. This user is the default administrator used to start development modeservers."*User password:" = []Input new *User password: OR [Exit][Reset][Accept]> [输入八位密码]<------------------------- BEA WebLogic Configuration Wizard ------------------------->Configure Administrative Username and Password:--------------------页脚内容11Create a user automatically assigned to the Administrative Role. This user is the default administrator used to start development modeservers.| Name | Value |_|_________________________|_________________________________|1| *User name: | weblogic |2| *User password: | ****** |3| *Confirm user password: | |4| Description: | The default administration user |Select Option:1 - Modify "User name"2 - Modify "User password"3 - Modify "Confirm user password"4 - Modify "Description"5 - Discard Changes页脚内容12Enter option number to select OR [Exit][Previous][Next]> 3<------------------------- BEA WebLogic Configuration Wizard ------------------------->Configure Administrative Username and Password:--------------------Create a user automatically assigned to the Administrative Role. This user is the default administrator used to start development modeservers."*Confirm user password:" = []Input new *Confirm user password: OR [Exit][Reset][Accept]> [确认八位密码] ///口令必须与上面的一样<------------------------- BEA WebLogic Configuration Wizard ------------------------->Configure Administrative Username and Password:--------------------页脚内容13Create a user automatically assigned to the Administrative Role. This user is the default administrator used to start development modeservers.| Name | Value |_|_________________________|_________________________________|1| *User name: | weblogic |2| *User password: | ******** |3| *Confirm user password: | ******** |4| Description: | The default administration user |Select Option:1 - Modify "User name"2 - Modify "User password"3 - Modify "Confirm user password"页脚内容144 - Modify "Description"5 - Discard ChangesEnter option number to select OR [Exit][Previous][Next]> next<------------------------- BEA WebLogic Configuration Wizard ------------------------->Domain Mode Configuration:--------------------------Enable Development or Production Mode for this domain.->1|Development Mode2|Production ModeEnter index number to select OR [Exit][Previous][Next]> 2页脚内容15<------------------------- BEA WebLogic Configuration Wizard ------------------------->Java SDK Selection:-------------------->1|JRockit SDK 1.4.2_04-8130 @ /home/weblogic/bea/jrockit81sp3_142_04 2|Sun SDK 1.4.2_04 @ /home/weblogic/bea/jdk142_043|Other Java SDKEnter index number to select OR [Exit][Previous][Next]> 1<------------------------- BEA WebLogic Configuration Wizard ------------------------->Select the target domain directory for this configuration:----"Target Location" = [/home/weblogic/bea/user_projects/domains]Input new Target Location OR [Exit][Previous][Next]> [直接回车]页脚内容16<------------------------- BEA WebLogic Configuration Wizard ------------------------->Edit Domain Information:------------------------| Name | Value |_|________|__________|1| *Name: | mydomain |Enter value for "Name" OR [Exit][Previous][Next]> [输入名称或者直接回车] <------------------------- BEA WebLogic Configuration Wizard -------------------------> Creating Domain...0% 25% 50% 75% 100%[------------|------------|------------|------------]页脚内容17[***************************************************]**** Domain Created Successfully! ****完成服务的建立!1.4 部署应用1.4.1 启动和关闭1、如何启动WebLogic[weblogic@jcms bin]$ cd /var/web/jsp/bea/user_projects/domains/mydomain [weblogic@jcms bin]$ ./startWebLogic.sh (需要输入用户名密码)2、如何关闭WebLogic[weblogic@jcms bin]$ ./stopWebLogic.sh1.4.2 设置自动启动WebLogic1、无需输入用户名密码启动关闭weblogic。
第2章 BEA WEBLOGIC8.1安装配置说明

第2章BEA WEBLOGIC8.1安装配置说明§2.1 BEA 安装向导在WebLogic Platform 8.1安装文件根目录下, 找到并单击执行文件server810_win32,出现如下图所示界面:图2-1-1初始化窗口上图是安装初始化页面,完成后,自动出现如图2-1-2所示窗口:图2-1-2 欢迎窗口图2-1-2是WebLogic Platform 8.1欢迎界面,如退出安装请点击“Exit”,点击“Next”,东软检察业务综合管理信息系统3.0用户手册进入图2-1-3所示窗口继续安装:图2-1-3 BEA License 协议选择“Yes”接受协议,此时“Next”键变成有效,单击进入下一步安装:图2-1-4 选择 BEA 安装根路径第2章BEA WEBLOGIC8.1安装配置说明在图2-1-4中,在左上栏默认选择“Create a new BEA Home”, 在“BEA Home Directory”栏的文本框中可以直接输入WebLogic Platform 8.1的安装目录,也可通过文本框下面的“Browse”键和“Reset”键来选择,其中“Reset”键功能是恢复显示上一次文本框中路径。
确认输入正确路径后,单击“Next”进入下一步安装:图2-1-5 选择安装类型在图2-1-5所示窗口中,有两种安装类型可供选择,选择“Custom Installation(自定义安装)”,单击“Next”,进入下一步安装:东软检察业务综合管理信息系统3.0用户手册图2-1-6 选择安装的组件图2-1-6中有多个组件供选择安装,选择“WebLogic Server->Server”,如上图所示,确认后,单击“Next”进入下一步安装:图2-1-7 选择产品安装路径在图2-1-7中,选择产品安装路径,可以通过“Browse”键和“Reset”键另行第2章BEA WEBLOGIC8.1安装配置说明选择,建议使用默认路径:BEA Home Directory\weblogic81,确认后,单击“Next”进入下一步安装:图2-1-8 安装Node Manager图2-1-8中,有两个选择项,选择下面一项,即“No,do not install now. See product documentaion for post-install registration of Node Manager as Windows Service”,如上图所示,确认后,单击“Next”进入下一步安装:东软检察业务综合管理信息系统3.0用户手册图2-1-9 BEA WebLogic Platform 8.1图2-1-9是BEA WebLogic Platform 8.1的安装窗口,右下角进度条即是安装进度说明,等待安装进度条满时,自动跳入到图2-1-10所示窗口:2-1-10 安装结束图2-1-10显示安装成功信息,即Message:Congratulations! Wbeblogic Platform 8.1 has been successfully instralled to d:\bea\weblogic8.1.说明安装成功!下一步可以创建WebLogic Configuration!【注意】不要选中Install XML Spy选择Run the Configration Wizard,确认后,单击“Done”进入下一步安装:第2章BEA WEBLOGIC8.1安装配置说明图2-1-11 配置向导在图2-1-11所示窗口中选择默认值:Create a new WebLogic configuration,确认后,单击“Next”进入下一步安装:图2-1-12 选择配置路径如图2-1-12所示,采用默认路径,确认后,单击“Next”进入下一步安装:东软检察业务综合管理信息系统3.0用户手册图2-1-13 选择配置方式如图2-1-12所示,采用默认选择:Express,确认后,单击“Next”进入下一步安装:图2-1-14 配置超级用户信息在图2-1-14中输入超级用户的信息,其中用户名和密码(八位或八位以上)是必填项,填写完毕,确认后,单击“Next”进入下一步安装:第2章BEA WEBLOGIC8.1安装配置说明图2-1-15 确认口令在图2-1-15所示窗口的文本框中输入您在图2-1-14中所输入的用户密码内容,确认后,按回车,进入下一步安装:图2-1-16 WebLogic 配置安装在图2-1-16中,“Configration Name”项采用默认值“mydomain”,点击“Create”,进行WebLogic配置安装,右下角显示安装进度条。
linux环境下安装、部署weblogic8.1.5
部署前准备创建Weblogic用户组groupadd weblogicuseradd –g weblogic weblogicpasswd weblogic(修改weblogic用户密码)创建Weblogic部署目录,修改目录及安装文件的权限mkdir /opt/middleware/weblogic815chown –Rf weblogic:weblogic /opt/middleware/weblogic815chown weblogic:weblogic weblogic815_linux32.binchmod a+x weblogic815_linux32.bin用weblogic用户登录系统su - weblogic安装Weblogic8.1.5执行./ weblogic815_linux32.bin –mode=console进入控制台安装的欢迎界面Extracting 0%....................................................................................................100%Unable to instantiate GUI, defaulting to console mode.<----------------- BEA Installer - WebLogic Platform 8.1 SP5 ----------------->Welcome:--------This installer will guide you through the installation of WebLogic Platform 8.1 SP5. Type "Next" or enter to proceed to the next prompt. If you want to change data entered previously, type "Previous". You may quit the installer at anytime by typing "Exit".Enter [Exit][Next]>键入[Next]继续此时出现授权许可协议,读完后键入[1]继续<----------------- BEA Installer - WebLogic Platform 8.1 SP5 ----------------->BEA Systems License Agreement:------------------------------BEA SYSTEMS, INC. SOFTWARE LICENSE AGREEMENTUSE OF SOFTWARE ORDERED FROM BEA SYSTEMS, INC. ("BEA") IS PROVIDED ONLY UNDERLICENSE FROM BEA. PLEASE READ THE FOLLOWING LICENSE CAREFULLY AND INDICATE YOUR ACCEPTANCE BY CLICKING THE ACCEPTANCE BOX. CERTAIN CAPITALIZED TERMS AREDEFINED IN SECTION 11.1. LICENSE TERMSa. WebLogic SDK Use. The terms of this Section 1(a) are applicable to you ifyou have registered as a WebLogic SDK customer. Subject to the terms of thisAgreement, BEA grants to you a non-exclusive, non-transferable, royalty-freelicense to use WebLogic SDK solely for Development Use and Scale-LimitedPersonal Use for the number of users and/or developers and the number of CPU's, Servers and/or at the Sites, as specified at the time of registration. Thirdparty software products or modules supplied by BEA, if any, may be used solelywith the Software. All rights not specifically granted to you herein areretained by BEA.b. WebLogic SDK Pro Use. The terms of this Section 1(b) are applicable to youif you have registered as a WebLogic SDK Pro customer. Subject to the terms ofthis Agreement, BEA grants to you a non-exclusive, non-transferable,Select Option:1 - Yes, I agree with the terms of the license2 - No, I do not agree with the terms of the license提示选择一个BEA主目录<----------------- BEA Installer - WebLogic Platform 8.1 SP5 ----------------->Choose BEA Home Directory:--------------------------"BEA Home" = [/home/weblogic/bea]Input new BEA Home OR [Exit][Previous][Next]>输入:/opt/middleware/weblogic815/bea确认BEA主目录*BEA home choice->1|Yes, Use this BEA home directory [/opt/middleware/weblogic815/bea]2|No, return to BEA home directory selection输入[1]继续<----------------- BEA Installer - WebLogic Platform 8.1 SP5 ----------------->Choose Install Type:--------------------->1|Complete|Install the complete BEA WebLogic Platform.2|Custom Installation|Choose software components to install and perform optional configuration. Enter index number to select OR [Exit][Previous][Next]>选择安装类型,键入[1]继续,完全安装<----------------- BEA Installer - WebLogic Platform 8.1 SP5 ----------------->Choose Product Directory:-------------------------"Product Installation Directory" = [/opt/middleware/weblogic815/bea/weblogic81] Input new Product Installation Directory OR [Exit][Previous][Next]>选择安装路径,默认,键入[Next]继续<----------------- BEA Installer - WebLogic Platform 8.1 SP5 ----------------->Choose Product Directory:-------------------------->1|Yes, use this product directory|[/opt/middleware/weblogic815/bea/weblogic81]2|No, select another product directoryEnter index number to select OR [Exit][Previous][Next]>确认安装路径,键入[1]继续<----------------- BEA Installer - WebLogic Platform 8.1 SP5 ----------------->Installing files..0% 25% 50% 75% 100%[------------|------------|------------|------------][***************************************************]<----------------- BEA Installer - WebLogic Platform 8.1 SP5 ----------------->Installing JDK....0% 25% 50% 75% 100%[------------|------------|------------|------------][***************************************************]<----------------- BEA Installer - WebLogic Platform 8.1 SP5 ----------------->Installation CompleteCongratulations! WebLogic Platform 8.1 SP5 has been successfully installed to /opt/middleware/weblogic815/bea/weblogic81.Press any key to continue OR [Exit]>安装完毕创建服务使用weblogic用户登录系统cd /opt/middleware/weblogic815/bea/weblogic81/common/bin./config.sh进入设置Unable to instantiate GUI, defaulting to console mode.<--------------------- BEA WebLogic Configuration Wizard --------------------->Create or Extend a Configuration:---------------------------------Choose between creating and extending a configuration. Based on your selection, the Configuration Wizard guides you through the steps to generate a new orextend an existing configuration.->1|Create a new WebLogic configuration| Start here to create a WebLogic configuration in your projects|directory.2|Extend an existing WebLogic configuration| Start here to extend an existing WebLogic configuration. Use this|option to add applications and services, including Database access (JDBC)|and Messaging (JMS). This option also enables you to extend functionality|by enabling WebLogic Workshop.Enter index number to select OR [Exit][Next]>创建一个新的weblogic配置,键入[1]继续<--------------------- BEA WebLogic Configuration Wizard --------------------->Select a Domain Template:-------------------------Please select a template from the list or select another directory of templates.* [/opt/middleware/weblogic815/bea/weblogic81/common/templates/domains]1|Basic WebLogic Portal Domain 8.1.5.0| BEA Systems, Inc.| Create a basic WebLogic Portal domain, without installing sample|applications. Domains created from this template will support the|WebLogic Server, WebLogic Workshop and WebLogic Portal runtime|functionality, including support for J2EE applications, Web applications,|Web Services, custom controls and portals. Use domains created from this|template for development of WebLogic Portal applications.2|Avitek Medical Records Sample Domain 8.1.5.0| BEA Systems, Inc.| Create the Avitek Medical Records domain in a directory outside of the|installed kit. The Avitek Medical Records is a WebLogic Server sample|application suite that concisely demonstrates all aspects of the J2EE|platform.3|Basic WebLogic Integration Domain 8.1.5.0| BEA Systems, Inc.| Create a basic WebLogic Integration domain, without installing sample|applications. Domains created from this template will support the|WebLogic Server, WebLogic Workshop and WebLogic Integration runtime|functionality, including support for J2EE applications, Web applications,Enter index number to select OR [Down][Exit][Previous][Next]>选择配置模板,由于没有,键入[Down]继续<--------------------- BEA WebLogic Configuration Wizard --------------------->Select a Domain Template:-------------------------Please select a template from the list or select another directory of templates.|Web Services, custom controls and business processes. Use domains created |from this template for development of WebLogic Integration applications.->4|Basic WebLogic Server Domain 8.1.5.0| BEA Systems, Inc.| Create a basic WebLogic Server domain without installing sample|applications.5|WebLogic Server Examples Domain 8.1.5.0| BEA Systems, Inc.| Create the WebLogic Server Examples domain in a directory outside of the |installed kit. The Examples domain contains a collection of examples to|show best practices for coding individual J2EE APIs.6|Basic WebLogic Platform Domain 8.1.5.0| BEA Systems, Inc.| Create a basic WebLogic Platform domain, without installing sample|applications. Domains created from this template will support the|WebLogic Server, WebLogic Workshop, WebLogic Integration and WebLogic|Portal runtime functionality, including support for J2EE applications, Web |applications, Web Services, custom controls, business processes and|portals. Use domains created from this template for development of|WebLogic Platform applications.Enter index number to select OR [Up][Down][Exit][Previous][Next]>键入[4]继续<--------------------- BEA WebLogic Configuration Wizard --------------------->Choose Configuration Option:----------------------------*Do you want to run the wizard in express mode?->1|Yes2|NoEnter index number to select OR [Exit][Previous][Next]>键入[1]继续<--------------------- BEA WebLogic Configuration Wizard --------------------->Configure Administrative Username and Password:-----------------------------------------------Create a user automatically assigned to the Administrative Role. This user isthe default administrator used to start development mode servers.| Name | Value | _|_________________________|_________________________________| 1| *User name: | weblogic | 2| *User password: | | 3| *Confirm user password: | |4| Description: | The default administration user |Select Option:1 - Modify "User name"2 - Modify "User password"3 - Modify "Confirm user password"4 - Modify "Description"Enter option number to select OR [Exit][Previous][Next]>修改密码,键入[2]继续<--------------------- BEA WebLogic Configuration Wizard --------------------->Configure Administrative Username and Password:-----------------------------------------------Create a user automatically assigned to the Administrative Role. This user isthe default administrator used to start development mode servers."*User password:" = []Input new *User password: OR [Exit][Reset][Accept]>输入密码,键入[回车]确认<--------------------- BEA WebLogic Configuration Wizard --------------------->Configure Administrative Username and Password:-----------------------------------------------Create a user automatically assigned to the Administrative Role. This user isthe default administrator used to start development mode servers.| Name | Value | _|_________________________|_________________________________| 1| *User name: | weblogic | 2| *User password: | ******* | 3| *Confirm user password: | |4| Description: | The default administration user |Select Option:1 - Modify "User name"2 - Modify "User password"3 - Modify "Confirm user password"4 - Modify "Description"5 - Discard ChangesEnter option number to select OR [Exit][Previous][Next]>确认密码,长度最小8个字符,键入[3]继续<--------------------- BEA WebLogic Configuration Wizard --------------------->Configure Administrative Username and Password:-----------------------------------------------Create a user automatically assigned to the Administrative Role. This user isthe default administrator used to start development mode servers."*Confirm user password:" = []Input new *Confirm user password: OR [Exit][Reset][Accept]>确认密码,密码必须与上次输入一致,键入[回车]继续<--------------------- BEA WebLogic Configuration Wizard --------------------->Configure Administrative Username and Password:-----------------------------------------------Create a user automatically assigned to the Administrative Role. This user isthe default administrator used to start development mode servers.| Name | Value | _|_________________________|_________________________________| 1| *User name: | weblogic | 2| *User password: | ******* | 3| *Confirm user password: | ******** |4| Description: | The default administration user |Select Option:1 - Modify "User name"2 - Modify "User password"3 - Modify "Confirm user password"4 - Modify "Description"5 - Discard ChangesEnter option number to select OR [Exit][Previous][Next]>键入[Next]继续<--------------------- BEA WebLogic Configuration Wizard --------------------->Domain Mode Configuration:--------------------------Enable Development or Production Mode for this domain.->1|Development Mode2|Production ModeEnter index number to select OR [Exit][Previous][Next]>选择产品模式/开发模式。
WebLogic8部署

文档来源为:从网络收集整理.word版本可编辑.欢迎下载支持.weblogic8部署企业应用1、安装weblogic首先,必需安装weblogic8.1(SP2)2、创建weblogic的测试domain3、启动weblogic的domain由于是生产模式,启动时需输入用户名、密码4、进入管理控制台5、部署企业应用程序文件a、在控制台树上Deployments: Web Application Module,在页面上点击“Deploy a new WebApplication Module”链接,出现下图,可以选择文件或目录进行发布:b、选择“upload your file(s)”链接,进入如下页面,选择打包好的web应用文件,点击“upload”上传c、点击进入“\kdcerpserver \ upload”目录,如下图所示,选择kdcerp.war文件,点击“TargetModule”按钮发布6、配置数据源a、配置数据库链接池在控制台树上Services:JDBC:Connection Pools,点击“Configure a new JDBC Connection Pool”链接,进入如下页面,选择合适的驱动程序:b、配置weblogic JDBC Tx Data Source在控制台树上Services:JDBC:Data Sources,点击“Configure a new JDBC Data Source”链接,进入如下页面,输入合适的jndi名称(必需和程序中保持一致):7、重启weblogic,部署完成8、其它应用设置a、安装weblogic为系统服务installService.cmd文件可以注册当前web应用到系统服务中具体的用法为installService.cmd [用户名] [密码]b、优化weblogic编辑\bea\weblogic81\common\bin\目录下的commEnv.cmd文件的部分设置可以优化weblogic例如:修改:beaif "%PRODUCTION_MODE%" == "true" goto bea_prod_modeset JAVA_VM=-jrockitset MEM_ARGS=-Xms128m -Xmx256m为:beaif "%PRODUCTION_MODE%" == "true" goto bea_prod_modeset JAVA_VM=-jrockitset MEM_ARGS=-Xms512m –Xmx512m可以获得更好的内存利用率c、解决数据库服务器重启后weblogic不能自动重新连接数据库的问题设置connection的Test Table Name,建议为哑元“DUAL”,并且适当选择“Test Reserved Connections”、“Test Created Connections”和“Test Released Connections”等选项的应用1。
Weblogic安装配置手册(windows)-经典保留

中间件安装配置指南(Weblogic for Windows)第 1 章概述Weblogic的安装配置总共包括五个部分:1. 数据库产品的安装(详见相应数据库安装文档)2. 初始化数据库(详见相应数据库文档)3. Weblogic8.1中间件产品的安装4. 创建Weblogic实例5. 配置实例第 2 章安装数据库详见相关数据库安装文档。
第 3 章初始化数据库详见相关数据库文档。
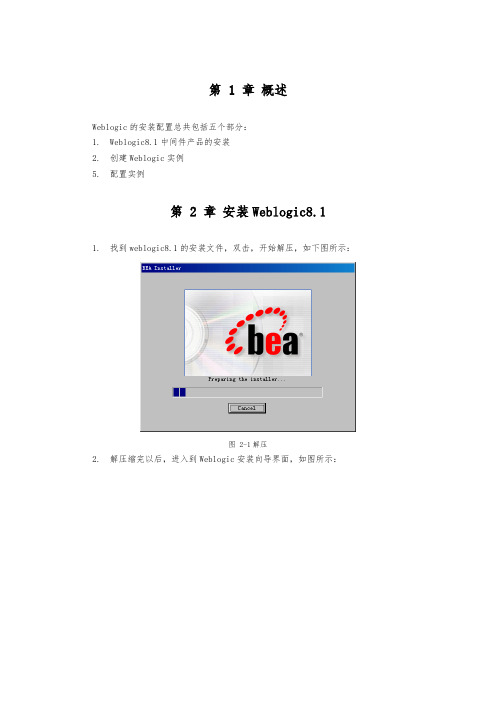
第 4 章安装Weblogic8.11. 找到weblogic8.1的安装文件,双击,开始解压,如下图所示:图 4-1解压2. 解压缩完以后,进入到Weblogic安装向导界面,如图所示:图 4-2安装向导3. 点击下一步,进入到许可协议界面,选择“是”,然后点击“下一步”图 4-3许可协议4. 出现如下界面,点击“浏览”可以选择BEA的主目录的路径,也可采用默认的安装路径;(这个路径需要记住,在配置实例的时候需要用到)图 4-4选择BEA主目录5. 点击“下一步”,进入到下面的窗口;图 4-5选择安装类型6. 选择“自定义”,进入到下面的窗口:图 4-6选择组件7. 只需要选择Weblogic Server-Server即可,参见上图示例,然后点击“下一步”,进入到下面的界面;图 4-7选择产品目录8. 在上面的窗口中选择产品安装的目录,也采用默认的即可,然后点击下一步,选择“立即安装”,开始程序的安装。
9. 程序安装完成后,会出现如下窗口;图 4-8安装完成10. 把上面窗口中两个选项前面的勾去掉,点击完成即完成了Weblogic的安装。
第 5 章创建Weblogic实例1. 找到系统任务栏上按钮,依次找到“开始>程序>BEA WebLogic Platform8.1>Configuration Wizard”,弹出下面的窗口:图 5-1创建或扩展配置2. 在上面的窗口中选择第一项(新建WebLogic配置),然后点击“下一步”,进入到下面的窗口;图 5-2选择配置模板3. Weblogic配置模板选择Basic WebLogic Server Domain,点击“下一步”,进入到下面的窗口;图 5-3选择配置方式4. 选择“快速”,点击“下一步”,进入到下面的窗口:图 5-4配置管理用户名和密码5. 在上面的窗口中填写启动Weblogic服务和进入Weblogic管理控制台的管理员信息。
WebLogic安装与配置(图解)
1Weblogic安装与配置EJB要基于一个EJB Module,然后整个Module一起编译、部署到服务器上。
因此服务器必须支持EJB容器,如WebLogic或JBoss等;而Tomcat只是纯Web服务器,因此不支持EJB。
当然,apache组织也在开发自己的开源J2EE服务器,名字叫做Geronimo,目前已经有正式的版本面市,本章的示例则是基于Weblog ic实现。
1.1 安装Weblogic 8.1为了实现本章的操作,首先安装Weblogic 8.1,步骤如下。
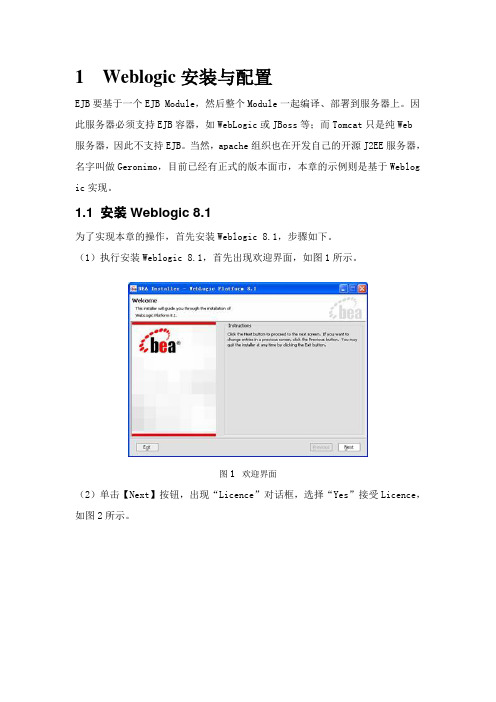
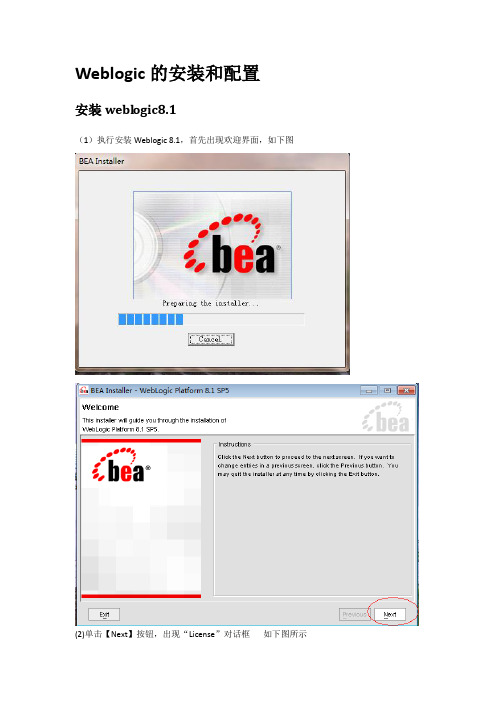
(1)执行安装Weblogic 8.1,首先出现欢迎界面,如图1所示。
图1 欢迎界面(2)单击【Next】按钮,出现“Licence”对话框,选择“Yes”接受Licence,如图2所示。
图2 “Licence”对话框(3)单击【Next】按钮,出现选择安装目录对话框,默认为C:\bea,如图3所示。
图3 选择安装目录(4)单击【Next】按钮,出现选择安装方式对话框,默认为典型安装,如图4所示。
图4 选择安装方式(5)单击【Next】按钮,出现选择Product目录对话框,默认为典型C:\bea\w eblogic81,如图5所示。
图5 选择Product目录(6)单击【Next】按钮,开始安装,如图6所示。
图6 安装(7)安装完毕后,提示是否安装XML Spy,本章的示例不需要使用该软件,因此将该复选框取消,如图7所示,单击【Done】按钮结束安装过程。
图7 安装完毕1.2 配置Weblogic 8.1服务器安装完成后还需要配置服务器实例,本节演示如何配置一个基本的Weblogic服务器实例,步骤如下。
(1)选择【开始】|【程序】|【BEA Weblogic Platform 8.1】|【Configurat ion Wizard】命令运行配置向导,出现Weblogic配置向导对话框,如图8所示。
默认情况下,选择配置方式为“创建一个新的服务器配置(Create a new WebLo gic configuration)”,这里不做修改。
Weblogic8.1安装文档

Weblogic8.1安装文档(平台linuxAS4)文档历史2006-2-27 张俊刚李 洸 技术指导文档整理、创建2006-3-2 李 洸 增加apache配置说明2006-3-6 李 洸李传彬 增加weblogic域配置说明 增加weblogic守护进程说明注:限内部使用,不得外传深圳市深讯信息科技股份发展有限公司技术中心一. 安装前的准备工作1.1系统配置安装要求平 台 :LINIX AS4硬盘空间 :按照开发设计而定,安装目录要求空间至少5GSWAP大小:2倍物理内存1.2下载安装文件下载地址为:/bbs/servlet/D2DServlet/download/81-8992-44196-240/license.bea使用方式:替换c:\bea目录下的这个文件,这样就可以使WebLogic Platform用不过期1.3创建BEA用户、BEA组#groupadd bea# useradd –d /usr/local/bea –g bea bea#passwd bea输入两次密码bea二. 安装步骤1. 安装文件:server812_linux32.bin2. #./server812_linux32.bin -mode=console然后按照提示一步步安装,把安装目录指向/usr/local/bea。
3. 安装画面:3.1 Su 到root用户找到安装文件server812_linux32.bin执行 #./server812_linux32.bin -mode=console出现字幕提示界面3.2 输入Next继续,提示证书说明。
输入HOME路径,输入/usr/local/bea/回车3.4 确认输入HOME路径 ,输入1回车3.5 选择安装类型1.完全安装2.普通安装(可选安装)选择1完全安装。
回车。
3.6 选择安装路径/usr/local/bea/weblogic81输入NEXT 回车。
Weblogic8.1安装和配置
Weblogic的安装和配置安装webl ogic8.1(1)执行安装Weblogic 8.1,首先出现欢迎界面,如下图(2)单击【Next】按钮,出现“License”对话框如下图所示(2)选择“Yes”单击【Next】按钮出现选择安装目录对话框,如下图所示(3)选好安装的路径,单击【Next】按钮,出现选择安装对话框,默认的是典型安装,如下图所示(4)选好后,单击【Next】按钮,出现Product目录对话框如下图所示(4)选好product的目录单击【Next】按钮,进入安装进度对话框:如下图所示:(5)安装完毕后会提示是否安装XML Spy,不会用的到得话点【Done】结束安装过程配置webl ogic8.1服务器(1)选择【开始】|【程序】|【BEA Weblogic Platform 8.1】|【Configuration Wizard】选择“创建一个weblogic配置(Create a new WebLogic configuration)”,如下图所示选择创建新的实例,单击【Next】进入如下界面选好安装目录,单击【Next】出现如下图:一般选Express快速单击【Next】打开如下图填写用户名,口令之后单击【Next】进入如下界面:点击【Next】进入如下界面:完成单击【Dnoe】查看配置是否成功(1)选择【开始】|【程序】|【BEA Weblogic Platform8.1】|【User Projects】|【mydomain】|【Start Server】启动服务器,成功启动后,打开浏览器器,输了http://127.0.0.1:7001/console看到如下图,表示配置成功。
正确输入进入创建JNDI,选择JDBC DATA SOURCES添加数据源ORACLE选择数据库类型,尽量使用自己的驱动包。
注释:SQLSERVER数据库驱动包不是很好用,偶尔创建不出来。
测试驱动(成功)。
weblogic安装配置手册(win)
第 1 章概述Weblogic的安装配置总共包括五个部分:1. Weblogic8.1中间件产品的安装2. 创建Weblogic实例5. 配置实例第 2 章安装Weblogic8.11. 找到weblogic8.1的安装文件,双击,开始解压,如下图所示:图 2-1解压2. 解压缩完以后,进入到Weblogic安装向导界面,如图所示:图 2-2安装向导3. 点击下一步,进入到许可协议界面,选择“是”,然后点击“下一步”图 2-3许可协议4. 出现如下界面,点击“浏览”可以选择BEA的主目录的路径,也可采用默认的安装路径;(这个路径需要记住,在配置实例的时候需要用到)图 2-4选择BEA主目录5. 点击“下一步”,进入到下面的窗口;图 2-5选择安装类型6. 选择“自定义”,进入到下面的窗口:图 2-6选择组件7. 只需要选择Weblogic Server-Server即可,参见上图示例,然后点击“下一步”,进入到下面的界面;图 2-7选择产品目录8. 在上面的窗口中选择产品安装的目录,也采用默认的即可,然后点击下一步,选择“立即安装”,开始程序的安装。
9. 程序安装完成后,会出现如下窗口;图 2-8安装完成10. 把上面窗口中两个选项前面的勾去掉,点击完成即完成了Weblogic的安装。
第 3 章创建Weblogic实例1. 找到系统任务栏上按钮,依次找到“开始>程序>BEA WebLogic Platform8.1>Configuration Wizard”,弹出下面的窗口:图 3-1创建或扩展配置2. 在上面的窗口中选择第一项(新建WebLogic配置),然后点击“下一步”,进入到下面的窗口;图 3-2选择配置模板3. Weblogic配置模板选择Basic WebLogic Server Domain,点击“下一步”,进入到下面的窗口;图 3-3选择配置方式4. 选择“快速”,点击“下一步”,进入到下面的窗口:图 3-4配置管理用户名和密码5. 在上面的窗口中填写启动Weblogic服务和进入Weblogic管理控制台的管理员信息。
- 1、下载文档前请自行甄别文档内容的完整性,平台不提供额外的编辑、内容补充、找答案等附加服务。
- 2、"仅部分预览"的文档,不可在线预览部分如存在完整性等问题,可反馈申请退款(可完整预览的文档不适用该条件!)。
- 3、如文档侵犯您的权益,请联系客服反馈,我们会尽快为您处理(人工客服工作时间:9:00-18:30)。
WebLogic8.1 安装部署说明版本 <1.0>修订历史记录目录1.简介41.1目的41.2范围41.3概述42.参考资料43.系统环境43.1硬件要求43.2软件环境44.安装部署44.1部署前准备44.2安装WebLogic 8.1 54.3创建服务54.4部署应用114.4.1启动和关闭114.4.2设置自动启动WebLogic 124.5常见问题FAQ 13安装部署说明1.简介1.1目的本文档主要介绍WebLogic8.1在Linux系统下的通用安装部署1.2范围应用范围包括有:大汉网络项目部使用该系统的客户1.3概述2.参考资料3.系统环境3.1硬件要求∙服务器:最低配置:P4 2.0 CPU、512M内存、2G剩余硬盘空间3.2软件环境∙服务器:RedHat Linux 7.3以上/RedHat.Enterprise.Server.3.ASWebLogic platform 8.1 sp44.安装部署4.1部署前准备把WebLogic的bin包放在/home目录上.1、创建weblogic用户组。
groupadd weblogicuseradd -g weblogic weblogicpasswd weblogic(修改weblogic密码)2、创建/var/web/jsp/bea目录,修改目录所有者权限mkdir /var/web/jsp/beachown –Rf weblogic:weblogic /var/web/jsp/bea3、用weblogic用户登陆系统,修改配置文件。
vi ~/.bash_profile增加export LANG=en_US.iso8859154.2安装WebLogic 8.1赋予.bin可执行权限:chmod a+x platform814_linux32.bin执行./platform814_linux32.bin -mode=console进入控制台安装的欢迎界面,键入[Next]继续此时出现授权许可协议,读完后键入[Yes]继续提示选择一个BEA主目录:输入:/var/web/jsp/bea确认BEA主目录, 键入[1]继续选择安装类型, 键入[1]继续选择安装路径,默认,输入[next]继续。
确认安装路径。
键入[1]继续安装完毕。
注:(两个补丁文件见补丁包的说明)4.3创建服务使用WebLogic用户登录系统:[weblogic@jcms bin]$ cd /var/web/jsp/bea/weblogic81/common/bin[weblogic@jcms bin]$ ./config.shUnable to instantiate GUI, defaulting to console mode.进入设置:<-------- BEA WebLogic Configuration Wizard -------------->Create or Extend a Configuration:---------------------------------Choose between creating and extending a configuration. Based on your selection, the Configuration Wizard guides you through the steps togenerate a new or extend an existing configuration.->1|Create a new WebLogic configuration| Start here to create a WebLogic configuration in your projects directory.2|Extend an existing WebLogic configuration| Start here to extend an existing WebLogic configuration. Use this option to add applications and services, including Database| access (JDBC) and Messaging (JMS). This option also enables you to extend functionality by enabling WebLogic Workshop.Enter index number to select OR [Exit][Next]> 1<-------------------------------- BEA WebLogic Configuration Wizard ----------------------->Select a Domain Template:-------------------------Please select a template from the list or select another directory of templates.*[/home/weblogic/bea/weblogic81/common/templates/domains]1|Basic WebLogic Platform Domain 8.1.3.0| BEA Systems, Inc.| Create a basic WebLogic Platform domain, without installing sample applications.Domains created from this template will support the|WebLogic Server, WebLogic Workshop, WebLogic Integration and WebLogic Portalruntime functionality, including support for J2EE|applications, Web applications, Web Services, custom controls, business processes and portals. Use domains created from this template|for development of WebLogic Platform applications.2|Basic WebLogic Portal Domain 8.1.3.0| BEA Systems, Inc.| Create a basic WebLogic Portal domain, without installing sample applications.Domains created from this template will support the|WebLogic Server, WebLogic Workshop and WebLogic Portal runtime functionality, including support for J2EE applications, Web applications,|Web Services, custom controls and portals. Use domains created from this template for development of WebLogic Portal applications.3 |Basic WebLogic Integration Domain 8.1.3.0| BEA Systems, Inc.| Create a basic WebLogic Integration domain, without installing sample applications. Domains created from this template will support|the WebLogic Server, WebLogic Workshop and WebLogic Integration runtime functionality, including support for J2EE applications, Web|applications, Web Services, custom controls and business processes. Use domains created from this template for development of WebLogic|Integration applications.4|Basic WebLogic Workshop Domain 8.1.3.0| BEA Systems, Inc.Enter index number to select OR [Down][Exit][Previous][Next]> down<---------------------- BEA WebLogic Configuration Wizard ---------------------------->Select a Domain Template:-------------------------Please select a template from the list or select another directory of templates.| Create a basic WebLogic Workshop domain, without installing sample applications. Domains created from this template will support the |WebLogic Server and WebLogicWorkshop runtime functionality, including support for J2EE applications, Web applications,Web Services and |custom controls. Use domains created from this template fordevelopment of WebLogic Workshop applications.->5|Basic WebLogic Server Domain 8.1.3.0| BEA Systems, Inc.| Create a basic WebLogic Server domain without installing sample applications.6|WebLogic Server Examples Domain 8.1.3.0| BEA Systems, Inc.| Create the WebLogic Server Examples domain in a directory outside of the installed kit. The Examples domain contains a collection of|examples to show best practices for coding individual J2EE APIs.7|Avitek Medical Records Sample Domain 8.1.3.0| BEA Systems, Inc.| Create the Avitek Medical Records domain in a directory outside of the installed kit. The Avitek Medical Records is a WebLogic Server |sample application suite that concisely demonstrates all aspects of the J2EE platform.8|Select another directory locationEnter index number to select OR [Up][Exit][Previous][Next]>5<--------------------- BEA WebLogic Configuration Wizard --------------------->Select a Domain Template:-------------------------Please select a template from the list or select another directory of templates.*The selected template is the same as the one you are working on. Do you*want to reload the template ?->1|Yes2|NoEnter index number to select OR [Exit][Next]> 1<------------------------- BEA WebLogic Configuration Wizard ------------------------->Choose Configuration Option:-------------------------*Do you want to run the wizard in express mode?->1|Yes2|NoEnter index number to select OR [Exit][Previous][Next]> 1<------------------------- BEA WebLogic Configuration Wizard ------------------------->Configure Administrative Username and Password:--------------------Create a user automatically assigned to the Administrative Role. This user is the default administrator used to start development modeservers.| Name | Value |_|_________________________|_________________________________|1| *User name: | weblogic |2| *User password: | |3| *Confirm user password: | |4| Description: | The default administration user |Select Option:1 - Modify "User name"2 - Modify "User password"3 - Modify "Confirm user password"4 - Modify "Description"Enter option number to select OR [Exit][Previous][Next]> 2<------------------------- BEA WebLogic Configuration Wizard ------------------------->Configure Administrative Username and Password:--------------------Create a user automatically assigned to the Administrative Role. This user is the default administrator used to start development modeservers."*User password:" = []Input new *User password: OR [Exit][Reset][Accept]> [输入八位密码]<------------------------- BEA WebLogic Configuration Wizard ------------------------->Configure Administrative Username and Password:--------------------Create a user automatically assigned to the Administrative Role. This user is the default administrator used to start development modeservers.| Name | Value |_|_________________________|_________________________________|1| *User name: | weblogic |2| *User password: | ****** |3| *Confirm user password: | |4| Description: | The default administration user |Select Option:1 - Modify "User name"2 - Modify "User password"3 - Modify "Confirm user password"4 - Modify "Description"5 - Discard ChangesEnter option number to select OR [Exit][Previous][Next]> 3<------------------------- BEA WebLogic Configuration Wizard ------------------------->Configure Administrative Username and Password:--------------------Create a user automatically assigned to the Administrative Role. This user is the default administrator used to start development modeservers."*Confirm user password:" = []Input new *Confirm user password: OR [Exit][Reset][Accept]> [确认八位密码] ///口令必须与上面的一样<------------------------- BEA WebLogic Configuration Wizard ------------------------->Configure Administrative Username and Password:--------------------Create a user automatically assigned to the Administrative Role. This user is the default administrator used to start development modeservers.| Name | Value |_|_________________________|_________________________________|1| *User name: | weblogic |2| *User password: | ******** |3| *Confirm user password: | ******** |4| Description: | The default administration user |Select Option:1 - Modify "User name"2 - Modify "User password"3 - Modify "Confirm user password"4 - Modify "Description"5 - Discard ChangesEnter option number to select OR [Exit][Previous][Next]> next<------------------------- BEA WebLogic Configuration Wizard ------------------------->Domain Mode Configuration:--------------------------Enable Development or Production Mode for this domain.->1|Development Mode2|Production ModeEnter index number to select OR [Exit][Previous][Next]> 2<------------------------- BEA WebLogic Configuration Wizard ------------------------->Java SDK Selection:-------------------->1|JRockit SDK 1.4.2_04-8130 @ /home/weblogic/bea/jrockit81sp3_142_042|Sun SDK 1.4.2_04 @ /home/weblogic/bea/jdk142_043|Other Java SDKEnter index number to select OR [Exit][Previous][Next]> 1<------------------------- BEA WebLogic Configuration Wizard ------------------------->Select the target domain directory for this configuration:----"Target Location" = [/home/weblogic/bea/user_projects/domains]Input new Target Location OR [Exit][Previous][Next]> [直接回车]<------------------------- BEA WebLogic Configuration Wizard ------------------------->Edit Domain Information:------------------------| Name | Value |_|________|__________|1| *Name: | mydomain |Enter value for "Name" OR [Exit][Previous][Next]> [输入名称或者直接回车]<------------------------- BEA WebLogic Configuration Wizard -------------------------> Creating Domain...0% 25% 50% 75% 100%[------------|------------|------------|------------][***************************************************]**** Domain Created Successfully! ****完成服务的建立!4.4部署应用4.4.1启动和关闭1、如何启动WebLogic[weblogic@jcms bin]$ cd /var/web/jsp/bea/user_projects/domains/mydomain[weblogic@jcms bin]$ ./startWebLogic.sh (需要输入用户名密码)2、如何关闭WebLogic[weblogic@jcms bin]$ ./stopWebLogic.sh4.4.2设置自动启动WebLogic1、无需输入用户名密码启动关闭weblogic。