osgearth记录文本(编辑)
osgEarth1_Document

Developers : Working with Maps ¶A Map is the central data model in osgEarth. It is a container for image, elevation, and feature layers.Loading a Map ¶The easiest way to render a Map is to load it from a earth file?. Since osgEarth uses OpenSceneGraph plugins, you can do this with a single line of code:osg::Node* globe = osgDB::readNodeFile("myglobe.earth");You now have an OpenSceneGraph Node that can be added to your scene graph and displayed. Seriously, it really is that simple!This method of loading a Map is, more often than not, all that an application will need to do. However, if you want to create your Map using the API, read on.Programmatic Map Creation ¶osgEarth provides an API for creating Maps at runtime.The basic steps to creating a Map with the API are:1.Create a Map object2.Add imagery and elevation layers to the Map as you see fit3.Create a MapNode that will render the Map object4.Add your MapNode to your scene graph.You can add layers to the map at any time.#include <osgEarth/Map>#include <osgEarth/MapNode>#include <osgEarthDrivers/tms/TMSOptions>#include <osgEarthDrivers/gdal/GDALOptions>using namespace osgEarth;using namespace osgEarth::Drivers;...// Create a Map and set it to Geocentric to display a globeMap* map = new Map();// Add an imagery layer (blue marble from a TMS source){TMSOptions tms;tms.url() = "/wms-c/Basic.py/1.0.0/satellite/"; ImageLayer* layer = new ImageLayer( "NASA", tms );map->addImageLayer( layer );}// Add an elevationlayer (SRTM from a local GeoTiff file){GDALOptions gdal;gdal.url() = "c:/data/srtm.tif";ElevationLayer* layer = new ElevationLayer( "SRTM", gdal );map->addElevationLayer( layer );}// Create a MapNode to render this map:MapNode* mapNode = new MapNode( map );...viewer->setSceneData( mapNode );Working with a MapNode at runtime ¶A MapNode is the scene graph node that renders a Map. Whether you loaded your Map from an Earth File or created it using the API, you can access the Map and its MapNode at runtime to make changes. If you did not explicitly create a MapNode using the API, you will first need to get a reference to the MapNode to work with. Use the !Map::findMapNode utility function://Load the maposg::Node* loadedModel = osgDB::readNodeFile("mymap.earth");//Find the MapNodeosgEarth::MapNode* mapNode = MapNode::findMapNode( loadedModel );Once you have a reference to the MapNode, you can get to the map:// Add an OpenStreetMap image sourceTMSOptions driverOpt;driverOpt.url() = "/";driverOpt.tmsType() = "google";ImageLayerOptions layerOpt( "OSM", driverOpt );layerOpt.profile() = ProfileOptions( "global-mercator" );ImageLayer* osmLayer = new ImageLayer( layerOpt );mapNode->getMap()->addImageLayer( osmLayer );You can also remove or re-order layers:// Remove a layer from the map. All other layers are repositioned accordingly mapNode->getMap()->removeImageLayer( layer );// Move a layer to position 1 in the image stackmapNode->getMap()->moveImageLayer( layer, 1 );Working with Layers ¶The Map contains ImageLayers and ElevationLayers. These contain some properties that you can adjust at runtime. For example, you can toggle a layer on or off or adjust an ImageLayer opacity using the API:ImageLayer* layer;...layer->setOpacity( 0.5 ); // makes the layer partially transparentBack to Developers GuideDevelopers Guide : Shader Composition ¶osgEarth uses GLSL shaders in several of its rendering modes. By default, osgEarth will detect the capabilities of your graphics hardware and automatically select an appropriate mode to use.Since osgEarth relies on shaders, and since you as the developer may wish to use your own shader code as well, osgEarth provides a shader composition framework. This allows you a great deal of flexibility when incorporating your own shaders into osgEarth.There are several ways to integrate your own shader code into osgEarth. These are discussed below. But first it is important to understand the basics of osgEarth's shader composition framework.Framework Basics ¶osgEarth installs default shaders for rendering. The default shaders are shown below. Note the following function types:•built-in functions: functions that osgEarth installs by default (but that you can override) •user functions: functions that you "inject" into the shader either before (pre) or after (post) the built-ins.// VERTEX SHADER:void main(void){gl_Position = gl_ModelViewProjectionMatrix * gl_Vertex;...// "LOCATION_PRE_VERTEX" user functions are called here:pre_vertex_function_1(...);...// the built-in functions are called next:osgearth_vert_setupTexturing();if ( lighting_enabled )osgearth_vert_setupLighting();// "LOCATION_POST_VERTEX" user functions are called last:post_vertex_function_1(...);}// FRAGMENT SHADER:void main(void){vec4 color = vec4(1,1,1,1);...// "LOCATION_PRE_FRAGMENT" user functions are called here:pre_fragment_function_1(color);...// then the built-in osgEarth functions are called:osgearth_frag_applyTexturing(color);if (osgearth_lighting_enabled)osgearth_frag_applyLighting(color);...// "LOCATION_POST_FRAGMENT" user functions are called last:post_fragment_function_1(color);...gl_FragColor = color;}VirtualProgram ¶osgEarth include an OSG state attribute called VirtualProgram that performs the runtime shader composition. Since VirtualProgram is an osg::StateAttribute, you can attach one to any node in the scene graph. Shaders that belong to a VirtualProgram can override shaders lower down on the attribute stack (i.e., higher up in the scene graph). In the way you can override individual shader functions in osgEarth.The sections below on integration will demonstrate how to use VirtualProgram.Integrating Custom Shaders ¶There are two ways to use shader composition in osgEarth.•Injecting user functions•Overriding osgEarth's built-in functions with a custom ShaderFactoryInjecting User Functions ¶In the core shader code above, you see "user functions" (e.g., "pre_fragment_function_1()" etc). These don't exist in the default shaders that osgEarth generates; rather, they represent code that you as the developer can "inject" into various locations in the built-in shaders.For example, let's use User Functions to create a simple "haze" effect. (NOTE: see this example in its entirety in osgearth_shadercomp.cpp)static char s_hazeVertShader[] ="varying vec3 v_pos; \n""void setup_haze() \n""{ \n"" v_pos = vec3(gl_ModelViewMatrix * gl_Vertex); \n""} \n";static char s_hazeFragShader[] ="varying vec3 v_pos; \n""void apply_haze(inout vec4 color) \n""{ \n"" float dist = clamp( length(v_pos)/10000000.0, 0, 0.75 ); \n"" color = mix(color, vec4(0.5, 0.5, 0.5, 1.0), dist); \n""} \n";osg::StateAttribute*createHaze(){osgEarth::VirtualProgram* vp = new osgEarth::VirtualProgram();vp->setFunction( "setup_haze", s_hazeVertShader,osgEarth::ShaderComp::LOCATION_POST_VERTEX );vp->setFunction( "apply_haze", s_hazeFragShader,osgEarth::ShaderComp::LOCATION_POST_FRAGMENT );return vp;}...sceneGraph->getOrCreateStateSet()->setAttributeAndModes( createHaze() );In this example, the function "setup_haze" is called from the core vertex shader after the built-in vertex functions. The "apply_haze" function gets called from the core fragment shader after the built-in fragment functions.There are FOUR injection points, as follows:Location Shader SignatureShaderComp::LOCATION_PRE_VERTEXVERTEX void functionName(void) ShaderComp::LOCATION_POST_VERTEXVERTEX void functionName(void)ShaderComp::LOCATION_PRE_FRA GMENT FRAGMENTvoid functionName(inout vec4color)ShaderComp::LOCATION_POST_FR AGMENT FRAGMENTvoid functionName(inout vec4color)As you can see, user functions literally let you inject code into the main shaders seamlessly.Customizing the Shader Factory ¶If you want to replace osgEarth's built-in shader functions (e.g. osgearth_vert_setupLighting() et al), you can install a custom ShaderFactory. The ShaderFactory is stored in the osgEarth Registry and contains all the methods for creating the built-in functions. You can install your own ShaderFactory like this:#include <osgEarth/ShaderComposition>...class CustomShaderFactory : public osgEarth::ShaderFactory{... override desired methods here ...};...osgEarth::Registry::instance()->setShaderFactory( new CustomShaderFactory() ); This method is good for replacing osgEarth's built-in lighting shader code. HOWEVER: be aware that override the built-in texturing functions may not work. This is because osgEarth's image layer composition mechanisms override these methods themselves to perform layer rendering.Sampling Image Layers ¶What if you want to access one of the Map's ImageLayers from your shader? Since osgEarth internally manages image layers, texture units, and composition, it is not as simple of calling GLSL's texture2D() function. Here's how to do it.Use the TextureCompositor interface to create a sampler function for the layer you want to query.You can then call this sampler function from your shader. Here's an example.// assume "layer" is the image layer you want to sample, and "vp" is a VirtualProgram state attribute:osgEarth::ImageLayer* layer;osgEarth::VirtualProgram* vp;// first get a reference to the texture compositor.osgEarth::TerrainEngine* engine = mapNode->getTerrainEngine();osgEarth::TextureCompositor* comp = engine->getTextureCompositor();// next, request a sampling shader for the layer in question.osg::Shader* sampler = comp->createSamplerFunction( layer, "sampleMyLayer", osg::Shader::FRAGMENT );// add it to your VirtualProgram:vp->setShader( "sampleMyLayer", sampler );...Then in your shader code, you can call the "sampleMyLayer" function:// FRAGMENT SHADERvoid sampleMyLayer(void); // declaration...void someFunction(){...vec4 texel = sampleMyLayer();...}The sampler function will automatically sample the proper sampler with the current texture coordinate.System Uniforms ¶In addition the the OpenSceneGraph system uniforms (which all start with "osg_"), osgEarth provides various uniforms (all of which start with ("osgearth_"). They are:•bool osgearth_LightingEnabled - whether GL lighting is enabled•bool[] osgearth_ImageLayerEnabled - whether image layer "n" is enabled•float osgearth_CameraRange - distance from the camera to the current vertexBack to Developers Guide。
OSGEarth编译与测试

第一章OSGEarth编译与测试2.1 OSGEarth编译第一步:配置系统环境变量。
新设置OSG_FILE_PATH变量,值为E:\OSGearth\OSGEARTH\data; E:\OSGearth\GDAL\data;向PATH添加值:E:\OSGearth\3rdParty\bin;E:\OSGearth\OSGEARTH\bin\Debug;E:\OSGearth\OSGEARTH\bin\Release;第二步:使用“生成”->“批生产”,选择all_build(debug|win32和release|win32)进行生成。
在编译过程中存在4个文件无法编译成功,但是不影响正常的测试。
第三步:修改这些错误。
上述错误的问题主要出现在E:\osgearth\osgearth\src\applications\osgearth_imageoverlay\osgearth_imageoverlay.cpp文件的36-39行。
原因是OSG_MIN_VERSION_REQUIRED(2,9,6)限制了osg的版本。
本文使用了v3.0.1版,因此需要添加需要添加ImageOverlayEditor文件。
(目前还没有解决)2.2 OSGEarth测试测试release版本:1.打开cmd窗口,进入E:\osgearth\osgearth\vs2010\bin\Release;2.输入命令:osgearth_viewer.exe E:\osgearth\osgearth\tests\gdal_tiff.earth;会出现一个提示3.复制所需的dll到E:\osgearth\osgearth\vs2010\bin\Release文件夹中。
可能需要重复好多次。
4.测试成功会出现下面界面:。
osgearth_conv 用法

osgearth_conv 用法关于osgearth_conv 的用法osgearth_conv 是一个开源的命令行工具,用于在OpenSceneGraph 环境中进行地理数据转换和处理。
它提供了丰富的功能和选项,使用户能够灵活地处理地理数据以支持各种地理可视化和分析应用。
本文将一步一步地回答关于osgearth_conv 的用法。
一、安装osgearth_conv要使用osgearth_conv,首先需要安装OpenSceneGraph 和OsgEarth。
OpenSceneGraph 是一个高性能的、跨平台的3D 编程工具包,而OsgEarth 是基于OpenSceneGraph 的地理可视化工具包。
安装这两个工具包后,就可以使用osgearth_conv 了。
二、osgearth_conv 的基本用法osgearth_conv 的基本用法如下:osgearth_conv input_file [options]其中,input_file 是输入的地理数据文件路径,而options 表示一些可选的参数和选项。
三、地理数据格式支持osgearth_conv 支持多种地理数据格式,包括常见的地理信息系统(Geographic Information System,简称GIS) 格式如Shapefile、GeoJSON、KML 等,以及常用的栅格数据格式如GeoTIFF、JPEG2000 等。
用户可以根据自己的需要选择相应的输入格式。
四、地理数据投影转换osgearth_conv 提供了投影转换的功能,用户可以将输入数据从一个坐标系转换到另一个坐标系。
例如,如果输入数据使用的是WGS84 坐标系(经纬度坐标),而用户希望将其转换为投影坐标系,可以使用如下命令:osgearth_conv input_file in-epsg 4326 out-epsg 3857其中,in-epsg 表示输入数据的坐标系编码,4326 表示WGS84 坐标系;out-epsg 表示输出数据的坐标系编码,3857 表示Web Mercator 投影坐标系。
osgEarth_Document
osgEarth - Terrain On Demand ¶The objectives of osgEarth are to:•Enable the development of geospatial applications in OSG.•Make it as easy as possible to visualize terrain models.•Interoperate with open mapping standards, technologies, and data.What it is ¶osgEarth is a terrain generation system for OpenSceneGraph applications. There are two ways to render terrain using osgEarth:•On-demand terrain: Generate and display a terrain at run-time with no pre-processing;osgEarth will access the raw data sources at application run time and composite them into a terrain model on the fly. No terrain model is actually stored to disk.•Pre-built terrain: Use the osgearth_seed utility to pre-cache image, elevation, and vector data from your raw data sources, and then run off the cache. This is similar to the way traditional terrain generation systems work - you build your terrain offline, then load it into yourapplication.Design ¶osgEarth's internal design reflects its focus on real-time data ingestion. Data sources are generally optimized into tile hierarchies for fast serving and consumption over the web. osgEarth deals with map data in terms of these tile hierarchies. Any raster source, no matter its organization or location, will be broken down into a hierarchy of optimized tiles by osgEarth for display.Now, the farther away the structure of your source data is from a tile hierarchy, the more processing osgEarth will need to apply to it before display - and more processing means less performance. (Caching can mitigate this to a great extent.) Yes, osgEarth can and will mosaic, reproject, and crop data to get it onto the terrain ... but it's happiest and fastest when the source data is already optimized. Read the section of Data Preparation for more details on how to prepare source data for best results.Try it on ¶The quickest and easiest way to get up and running with osgEarth is to simply load a .earth file. Find the tests folder and fire it up from the command line:osgviewer gdal_tiff.earthWe call this the zero-integration approach to using osgEarth. osgEarth includes a standard OSG loader that will read these files and produce a scene graph. If you have the osgEarth runtime libraries in your path, you can incorporate osgEarth terrains into your application without any additional coding.Is it for you? ¶So: does osgEarth replace the need for offline terrain database creation tools? In many cases it does, but that will depend entirely on your particular application.Consider using osgEarth if you need to:•Get a terrain base map up and running quickly and easily•Access open-standards map data services like WMS, WCS, or TMS •Integrate locally-stored data with web-service-based data•Incorporate new geospatial data layers at run-time•Run in a "thin-client" environment•Deal with data that may change over time•Integrate with a commercial data providerCreating Maps - Primer ¶This is a basic primer on creating maps for osgEarth. We suggest you peruse the sample .earth files in the source code repository for a wide away of examples.osgEarth uses an XML based file format called an Earth File to specify exactly how source data turns into an OSG scene graph.For a detailed view of all the options available when creating an Earth File, please see the Earth File Elements Reference.At it's core, the Earth File allows you to specify•The type of map to create (geocentric or projected)•The image, elevation, vector and model sources to use•Where the data will be cachedThe samples folder in the repository contains numerous examples of Earth files and how to use them.Simple Map File ¶Here is a very simple example that reads data from a WMS server and renders it to a round-earth3D model:<map name="MyMap" type="geocentric" version="2"><image name="bluemarble" driver="gdal"><url>/data/world.tif</url></image></map>This Earth File creates a geocentric Map named "MyMap?" with a single GeoTIFF image source called "bluemarble". The driver attribute tells osgEarth which of it's drivers to use to load the image. All sub-elements are specific to the selected driver. To learn how to configure each of the drivers in osgEarth, please see the drivers page.Multiple Image Layers ¶osgEarth supports maps with multiple image sources. This allows you to create maps such as base layer with a transportation overlay or provide high resolution insets for specific areas while providing a lower resolution base map. To add multiple images to a Earth File, simply add multiple "image" elements to your Earth File.<map name="Transportation" type="geocentric" version="2"><!--Add a base map of the blue marble data--><image name="bluemarble" driver="gdal"><url>c:/data/bluemarble.tif</url></image><!--Add a high resolution inset of Washington, DC--><image name="dc" driver="gdal"><url>c:/data/dc_high_res.tif</url></image></map>The above map provides two images from local data sources using the GDAL plugin. osgEarth uses various methods to render the image layers, so the limit on how many image layers you can render depends on your hardware (more info). Order is important when defining multiple image sources: they are applied bottom to top in the order that they specified in the file.Elevation Data ¶Adding elevation data to an Earth File is very similar to adding images. Elevation data can be added to an Earth File by adding an elevation element to the XML:<map name="Elevation" type="geocentric" version="2"><!--Add a base map of the blue marble data--><image name="bluemarble" driver="gdal"><url>c:/data/bluemarble.tif</url></image><!--Add SRTM data--><elevation name="srtm" driver="gdal"><url>c:/data/SRTM.tif</url></elevation></map>This Earth File has a base blue marble image as well as a elevation grid that is loaded from a local GeoTiff? file. Any number of elevation sources can be added to the Earth File and they will be combined together by osgEarth. As with images, order is important to elevation data as well. For instance, if you had a base elevation datasource that had low resolution coverage of the entire world and a high resolution inset of Denver, CO, you would specify the base data FIRST, followed by the high res data.Most drivers in osgEarth support reading heightfields as well as imagery. However, it is important to note that only 16 and 32 bit datasources can be used as heightfield datasources.Caching ¶osgEarth can cache tiles on disk in order to increase performance to avoid downloading/processing tiles multiple times.<map name="TMS Example" type="geocentric" version="2"><image name="metacarta blue marble" driver="tms"><url>/wms-c/Basic.py/1.0.0/satellite/</url></image><options><!--Specify where to cache the data--><cache><path>c:/osgearth_cache</path></cache></options></map>This Earth File shows the most basic way to specify a cache for osgEarth. This tells osgEarth to enable caching and to cache to c:/osgearth_cache. Both absolute and relative paths can be used when specifying the cache path. If a relative path is given for the cache path, it will be relative to the location of the Earth File.A more detailed description of how to configure caching is available in the caching section.<map> ¶A map configuration that describes how to render geospatial data as a unified terrain model. osgEarth can render maps in one of two ways:•Geocentric - If the value of the map's type attribute is geocentric, round, globe or earth then the map will be displayed as a whole earth, geocentric globe. Please note that only geodetic and mercator profiles can be rendered as a Geocentric globe.•Projected - If the value of the map's type attribute is projected or flat then the map will be displayed in a flat projection. This is useful for displaying data that is in a projectedcoordinate system such as UTM, but you can also render whole earth geodetic or mercator data in a flat projection, e.g., for 2D mapping applications.Attributes ¶name Human-readable name of the map. optionaltype Type of map to render: geocentric for round-earth (default), projected for flat-earth (default: geocentric)optionalversion Specified the version of the earth-file format. Should be "2" when usingosgEarth 2.x.requiredSub-elements ¶<options>Configures the map and all runtime behavior of the terrain engine. optional<image>An image layer. Your graphics hardware, along with the compositor thatosgEarth is using, will determine the maximum number of <image> layersyou can display.optional<elevation> An elevation layer. Elevation layers of different sizes and resolutions can be stacked. There is no artificial limit to the number of elevation layersosgEarth supports.optional<model> A model data source (e.g., feature data, external models) optional <overlay> A layer that drapes geometry over the terrain optional Example ¶<map name="earth" type="geocentric" version="2"><options>...</options><image ...></image><elevation...></elevation></map>osgEarth Drivers ¶Image / Elevation Drivers ¶These drivers generate image or elevation tiles that make up the terrain itself.AGGLite Rasterizes feature data into image tiles.ArcGIS Reads imagery data from ESRI ArcGIS Server map services or the ArcGIS Online web serviceComposite Combines multiple <image> layers into one logical image layerGDAL Reads geo-referenced imagery and elevation data in a large number of formats including GeoTIFFOSG Reads non-geo-referenced imagery (like JPEGs) using one of the OpenSceneGraph image reader/writersTileCache Reads image tiles from a MetaCarta TileCache cache folderTileService Reads tiles from a NASA WorldWind TileService repositoryTMS Reads tiles from an OSGeo TileMapService repositoryWCS Reads from an OGC Web Coverage ServiceWMS Reads from an OGC Web Mapping ServiceVPB Integrates with an existing VirtualPlanetBuilder terrainModel Drivers ¶Model drivers ingest data and create nodes that can be placed on top of the terrain. These could be "draped" layers, or they could be 3D models.Feature Geometry Renders vector data as OSG geometryFeature Overlay Drapes vector data on the terrain using projected texturesFeature Stencil Drapes vector data on the terrain using a stencil buffer techniqueSimple Loads an external model and places it in the scene graphFeature Drivers ¶Feature drivers are used to read raw GIS vector data. They do not create visible geometry directly; model drivers that display vector data will use feature drivers to read in the vector data.OGR Reads raw vector feature data from Shapefiles and a number of other formats using the GDAL/OGR toolkitCache Drivers ¶Cache drivers are used to provide tile caching implementations to osgEarth.tms Stores cached tiles in a TMS-style file hierarchy on disk. (DEFAULT)sqlite3Caches tiles in an sqlite3 database on disk.Terrain Engine Drivers ¶A terrain engine driver provides osgEarth with a terrain skin (image+elevation) rendering implementation.A terrain renderer based on the OpenSceneGraph osgTerrain library. osgterrain(DEFAULT)Caching ¶osgEarth can cache tiles in order to increase performance. One an image or heightfield has been created once, it is generally much faster to access a local cache for that tile rather than create the tile or download it from the web again.All layers in the map share a single cache object defined at the map level.There are multiple types of caches that can be used in osgEarth, but all caches are specified with the following format:<cache type="cache_type"><property1>value</property2><property2>value</property2>...</cache>The type parameters tells osgEarth which type of cache to create. All properties and their corresponding values will be passed to the cache to configure it.General Notes•All disk based caches use the image and heightfield name to create the folder to cache to.Please make sure that your layer names are unique per each cache path.•osgEarth uses OpenSceneGraph?'s existing plugins to read and write data. Make sure that the format you specify for the caches has good support for reading and writing. For example, the tiff plugin in OpenSceneGraph? 2.6.1 has a problem writing 16 and 32 bit datasets, so it is inappropriate to use when caching heightfields. The DDS plugin does support writing both16 and 32 bit datasets to disk. The tiff plugin is the recommended plugin to use for OSG 2.8and above.•It is possible to run osgEarth completely off of a cache by setting theOSGEARTH_CACHE_ONLY environment variable or using the <cache_only> attribute.•It is possible to override the cache format and disable caching for a particular layer by using the <cache_enabled> and <cache_format> elementsSeeding the Cache ¶Sometimes it is useful to pre-seed your cache for a particular area of interest. osgEarth provides a utility application, osgearth_seed to accomplish this task. osgearth_seed will take an Earth file and populate your cache.osgearth_seed UsageCommand:osgearth_seed [options] filenameOptions:--bounds minx miny maxx, maxy The geospatial extents to seed.--min-level level The minimum level to seed down to.--max-level level The maximum level to seed down to.-b Shorthand for --bounds.--cache-path Use a different cache path than the one defined in the earth file--cache-type Override the cache type if youoverride the cache path (tms or disk).Types of Caches ¶TMS (default) ¶If the cache type is tms then osgEarth caches files to disk using a format compatible with the TMS specification.The tms style cache has the following properties:•path - The path on disk to cache tiles to•format - The format to cache to (png, jpg, dds, etc). If no format is specified, the preferred format of the image or heightfield source will be used. If there is no preferred format for the source, the default will be png.•tms_type - If the value of tms_type is google then the y tile index will be inverted so that 0,0 is the top left tile rather than the bottom left tile.<map name="My Map" type="geocentric"><!--Specify a map level "tms" cache for all images and heightfields--><cache type="tms"><path>c:/osgearth_cache</path></cache><image name="bluemarble" driver="tms"><url>/wms-c/Basic.py/1.0.0/satellite/</url></image><image name="inset" driver="gdal"><url>c:/data/inset.tiff</url></image></map>Sqlite3 ¶Set the cache type to sqlite3 to store your cache in a sqlite database file. This is nice because the entire cache is in a single file, making it easy to transport if necessary.The sqlite3 cache has the following properties:•path - path to the database file.Example:<map type="globe"><cache type="sqlite3"><path>c:/osgearth_cache.db</path><max_size>300</max_size> <!-- MB --></cache><image name="bluemarble" driver="tms"><url>/wms-c/Basic.py/1.0.0/satellite/</url></image>Tile Cache ¶If the cache type is tilecache then osgEarth caches files to disk using a format that is compatible with Metacarta's TileCache "Disk" style caching. This means that the resulting osgEarth cache canbe used by any client that can consume publicly accessible TileCache? disk caches such as OpenLayers or osgEarth. This is very useful because as you are browsing and caching tiles, you are actually creating a map that can be browsed by other clients. If no cache type is specified, then a TileCache? style cache will be used.The tilecache style cache has the following properties:•path - The path on disk to cache tiles to•format - The format to cache to (png, jpg, dds, etc). If no format is specified, the preferred format of the image or heightfield source will be used. If there is no preferred format for the source, the default will be png.<map name="My Map" type="geocentric"><!--Specify a map level "tilecache" cache for all images and heightfields--><cache type="tilecache"><!--All tiles will be cached to c:/osgearth_cache--><path>c:/osgearth_cache</path><!--All tiles will be cached to png format. If we did not specify the format, tiles would be cached to the preferred format of the tile source--><format>png</format></cache><image name="TMS" driver="tms"><url>/wms-c/Basic.py/1.0.0/satellite/</url></image><image name="inset" driver="gdal"><url>c:/data/inset.tiff</url></image></map>Back to DocumentationosgEarth Developers Guide (Version 2.x) ¶osgEarth was designed with ease of application integration as one of its main goals. There are really two ways to go about integrating osgEarth. You can create an Earth File and load it into your application or you can programmatically create a map at runtime using the osgEarth API. Topics:•Working with maps•The utilities library•Shader composition•Building your own driver?Loading a Map ¶Because much of the functionality of osgEarth is wrapped up in OpenSceneGraph plugins, it is possible to load a map from an Earth File with a single line of code:osg::Node* globe = osgDB::readNodeFile("myglobe.earth");You now have an OpenSceneGraph Node that can be added to your scene graph and displayed. Seriously, it really is that simple! :)This method of loading a Map is more often than not all that an application will need to do. If your application already supports VirtualPlanetBuilder terrain databases, then you should have very little work in integrating osgEarth as the scene graphs are extremely similar. Both are based on osgTerrain and the !PagedLOD system and both are decorated with an osg::CoordinateSystemNode. The only real difference between the two is that an osgEarth database is built on the fly rather than pre-generated.Programmatic Map Creation ¶osgEarth also provides an API for creating Maps at runtime. This is very useful if your application allows a use to select from various layers to display at runtime.The basic steps to creating a Map with the API are:1.Create a Map object2.Add imagery and elevation layers to the Map as you see fit3.Create a MapNode that will render the Map object4.Add your MapNode to your scene graph.You can add layers to the map at any time. However, once you add a layer to the map, it makes a copy of the options and you can no longer change them.#include <osgEarth/Map>#include <osgEarth/MapNode>#include <osgEarthDrivers/tms/TMSOptions>#include <osgEarthDrivers/gdal/GDALOptions>using namespace osgEarth;using namespace osgEarth::Drivers;...// Create a Map and set it to Geocentric to display a globeMap* map = new Map();// Add an imagery layer (blue marble from a TMS source){TMSOptions tms;tms.url() = "/wms-c/Basic.py/1.0.0/satellite/"; ImageLayer* layer = new ImageLayer( "NASA", tms );map->addImageLayer( layer );}// Add an elevationlayer (SRTM from a local GeoTiff file){GDALOptions gdal;gdal.url() = "c:/data/srtm.tif";ElevationLayer* layer = new ElevationLayer( "SRTM", gdal );map->addElevationLayer( layer );}// Create a MapNode to render this map:MapNode* mapNode = new MapNode( map );...viewer->setSceneData( mapNode );Working with a MapNode at runtime ¶Whether the Map was loaded from an Earth File or created at run time, the Map can modified at runtime. If a Map was loaded from an Earth File, you will first need to get a reference to the MapNode to work with. Use the !Map::findMapNode utility function://Load the maposg::Node* loadedModel = osgDB::readNodeFile("mymap.earth");//Find the MapNodeosgEarth::MapNode* mapNode = MapNode::findMapNode( loadedModel );Once you have a reference to the MapNode, you can add image or elevation layers:// Add an OpenStreetMap image sourceTMSOptions driverOpt;driverOpt.url() = "/";driverOpt.tmsType() = "google";ImageLayerOptions layerOpt( "OSM", driverOpt );layerOpt.profile() = ProfileOptions( "global-mercator" );ImageLayer* osmLayer = new ImageLayer( layerOpt );mapNode->getMap()->addImageLayer( osmLayer );You can also remove or re-order layers:// Remove a layer from the map. All other layers are repositioned accordingly mapNode->getMap()->removeImageLayer( layer );// Move a layer to position 1 in the image stackmapNode->getMap()->moveImageLayer( layer, 1 );Processing Source Data ¶If you have geospatial data that you would like to view in osgEarth, you can use the GDAL driver. If you plan on doing this, there a few performance guidelines you should follow:Reproject your dataosgEarth will reproject your data on your fly if it does not have the necessary coordinate system. For instance, if you are trying to view a UTM image on a geodetic globe (epsg:4326). However, osgEarth will run much faster if your data is already in the correct coordinate system. You can use any tool you want to reproject your data such as GDAL, Global Mapper or ArcGIS. For example, to reproject a UTM image to geodetic using gdal_warp:gdalwarp -t_srs epsg:4326 my_utm_image.tif my_gd_image.tifBuild tiled imageryTypically formats such as GeoTiff? store their pixel data in scanlines. This generally works well, but because of the tiled approach that osgEarth uses to access the data, you may find that using a tiled dataset will be more efficient as osgEarth doens't need to read nearly as much data from disk to extract a tile. To create a tiled GeoTiff? using gdal_translate, issue the following command:gdal_translate -of GTiff -co "TILED=YES" myfile.tif myfile_tiled.tifBuild overviewsAdding overviews (also called pyramids or rsets) will greatly increase the peformance of a datasource in osgEarth. You can use the gdaladdo utility to add overviews to a dataset. For example:gdaladdo -r average myimage.tif 2 4 8 16Generating Tiled Datasets ¶While it is possible to use geospatial source data directly in osgEarth, it is much more efficient to pre-tile the data into an optimized tile hierarchy. There are many tools available to accomplish this, including osgEarth!osgEarth ¶One of the easiest ways to create a nicely tiled datasource is to use osgEarth's built in caching mechanism. Caches created by osgEarth are based on open standards datasources such as TMS and can actually be used as a datasource directly once they are cached. For example, lets say we have a single GeoTiff? of NASA's BlueMarble? image that we want to tile up.First, create a map file called bluemarble.earth that references the Blue Marble GeoTiff? using the GDAL plugin<map name="bluemarble" type="geocentric" version="2"><!--Add a reference to the image --><image name="bluemarble" driver="gdal"><url>c:/data/bluemarble.tif</url></image><options><!--Tell osgEarth to cache the tiles in a TMS format--><cache type="tms"><path>c:/osgearth_cache</path><!--Tell osgEarth to cache the tiles to JPG to save disk space--><format>jpg</format></cache></options></map>When you run:osgviewer bluemarble.earthyou should see tile begin to cache to the c:/osgearth_cache/bluemarble folder as you browse around the globe.Lets automate the caching process by using the osgearth_seed program.Run:osgearth_seed --max-level 7 bluemarble.earthOnce this is complete, you will have a fully cached TMS datasource in yourc:/osgearth_cache/bluemarble directory.Now, lets remove the need for the original GeoTiff? file and directly access the TMS datasource. Make a mapfile called bluemarble_tms.earth:<map name="bluemarble-tms" type="geocentric" version="2"><!--Add a reference to the TMS xml file --><image name="bluemarble" driver="tms"><url>c:/osgearth_cache/bluemarble/tms.xml</url></image></map>Running osgviewer with bluemarble_tms.earth will directly hit the cache. You can freely move the bluemarble datasource anywhere you want, even a webserver! For instance, you can deploy the tiles by copying the bluemarble directory to a public folder on your webserver.Then, we could change our bluemarble_tms.earth file to<map name="bluemarble-tms" type="geocentric" version="2"><!--Add a reference to the TMS xml file --><image name="bluemarble" driver="tms"><url>/tiles/bluemarble/tms.xml</url></image></map>Running osgviewer will now hit the tiles on the server! Just for completeness, you could also copy the bluemarble_tms.earth file to your webserver as well and load it from the web like:osgviewer /maps/bluemarble_tms.earthIt is important to note that this procedure doesn't apply only to geospatial data on your source machine. It is completely possible to use this procedure to cache data from a server such as WMS to a local TMS cache!Maptiler ¶MapTiler is a nice little GUI tile generator that was originally developed as the gdal2tiles script forGDAL. It can be used to generate TMS (Tile Map Resource) tile sets that can be used directory in osgEarth.It is very important to note that the BoundingBox? element in the tilemapresource.xml file output by MapTiler? has it's x's and y's reversed. So, once tile generation is complete, open up the tilemapresource.xml file in a text editor, swap the minx/miny, maxx/maxy values and save the fileYou should then be able to create a new [TileSourcePluginTMS TMS] image source that references the tilemapresource.xml fileTileCache? ¶TileCache is a small Python WMS-C implementation that lets you easily publish a caching tile server. Once you have TileCache? installed according to the directions on their website, you can setup osgEarth to access it as a WMS or TMS service and TileCache? will cache the tiles as you browse. Another added benefit is that you can use TileCache?'s "disk" cache mode and then use osgEarth's TileCache Driver to access the cache folder directory.Back to Documentation。
osgearth学习文档
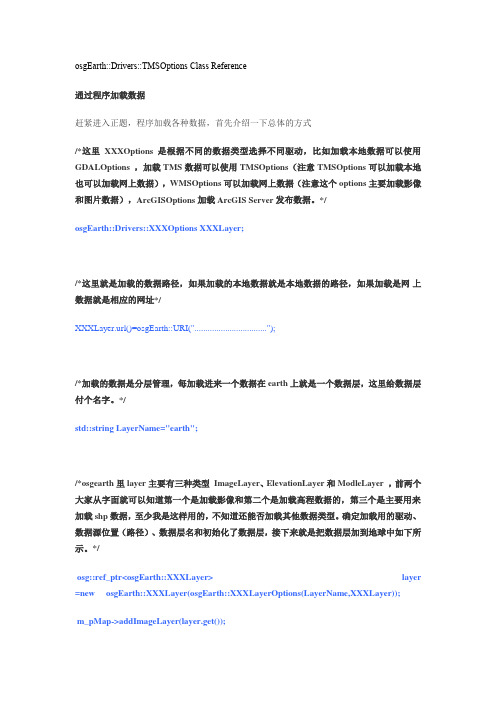
osgEarth::Drivers::TMSOptions Class Reference通过程序加载数据赶紧进入正题,程序加载各种数据,首先介绍一下总体的方式/*这里XXXOptions 是根据不同的数据类型选择不同驱动,比如加载本地数据可以使用GDALOptions ,加载TMS数据可以使用TMSOptions(注意TMSOptions可以加载本地也可以加载网上数据),WMSOptions可以加载网上数据(注意这个options主要加载影像和图片数据),ArcGISOptions加载ArcGIS Server发布数据。
*/osgEarth::Drivers::XXXOptions XXXLayer;/*这里就是加载的数据路径,如果加载的本地数据就是本地数据的路径,如果加载是网上数据就是相应的网址*/XXXLayer.url()=osgEarth::URI(".................................");/*加载的数据是分层管理,每加载进来一个数据在earth上就是一个数据层,这里给数据层付个名字。
*/std::string LayerName="earth";/*osgearth里layer主要有三种类型ImageLayer、ElevationLayer和ModleLayer ,前两个大家从字面就可以知道第一个是加载影像和第二个是加载高程数据的,第三个是主要用来加载shp数据,至少我是这样用的,不知道还能否加载其他数据类型。
确定加载用的驱动、数据源位置(路径)、数据层名和初始化了数据层,接下来就是把数据层加到地球中如下所示。
*/osg::ref_ptr<osgEarth::XXXLayer> layer =new osgEarth::XXXLayer(osgEarth::XXXLayerOptions(LayerName,XXXLayer));m_pMap->addImageLayer(layer.get());(1)加载本地数据a 本地影像数据,数据类型为tifosgEarth::Drivers::GDALOptions imagelayerOpt;//选择GDALOptionsimagelayerOpt.url() = osgEarth::URI("E:\\vs2010Progam Files\\osgVR74\\osgVR74\\world.tif");//影像数据路径std::string imagelayerName = "worldimage"; //影像数据层名osg::ref_ptr<osgEarth::ImageLayer> imageLayer = new osgEarth::ImageLayer(osgEarth::ImageLayerOptions(imagelayerName ,imagelayerOpt));//初始数据层m_pMap->addImageLayer(imageLayer .get());b 本地高程数据,数据类型为tifosgEarth::Drivers::GDALOptions demlayerOpt;//使用还是GDALOptionsdemlayerOpt.url() = osgEarth::URI("E:\\vs2010Progam Files\\osgVR74\\osgVR74\\worlddem.tif");//高程数据路径std::string demlayerName = "worlddem";//高程数据层名osg::ref_ptr<osgEarth::ImageLayer> demLayer = new osgEarth::ImageLayer(osgEarth::ImageLayerOptions(demlayerName,demlayerOpt));//初始数据层m_pMap->addImageLayer(demLayer.get());加载本地经过package 切片的数据还可以用TMSOptions,osgEarth::Drivers::TMSOptions tmsOpt;////选择TMSOptions 驱动tmsOpt.url()=osgEarth::URI("//Edvis_-1/Layer_0/tms.xml");//package切片生成金字塔文件下的xmlstd::stringDemtmslayerName="TmsDem";//图层名osgEarth::ElevationLayerOptionstmslayerOpt(DemtmslayerName,tmsOpt);osg::ref_ptr<osgEarth::ElevationLayer> TmsDemLayer = new osgEarth::ElevationLayer(tmslayerOpt);m_pMap->addElevationLayer(TmsDemLayer.get());//初始化图层并加入到地球中(2)加载网上数据a 加载ArcGIS Server 发布的数据加载方式与上面提到的类似osgEarth::Drivers::ArcGISOptions MapImageLayer;MapImageLayer.url()=osgEarth::URI("");std::string CdlayerName="worldimage";osg::ref_ptr<osgEarth::ImageLayer> cdlayer =new osgEarth::ImageLayer(osgEarth::ImageLayerOptions(CdlayerName,MapImageLayer));m_pMap->addImageLayer(cdlayer.get());//这里注意,当osgearth访问ArcGIS Server 发布数据的时候有些问题很奇怪,用上面的方式访问ArcGIS Server 国外发布的数据没问题,但是访问自己发布的数据就会有问题,经过试验投影要设成3857才能正常访问。
osgEarth编译总结
首先在osg的编译上有一点记录一下:1 我们下载的第三方依赖3rdParty_x86_x64 这个文件对于VS2008和VS2010来说可能VS2008的提供库要全一些。
2 对于3rdParty_x86_x64文件夹下的x86和x64来说我们的系统如果是32位的应该就只能选x86 对于x64来说我们两个包都是可以选择的,据说在64位的系统上的32位程序是模拟运行的。
如果我们编译时选择直接编译。
那最好是选x86那个包。
在这次的选择中选择x64包结果编译到osgDB库的时候出现了错误。
如果想编译出来的程序只是用于x64 那么可以尝试在x64包的基础上对VS进行相关的设置,应该是不会有很大问题的。
下面主要是对osgEarth进行编译由于osgEarth没有对第三方依赖进行打包,所以我们就不得不自己进行配置相关的依赖。
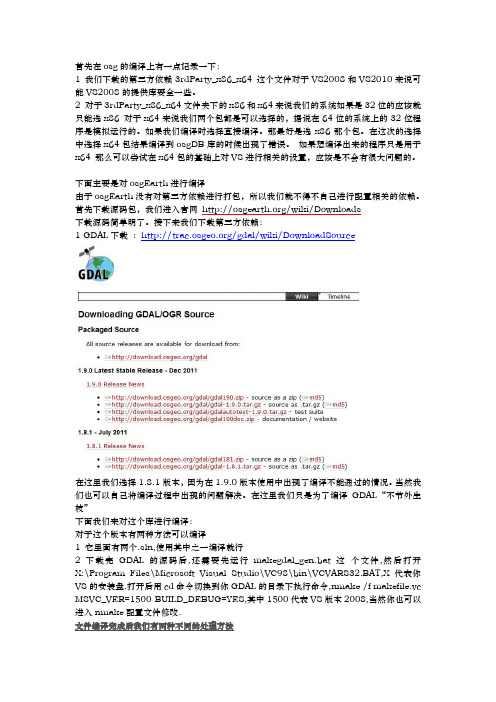
首先下载源码包,我们进入官网/wiki/Downloads下载源码简单明了。
接下来我们下载第三方依赖:1 GDAL下载:/gdal/wiki/DownloadSource在这里我们选择1.8.1版本,因为在1.9.0版本使用中出现了编译不能通过的情况。
当然我们也可以自己将编译过程中出现的问题解决。
在这里我们只是为了编译GDAL“不节外生枝”下面我们来对这个库进行编译:对于这个版本有两种方法可以编译1 它里面有两个.sln,使用其中之一编译就行2 下载完GDAL的源码后,还需要先运行makegdal_gen.bat这个文件,然后打开X:\Program Files\Microsoft Visual Studio\VC98\bin\VCVARS32.BAT,X代表你VS的安装盘.打开后用cd命令切换到你GDAL的目录下执行命令,nmake /f makefile.vc MSVC_VER=1500 BUILD_DEBUG=YES,其中1500代表VS版本2008,当然你也可以进入nmake配置文件修改.文件编译完成后我们有两种不同的处理方法方法一将生成的lib dll 包括: gdal_i.lib gdal.lib cpl.lib(port目录下) ogr.lib(ogr目录下), 以及gdal17.dll 拷贝到E:\OSG\GDAL\apps下,这一种在后面的使用中会直接将这个作为cmake的应用目录(在工程中添加包含目录时会很麻烦,不推荐采用)方法二GDAL编译完成后的文件存放于C0:\warmerda\bld,包含文件include,lib,data,bin,可将它们拷贝到GDAL文件夹下,置于OSG目录下。
osgearth各个例子功能概述

osgearth各个例⼦功能概述转⾃:/wl198302/article/details/21177309最近在学习osgearth,对其还不是很理解,有些例⼦不会运⾏,有些可以,把可以的做个统计,以备后⾯查⽤。
1、osgearth_graticule:⽣成经纬线。
2、osgearth_annotation:各类标注(点、线、⾯、模型、⽂本等)。
3、osgearth_city:加载⼀个城市三维模型,可以浏览。
4、osgearth_clamp:在⼀个区域加载⽣成5000个树⽊的三维模型展⽰。
5、osgearth_colorfilter:运⾏不起来……6、osgeatth_controls:有⼀个osg的图标,可以控制透明度与⽅向。
还有⼀些⽂本矩形框之类的。
7、osgearth_demo:qt的⼀个集成地球的例⼦8、osgearth_elevation:显⽰⿏标所指位置的经纬度、坐标系、⾼程(MSL\HAE)、分辨率。
不过运⾏⾮常缓慢。
9、osgearth_featureeditor:添加⼀条线,并可以修改线的节点与颜⾊(编辑时,线的形状变为虚线段)。
10、osgearth_featurfilter:出来⼀个地球,不知道需要什么数据才能运⾏出效果。
例⼦给出的⽤途为-简单的功能过滤,改变数据源特征属性的值。
11、osgearth_featureinfo:不是界⾯程序,不知道⼲嘛的……12、osgearth_featuremanip:出现⼀个地球,没明⽩⼲嘛的……13、osgearth_featurequery:同上……14、osgearth_imageoverlay:在地图上叠加⼀张gif图⽚,并可以控制图⽚的透明度。
15、osgearth_features:代码建⽴地图,并加载各国分界线的shp数据。
16、osgearth_los:以稍稍⽔平的视⾓,显⽰飞机模型绕⼀点旋转,还有⼀些运动对象。
17、osgearth_manip:地球上⽣成⼀个⽴体的helloworld⽂字,并且可以控制⽂字⾏⾛,快速定位不同级别的视点,让⽂字始终在屏幕中央,地球滚动,很好的功能 O(∩_∩)O~18、osgearth_map:代码⽣成地球tms地图图层。
osgearth笔记
o s g e a r t h笔记(下载)(总9页)--本页仅作为文档封面,使用时请直接删除即可----内页可以根据需求调整合适字体及大小--osgEarth学习笔记这是个人在学习osgEarth时根据体会或从别的地方看到的做的一个简单整理,有些东东就是官方文档翻译过来的,都是根据自己的需要感觉需要记录下来什么东西就随便记录下来了,也没有个条理,都是用到哪记到哪,别见怪。
对个人在初期使用osgEarth时有很多帮助,所以特发上来,希望对大家也有帮助osgEarth学习笔记1. 通过earth文件创建图层时,可以指定多个影像数据源和多个高程数据源,数据源的顺序决定渲染顺序,在earth文件中处于最前的在渲染时处于最底层渲染;所以如果有高低精度不同的影响数据或者高程数据,在创建earth文件时要将粗精度的数据放在上方xml节点,高精度的放在其下面的节点;2. osgEarth自带多种驱动器,不同的驱动器驱动不同的数据源,自己也可以扩展驱动器读取相应的数据;3. 可以通过profile属性指定数据的投影方式或者数据分页方式以及地理空间延展;osgEarth通过profile创建数据四叉树,每个四叉树节点数据瓦片通过TileKey类来标示;一个地形数据能否正常工作要看创建它的驱动器是否能够创建和对应profile兼容的数据瓦片;比如,如果要生成地球数据,就需要指定global-geodetic 或者global-mercator profile,相应的数据源要能够在这种profile下生成相应的地形数据;4.通过earth文件,最基本的也是最主要的功能是我们可以指定生成地形的坐标属性(地理坐标或投影坐标)影像数据、高程数据、矢量数据、模型数据、以及缓冲位置,通过这些基本要素就可以轻易生成我们想要的地形;5. osgEarth只能使用16或32位的高程数据源;6. 如果直接使用原始的影像、高程以及矢量数据,可以用GDAL驱动器,在这种情况下需要注意几个性能的问题。
osgearth 参数
osgearth 参数
osgEarth是一个用于地理信息系统(GIS)的开源软件库,它使用OpenSceneGraph(OSG)作为其3D引擎。
osgEarth提供了许多参数来配置和定制其功能和行为。
以下是一些常见的osgEarth参数:
1. 模型位置:使用`url`字段表示模型的位置路径。
2. 视点图层:使用`viewpoints`关键字来表示,包含了`name`、`heading`、`lat`、`long`、`height`、`pitch`和`range`七个参数,分别表示图层名称、
方位角、位置纬度、经度、高度、俯仰角、范围。
3. 挤压符号:用于创建3D形状的挤压几何,例如从源矢量数据中挤压2D
向量。
4. 图标符号:描述二维图标的外观,常用于点替换,用图标代替几何模型。
5. 模型符号:描述外部的3D模型。
请注意,上述参数只是一部分osgEarth提供的参数,并不详尽无遗。
您应
该参考osgEarth的官方文档或源代码以获取完整的参数列表和详细说明。
osgEarth手册

1、OSGEARTH 安装OsgEarth是一个跨平台的库,可以使用版本号为2.6.2或更新版本的Cmake 对其进行编译。
1.1、获取源码三个方法可以获取osgearth源码:Option1:使用GITosgEarth源码托管于GitHub,所以我们需要一个Git客户端。
Windows下推荐T ortoiseGit,SVN 小乌龟的Git 版本。
评价:该有的功能基本都有了,还是不错的。
备注:GitHub是一个为那些使用Git版本控制系统的项目提供基于互联网的存取服务的Git存取站点。
它是由GItHub公司(先前被称作用Logical Awesome)的开发者Chris Wanstrath, PJ Hyett, 和Tom Preston-Werner 使用Ruby on Rails写成的。
最新版本是Version 2.0,osgearth_2.0_T2011-02-24。
Option2: 下载tarballtarball是linux下最方便的打包工具,是以tar这个指令来打包与压缩的档案。
下载页面: /gwaldron/osgearth/downloadsOption3:使用版本控制SVN在您的SVN客户端上键入:/gwaldron/osgearth.git1.2、准备工作osgEarth需要第三方支持库才能编译。
所需的依赖服务如下:●OpenSceneGraph 2.8或更新的●GDAL 1.6或更新的,Geospatial Data Abstraction Layer的缩写。
是一个在X/MIT许可协议下的开源栅格空间数据转换库●CURL- HTTP transfer library,是一个利用URL语法在命令行方式下工作的文件传输工具。
可选依赖如下(没有他们,osgEarth可以运行,但将会失去一些功能):●GEOS3.2.0或更高版本-C++拓展库,这个库是用来osgEarthFeatures模块执行各种几何处理操作,如缓冲和交集。
osgEarth数据读取流程

fromFile()
readNodeFile() ReadFile.cpp ReaderWriter::Re adResult readNode() options>getReadFileCall back() EarthFileSerializer1 .deserailize() version == "2" EarthFileSerializer2. deserailize()
deserialize()
Map addImageLayer() addElevationLayer(
)
addModelLayer()
map.cpp
Conf ig
addTerrainMaskLaye r()
images 为XML文件中的所 有image元素 ConfigSet images = conf.children( "image" );
根据配置文件中的options元素配置地形引擎 如果没有配置该选项,则自动加载 osgdb_osgearth_engine_mp.dll作为地形引擎
地形引擎需要一个Container 来设置光照状态,而不能直接 在引擎上来设置
_terrainEngineContainer = new osg::Group(); _terrainEngineContainer->setDataVariance( osg::Object::DYNAMIC ); this->addChild( _terrainEngineContainer.get() );
MapNode* mapNode = new MapNode( map, mapNodeOptions )
MapNode::init()
编译osg、osgEarth、QGIS

编译QGIS-修改记录目录编译QGIS (1)- (1)修改记录 (2)目录 (3)1.准备 (4)1.1.下载源码: (4)1.2.下载依赖的第三方库 (4)1.3.使用osgeo4w-setup下载第三方依赖库 (4)1.3.1.osgeo4w-setup的获取 (4)1.3.2.下载第三方库 (4)2.编译OpenSceneGraph-3.2.1 (5)3.编译osgearth (5)4.编译QWT 5.2.3 (7)5.编译QGIS (8)5.1.准备: (8)5.2.修改CMakefile.txt文件: (8)5.3.编译Debug版本: (9)5.4.编译Release版本 (10)1.准备1.1.下载源码:下载OpenSceneGraph-3.2.1、osgearth-osgearth-2.5、qgis_2.4的源码;1.2.下载依赖的第三方库使用下载QIS依赖的第三方库。
使用windows-VS10.0.30319-x86-debug.7z中的osg第三方库。
1.3.使用osgeo4w-setup下载第三方依赖库1.3.1.o sgeo4w-setup的获取从安装版QGIS中获取。
或从/osgeo4w/网站获取。
1.3.2.下载第三方库1)运行osgeo4w-setup2)选择“Advanced Install“,下一步;3)选择“Download Without Installing“,下一步。
(只下载不安装,目的是以后继续使用下载的文件。
也可以选择”Install from Internet“);4)在“Select Loacal Package Directory“,选择存放安装包的本地目录,下一步。
5)在“Select Packages“页面中,选择要下载的包。
安装:1)在上述第3)步中,选择“Install from Local Directory“,2)在“Root Directory“中指定安装的目的目录(如E:\QEarth)3)在“Select Loacal Package Directory“中选择上面第4)步指定的存放安装包的本地目录。
OSGEarth编译
第一章OSGEarth编译
上一章我们做的所有工作都是为了配置OSGEarth,
第一节sln生成
VS2010的sln文件生成是OSGEarth的关键。
作者在配置出现很多错误,从而导致了使用VS2010编译出现很多问题。
1.1 CMAKE配置
第一步:启动CMake -gui.exe并设置文件地址,将编译地址设置为E:\OSGEARTH\OSGEARTH\vs2010,然后“configure”
添加方法:点击“Add Entry”,弹出Add Cache Entry对话框(如下图所示)
完成后cmake参数列表顶端出现添加的两个参数:
第二步:设置相关参数
设置完成后再次“configure”
第三步:生成vs2010文件。
点击“Generate”,结果如下:
E:\osgearth\osgearth\vs2010文件夹截图:
1.2 VS2010配置
第一步:使用vs2010打开E:\osgearth\osgearth\vs2010 \OSGEARTH.sln文件。
第二步:打开all_build工程属性,设置库目录和包含目录。
包含目录:
库目录:
保存所有文件,这样SLN文件就可以使用了。
osgEarth编译
以下文档是osg和osgearth的编译过程,系统要求如下:操作系统:win7 home basic x64编译器:vs2010〇前言本文档编译成功后会形成4个目录,分别为:1Open Scene Graph, C:\Open Scene Graph2OpenSceneGraph, C:\OpenSceneGraph3OSG, D:\OSG4osgEarth, D:\osgEarth第一个存放osg软件,用于只使用osg软件用。
文件夹大小199M第二个存放osg+osgearth软件,用于使用osgearth和osg用。
文件夹大小626M第三个存放osg编译过程文件,用于对osg软件升级开发用。
文件夹大小3.6G第四个存放osgEarth编译过程文件,用于对osgEarth软件升级开发用。
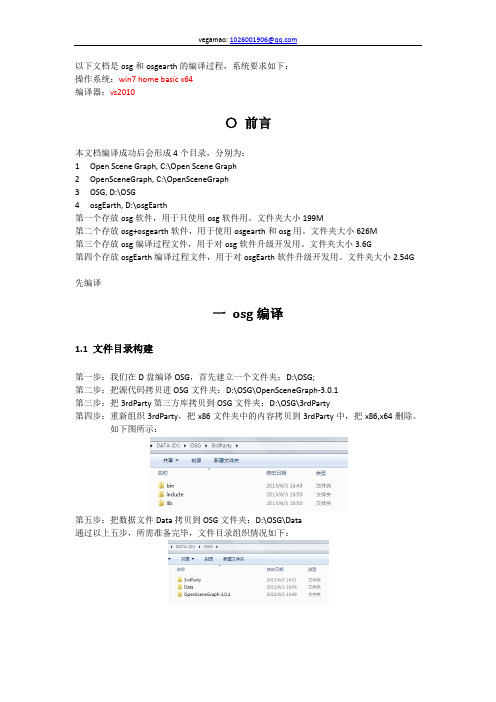
文件夹大小2.54G 先编译一osg编译1.1 文件目录构建第一步:我们在D盘编译OSG,首先建立一个文件夹:D:\OSG;第二步:把源代码拷贝进OSG文件夹:D:\OSG\OpenSceneGraph-3.0.1第三步:把3rdParty第三方库拷贝到OSG文件夹:D:\OSG\3rdParty第四步:重新组织3rdParty,把x86文件夹中的内容拷贝到3rdParty中,把x86,x64删除。
如下图所示:第五步:把数据文件Data拷贝到OSG文件夹:D:\OSG\Data通过以上五步,所需准备完毕,文件目录组织情况如下:1.2 Qt和wxWidgets安装下载qt和wxWidgets安装文件:qt-win-opensource-4.8.4-vs2010.exe和wxMSW-2.8.12-Setup.exe,如图所示:1.3 cmake设置第一步:把cmake程序拷贝到C盘,C:\cmake-2.8.11-win32-x86第二步:打开cmake程序第三步:直接在source code文本框中输入D:/OSG/OpenSceneGraph-3.0.1第四步:在OSG文件夹中建立Build目录,用于存放编译工程文件第五步:直接在build the binaries文本框中输入D:/OSG/Build第六步:点击Configure第七步:选择Visual Studio 10,点击finish 第八步:等待初始配置结果:第九步:观察配置结果第十步:TIFF,FreeType配置修改观察cmake配置结果,显示TIFF,FREETYPE,没有找到,需要进行指定,TIFF没有debug版本,这里把debug版本指定为release版本。
osgearth
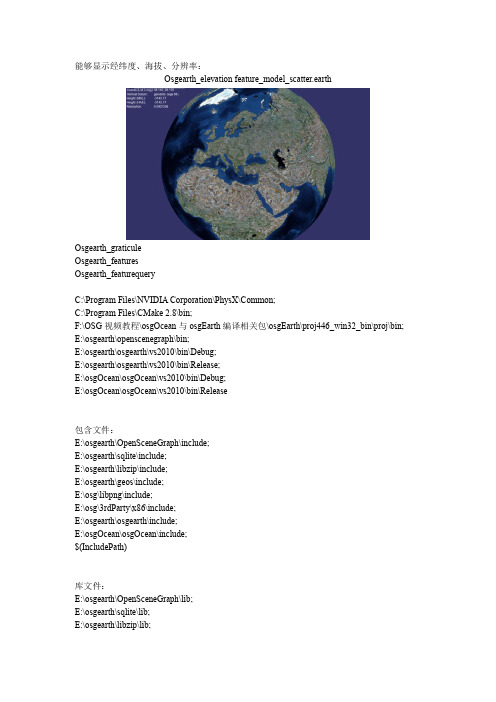
能够显示经纬度、海拔、分辨率:Osgearth_elevationfeature_model_scatter.earthOsgearth_graticuleOsgearth_featuresOsgearth_featurequeryC:\Program Files\NVIDIA Corporation\PhysX\Common;C:\Program Files\CMake 2.8\bin;F:\OSG视频教程\osgOcean与osgEarth编译相关包\osgEarth\proj446_win32_bin\proj\bin; E:\osgearth\openscenegraph\bin;E:\osgearth\osgearth\vs2010\bin\Debug;E:\osgearth\osgearth\vs2010\bin\Release;E:\osgOcean\osgOcean\vs2010\bin\Debug;E:\osgOcean\osgOcean\vs2010\bin\Release包含文件:E:\osgearth\OpenSceneGraph\include;E:\osgearth\sqlite\include;E:\osgearth\libzip\include;E:\osgearth\geos\include;E:\osg\libpng\include;E:\osg\3rdParty\x86\include;E:\osgearth\osgearth\include;E:\osgOcean\osgOcean\include;$(IncludePath)库文件:E:\osgearth\OpenSceneGraph\lib;E:\osgearth\sqlite\lib;E:\osgearth\libzip\lib;E:\osgearth\geos\lib;E:\osg\libpng\lib;E:\osg\3rdParty\x86\lib;E:\osgearth\osgearth\vs2010\lib;E:\osgOcean\osgOcean\vs2010\lib;$(LibraryPath)E:\osgearth\sqlite\lib;E:\osgearth\OpenSceneGraph\lib;E:\osgearth\libzip\lib;E:\osgearth\geos\lib; E:\osg\3rdParty\x86\lib;$(LibraryPath)E:\osgearth\osgearth\tests>osgearth_featurequery feature_stencil_polygon_draping.earth包含文件:E:\osgearth\OpenSceneGraph\include;E:\osgearth\sqlite\include;E:\osgearth\libzip\include;E:\osge arth\geos\include;E:\osg\libpng\include;E:\osg\3rdParty\x86\include;E:\osgearth\osgearth\include; E:\osgearth\osgearth\src;E:\osgOcean\osgOcean\include;$(IncludePath)库文件:E:\osgearth\OpenSceneGraph\lib;E:\osgearth\sqlite\lib;E:\osgearth\libzip\lib;E:\osgearth\geos\lib; E:\osg\libpng\lib;E:\osg\3rdParty\x86\lib;E:\osgearth\osgearth\vs2010\lib\Debug;E:\osgearth\osge arth\vs2010\lib;E:\osgOcean\osgOcean\vs2010\lib;$(LibraryPath)附加依赖项:OpenThreadsd.lib;osgd.lib;osgDBd.lib;osgFXd.lib;osgGAd.lib;osgManipulatord.lib;osgParticled.l ib;osgShadowd.lib;osgSimd.lib;osgTerraind.lib;osgTextd.lib;osgUtild.lib;osgViewerd.lib;osgdb_os gearth_feature_ogrd.lib;osgdb_osgearth_feature_tfsd.lib;osgdb_osgearth_feature_wfsd.lib;osgdb_ osgearth_gdald.lib;osgEarthd.lib;osgEarthAnnotationd.lib;osgEarthFeaturesd.lib;osgEarthSymbol ogyd.lib;osgEarthUtild.lib;%(AdditionalDependencies)。
osgearth学习文档
osgearth学习⽂档osgEarth::Drivers::TMSOptions Class Reference通过程序加载数据赶紧进⼊正题,程序加载各种数据,⾸先介绍⼀下总体的⽅式/*这⾥XXXOptions 是根据不同的数据类型选择不同驱动,⽐如加载本地数据可以使⽤GDALOptions ,加载TMS数据可以使⽤TMSOptions(注意TMSOptions可以加载本地也可以加载⽹上数据),WMSOptions可以加载⽹上数据(注意这个options主要加载影像和图⽚数据),ArcGISOptions加载ArcGIS Server发布数据。
*/osgEarth::Drivers::XXXOptions XXXLayer;/*这⾥就是加载的数据路径,如果加载的本地数据就是本地数据的路径,如果加载是⽹上数据就是相应的⽹址*/ XXXLayer.url()=osgEarth::URI(".................................");/*加载的数据是分层管理,每加载进来⼀个数据在earth上就是⼀个数据层,这⾥给数据层付个名字。
*/std::string LayerName="earth";/*osgearth⾥layer主要有三种类型ImageLayer、ElevationLayer和ModleLayer ,前两个⼤家从字⾯就可以知道第⼀个是加载影像和第⼆个是加载⾼程数据的,第三个是主要⽤来加载shp数据,⾄少我是这样⽤的,不知道还能否加载其他数据类型。
确定加载⽤的驱动、数据源位置(路径)、数据层名和初始化了数据层,接下来就是把数据层加到地球中如下所⽰。
*/osg::ref_ptr layer =new osgEarth::XXXLayer(osgEarth::XXXLayerOptions(LayerName,XXXLayer));m_pMap->addImageLayer(layer.get());(1)加载本地数据a 本地影像数据,数据类型为tifosgEarth::Drivers::GDALOptions imagelayerOpt;//选择GDALOptionsimagelayerOpt.url() = osgEarth::URI("E:\\vs2010Progam Files\\osgVR74\\osgVR74\\world.tif");//影像数据路径std::string imagelayerName = "worldimage"; //影像数据层名osg::ref_ptr imageLayer = new osgEarth::ImageLayer(osgEarth::ImageLayerOptions(imagelayerName ,imagelayerOpt));//初始数据层m_pMap->addImageLayer(imageLayer .get());b 本地⾼程数据,数据类型为tifosgEarth::Drivers::GDALOptions demlayerOpt;//使⽤还是GDALOptionsdemlayerOpt.url() = osgEarth::URI("E:\\vs2010Progam Files\\osgVR74\\osgVR74\\worlddem.tif");//⾼程数据路径std::string demlayerName = "worlddem";//⾼程数据层名osg::ref_ptr demLayer = new osgEarth::ImageLayer(osgEarth::ImageLayerOptions(demlayerName,demlayerOpt));//初始数据层m_pMap->addImageLayer(demLayer.get());加载本地经过package 切⽚的数据还可以⽤TMSOptions,osgEarth::Drivers::TMSOptions tmsOpt;////选择TMSOptions 驱动tmsOpt.url()=osgEarth::URI("//Edvis_-1/Layer_0/tms.xml");//package切⽚⽣成⾦字塔⽂件下的xmlstd::stringDemtmslayerName="TmsDem";//图层名osgEarth::ElevationLayerOptionstmslayerOpt(DemtmslayerName,tmsOpt);osg::ref_ptr TmsDemLayer = new osgEarth::ElevationLayer(tmslayerOpt);m_pMap->addElevationLayer(TmsDemLayer.get());//初始化图层并加⼊到地球中(2)加载⽹上数据a 加载ArcGIS Server 发布的数据加载⽅式与上⾯提到的类似osgEarth::Drivers::ArcGISOptions MapImageLayer;MapImageLayer.url()=osgEarth::URI("http://xxx.xxx.xxx.xxx.:xxxx/arcgis/rest/services/world/ma p003/MapServer");std::string CdlayerName="worldimage";osg::ref_ptr cdlayer =new osgEarth::ImageLayer(osgEarth::ImageLayerOptions(CdlayerName,MapImageLayer));m_pMap->addImageLayer(cdlayer.get());//这⾥注意,当osgearth访问ArcGIS Server 发布数据的时候有些问题很奇怪,⽤上⾯的⽅式访问ArcGIS Server 国外发布的数据没问题,但是访问⾃⼰发布的数据就会有问题,经过试验投影要设成3857才能正常访问。
osgearth 简单的例子

1. 介绍osgEarthosgEarth是一个开源的地理空间3D渲染引擎,它建立在OpenSceneGraph(OSG)之上,提供了一套方便易用的工具和库,用于构建高性能的3D地球可视化应用程序。
osgEarth支持多种数据格式和地理空间数据源,包括地形数据、卫星影像、矢量数据等,用户可以利用osgEarth快速、灵活地构建出各种类型的地球可视化应用。
2. osgEarth的基本概念在了解osgEarth之前,需要了解一些基本概念。
osgEarth使用用于地球可视化的场景图,其中包含了地形、卫星影像、矢量数据和其他图层信息。
osgEarth使用图层树来管理这些数据,每个图层都有自己的样式和渲染规则。
osgEarth还提供了一套简单的、高效的符号渲染系统,可以用于在地图中显示各种地理要素。
3. osgEarth的简单例子下面通过一个简单的例子来介绍osgEarth的基本用法。
假设我们有一些地形数据和卫星影像数据,我们希望将它们加载到osgEarth中进行可视化展示。
(1)我们需要创建一个OSG Viewer实例,作为osgEarth可视化的窗口。
(2)我们需要创建一个Map实例,用于管理地理空间数据。
我们可以向Map实例中添加地形图层和卫星影像图层。
(3)接下来,我们需要创建一个MapNode实例,它是地球可视化的根节点。
我们可以将Map实例和OSG Viewer实例传递给MapNode实例。
(4)我们将MapNode实例添加到OSG Viewer中,这样就完成了地球可视化的搭建工作。
通过以上简单的步骤,我们就可以将地形数据和卫星影像数据加载到osgEarth中进行可视化展示了。
当然,osgEarth还提供了丰富的样式和渲染规则设置,可以根据实际需求进行定制化操作。
4. 总结osgEarth作为一个开源的地理空间3D渲染引擎,提供了丰富的功能和灵活的工具,可以帮助用户快速、高效地构建各种类型的地球可视化应用。
osgearth源代码中各个sample案例详解
osgearth源代码中各个sample案例详解英文版详解OSGEarth源代码中的各个Sample案例OSGEarth, an open-source geospatial visualization library, offers a range of sample cases to demonstrate its capabilities. These samples not only showcase the functionality of OSGEarth but also provide valuable insights into how the library can be used in real-world scenarios. In this article, we delve into each of the sample cases in the OSGEarth source code, explaining their purpose, implementation, and key learnings.Sample 1: Basic Map VisualizationThis sample demonstrates the basic functionality of loading and displaying a map using OSGEarth. It covers the steps involved in initializing the library, loading a map layer, and rendering it on the screen. Key takeaways include understanding the core components of OSGEarth and how to set up a basic map visualization pipeline.Sample 2: Interactive Map NavigationThis sample extends the basic map visualization by adding interactive navigation features such as panning, zooming, and rotating the map. It highlights the ease with which OSGEarth integrates user interaction and demonstrates how to handle map navigation events programmatically.Sample 3: Geospatial Queries and AnalysisThis sample demonstrates the geospatial querying and analysis capabilities of OSGEarth. It covers techniques such as querying for features within a specific area, calculating distances and areas, and performing spatial joins. This sample highlights the power of OSGEarth in geospatial data analysis and processing.Sample 4: Integration with External Data SourcesThis sample demonstrates how OSGEarth can be integrated with external data sources such as shapefiles, KML files, and databases. It covers the steps involved in loading and displaying data from these sources within the OSGEarth framework. Thissample is essential for those looking to integrate their own geospatial data into OSGEarth applications.Sample 5: Advanced Visualization TechniquesThis sample showcases advanced visualization techniques such as layer styling, symbology, and animations using OSGEarth. It covers techniques to enhance the visual appeal of maps and improve user engagement. Developers interested in creating visually appealing and engaging maps will find this sample particularly useful.In conclusion, the samples in the OSGEarth source code provide a comprehensive overview of the library's capabilities and offer valuable insights into its usage. From basic map visualization to advanced visualization techniques and integration with external data sources, these samples cover a wide range of scenarios and use cases. Developers and enthusiasts alike can benefit from exploring these samples and applying the knowledge gained to their own geospatial visualization projects.中文版详解OSGEarth源代码中的各个Sample案例OSGEarth是一个开源的地理空间可视化库,提供了一系列示例案例来展示其功能。
- 1、下载文档前请自行甄别文档内容的完整性,平台不提供额外的编辑、内容补充、找答案等附加服务。
- 2、"仅部分预览"的文档,不可在线预览部分如存在完整性等问题,可反馈申请退款(可完整预览的文档不适用该条件!)。
- 3、如文档侵犯您的权益,请联系客服反馈,我们会尽快为您处理(人工客服工作时间:9:00-18:30)。
osgEarth学习笔记这是个人在学习osgEarth时根据体会或从别的地方看到的做的一个简单整理,有些东东就是官方文档翻译过来的,都是根据自己的需要感觉需要记录下来什么东西就随便记录下来了,也没有个条理,都是用到哪记到哪,别见怪。
对个人在初期使用osgEarth时有很多帮助,所以特发上来,希望对大家也有帮助osgEarth学习笔记1. 通过earth文件创建图层时,可以指定多个影像数据源和多个高程数据源,数据源的顺序决定渲染顺序,在earth文件中处于最前的在渲染时处于最底层渲染;所以如果有高低精度不同的影响数据或者高程数据,在创建earth文件时要将粗精度的数据放在上方xml节点,高精度的放在其下面的节点;2. osgEarth自带多种驱动器,不同的驱动器驱动不同的数据源,自己也可以扩展驱动器读取相应的数据;3. 可以通过profile属性指定数据的投影方式或者数据分页方式以及地理空间延展;osgEarth通过profile创建数据四叉树,每个四叉树节点数据瓦片通过TileKey类来标示;一个地形数据能否正常工作要看创建它的驱动器是否能够创建和对应profile兼容的数据瓦片;比如,如果要生成地球数据,就需要指定global-geodetic 或者global-mercator profile,相应的数据源要能够在这种profile下生成相应的地形数据;4.通过earth文件,最基本的也是最主要的功能是我们可以指定生成地形的坐标属性(地理坐标或投影坐标)影像数据、高程数据、矢量数据、模型数据、以及缓冲位置,通过这些基本要素就可以轻易生成我们想要的地形;5. osgEarth只能使用16或32位的高程数据源;6. 如果直接使用原始的影像、高程以及矢量数据,可以用GDAL驱动器,在这种情况下需要注意几个性能的问题。
第一,将数据源预先进行坐标变换,变换为目标地形坐标,否则osgEarth会对源数据进行坐标投影变换,这将降低数据的加载及处理速度。
如果预先已经将数据源进行正确的坐标变换,osgEarth就可以省略这个步骤,从而提高其实时处理速度;第二,预先对影像数据进行瓦片处理,比如tiff格式的影像数据,它是逐行扫描存储的,而osgEarth是每次读取一个瓦片数据,如果预先对影像数据进行瓦片处理,在动态过程中osgEarth就不需要每次读取整个大块影像数据然后提取其需要的瓦片数据,而可以直接读取相应的瓦片数据即可,这样就大大提高了瓦片数据的读取速度。
可以通过gdal_translate工具对影像数据进行瓦片处理;第三,创建金字塔数据集可以使osgEarth读取数据更加高效,可以用gdaladdo工具创建金字塔数据集;总之,要想提高osgEarth的处理效率,就要预先创建高效的数据瓦片结构,除了用gdal、vpb等工具外,也可以通过osgEarth的数据缓冲机制创建预处理的瓦片数据集。
比如我们可以创建一个如下的earth文件将数据缓冲到指定的目录:<map name="bluemarble" type="geocentric" version="2"><!--Add a reference to the image --><image name="bluemarble" driver="gdal"><url>c:/data/bluemarble.tif</url></image><options><!--Tell osgEarth to cache the tiles in a TMS format--><cache type="tms"><path>c:/osgearth_cache</path><!--Tell osgEarth to cache the tiles to JPG to save disk space--><format>jpg</format></cache></options></map>这种缓冲方式只能缓冲在执行该文件时浏览过的地形数据,而不能自动缓冲所有的数据,要想自动缓冲所有的数据,就需要用到osgEarth自带的一个工具,osgearth_seed,通过osgearth_seed --max-level 7 bluemarble.earth将数据全部缓冲到指定位置,通过这种方式缓冲后,我们就拥有了一个完整的TMS数据源,我们可以直接通过文件目录的方式访问该数据源,也可以将该数据源拷贝到我们自己的本地web服务目录下。
详情见/wiki/DataPreparation。
除此之外还可以用MapTiler以及TileCache 工具创建瓦片数据源,用它创建的瓦片数据源也可以直接在osgEarth下使用;7. 可以通过两种方式将osgEarth集成到我们自己的osg应用程序中,第一种就是直接通过earth文件的方式,直接将earth文件读入作为一个osg节点加入场景即可,另外一种方式就是通过osgEarth的API。
通过API的方式大体需要以下几个步骤:创建map对象——创建影像数据层——创建高程数据层——将影像数据层以及高程数据层加入到map 对象——根据前面创建的map对象创建mapNode节点——将mapNode节点加入到场景;示例见/wiki/DevelopersGuide。
无论是通过earth文件创建的地形还是通过API创建的地形,我们都可以在运行时对其进行修改,如果是用earth文件创建的地形,需要先找到该earth文件对应的mapNode,通过以上两种方式创建的mapNode,我们可以对地形进行修改操作,如添加新的影像、高程数据,移除特定的影像、高程数据,重新制定影像、高程数据的顺序等;8. 如果我们的地形用的是地心坐标系,可以会碰到当相机距离地面非常近的时候地形被裁减掉的问题,要解决这个问题我们可以通过设置相机的远近裁剪比率或者创建AutoClipPlaneHandler来解决。
AutoClipPlaneHandler可以动态监视相机,当相机距离地面很近时动态调整相机的近裁减面;9. 在地形上放置模型对象时可以使用ObjectPlacer类,通过该类可以直接通过经纬度坐标进行模型的放置操作;10. osgEarth的目标是能够在osg中开发基于地理信息的应用,能够方便地浏览地理模型数据,能够与开放标准的地理数据兼容;osgEarth渲染地形的模式分为两种:实时在线模式(直接使用原始数据渲染生成)以及离线模式(数据预处理成瓦片数据或地形数据库);11. osgEarth使用于以下几种情况的应用:快速方便地运行地形地图数据;使用开放标准的地形地图数据,如WMS、TMS、WCS等;通过Web服务的方式集成本地存储的地形地图数据;系统要求以瘦客户端的方式运行;经常处理随着时间改变的数据;集成商业数据;12. 在使用osgEarth自带的漫游器EarthManipulator时,如果给漫游器设置一个矩阵或者给漫游器设置一个TetherNode然后再解除,然后再移动相机位置,这时计算出的Center会有一个跳跃,然后才正常,造成这个问题的原因是给漫游器设置了参考节点(通过SetNode函数)造成的,设置了参考节点后漫游器要根据参考节点重新计算Center和相机姿态等参数,在以上两种情况发生时,在重新计算Center时出现了偏差,要想避免以上两种情况下造成的移动异常,可以不让相机结合参考节点重新计算Center,即将Pan函数中的recalculateCenter注释掉即可;13. Map的类型分为geocentric和projected两种类型,即地心方式和投影方式,要建立圆形地球就用geocentric类型,用这种类型如果要制定profile,只有geodetic(WGS84投影)和mercator(墨卡托投影)两种模式;14. Earth文件详解:<!—type 属性可以是geocentric和projected两种模式,分别对应地心坐标系和平面投影坐标系,默认是地心坐标模式。
Version是osgEarth的主版本号,必须有版本号--><map name=”myMap”type=”geocentric”/”projected”version=”2”><!—定义地图各图层的运行时显示属性--><options><!—定义数据缓冲机制,缓冲类型有三种,tms、sqlite3以及tile cache,默认是tms,如果将cache_only设为true,osgEarth将只加载缓冲的数据,不加载任何非缓冲的数据,默认是false--><cache type=”tms”/”sqlite3”/”tilecache”cache_only=”false”><!—缓冲数据存放目标目录,适用于tms以及tilecache 两种类型,直接指定缓冲目录--> <path>C:/myCache</path><!—缓冲数据存放目标文件,适用于sqlite3,指定数据库文件名--><path>C:/myCache.db</path><!—缓冲目标文件类型,适用于tms以及tilecache两种类型,如果没有指定类型,将默认用影像数据或高程数据的类型--><format>jpg</format><!—tms类型,仅适用于tms类型,注意如果该类型是google,索引就是反的--><tms_type>google</tms_type><!—缓冲文件最大值,单位是MB,不知道该属性是否只是适用于sqlite3,有待确定--> <max_size>300</max_size></cache><!—坐标投影属性,该属性相当于渲染数据的地理空间上下文,它决定了系统以哪种方式将世界坐标数据投影到屏幕像素。
为了正确渲染影像数据以及高程数据,osgEarth需要知道数据源的profile以及渲染时的profile以进行必要的转换。
--><profile name=”myProfile”><!—空间参考系统初始化字符串,该字符串的值可以参考PROJ4或WKT,下面是用PROJ4定义的WGS84投影profile,srs以及作用范围的定义同样适用于平面投影模式--><srs>prog=latlong +ellps=WGS84 +datum=WGS84</srs><!—如果只想让该profile作用在某个区域,可以给其指定范围--><xmin>-10.2</xmin><xmax>-10</xmax><ymin>20</ymin><ymax>30</ymax><!—由于WGS84比较著名,所以可以用下面的简化方式代替上面的定义--><profile>global-geodetic</profile><!—另外一个著名的球体投影就是墨卡托投影(yahoo、google、微软、openstreetmap都是用的这种投影方式),这种投影方式的优点是可以在任何纬度或者预留区域正确地显示文本信息,可以用下面的简化方式定义--><profile>global-mercator</profile><!—也可以不用简化方式,简化方式使用默认的椭球体,也可以通过定义srs自己定义椭球体--><srs>+proj=latlong +a=6800000 +b=6800000</srs><!—定义垂直空间参考系统,相当于垂直高程大地基准--><vsrs>egm96-meters</vsrs></profile><!—定义地形引擎如何渲染影像数据和高程数据--><terrain><!—定义如何从上层高程数据采集当前层需要的高程数据,比如如果影像数据可以分割到17层,而高程数据到7层,那么8-17层的高程数据就需要从第7层去采集,下面的属性就指定了以何种方式去采集相应的高程值,一共有四种采集方式,分别是nearest(采集最近相邻点)、bilinear(双线插值)、average(平均值插值)、triangulate(根据相邻的四个点插值)--><elevation_interpolation>nearest/bilinear/average/triangulate</elevation_interpola tion><!—定义是否开启地形表面的光照,默认是开启--><lighting>true</lighting><!—定义如何加载地形数据(数据加载策略),可以定义加载模式mode,分为standard(标准加载模式)、sequential(顺序加载模式)以及preemptive(优先级加载模式),默认是标准加载模式,preemptive加载模式不同于顺序加载模式,当需要加载最高级瓦片时需要从最低级开始逐层加载,而preemptive模式可以直接跳过中间级直接加载最高级,同时还可以设定不同数据的加载优先级,比如可以设定优先加载影像数据而后加载高程数据等,这样可以在视觉上得到优化处理。